artem
Part of things
 
Posts: 22
|
|
Jun 22, 2021 18:05:07 GMT
|
Hi there! So here is a some pics from 1.5 year ago, when I decided to change alternator bearings and to restore alternator overall a bit. This is how it looked when I took it of the car. Bosch 90A: 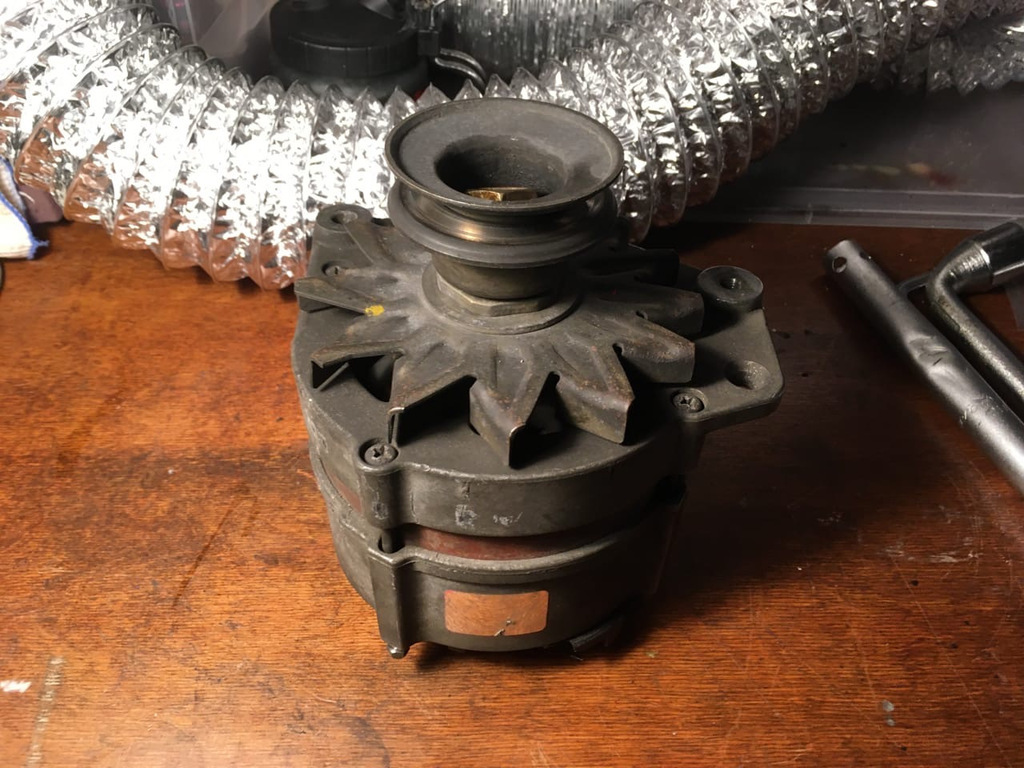 Took it apart, all greasy inside and outside: 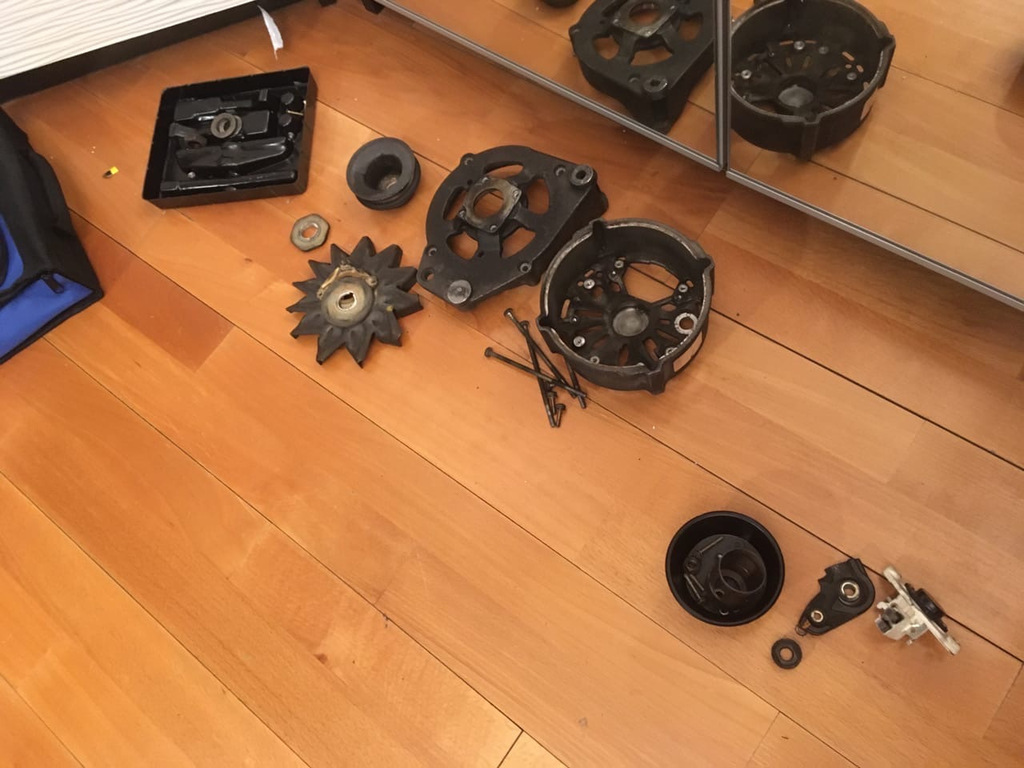 Rotor and diode bridge was in pretty good condition, I just checked it with multimeter and carefylly washed parts with soapy water. Slip rings had minimum sign of wear, as they were replaced recently. 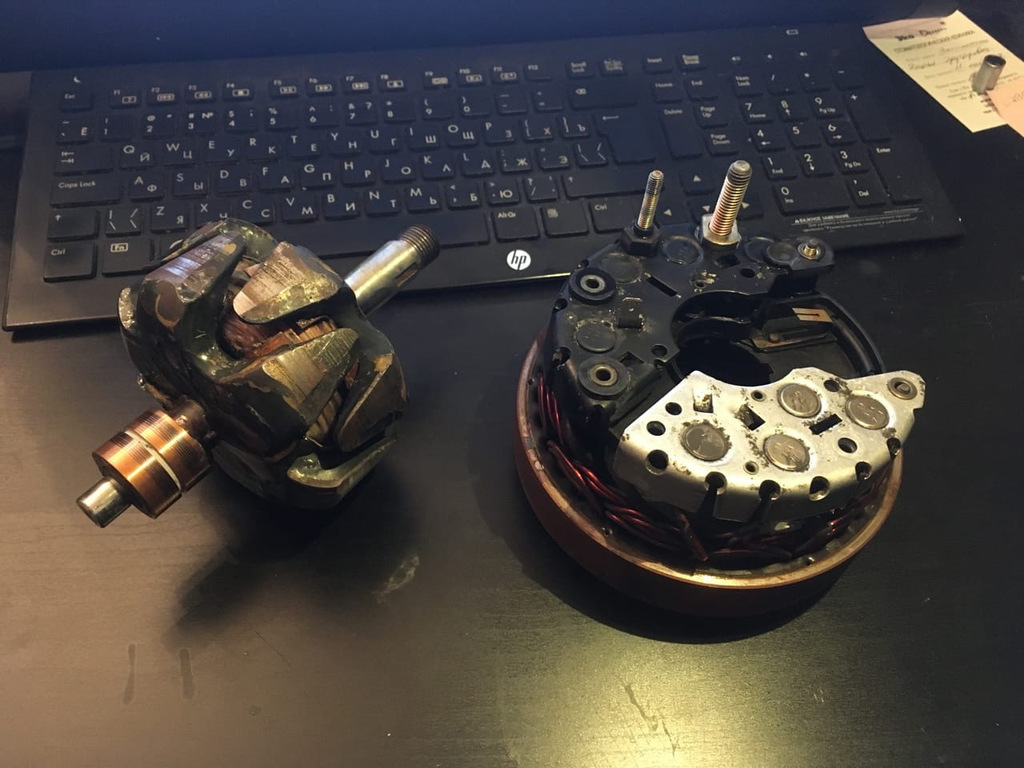 Paint chiped off stator's metal ring. Rotor had some signs of repair and a piece of epoxy resin fell off, so I just applied it to the same place. 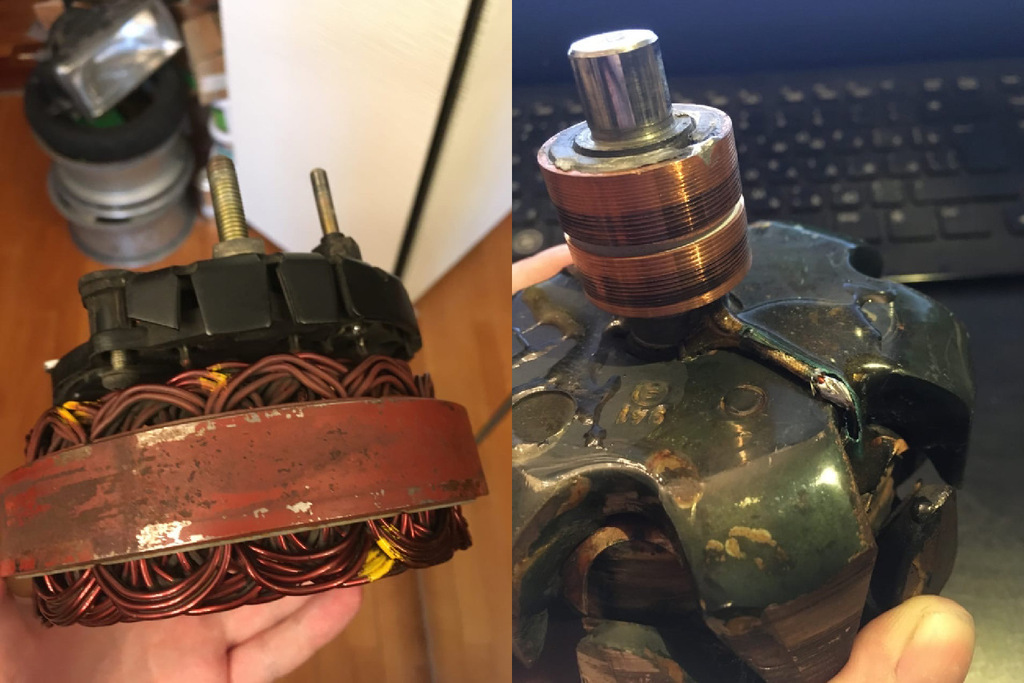 I didn't want to assemble alternator back with dirty and oxidized parts, so I ask a guy who runs a aquablast shop to clean the parts and here is the result, clean and shiny  . Put a dirty spare alternator cover to compare the difference. 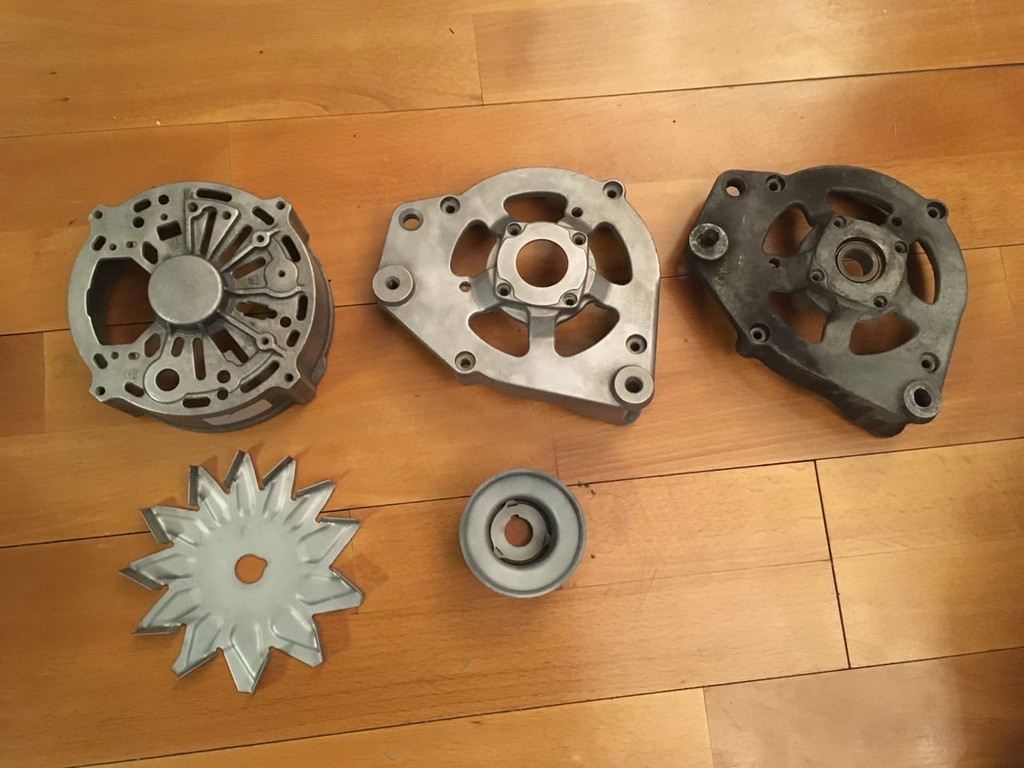 Steel parts was also cleaned and lost their zink cover, so i desided to use chemical bluing to protect steel parts. WARNING: after 1.5 years, I can say that it was not a good idea  bluing is good to protect guns, but not car parts, so use zinc-plating to protect bare metal parts from corrosion. bluing is good for some short period of time, like several month. 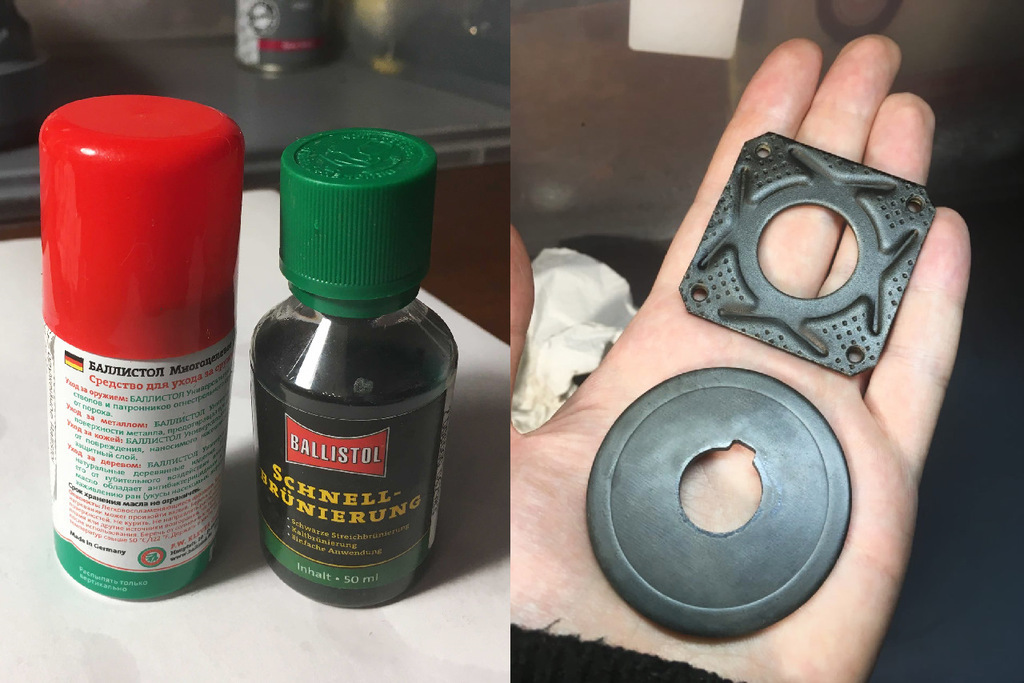 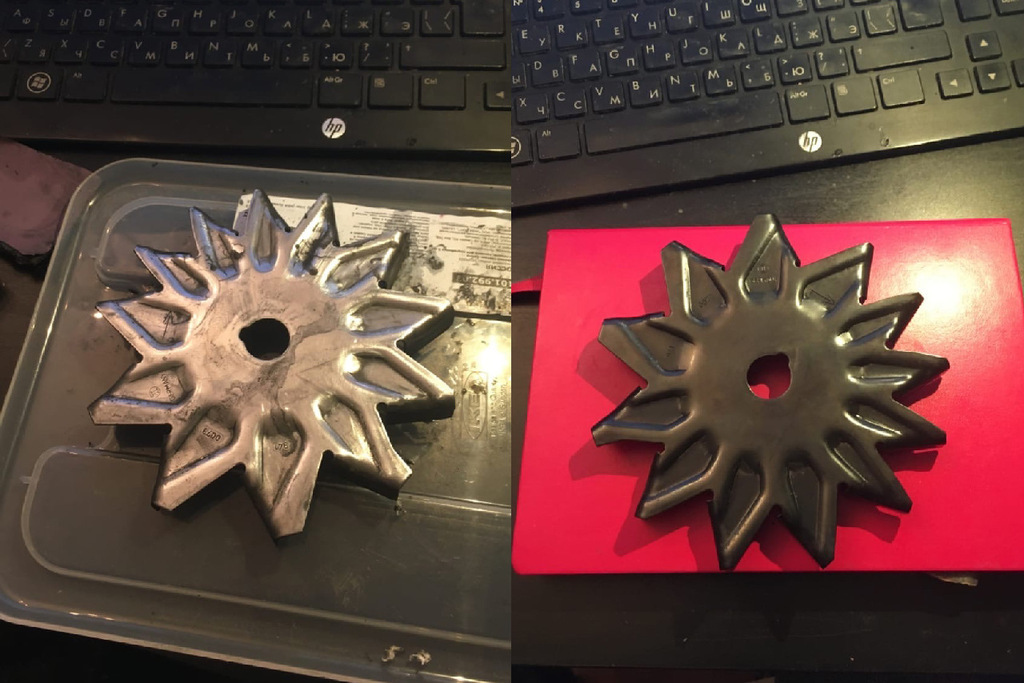 I coated the stator's metal ring with epoxy primer and painted it with "near factory look color" enamel paint: 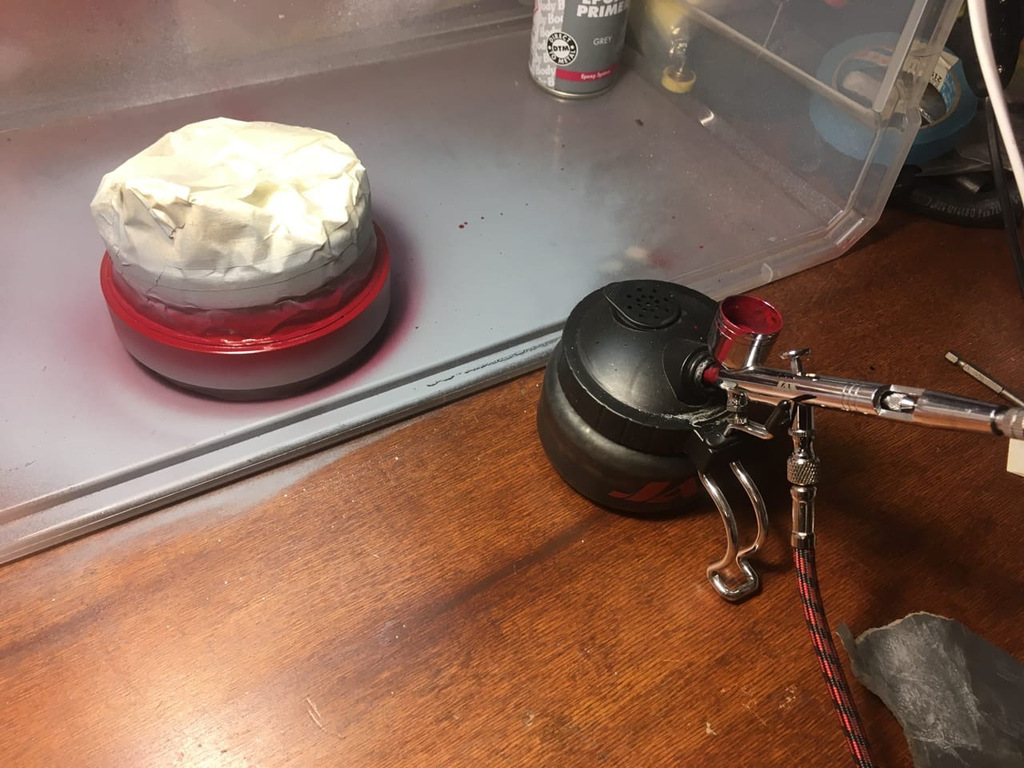 Looking good! 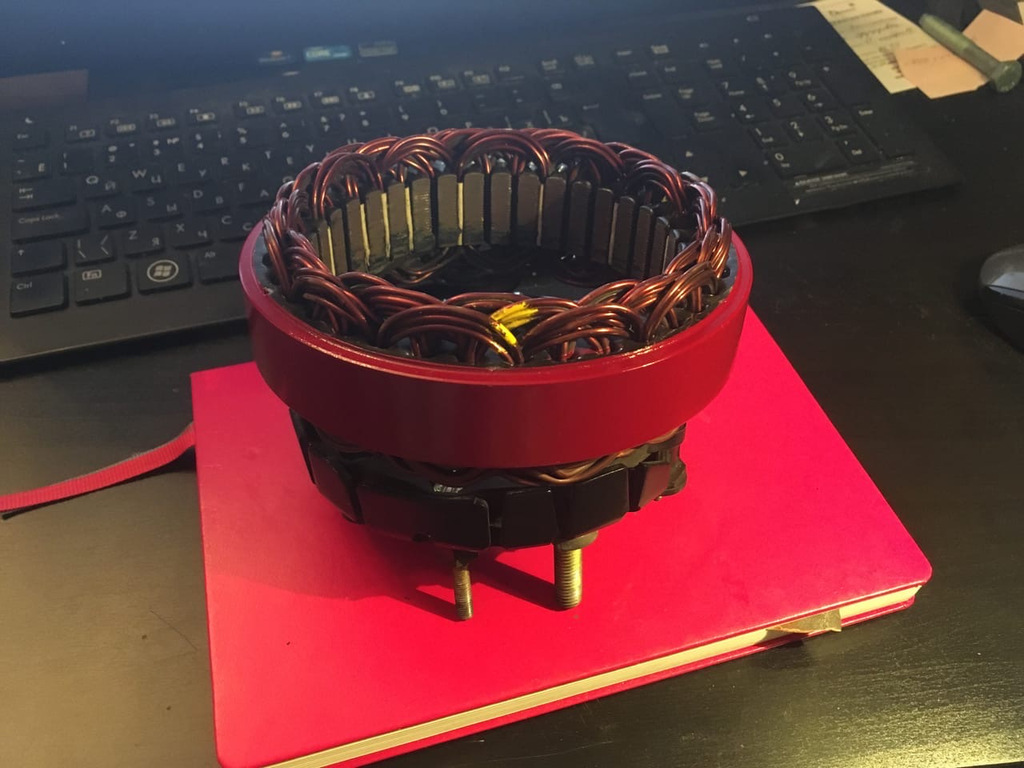 Time to assemble it back together 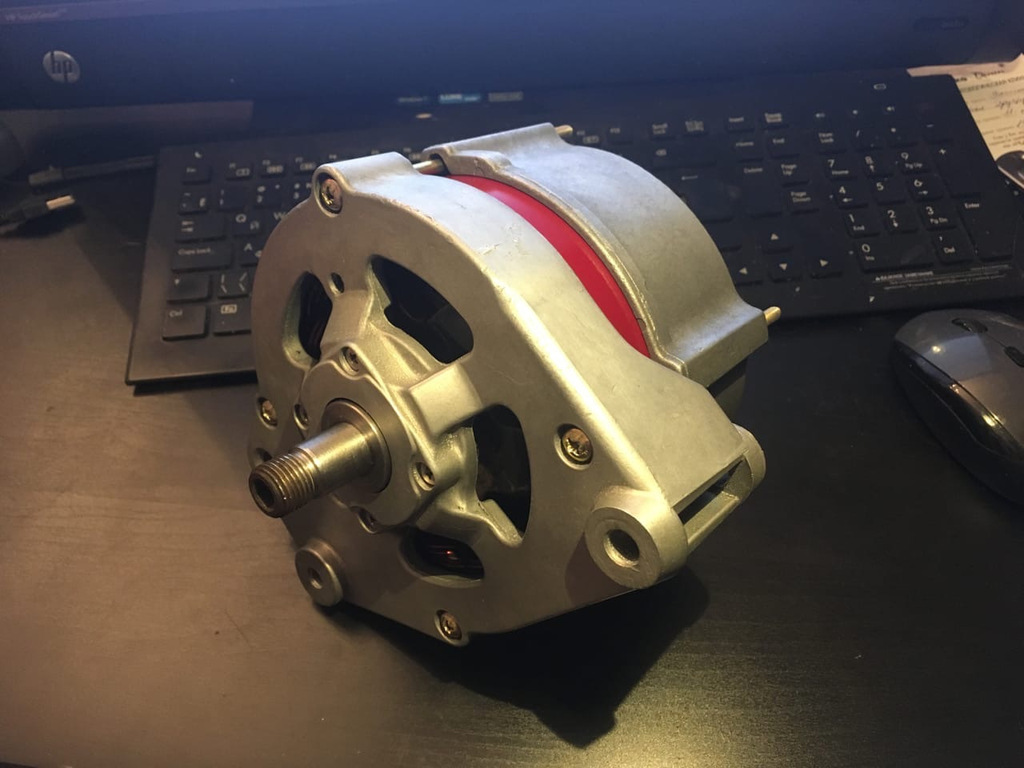 Bought some new bolts to assemble the two halfs of the alternators body: VAG 037903555 4pc. And also new pulley: VAG 049903119L
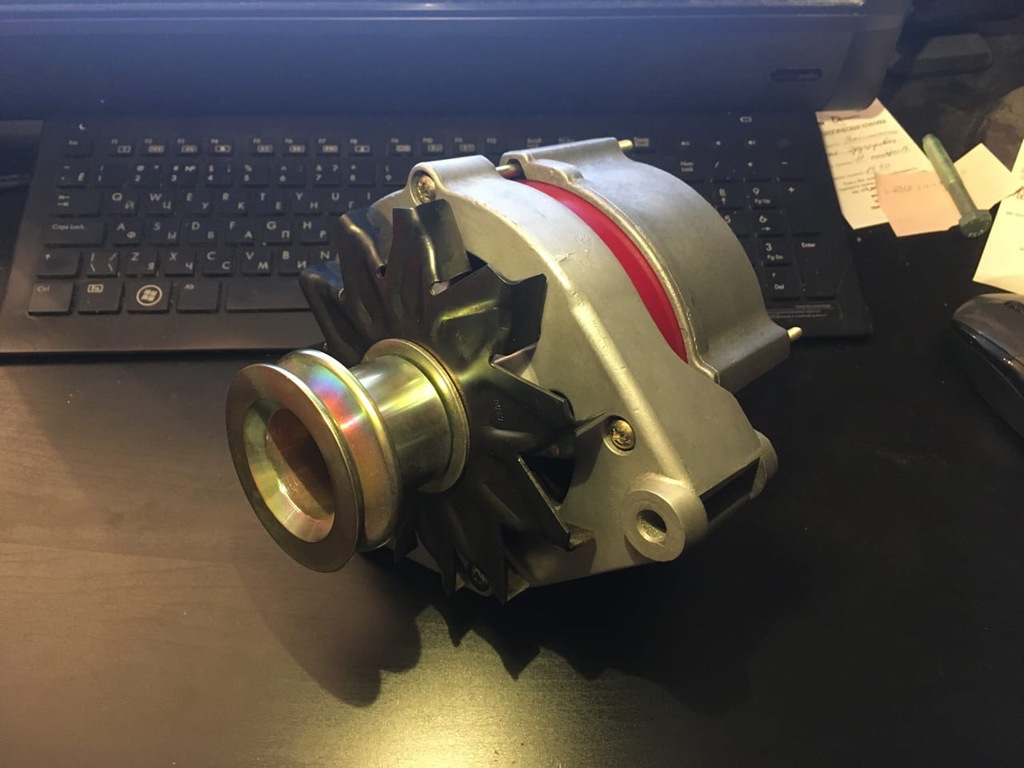 Back side of alternator: 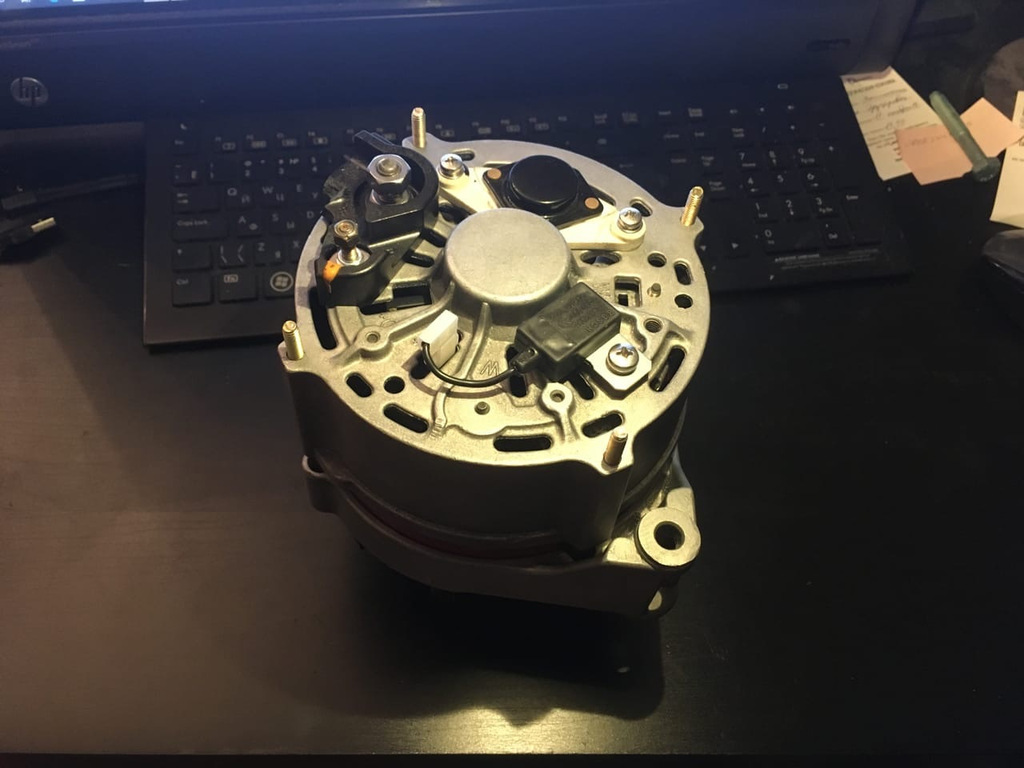 And finally on the car again. Now it looks suspiciously cleaner than the rest engine bay  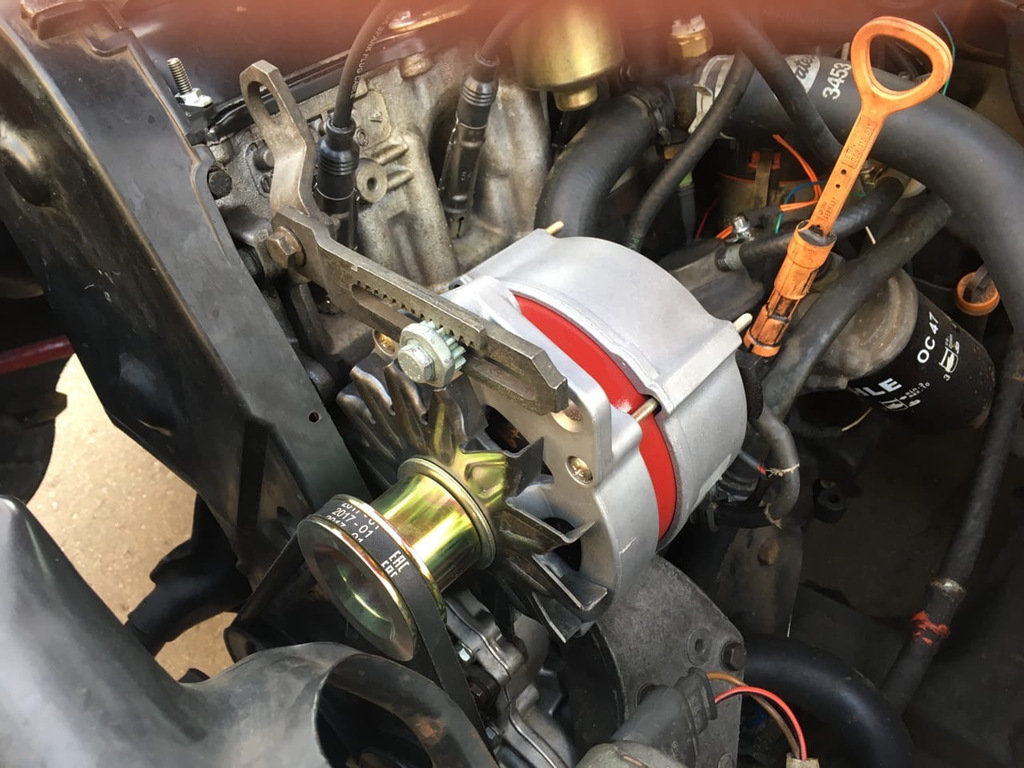 |
| |
Last Edit: Jun 22, 2021 18:07:01 GMT by artem
|
|
|
|
artem
Part of things
 
Posts: 22
|
|
|
|
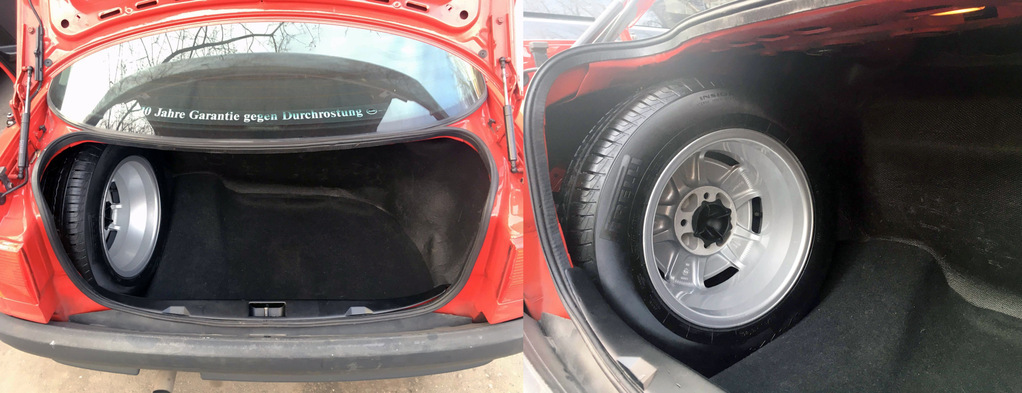
Although the car was painted, the wheels remained untouched. Rusty factory steel rims with old winter tyres were making me depressed every time I looked at them. Audi 80 B3 had a great variety of factory rims, 14s and 15s for the Sport Edition. I chose 14 inch factory Ronal Aero-Design - simple and stylish. I had to buy 7 of them, before I got the complete set of 5 rims and 5 central caps. These caps turned out to be quite rare, so i had to buy 2 extra rims because of them. This is how the rims was looking when I bought them. Rest 5 of them were looking pretty much the same: 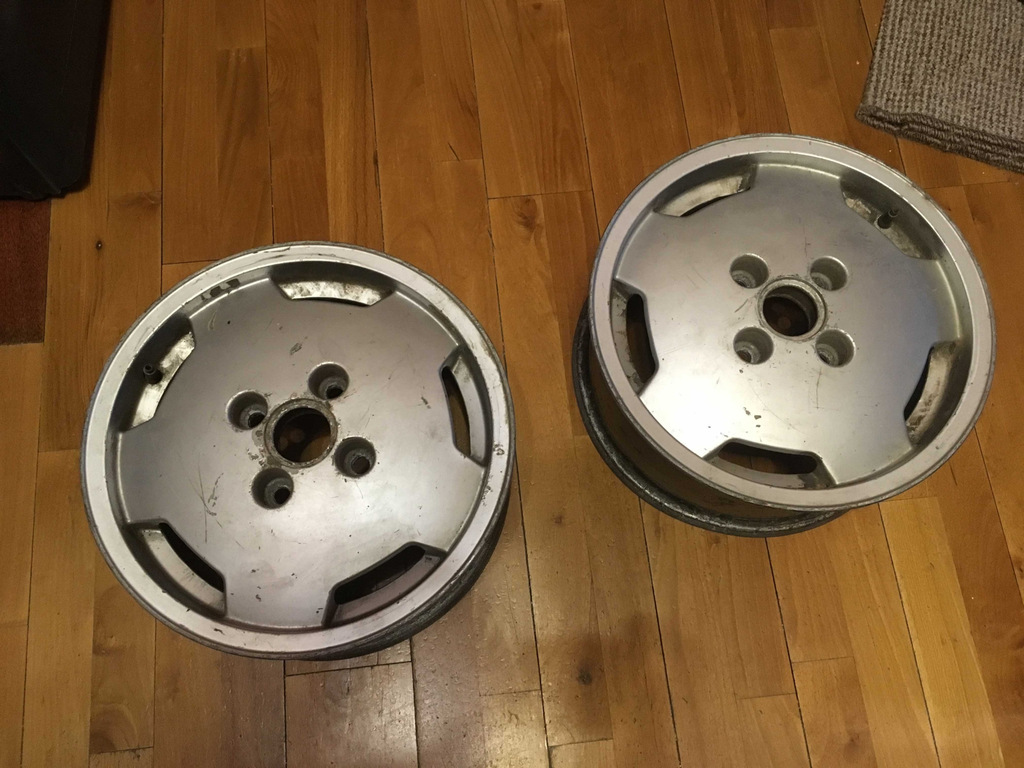 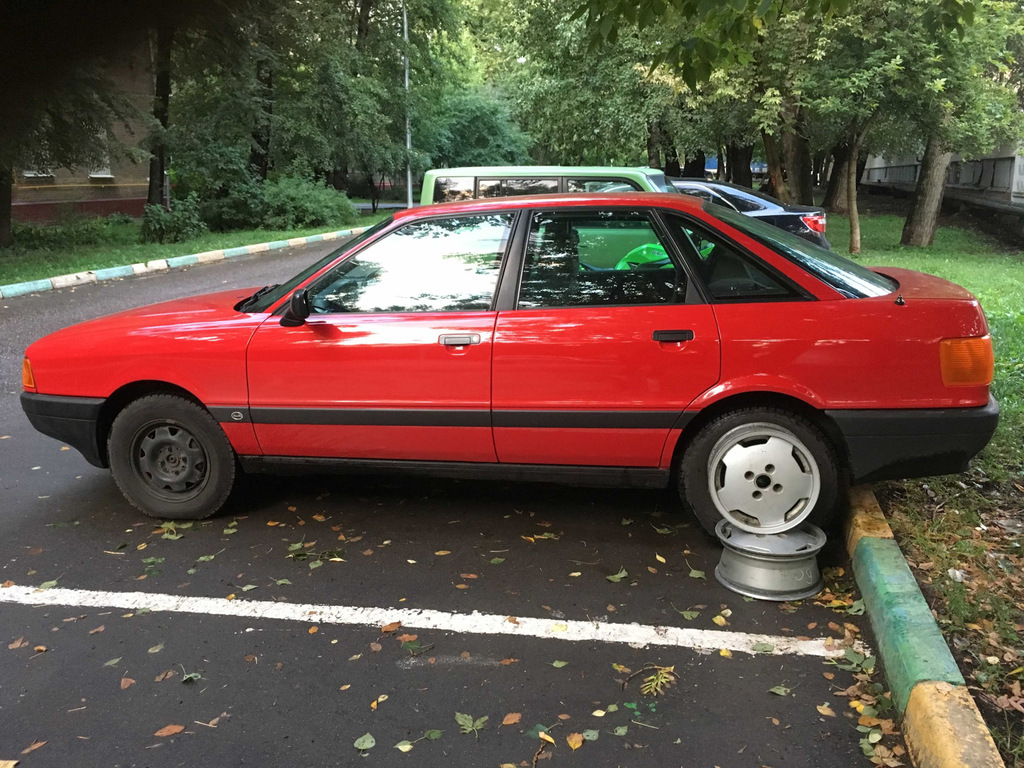 Next, I picked 5 more or less circular rims out of 7 and took them to straightening and then to sandblasting + powdercoating: 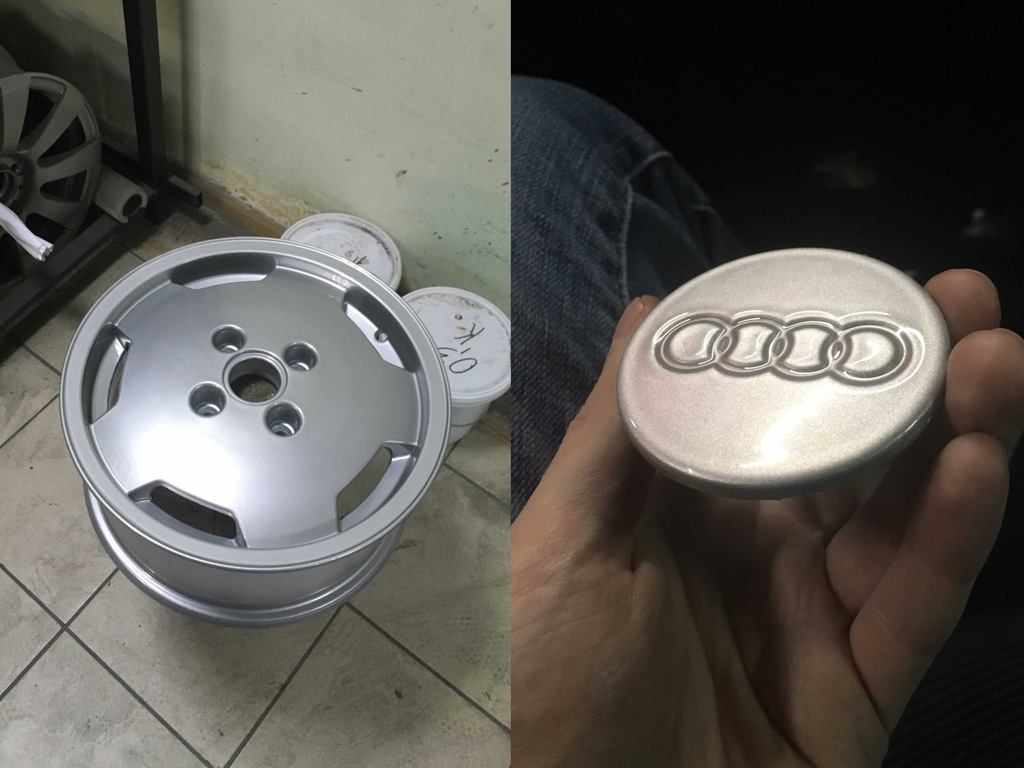 The result turned out pretty good, except for 2 things: first - clear coat layer came out pretty thick, so the Audi badges on central caps "drowned" in clear coat, and second one - the color tone of silver powdercoat paint is not matching the original color of the rims, but I think it's just me being overly picky. The next thing i've bought was the set of Pirelli Cinturato P1 tyres, with factory dimensions of 175/70R14. I сhose Pirelli tyres because the vintage scale model kit of Audi 80 by Fujimi have the same ones  . 1/1 scale next to a 1/24 scale: 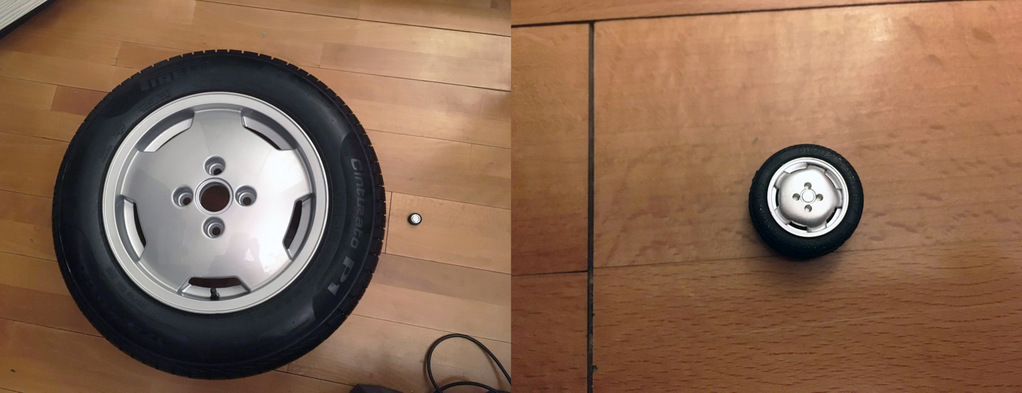 The spare wheel was also fitted and secured in the trunk with special factory plastic bolt: VAG 853809377
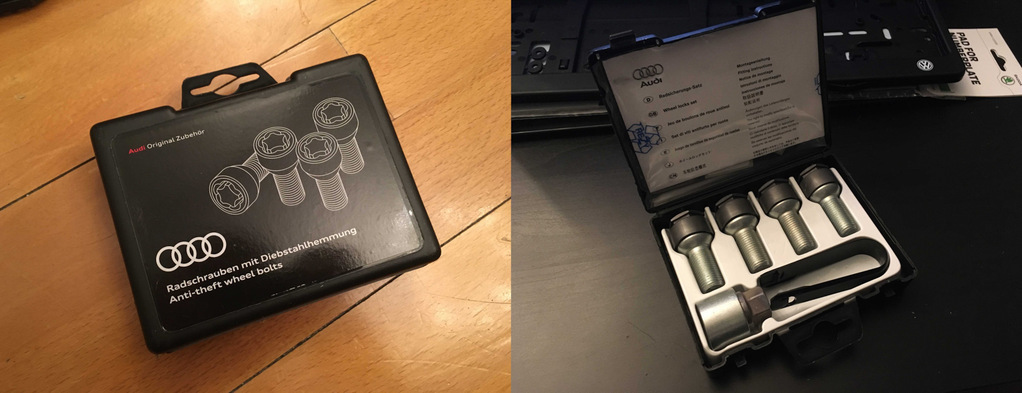
 I also bought a set of fresh wheel bolts: VAG WHT001812 12pc 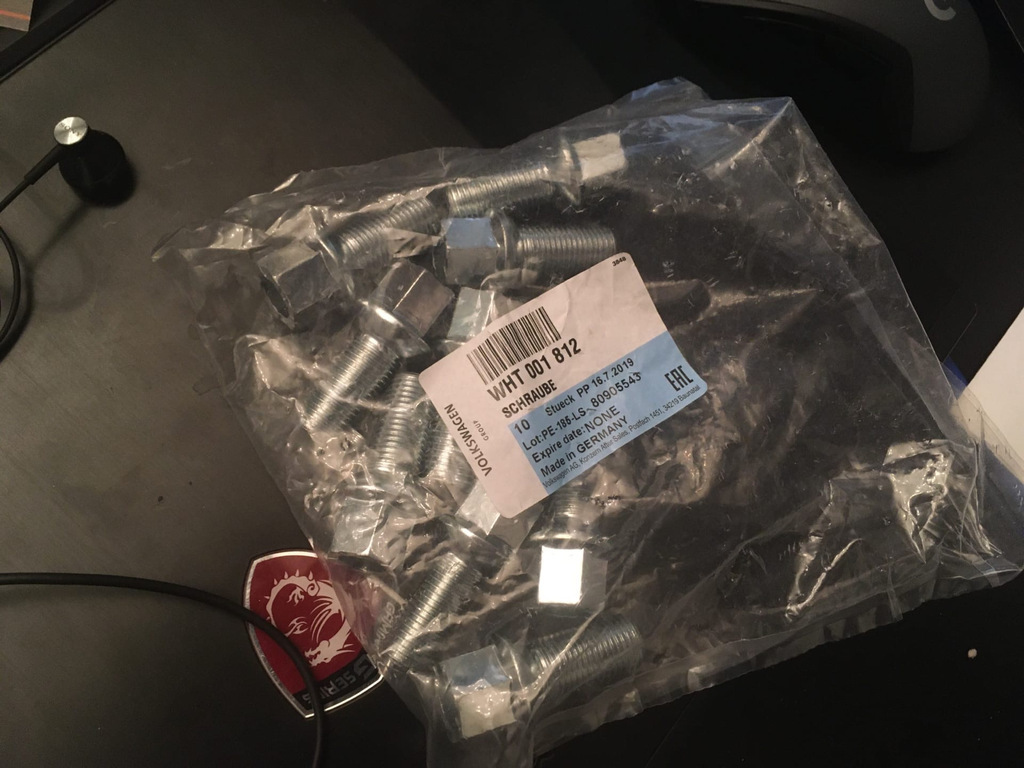 And just in case... a set of anti-theft bolts: VAG 4F0071455
 Much better now! 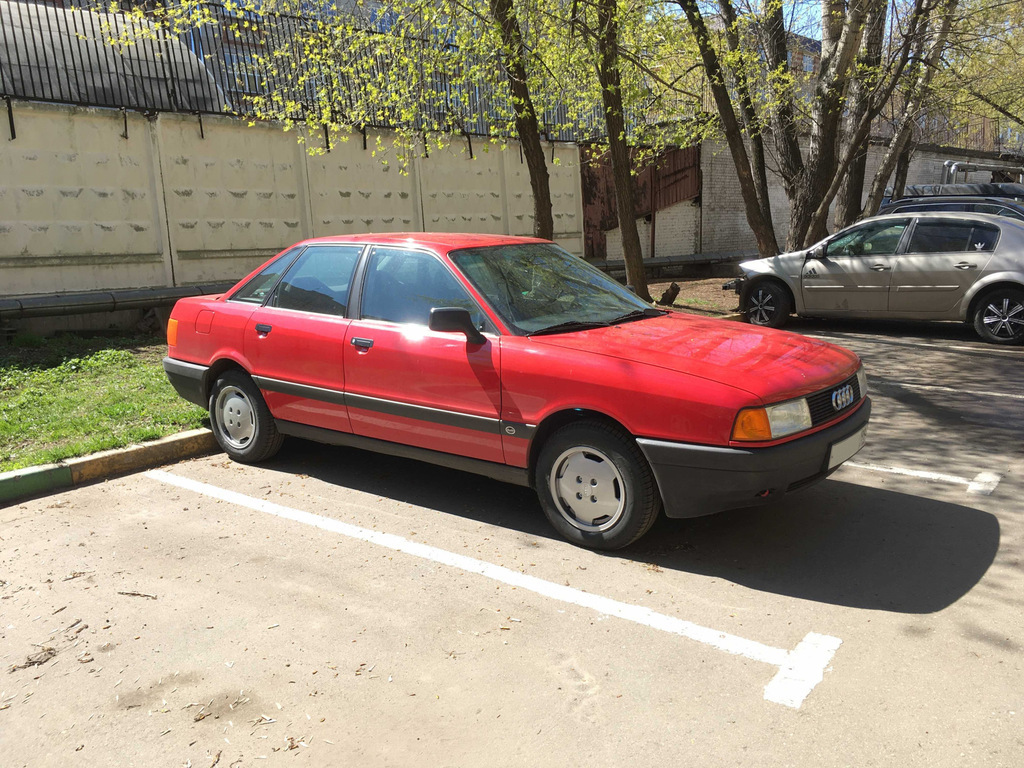 |
| |
Last Edit: Jul 2, 2021 20:59:26 GMT by artem
|
|
|
|
|
|
|
|
looking really nice. Probably the best kept Audi 80 in Russia.
|
| |
|
|
Dr.AK
Part of things
 
Posts: 427
Club RR Member Number: 62
|
1989 Audi 80 B3Dr.AK
@docak
Club Retro Rides Member 62
|
|
|
Those wheels do wonders for it. I realy like em. I've been thinking about getting those for mine, actually. But still a lot of stuff to do before that  |
| |
|
|
l10mcu
Part of things
 
Posts: 62
|
|
|
|
|
It's a lovely car and is a credit to you.
|
| |
|
|
artem
Part of things
 
Posts: 22
|
|
|
|
looking really nice. Probably the best kept Audi 80 in Russia. Thank you! Actually, there are more and more people here in Russia that are restoring and keep these cars in great condition, so I can say some guys have succeeded more than me  Those wheels do wonders for it. I realy like em. I've been thinking about getting those for mine, actually. But still a lot of stuff to do before that  Factory hubcaps are great too! They give a car a more classic look. I got me a set by the way  It's a lovely car and is a credit to you. Thank you! |
| |
Last Edit: Jul 3, 2021 19:53:16 GMT by artem
|
|
artem
Part of things
 
Posts: 22
|
|
Jul 18, 2021 20:50:40 GMT
|
Engine bay hadn't been washed for ages. There are plenty things to fix in the engine bay besides cleaning it, but I just wanted to do it for a long time  Before cleaning: 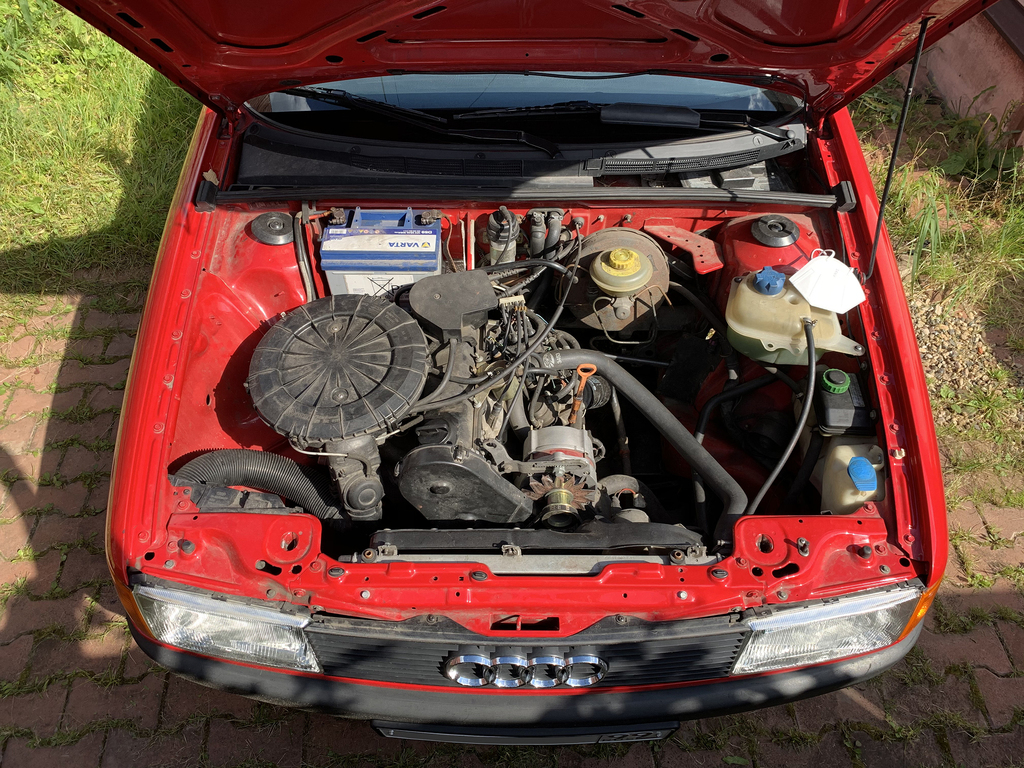 Leaves and dust under windshield drain cover: 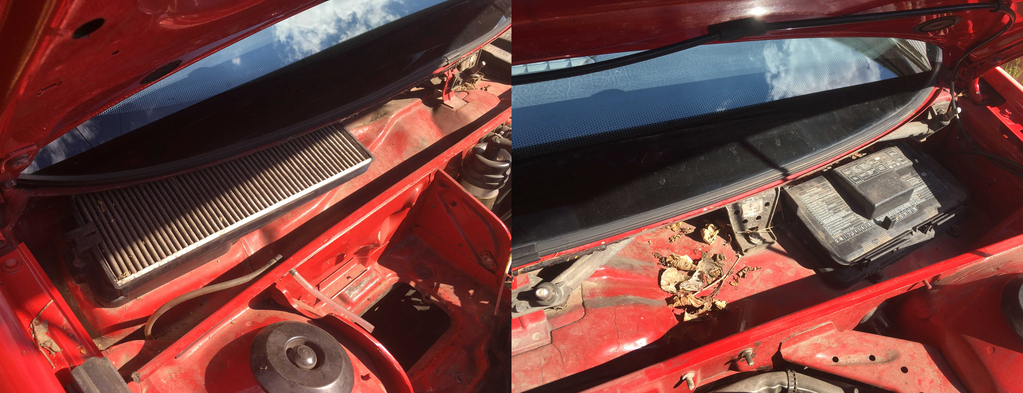 I used KochChemie products for this engine cleaning. KochChemie Golden Star for cleaning the dirt and grease, and then applied KochChemie Motorplast conserver. The key point for this is to apply Golden Star on completely dry engine surface, as it's a dielectric liquid, and will not work on wet surfaces. 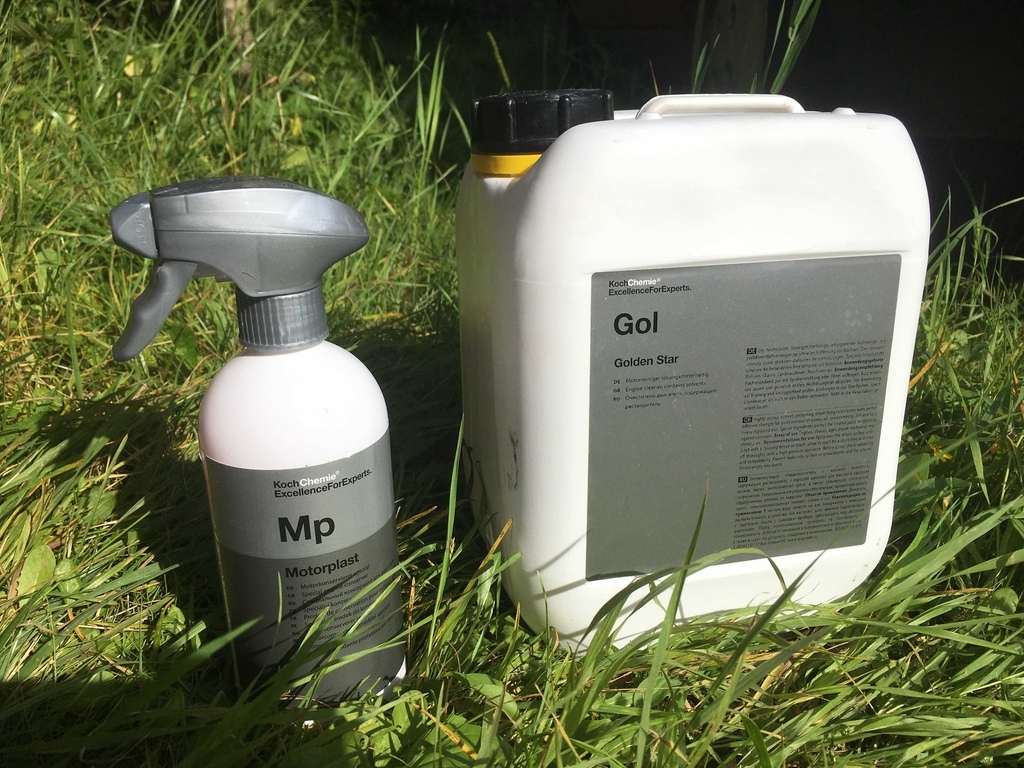 This is a result after washing with cleaner and rinsing it with water. Turned out pretty well: 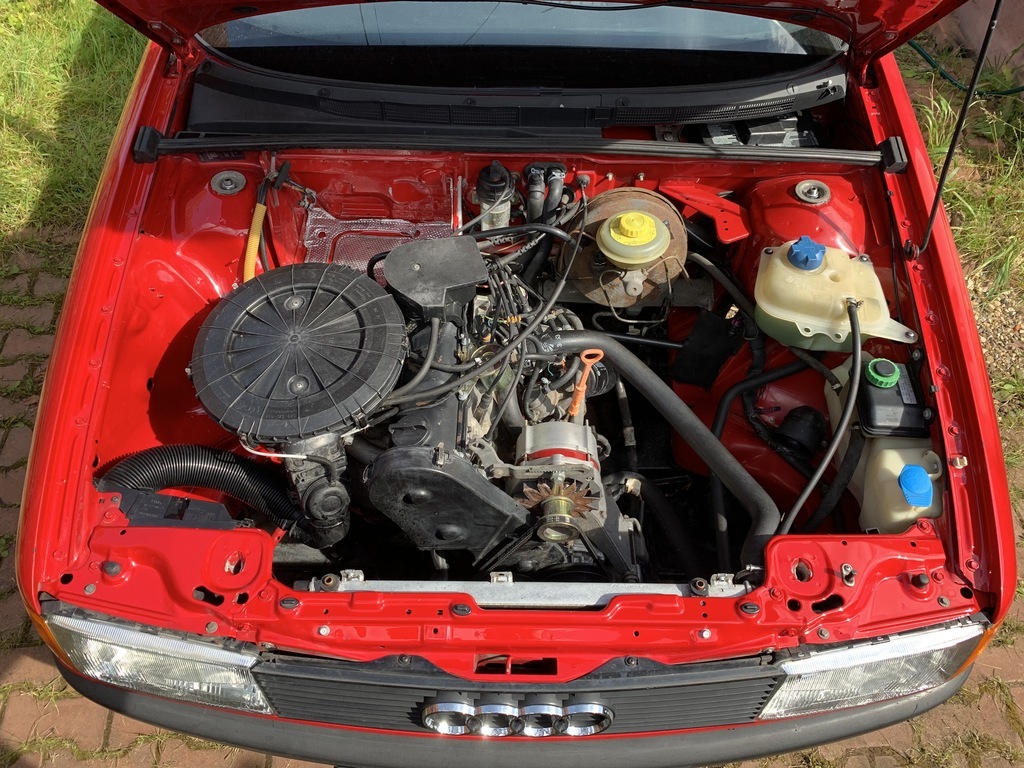 Time to apply conserver. Plastic and rubber parts looks excellent after that: 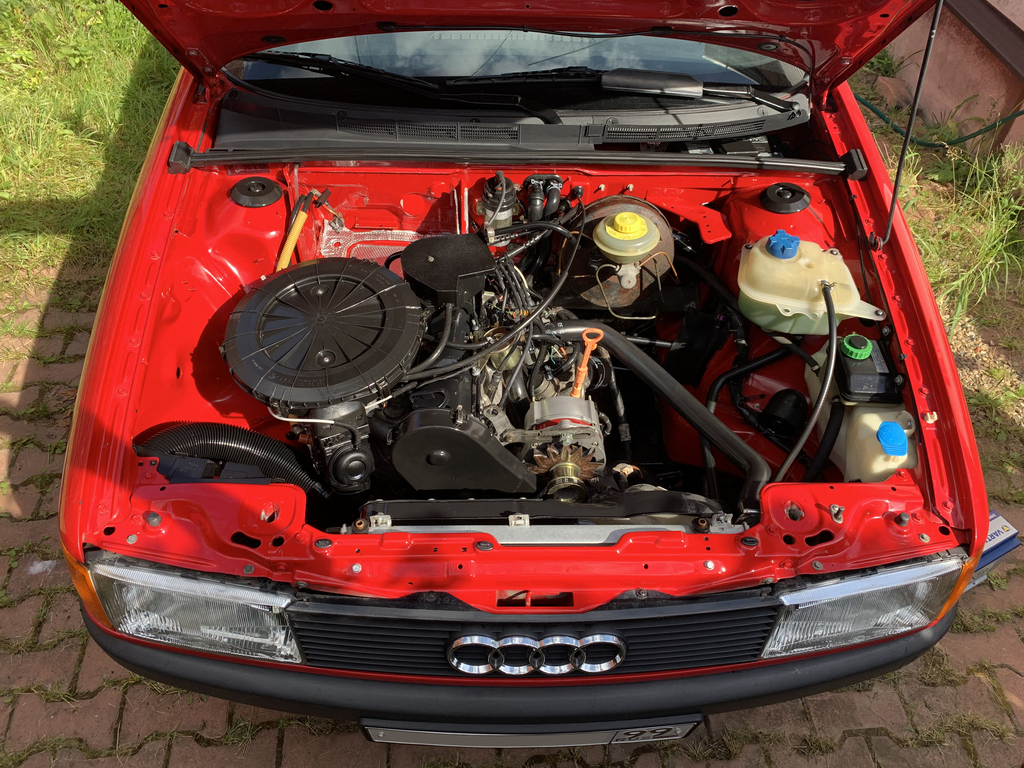 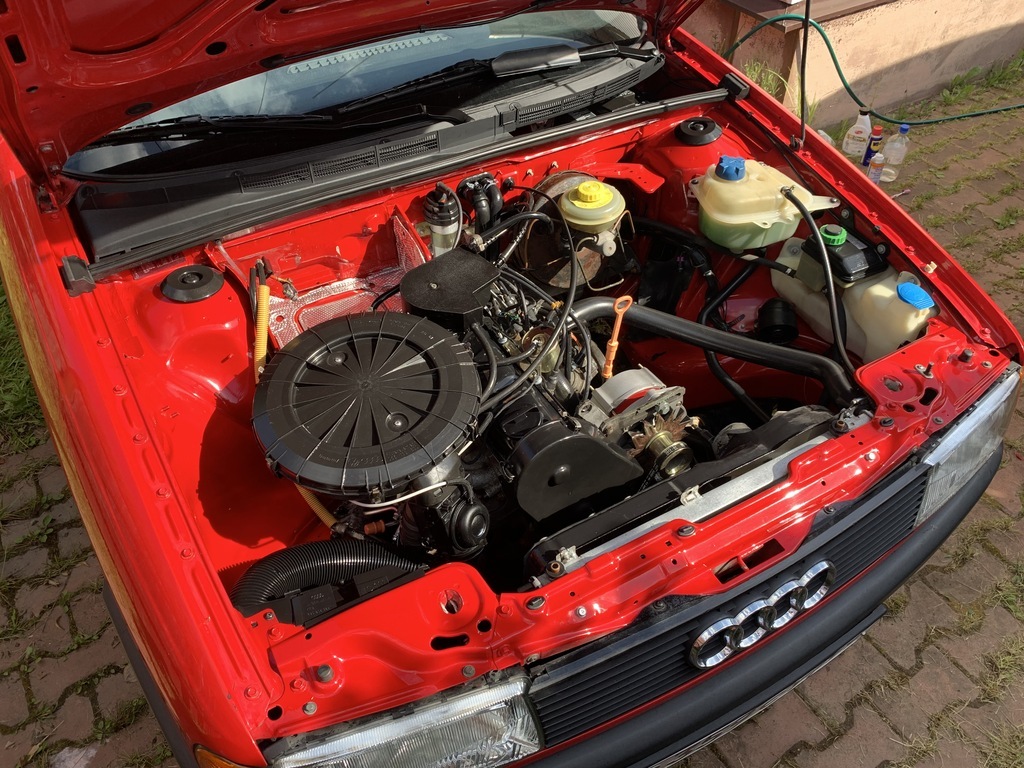 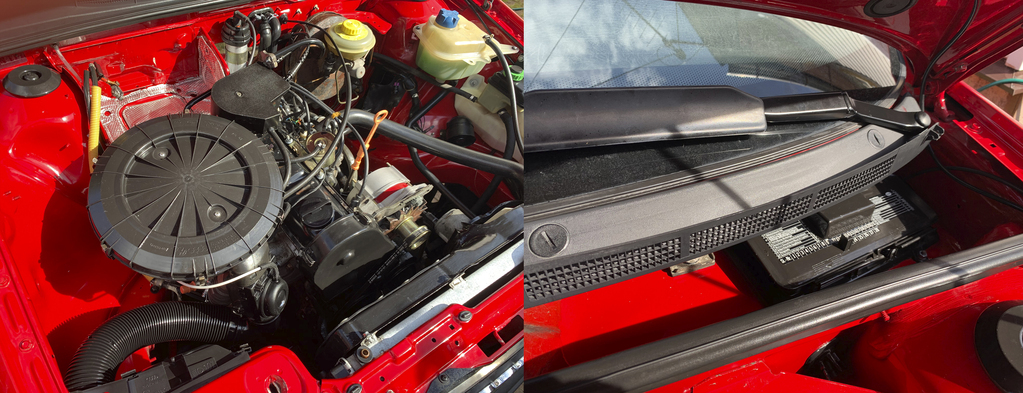 |
| |
|
|
artem
Part of things
 
Posts: 22
|
|
Jul 23, 2021 12:50:03 GMT
|
After cleaning, I inspected the engine bay and found some rusty metal parts. I took off the fan frame and some brackets and took them to powder coating shop. This is the small part of painted parts: front engine mount, steering rack brackets, brake lines bracket and suspension spring plate 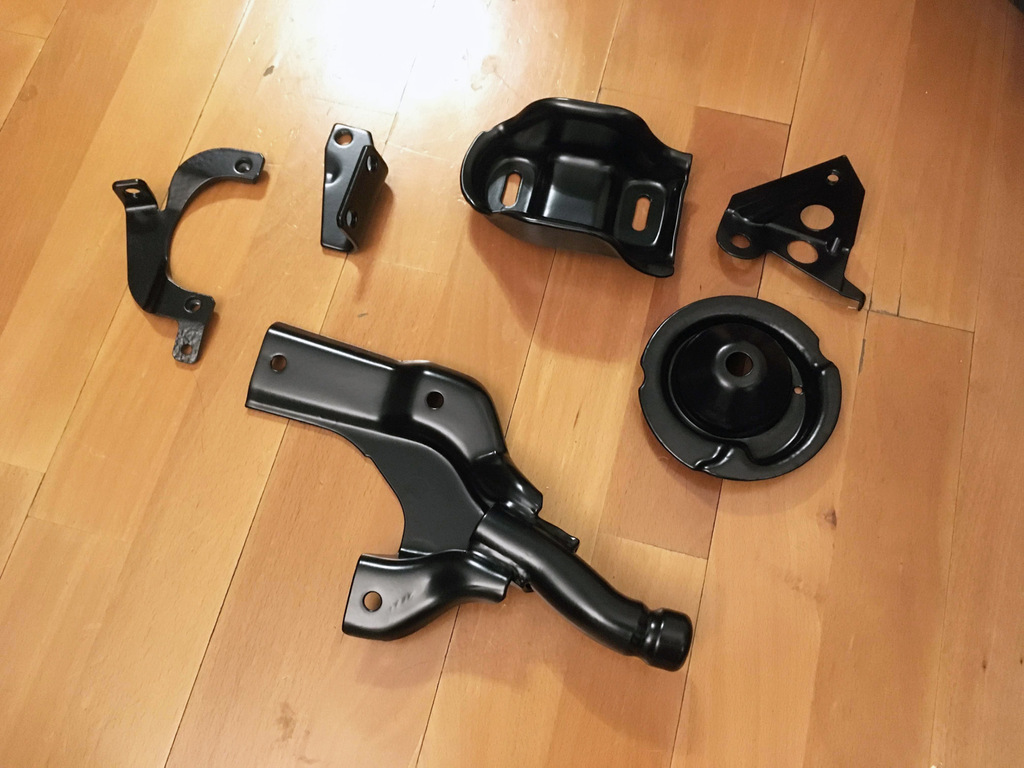 Cleaned the fan and the rest of the plastic parts as much as I could, and assembled them all together: 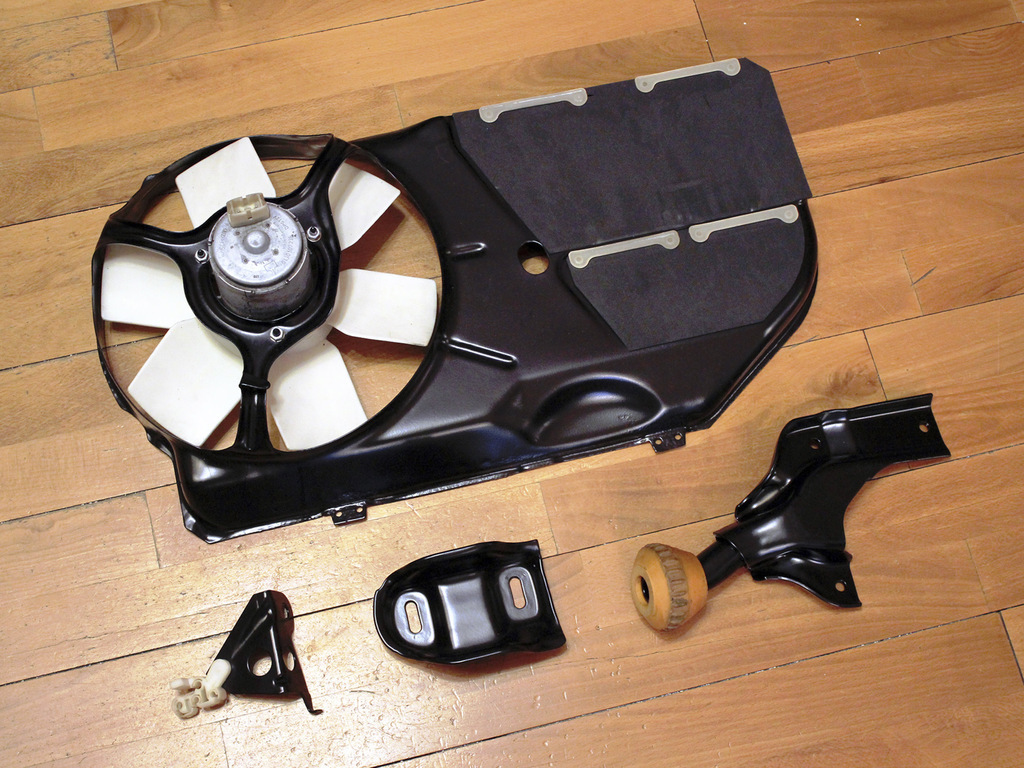 I bought this stickers for engine bay while ago, so it's finally time to use them  I ordered some of them by mistake, for example I don't have catalytic converter, so I don't need an orange sticker on valve cover. Also I have a different fan motor, so I won't put this sticker on mine. These are not factory made but quality is really good. 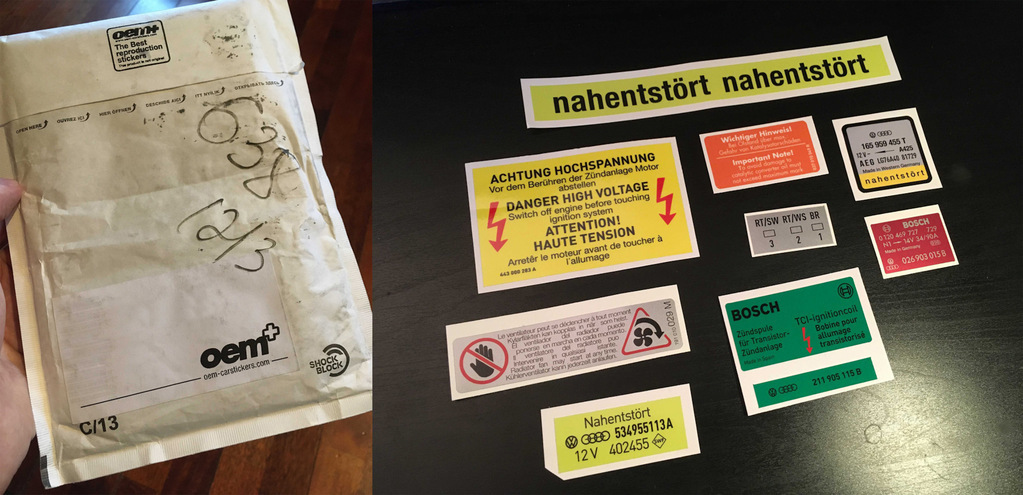 Fan frame is on it's place: 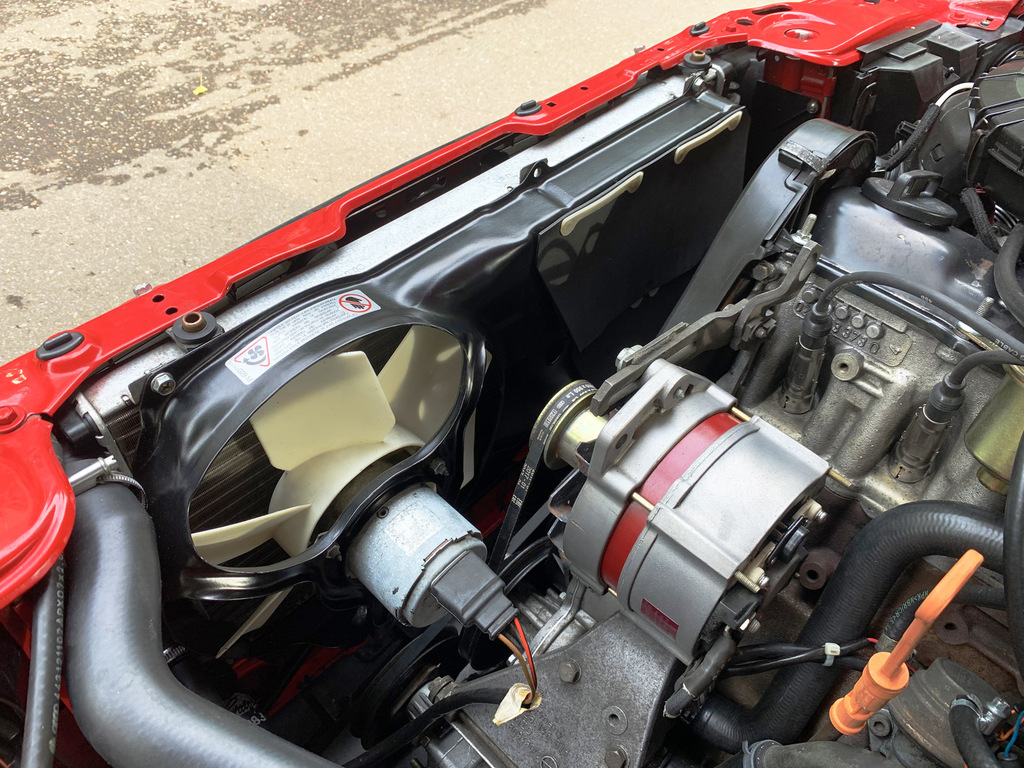 Put stickers on restored parts. Not all of them, I will apply them as I'll restore other parts. I also bought new battery cover VAG 893915437. Looks neat with cover now. 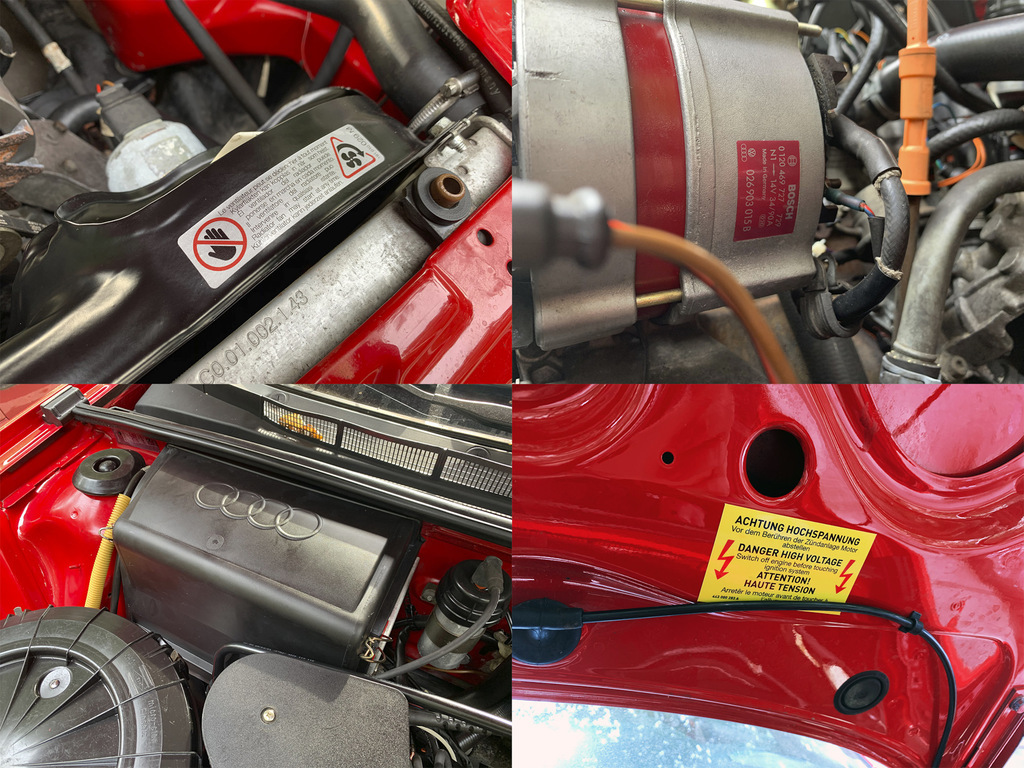 Looks much better now but there are always things to improve  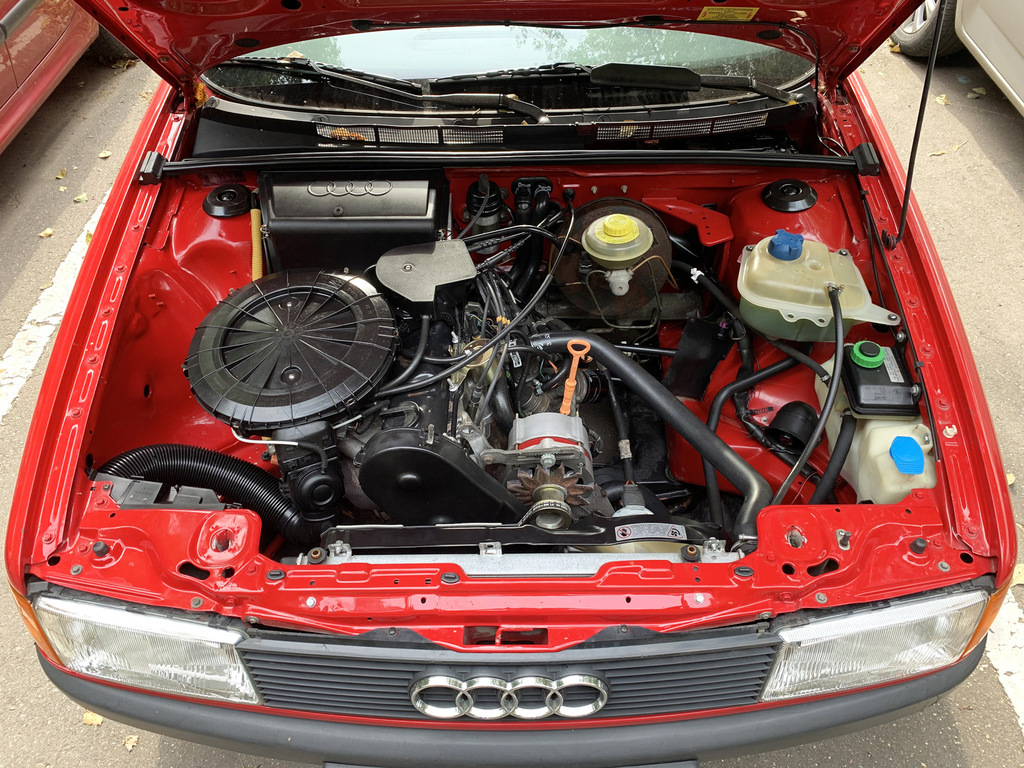 |
| |
|
|
|
|
|
Jul 23, 2021 15:16:21 GMT
|
|
This is an excellent thraed and you are doing a very good job restoring the car! What an inspiration, since I'm just out of the garage to fix my 80 B3. By the way, it never fails to amaze me how many variations of the "typ 89" luggage compartment trim there are. Spare wheel to the side / under the floor, ski bag or no, plastic or carpet upholstery, different colours etc....
|
| |
Citroën DS 21 '66, Renault 16 TS '73, Scimitar GTE '74, Audi 80 '87, Merc 190E '88, Peugeot 205 GTI '88, BMW 735iL '89, Merc 230TE '89 , BMW 320i '92
|
|
artem
Part of things
 
Posts: 22
|
|
Aug 18, 2021 13:16:24 GMT
|
This is an excellent thraed and you are doing a very good job restoring the car! What an inspiration, since I'm just out of the garage to fix my 80 B3. By the way, it never fails to amaze me how many variations of the "typ 89" luggage compartment trim there are. Spare wheel to the side / under the floor, ski bag or no, plastic or carpet upholstery, different colours etc.... Thank you! Yeah, it's fun to discover and collect these factory options, I think there is no two similar Audi 80, every one has it's special touch  |
| |
|
|
|
|
artem
Part of things
 
Posts: 22
|
|
Aug 18, 2021 13:52:55 GMT
|
I had too many car parts laying around in my apartment, so I started to stumble over them. That means that it's time to take out another part outside and install it on the car  . This time it will be the trunk lid inner cover. It turned out to be a very rare part for B3 chassis, I've seen it in sale only 3 times during 3 years, always overpriced. So the third time I saw it, it was me buying it  . Part number – VAG 893867975. Some people say this was an optional part for Japanese and US market, so it's hard to find. 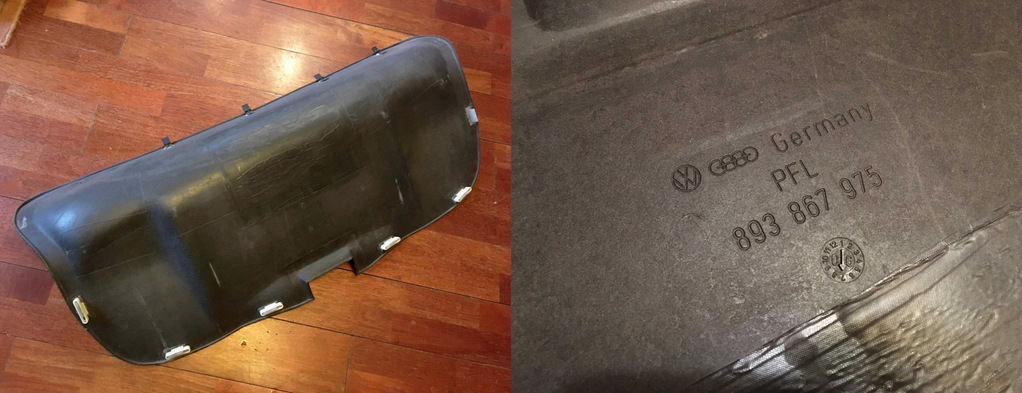 This cover was it nearly perfect condition: no cracks, no fabric damage, only some clips missing. It would be okay to put the cover as it was, but I decided to make 3D models of missing parts and print them using durable SLA resin. This material has pretty much the same properties as the original plastic of clips. 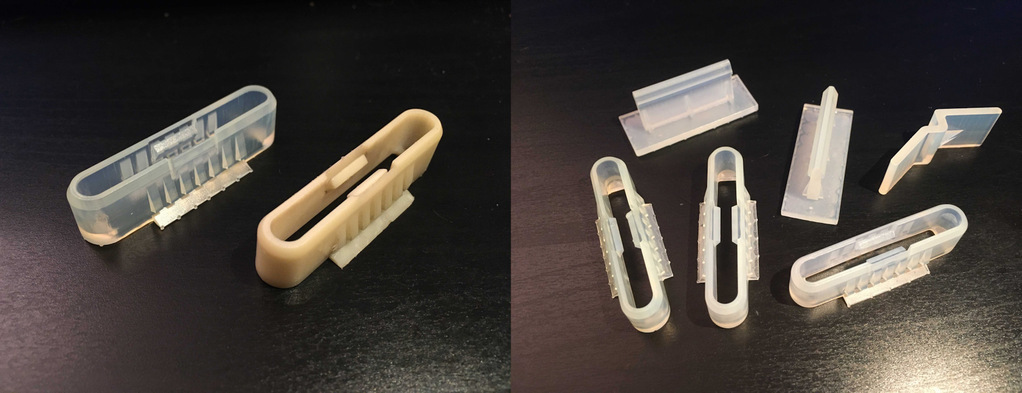 I fixed the hooks to the cover with windshield adhesive and inserted the clips into the trunk lid. Original clip part number – VAG 893867981
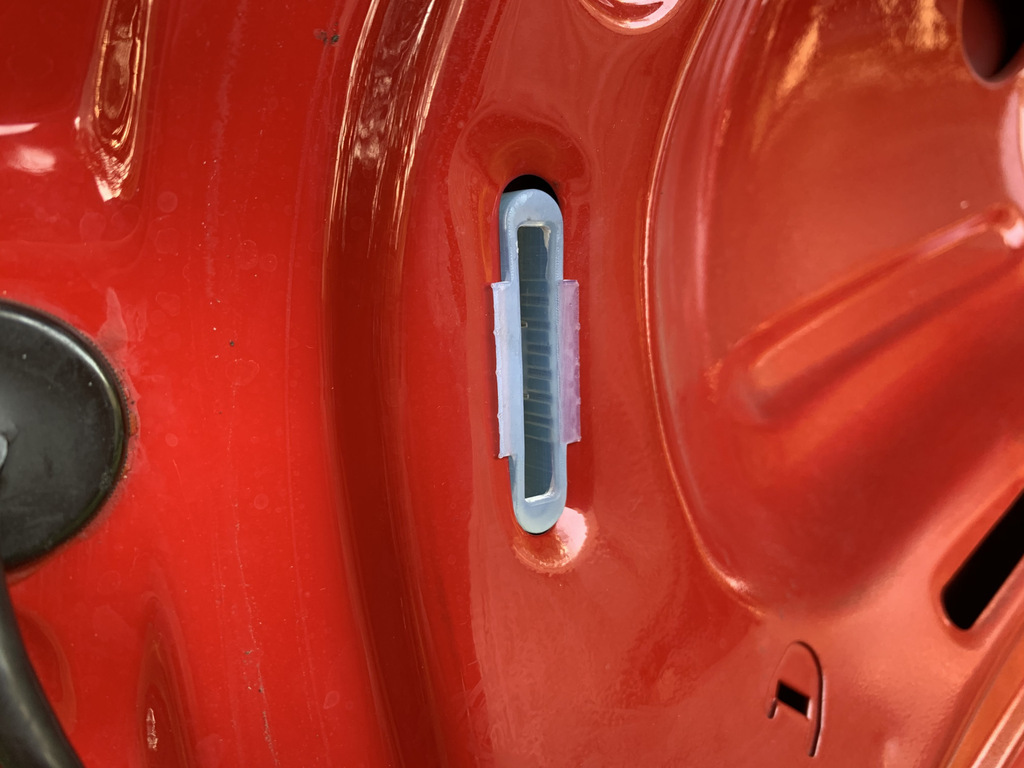 I also replaced contact switch – VAG 893947561A, and it's sealing cover – VAG 893947565A. 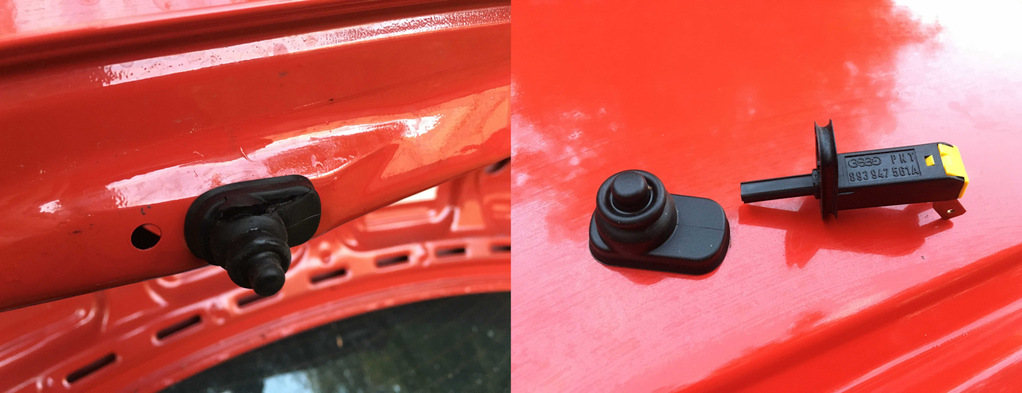 Before/after pic: 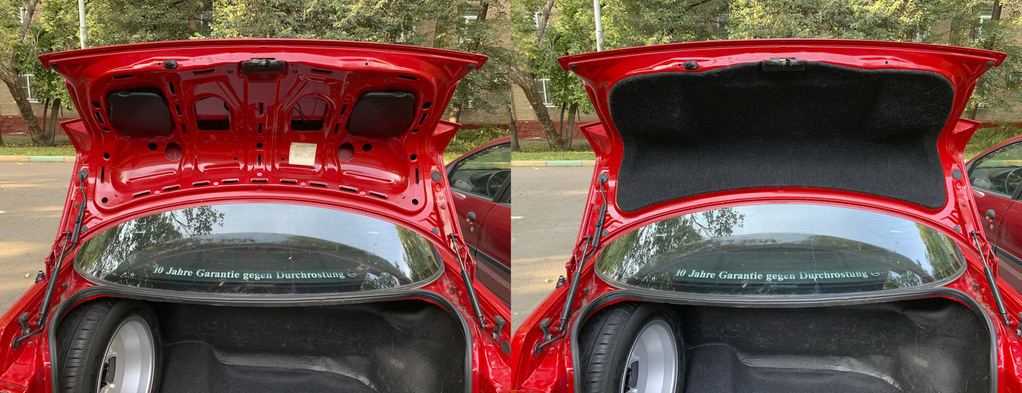 Finally on its place 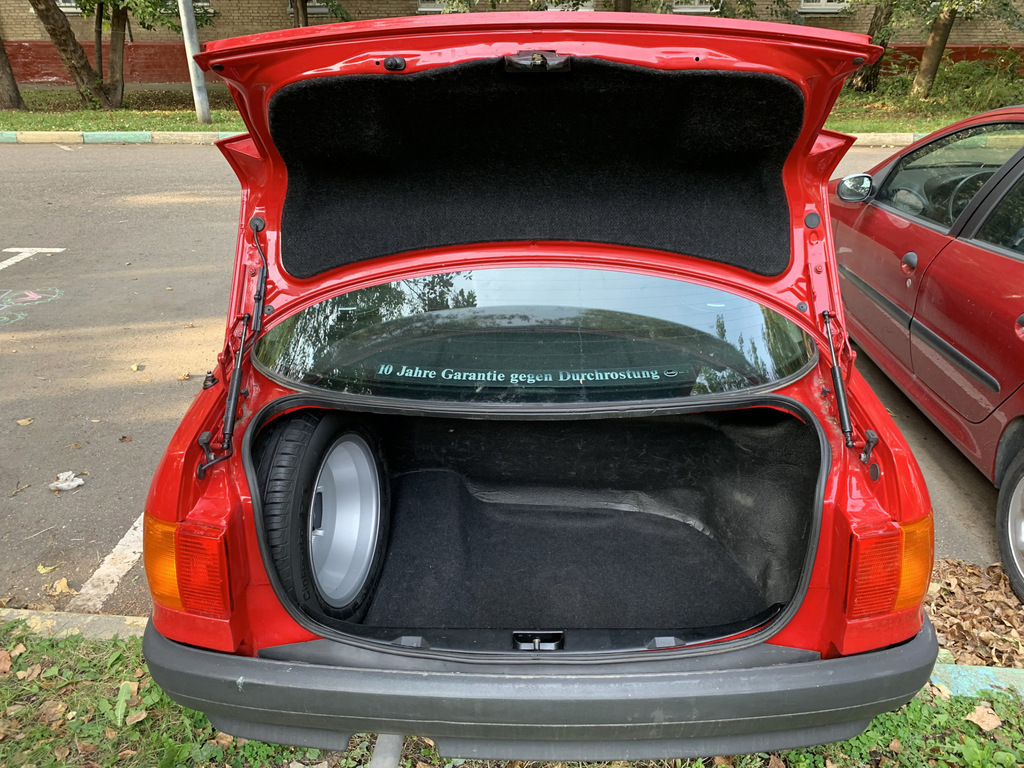 |
| |
|
|
Dr.AK
Part of things
 
Posts: 427
Club RR Member Number: 62
|
1989 Audi 80 B3Dr.AK
@docak
Club Retro Rides Member 62
|
Aug 18, 2021 15:09:14 GMT
|
|
You are doing some brilliant work here. Where did you get those new stickers if I may ask? I'd love some of these for mine sometime down the road.
|
| |
|
|
artem
Part of things
 
Posts: 22
|
|
|
|
You are doing some brilliant work here. Where did you get those new stickers if I may ask? I'd love some of these for mine sometime down the road. Thanks! oem-carstickers.com - there are mostly old VW stickers, but most of tech stickers are the same for old Audis, I just scrolled through all stickers and picked what i needed. |
| |
|
|
artem
Part of things
 
Posts: 22
|
|
|
|
Bought this wiper mechanism for only 6$, mine was okay but all covered in 30y.o. grease and dirt. So I decided to refresh the mechanism I've bought and swap it. 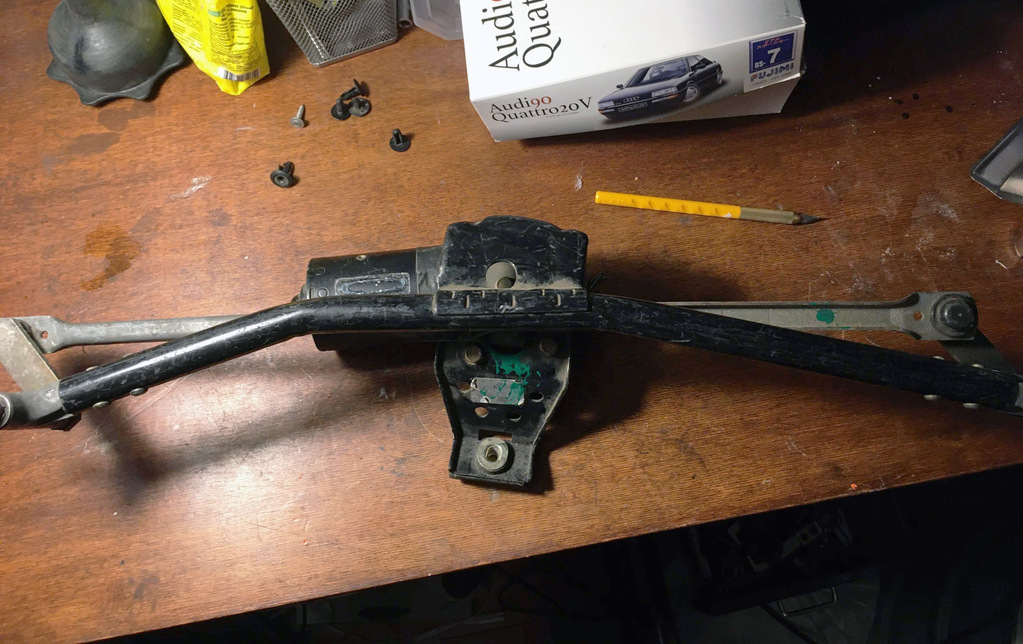 I disassembled and inspected the mechanism, turned out it was in nearly perfect condition, no sign of rust and wear. 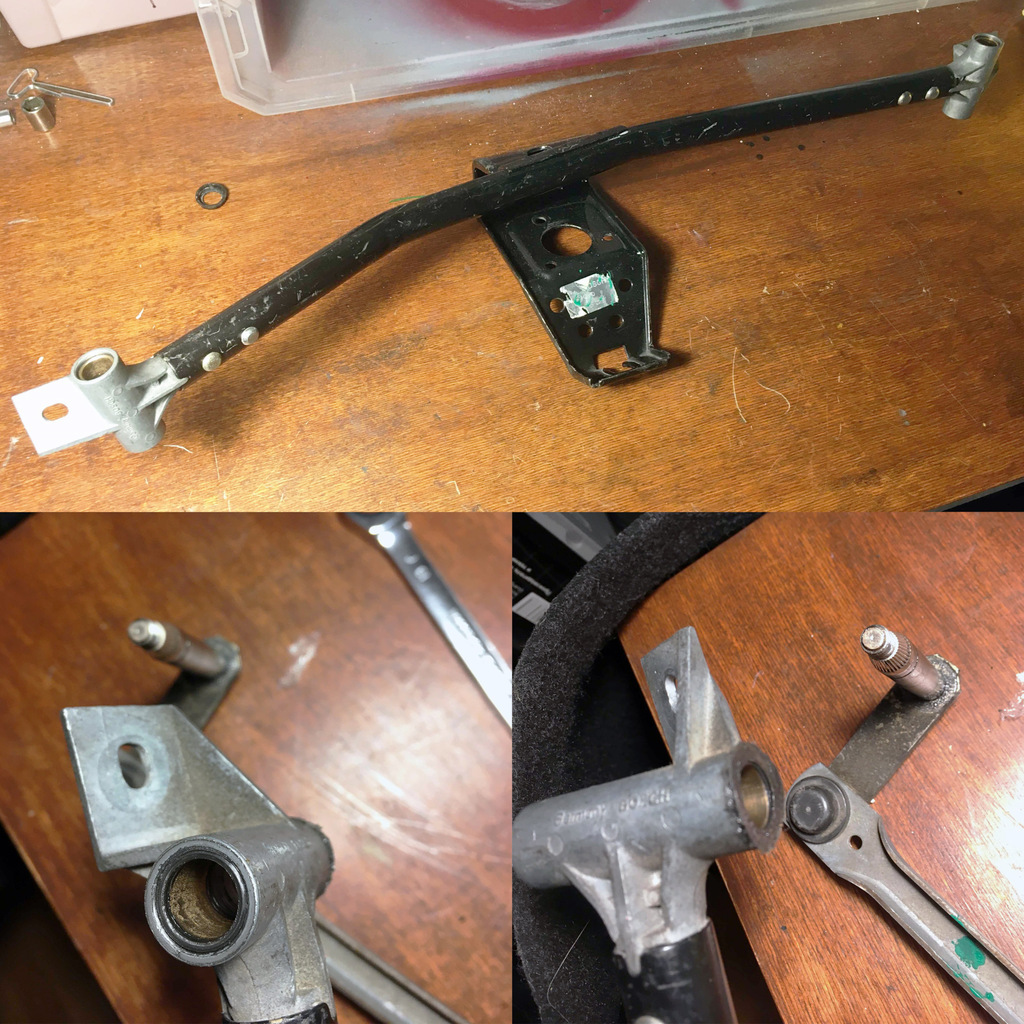 So the plan was to clean aluminium parts and to refresh paint on mechanism and wiper motor. I painted mechanism frame with epoxy primer and then with 2k black acryllic paint. As for motor shell, I also applied the epoxy primer and painted it with black enamel paint with 3 layers of 2k clearcoat. Last layer of clearcoat was applied dry to create semi-matt surface. After all parts dried, I assembled the mechanism back together using Mobil XHP 222 grease, and also cleaned all electric connections with Liqui Moly 7510 Kontaktreiniger cleaner. Final result: 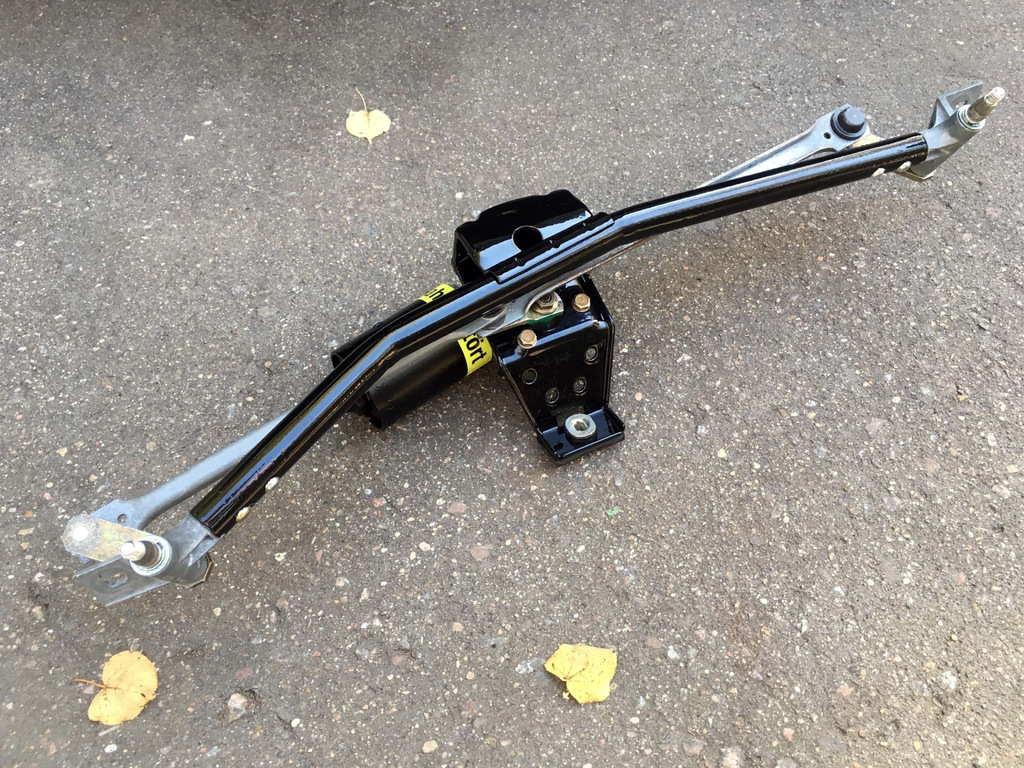 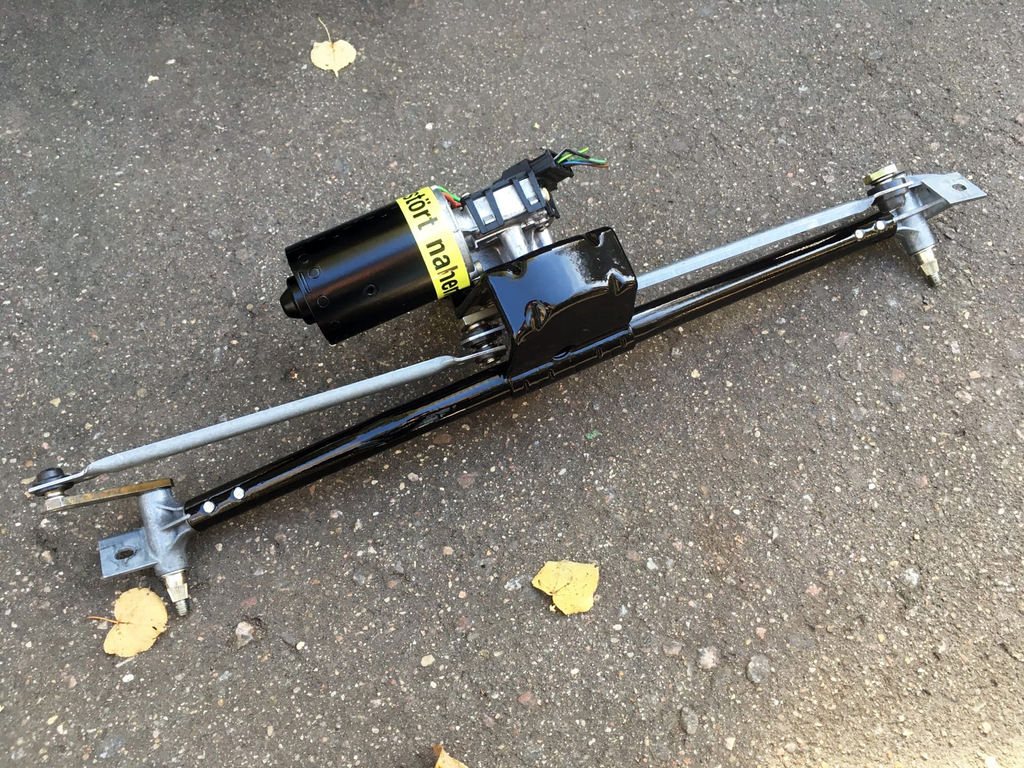 I also didn't forget about motor sticker  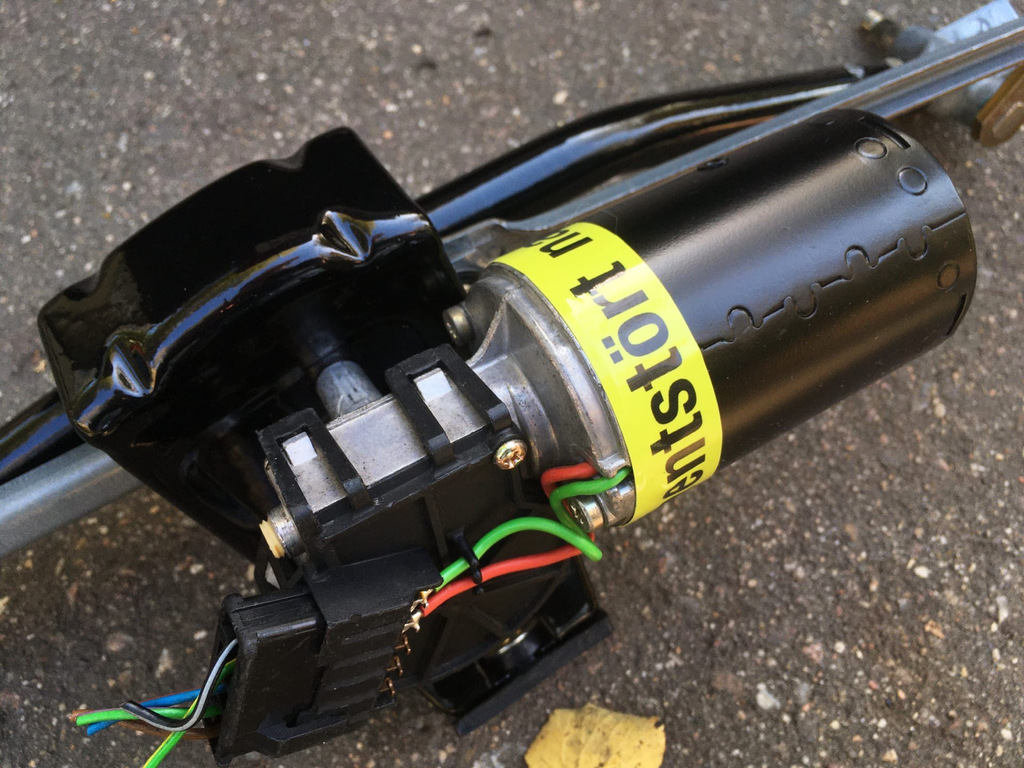 New and old wiper mechanism. It turned out they are slightly differs: restored one was produced by Bosch and the old one was produced by SWF. SWF wiper motor has rivets on it's cover, so you can't really maintain it without drilling them out. 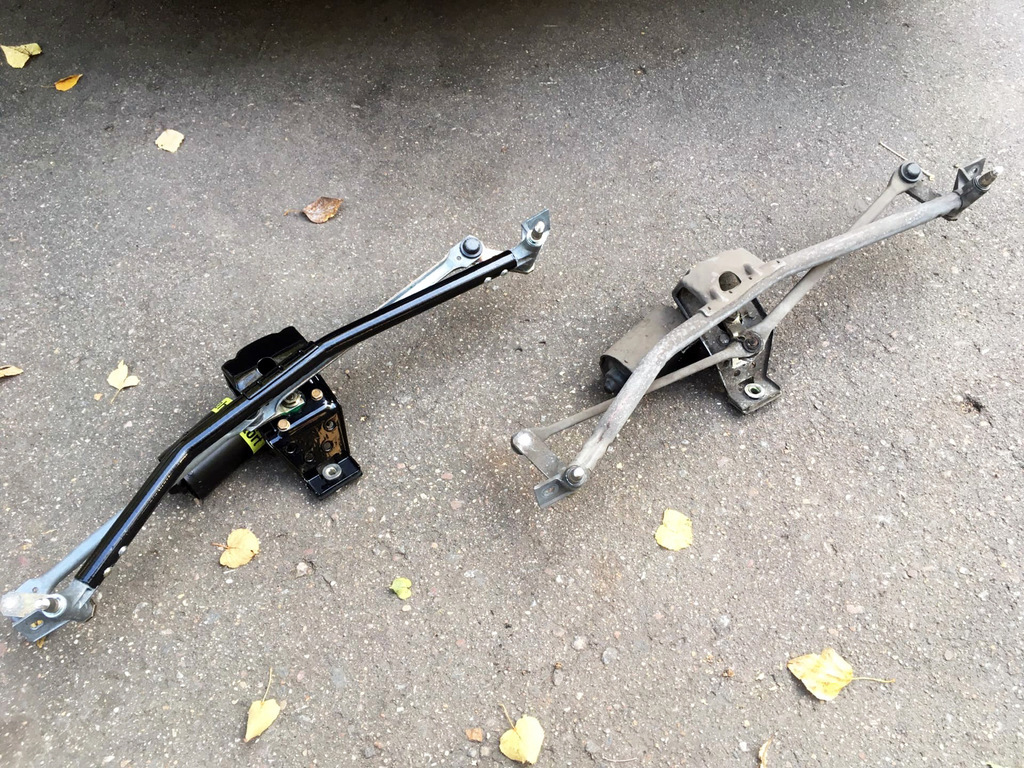 Installed: 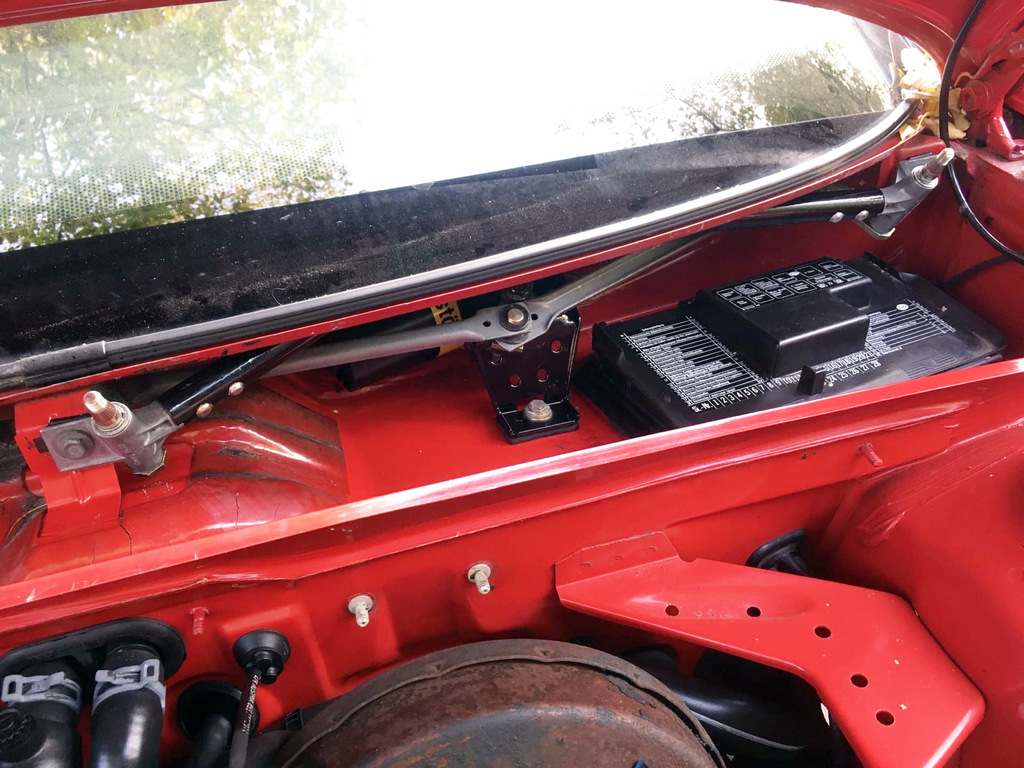 It's important to adjust the mechanism before turn the wipers on, otherwise blades will go downwards under the bonnet  I've adjusted it this way: untightened the nut on wiper motor shaft and manually rotated the mechanism (without the motor shaft) intil blade shafts reached its bottom dead centre when shafts stops to rotate. Ones this was done, I tightened the nut on wiper motor shaft and thats it. |
| |
Last Edit: Sept 7, 2021 8:00:48 GMT by artem
|
|
artem
Part of things
 
Posts: 22
|
|
Sept 18, 2021 11:20:18 GMT
|
Winter is coming, so it's time to prepare winter set of wheels (even though this was a year ago  ) Car has been running on its original 14inch factory steel rims for 31 years. This is how they looked, VAG 431601025R steel rims with old winter tyres. I was in a hurry so this is the only photo I've made before restoration: 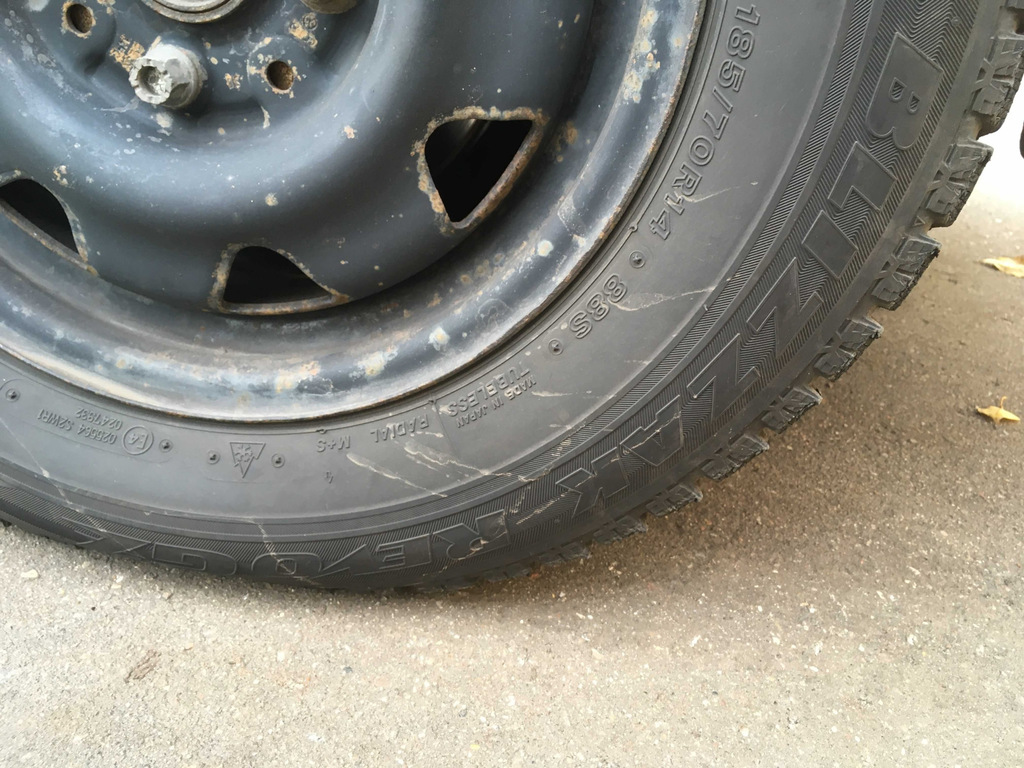 First of all I took this set of rims to local workshop for straightening, as rim lips were slightly bent. After that, rims were powdercoated with primer, black paint and semi-gloss clearcoat. Looks pretty much like original "rallyeschwarz" color. 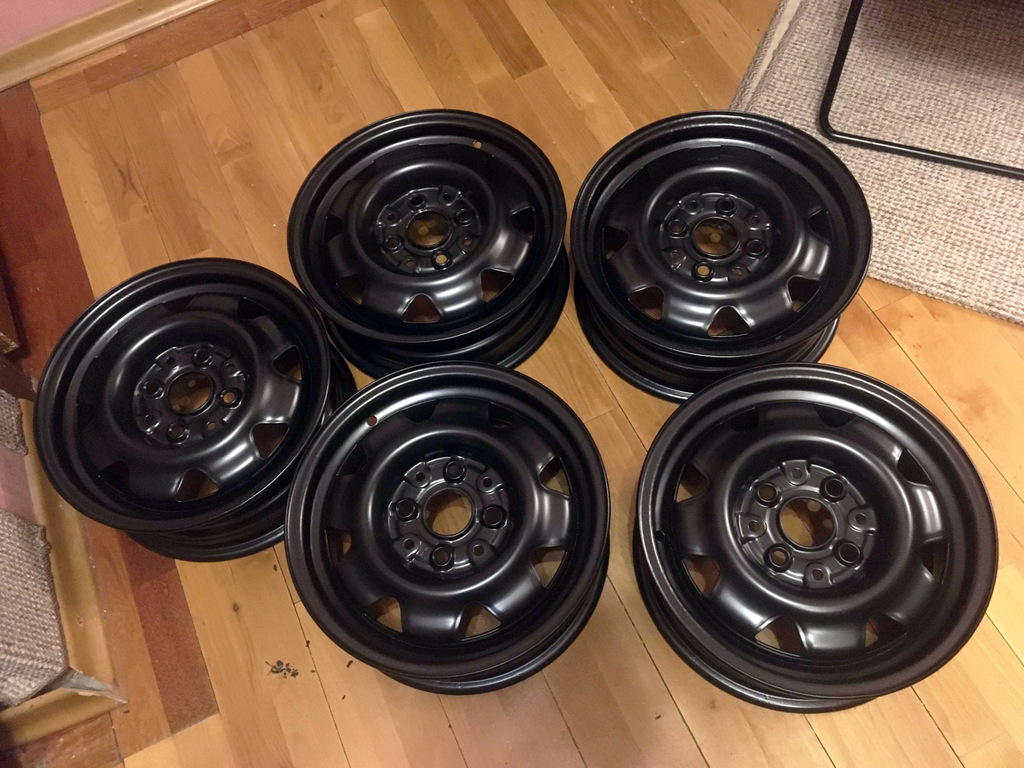 After sandblasting some small sand grains were stuck in the seam, that can cause corrosion in that spots, so I applied black acrylic paint using syringe. 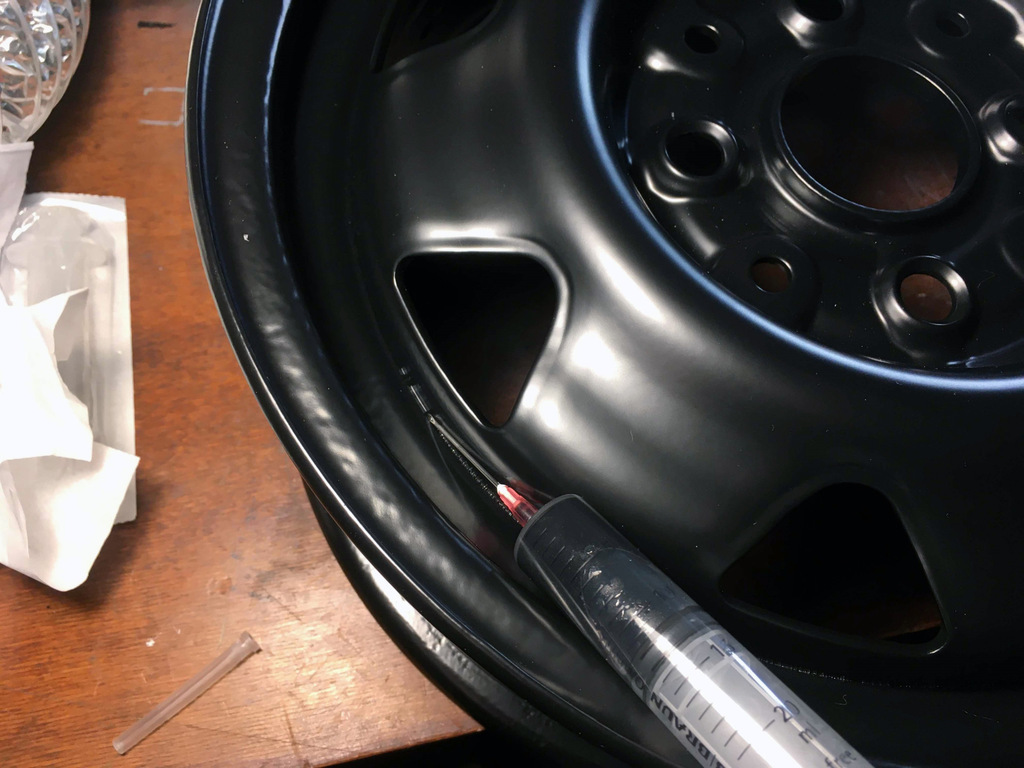 I also bought new valve stems VAG 311601361
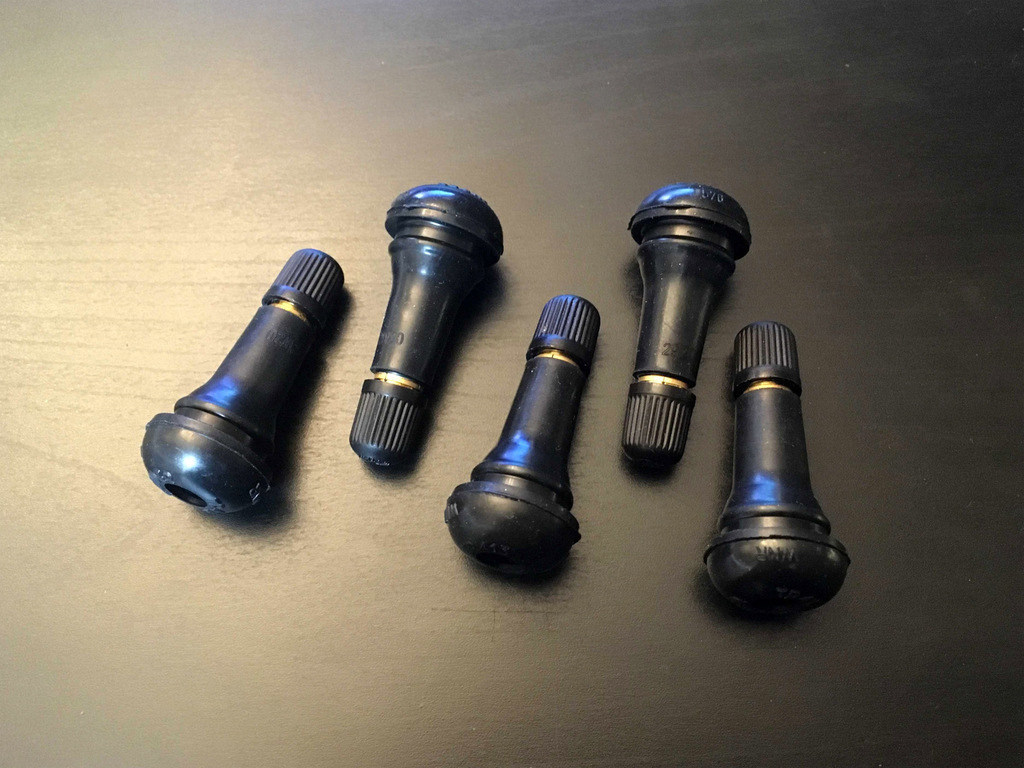 As for the tyres, I chose Pirelli Cinturato Winter 175/70 R14. These tyres look more like original factory tyres from 80s with their classic pattern design, so thats why I bought them. With wheels installed: 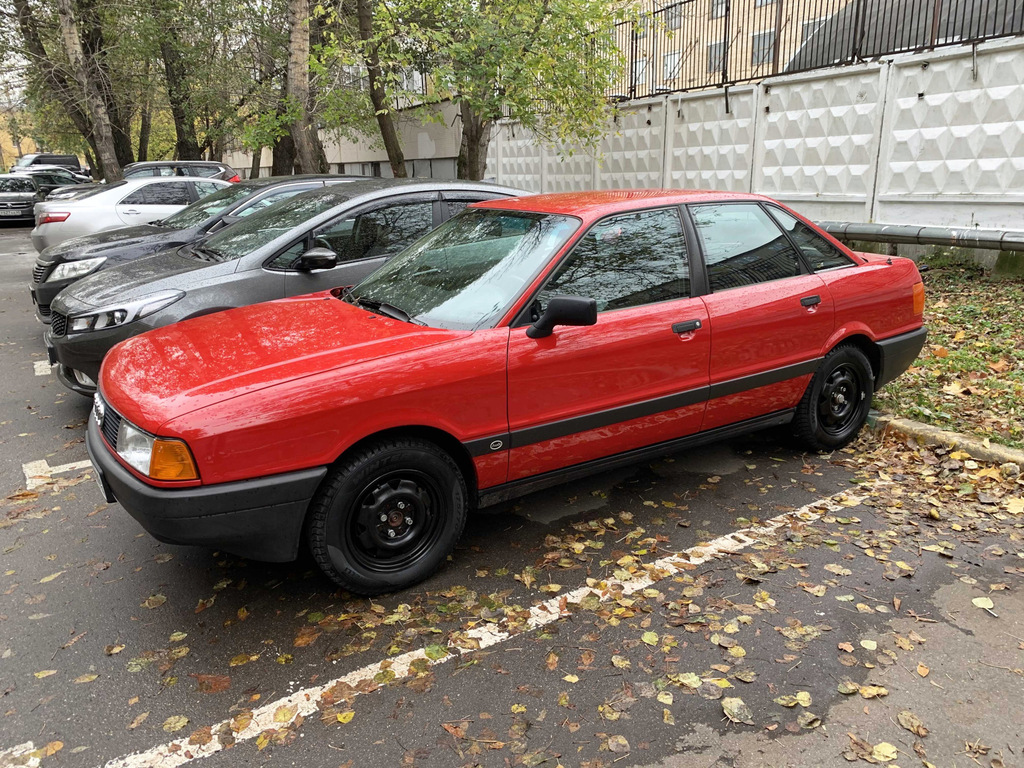 I didn't forget about spare tyre: 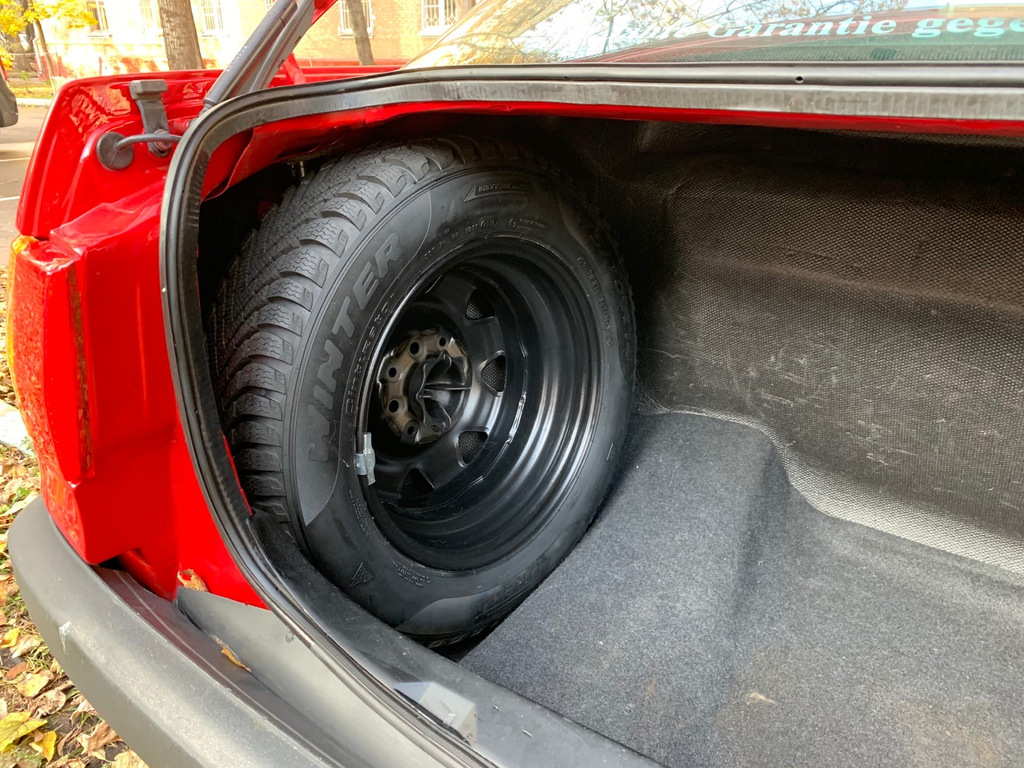 And also found a rare spare wheel cover VAG 893867594G. Spent more that a year trying to find it  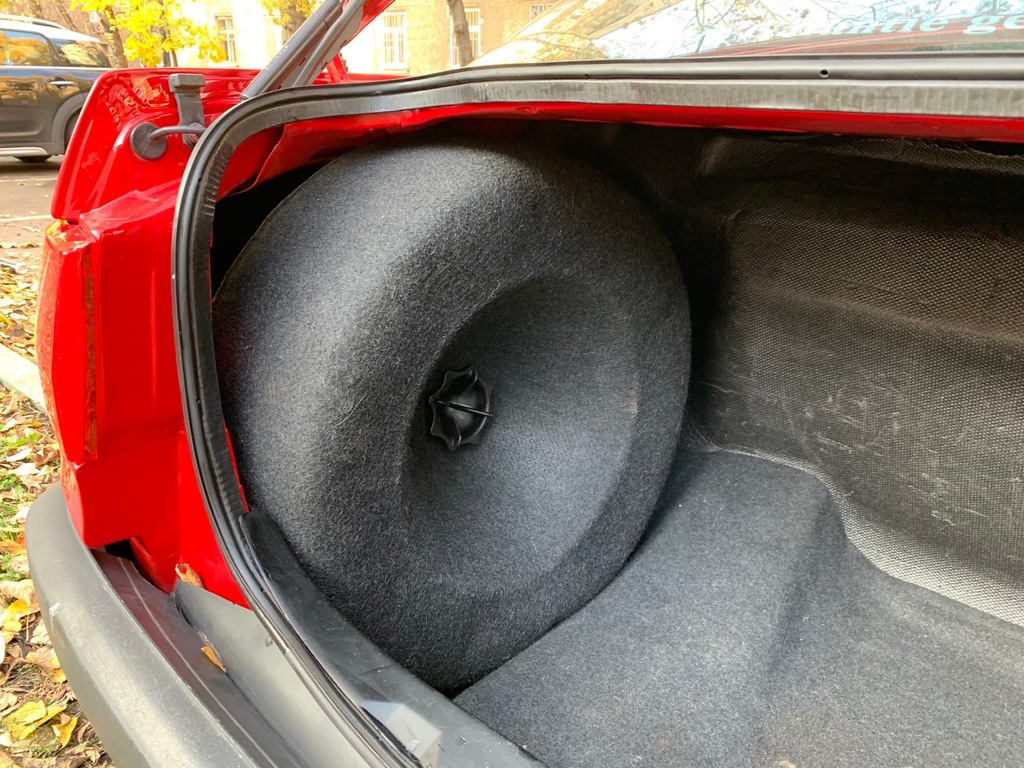 |
| |
|
|
artem
Part of things
 
Posts: 22
|
|
Oct 25, 2021 11:02:56 GMT
|
Hello! I was paying small attention to suspension and brakes, so they started to make strange noises. All rubber bushings were still original factory parts so there were signs of dry cracked rubber and deformation, as well as wheel bearings were making noises and shock absorber were no longer absorbing the shocks  There were a lot of work to be done with suspension, so I came up with the idea to buy spare set of suspension and restore it separately from the car. In that way, the car won't hang somewhere in the workshop without the ability of being moved and I can spend as much time as I want to rebuild all parts properly. Furthermore, using this chance, I can install the latest factory modification of suspension for the B3 chassis - rear axle with disc brakes, front struts with the larger and more durable wheel bearings, and latest version of anti-roll bar that attaches to the struts. So this is what I've managed to find: 1) Rear axle assembly — 8G0500047. With disc brakes and calipers + track bar 895505173A
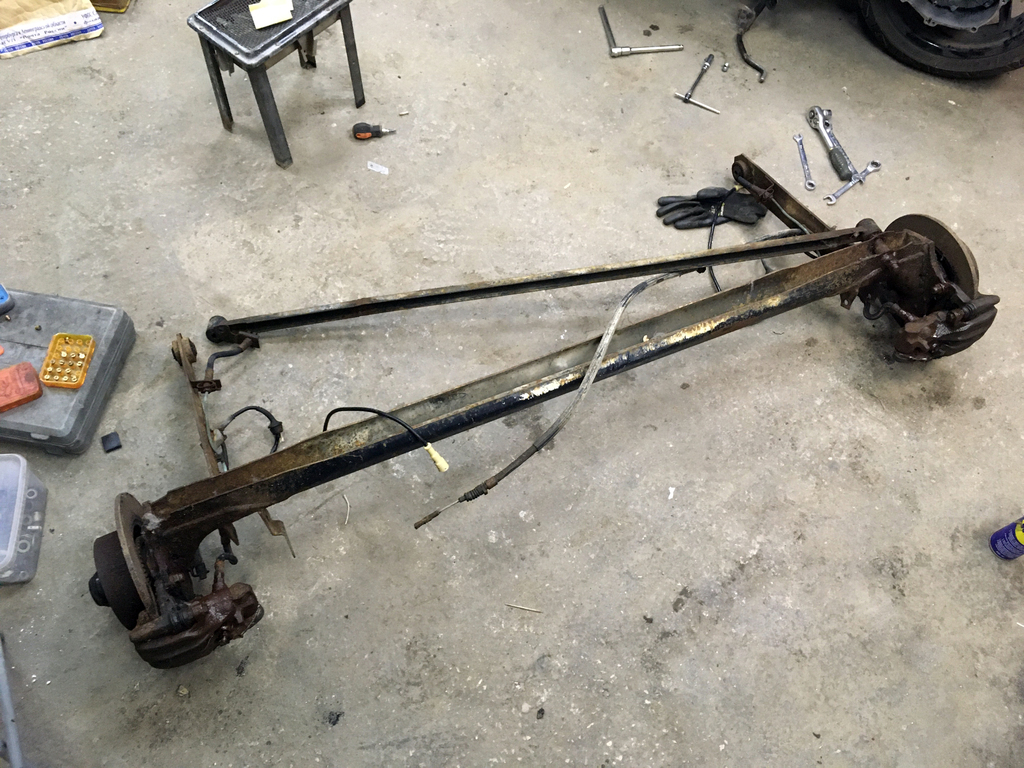 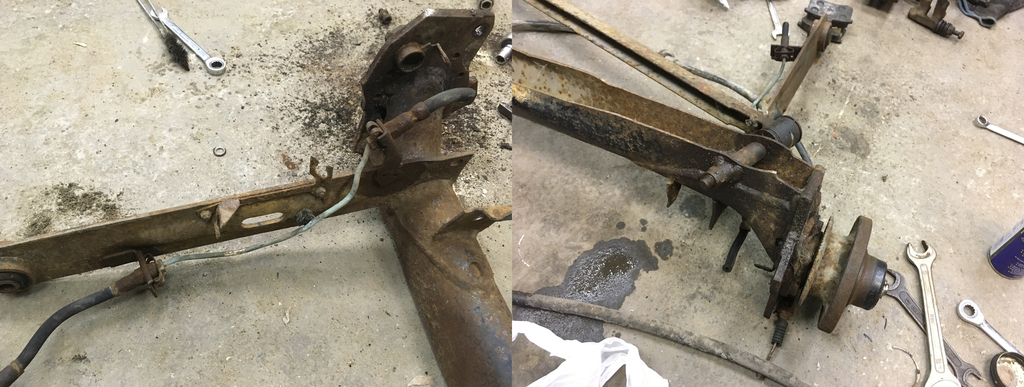 2) Front struts assembly from 1991 chassis — left strut 893412033E + right strut 893412034E. Also with steering knuckles — 893407241R left knuckle + 893407242R right knuckle. This is the latest version of front stuts — steering knuckle has bigger (75mm) wheel bearing and is bolted to strut, not welded like in earlier modifications. Struts also have bracket for anti-roll bar link. 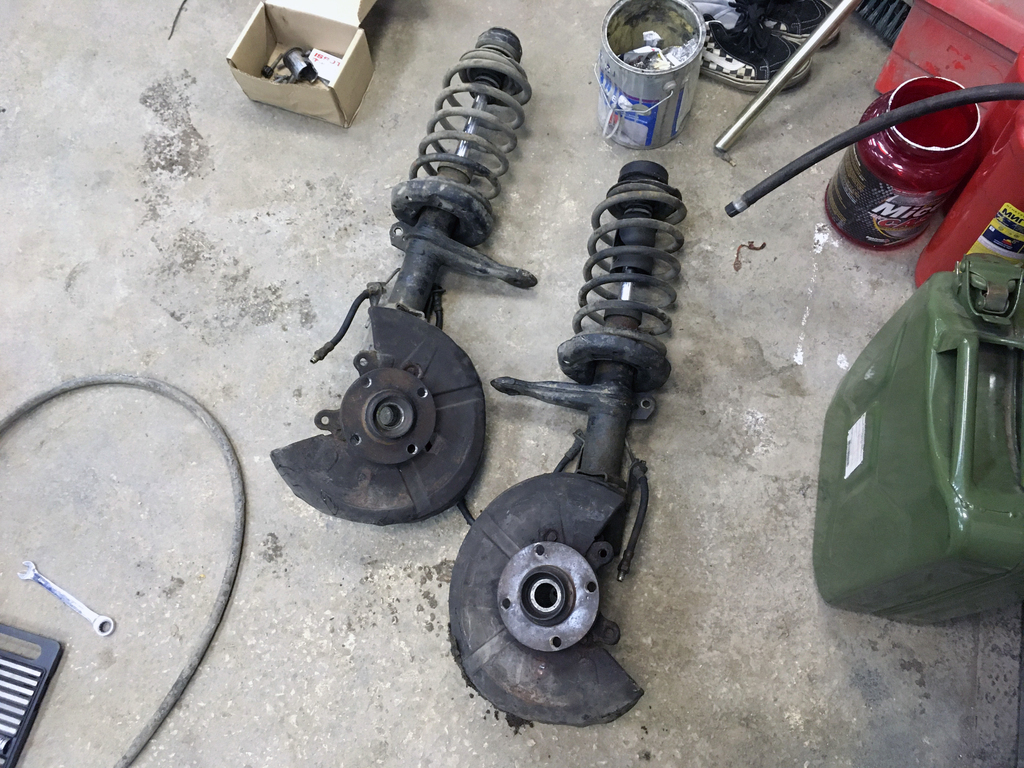 3) Subframe – 893199313M. There are several versions of subframes, depending on quattro or non-quattro, 4-cyl or 5-cyl engine, gearbox type. Mine is the simplest without any additional brackets. 4) Anti-roll bar from 1991 chassis — 893411309E. It's 23mm thick and bolted onto the struts using links. Earlier versions were bolted to suspension arms. I dissasembled all parts and extracted all rubber bushings and bearings to sandblast and powdercoat them. 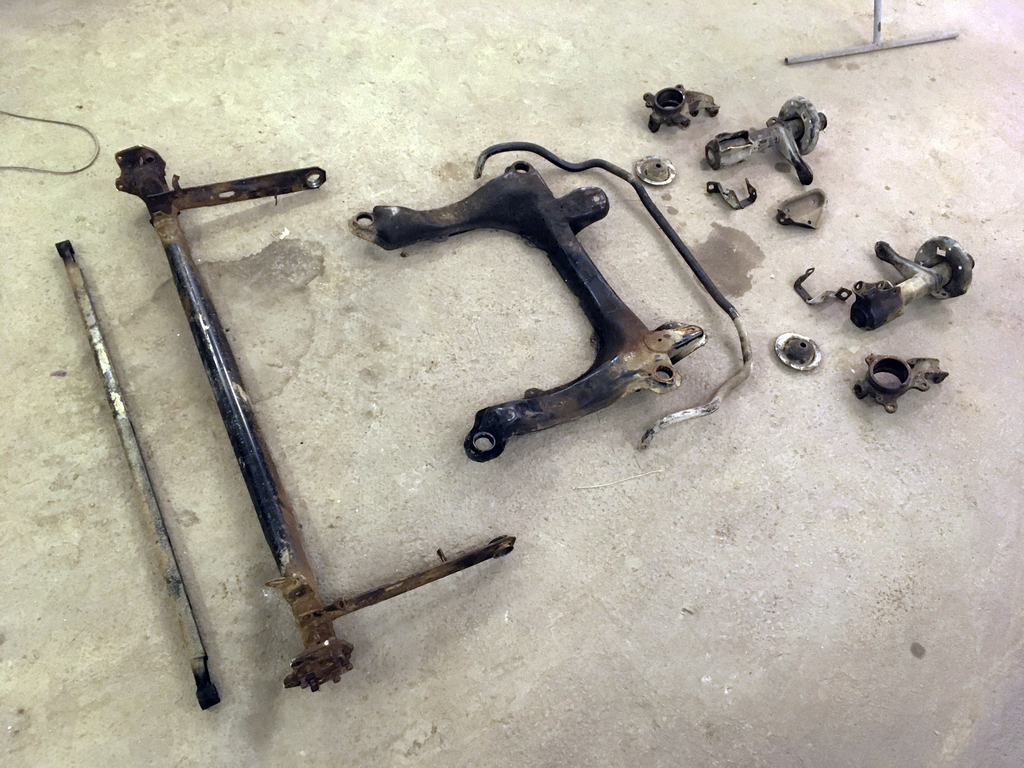 After sandblasting: 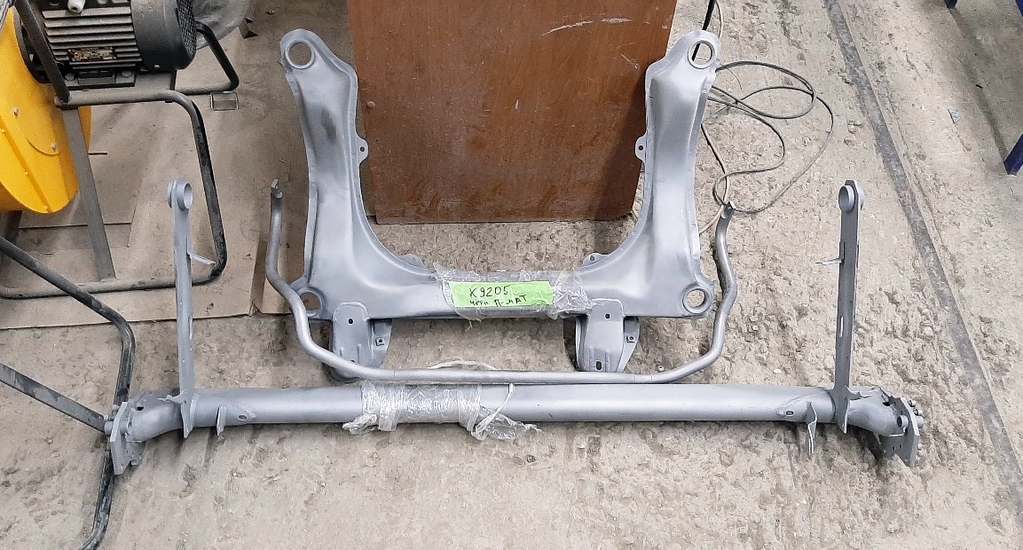 After powdercoating in factory-look black satin paint. Don't worry, purple and gold calipers are not mine  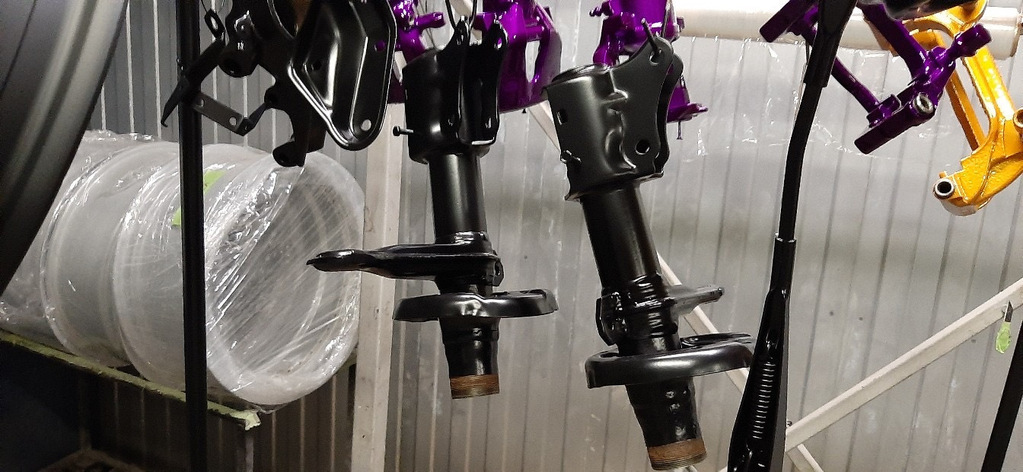 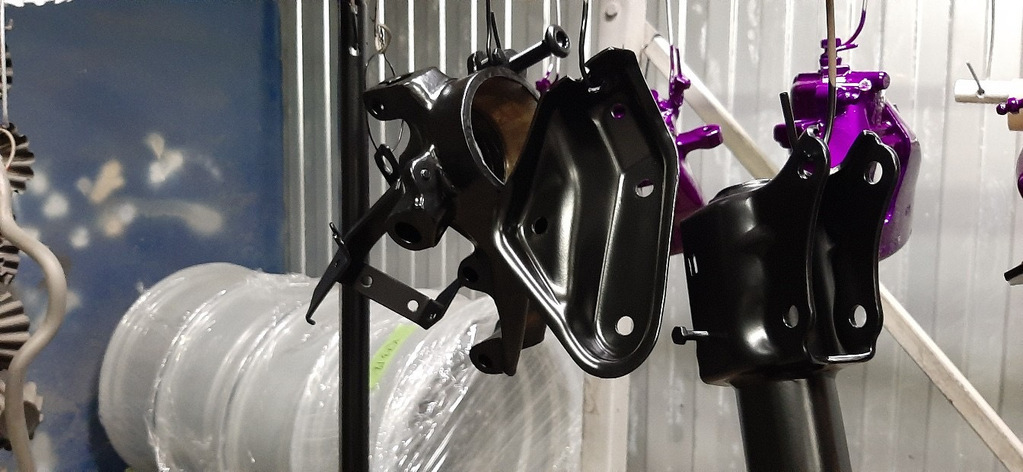 Subframe: 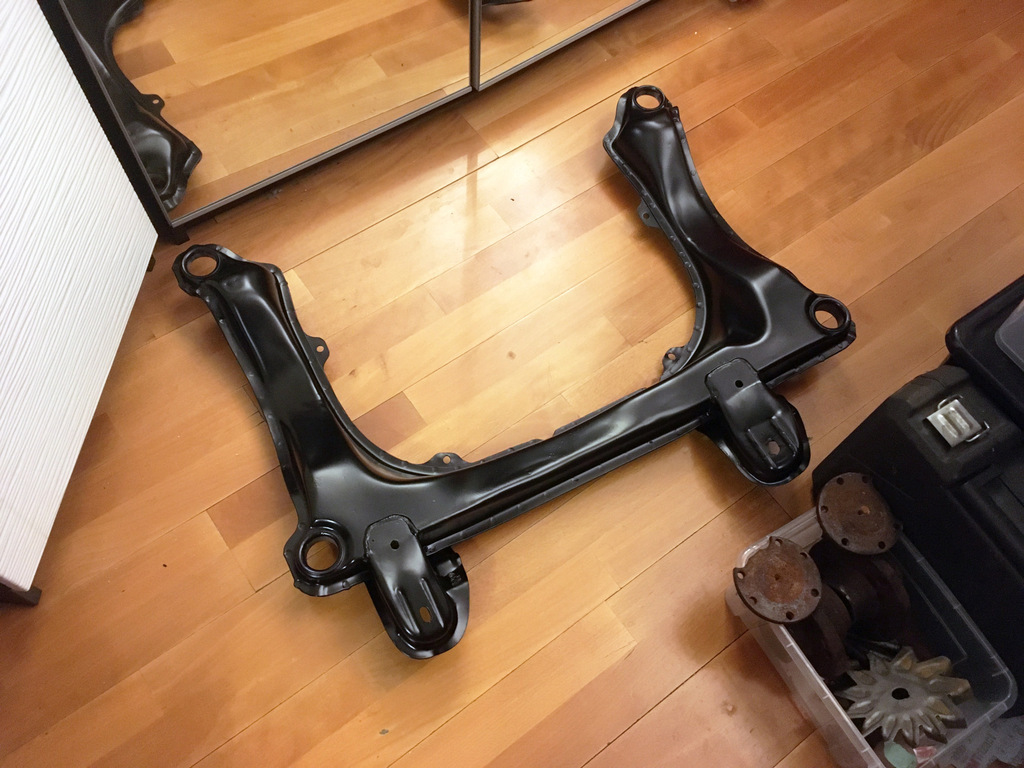 Some smaller parts are no longer available for order, so they were aqua-blasted and zinc-coated. Before: 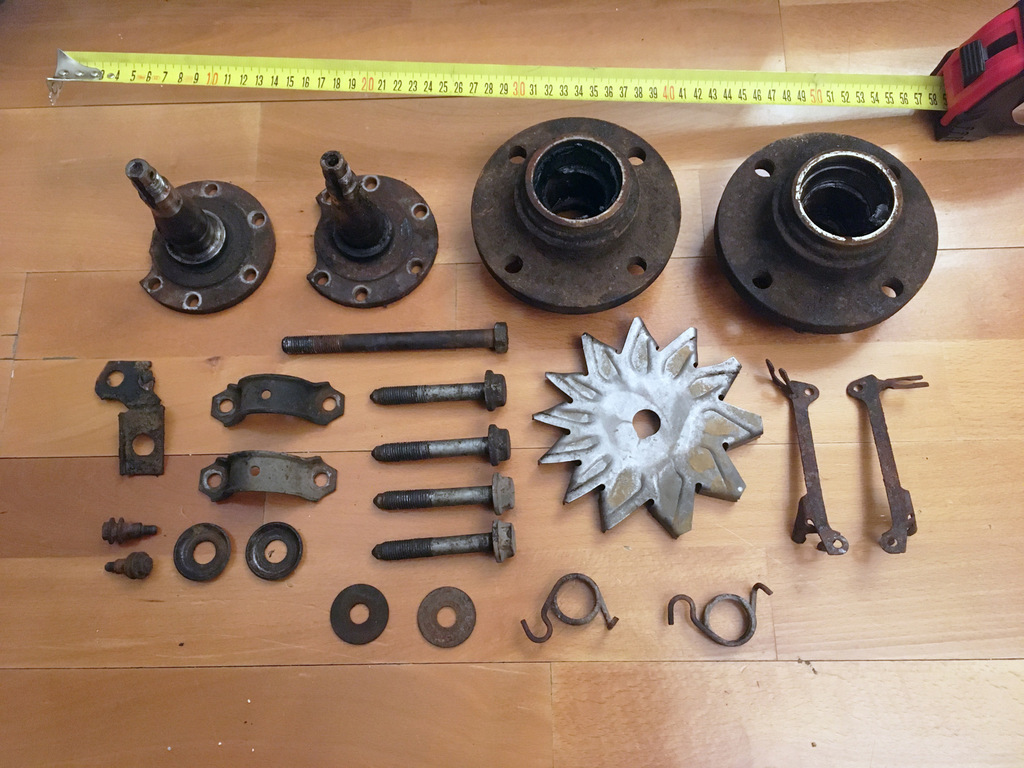 After: 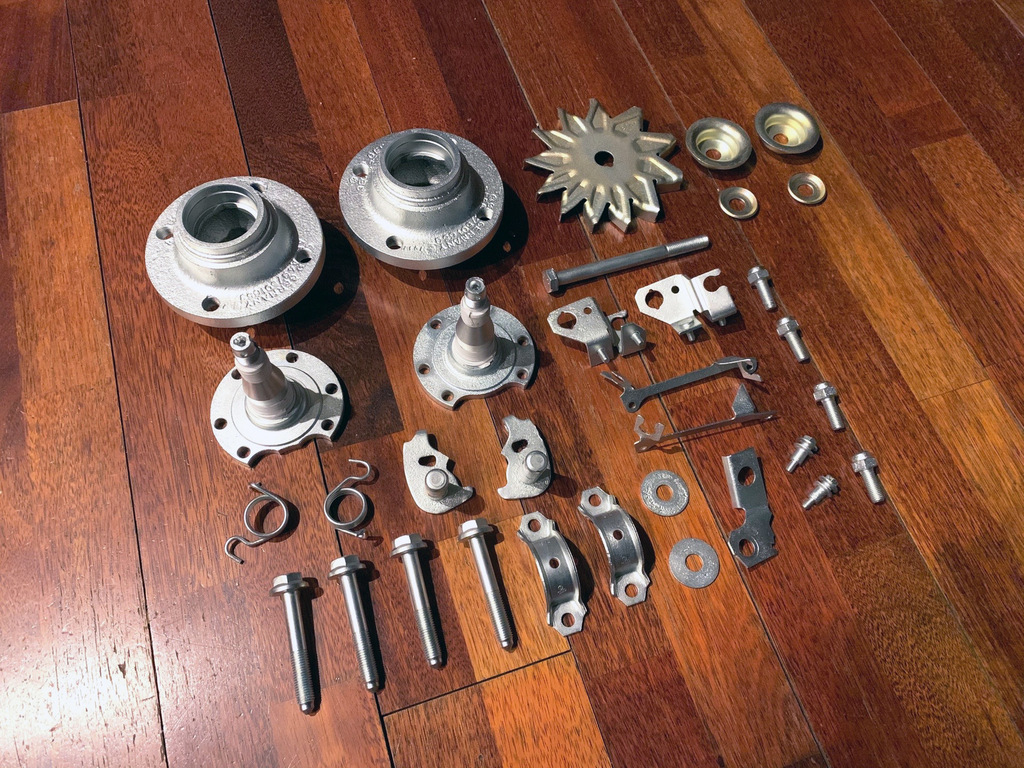 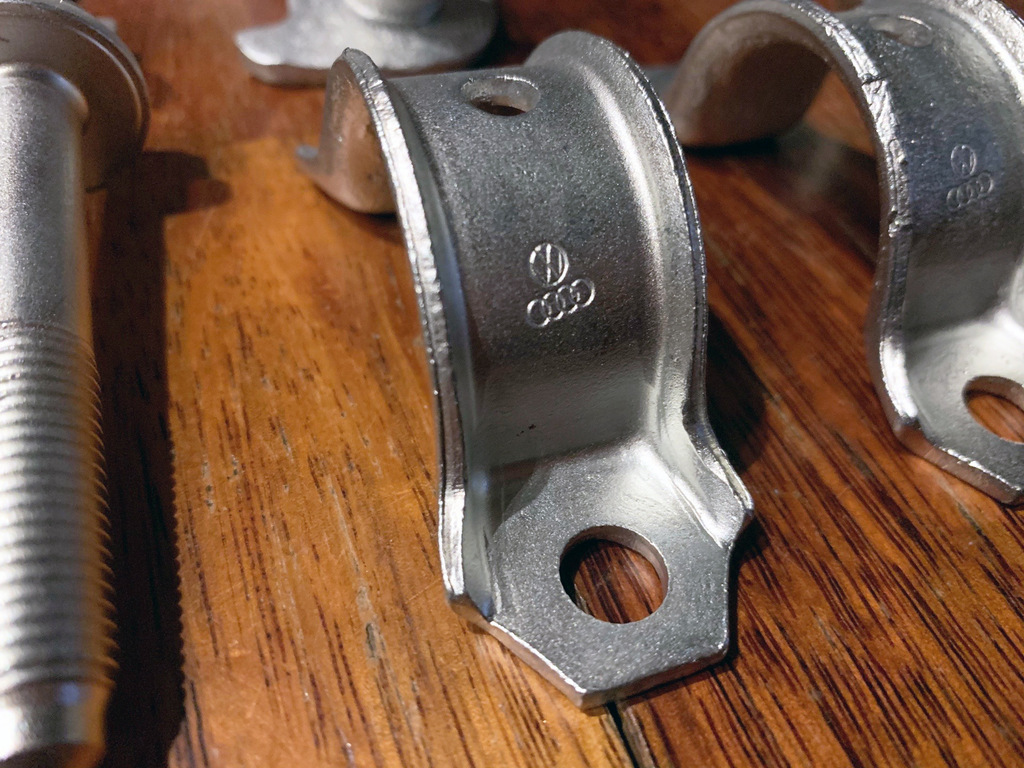 See you next time! |
| |
|
|
|
|
|
Oct 25, 2021 18:21:56 GMT
|
Brilliant job as always, the attention to detail is amazing! That boot lid liner is a nice find, didn't even know they existed for the typ89. My car has been treated with extra sound proofing in the doors and floor and the noise that since then has been audible from the general direction of the luggage compartment tells that something like this might be handy... Just now noticed the car has rear disc brakes even it is equipped with a carb engine. Always thought those came only with the higher output engines. BTW, if anybody needs a similar spare wheel cover in beige, I have one  |
| |
Citroën DS 21 '66, Renault 16 TS '73, Scimitar GTE '74, Audi 80 '87, Merc 190E '88, Peugeot 205 GTI '88, BMW 735iL '89, Merc 230TE '89 , BMW 320i '92
|
|
artem
Part of things
 
Posts: 22
|
|
Oct 26, 2021 17:29:22 GMT
|
Brilliant job as always, the attention to detail is amazing! That boot lid liner is a nice find, didn't even know they existed for the typ89. My car has been treated with extra sound proofing in the doors and floor and the noise that since then has been audible from the general direction of the luggage compartment tells that something like this might be handy... Just now noticed the car has rear disc brakes even it is equipped with a carb engine. Always thought those came only with the higher output engines. BTW, if anybody needs a similar spare wheel cover in beige, I have one  Thanks! I haven't noticed any difference in incoming noise with that boot lid liner installed (it's still noisy  ), so I think I've bought it just because it's rare part. My car came with rear drum brakes originally, but I thought that it's a good chance for upgrade and found a spare axel with disc brakes. Looking ahead, I can say that it was worth it, brakes became more responsive and predictable. The only thing is, I haven't installed ABS system yet, so this might be a bit tricky at winter, but as far as I know, not all B3s were equipped with ABS when rear disc brakes installed. |
| |
Last Edit: Oct 26, 2021 17:30:32 GMT by artem
|
|
artem
Part of things
 
Posts: 22
|
|
Dec 22, 2021 11:01:25 GMT
|
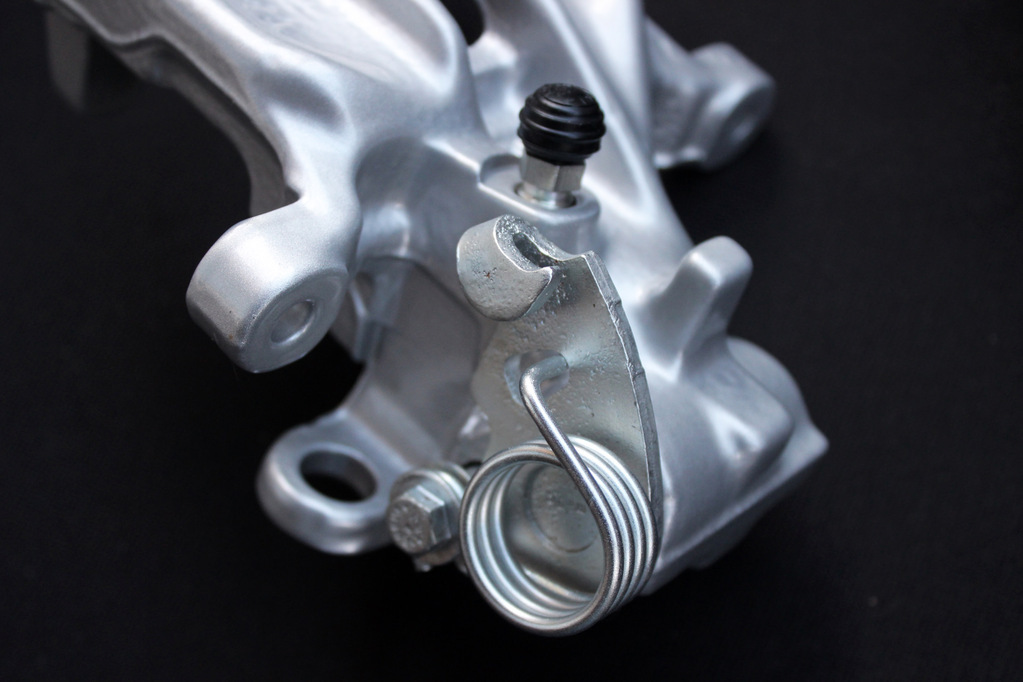
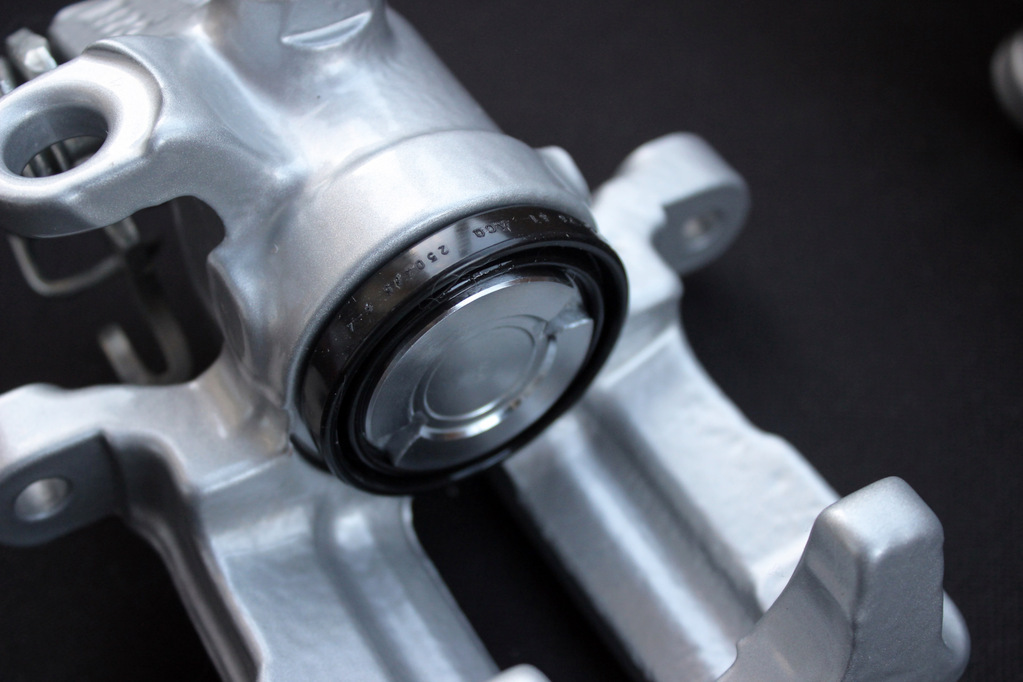
Hello! Time to restore some parts from the set of suspension I've bought. Started from the tricky ones - rear calipers. This is how they looked when I took them from the rear axle, original Lucas 38 calipers: 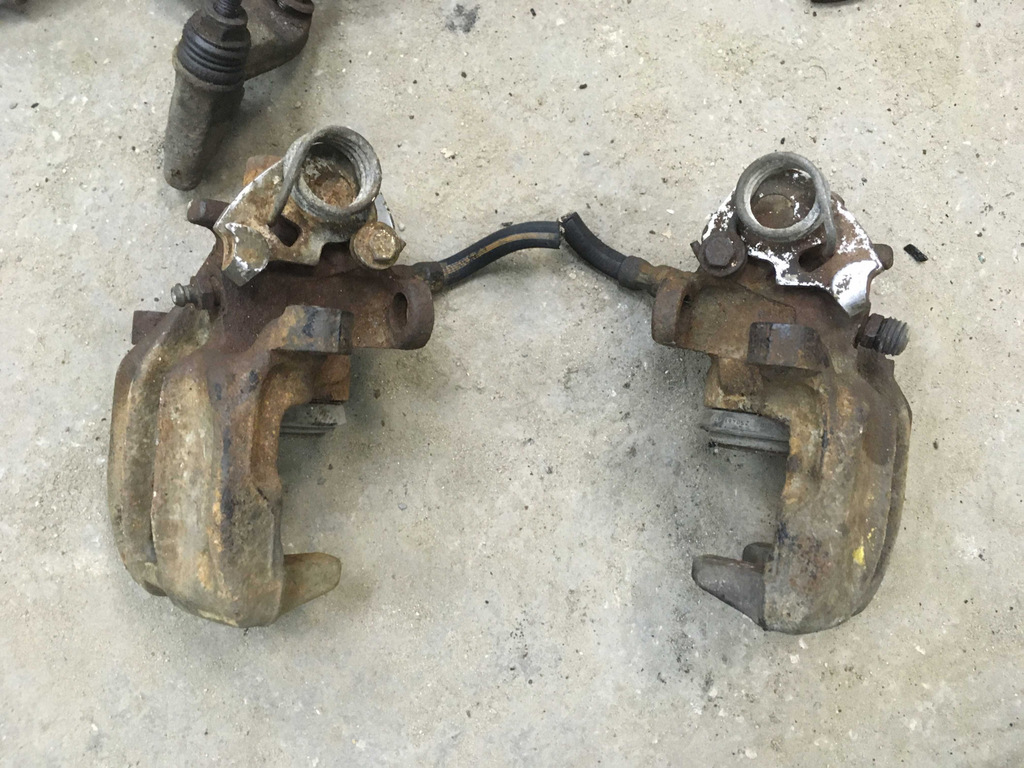 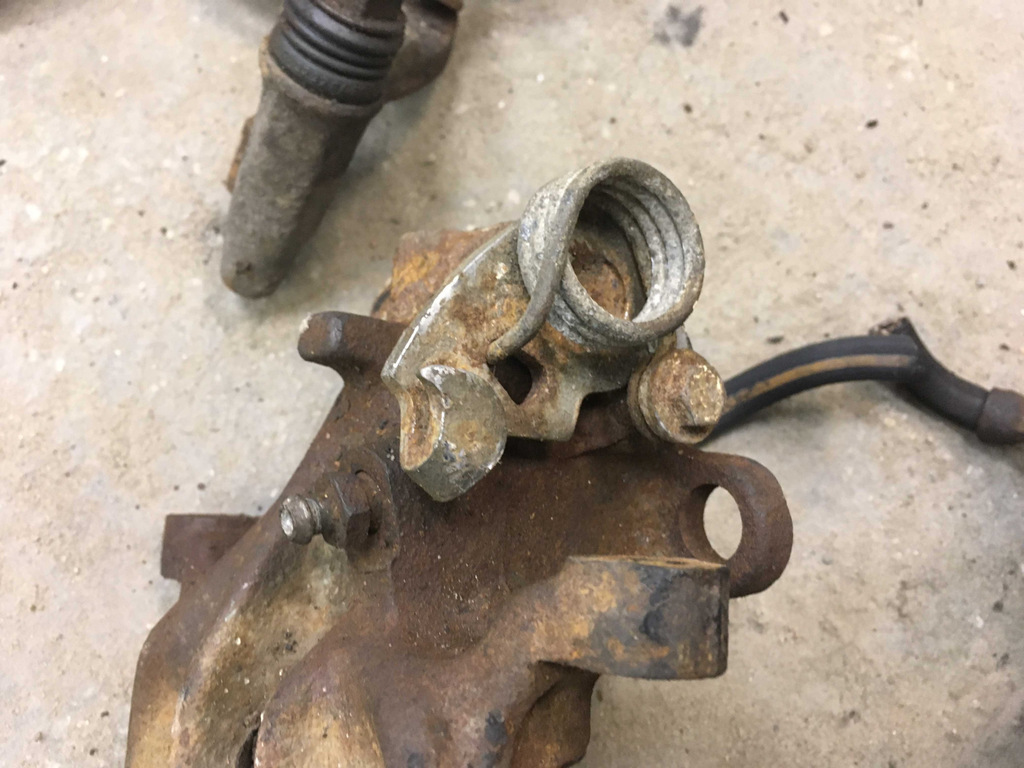 I decided to sandblast and powdercoat them with the rest of the suspension parts. Painted in silver metallic + gloss coat. Turned out pretty nice 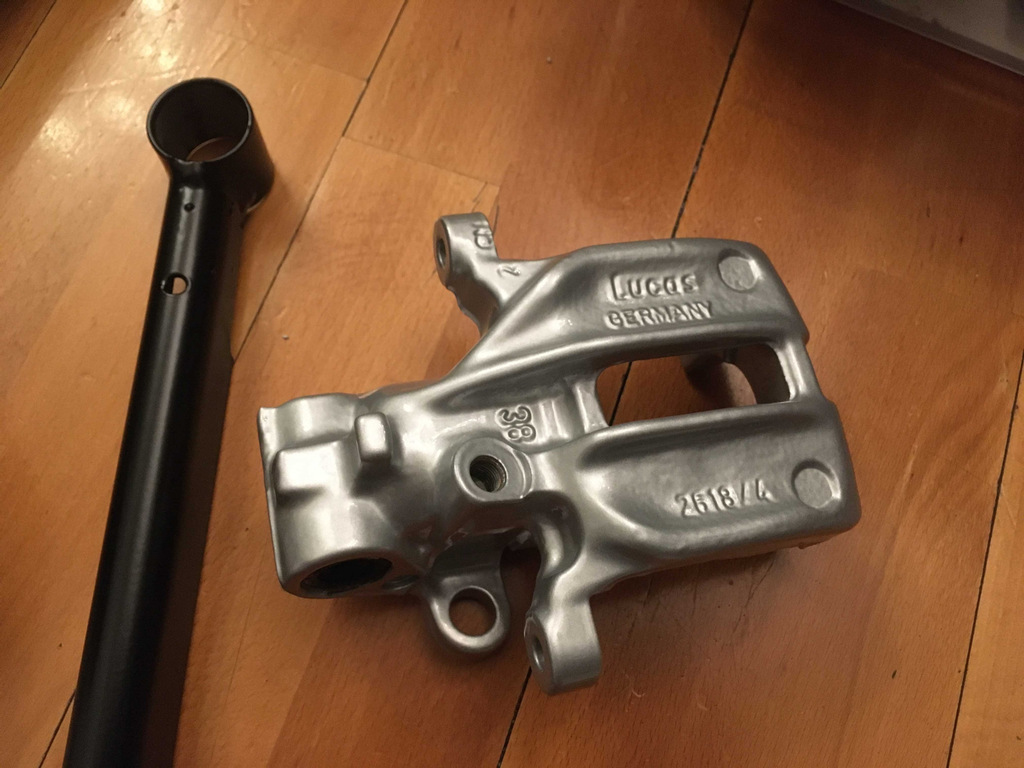 As for the repair kit, I bought two sets of FRENKIT 238902. This is a full repair kit with piston and all rubber seals. All parts together ready for assemble: 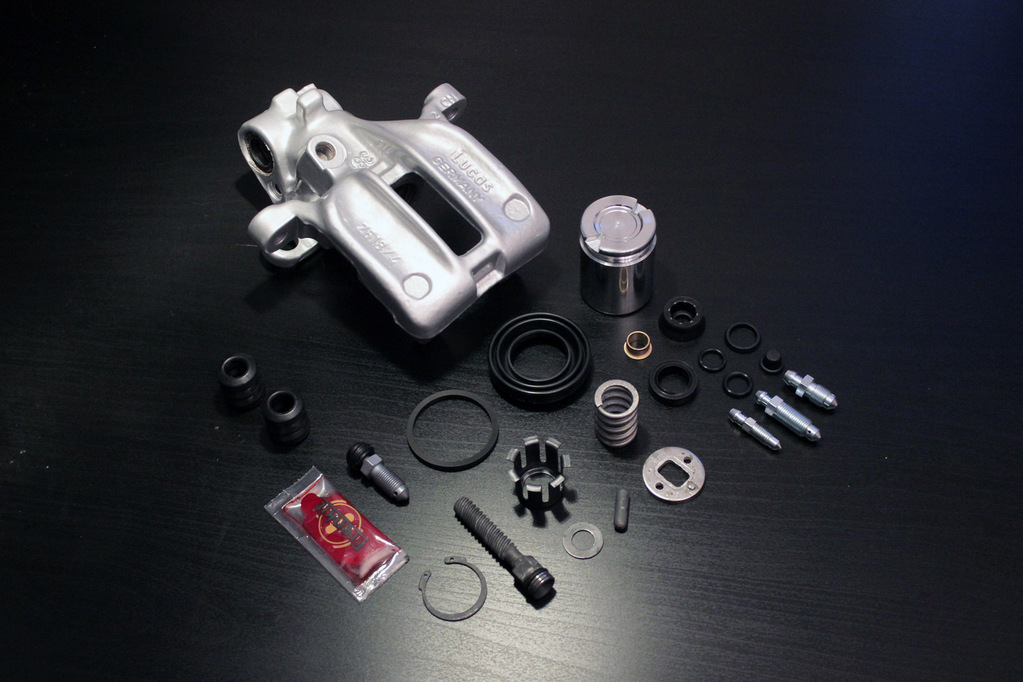 I checked reviews of this Frenkit repair sets and some people claimed that rubber sleeves for pistons aren't durable enough, so I found the original VAG 8D0698671 repair kit. Expired 11 years ago lol. Bought it just for fun. 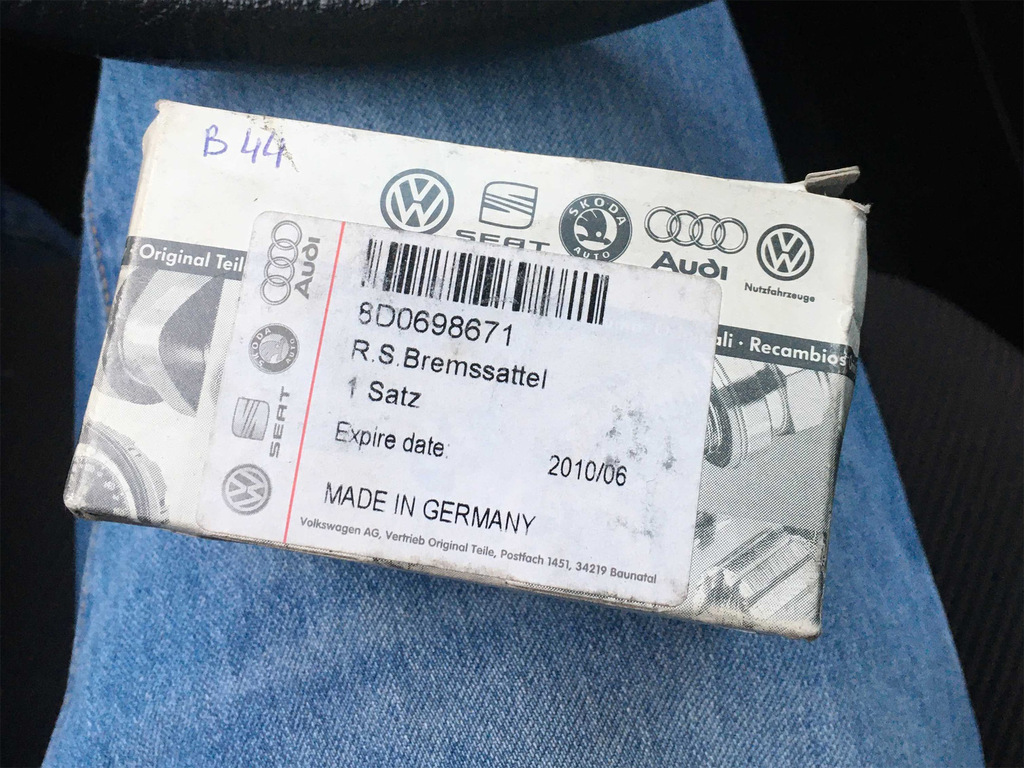 Despite the expiry date, all rubber sleeves inside were in perfect condition, no cracks or any other signs of degradation. Repair kit contained 2 rubber sleeves for pistons and 2 rubber sealing rings, plus some special montage fluid. The instruction attached says that seals must be soaked in this fluid at least for 45 minutes before assembly. 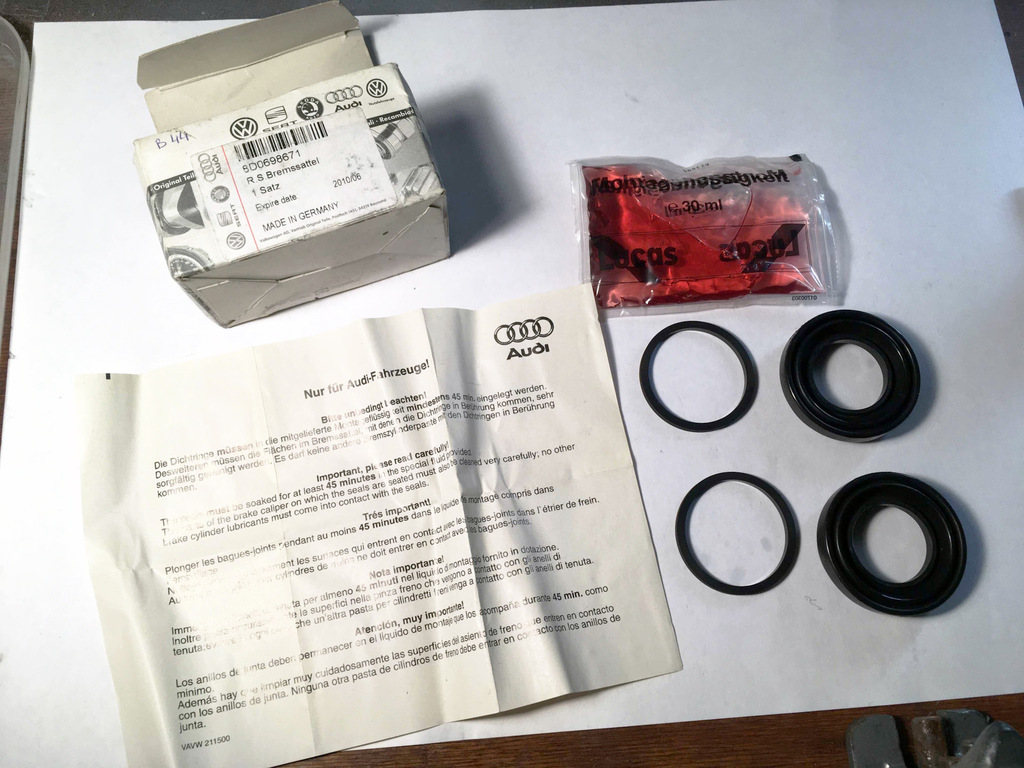 The most tricky part of assembly is installing the retaining rings inside caliper. Ring is placed at the bottom of the caliper and holding a loaded spring of handbrake mechanism. So I had to press the spring with bearing extractor and use special bended pliers to install the rings. I also used ATE 03.9902-0511.2 montage paste for calipers during the whole process of assembly. 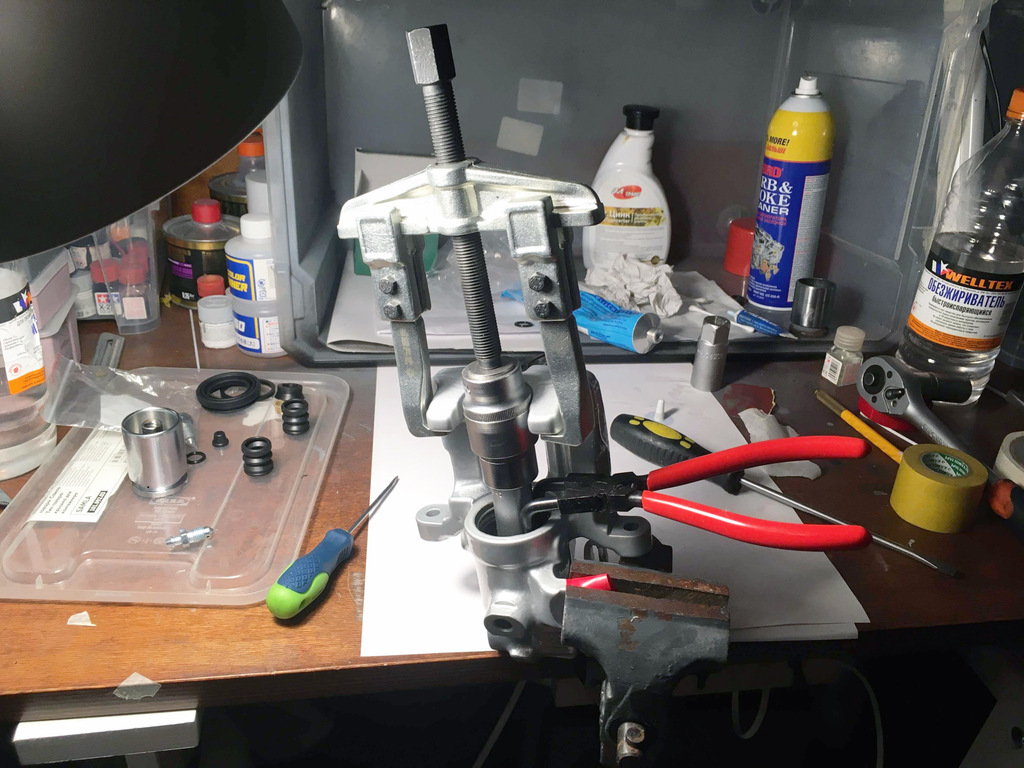 Finally, some refreshed calipers: 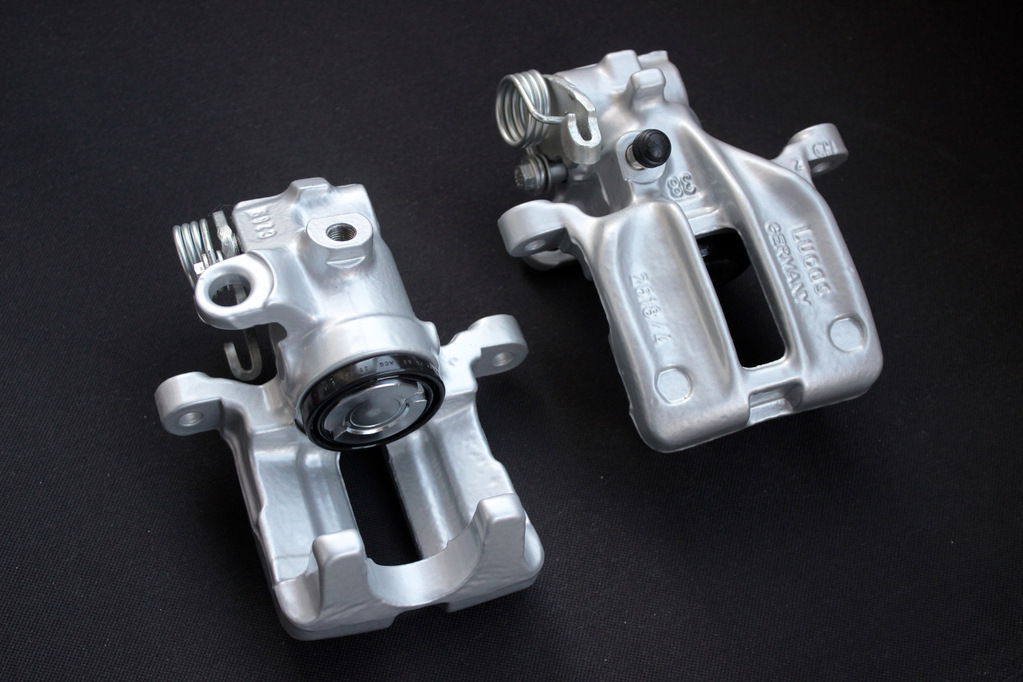 All small external parts like springs and bolts were also aquablasted and zinc coated. I also bought 2 new bleeding valves ATE 03.3518-5200.2
  |
| |
|
|
gezzard
Club Retro Rides Member
Posts: 644  Club RR Member Number: 69
|
1989 Audi 80 B3gezzard
@gezzard
Club Retro Rides Member 69
|
Dec 22, 2021 11:19:26 GMT
|
|
I've just sat and read the whole of this thread on my lunch break, the Audi looks fantastic, and I admire the effort that you've put in to not only restoring it, but also sourcing and using OEM parts.
Looking forward to further updates.
|
| |
|
|
|
|


 . Put a dirty spare alternator cover to compare the difference.
 bluing is good to protect guns, but not car parts, so use zinc-plating to protect bare metal parts from corrosion. bluing is good for some short period of time, like several month.


 . Put a dirty spare alternator cover to compare the difference.
 bluing is good to protect guns, but not car parts, so use zinc-plating to protect bare metal parts from corrosion. bluing is good for some short period of time, like several month.


