|
|
|
Nov 12, 2022 15:22:40 GMT
|
|
|
| |
|
|
|
|
|
|
|
Nov 13, 2022 12:41:24 GMT
|
|
I jacked up the front of the Cooper and had a look underneath. Looks like the fresh oil that has leaked onto the garage floor is power steering fluid and not engine oil, as confirmed by the half empty power steering fluid reservoir.
The back of the engine is covered in oil, ditto the sump and subframe.
I need to replace the auxiliary belt.
I need to replace the a/c compressor clutch.
The cam cover gasket that I replaced last year is leaking again as the spark plug tubes are full of oil.
According to the service history the supercharger was serviced a couple of years ago but who knows whether the service was actually done.
I’ve decided, I’m retiring the Cooper until further notice and I’m going to remove the subframe and front end and service / replace whatever necessary to make the Cooper oil and fluid tight.
Watch this space for further updates.
And wish me luck.
|
| |
|
|
|
|
|
Nov 14, 2022 17:19:51 GMT
|
Cooper major works project Day 1. Ideally, to carry out the proposed repairs I would want the Cooper in my workshop, which has heat, plenty of electricity, a decent sound system and most importantly, an abundance of space. However, my BMW E46 lives in the workshop and as it won't fit in the right side space of the double garage where I keep the Cooper and, as I refuse to park the BMW outside, especially during the winter months, I will have to work on the Cooper in the smallest of the three available spaces. I started by reversing the Cooper into the garage and creating access via the interior to the boot mounted battery by removing the sub-woofer and dropping the rear seats. 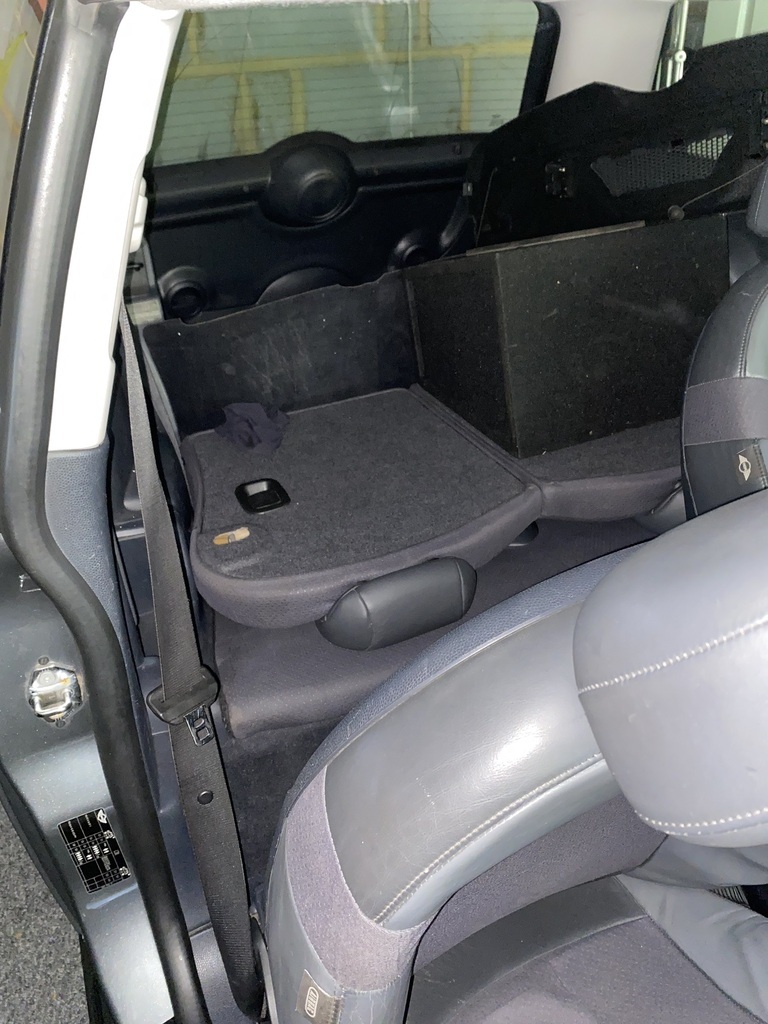 I then used a syringe to remove the rest of the fluid from the power steering reservoir. If I left it, it would only drip down onto the garage floor. The fluid looks black in the photo but is actually quite clean. It may come in handy when I test the system for leaks. Once fixed, I will fill the system with fresh fluid. 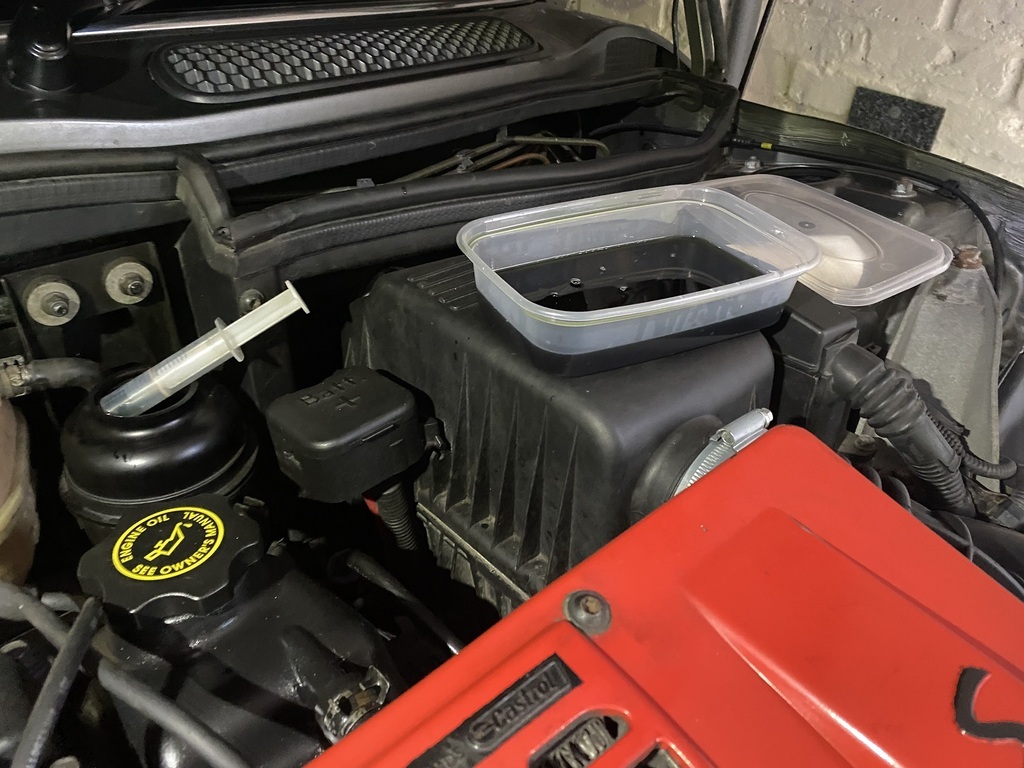 I got the Cooper as far back in the garage as possible, jacked it up and removed the front wheels. The trouble with this arrangement is that I won't be able to start the engine with the exhaust pipe facing the back wall, as doing so would fill the adjoining kitchen with copious amounts of CO and other nasties. My wife wouldn't be happy. I need to obtain a suitable conduit that would enable me to expel the exhaust gases from the back of the Cooper and out of the garage. Any ideas? 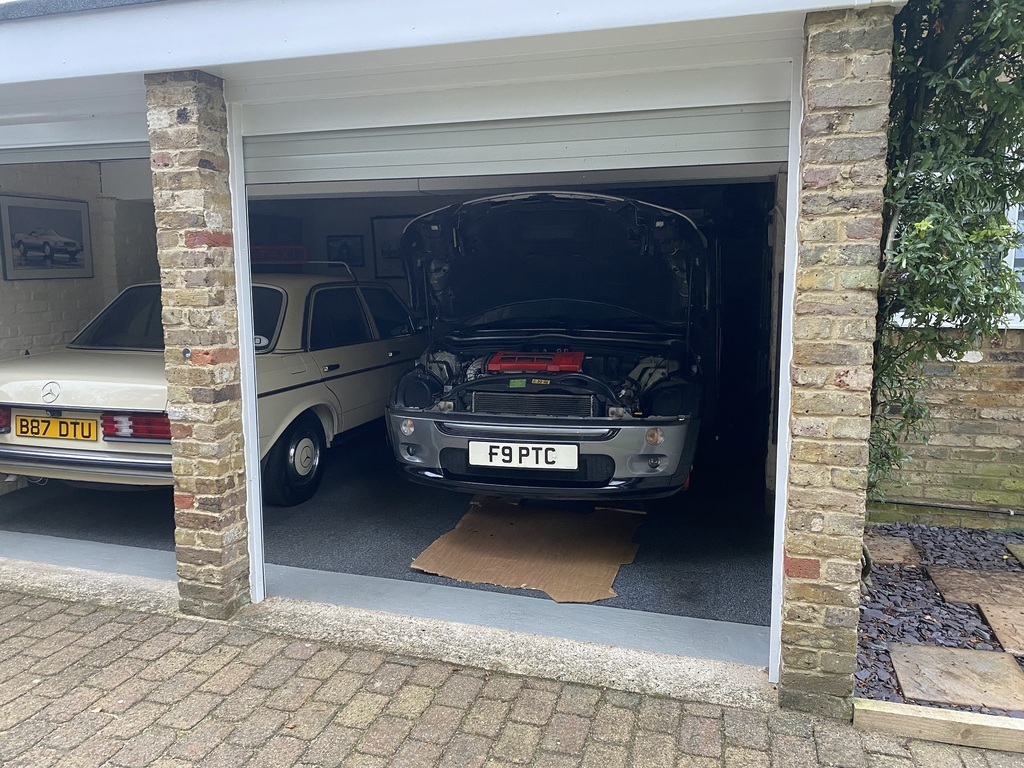 Hopefully I have enough space to work under the car and remove the subframe. 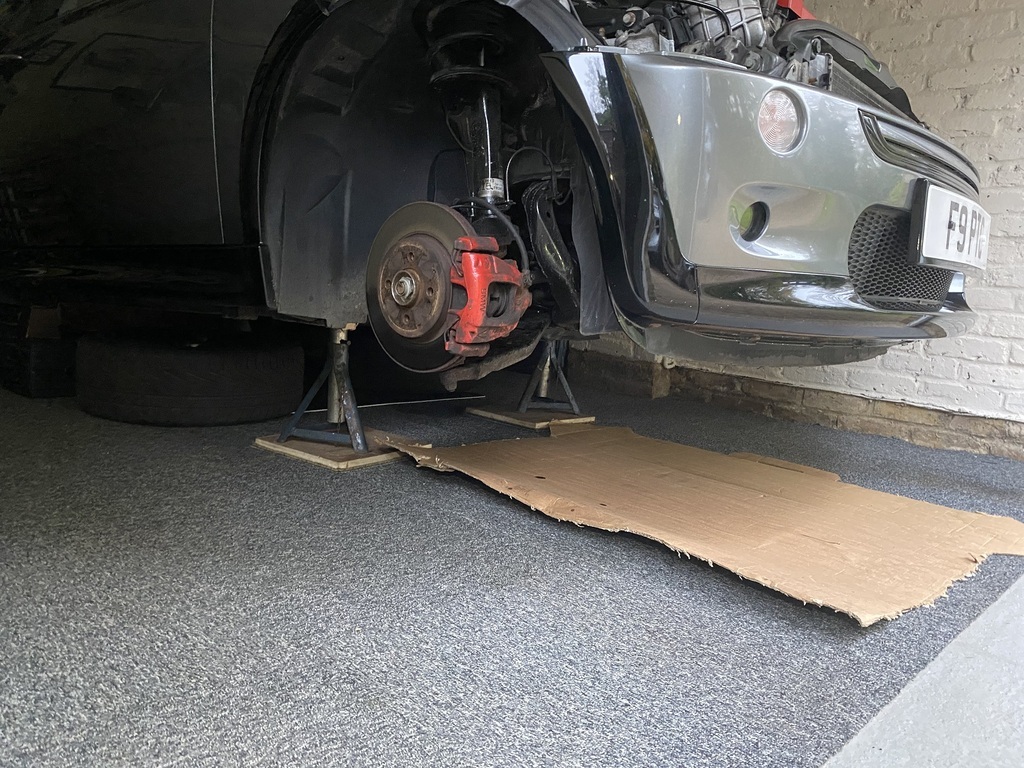 Ok, it's not exactly Snap-On but I'm hoping that this recently acquired tool will make life easier. 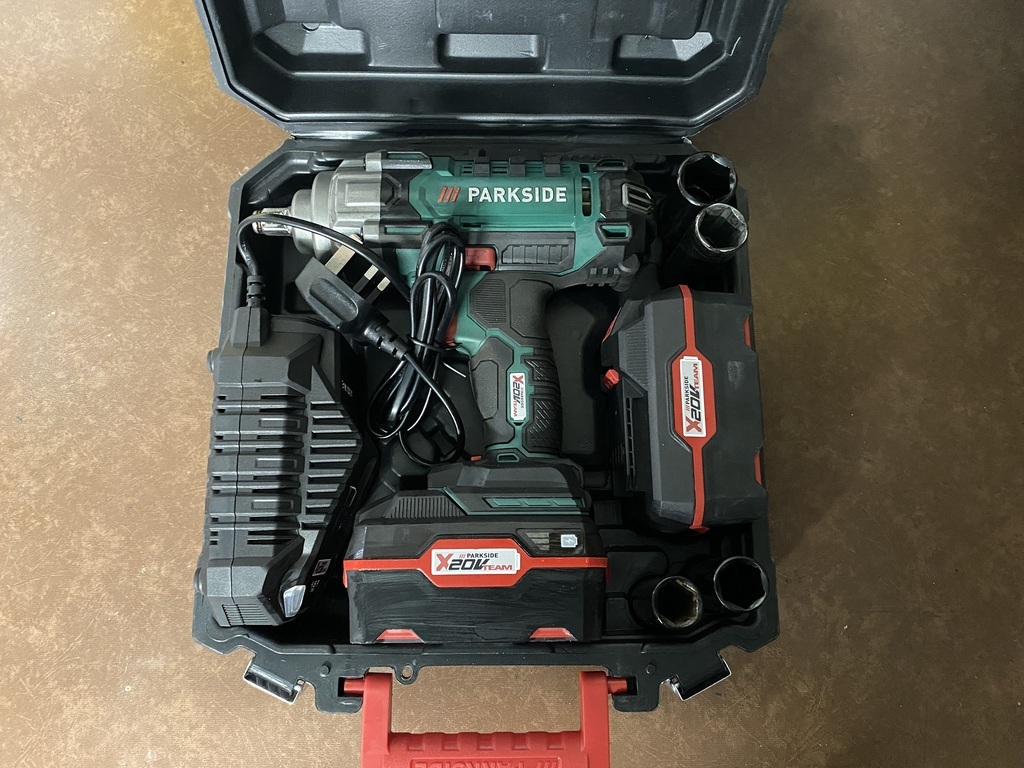 The plan is to remove whatever will be necessary to gain access to the rear of the engine whilst leaving the engine undisturbed so that I can trace as many of the oil / fluid leaks as possible. |
| |
|
|
|
|
|
Nov 14, 2022 18:35:09 GMT
|
|
A dipstick tube seal, crankshaft sensor seal and rear main oil seal fixed it on my wife's very late R52 S. Supercharger was pretty simple to remove also, waterpump being stuck to the back of it is a little weird. Single mass flywheel and clutch conversion at the same time has livened it up a treat.
|
| |
|
|
|
|
|
Nov 19, 2022 16:00:35 GMT
|
Cooper major works project Day 2. My idea of fun on a Saturday morning. 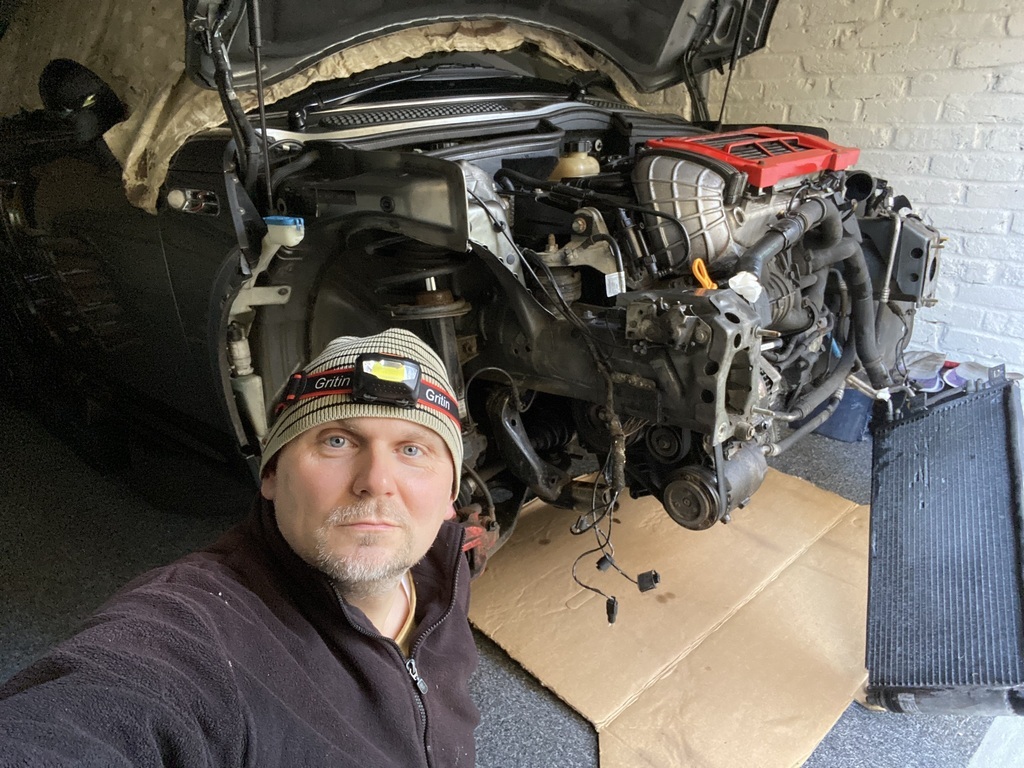 Firstly, I removed the front bumper and crash bar. Initially I planned on keeping the radiator in place as I wanted to run the engine with the subframe removed to see where the oil leaks are coming from. However, my search for a reasonably priced pipe that I would need to expel exhaust gases out of the garage proved fruitless and I decided that as don't want to do this job twice, I will replace every possible seal and gasket and therefore there will be no need to run the engine. I removed the radiator, front (plastic) panel and the offside wheel arch liner. The Parkside impact driver made removal of various fixings so much easier. This is how the Cooper looks now. 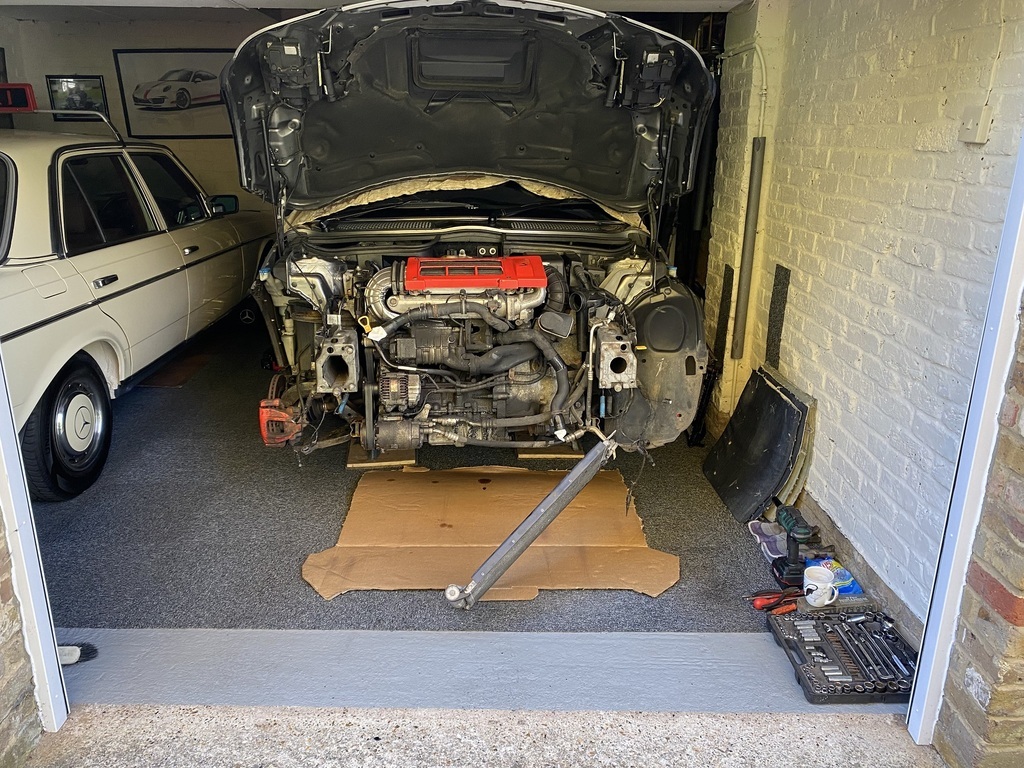 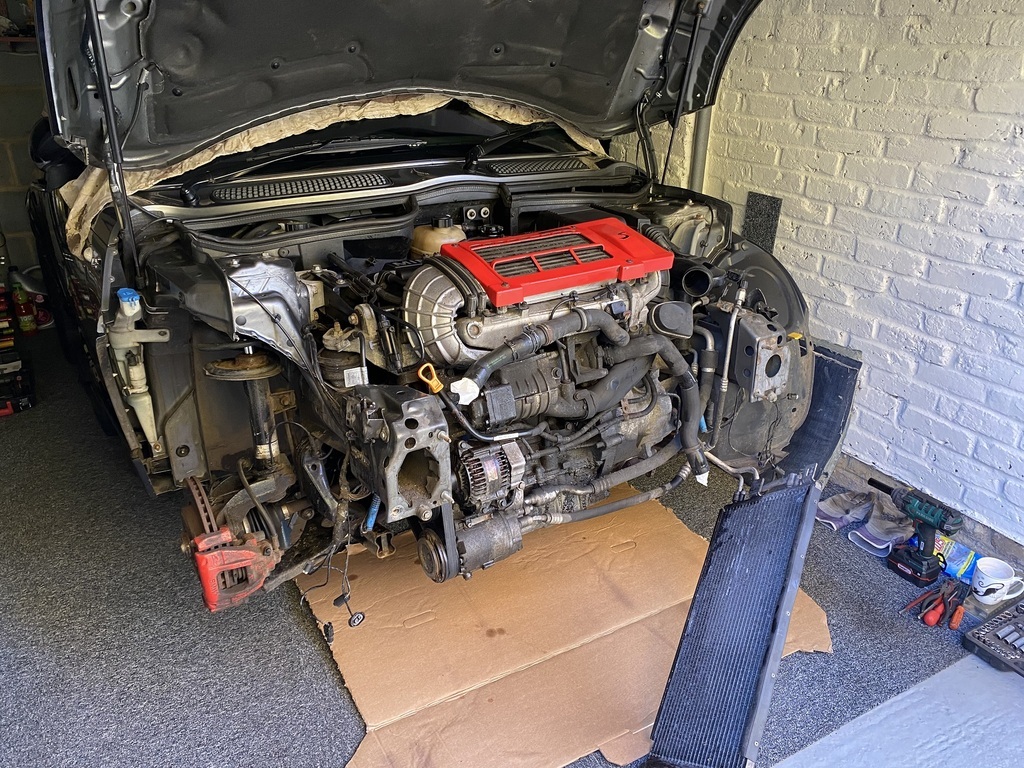 The a/c rad is hanging awkwardly across the front of the engine but there is no way of removing it without degassing the a/c system. Storage space in the double garage is limited so I had to be creative. I fabricated a bespoke R53 parts storage tray. As I'm taking bits off, I store everything in labelled envelopes, which should make re-assembly easier. I am also making notes on which bits I need to replace. So far I will need six wheel arch liner screws to replace two that refused to come out and had to be destroyed and four that were missing. 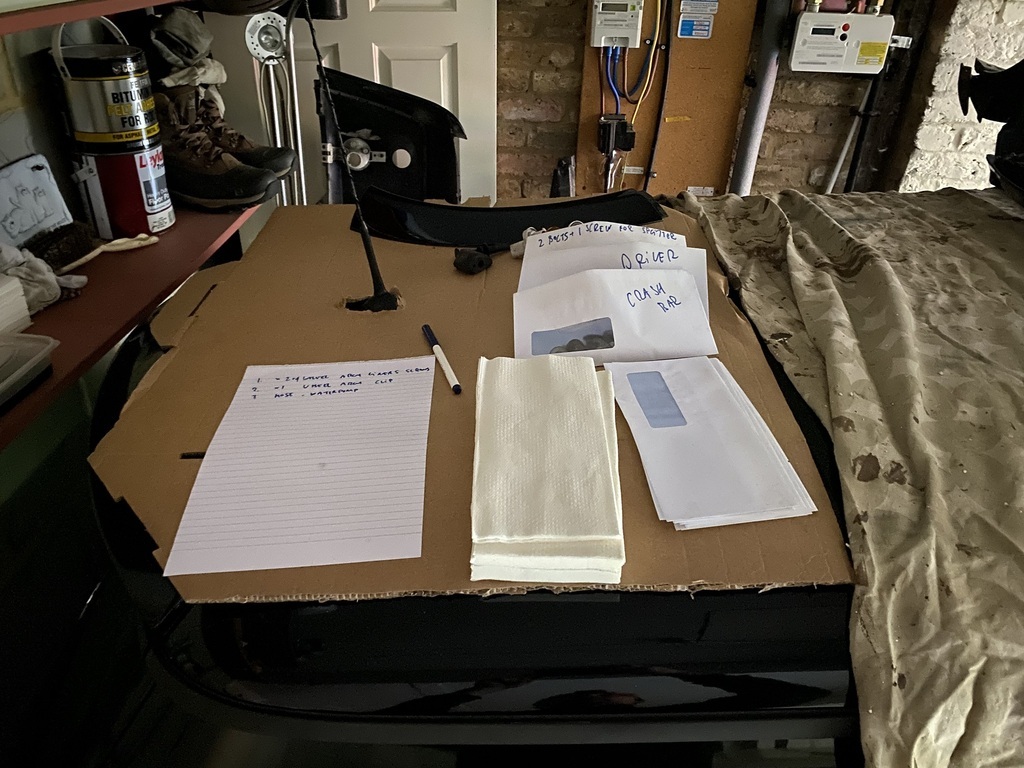 With the front and side of the engine partially revealed, I could assess the extent of the oil leak issues. Crank end seal is most probably causing this leak. 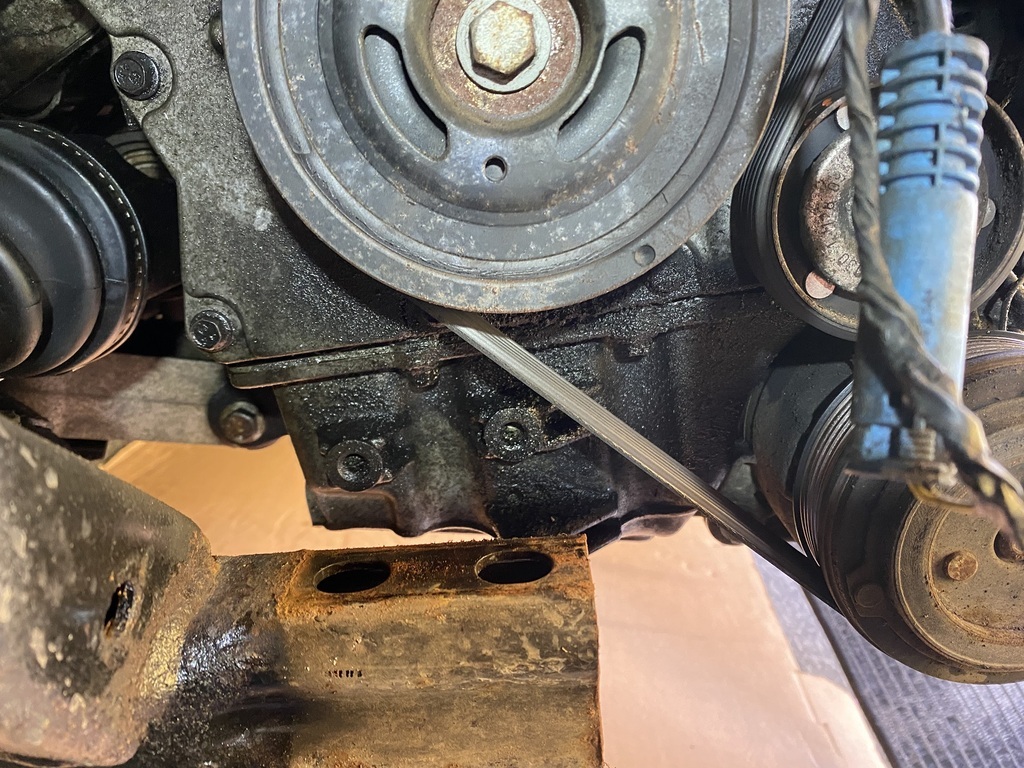 The front of the engine block is covered with a thick layer of dirt and oil. 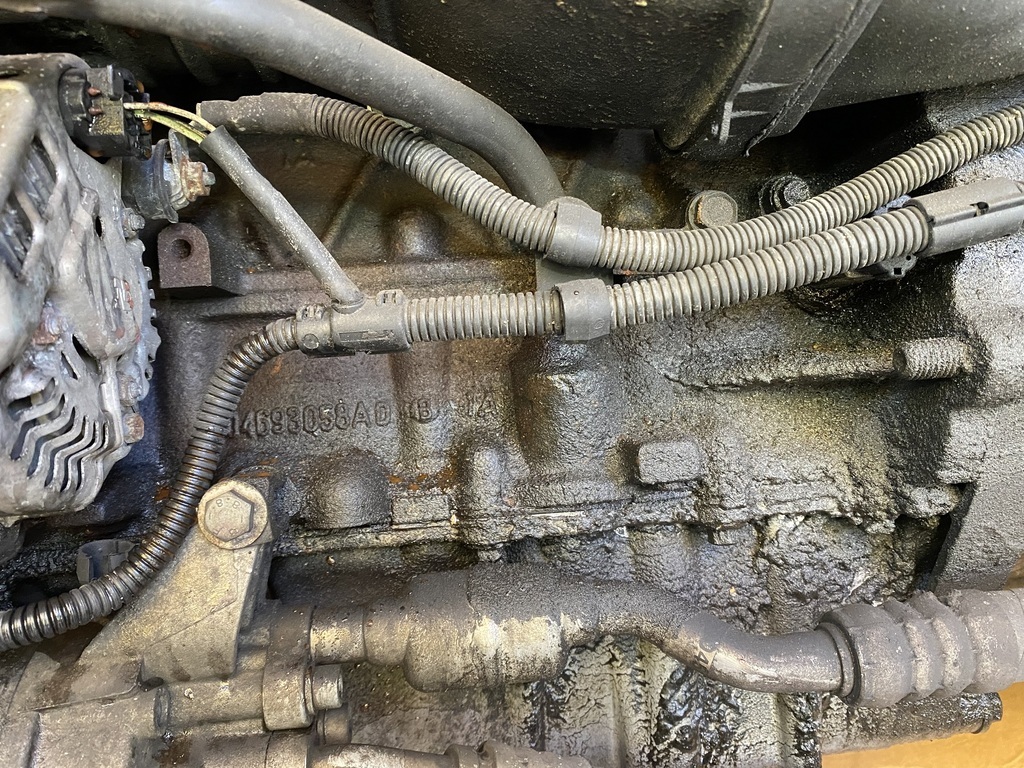 The supercharger is absolutely filthy. 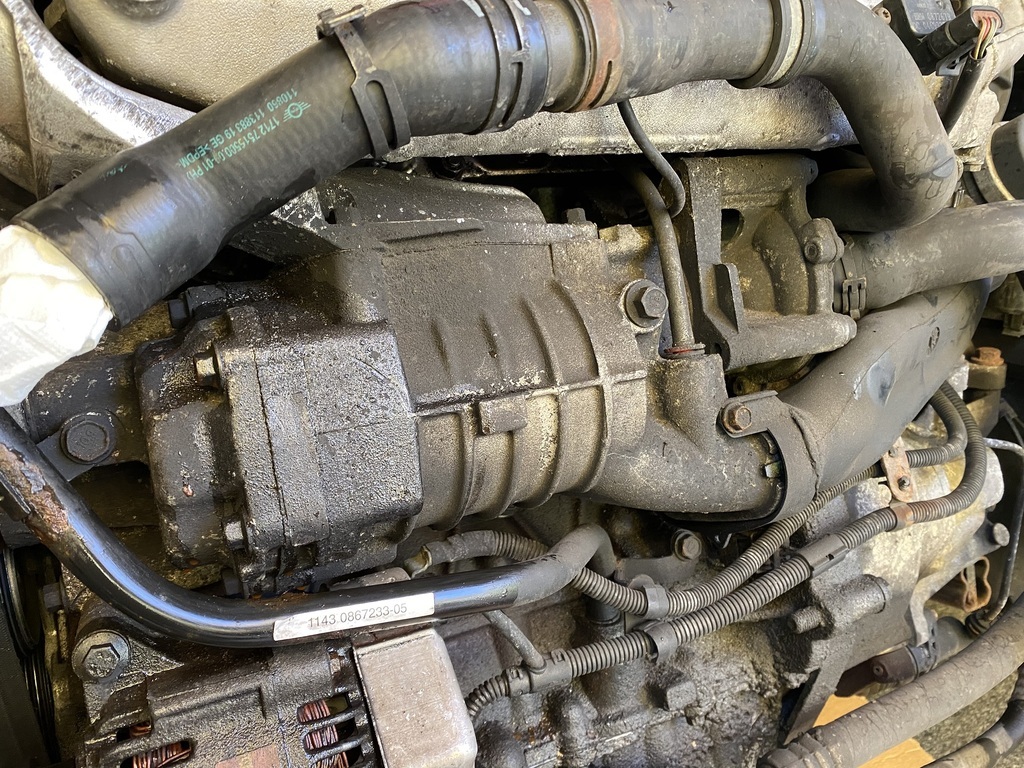 I've got plenty of work ahead of me to make everything clean and oil tight. I noticed that the water hose that extends from the water pump towards the front of the engine bay has been rubbing on something and will need replacement. 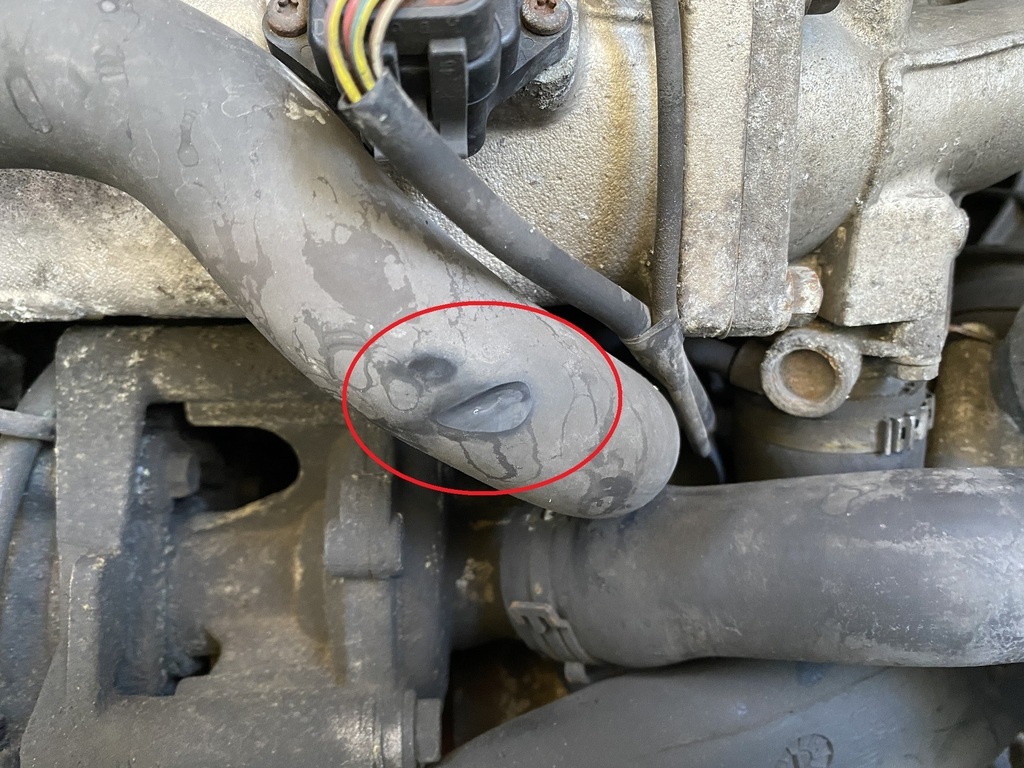 Nice to see no corrosion or problems in the concealed areas behind the wheel arch liner. 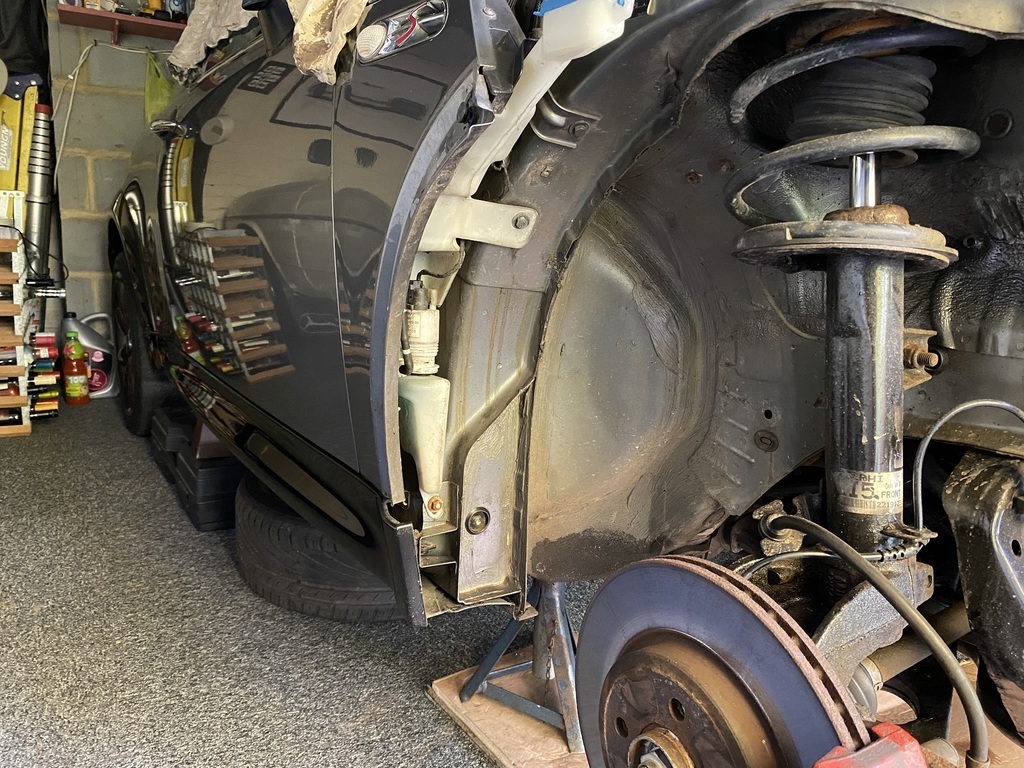 I need to replace the a/c compressor clutch as the system is fully gassed but the clutch is not engaging. Looks fairly easy, if the bolt comes out. 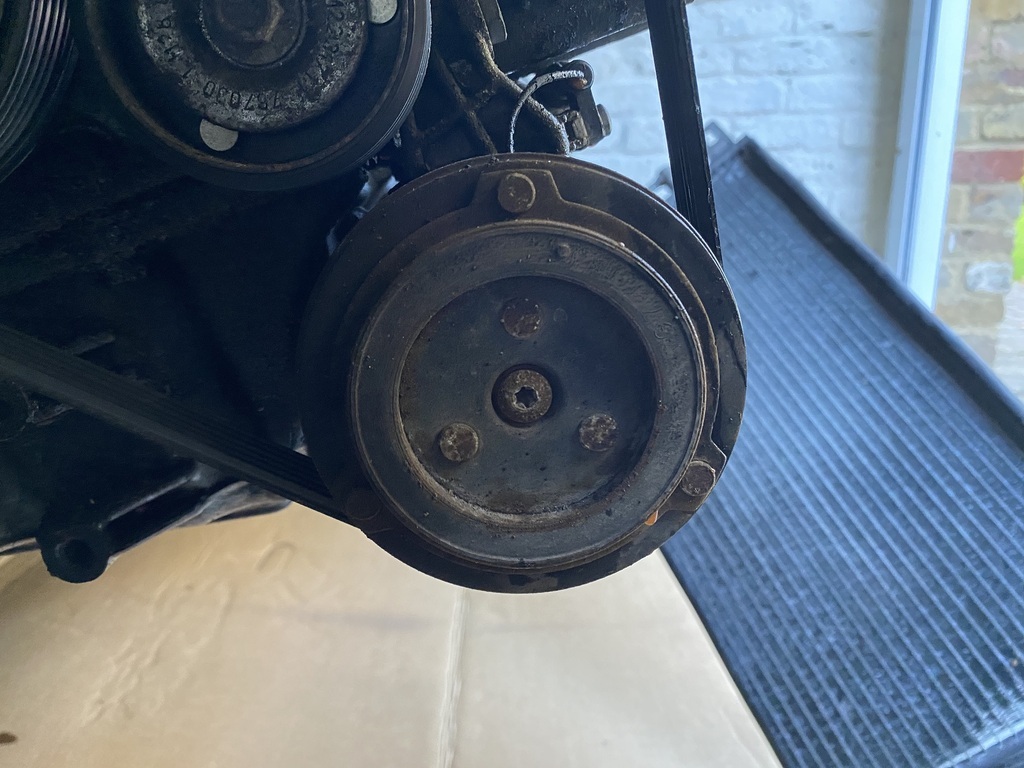 I've watched a really good 30 minute YouTube video about how to remove the subframe. It doesn't look that complicated and as my Cooper has had the clutch, DMF and steering rack replaced in the past few years (under previous ownership), the subframe must have been removed to enable these jobs and therefore I won't be dealing with nuts and bolts that haven't been disturbed in almost 20 years. |
| |
|
|
|
|
|
Dec 10, 2022 15:42:39 GMT
|
I haven't made any progress with the Cooper since the last update due to a sinus infection and a covid infection, both caused by the cold weather and because I had to spend some time sorting out a few issues with my BMW 325Ci. I'm better now and had a bit of time today to make an aux belt removal tool, which compresses the tensioner and enables the belt to be removed from the pulleys. I know that a proper tool can be bought for £10, however I have already made a couple of special tools for the Cooper and I enjoy a little challenge. I found some suitable metal pieces in a skip and with a bit of drilling, cutting and filing, I made this: 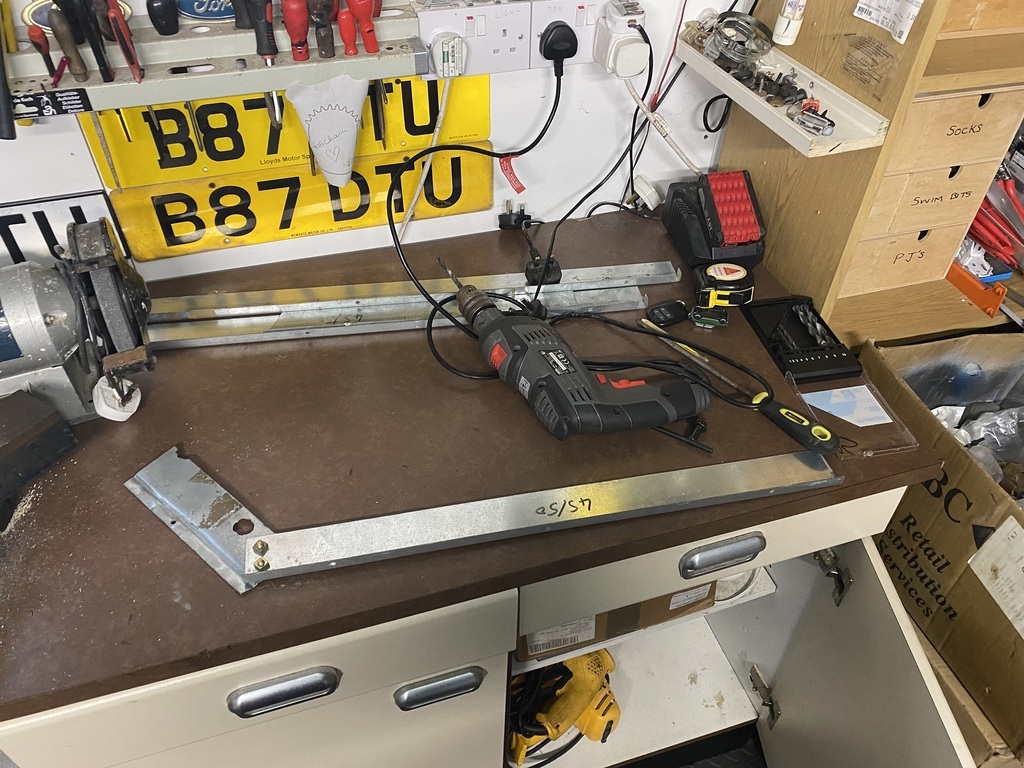 It's not pretty but it works and cost £0. To get the tool to fit as intended, I had to remove this plastic valve and loosen an earthing cable bolt. I'm posting these photos as a reminder for me to refit both when I start the reassembly process.  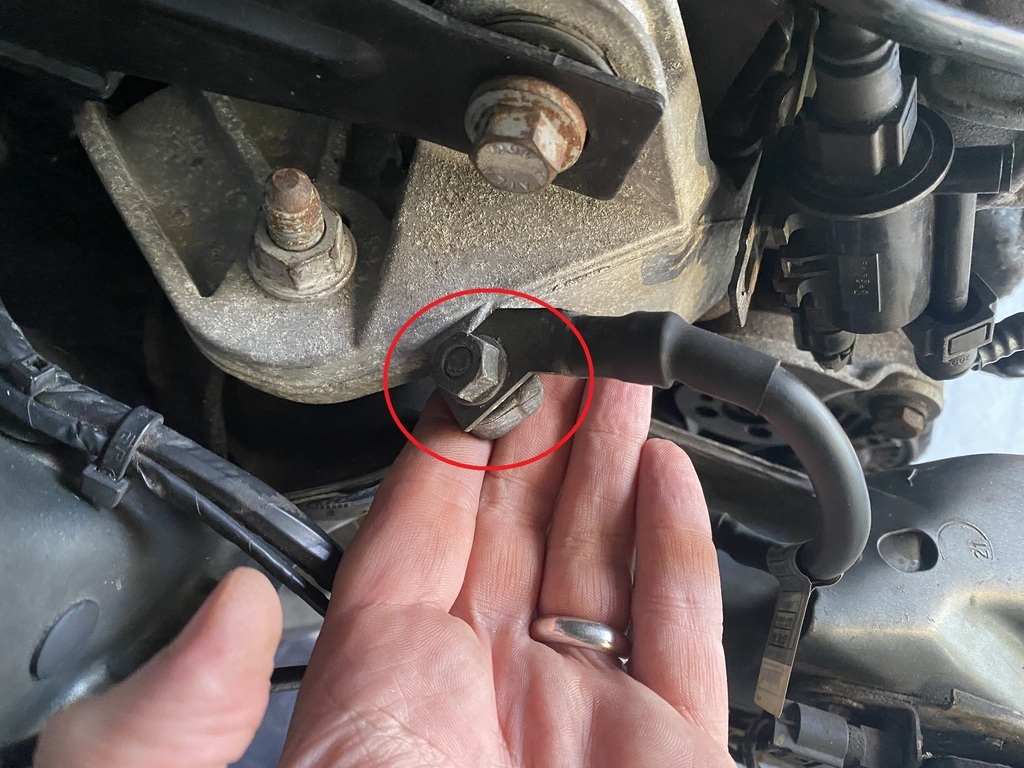 The tool fits like this: 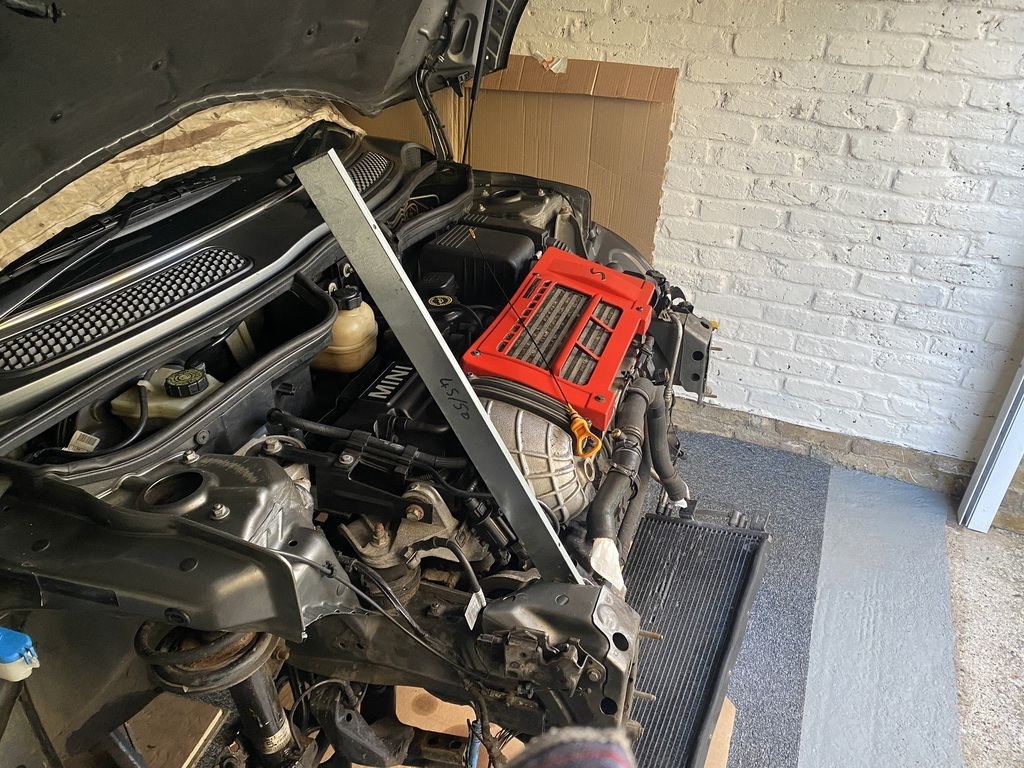 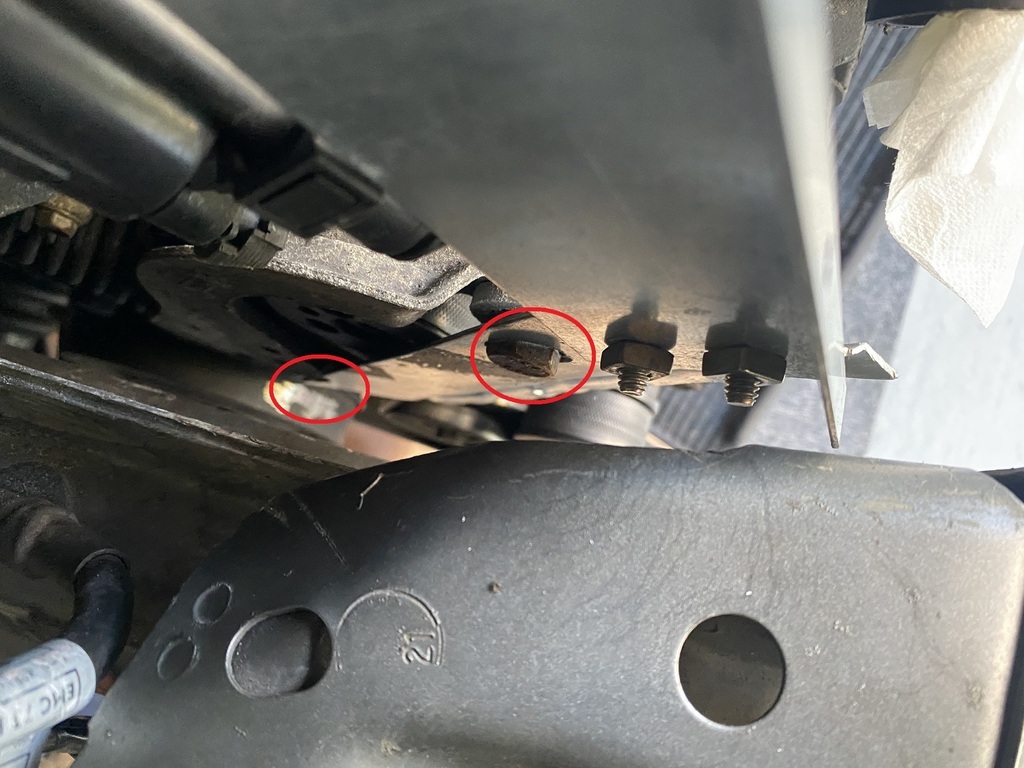 By pulling the upper part of the tool forward causes the lower part to push on the tensioner and compress the tensioner spring. Nice and simple. I now have a plan how to make a crankshaft pulley removal tool. The right tool costs £40 so it would be a right result if I could make one myself. The previous owner advised me that the a/c system is all ok but the compressor clutch does not engage. I wanted to remove the clutch (and replace it) but turning the central bolt causes the clutch to spin. I can't see a way of stopping the clutch spinning. Any ideas guys? 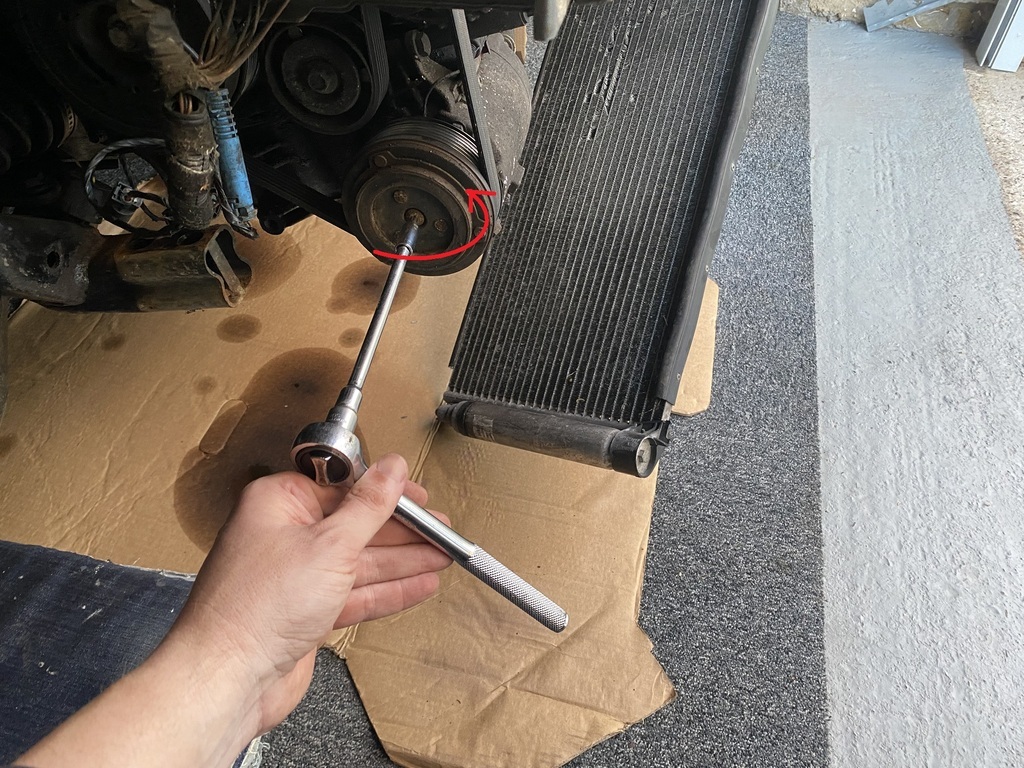 |
| |
|
|
2p2g1m
Part of things

Posts: 116
|
|
Dec 10, 2022 18:13:06 GMT
|
|
Try using your impact gun on the clutch bolt and hold the other bit with your hand. It shouldn’t be mega tight. Wear some thick gloves tho in case it bites.
|
| |
|
|
|
|
|
Dec 10, 2022 21:58:48 GMT
|
Try using your impact gun on the clutch bolt and hold the other bit with your hand. It shouldn’t be mega tight. Wear some thick gloves tho in case it bites. Noted! That’s the same advice that I got from the guys on the R53 Facebook group. |
| |
|
|
|
|
|
Dec 16, 2022 11:14:43 GMT
|
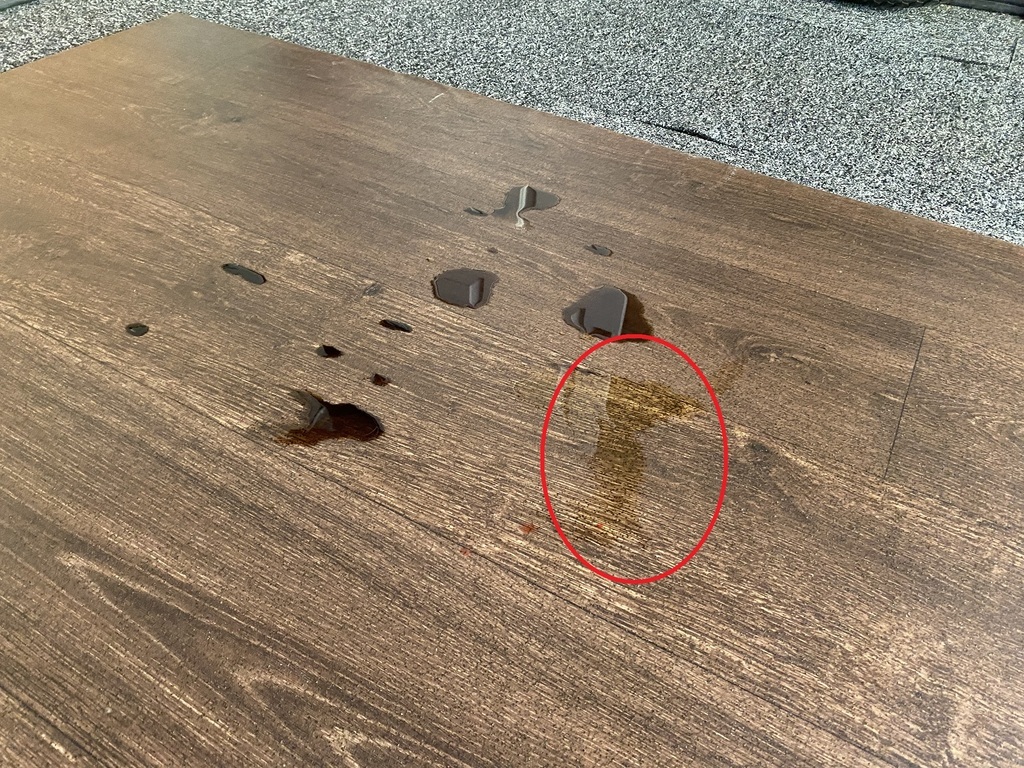
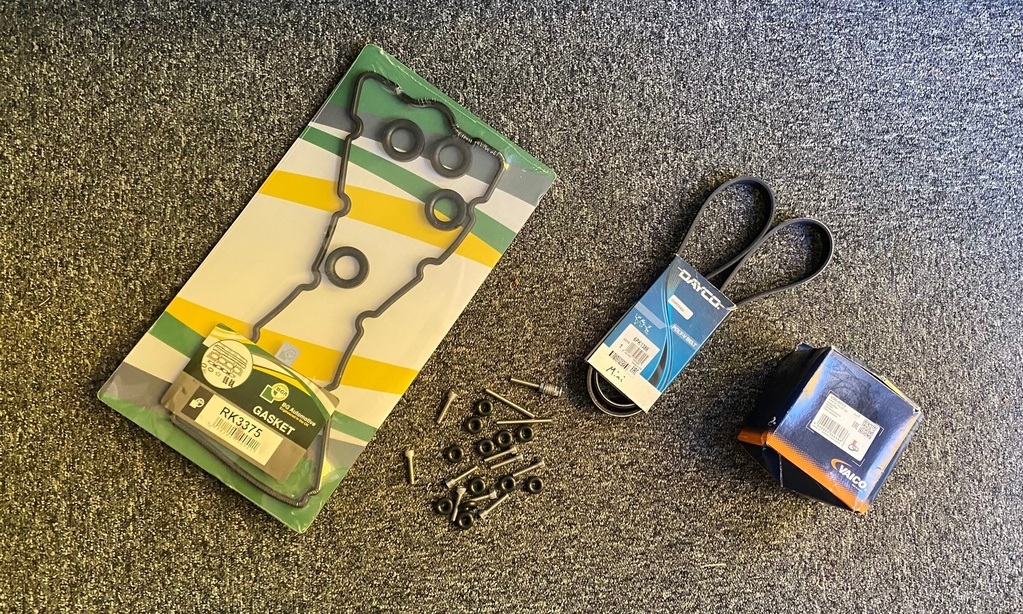
I had planned to remove the front subframe to gain access to the rear of the engine block, to enable repairs to whatever could be causing engine oil leak/s. I posted a couple of questions on the R53 Facebook forum about the pitfalls of removing the subframe and the general consensus is that I should leave it well alone. I was given this advice on the basis that apart from the oil filter housing seal, there is nothing at the back of the W11 engine that could cause an oil leak. This is an image of the back of the engine which I got from the internet. 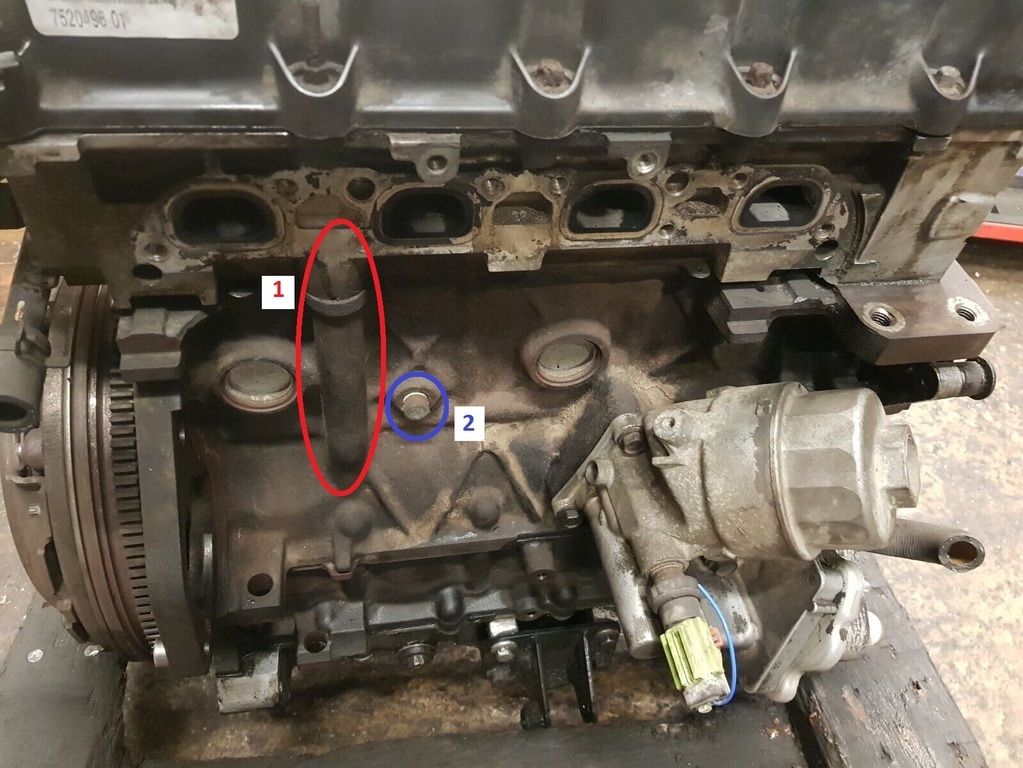 Feature 1, circled in red, is an internal oil feed tube, which is sealed by the head gasket. Feature 2, circled in blue, is a coolant drain plug. Neither would cause an oil leak, at least not one that I could remedy by removing the subframe. On the basis that I've already had the oil filter housing seal replaced last year, I have decided not to make life more difficult and not remove the subframe. To remedy engine oil leaks I propose to replace the following: 1. Cam cover gasket. 2. Crank sensor seal. 3. Crank front seal. 4. Sump gasket. According to the service history, the supercharger was serviced in November 2017, at 102,920 miles, which was 5 years and 10k miles ago. The supercharger was serviced as part of more major works, which included replacement of the clutch and flywheel, the timing chain and various other bits. The invoice amounts £1,877.50. Seems legit but I still propose to renew the supercharger oil and seals. It makes sense to do so as I want to take the supercharger off to clean the front of the engine, which is covered with oil and muck. I've never serviced a supercharger before and I doubt I'll ever have another opportunity. I am hoping that once I remove the auxiliary belt and spin the supercharger by hand, there won't be any issues with the supercharger and the water pump. I already have a replacement auxiliary belt, two, in fact, hopefully one of them is the right length. I followed this guide to get the right belt.  I acquired the other belt as part of a job-lot of R53 parts. To remedy the power steering fluid leak, I propose to replace the hose that extends from the fluid reservoir down to the pump / rack. To remedy the non-functioning air conditioning, I propose to replace the compressor clutch with a used item. That's it for now. I am not aware of anything else that I should consider as part of this project but please let me know if I have missed something. I am now on annual leave until early January and as soon as the weather warms up, I will make more progress and report back. |
| |
|
|
|
|
|
Dec 19, 2022 15:24:17 GMT
|
The ambient temperature was up to 14 C degrees today, up from -7 C degrees a few days ago. Time to make progress with the Cooper. Before removing the auxiliary belt, I checked online what route it takes around the pulleys.  And then sketched my own based on what I could see in front of me.  With the help of the tool that I made last week, the belt came off in seconds. 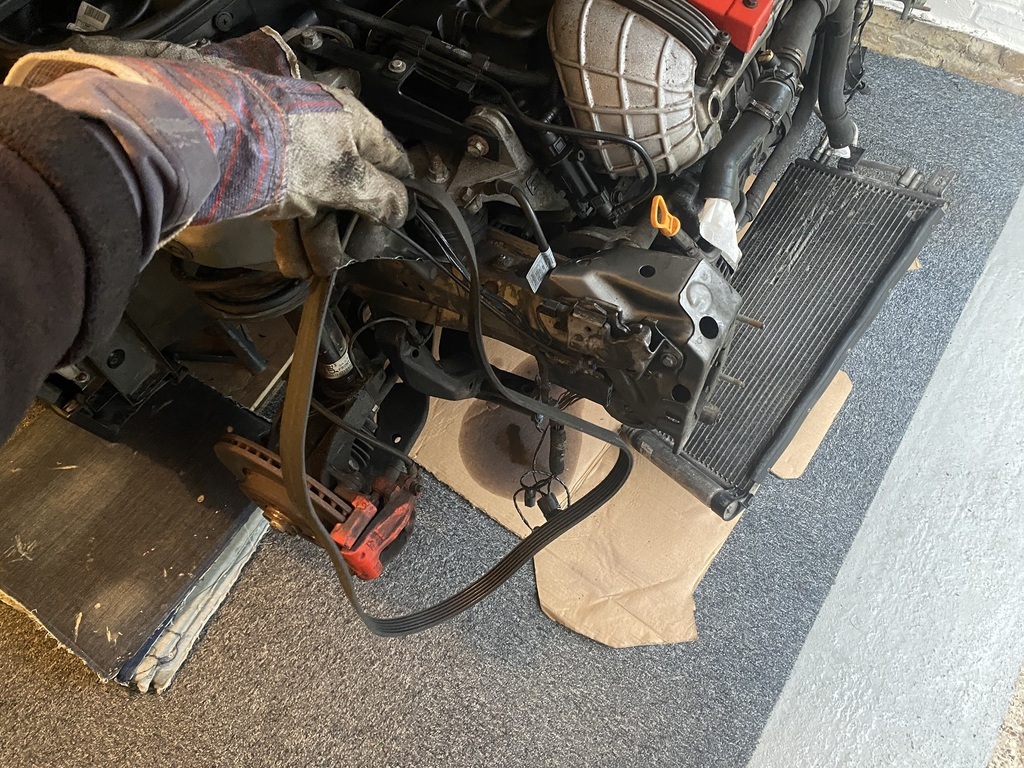 Next to be removed was the crank pulley bolt. I put my impact wrench on it but it wouldn't shift. Then I put the transmission in gear, put a socket and power bar on the bolt but the crank turned, so I got my twelve year old to sit in the car and press the brake pedal whilst I repeated the exercise. The pulley was still spinning! What was going on??? With the front of the Cooper up in the air and the wheels off, the driveshafts were spinning in the hubs but the brake discs remained static. I put a couple of wheel bolts back in on both sides, repeated the process and the bolt loosened without drama. 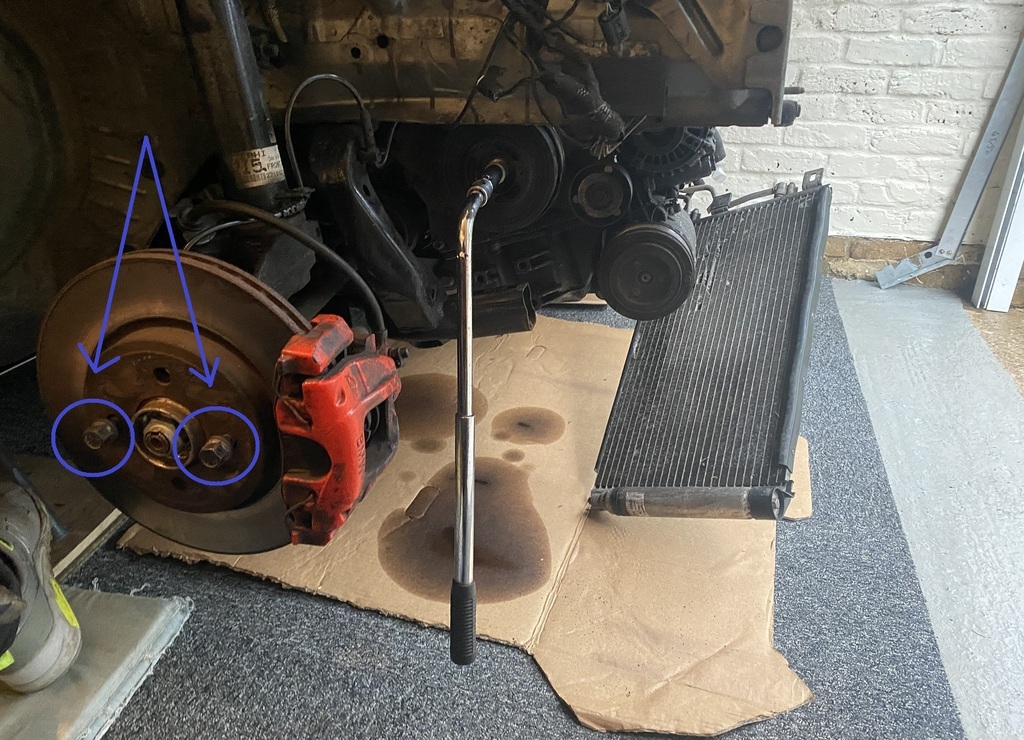 Next to be removed was the crank pulley. This process requires a special tool, which costs £43.61. 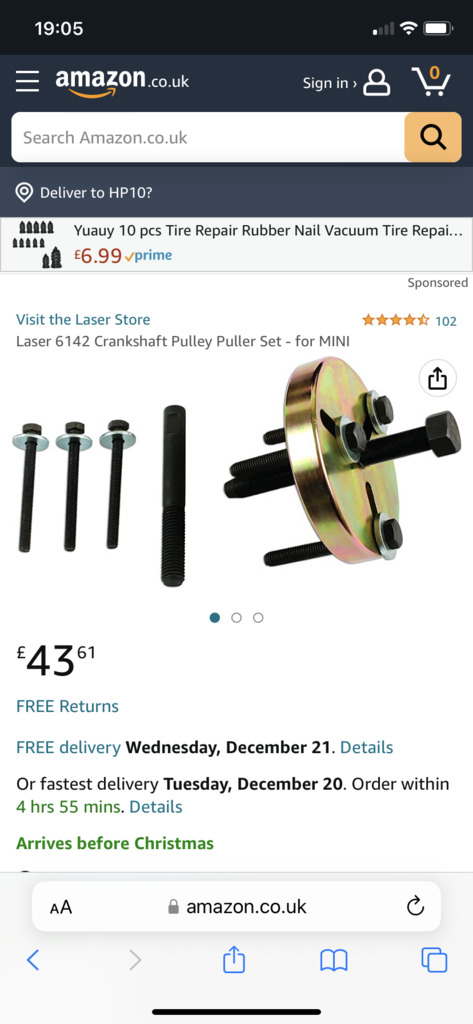 On the basis that I propose to remove the crank pulley only once and never again (I hope!), I wasn't happy about spending money on the special tool. So I made my own out of a piece of 4x2 timber, a few bolts, nuts and washers and a couple of old 13mm spanners. I started by taking some measurements. 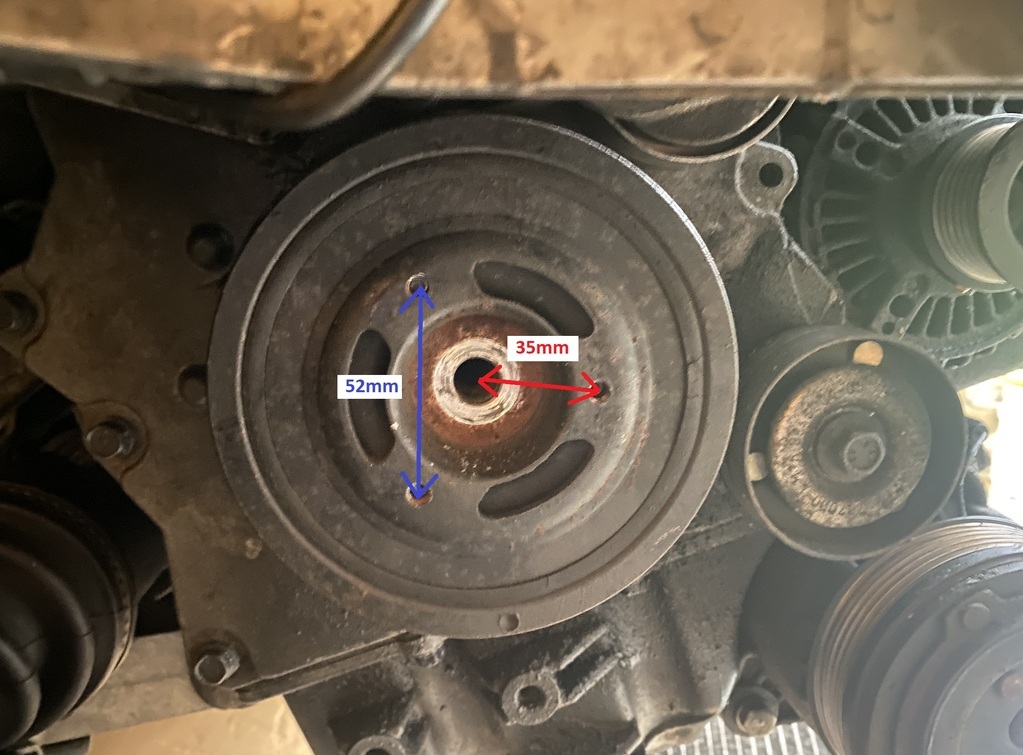 And got to work. 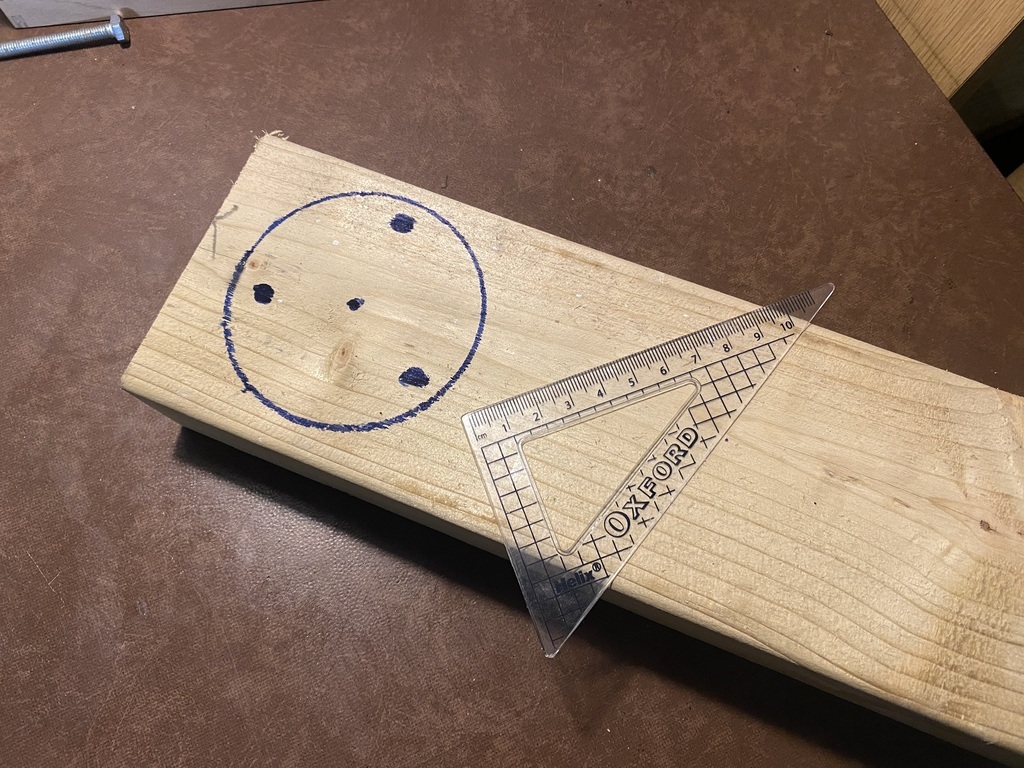 About 90 minutes later I made this.  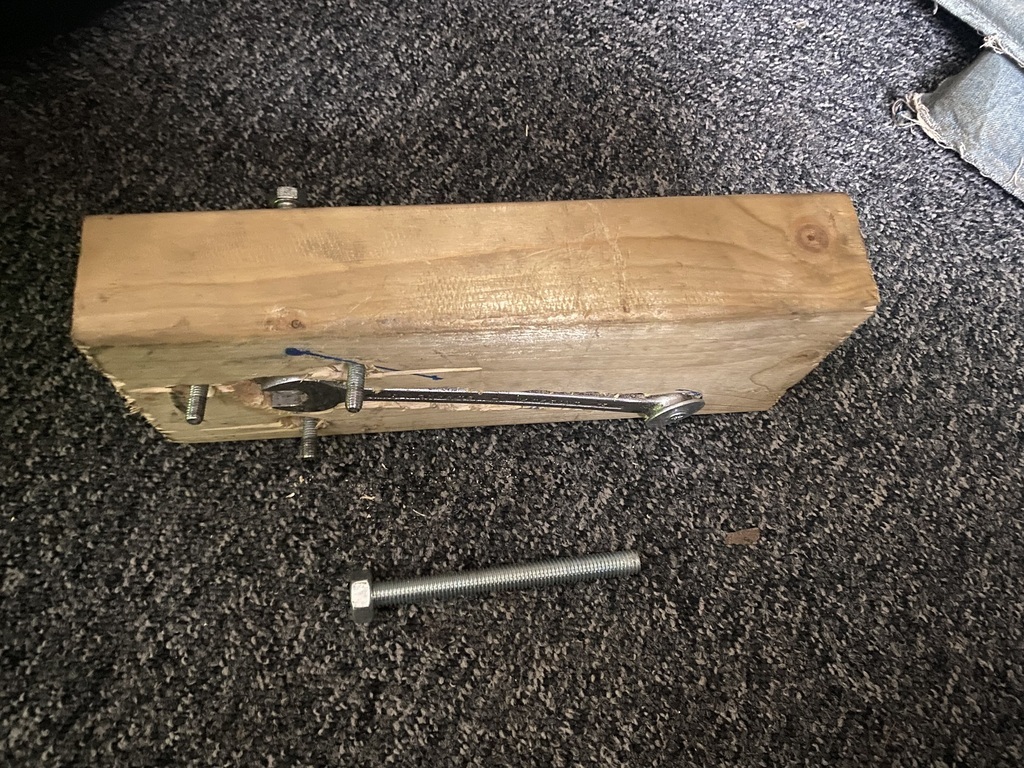 It works like this, a 110mm long loose bolt passes via the crank pulley central hole towards the end of the crankshaft. 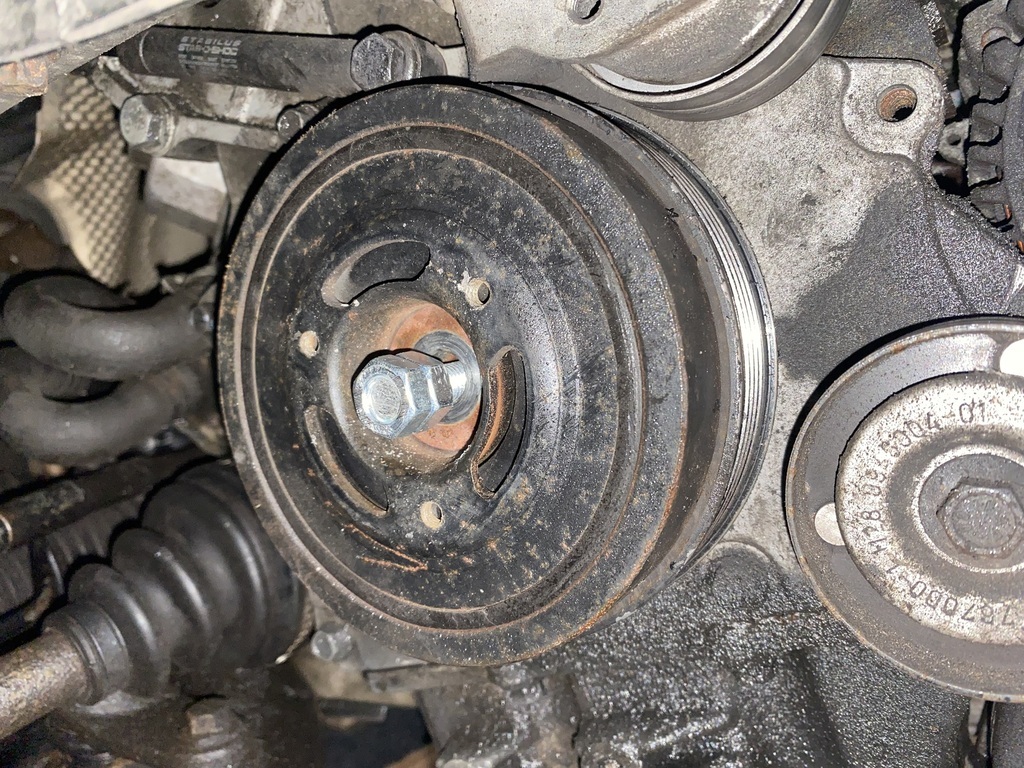 Three M6 bolts screw into the front of the pulley and by turning the central bolt clockwise, which presses onto the end of the bolt that is waiting inside the pulley central hole, the tool pulls the pulley away from the end of the crankshaft. 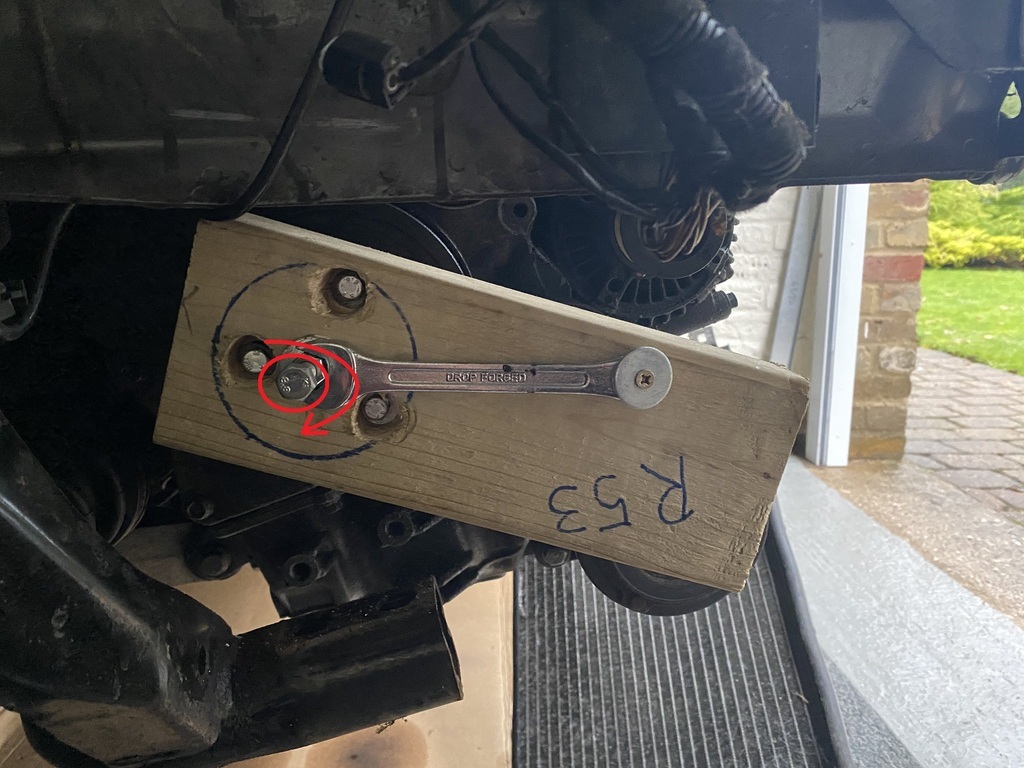 The tool worked first time and the crank pulley came away without any damage. 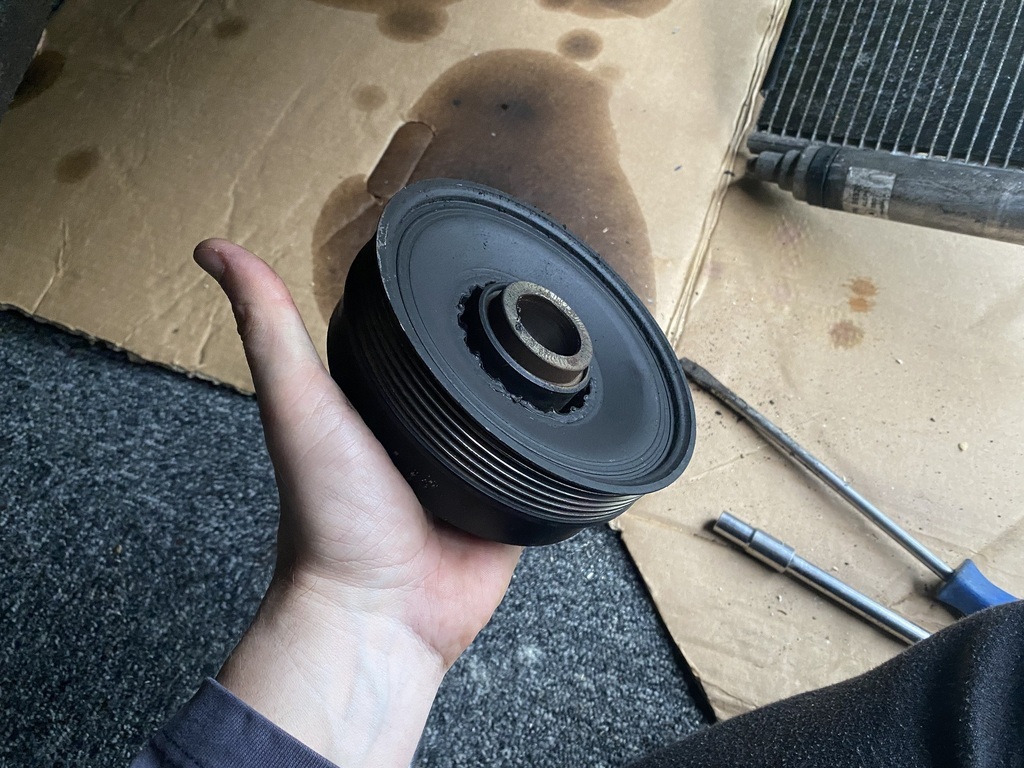 Giving access to the leaking oil seal. 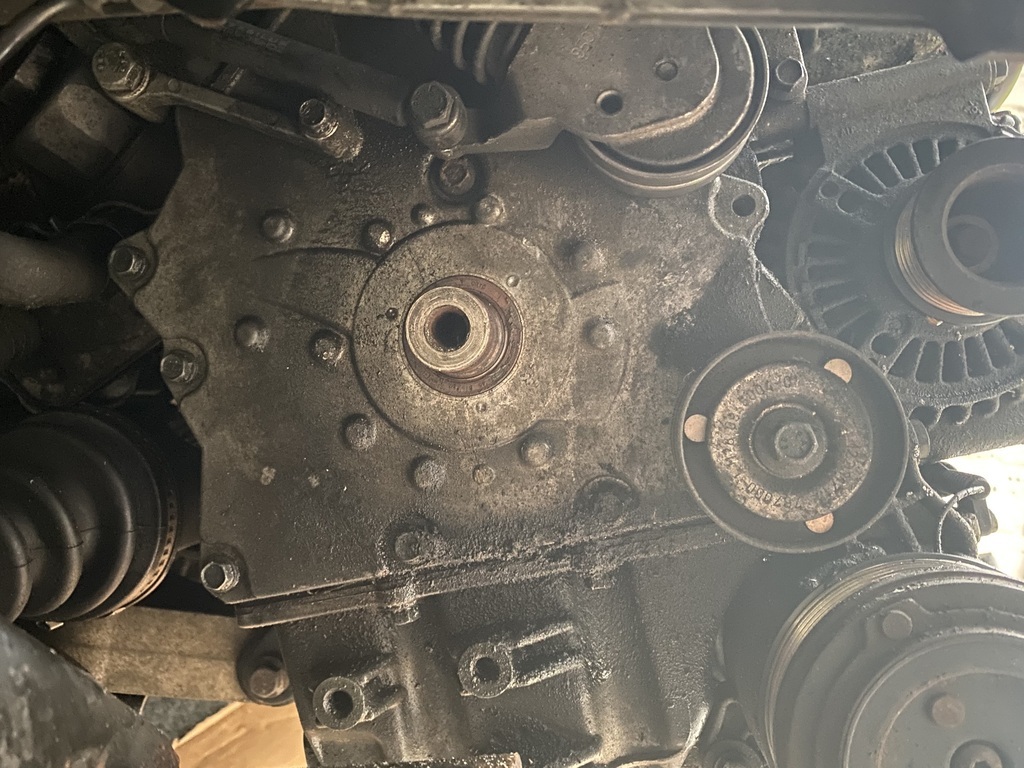 All for the grand total of £0. I made a bit of a mess in the workshop whilst making the tool, which wasn't good for my OCD. 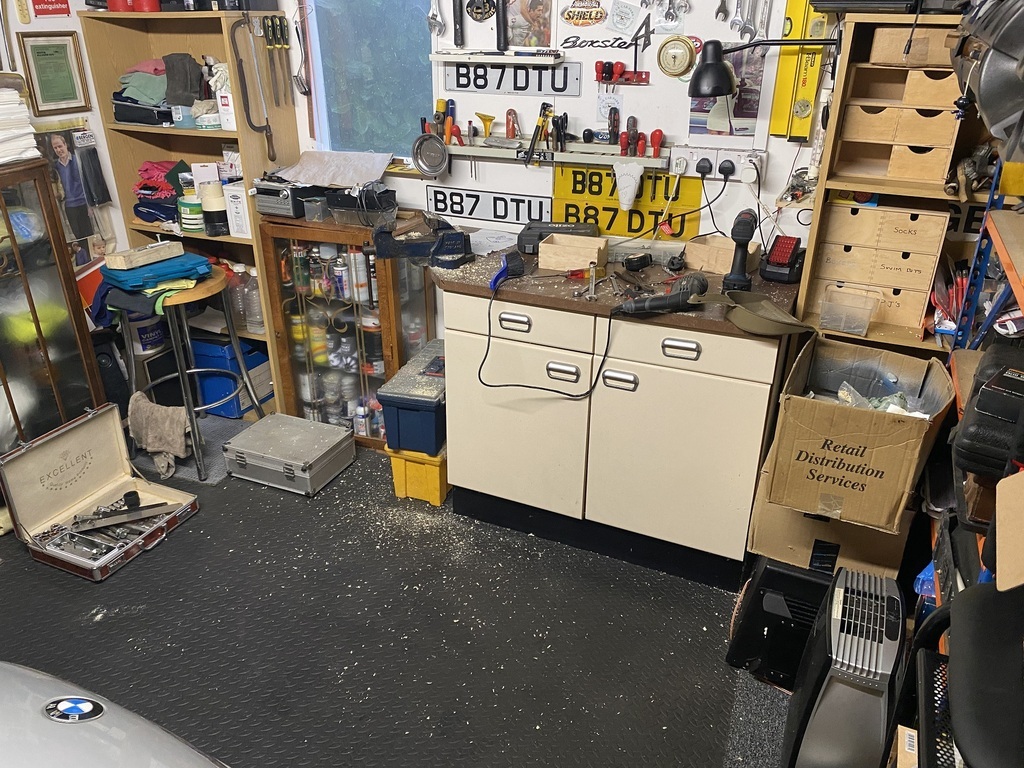 A quick hoover up later, sanity was restored. 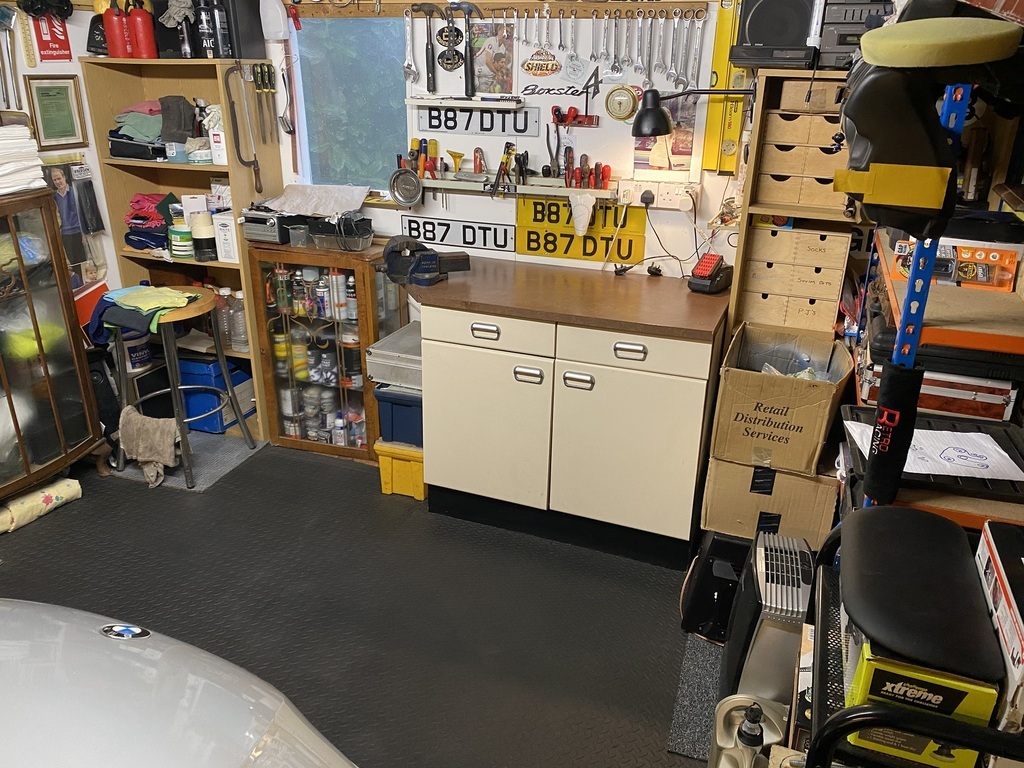 More fun later this week. |
| |
|
|
|
|
keif
Part of things
Posts: 14 
|
|
Dec 20, 2022 17:59:23 GMT
|
|
Looks like the supercharger was serviced as part of the huge 100k mile service. Which is basically all fluids, serviceable items and belts changed.
Have a look at Wheeler Dealers: Season 14, Episode 16 when then do this service on a 2004 Mini Cooper S MC40.
Nice work on the free tool make up.
|
| |
|
|
|
|
|
|
|
Looks like the supercharger was serviced as part of the huge 100k mile service. Which is basically all fluids, serviceable items and belts changed. Have a look at Wheeler Dealers: Season 14, Episode 16 when then do this service on a 2004 Mini Cooper S MC40. Nice work on the free tool make up. Thanks bud, I think I’ve seen that episode at least ten times. The big 100k mile service is a bit of a myth in R53 circles but I’m glad that my Cooper had it done. 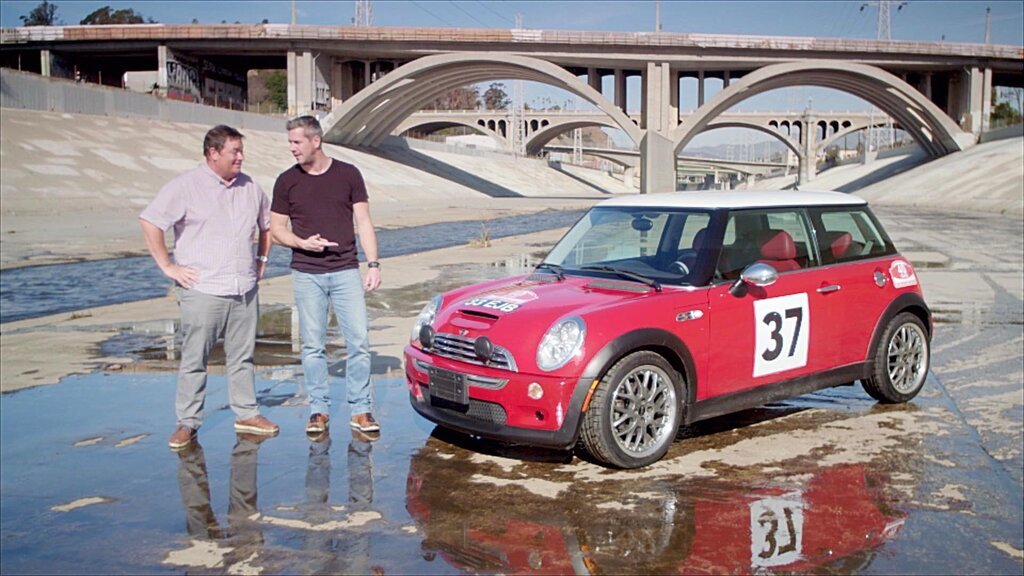 |
| |
|
|
|
|
|
Dec 21, 2022 14:07:04 GMT
|
I've made a bit more progress today. I've managed to remove the intercooler, a couple of hoses, the supercharger intake situated on the right side of the intercooler and I've loosened the black pipe that is fixed to the back of the supercharger. 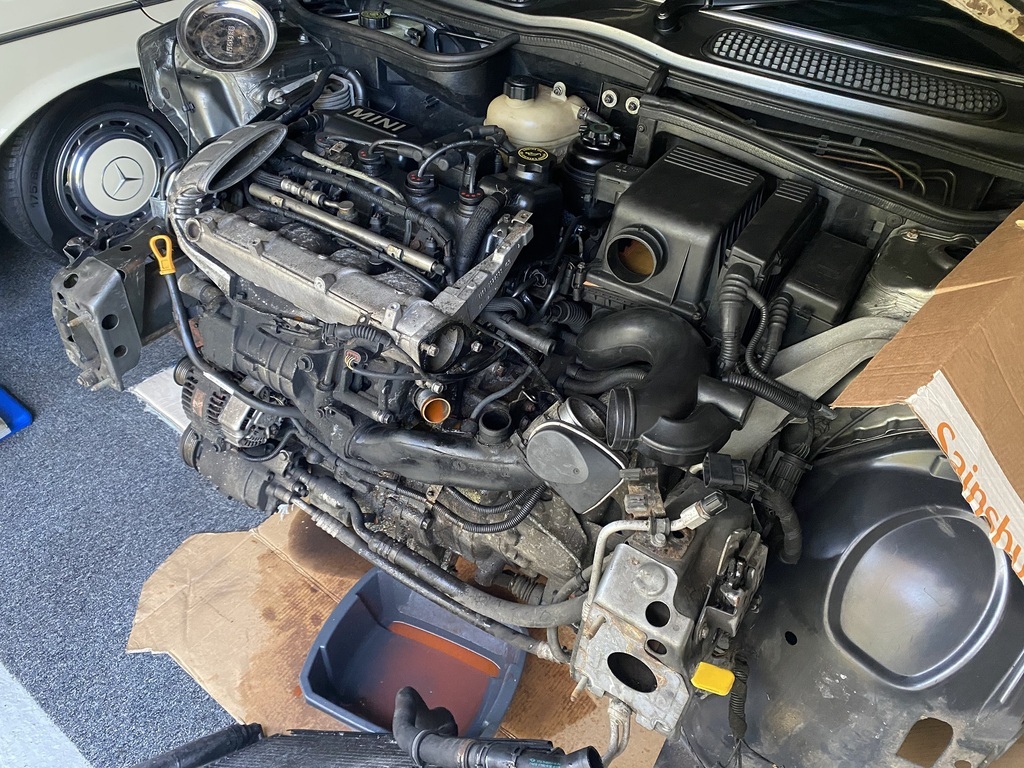 There are two pipes that extend from the black plastic pipe fixed to the back of the supercharger. 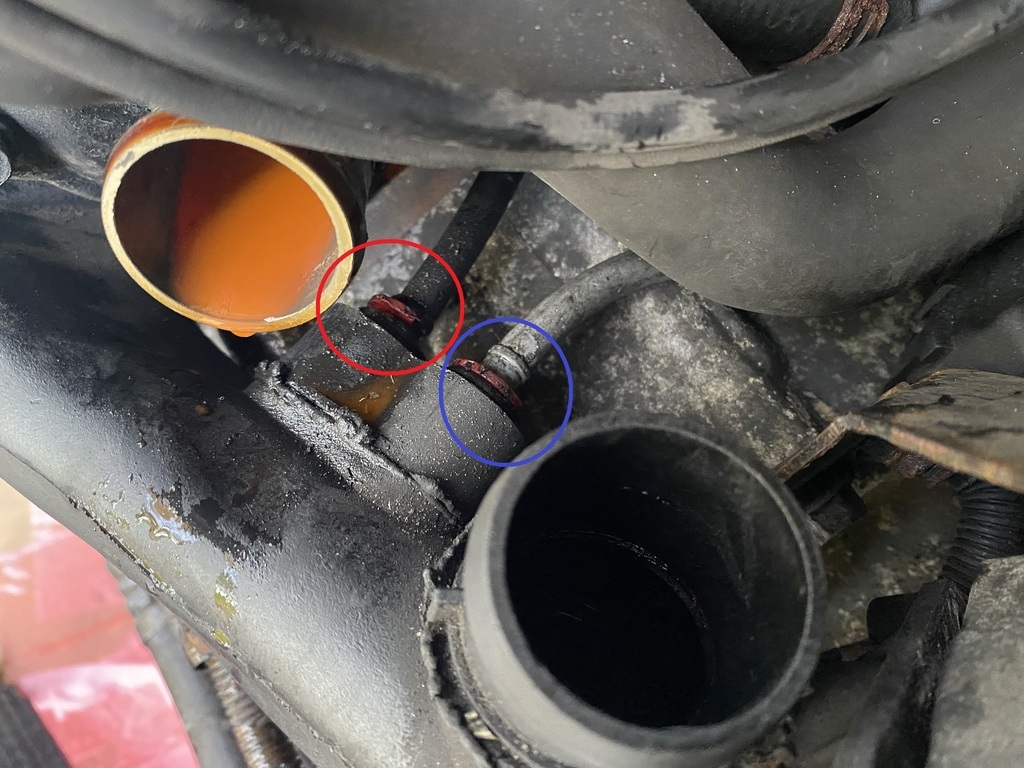 The pipe circled in red extends up via the engine bay and into the bulkhead. I have no idea what it does. 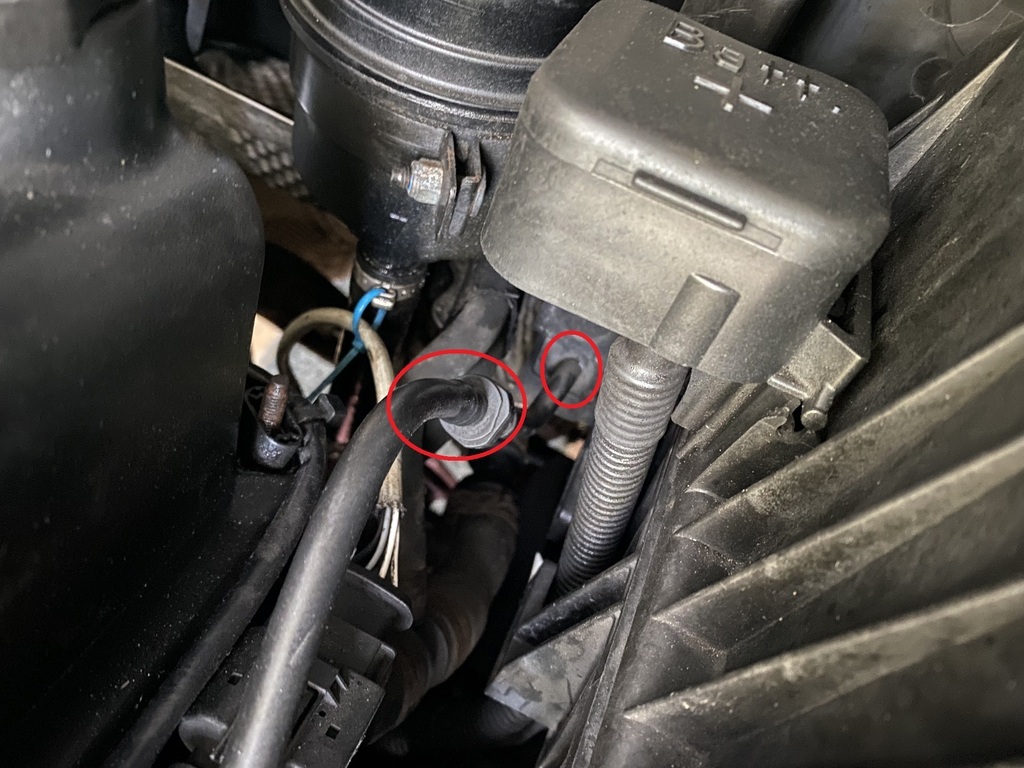 The pipe circled in blue extends to the point illustrated by the blue arrow... 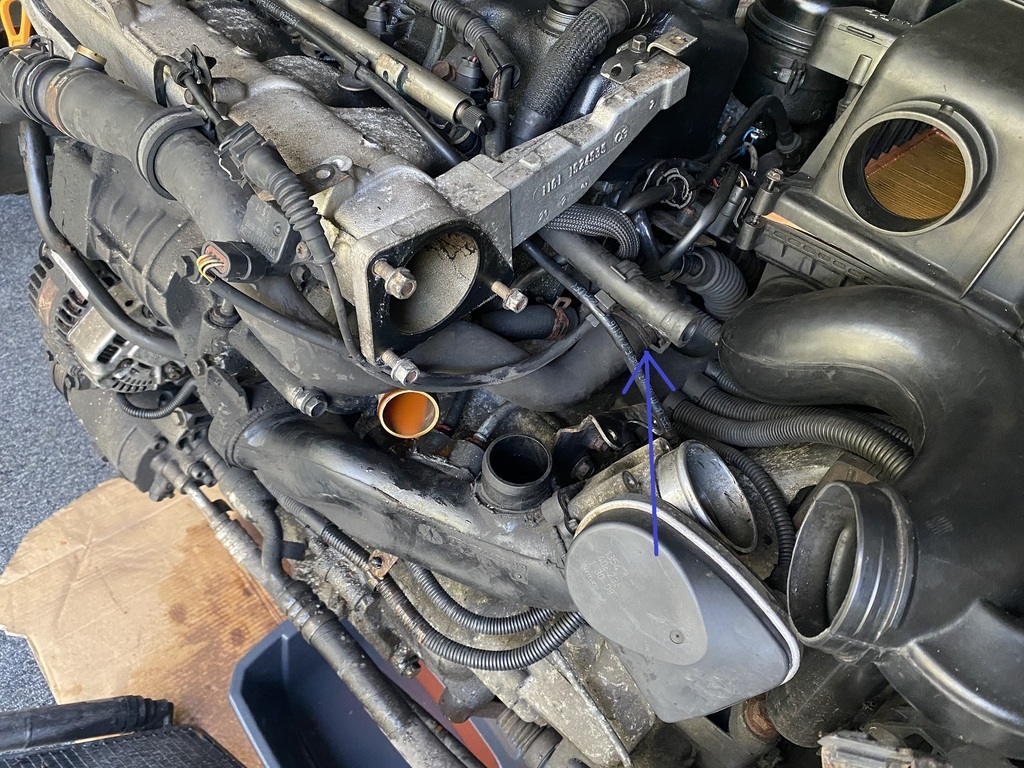 ... at which point the pipe is broken. I have no idea what is does and where it should extend to. Any ideas? My next task is to remove the supercharger. Before doing so, I'm going to watch a few YouTube guides as the task is not as simple as I first thought, even though Ant made it look easy when he did it! |
| |
|
|
keif
Part of things
Posts: 14
|
|
Dec 21, 2022 17:31:03 GMT
|
Thanks bud, I think I’ve seen that episode at least ten times. The big 100k mile service is a bit of a myth in R53 circles but I’m glad that my Cooper had it done. Yeah, as a MINI person myself its had a good amount of viewings here. Not sure if it's more of a "thing" over the other side of the pond, but as you say, a bit of a myth here, but made good TV. |
| |
|
|
|
|
|
Dec 21, 2022 17:36:56 GMT
|
|
Research revealed that the pipe that extends through the bulkhead is linked to the brake servo.
The other pipe should connect to the MAP sensor, which it doesn’t, as it’s broken.
An incorrectly functioning MAP sensor can affect engine performance, including exhaust emissions, which the Cooper struggled with at the last MoT. The plot thickens.
|
| |
|
|
|
|
|
Dec 27, 2022 16:05:35 GMT
|
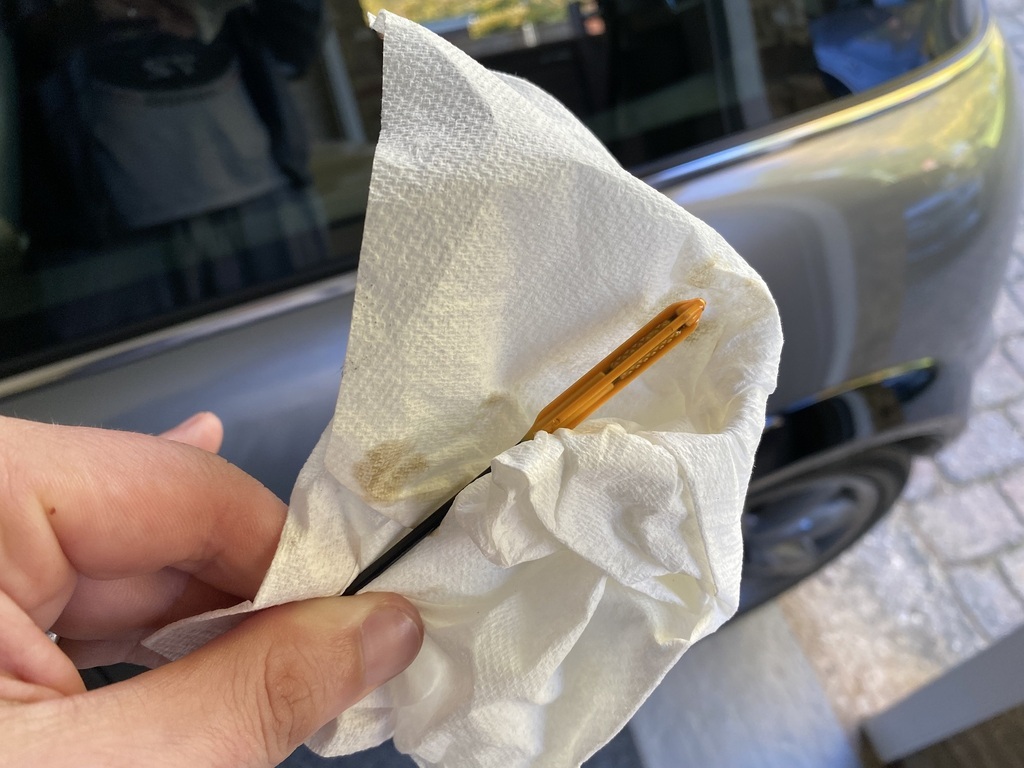
I enjoyed spending Christmas with family, however the broken MAP sensor pipe was on my mind the entire time. Buying a replacement sensor would not be a massive issue but I don't like spending money unnecessarily. I had time to look at the problem today. It didn't take long to find the next issue. The front bolt that secures the MAP sensor to the fixing bracket had the remains of a socket inside it. It wasn't going to come off. 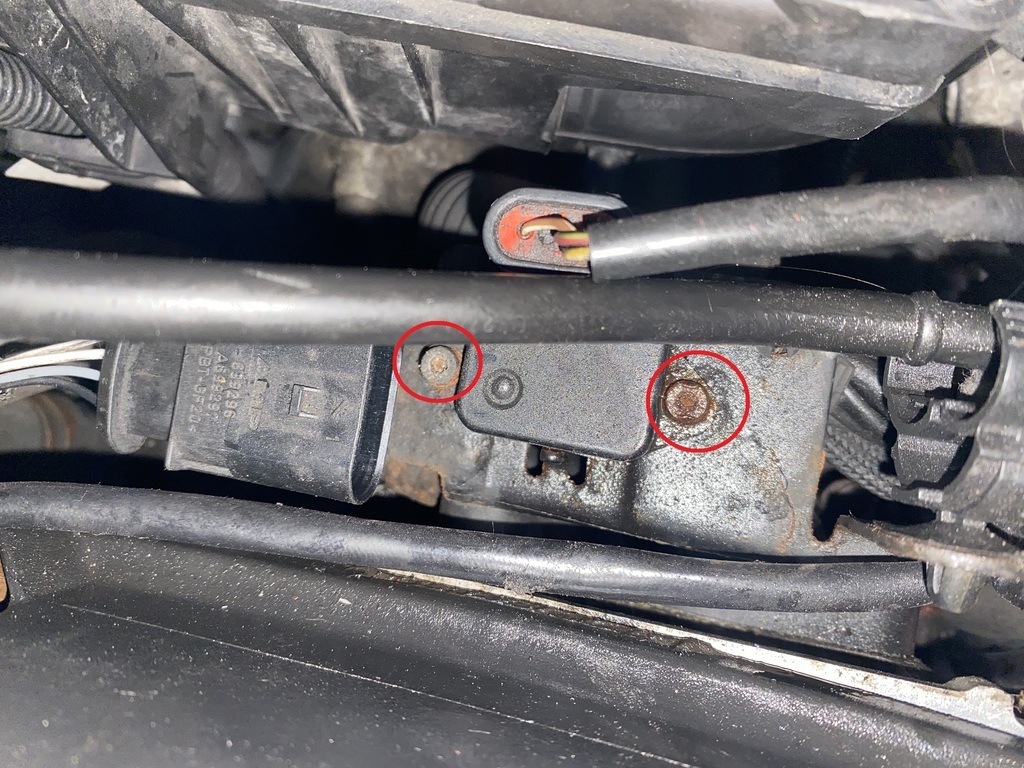 To gain access to enable removal of the bracket, I had to remove the air filter box and ECU. 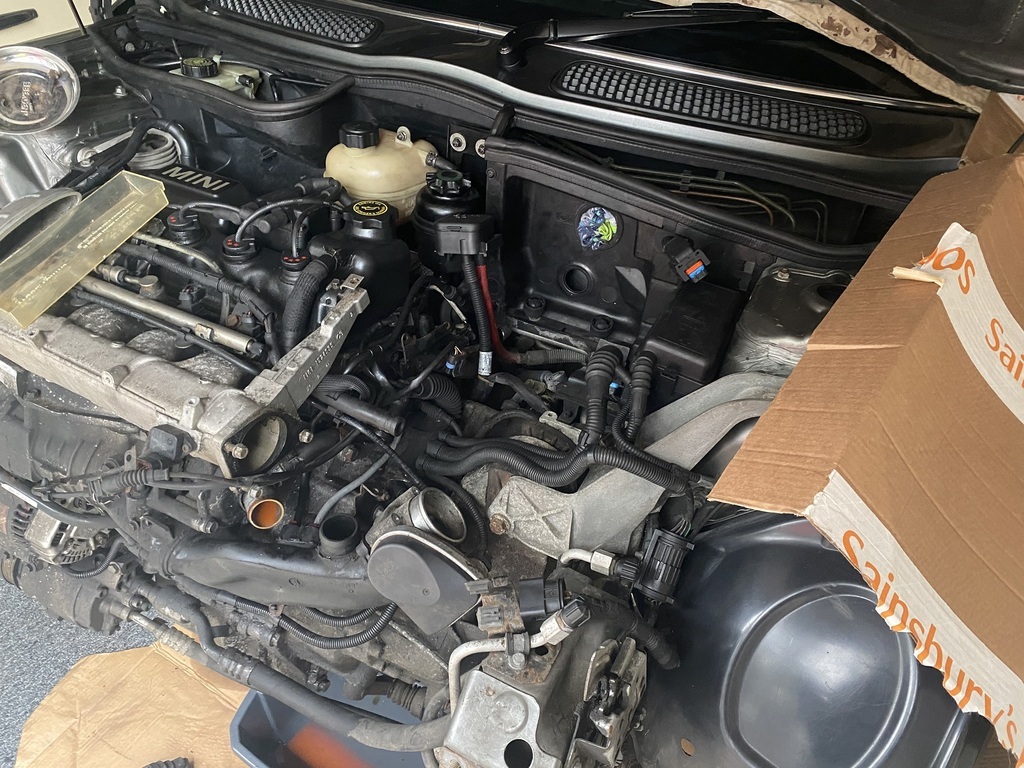 With the sensor removed and turned upside down, the broken piece that connects to the pipe was noted by its absence. 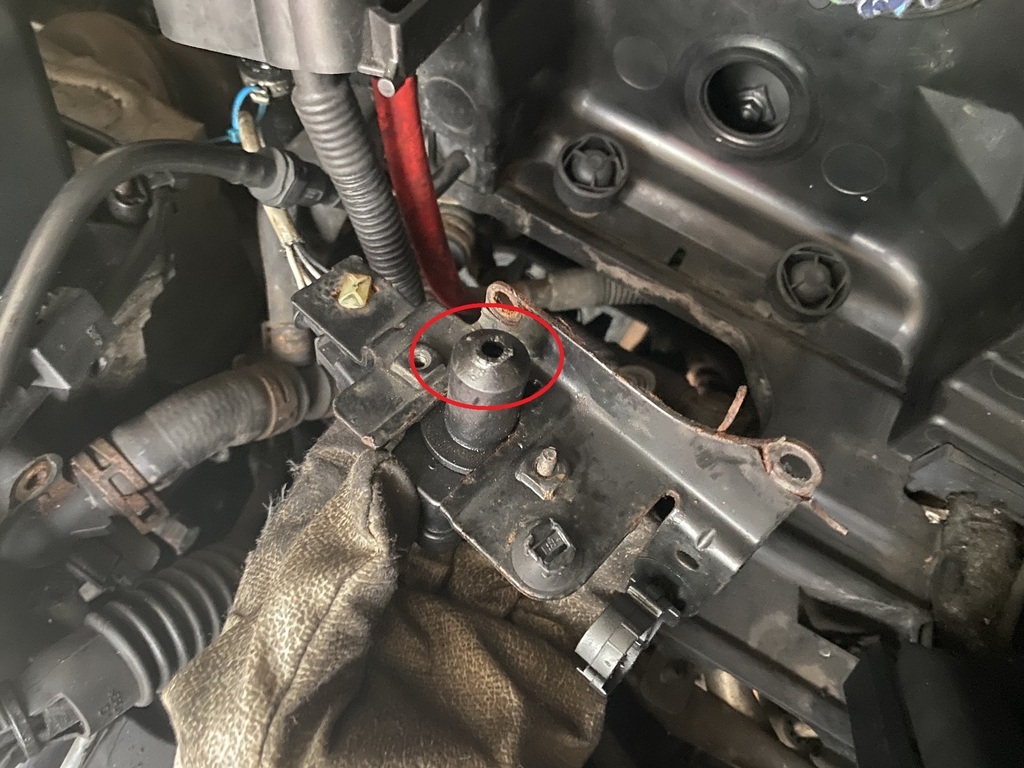 And noted again inside the pipe. 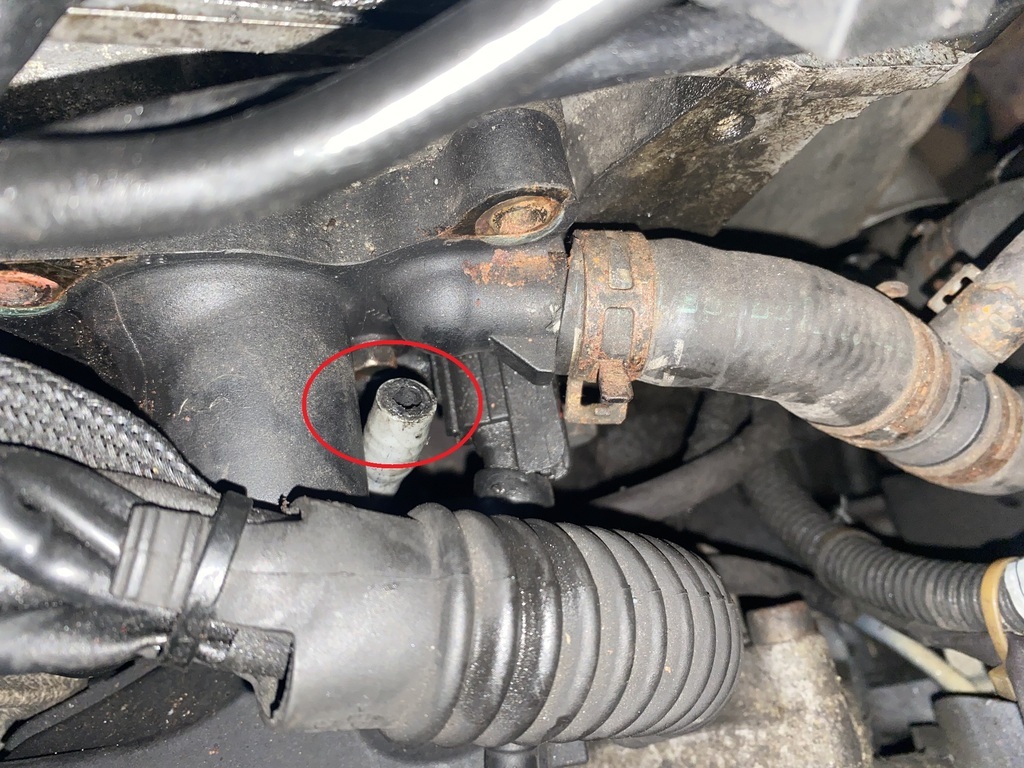 With the sensor removed, it was obvious that it had come out with the bracket. In the past, someone has tried to remove it before and, evidently, failed. 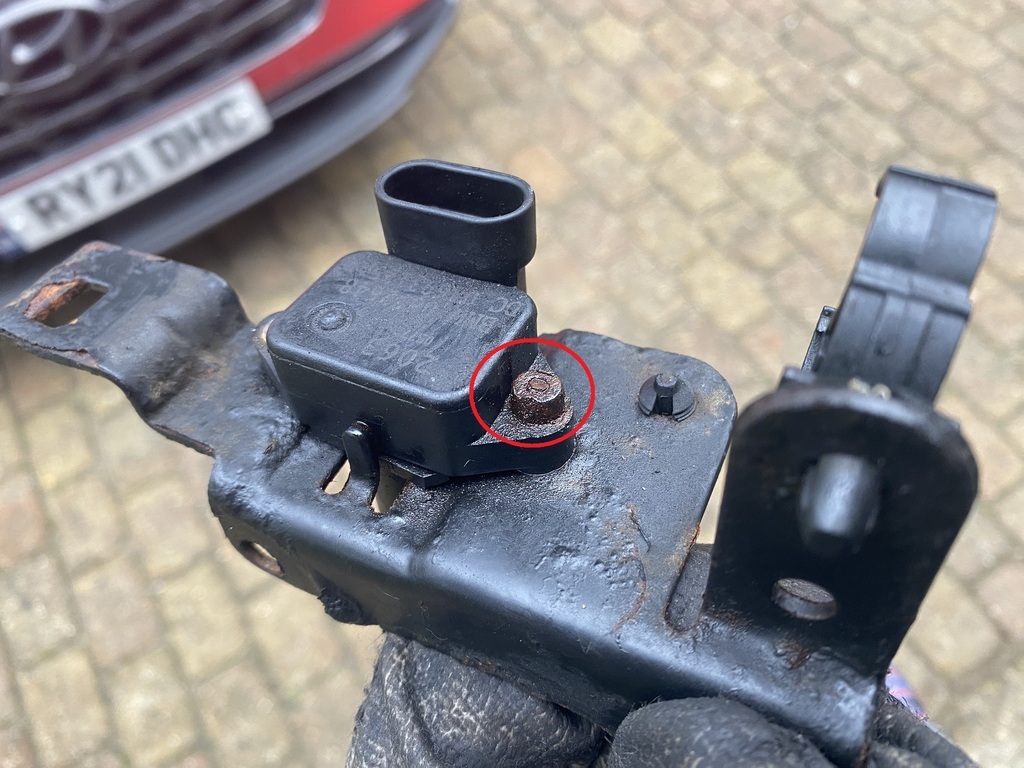 Research on the internet revealed that people have glued the broken piece back onto the sensor, apparently with success. I don't believe in adhesives, especially when applied to a butt joint. I foraged through my collection of old hoses, which included finding a plastic sleeve that originally surrounded cables from a Mercedes Benz W123 starter motor. 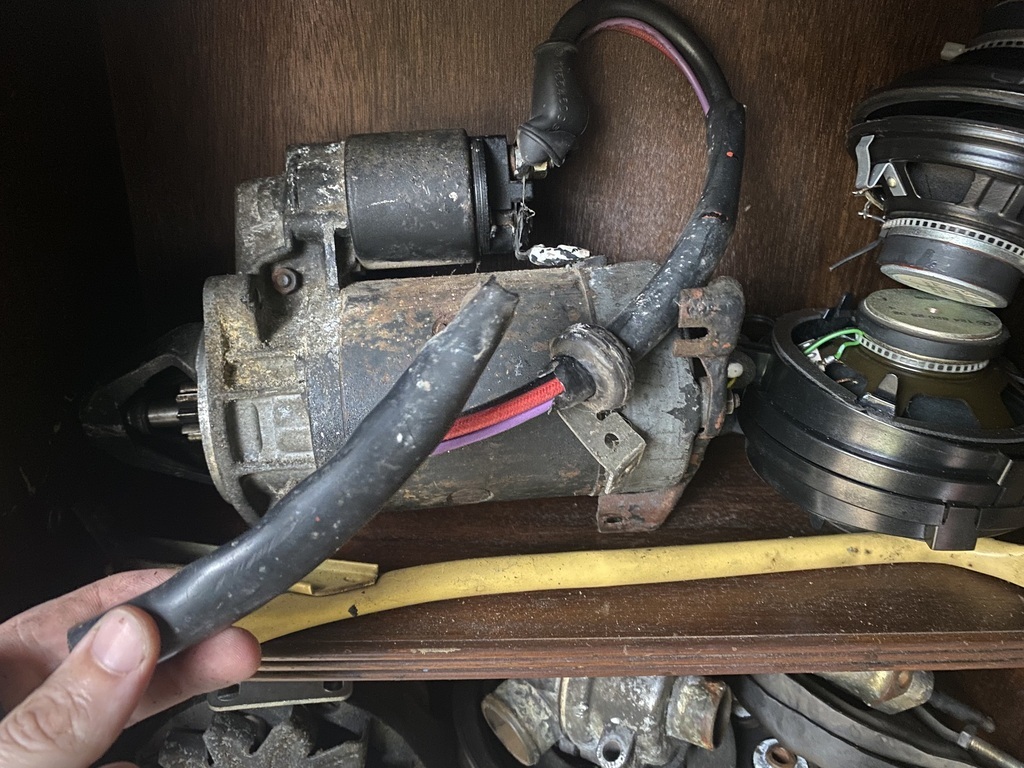 I ended up putting a length of rubber hose alongside the end of the sensor and connected the two with the plastic sleeve, which fitted very snuggly. 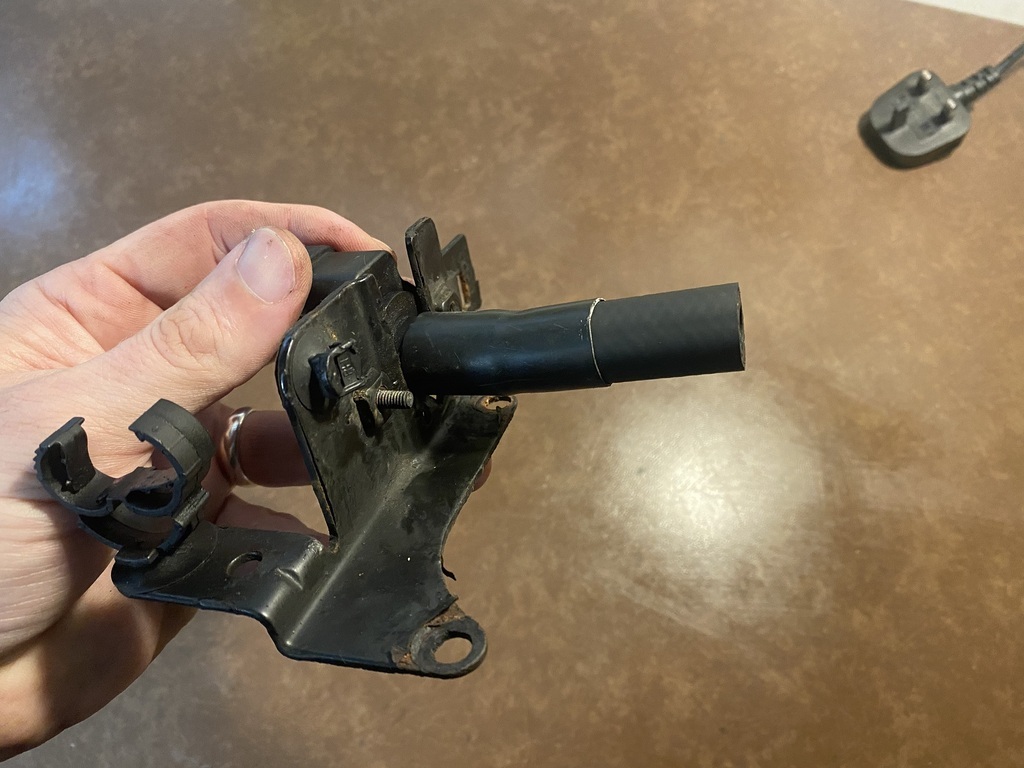 At the other end, the rubber hose also fitted snuggly over the end of the pipe. 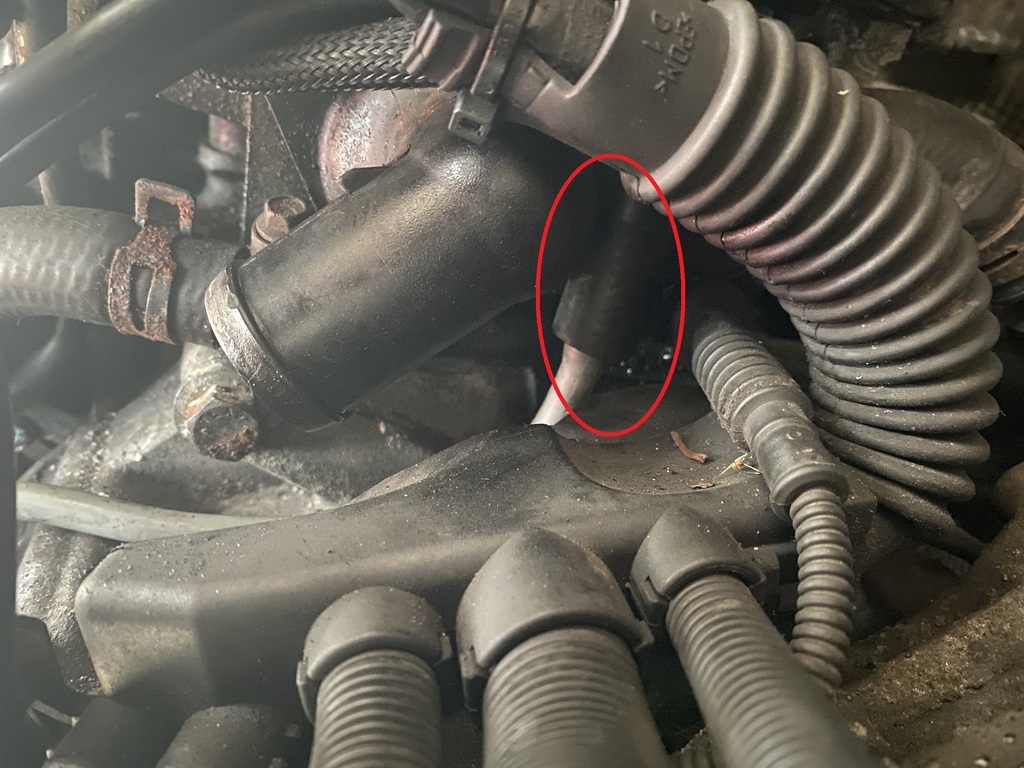 I refitted the pipe and sensor and consider the problem solved. Hopefully. Next, I removed the alternator and the dipstick tube. With the dipstick tube removed, I plugged the hole where it fits into the engine block, as removal of the supercharger and the attached water pump will result in water spilling over the front of the engine and I didn't want it mixing with the oil in the Cooper's sump. Then I removed the supercharger. 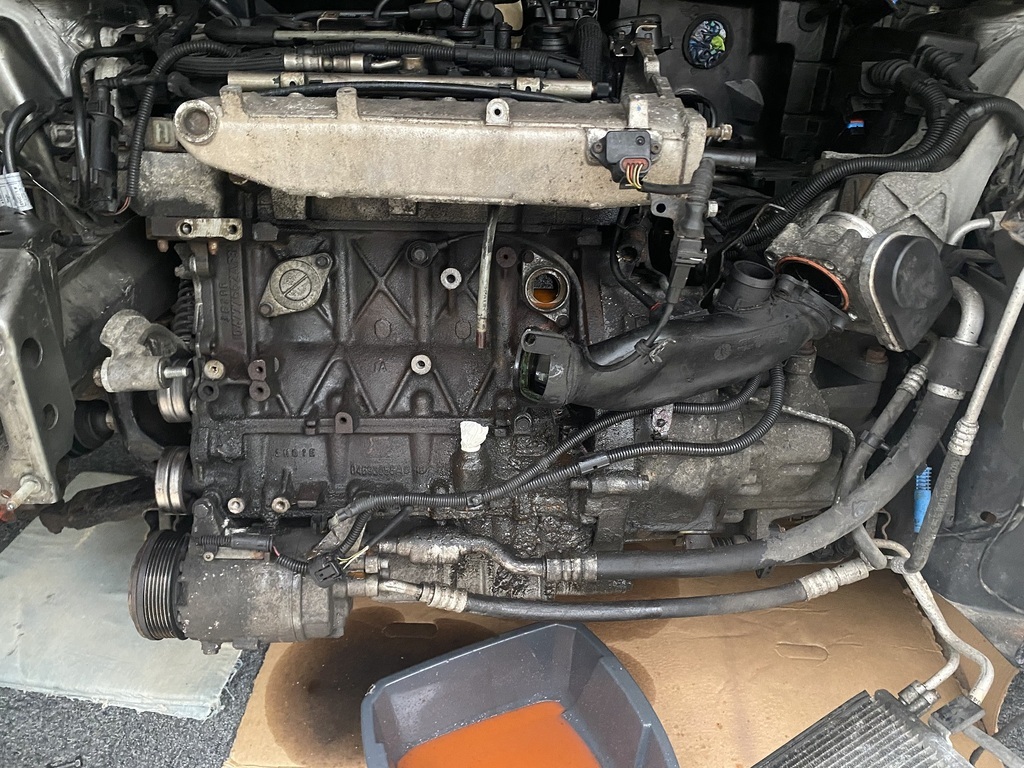 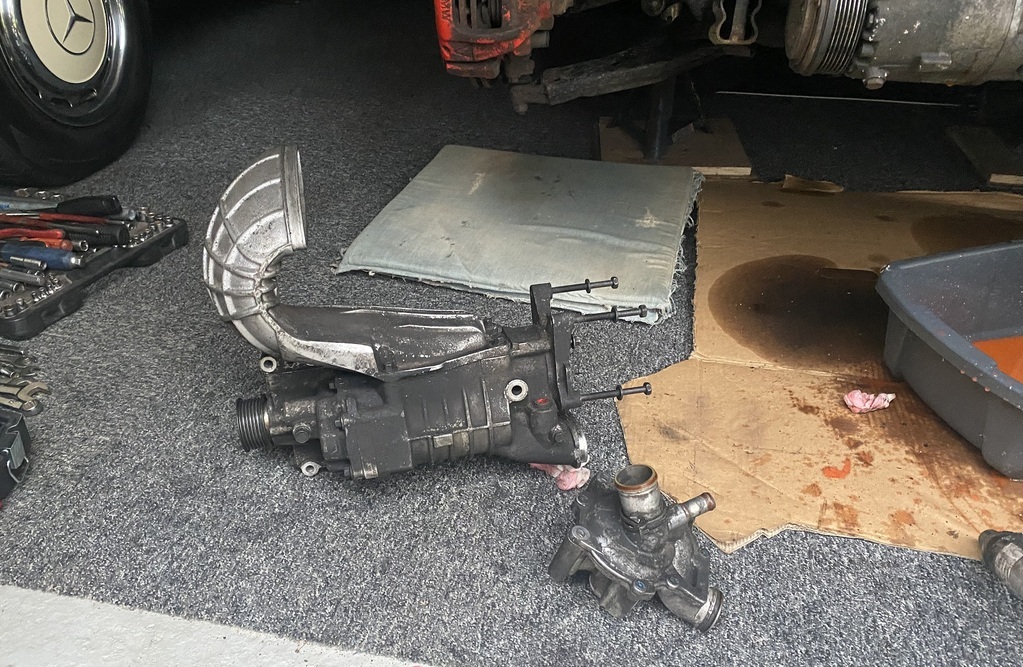 A quick look inside the supercharger revealed a very clean set of rotors. I've read stories about rumbling sounds coming from the supercharger but I am pleased to confirm that spinning the pulley did not result in any unwanted noises.  This is how the Cooper's engine looks now. Dirty! 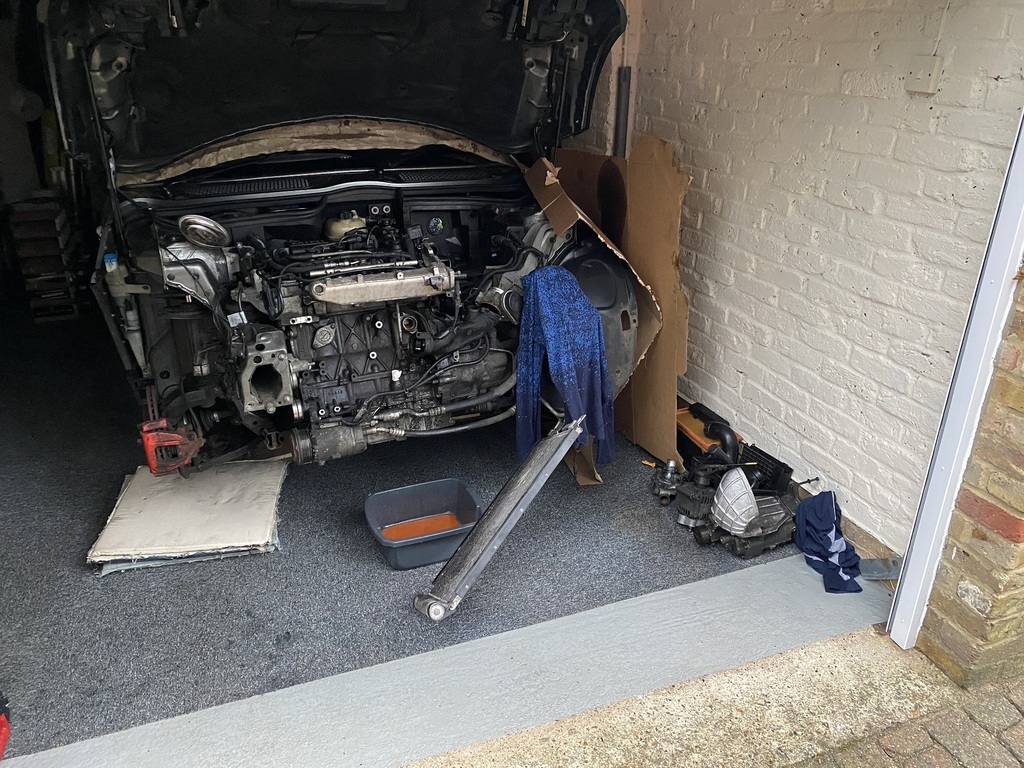 An inspection of the cam cover and HT cable plugs revealed that the cam cover gasket and spark plug tube seals are leaking huge amounts of oil. The cam cover and top of the inlet manifold are all covered with a layer of oil. 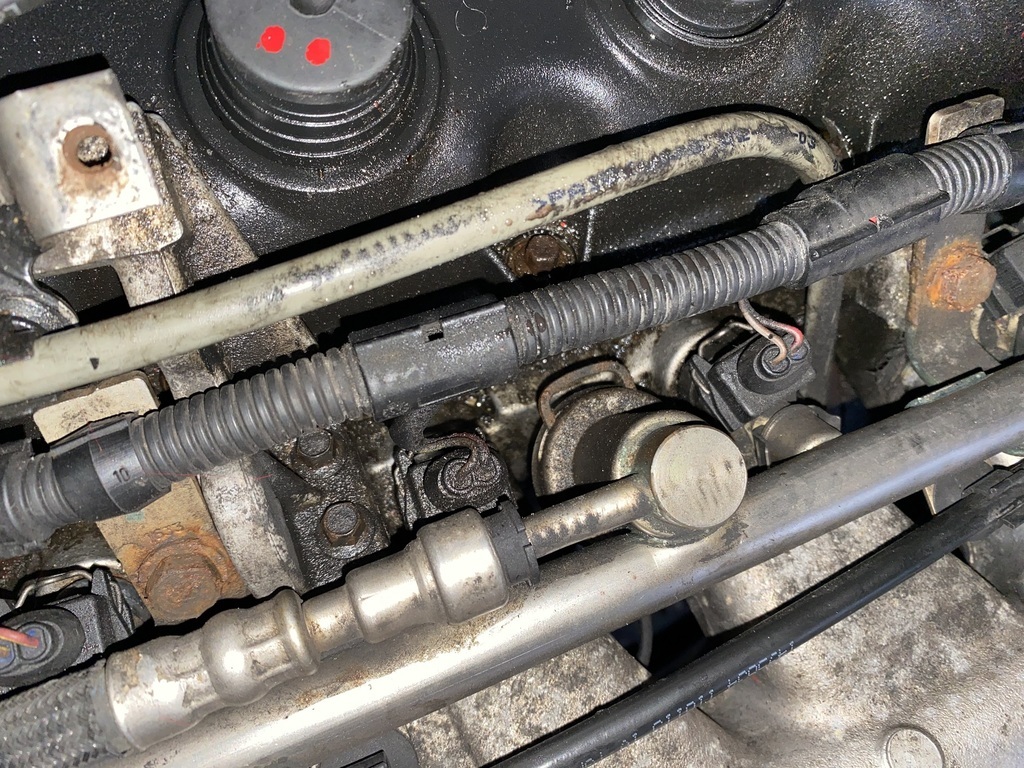 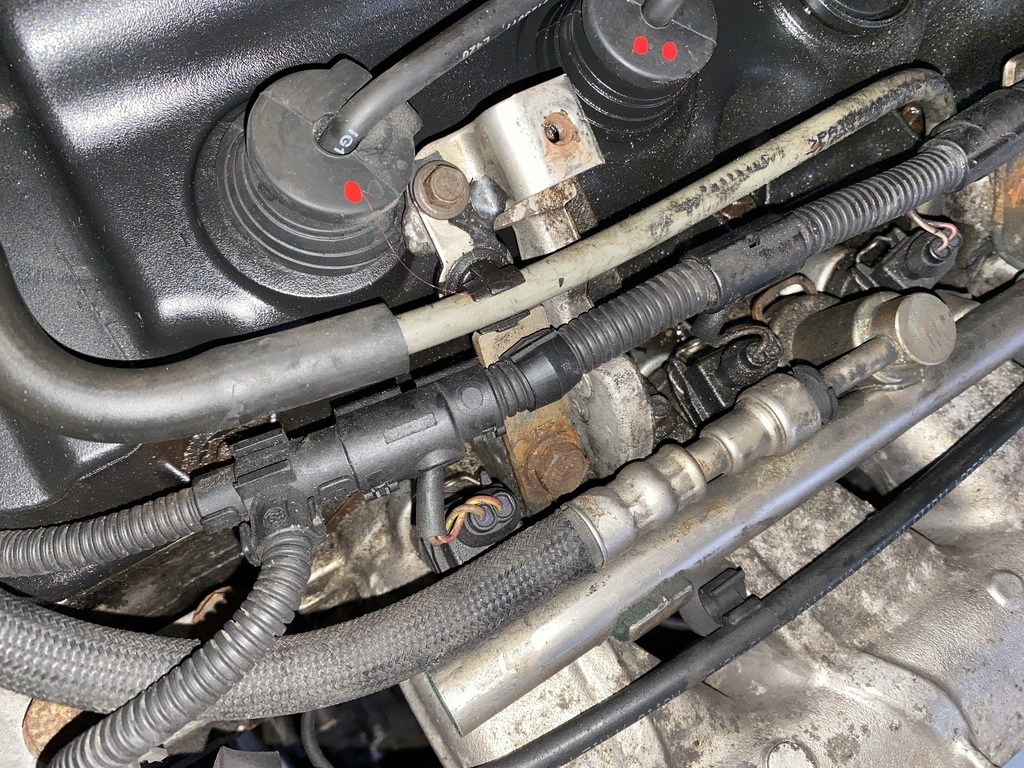 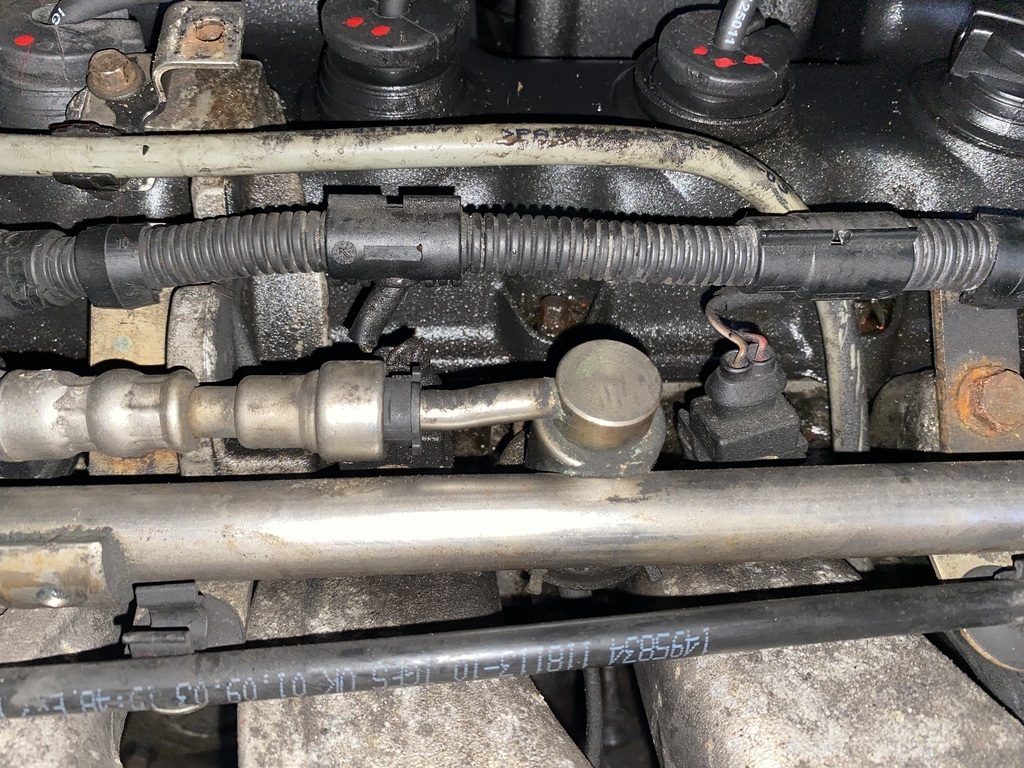 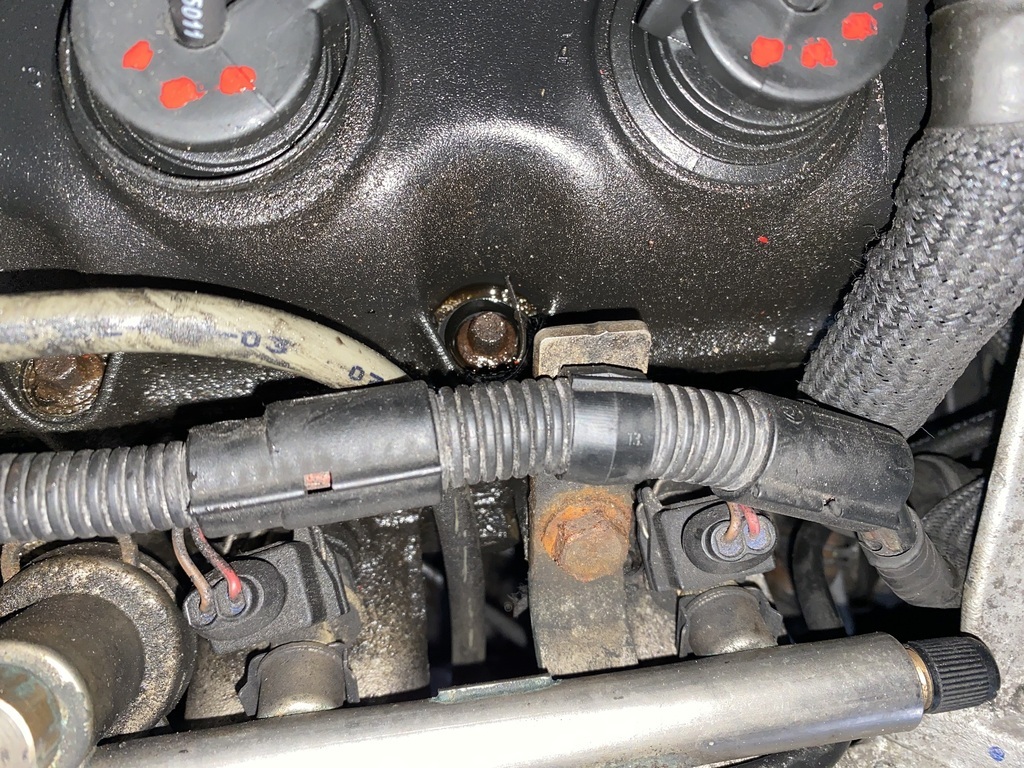 Oil is not dripping down onto the engine block, presumably because it goes over and through gaps in the inlet manifold and down onto the supercharger and the alternator. 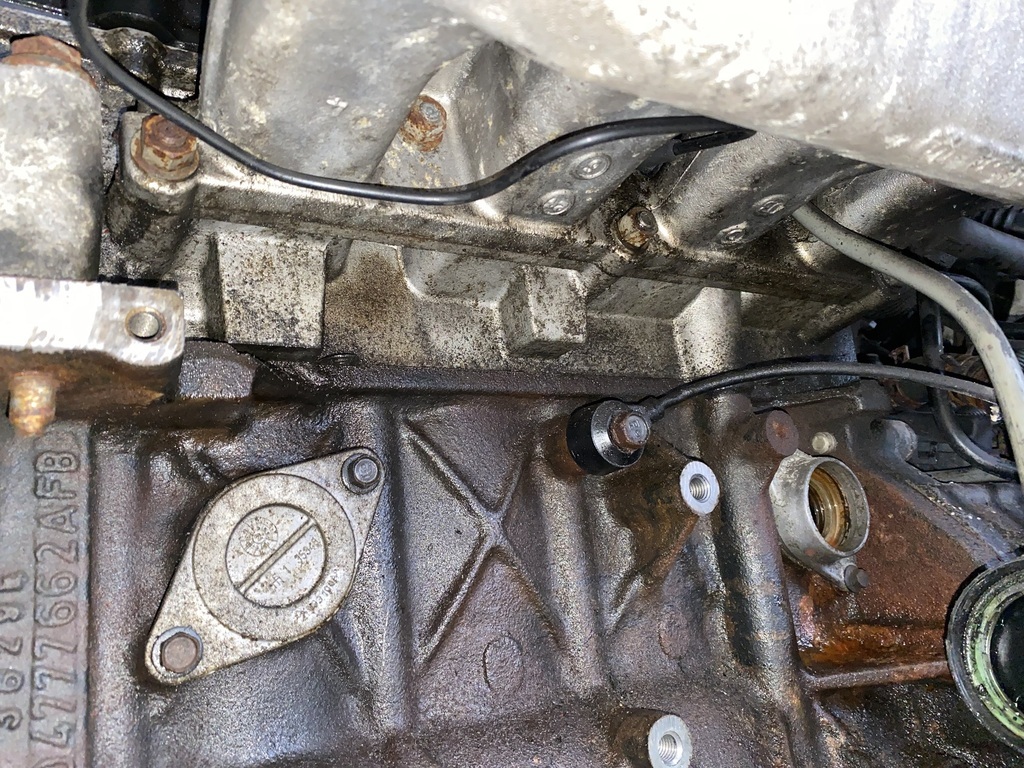 Next to come off is the cam cover, then the sump. Following today's successful tinkering, I've got my mojo back and I may well make further progress tomorrow. |
| |
|
|
|
|
|
Dec 28, 2022 16:08:46 GMT
|
It was wet and windy and I didn't fancy working on the Cooper today. I could have closed the garage door and worked in comfort but I prefer natural daylight and the open plan environment of my driveway. Instead, I spent a bit of time cleaning up the ancillaries in my workshop. I bought some paraffin.  4 litres for £12 is a bargain compared with what a can of Gunk or Jizer would set me back. The plan was to apply the paraffin with a paintbrush and a toothbrush in the tight spots. I formed a splash-proof workstation in my workshop. 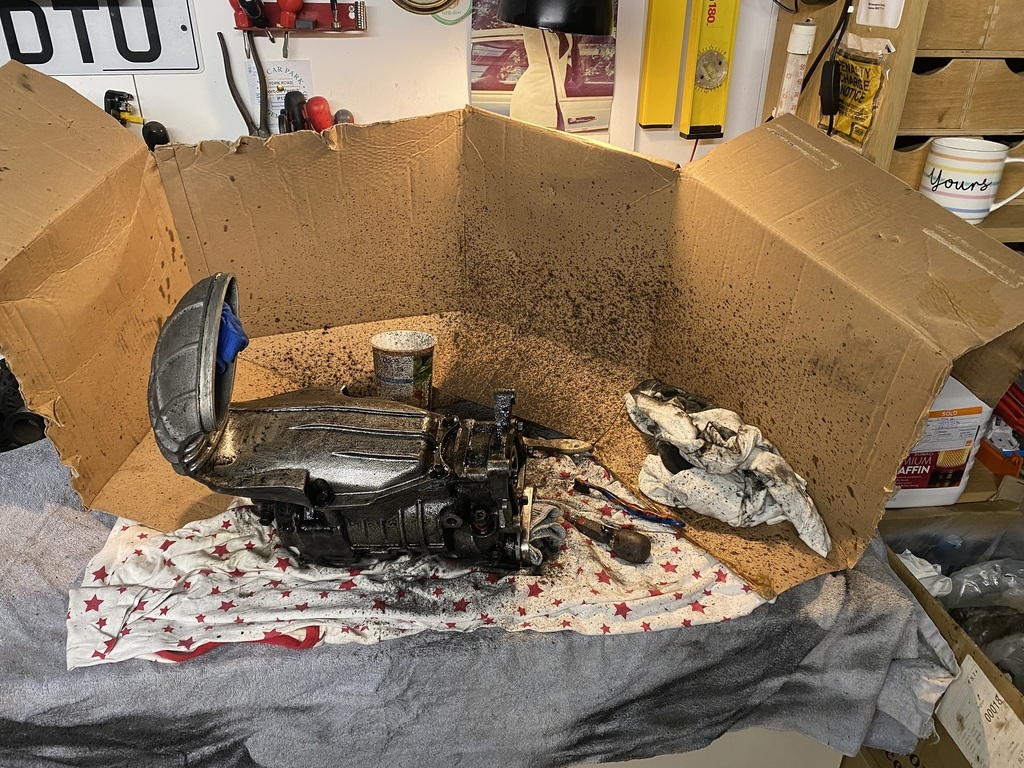 First up was the supercharger. It was filthy! 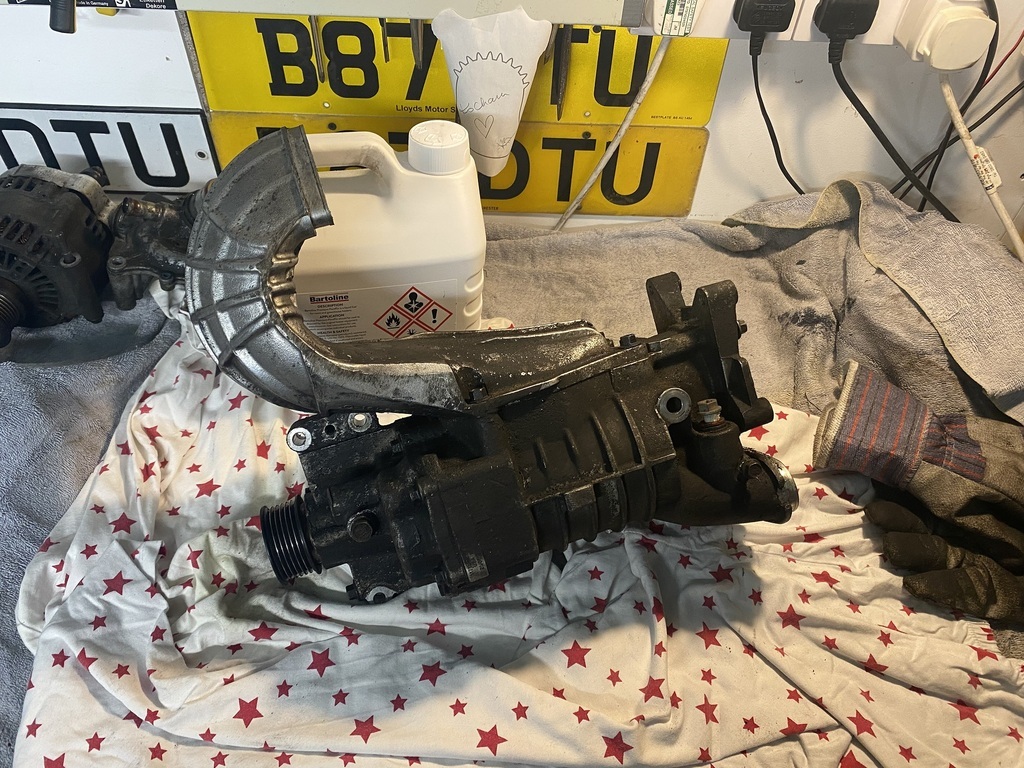 An hour later it looked like this. Some of the metal is a little pitted and stained but as the supercharger is completely concealed beneath the intake system, I am not too fussed about aesthetics. 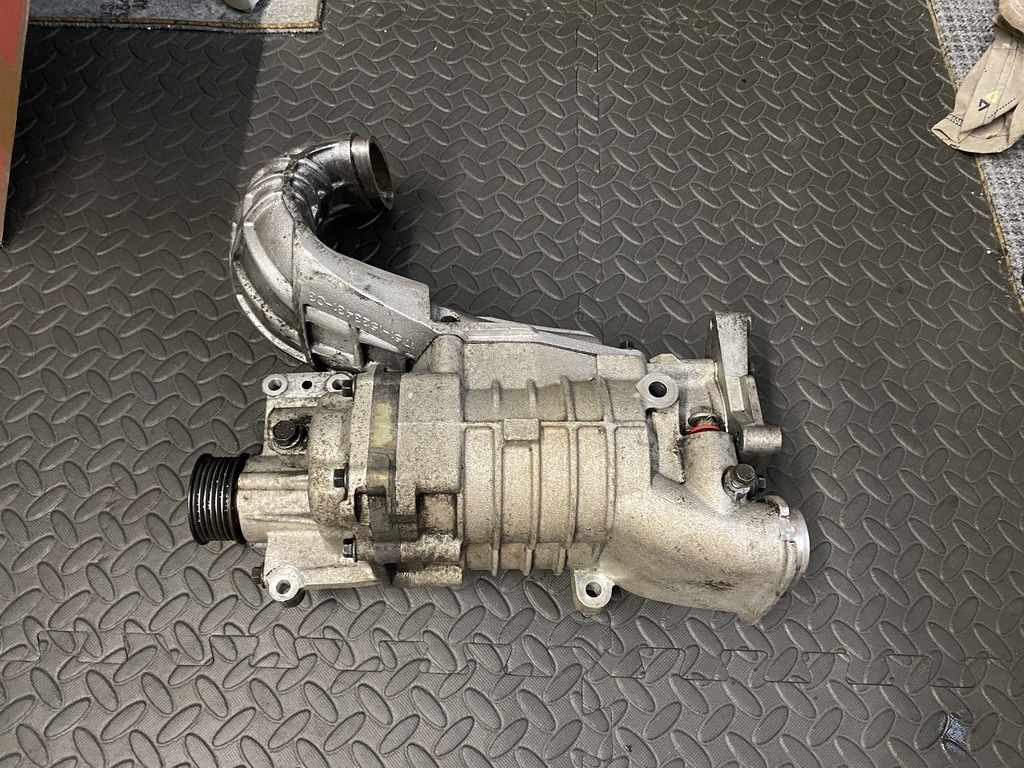 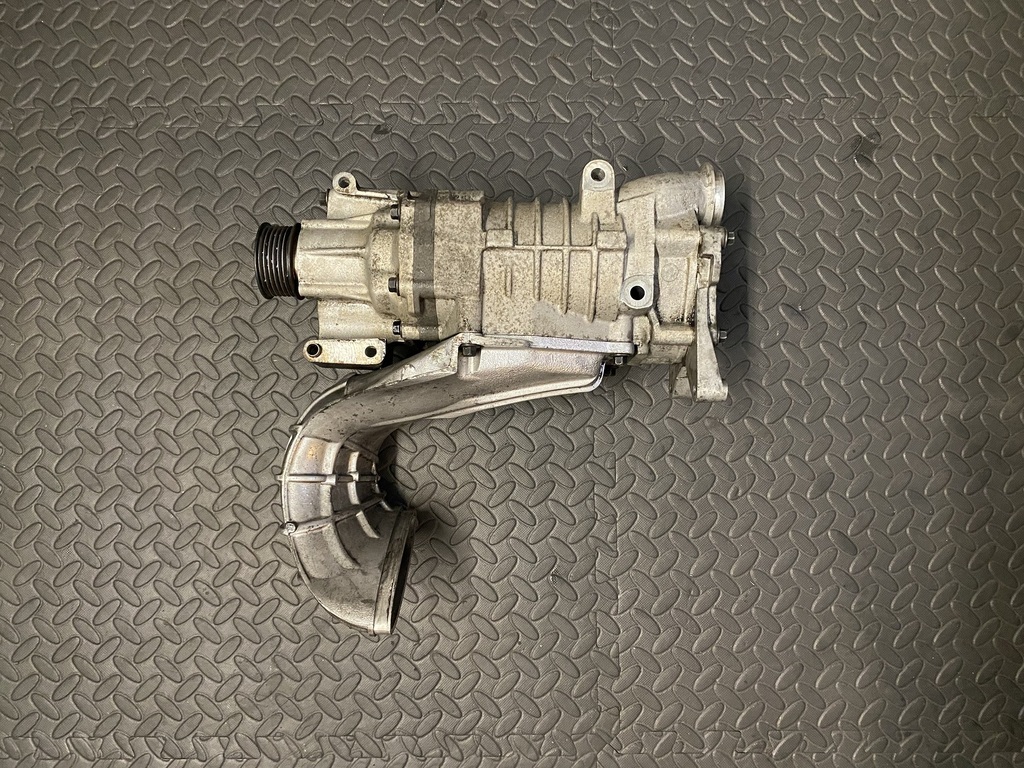 Next up was the water pump, which was also caked in oil. 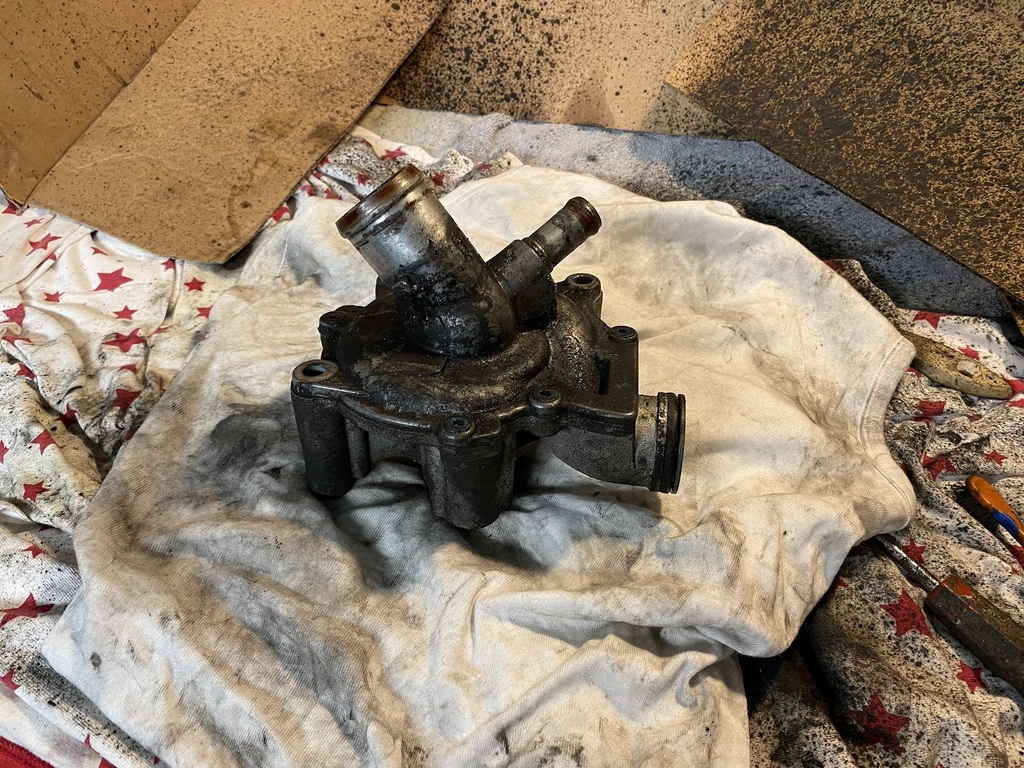 And ten minutes later it looked good enough to eat. 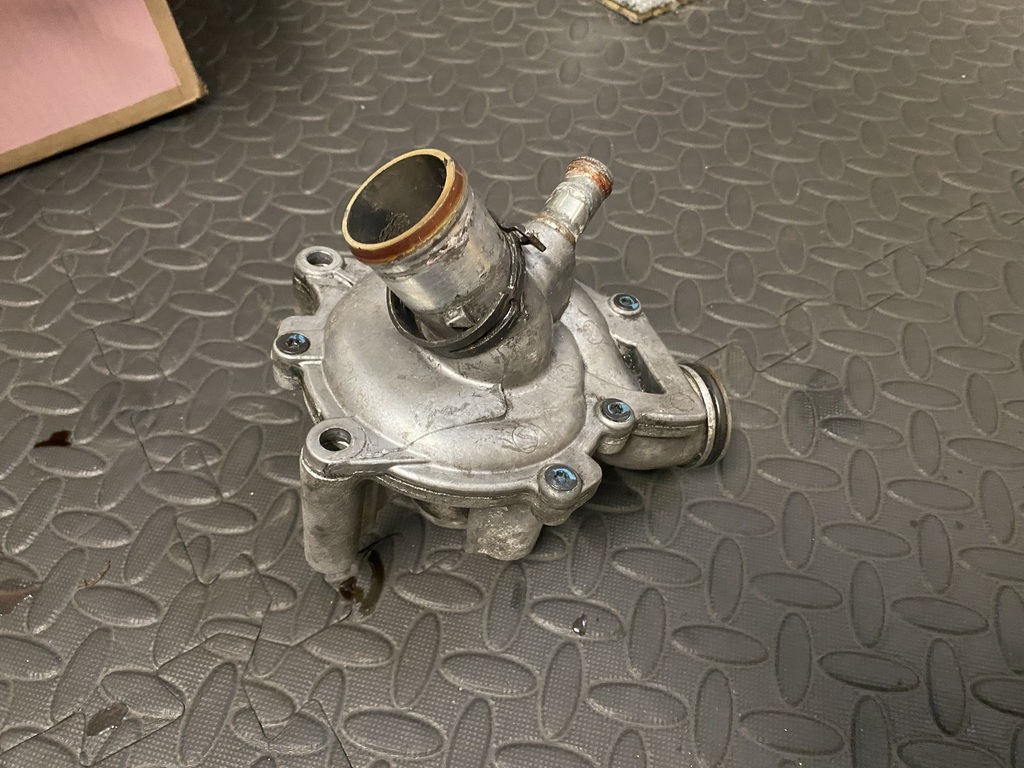 I used a toothbrush and minimal amounts of paraffin to clean the alternator. 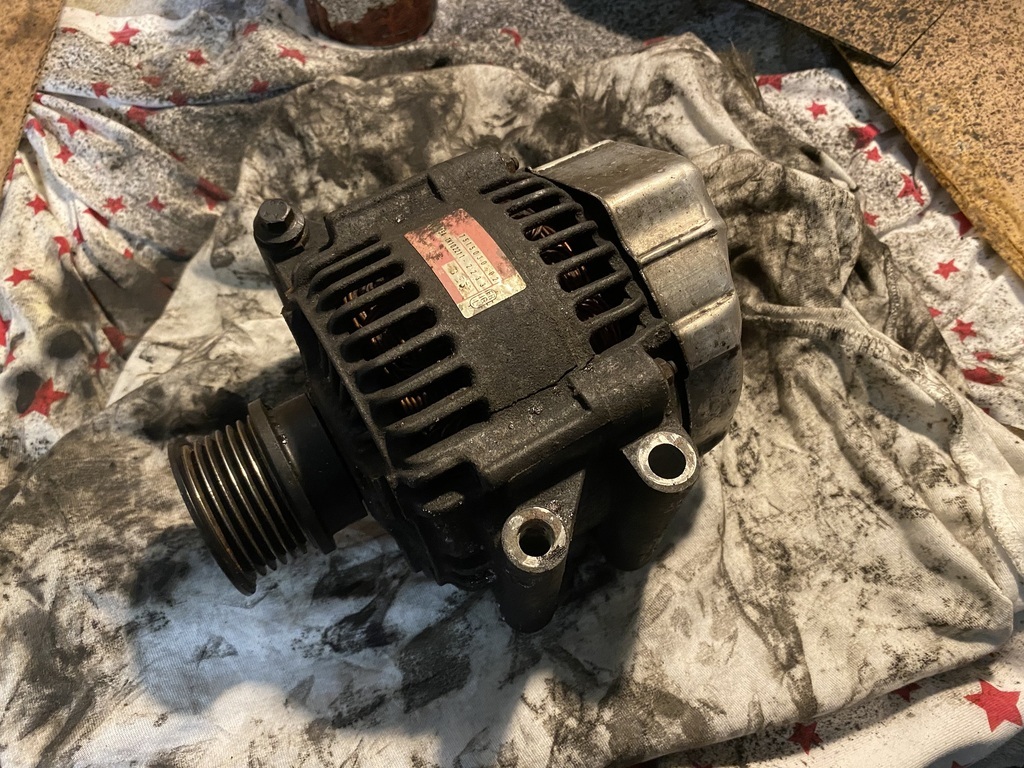 It's not perfect but it'll do. 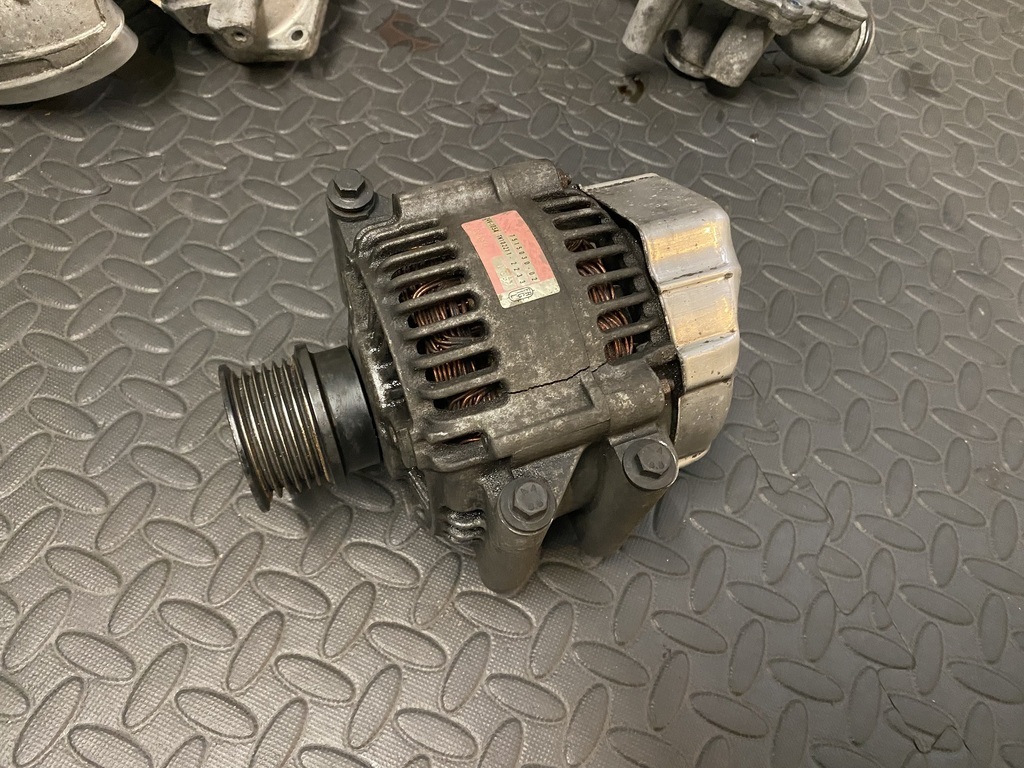 In the end, I used about 50ml of paraffin, approx £0.15 worth. I will probably use the same quantity to clean the engine block, sump and gearbox. Another good result. |
| |
|
|
2p2g1m
Part of things
Posts: 116
|
|
Dec 28, 2022 16:23:23 GMT
|
|
Nice work. Looks like your alternator is cracked! I had the same thing on the one I owned. It did fail completely eventually, might be worth looking at a new one whilst it’s apart.
|
| |
|
|
|
|
|
Dec 28, 2022 16:45:16 GMT
|
Nice work. Looks like your alternator is cracked! I had the same thing on the one I owned. It did fail completely eventually, might be worth looking at a new one whilst it’s apart. Well noticed, thank you. I was too high on paraffin fumes to spot the crack. |
| |
|
|
|
|
|
Dec 28, 2022 17:59:33 GMT
|
Nice work. Looks like your alternator is cracked! I had the same thing on the one I owned. It did fail completely eventually, might be worth looking at a new one whilst it’s apart. One chap on the Facebook R53 page suggested that I shouldn’t bother replacing the alternator just because it has a crack. What do you reckon? |
| |
|
|
|
|