pobsey
Part of things

Posts: 25
|
|
Apr 23, 2022 21:26:54 GMT
|
|
To be honest dropping the front subframe is a doddle, 8 bolts plus the front bumper extensions.
I’ve even dropped it just to change the manifold all on the drive with a trolley jack, couple of axle stands and a 1/2” Halfords socket set
|
| |
|
|
|
|
|
|
|
|
|
To be honest dropping the front subframe is a doddle, 8 bolts plus the front bumper extensions. I’ve even dropped it just to change the manifold all on the drive with a trolley jack, couple of axle stands and a 1/2” Halfords socket set But how about all the other stuff that drops down with the subframe? Looking at Kelvinator’s photo, there are numerous other connections and elements that need to be separated to enable removal of the subframe. Separating the steering column u-j from the rack looks like fun! Please appreciate that I have limited spare time and whilst I do enjoy tinkering with my two old Mercs (which have been subjects of fairly big surgery over the years), for me ownership of the Cooper is more about driving than fixing. |
| |
|
|
pobsey
Part of things
Posts: 25
|
|
Apr 24, 2022 20:22:49 GMT
|
|
I completely agree, the steering column is held to the rack with a pinch bolt, you also drop the power steering fluid bottle to save emptying it, disconnect the two power leads to the power steering pump and I normally pop the outer ball joints and steering arms and your home free. To be honest mine has been apart so much nothing is seized and comes apart without a fight. Cars with more miles/less tinkering will put up a bit of a fight, bmw/mini chose to spec bolts that like to corrode
|
| |
|
|
Paul
Posted a lot
Posts: 1,903
|
|
|
|
Please appreciate that I have limited spare time and whilst I do enjoy tinkering with my two old Mercs (which have been subjects of fairly big surgery over the years), for me ownership of the Cooper is more about driving than fixing. This is an attitude I can entirely get on board with tbh. I'm lucky enough that I have a little bit of disposable income to spend on my projects too, whereas I can't always muster enough time...or enthusiasm. Case in point, I just paid an auto electrician to come and diagnose a faulty crank sensor on my campervan. I may have got there in the end after much head scratching and crawling around underneath (although I'm not even sure of that tbh)...but I just cba. My R53 has a minor oil leak from somewhere, but I was told that they all do that...so I'm leaving it  |
| |
|
|
|
|
|
Apr 27, 2022 16:49:35 GMT
|
Firstly, a big thank you to everyone who responded to my last post. I fully appreciate both points of view and nobody has said anything wrong. I am lucky enough to have four cars, including a new (leased) daily, a toy that I use mostly for having fun (the Cooper) and two old Mercs (which are my long term love affairs). Each plays a different role and the Cooper's main task is to entertain me out on the road - NOT in the workshop. I watched the video that presents how to remove the front subframe. I'm not saying that the job is impossible or beyond my abilities but it's not something that I wish to get involved with. I can predict problems, seized nuts and bolts / ball joints and a need to replace a lot more parts than a couple of oil seals. I contacted a (relatively) local MINI specialist, located approx 30 mins from my 'hood. I took the Cooper to them this afternoon and within a few seconds of lifting the bonnet, one of the mechanics noticed that the top radiator hose is chaffing on the inlet manifold and the rubber has worn almost right through. 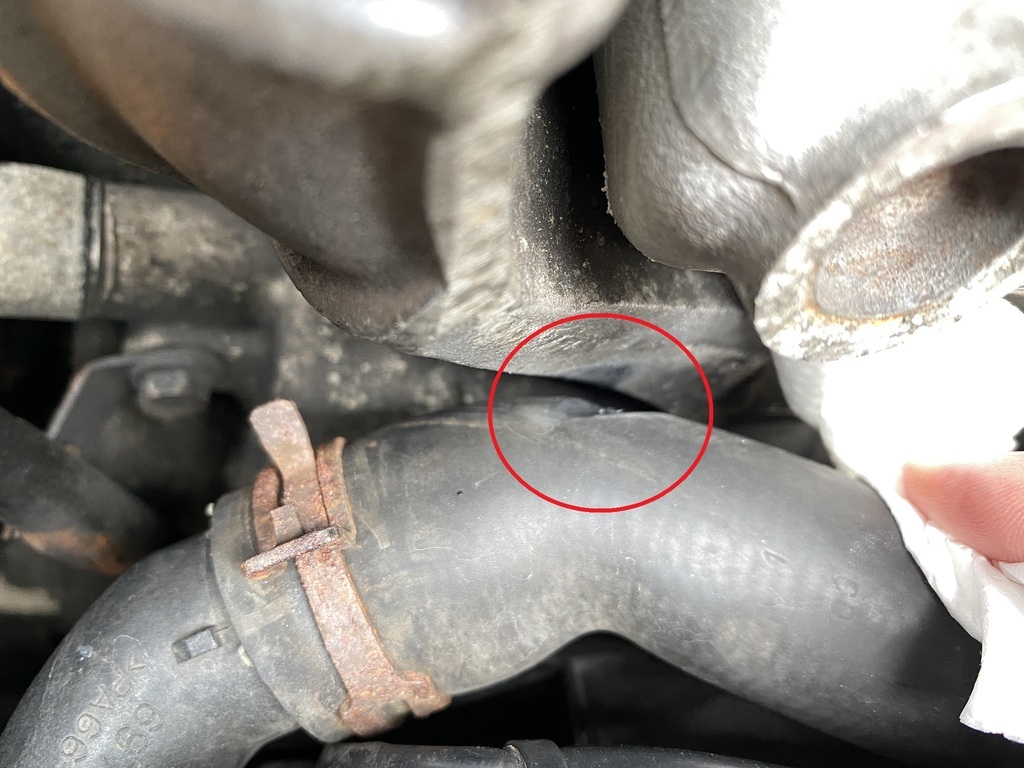 Good spot! I've added replacement of the hose to the list of jobs that they will be doing for me. The mechanic is aware of what needs to be done to replace the oil filter housing seals, he's quoted approx 2 hours for the job. I have also asked the mechanic to change the engine oil and filter and check the transmission oil level and top it up if necessary. All being well, I will have the Cooper back on Friday afternoon, in which case I will pressure wash the oil stains from the underside and give it a good tart up over the long Bank Holiday weekend. The guys at Dashwood Motors have, hitherto, been an absolute joy to deal with. 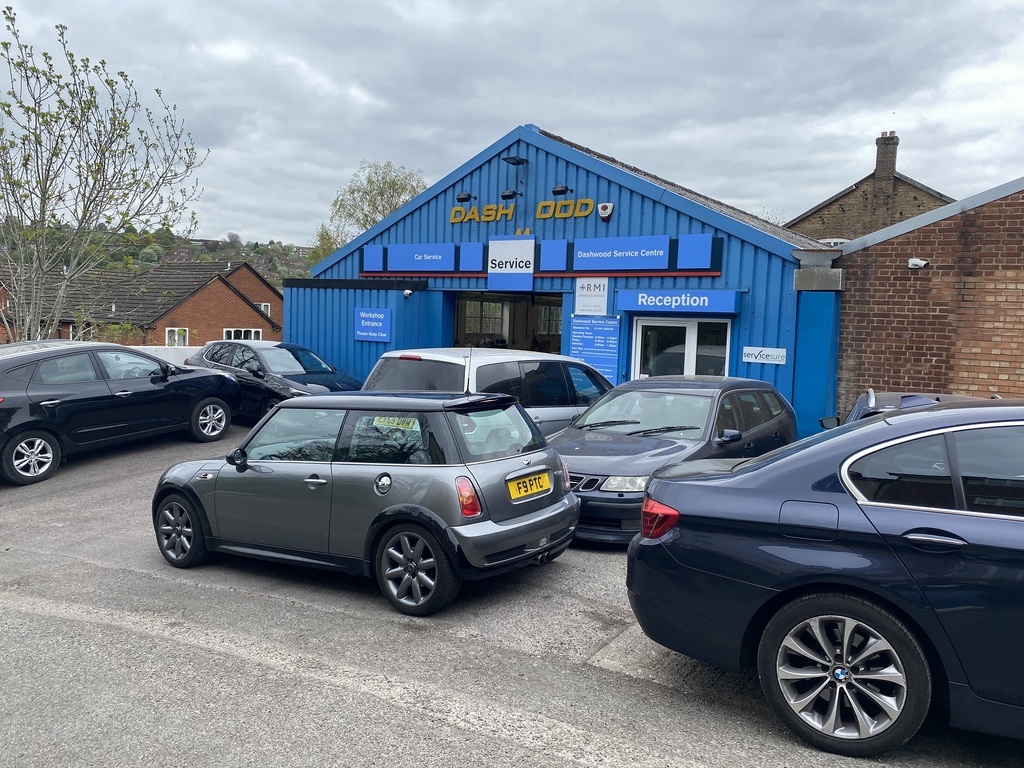 Once the Cooper is fixed and back on the road, I will take some more arty-farty photos, like the ones below. Aside from driving the Cooper, I love taking photographs of it. I love this car to bits, providing that I don't have to get my hands dirty! 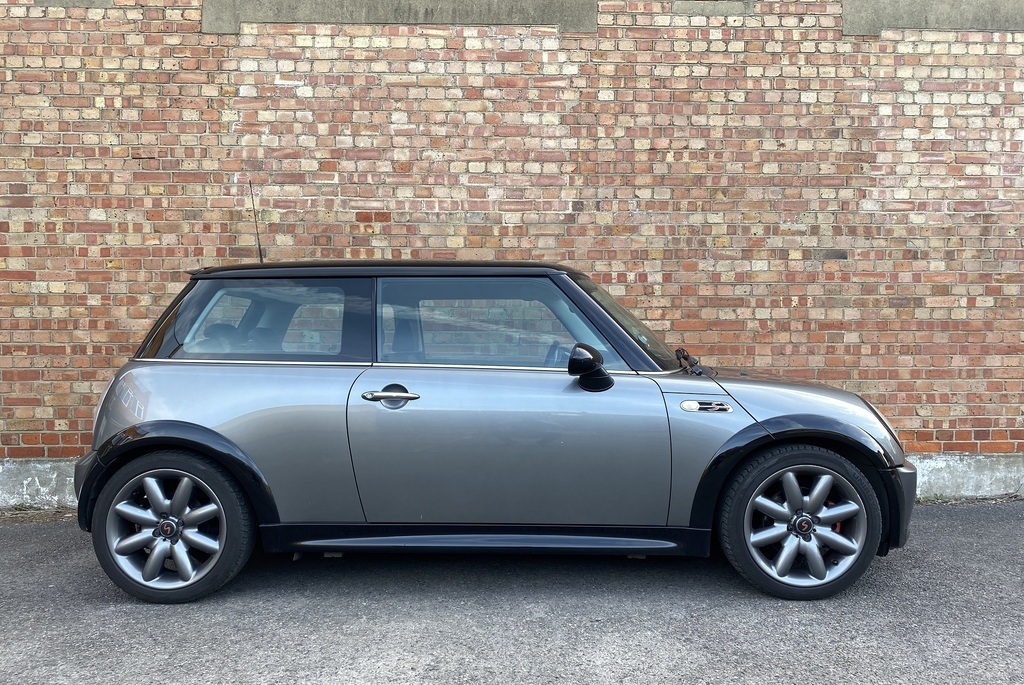 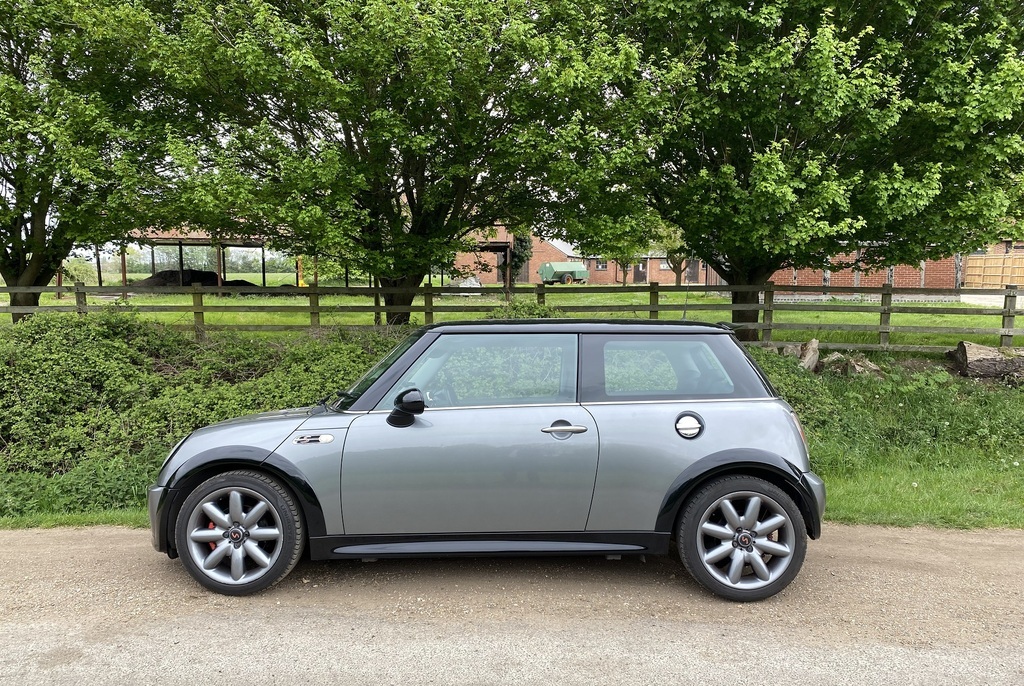 |
| |
|
|
thebaron
Europe
Over the river, heading out of town
Posts: 1,643 
|
|
Apr 27, 2022 17:30:18 GMT
|
|
Enjoying your car is the most important thing. You don't have to have skinned knuckles and grease stains to do that ;-)
Car is looking great
|
| |
|
|
Paul
Posted a lot
Posts: 1,903
|
|
Apr 27, 2022 18:30:51 GMT
|
|
Good spot on the top hose...that's a really common failure point.
|
| |
|
|
thebaron
Europe
Over the river, heading out of town
Posts: 1,643
|
|
Apr 28, 2022 13:27:02 GMT
|
|
I'm going to test drive a 2003 S next week. My friend with the garage is changing his business model in June of this year due to health reasons.
He has a chronically bad back that means he cannot work on cars anymore. He's downsizing his business and focusing on sales only from June onwards.
As a consequence he is selling off his garage loaners and one of these is a 2003 Cooper S. It has a massive 328,000kms on it but the the head gasket and the supercharger were both replaced / rebuilt at 275,000km. It also has a fresh MFK so I could run it for 6-9 months and sell easily at the same price.
Looking forward to a spin in it either way as I have never driven an S. Just drove a Cooper once but that was 17 years ago.
|
| |
|
|
|
|
|
Apr 29, 2022 15:51:56 GMT
|
The garage sent me a text early afternoon, confirming that the Cooper is ready for collection. I caught the smelliest Uber cab known to man, picked up the Cooper and got home excited to have my baby back. The bill for the top hose and a few other bits and labour, including Mr Sunak's cut, was £325. Fine with me. The oil filter housing seals have been changed, the radiator top hose has been replaced and the coolant has been topped up with anti-freeze (I knew that it was a bit low although according to the dial the engine temp never got above mid point and there has been no evidence of any coolant loss). The oil and filter have been changed, which involved replacement of a damaged sump thread with a re-tapped thread and installation of an oversized sump plug. Just as well I got the garage to do the oil change! The plan for tomorrow is to give the underside of the Cooper a good clean. I started today by getting the car off the ground. When I investigated the noisy steering system last year, I removed the front wheels and re-fitted them using the right amount of human strength. Today, to remove the rear wheels, I had to call upon the services of a long extension bar, a 17mm socket and every muscle in my upper body to shift the wheel nuts. Whoever did them up that tight is a butt munch. With the nuts removed, the rear wheels wouldn't come off. A few good smacks with a large hammer got them off. If I had to take the wheels off in an emergency with the standard wheel brace that comes with the car I would have been stuffed. 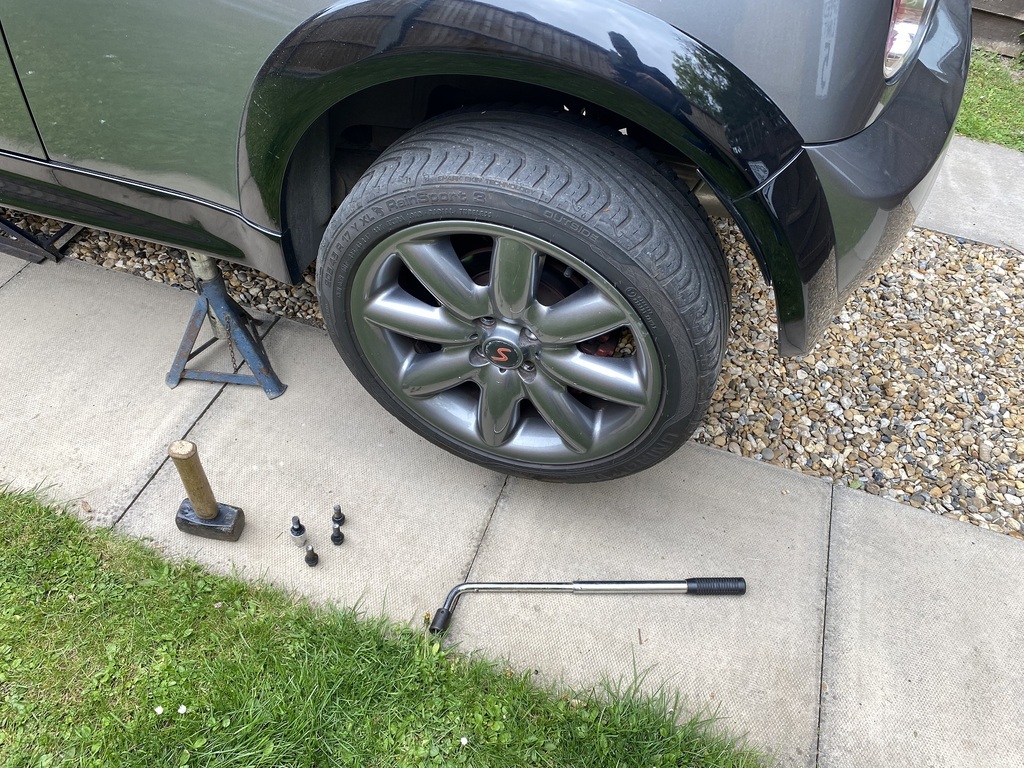 With all four wheels eventually removed, I got the Cooper as high as I could on axle stands. 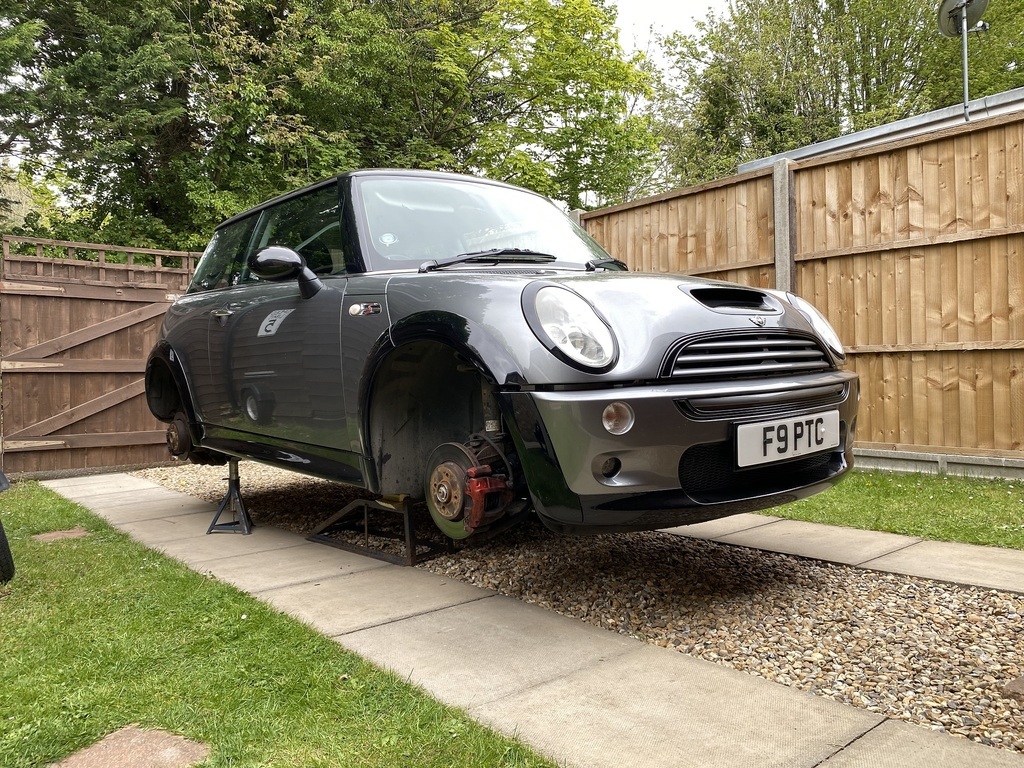 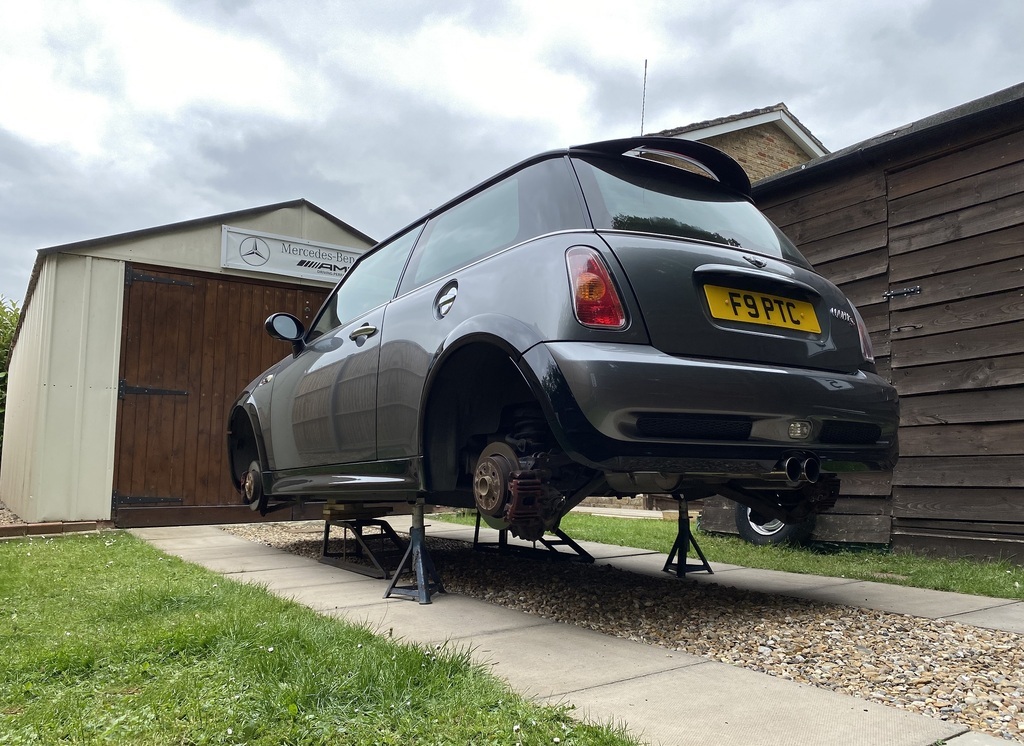 The front wheel arch liners are filthy, as are all the suspension parts. 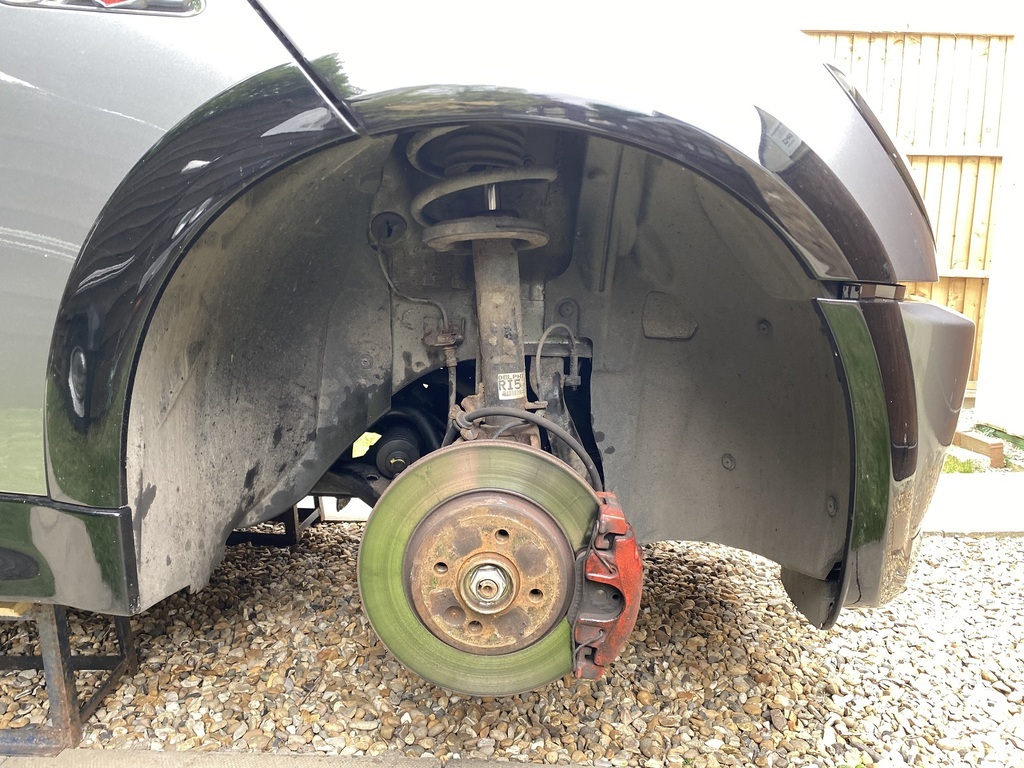 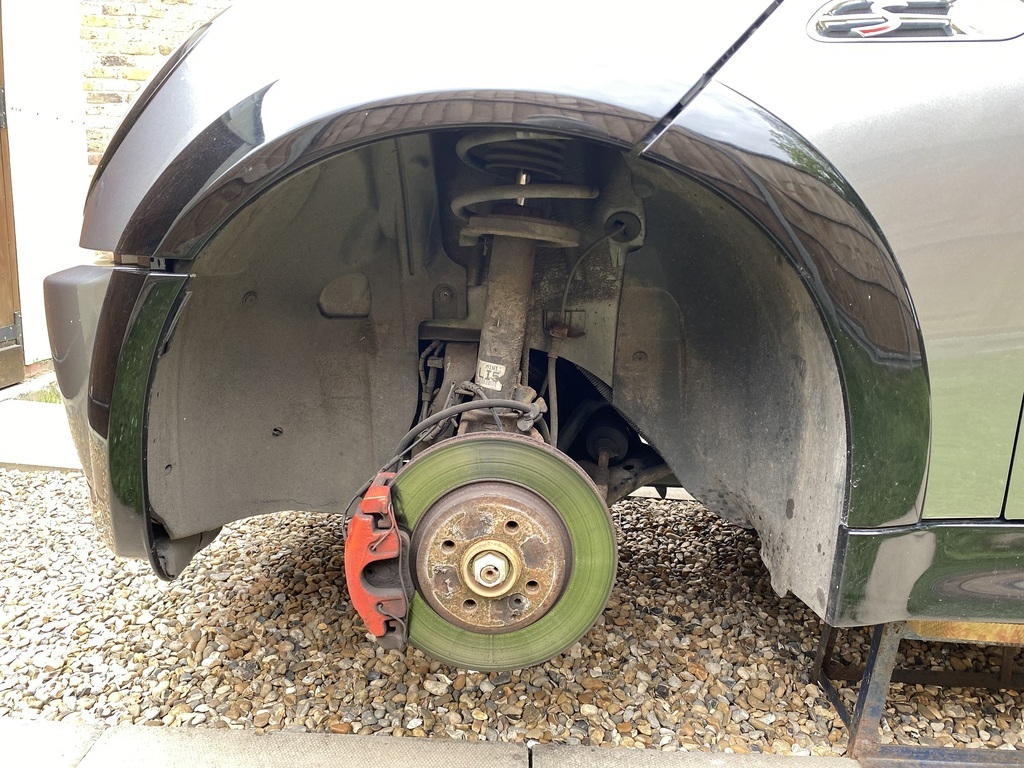 The rears are pretty much the same. 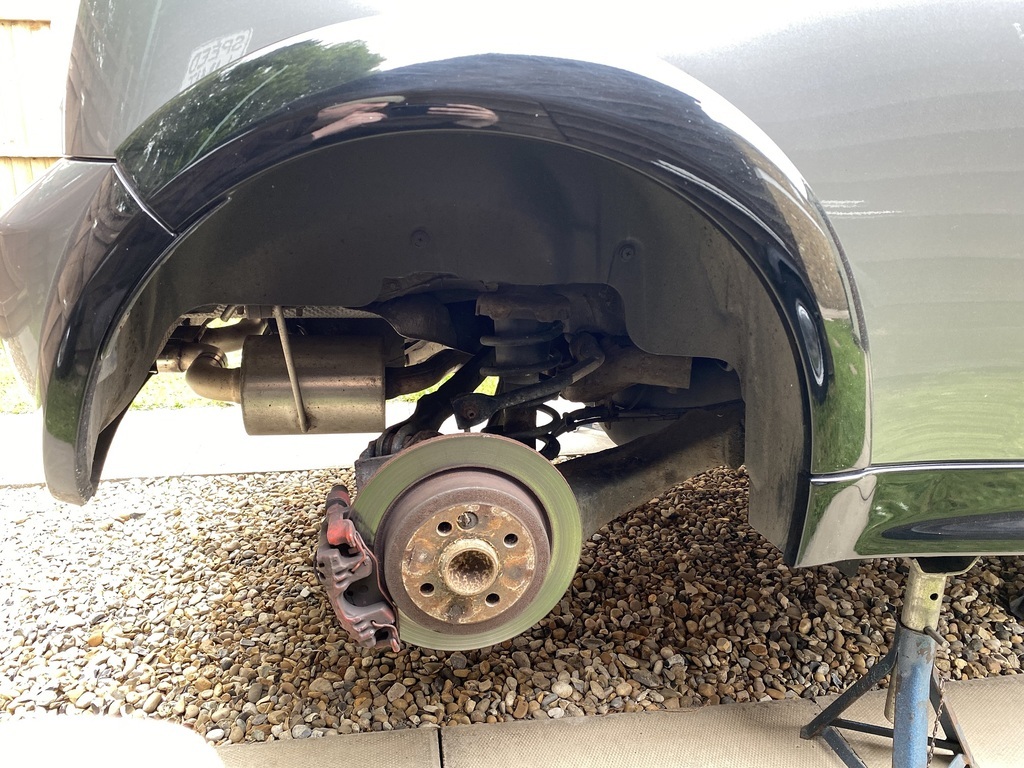  My initial inspection of the underside didn't reveal any horrors. 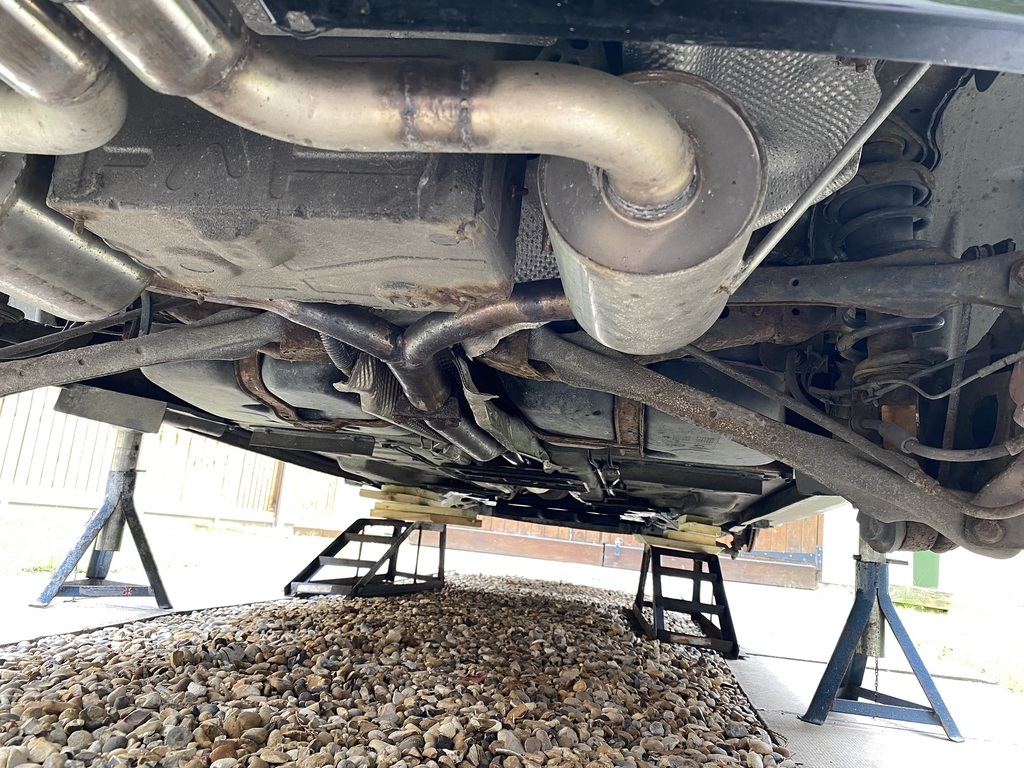 There's a bit of grot on the bottom of the battery box but a poke with a screwdriver revealed that under the surface rust the metal is solid. 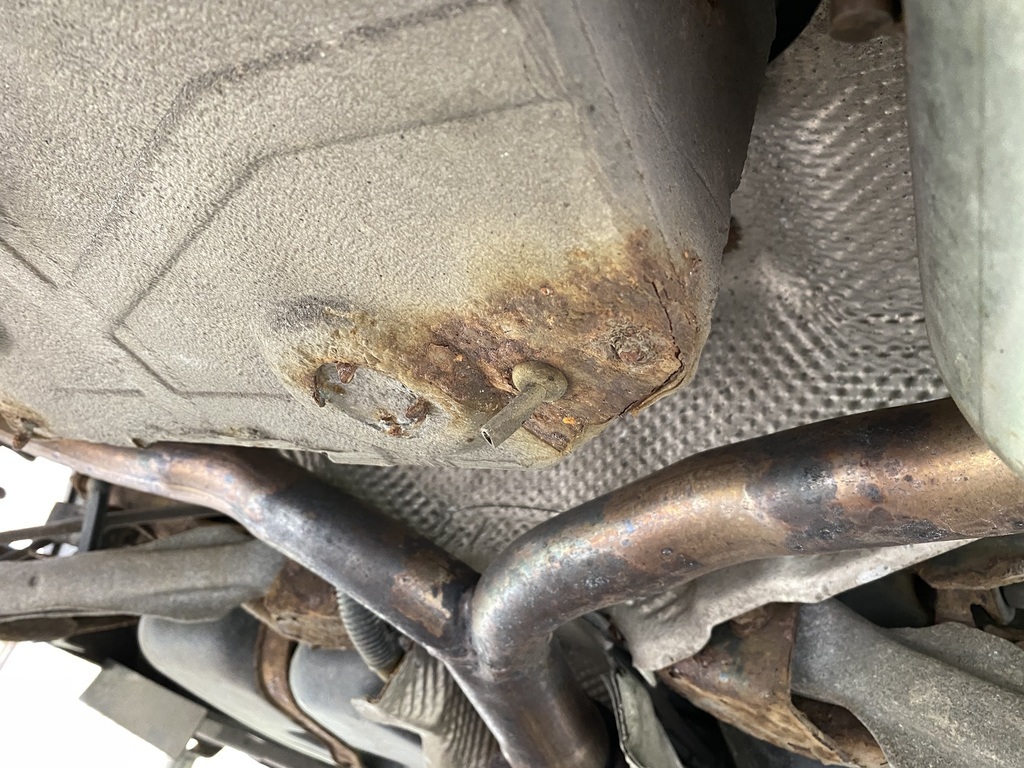 The straps that support the (plastic) fuel tank are the same, they look rusty but are all solid. 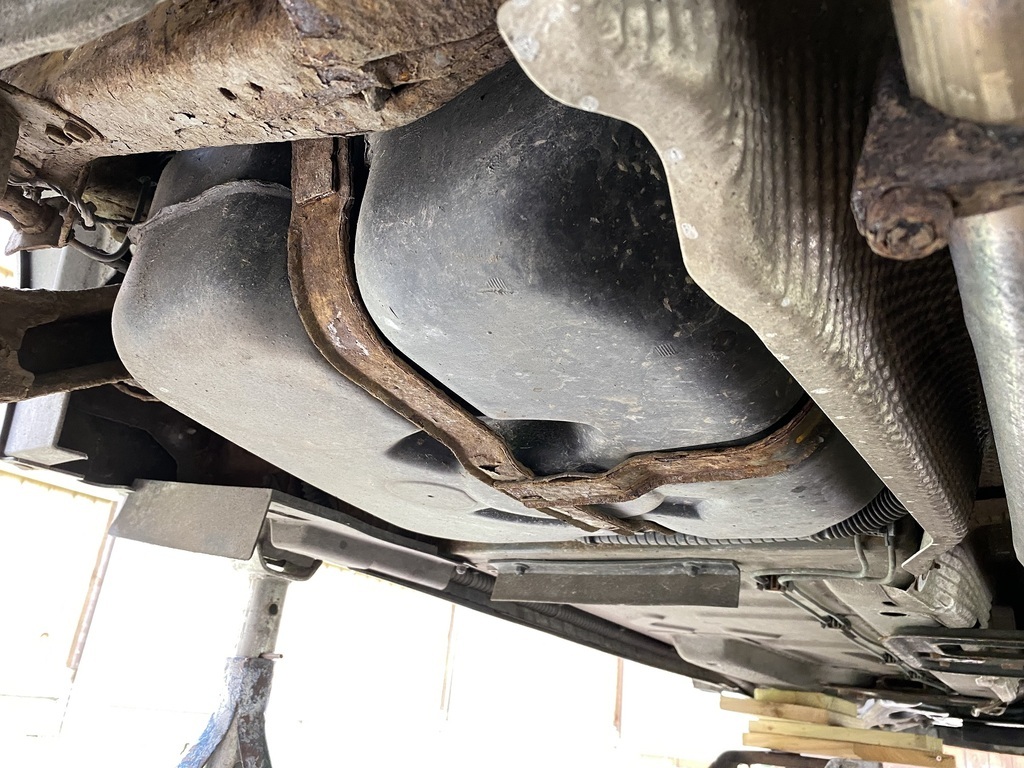 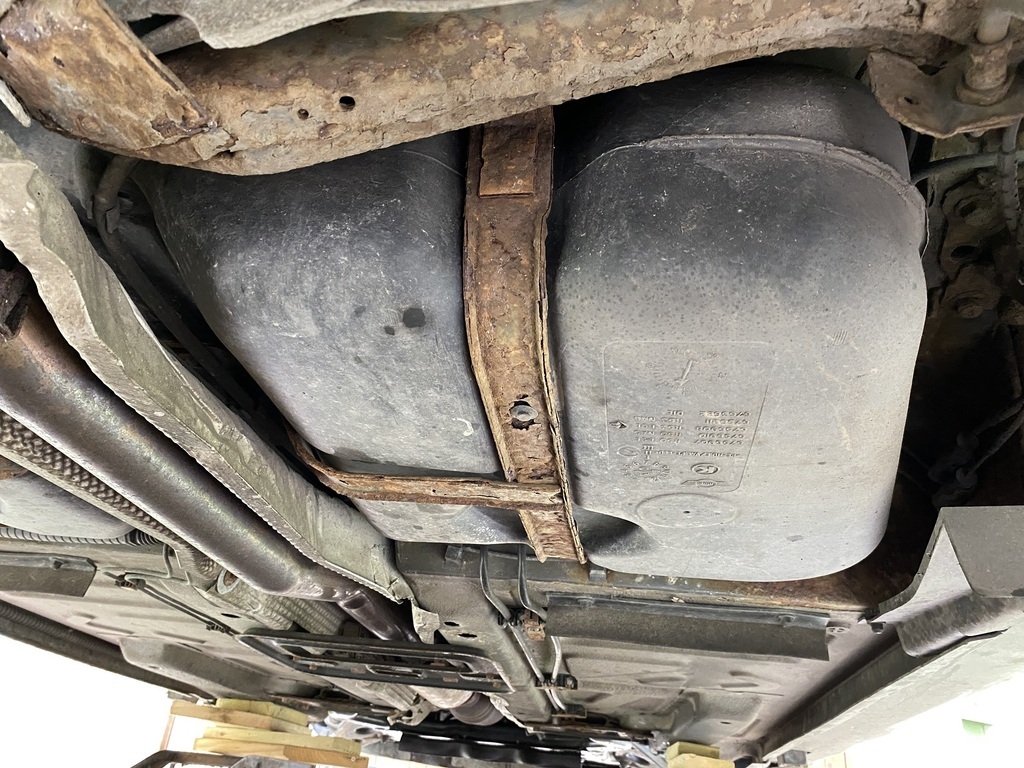 And the rear suspension fixing points are also unattractive but solid. 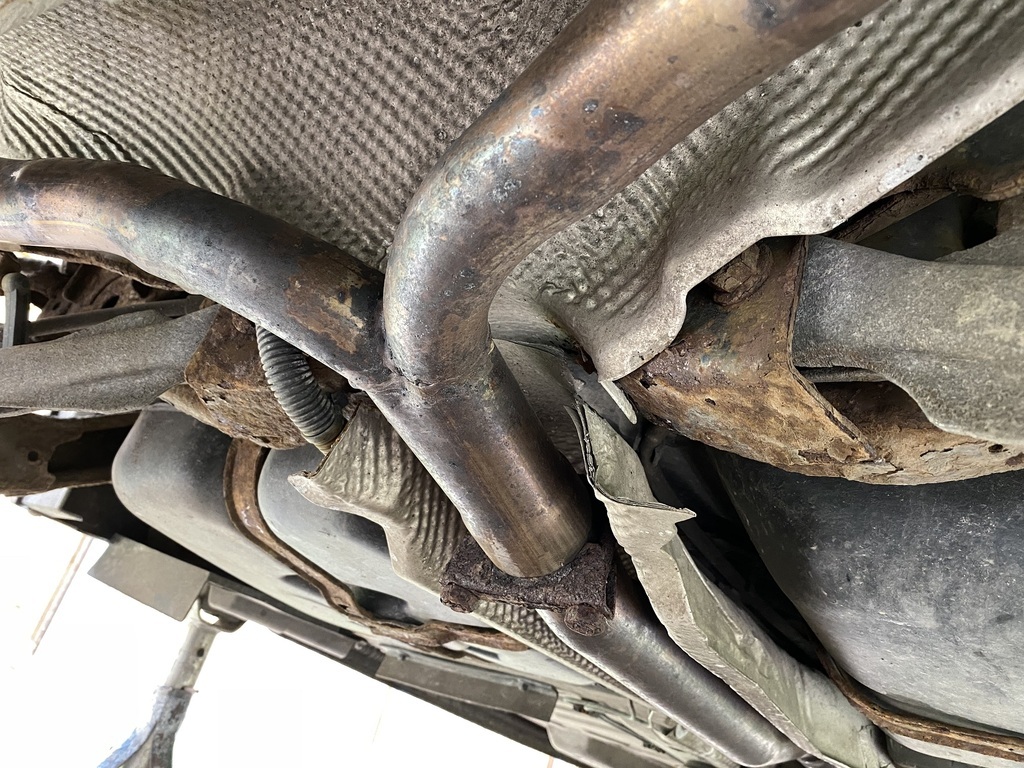 The plan is to pressure wash everything, scrape off the loose surface rust and spray plenty of black Hammerite everywhere to keep the rust at bay. The underside of the engine and the front subframe are covered in engine oil. It's filthy! 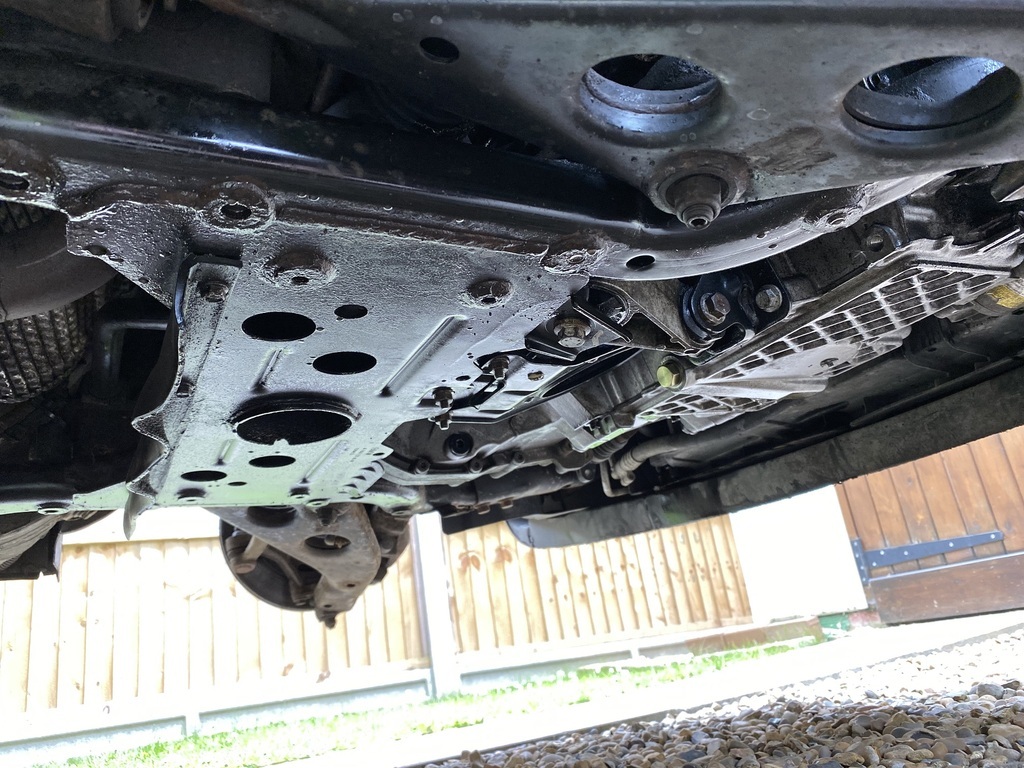 New sump plug - check. 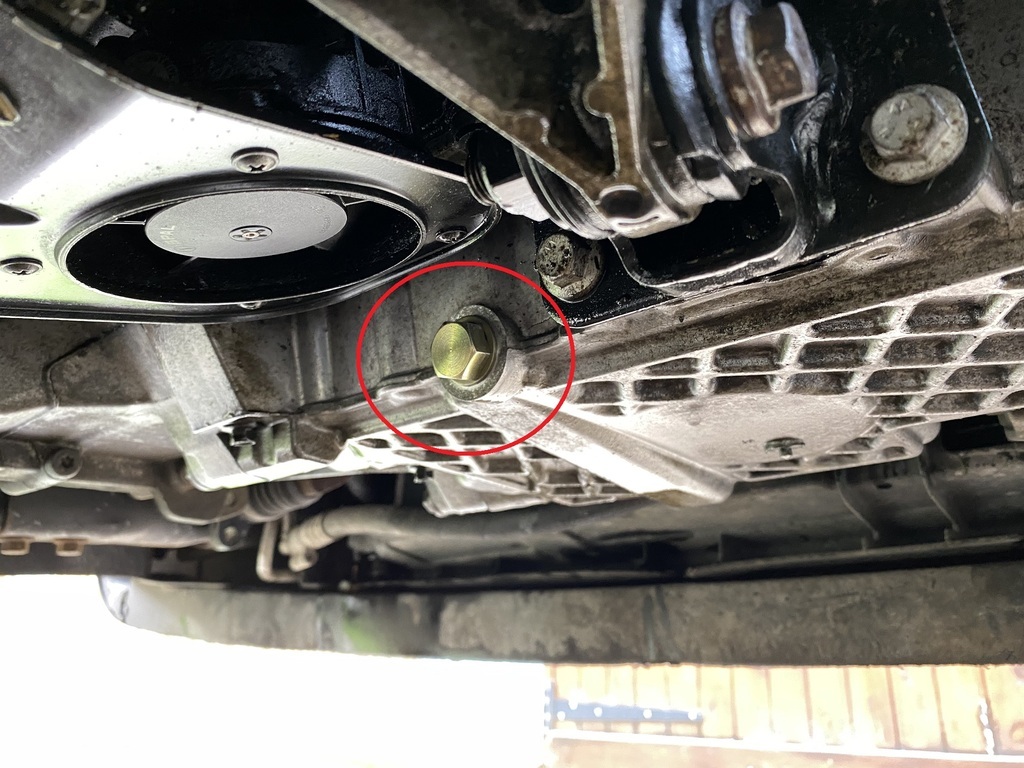 New radiator top hose - check. 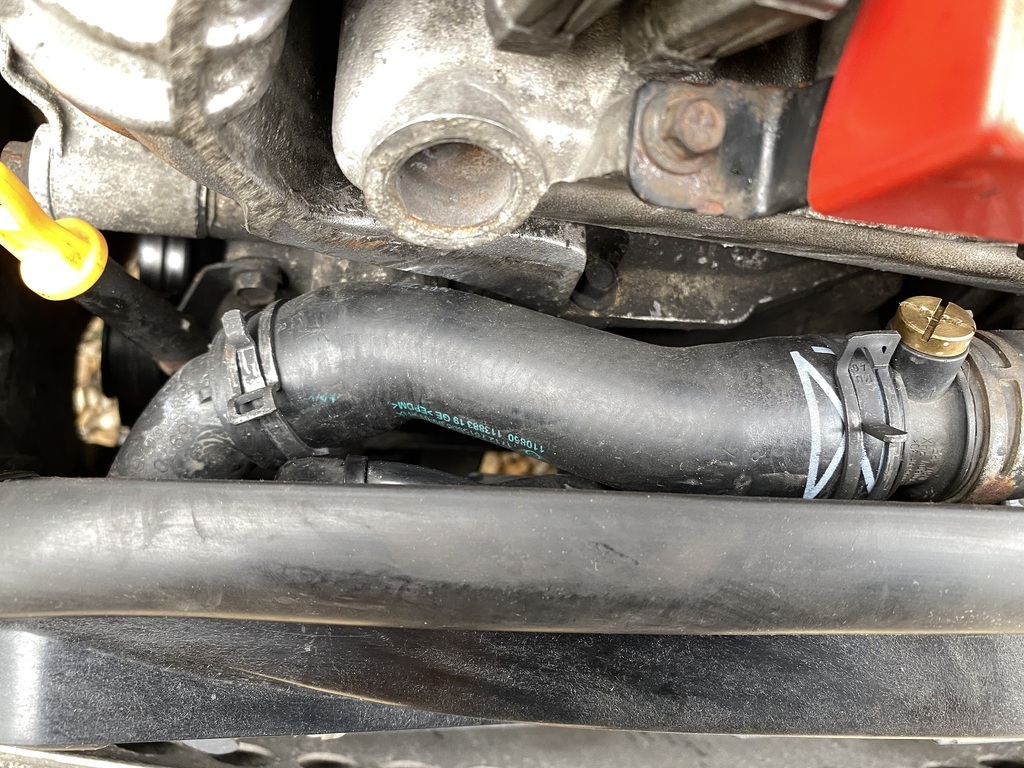 That is almost as far as I got today, I'm saving myself for the main event tomorrow. Cleaning, tinkering and beautifying cars gives me pleasure and getting my hands dirty will not be a problem. One last job today involved getting the Gorilla glue out and re-sticking the S badge on the rear offside wheel. The badge came off when I removed the wheel. Easy fix. 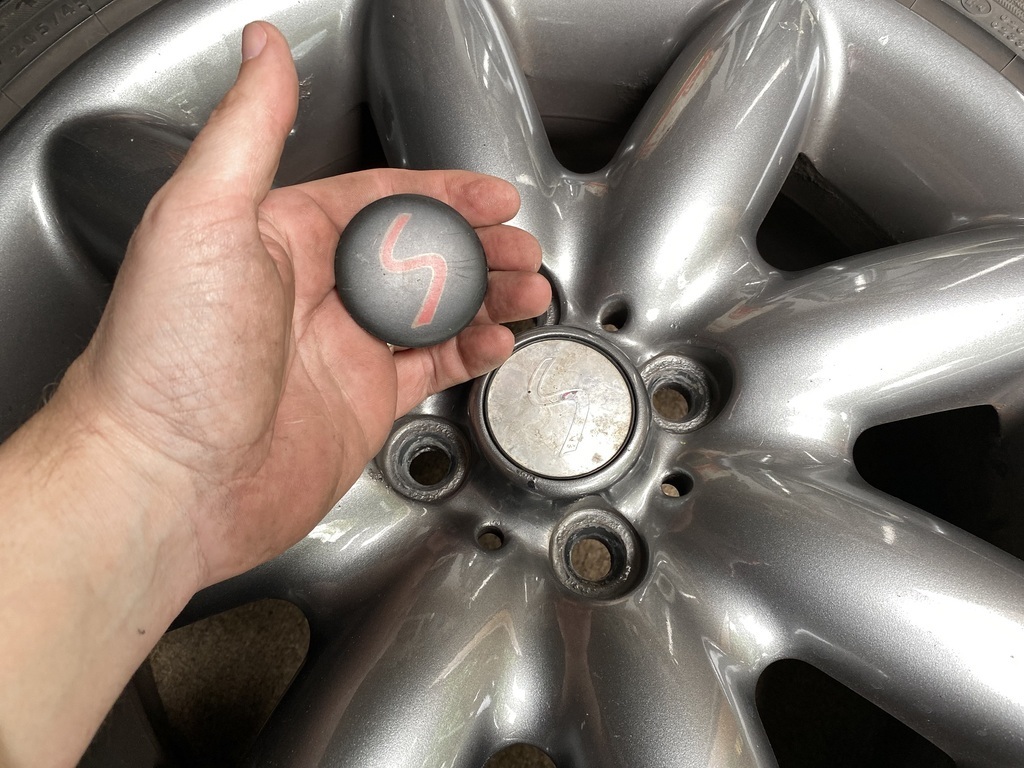 This time tomorrow the Cooper will look.... exactly the same. Unless you poke your head underneath. Wish me luck. |
| |
|
|
|
|
|
Apr 29, 2022 15:53:43 GMT
|
I'm going to test drive a 2003 S next week. My friend with the garage is changing his business model in June of this year due to health reasons. He has a chronically bad back that means he cannot work on cars anymore. He's downsizing his business and focusing on sales only from June onwards. As a consequence he is selling off his garage loaners and one of these is a 2003 Cooper S. It has a massive 328,000kms on it but the the head gasket and the supercharger were both replaced / rebuilt at 275,000km. It also has a fresh MFK so I could run it for 6-9 months and sell easily at the same price. Looking forward to a spin in it either way as I have never driven an S. Just drove a Cooper once but that was 17 years ago. Buy it, you will love it. My Cooper S has done almost 123k miles, which equates to just under 200k km. Rattles and squeaks aside, it drives great and is soooo much fun. |
| |
|
|
|
|
pobsey
Part of things
Posts: 25
|
|
Apr 29, 2022 18:31:57 GMT
|
|
Check the areas just in front of the rear trailing arm mounting point and the areas just in front of the fuel tank these are particular weak points for rust
|
| |
|
|
pobsey
Part of things
Posts: 25
|
|
Apr 29, 2022 18:34:24 GMT
|
|
|
| |
|
|
|
|
|
|
|
The day I've been waiting for since I bought the Cooper last summer has finally come. 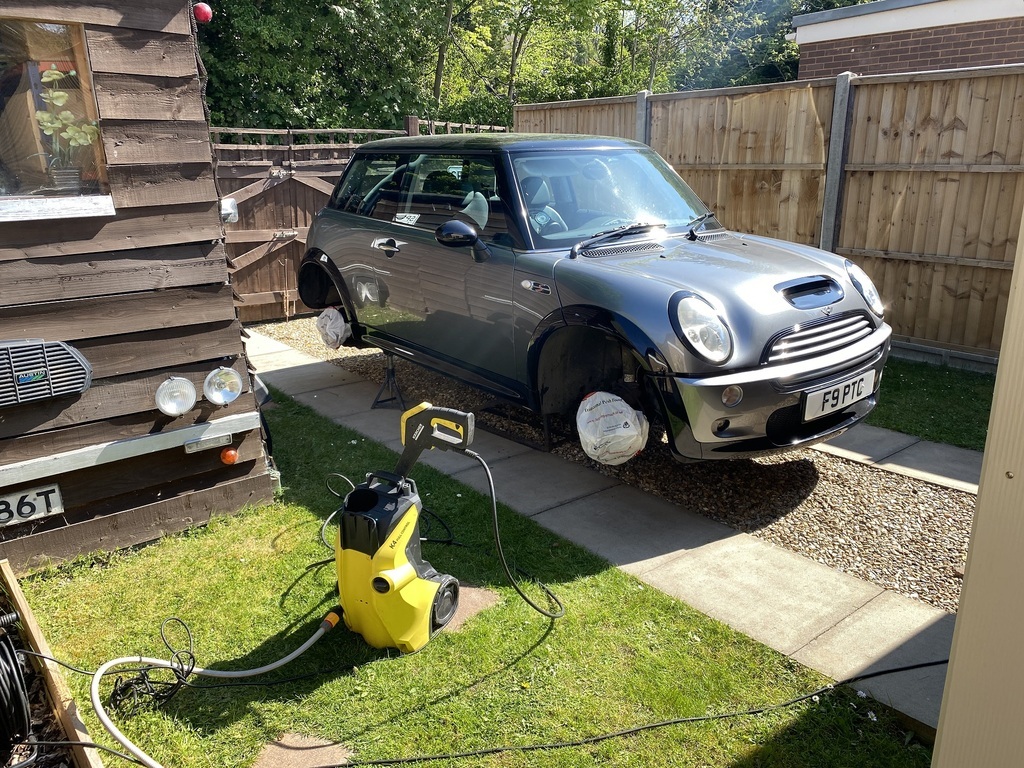 I pressure washed the underside of the car, all four wheel arches and suspension components and as much of the underside of the engine and front subframe as possible. The engine bay is not perfect but hopefully it is now free from oil leaks. 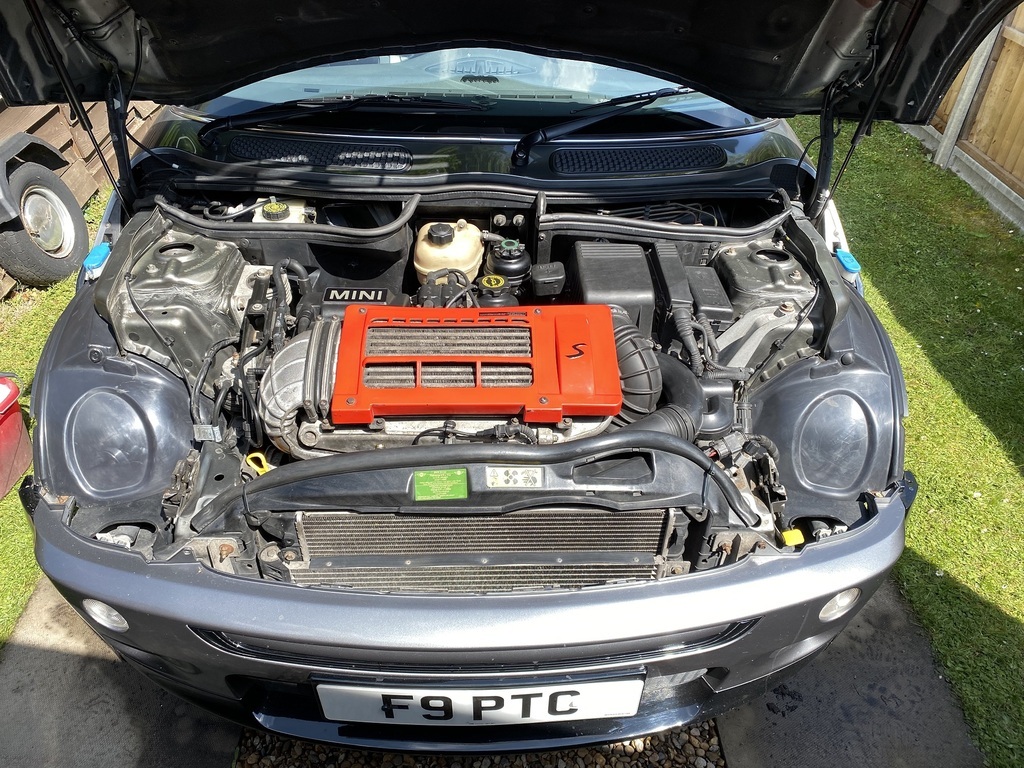 Work in progress. 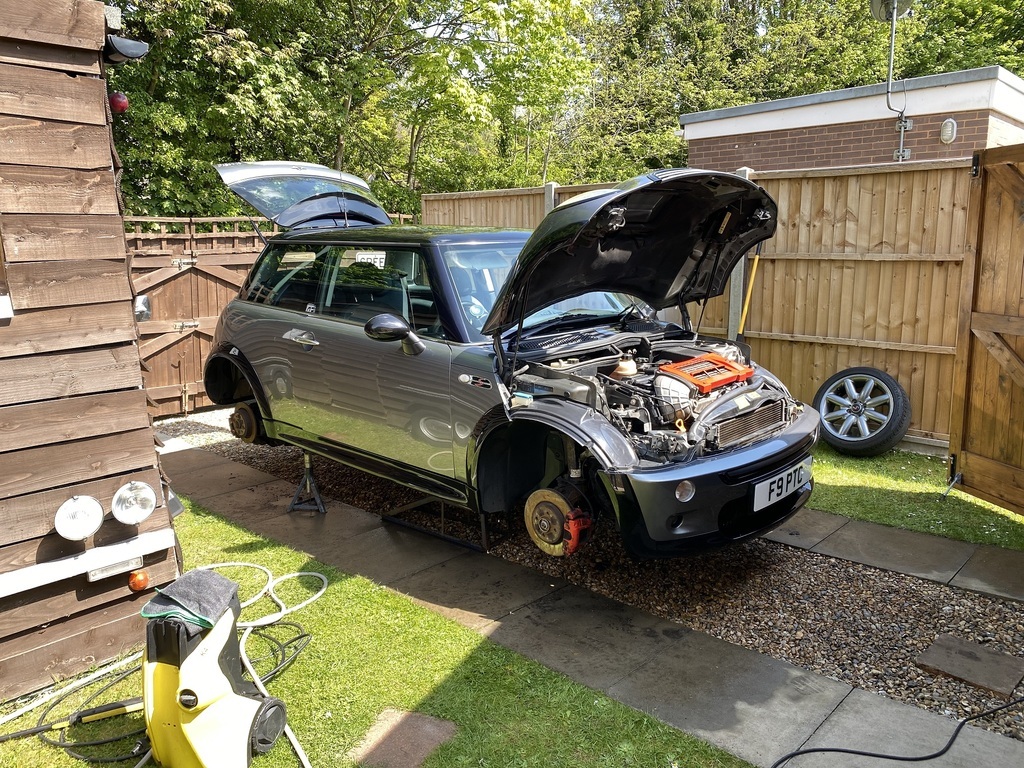 The filthy wheel arches and suspension components came up a treat and all corroded metal got a squirt of Hammerite. 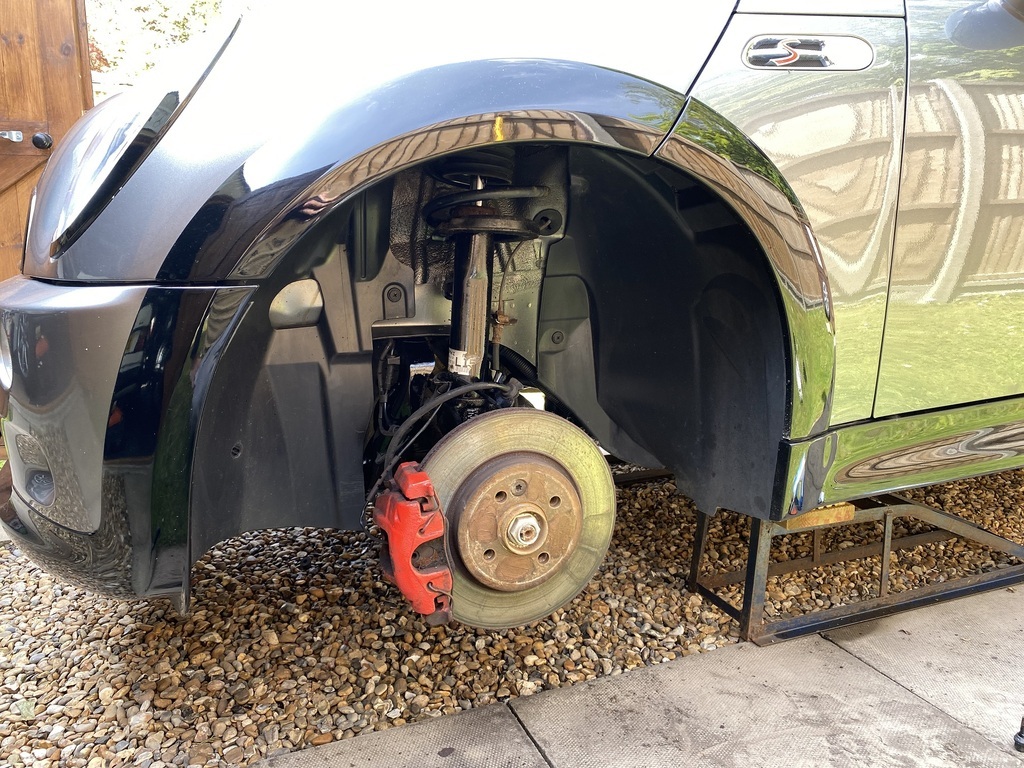 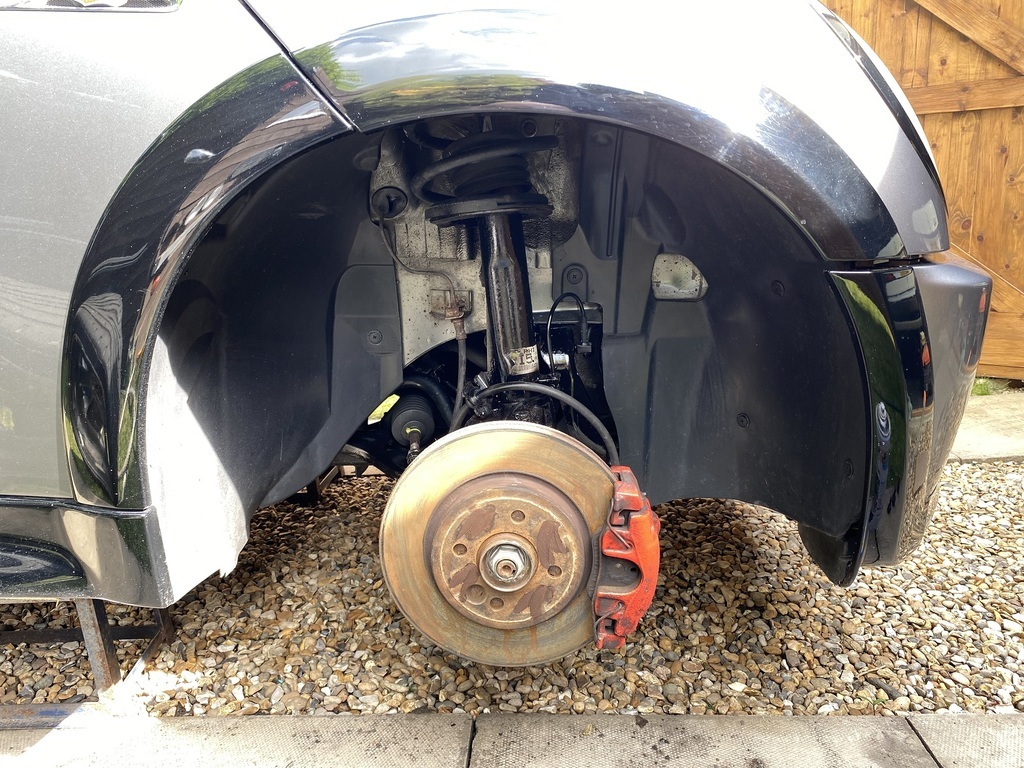 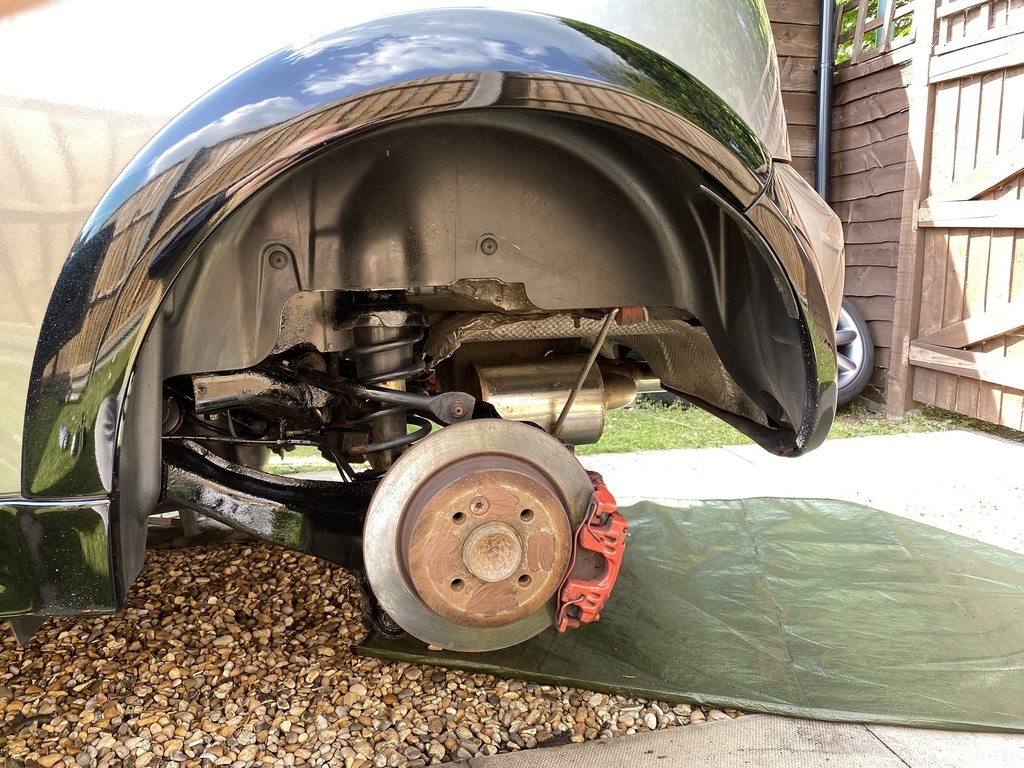 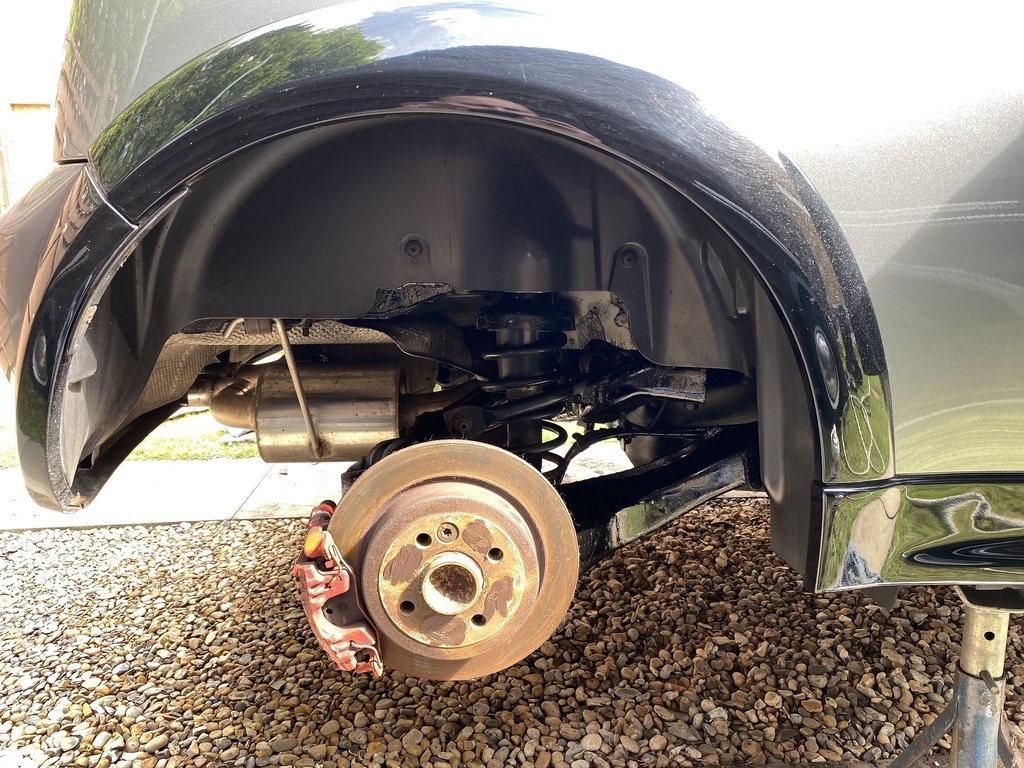 There was no serious corrosion underneath. The paint coatings were a bit bubbly to the front of the fuel tank and where the trailing arms meet the body but all the metal was solid. I scraped off all loose rusty flakes and sprayed the lot with Hammerite. 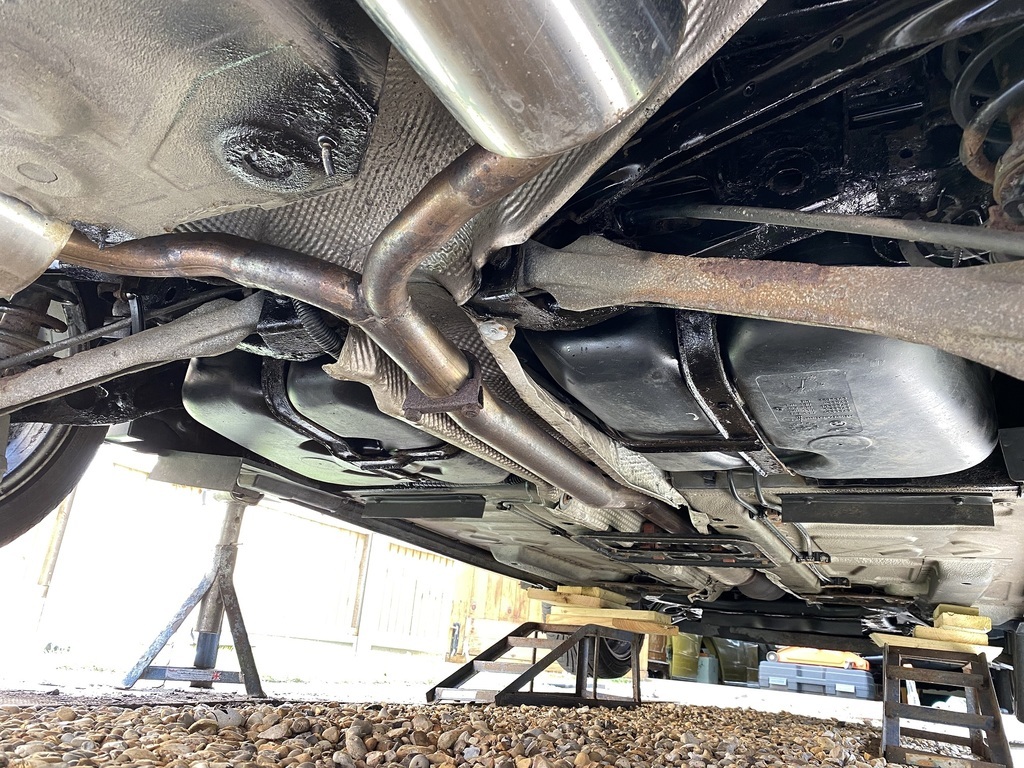 |
| |
Last Edit: May 1, 2022 6:45:55 GMT by Peter C
|
|
|
|
|
|
|
The alloy wheels needed a bit of TLC. 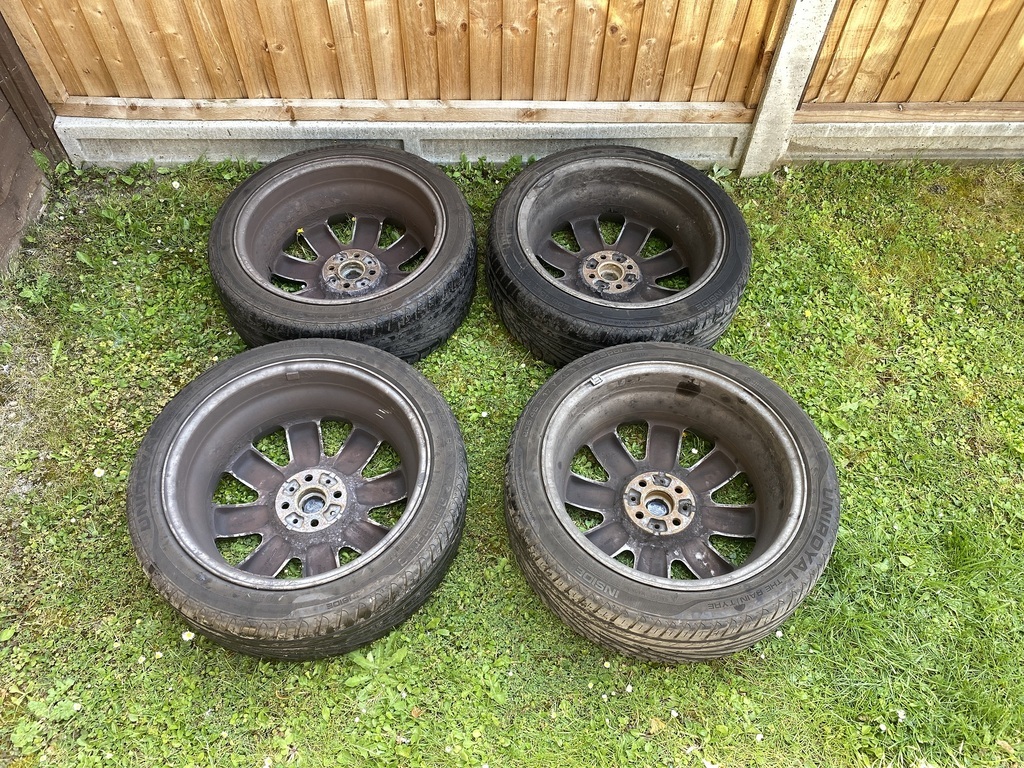 After a wash they looked no better. 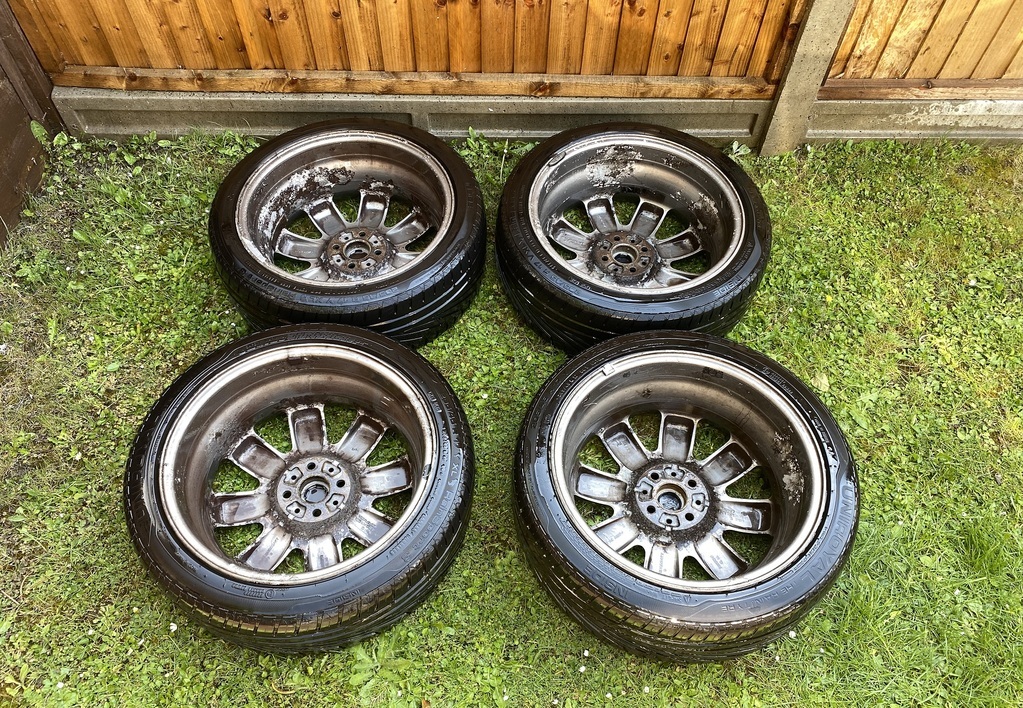 However, on the side that matters they look ok. The wheels have been re-sprayed (by a previous owner) and the finish is generally ok. I don't want to fit aftermarket wheels, although the guys on the R53 Facebook page are offering sets of very cool wheels for not much money. All four tyres currently have approx 4-5mm of tread and as I'm doing approx 5k mile a year in the Cooper, I have plenty of time to decide what to do. 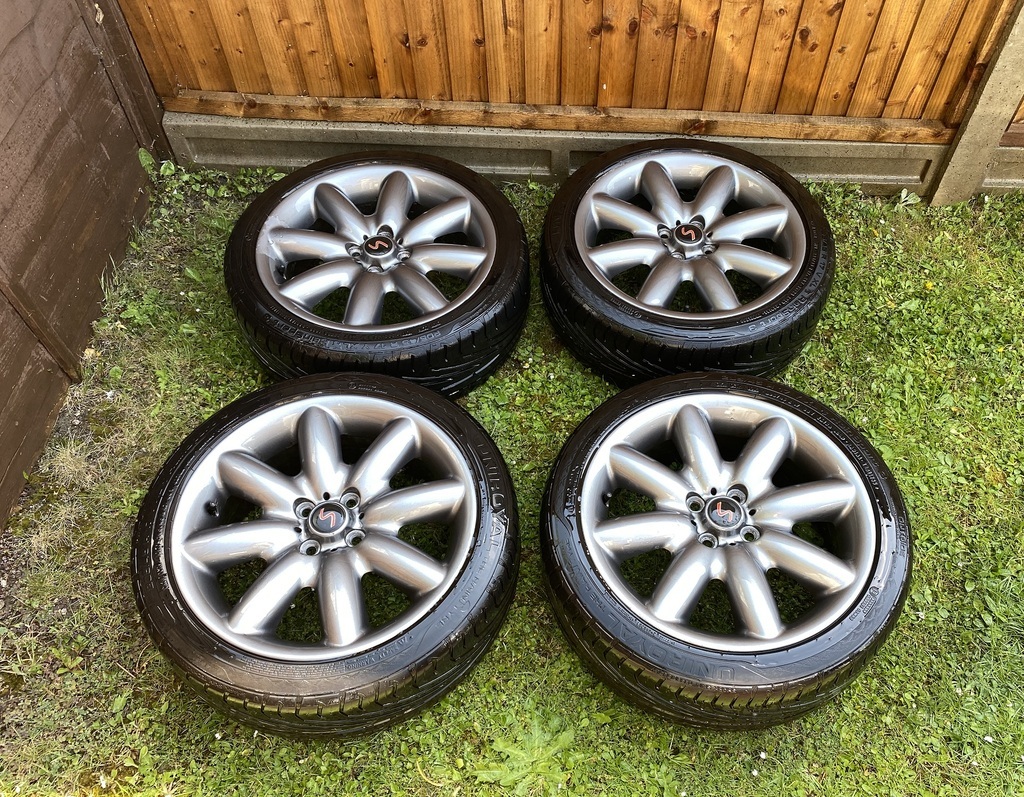 One of the wheels had a bit of lacquer damage. 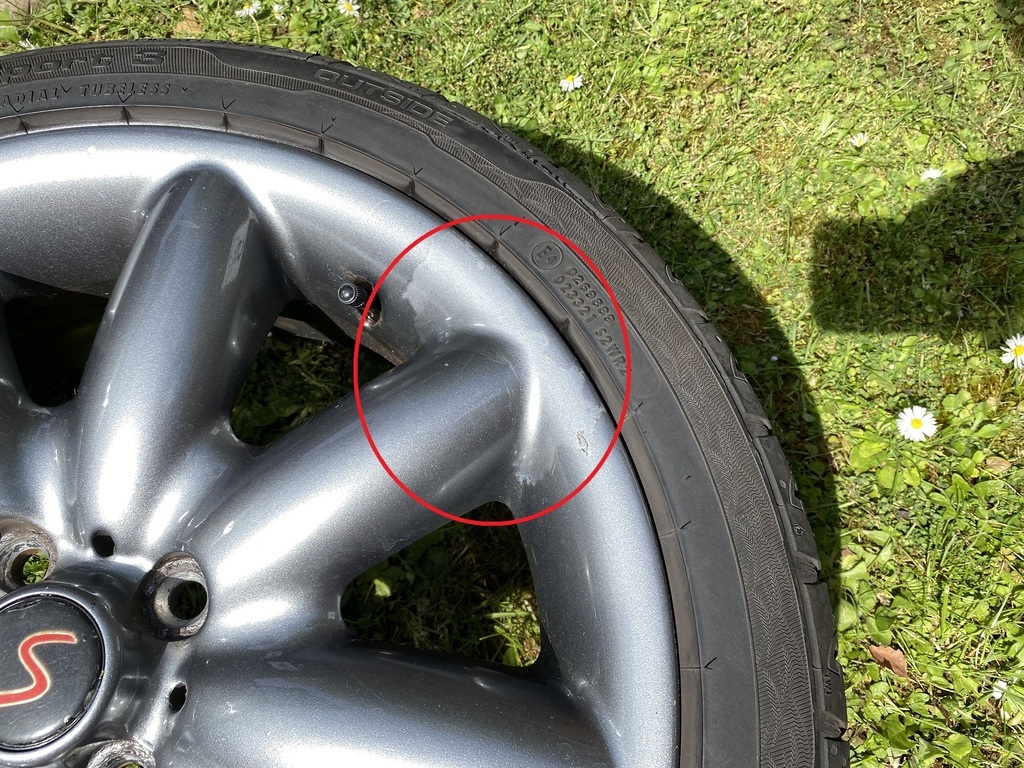 I rubbed down the flaky edges and masked off the rest of the wheel, ready for spraying. The Cooper's wheels are a very similar colour to my daily Kia Exceed. I had an aerosol can left over from when I bodged a repair on the Kia's rear bumper and it seemed sensible to make use of it.  I'm happy with the result, the colour match is not 100% but it's close enough. 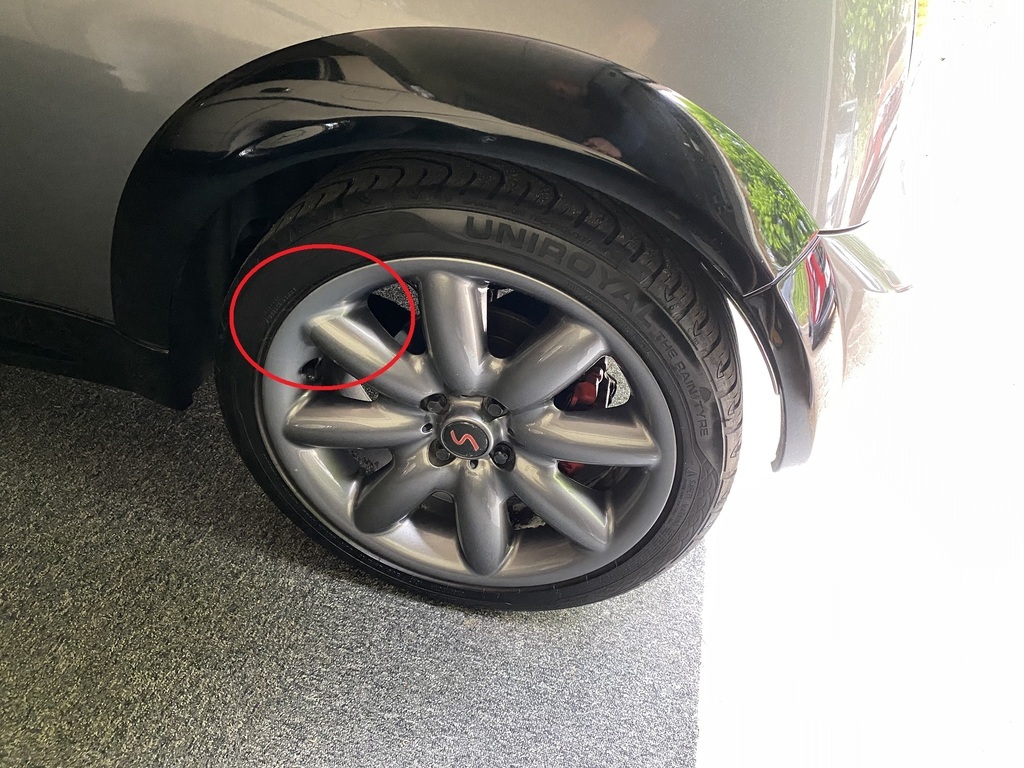 After a long day's work, I took the Cooper for a quick spin around the block. As predicted, it looked no different but I am happy with the knowledge that it is clean and protected underneath, even if nobody else gets to see my efforts. 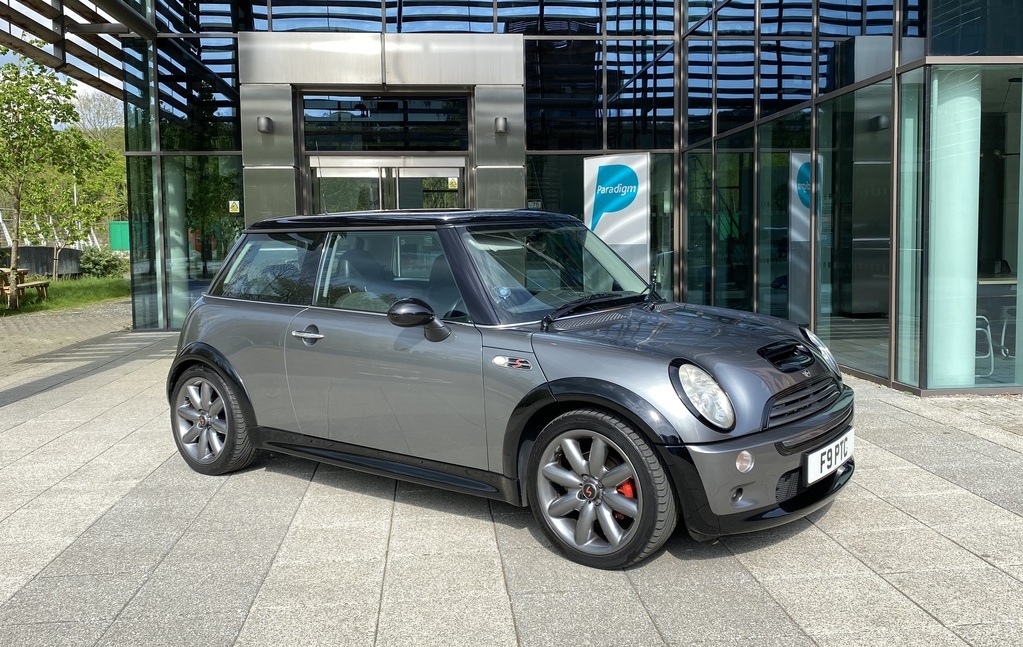 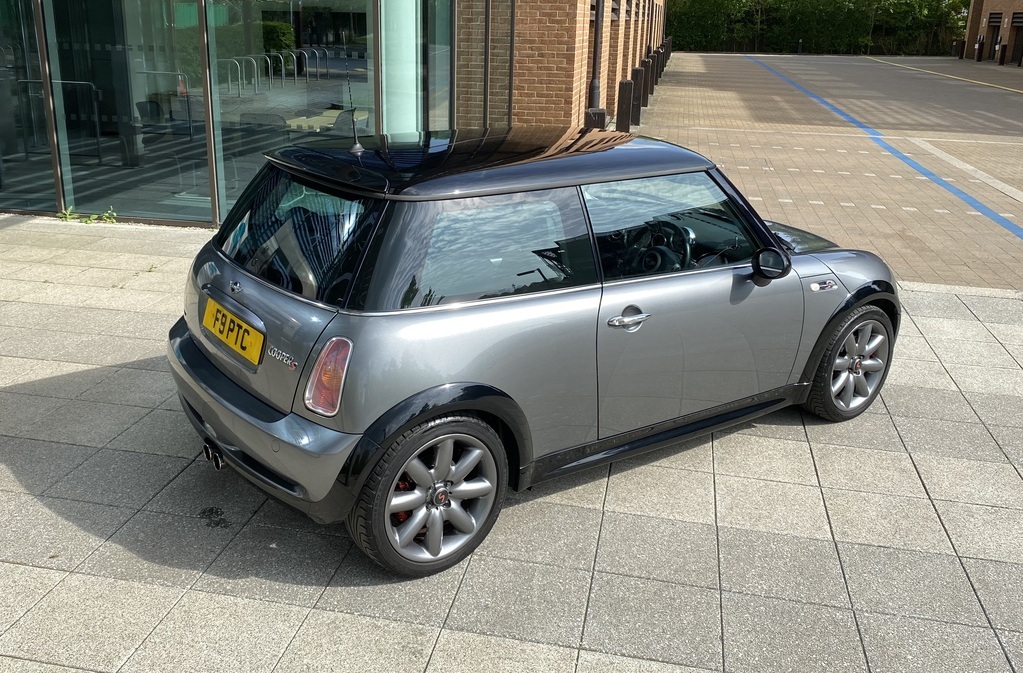 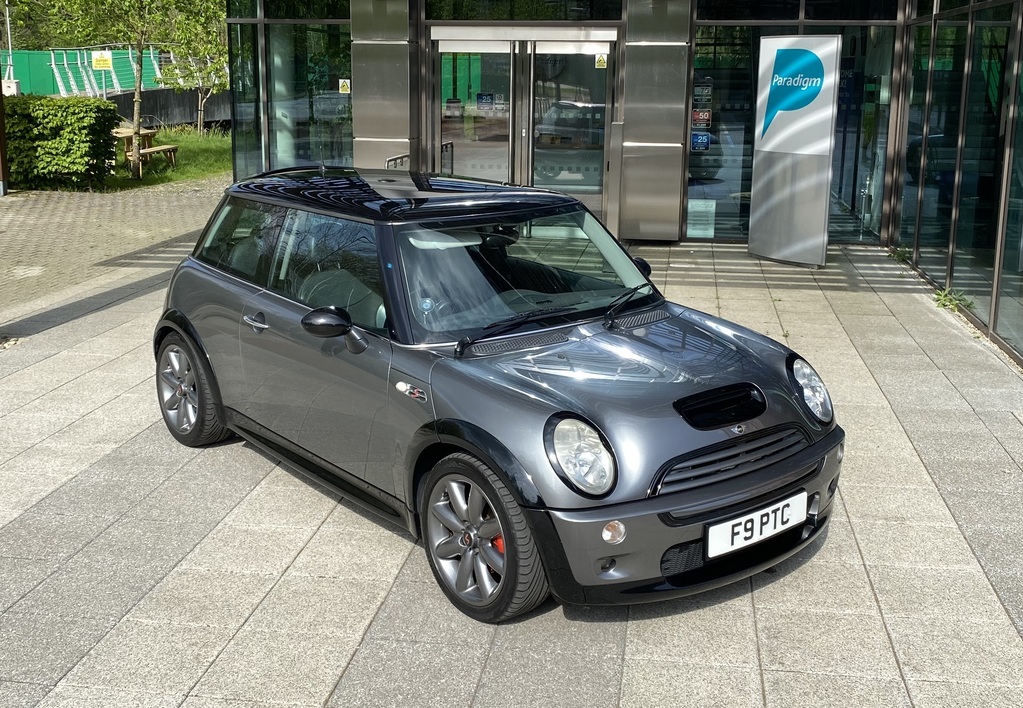 |
| |
Last Edit: May 1, 2022 6:47:13 GMT by Peter C
|
|
jpsmit
Posted a lot
Posts: 1,254
|
|
|
|
|
Looks awesome - so good that apparantly you can park on the sidewalk. 😂
|
| |
|
|
|
|
|
|
|
|
Great job, that looks really good under the arches now. I'm jealous of your outdoor space to be able to do cleaning like that.
|
| |
|
|
|
|
|
|
|
Great job, that looks really good under the arches now. I'm jealous of your outdoor space to be able to do cleaning like that. Thank you, I’m really happy with how the arches and underside turned out. By all means pop over if you’re ever near Beaconsfield and want to play with cars. |
| |
|
|
|
|
|
|
|
Great job, that looks really good under the arches now. I'm jealous of your outdoor space to be able to do cleaning like that. Thank you, I’m really happy with how the arches and underside turned out. By all means pop over if you’re ever near Beaconsfield and want to play with cars. Thanks for the offer, but i think 11,000 Miles might be a bit far for me to pop over  I don't recall if it was brought up in the thread, but have you checked the front strut top mounts for mushrooming? Its worth getting some reinforcement plates to stop it (or fix it). blog.ecstuning.com/how-to-fix-mushrooming-on-mini-cooper-strut-towers/ |
| |
|
|
|
|
|
May 22, 2022 16:05:14 GMT
|
Thank you, I’m really happy with how the arches and underside turned out. By all means pop over if you’re ever near Beaconsfield and want to play with cars. Thanks for the offer, but i think 11,000 Miles might be a bit far for me to pop over  I don't recall if it was brought up in the thread, but have you checked the front strut top mounts for mushrooming? Its worth getting some reinforcement plates to stop it (or fix it). blog.ecstuning.com/how-to-fix-mushrooming-on-mini-cooper-strut-towers/Would be a good road trip! As far as I know, my Cooper is fungi-free. |
| |
|
|
|
|
|
May 22, 2022 16:24:46 GMT
|
I had a bit of time today to tinker some more with the Cooper. Two jobs needed doing. Job one, I recently noticed when pulling the Cooper out of the garage (by hand) that both rear brakes were a little noisy. I could hear that the pads were rubbing on the rusty edges of the discs. The brakes were not significantly binding but with the back of the car jacked up, the rear wheels would not spin up as fast as they should. I removed the offside rear wheel and took off the caliper. The brake pads have plenty of meat left. 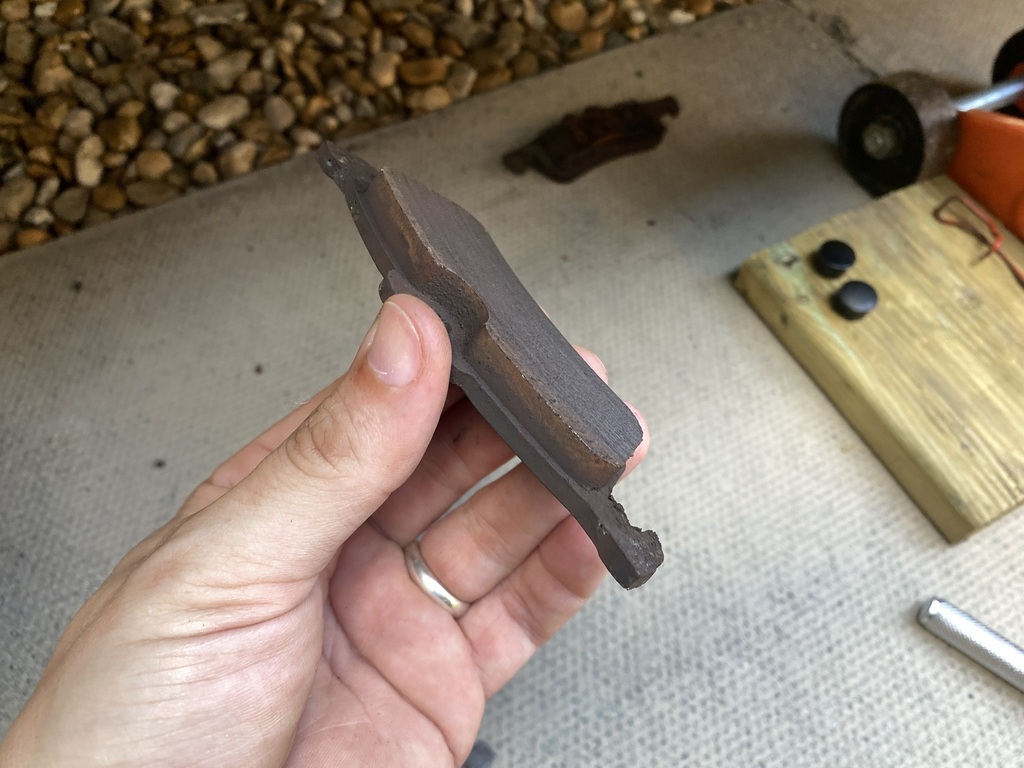 The calilper looked clean, including the piston, under the dust cover. 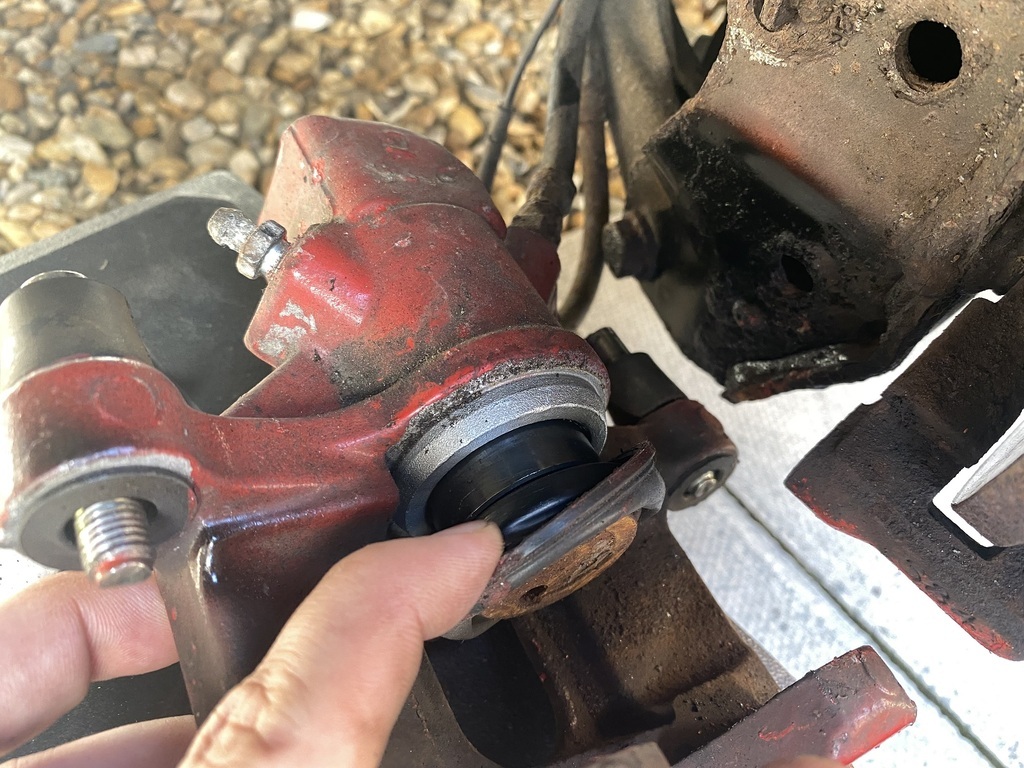 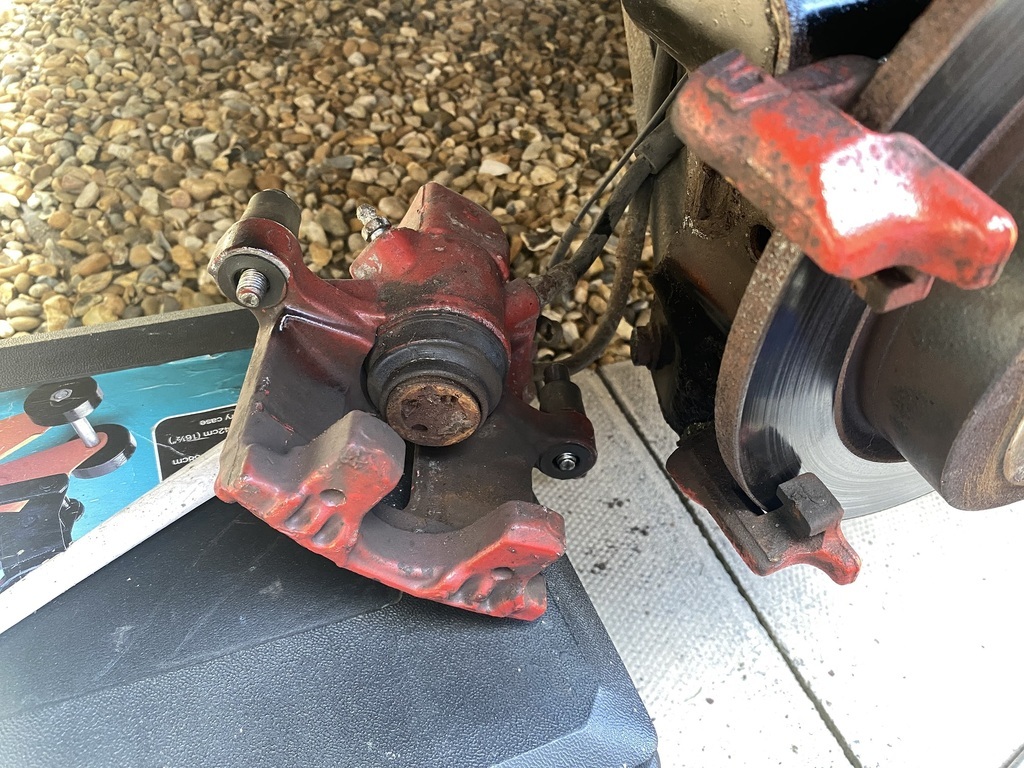 A G-clamp wouldn't do, the caliper needs a special tool to wind it back in. Chances of getting the tool on a Sunday morning were slim to none. Time to make another special DIY tool! I used an old grinder locking spanner and added a nut and bolt exactly 20mm away from one of the original pins. 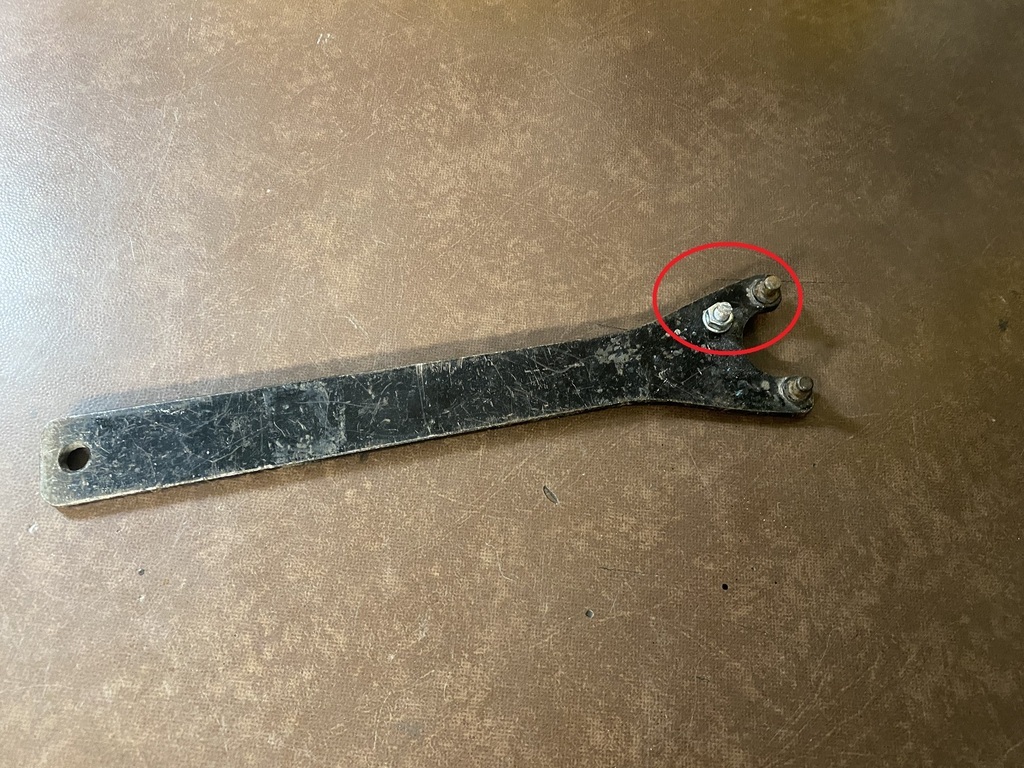 The bolt and pin lined up perfectly with two of the four holes on the front of the piston. 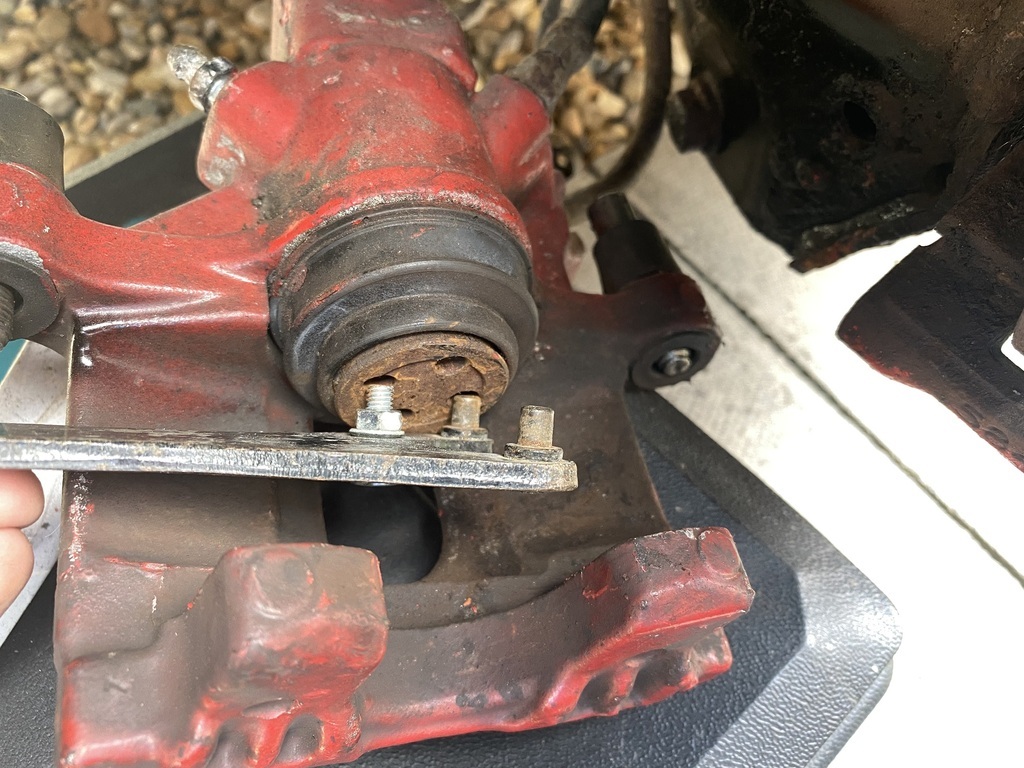 There was little resistance, the piston went back into the caliper very easily. 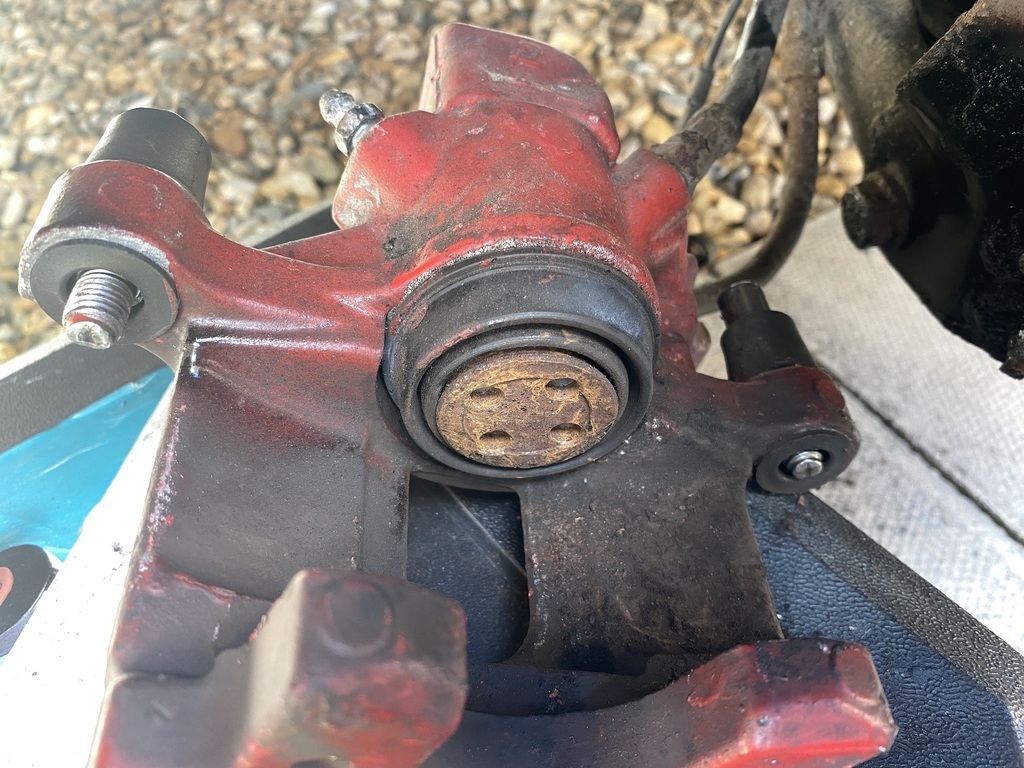 Re-assembly was easy, the pads and anti-rattle pin went back on without any problems. I did the same on the other side, it took less that 10 minutes. Job two, the gear shift was a little clunky. The gear shift mechanism, located on top of the gearbox, under the airbox, needed some lube. Last week I bought some white grease especially for this job. To get to the gear shift mechanism, the airbox needs to come out. To remove the airbox, two ECU plugs need to be disconnected, which means that the battery needs disconnecting first. 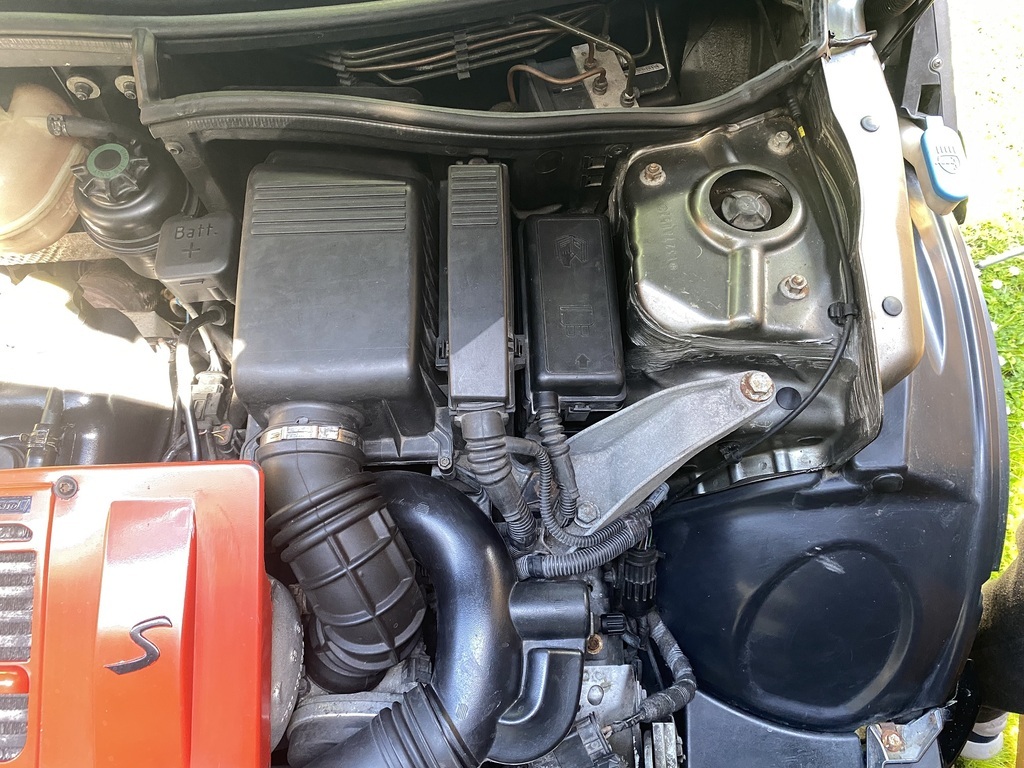 Getting all this out was easy and I soon had the gear shift mechanism exposed. 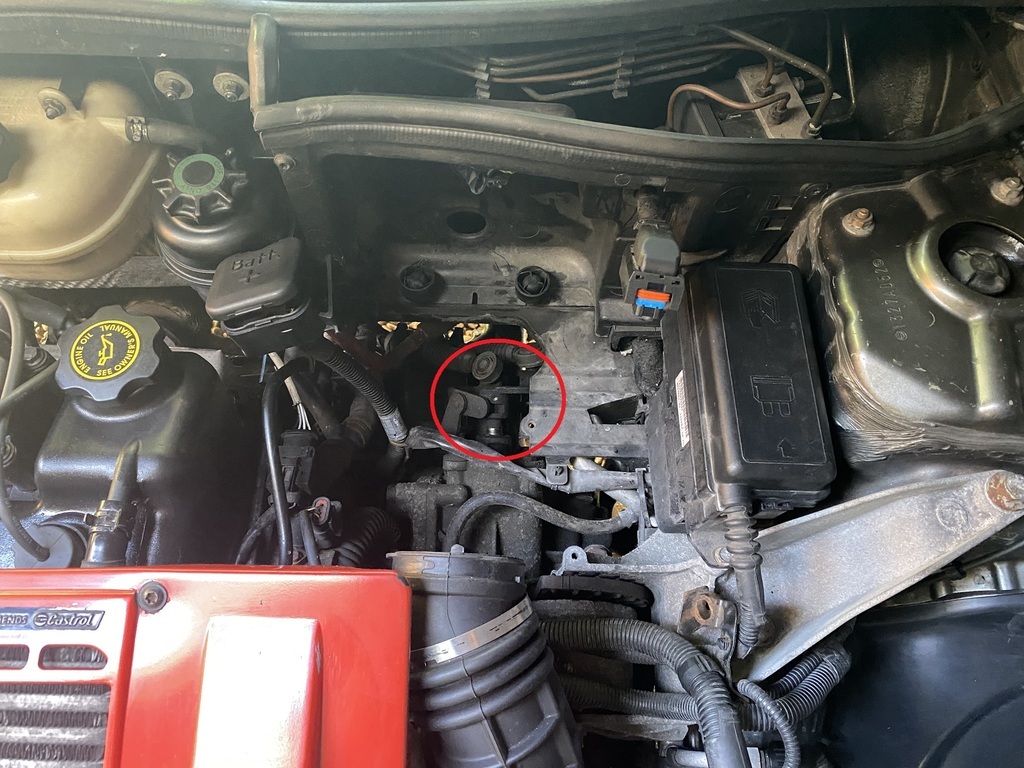  Whilst my wife was shifting gears, I sprayed the mechanism with plenty of white grease. 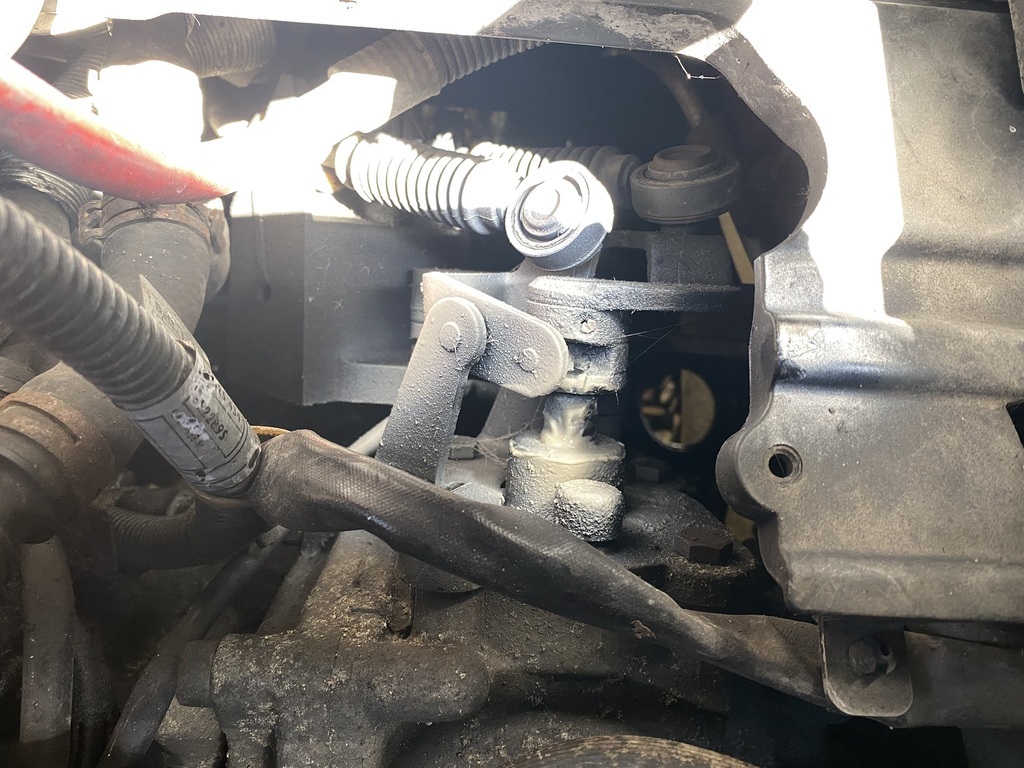 The gear change feels smoother now, particularly from neutral into first and neutral into reverse. Success! |
| |
|
|
|
|


