ChasR
RR Helper
motivation
Posts: 10,189
Club RR Member Number: 170
|
2003 Mini Cooper S (R53)ChasR
@chasr
Club Retro Rides Member 170
|
May 23, 2022 10:06:48 GMT
|
Just managed to read the thread from start to finish. I have to say, it's looking good! It's great to see the progress on this. These really have matured nicely with time, still looking quite fresh. I have always debated getting one and this thread isn't helping! But a few things will stop me for the forseeable. -The wings on my M3 are terrible now (I best update that thread). I need to make a decision on the bodywork -I also want to do the dampers on that, but at a minimum go with either genuine or Koni Sports, which is going to be pricey. -I'm most likely going to get another bike, so that will take some of my time. -The MPG of these put me off, as it's probably a car I'd use a lot. Recent fuel price rises won't help, but it seems you stated they're not as bad as I thought. From everyone I knew, these seemed to do no more than 30MPG on a run, with low-mid 20s being the norm. Would love to see you remove the front strut pinch bolt from the hub carrier, they seized and snapped when these cars were still in manufacturers warranty, let alone after 18 years 😂 Have a look at my Instagram basically_stock_r53, with a few upgrades these are great cars that put a smile on your face, just don’t look at the VED rate or fuel consumption 😉 To be fair, almost any car can have the strut bolt seizing. My E91 does, thanks to it having an alloy carrier. A couple of Mondeos did too in the past. Good news first, I bought a little Matchbox model of a grey 2003 R53 Cooper S.  The previous owner advised me that he removed a sub and amp from the boot, installed by another previous owner, which he very kindly offered to send me. When the ICE arrived, I re-installed all necessary cabling and plugged in the amp and sub and... not a sausage, it didn't work. I removed the amp and sub from my W124 and fitted them instead and bingo, we have music. A lot of music! The Pioneer head unit is decent and the speakers must have been upgraded at some point because together with my amp and sub, the system sounds superb. And I still have half a boot left. I know someone who is willing to take a look at the defective amp, it might be fixable.  With 90s on systems, the speakers despite information to the contrary, are quite good unless you put in alot of -time -investment into making something that's a decent step up. The headunits however are where manufacturers especially BMW unless you go for one of their audio options) cheap out. Thus, a good headunit like what you have will normally make a pleasant difference. For ages now, I've just been chucking a sub and a headunit into a car. That said, this Weekender has given me ideas again... I'll have to keep an eye out on this thread. |
| |
|
|
|
|
|
|
|
May 23, 2022 10:52:53 GMT
|
ChasRThank you for reading my posts. All understood, an M3 should take priority over an R53 all day long. I drive my Cooper very gently and it easily returns mid to upper 30s MPG but no doubt that figure would drop by at least 10MPG if I drove it like it should be driven. That's probably why my brakes have started to bind - because I rarely use them!
|
| |
|
|
2p2g1m
Part of things

Posts: 116
|
|
May 23, 2022 20:28:52 GMT
|
|
I ran one of these for a while, great car. Had issues with rear calipers also. It was the sliders on mine that where the issue. The aluminium cailper oxidises around the rubber sleeve which then makes it tight onto the steel sliders. I had to pull rubber sleeve out and clean out the oxidation with a round file and then the sticking was resolved. Admittedly the car wasn’t as clean as yours so it may not be your issue.
|
| |
|
|
|
|
|
May 24, 2022 16:29:20 GMT
|
I ran one of these for a while, great car. Had issues with rear calipers also. It was the sliders on mine that where the issue. The aluminium cailper oxidises around the rubber sleeve which then makes it tight onto the steel sliders. I had to pull rubber sleeve out and clean out the oxidation with a round file and then the sticking was resolved. Admittedly the car wasn’t as clean as yours so it may not be your issue. Good tip, thank you. Not wishing to leave a stone unturned, I investigated this afternoon. I removed both pins from the nearside caliper and both are free from corrosion and both still have grease on them from the last time someone fiddled with the rear brakes. Top pin: 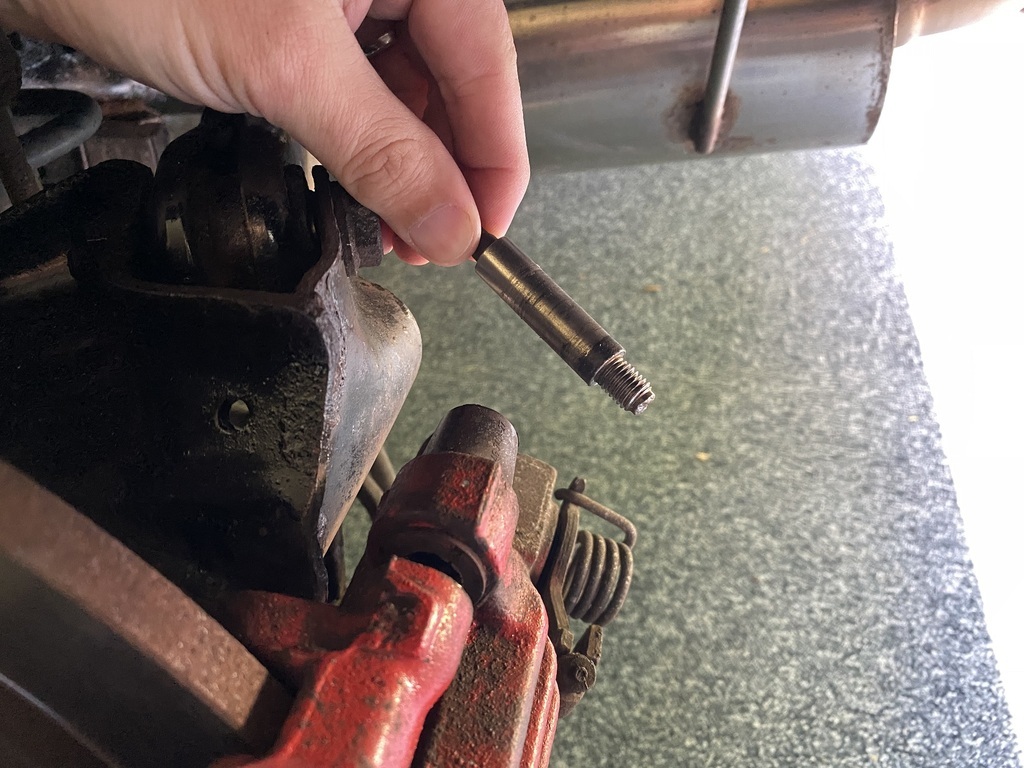 Bottom pin: 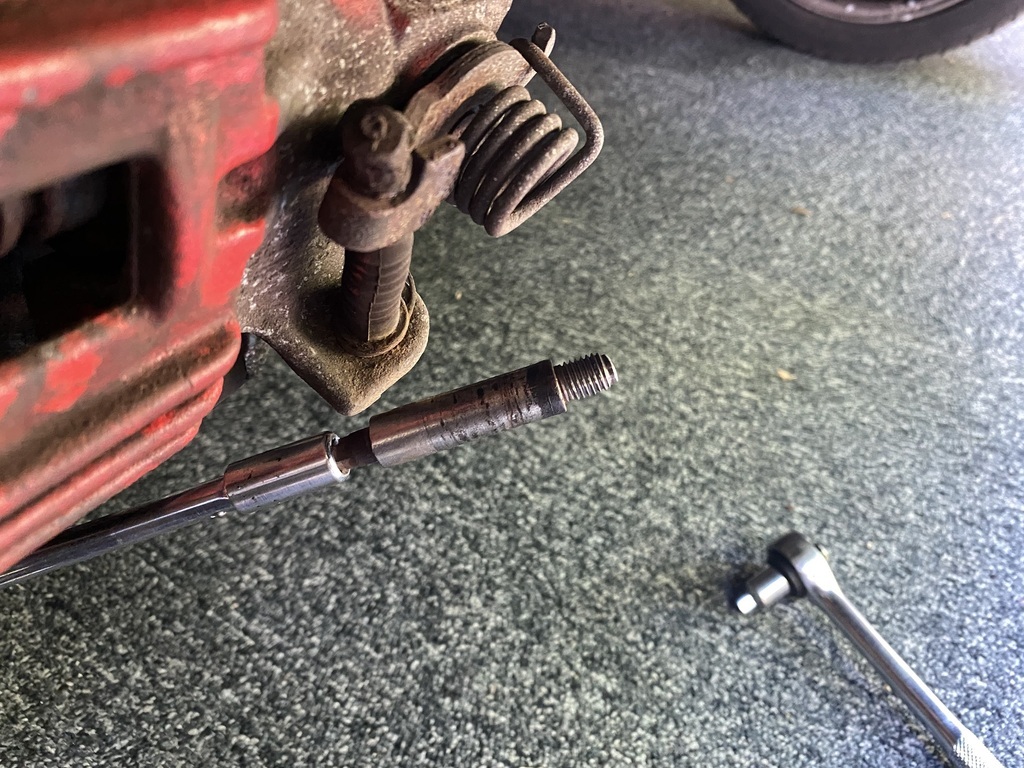 Both brake pads have worn about the same and the brakes work ok. 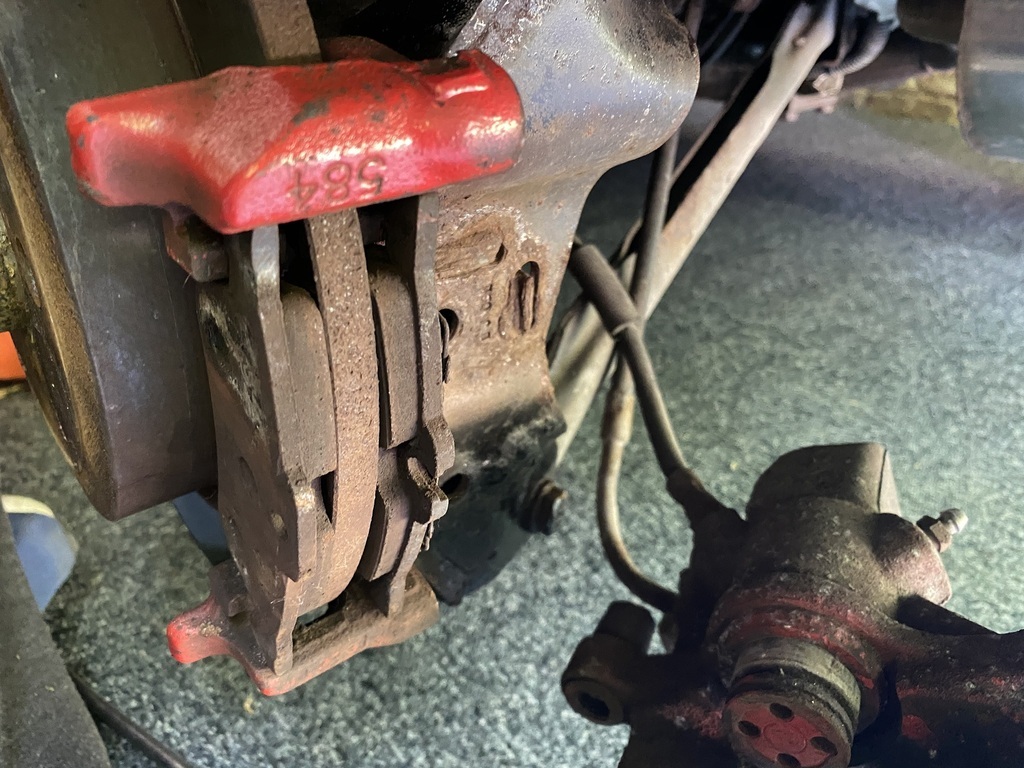 Providing that the MoT man doesn't make a fuss about the slight binding, I won't be taking this matter any further. In other news, despite having the oil filter housing seals replaced a couple of weeks ago, there is still a significant oil leak coming from somewhere from the back of the engine. Argh. |
| |
|
|
2p2g1m
Part of things
Posts: 116
|
|
May 24, 2022 18:10:44 GMT
|
|
Glad all is good. Mine was wearing pads unevenly so you are looking good. 👍
|
| |
|
|
pobsey
Part of things
Posts: 25
|
|
May 25, 2022 17:03:20 GMT
|
|
Sump gasket is another common oil leak source
On the brakes it you do need to replace brakes, you can use the later r56 rear calipers which are a better design and remove the possibility of the my binding, but that may mean new hand brake cables as one set have round ferrells and and the others have square
|
| |
|
|
|
|
|
May 25, 2022 18:30:41 GMT
|
Sump gasket is another common oil leak source On the brakes it you do need to replace brakes, you can use the later r56 rear calipers which are a better design and remove the possibility of the my binding, but that may mean new hand brake cables as one set have round ferrells and and the others have square Do you know whether the front subframe needs to be removed to enable replacement of the sump gasket? Noted about the brakes, thank you for the heads up. |
| |
|
|
|
|
|
|
|
When I removed the airbox to get access to the gear linkage a couple of weeks ago, I noticed that the rubber pipe that extends from the airbox towards the opening in the bulkhead was missing. I taped up the openings in the airbox and bulkhead as a temporary measure and posted a wanted ad for the pipe on the R53 Facebook page. 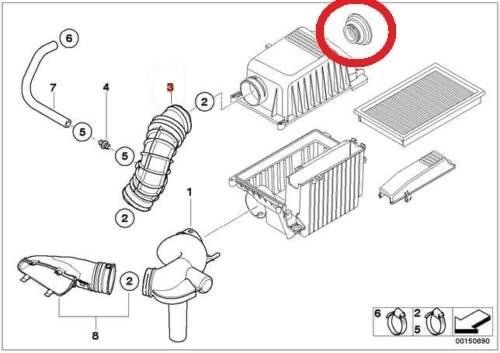 A kind group member posted this to me, free of charge. Top bloke. 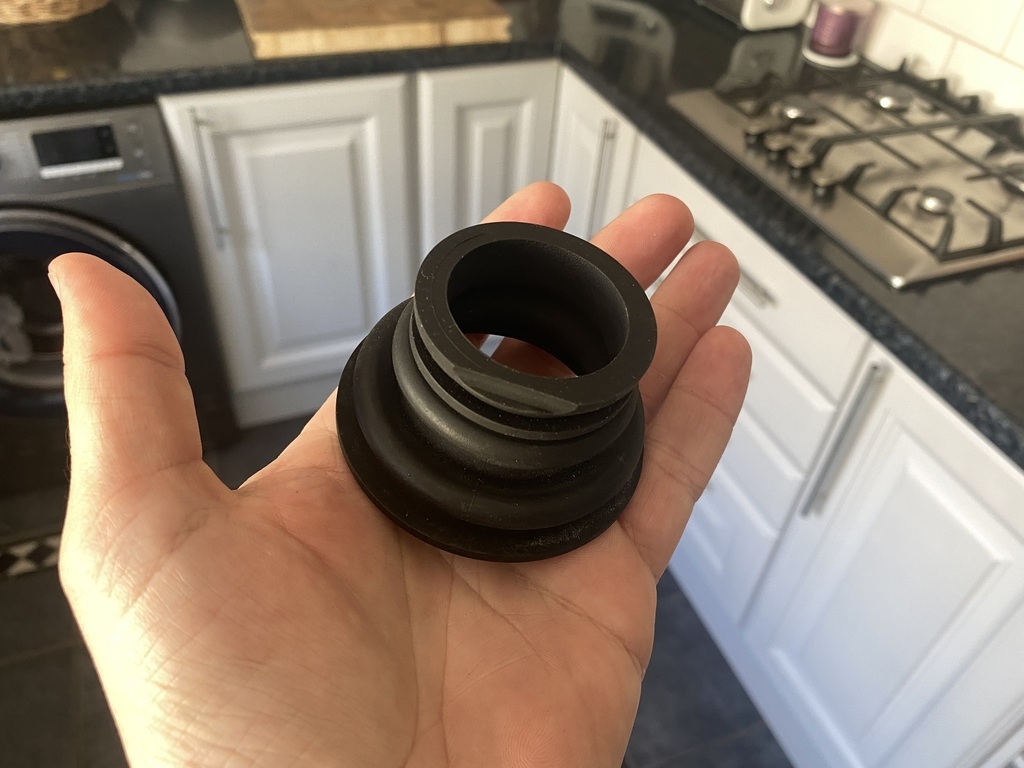 Fitting the rubber pipe didn't take long. It slots into the airbox and the other end presses up against the bulkhead. 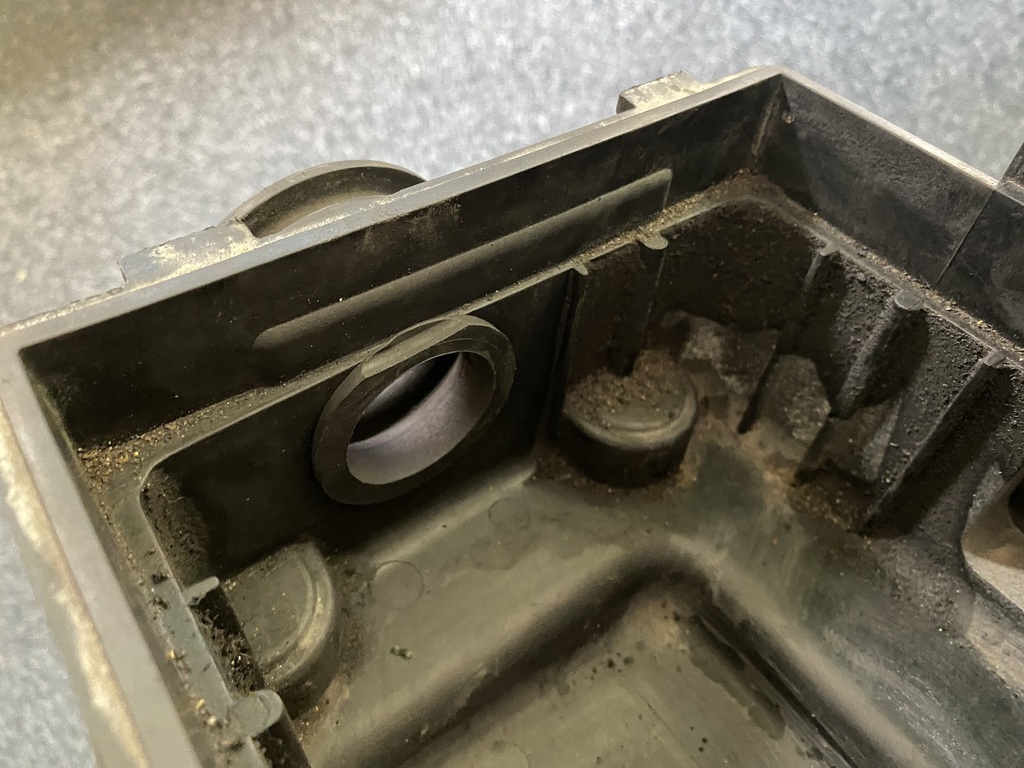 When I moved the Cooper out of the garage, I saw the usual reminder on the cardboard that the engine is leaking oil as well as a fresh pink stain that looked very much like anti-freeze. Great. 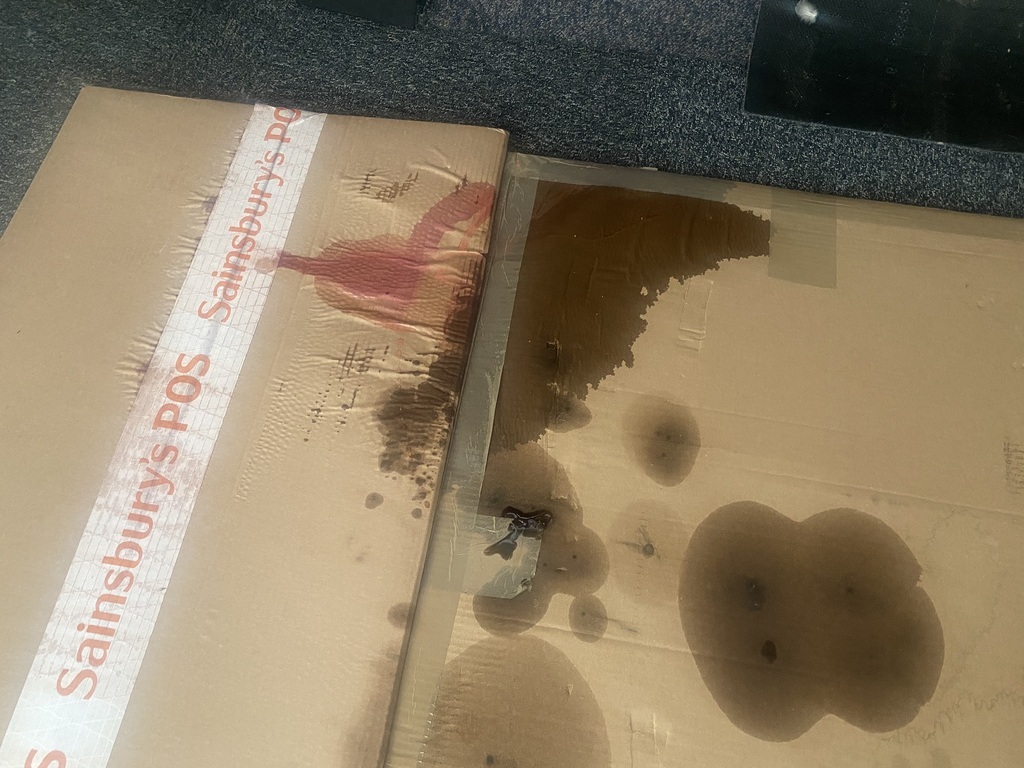 And there was a lovely little drip of the same pink liquid on the underside of the bumper. 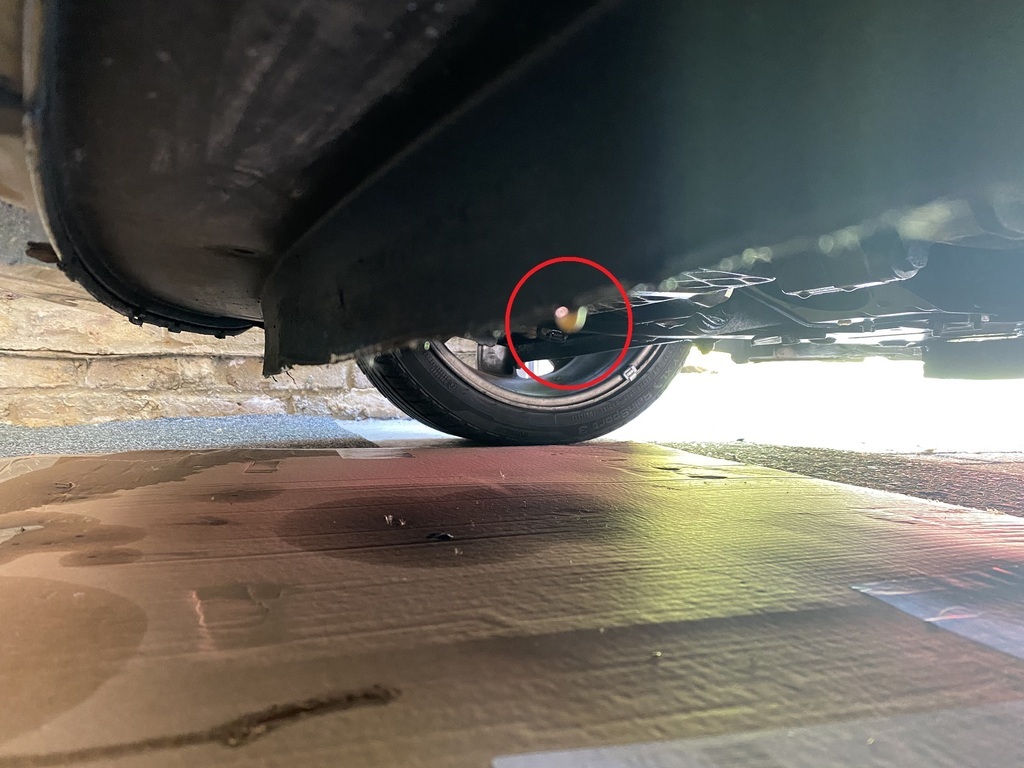 Time to investigate. I removed the front bumper, followed by the crash bar. 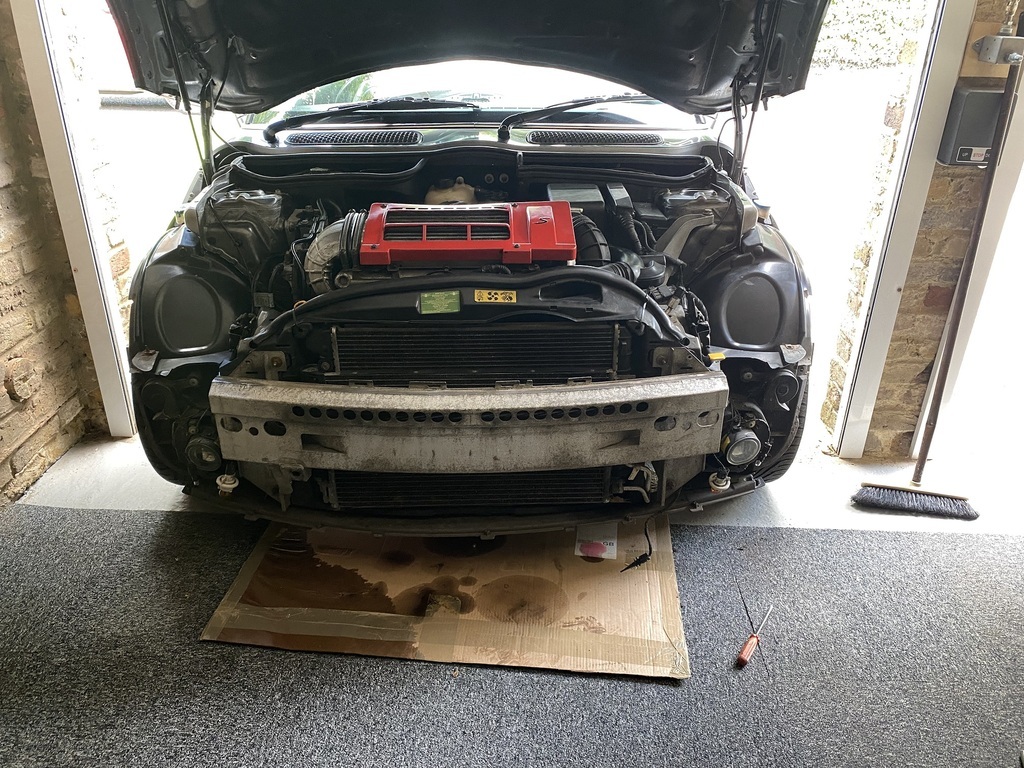 The very bottom of the radiator on the nearside of the car was soaking wet. 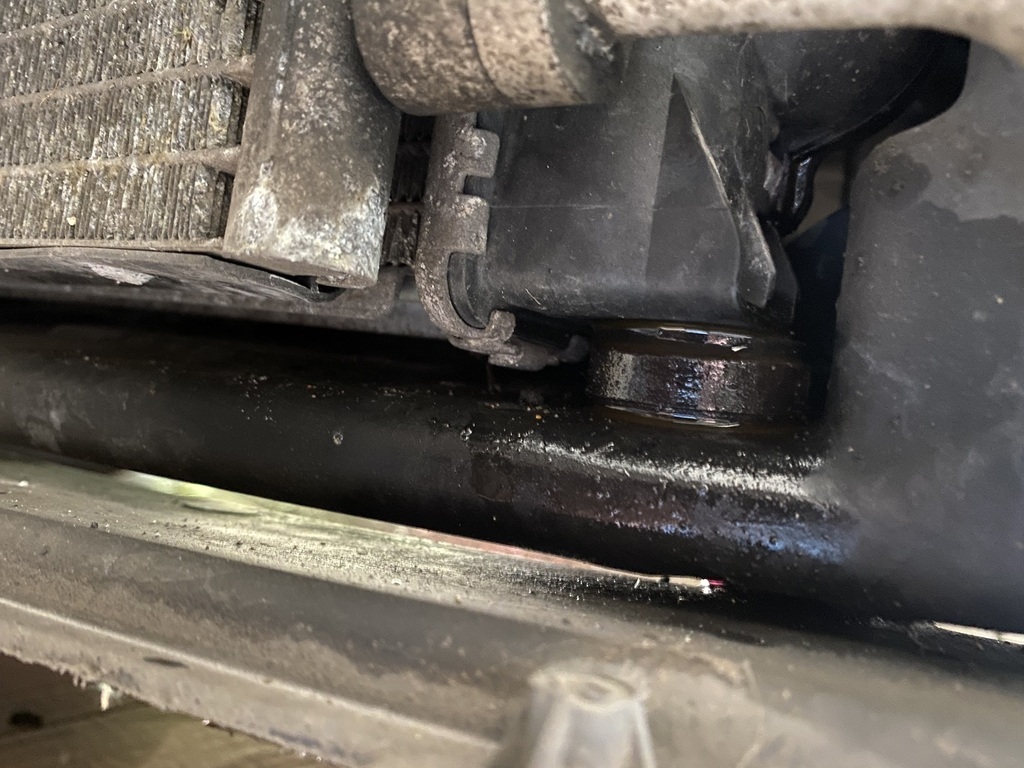 Tinkering with the Cooper is rarely fun as access in the tightly packed engine bay is a pain and the quality of fixings is generally quite poor. I needed to remove the air con radiator but stumbled upon a captive nut that was no longer captive. I ended up cutting into the plastic to release the radiator. 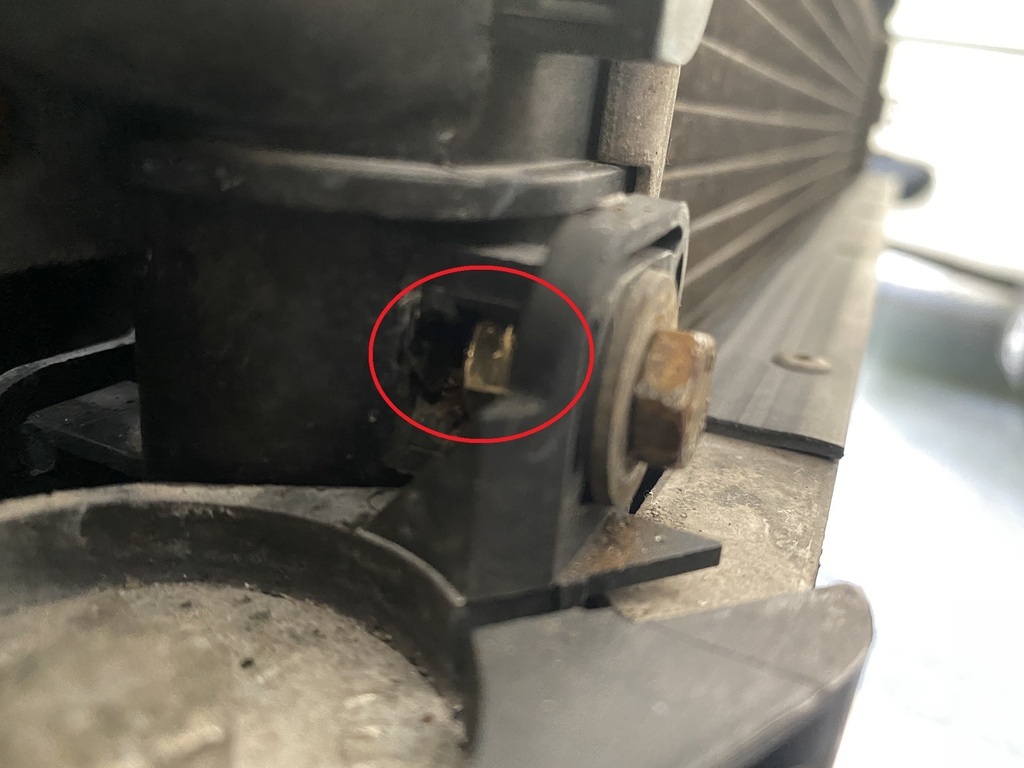 With the air con radiator out of the way, I disconnected the top and bottom hoses and removed the radiator. 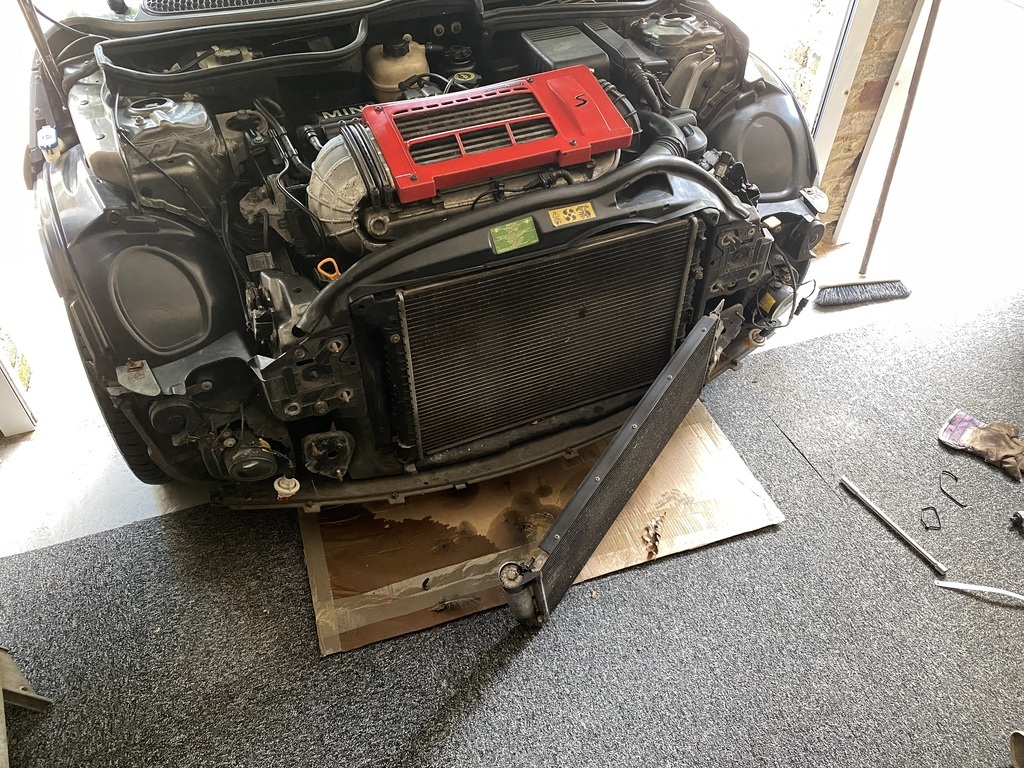 I sealed the bottom hose opening with tape and foil, filled the radiator with water and noticed drips coming out of the bottom elbow to radiator joint. 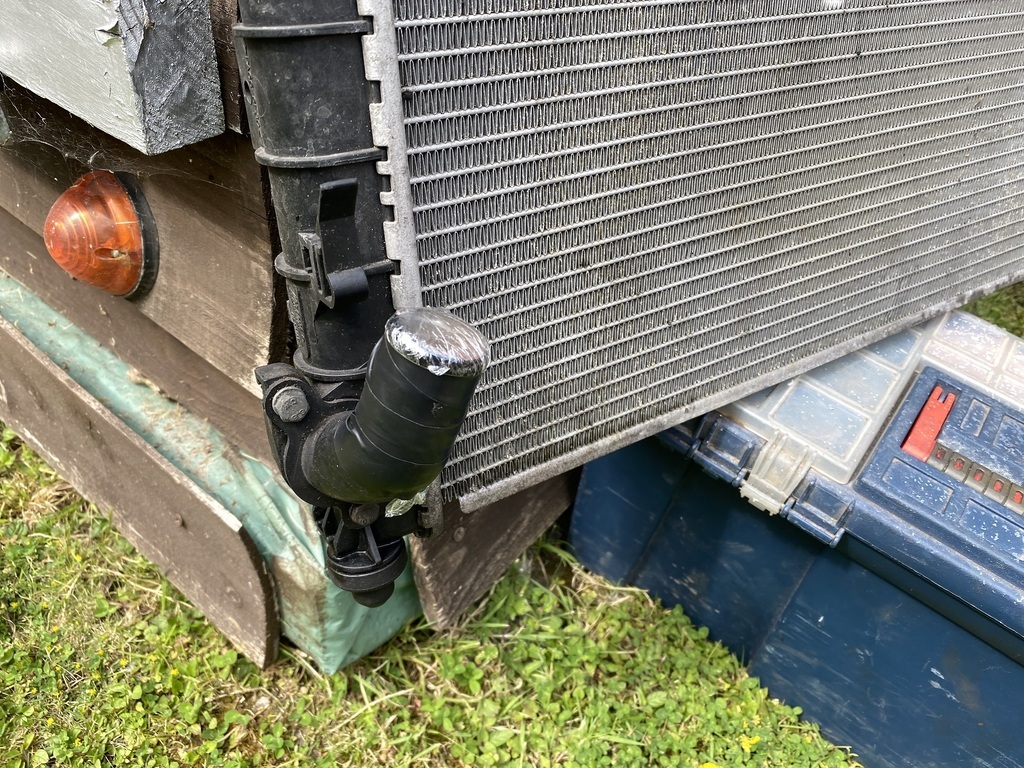 I removed the bottom elbow. The surface of the elbow that abuts the radiator was not flat. Bad quality part or could plastic bow with age? The o-ring looked absolutely fine. I applied silicone gasket sealer around the joint and re-fixed the elbow. As a precaution I did the same with the upper elbow, however I found the mating surface to be flat. 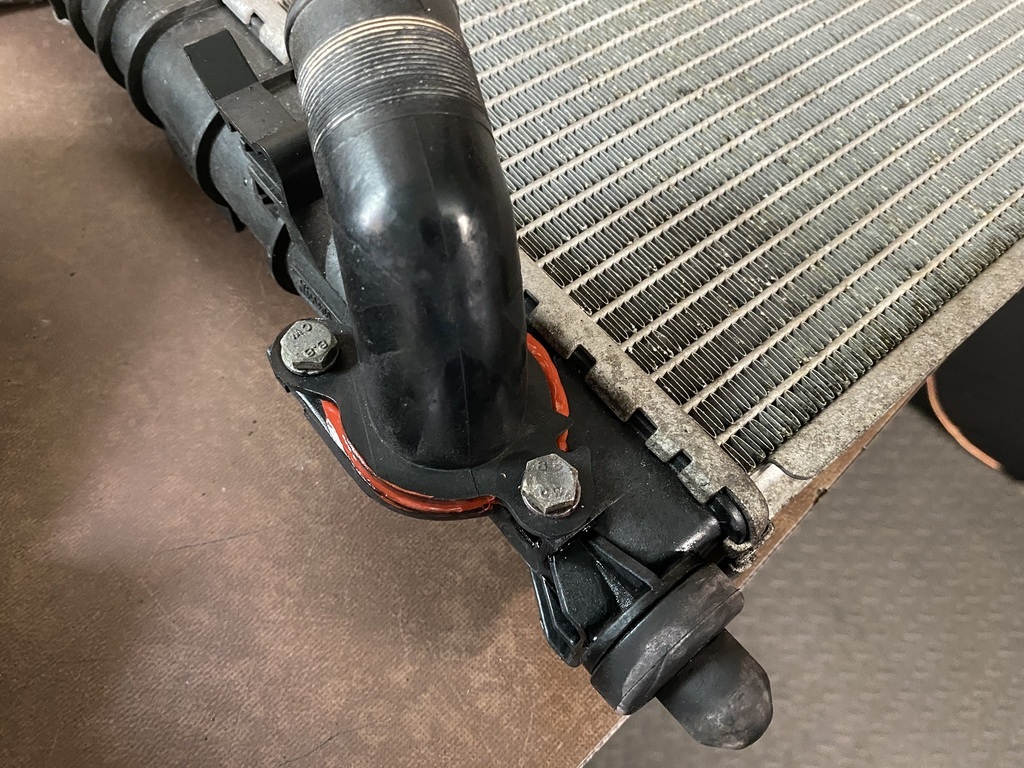 I left the sealant to set overnight. Re-assembly begins this morning.  In other news, I am considering selling my W124 - see Cars For Sale. |
| |
Last Edit: Jun 3, 2022 6:33:32 GMT by Peter C
|
|
|
|
|
|
|
Re-assembly time! Before putting the radiator back in, I noticed that a a chunk of rubber was missing from the bottom radiator hose where it has been chaffing on the fan.  I wrapped a bit of vinyl tape around the hose, which will hopefully protect the hose from further damage. 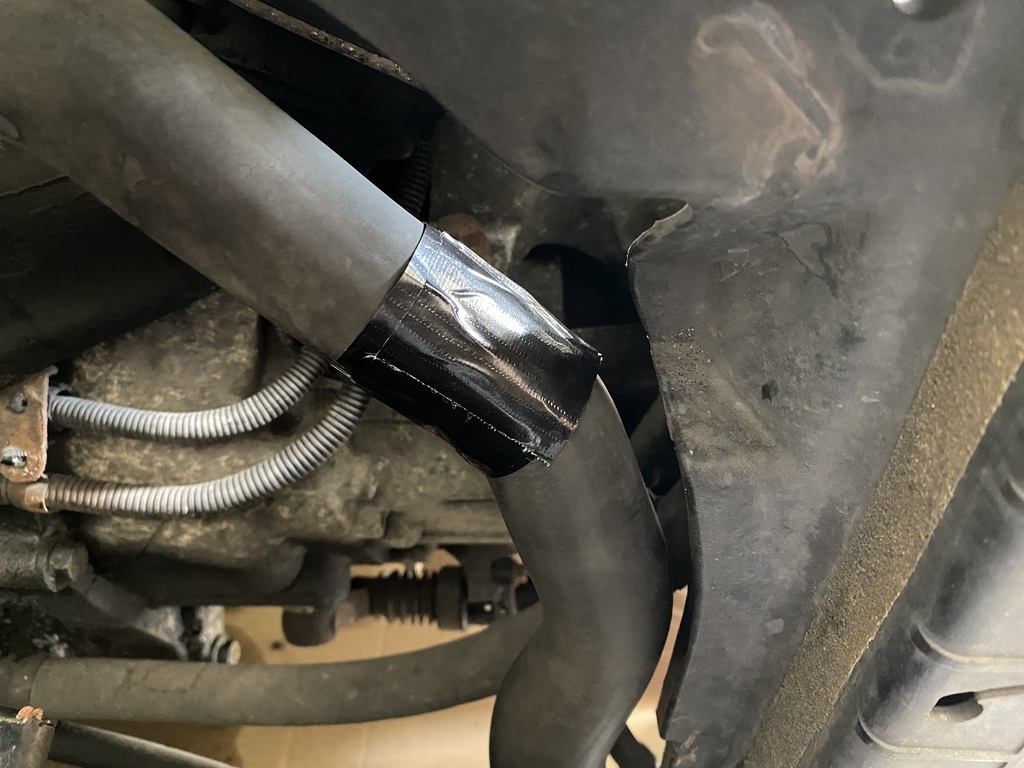 Having cut the plastic around the non-captive captive nut, I ended up doing a cunning cable tie repair around the bolt that secures the air con radiator to the front of the radiator. 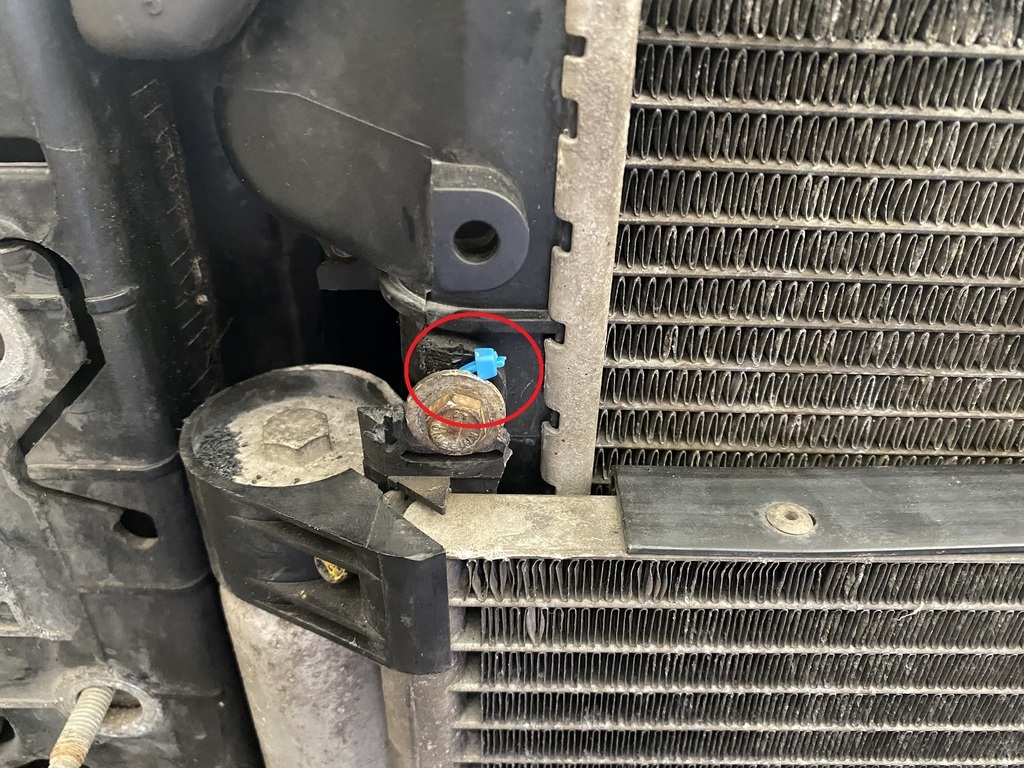 Before re-assembling the bumper, I topped up the coolant and ran the engine for 15 minutes. There was no evidence of any further leaks from the bottom of the radiator. 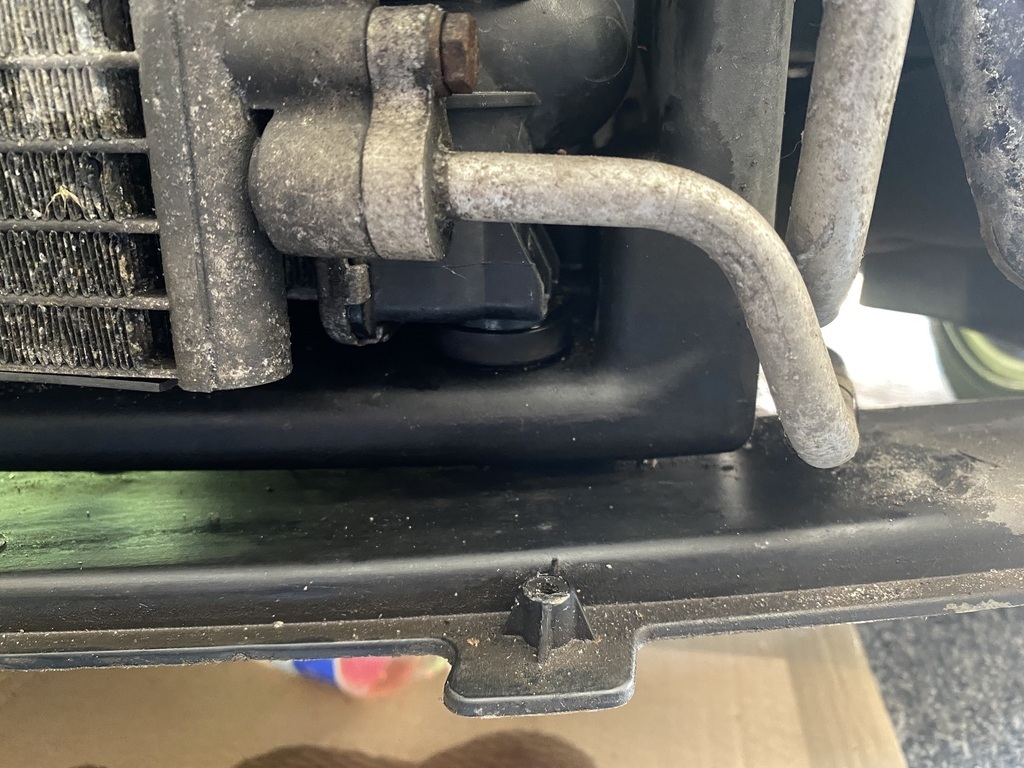 I made sure that the crash bar went back in exactly how it came out, to prevent problems with bumper alignment. The first attempt was unsuccessful.  With everything else put back, it was time to get the bumper back on.  After getting the bumper back on, I had one last bolt to re-fit. Turns out that the crash bar wasn't 100% correctly aligned after all and the upper nearside bumper bolt wouldn't go in. Rather than removing all the other fixings and re-aligning the crash bar for the third time, I secured the top of the bumper with a cable tie. 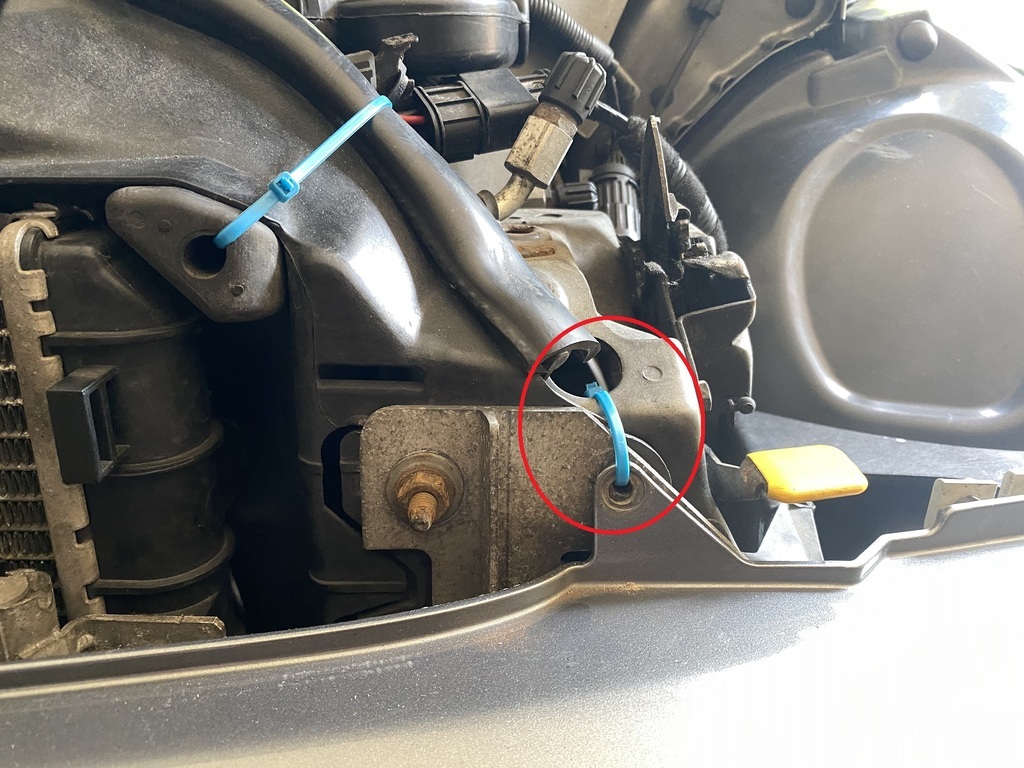 Bumper back on, no alignment issues to report. 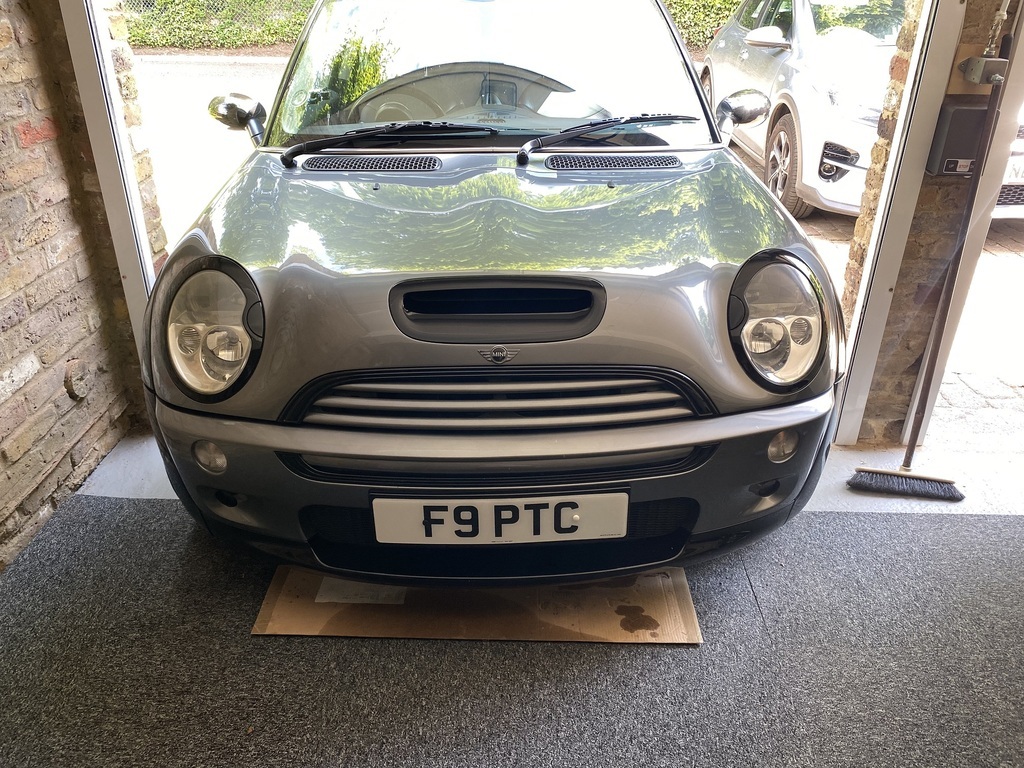 I took the Cooper up the road and back, got the engine to running temperature whilst the heater was set to hot. 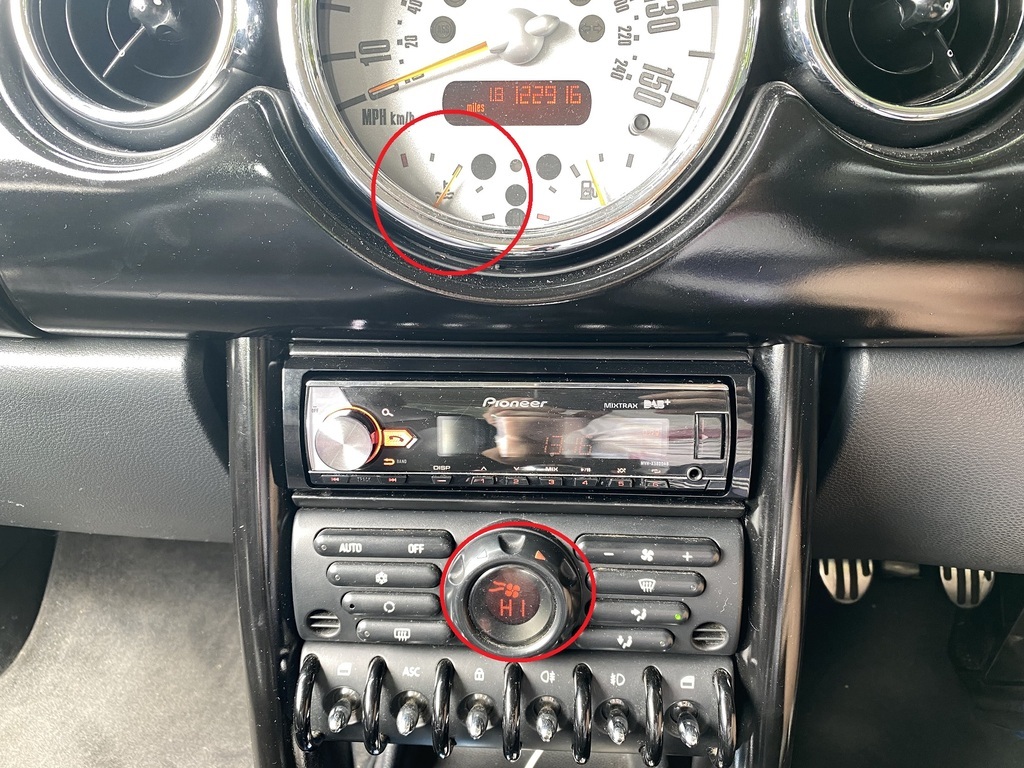 I bled the cooling system by loosening this screw. Then I re-filled the coolant reservoir and everything was looking good. 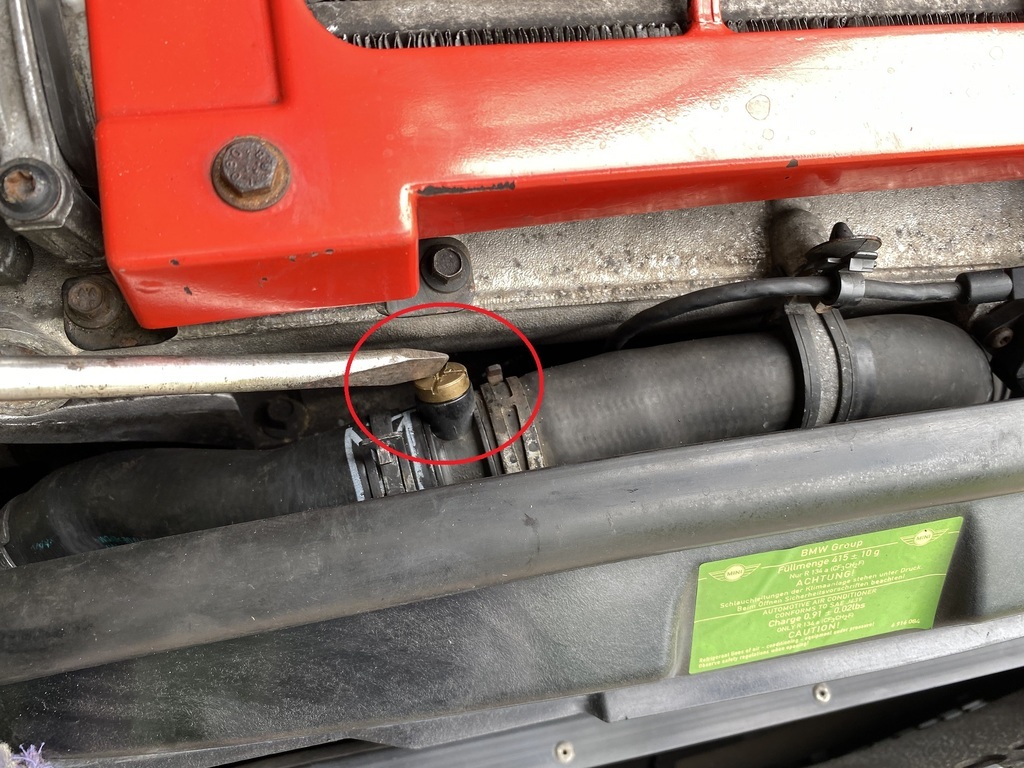 I took the Cooper for a trip to London and back, a round journey of approx 50 miles. Whilst there is still a smelly anti-freeze residue, which is to be expected considering how much coolant was spilled over parts of the engine bay that are inaccessible for cleaning, there was no evidence of any leaks and the coolant level in the reservoir hadn't changed. Win. I put the Cooper back in the garage and I'm now enjoying a cold Corona whilst writing this story, which seems to have a happy ending. 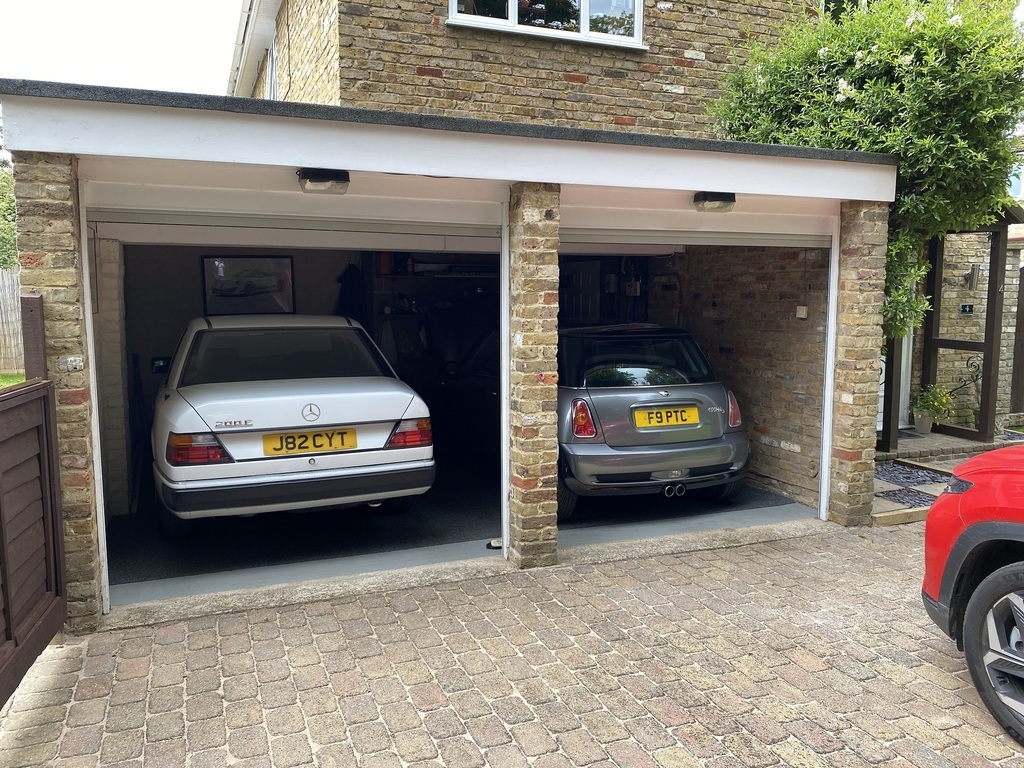 MoT time on Friday morning. Let's hope for another happy ending. |
| |
|
|
Paul
Posted a lot
Posts: 1,903
|
|
|
|
|
My water leak on my R53 has returned with a vengeance, and I can see quite clearly that it's the seal/gasket around the upper hose joint into the rad.
Can't say I'm looking forward to taking everything off the front to get to it - although pleased to see that a decent daub of silicone gasket seems to have done the trick. Hoping I can get away with the same...
|
| |
Last Edit: Jun 4, 2022 9:47:10 GMT by Paul
|
|
|
|
|
|
|
|
|
My water leak on my R53 has returned with a vengeance, and I can see quite clearly that it's the seal/gasket around the upper hose joint into the rad. Can't say I'm looking forward to taking everything off the front to get to it - although pleased to see that a decent daub of silicone gasket seems to have done the trick. Hoping I can get away with the same... It’s not a difficult job, looks worse in the photos than it was. You don’t need to jack the car up and if you’re prepared to fix the upper elbow joint with the radiator in situ and bottom hose still connected, you will only lose a bit of coolant. |
| |
|
|
Paul
Posted a lot
Posts: 1,903
|
|
|
|
My water leak on my R53 has returned with a vengeance, and I can see quite clearly that it's the seal/gasket around the upper hose joint into the rad. Can't say I'm looking forward to taking everything off the front to get to it - although pleased to see that a decent daub of silicone gasket seems to have done the trick. Hoping I can get away with the same... It’s not a difficult job, looks worse in the photos than it was. You don’t need to jack the car up and if you’re prepared to fix the upper elbow joint with the radiator in situ and bottom hose still connected, you will only lose a bit of coolant. Yeah it wasn't that bad...most of my captive bolts remain captive, although I'm missing a couple under the bumper. Decided to pull the whole rad as I wanted to properly inspect it. Situation was identical but reversed 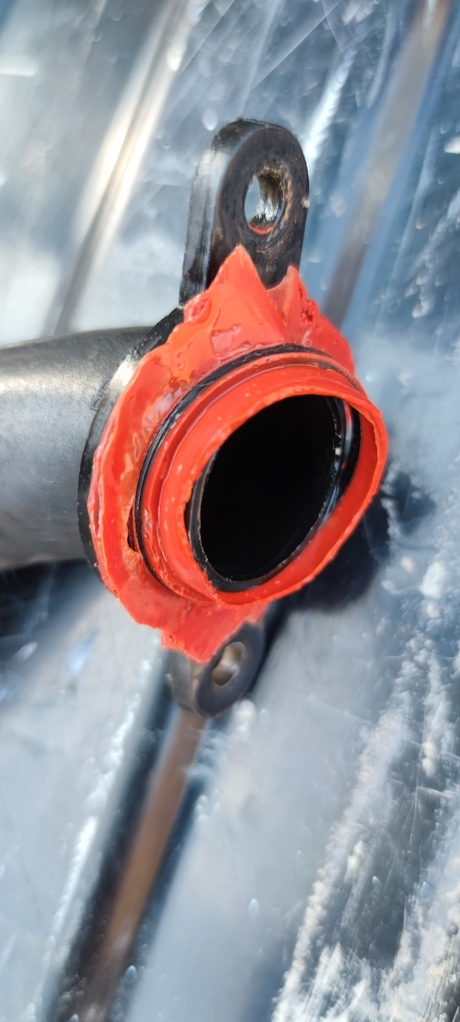 Thin O ring was flattened and the sealant had totally given up. Do these warp in heat? Not even close to a flat mating surface...not sure if the joint can be bought separately if this doesn't hold. I've done the same as you...tightened as much as I dare and slathered in gasket sealant. Will reinstall tomorrow |
| |
|
|
|
|
Paul
Posted a lot
Posts: 1,903
|
|
|
|
Went to town on the sealant as the pipe is nowhere near flush with the rad 😬 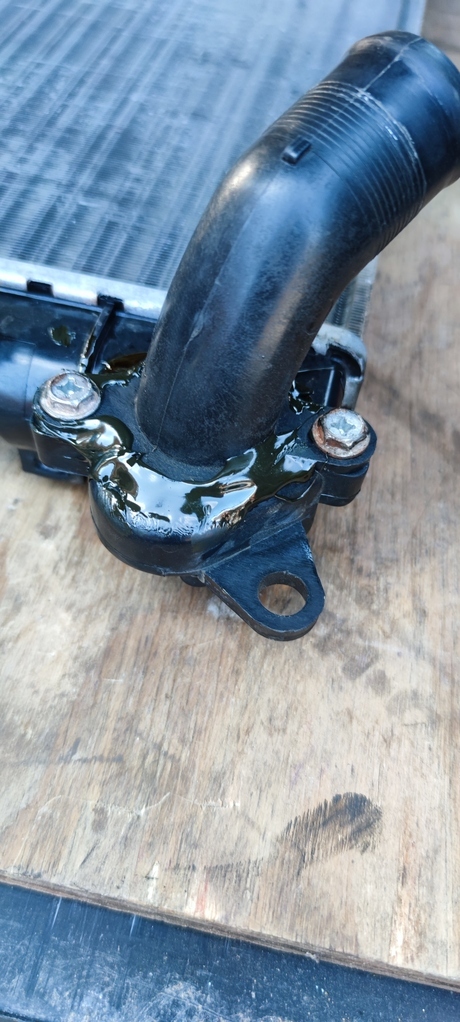 Followed your lead on the cable tie fix... These plugs... 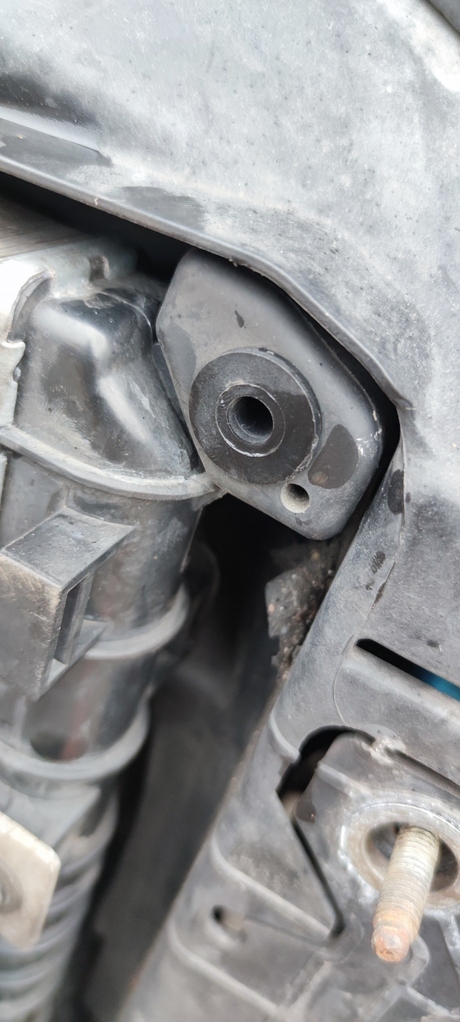 Are rubbish... 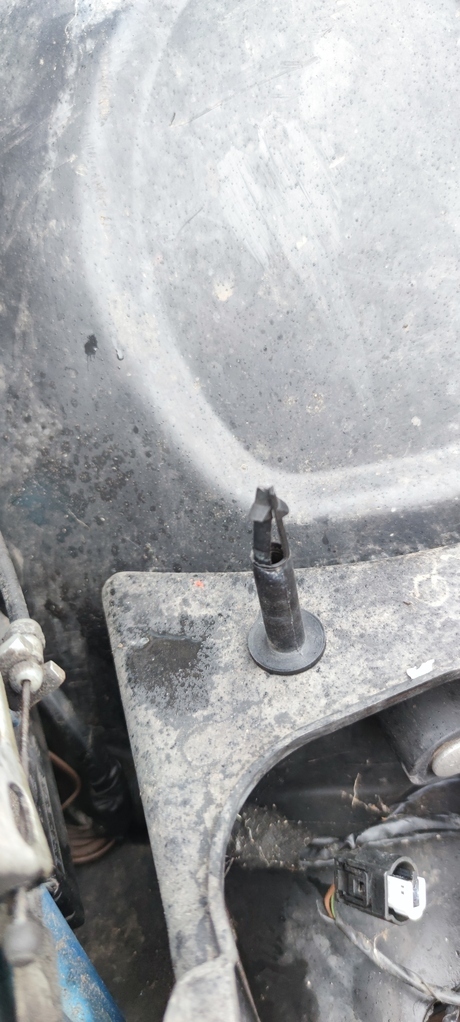 So I too had to adapt 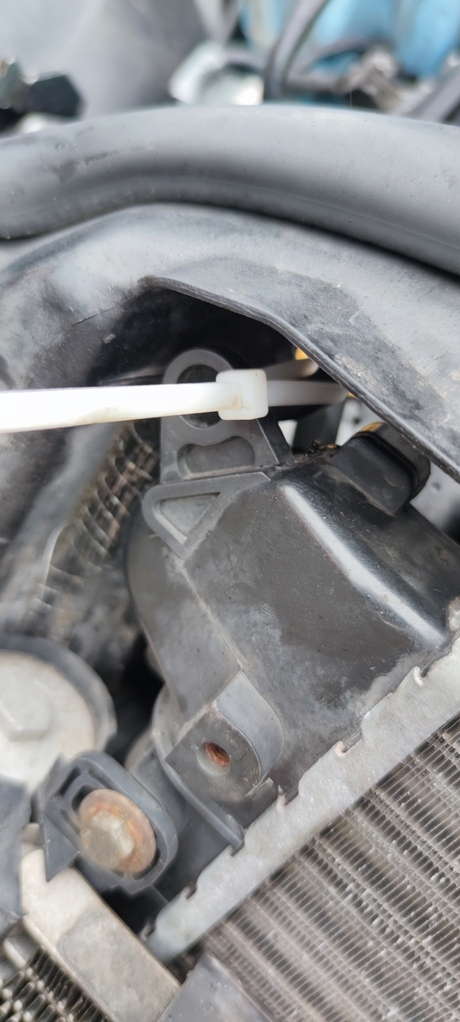 Seems to be holding up fine, need to take it out for a proper blast to really get the water really pumping |
| |
Last Edit: Jun 6, 2022 19:41:56 GMT by Paul
|
|
pobsey
Part of things
Posts: 25
|
|
|
|
|
There is also another bleed nipple on the right hand side of the cylinder head.
I’m expecting my radiator will need replacing soon, it is looking very tired, when the time comes the air con condenser will also get replaced
|
| |
|
|
|
|
|
|
|
There is also another bleed nipple on the right hand side of the cylinder head. I’m expecting my radiator will need replacing soon, it is looking very tired, when the time comes the air con condenser will also get replaced Yes, the chap in the YouTube video mentioned the other bleed nipple but I must confess that I couldn’t find it. My Cooper seems to be running ok with the coolant system bled from just the front nipple. |
| |
|
|
|
|
|
Jun 10, 2022 16:32:32 GMT
|
I took the Cooper for its first MoT in my custody this morning. 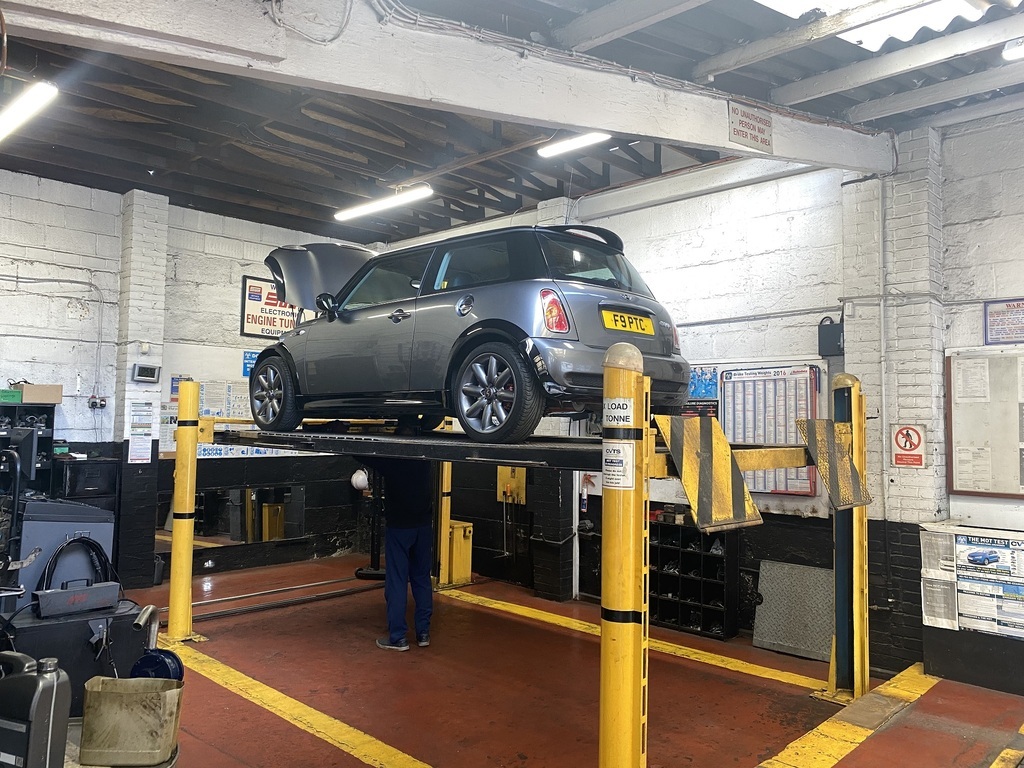 Mostly good news. The tester noticed the engine oil leak. Evidently, replacing the oil cooler and oil filter housing seals has not fixed the oil leak. The other advisory related to the steering rack, which had a bit of play along the inner side of the track rods. Odd, as, according to the service history, the steering rack was replaced a few years ago. The main issue related to the emissions test. The HC and lambda readings were ok but the CO reading wouldn't drop below 0.20. 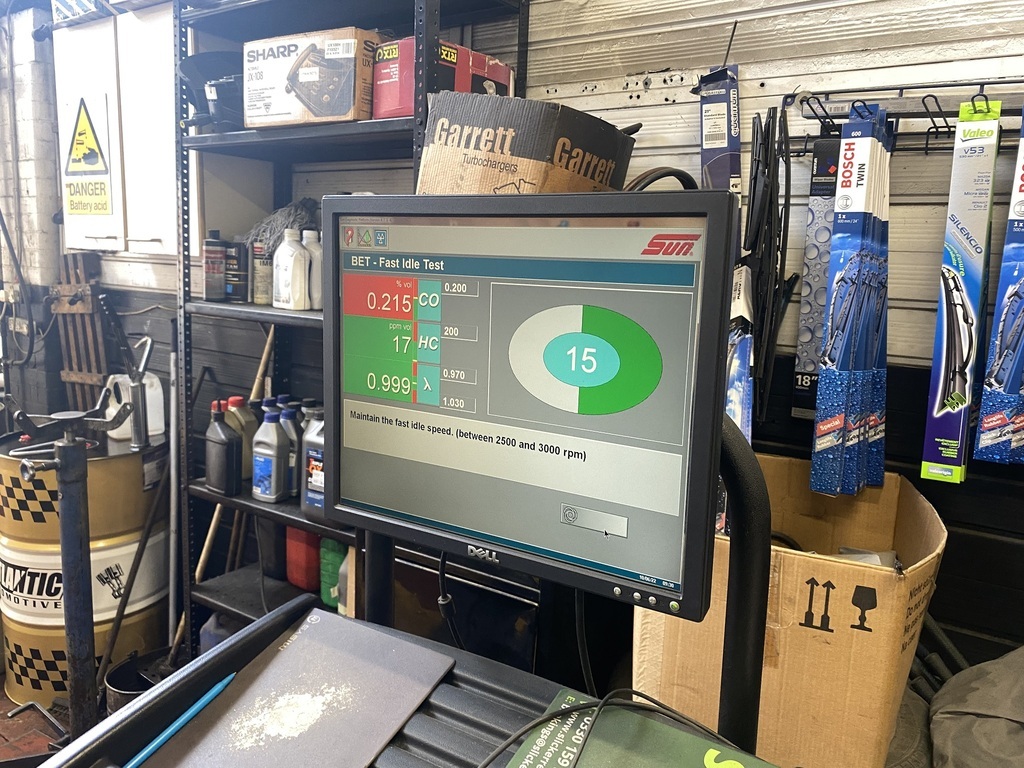 The tester kept re-testing, each time slightly increasing the engine revs and eventually the screen displayed three green lights. Woo hoo! 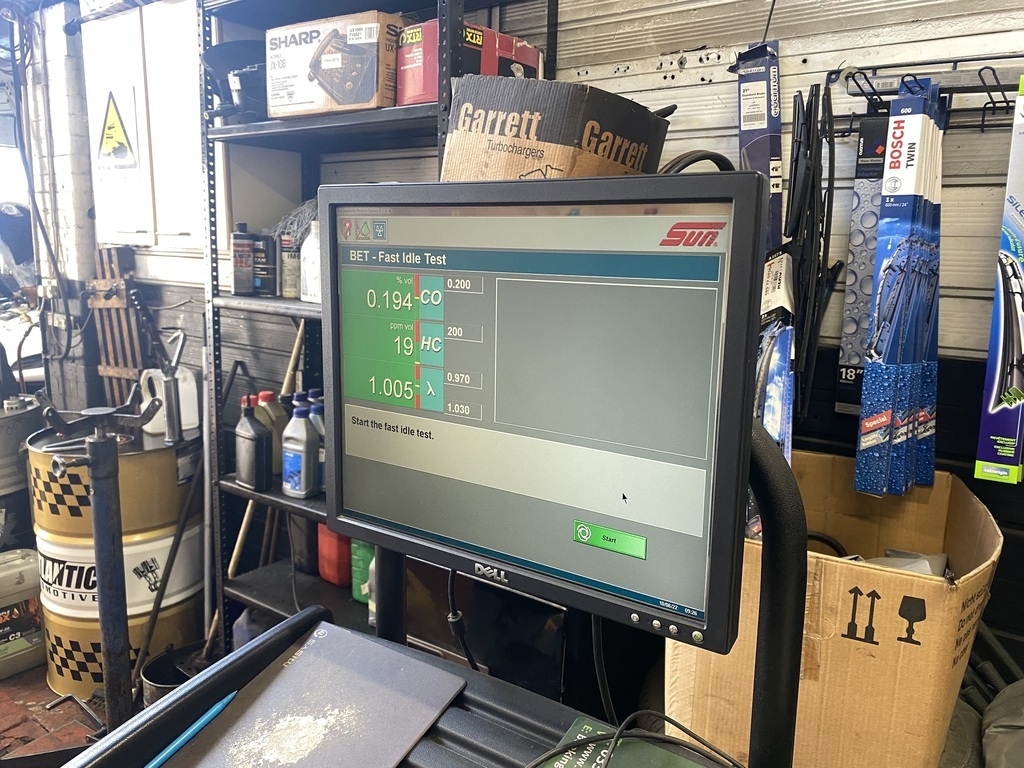 The tester suggested that I add some fuel cleaner to the system before next year's test. What else can I do to reduce the CO reading? Once the paperwork was sorted out, I jumped in the Cooper and.... it wouldn't start. It started eventually but it wasn't happy and it stalled as soon as I released the throttle. The emissions test took a good 10-15 minutes, with the engine running at 2-4k revs, with the car stationary, inside a warm building. Whilst the coolant temperature was all ok, I suspect that ambient temperature under the bonnet got high and the non starting / poor running was caused by fuel vaporisation. I took the Cooper out on the main road, gently got it up to 30MPH and within 60 seconds it was firing on all four and didn't miss a beat on route home. Phew! Whilst the Cooper was up in the air, I had a good look under the engine and it seems that the coolant leak repair has worked. I also noticed that I missed a couple of areas whilst rust proofing the floorpan a few weeks ago. A job for tomorrow. Today was a good day! |
| |
Last Edit: Jun 10, 2022 17:16:57 GMT by Peter C
|
|
|
|
|
Jun 12, 2022 12:36:18 GMT
|
Unrelated to my Cooper, this story was going round the R53 Facebook page earlier this week. The registration number A1 is currently fitted to a Cooper S (R56). £3k car with a £500k number plate! 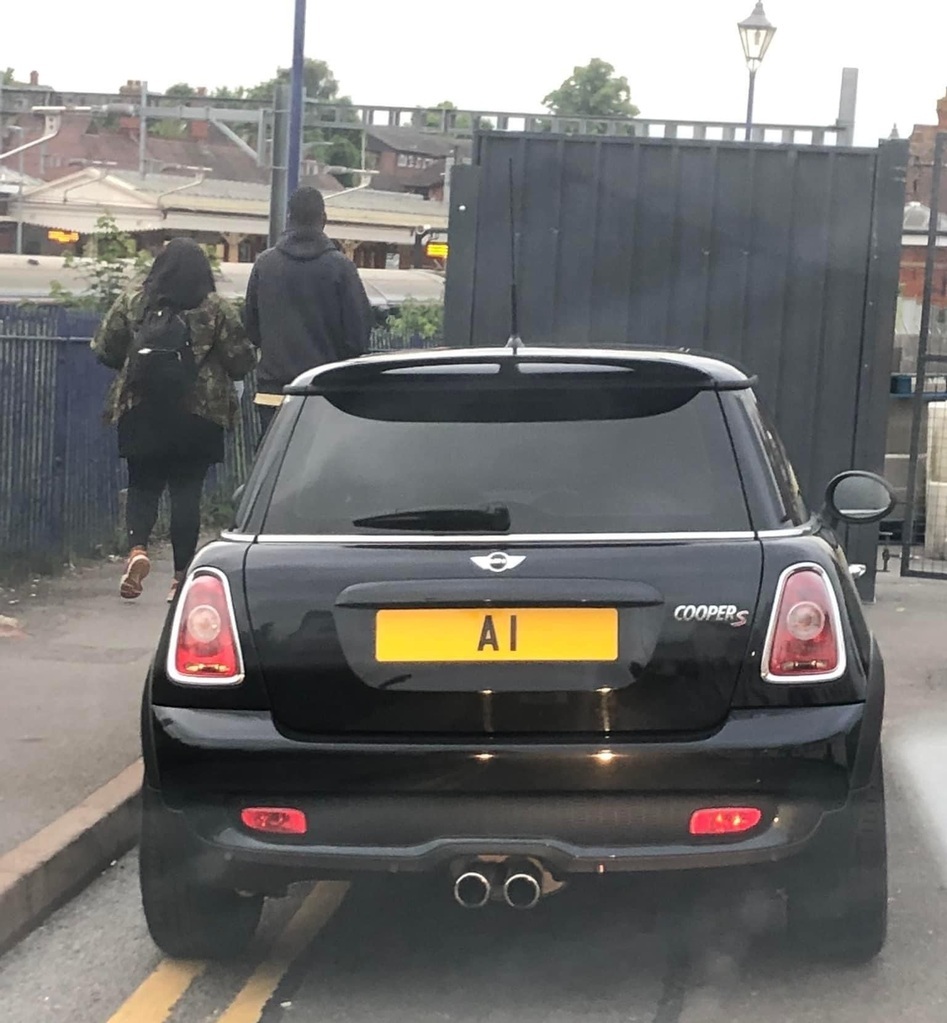 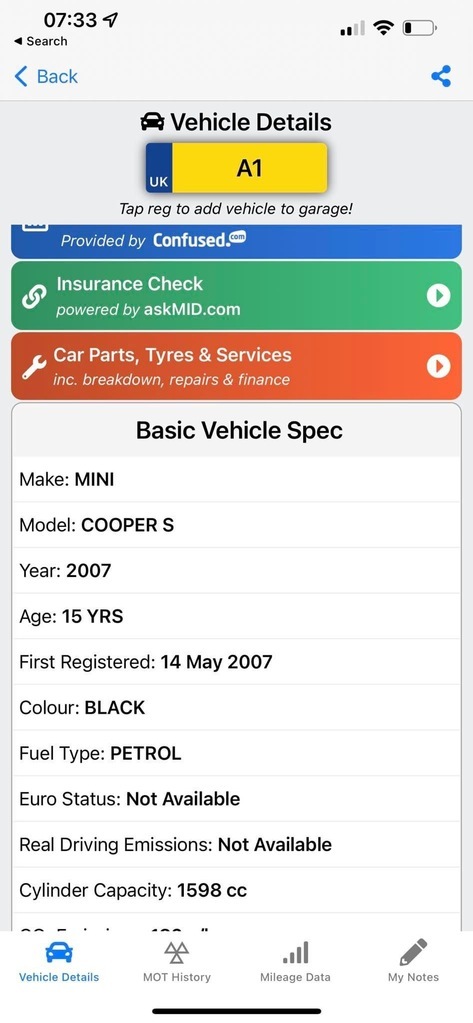 |
| |
|
|
|
|
|
Jun 12, 2022 12:51:37 GMT
|
When I re-fitted the radiator following the elbow joint repair, I used cable ties to secure the radiator to the cowling. I hooked the blue (only colour I had) cable ties over the top of the rubber seal, which didn't look great. Yesterday I re-fitted the cable ties in a different, more discreet, way. 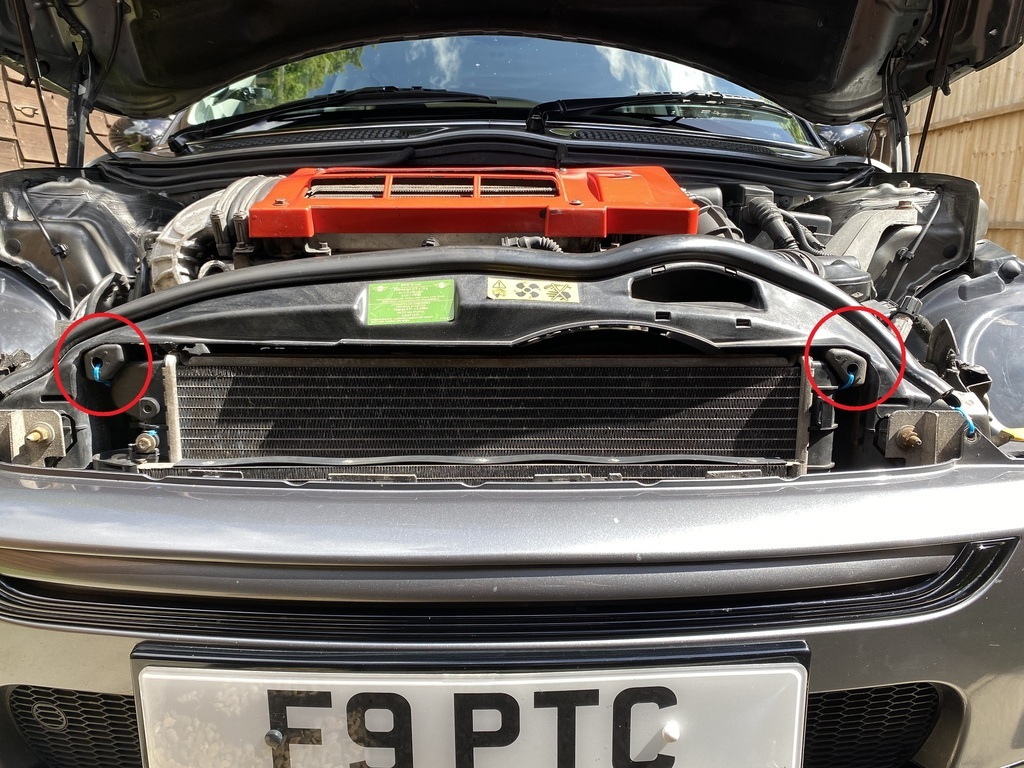 I had a bit of spare time yesterday so I popped over to Wokingham, to pay A1 breakers a visit. Well worth it. The yard is well organised, clean and the staff are very friendly. 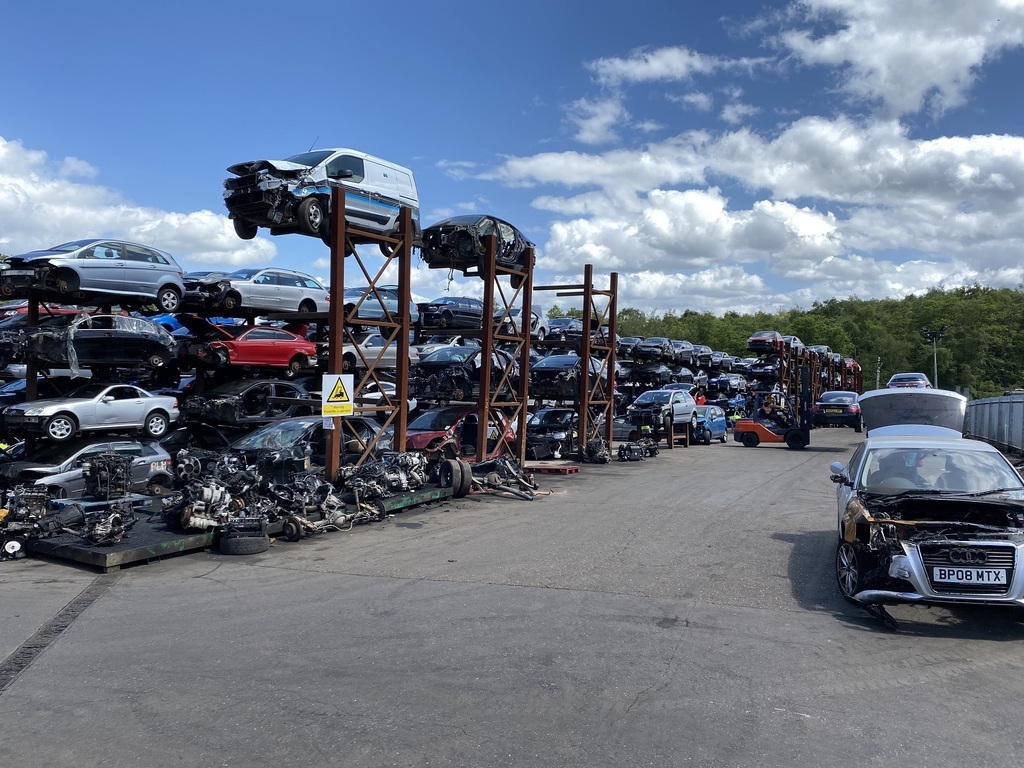 They had a few R50s and R52s, which I forgot to photograph. I went through one R50 Cooper and walked away (£40 lighter) with a space saver spare wheel, fabric for the back of the rear seats, a new driver's side sun visor... 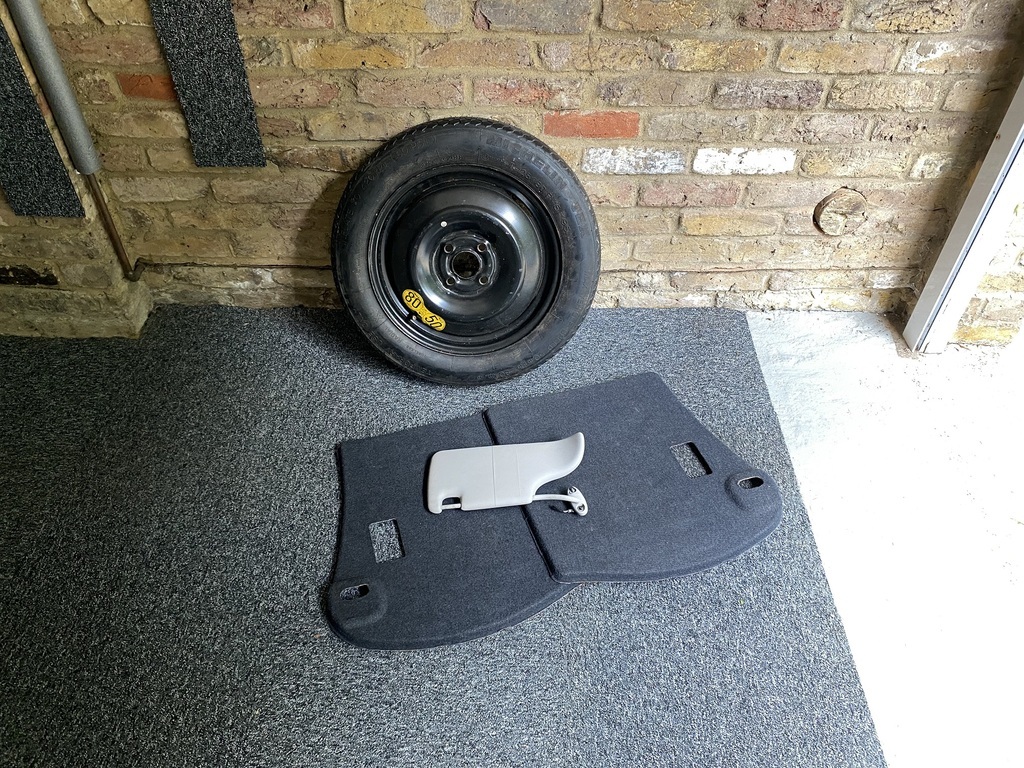 ... radiator clips and some chrome effect plastic trim for the interior. 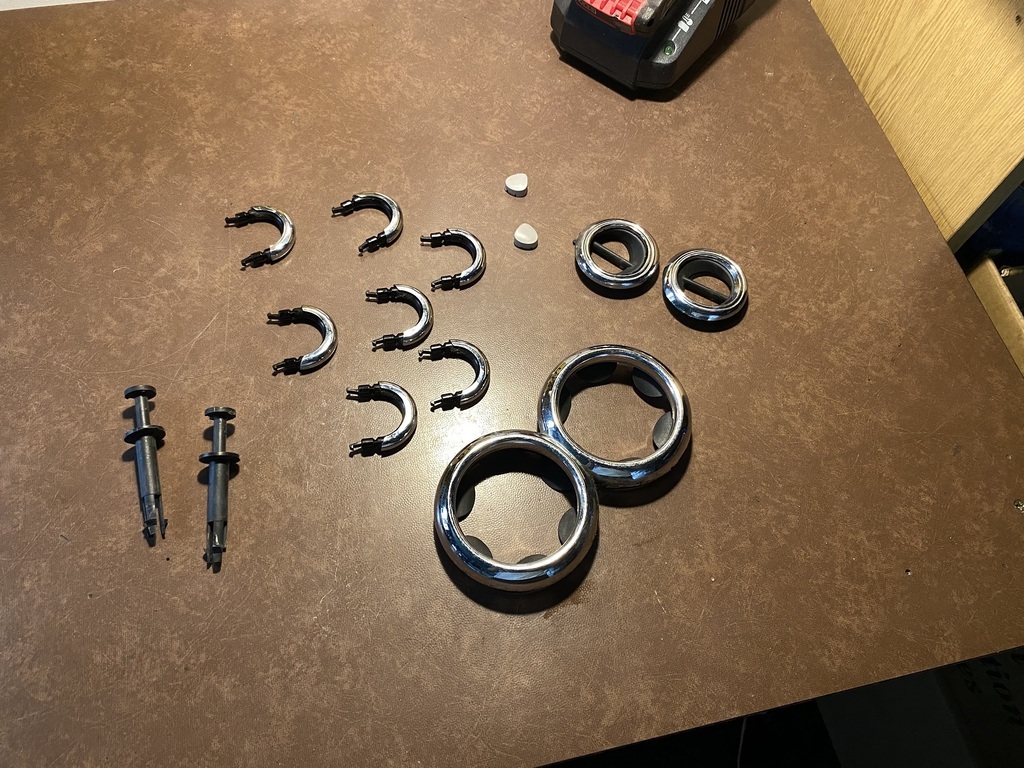 One of the previous owners must have had a dog, who travelled in the back of the Cooper with the seats folded down. The horrible beast ruined the fabric that lines the back of the rear seats.  Ten minutes later, new fabric was in. Much better. 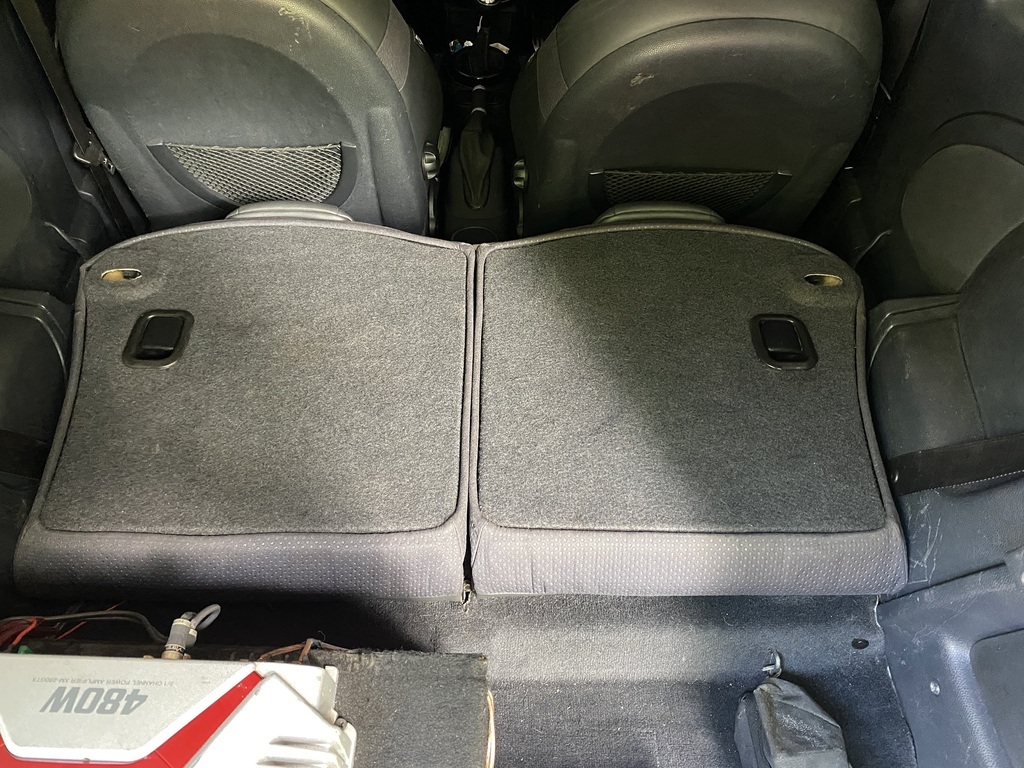 The original driver's side sun visor was damaged. 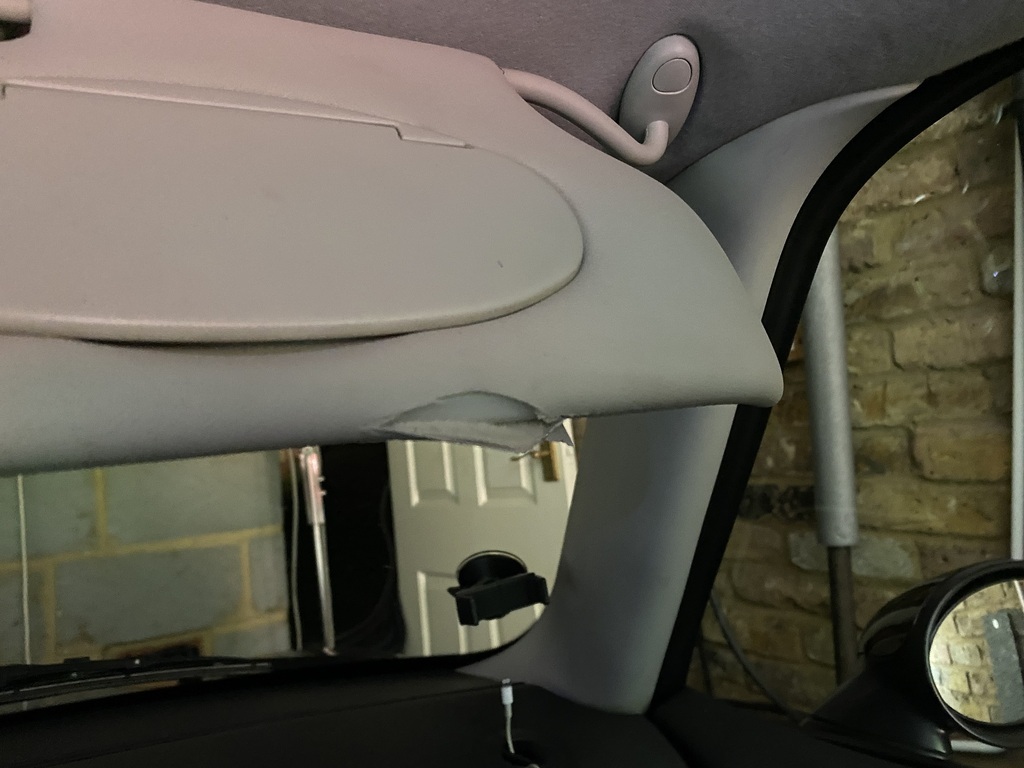 Two minutes later, the replacement was fitted. The mirror lights work but the cover flap doesn't stay up - obviously! 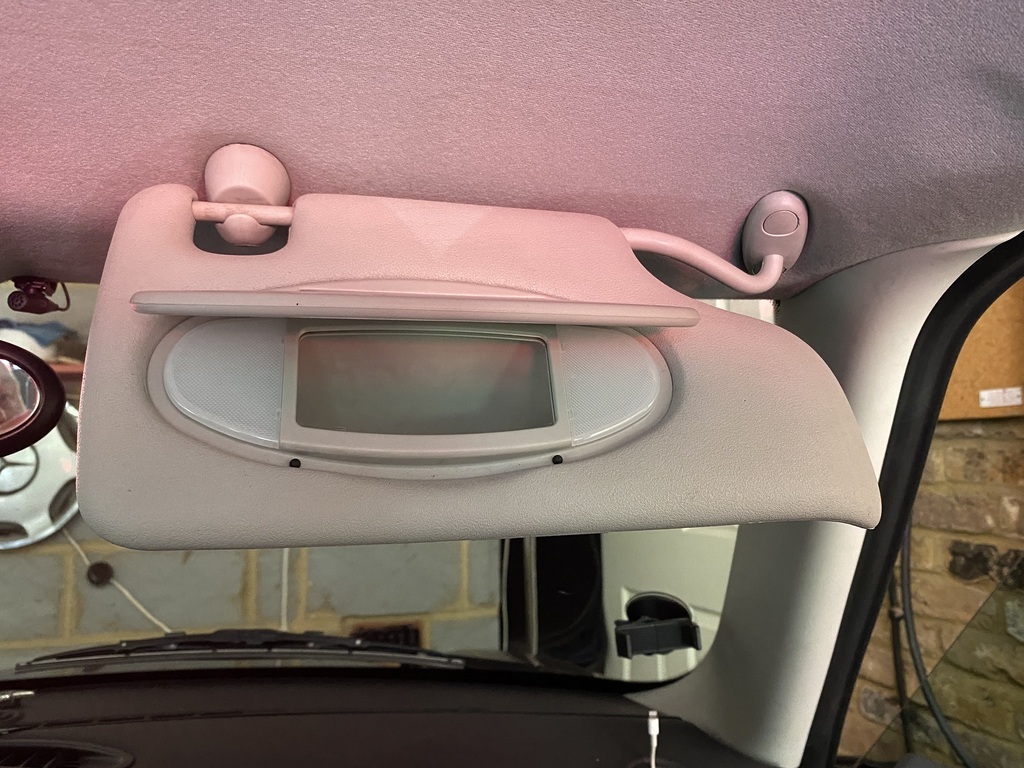 I like most of the previous owner's attempts to improve the Cooper's appearance, especially all the expensive work done to the exterior of the car. However, spraying various interior plastics gloss black has left the interior rather gloomy. I am a fan of less is more when it comes to modifying cars and I don't intend to replace every black painted bit of trim with something bling but fitting the chrome effect cup holder rings and the half-round brackets that fit between the toggle switches has made the bottom central part of the dashboard less austere. Before. 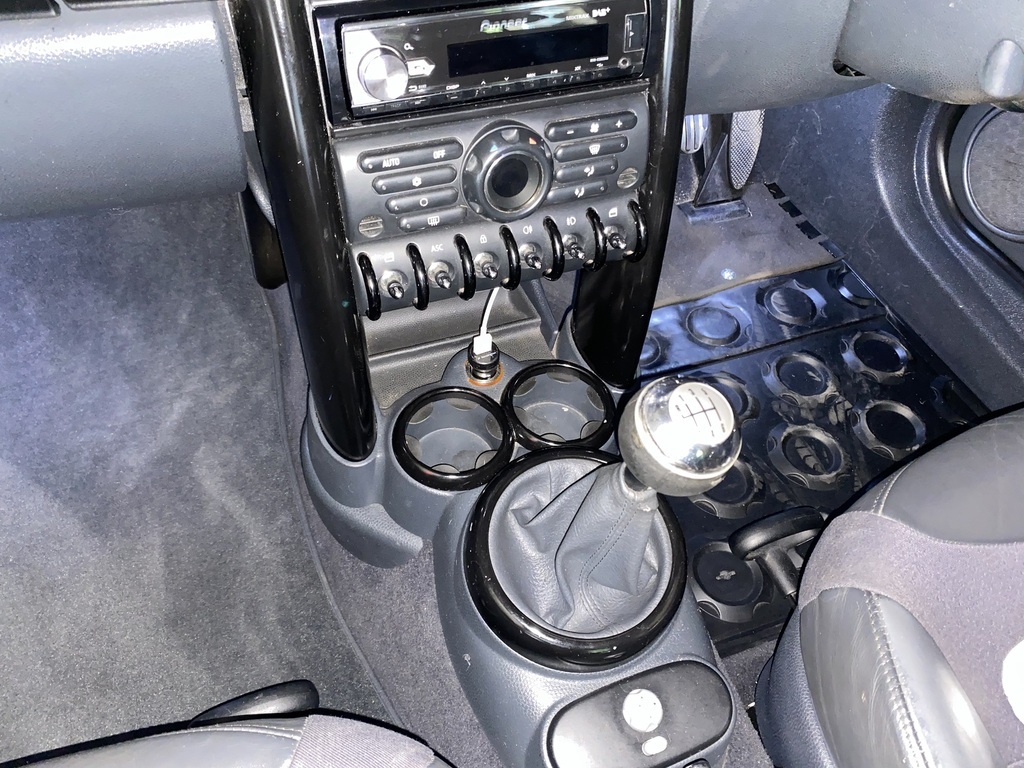 After. 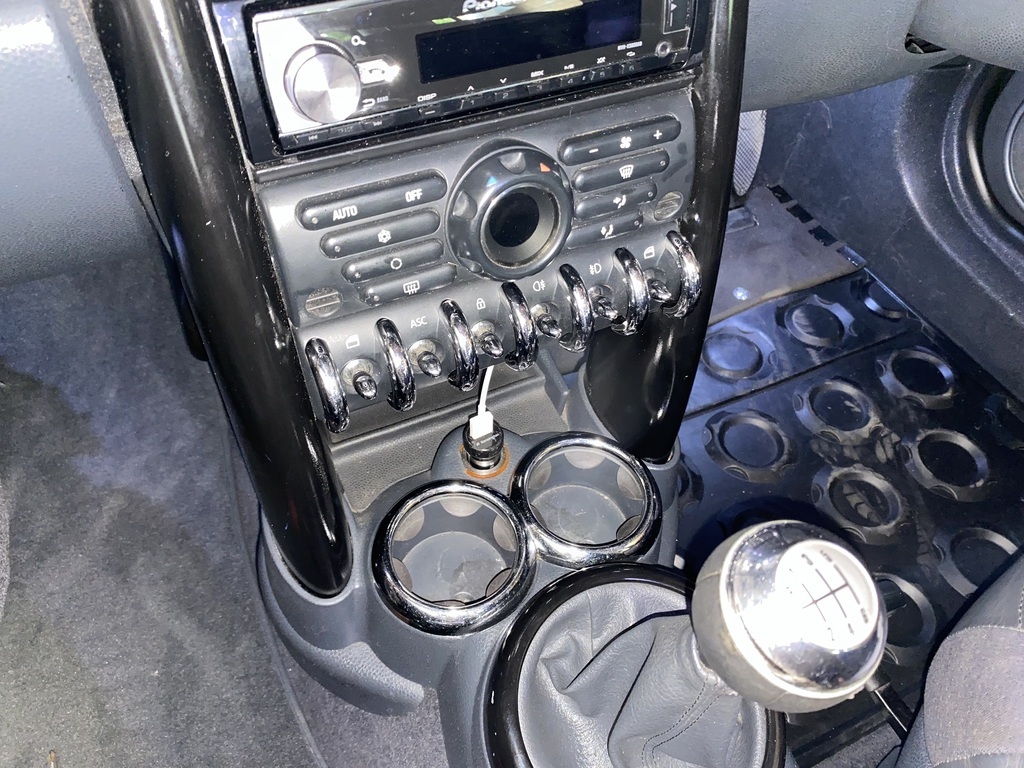 And finally, I removed the cable ties that were securing the radiator and fitted the correct plastic clips. Win. 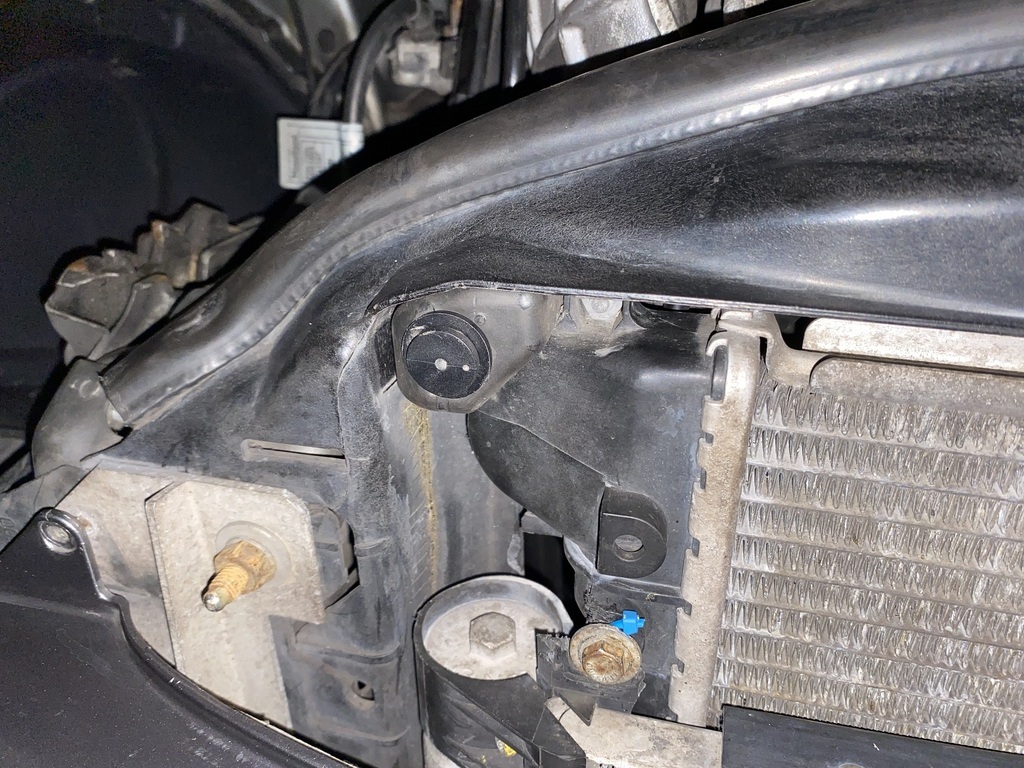 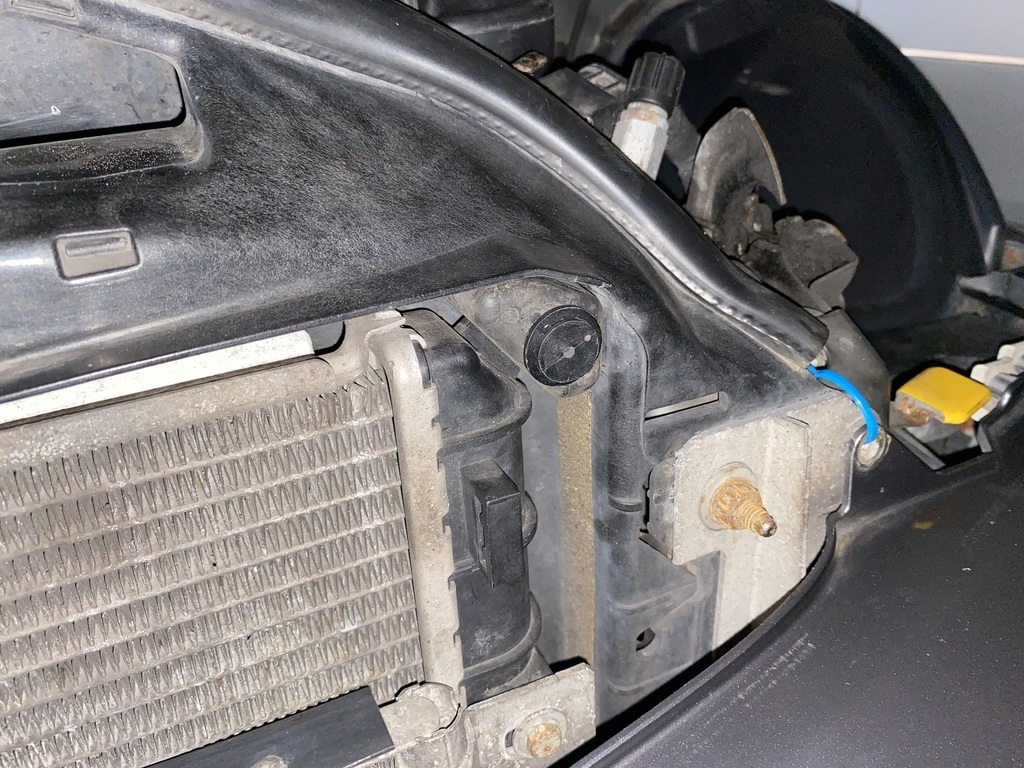 |
| |
|
|
tubthumper
Part of things
Posts: 586
Member is Online
|
|
Jun 12, 2022 18:46:10 GMT
|
Unrelated to my Cooper, this story was going round the R53 Facebook page earlier this week. The registration number A1 is currently fitted to a Cooper S (R56). £3k car with a £500k number plate! There's an interesting story behind that plate and it's current owner.Worth a Google. |
| |
|
|
|
|


 Good news first, I bought a little Matchbox model of a grey 2003 R53 Cooper S.


