goldnrust
West Midlands
Minimalist
Posts: 1,887
|
|
Nov 10, 2022 16:55:05 GMT
|
Tuned engine is a big thing in the 500 world. Even most of the rivet counting types don’t seem to mind a bit of engine tuning. I guess that’s to be expected when you start with 12.5 / 17 hp (model depending). Tuned engines don’t have to be that expensive horrido. For a start clones of Davide Cirone’s engine are for sale on the website of the guy who builds it for Davide, for €8600, so quite a bit less that £12k www.dangelomotori.it/prodotto/motore-completo-800-cc-per-fiat-500-f-l-r-e-fiat-126-depoca/It’s worth pointing out that the engine Davide Cirone uses is very highly tuned, essentially everything aside from the crank case is an aftermarket part including the head and billet crank, basically as far as you can take the standard 2 cylinder without serious engineering of things like OHC conversions. You’re also talking what is essentially a turn key solution, and all the ancillaries add up too. That exhaust is £1k on its own. I'm sure you could spend the same and much more on most engines tuned to the same level. Just chances are they’d make more than 60hp when done. Haha. If you want to do it yourself, then there’s lots of parts out there and most are pretty cheap. As paul Y mentions, one short cut to some more power is to fit a 126 engine, that can bump you up to 650cc, and up from 17hp to 24hp. The standard 500cc engine cases can be modified to take 650c or 595cc barrels and pistons or 540cc pistons and barrels will drop straight in. A set of barrels and pistons is £300-350. After that there’s a range of cams out there, from mild to full race, for about £200. That with a larger carb, from a 126 or various other options, will see you revving out higher than the standard 4700rpm and making more power that way. Larger intake valves are another common mod. There’s only 2 to change so that’s not too expensive. The stock crank limits you to around 6000-6500rpm due to its 2 bearing design it will break if you Rev it any higher. But keeping to a safe 6000rpm, your 650cc engine with cam, bigger intake valve, bigger carb and a better flowing exhaust should see you in the mid 30s hp. I believe to get much more you need to look at more capacity, which normally involves a stroker crank, which if it’s a steel forged item will also allow you to rev the engine higher and get you towards the numbers like Davide’s engine. The 500 is Italy’s Mini, so they do lots of racing and there’s endless performance parts out there. Would you like a 6 speed sequential to go with that tuned engine? There’s lots of videos online from the hill climb / slalom races that seem to be popular in Italy. There’s a class for 500s / 126s where they use the standard 2 cylinder engine with a 700cc limit, other than that there seems to be all kinds of wild mods! As kevins mentions, bike engines is another route. With the car only weighing 480kg, it’s quite suitable for a bike engine. I’ve got two engines with mine, the plan is to make one half decent one out of the pair to get me out on the road, and then use the left overs as the basis for something with a bit more go… if only there was a way to force more air into the engine. That would make up for the lack of revs on the stock crank wouldn’t it…. |
| |
Last Edit: Nov 10, 2022 17:06:35 GMT by goldnrust
|
|
|
|
|
|
|
Nov 10, 2022 16:57:17 GMT
|
|
There was one in street machine with a rover V8. You drove it from the back seat. Had a 10 inch prop shaft 🙂
|
| |
|
|
|
|
|
Nov 10, 2022 17:52:39 GMT
|
|
Two more options, both likely to be expensive (and one of them way out in left field):
a) A Steyr-Puch engine. Lovely flat twin thing, fitted to the 500's Austrian cousin. Also found in Häflingers. And designed by Ledwinka Jr;
b) Another flat-twing thing... Panhard. I admit this was mentioned to me in a conversation with another (older) car nut like, forty years ago, but it seems it was a thing, back in the day. I wonder what's the going rate for one in BT/CT "Tigre" spec?
Best of luck with the project!
|
| |
|
|
|
|
|
Nov 10, 2022 20:39:50 GMT
|
Two more options, both likely to be expensive (and one of them way out in left field): a) A Steyr-Puch engine. Lovely flat twin thing, fitted to the 500's Austrian cousin. Also found in Häflingers. And designed by Ledwinka Jr; b) Another flat-twing thing... Panhard. I admit this was mentioned to me in a conversation with another (older) car nut like, forty years ago, but it seems it was a thing, back in the day. I wonder what's the going rate for one in BT/CT "Tigre" spec? Best of luck with the project! The Steyr-Puch motor was also used in the AC Invacar. Not that we're exactly knee deep in those any more. Though the Panhard motor is around 60hp from memory, though the idea of using a Steyr or Panhard flat twin brings to mind the BMW boxer bike engine, as occasionally fitted to 2CVs. It would certainly physically fit the space. I suppose somebody has done it. I saw one fitted with a Fiat 850 motor once. Even that went almost entirely under the engine lid. Goldenrust - that's a lot less painful than I remember. I'm sure I found an 85hp unit somewhere that was just shy of 13k euros, but 60hp for 6800 doesn't actually seem all that insane. (for a given value of insane...) |
| |
|
|
goldnrust
West Midlands
Minimalist
Posts: 1,887
|
|
Nov 20, 2022 21:37:40 GMT
|
horrido I think the engine you're thinking of with 80 odd HP for €13k is on the same website, haha. Cisitalia both those engines are certainly interesting! The Steyr-Puch flat twin was available as a 650 with a factory 43hp at one stage, more than any of the factory tuned Fiat parallel twin variations. Plans for the moment involve sticking with the stock engine. I wanna just see what it was meant to feel like from the factory, and to learn the crash gearbox first. When I am ready for some tuning then they start in such a slow state of tune (just 35hp per litre), there's a lot an amateur like me should be able to do at home and have fun trying ot get more out of it. The engines are cheap and common enough to try some experimental stuff without worrying too much if things go wrong! Things have been progressing nicely over rather past few days, I've been working through my boxes of mechanical parts, nice to have bits to be working on in the comfort of the shed on a blustery damp autumn evening. With the front kingpins and uprights sorted in the pervious update, I could now assemble the brakes, with blasted and painted backing plates, new wheel cylinders and new shoes. 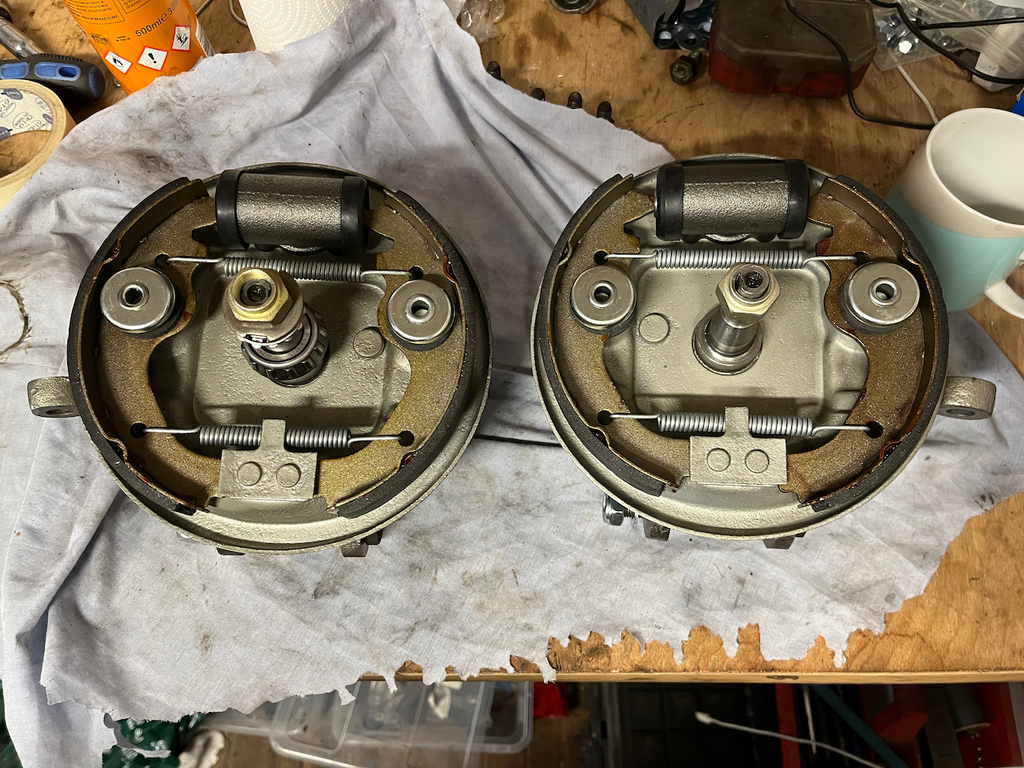 Before fitting the new wheel bearings into new drums and getting this little section finished off. 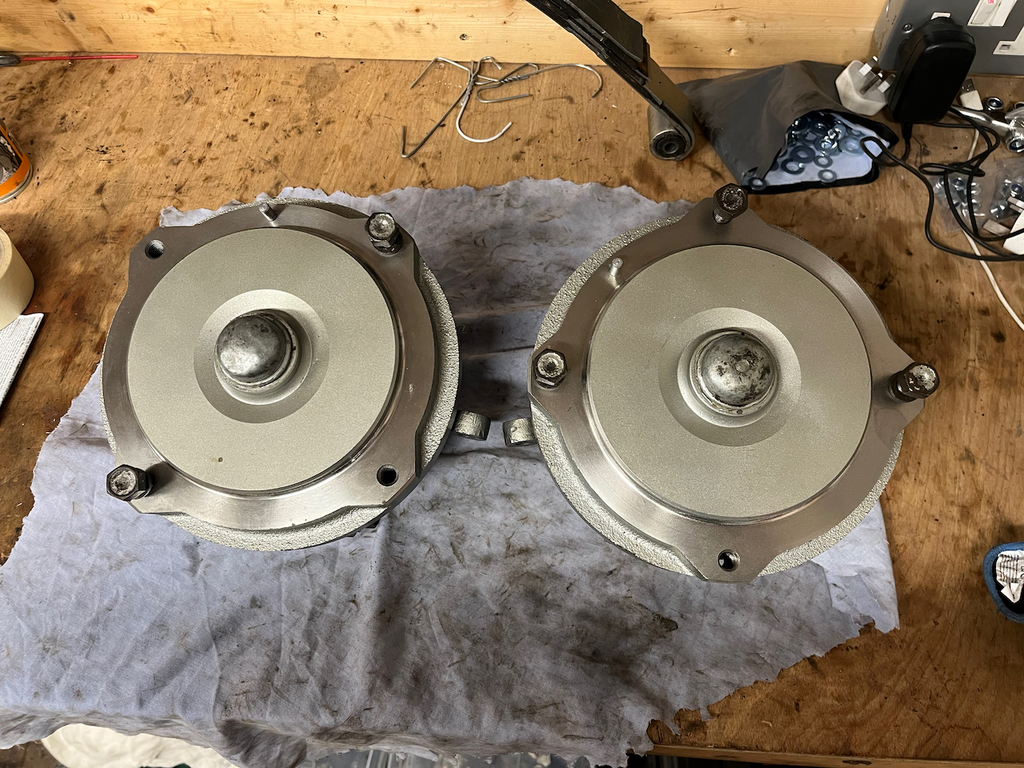 Getting the drums on was a bit of a challenge! I presume the new shoes are just a fraction big, I spent ages fiddling about repositioning the self adjusters and trying to centre the shoes in order to get the drum on with no luck. In the end I filed 1/2 a millimetre or so off the end of each of the tangs on the shoes where they go into the wheel cylinder and then I was finally able to squeeze the drum on. The steering box was next, it was a big greasy mess as can be seen in the previous update where I had all the parts on the bench, but after some clean up it wasn't looking too bad. 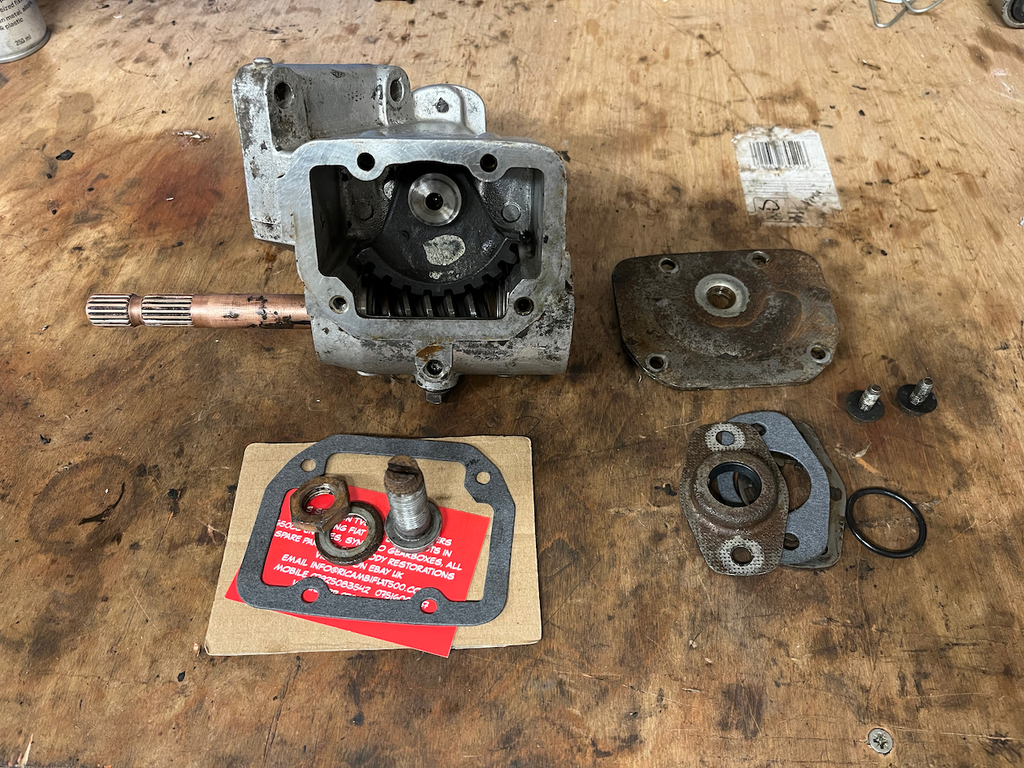 My plan was to do a full rebuild on it, but the castlated plug that adjusts preload on the input shaft bearings was firmly seized. I bought a special tool for it, and the tool destroyed itself before the nut moved, that was after copious amounts of heat and penetrating oil. So yeah... that's not coming out without risking damaging of the main casting. Luckily the input bearings felt fine with no play, and I was able t clean it out, replace all the seals, paint it, fill it with fresh oil and adjust it for a nice smooth action with no play. If it's done 57 years without the bearings developing any slack, then I think it will do a few more yet! 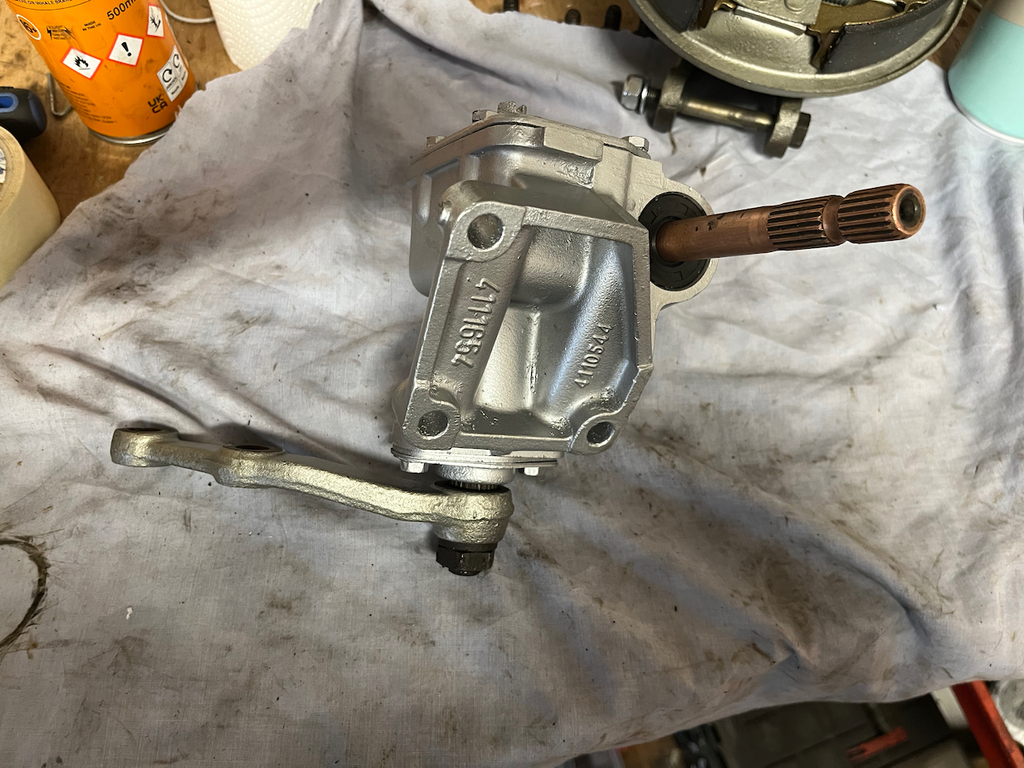 That basically covers all of the front end steering, suspension and brakes, excluding the bits that will be replaced e.g. track rod arms, so time to start on the rear!
|
| |
Last Edit: Nov 20, 2022 21:51:10 GMT by goldnrust
|
|
goldnrust
West Midlands
Minimalist
Posts: 1,887
|
|
Nov 20, 2022 21:49:40 GMT
|
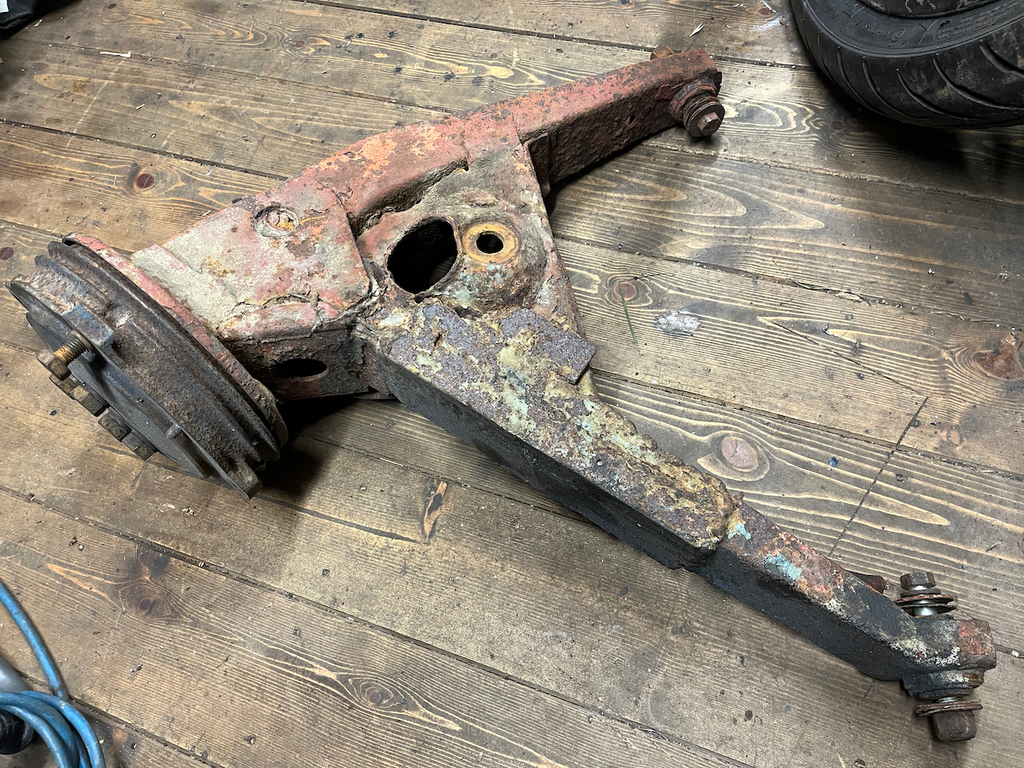 The original rear arms are not in a good way. Some seriously dodgy plating work going on and some major rust. Also, these lovely reassuring wheel bolts, looking like the are only moments away from snapping with thread stretch like that! 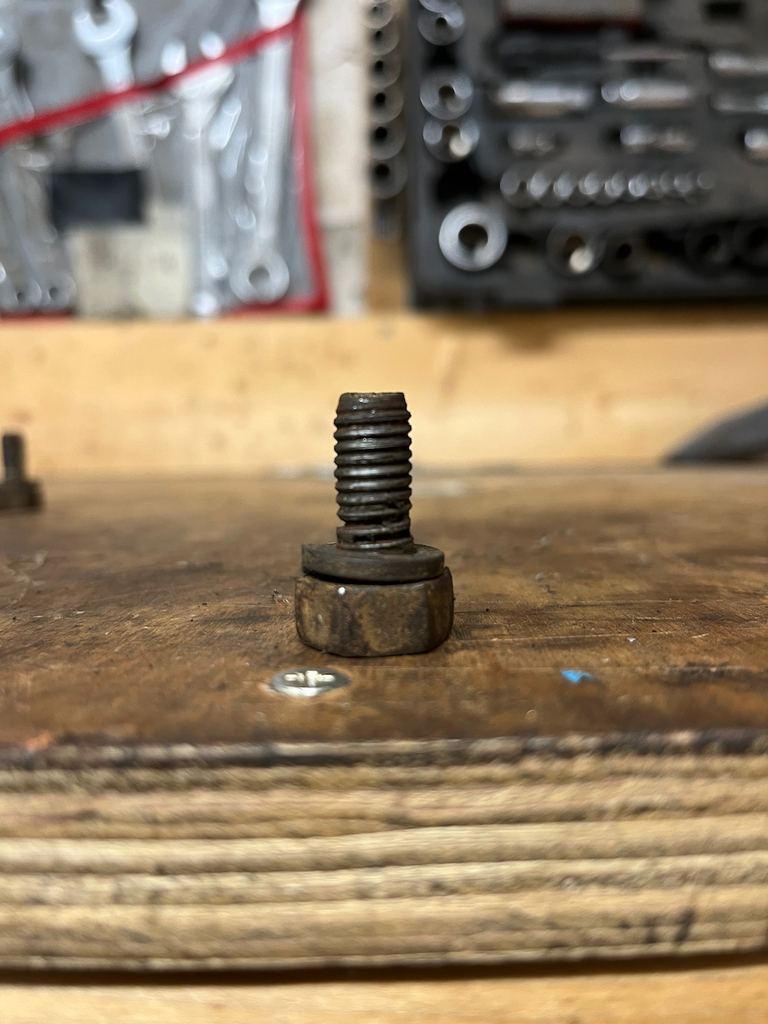 So most of this will be going in the bin. This is all that was worth saving (and this handbrake arms will be swapped for new in the end also)... 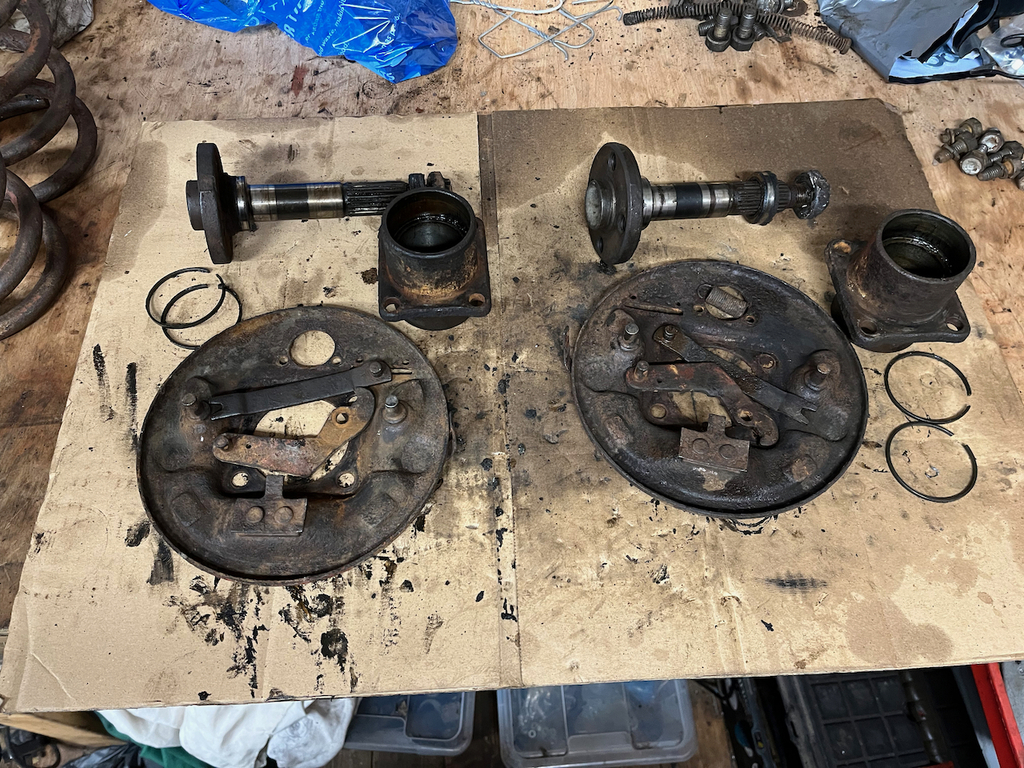 And then after some cleaning, blasting ,wire wheeling and painting those parts are looking a bit better. 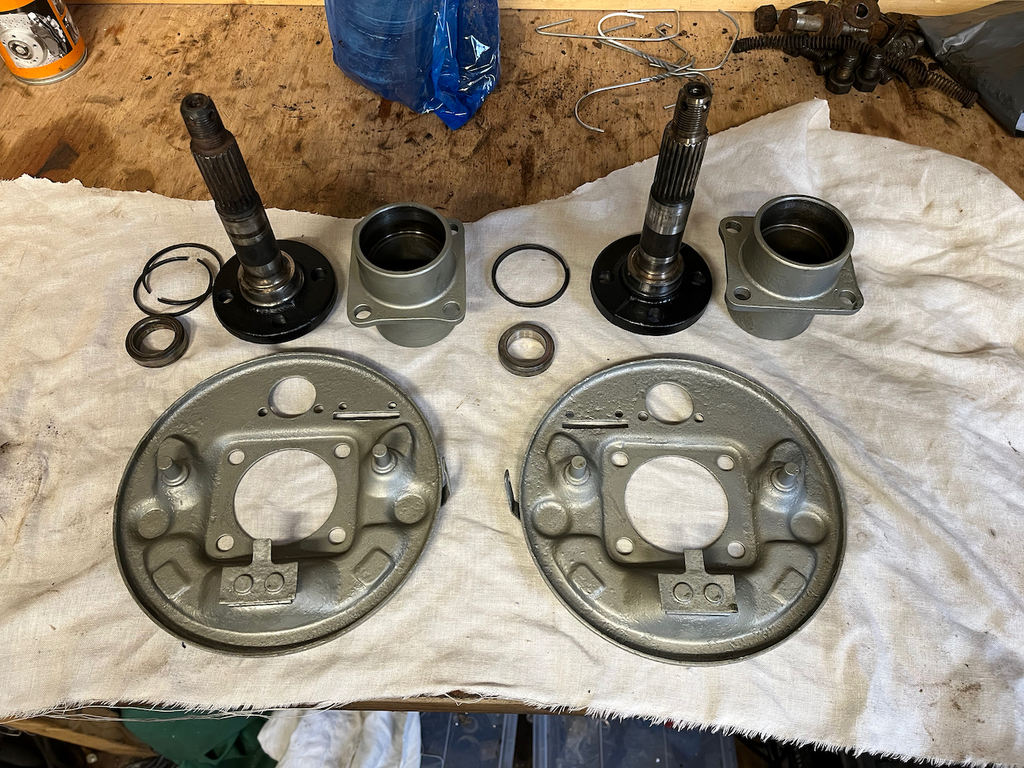 I didn't buy rear wheel bearings with my last parts order, an oversight, so I put these bits to one side till I'm ready to make another parts order and had a rummage in my box of bits waiting ot be restored. The pile is getting much smaller, especially with the big suspension and brakes bits out of the way, but there's still a bunch of fiddly bits to deal with. 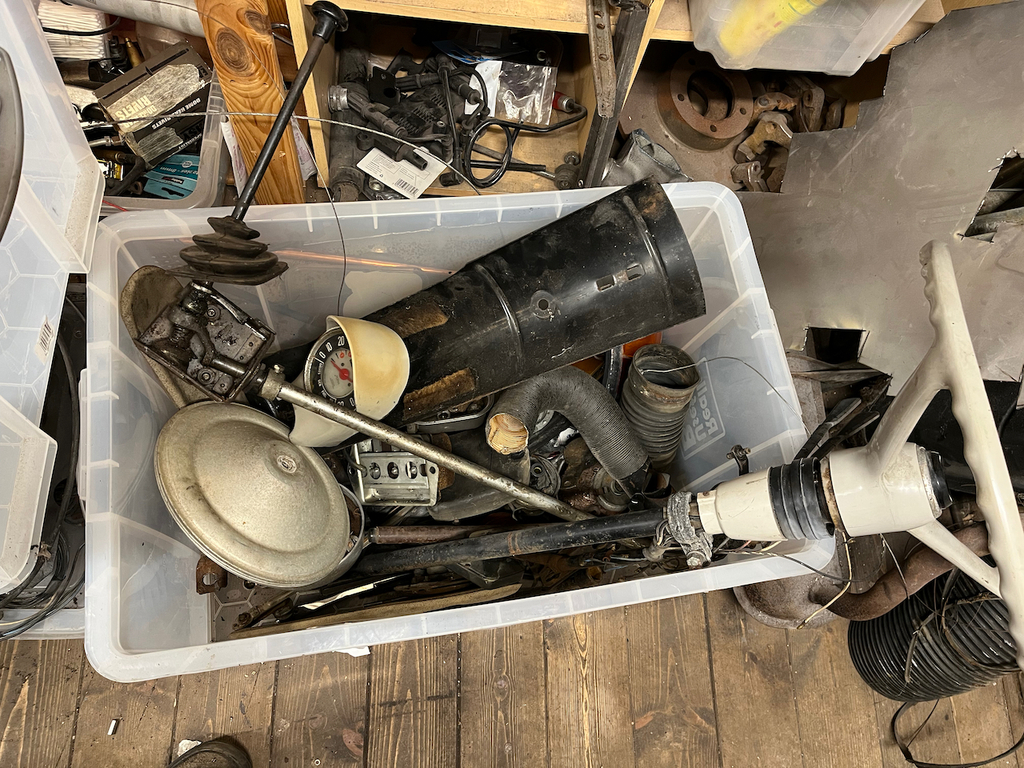 This "lovely" custom clutch pedal stop caught my eye... 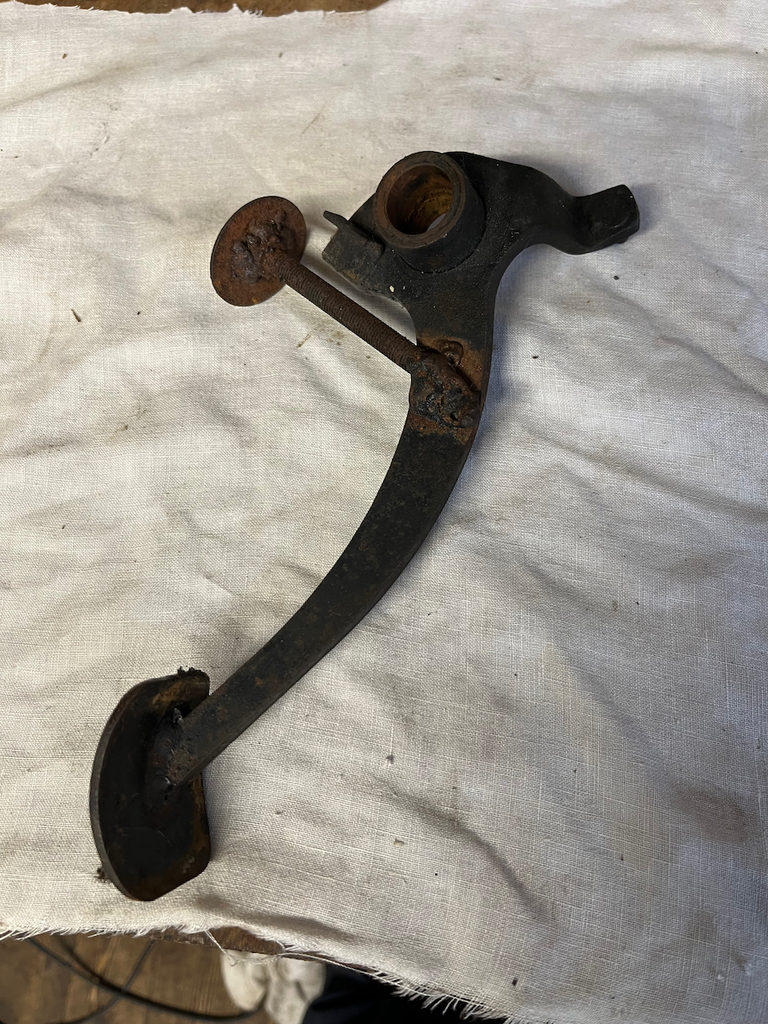 .. and so the pedal box was the next item for clean up. I went to town polishing all the pivot points, a trick I learnt from classic motorbikes, it can make a surprising difference to pedal/lever actions once they're loaded up with some force. I figure anything gain I can make, no matter how small, will help make the most of any power the brakes will have! 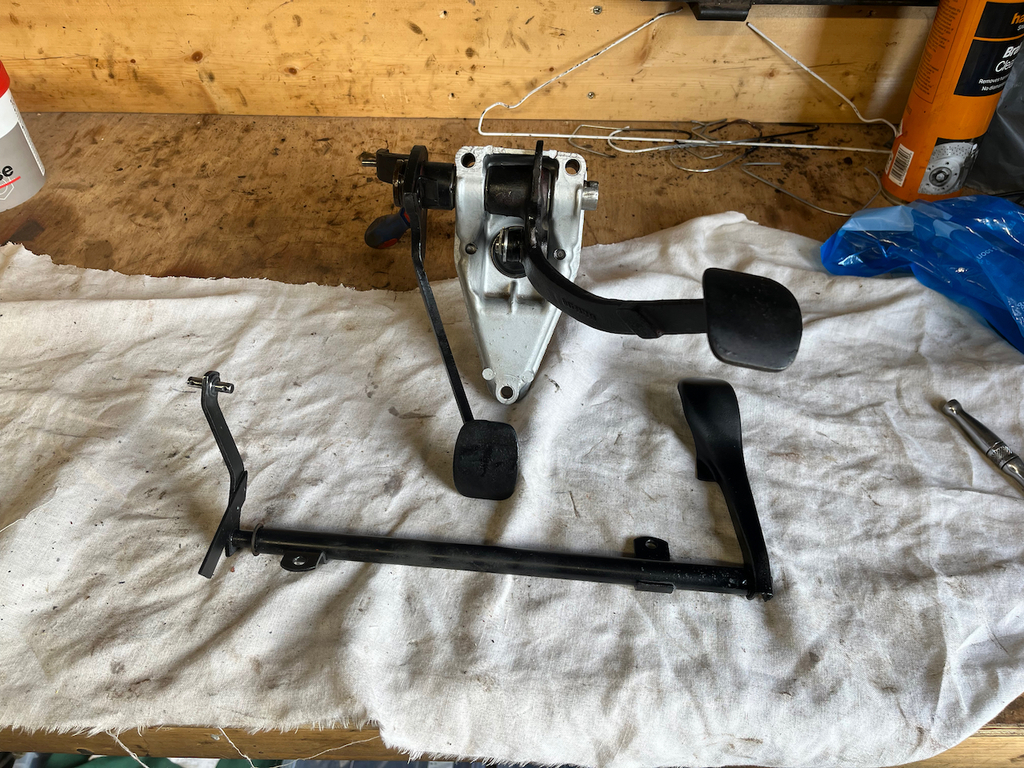 I also stripped and cleaned up the gear shifter linkage. I didn't go to town on there paint as it's 90% hidden, but again where it slides on bushes its polished and the corrosion and old grease is gone so it should have a nice smooth action. 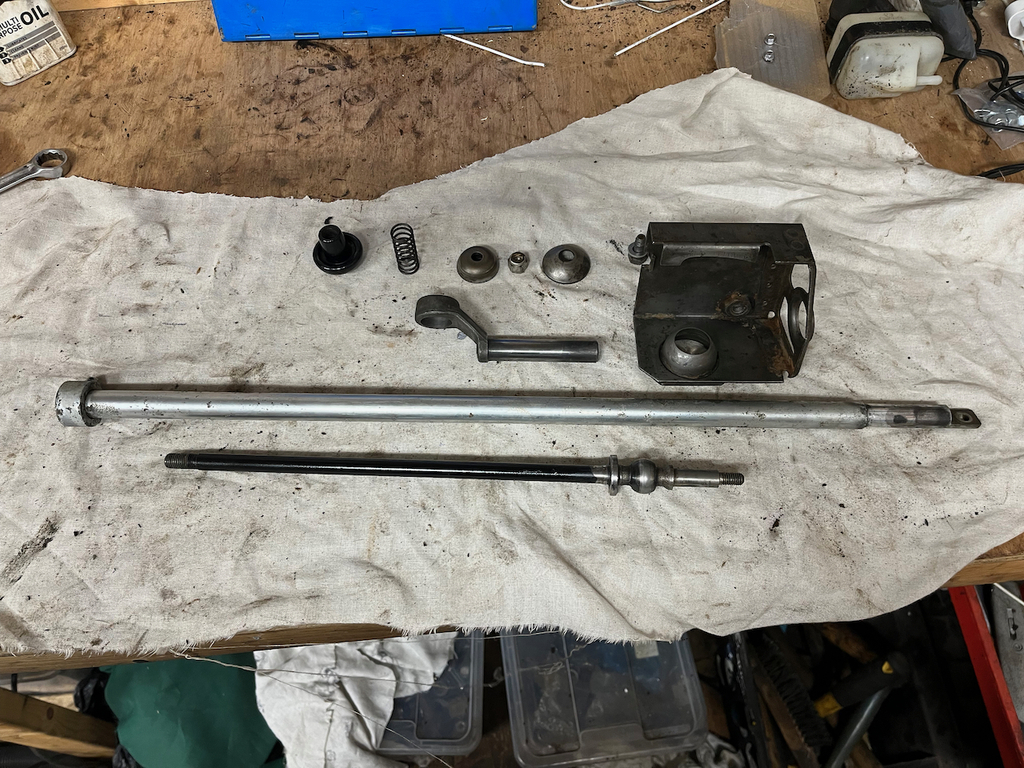 I think the last 'mechanical' components that box are the handbrake and the wiper motor assembly, the rest of it falls more under the category of trim / cosmetics. Still I will work my way through the pile cleaning things up and then it's probably time I should get back to sanding the body work... so I think I'll start looking at the gearbox instead! hahaha. |
| |
|
|
|
|
|
Nov 20, 2022 22:56:58 GMT
|
Really enjoying the updates that you have been making, your updates are always very informative. If you are interested in watching a restoration of a Fiat 500 from Australia, Howard Astill has a YouTube channel and has done a Fiat 500. www.youtube.com/@astilldesign Warren |
| |
|
|
|
|
|
|
|
|
This is a great thread, I am facing the depths of a full resto on an early 500 Nuovo and am always looking to learn how others have done it.
|
| |
More vintage bikes than cars
1959 Fiat 500 Nuovo America
|
|
goldnrust
West Midlands
Minimalist
Posts: 1,887
|
|
|
|
Thank you Tylerman . '59 is an early one! I saw your pictures in metalshapes thread, looks like you've got a fairly big job on your hands there, but they are lovely little cars to work on. So yes, working on cars... what have I been up to these past few weeks I hear you ask? Picking up where we left off, I was continuing to potter on with some of the smaller mechanical bits. The handbrake was looking a bit crusty. 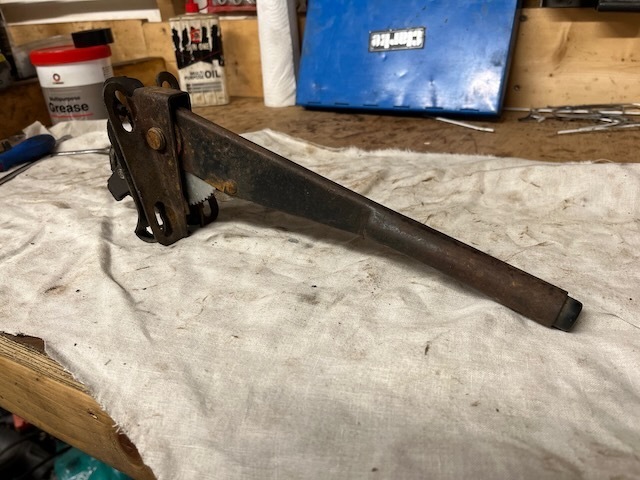 So thats got pulled to bits... 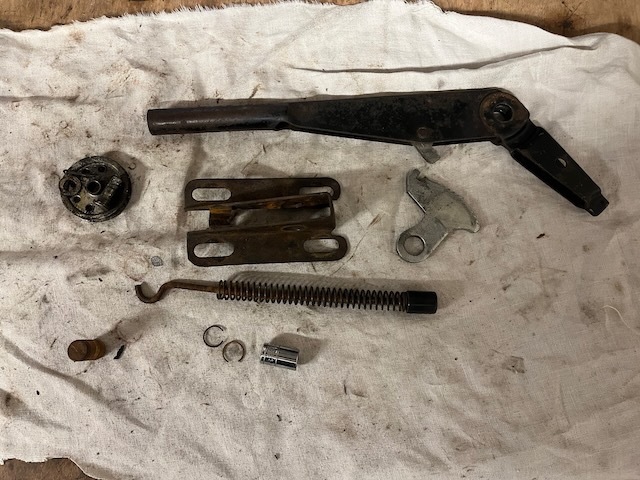 ... before cleaning, polishing of sliding surfaces and a quick lick of paint. 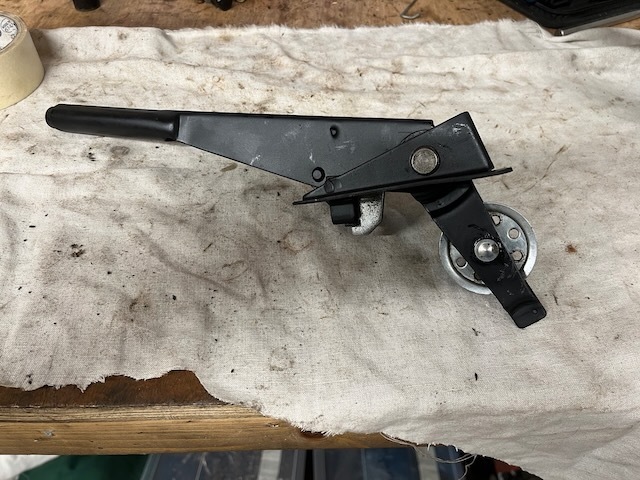 The windscreen wiper mechanism got the same treatment. 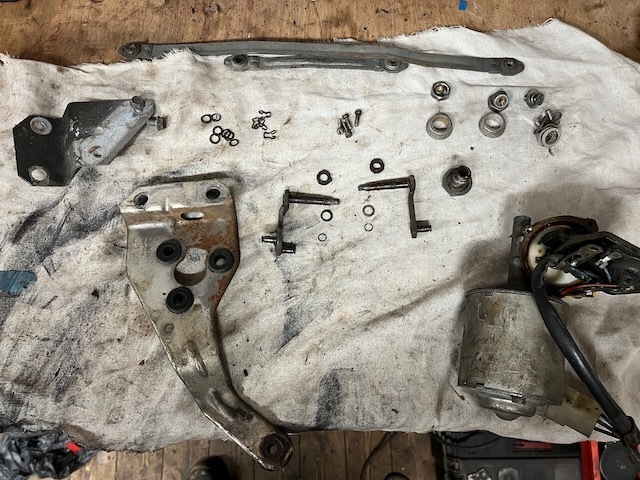 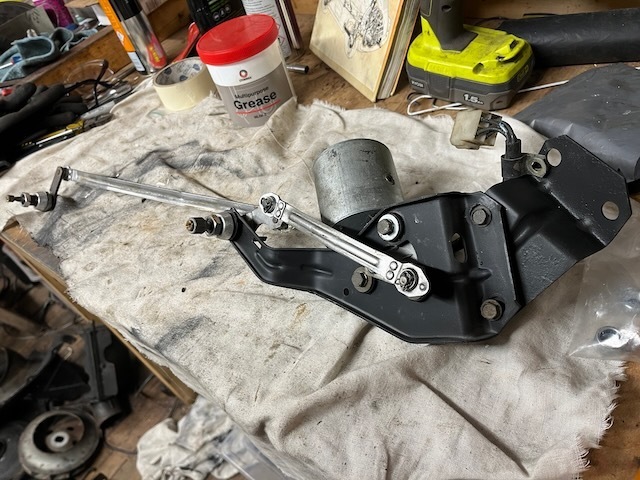 And that essentially brought us to the end of the mechanical bits in my boxes of part!. I did have the fuel tank on my list at this point but one quick look inside... 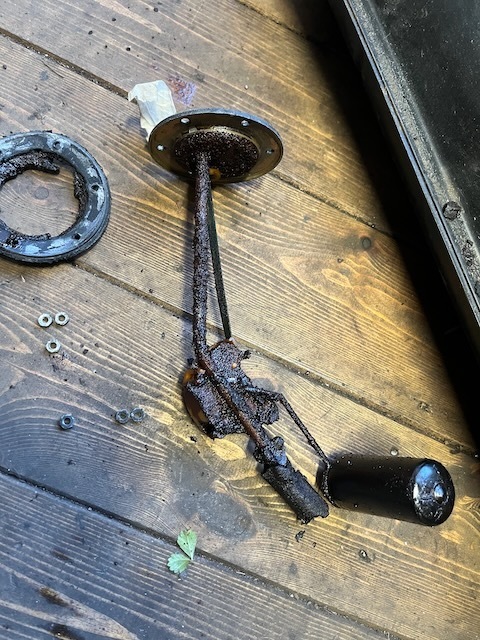 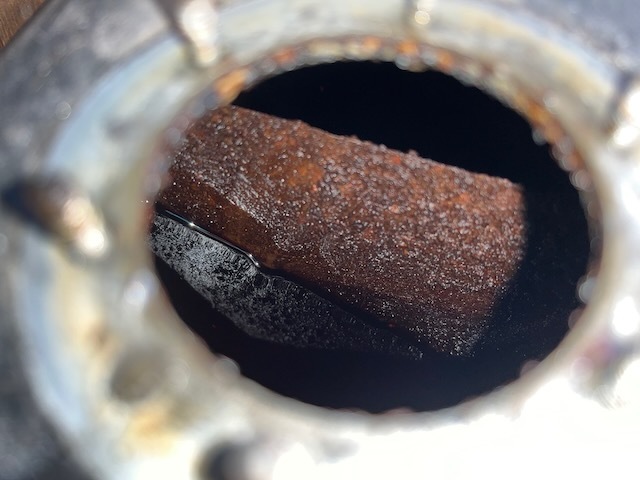 ... and I decided that it would not be in my best interest to do battle with trying to save this one. If, like my Daimler, a new tank was north of £500 then I'd be out there now trying to clean it before using a fuel tank liner to seal it and trying to clean and repair the sender. But a new 500 fuel tank comes in around £150, so I think I'll just put my old tank I the scrap pile and move on! As I still had a couple of weeks till I would be able to make my next big parts order, I thought I'd make myself useful and start on some of the more cosmetic cleanup needed on some parts. I started with the hub caps. They needed a good wash first, with hot soapy water and fine wire wool getting the heaviest corrosion off. After that a bit of Autosol and a buffing pad on the pillar drill made light work of giving them some shine. I did do all 4! 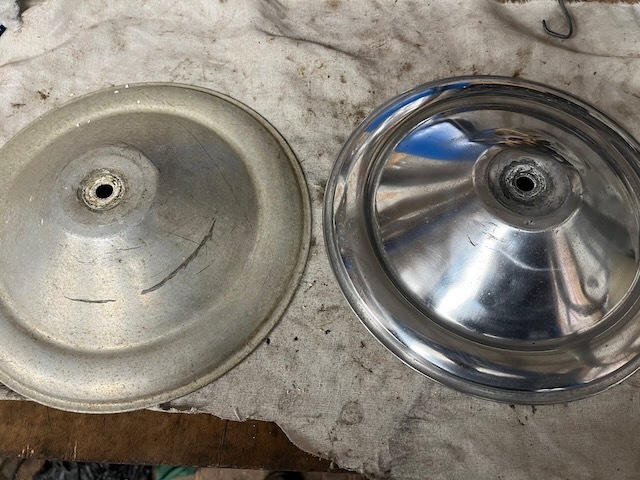 I then turned my attention to the steering column. The steering wheel was covered in a sort of baked on dirt, the best way to shift it again seemed to be to go at it with some fine wire wool, and then polish it back up with some cutting compound. I also painted the column itself and glued my light/indicator stalks. If they do fail I will still be able to operate the switch and then can swap it out for a modern replacement, so I figure its worth a punt on repairing the originals first. I also had a go at the speedo. Again it was covered with baked on dirt and also appears to be sun damaged on the top, with some heavy brown staining. Again wirewool was able to cut through the dirt and then I polished the plastic back up with compound. The speedo itself comes apart easily enough and the staining on the dial cleaned up surprisingly easily. Here's a before: 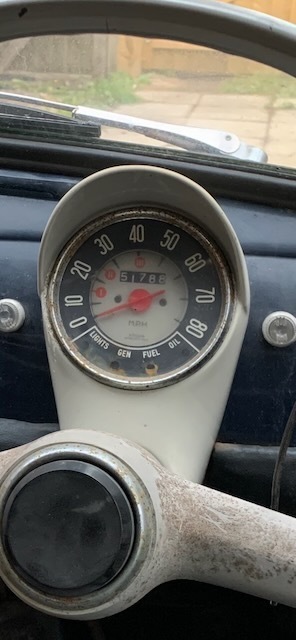 And after: 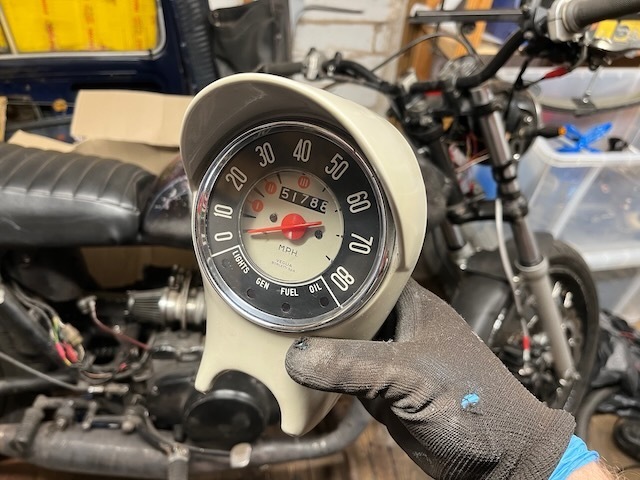 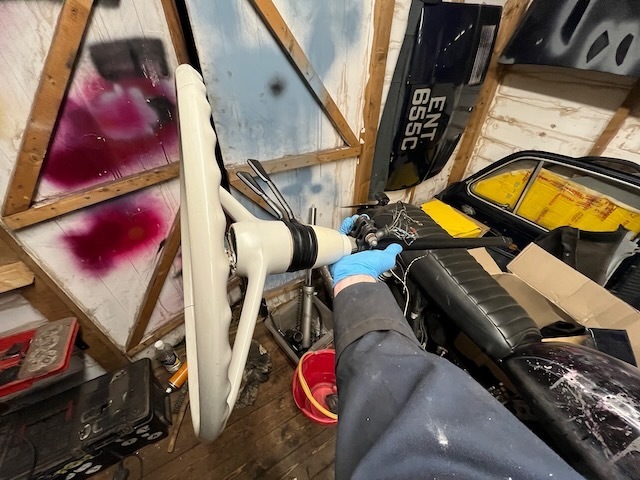 At this stage I had been paid and could order the next pile of bits. This meant I could continue to put the rear suspension back together. The rear wheel bearings were first on my list. 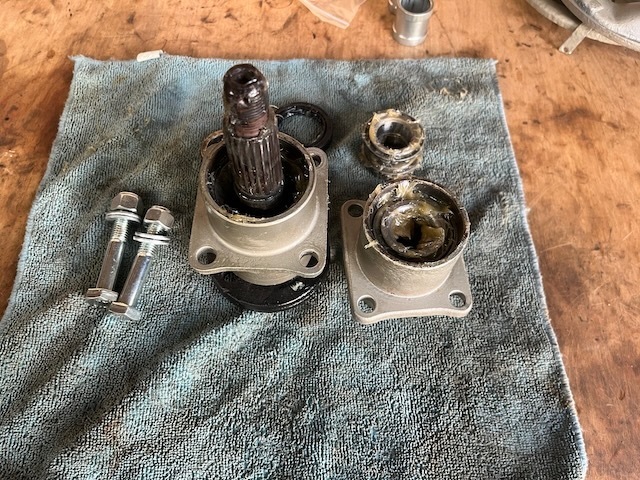 All fairly straight forward. Getting the preload right with the crushable spacer took a little careful work but was not as bad as I was expecting from some of the things I'd read online! Next I could assemble the rear brakes. 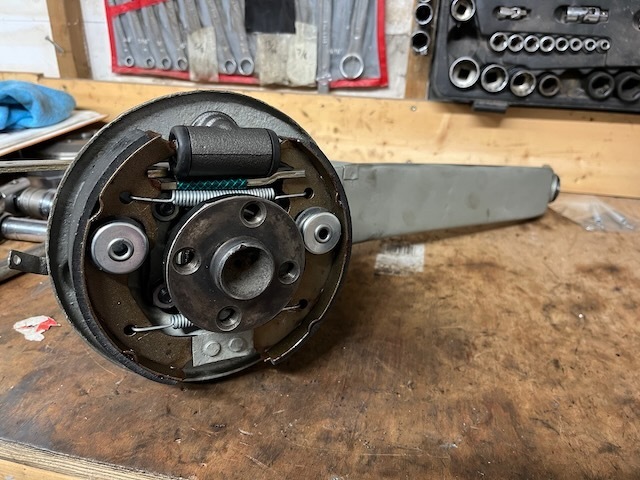 Like the fronts even with the shoes fully retracted I struggled to get the drums on. But this time I found a clearer problem. The pins on my original handbrake linkage were all seized solid so I had purchased replacements. Comparing the old to the new, one of the new link was approx 2mm longer than the old. 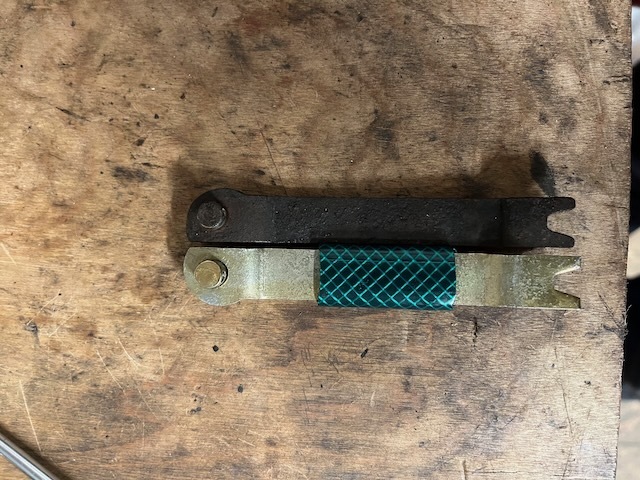 And this was enough to hold the shoes out a touch even with the handbrake arm fully retracted. A little tickle with the angle grinder adjusted my new linkage and now I could get the drums on. 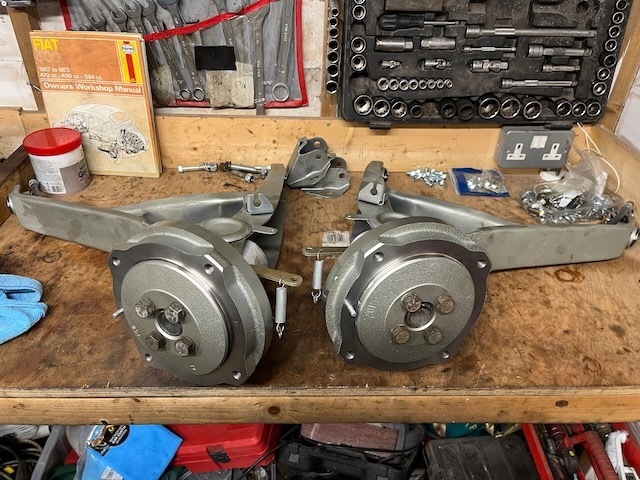 And then my last job on this little assembly was to run a bit of brake hardline from the wheel cylinders to where the Flexi lines mount on the suspension arm. 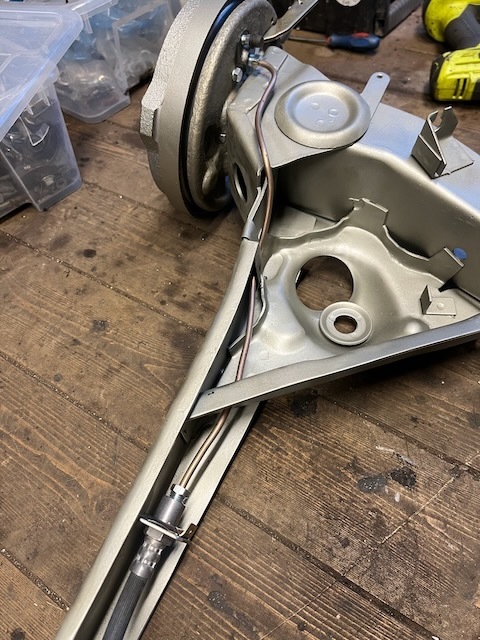 So now I've got a pile of nice shiny mechanical bits cluttering up my shed, and with the underside of the shell now complete, it seemed only logical to start bolting some of them on! Front suspension and steering first. 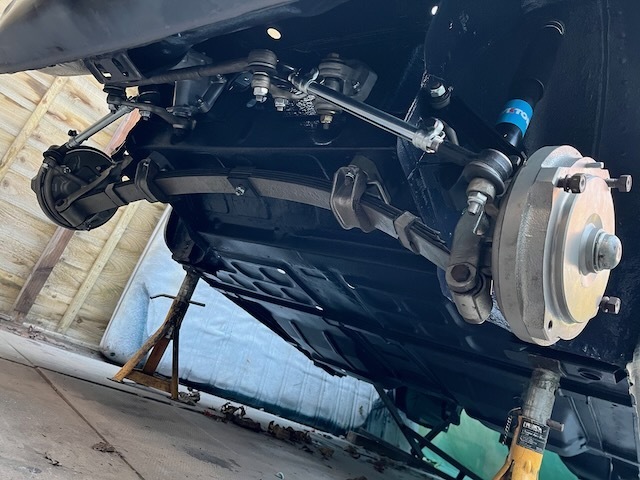 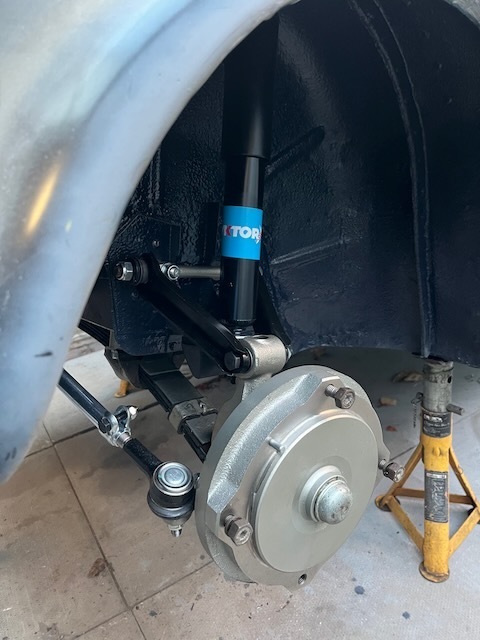 And then the rear suspension (note to self wipe those oily finger prints off! haha). The rear suspension arms should be shimmed to make sure the track width is equal each side, but I'm not finding much information about it online. All my original shims were rusted to bits and these are new arms anyway, so would need different shims I presume. For now I've just used some washers to centralise the arms in the adjustment. A quick check with a tape measure suggests they are probably close enough! 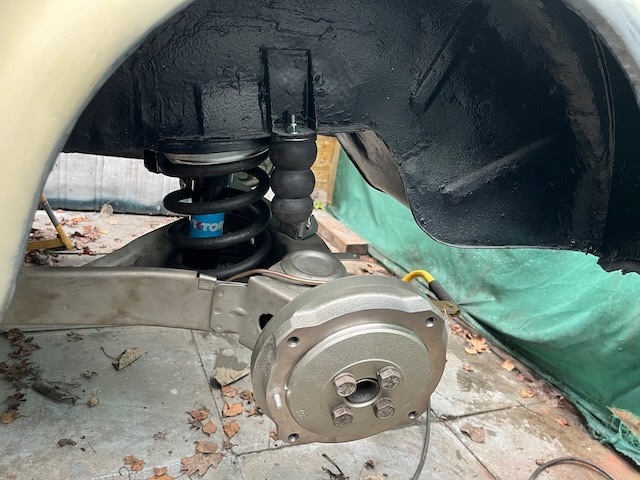 And then, I couldn't not bolt some wheels up. This is the first time the car has sat on its own wheels in my ownership, so quite a little milestone. The wheels themselves will need a clean up and paint and the tyres are definitely going to be replaced bone there car goes on the road, the rear tyres are remoulds which is enough to scare me off using them even if they weren't heavy perished and hard as plastic. haha. 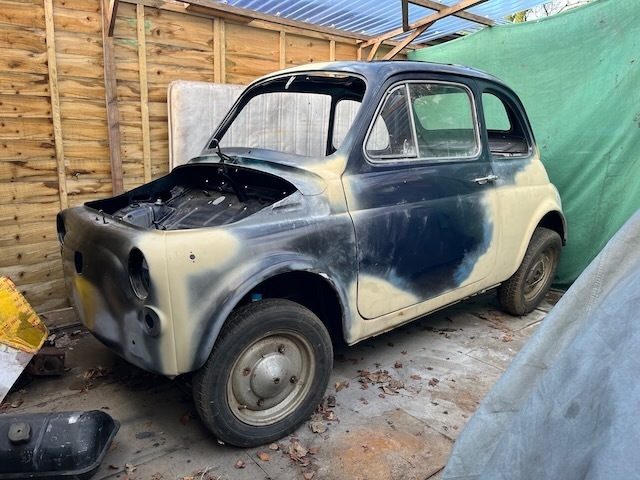 It's sitting a little high... There's still an awful lot of car left t bolt together, not least the engine and gearbox! Given that the weather is not yet really suitable for bodywork, it seemed logical to tackle the engine and gearbox next. By the time I've dealt with them spring should be on its way and I can go back to paint prep and painting before continuing to assemble the car. So let's start wit the gearbox. It's a dirty old thing... 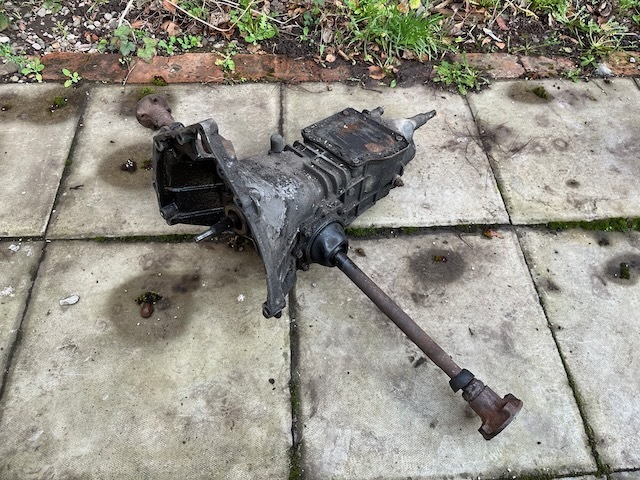 I presume it was a mixture of waxoyl, road dirt and baked on gearbox oil. Either way the engine degreaser spray I'd bought made no dent on it. White spirit and lots of elbow grease had a better result, not perfect yet but plenty good enough for now to get it inside the shed and to not risk dirt falling inside when I open it up. Cup for scale here, its like a toy gearbox! 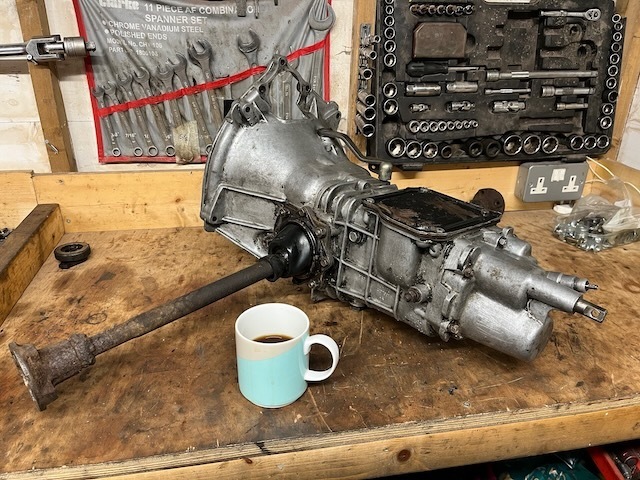 The main job for the gearbox is to replace the driveshafts. A previous owner has decided to weld together what should be a splined joint, not quite sure why?! 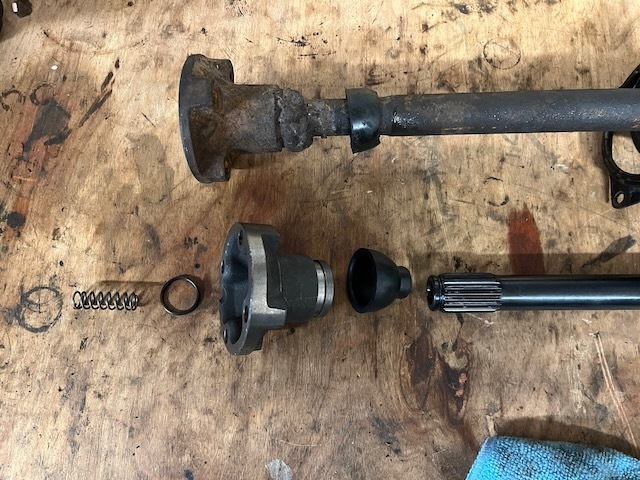 Anyway, new driveshafts seemed a sensible move! It was at this point I realised that replacing the drive shafts is not as straight forward as it sounds, the differential needs to come out and be split in half to extract the shafts. This is as far as I've currently got. 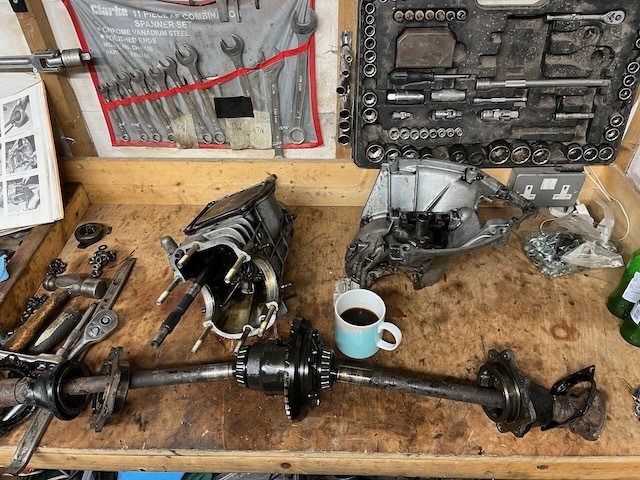 With the gearbox this far apart I'm not 100% confident that the input shaft turns as smoothly as I'd like, theres a bit of a bearing noise. So I suspect I will be digging into the rest of the gearbox after all! Thinking of the gearbox, can anyone confirm if the gear selector should be sprung to hold the stick upright when in neutral? I can select all 5 gears (4 forward + revise) fine by moving the selector on the gearbox, but when in neutral there's no resistance to twisting the selector / moving the stick side to side. I would expect it to be sprung to the centre? As I'm going to be pulling the box apart anyway to look at the bearings I'm sure it will be obvious if there's a broken spring or anything, but never hurts to ask! |
| |
|
|
glenanderson
Club Retro Rides Member
Posts: 4,357
Club RR Member Number: 64
|
|
|
|
|
I can’t remember for sure, but I don’t think there’s any springing to the gear lever action and, like a VW Beetle, the reverse lockout is on the lever mechanism not in the ’box.
I helped a mate fit a later 126 gearbox to his 500, and I remember that the driveshafts were too long. Rather than dismantle the gearboxes to swap the shafts over we just chopped them down. This resulted in them failing, one after the other, in pretty short order. A similar application of weld got him running again long enough to pass it on to a new owner. My excuse is that it was 35-odd years ago and we knew no better. 🤣🤣
|
| |
My worst worry about dying is my wife selling my stuff for what I told her it cost...
|
|
|
|
|
|
|
|
|
Great work on the little fiat. Mine has no side to side centering on the stick just like glenanderson suggests. So I guess that is how they are meant to be. |
| |
|
|
goldnrust
West Midlands
Minimalist
Posts: 1,887
|
|
|
|
Thanks glenanderson and sebastiaan hopefully that means there’s nothing broken with my gear box then! Haha. I can confirm the reverse lock out is on the gear lever in the cabin. I can also confirm this is a 500 box, no synchros, and 500 shafts so no need for shenanigans like those you describe. Haha. Like you say though, I’m sure this bodge ewas done at a time where the car was essentially worthless and where the price of new shafts and potentially paying a garage to rebuild the gearbox to fit them wasn’t financially viable. |
| |
Last Edit: Jan 7, 2023 19:44:22 GMT by goldnrust
|
|
|
|
|
|
|
"The main job for the gearbox is to replace the driveshafts. A previous owner has decided to weld together what should be a splined joint, not quite sure why?!" The splines on the driveshafts are a known failure point. They can strip... Since you cant take a shaft out without splitting the gearbox ( which you can do on 600 and 850 boxes ), the box has to come out of the car to do it. Welding the flange to the shaft is a quick and dirty fix... Edit. Also, back in the days when these cars were still plentiful in junkyards, it was not uncommon to swap a 126 engine & box into a 500 ( only 600cc at the time ). And because the rear track on a 126 is a bit wider, some people would just chop off a bit off the driveshafts instead of doing it right and use 500 shafts. That would loose about 1/2 of the outside splines, so the weld fix would happen ( before or after the splines failed...) But that doesnt apply to your car, because you have a 500 box. As a extra piece of useless trivia, I've been told that the synchro rings in the 126 boxes generate a tiny little bit of drag in the gearbox. Which then reduced the performance of the car. I've never been able to check if this is true, but I figured a 500 doesnt have enough power to potentially give any of it away, and double clutching was easy...  Great progress on the 500, very nice to see.  |
| |
|
|
goldnrust
West Midlands
Minimalist
Posts: 1,887
|
|
|
|
As a extra piece of useless trivia, I've been told that the synchro rings in the 126 boxes generate a tiny little bit of drag in the gearbox. Which then reduced the performance of the car. I've never been able to check if this is true, but I figured a 500 doesnt have enough power to potentially give any of it away, and double clutching was easy...  One of the things I’m very interested to experience with the 500 is what the non-synchro box is like to use. I’ve never tried one before. You see a few videos online where people seem to fly up and down the box with no trouble and plenty of others where people almost seem scared to change gear and struggle, and these are supposed enthusiasts! I like the idea of keeping to its pure simple concept, and I’m happy to put a bit of time into getting the hang of the gearbox, so knowing it’s marginally more efficient is another reason to try and stick it out with the 500 box instead of ‘upgrading’ to a 126 box! Haha. |
| |
|
|
|
|
|
|
|
|
The Fiat 500 box is lovely, precise and quick shifting.
I've owned quite a few cars after my first 500, and as far as gearboxes go it set the standard for all of them...
|
| |
|
|
glenanderson
Club Retro Rides Member
Posts: 4,357
Club RR Member Number: 64
|
|
|
|
|
Double-declutching becomes second nature in no time if you have enough mechanical sympathy to understand what it is you’re asking the mechanism to do. Given your evident mechanical abilities I’d be astonished if you couldn’t master it. It’s simply a case of matching engine and road speeds for the gears you want to mesh.
Once muscle memory has set, enough miles in the car will see you only using the clutch to pull away.
|
| |
My worst worry about dying is my wife selling my stuff for what I told her it cost...
|
|
teaboy
Posted a lot
   Make tea, not war.
Posts: 2,125
|
|
|
|
|
I’m not going to try to teach you how to change gears, I just want to say that I think you are doing a fantastic job with the Giacosa masterpiece.
|
| |
|
|
goldnrust
West Midlands
Minimalist
Posts: 1,887
|
|
|
|
Well that’s a glowing review of the gearbox experience metalshapes! My gold standard to compare gearbox shift feel to, is the one from my Lancia Fulvia. I would describe that much as you have the 500 box, so I have high hopes! I’m sure I’ll get the hang of it glenanderson. I’m used to rev matching downshifts on motorbikes, and understand the physics going on inside the box so I’m sure I’ll get to grips with it. That said, it’s been over a year since I last drove a manual at all, so the bigger question will be whether I remember to clutch in when coming to a stop… hahaha. Thanks teaboy  |
| |
|
|
|
|
|
|
|
|
From my experience, the quicker you shift it ( going up ) the nicer it gets.
You just have to time your pedal movements with a very quick flick of the wrist.
And double clutching on the way down.
Don't be afraid to hurt it, its built to stand up to the massive flywheel on a 500 engine ( with its potential of a lot of stored energy).
But never try to put it 1st if the car is moving.
That will do damage... ( which is typical with cars of the period when 1st and reverse used some of the same gears )
|
| |
|
|
goldnrust
West Midlands
Minimalist
Posts: 1,887
|
|
Jan 14, 2023 23:04:48 GMT
|
As we're in the middle of some gearbox chat at this point on the thread, now seems as good a time as any to do an update on the gearbox! Had I realised what a pain it was to change the drive shafts when I purchased them, maybe I'd have been more inclined to stick with the bodged originals, haha. Anyway, last time the diff/bearings/shafts assembly was out of the gearbox. The centre of the diff is two sections bolted together, this both allows for adjustment of the spider gear mesh via shims (more on that later) and that once separated you can slide the driveshafts out of the centre out of the diff. It was only when I'd got it in two halves that I realised that my welded up shafts woulds have to be cut before they could slide out. I wish I'd realised this when the box was fully assembled as I didn't have to be quite so careful of metal filings getting about the place! Anyway, with that sorted it was fairly straight forward to slide the old shafts out, slide the new shafts in and bolt it all back together again. 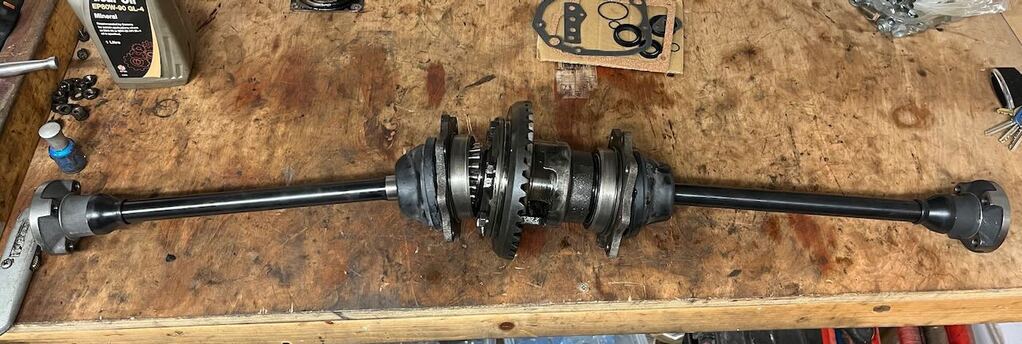 Excellent, apart from the diff now wouldn't turn! It tuned out that somehow the shim or the side gear that rides on the shim, had hung up when I was assembling the diff and not seated properly jamming the whole unit. Once I'd finally figured that out I was able to reassemble it while keeping pressure on the side gear so that it couldn't drop out of place again. Bit fiddly, but glad I noticed now and not later! I had mentioned in the previous post that I wasn't sure if the input shaft bearing was a bit rough as there was some noise. This turned out to be a false alarm, as having moved the gearbox off the resonant table top, then the noise totally disappeared! I think the noise was just the sound of the constant mesh gears turning and resonating through the work bench. I took the inspection plate off the top and had a look around and could find nothing too concerning (aside from comically small gears, finger for scale!) 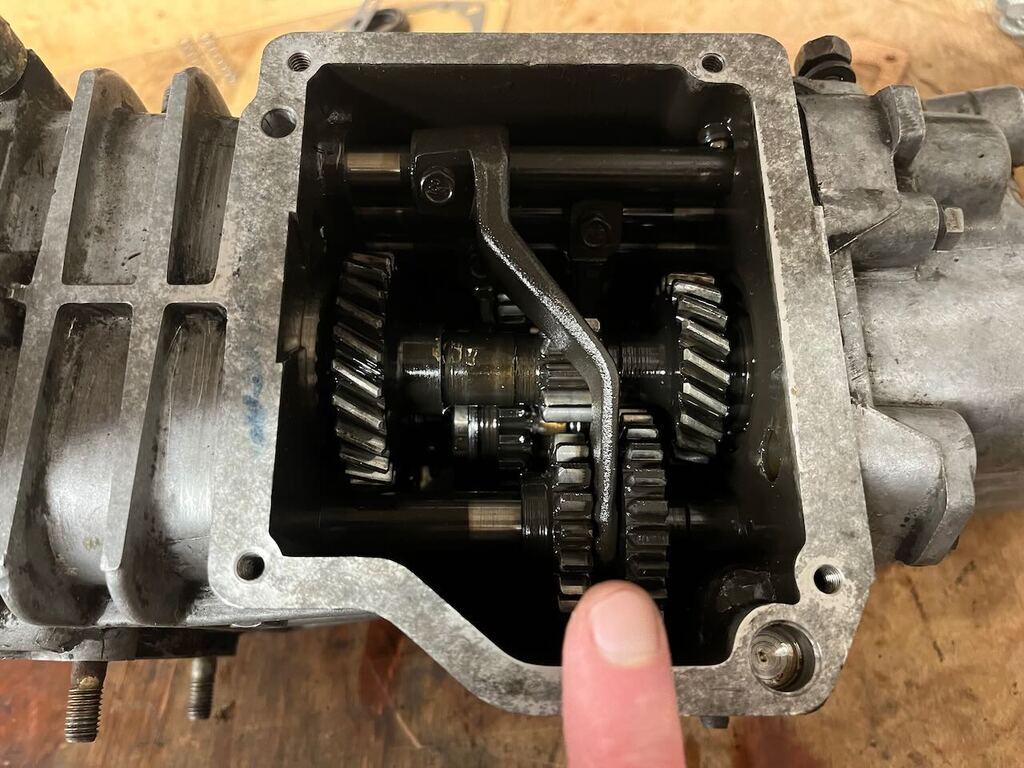 So there was nothing for it but to do a bit more cleaning up of the critical surfaces, where the case halves meet for example, and to freshen up a few of the covers with a bit of satin black paint and to bolt it all back together! 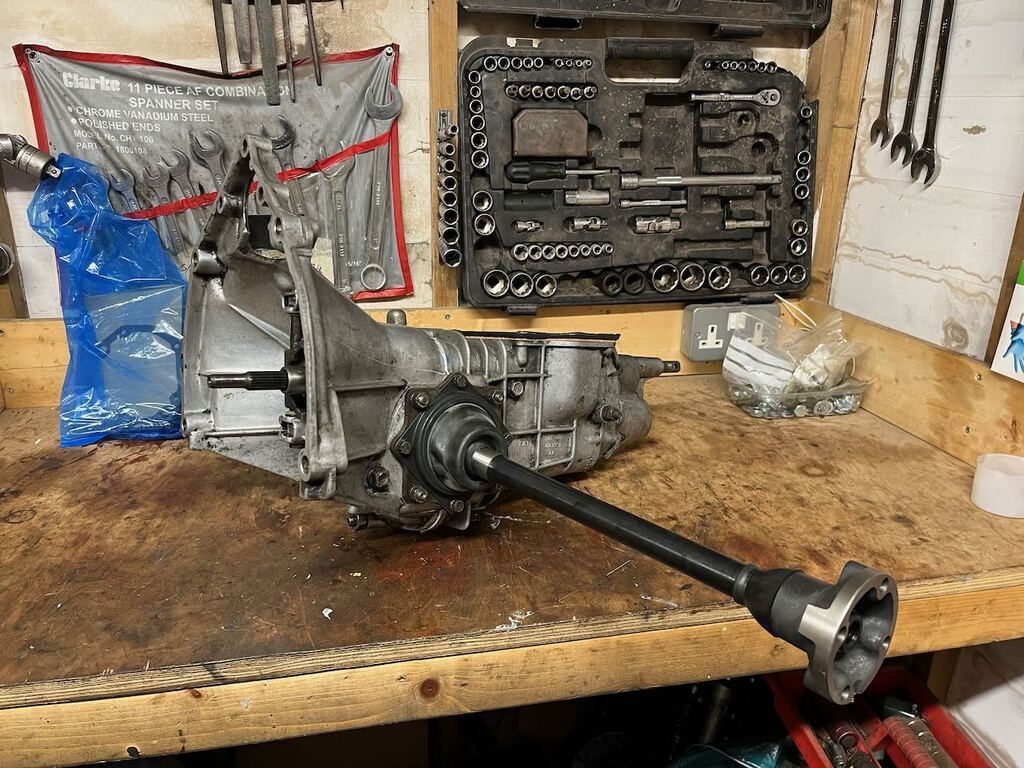 So close, but falling at the last hurdle, I managed to pinch the new o-ring seal on the input shaft seal/bushing holder thing. It might have been me, but I felt the new o-ring wasn't a great fit when I put on and might have been part of the problem, so I measured up and ordered some new o-rings with a slightly smaller ID and will try again. 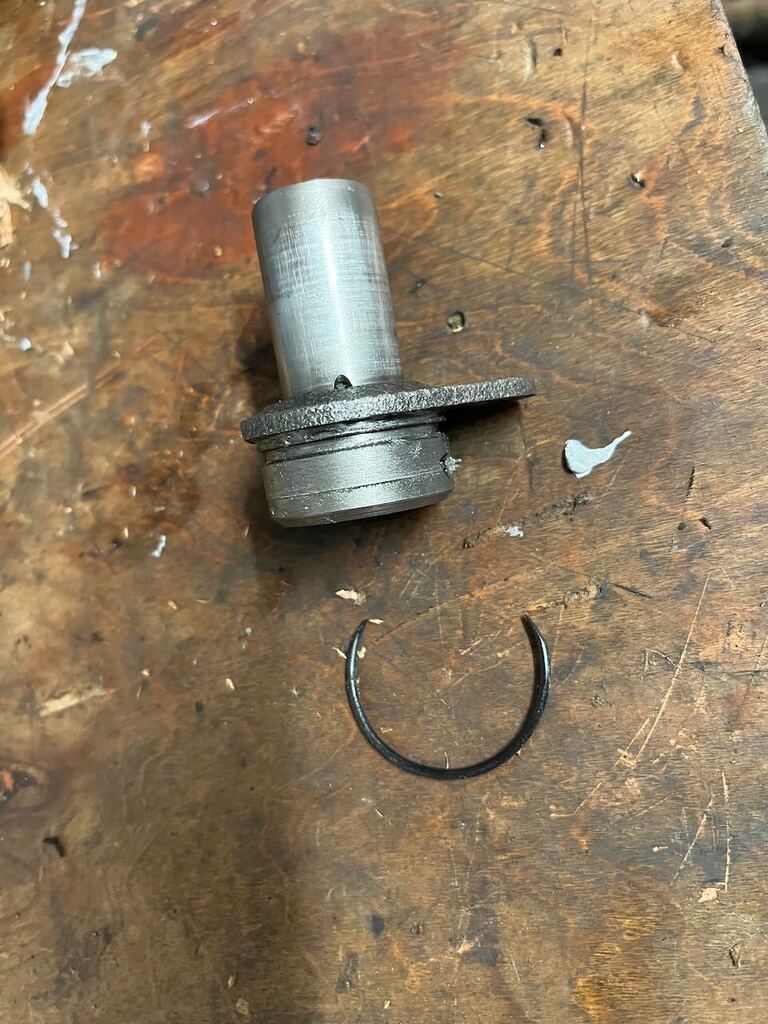 So, presuming the new o-ring goes in without snagging, that should take just 5 minutes, then I can put a tick next to project gearbox and move on to the engine! Thats exciting. I've not dug the engine(s) out of the other shed yet, but in the mean time a bit of back story and a plan; My car came with the original matching numbers engine, which looked fairly complete if a bit rough. But it turned over ok by hand and had some form of compression. The seller claimed it ran when he poured a bit of petrol down the carb and stuck a battery on it. 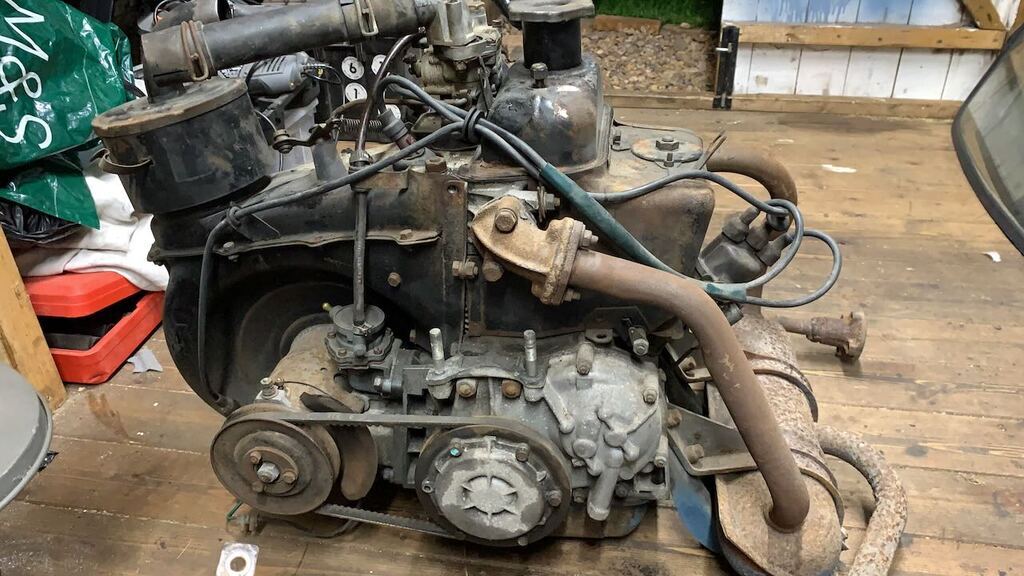 Way back in December 2021 when I was bored one afternoon I decided to investigate a bit further and whip the head off and have a bit of a poke around. 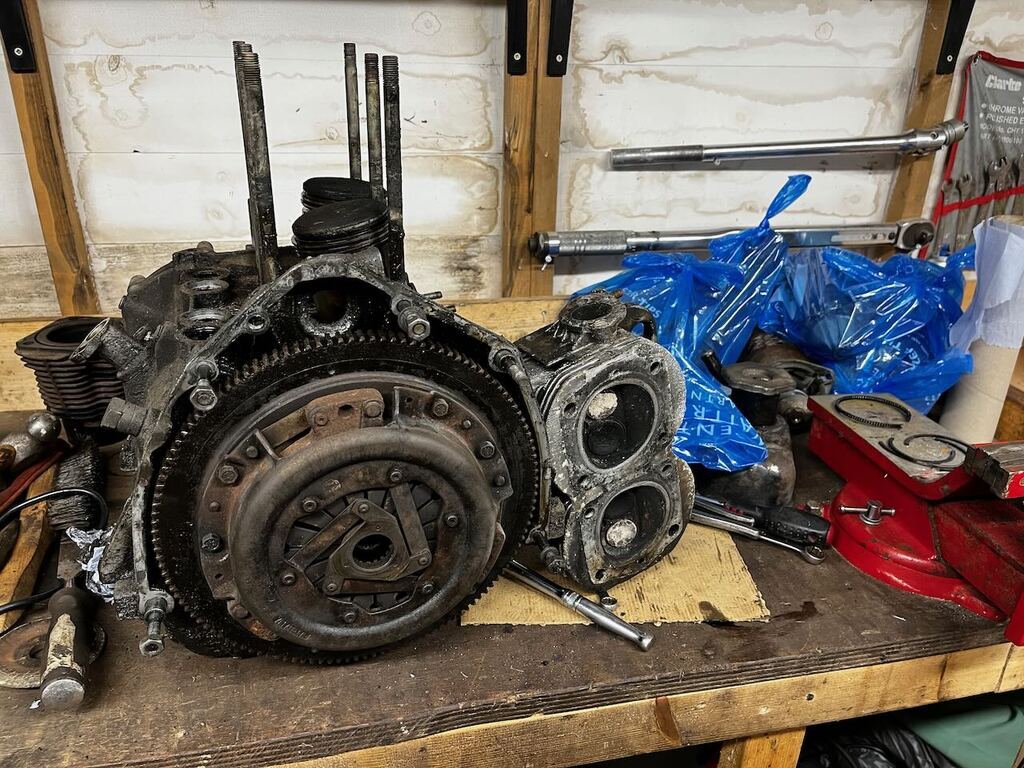 What I found wasn't promising. For a start the bores were scored and the top piston rings fell out in two parts... 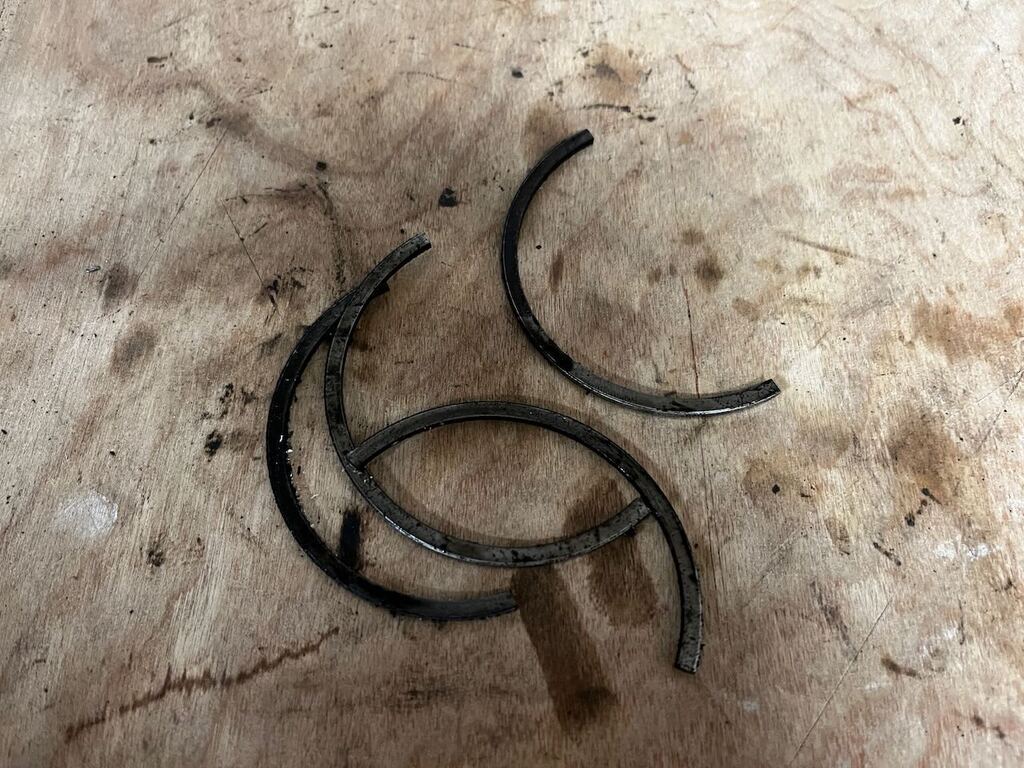 The cylinder head didn't look amazing either, with some possible cracking between the valves which I believe is not uncommon. Anyway, I didn't look too deeply as I knew it wasn't a priority, I just packed up the parts and buried it in the corner of the shed for later. Fast forward to April 2022, and I was browsing eBay when I spotted an auction for a 500 engine just 5 miles up the road which wasn't attracting much attention, it seemed worth a punt, especially if it went for less than the cost of a rebore and pair of pistons for my original. I stuck in a low bid and a couple of days later won it for £80! I was told it was a good running engine when it was removed from the car to be replaced by the usual 650cc 126 engine, but aside from checking it turned over by hand before lifting it into the boot of the Daimler (not a great move as I didn't think about the fact that the distributer was missing when I laid it down and it dumped a bunch of oil in the back of the Daimler...) I've not looked into this any further! Plan A is to go through both engines properly and then see how cheaply I can put together a reasonable standard engine. Best case scenario I can do some cleaning up, a new set of gaskets, a bit of valve lapping, maybe just break the glaze on the bores with a home hone and have a standard engine that I can hit the road with? Then in time (presuming I enjoy driving the car as much as I expect to!) I might look to build up a tuned up engine using my spare engine parts as a basis. If this is not possible, for example if I find the bores are damaged in my eBay engine too, then Plan B is to jump right to a moderately tuned engine. I don't really want to start spending lots of money on standard parts, when performance parts cost essentially the same! I'd be thinking something like a 540cc build (or 595cc depending on the price of having the cases machined) with a cam, bit of porting, exhaust and carb change? Fingers crossed for the cheap option A though, as ultimately that way I'm more likely to get chance to get out and driver the car sooner  I'm hoping to start investigating the coming week so should have a clearer plan soon! |
| |
|
|
|
|


