goldnrust
West Midlands
Minimalist
Posts: 1,887
|
|
Apr 11, 2023 12:16:44 GMT
|
Thanks jamesd1972, ready for summer is indeed the plan! That’s very kind of you eurogranada. I just bumble through in my own way! dikkehemaworst possibly too late, I did not extend the push rod tubes. They did still sit higher than the head and need a bit of squashing to get the head on, so maybe I’ll be ok. I had read of them as a common leak point so as well as fitting new seals I heave each one a smear of RTV. Time will tell if it seals! |
| |
|
|
|
|
goldnrust
West Midlands
Minimalist
Posts: 1,887
|
|
Apr 19, 2023 20:02:07 GMT
|
Not a big update today, but not an inconsequential one either! Today I had a rare day when I was neither working nor parenting and the weather was dry (if rather breezy). It was about good as things were going to get and so I should get on put some paint on the car  Masking up always takes longer than I expect it should, and with a bit of tidying up and cleaning the spray gun out that took me till lunch time. 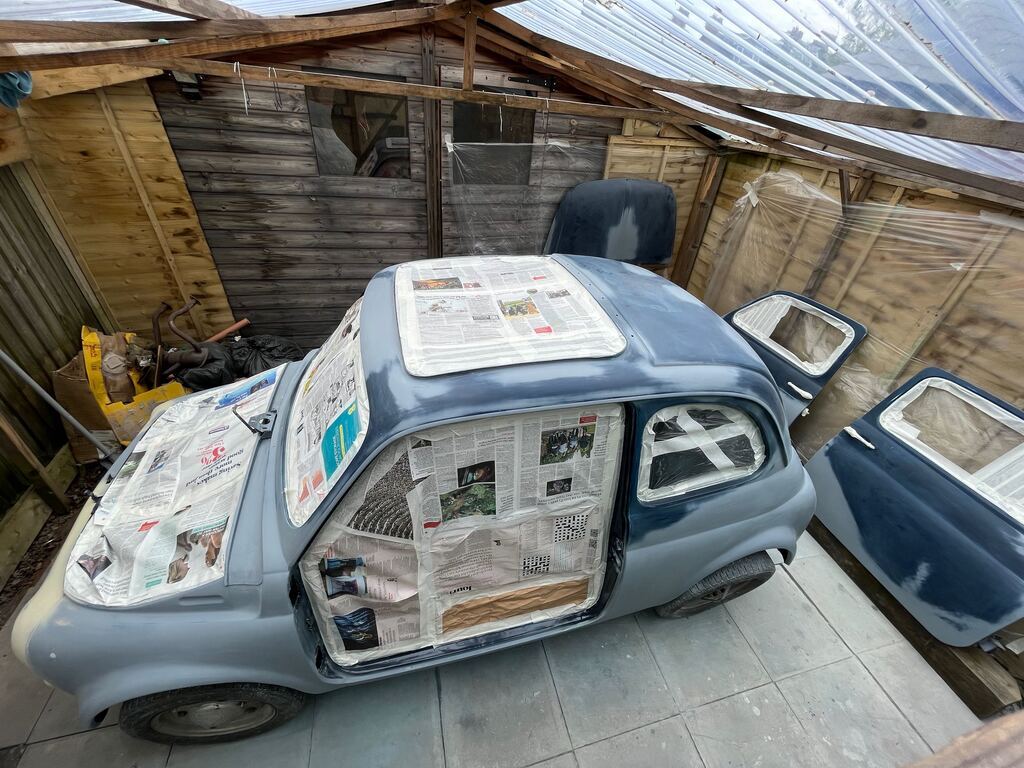 After lunch I got right to it. Ominously there was already a layer of dust / pollen on the car. There are some big trees not far from my carport and the wind was busily knocking the last removing catkins off one of them. Anyway, as I already mentioned I'm not going to get a better opportunity for a while so I wiped the car down again, mixed the paint up and got the first coat sprayed.  Not too bad, no major drama, a bit heavy in a couple of places so I turned the paint delivery down a touch on the gun and gave it a few minutes before getting coats 2 and 3 laid down.  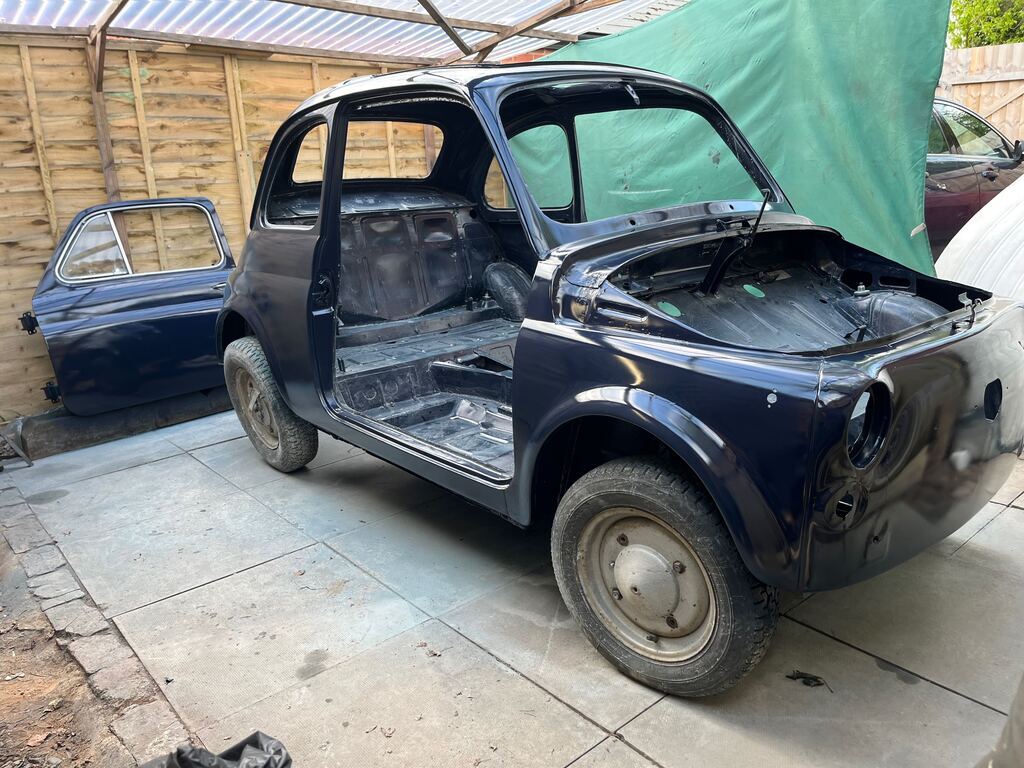 And there we have it, a blue car once again. Overall I'm pretty happy, yes theres a couple of runs and plenty of dust in the finish, but its a single stage paint so in a few weeks will get wet sanded and polished and you'll never know the surface finish wasn't amazing from day 1. The main thing for me was that there were no major disasters! No crazy paint reactions, I didn't drag the air line over any wet paint, it didn't come on to rain while I was in the middle of a coat, etc! It feels like a major milestone in this project to have it painted. I have a big pile of bits that I can start bolting back on to the car, so hopefully with some things like doors on, glass in and a few bits of trim on, this will really start to feel like a car again  |
| |
|
|
jimi
Club Retro Rides Member
Posts: 2,233 
|
|
Apr 19, 2023 20:13:37 GMT
|
|
Looks good to me 😎
|
| |
Black is not a colour ! .... Its the absence of colour
|
|
|
|
|
|
|
|
Thats a huge milestone and it looks great. Well done!
|
| |
|
|
|
|
|
Apr 20, 2023 13:08:39 GMT
|
|
Well done mate. Absolute pain in the bum painting a car like this. There is always some drama. I've been there with the Fulvia and I've ended up re-doing it three times and its still not perfect. Nothing a good cut and polish wont help though like you say.
|
| |
|
|
|
|
|
Apr 22, 2023 20:45:05 GMT
|
Lovely  another great update and milestone on a superb thread from Steve! Always fun to read. |
| |
|
|
|
|
|
Apr 22, 2023 20:58:46 GMT
|
|
Looks great, you must be well pleased with it :-)
|
| |
|
|
goldnrust
West Midlands
Minimalist
Posts: 1,887
|
|
|
|
Thanks guys  |
| |
|
|
goldnrust
West Midlands
Minimalist
Posts: 1,887
|
|
|
|
Ok, so the big push of painting is over, thats a weight off my shoulders, but the car is far from done and I'd really like to be able to use it and enjoy it this summer. So the big push now is to get it put together and to get driving! With that in mind, there's going to be some compromises made on the restoration to get the car back together nice and quick! Mainly with trim and other small details, things that are easily fixed in the future. For example, I can put the old warped and dog eared door cards back in for now, and in the future I can spend the time/money to get a nice set together and its only a 1/2 hour job to swap them over. Those kind of compromises aren't really possible when dealing with the body shell metalwork or paint. Speaking of paint, I did have a couple of details left to paint. I had hoped to hang my doors to paint them, but that didn't work out, so a week or so after painting the main shell I went back and painting the inner edge of the doors where I'd repaired them.  And then to avoid the risk of damage by having them about the shed, it made sense to get the doors and bonnet bolted on to the car. 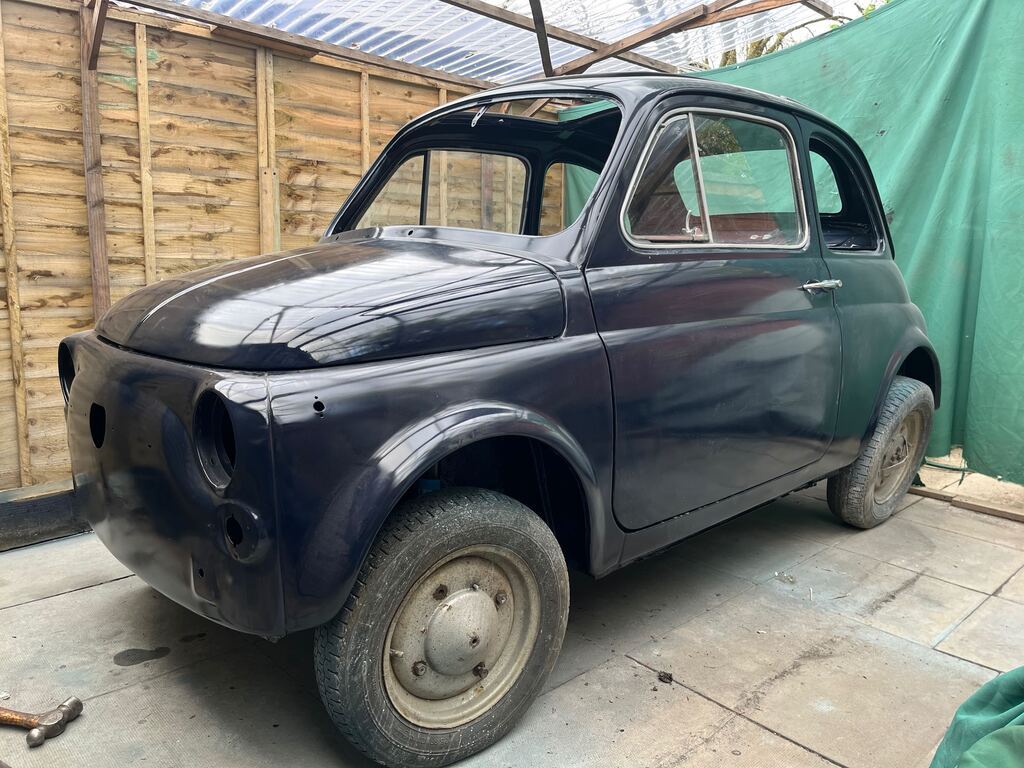 They went on with all new seals and rubber pads and I'm pretty happy with the alignment. The drivers door isn't quite as good as passengers but I can fiddle and fine tune it in the future, it might help once the door seals have settled in a bit and aren't quite so big and fresh. Right now the doors need a hefty slam to get them to latch! 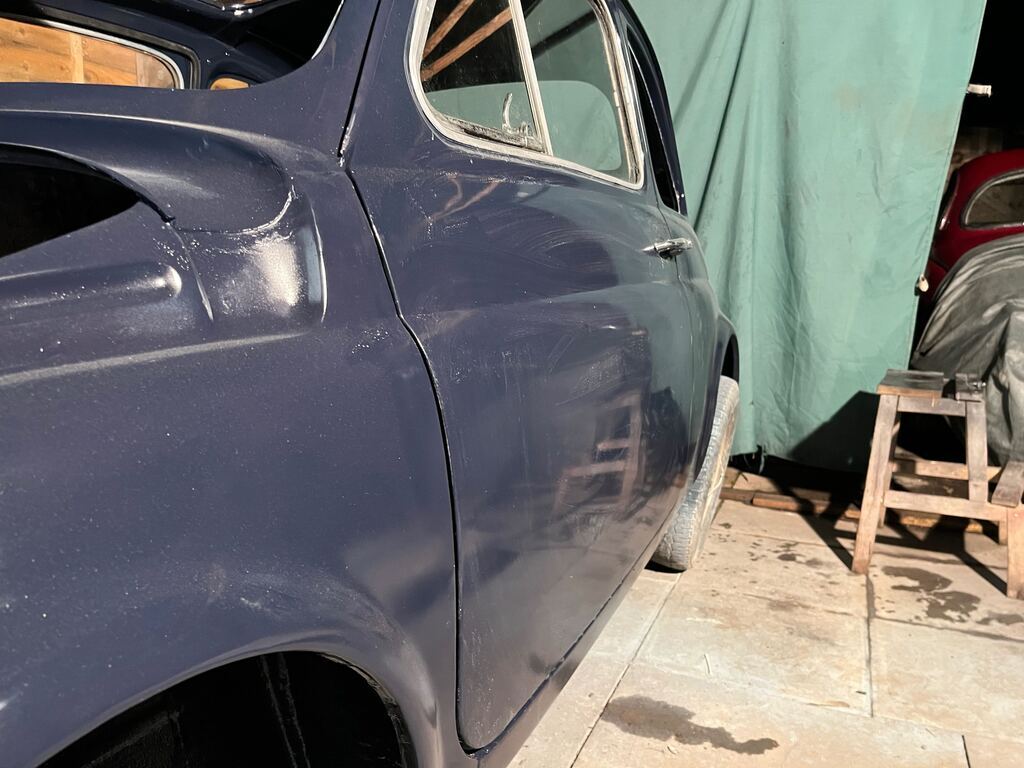 With the doors on, it made sense to get the glass in next. The plan is to make the car weather tight, then I can give the inside a proper deep clean and start to put bits back in. The rear window and side windows all had a plastic film on the inside that was yellowed and hazy, the windscreen was fine though. I don't know if this film was standard or not? Either way with some careful razor blade, scouring pads and thinners work I was able to get it all off and can now see through the windows!  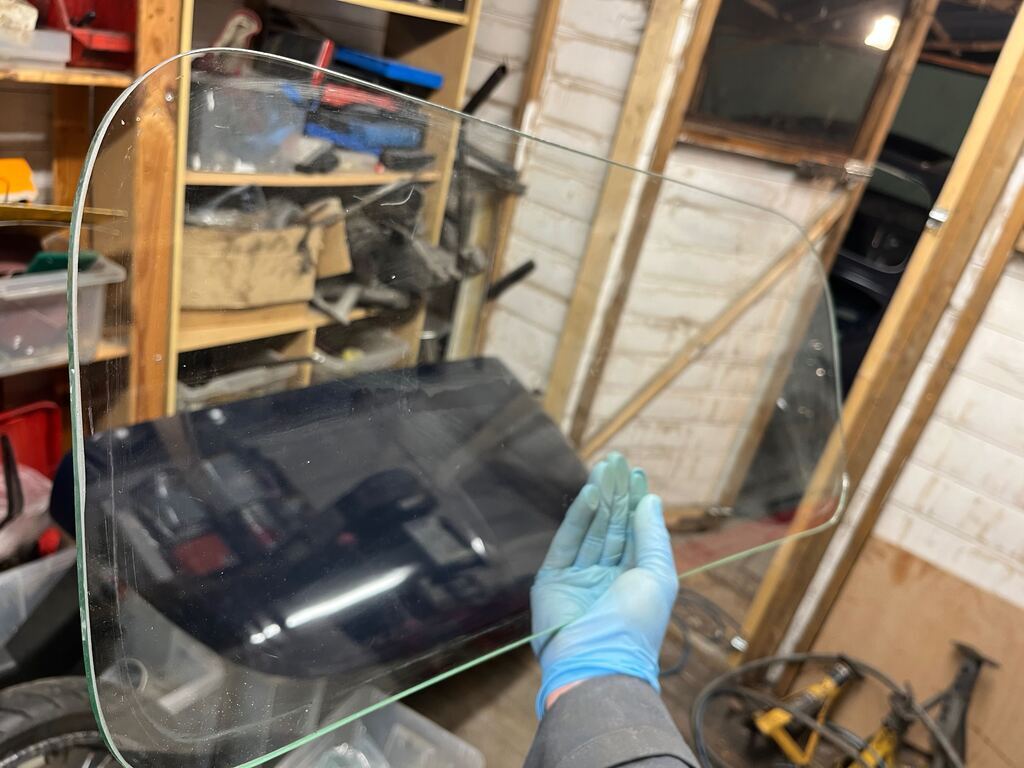 Much better! Rear window in first, and whilst it's never a super fun job getting windows back in, I have to say this went fairly smoothly. The small scale of the car definitely helped, as did the fact the the new window rubbers were quite soft and pliable. I used my usual technique. I put the rubber round the glass, wrapped some electrical wire (no strong to hand!) into the seal, lubricated the inner edge of the seal with a bit of washing up liquid and offered the window up to the car, then pulling on the wire while applying pressure from the outside was able to work the lip of the seal round the window frame and seat the window into the car.  With the windows in on their rubber seals, I then went round and squirted a bead of Arbomast both between the glass and the rubber and between the rubber and the frame. I did all 4 windows. It's a messy old job but it's well worth it to avoid any chance of leaks. Once it's dried a bit more I'll go round with a cloth and a bit of water and wash the last of the residue away. The car came with lots of random stickers, on the windows, dashboard and bumpers. It seemed nice to keep one as a memory of its previous life, so I put the 'blood donors love life' cling sticker back in the front window, and with that the glass is done! 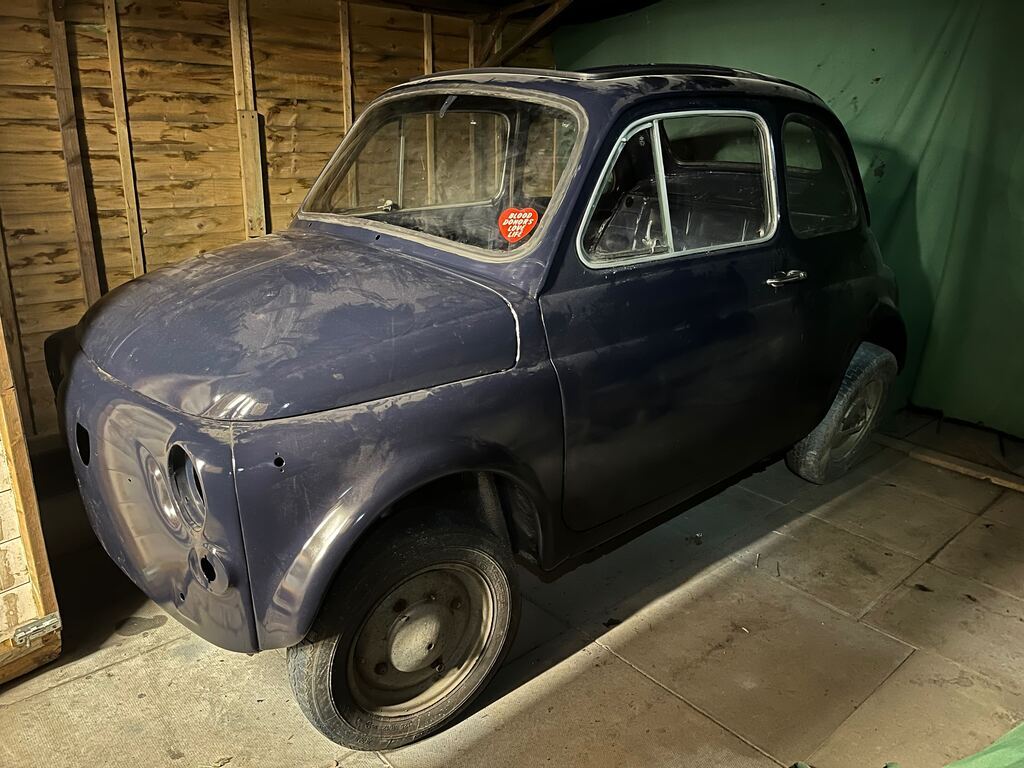  In terms of weather tightness, there's still a rather large hole in the roof, so I best do something about that. 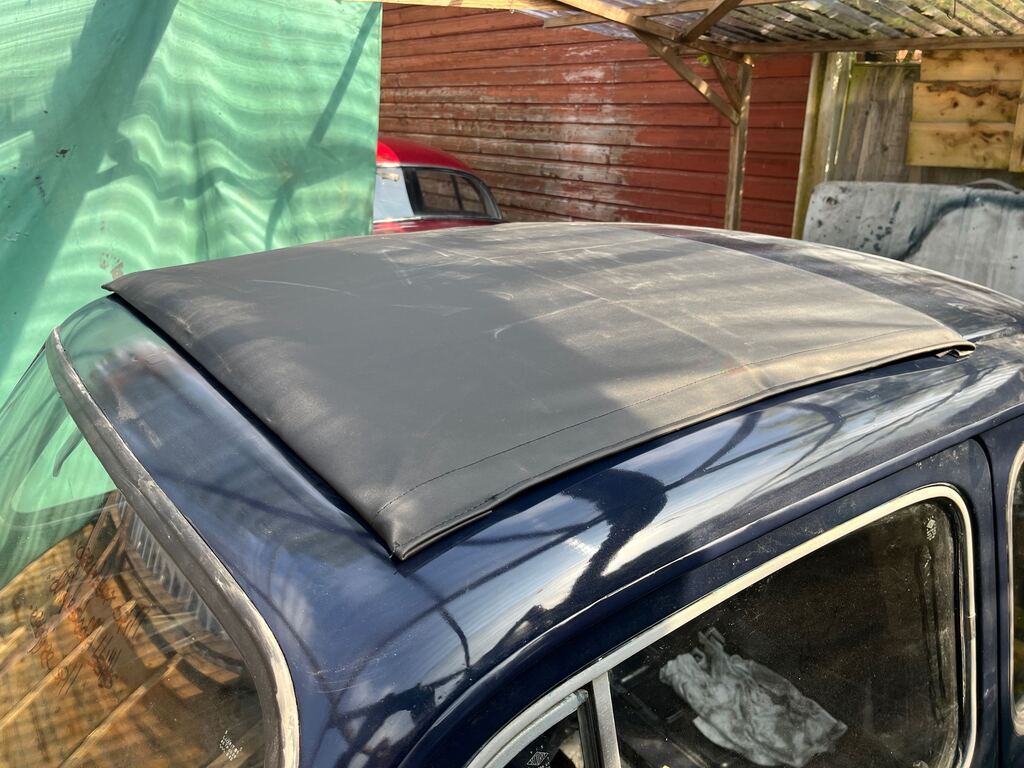 The new sunroof fabric went over the old frame fairly easily. I didn't take many pictures as I was just getting on, but I did clean and paint the frame also. Most of the rear edge of the sunroof is held down with a bar that bolts through to the underside of the roof, but the two outer corners go into a closed section of the roof structure and as such the factory just used self tappers... I wish I had realised this before I did the bodywork! A previous owner had just filled the holes and painted over them. I put new screws in, which was fine on the drivers side but on the passengers side the hole in the roof was clearly enlarged and stripped. I put a bigger thread screw in which is holding for now, but I think I will need to revisit in the future, might be a job for a rivnut or something. Anyway, for now it's basically weather tight, excellent. So I was going to start on cleaning the inside... but putting the sunroof on hadn't taken that long, the night was still young and I was fed up of tripping over the gearbox in the shed, so I thought I'd put that in next instead, 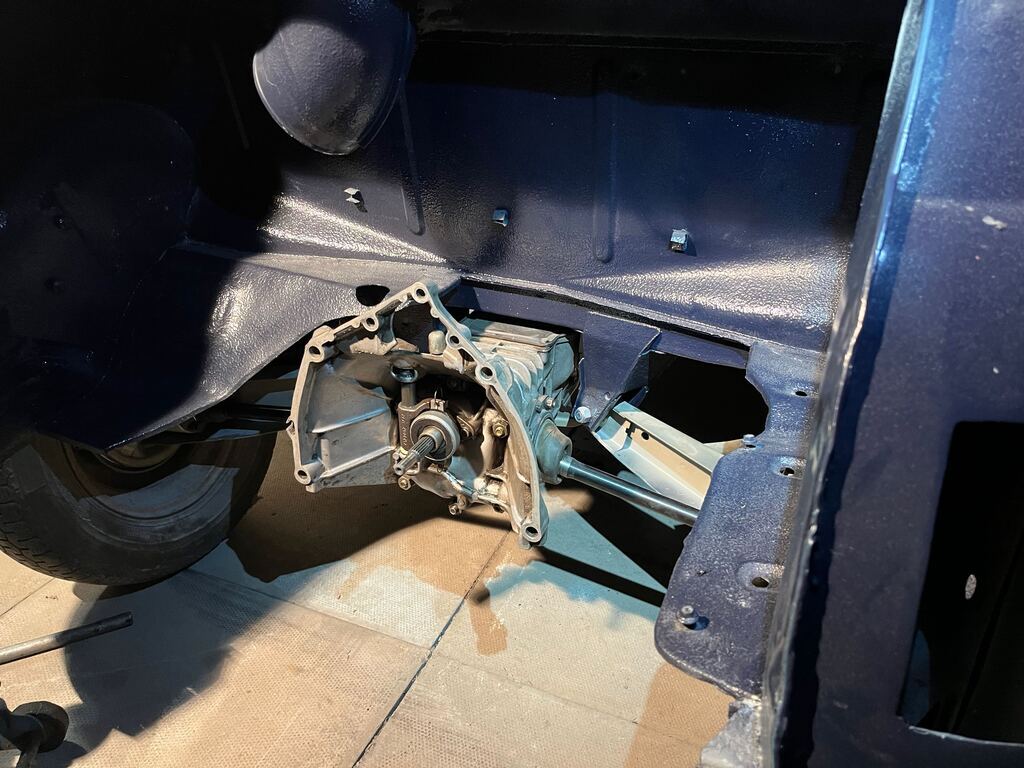 A combination of it's size and location in the back of the car, made this a rather easy job. Certainly it's a far cry from trying to get the big old automatic in from underneath the middle of the Daimler! The next day I thought it would be rude to not offer the engine up now the gearbox was waiting for it. Again very straight forward, I got a jack under the sump and was able to just wheel the engine into the bay and jack it up into place while steadying it with the other hand. I did have 5 minutes of fun getting the input shaft to slide into the clutch splines... but it was nothing in the big scheme of these things of putting engines in to cars on my own!  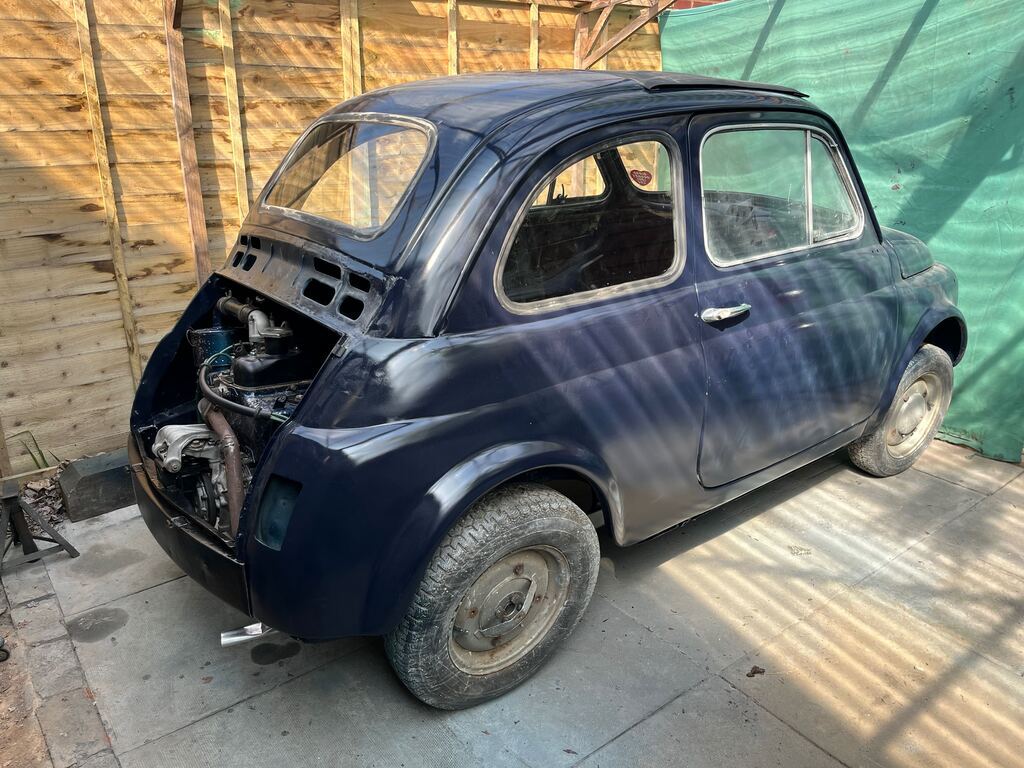 The first of the compromises... as you can see the back panel is currently just in satin black. It's not in great shape, with various dents and scrapes, and I'd kind of forgotten about it when I was painting the rest of the shell! So for now I've given it a quick blast of satin black, which think looks quite cool against the rest of the paint, and it will stay like this for a while  So engine in, thats another nice little milestone! Looking at the nice shiny car that's coming back together theres one big eye sore, the crusty old wheels and ancient tyres (two of which of remoulds... mmm safe). While I had daylight and could run noisy tools I thought I'd get on and get the wheels off, to give them a quick wire wheel down, coat of paint and then I could put the new tyres on. But as I started to let the air out of one of the front wheels, I found the rim around the valve stem was really only being held together by the paint, damn!  The other wheels aren't holed but after I'd removed the tyres and bee over them with the wire wheel, I could see that they were all very heavily corroded and pitted around the valve stem opening. 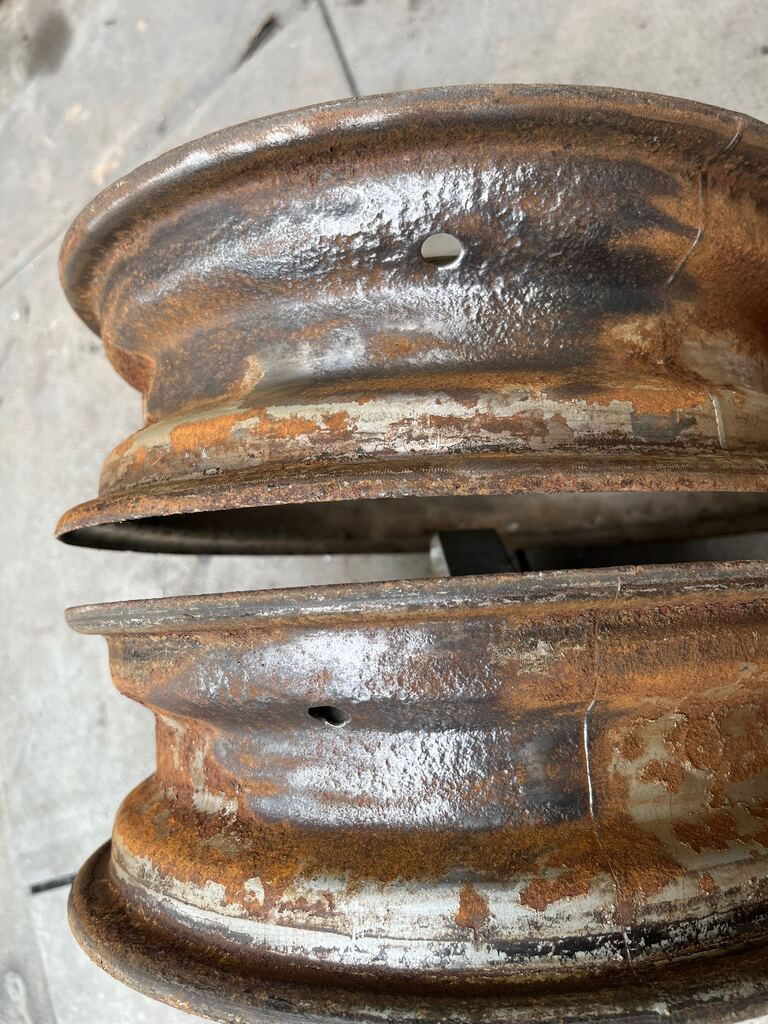 I could put the new tyres on and you'd never know, but having seen the other wheel gone to holes, and seeing the depth of that pitting, I don't think I'd feel safe doing that. So that rather stopped me in my track. I best get on an order a new set of wheels  I'd really like to get some 10" wheels for this. From pictures online I think lowered on 10" wheels with some chunky tyres, they look great, much as Mini's do in the same style, but 10" wheel options are neither cheap or easily available, and it would look silly without the lowering and other mods. So for now, and to get me on the road to see if I actually enjoy driving her car before throwing more money at it, a set of standard replacement wheels will do. Plenty to be getting on with while I wait for those to arrive... I will report back soon. |
| |
|
|
glenanderson
Club Retro Rides Member
Posts: 4,357
Club RR Member Number: 64
|
|
|
|
|
I think new wheels are a sound idea. 👍
|
| |
My worst worry about dying is my wife selling my stuff for what I told her it cost...
|
|
|
|
|
|
|
|
|
|
That is a lot of progress.
Very cool to see it going back together.
|
| |
|
|
|
|
|
|
|
|
Looking good!
In my youth I respoked a motorcycle wheel with a rusty rim in worse condition than that and once I lost two spokes side by side through a rust hole, I realized my life was worth another $150 to buy a repop rim and do it right. Good call.
|
| |
More vintage bikes than cars
1959 Fiat 500 Nuovo America
|
|
goldnrust
West Midlands
Minimalist
Posts: 1,887
|
|
|
|
Well I’m glad the consensus is ‘yes good idea to get new wheels’ rather than ‘don’t be a wimp, I did 10 years on a set like that’ haha. Wheels should come tomorrow, and I was able to order A few other bits and bobs I realised I was missing at the same, so I will have a big stack of bits ready to fit to the car when I have some time. I was able to find a few minutes to bolt the rebuilt pedal box, steering column and speedo back in. 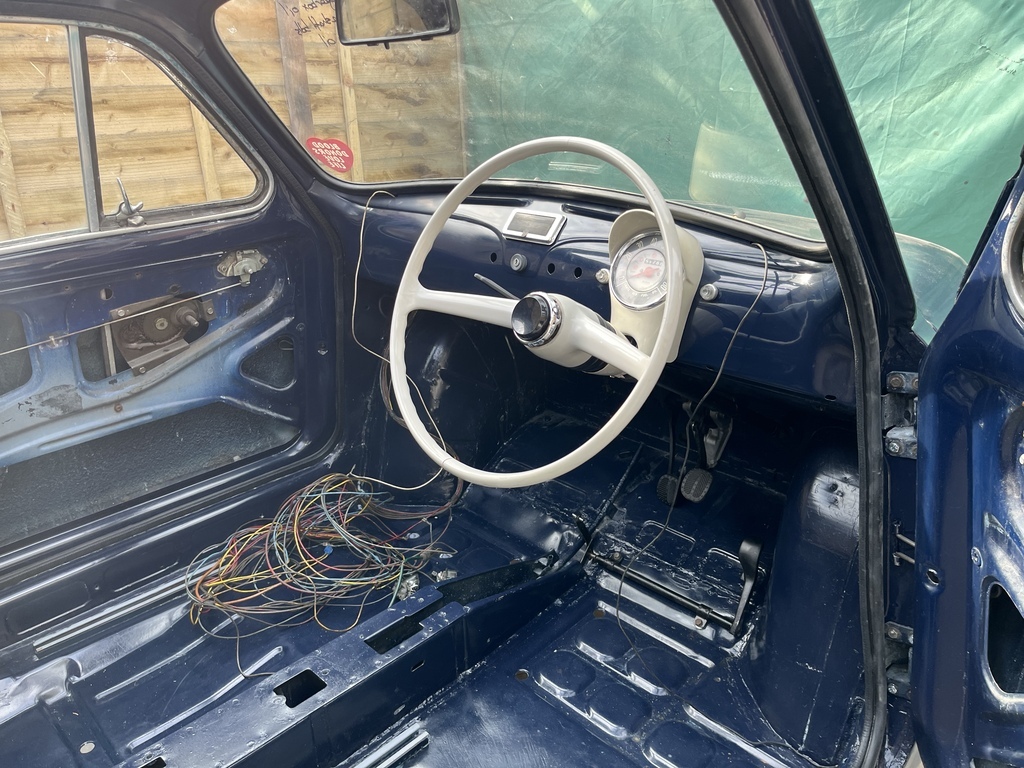 And made a start on one of the less exciting jobs, threading the loom back through. I don’t mind electrics and, as you’d expect, it’s a pretty simple system on the 500, but as I started with a stripped down car I don’t have many reference pictures for where the loom runs. There’s a fair bit of trial and error and studying of wiring diagrams to be done to work out where it all plugs in…  That and the half dozen control cables to thread through the Center Tunnel should keep ne busy for a couple of evenings this week! |
| |
|
|
goldnrust
West Midlands
Minimalist
Posts: 1,887
|
|
May 16, 2023 22:00:00 GMT
|
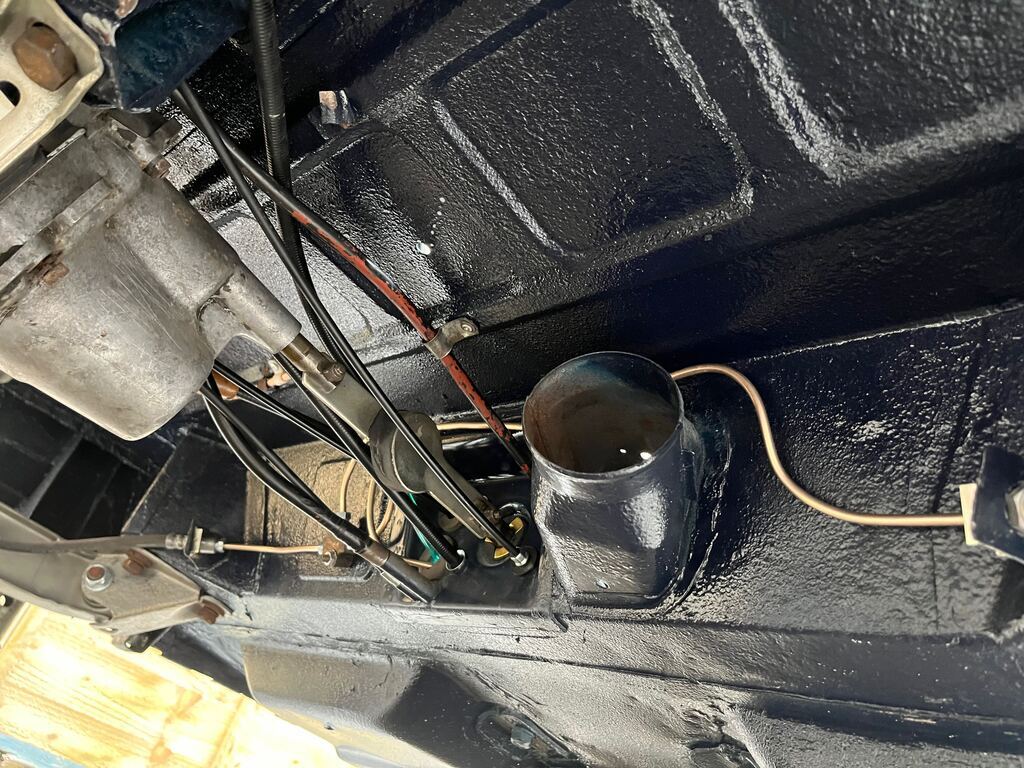 That 'half dozen' cables to run through the centre tunnel, turned into a full dozen and was a fairly time consuming job. I wasn't helped here by the fact that my car came to me already disassembled, so I was relying on pictures found online (and a few helpful forums posts!) to work out where all the different cables would run. There's also an order to which they need to go in, and some cables thread from front to back and others from back to front, it was quite the puzzle! The wiring continues to be a challenge! I've worked out where most of it plugs in now, thanks to some late nights studying the wiring diagrams, but I'm suffering with an old loom with many connectors in poor condition. The fuse box is a prime example of this, lots of corrosion... 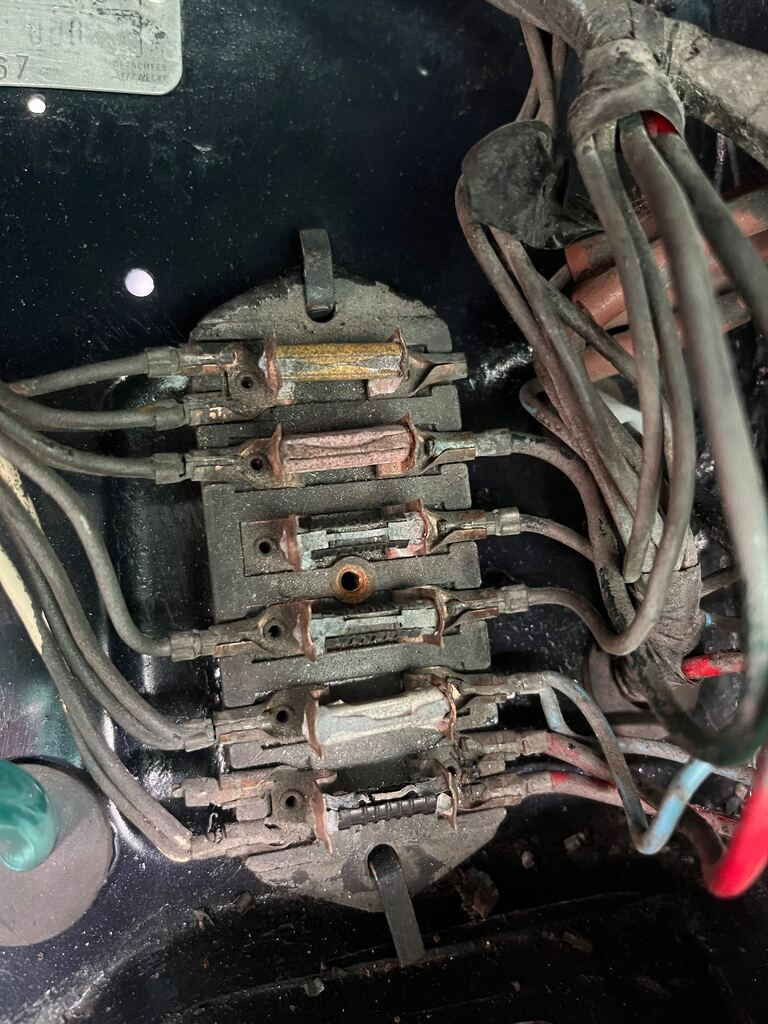 So I've stripped that down and cleaning it all up, and now some power is circulating in the car I can see that the ignition switch is only intermittently working, so I suspect the inside of it will also look like the fuse box did! I think I might have to take all the dashboard switches apart and clean up the contacts. Some more hours of wiring needed! To build up the enthusiasm to tackle that, I wanted some nice quick wins, so I thought I'd start putting the interior back in. As previously mentioned, this is where I'm going to switch gears from 'full restoration' to 'just get me on the road this summer', so I will 'make do and mend' with what I have and can give the interior a full make over at some stage in the future. So the first job was to give the bits I have a damn good clean. I tried out using magic eraser sponges, as I saw them recommended on another thread as good for vinyl, and I have to say they did a great job. Just water and the sponge brought these sun visors round with minimal effort.  The sun visors could now go in the car, along with more of the switch gear (which now needs to come back out...), new dash pads and new heater hoses. 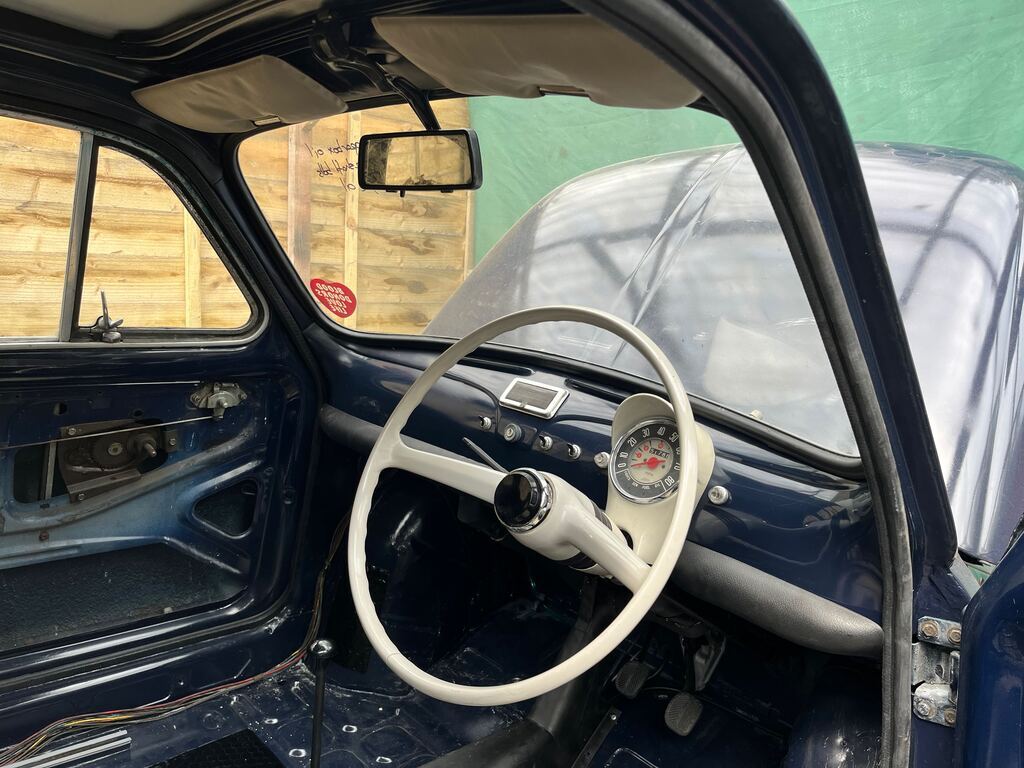 When I had some daylight I gave the rest of the interior the same treatment, with mixed results. The sponges dealt with general dirt and mildew staining really well, but couldn't touch where there was under seal overspray on the seats and obviously the front seats are badly discoloured with what I presume is sun damage. I did try some more aggressive options, isopropyl alcohol got the majority of the under seal off, but nothing I tried could improve the sun damage. Seat covers are available and not especially expensive (well not compared to Daimler prices anyway!), so they will get swapped in due course. The door cards are badly warped and mildly discoloured, but again they will do for now. 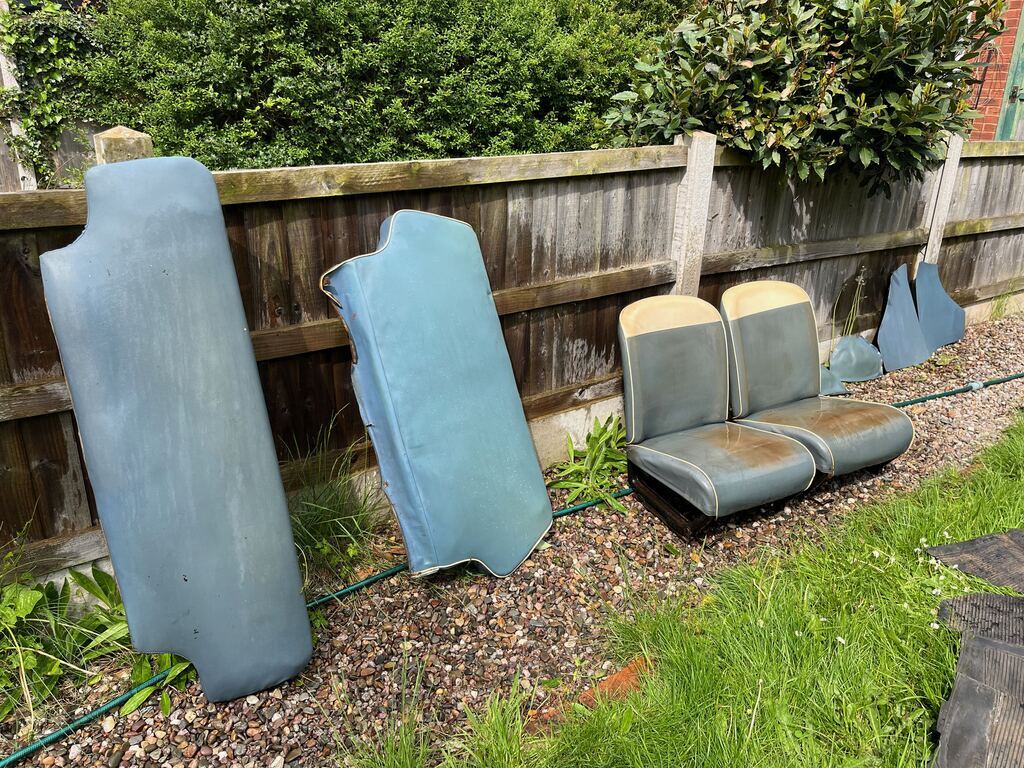 It was at this point that I realised that as far as I can tell, my 'complete' car in pieces did not include any of the internal door hardware, so I will have to order new door handles and window winders! Not the end of the world, but all these little bits do add up! Anyway, time to put some interior back in the car. I started by putting some fresh modern sound deadening in. I didn't go wild, 500s are not quiet at speed, and never will be, but it can't hurt to try to take the edge off it! haha 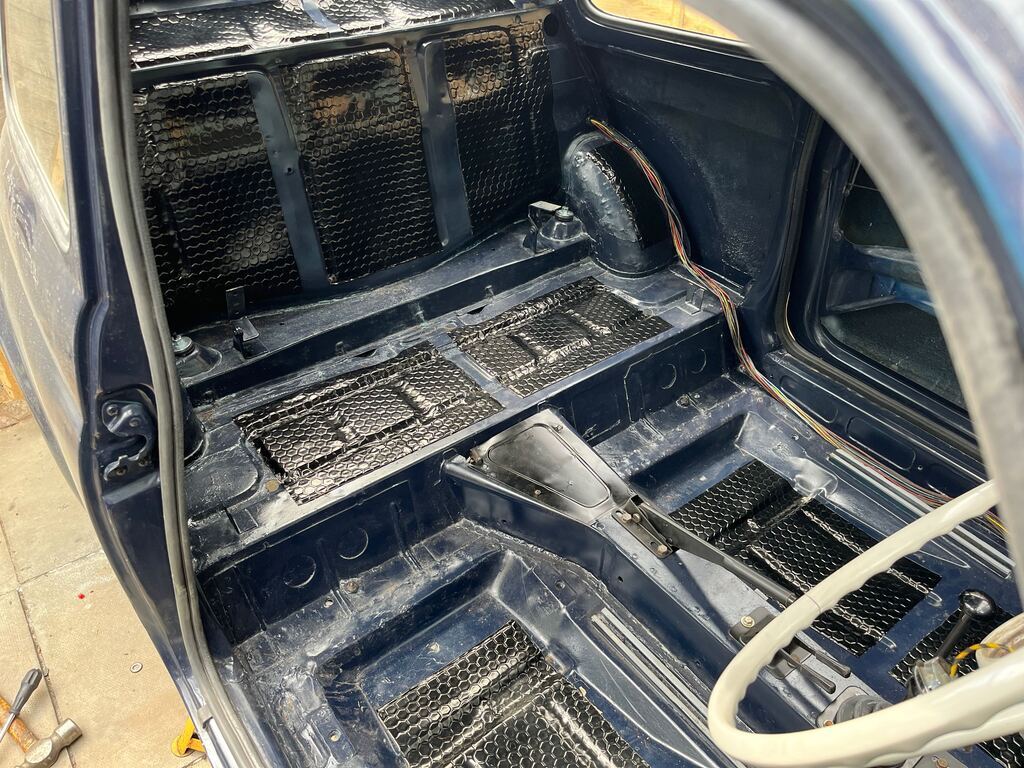 I followed this up with some closed cell foam to replace the original jute and then laid the original heavy sound deadening mat that forms the parcel shelf and rear seat back. For the floor I rescued the original rubber mats. The 500f came with rubber mats, it was only the 500L (for lusso/luxury!) that came with carpet. My mats were torn and splitting in many places, and most would bin them and replace them with a new carpet set which is 1/3 of the price of new replacement mats, but I like the utilitarian aesthetic of the mats. After a hose down and clean up, I made patches from some pieces of the old inner tubes and glued them to the back of the mats to join the splits. It's far from perfect, but it's a great improvement from where I started. I still need to fit the sill covers.  And with that the seats could go in, for an almost completed interior.  My new wheels arrived a few days ago also, so I have been able to get them painted up and fitted a new set of tyres and tubes. I'm really placed with the black wheels, they do exactly what I wanted them to. 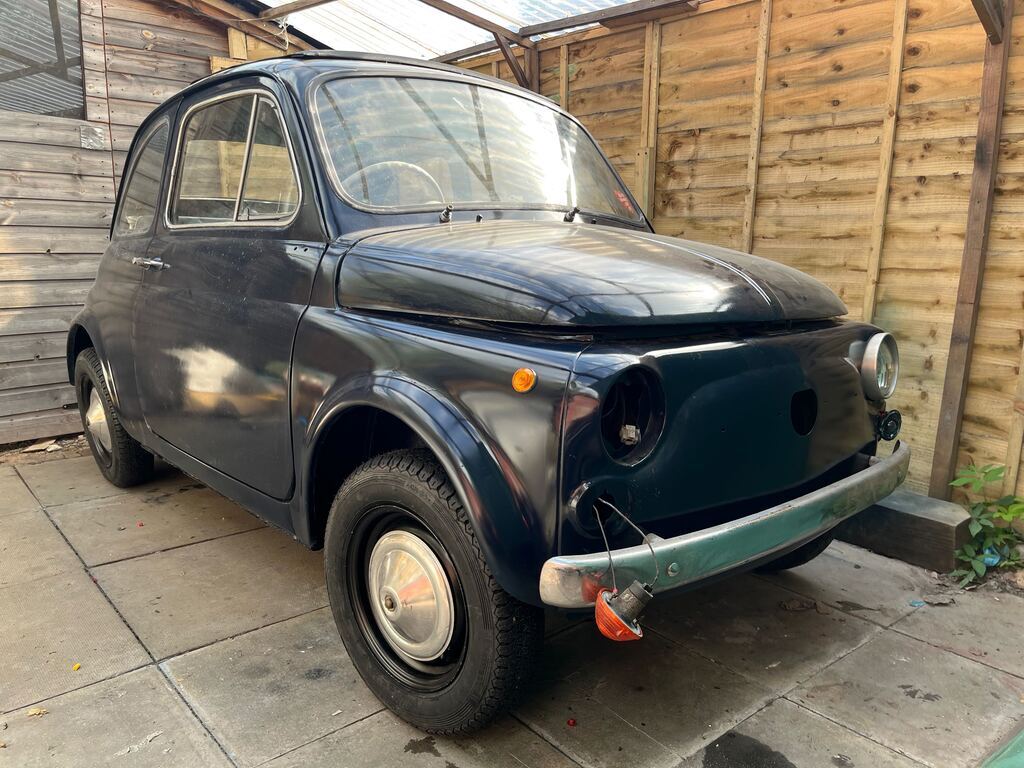 I stuck the bumpers on too while I was at it, and no I didn't stop to polish them up, I can see light at the end of the tunnel now and it's a mad dash to the finish and to a first chance to drive it! There's quite a few 'finishing off' type jobs on the list still, but I'm hoping it will only be a handful of weeks now till I can go on that first test run. There's a classic car night at a local pub in a fortnight, maybe I'll even see if I can make it there! |
| |
|
|
|
|
|
May 16, 2023 22:09:11 GMT
|
If you get stuck their is a firm in Redditch that do electrical components for cars: www.almsolutions.co.uk/I've used them for bits and pieces and they are really good, you can do click and collect with them. They open 8:30am to 5:30pm Monday to Friday so if your stuck and you can get to them they might be able to help. |
| |
|
|
goldnrust
West Midlands
Minimalist
Posts: 1,887
|
|
May 31, 2023 22:13:48 GMT
|
Ok so, I ended that last update that 'hopefully within a handful of weeks I can get out on the road', and I'm pleased to say that the goal has been achieved! I pulled out all the stops, and with many late nights in combination with a couple of child free days off work, and I was able to blast through the remaining issues and hit the road!  Where I have failed, is in being a responsible build thread author, as I did not take many pictures in this last mad dash to the finish... Picking ups where I left off, on the wiring loom. The headaches were mainly solved with 3 steps. Step 1, I realised I'd plugged the 'McLaren F1 inspiring interior light in the rear view mirror' in backwards. I had foolishly gone 'well theres two wires to it, theres a switch and a bulb in there, can't see it matters which wire goes where...' wrong! The light actually has 3 connections; +12v feed, earth wire which connects to the door switch and (crucially) it also earths through the mounting bolts should you wish to manually switch the light on. So I'd connected 12v straight to ground, that'll be why the fuse blew! Thank you fused electrics for saving me from melting the wiring loom / burning down my car! Step 2, I had already hypothesised in the previous post the the ignition switch contacts could be dirty, and indeed they were. I took the switch to bits and cleaning out all out and now it was working reliably. Step 3, I found that several contacts inside my column switch gear were also not working. I had not initially realised that due to the way the car is wired. There are independent contacts in the column switches for left and right headlights, and these dirty contacts lead to strange seeming issues like dip beam only on the left headlight and main beam only on the right! I had already repaired my original column switches, the plastic arms were cracked, and the repairs were not feeling confidence inspiring so, rather than try to clean the contacts inside, I purchased a new set of column switches. So that was the wiring sorted, and the same parts order than bought my new column switches also brought interior door handles and other little bits I was missing. With those bits all fitted I had, for the first time, what appeared to be a complete car!  And so from assembly, on to preparation for driving. Now I had a complete car, I simulated the weight of a couple of passengers, e.g. plonked a bunch of bits of paving slab and various bits of scrap metal inside the car, and then torqued up all the suspension bush bolts now the car sat at the right ride height. I also did a rough alignment, checking the rear toe wasn't wildly out and doing a quick tracking. And with that I was ready to see if it would run.... which it did! I thought it might take a while to draw fuel the length of the car from the tank, so while I cranked it over I had a friend watch the clear fuel line to see if they could see it filling up. Within a matter of seconds it had made a cough and run for a moment. So clearly it was going to go, and we caught the moment from there on camera. As you can hear it's not running quite right... which began the first of several teething issues to solve. The engine seemed ok once given a reasonable amount of throttle, but wouldn't idle without lots of choke, even when warm and transitioning of closed throttle would stumble and almost stall before picking up. Attempting to tune the idle circuit made no difference and so all signed pointed to a non-functioning idle circuit. In hindsight I should have just pulled the easily accessible idle just out, and I would have seen that despite my efforts to clean the carb last autumn I had done a poor job of cleaning the idle jet and it was still partially blocked (it was blocked solid when I first stripped the carb). But I didn't do that, I took the carb off and went through the whole thing again just to be sure there were no other issues. Thankfully there weren't and when refitted to the engine, it now idled very happily and transitioned off idle very smoothly, an easy fix! Other issues included; the low fuel warning light staying on even when I'd filled the tank (I took the sender out of the tank, found no problem and put it back it then the problem magically went away, I'm yet to use enough fuel to know if the light comes back on when it should!), the gear lever learning forwards a bit and making it hard to get 1st and 3rd even when at the limit of it's slotted adjustment ( I filed out the adjustment slots till the stick was vertical in neutral and this solved there issue) and a vibrating noise that just didn't sound 'right' when cornering left (which turned out to be the gearbox just touching its cross member, so a small tweak to the position of the mounting blocks lifted it a couple of mm and the noise was gone). I did several short drives, just doing a few laps of the local backstreets till I was happy I'd ironed out the issues and could go for a bigger drive. Saturday morning rolled round bright and cheerful, and what a nice start to the bank holiday it was to take my little Fiat for its first proper run. 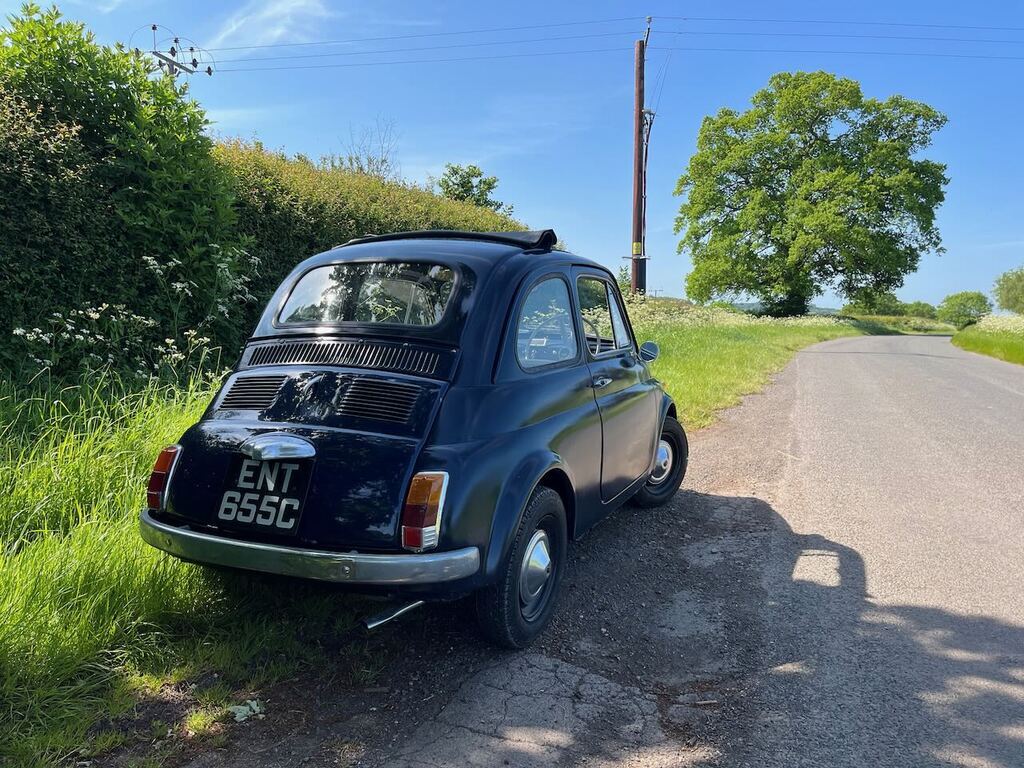 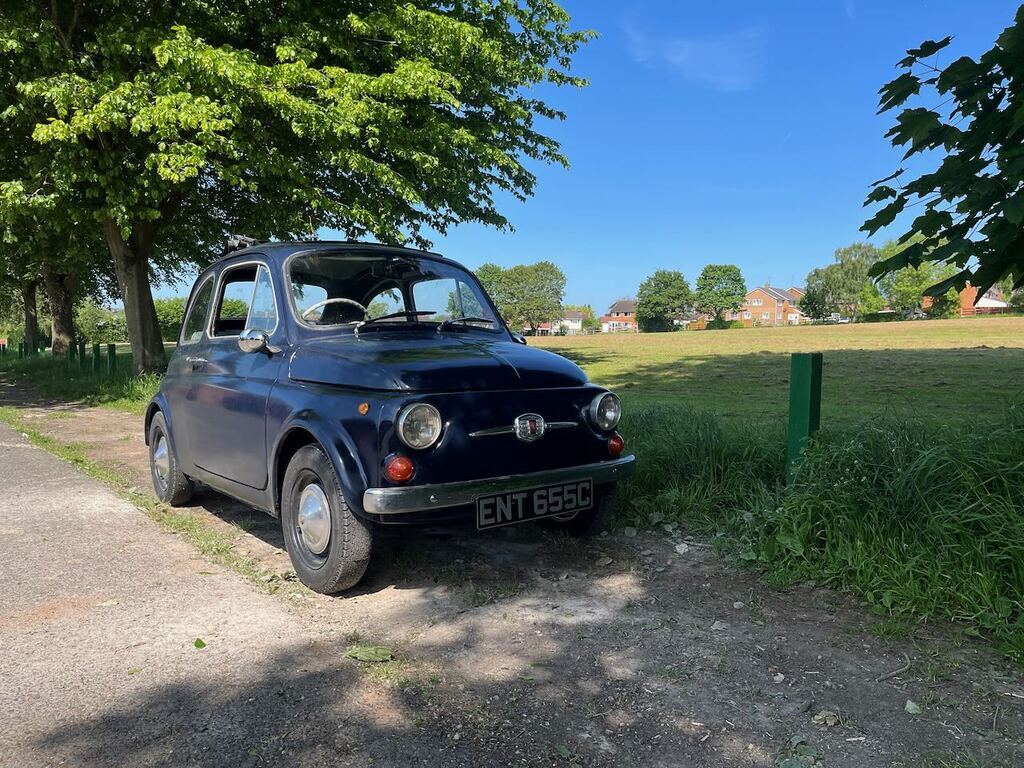 So, the paint needs a wet sand and polish yes (and well just a wash to get several weeks of dust and grimy finger prints off it!) but she's looking good! The real question you'll be asking though, is what was it like to drive? Strange, challenging, very noisy and slow...but ultimately brilliant is the answer! There is so much sheer joy to be had in really having to 'drive', and with this little car you 'drive', it's busy theres lots to do and think about. It took me several short drives, before I was getting my double de-clutch heal & toe downshifts right, but I feel I've got a pretty good handle on it now. The focus, intensity and satisfaction of driving the 500 round town, getting those shifts right and feeling that nimble light steering talk to me, just keeping up with normal traffic, is like that of thrashing a much bigger faster car down a B road. Since Saturday I've been using it whenever I can, whether its going out to a local classic car pub night (to which I was late and missed 90% of the cars!) or popping to the supermarket, I've done probably 80 miles or so now. I feel there's still some way to go before I've really mastered the car, and feel totally at home in it, but I love that challenge and I'm already looking forward to my next chance to go for a drive! 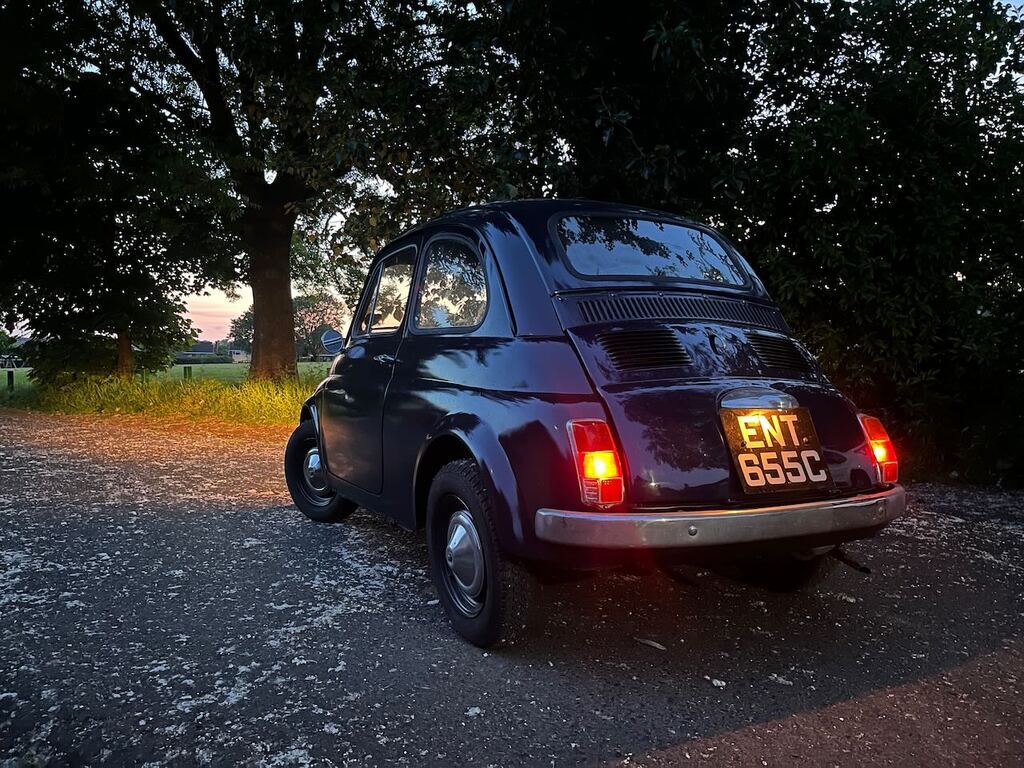 |
| |
|
|
teaboy
Posted a lot
   Make tea, not war.
Posts: 2,125
|
|
May 31, 2023 22:25:02 GMT
|
|
Fantastic, well done.
|
| |
|
|
bstardchild
Club Retro Rides Member
Posts: 14,975
Club RR Member Number: 71
|
|
May 31, 2023 22:55:18 GMT
|
|
Most excellent - Paintwork looks good now - appreciate it will be better with wet sand and polish but for a home respray it's great
PS Those old wheels eeekk!!!
|
| |
|
|
glenanderson
Club Retro Rides Member
Posts: 4,357
Club RR Member Number: 64
|
|
|
|
|
Brilliant. Great news. 👍👍
|
| |
My worst worry about dying is my wife selling my stuff for what I told her it cost...
|
|
|
|
|
|
|
|
Great news and well done! They really are fun to drive aren't they?
Which reminds me I must attend to the engine without head situation on mine....
|
| |
|
|
|
|


