|
|
|
|
|
|
Re. Your corroded tank. I’ve done dozens this way & it really really works.
Find yourself 4 or 5 good handfuls of broken side glass from a car window. You know how it shatters like on old windscreen used to?
I usually nip to local scrappy & they’re always happy to give you a load, they tend to have it lying everywhere.
Shove it in the tank, block the filler & shake until your arms fall off, then do it some more. It scours the metal like you can’t believe. The sharp edges on the glass really do the job.
The beauty with the glass also is when you’ve done, if there are any bits that are wedged in the odd corner (which there will be) they can stay. They don’t dissolve & gob the fuel up & they are too large to get sucked past the tap & block anything.
Another take on the shaking part, which I have now done a couple of times is, wrap the tank in a blanket, bubble wrap etc etc & wedge it in the tumble dryer. But beware it has to be seriously wedged & packed in there so the tank just spins around & does NOT bounce obviously.
This works superbly.
|
| |
|
|
|
|
|
|
|
Feb 24, 2022 12:23:40 GMT
|
|
I did exactly as Rattlecan with an old CB250 tank.
When dry, I poured in some resin ( the stuff used for fibreglasing), but as I did, kept airflow going through the petrol/ reserve tubes with an airline.
|
| |
Last Edit: Feb 24, 2022 12:24:22 GMT by tubthumper
|
|
adam73bgt
Club Retro Rides Member
Posts: 4,862
Club RR Member Number: 58
|
|
Feb 25, 2022 15:46:07 GMT
|
|
That's interesting, I'd not thought of using broken glass before, might have to see if I can source some. There is a large lump of something rattling around in the tank which I'd like to get out first, the shape of the filler makes it a bit awkward though
|
| |
|
|
|
|
|
Feb 25, 2022 19:35:54 GMT
|
|
I've done similar but I got 500 m5 flat washers for £6 and used them. I cobbled together something to hold it on the side of a bicycle hub and used thst to drive it round and round.
|
| |
|
|
adam73bgt
Club Retro Rides Member
Posts: 4,862
Club RR Member Number: 58
|
|
|
|
While I find some sharp things to chuck in the tank, I've gone back to focusing on bits to make the bike a "rolling chassis" again, namely the wheels. Used a slightly unorthodox method of tyre removal, but cutting them got them off   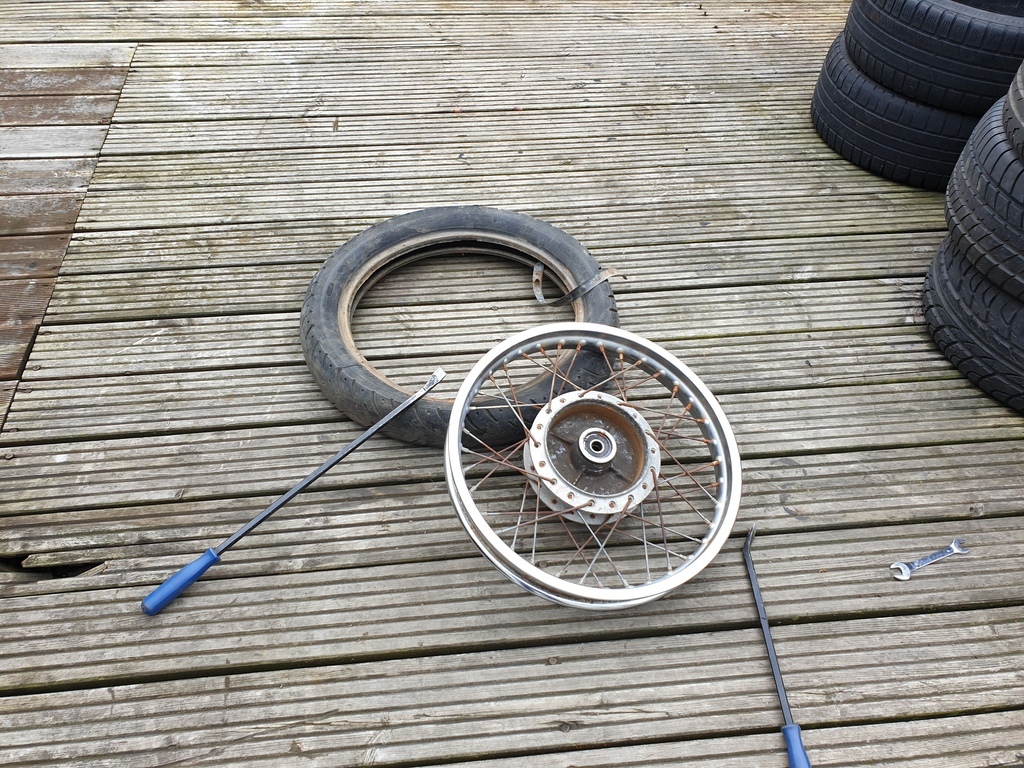 Both wheels have a spot of quite bad corrosion, must have been the bottom of the wheel where the bike had been standing for years 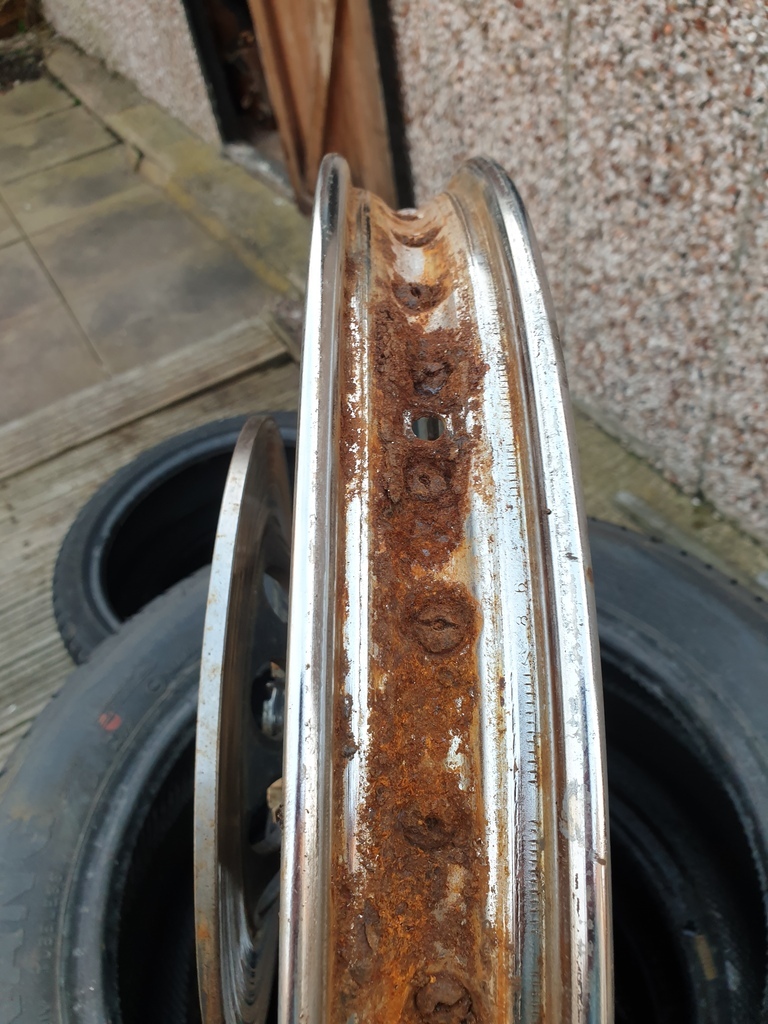 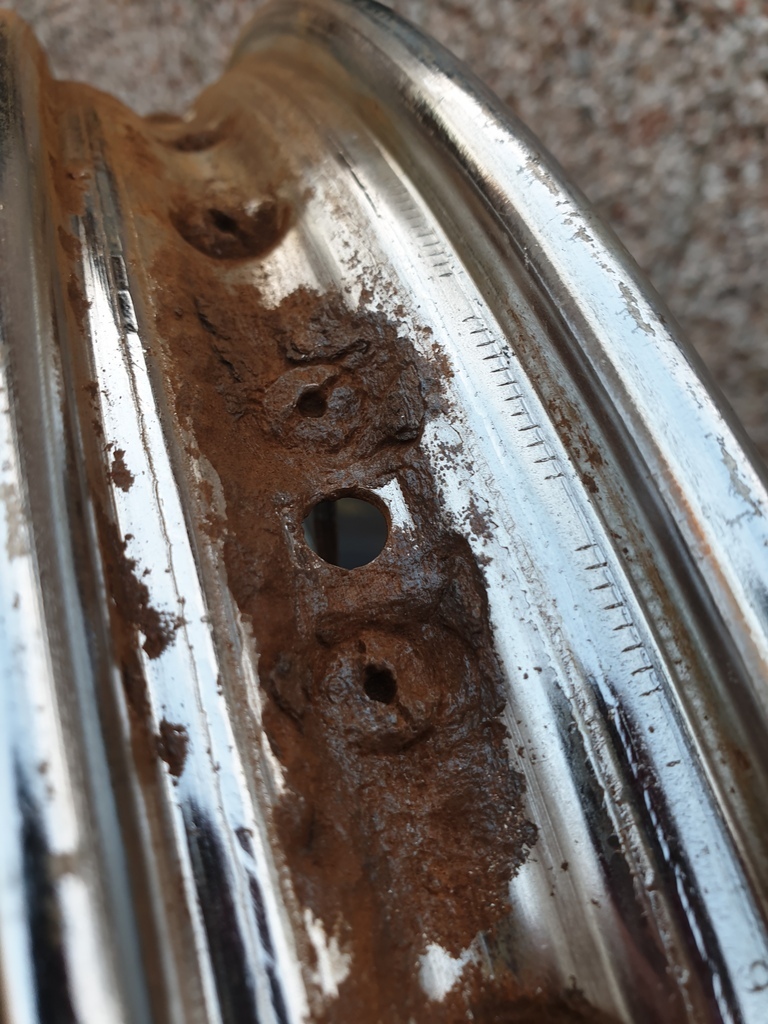 Not sure how usable that would be? The rim still feels strong from the outside, but I'll just have to add rims to the list of parts if need be. I need to get something to pull the bearings out with as doesn't seem I'll be able to drift them out, but shouldn't be an issue 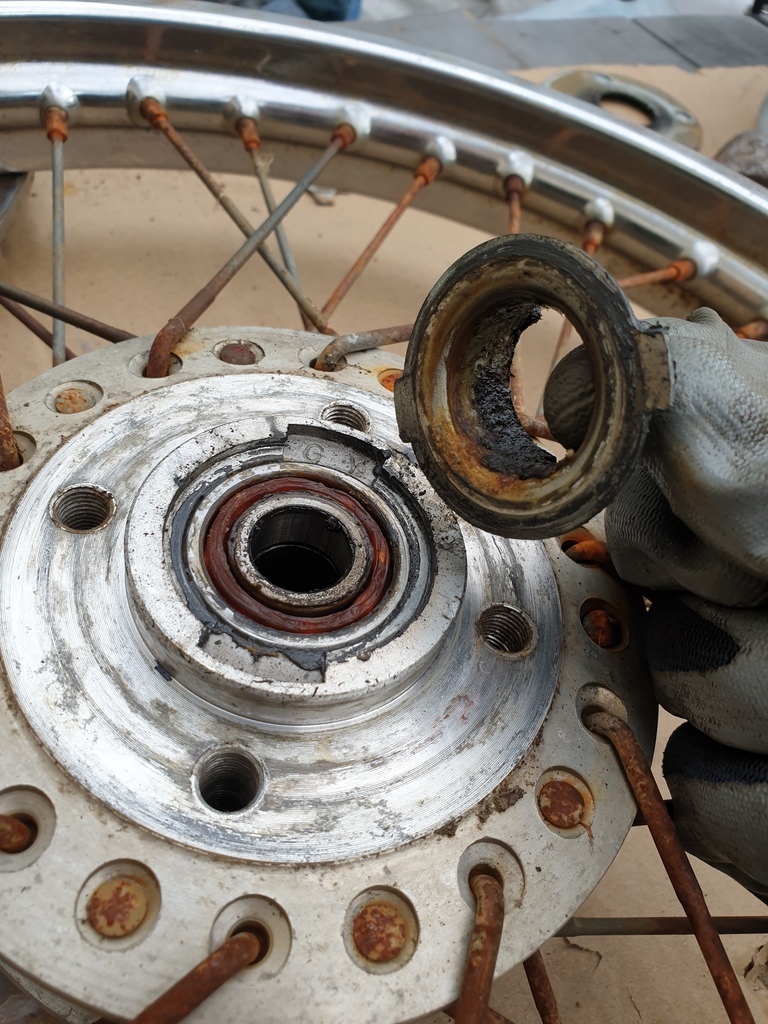 The front disc looks usable, I just need to find someone with a lathe who'll give it a quick turn to tidy up the surface. I'll get a couple spokes out of each wheel for reference for ordering new ones then finish up the wheel strip down. In less related news, my Suzuki just flew through it's MOT and is up for sale again, so hopefully once that sells I can allow myself to spend a bit more on the Kawasaki! |
| |
|
|
93fxdl
Posted a lot
 Enter your message here...
Posts: 1,999
|
|
|
|
|
You drive the bearings out from the opposite side, but there is a spacer tube between them which can make it awkward to get started, if worst comes to worst, weld a piece of plate to one bearing, then drift that one out first
Ttfn Glenn
|
| |
|
|
adam73bgt
Club Retro Rides Member
Posts: 4,862
Club RR Member Number: 58
|
|
|
|
|
Yeah that was what I planned to do but the spacer tube made it look tricky as there isn't much of a surface to start tapping on the bearing, I may give it a bit of a go anyway, test my drift skills 😅
|
| |
|
|
goldnrust
West Midlands
Minimalist
Posts: 1,872
|
|
|
|
|
You should be able to slide the spacer tube to one side, giving you a decent area to put a drift on to knock the bearing out with. Once the first one is out, the spacer tube comes out too and the 2nd one is dead easy.
|
| |
|
|
adam73bgt
Club Retro Rides Member
Posts: 4,862
Club RR Member Number: 58
|
|
|
|
|
Ah yes, on closer inspection it seems the spacer tube had stuck in the middle with years of standing in old sticky grease, levered aside I've managed to get a drift on the bearing and things are moving, cheers!
|
| |
|
|
adam73bgt
Club Retro Rides Member
Posts: 4,862
Club RR Member Number: 58
|
|
Mar 12, 2022 14:17:48 GMT
|
Been a bit slack in the updates as I've spent the last week or so trying to shake a particularly unpleasant cold/cough, doesn't seem to be the 'vid if the tests are to be believed but very annoying. Anyway, I've also been slowed down by steering bearing dramas. First set I ordered never arrived, messaged the seller and got an instant refund, so they probably never got sent. Second set turned up quickly, sold as being for the right model year Z/KZ400, fitted one race and... 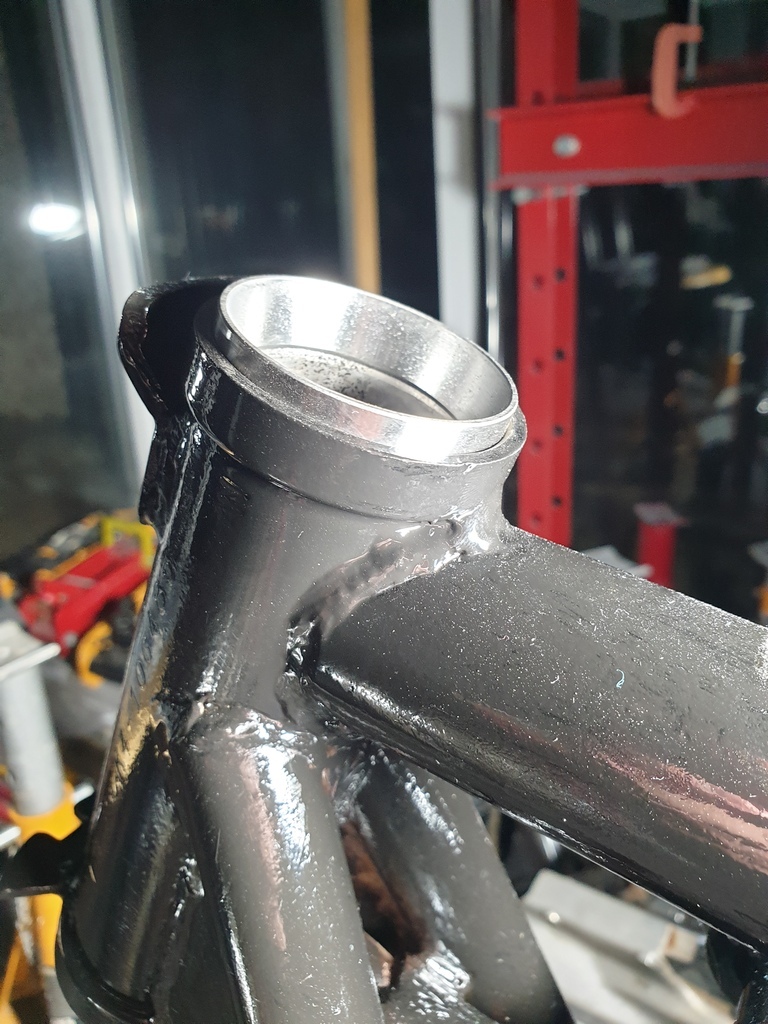 Yeah that's not right. I should have measured before fitting. Messaged this seller and to be fair they acknowledged the mistake and sent out another kit. Getting the race back out was a bit of a challenge as taper races don't have as bit a lip on them as the old ball bearing races, but I managed to do it. Now I'm a bit nervous though, the new bearings are the right size according to all the catalogues and stuff online, but the race height is 10mm, but the pocket at the top only seems to measure a bit over 8mm in depth so I think the race will still sit a bit proud? I have been tidying up the other bits anyway while I ponder that, this broken off bolt was in the lower clamp where the brake light switch block was fitted 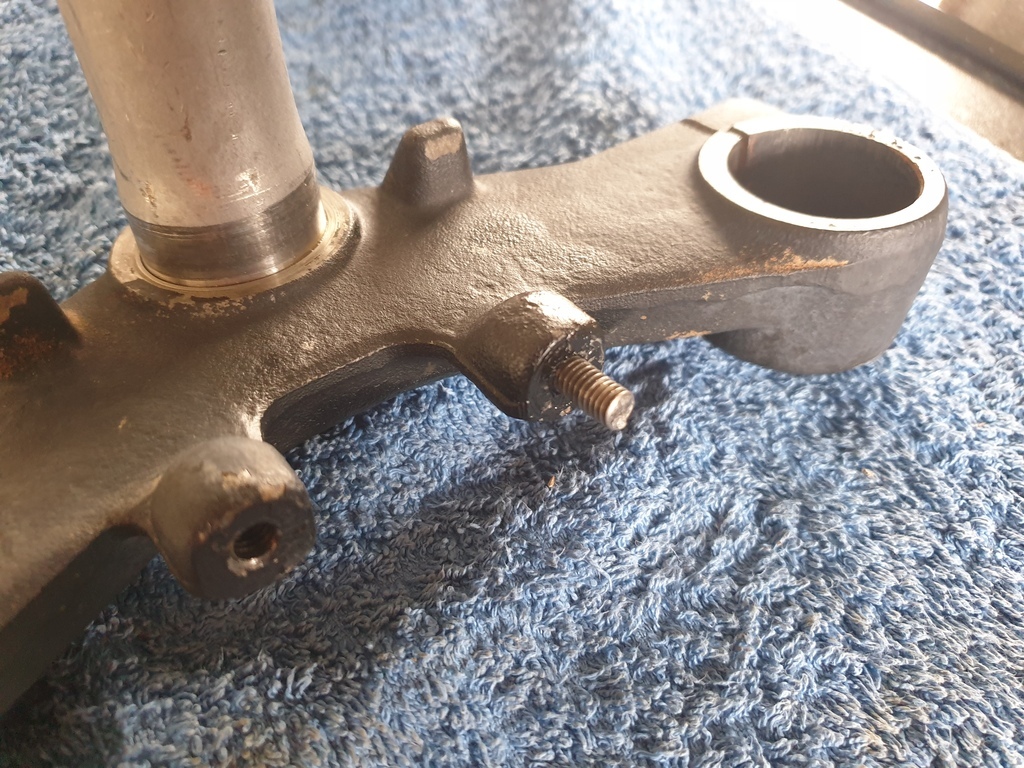 Soaked it over night in Deox C as I was removing some surface rust as well, couple taps with a hammer, penetrant spray, heated it up and easily came out with a stud extractor. Maybe a bit overkill but I wasn't taking any chances Painted it up and all the fixings got a de rusting and it looks pretty good 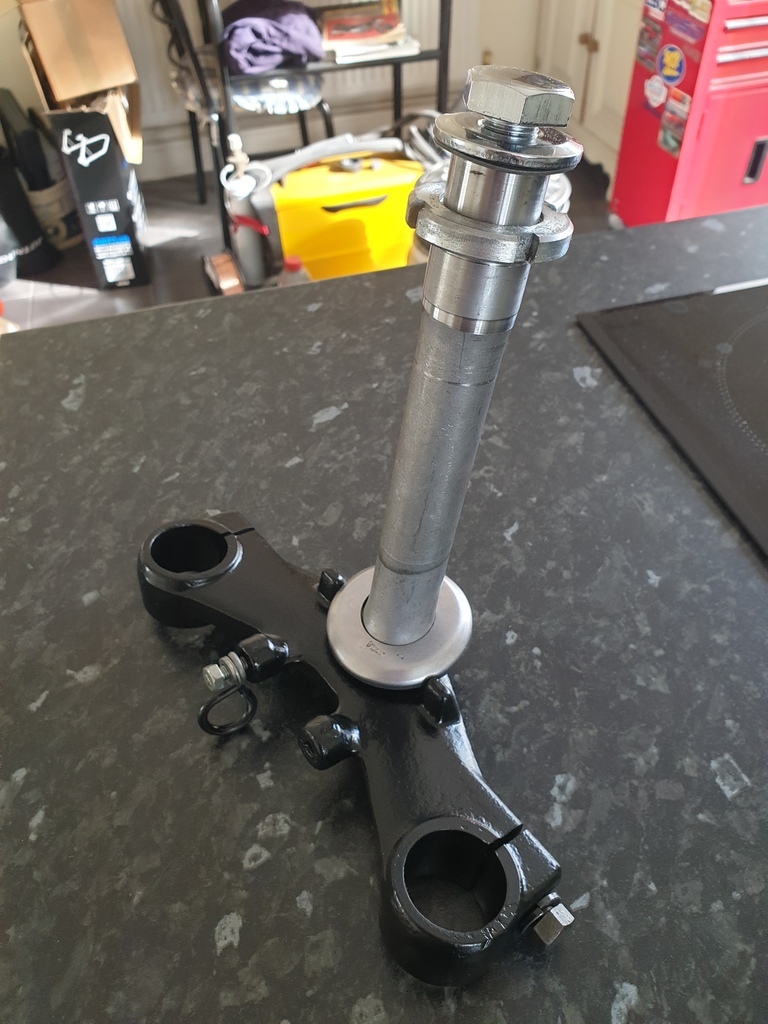 I've painted up the top one as well, so I can now pop the races in (assuming they're correct) pack the bearings and get these back on the frame  I've also been removing the wheel bearings, cleaning up the speedo drive housing and I've removed a few spokes whole but most of them will need cutting out so those are the next jobs |
| |
|
|
|
|
|
|
|
|
|
|
Can I start by saying I have no "interest" in motorbikes but have found this project to be really interesting and an enjoyable read,
It's always educational to see how different people carry out problem solving,
I particularly enjoy the "repair" rather than "replace" ethos,
Bookmarked and looking forward to seeing future updates on this thread,
Nigel
|
| |
BMW E39 525i Sport
BMW E46 320d Sport Touring (now sold on.)
BMW E30 325 Touring (now sold on.)
BMW E30 320 Cabriolet (Project car - currently for sale.)
|
|
adam73bgt
Club Retro Rides Member
Posts: 4,862
Club RR Member Number: 58
|
|
Mar 14, 2022 23:28:21 GMT
|
Thank you very much, I think the fact that I've started with a cheaper, more unloved model, makes me feel very much less guilty about doing some of the repairs "on the cheap". Not that I'm particularly cutting any corners, but I'm certainly not throwing new parts at it, it's more of a challenge to me this way A quick update, not that I have many photos to go with it. Got the steering bearing races in the frame without too much hassle and gave the surfaces a quick wipe with some brake cleaner to make sure they were clean. I then put the lower oil seal on the steering stem and tapped the lower bearing down into position. Some suggest that a suitably sized bit of pipe is best for doing this, I didn't have any to hand so instead had to do some careful punch work, acting only on the inner ring of the bearing so as not to damage the rollers. Bit of a faff but got there in the end. I should mention I packed the bearing with grease first, and then once installed, smeared a bit more over the top. I then packed the upper bearing with grease and set it to one side, ready to install the whole lot  No in progress photos as too much grease It went together pretty happily though, stem up from underneath, drop the top bearing down onto it, then the upper oil seal, a cover plate/washer then the adjusting nut. I've only done it up roughly for now, I can set the proper bearing tension later. I've also put the upper fork clamp on with its retaining washers and bolt. I've painted up the handlebar mounts also but need new rubbers before I can fit them! 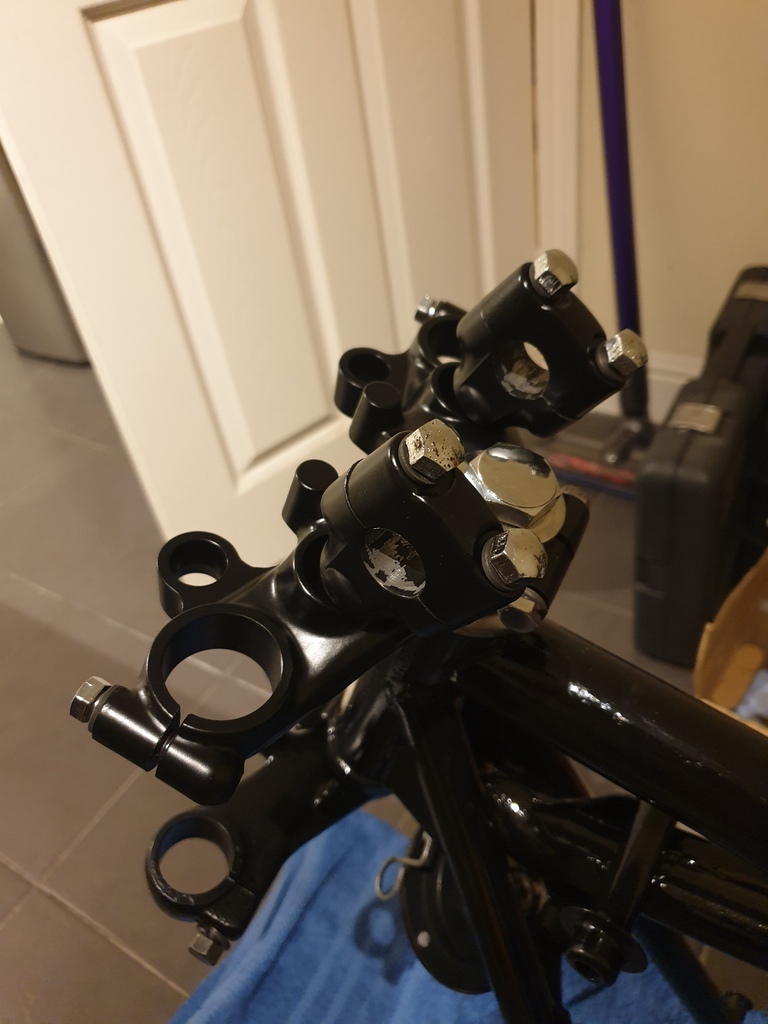 Looks pretty tidy compared to how it was 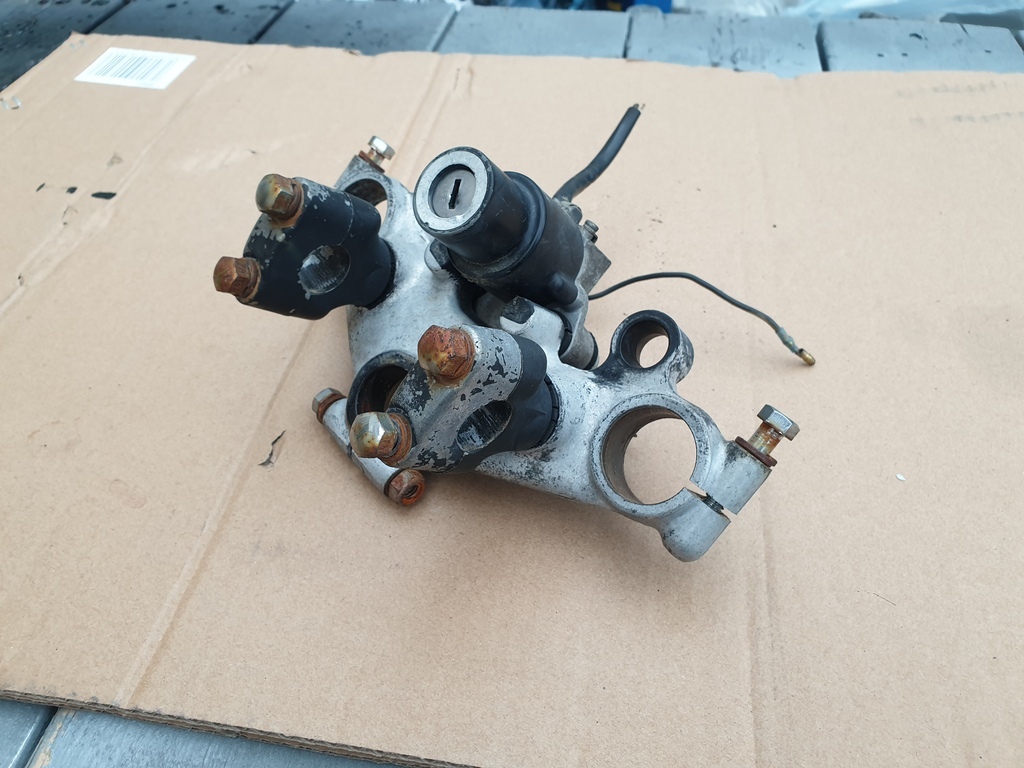 So now, wheels, forks and swing arm bearings and it should be on the way to being a rolling shell again |
| |
|
|
goldnrust
West Midlands
Minimalist
Posts: 1,872
|
|
|
|
Looking good Adam From experience I can say, don't get tempted to do away with the rubber mounts for the handlebars. I made up solid replacements for my Suzuki, as none of the more modern bikes I've previously owned had rubber mounted handlebars and I figure it would just reduce the feel of the front end... I found two things; 1. The small bit of compliance in the handle bars is nothing compared to the frame/forks/swing arm flex, so couldn't really feel any more directness and 2. The bars vibrates much I could barely hold on to them.  Either way, I soon installed some new rubber mounts! |
| |
|
|
adam73bgt
Club Retro Rides Member
Posts: 4,862
Club RR Member Number: 58
|
|
Mar 22, 2022 22:34:26 GMT
|
Thank you Yeah the rubber mounts seem to be easily available so I'll stick with them. I'm sure even with the balance shafts in the engine, there'll be some vibes that the handlebar mounts will help damp out. The rubber mounts for the ignition switch however seem to be out of stock/NLA so I may have to re-use the old ones or come up with another solution. I'd rather have a wobbly ignition switch than wobbly handlebars though Since my last update I think I took a couple days where I didn't do anything with the bike, I'd been hoping I'd get my Suzuki sold a bit quicker so I could focus on the Kawasaki more but no dice. The improvement in the weather this week may help that along though! I've just been going through the pile of bits really, cleaned up the engine mounting bolts and brackets, and also got the front hub out of the wheel, removed the bearings and gave it a good clean up 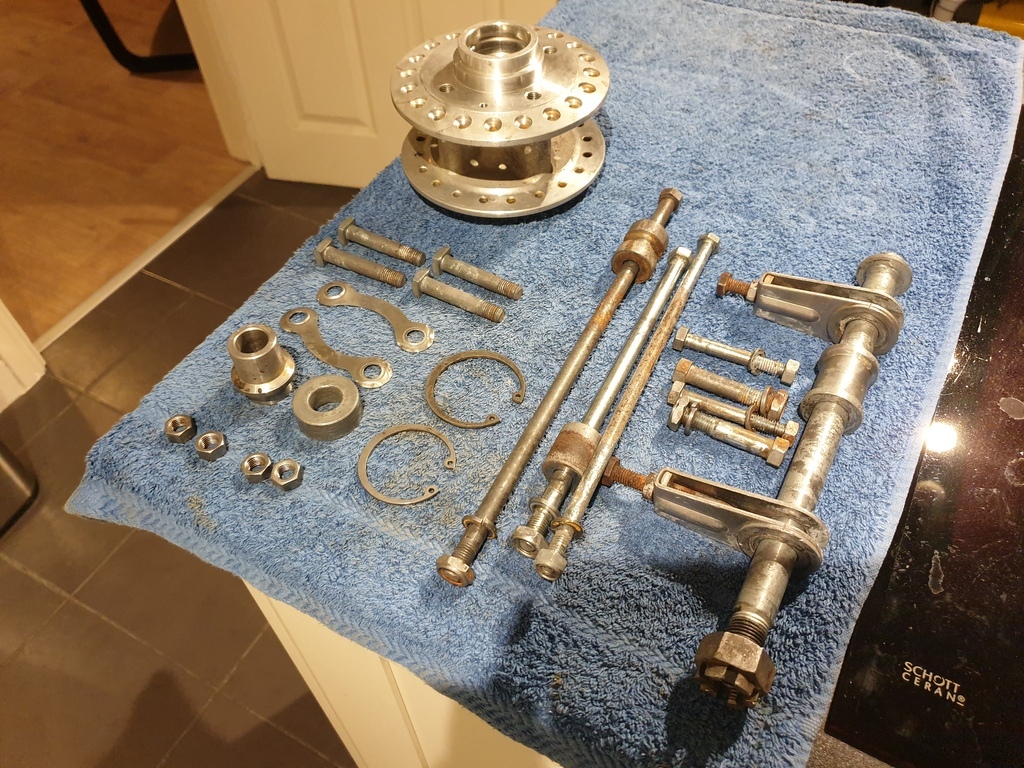 I managed to get most of the rear wheel spokes out without resorting to cutting them which was nice, just two had the ends a bit too rusted on, so got cut off. Getting the bearings out of the hub was straightforward using a punch 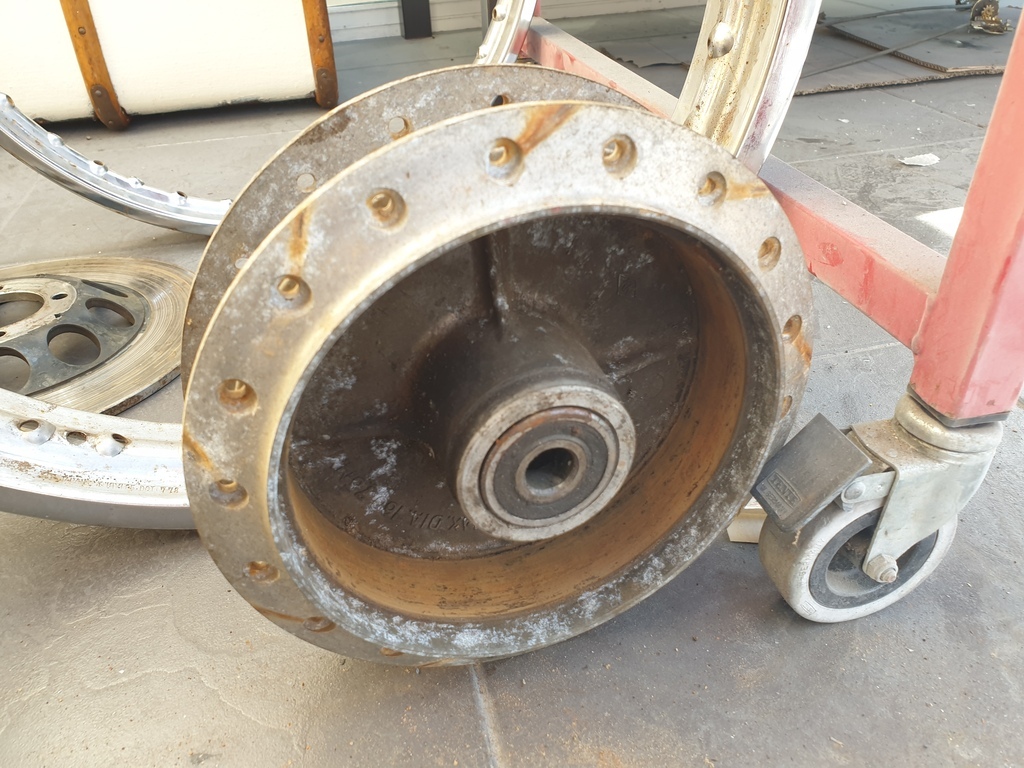 At this point I got a bit slack with the photos as I washed and deox c'd a load of bits, mainly the hubs, rear sprocket mount, rear brake mechanism and rod etc. Any thoughts of re-using the rear brake shoes were firmly ended when the lining simply came off one of the shoes  One bit I have cleaned up and actually reassembled is the speedo drive, put together with new grease and seal 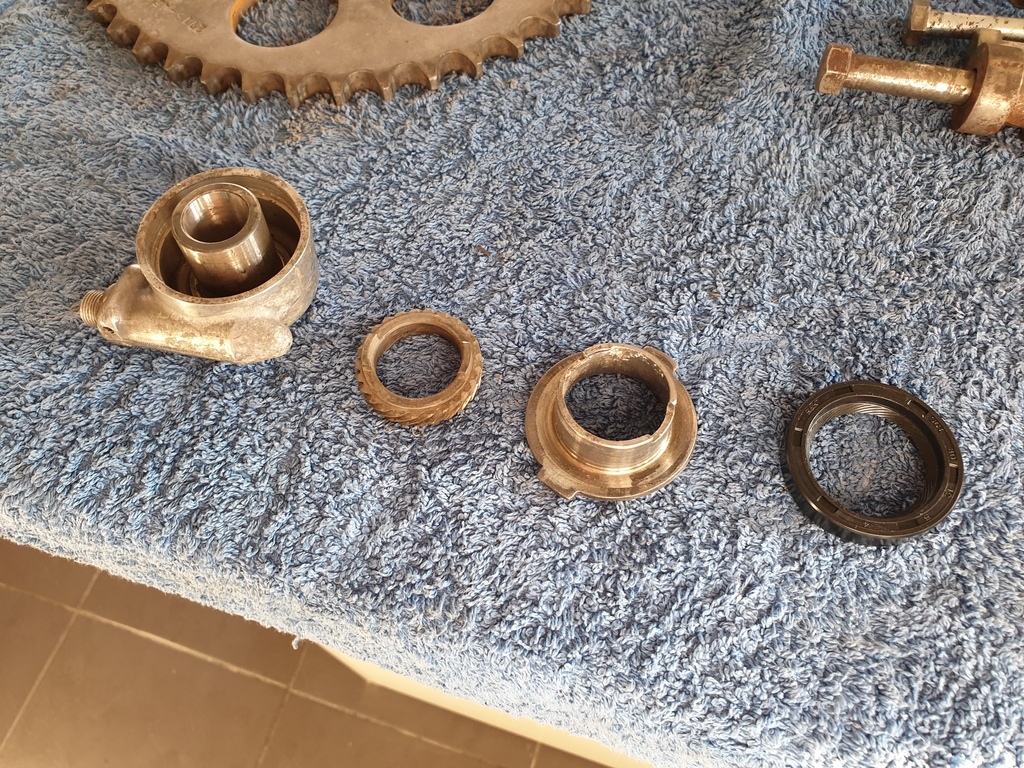 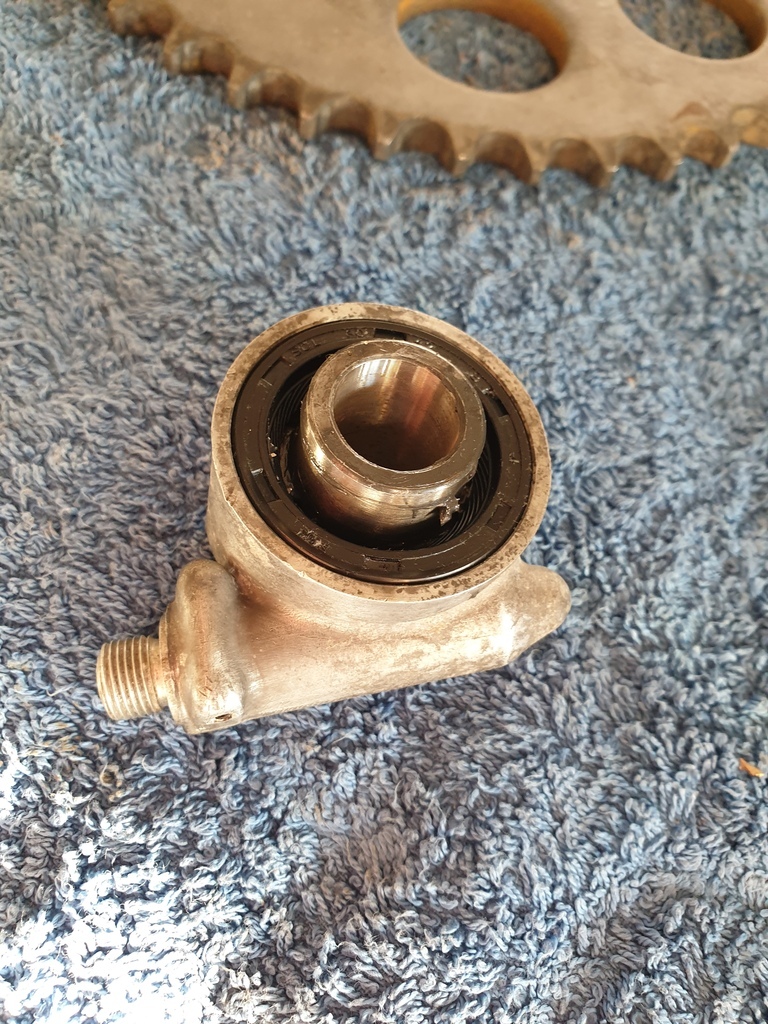 The front hub is also back together with both new bearings and seals, my press made short work of fitting the new bearings. I've cleaned up the wheel rims as well. The inner bits will need a bit more wire brushing and some Hydrate 80 applying, but the chrome has come up quite nicely using a bit of ally foil followed by metal polish 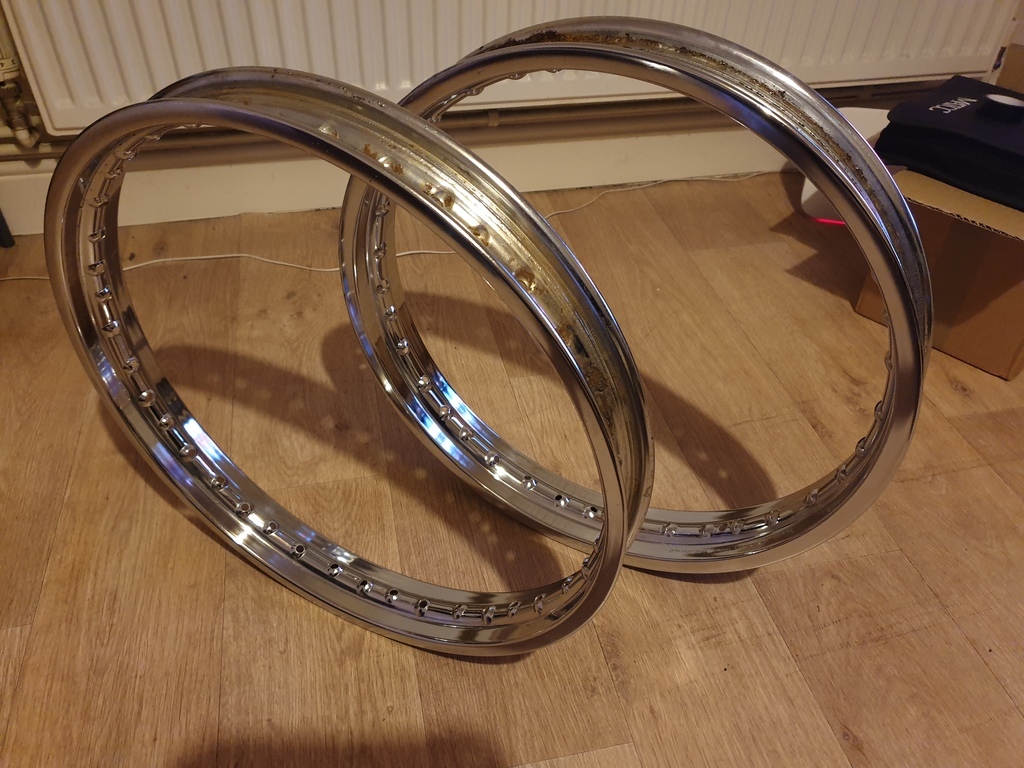 Not concours, but certainly will look good enough for this bike. Need to get some spokes ordered and could even start building the wheels back up. |
| |
|
|
TessierAshpool
Club Retro Rides Member
Posts: 507
Club RR Member Number: 168
|
|
|
|
Cool bikes these, this will look great when it's done. Very different, but I "restored" a rat-look KZ400 (with a GPz550 engine) over 2019/2020 and sold it on, here's a quick before and after pic set:  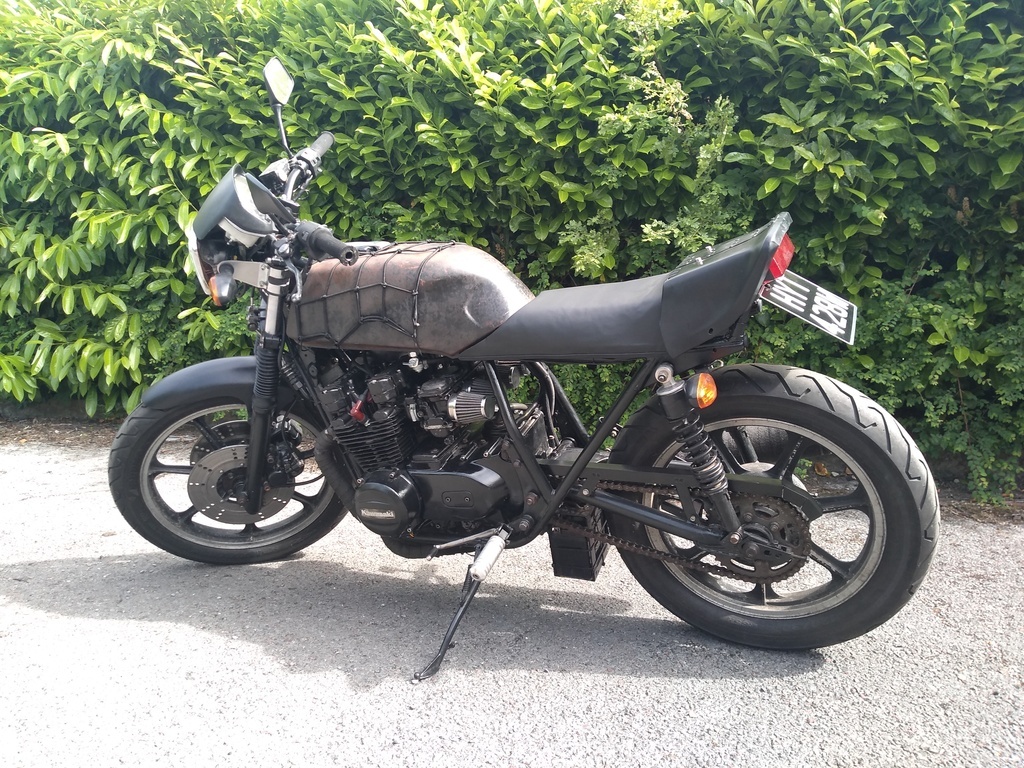 |
| |
|
|
adam73bgt
Club Retro Rides Member
Posts: 4,862
Club RR Member Number: 58
|
|
Mar 29, 2022 10:14:19 GMT
|
|
I'm not usually a huge fan of rat look bikes but I don't mind that at all, it's not overdone
I think that's the great thing about this sort of basic bike though, you can really apply any sort of style to it, be it rat look, survivor/daily rider, full resto, cafe racer, scrambler, flat tracker or even crazy Japanese bosozoku style 😅
|
| |
|
|
TessierAshpool
Club Retro Rides Member
Posts: 507
Club RR Member Number: 168
|
|
Mar 29, 2022 11:28:10 GMT
|
|
Yes the 70s into 80s steel cradle framed bikes are really versatile, easy to modify as an amateur to whatever style you like, before frames went into complicated materials and shapes.
|
| |
|
|
adam73bgt
Club Retro Rides Member
Posts: 4,862
Club RR Member Number: 58
|
|
|
|
Took a bit of a departure from the wheels to look at switchgear. Mostly because it was something easy to hand that I could refurb in the evenings. Started off with the right hand side 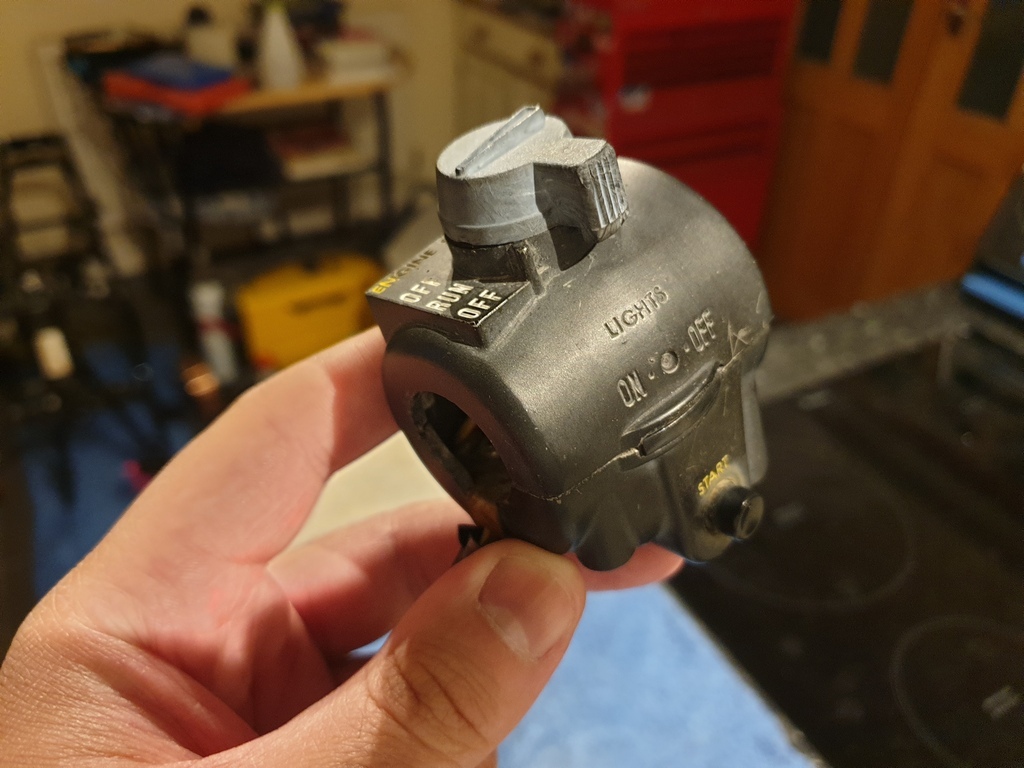 The starter button seemed to move OK, despite the lack of actual starter motor, but the kill switch on top didn't want to turn properly. It's quite easy to strip these down with a JIS screwdriver to hand and the reason for the killswitch issues soon became apparent.. 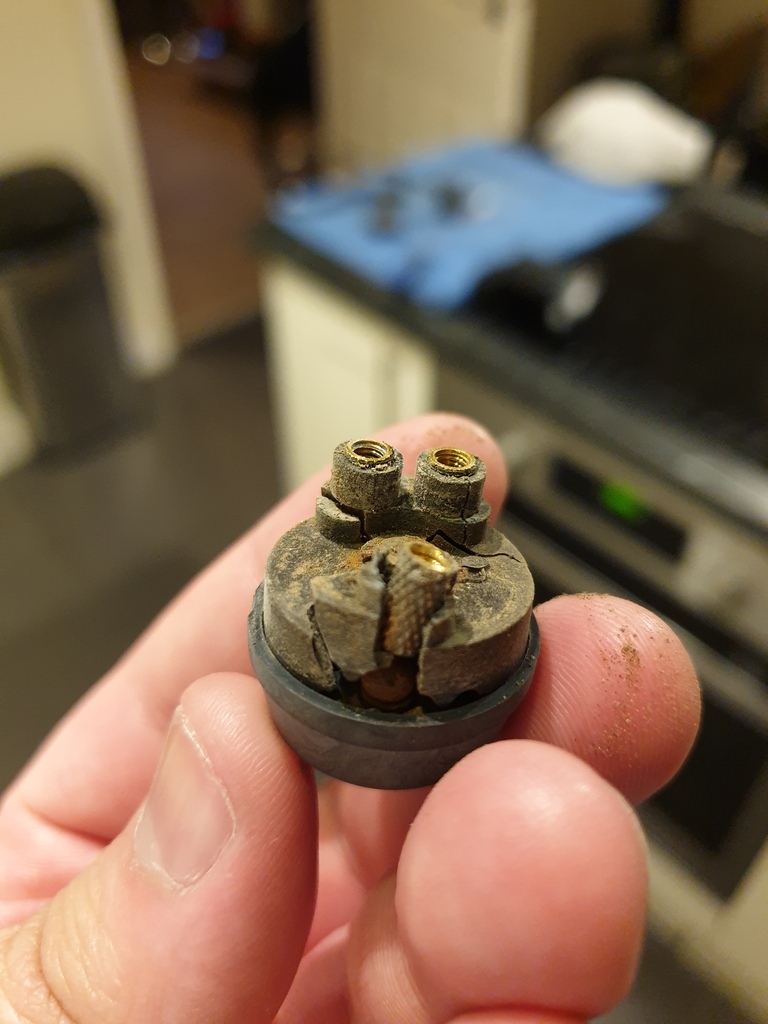 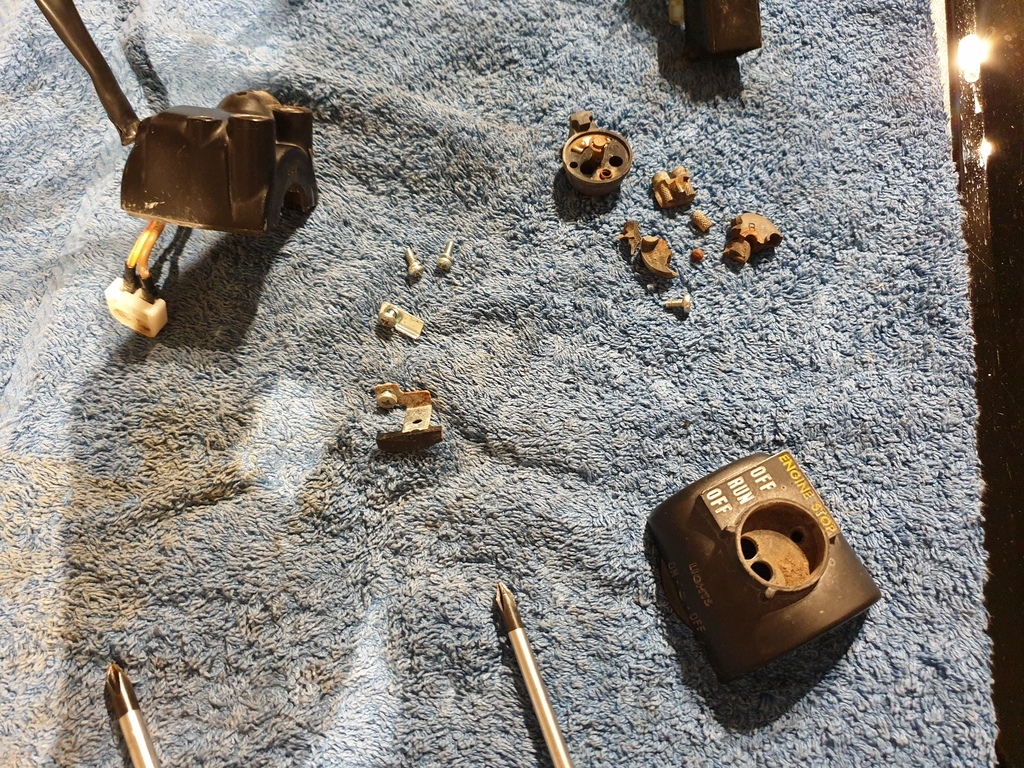 Another victim of the California sun! Also interesting is that where there are markings for a light switch of some sort, there is just a blanking plate, so I guess mine will have the lights on all the time? You can buy these new, but I wanted to repair it as it was just the kill switch that was the issue. Before that though, I stripped the left hand side switch as well 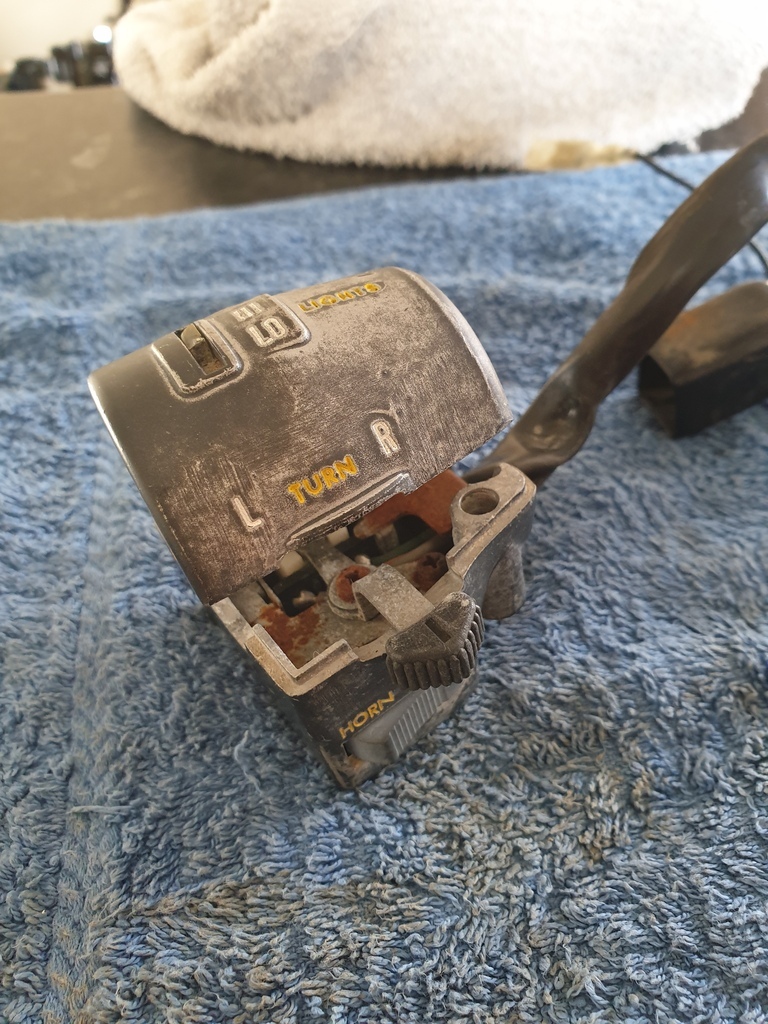 Pretty obvious issue on this side is the Hi Lo headlight switch knob has snapped off, quite a common issue it seems. I also managed to break the horn button while removing it 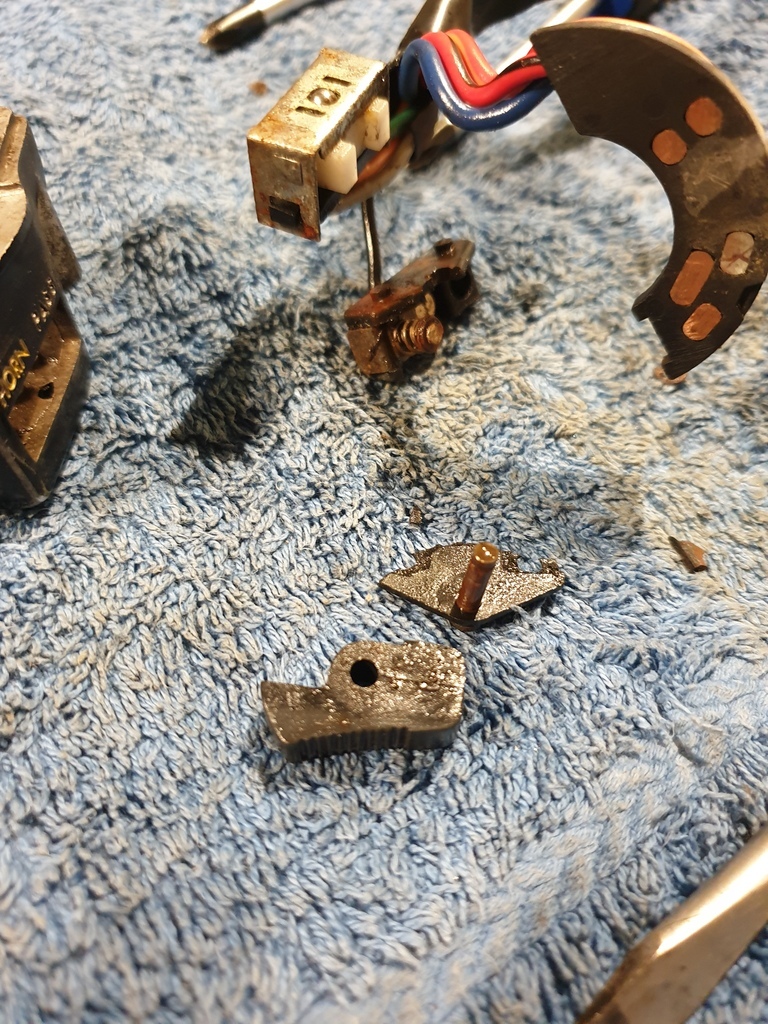 To fix the right hand switch, I picked up a second hand Z400 switch with a fully working kill switch for much less than a new assembly. 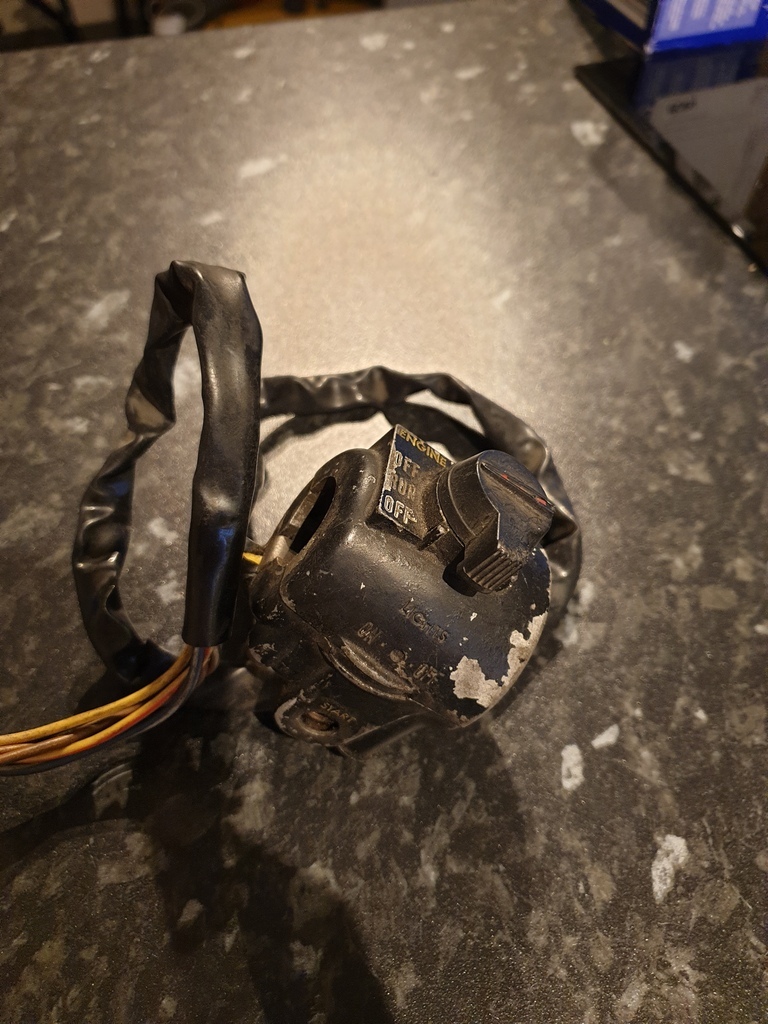 And for the left hand switch, bought a handy 3D printed replacement for the Hi Lo switch (though I still need to buy a new knob for the switch. I also managed to superglue the horn switch back together rather than pay an extortionate amount for a new one from the States. Bit of satin black on the bodies and some white paint pen and they're looking alright 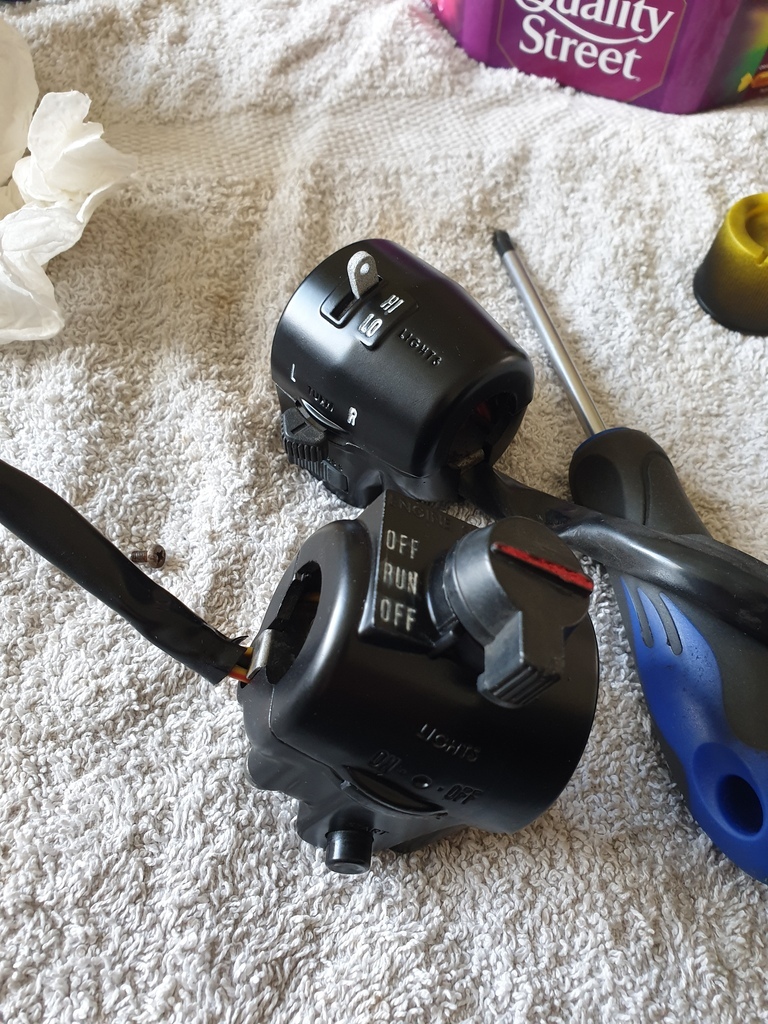 The 3D printed switch was part of a mini shopping spree on Z Power  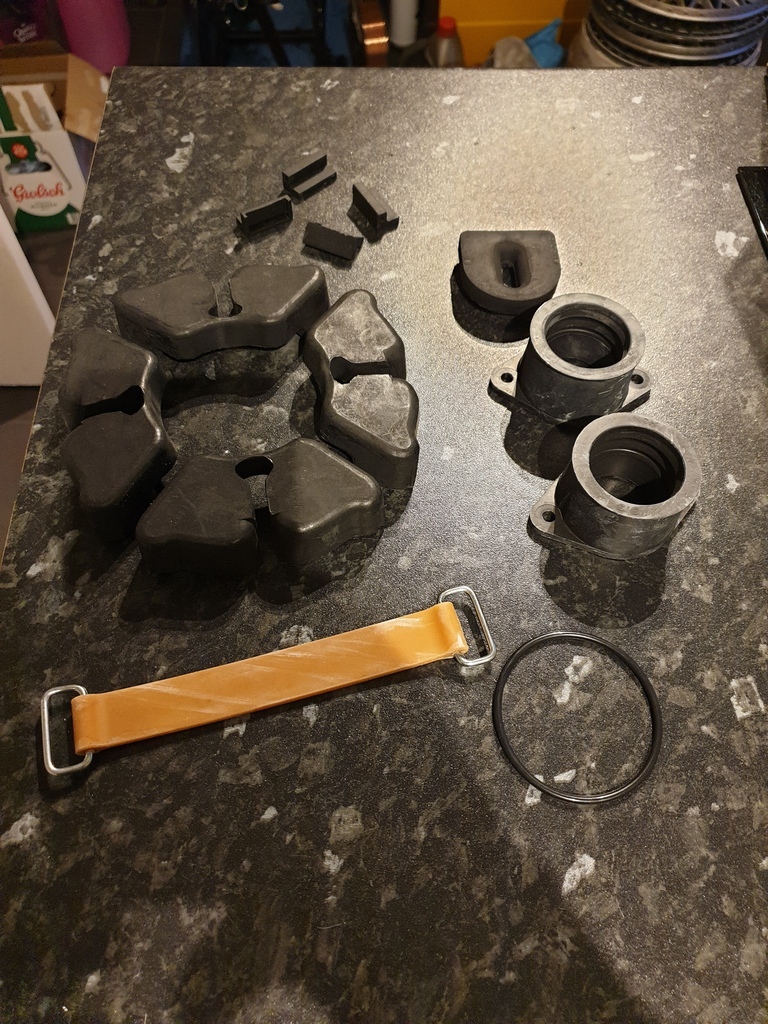 Got a couple rubber bits for the frame, new cush drive, battery strap, carb rubbers and an O ring for the rear hub as well. Also not pictured I got a chain and sprockets kit. So I can crack on with the rear hub ready for new spokes etc. I gave the centre of the front disc a quick sand and some satin black to smarten it up a bit, I'll just need to remove some of the excess, or let the brake pads do it for me 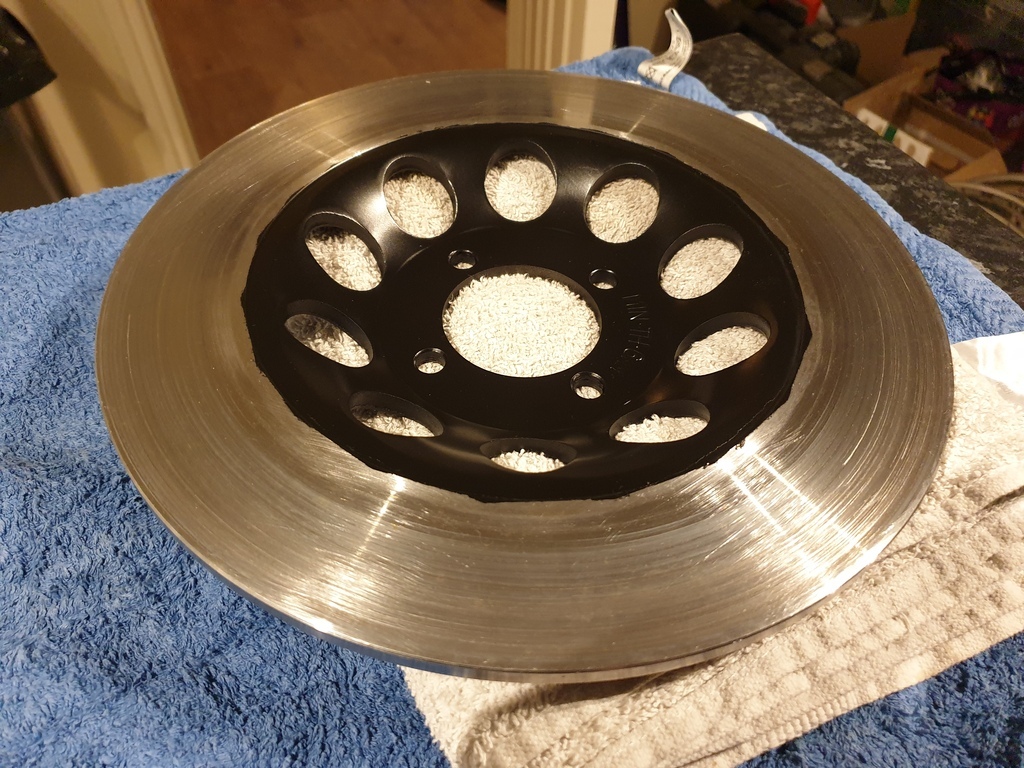 I've also been round the inner wells of both wheels with a wire brush on the rusty bits and hit them with some Hydrate 80 to stop the rust going any further. Finally, my big score on ebay this week was this used but infinitely better condition seat for a very reasonable price 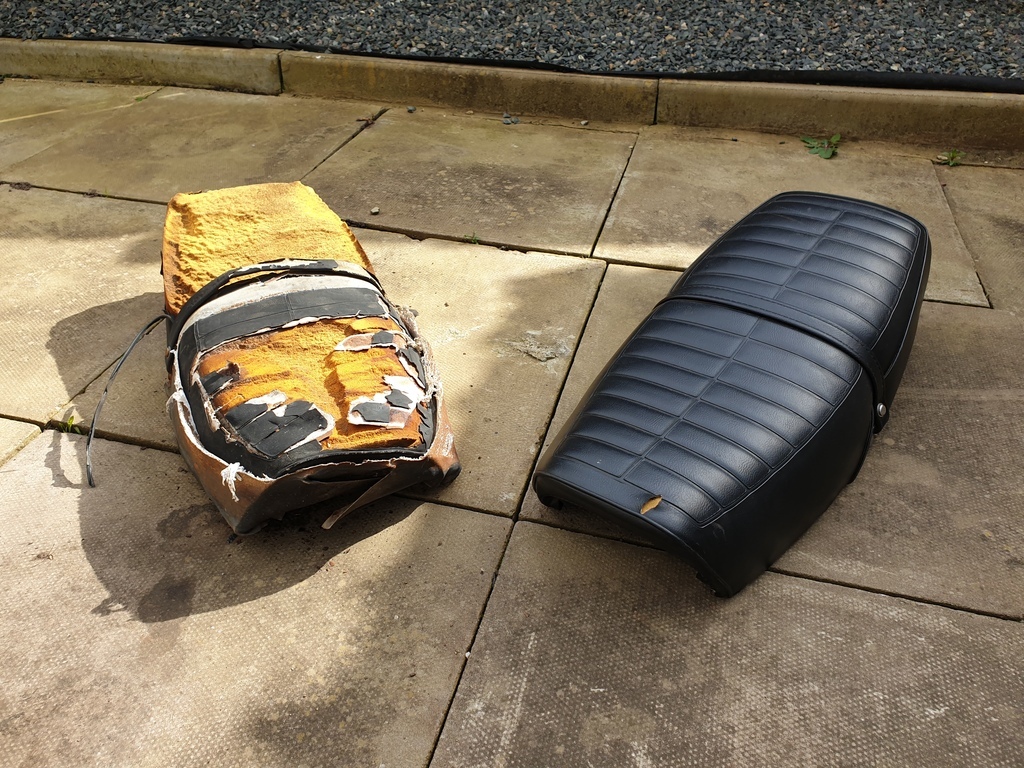 It's got a little tear but I can live with a bit of tape over that for now until I get round to recovering it. The huge advantage over the old seat is that it actually has a solid pan, whereas the old seat deposits a nice pile of rust wherever it goes And very lastly, I managed to get the fork inner to move a bit so I can see how the circlip comes out, actually getting it out will be quite another matter! |
| |
|
|
TessierAshpool
Club Retro Rides Member
Posts: 507
Club RR Member Number: 168
|
|
|
|
|
Those fork circlips are a PITA, the water just pools in there and rusts them solid. They should have a cap over them if I remember rightly, although mine were missing. Might not be a problem for you as yours look like they've never seen rain.
I'd recommend seeing if you can find some caps and then packing them full of marine grease to prevent future rust in there. You can also buy generic bungs from eBay in many sizes if you can't find Kawa ones.
|
| |
|
|
adam73bgt
Club Retro Rides Member
Posts: 4,862
Club RR Member Number: 58
|
|
|
|
|
Yeah mine do have the caps, they're not the tightest in the world though, probably affected by sunlight like most of the plastics on the bike so a bit of grease in there when I put them back together can't hurt.
The circlips seem to have avoided corrosion so far, having an initial go I quickly found I needed 3 hands to do it 😂 I'll struggle on a bit then maybe try and rope the gf in to help
|
| |
|
|
|
|


 Either way, I soon installed some new rubber mounts!
