jehu
Part of things
 
Posts: 99 
|
|
|
|
...the distributor shaft with attached gear and thrust washer, when inserted and engaged with the camshaft, should be "almost parallel to and offset towards the centre line of the engine". I have the chain gear wheels set up as per Fig.26 Page B.25 of the manual, but the 'offset' hardly seems 'almost parallel'. You can see in the pics below the nearest settings of the gear engagement differing by one tooth. 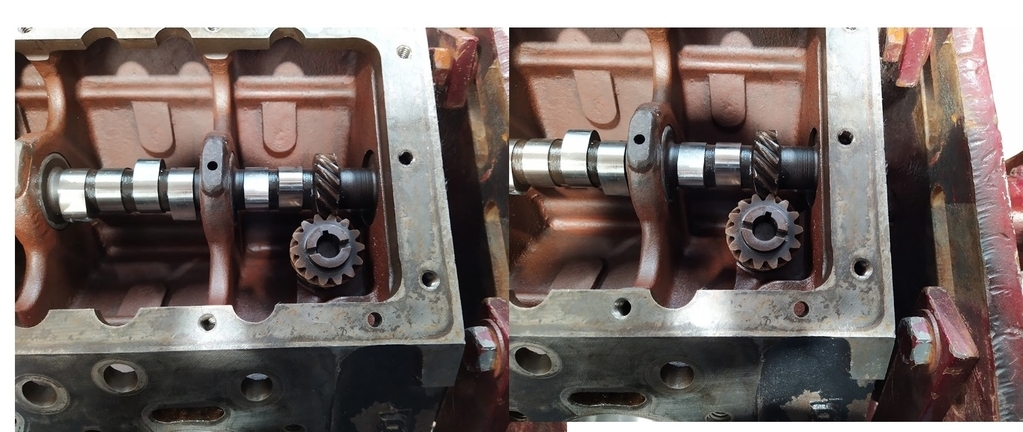 Ultimately the orientation of the oil pump drive is not that important. It just sets the angle of where your no1 cylinder is on the distributer cap. So if you’re happy with your can timing, measured off the marks on the pulley and if necessary confined by checking the valve positions, as described in you second post, then it’s all good.  The keyway, labelled C in the manual, should be pointing away from the centre line, so I believe you have the gear 180 degrees out there. The picture showing the gear is misleading! In terms of it being ‘almost parallel but pointing towards the centre line’, I believe I interpreted that to be more like your right hand picture. Thanks Goldenrust, I was never good at reading the question properly in exams and I seem to still do it in terms of instructions. I ignored, "The keyway will be pointing away from the centre line", just because it seemed nonsensical and the Fig.26 appeared to indicate the opposite. As you point out, the sentence should be interpreted as, "The keyway will be pointing away from the camshaft" Anyway thanks for the advice, I will leave it as the pic below: 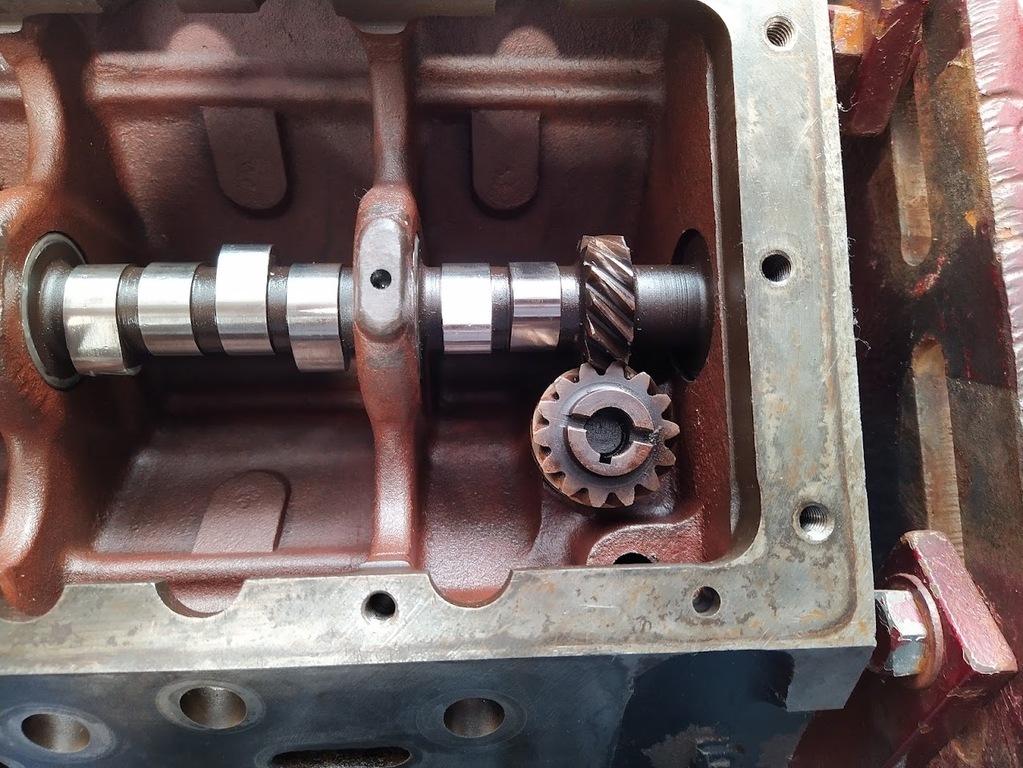 |
| |
Last Edit: Apr 24, 2022 7:31:07 GMT by jehu
2016 Audi Q3
1976 MGB
1968 Daimler 250 V8
|
|
|
|
jehu
Part of things
 
Posts: 99 
|
|
|
|
OK back into it after a couple of interruptions. Had to push the Daimler out to service the mother-in-laws car and put a clutch slave cyl kit in the MGB. I took the head gaskets out of the kit and wiped them over with petrol an a rag to remove the packing grease and it went to a flaky wax like mess that was very hard to clean off. I tried metho and diesel but it just got over everything without actually melting. With the second one I soaked in diesel for 24 hours and it came out just the same. Has anyone else had this problem? I bought the gasket kit from NZ. 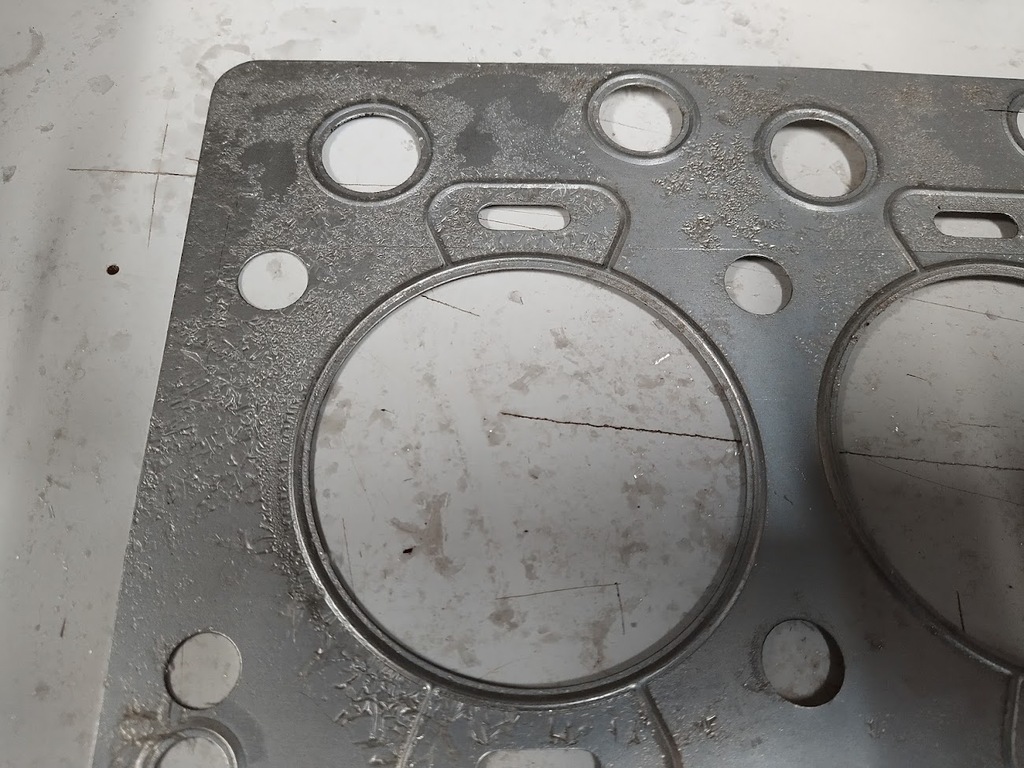 Even after much wiping with petrol I could still scrape up residue with my fingernail. 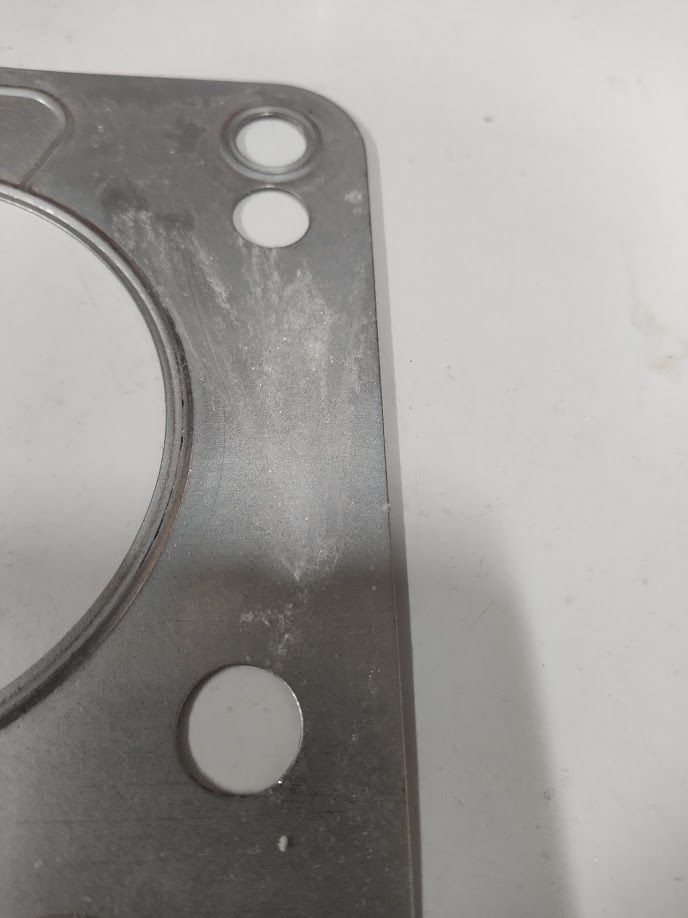 |
| |
Last Edit: May 18, 2022 6:06:16 GMT by jehu
2016 Audi Q3
1976 MGB
1968 Daimler 250 V8
|
|
jehu
Part of things
 
Posts: 99 
|
|
|
|
According to the manual the the cover on the tappet block assembly is aluminium with glass fibre wool underneath. Mine is steel with a disintegrating cork layer glued to it. I suppose this is for sound insulation so I have replaced the cork with a temperature resistant insertion rubber being as I was unable to find suitable cork sheet. 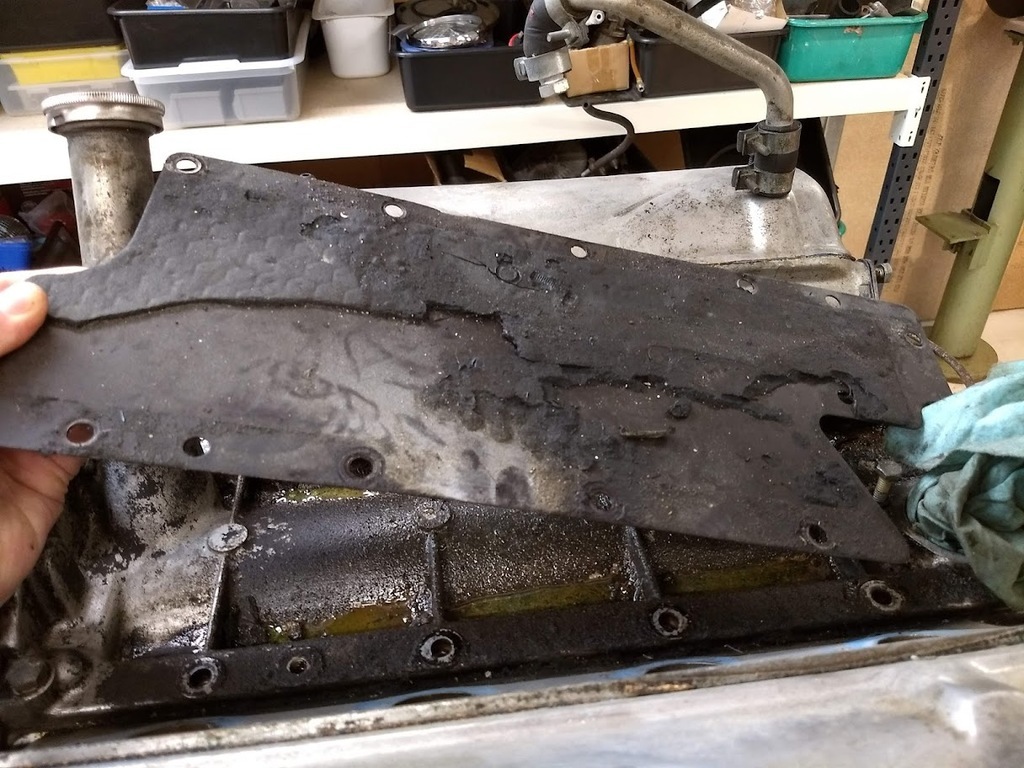 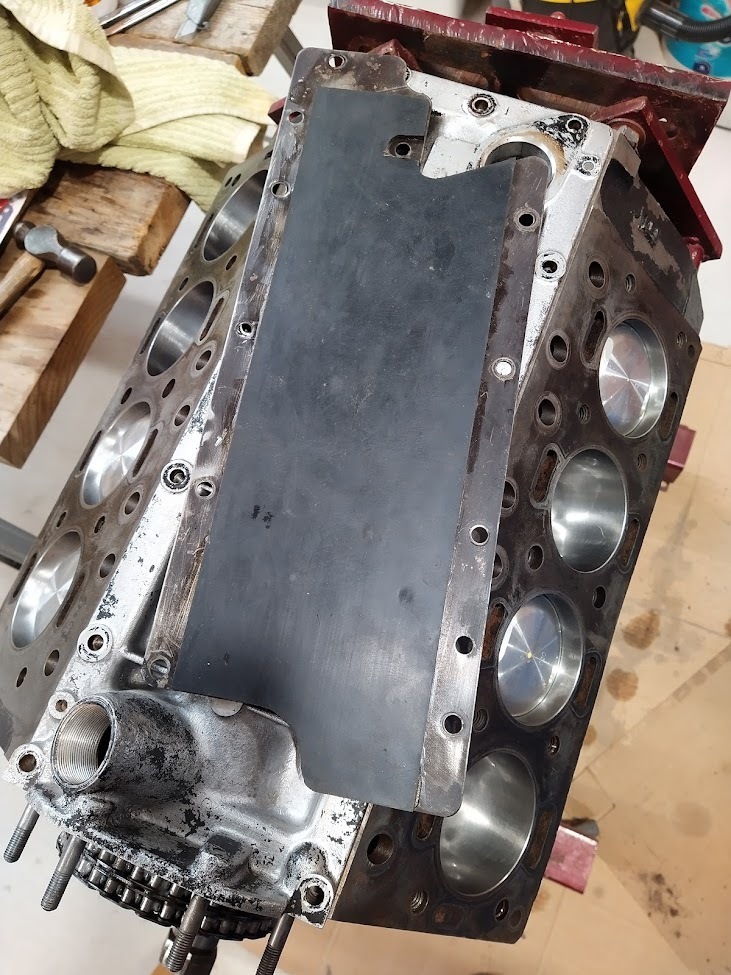 |
| |
2016 Audi Q3
1976 MGB
1968 Daimler 250 V8
|
|
|
|
|
May 19, 2022 19:09:45 GMT
|
|
try celly thinners or acetone re: headgasket covering
|
| |
|
|
jehu
Part of things
 
Posts: 99 
|
|
|
|
try celly thinners or acetone re: headgasket covering Thanks darrenh, I don't have any acetone on hand but thinners work better than petrol or metho. It still requires wiping over, wiping off and changing the rag multiple times. It is weird stuff! |
| |
2016 Audi Q3
1976 MGB
1968 Daimler 250 V8
|
|
jehu
Part of things
 
Posts: 99 
|
|
|
|
Not Happy! I just went to fit the heads, which I had been inspected cleaned and machined at my local machine shop, and out spilled a teaspoon or so of what looks like silica blasting cabinet media, all down my newly bored cylinders onto my new pistons! I unwrapped enough of the second head to see that it too had sand pouring out of the water jacket. At the very least, apart from the time involved, I will have to dismantle, clean, replace gaskets and sump joints. GRRR. 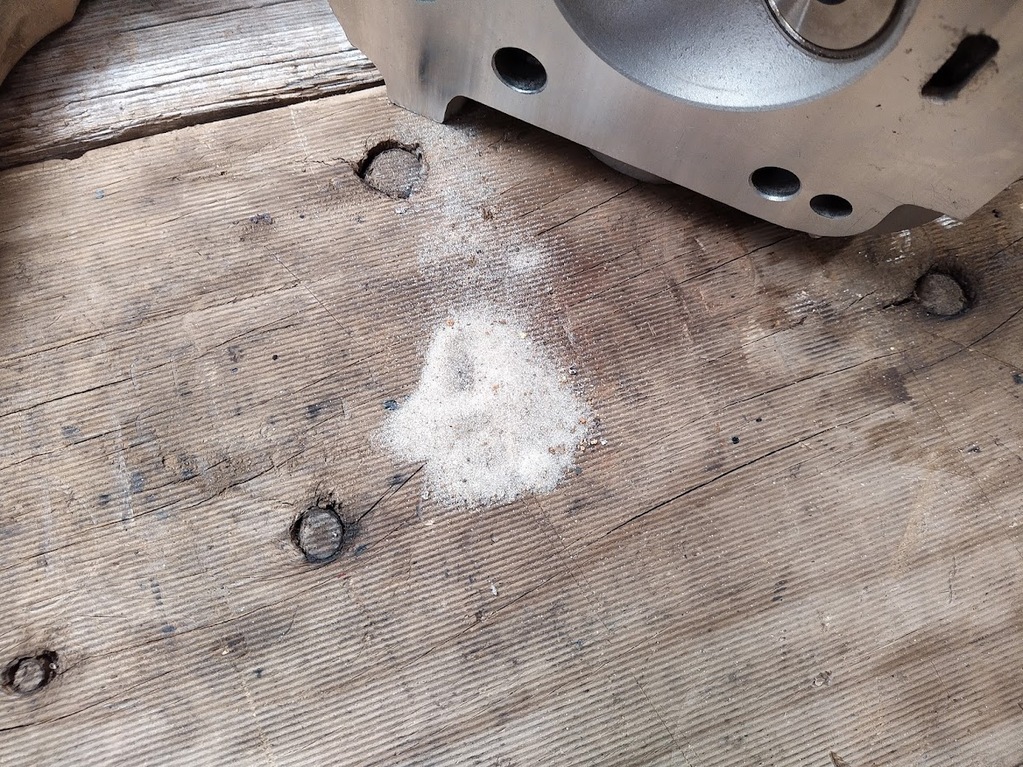
|
| |
Last Edit: May 22, 2022 7:44:34 GMT by jehu
2016 Audi Q3
1976 MGB
1968 Daimler 250 V8
|
|
goldnrust
West Midlands
Minimalist
Posts: 1,889
|
|
|
|
Argh.  That’s so frustrating. At least no damage is done, just time to clean it up. I’m sure many a rude word was said though! |
| |
|
|
|
|
|
May 24, 2022 12:52:01 GMT
|
|
faaaaaaaaaaaaaaark
|
| |
|
|
jehu
Part of things
 
Posts: 99 
|
|
|
|
I may have used a different expression but my sentiments exactly!  I contacted the machine shop guy, he was very apologetic and accepted full responsibility (didnt even blame the apprentice). He offered to come around, pick it all up and fix it. I took him up on cleaning the heads properly, and being the opportunist that I am, asked him to machine the valve guides and fit seals - something I regretted not doing first time around especially after reading Goldenrust's experience with oil burning. It's an ill wind... The pistons are showing a bit of scratching above the top ring as I had turned the engine over before I realised what was going on. I will give them a touchup with 1200 grit wet and dry before I wash them and replace the rings. I am pretty sure that the sand didnt get past the top end and so have turned the motor upside down and flushed the cylinders without removing the crankshaft. 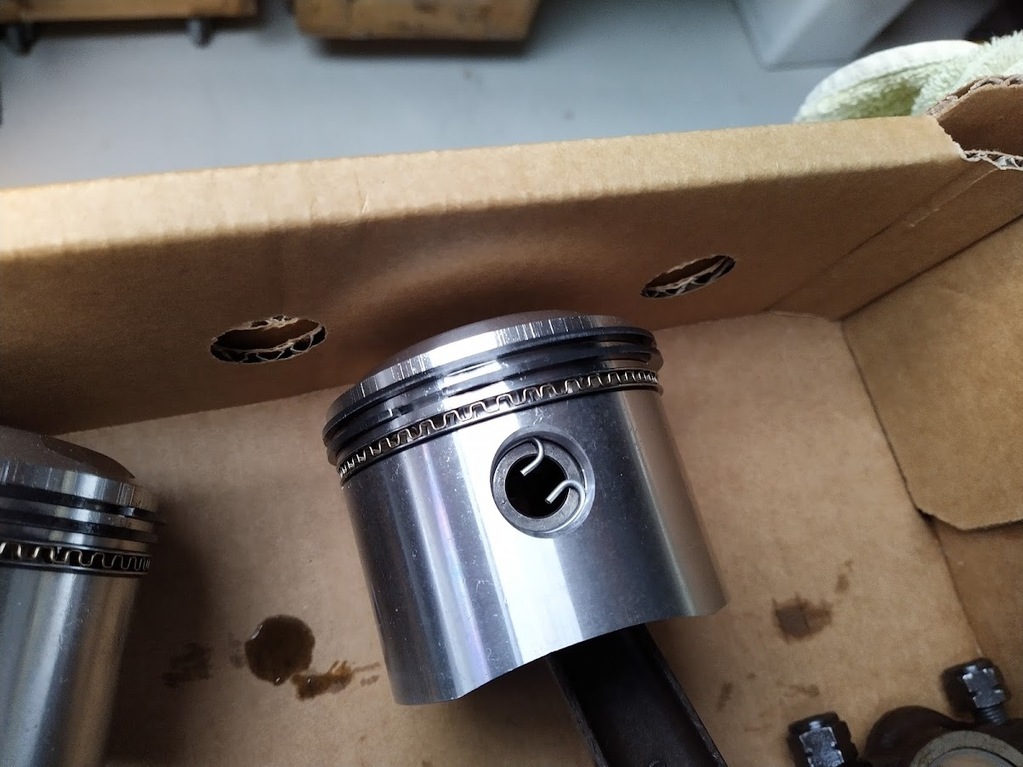 |
| |
2016 Audi Q3
1976 MGB
1968 Daimler 250 V8
|
|
|
|
|
May 25, 2022 12:19:10 GMT
|
|
Not good! At least it's all fixable.
|
| |
|
|
|
|
|
|
|
|
|
|
Oh no!
Good that the machinist has come to the party though.
Am following this build with interest, looking good!
Assume the engine parts were from the Daimler Club NZ?
What size are the pistons? and did the rings gap up correctly?
I'd seen people talking about excessive ring end gaps on new Daimler piston sets which has got me a bit nervous with my upcoming build.
And did the soft seal come off the head gaskets in the end? strange stuff. Did you try Brake clean on it?
|
| |
1964 Daimler 2.5 V8 (project)
2015 Disco 4 SDV6
|
|
|
|
|
|
|
|
Ooooh, just spotted this. Not started to read it just yet, will look forward to sitting down this evening and enjoy reading properly. Watching with interest.
|
| |
|
|
jehu
Part of things
 
Posts: 99 
|
|
May 26, 2022 12:29:49 GMT
|
Oh no! Good that the machinist has come to the party though. Am following this build with interest, looking good! Assume the engine parts were from the Daimler Club NZ? What size are the pistons? and did the rings gap up correctly? I'd seen people talking about excessive ring end gaps on new Daimler piston sets which has got me a bit nervous with my upcoming build. And did the soft seal come off the head gaskets in the end? strange stuff. Did you try Brake clean on it? Some parts were from DaimlerJag Club NZ eg - gasket set. Originally I was going to go with a ring set on the original std pistons but when I found the rings supplied necessitated the pistons being machined I decided to go the whole hog and had it bored to size with +30 pistons supplied by David Manners. (I couldnt find +20s and +10s may not have a been enough to clean up the bore wear). I finally went and bought some acetone which sorted the waxy stuff on the head gaskets. The rings supplied with the pistons needed a bit of filing to bring them to manual specs. Did I see some discussion on your blog about what the gap should be? Someone lent me a nifty little tool (which I had never seen before) to get them square. 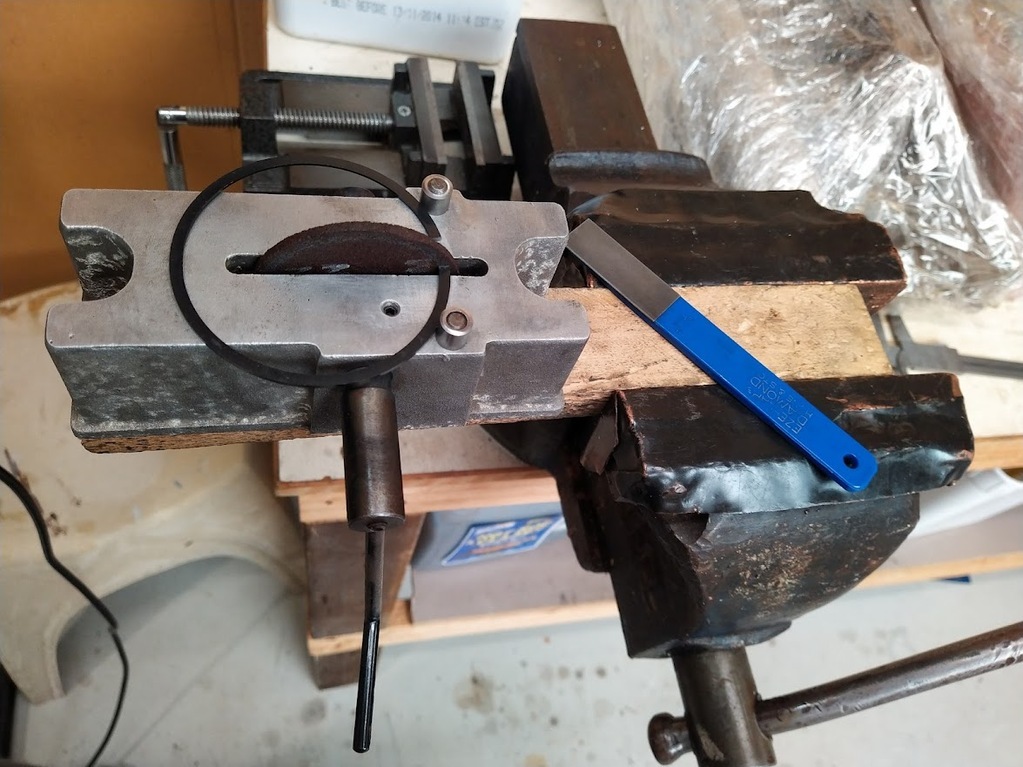 |
| |
2016 Audi Q3
1976 MGB
1968 Daimler 250 V8
|
|
jehu
Part of things
 
Posts: 99 
|
|
May 26, 2022 12:33:22 GMT
|
Ooooh, just spotted this. Not started to read it just yet, will look forward to sitting down this evening and enjoy reading properly. Watching with interest. Hi voucherboy, Is that a your Daimler in the icon? |
| |
2016 Audi Q3
1976 MGB
1968 Daimler 250 V8
|
|
|
|
|
May 26, 2022 18:20:09 GMT
|
Ooooh, just spotted this. Not started to read it just yet, will look forward to sitting down this evening and enjoy reading properly. Watching with interest. Hi voucherboy, Is that a your Daimler in the icon? Hi Jehu, yes that's mine. If you want some light reading material to get you off to sleep, my blog is at lootintheboot.uk I've read your thread. Some up's and down's....just like the rest of us...lol. At the beginning you mentioned that you had already completed a load of work, I'm sure we'd all be interested if you have some time to write that part up too. we all love a good story! |
| |
Last Edit: May 26, 2022 18:21:00 GMT by voucherboy
|
|
jehu
Part of things
 
Posts: 99 
|
|
|
|
Hi voucherboy, Is that a your Daimler in the icon? Hi Jehu, yes that's mine. If you want some light reading material to get you off to sleep, my blog is at lootintheboot.uk I've read your thread. Some up's and down's....just like the rest of us...lol. At the beginning you mentioned that you had already completed a load of work, I'm sure we'd all be interested if you have some time to write that part up too. we all love a good story! What an amazing rebuild Voucherboy. I showed someone the pics of your body work before you repaired; their comment was, "No self respecting garbo in Aust. would take that away." You certainly set yourself a challenge. The only welding I have ever done was the occasional 'tack' weld as an apprentice. And the last time I did that (50 years ago) was after waiting on a construction site for 2 hours for a welder to come and do it so I picked up the welder and did it myself. The next thing I knew was everyone was out on strike over a demarcation dispute. It took me a moment to realise it was because of me.  ) Anyway your work is an inspiration that I am glad I don't have to do. |
| |
2016 Audi Q3
1976 MGB
1968 Daimler 250 V8
|
|
jehu
Part of things
 
Posts: 99 
|
|
|
|
Well, Ive been distracted by a few other projects and not inspired by the cold weather. However I'm back to pottering. Since my last update I have stripped and cleaned all the sand blast medea out of everything and reassembled. The heads now have valve guides machined and inlet guide seals fitted. After advice from several of you I ordered an alloy radiator. The first one I received did not have the trans cooler, in spite of their advert pic showing the fittings. It turned out that all the Aust. ebay suppliers use the same pictures and when queried all of them only stocked for manuals. Most of them have changed their pics now that I have pointed it out, and none of them responded to emails requesting a rad for an auto. Anyway I ended up getting one direct from China which finally arrived having obviously been dropped on the way.  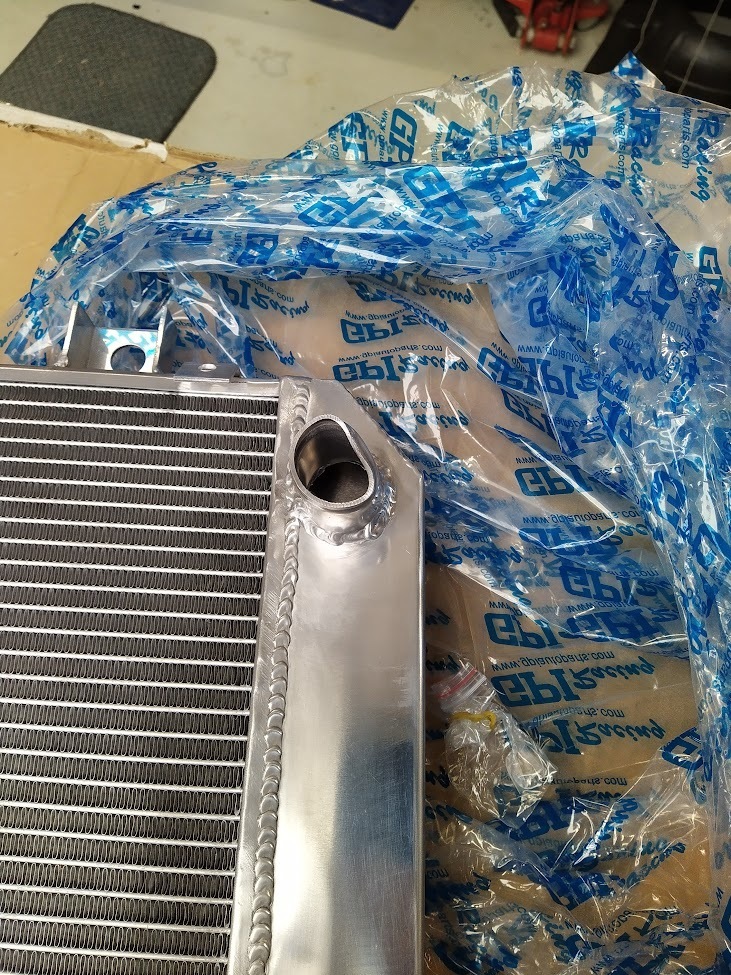 Being alloy it was not hard to straighten with some gentle persuasion - but just in case I loosened a tube I took it in and had it pressure tested. Thankfully the tubes were fine but they did find 2 pinholes in the welds which were easy to mig repair. I'm glad I didnt get it all back in before finding that. So I am just refitting the fan when I noticed that the workshop manual shows a 'balance piece' that was missing. It may explain why the water pump had done a bearing even though it did not look very old. Can anyone tell me how thick the steel would need to be to make a new one so I can balance the fan and fan torque control unit? 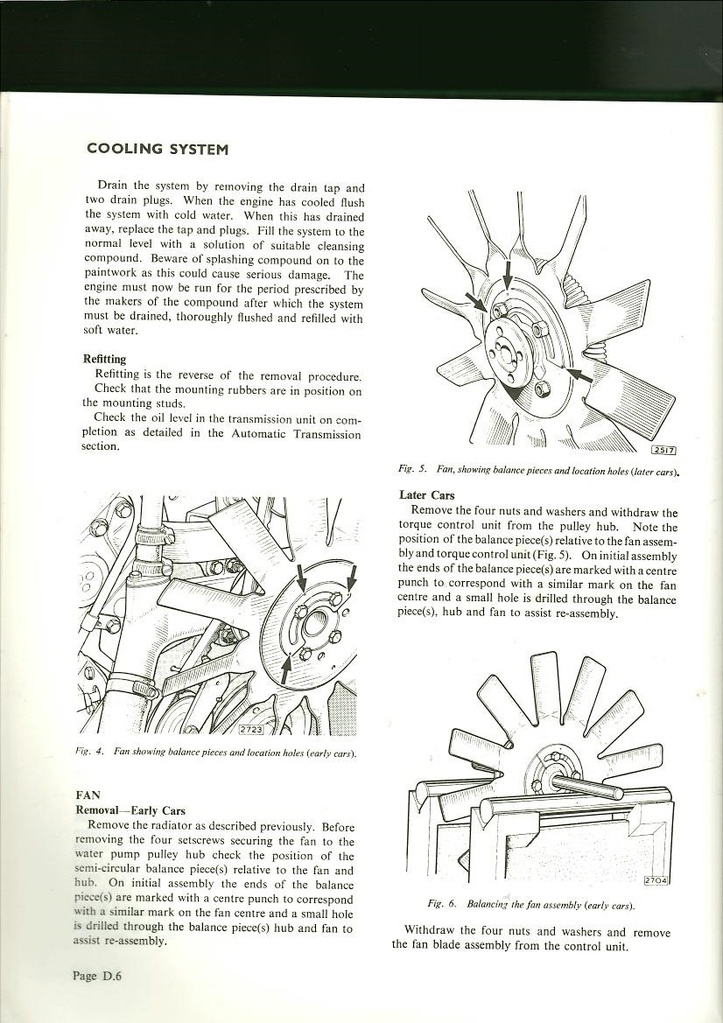 Cheers Jehu |
| |
2016 Audi Q3
1976 MGB
1968 Daimler 250 V8
|
|
|
|
|
Sept 8, 2022 19:01:32 GMT
|
Hi Jehu, yes that's mine. If you want some light reading material to get you off to sleep, my blog is at lootintheboot.uk I've read your thread. Some up's and down's....just like the rest of us...lol. At the beginning you mentioned that you had already completed a load of work, I'm sure we'd all be interested if you have some time to write that part up too. we all love a good story! What an amazing rebuild Voucherboy. I showed someone the pics of your body work before you repaired; their comment was, "No self respecting garbo in Aust. would take that away." You certainly set yourself a challenge. The only welding I have ever done was the occasional 'tack' weld as an apprentice. And the last time I did that (50 years ago) was after waiting on a construction site for 2 hours for a welder to come and do it so I picked up the welder and did it myself. The next thing I knew was everyone was out on strike over a demarcation dispute. It took me a moment to realise it was because of me.  ) Anyway your work is an inspiration that I am glad I don't have to do. "Oi!, that's a welder's job!" haha that's hilarious - great story :-) |
| |
1964 Daimler 2.5 V8 (project)
2015 Disco 4 SDV6
|
|
jehu
Part of things
 
Posts: 99 
|
|
Sept 17, 2022 7:23:37 GMT
|
Tried to static balance my fan assy as illustrated in the manual (see pic above) using washers and blu tac, with the intention of making a replacement 'balance piece', but I found it impossible. I would get it somewhere close but then try it again a few minutes later and the balance is different. There seems to be 2 issues: 1. The balance changes depending on the position of the 'turbine' relative to the 'impeller'. 2. The fluid appears to be quite viscous and drains to the bottom making it heavy in that position after a few moments. It is tempting to say, 'say near enough is good enough' but I don't want to have to buy another water pump because the unit is out of balance and flogs out the bearing. And presumably it must be reasonably important for Daimler to design a significant balance piece for the job. I really don't want the extra expense of buying an electric fan but I am wondering if I should go that route? 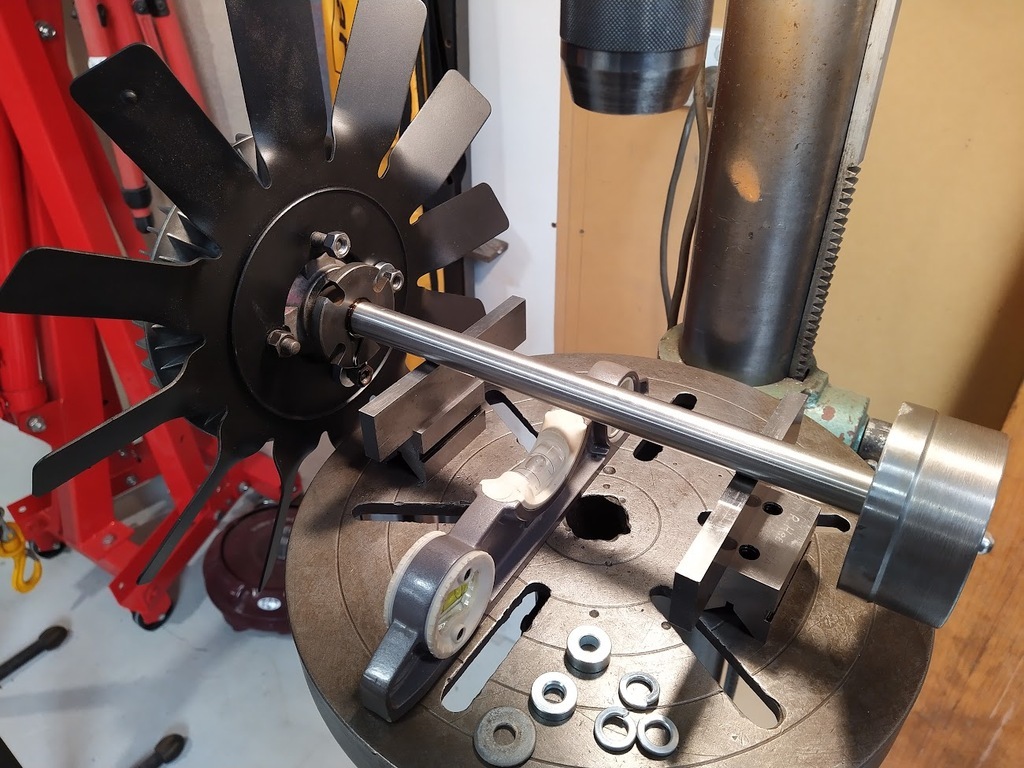 |
| |
2016 Audi Q3
1976 MGB
1968 Daimler 250 V8
|
|
|
|
|
Sept 17, 2022 8:49:13 GMT
|
|
I never balanced the fan on any of the Jag's i've rebuilt previously and i've never seen any seperate balance weights on the fan on any other cars with stamped metal fans.
Personally I wouldn't worry about it as I can't imagine many of these weights were refitted and/or reset when water pumps were replaced when the cars were in daily use.
|
| |
|
|
|
|


 That’s so frustrating.


 )
)


