Nathan
Club Retro Rides Member
Posts: 5,650
Club RR Member Number: 1
|
|
|
|
|
Small update.
Recently been putting miles on the GT and noticed a serious lack of power below 2k RPM.
Literally after 2.5k the power would kick in like a turbo lag, she also felt like it was missing or hesitating when pulling away so initially my thoughts turned to fuel AGAIN!
If you remember when I was doing the back garden testing, we found fuel sloshing due to no baffle and the pressure of the original MX pump being low. Most were sorted with an out of tank pump suited to about 250BHP with a swirl pot and adjustable regulator, oddly I decided to refit the old regulator which just compounded my new issues.
So on Thursday night after doing a random act of kindness (1970 Porsche broken down at the side of the road, basically got him going), I thought I'd have a look at the timing "Pic to follow", to my surprise the inlet timing was well out by at least 2 teeth! I have reset all the whole lot and will give it a try tomorrow. I need to get this problem sorted as I have a driver taking this to the gathering for me as I will be in the Capri.
Sorry about the lack of photos, not had chance to upload them.
|
| |
|
|
|
|
Nathan
Club Retro Rides Member
Posts: 5,650
Club RR Member Number: 1
|
|
Aug 27, 2014 15:18:10 GMT
|
Afternoon. With the Gathering looming I have been spending time going over the car to give it the biggest chance possible to get there. The Radiator was my main concern it was as old as the car and rather rusty inside, with the increased water pressure I had visions of this giving up on the road....So a new one was purchased. A simple job of changing a like for like component too all blooming day! Basically these re-manufactured are slightly bigger and overall rubbish in construction, needless to say they feel cheap (Yet the price is NOT). Also when I first put it into the car it blooming leaked from the inlet joint!...I could not return the item as that particular vesion is in limited supply so I needed to fix a NEW part. 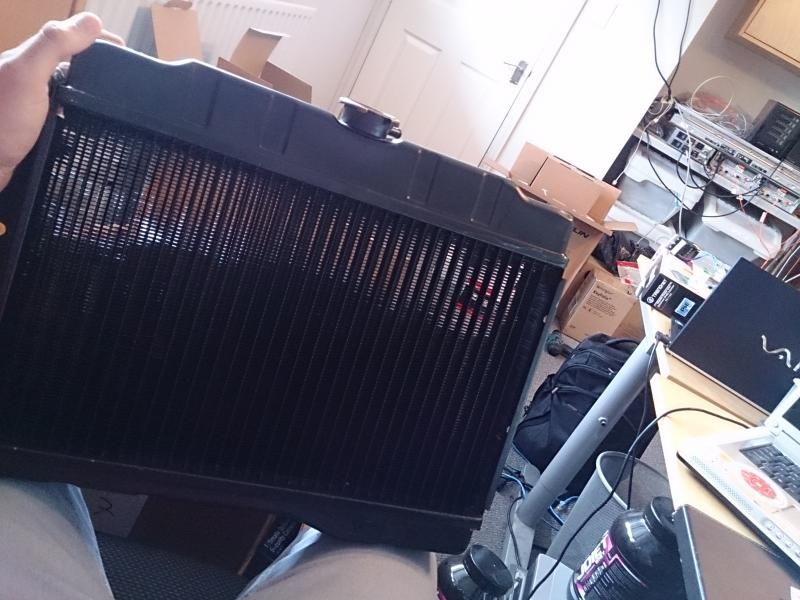 Honestly I'm not happy with it, the rad itself sits proud on the right hand side but its holding water so I can sort the niggles after the gathering. You can just about make out what I mean in this next image, to sort it I need to grind to gap a little more that the rad sits down in to. 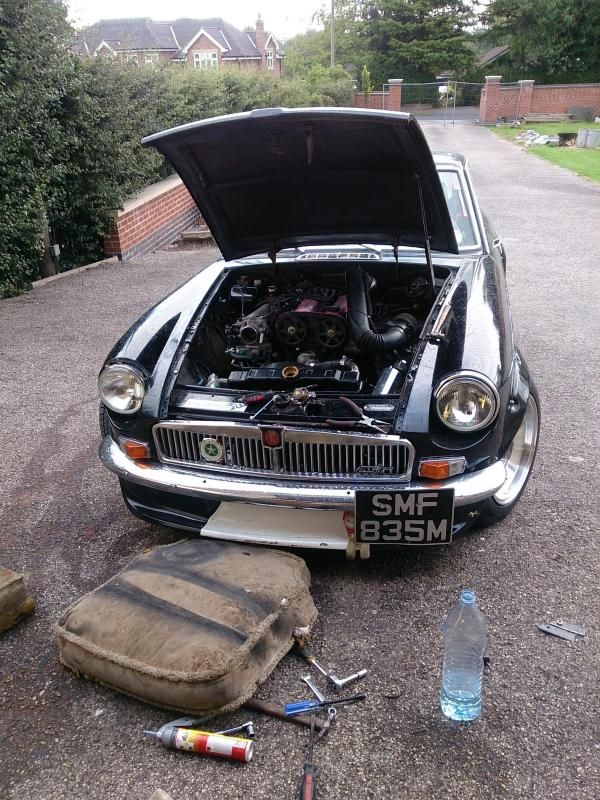 I mentioned the timing before? Well it was waaaaaaaaaaaaay out on the inlet side, so no wonder it felt like it was bogging down slightly. This has been reset and it feels more responsive and a lot quicker (I guess it was a little out in the MX before I changed the belt the first time). That's about it, the passenger seat is removed so I can assist in the masses of camping gear we take. Here she is waiting for Friday afternoon. 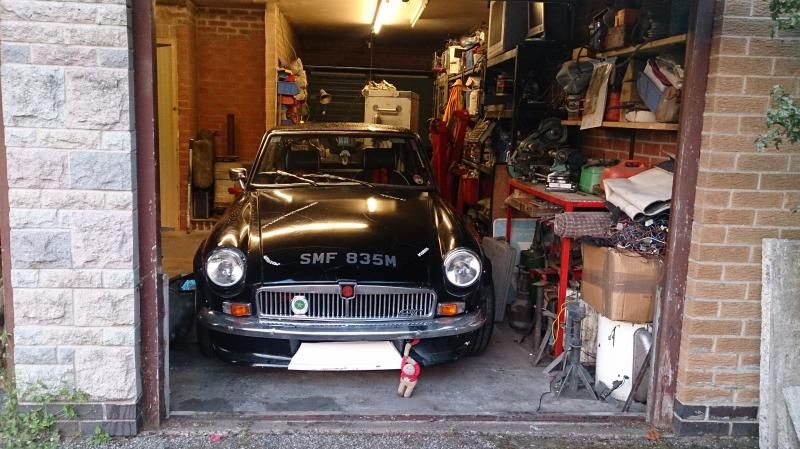 See you at the Gathering! |
| |
Last Edit: Aug 27, 2014 15:19:23 GMT by Nathan
|
|
Nathan
Club Retro Rides Member
Posts: 5,650
Club RR Member Number: 1
|
|
|
|
Afternoon. So the Gathering is now a dim and distant memory but I am happy to report the GT got there and back......which is saying something considering I am not 100% happy with the replacement. Anyway since the gathering I have just been enjoying the car really and thinking of ways to improve it. The main issue I have was the bonnet, not only was the paint shocking but the lift kit we added just got on my nerves, the kit was added due to the centre bonnet bracing fouling on the engine. I could have cut that brace out but the flex when doing do is insane, so instead I bought a replica MGC bonnet :-), these have no centre brace and of course are made from Fibreglass so less weight.. more speeds. So here we are, painted this weekend just needs a Cut and mop. 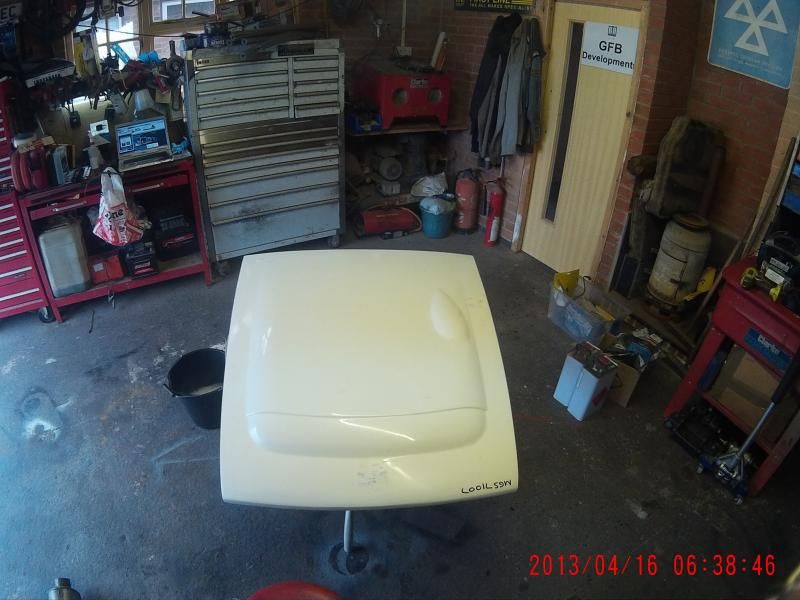 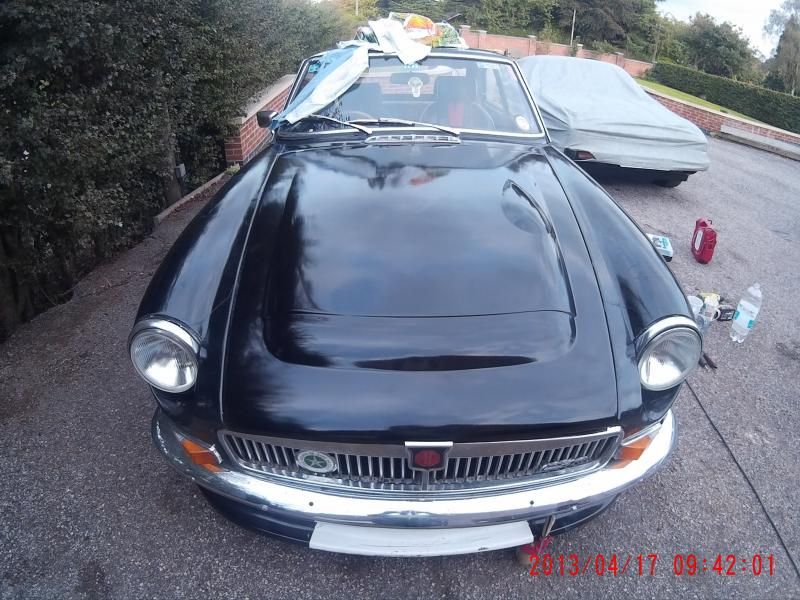 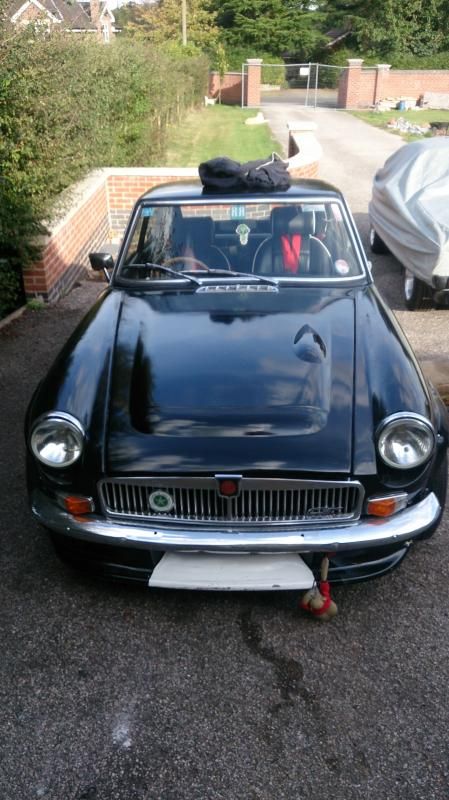 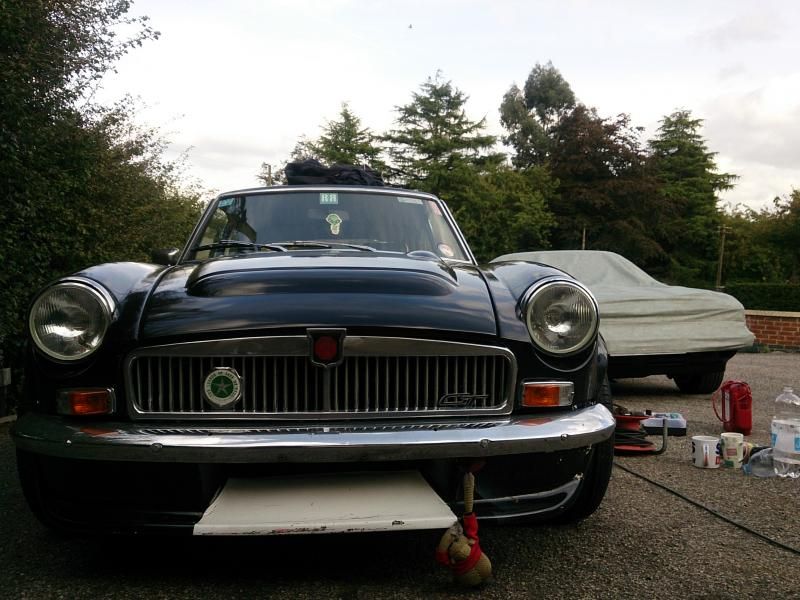 Also when we fitted the engine we used the Heater location to house the wiring, basically because the standard heater in a MGB is utter pants. Well this weekend it proved a heater is needed, even though the temp was not that low it felt cold. I managed to reinstate the heater with a few mods to make it smaller and more efficient into the cab, under the glove box (now redundant). Cheers. |
| |
|
|
|
|
|
|
|
|
I think that bonnet looks great, it suits the overall style of the car perfectly.
|
| |
|
|
|
|
|
|
|
The bonnet looks great  |
| |
You can't buy happiness but you can buy cars and that's kind of the same thing.
1989 Austin Metro
1994 Harley Davidson hardtail bobber
|
|
Nathan
Club Retro Rides Member
Posts: 5,650
Club RR Member Number: 1
|
|
Oct 31, 2014 11:57:18 GMT
|
|
So summers over, but that doesn’t mean the fun should stop.
I’ve had an excellent time finally using the GT, and along the way some small changes have been made. Since installing the motor I have been running on an “Adapted” MGB speedo cable, but this proved to be risky as the registered speed was around 10mph out!
This needed sorting before I was caught unknowingly speeding, but how?
My first idea was the get the existing gauge recalibrated and a custom cable made to length, however that was scrapped after the quotes I got were quite frankly eye watering! Instead I stripped the gauge down and measured it against the MX5 dial etc, it was practically bang on so making a hybrid Gauge was the way forward. The only problem I had to overcome was tacho reset, on the Smiths gauge this comprises of a bar at the bottom that spins to reset, whereas the MX is the modern press type. To get around this I had to make a small plastic arm that would mount vertically to the reset. Seems to work, so I’m happy.
I do need to take it to bit’s again and reset the overall mileage as it should correspond to the Smith’s last reading.
Now that the car is not in regular use I plan to go over all the fabricated mounting to check to stress or fracture. I’d deliberately given the whole running gear a hard time that way I can improve things if/when they break…up to yet nothing has.
Next up, and let’s be honest the only reason why you clicked this thread…..FORCED INDUCTION!
Personally the standard 1.8 power from the MX5 lump is perfect for an MGB, its power delivery feels right with regards to the standard items on the car (brakes etc).
The reason for going FI is probably just because I can, and I love to fabricate……not to mention the MX5 lump is suited to it.
So at the moment I am collecting the relevant Supercharger parts, the “Done” method seems to be Eaton M45 or MP62 but after speaking to Blown_Imp I may go the traditional Mazda route….We will see if one comes up though. ECU wise I am going with a Piggy Back solution that has the capability to grow, in terms of eventual removal of the AFM etc.
|
| |
|
|
Nathan
Club Retro Rides Member
Posts: 5,650
Club RR Member Number: 1
|
|
|
|
With the weekend nearly here the parts are starting to arrive. Charger 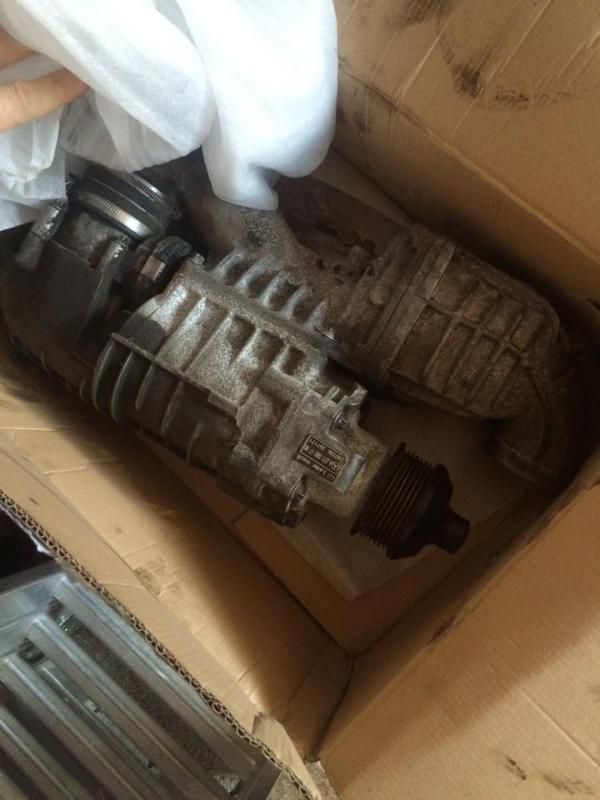 ECU (Stolen image as my phones flat)  There should be a mass of stainless Pipe arriving tomorrow, and I hope the Bypass valve and BOV. The fun begins making the mount for the Charger and the tensioner, regardless I am looking forward to the process. As I have not put many images up, here is one from the RRG campsite. 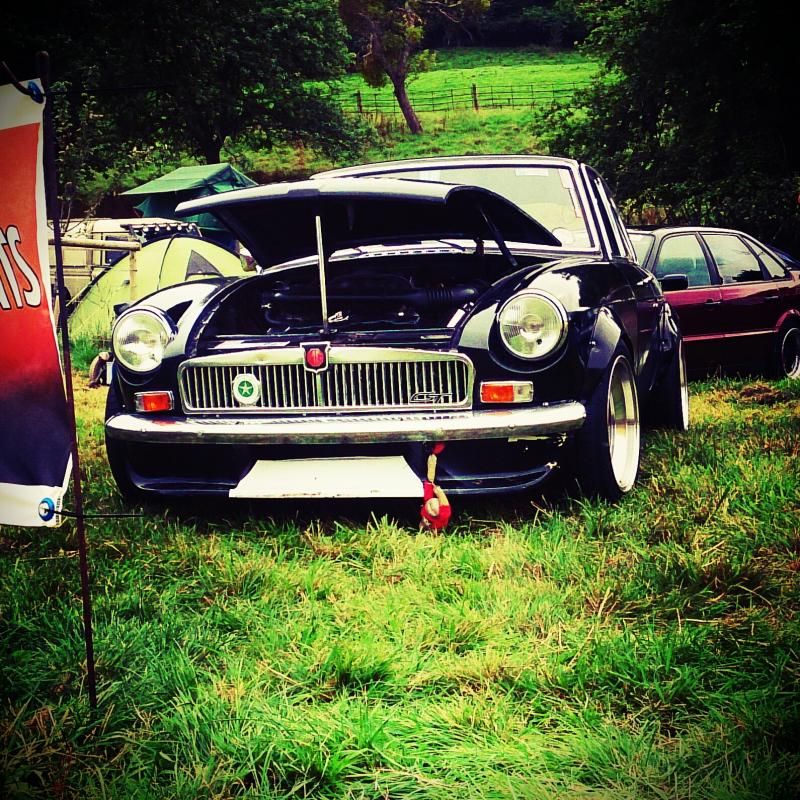 |
| |
|
|
adam73bgt
Club Retro Rides Member
Posts: 4,975
Club RR Member Number: 58
Member is Online
|
|
|
|
|
I'm interested to see what power you get from the charger setup, should be pretty brisk I imagine! Is it an Eaton m45?
|
| |
|
|
|
|
|
|
|
|
Could this get any cooler?
|
| |
|
|
Nathan
Club Retro Rides Member
Posts: 5,650
Club RR Member Number: 1
|
|
Nov 14, 2014 15:09:06 GMT
|
|
Cheers :-)
Well most of the bits have arrived now, apart from the ECU but I don't need that yet.
As of last weekend the Charger was mounted and the leftover stainless I had kicking about was mocked up, however we could not go any further due to the Intercooler not arriving and being unsure of it's location.
The space in front of the RAD is very limited due to height and the slam panel, the first idea was the route the pipework down and mount the IC low down (Think MK4 Golf type). This would mean you could see it through the valence hole, and to be honest I prefer it behind the grill.
I purchased a short but wide IC and sent the other item back, I guess this may impact overall effectiveness and total power but I don't mind really.
Cheers.
|
| |
|
|
|
|
Nathan
Club Retro Rides Member
Posts: 5,650
Club RR Member Number: 1
|
|
Nov 17, 2014 14:46:10 GMT
|
So the weekend has passed and a little more work has been done. The Charger was mounted on some dummy rear mounts and a V1 charger feed box was made, both of which will be re-done once I know the belts are all in line and fine (this has posed an issue). The intercooler has been mounted and the pipework make, just awaiting some Silicone pipe in various bends and lengths. The Mini bypass valve has also been mounted as the original charger unit is electrical and of course this cannot be used. Anyway I'm fully aware I am not treading on new ground with an SC on this lump, however this lump in a MGB and SC'd is new I guess. As I mentioned previous the belt to drive the SC did cause some head scratching due to the water hose config I installed before this FI route. Basically the bottom outlet on the MX lump comes out right where the engine mount is, so previously to combat this I simple flipped the alloy pipework so it faced the Rad and connected it up..Simple. However now this will foul the belt, so I am going to have flip this and re-jig the engine mount a little to make room for the pipes. Then comes the SC tensioner, I could just go to Moss and pay through the nose for a Jackson Racing tensioner kit but where is the fun in that. Anyway people want pictures right? ignore the date stamping, also sorry they are all Fisheye as I had to use the GoPro as the phone broke. 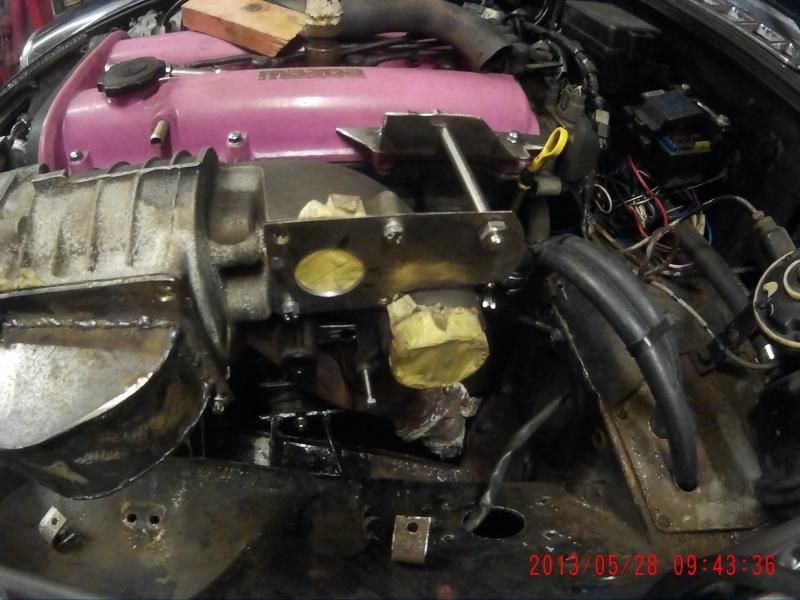 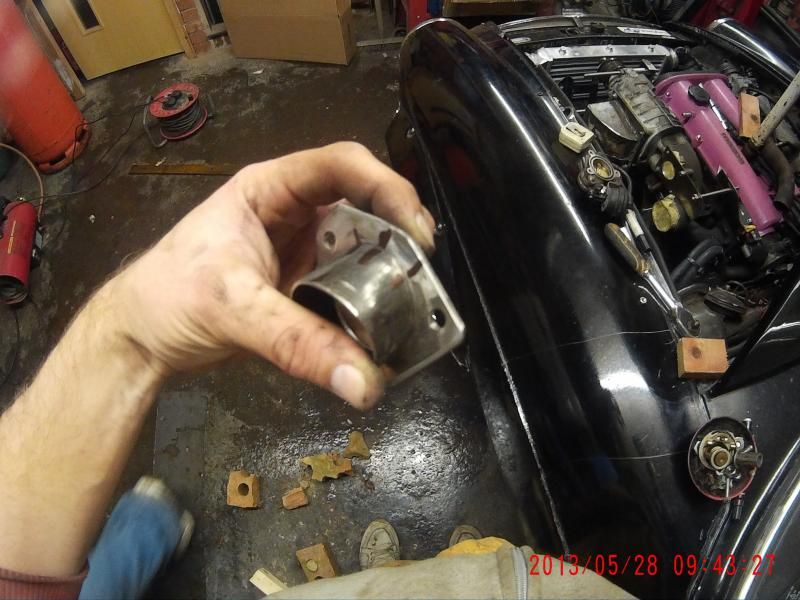 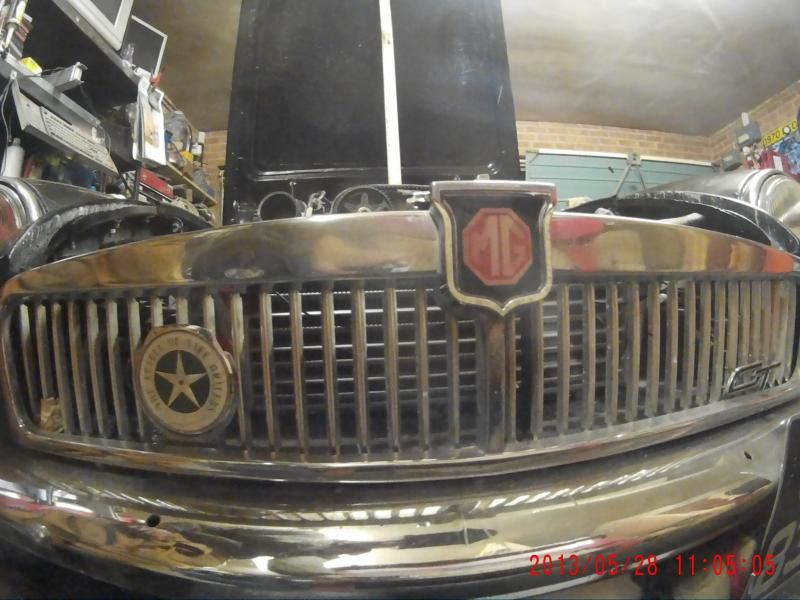 Obviously the dog doesn't care about any of this. 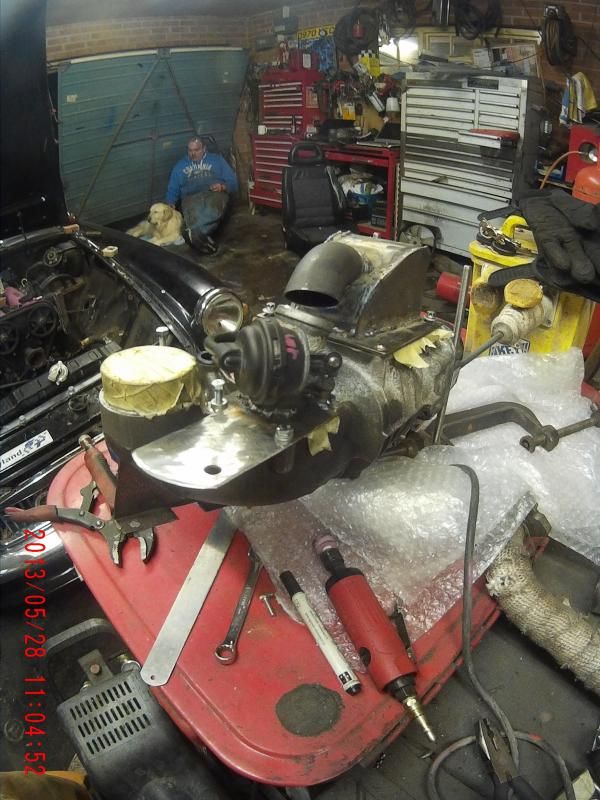 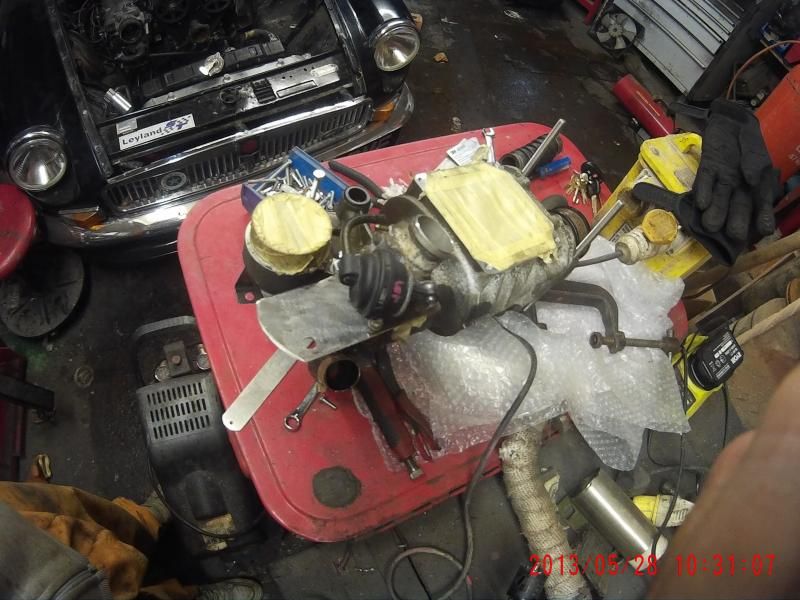 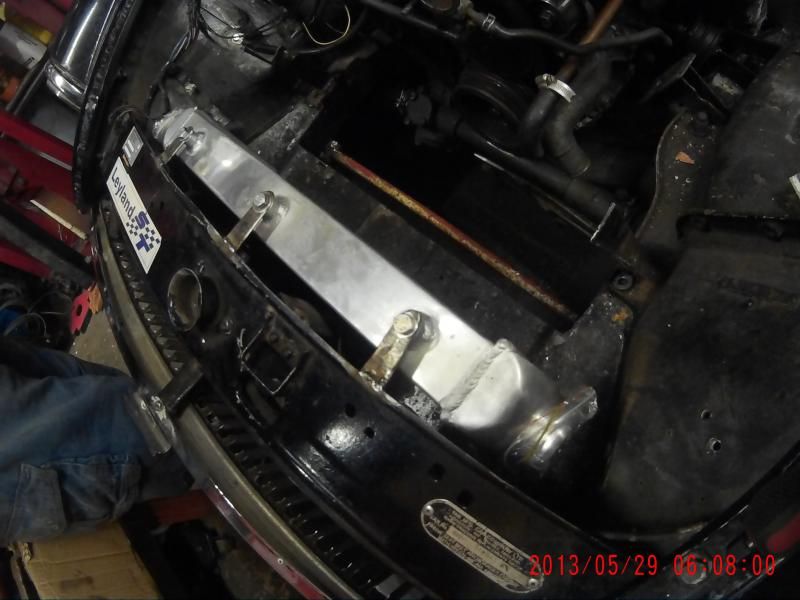 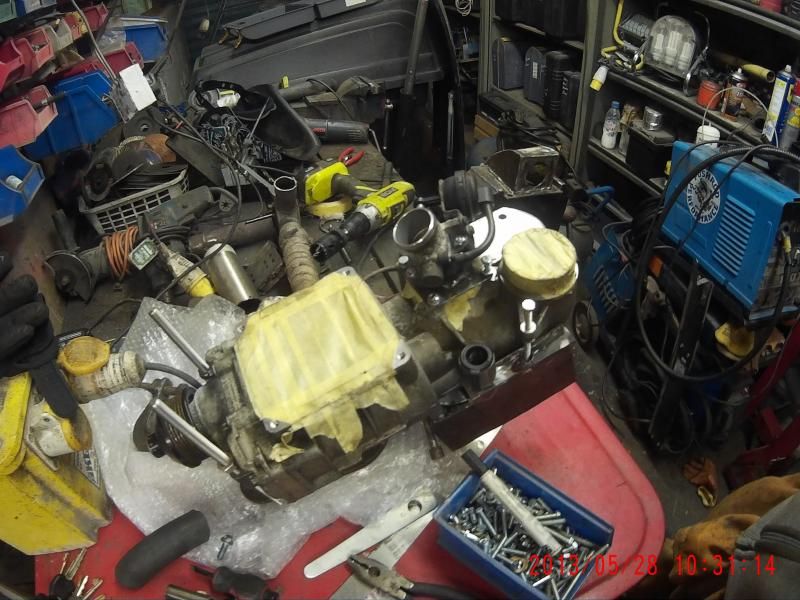 Enjoy. |
| |
|
|
Nathan
Club Retro Rides Member
Posts: 5,650
Club RR Member Number: 1
|
|
|
|
;-) I'll just leave this here: 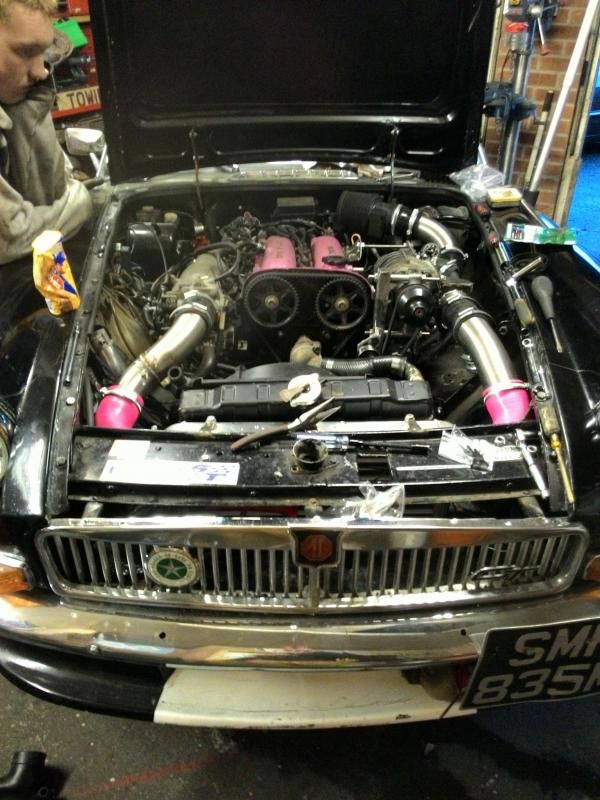 |
| |
|
|
stevietuck
Posted a lot
   Never argue with idiots,they drag you down to their level then beat you with their expertise!
Posts: 1,350
|
|
|
|
Well done that man!  |
| |
|
|
|
|
|
|
|
|
Just read this from the start,awesome job mate.
|
| |
|
|
Nathan
Club Retro Rides Member
Posts: 5,650
Club RR Member Number: 1
|
|
Dec 17, 2014 13:09:21 GMT
|
Afternoon. Well it's alive! I decided to use up a couple of holiday days pre-Xmas and together with a trip to Europe I managed to get all the wiring nipped up and the ECU sorted controlling the injectors. As per recommended I am using the ECUTuner DET3 as a fuel implant module, the device is able to act as a standalone but in this instance I didn't see any real gains. This mean the wiring was minimal, cutting injectors and wiring them into the DET3 directly, also splicing and intercepting the AFM/MAF plus the crank sensor was only needed.  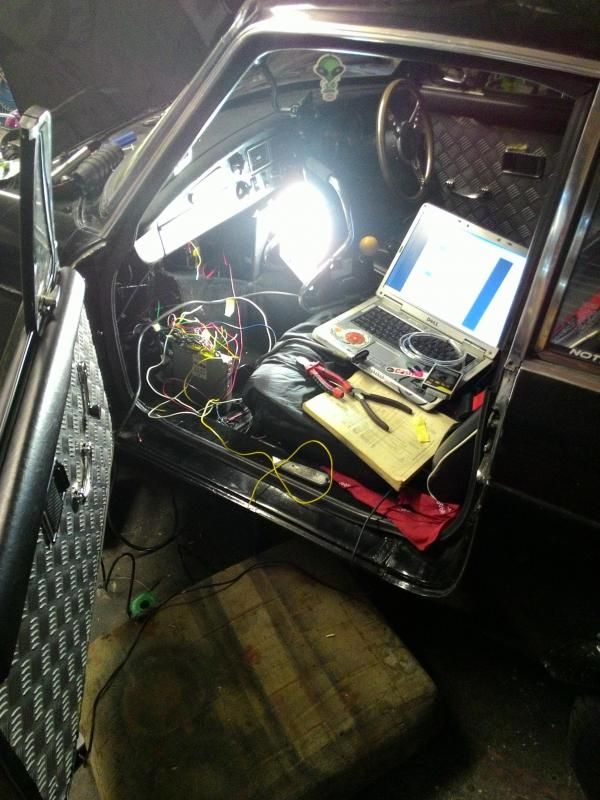 My view for most of Saturday. So installing the Tuner software and creating some "Danger to Manifold" maps were needed.......See what I did there. Honestly, this part did not go as planned! For some strange reason I had it in my head it was standalone so Timing maps were needed (As per standalone MS installs), this mean Saturday was a bust! Come Sunday morning and this time I was alone in my garage, I thought I'd have another look.....Boom..a basic VE table for the 500-1500RPM range was added and she ticks over like a dream. I have started on a simple running map for the time being, but I will need to get a mate to fine tune this as I drive At the moment I am getting a nice 14.7 AFR across the range, so I am confident its all working as it should, Once it's semi usable I will book a Dyno tune to nail it all down. 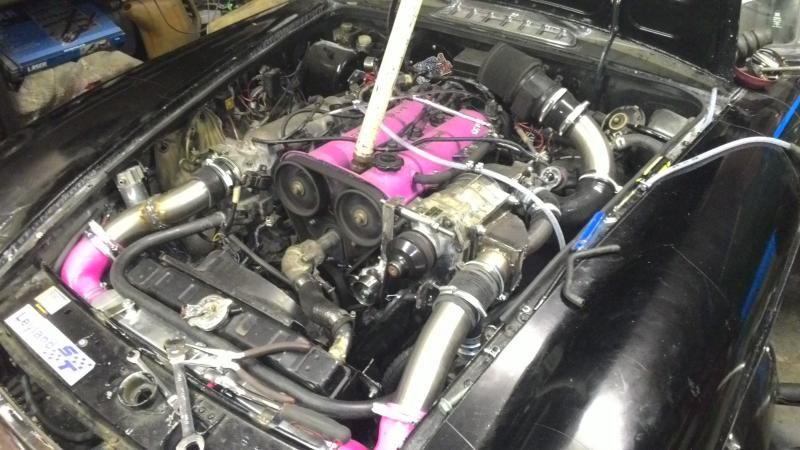 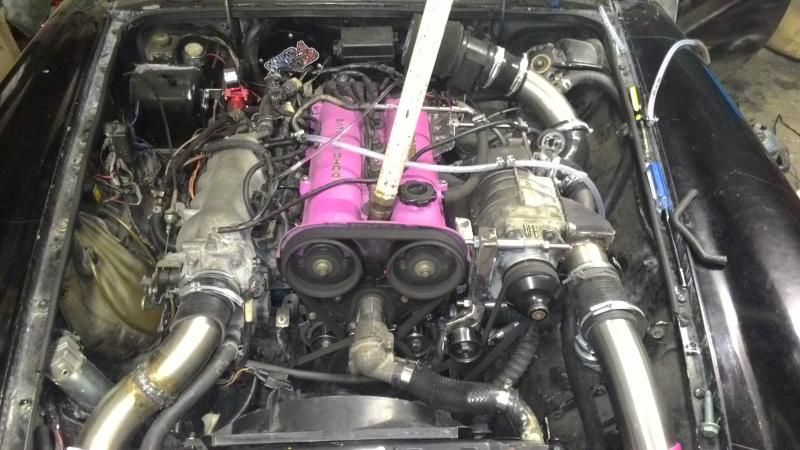 I did have another problem though, the charger belt was catching on the steering rack (the pulley was milled down upon the conversion due to this) so the only way around it was to raise the engine slightly. 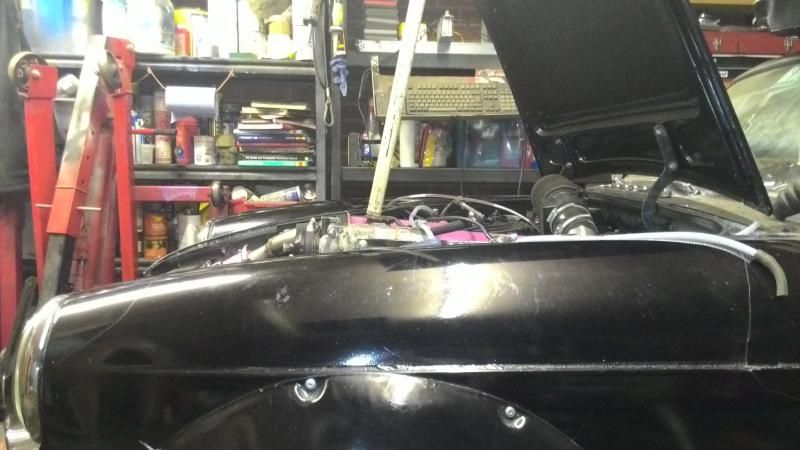 I am hoping the bonnet still closes, I do have the MGC one fitted so the extra head room it gives may help. If not then the bonnet lifters will be refitted, which I cannot stand by the way. |
| |
Last Edit: Dec 17, 2014 13:10:58 GMT by Nathan
|
|
|
|
|
Dec 17, 2014 14:49:11 GMT
|
|
Nice work that man. Looks a right eyeful.
|
| |
New cars. Who needs em.....
|
|
adam73bgt
Club Retro Rides Member
Posts: 4,975
Club RR Member Number: 58
Member is Online
|
|
|
|
Awesome, I bet this thing will fly along now!  |
| |
|
|
Nathan
Club Retro Rides Member
Posts: 5,650
Club RR Member Number: 1
|
|
Dec 18, 2014 10:42:54 GMT
|
|
Cheers guys.
Yeah I hope so, should find out this weekend.
It's certainly got a very distinctive whine to it now.
|
| |
|
|
bstardchild
Club Retro Rides Member
Posts: 14,962
Club RR Member Number: 71
|
|
Dec 18, 2014 20:17:47 GMT
|
Cheers guys. Yeah I hope so, should find out this weekend. It's certainly got a very distinctive whine to it now. Anything like this one |
| |
|
|
Nathan
Club Retro Rides Member
Posts: 5,650
Club RR Member Number: 1
|
|
|
|
|
Yes exactly like that, I haven't taken it that high yet as I am still testing the home-made tensioner.
|
| |
|
|
|
|


