Seth
South East
MorrisOxford TriumphMirald HillmanMinx BorgwardIsabellaCombi
Posts: 15,543
|
|
Oct 20, 2013 18:24:44 GMT
|
Cheers.  Cracking on with it now. Had a few more hours down there today. Here's the new outer layer for the drivers side 'rail' 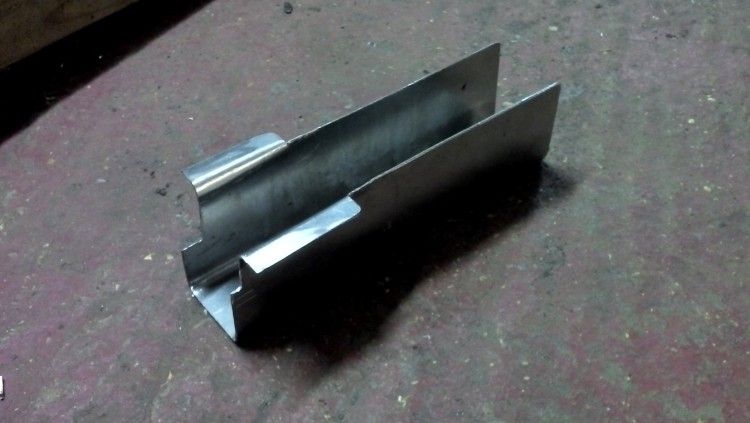 And all buzzed on, with that bottom repair further back finished up too. 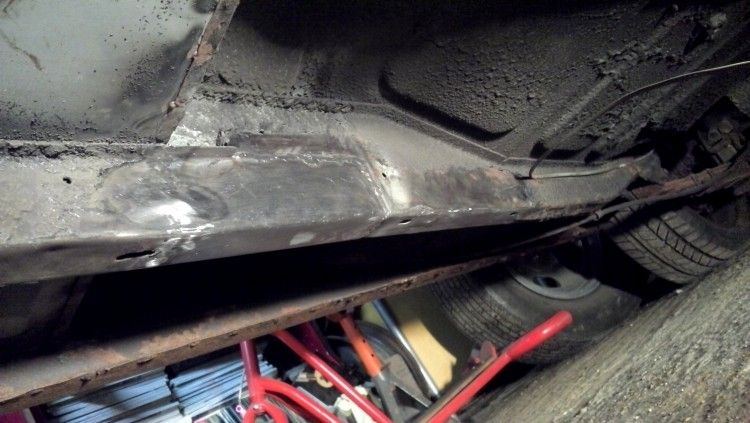 So, next job. Sills. Passenger side sill was fitted by me in around 2001 but then sat outside for a couple of years before the car hit the road, saw a few years of road use and then sat outside for a couple more years before the dungeon came up. It was all more solid than I thought it might have been, having already poked some holes in the inner sill. I buzzed along the corner to separate the sill from the step, knowing that the remains of the original were still underneath from last time and that if they were OK I'd want the option of using some of it. 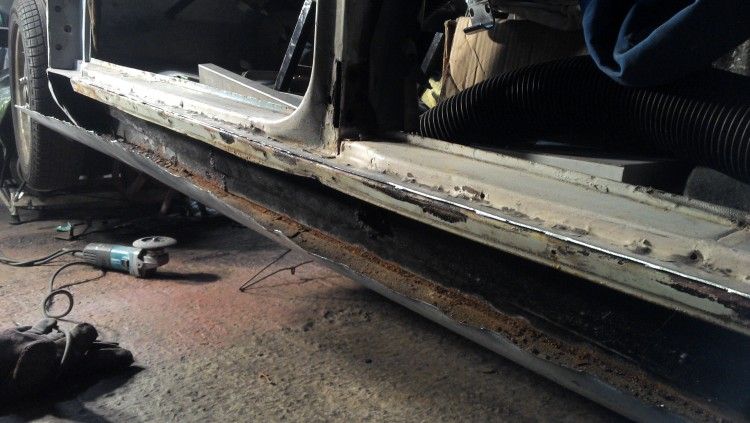 Inner was actually in much better order than I thought it might have been. 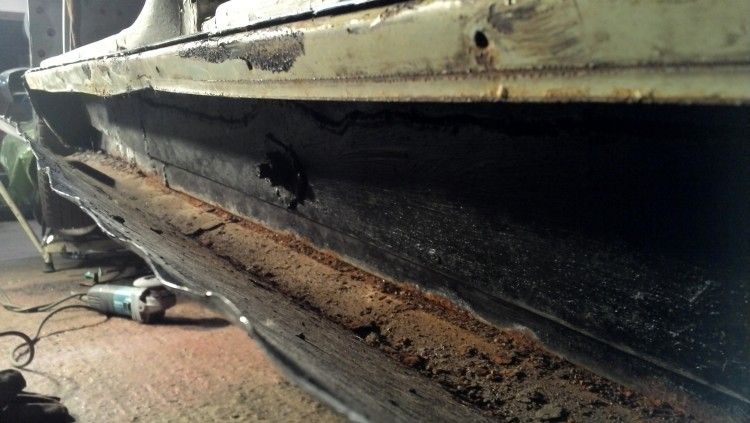 Will need some work just along the very bottom of the front section. Probably where dampness sat from water leaking in down the rotten bulkhead/a pillar. 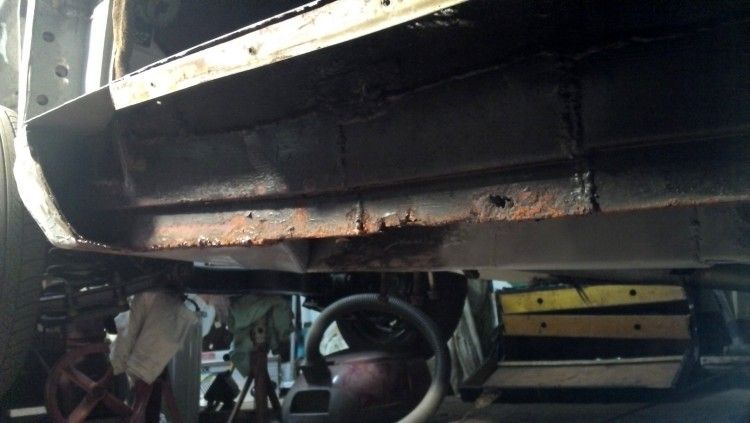 Front step panel shows an old rather untidy repair I did back in '01 or whenever but it is holed further along too. This will all come off as my new sill has this part of the panel. 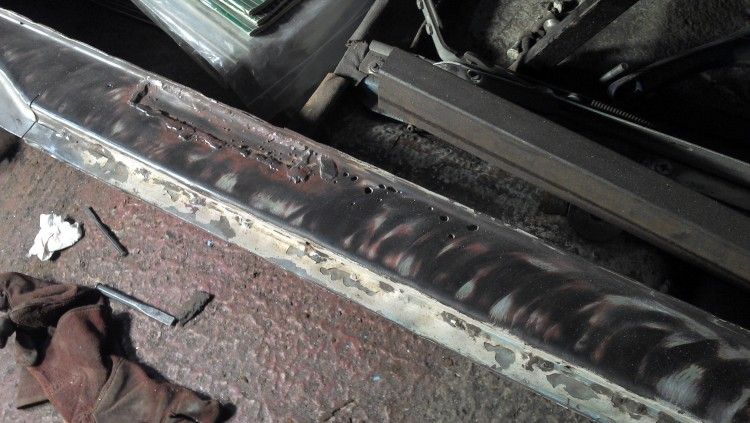 I carefully removed the remainder of my last sill from around the B pillar area as I'll be trying to make this all look factory this time around. 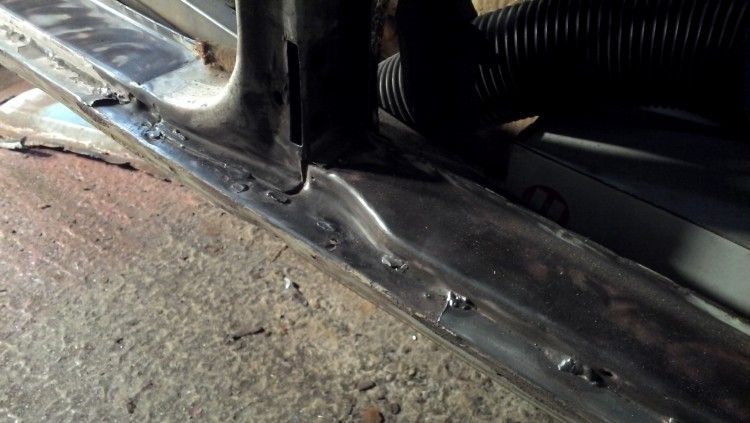 Next visit hopefully I'll get all these edges tidied up and repairs done ready to take the new sill. |
| |

Follow your dreams or you might as well be a vegetable. |
|
|
|
morrisoxide
Part of things
  It's just a question of style
Posts: 453
|
|
Oct 20, 2013 18:38:21 GMT
|
Really nice work. Wish my rails looked like that.  |
| |
|
|
Seth
South East
MorrisOxford TriumphMirald HillmanMinx BorgwardIsabellaCombi
Posts: 15,543
|
|
|
|
Thanks m-o. This sill work is dragging me down a bit. I knew it was going to be a bit of a pain but it is quite frustrating. Oh that I could just slap this on over the top and not worry about it... 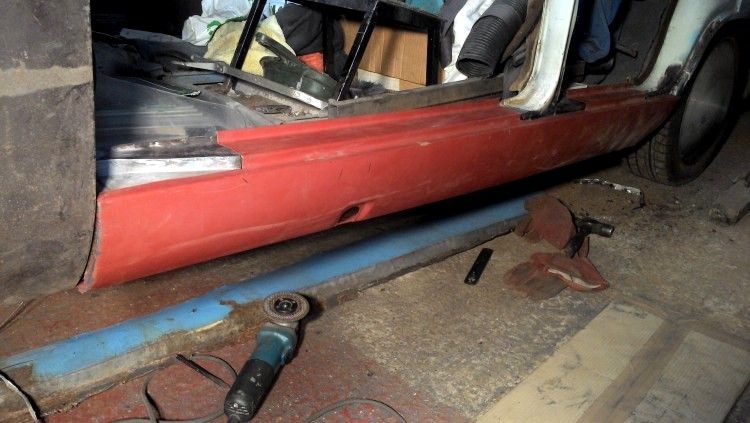 Cut and drilled to remove the section of front door step plate. 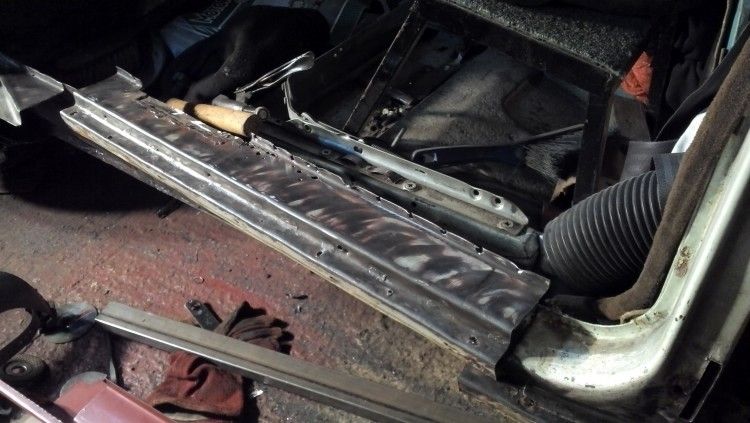 And this is where it starts taking ages to get a badly formed repro panel to start fitting the hole. It feels like it was made by someone who had once seen a Farina across a darkened workshop. The step panel section is not wide enough as can be seen by the 1/4" gap between it and the inner sill with it clamped at the base and held in place according to the dimensions I'd taken off the original before chopping it out. 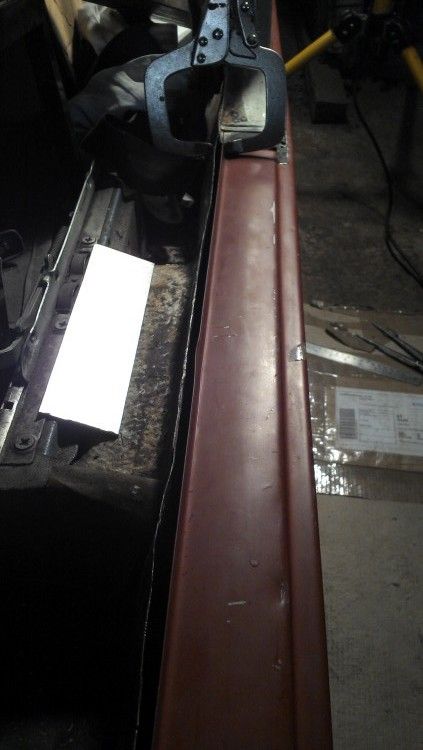 So I hammered that last fold flat and re-bent it (a bit at a time in a vice as it wouldn't go in my folder). Now it lines up. 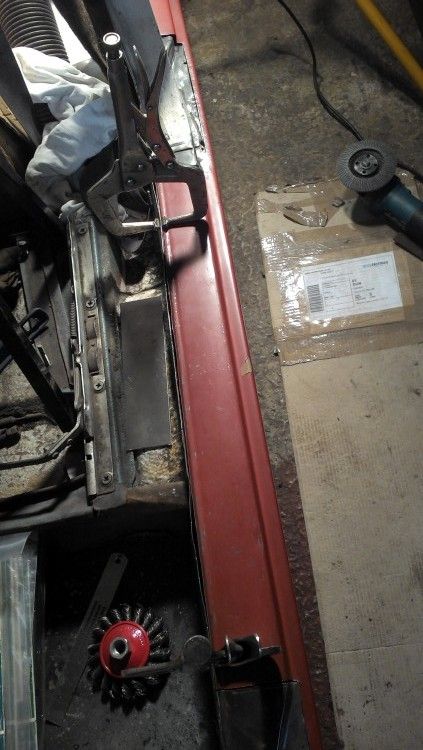 But now I am left with it looking like this. The step simply isn't heigh enough. I knew it was a little out but hoped to get away with it. Couldn't really tell until I had it sitting nicely flush. 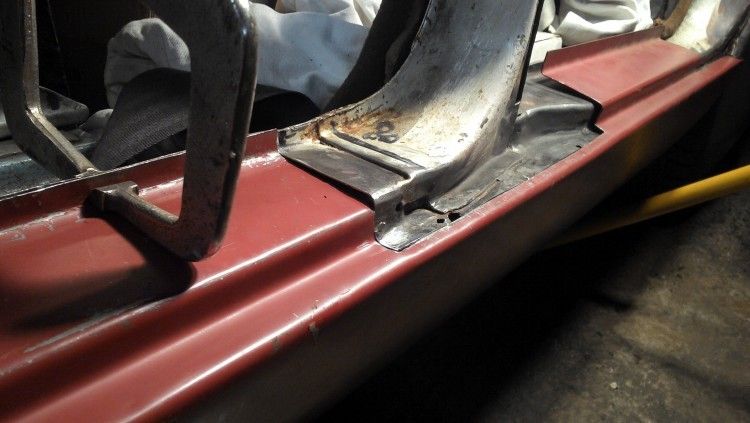 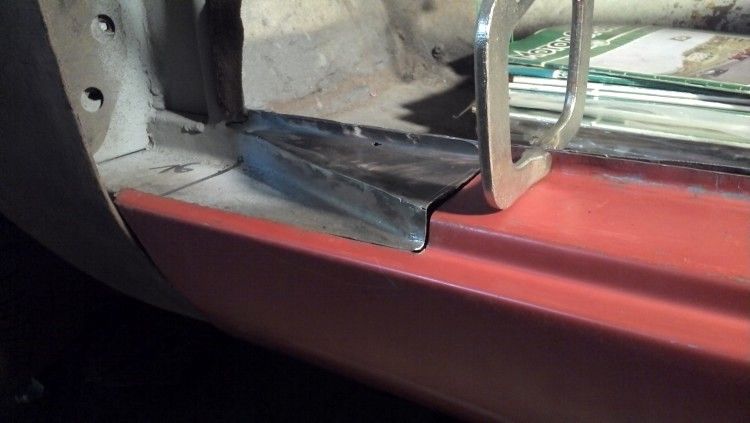 So I've got no option other that to cut it up and make a new step section and weld it on to the sill. To try and keep some other progress going while getting annoyed at that /\ I've finished off the wiper mechanism. I wanted to remove the wheel boxes and replace the seals under them, basically while they are easiest to access with all the dash out of the way. One came off OK but the other was a pain and even after weeks of soaking and tweaking each time I visited the dungeon it stripped the thread. Luckily I found a NOS one for a bargain price at the Stoneleigh Resto show so, armed with some O rings of the appropriate size I could fit the wheelboxes back in place. 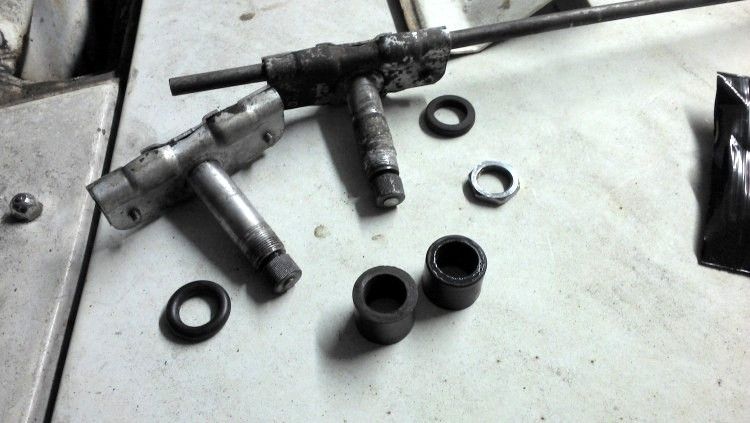 So I then put the tubes back in and finally greased the rack and pushed it through, replacing the wiper motor in its new position. 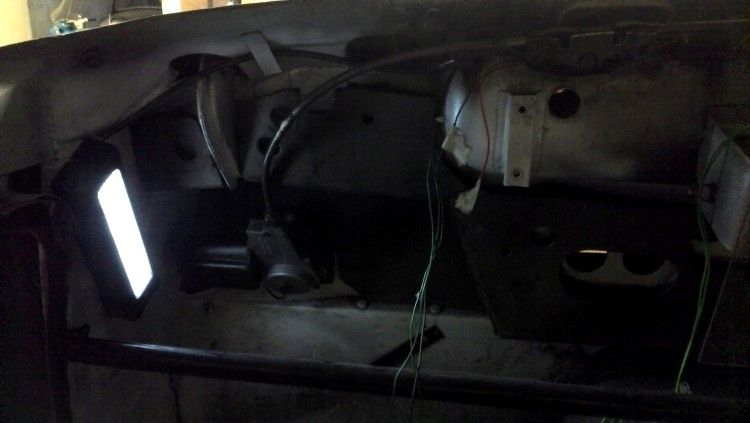 Hopefully none of that will have to come out again! |
| |

Follow your dreams or you might as well be a vegetable. |
|
79cord
Posted a lot
  
Posts: 2,617
|
|
|
|
|
Interesting to notice that wiper mechanism, hadn't seen any like it before.
Sorry to see the problems the replacement sill is providing.
|
| |
|
|
|
|
|
|
|
|
I sympathise Seth, I had exactly the same problems replacing the sills on my Cambridge. If I do any more in the future I'll try to save the top of the original sill, replacing it is a right pain. Mine still doesn't line up properly.
|
| |
1953 Austin A40 Somerset
1959 Austin A35
1958 Austin A55 Cambridge
1975 Vauxhall FE 2300S
1985 Austin Maestro 1.3 Base
|
|
|
|
|
|
|
I like the odd headlight and the filler around it, adds to the rat look!  |
| |
2001 vauxhall corsa 1972 VW Beetle 1986 Ford Capri Laser1999 BMW E36 323i Touring 1991 Volvo 940 estate 2002 Mazda 323f 2.0 sport 2016 Mercedes Sprinter 1999 nissan almera 1.4 1995 lexus gs300 1995 lexus ls400 1975 bmw 1602 fiat punto 2003 ford fiesta something else... |
|
Seth
South East
MorrisOxford TriumphMirald HillmanMinx BorgwardIsabellaCombi
Posts: 15,543
|
|
Jan 26, 2014 21:45:06 GMT
|
Progress on this has been frustratingly slow for a number of reasons so I am behind where I was hoping to be by this time. That driver's side sill has still been fighting me and I've not had much opportunity for a really good go at it in recent weeks. I've done the repair required to an overlap section of inner sill and I've made and welded on a new step plate section so that at least its dimensions are now about right, and with it screwed in place to the inner sill I bolted the front wing on to the A post and trial fitted the door to see how things were lining up. After checking some old photos as reference for what the door gaps used to be like I'm happy enough that things will be at least as good, and probably better once some adjustments are made. Must remember it's an end of line BMC vehicle after all.... 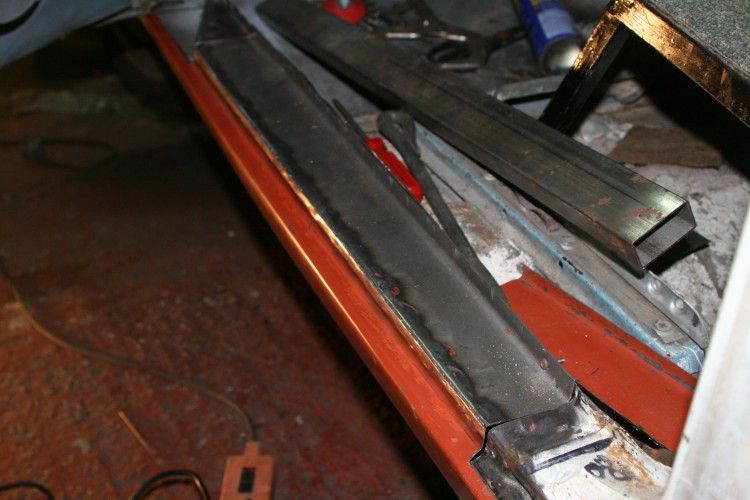 One of the things done to keep me sane at this time has been to fit all new windscreen washer tubing and source a working washer pump which I've tucked up behind the wiper motor. The washer bottle will be going on this end of the parcel tray too so its all close together and the pump is pretty level with where the fluid will be. 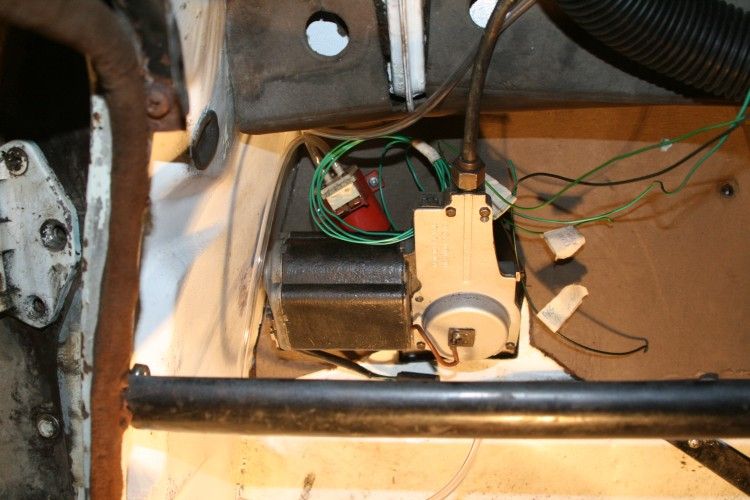 The never ending heater restoration is also pretty much done. Except that when taking it down to the dungeon today it fell over in the back of the car and badly chipped the paint I'd been trying to make look nice in two places.  I made new foam rings that seal it to the bulkhead where the tubes pass through using a piece or tube (Hillman strut tube actually) as a punch. 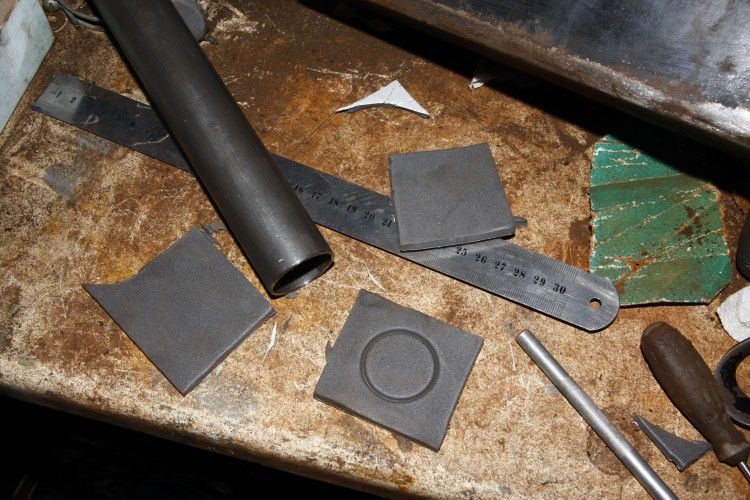 Having bought O rings that were too big to seal between the valve and the inlet pipe to the matrix I bought a couple of a smaller cross section at a model engineering show last weekend and both together seem to have gone on and filled the gap quite nicely. Time will tell if they actually seal but it wouldn't be disastrous as its easily accessable once bolted on the car. And today I bent up new actuating rods out of stainless wire I'd bought for the purpose to match the shape of the old rods. Hopefully once the paint damage is tidied up this will all look quite neat as just about the only thing in the engine bay (with the engine of course...) 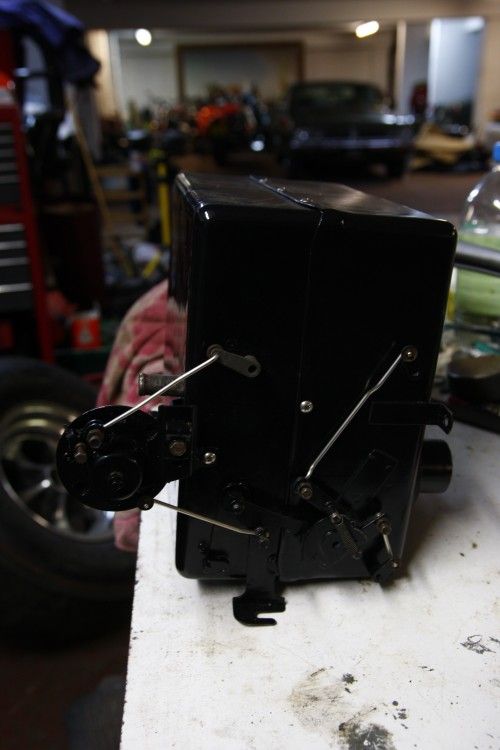 |
| |

Follow your dreams or you might as well be a vegetable. |
|
Pid363!
Posted a lot
   Madness is all in the mind!
Posts: 1,053
|
|
Jan 27, 2014 22:23:27 GMT
|
|
Seth great work as always. Them sills look like Earlpart ones and as you found out a pain to fit. I had one fitted a few years ago.Another thing I found was wrong was the jacking point cut out its the wrong size for the push in cover in the end we cut a piece out from an original sill off another car and let it in.
|
| |
Stupid is as stupid does!
|
|
|
|
|
|
|
Have seen the banner of this floating around and always admired it. Good to find the thread and see it progressing still! Looking at dates, though, it's given me much motivation to work faster!  D: Just got to get off my ass and source some bits and pieces that are holding me back (legitimate excuse, I swear!). Hope to see more progress on this soon.  |
| |
|
|
ChasR
RR Helper
motivation
Posts: 10,309
Club RR Member Number: 170
|
1970 Morris Oxford - 20/9/24 - ChasR
@chasr
Club Retro Rides Member 170
|
|
|
As above really. It is good to see that you are relentless at attacking this project, and are attempting to see it done. It certainly looks great and I really do like the effort you are putting into making things just so, as opposed to simply throwing them on. The hiddern window mechanism is a nice touch  . |
| |
|
|
|
|
Seth
South East
MorrisOxford TriumphMirald HillmanMinx BorgwardIsabellaCombi
Posts: 15,543
|
|
|
|
Thanks chaps. Pid, jacking point isn't something I'm worrying about.  Varelse, Chas, Time is something that has become a bit irrelevant with this car really. Working on it is just something I do and one day there'll be a finished car at the end of it. I don't think I'd voluntarily take anything else on now if I knew it'd take so long though (he says with the Borgward waiting in the queue...) I thought I might have to sort the front section of the rear arch out before putting the sill on so took a knot wheel to it. Shiny factory lead where the rear wing joint is. 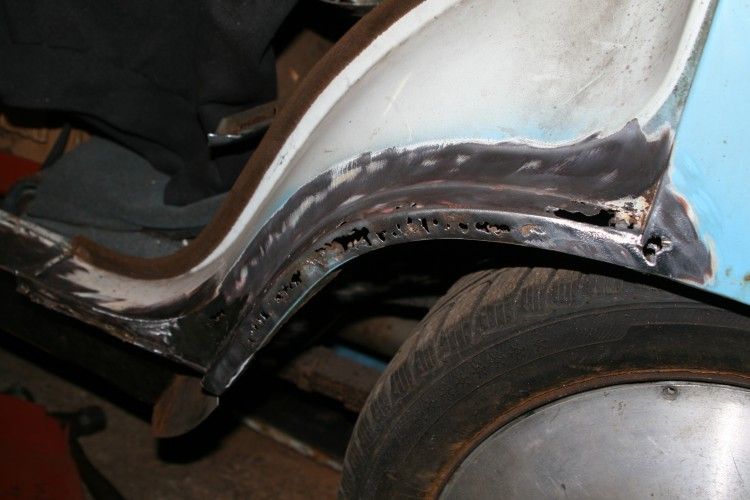 Then I made up a couple of repair sections, inner and outer. 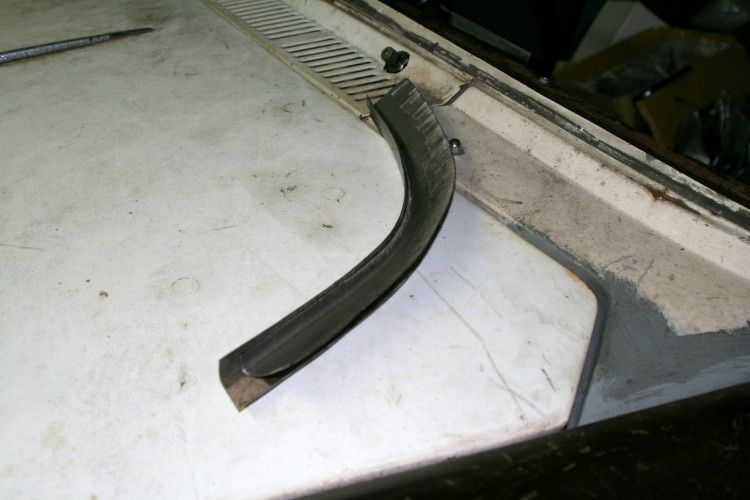 But with that done and a repair made to the lower door shut area I figured they didn't have to go on yet so got on with the sill. Wrote myself a note at one point to make sure I didn't forget to make all the plug weld holes where it meets the inner sill before I started welding it on... 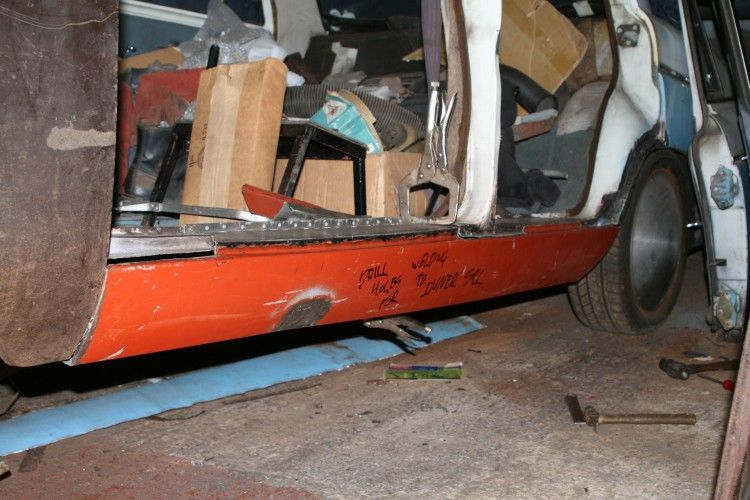 Inside got a couple of coats of Electrox and you can see some of the drains I formed by knocking a dip between jaws of the vice. 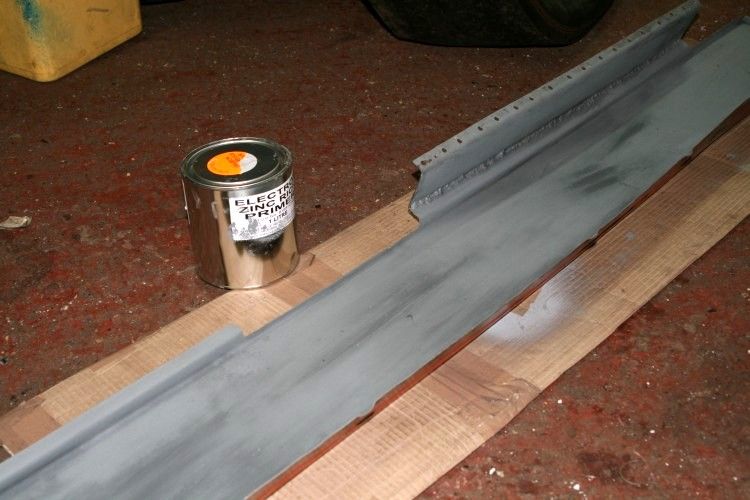 I spent a long afternoon/evening yesterday actually getting the sill welded on pretty much without a break as I just wanted this job to be over. V. happy with the way its gone in some places. 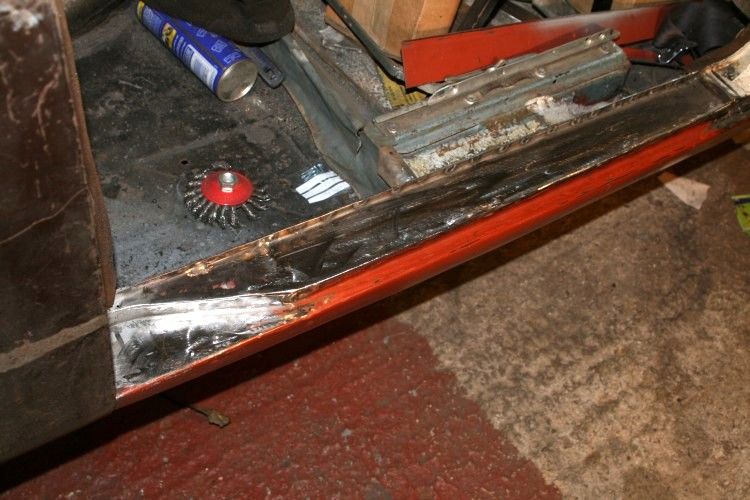 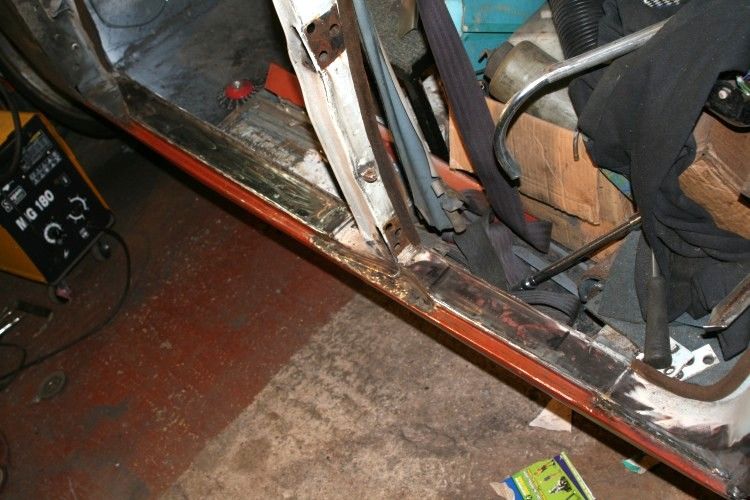 But its going to need a bit of filler here and there before paint. Hardly surprising with the amount of handling and manipulating its had. Ended up with a bit of a dip under the B pillar which I massaged out as best I could before plugging to the inner sill. 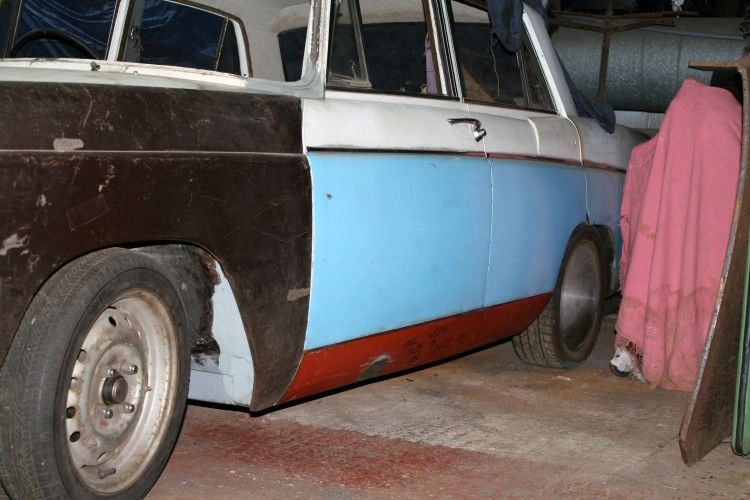 But its done. I can worry about that when I start on 'bodywork' Was nice to get the doors on and I'm really happy with the way the sill matches the front wing line, which it didn't before I started this work. The car may have to stay rollable for the next couple of weeks so I may tackle that wheel arch next rather than the other sill. I determined not to let the other sill take as long as this one though. |
| |

Follow your dreams or you might as well be a vegetable. |
|
Em
Part of things
  Fuel Injected? Carb Infested!
Posts: 601 
|
|
|
|
|
Nice work there Seth! Sill looks like it fits a treat now.
I like the "note to self" about the drain holes too, wish I'd done that when I was doing my doors...
|
| |
|
|
retrolegends
Club Retro Rides Member
Winging it.....Since 1971.
Posts: 3,726
Club RR Member Number: 94
|
1970 Morris Oxford - 20/9/24 - retrolegends
@retrolegends
Club Retro Rides Member 94
|
|
|
|
Nice to see some progress on this. Good work.
|
| |
1974 Hillman Avenger 1500DL1992 Volvo 240SE1975 Datsun Cherry 100a flying custard1965 Hillman SuperMinx Rock N Roller1974 Austin Allegrat Mk1 1.3SDL1980 Austin Allegro Mk3 1.3L1982 Austin Allegro Mk3 on banded steels2003 Saab 9-3 Convertible 220bhp TurboNutter1966 Morris Minor 1000 (Doris) 2019 Abarth 595C Turismo (not retro but awesome fun) www.facebook.com/DatsunCherry100a |
|
|
|
|
|
|
|
watching the progress on those sills, I was holding my breath!...then, in your last pic, I finally let out a sigh of relief!...looks great
JP
|
| |
I know its spelled Norman Luxury Yacht, but its pronounced Throat Wobbler Mangrove!
|
|
Seth
South East
MorrisOxford TriumphMirald HillmanMinx BorgwardIsabellaCombi
Posts: 15,543
|
|
Feb 16, 2014 22:24:57 GMT
|
Ta chaps. Well, last week I turned the car around so I could get on with the drivers side sill. I thought this side was in better order and the inner sill was all sound. Was just going to do it because it seemed daft not to. Well, I spent almost a whole day chopping. Things were not as good as I thought/expected. Was a struggle to keep the motivation going but figured that if I just kept going and got things ready for new metal to go in on my next visit then at least I'd make some progress next time. That next time was today and I made a good go at repairs to the rear outrigger, a section of floor above it and the rear foot or so of inner sill. 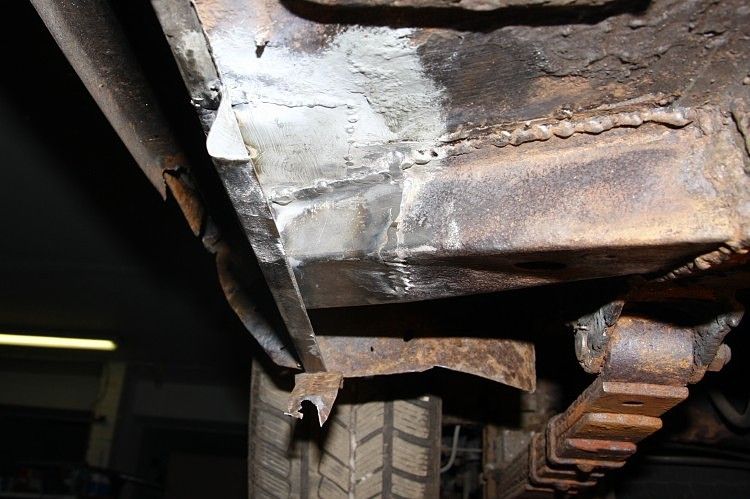 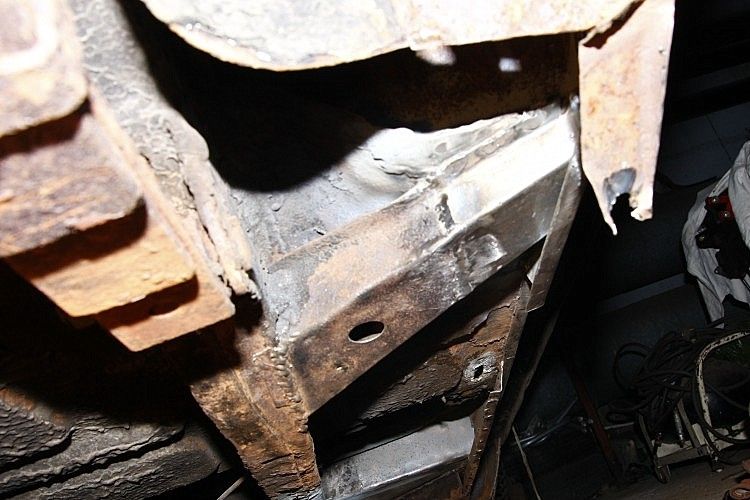 If I'd rustproofed the area better when I did this first time around then I wouldn't be back there again now. New repairs are neater than the old ones, solid parts of which remain and I won't be making the same mistakes again. Better news is that the sill step areas are sound so fitting the outer sill should at least be easier. 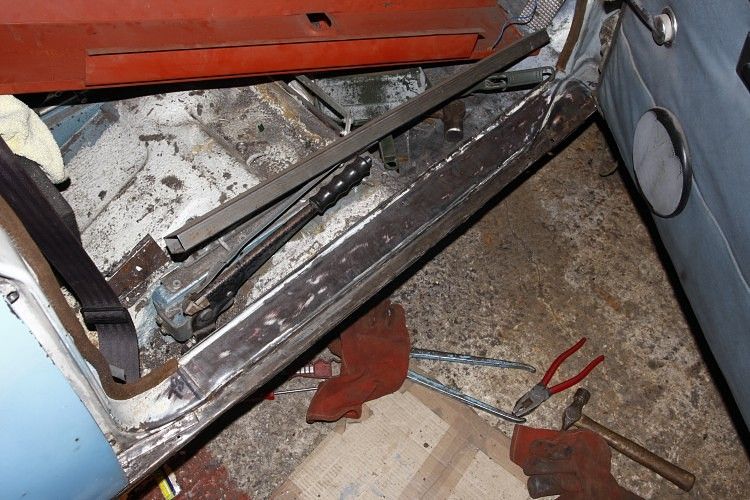 And when I was turning the Oxford round I took a shot with the Hillman beside 'just because'. 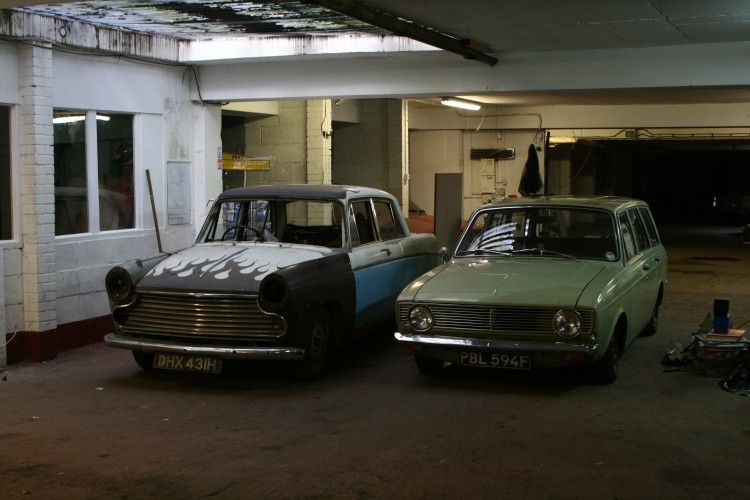 Hoping for another day on it this week which hopefully will see the inner sill all repaired and then I can start trial fitting/cutting in the new outer. It was four months from cutting the pass. side sill off to it being replaced. I don't want this side to take more than a month. |
| |

Follow your dreams or you might as well be a vegetable. |
|
|
|
|
Feb 17, 2014 11:47:40 GMT
|
Good to see you're still plugging away with this. Must be one of the longest running resto threads on here. Apart from mine that is. it won't be long now!!!  Quoted for truth.  Edited to add that Brian said that in 2007. The joke was less effective without the timestamp. |
| |
R.S. Autotech. Servicing/Repairs/Diagnostics.
|
|
retrolegends
Club Retro Rides Member
Winging it.....Since 1971.
Posts: 3,726
Club RR Member Number: 94
|
1970 Morris Oxford - 20/9/24 - retrolegends
@retrolegends
Club Retro Rides Member 94
|
Feb 17, 2014 20:54:17 GMT
|
|
Scary to think the Minx is older than the Oxford!
|
| |
1974 Hillman Avenger 1500DL1992 Volvo 240SE1975 Datsun Cherry 100a flying custard1965 Hillman SuperMinx Rock N Roller1974 Austin Allegrat Mk1 1.3SDL1980 Austin Allegro Mk3 1.3L1982 Austin Allegro Mk3 on banded steels2003 Saab 9-3 Convertible 220bhp TurboNutter1966 Morris Minor 1000 (Doris) 2019 Abarth 595C Turismo (not retro but awesome fun) www.facebook.com/DatsunCherry100a |
|
Seth
South East
MorrisOxford TriumphMirald HillmanMinx BorgwardIsabellaCombi
Posts: 15,543
|
|
Feb 18, 2014 23:00:16 GMT
|
Yeah, thanks for the reminder of the time passed Rev Dick!   retrolegends, End of the line for a '50s shape, with an up to date modern car next to it.  More progress today. This was the state of the front outrigger/inner sill that I'd fitted in 2002. 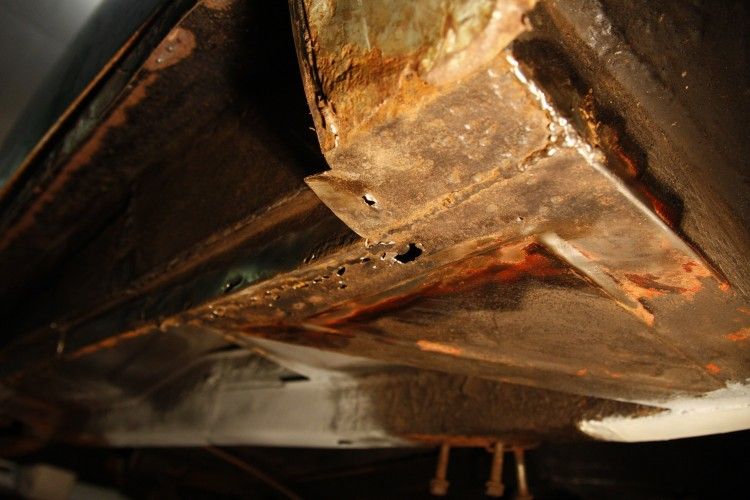 After a bit of work it's now somewhat more solid. 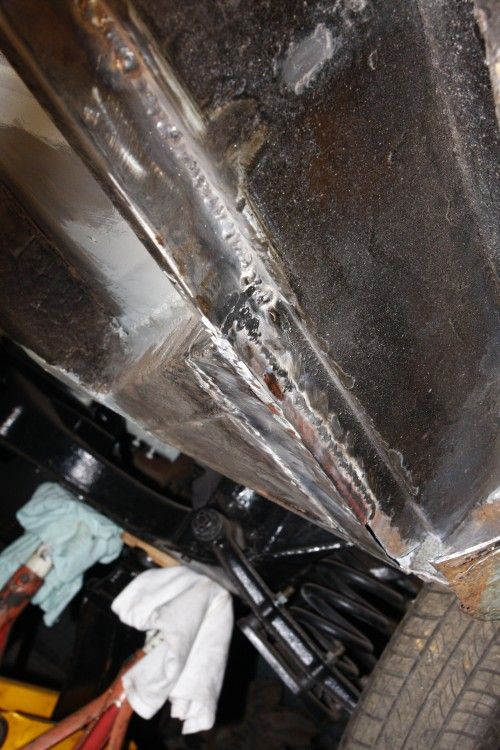 And I've replaced the lower section of the inner sill right the way along. 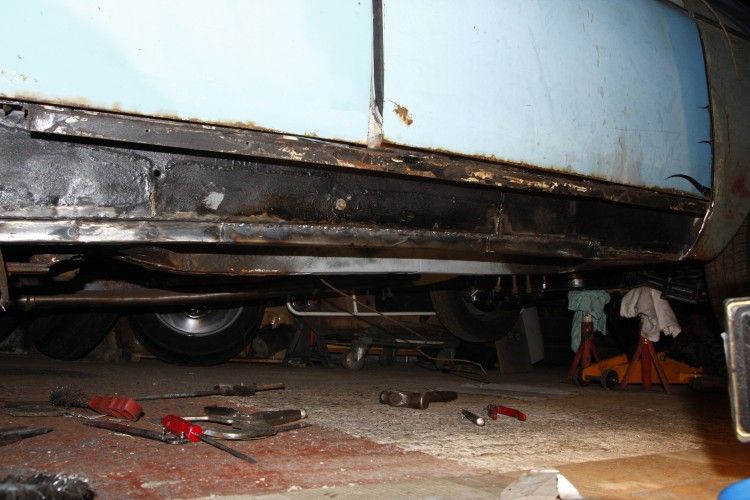 Quite happy with that for today's effort. Means I don't need to go crawling about under there any more before fitting the outer. A couple of weeks ago I tidied up the old welding and slapped on the Electrox on my modified gearbox crossmember, which was altered many moons ago to allow the exhaust to run between it and the floor rather than sit exposed below it. Today it got a coat of black so that's another thing 'done' 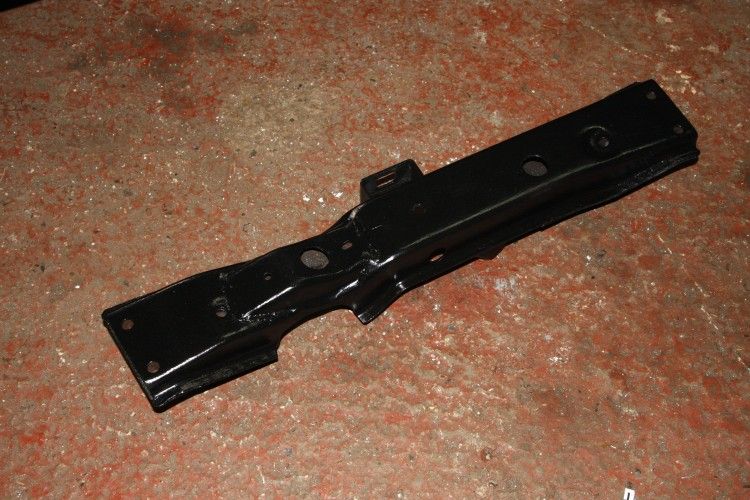 |
| |

Follow your dreams or you might as well be a vegetable. |
|
kilroy
Part of things
  Suit you sir...
Posts: 251
|
|
|
|
|
Seth
You're a legend mate.!
Your level of devotion to this machine surpasses most known human endeavour.
Huge respect and positive vibes for the inevitable outcome - outstanding stuff.
Go well.
Like much.
|
| |
|
|
Seth
South East
MorrisOxford TriumphMirald HillmanMinx BorgwardIsabellaCombi
Posts: 15,543
|
|
Feb 19, 2014 17:07:02 GMT
|
Cheers Kilroy! I was thinking just the other day that you seemed to have disappeared off the planet. What you up to? Gonna give us an update on that yard full of Marinas?  |
| |

Follow your dreams or you might as well be a vegetable. |
|
|
|


 I made new foam rings that seal it to the bulkhead where the tubes pass through using a piece or tube (Hillman strut tube actually) as a punch.

 D:
D:


