ChrisT
Club Retro Rides Member
Posts: 1,670
Club RR Member Number: 225
|
|
Jul 22, 2020 18:15:31 GMT
|
As usual what I thought would be a relatively simple job just measuring the crank turns into a lot more work. After removing main bearing caps I realized there's no way of getting calipers in to measure it. Have got some Plasigauge but that needs the bearing dry to accurately work, nothing for it but to remove the crank, which means removing the clutch, flywheel, all the pulleys etc from the front so the cover can come off to remove the oil pump  Taken a few measurements and it's not looking good, according to Haynes maind should be between 57.974 and 57.995 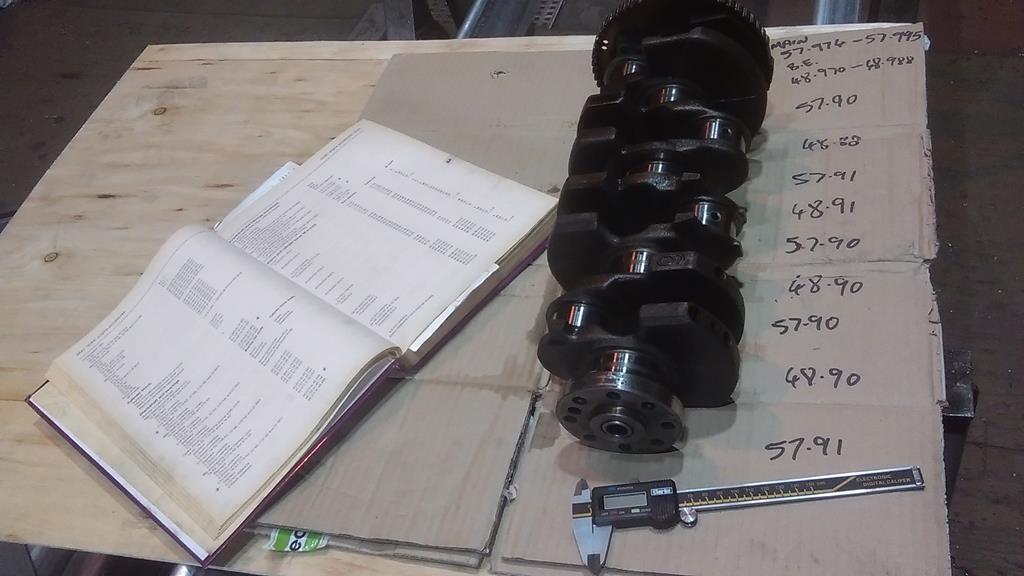 Oddly there's no obvious difference in wear between the middle and edges where the bearings sit. Will be reassembling dry and seeing what the Plastigauge has to say..... |
| |
Last Edit: Jul 22, 2020 18:17:11 GMT by ChrisT
|
|
|
|
|
|
|
Jul 22, 2020 23:13:04 GMT
|
|
have a look at the back of the bearings there will be markings that will indicate size if they are original bearings they will have a GM number google it and should be able to find the size and you need a micrometer to measure the journals properly
|
| |
|
|
stealthstylz
Club Retro Rides Member
Posts: 14,962
Club RR Member Number: 174
|
|
|
|
|
Definitely check it with a micrometer, but yeah that's not looking good based on those measurements. You've had the exact same symptoms as the 4M40 I've just done for my dad, and that was also 4 thou down on the crank across the board. Just worn out.
|
| |
|
|
|
|
|
|
|
|
very-nears arent accurate enough for this kind of measurement, they give you an idea, but you may find with a mic' they are ok (but i suppose on other hand you might not want them to be ok, as it will be a reason for your issues !
|
| |
|
|
ChrisT
Club Retro Rides Member
Posts: 1,670
Club RR Member Number: 225
|
|
Jul 24, 2020 22:24:13 GMT
|
Not had chance to use Plastigauge yet to back up vernier calipers results but did remember that when we got the lathe at work a few years ago the were some stuff in the tool drawer including this... 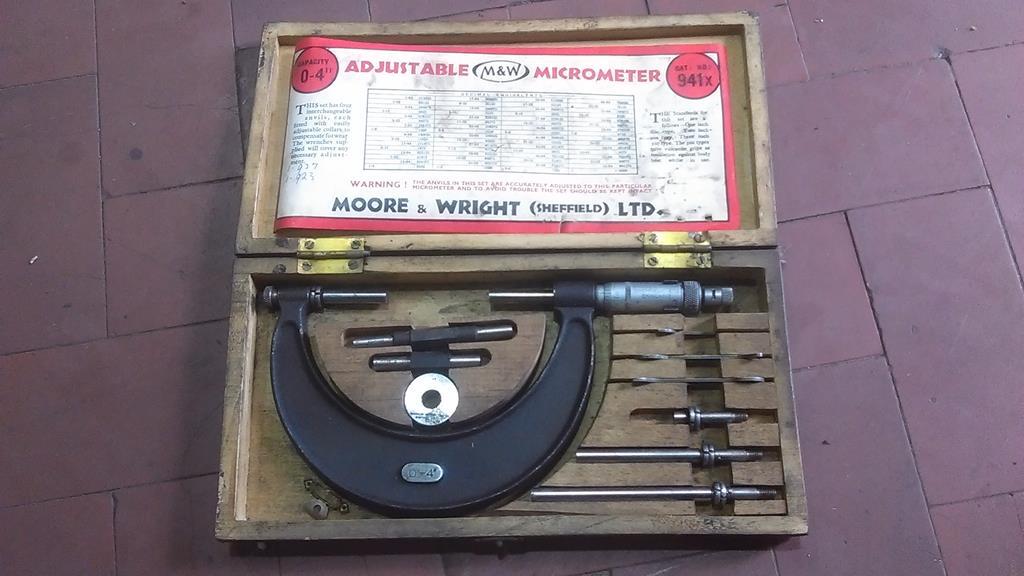 Off to learn how to read an imperial micrometer...... |
| |
|
|
ChrisT
Club Retro Rides Member
Posts: 1,670
Club RR Member Number: 225
|
|
Mar 21, 2021 19:54:53 GMT
|
As progress with the Manta has halted due to lack of enthusiasm I thought I'd use this thread to document some of the work on my 'modern' motor, as seems to be the fashion at the moment. Like the Manta I've owned it for quite some time now, has seen better days and in need of some TLC.... My 1998 Nissan 200sx S14a 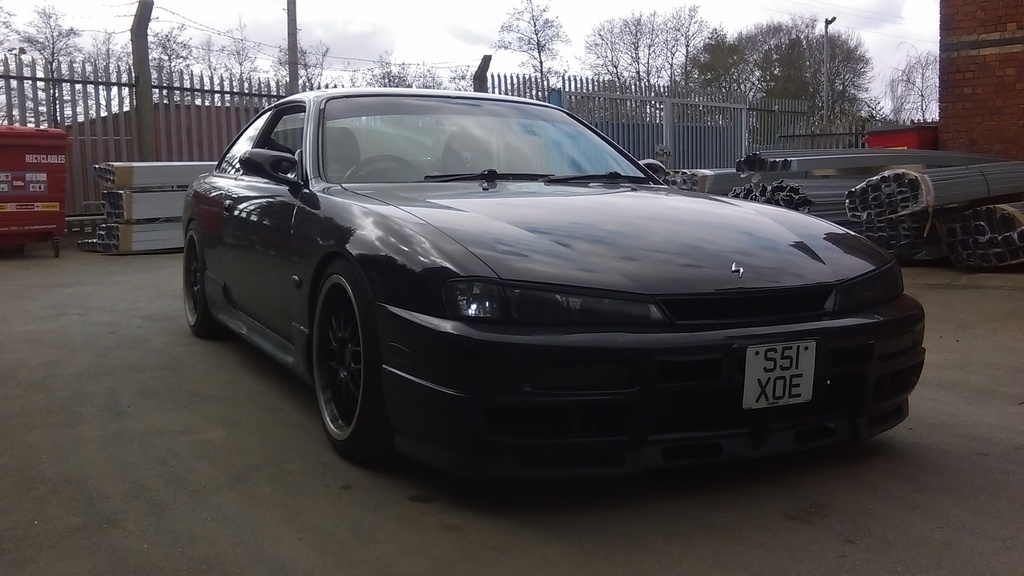 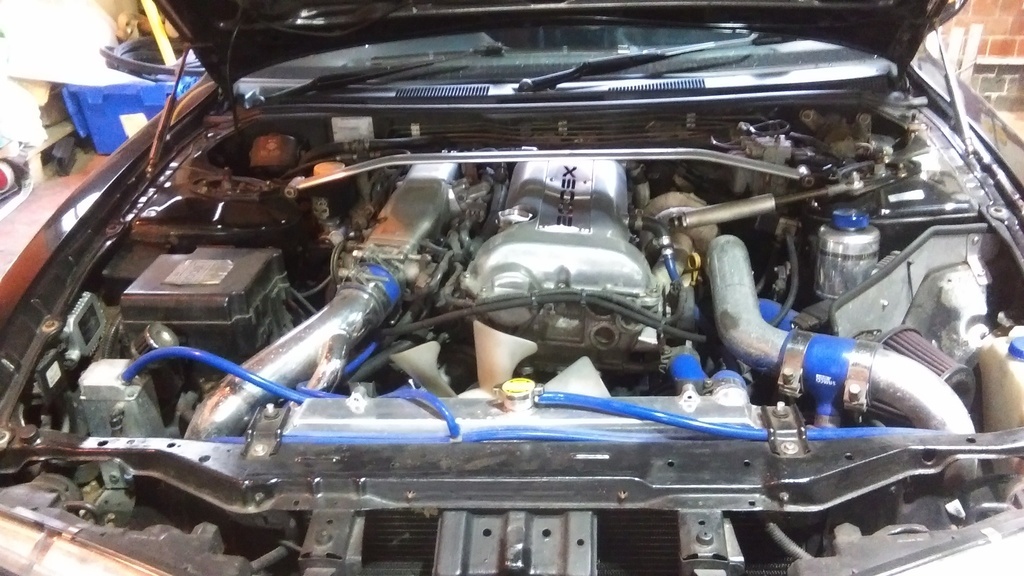 Quick spec list for anyone that's interested.... 2l 16V Turbo engine - SR20DET - Approx 297bhps and torques Apexi air filter Front mount intercooler - wing mount as standard Aluminium Radiator Walbro 255 fuel pump Tubular stainless manifold and 3" decat exhaust Nismo 555cc injectors Apexi S-AFCII to alter fueling Apexi AVC-R boost controller Apex Performance 'Comfy' coilovers Various poly bushes and rose jointed suspension arms Whiteline front and rear ARBs 8.5"x18 wheels with 225/40 18 Toyo T1R tyres Z32 front brake calipers S14 rear lights Japanese spec bumper and loads more but I won't go on. MOT was last September and a few items were flagged up - a bit of underside corrosion, front ball joint, but with lockdown I've not used it so not got round to fixing any of them, also need to fit a new battery tray as I bought a new battery last year which turned out to be bigger than the old one. Today I thought I'd start with the ball joint, simple matter of unbolting the lower arm, pressing it out, a new one in and bolt back up. Pan was to document the process with plenty of pictures but that didn't happen. After a bit of a fight it was off... 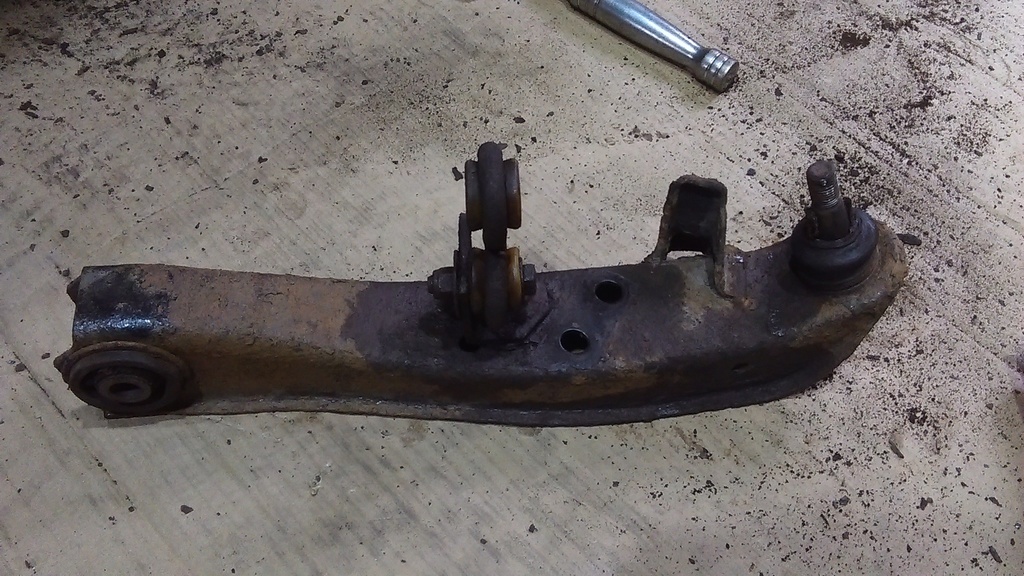 Leaving this gap... 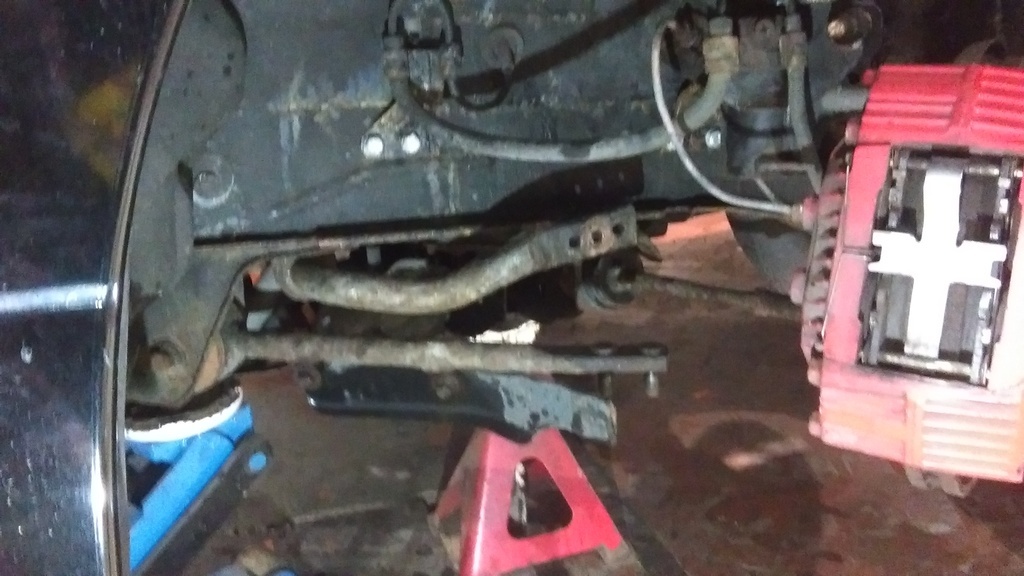 Employing this fly press at work to remove it... 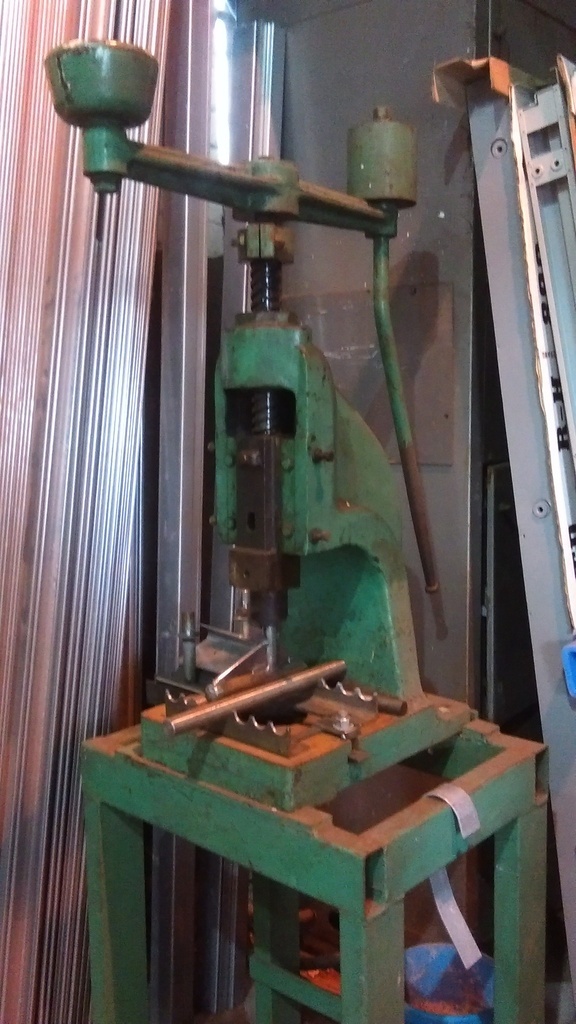 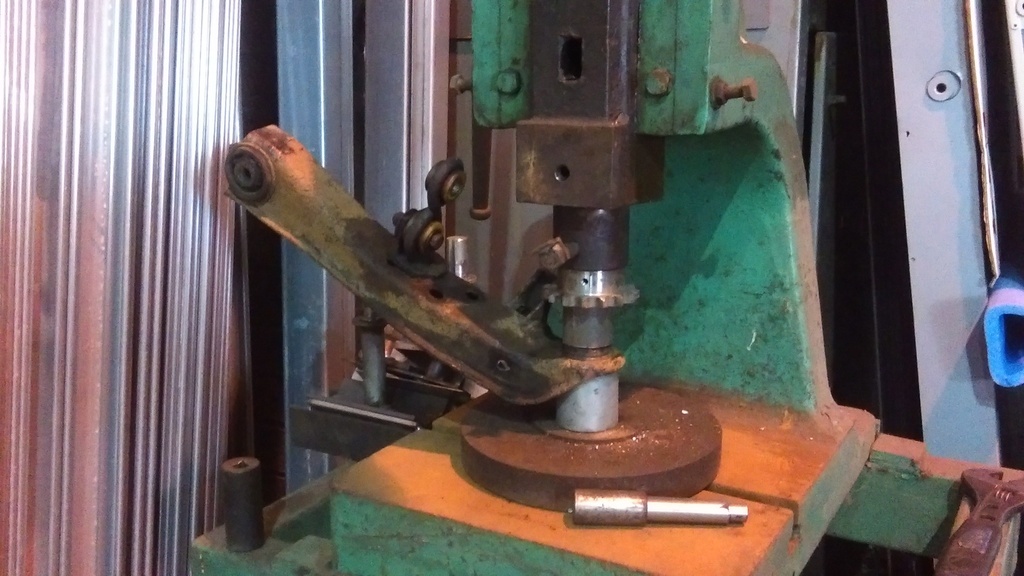 Worked well and then I hit a slight snag and the photos stopped, I've got so much respect for all the other contributors on here that stop and take regular pictures of their work. Seems the new ball joint is slightly bigger than the old one and wouldn't locate/press into the arm  Resorted to filing the hole a little and adding a chamfer to help locate it, which did work in the end. But yet again I was questioning why I bother spending my time doing jobs like this, I get no enjoyment from them and the smallest thing going wrong puts me in a bad mood, not what a hobby should be doing  |
| |
Last Edit: Mar 31, 2021 15:11:02 GMT by ChrisT
|
|
|
|
|
Mar 21, 2021 21:25:43 GMT
|
|
don't let it get you down. You have 2 retros that reflect your personality, pretty unique I would say. I run a shagger of a 320d tourer that's hangin at the seams an even changing a bulb fills me with dread. I don't even have a retro anymore as the thought of workin on them makes me shiver. Keep on at it an this year may change your outlook
|
| |
|
|
ChrisT
Club Retro Rides Member
Posts: 1,670
Club RR Member Number: 225
|
|
|
|
Thanks, I think part of the problem is I know all the work that they both need and that it's all stuff I probably should have been doing over lockdown but not had the enthusiasm which really annoys me. One job at a time and it will get done..... Spent the weekend at the workshop doing ticking off a couple of jobs on the SX, bought a new battery for it last year sometime but it turned out to be larger, both physically and in output, than the one I had. It's located in the boot as the pipework for the front mount intercooler conversion goes through the battery tray in the engine bay, so I figured a bigger capacity battery wouldn't be a bad idea, just meant remaking the mounting bracket. New battery in place, temporarily held down with ratchet strap... 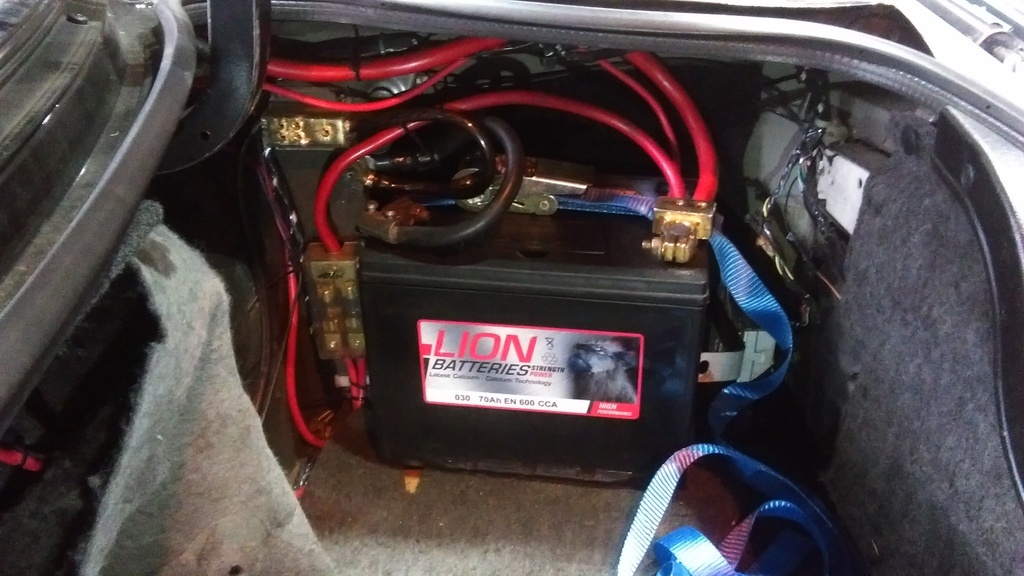 Old tray with bit of wood one side so new battery can sit on top of it... 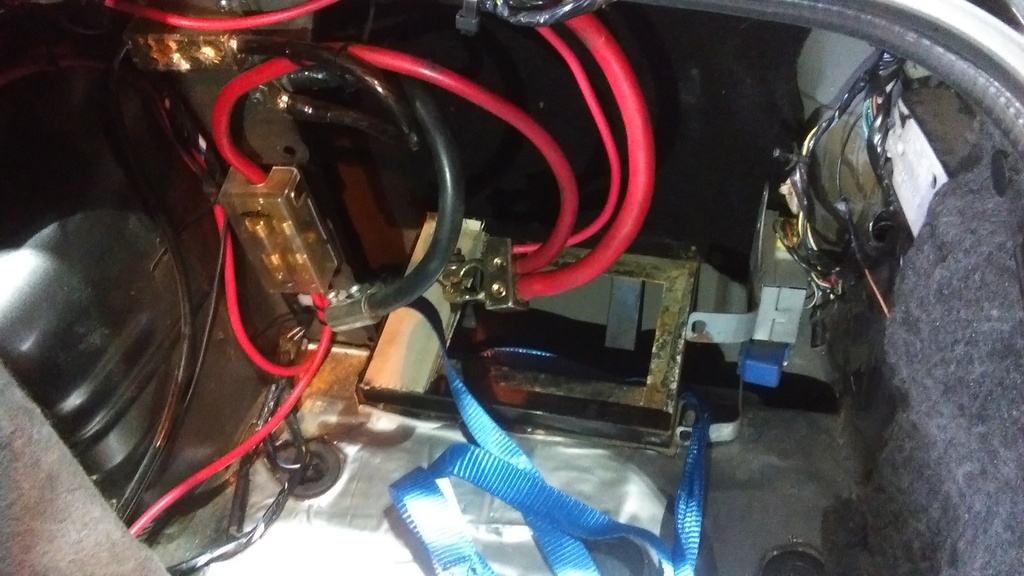 Old one out, put a bit of thought into the design of this, new one will not have the legs as there's more area to attach it to the boot floor.... 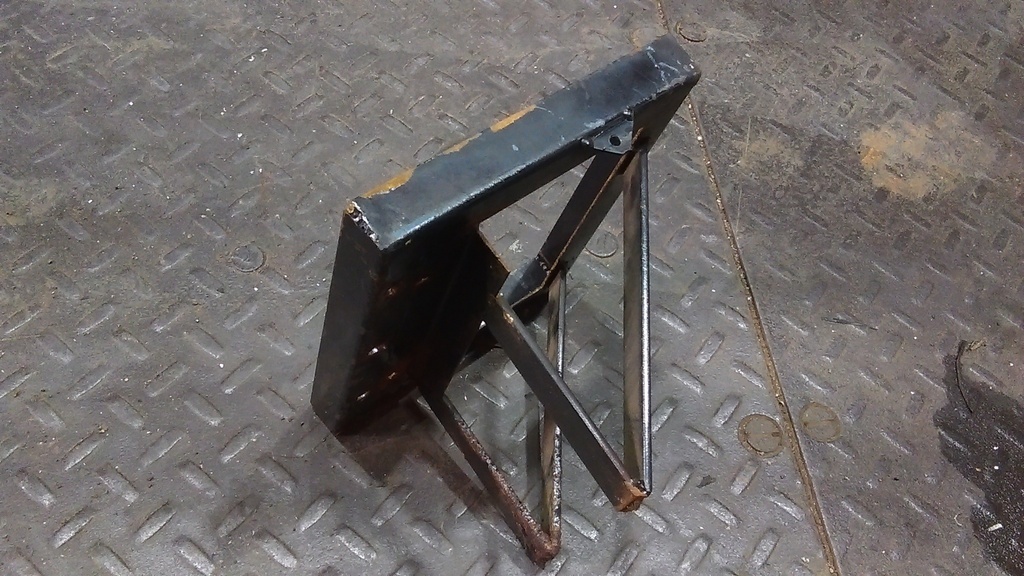 New one in, ended up putting another fixing in the front left corner as it flexed once battery was on it.... 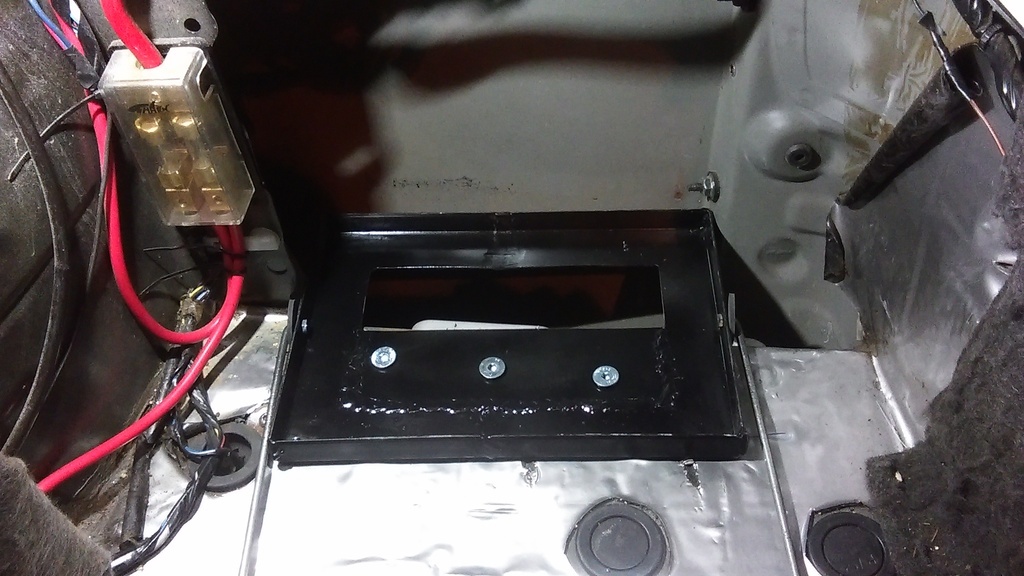 A few bits of rubber to protect the battery from rubbing on the fixings/welds... 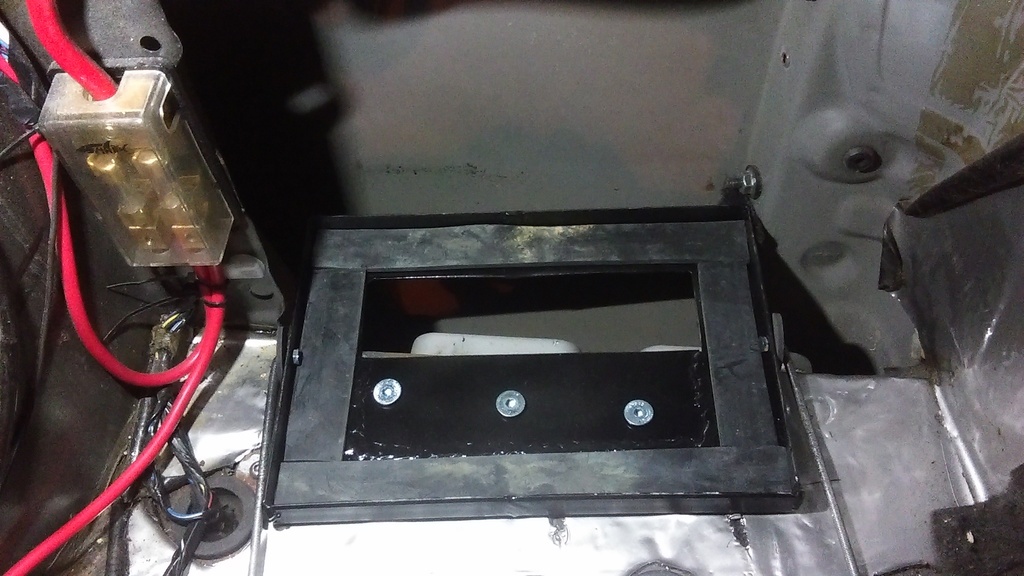 And battery in place, just a strip of steel across the top for now to keep it in place.... 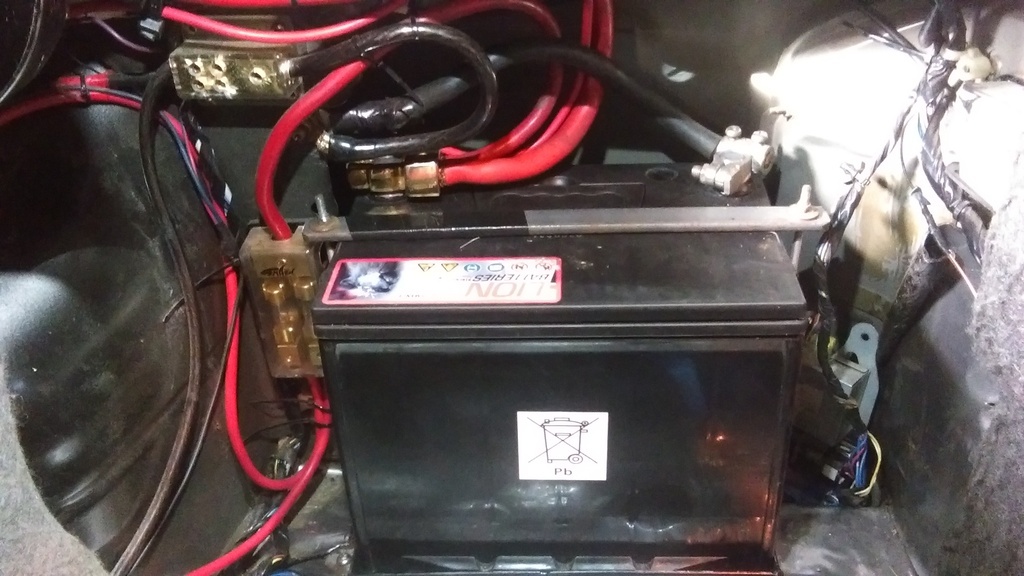 Wheels were in need of a bit of a clean, front ones in particular, polished lip was starting to show signs of corrosion...... 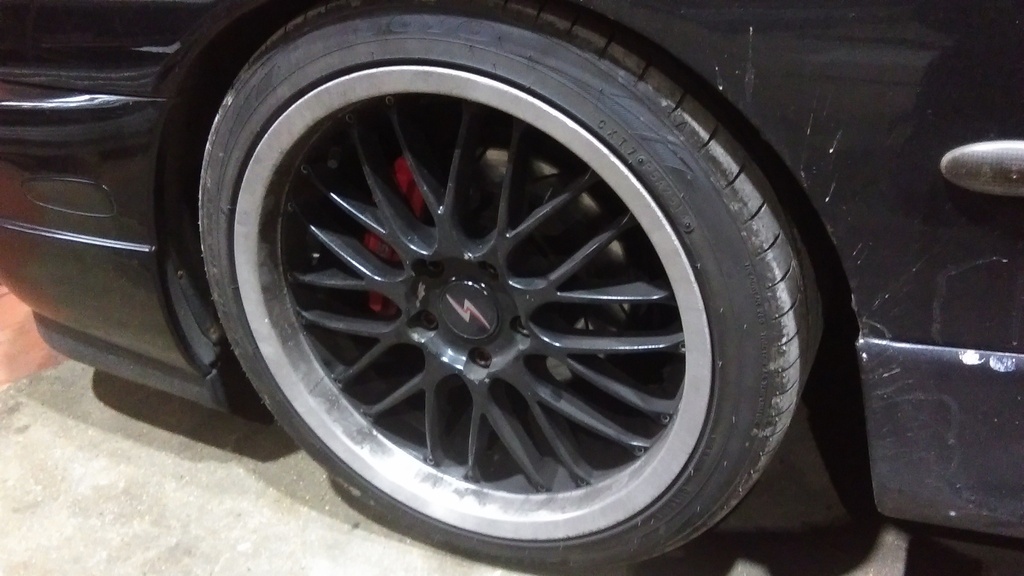 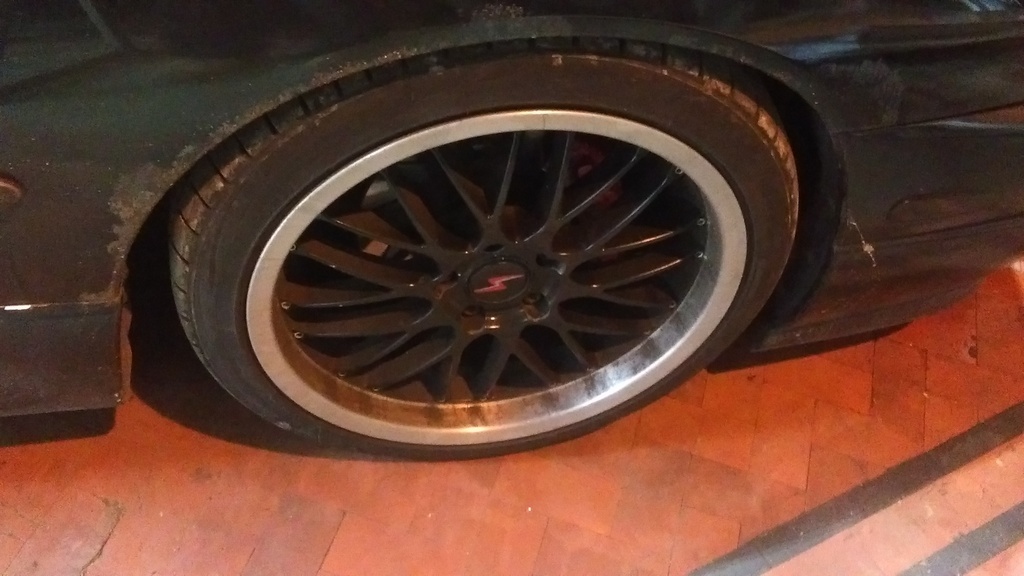 Low entry jack under the front and trolley jack under the back soon had the car in the air and wheels off.... 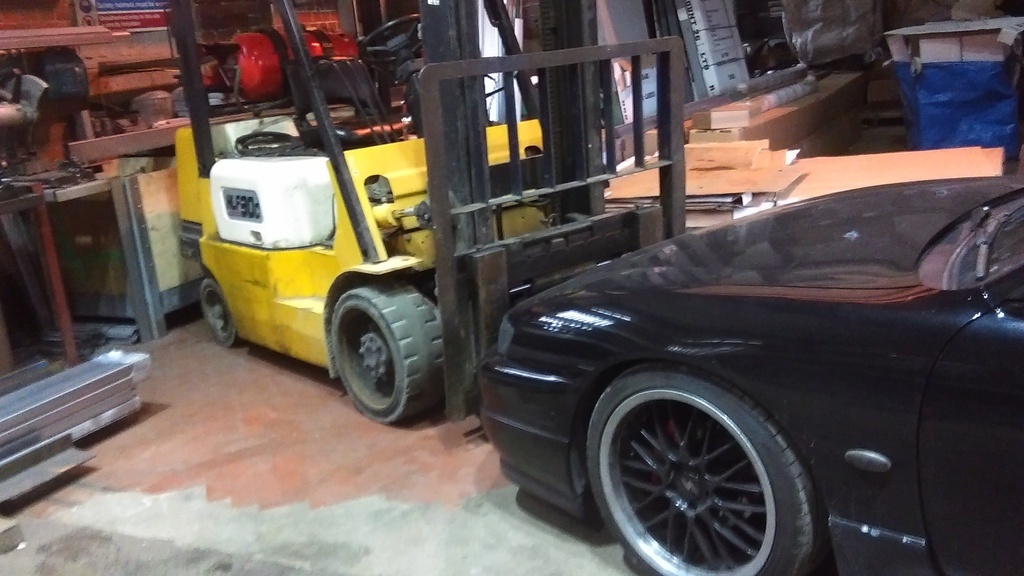 After a good scrub with Halfords wheel cleaner they looked better but the lip needed a proper clean so wheel back on the rear, engine running in 3rd gear, beginning with the use of a file to take the worst of the kerb rash off followed by a few grades of wet and dry, starting at 80, and finally some Autoglym metal polish to protect them..... 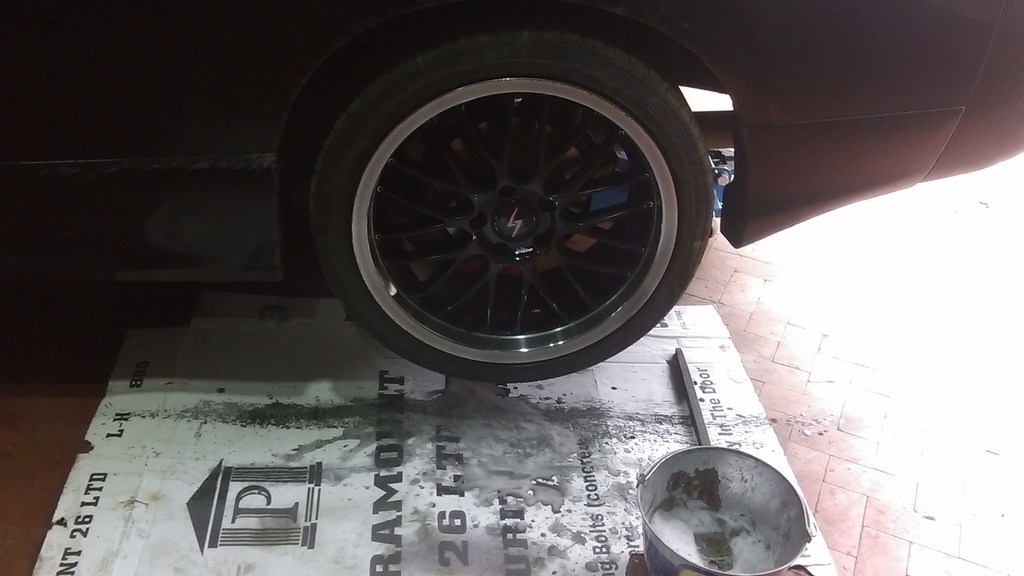 Much better..... 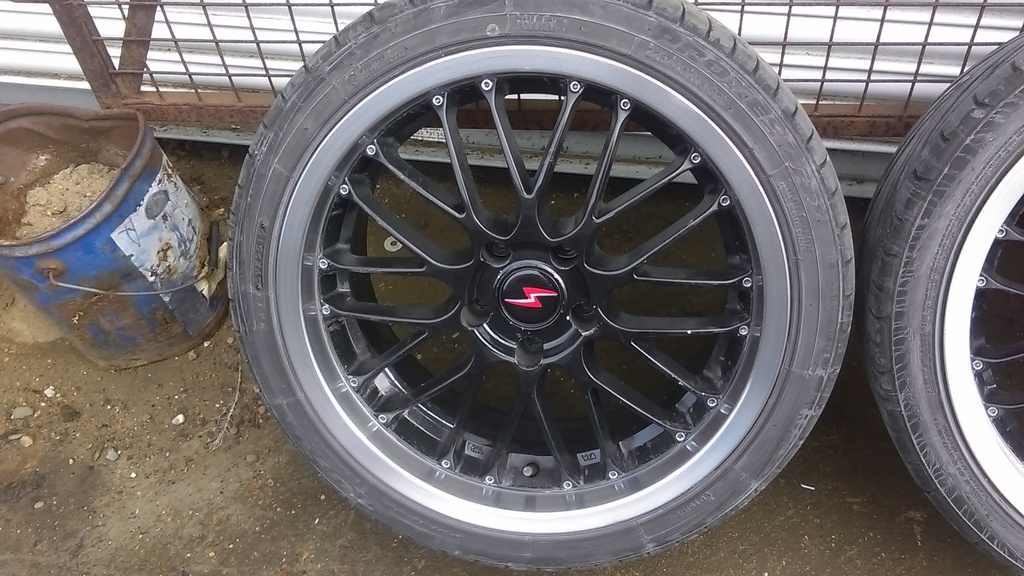 MOT did flag up one rear tyre in need of replacing soon but looking at them the other's not much better, and checking the dates on them they're over 10 years old so really is time for new ones so got some new ones on order..... |
| |
|
|
ChrisT
Club Retro Rides Member
Posts: 1,670
Club RR Member Number: 225
|
|
Apr 10, 2021 18:04:33 GMT
|
Done a bit more to the sx today, number plate lamp gave up (one of the bulbs went and housing was in such bad condition there was no chance of replacing it) the other year, temporarily stuck an LED lamp in place to get it through MOT but that was now only just hanging on, and looked curse word, decided to fix it. Bit of steel angle.... 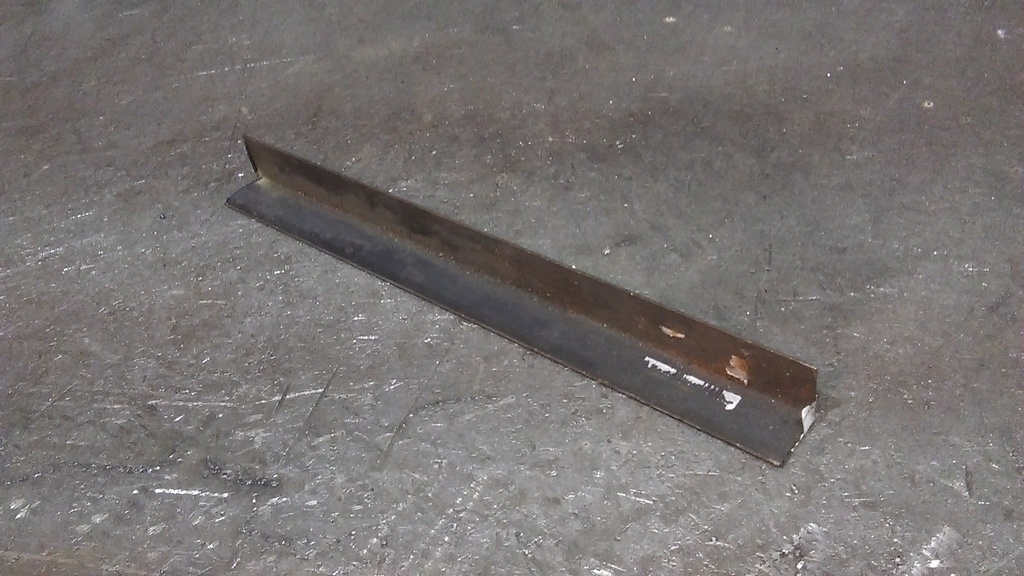 A couple of cuts, bends, rivets and rivnuts.... 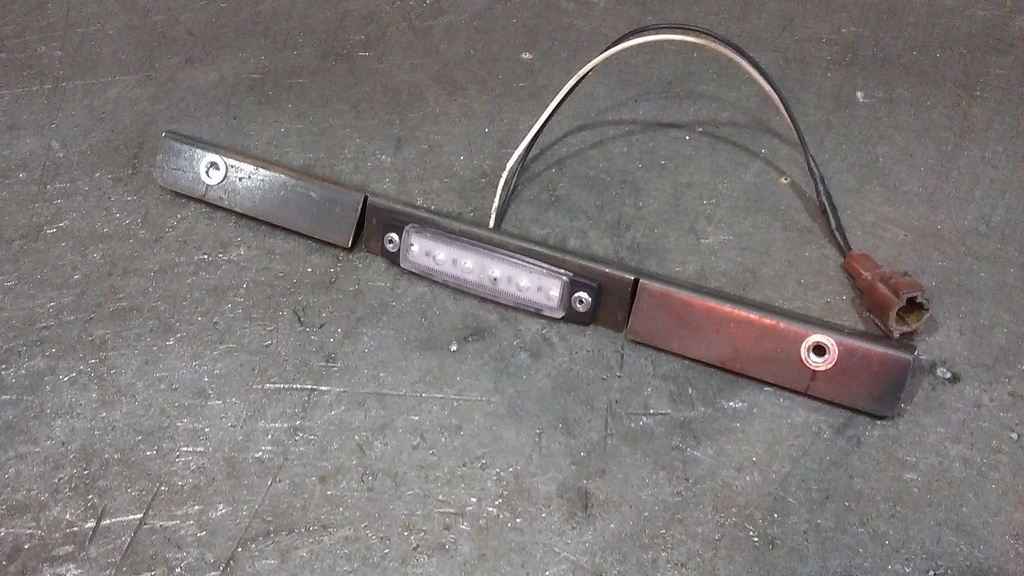 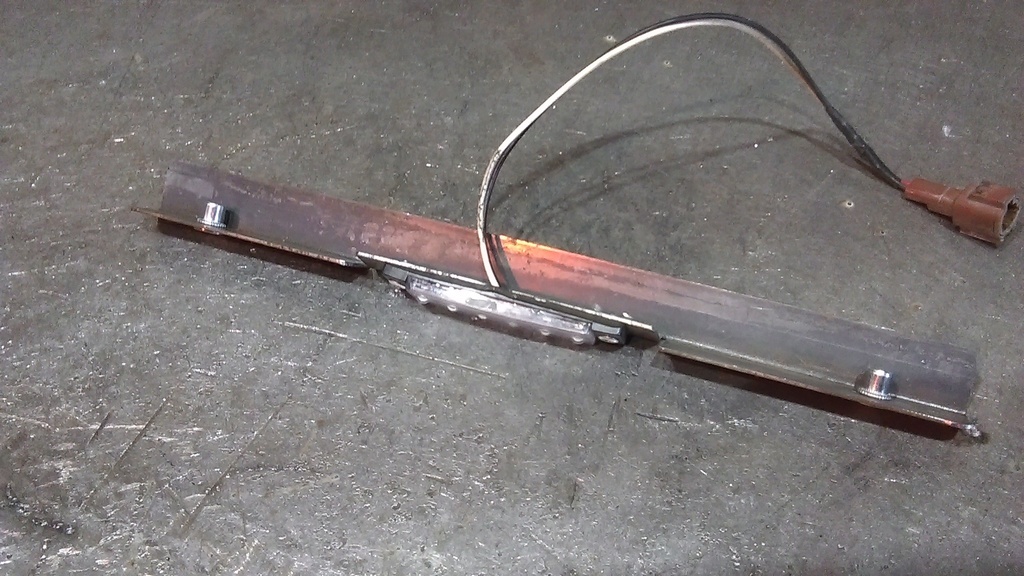 Painted, also managed to break one of the wires off the back, Araldited it in position until I can get a replacement LED..... 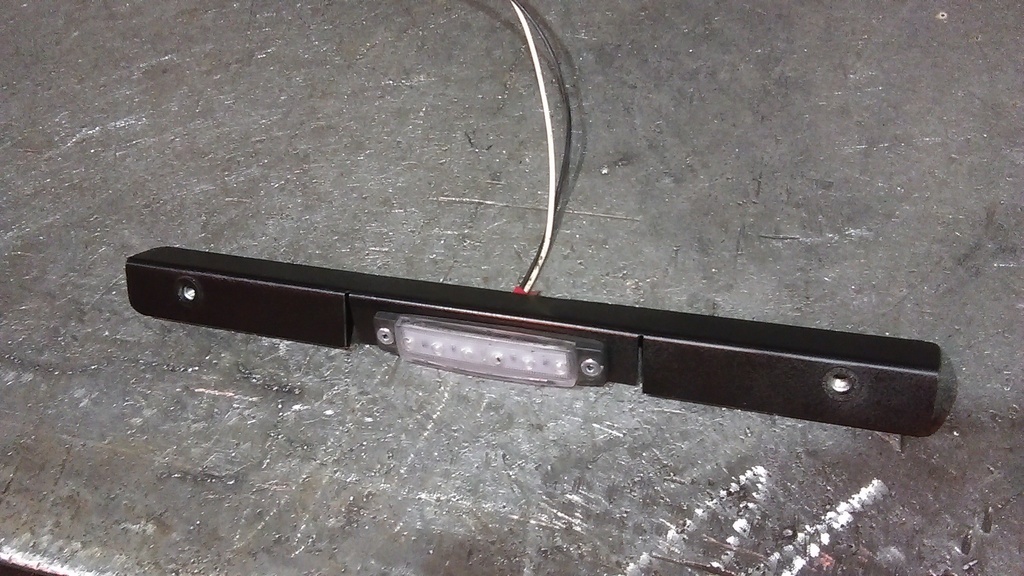 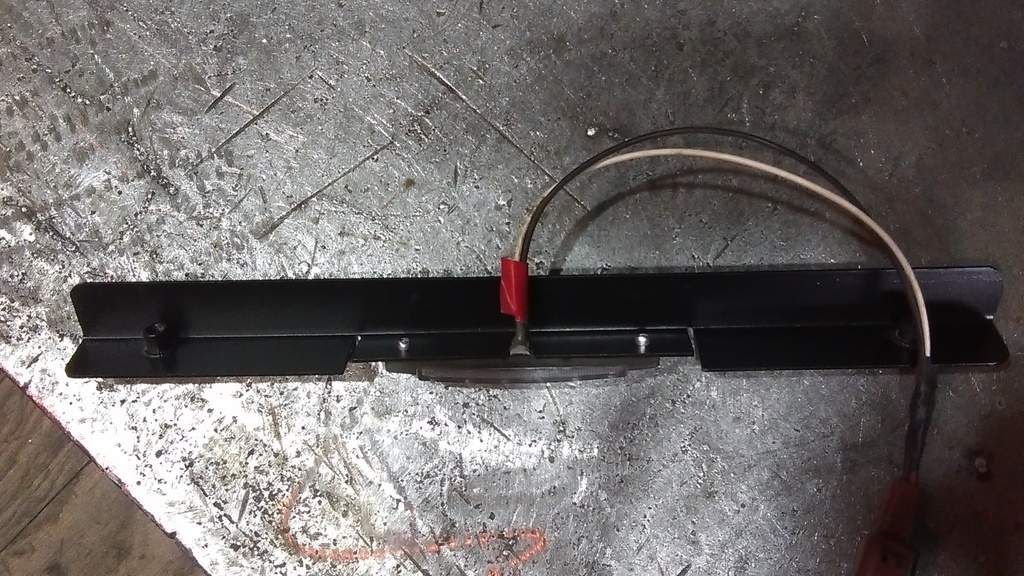 In position with some stainless bolts (that's the sun shining on the plate not the light) 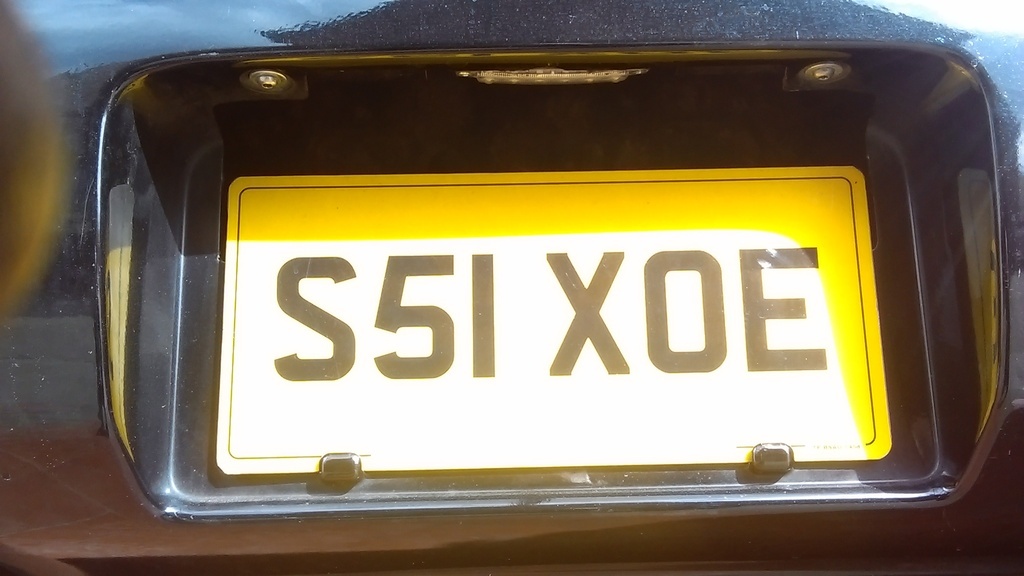 That should last a bit longer. Building up to attacking the rust flagged up at MOT, only a couple of small patches underneath. Inner wing has been showing a bit of corrosion for a while yet but it looked solid, had a look today - after removing the fuse box and several other bits and bobs. After a bit of wire brushing and a poke with a big screwdriver it's in need of a bit of patching too....... |
| |
|
|
ChrisT
Club Retro Rides Member
Posts: 1,670
Club RR Member Number: 225
|
|
Apr 24, 2021 14:46:03 GMT
|
Was all set to sort the rust (or at least make a start) last weekend, got down the workshop early Saturday and set to with the angle grinder mounted wire brush which showed up several other places that needed attention - along the sills, rear arch behind the wheel and drivers footwell. The footwell was no surprise as I did the passenger one a couple of years ago but it wasn't an easy repair with several panels meeting. Made a start on the inner arch, wasn't going for a pretty repair, just sound to get it through the MOT in September. Couple of holes... 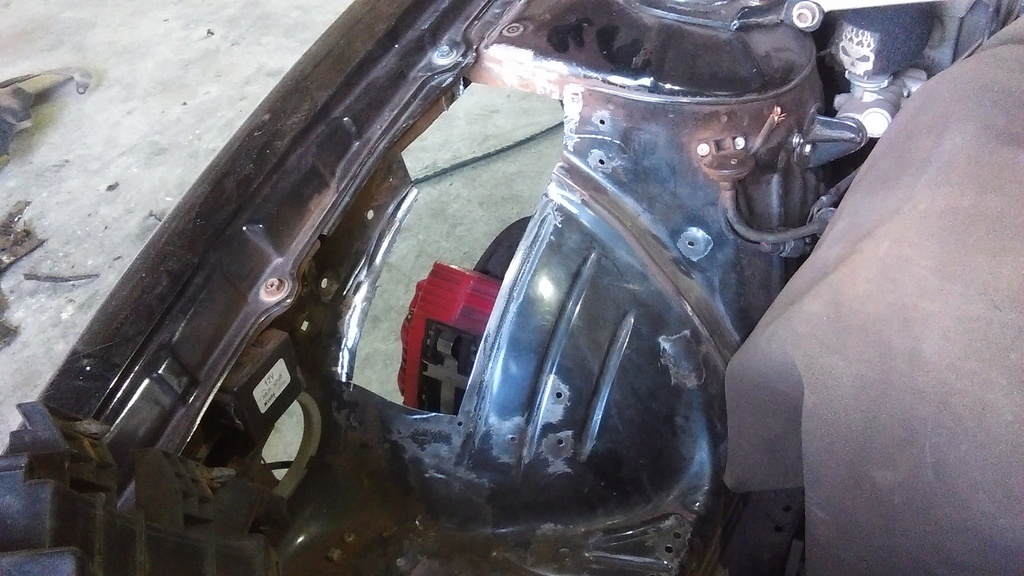 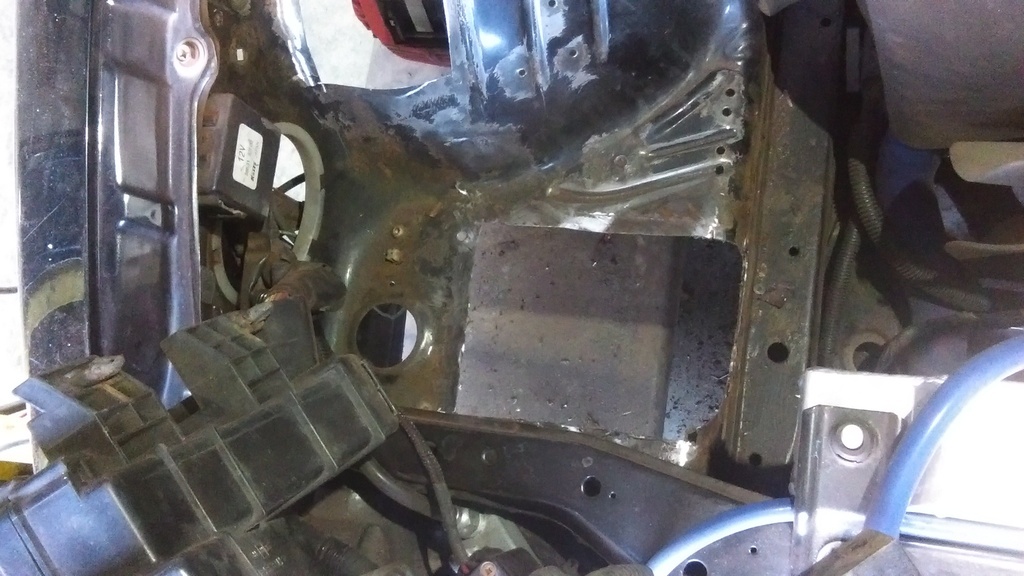 And afterwards from underside with some really dodgy welding.... 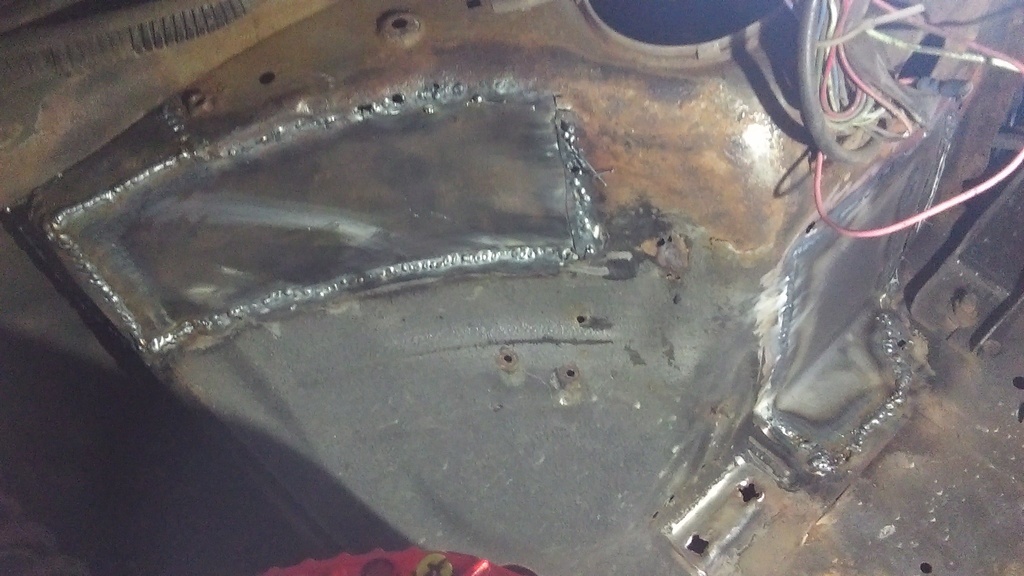 Really wasn't enjoying the repair, couldn't seem to get the weld right, so I threw my toys out the pram again and gave up on it. Decided I can't face all the welding that needs doing to it so while it's got a few months MOT left I'm selling it. |
| |
|
|
|
|
ChrisT
Club Retro Rides Member
Posts: 1,670
Club RR Member Number: 225
|
|
May 15, 2021 18:25:51 GMT
|
Unknowingly advertised the SX for a lot less than it was worth so it took longer to write the ad than to actually sell it, here it is driven off by the new owners dad... 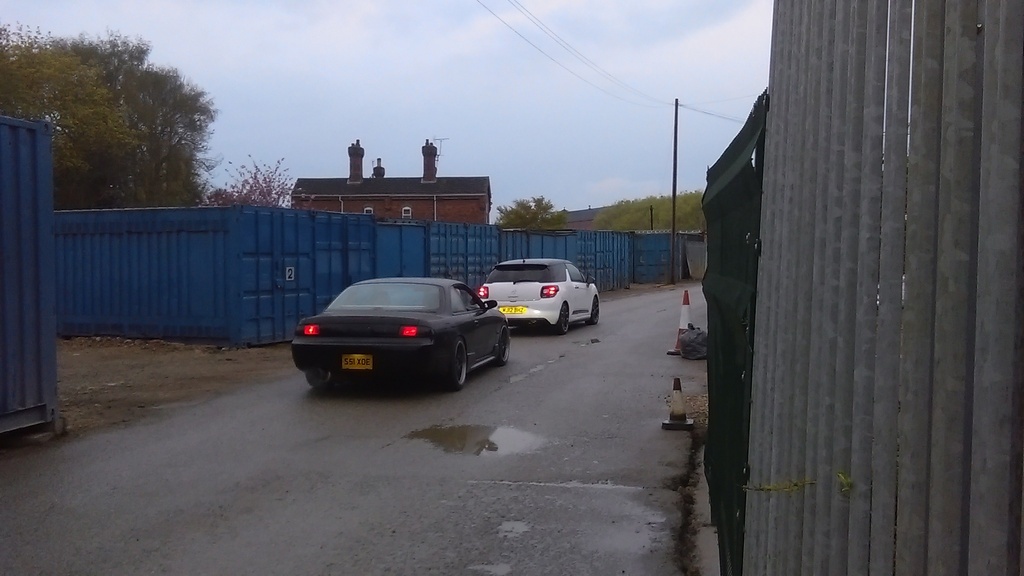 As a replacement I got this BMW E92 320i... 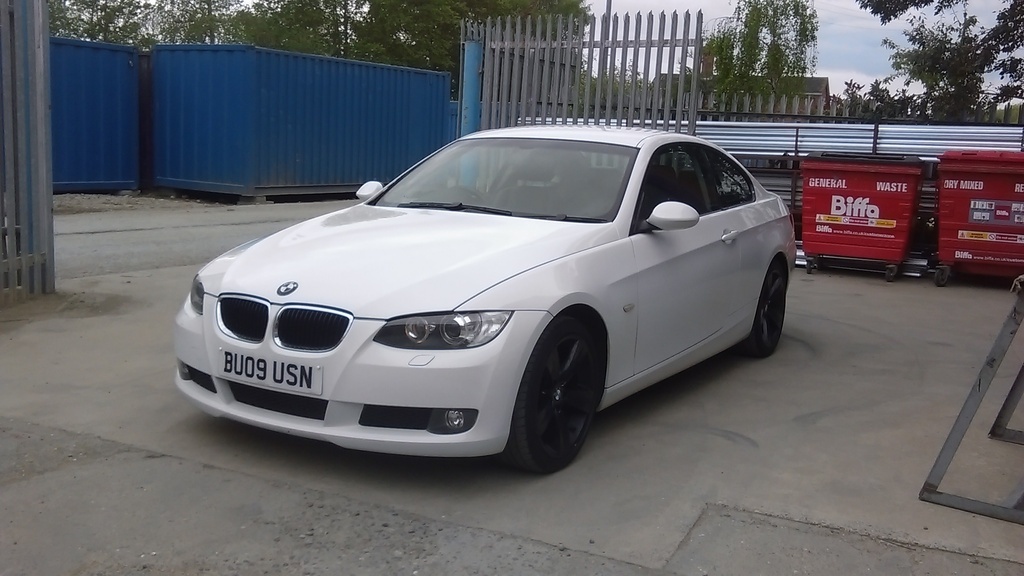 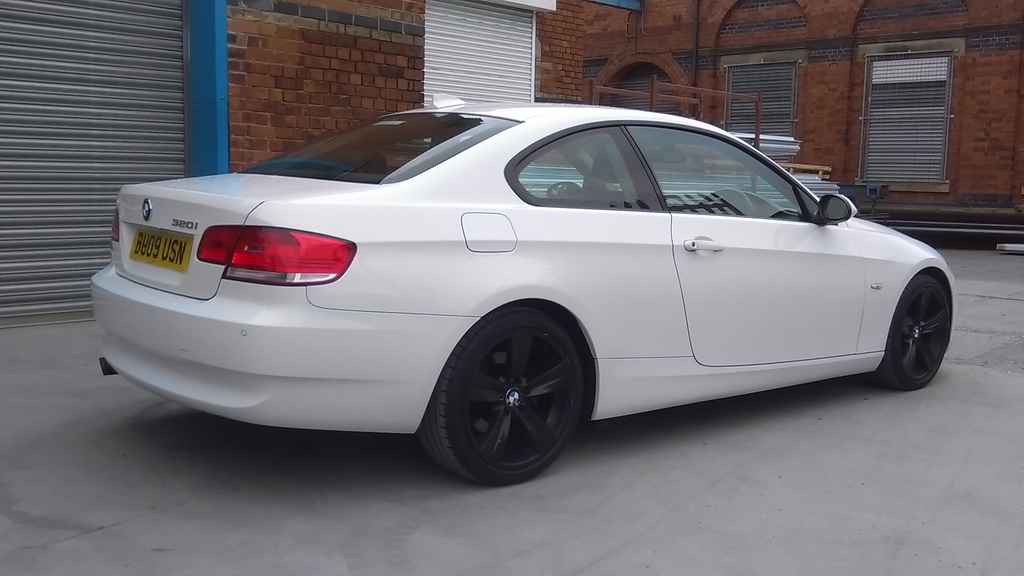 Something reliable that doesn't need any work (except it turns out it does) so I can concentrate my efforts/anger on the Manta. Have managed a little bit, as the engine's out I ought to tidy up the subframe, starting with the passenger side outrigger which I'd previously notched for exhaust clearance.. 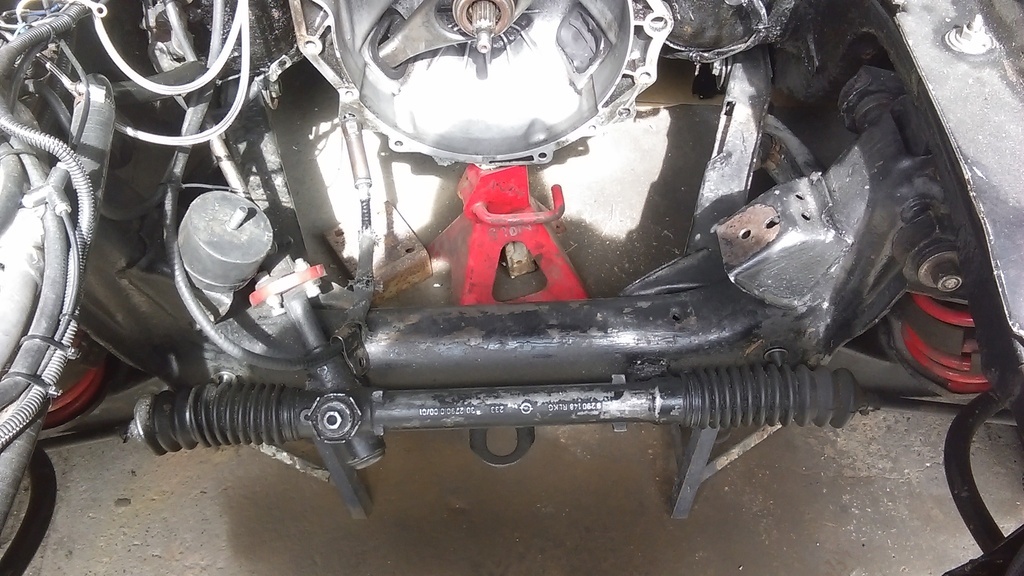 Cut it out more and made a better job of plating the hole... 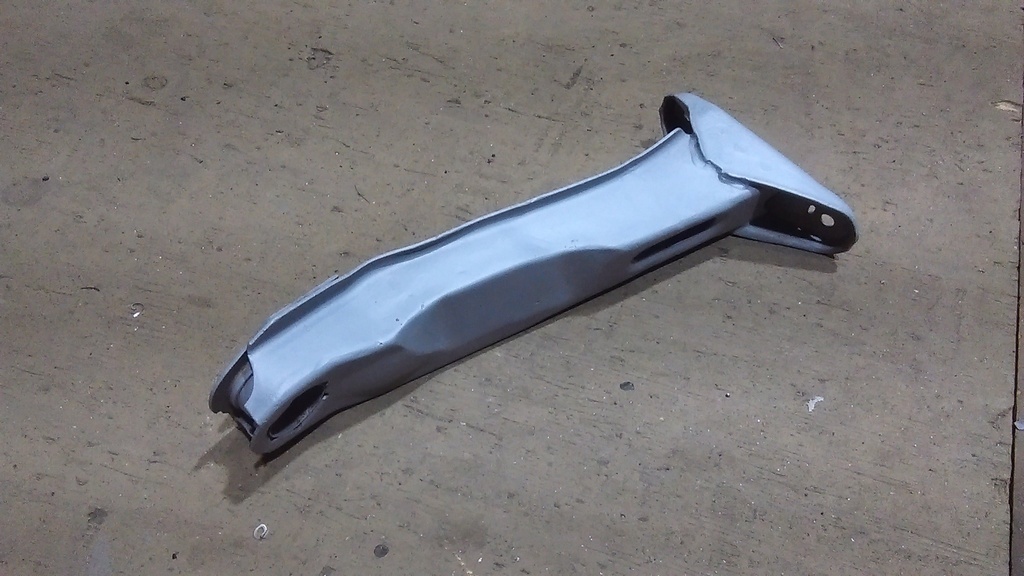 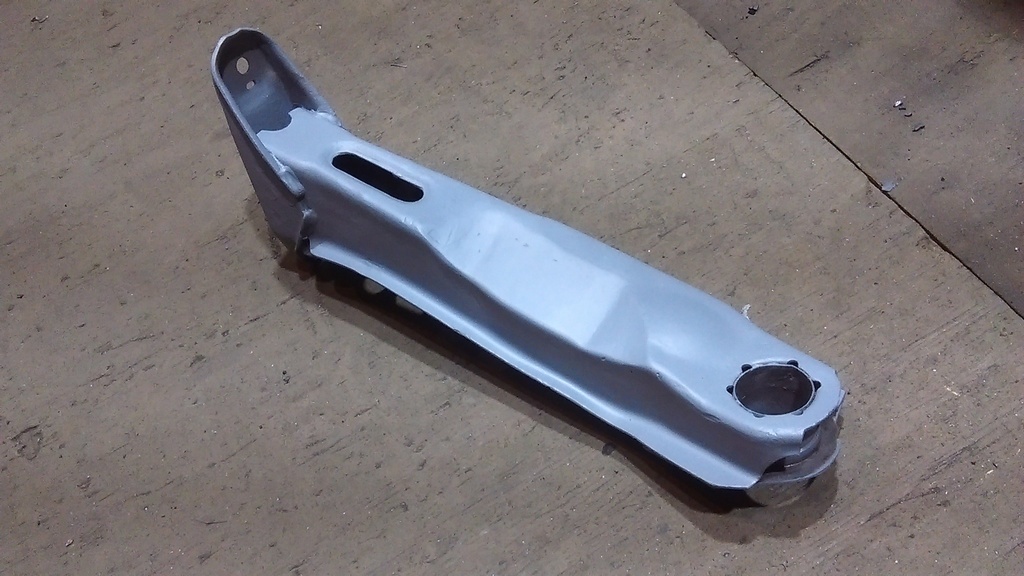 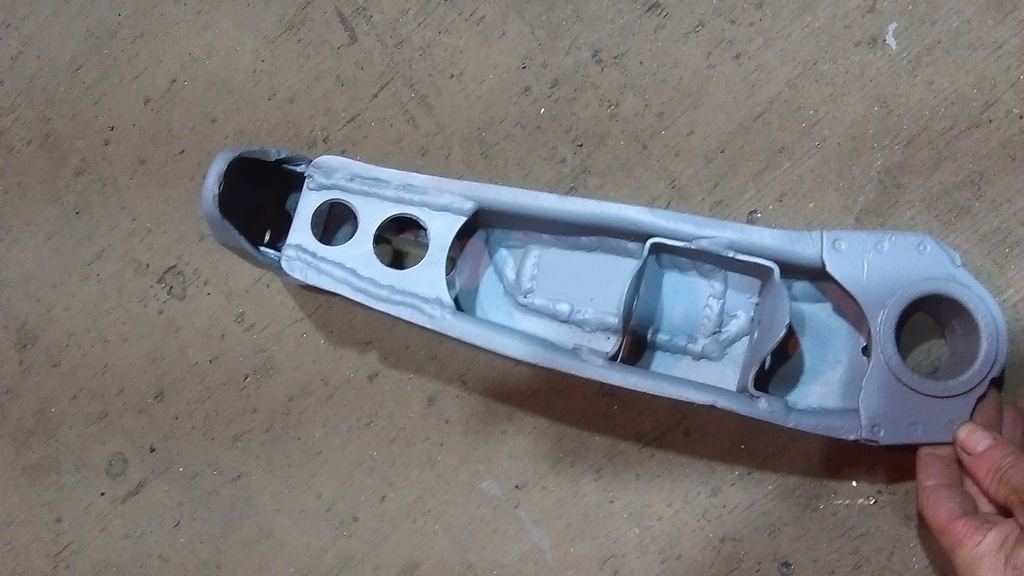 |
| |
Last Edit: May 19, 2021 17:27:30 GMT by ChrisT: Added pics.
|
|
ChrisT
Club Retro Rides Member
Posts: 1,670
Club RR Member Number: 225
|
|
|
|
It would seem it's been exactly 3 years since the start of my low oil pressure problems and almost 2 years since the engine came out so surely everything is sorted now..... 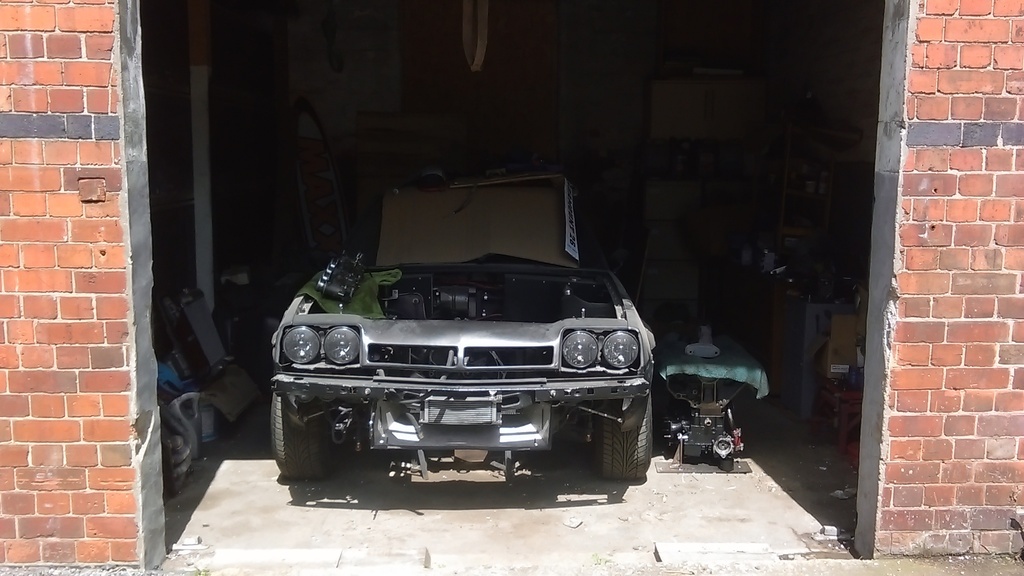 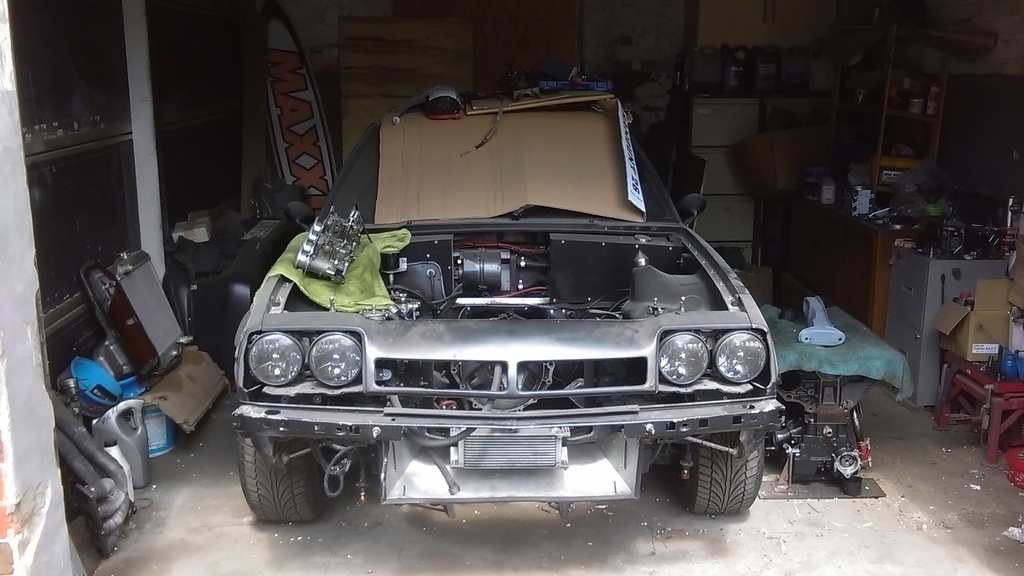 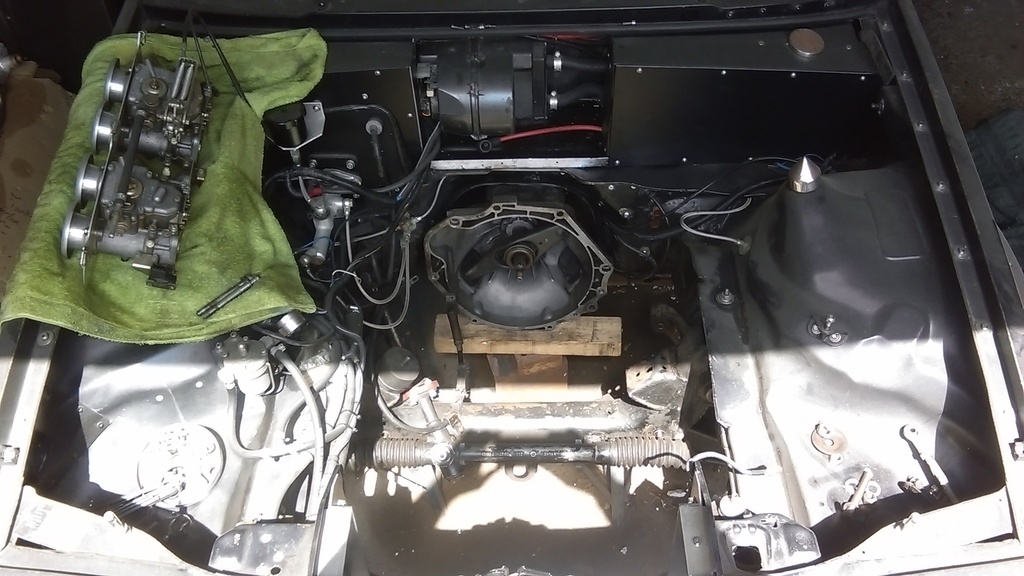 Nope, most recent images look very much like ones on the previous page, not had the enthusiasm for it at all but I'm making a start, not sure how long this will last though. Thought getting rid of the SX would mean I could concentrate on the one car but it hasn't, even thought about selling this but obviously it's not worth a great deal with the engine out/not working and there's some areas that need attention before I'd be happy passing it on to anybody. Chassis rail swan necks are the first on the list, I've 'repaired' them in the past when replacements were hard to get/expensive but I've got some on order now, just need to remove the front cross member and a few other parts to gain proper access. Still haven't taken the crank to be measured/reground either, another job for the list... In other news, the BMW E92 has turned out to be a bit of a lemon and has needed a bit of attention to get it to a level I'm happy with, alarm bells did start ringing when I saw that just about every bolt/screw in the engine bay was a different, never mind the amount missing. So far it's had new Goodyear tyres all round to replace the Linglong/landsail assortment it came with. New wheel bolts to replace the varied selection that were fitted. New vacuum pump and engine cover gasket to stop the oil leaking onto the exhaust. New plugs and afm cleaner to try and sort rough idle. New battery and an OBD reader to 'register' new battery to car and clear faults. Trip to a specialist to diagnose the engine light and rough idle - turns out it's had new injectors fitted (W'hoo!) but they weren't coded to the engine so have been over fueling which in turn is causing the O2 sensors to fail (Booo!) - Injectors now coded and all three O2 replaced. A slight noise I noticed on test drive but dismissed as nothing turns out to be the rear diff so I've been on the look out for a replacement and a local one's just turned up - will be fitting it next week. |
| |
Last Edit: Jun 10, 2022 7:55:00 GMT by ChrisT
|
|
ChrisT
Club Retro Rides Member
Posts: 1,670
Club RR Member Number: 225
|
|
Jun 14, 2022 19:58:48 GMT
|
Picked up the rear diff the other day so time for a bit of work on the BMW. In preparation I've watched a video on Youtube on how to do the job, just to get an idea of whether it was worth paying someone to do it or tackle it myself. Looked fairly straight forward just requiring a 50mm spanner to undo the nut at the end of the prop. Video suggests using a crows foot wrench but the local tool shop didn't have any of that size in so instead I bought this... 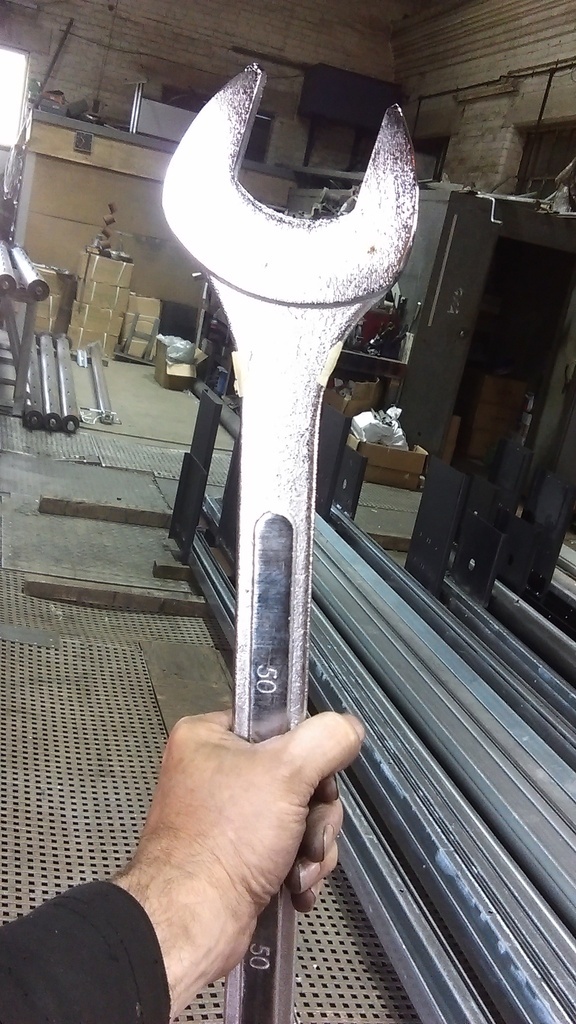 Cue lots of jokes about my massive tool  Upon getting the diff I realized the internet had lied to me, there was no prop nut, just a flange like on the two output shafts, a quick look under the car verified this. Up on the lift at work, the offending article in place..... 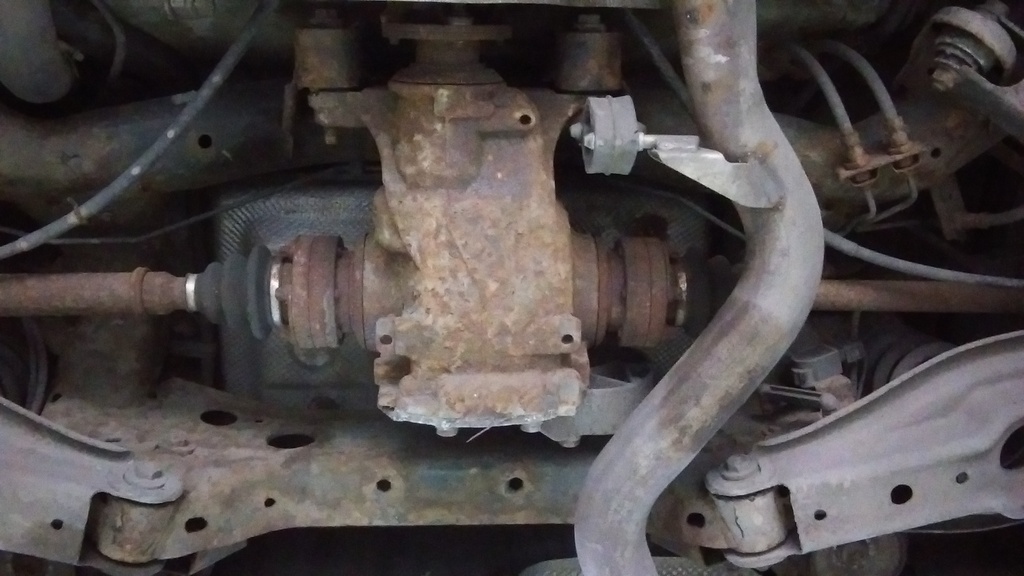 Somewhat rusty and, despite how easy it looks, slightly awkward to get to torx head bolts to tackle, eventually all came away, gearbox jack was a godsend ..... 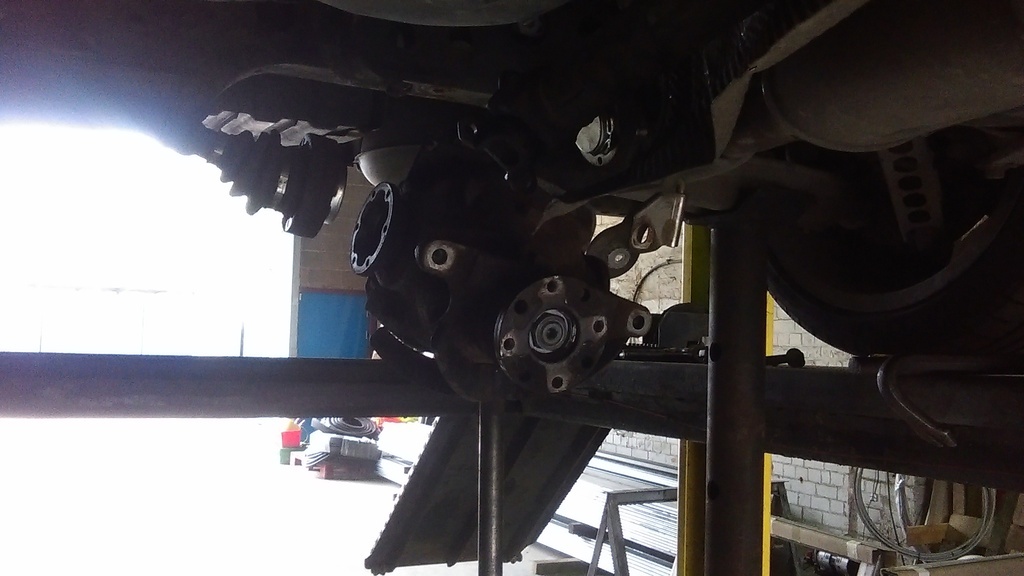 Replacement ready to go in with fresh oil, came from a similar mileage car but as it was drained for shipping I didn't get chance to see what condition the oil was. 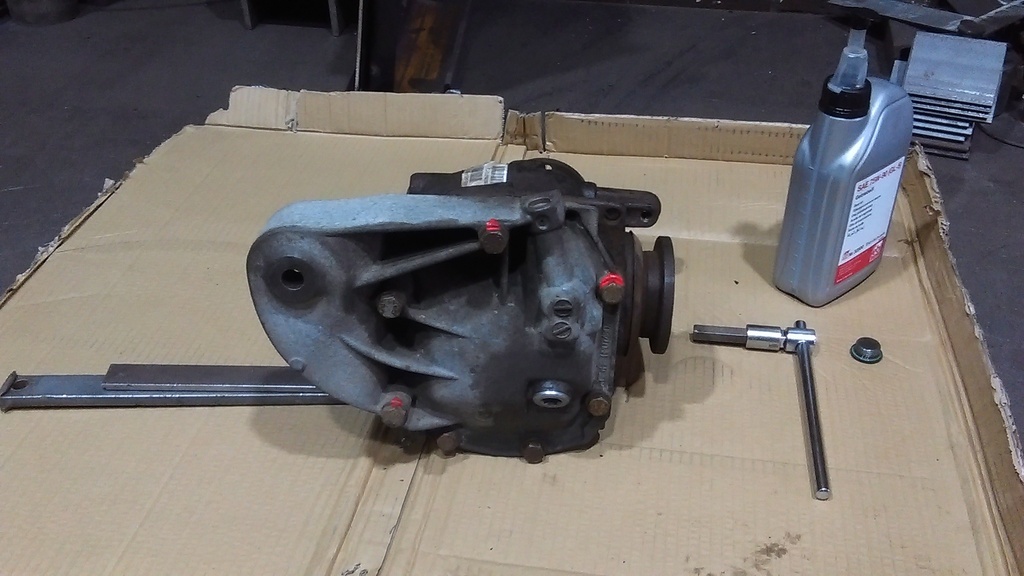 Got it all back together relatively quickly, started torqueing the bolts and was thinking how well it was going when I snapped one on the output flange  Have decided to replace all 20 bolts now as a precaution, who knows how close to snapping any of the others I'd done were, hopefully get them before the w/end. |
| |
|
|
ChrisT
Club Retro Rides Member
Posts: 1,670
Club RR Member Number: 225
|
|
|
|
Most of the offending bolt.... 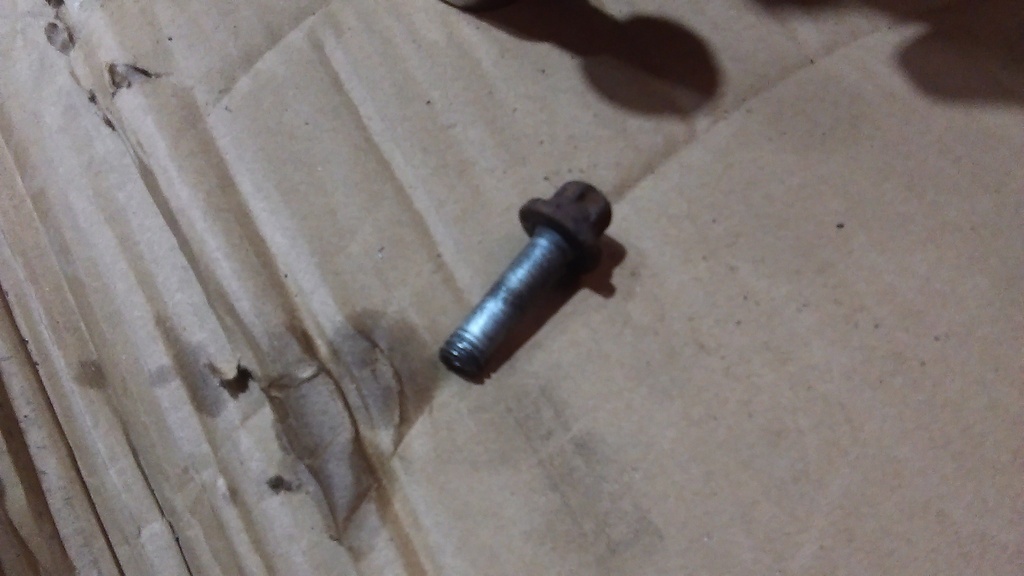 The rest of it in here.... 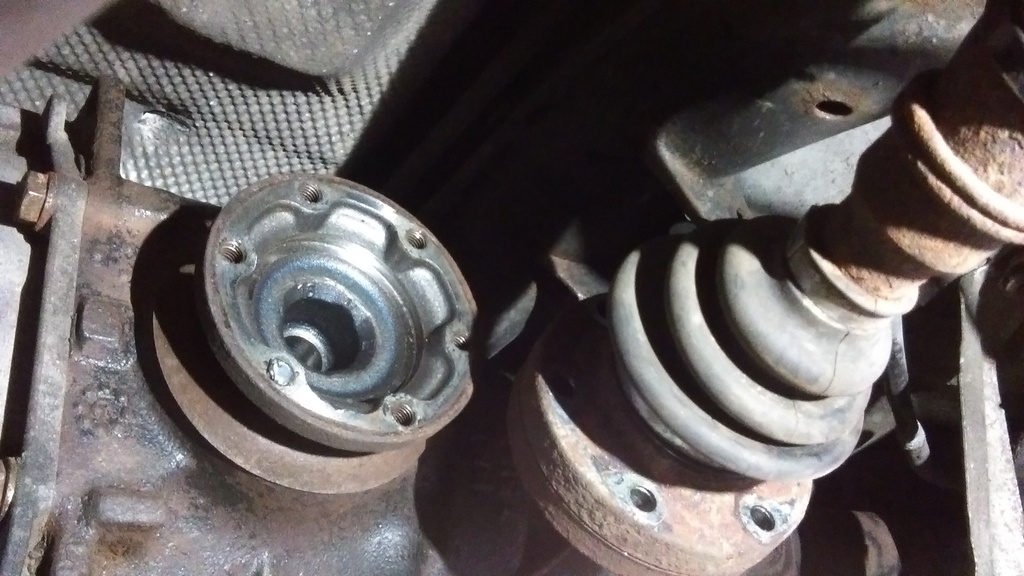 The bolt comes through the rear of the flange so wasn't concerned about removing it, usually running a 5mm drill down the middle of it is enough to shift it as the drill generally snags as it comes through and winds the bolt out the back. Today it didn't and to help, despite grinding the surface flat and centre punching it, I drilled off centre. If I'd thought about it I would have run an 8mm down the drive shaft flange while it was attached to get a true centre mark. Oh well, plan B, make up something to guide a 6.5mm through the middle of the bolt, cut the threaded part off an 8mm caphead bolt, stick it in the lathe and bore a 6.5mm hole in it..... 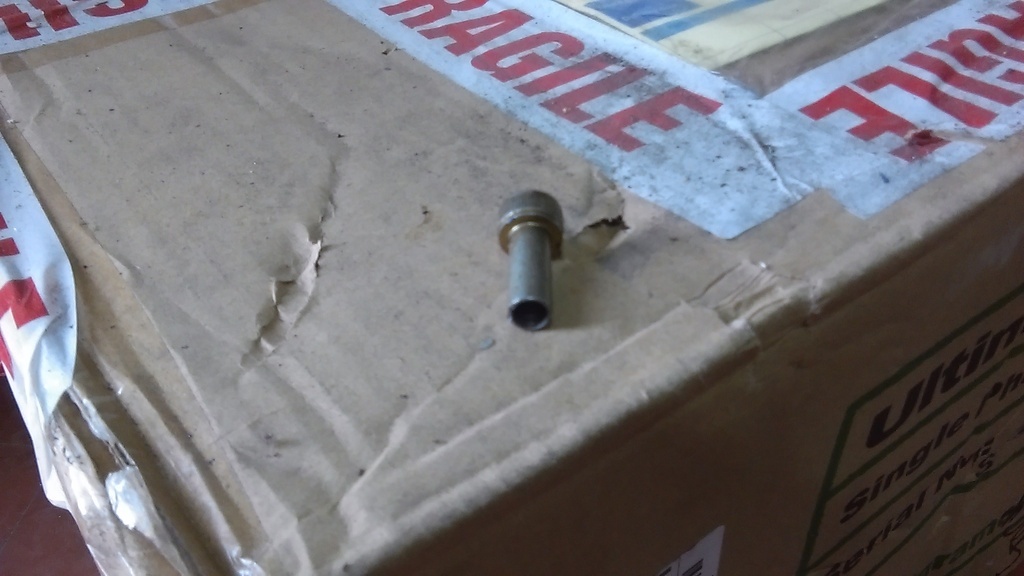 Which will fit in the output flange like so... 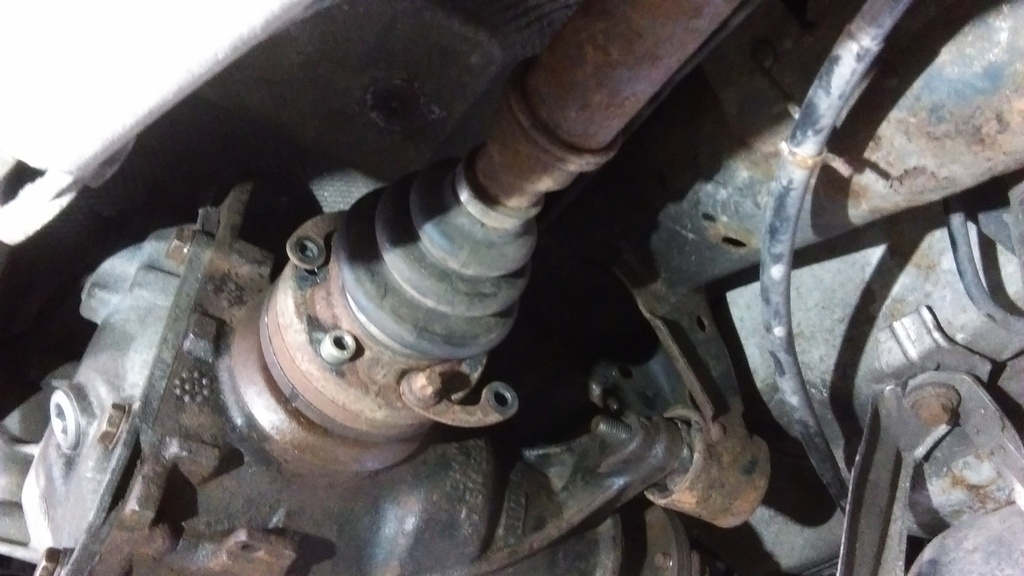 Except I couldn't get a drill in high enough to use with the drive shaft where it is  Did remember later I've got a right angle drill adaptor which might have worked. Eventually fought the remains of the bolt out without damaging the threads and got all the bolts replaced (both sides) and torqued up to the correct settings this time..... 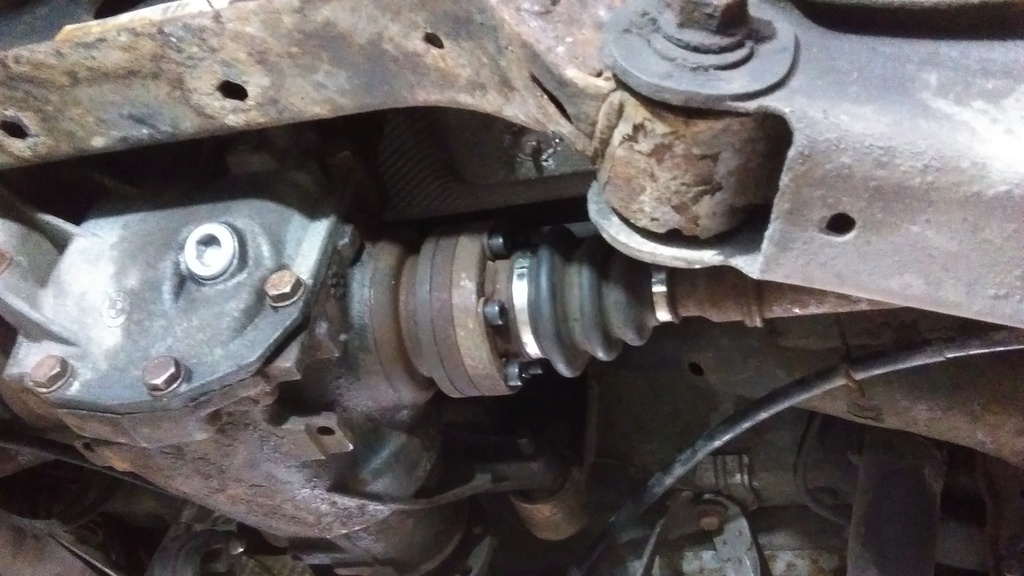 Proper BMW bolts were expensive and not easy to come by quickly so opted for some 12.9 capheads which are well up to the job. Old bolts Vs new ones... 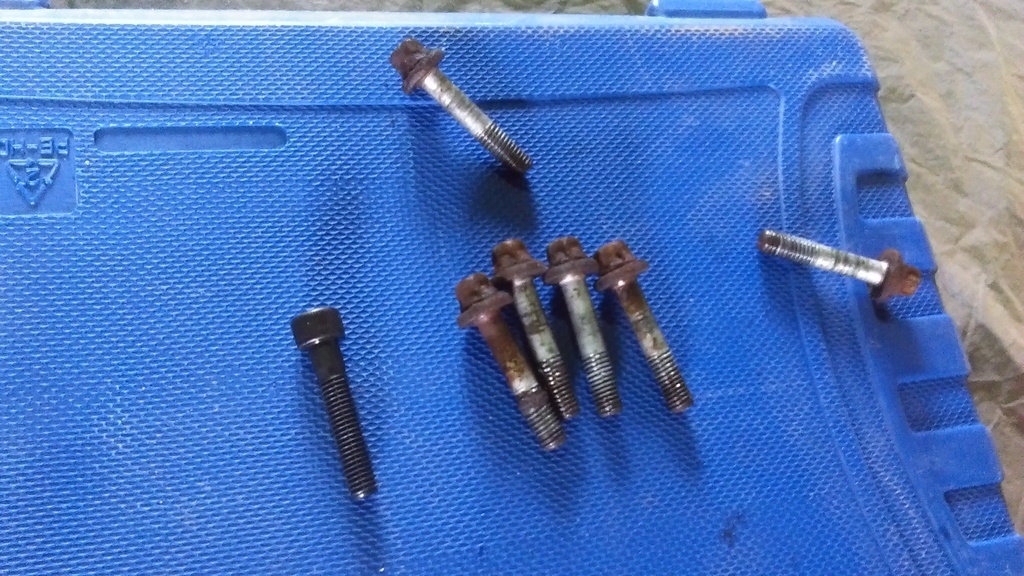 Old diff feels a lot stiffer than the new one. BMW's lifetime diff oil at 94k miles.... 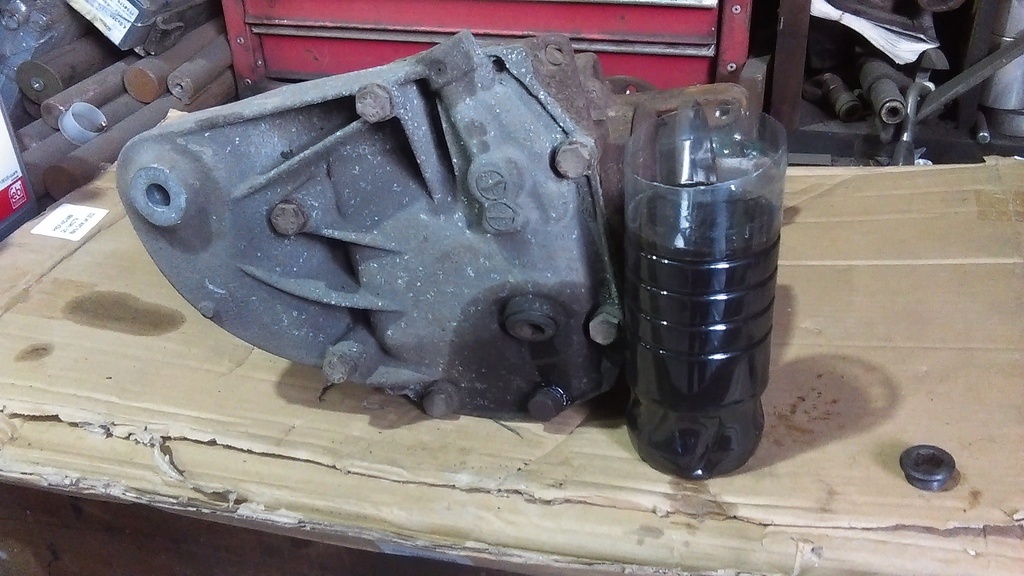 The good news is, after all this work, the noise has gone  I think that's all the outstanding niggles sorted now, I can just get on and use it. Although I am tempted to get some better looking wheels for it, and maybe lower it slightly...... |
| |
Last Edit: Jun 18, 2022 11:42:52 GMT by ChrisT
|
|
misteralz
Posted a lot
   I may drive a Volkswagen, but I'm scene tax exempt!
Posts: 2,500
|
|
Jun 20, 2022 12:12:02 GMT
|
|
Liked for the end result, not the hassle.
|
| |
|
|
ChrisT
Club Retro Rides Member
Posts: 1,670
Club RR Member Number: 225
|
|
Sept 2, 2022 20:22:45 GMT
|
Work has been progressing very slowly. Front crossmember/subframe came out with ease, no surprise as it's been out relatively recently.... 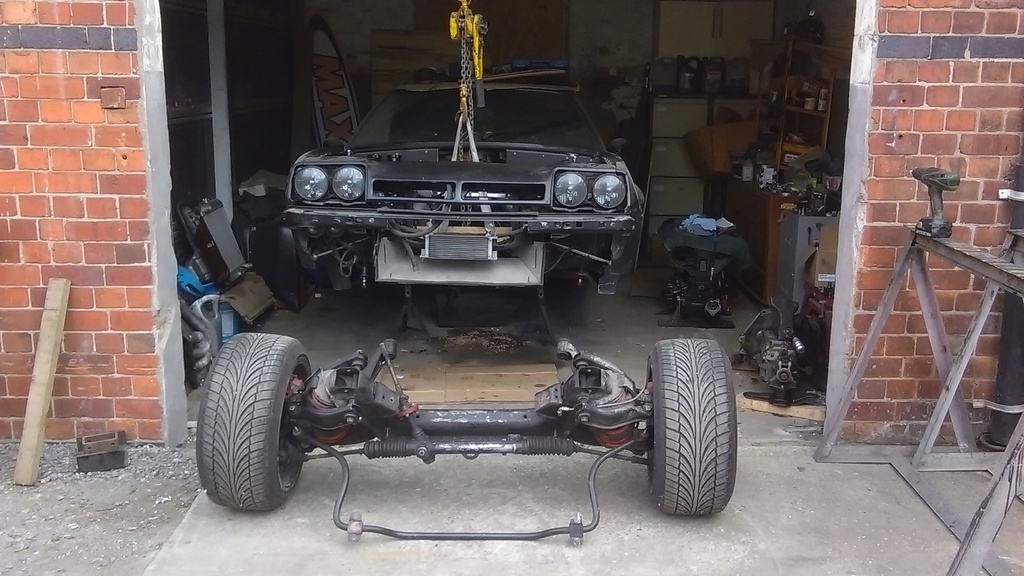 Offending areas, chassis rail swan necks, bolts and bush sleeve are well corroded together... 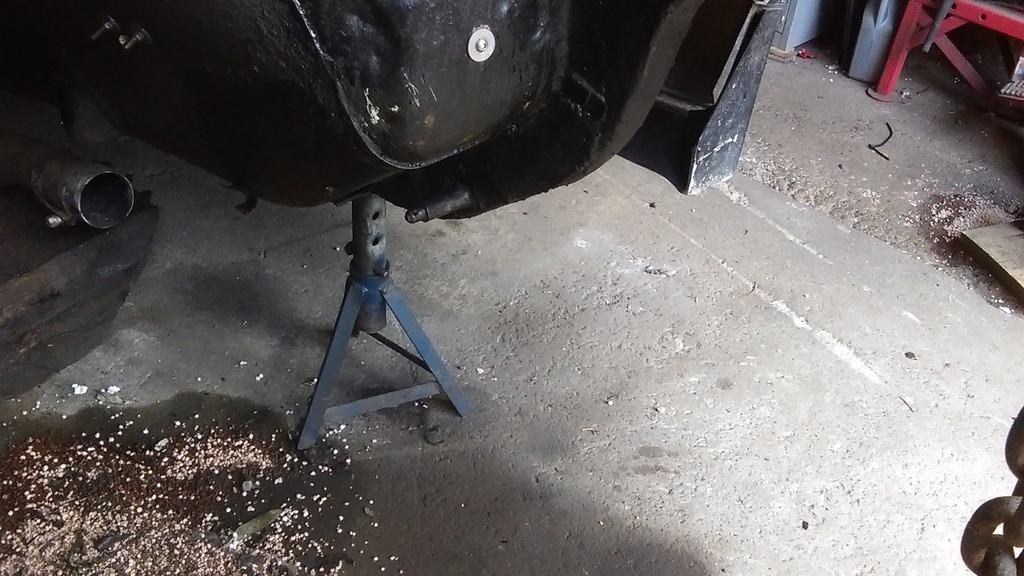 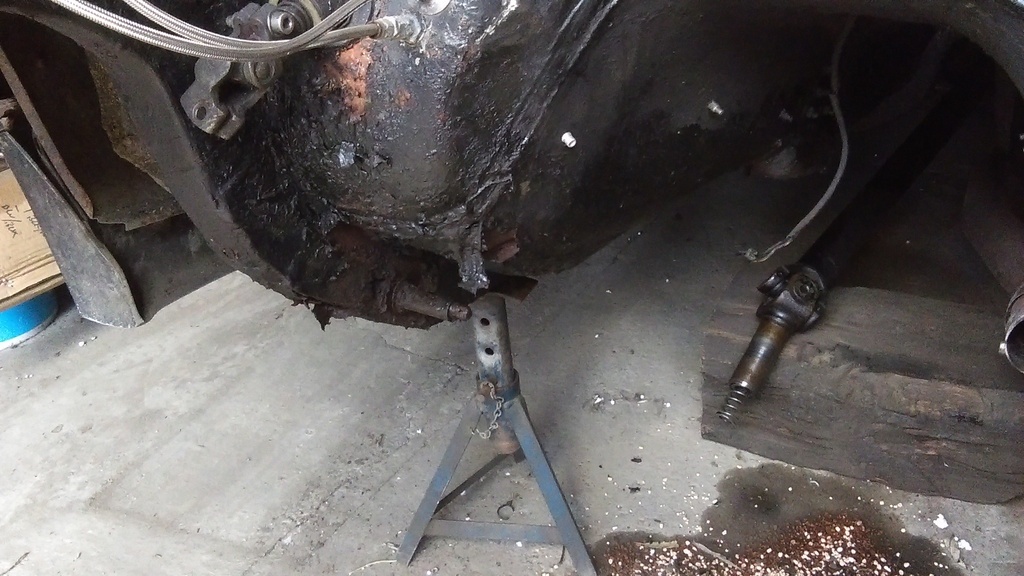 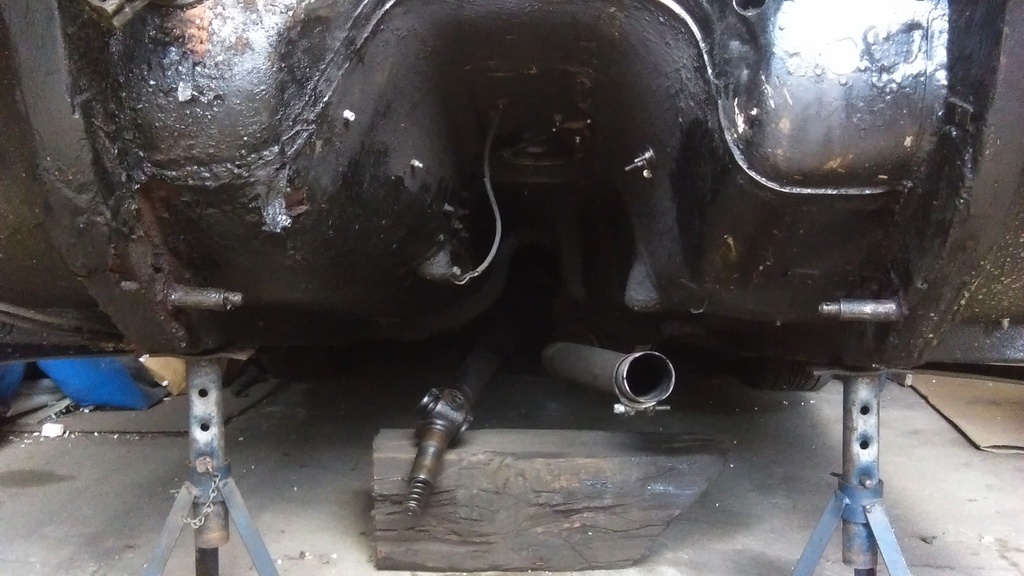 Ordered swan neck panels arrived, sold as non-handed but they very obviously are as there's a lip on one side and not the other. Contacted the seller but, although they we very helpful and did get in touch with their supplier to check with them, still maintained they were correct and just needed a bit of adjustment to sit bot sides.... 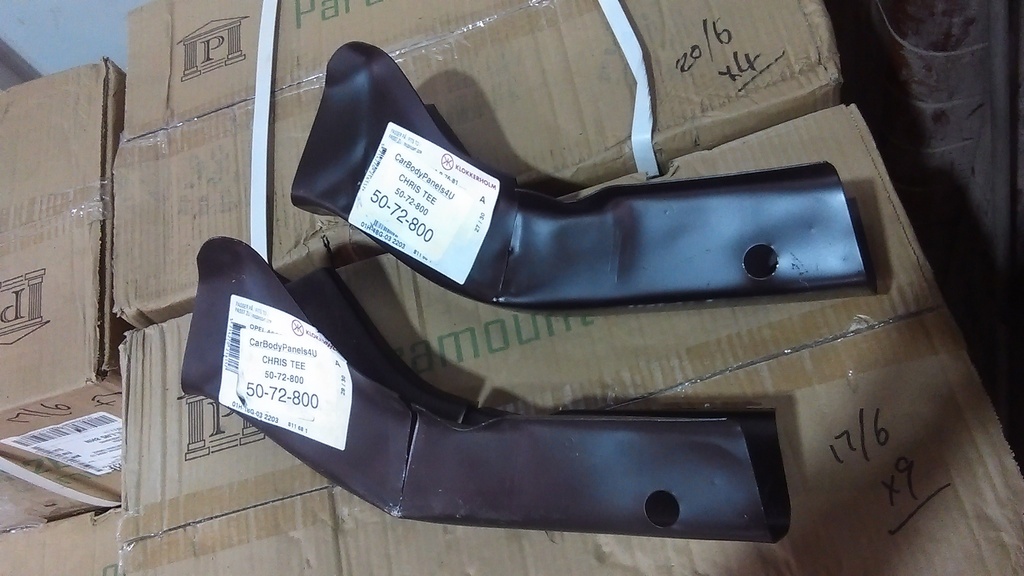 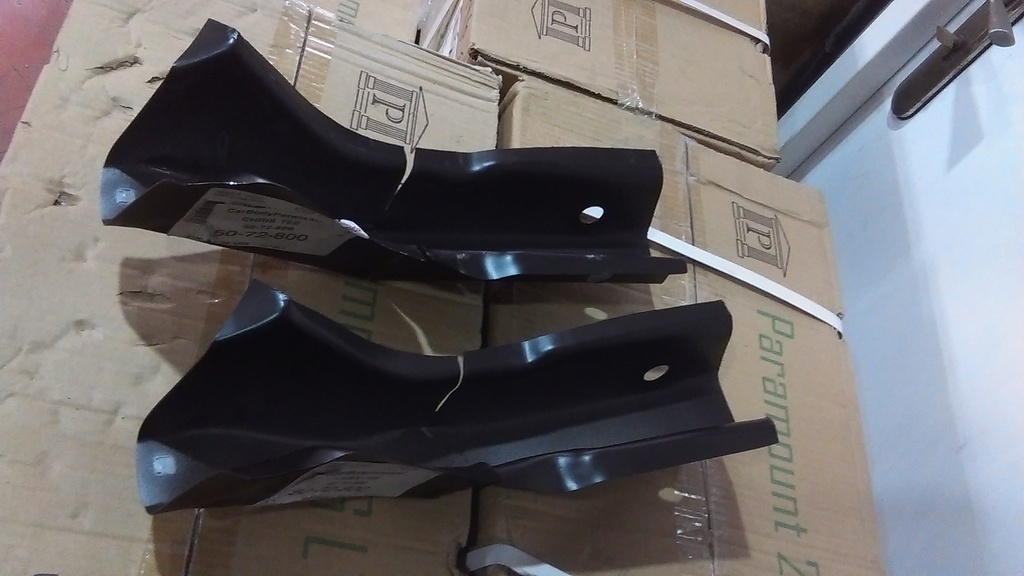 I have been at them with an angle grinder and hammer so they are suitable for each side but no pictures. Passenger side chassis bolt put up a bit of a fight, surprisingly use of a windy gun freed it from the chassis rail insert, I thought it would just rip it out. The Bush sleeve was not moving though so removed the bolt head.... 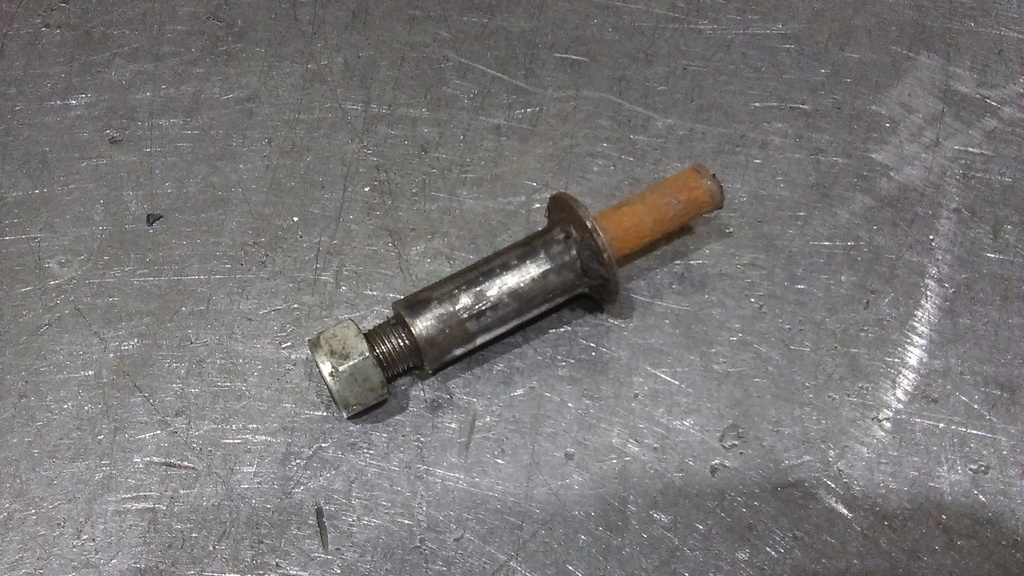 Fly press should make short work of separating the two... 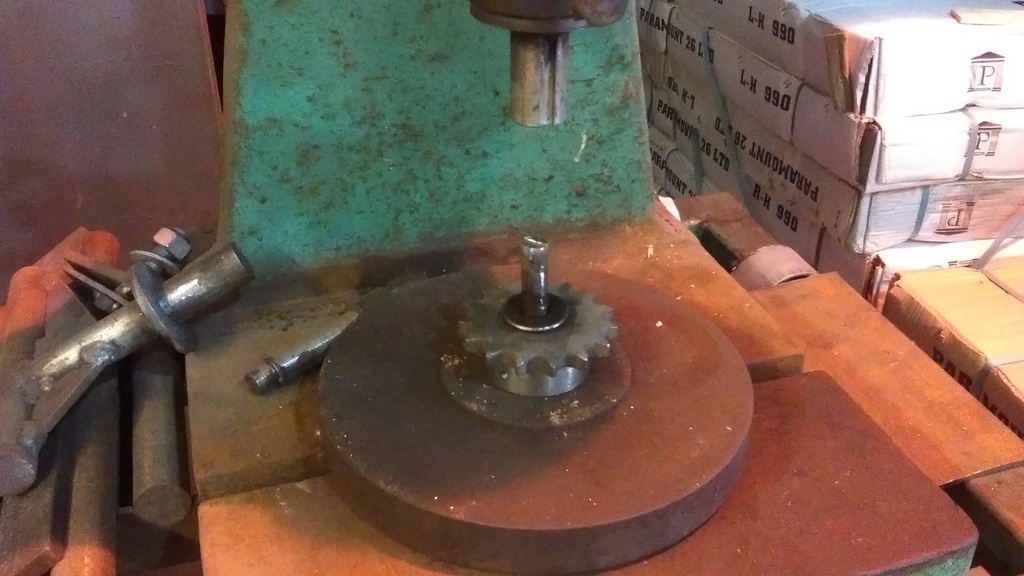 And it did... 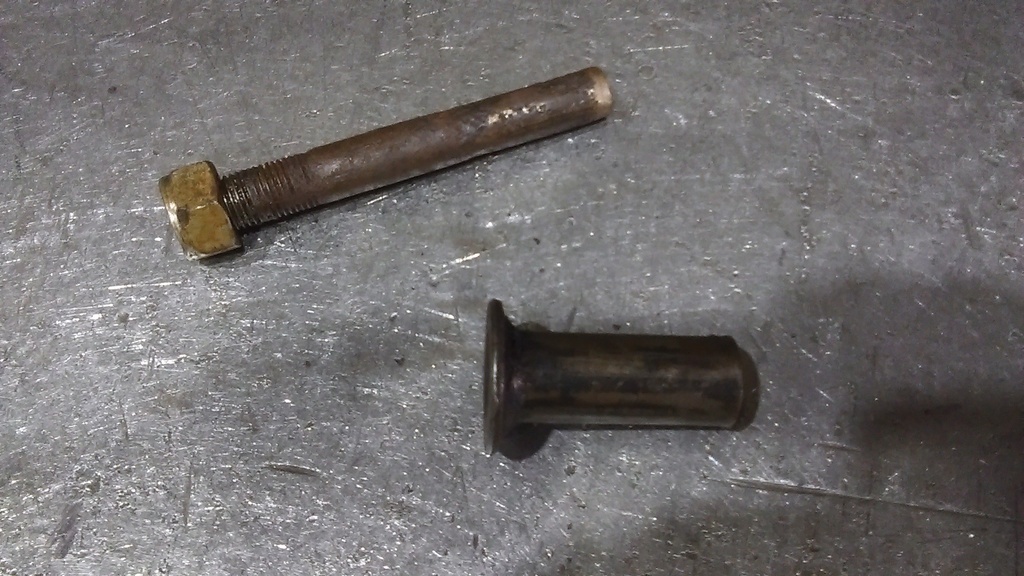 This job has been a voyage of discovery, trying to remember what I did all those years ago when first modifying it, when I had the enthusiasm but not necessarily the skill or tools to do it right and this was my daily driver so repairs had to be quick as it couldn't be off the road. Looking at the bush and the sleeve it is obvious the two are not designed to fit together, the sleeve has a curved neck whereas the bush is 90 degree and the collar is too wide to fit in the bush.... 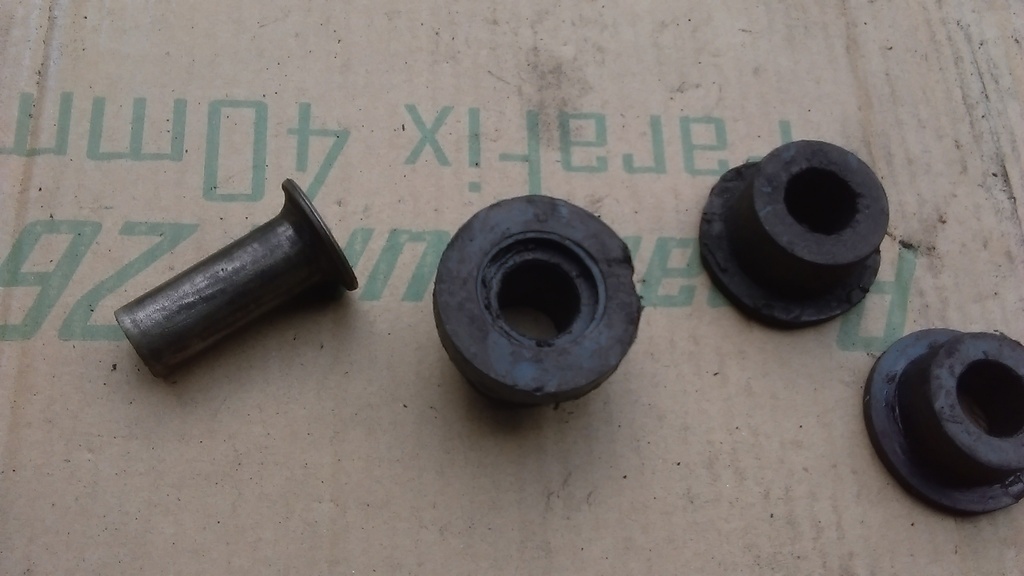 I thought I had replaced the bolts at some point but looking at them, with the tapered end and hole for lock pin, I don't think I did. There are remnants of rubber on the sleeve so it looks like when fitting the new bushes I couldn't remove the bolt or sleeve so just reused them. Had a look though some boxes of bits in the garage and happened across the 'new' bolts with the correct sleeves on them so mystery solved... 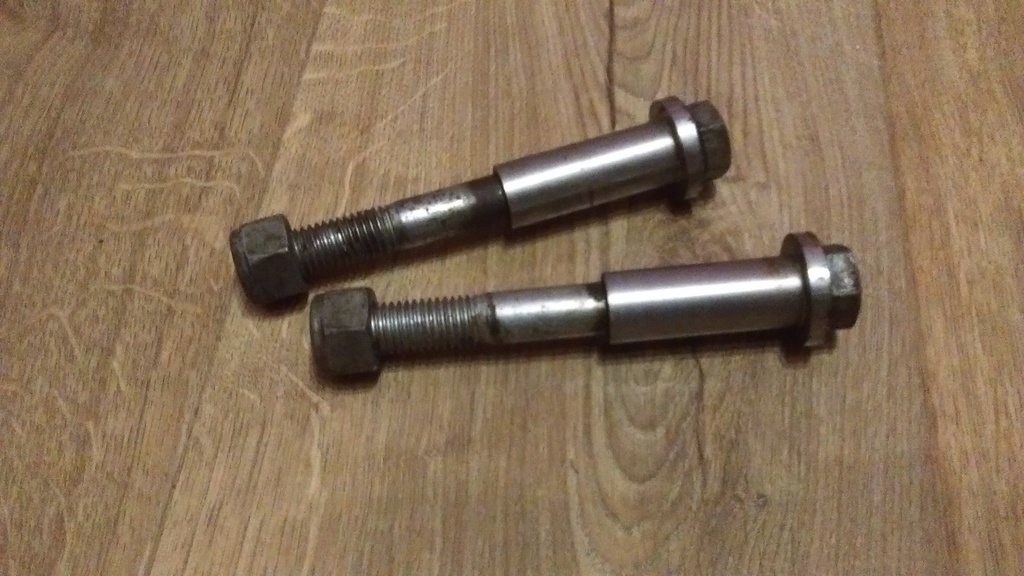 More bodgery ahoy, after comparing the bushes one side of the drivers side one has been cut down to allow room for the plate I welded to the inner chassis rail.... 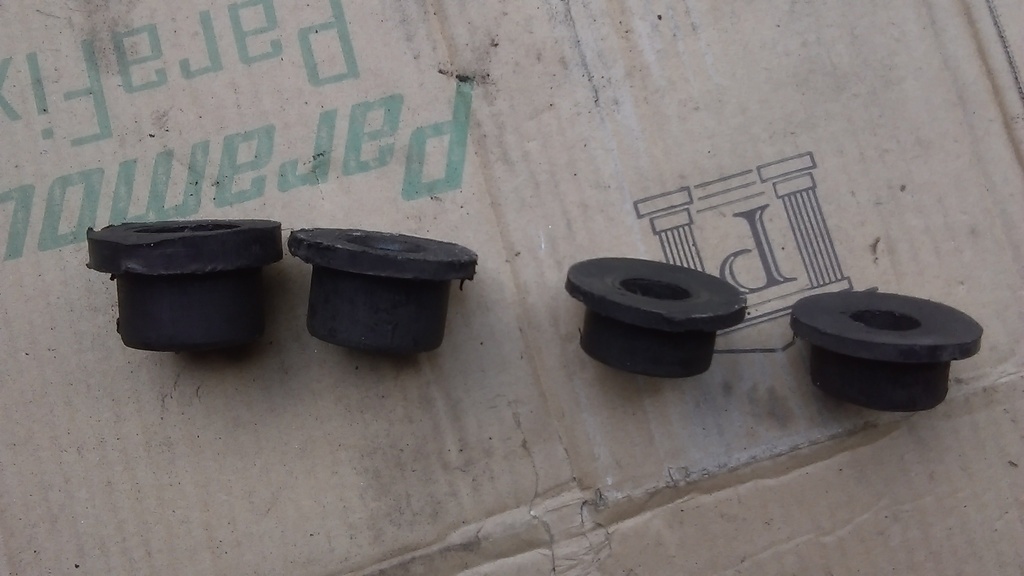 So all that messing around was waste of time as I need to be ordering new ones. Started cutting back the patches on the passenger side rail, original structure was double skinned for added strength but it's a recognized rust trap so there's little left of this. Repair panels will cover the majority of this but the inner structure will have to be remade. 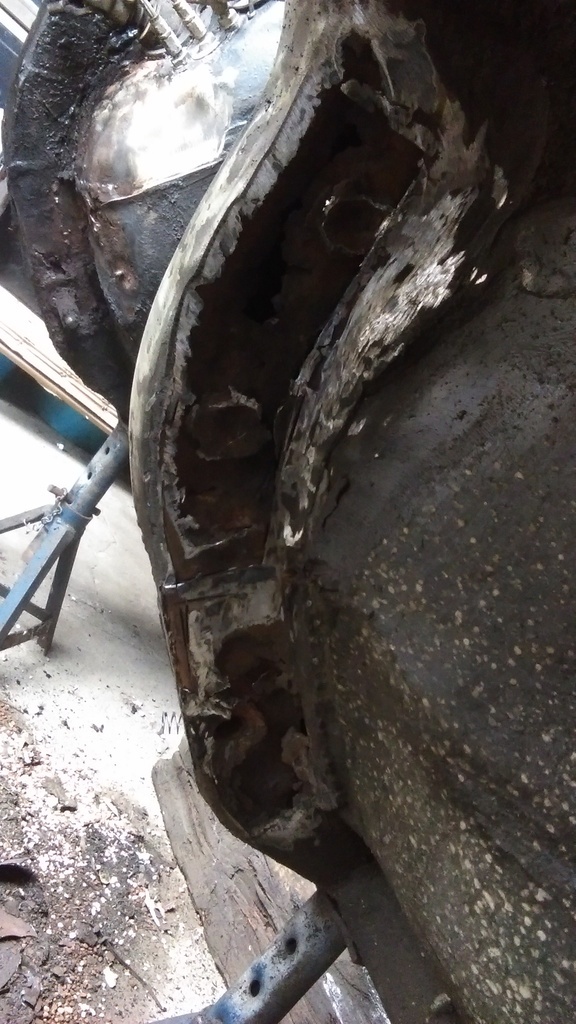 Will also have to design some kind of jig to keep the chassis bolt hole/crush tube in the correct place, I'm assuming it should line up with the one on the other side so should be able to make something that sits in the trans tunnel between them that ties into the other suspension mounts or run something from the outriggers/jacking points.... In BMW news, put a few miles on it over the summer, down to the Cotswolds and Bath the other month and over to St Davids and the Pembrokeshire coast last month. Wining diff is quiet which is nice, still feels a bit slow to me, as if it's missing under load, did a system check and the air flow sensor fault code came up which could explain the sluggishness, so I've replaced that. Also had the low oil pressure light come on a couple of times which isn't ideal. Might be as simple as replacing the sensor but, if the interwebs are to be believed, could be timing chain guides disintegrating, getting into the oil and blocking the sensor  |
| |
Last Edit: Sept 3, 2022 8:11:28 GMT by ChrisT
|
|
|
|
|
|
|
|
It’s good revisiting repairs you did years ago. They were acceptable then but frowned upon now. Even though they lasted all those years. We’ve all become a bit too sensitive.
|
| |
|
|
ChrisT
Club Retro Rides Member
Posts: 1,670
Club RR Member Number: 225
|
|
|
|
It’s good revisiting repairs you did years ago. They were acceptable then but frowned upon now. Even though they lasted all those years. We’ve all become a bit too sensitive. Not sure some of my repairs were acceptable back then but they somehow got it through an MOT at the time and then went on my list of 'things that need sorting out properly later' list..... |
| |
|
|
ChrisT
Club Retro Rides Member
Posts: 1,670
Club RR Member Number: 225
|
|
Sept 9, 2022 19:06:03 GMT
|
Been slowly digging away at the old patches and rust... 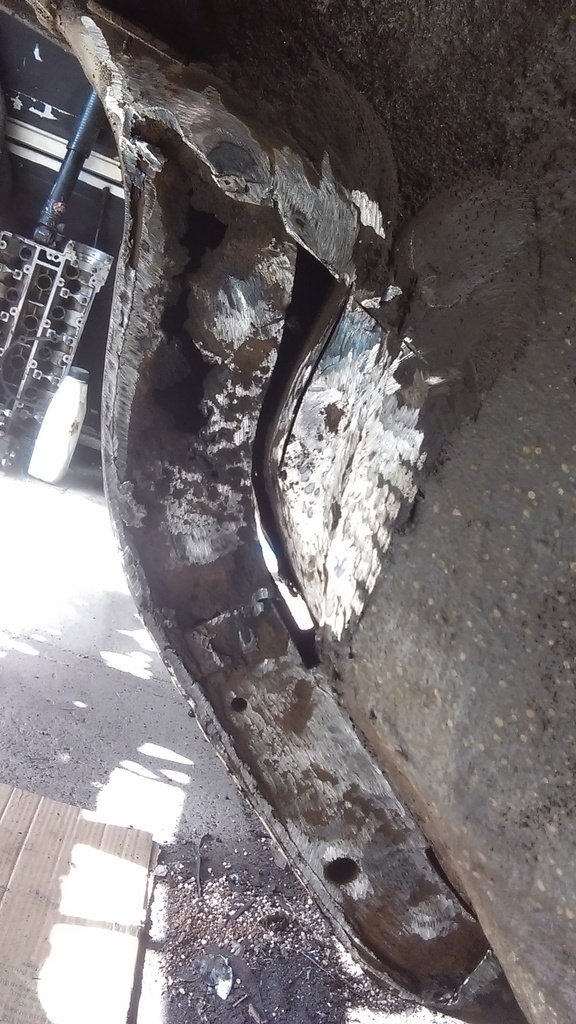 The inner structure around the lower subfrane mounting hole is actually sound, the section above not so much. Doesn't get any better further up but at least I know what I'm faced with now. 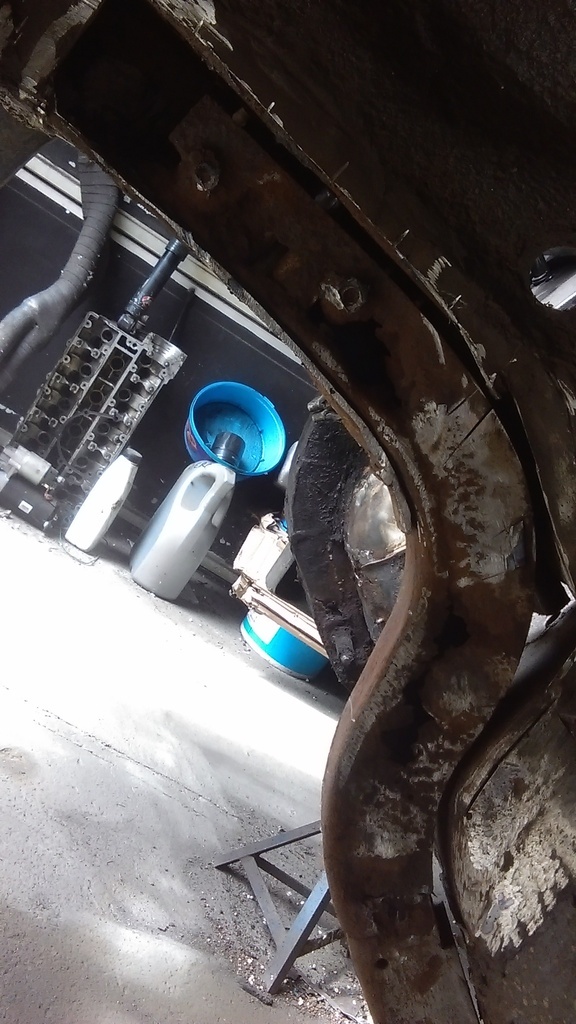 It doesn't look too difficult to remake the inner part and the repair panels will cover quite a lot of this. Have ordered some 50x25x2.5mm box section, I think putting a few notches in this will be the easiest way to replicate the shape of the original. Noticed the poly steering column joiner has split, which isn't good... 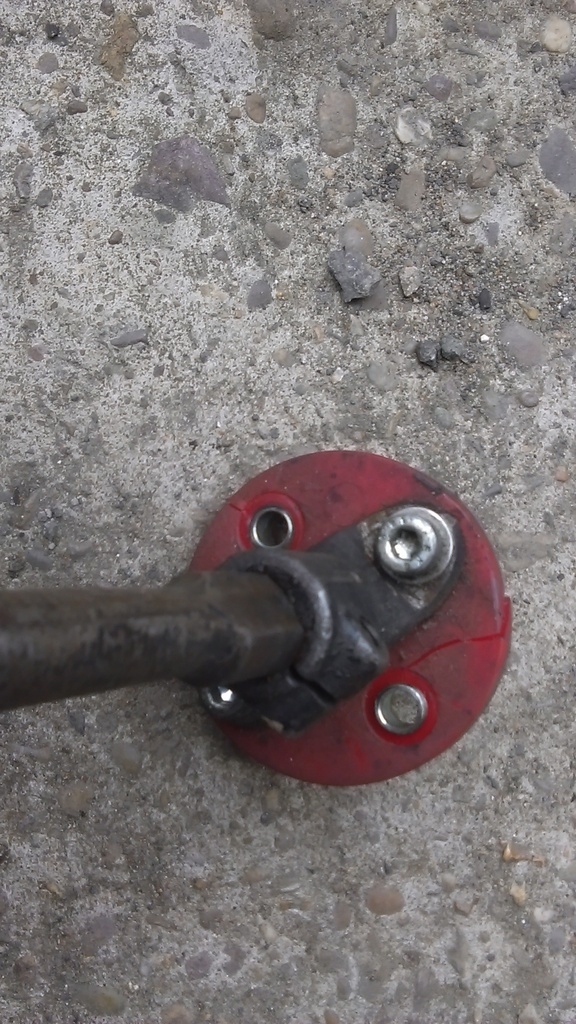 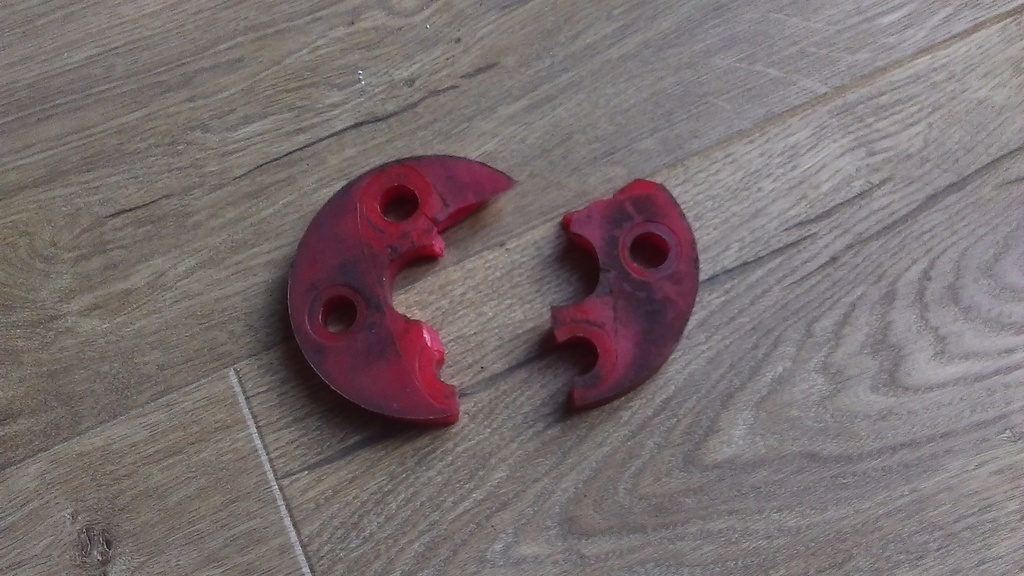 It's designed to fit a VW of some description but the dimensions were close enough that I thought I could use it, I'm wondering if the bolt hole spacing was maybe just a little bit small causing it to be in constant tension and hence the eventual split. Think I'll go back to rubber.. And a little good news, removing the bottom of the column revealed this little clip which sprung off a pushrod on the carb throttle linkage, been using a bit of wire since losing it. 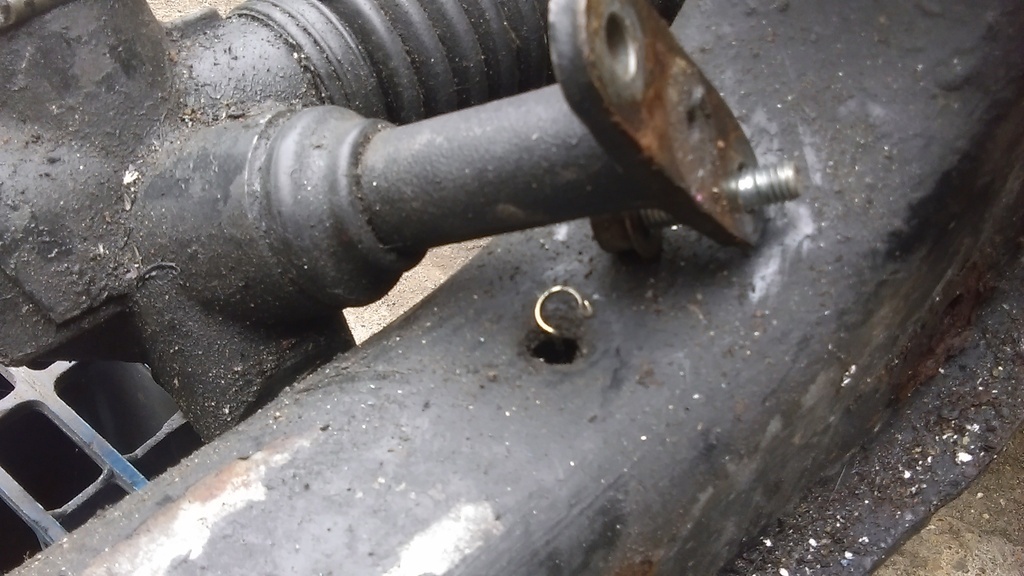 |
| |
Last Edit: Sept 11, 2022 8:50:15 GMT by ChrisT
|
|
ChrisT
Club Retro Rides Member
Posts: 1,670
Club RR Member Number: 225
|
|
Sept 10, 2022 12:41:05 GMT
|
Instead of cracking on with sorting the rust issues I'm finding other less important jobs to do. The gearshift is good but there's always been a bit of looseness to it, so as the gearbox is out now's a good time to look at it. Gear lever in housing is ok, which is good as I can't figure out how to remove it from the plastic bearing it sits in. Between it and the gearbox is a short pushrod, again gear lever end feels tight, where it joins the gearbox would appear to be the culprit. The round end of the rod joins to a corresponding one on the gearbox by a joiner with some holes and pins - covered be a sleeve to stop them dropping out.... 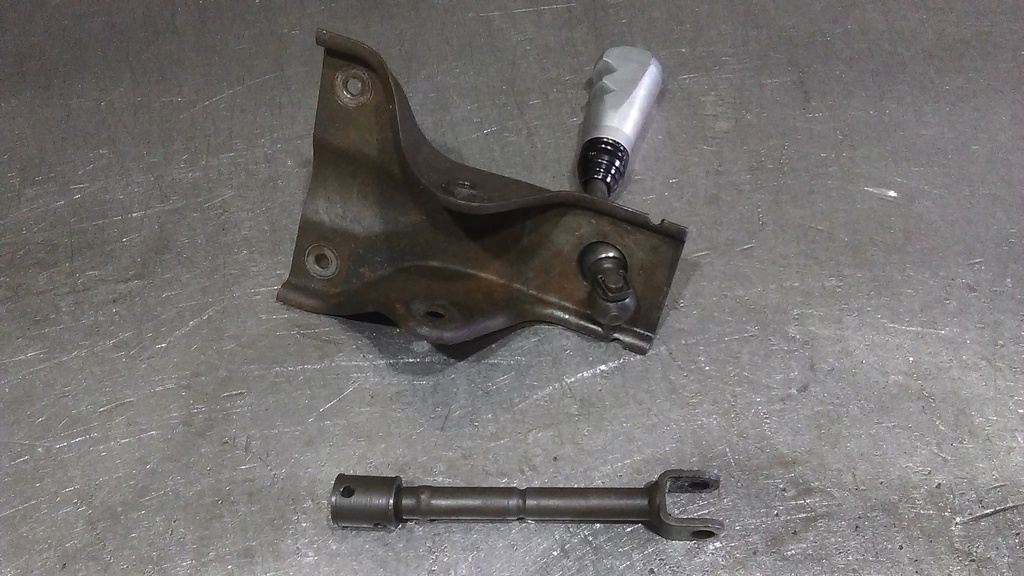 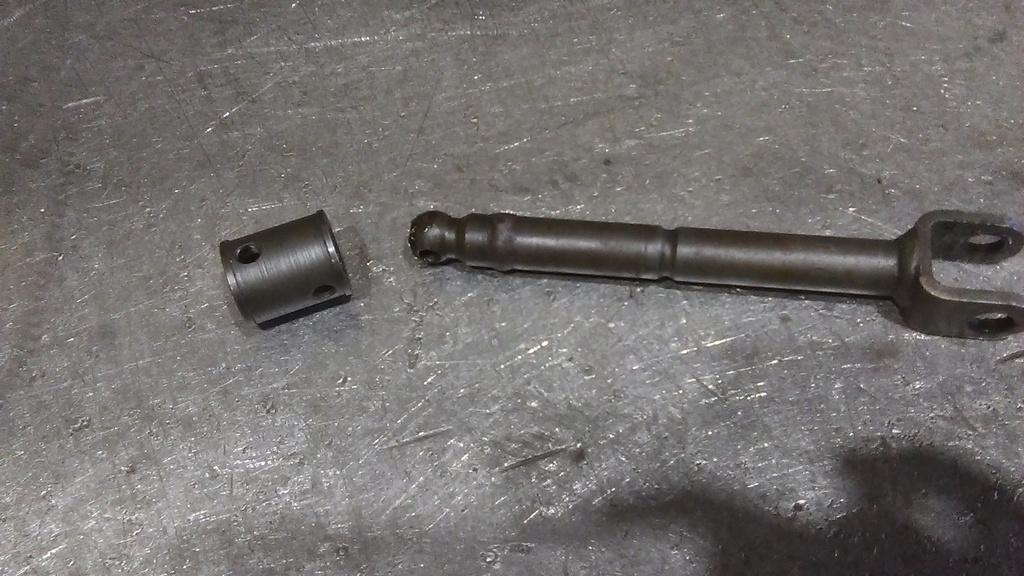 the pins in the joiner have a little bit of play which must translate to a lot at the lever end. First thought was put some 6mm roll pins through to take up any slack but that removed all movement. Second idea, drill out the holes in the joiner to 6.5 and refit roll pins. Trick I learnt off someone on Youtube - to line up the two existing holes put a drill bit in the chuck upside down and put it through the holes before clamping everything up.... 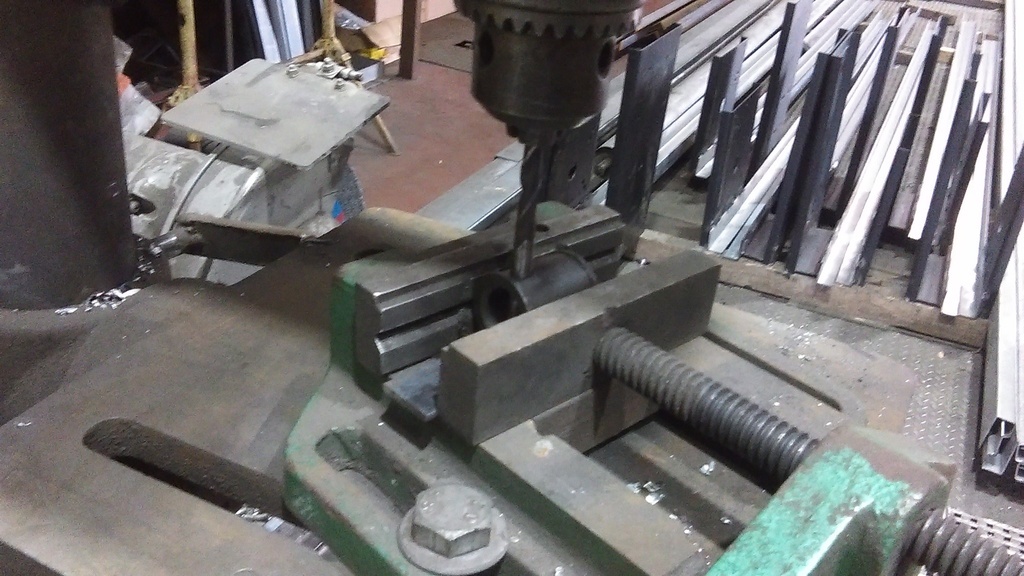 Unfortunately it seems to be hardened steel to my standard drill bit wouldn't touch it, ordered a new Cobalt bit and used plenty of cutting fluid but still no luck, think the pillar drills slowest speed is still too much.... 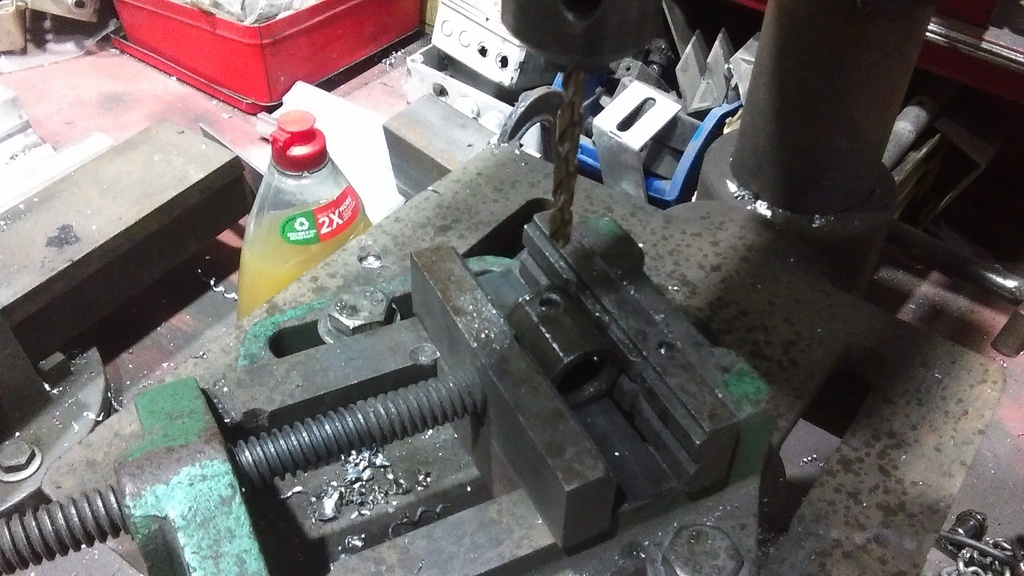 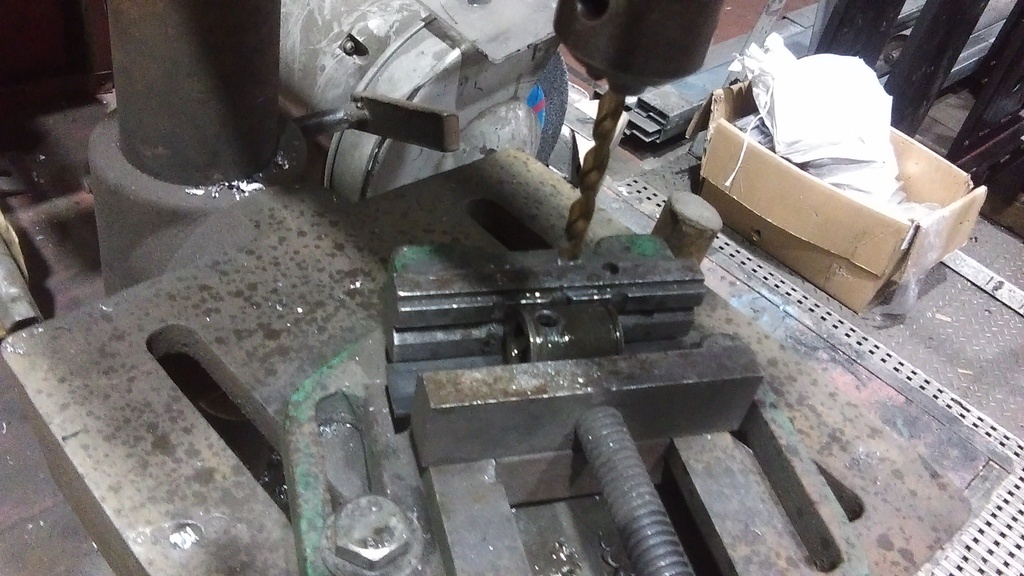 When rebuilding the suspension years ago there was a bush between the chassis and top of the front subframe, this had seen better days but wasn't the kind of thing you could get replacements for so just cut out the rubber and welded the whole thing up, because racecar.... 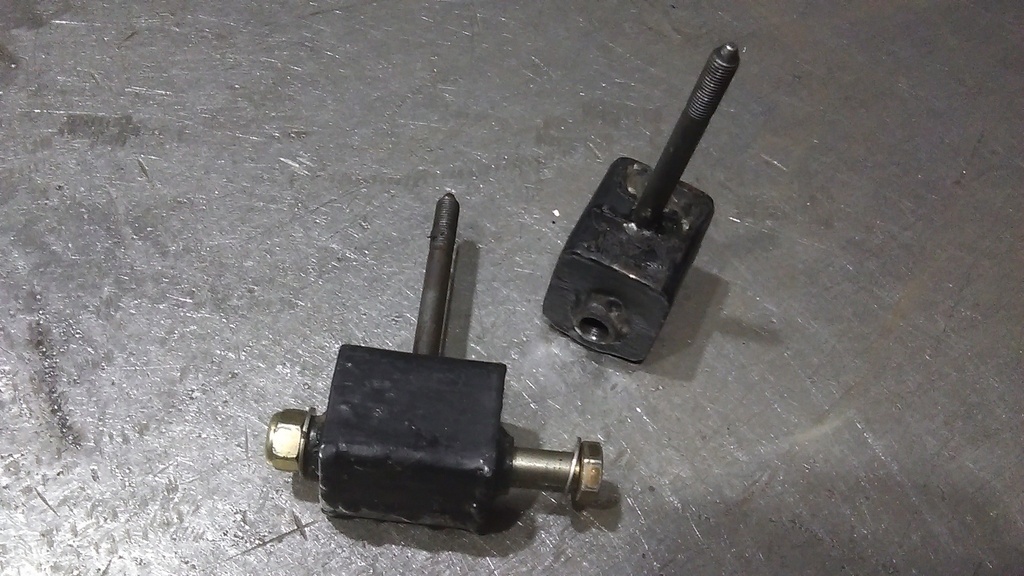 Decided, with replacing the other nylon subframe to chassis bush with poly I'd do something with this one, so with a pair of universal bushes, a bit of steel tube to house them in, some cut up box section and a couple of m10x1.25 bolts (not pictured as I ordered m10x1 by mistake), I can fabricate something... 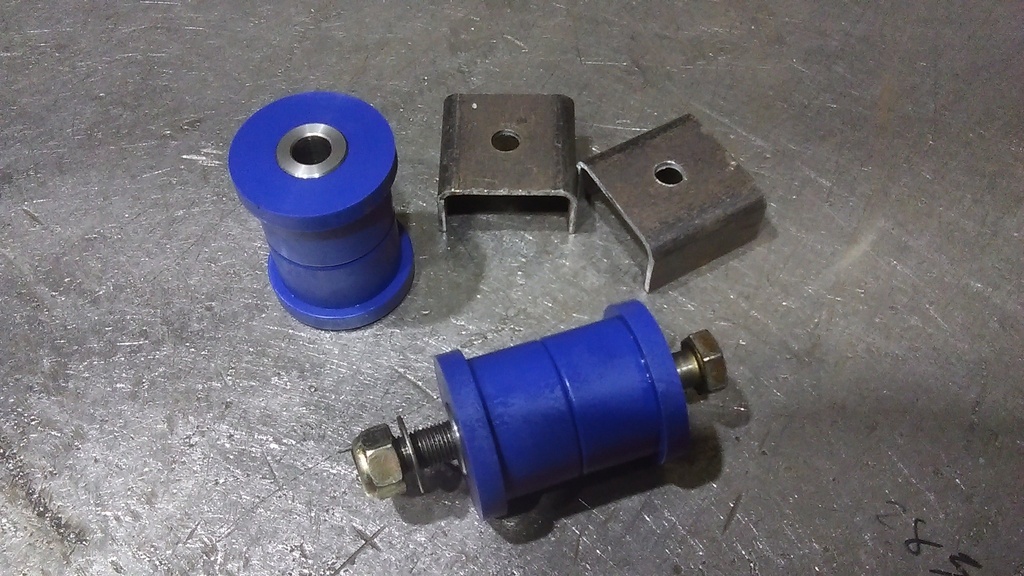 |
| |
Last Edit: Sept 11, 2022 8:42:31 GMT by ChrisT
|
|
|
|


