ChrisT
Club Retro Rides Member
Posts: 1,670
Club RR Member Number: 225
|
|
Apr 24, 2018 19:03:36 GMT
|
Handy hint thanks but probably won't be revving that high, certainly not for long periods anyway. Trying to think back to what the rev limit was actually set at  Day 3 - Rain stopped play so did little more than connect a few wires and install the ARP head studs.... |
| |
|
|
|
|
|
|
|
Apr 27, 2018 22:06:57 GMT
|
|
for collets i dig out dads old pot of castrolease heavy, which is super thick grease like chewing gum (i suppose truck 5th wheel grease would do it) teeny bit in the grooves of the collet, then again to stick it to the tip of a thin screw driver, fiddle it in through the compressor tool. first time every time !
how come you went to the expense of new omegas ?
|
| |
Last Edit: Apr 27, 2018 22:08:09 GMT by darrenh
|
|
ChrisT
Club Retro Rides Member
Posts: 1,670
Club RR Member Number: 225
|
|
|
|
|
I used some heavy oil on a screw driver and the end of the valve to help stick the collet, just the screwdriver was a little on the large size as I couldn't find a thin one that was long enough, some went straight on others decided to be awkward.
From what I could see the forged Omega pistons were not that more expensive than standard new ones plus I needed ones with larger cut outs for the high lift cams.
|
| |
|
|
ChrisT
Club Retro Rides Member
Posts: 1,670
Club RR Member Number: 225
|
|
|
|
A bit of progress over the last few days, head back on and cams fitted, rotating the engine there's no valve/piston contact which is nice...... 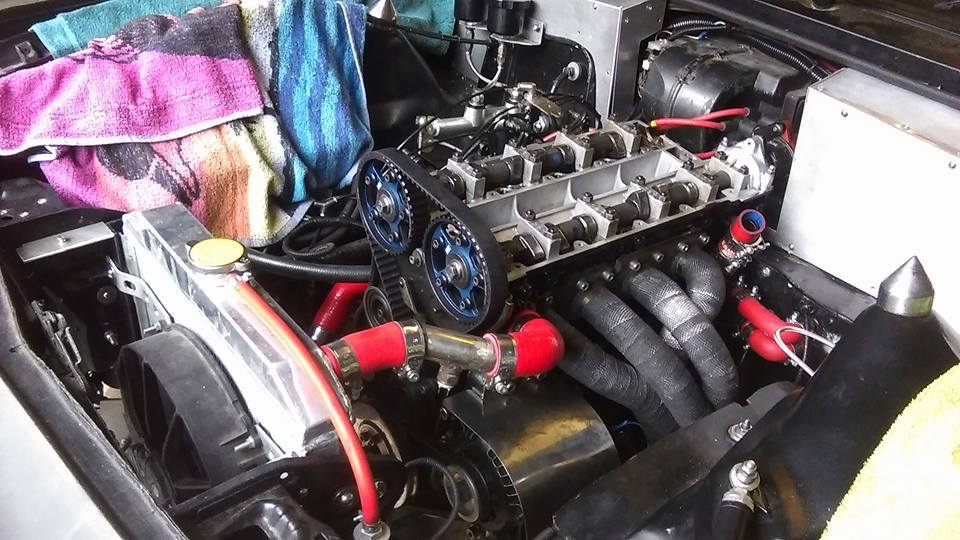 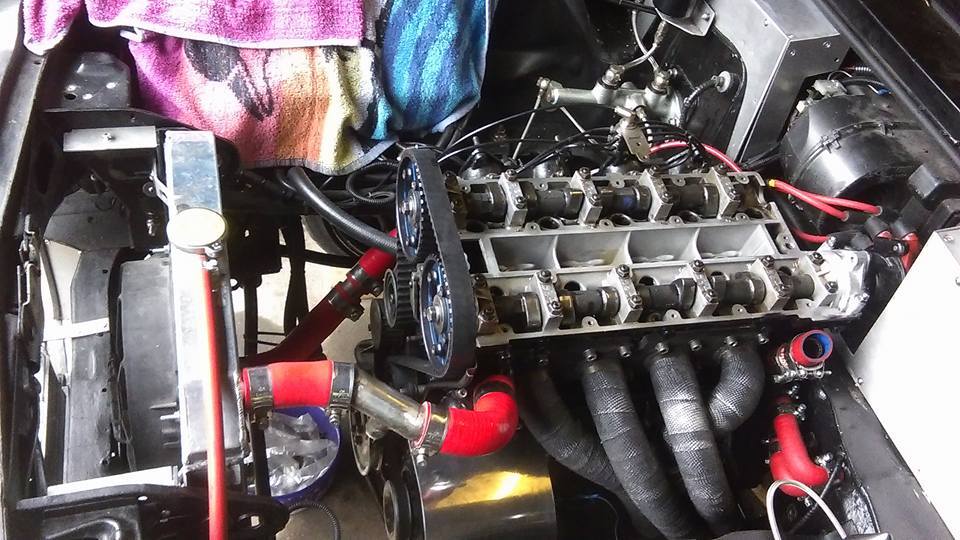 I've altered the coolant hoses slightly, when I originally put them together one of the outlets from the inlet manifold was only 10mm ID, reading up this wasn't really big enough and was bunged up with crud (although not had a problem with overheating) so made a new connector to take 16mm hose, just it doesn't quite line up where I though it would - 90 degree elbow ordered which should sort it. Also, the upper outlet should be a bleed to the expansion tank rather than routed down to the back of the water pump so, as I've not got an expansion tank I drilled and tapped the takeoff to M10x1 and fitted an allen headed bung which can be undone when filling the system..... 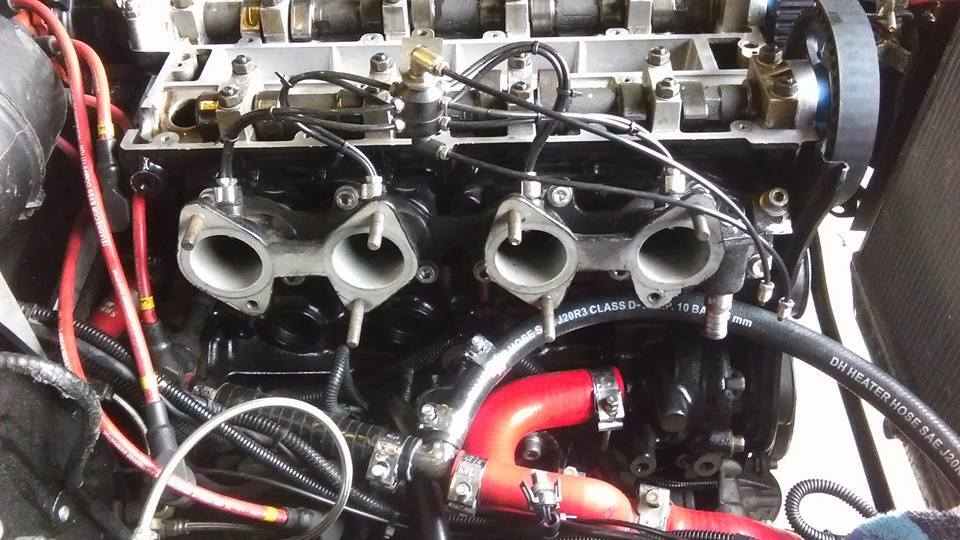 Another slight set back, I can't seem to shift the oil way bung in the block where the oil pressure gauge and fuel pup cut off switch need to go, none of my allen key sockets fitted so had to use a normal allen key, couldn't really get much force on it so ordered a socket to fit.... 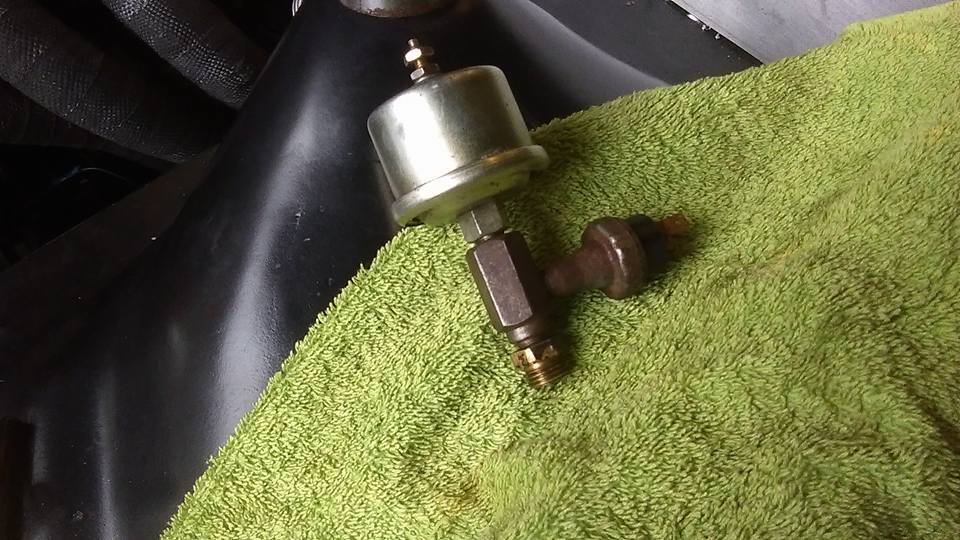 |
| |
Last Edit: May 2, 2018 22:04:18 GMT by ChrisT
|
|
ChrisT
Club Retro Rides Member
Posts: 1,670
Club RR Member Number: 225
|
|
|
|
With the correct size allen bit and breaker bar the oilway bung came out after a bit of a fight.... 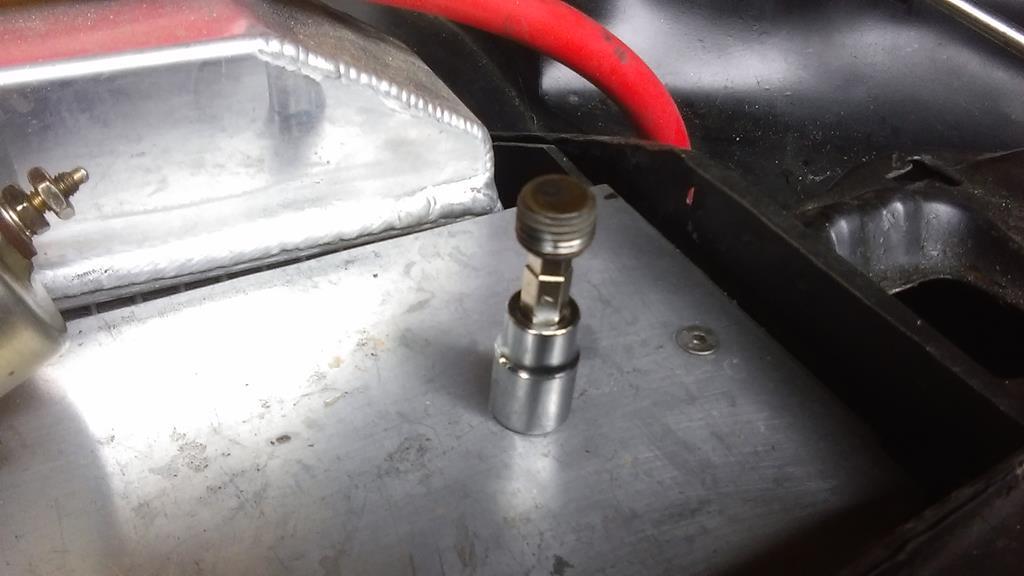 Slight problem fitting the two senders, threads must be in slightly different position to old block as after winding adaptor in the hole for pump switch was opposite side to where it needed to be, couldn't find a way to correct this so not using the pressure sender, for now.... Made an elbow to go beneath the inlet manifold so I could connect to the coolant hoses.... 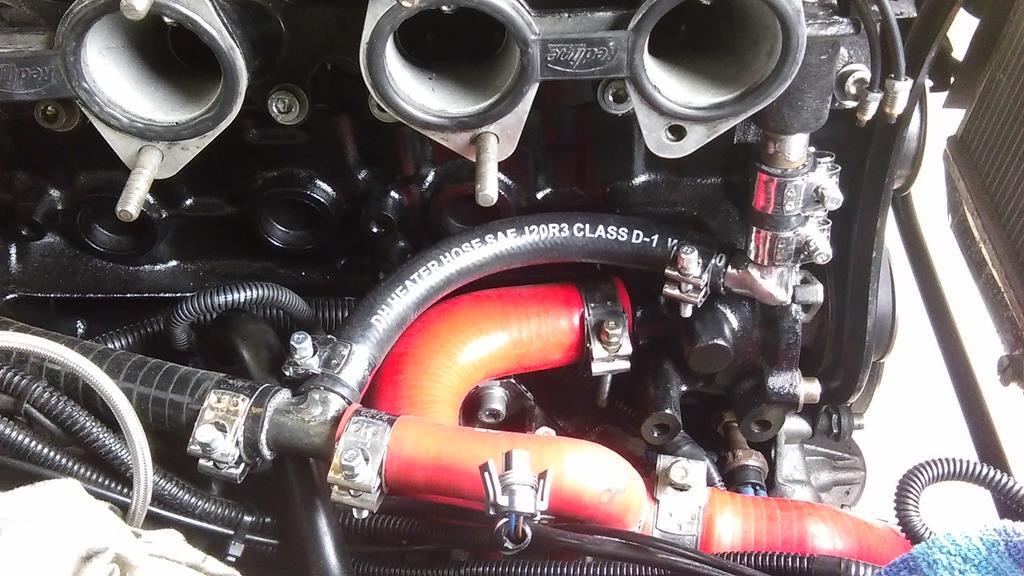 With that connected that's the cooling system done so filled it up and checked for leaks while all the clamps were accessible, seems all good and new bleed screw did it's job  So back on with the carbs and cam cover.... 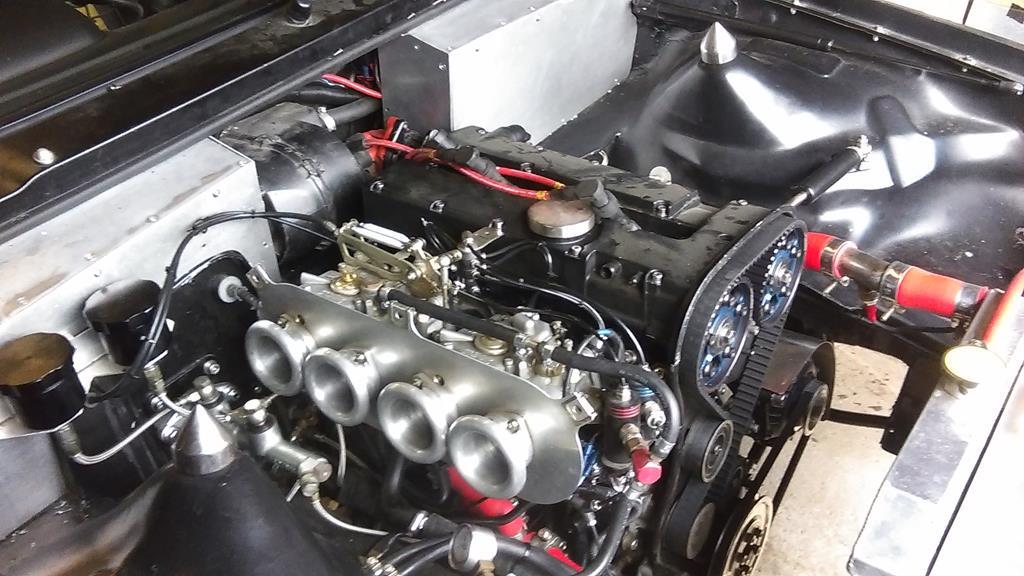 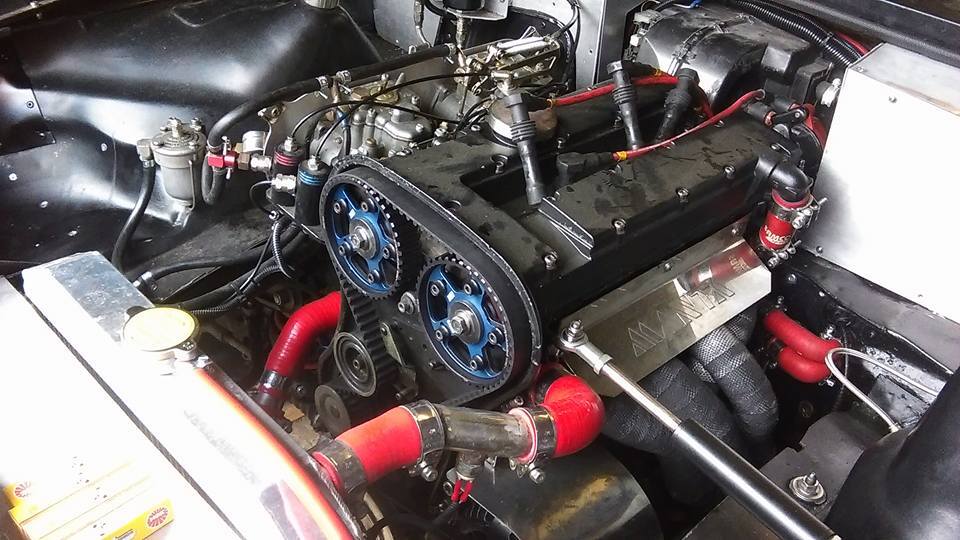 Would have filled with oil but realised I'd neglected to buy an oil filter..... |
| |
Last Edit: May 3, 2018 5:13:50 GMT by ChrisT
|
|
ChrisT
Club Retro Rides Member
Posts: 1,670
Club RR Member Number: 225
|
|
|
|
|
Oil filter bought, filled with oil and fitted, then filled engine.
No leaks so time to turn it over with plugs out to get oil circulating...
After a bit of cranking still no oil light going out so primed oil pump and result - oil pressure!
Did some other little jobs (dropping car off stands, tightened ARB bolts etc) then went back to crank engine again and turning ignition on showed oil pressure still there!
That's not right....
Not sure what the cause is, will start with pressure relief valve.....
|
| |
|
|
ChrisT
Club Retro Rides Member
Posts: 1,670
Club RR Member Number: 225
|
|
|
|
|
Although thinking about it, I'm fairly sure there's no way an engine can hold oil pressure when not turning, probably more likely to be the sender unit stuck - if I'd got the aux pressure gauge hooked up I could double check it......
|
| |
|
|
ChrisT
Club Retro Rides Member
Posts: 1,670
Club RR Member Number: 225
|
|
|
|
Got to the bottom of the constant oil pressure - took out the fuel pump cut off switch and replaced with aux oil pressure gauge sender, cranked the engine and the aux gauge showed a gradual rise in pressure, whereas the factory gauge was still stuck in one position and the pressure light out. Must be the sender unit so took it off and gave it a good clean with carb cleaner and the airline, all connected up it works as it should do. Have left the aux gauge connected up for now, just in case the old sender decides to play up again, bridged the wires to the cut off switch to get the fuel pump working. With oil pressure (and a working gauge) it's about ready to start but I've been putting it off until I can start it and go driving to bed the rings in - being in town most of the time I'd be stuck in traffic idling which I'm lead to believe isn't good for it. Thinking Sunday evening might be a good time....... Meanwhile, while the bonnet is off, been tidying the aluminium paneling across the bulkhead, the ends where the hinges come through were a bit rough round the edges so made some new bits up.... Before..... 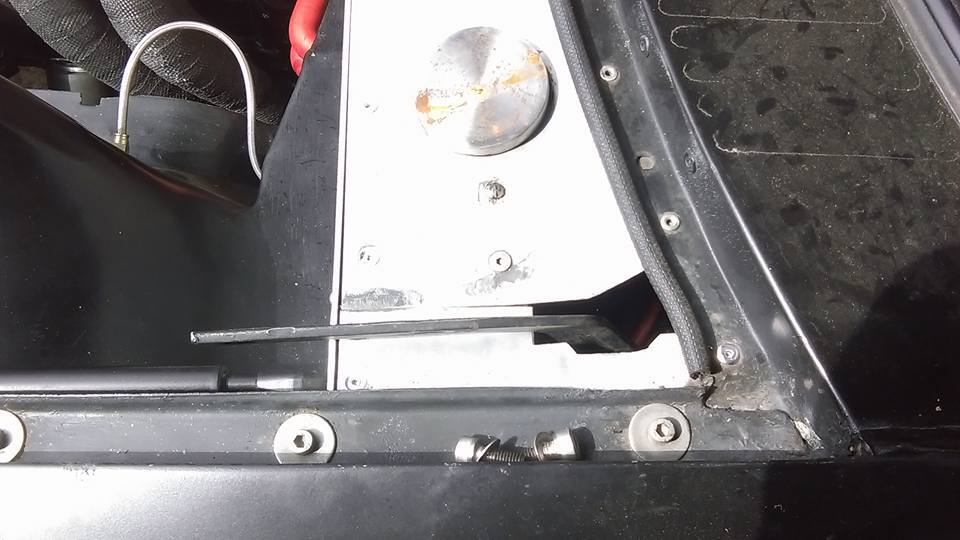 After.... 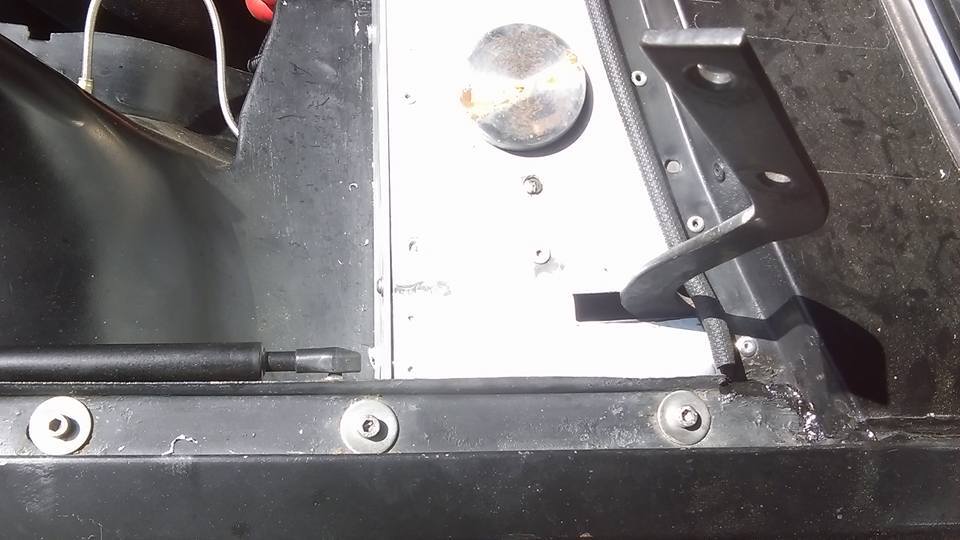 And the same the other side..... 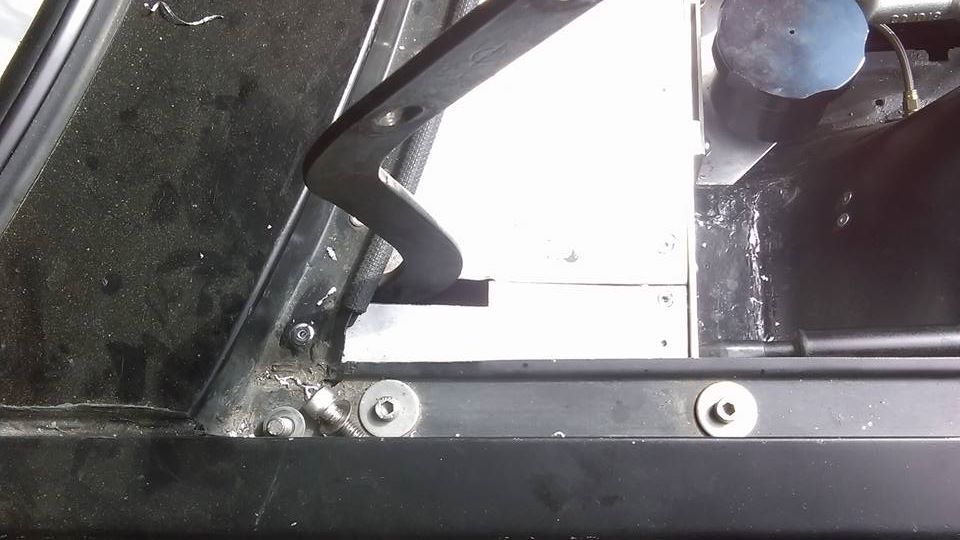 Have also noticed the middle section where the heater motor is is not central, not a huge problem but as I'm thinking of a curved part over the motor I think it would be easier to make if both sides are even, and as it's the passenger side that needs shortening it'll give me a bit more room round the dizzy, that's a little job for tomorrow..... |
| |
|
|
ChrisT
Club Retro Rides Member
Posts: 1,670
Club RR Member Number: 225
|
|
|
|
Aluminium paneling cut back by about 13mm on passenger side so its the same size as the other side, certainly no very noticeable but it does give better clearance round the dizzy and it should make making the centre section easier with it even. I'm thinking, as wrapping the rear view mirror went so well, I might do the bulkhead panels in the same black, they don't fit too well so would be less noticeable in black.... Before.... 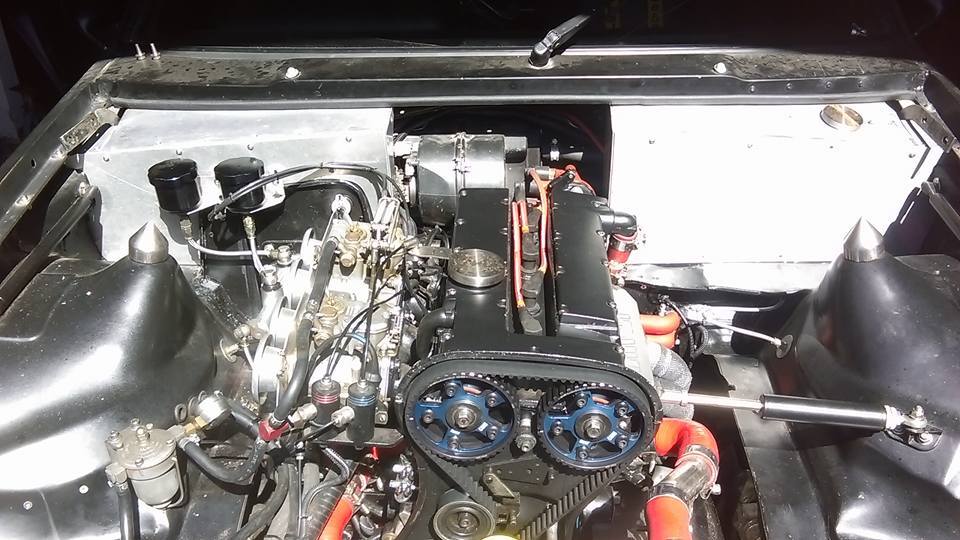 After.... 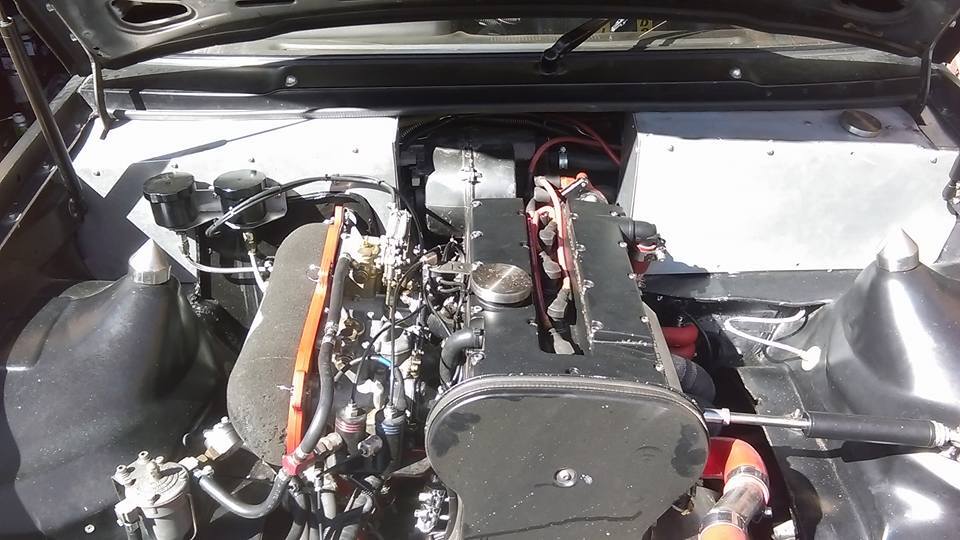 In other news, got engine fired up, started a lot easier than it has done for a while, ran a bit rough but a little tweaking got it driveable, took it out for a little drive round the estate then brought it back to check for leaks - all seems ok, although it did get up to operating temperature a lot quicker than it used to, hoping this is an airlock or something like and not my reworking of the coolant pipes  Will adjust the carbs some more tomorrow and take it out for a proper bedding in run...... |
| |
Last Edit: May 7, 2018 17:12:21 GMT by ChrisT
|
|
ChrisT
Club Retro Rides Member
Posts: 1,670
Club RR Member Number: 225
|
|
May 10, 2018 22:38:48 GMT
|
Tweaked the carbs some more the other day and got it running better so took it out for a bit of an engine bedding in run, all went ok until the next day when I found a load of brake fluid under the car  Seems to be join between reservoir hose and master cylinder, think fitting/removing air filter has maybe caused it to fail with it being very close...... |
| |
|
|
|
|
|
|
|
|
|
|
All in all, that brake hose failure seems like small peanuts compared to all the other major work you have done...so its still a winning endeavor in my book. well done.
perhaps the quick warm up to temperature is due to the engine bedding in, carb adjustments, or like you said, and air pocket....(I always squeeze the upper and lower hoses until I hear fluid running through them...you can tell when most of the air is out...cold, cap off rad...then run up to temp with rad cap off and watch the coolant flow...air escapes this way too...but I'm sure you already know this stuff!)
JP
|
| |
I know its spelled Norman Luxury Yacht, but its pronounced Throat Wobbler Mangrove!
|
|
ChrisT
Club Retro Rides Member
Posts: 1,670
Club RR Member Number: 225
|
|
May 11, 2018 20:37:15 GMT
|
Just annoyed that at a time I should be out driving it it's confined to the garage, again  Think the cooling system is OK, didn't get very high when out running in the other night only while stood afterwards which is normal - checked for any hotspots with infrared thermometer and nothing seemed too hot. The problem with the brakes isn't quite as simple as a leaking hose, the braided hoses from the reservoirs attach to the master cylinder via metal barbs in the rubber seals bolted to a banjo (see first pic in previous post) not sure what part is leaking or whether it's been caused by fitting/removing the air filter as it's very close to them. Have fitted the plastic reservoir and there's no leaks so it's not the rubbers but can't use it with that fitted as there's no way of getting the air filter on..... 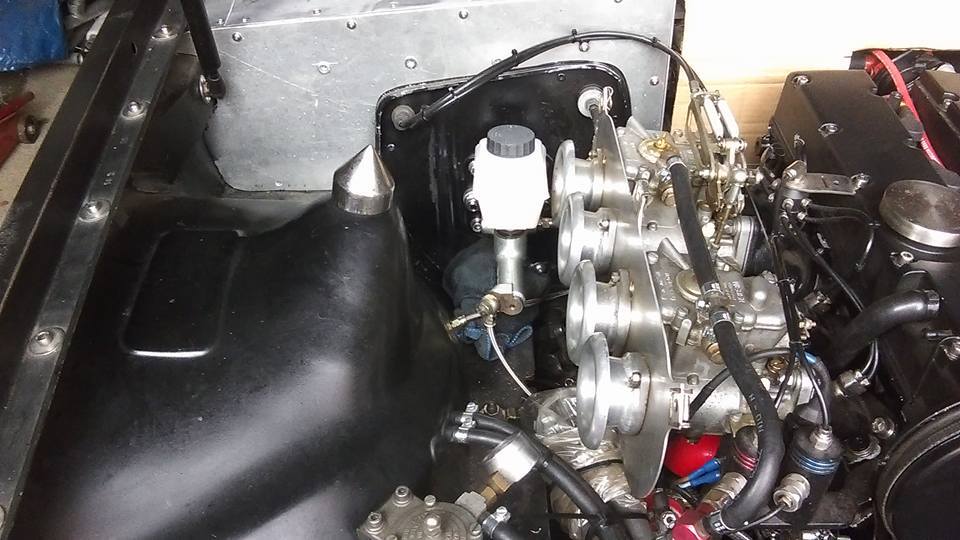 Did notice the master cylinder is angled up slightly, so to remedy this and hopefully give a little more room I've adjusted the mounting plate..... 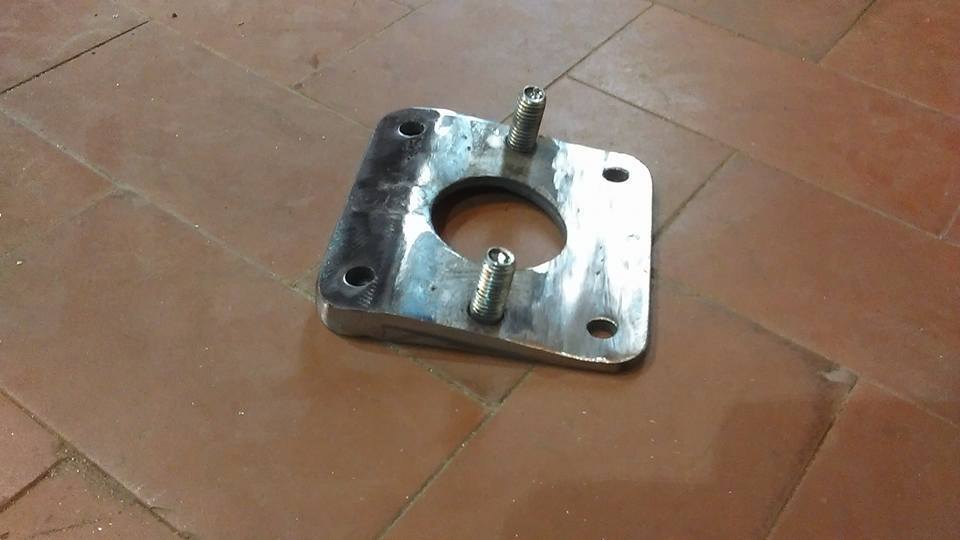 Also, the outlet to the front brakes at the rear of the master cylinder gets in the way when wiggling in the air filter so replacing the straight connector with a banjo. If I can't sort out the leak I've found these VW Beetle items which could work and would be more slimline than present set up, will have to replace the braided reservoir hose with rubber though.... 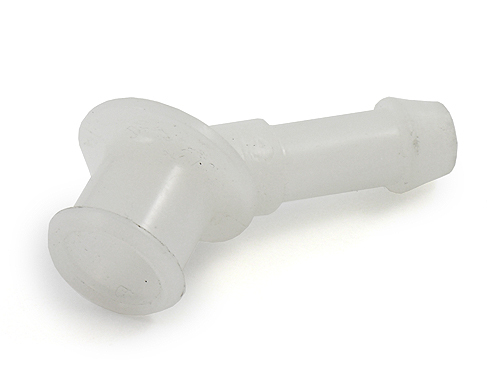 |
| |
|
|
ChrisT
Club Retro Rides Member
Posts: 1,670
Club RR Member Number: 225
|
|
May 12, 2018 14:50:42 GMT
|
Angled mounting plate painted and fitted, master cylinder is now sitting level.... 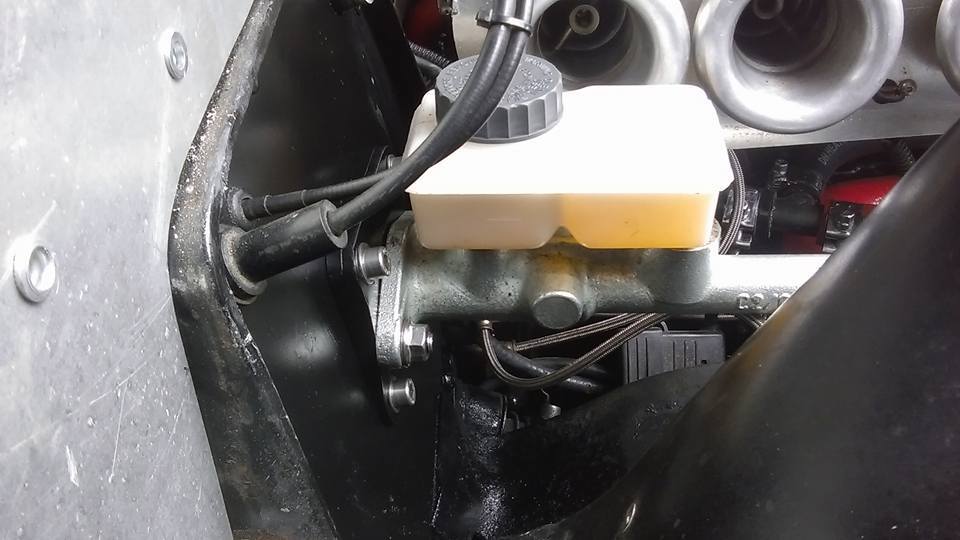 Took the banjo/barb fittings apart, cleaned everything and reassembled with threadlock.... 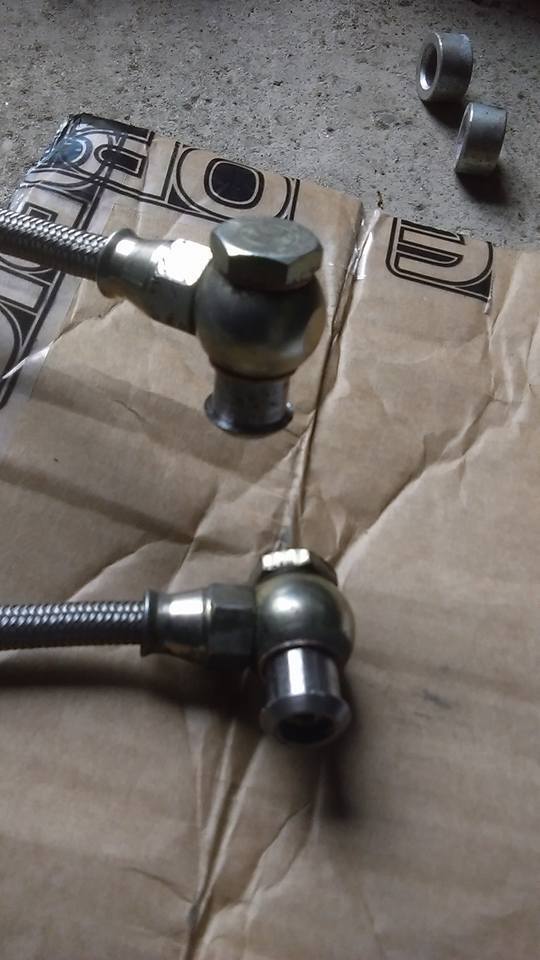 Just waiting for a banjo fitting to arrive so I can continue..... In other news, bought a 'radial T piece' to try and get the fuel pump cut off switch re fitted but due to me not really reading the description it didn't fit as expected but by chance I found another T piece in my box of bits which fitted exactly how I needed..... 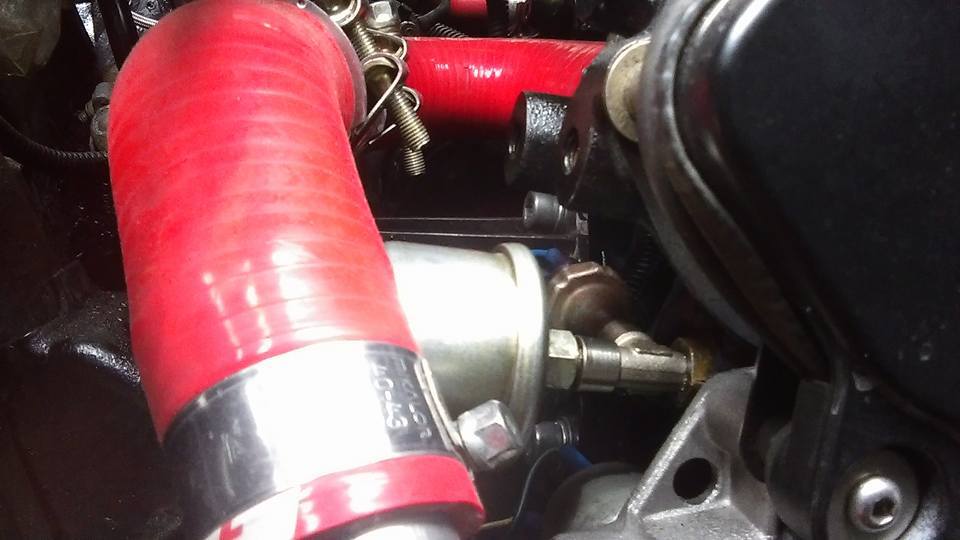 |
| |
|
|
ChrisT
Club Retro Rides Member
Posts: 1,670
Club RR Member Number: 225
|
|
May 14, 2018 17:56:40 GMT
|
Aluminium paneling wrapped in matt black vinyl, looks more like satin black to me but that's good as it almost matches some of the paintwork.... 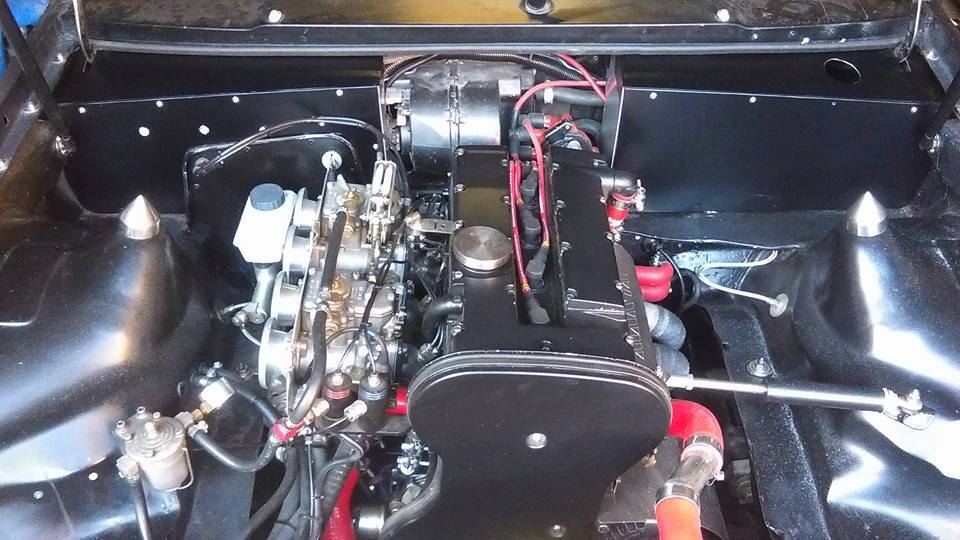 I think it looks a lot better  |
| |
Last Edit: May 14, 2018 21:36:43 GMT by ChrisT
|
|
|
|
|
May 14, 2018 18:26:40 GMT
|
|
only real way to "clock" an adapter in your favour (in the oil gallery) is to use different thickness copper washer
|
| |
|
|
ChrisT
Club Retro Rides Member
Posts: 1,670
Club RR Member Number: 225
|
|
May 14, 2018 18:34:52 GMT
|
only real way to "clock" an adapter in your favour (in the oil gallery) is to use different thickness copper washer Yeah, would have done but the original adapter I was using only had minimal thread into the block, used an extra copper washer and it didn't make much difference, didn't want to risk adding any more. |
| |
|
|
wotnot
Part of things
 
Posts: 55 
|
|
May 14, 2018 21:12:55 GMT
|
|
Love this car.
|
| |
W201 2.6 sportline
|
|
ChrisT
Club Retro Rides Member
Posts: 1,670
Club RR Member Number: 225
|
|
May 15, 2018 20:47:51 GMT
|
|
|
| |
Last Edit: May 16, 2018 5:27:04 GMT by ChrisT
|
|
ChrisT
Club Retro Rides Member
Posts: 1,670
Club RR Member Number: 225
|
|
May 16, 2018 19:19:35 GMT
|
Found some Ramair air filter foam sheets on ebay, cut down and cable tied round the trumpets allow me to use the std master cylinder while running in the engine, until I get the brake pipes/leak sorted.... 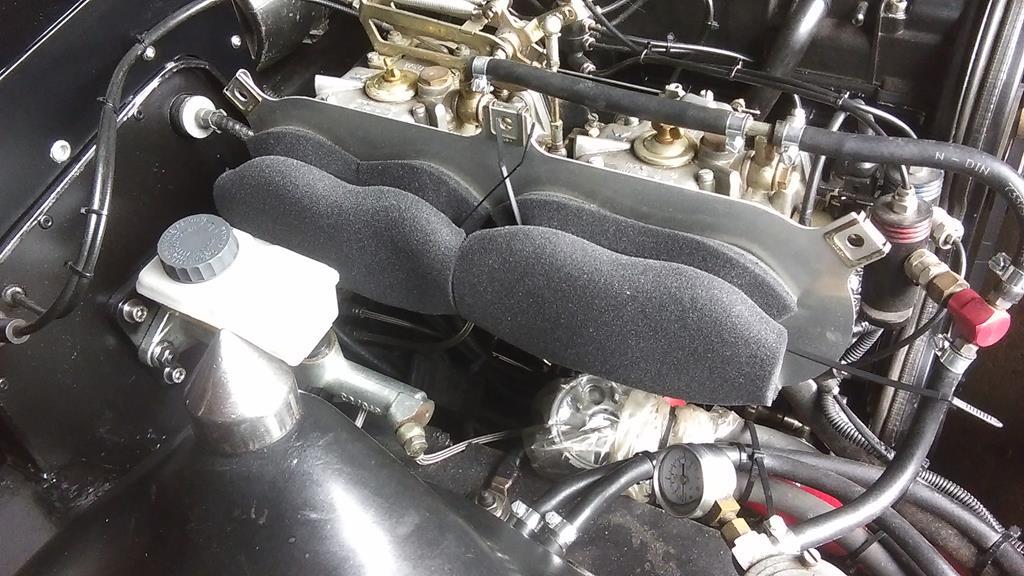 Not ideal for air flow and performance I know but should be ok for running in..... |
| |
|
|
ChrisT
Club Retro Rides Member
Posts: 1,670
Club RR Member Number: 225
|
|
May 18, 2018 18:56:30 GMT
|
Straight brake line end replaced with banjo giving a bit more room to get air filter in.... 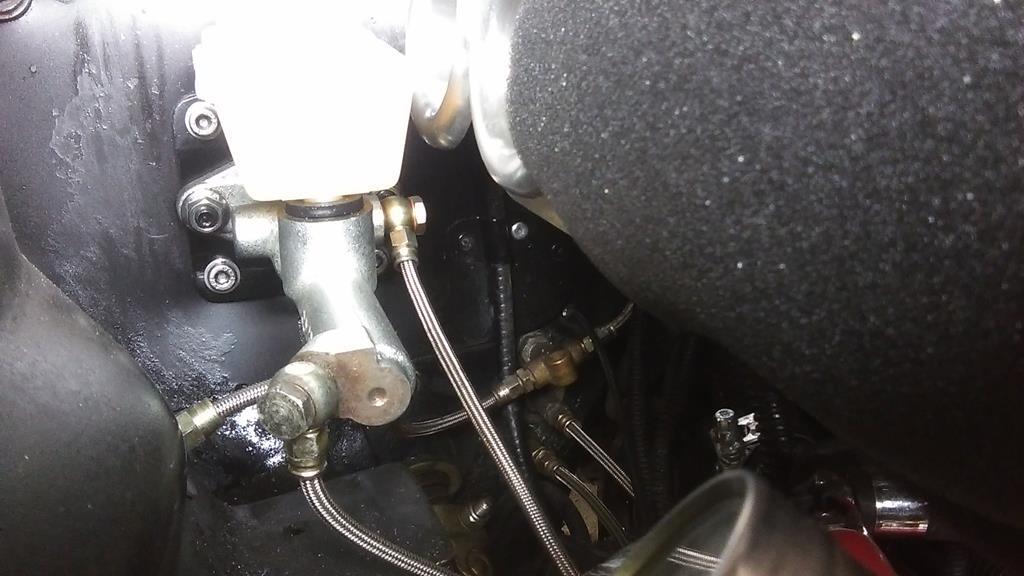 Would be just a matter of bleeding the brakes apart from I've managed to strip the thread from a bleed nipple  |
| |
Last Edit: May 18, 2018 18:57:44 GMT by ChrisT
|
|
|
|


