|
|
|
|
|
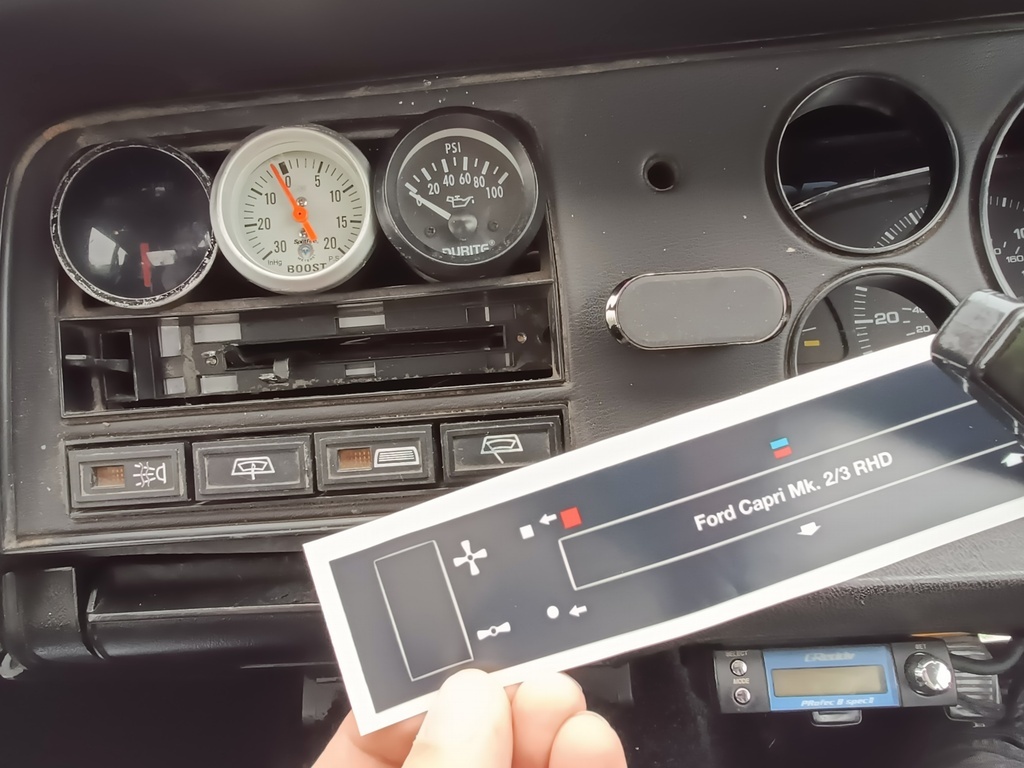
I've fitted a 'new' dashboard - the no dashboard look was cool but wasn't originally intentional. Some of this is temporary - the Nissan gauges sat behind the fascia for example. But it's an uncut insert that nicely fits my tree gauges. I've also moved the boost controller to a much better position. Not the easiest thing to tune, particularly when it's not in the line of sight! I can't find my glove box at the moment, and I'm sure I haven't got rid of it so I'm going to keep searching. Feels much better in there though. Commuting in it again this week 👌 Just ordered a pair of new rear tyres as well - extra grip at the strip (Best of British coming up soon) 💪 I've gone for Vitour R1s - great reviews and fantastic looking muscle car tyres with raised white lettering  And the dash pics. I've cleaned it all up now so it looks better. It is only temporary but so was the last setup that lasted about 7 years...   |
| |
|
|
|
|
|
|
|
|
|
I've cleaned all the dust and muck now. Next thing is to find the squeaky rattle at the rear of the cabin that's driving me insane! I could also do with a better cup holder than the cable tied air intake as my Costa (other coffee outlets are available) thermos doesn't really fit it 😂  |
| |
|
|
|
|
|
Jul 19, 2023 12:04:53 GMT
|
 Fitted this but didn't realize I was missing a part of mine so it's gone on looking pretty awful. Good to have it for now though - no more guesswork! I'm bidding on a new panel so hopefully I'll be able to sort this properly soon |
| |
|
|
|
|
|
Jul 20, 2023 20:27:08 GMT
|
|
Here a little more useful information on tuning the Greddy Profec B Spec II. I asked for this advice on SXOC many years ago and I've just come across it again:
If you put it off, it will run the standard boost.
You don't want to boost during the run in. Run in mean you should not put too much load, or change revs too fast. You SHOULD go higher than 3000rpm in fact. 4500-5000 is fine as long as you don't boot it or stay there all the time. I would not go under 2000/2500rpm, don't let the engine go too low, and don't stay at the same rev all the time. And don't go positive pressure !
Read the manual it really is cristal clear. Here is a little help though.
The only "catch" is accessing the first setting, by NOT touching the lower button but just turning the knob.
This setting sets the solenoid duty, basically it will set the max pressure you will get once the wastegate opens.
the next setting is the gain. It is somewhat the "ramp" of the regulation. I cant describe it easily ... basically, the aim is to set this high, until you get boost spike. If it is too low, the wastegate will open too fast and you will have longer spooling time. If it is too high, you get a boost spike.
The next setting is the pressure where the boost controler really starts to work, ie when the wastegate regulation start. Until this boost is attained, the wastegate is closed. Basically, you want to set this at your desired boost value minus 0.10 - 0.15bar.
the next one is the warning : if boost gets to this value, the wastegate will be open. Safety feature. Set it 0.1 bar higher than the boost you want to attain.
Next one is x%drop. It works with the previous value, i set it on 15%, i don't quite remember if it drops the boost to x% solenoid duty or if it minues the boost of x%.
Last one is higher attained boost. Reset this value by staying on the knob until it beeps. You don't want to look at your gauge while setting your BC, so look at the road, stop and then look at it.
if you get boost spike, lower gain (you don't want boost spike so set this value low !! good value is around 25-35%; start with 15%).
if the boost falls when hitting the pressure when the regulation starts, it means the first setting is too low.
|
| |
|
|
|
|
|
Jul 20, 2023 20:28:30 GMT
|
This is also really useful  |
| |
|
|
|
|
|
|
|
|
Thought you guys might like my newest YouTube Shorts
I'm working on some long form videos at the moment. One is the trials and tribulations of fitting my LSD to the Atlas axle and another is picking up my XJ40 from the other side of the country. There'll be another coming from my race weekend at Santa Pod (Best of British) where I'll be looking to beat my PB now I have more boost (another 2psi) and more traction (LSD and new tyres).
Would love to have you subscribing to my channel - plus you won't miss my content when it's up!
Hope to see you over there 😊
|
| |
|
|
|
|
|
|
|
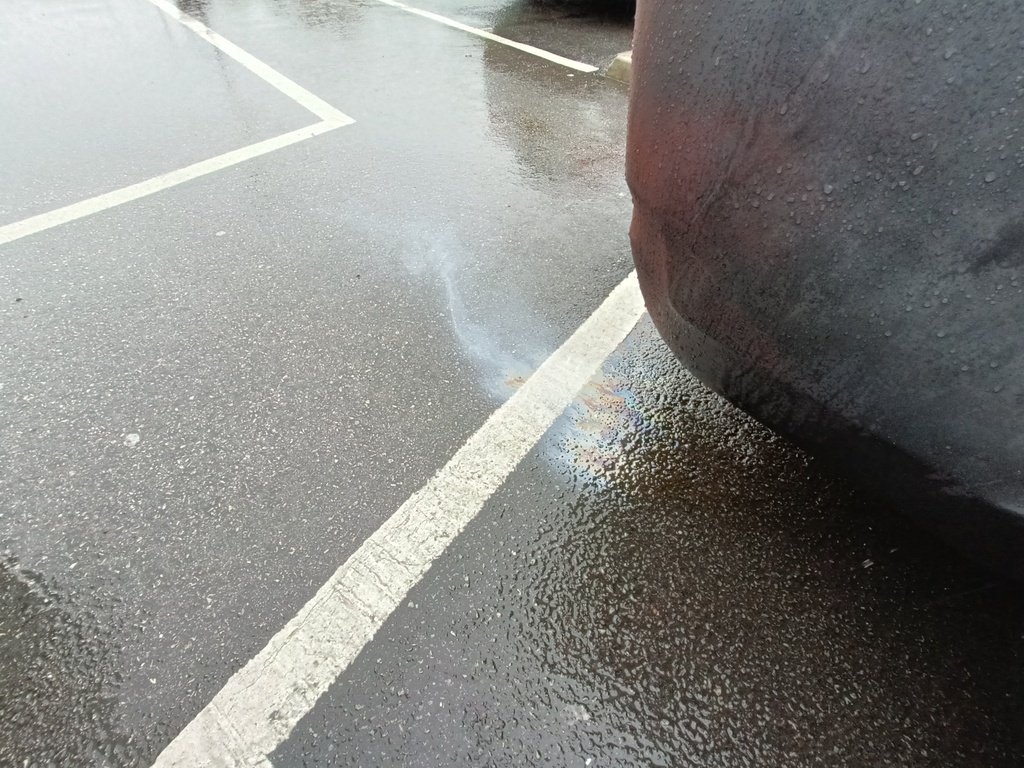
With my new tyres arriving, it seemed a shame not to turn the old ones in to smoke. It was raining unfortunately, but went for it anyway. There's a little off-road stretch by a truck depot that's empty on a Sunday so I made my way up there. It spins around quickly with the LSD! Unfortunately, I could smell petrol really strongly - turns out one of my brackets holding the fuel pump came loose and has been rubbing on the handbrake cable. It had actually rubbed straight through the body and was blasting fuel out at high pressure all under the car 😳 It was lashing down, managed to take a pipe off, good it back on itself and clamp it with mole grips (handles secured with hoseclip. Disaster avoided! Funny thing is, I may not have noticed this had I not been messing about in it. Race weekend in a couple of weeks and it's off the road awaiting a new 255lph pump. Standard really 😂  |
| |
|
|
|
|
|
|
|
|
I had to chop the lower bushes out of my adjustable AVO shocks when I took the axle off - does anyone know if you can get replacements from anywhere?
I'm running my standard shocks again and I could do with putting the updated ones back on if possible
|
| |
|
|
|
|
|
|
|
Hi I just had to replace the bushes on my AVO adjustable shocks and you can get the bushes direct from the AVO website WWW.AVOUK.com, under accessory, they are about £3.25 or more depending on which size you need. Another thing you can do if you have the older style of AVO shock ( the one which has a narrow metal mounting eye and a large bush which sticks out either side ) is to convert it to sperical bearing ( which is what I did with mine ) as these older type had the groves machined in them for the circlips which hold the bearing in, The price for this conversion is about £6.49 per eye. |
| |
71 ford mustang being restored
71 triumph spitfire 3.5 v8
88 bmw e32 735 --SOLD--
|
|
|
|
|
|
|
Hi I just had to replace the bushes on my AVO adjustable shocks and you can get the bushes direct from the AVO website WWW.AVOUK.com, under accessory, they are about £3.25 or more depending on which size you need. Another thing you can do if you have the older style of AVO shock ( the one which has a narrow metal mounting eye and a large bush which sticks out either side ) is to convert it to sperical bearing ( which is what I did with mine ) as these older type had the groves machined in them for the circlips which hold the bearing in, The price for this conversion is about £6.49 per eye. Wonderful, thanks mate! Need to work out which one I need but I know it had the bush that stuck out either side. Would I just need the spherical bearing and the bush for the conversion? |
| |
|
|
|
|
|
|
|
|
|
|
If you have got the shocks which will take the spherical bearing all you need is the spherical bearing kit ( you should be able to see two grooves machined into the inside of the bush housing on the shock when you have removed the old bush ), the kit includes the spherical bearing and two circlips to retain it in place, it is also sized to take a half inch bolt though the middle of the bearing, so no other parts are needed.
On a side note you will need to make or buy some spacers or washers as the bearing assembly is a lot narrower than the original polybush and will have clearance problems if not spaced correctly ( you could modify the old crush tube to do this job which is what I might do ).
|
| |
71 ford mustang being restored
71 triumph spitfire 3.5 v8
88 bmw e32 735 --SOLD--
|
|
|
|
|
|
|
If you have got the shocks which will take the spherical bearing all you need is the spherical bearing kit ( you should be able to see two grooves machined into the inside of the bush housing on the shock when you have removed the old bush ), the kit includes the spherical bearing and two circlips to retain it in place, it is also sized to take a half inch bolt though the middle of the bearing, so no other parts are needed. On a side note you will need to make or buy some spacers or washers as the bearing assembly is a lot narrower than the original polybush and will have clearance problems if not spaced correctly ( you could modify the old crush tube to do this job which is what I might do ). Perfect - yeah they're the old kind. Just pressed the bush out and saw the circlip grooves 👍 so do the bearings act instead of the bushes then? And the bolt just goes straight through the bearing? Thanks for your input, mate! |
| |
|
|
|
|
|
|
|
|
Changed the brakes yesterday - I now have grooved, as well as drilled and vented up front and I swapped the green stuff pads for yellow stuff. I'll update with pics when I'm home but just come back from a shakedown and it stops so much better.
Does anyone know why my newish alternator needs spinning up really fast before it actually starts working? Doesn't supply any volts at all until revved up to 4.5k - the batt light is on until this point.
I adjusted the belt as the bracket is a little damaged and now it requires nearly 6k before it starts working! Once the lights off it stays off for the rest of the drive unless I turn it off and then I'll need to redline it again to get it to work!
|
| |
|
|
|
|
|
|
|
Just spoken to Avo and the bearings do indeed replace the shocks to effectively have solid mounts. They should arrive tomorrow which is great! I'm heading in a 3 hour drive down to the Pod at the weekend and really want to have the proper suspension back on. Although I will be having the rear shocks at their softest for the strip, I like to have them on a mid setting for the road. Thank you kusanagi! |
| |
|
|
|
|
|
|
|
|
No problem, glad I could help.
|
| |
71 ford mustang being restored
71 triumph spitfire 3.5 v8
88 bmw e32 735 --SOLD--
|
|
|
|
|
Oct 27, 2023 23:43:10 GMT
|
|
Cold start video 👇
Next job is to rebuild my Skyline injectors so I can start the winter engine tuning. I have all parts for stage 3 now (330bhp) so that's the plan over winter.
Anyone suggest a good way of sorting the injectors? They came from a running RB but I'd rather have peace of mind and give them a clean and new o rings before I fit them.
|
| |
|
|
mk2cossie
Club Retro Rides Member
Posts: 3,063  Club RR Member Number: 77
|
'86 Capri Turbo mk2cossie
@mk2cossie
Club Retro Rides Member 77
|
|
|
|
If it were me, I'd send them off for ultra sonic cleaning, and flow tested
Then you'll know they are clean, and all flow pretty much the same 👌
|
| |
|
|
|
|
|
Oct 29, 2023 15:15:17 GMT
|
If it were me, I'd send them off for ultra sonic cleaning, and flow tested Then you'll know they are clean, and all flow pretty much the same 👌 Any recommended companies you know of? |
| |
|
|
|
|
|
Oct 29, 2023 15:19:12 GMT
|
|
My winter list includes:
Rebuild and fit Skyline injectors
Fit Z32 AFM
Replace stage 2 with stage 3 chip (HD)
Blend bonnet bulge into bonnet
Replace engine mounts with polys
Fit a new cambelt
Paint the rocker cover
Modify the exhaust
I'm looking forward to starting - just finished carpeting the garage to make it a bit nicer over winter (I did have a patchwork of old carpets and rugs but it was a pain if i needed to weld or do anything fuel related. Now I can just roll it up on one go. 👌
|
| |
|
|
|
|
|
Jan 12, 2024 16:10:30 GMT
|
Just an update - I've done exactly none of the above things  I have however just woken it from hibernation as one of the dailies has no MoT so I shall pop a few pics up later |
| |
|
|
|
|


