hairymel
Club Retro Rides Member
avatar by volksangyl
Posts: 1,081
Club RR Member Number: 207
|
|
|
|
the blue line is turned on and off by the purple bit in the black blob- important to note that although they get close, they never touch- the blue bit is all nice and happy and computer-voltages, the purple one is all the voltages that make the car happy. They aren't exactly compatible, so they're separated there. this made me smile  i kind of wish you had been lecturing me 20 years ago when i got chucked off a comm sys degree for not understanding how the three legged fuses worked ;D |
| |
whats that burning smell?
oh curse word :-(
|
|
|
|
|
|
|
Jun 27, 2012 20:56:36 GMT
|
I kind of wish you had been lecturing me 20 years ago when I got chucked off a comm sys degree for not understanding how the three legged fuses worked ;D They work by plugging them in backwards and letting the smoke out- much like anything Lucas. It took me a good while to grapple what each bit does, how to design for it, how to properly make it work without it going PHUT. This circuit took a fair bit of thinking though- a lot of more seasoned electronics people would have said "This here, that there, job done wahey go home" but I do have to sit with a calculator and my electronics books and google lol This could probably have been done in a more elegant way but I have my reasons for the design, and it works quite nicely. I picked up a Molex connector at Radio shack today too so I'm going to solder it all in and give it a whirl- got the day off work today to go bring the dog to the vet's. It's scorchingly hot. For giggles I should go put a thermometer in the car to go see what temperature it is in there... (Just did, and according to my meat thermometer from the kitchen, it's 165F/74C, which is medium-well steak) That's why I've been avoiding doing anything on the car lately. --Phil |
| |
Last Edit: Jun 27, 2012 20:56:52 GMT by PhilA
|
|
|
|
|
Jun 27, 2012 21:00:51 GMT
|
|
Then this resumes your day...
|
| |
|
|
|
|
|
Jun 27, 2012 21:35:46 GMT
|
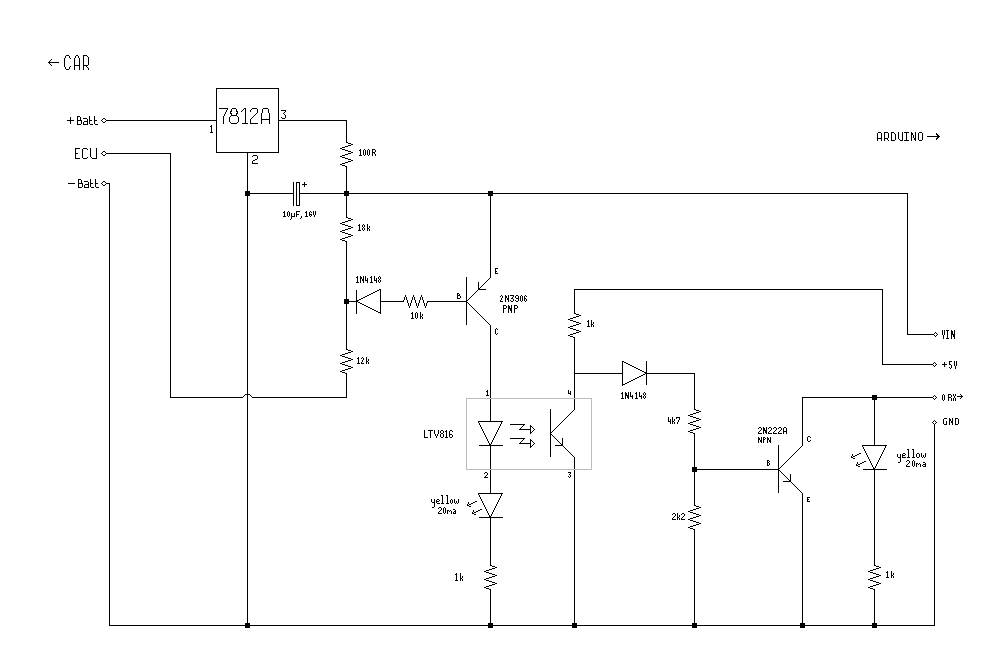 There we go, the official interface circuit diagram. |
| |
Last Edit: Aug 26, 2013 15:58:34 GMT by PhilA
|
|
|
|
|
Jun 27, 2012 21:39:33 GMT
|
Then this resumes your day... Hehe  |
| |
Last Edit: Jun 27, 2012 21:39:56 GMT by PhilA
|
|
|
|
|
Jun 30, 2012 16:00:30 GMT
|
|
Tested the circuit board on the car yesterday, zip, nada, nowt.
Went back home, eyeballed the circuit board, which had been assembled late at night and soldered early in the next morning, and I saw where I'd gone wrong.
I mended the circuit with a neat little bit of blue wire. I'd put one of the resistors in the wrong place...
Going to try again if I have time today.
--Phil
|
| |
|
|
|
|
|
Jun 30, 2012 19:09:55 GMT
|
|
«When in doubt, flat out... » Colin McRae
That is the most famous words I've ever learnd...
|
| |
|
|
|
|
|
Jun 30, 2012 19:18:00 GMT
|
|
If you can't fix it duck tape then you've got an electric problem...
|
| |
|
|
|
|
|
|
|
|
What the heck.
I've done something glaringly wrong that I can't figure out. I get some trash data but only if I touch the Collector of the output transistor.
What the heck?
Back to testing and drawing board. Got some ideas.
--Phil
|
| |
Last Edit: Jul 1, 2012 1:26:44 GMT by PhilA
|
|
|
|
|
|
|
Put the electronics aside in disgust. It should be working but it isn't. Instead, I decided to tackle the brakes. It's still bloody hot outside, made worse by the thunder-lightning-rain we've been having which occasionally add some water to the heat like the fat guy in the sauna who doesn't know when to stop chucking water on the coals. Again, the car assumed the position. 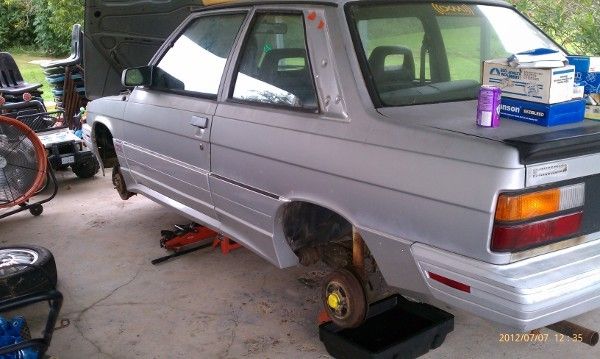 (Incidentally I was pleased that even jacked up like this I can still open and close both doors with my pinky finger) The liberal spraying of PB Blaster 2 weeks ago has paid off. Undid the master cylinder with little trouble: 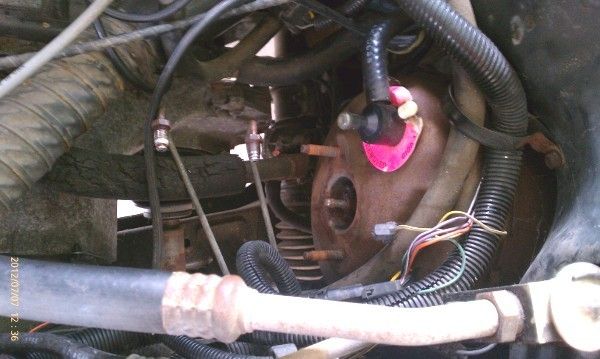 Took a look at it, it's not overly bad by any means, but being that it's sat up for ages, I'm not taking any risks: 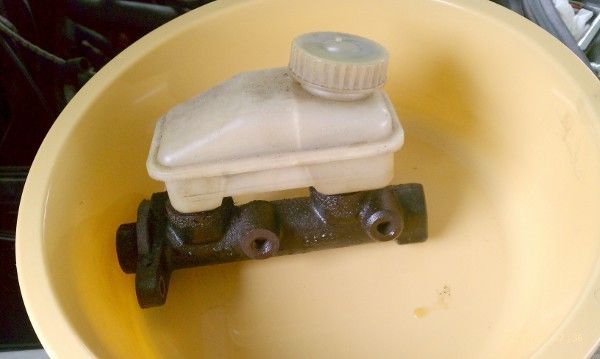 The reason for my concern? After a huge fight worrying about breaking old plastic, I upended the dregs of the fluid: 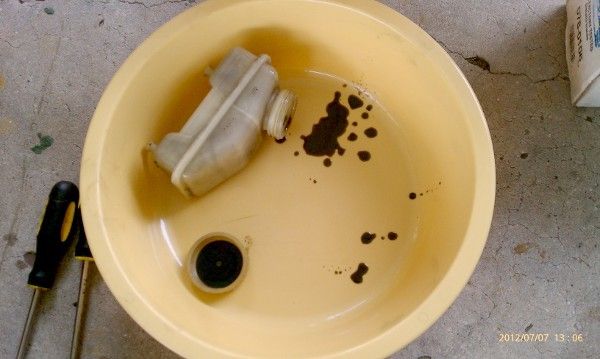 Ew. Cleaned that out thoroughly, and fit the new master cylinder. 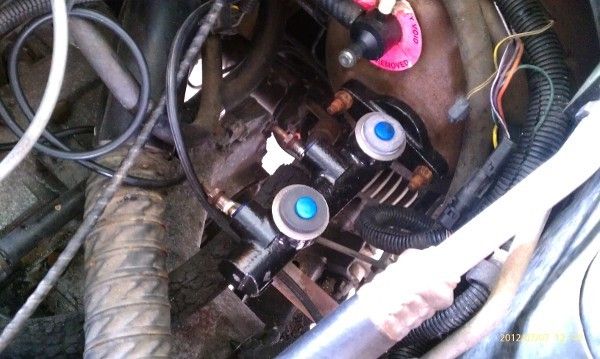 Made sure it was all spotless and put it together again, fought and cursed and kicked wheels at the solid line that didn't want to align correctly and screw in- after a lot of a fight it was in properly: 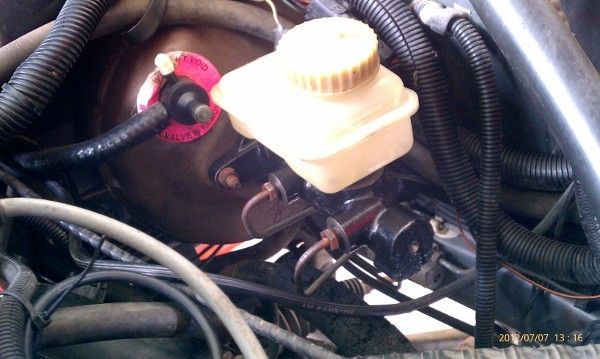 Moved to the back, took the drums off, split the old slaves off: 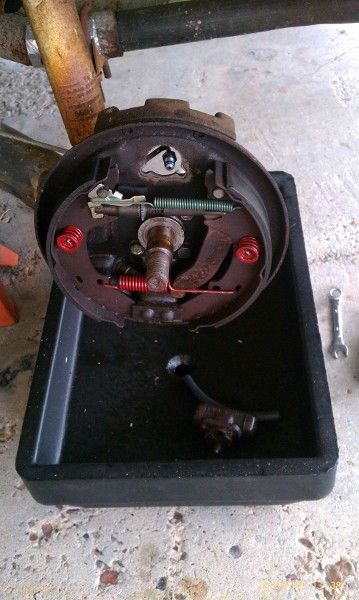 Cleaned up and fit new ones: 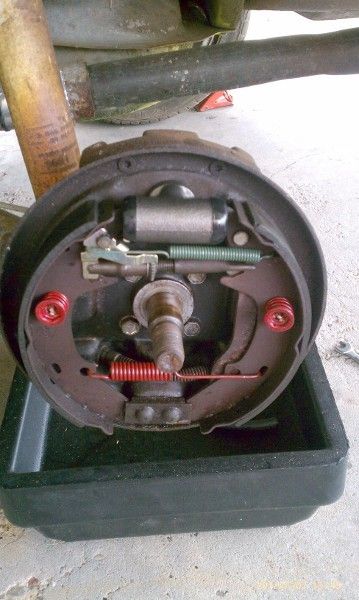 After that my hands were too grubby to carry on taking pictures. Fought with the stupid, damnfool heat shield under the car, then PB Blaster'd the adjuster for the handbrake and spent 45 minutes on my back cursing at the thing to get the nut off. Fitted two new cables (WHO DECIDED THAT THE CABLES ARE HELD ON BY THE BOLT FOR THE ANTI ROLL BAR? STEP UP SO I CAN MAIM YOU WITH EXTREME PREJUDICE) Got the rears adjusted up as best I can per the book, adjusted the handbrake (a nice smooth four clicks, pleasant) and stuck the Eezi-Bleed on it. After not tightening things right and widdling fluid all over the floor, I bled up some burps out of the system and still can't get pedal, it's airlocking. It has a "Safety Valve" which has a shuttle valve inside which clicks over if one side of the system loses pressure compared to the other. I can feel the pedal go PLOK towards the lower end of the travel so there's air somewhere... but the warning light on the dash doesn't come on. It should. Probably the switch is duff, I don't know. Either way the pedal does firm up towards the bottom of the travel now and I took it for a brief spin down the road. Feels positive enough, which is a start. Have the flexis to change, gotta change out the CV boot on the front (again, it split, must've been a bit old) and I'm tempted by new calipers for the front.. fit the Jubilee clips to the heater pipework, get the $%^&ing R clip into the gearbox for the speedo cable, put the seatbelt mount back on inside and it'll be ready to go... Once it's going, I'm going to blezz about on the old tyres for a while, see how badly they fare, change them out, at that point do the steering arms, have 4 new boots put on, get the steering aim set and that should see me well, hopefully. --Phil |
| |
Last Edit: Jul 8, 2012 22:49:54 GMT by PhilA
|
|
|
|
|
Jul 15, 2012 19:36:42 GMT
|
More brakes today, mostly being up under the car fighting spiders and dirt. The rear brake pipes were questionable: 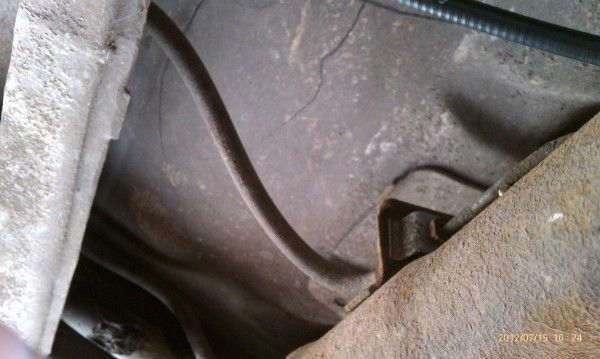 They looked new-ish (as in newer than the car) but still fusty. Got a pair of new ones for the back: 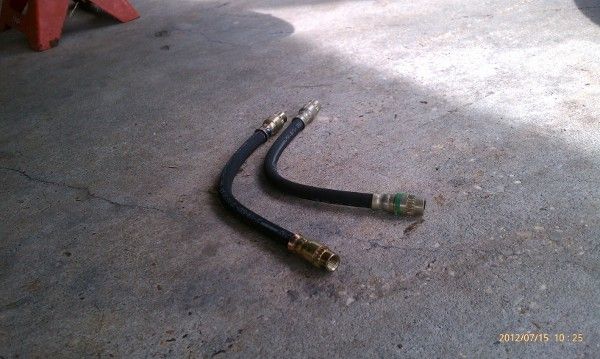 Fought with the old union on one pipe: 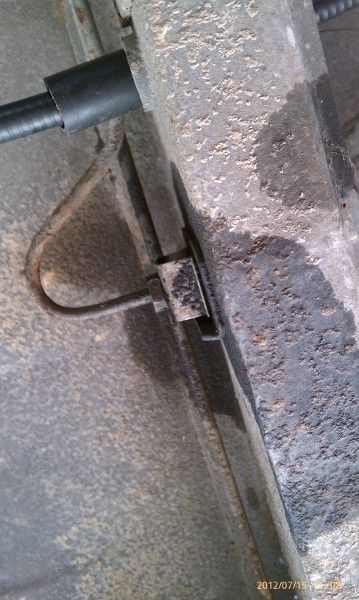 Finally with vice grips and a breaker bar it came undone and was replaced: 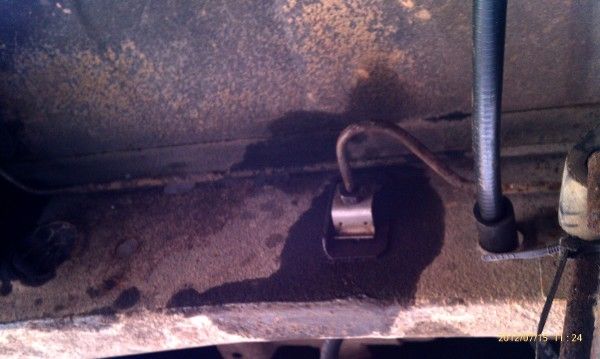 Looking a bit better with all the perishable brakes parts under the back replaced: 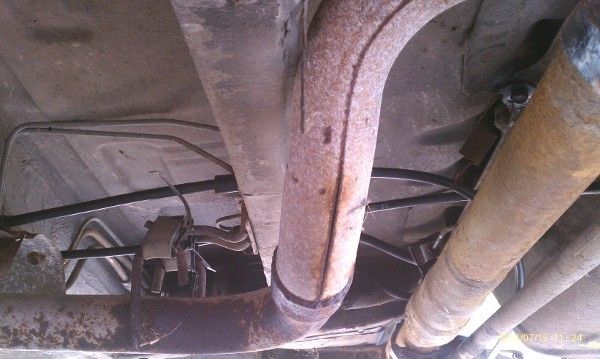 Did the front brake pipe too that I hadn't changed yet: 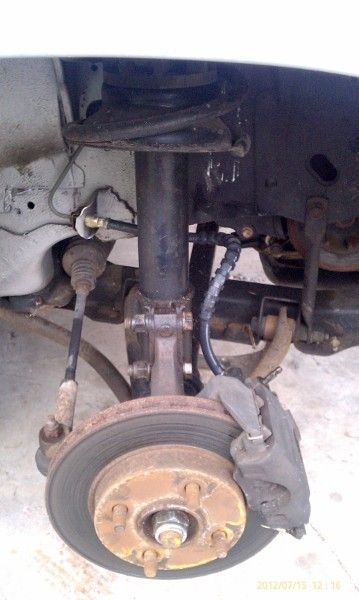 Bled it up, and I am definitely now suspicious of the safety valve. I get good pedal on the back end of the pedal travel. I have been warned by a few people that the shuttle valve that closes off a failed part of the circuit. I think it may be jammed in one position, not allowing me to bleed the near end of the master cylinder. Fun fun. Yet more brake fluid. At least it's been flushed through thoroughly. --Phil |
| |
Last Edit: Jul 15, 2012 19:37:41 GMT by PhilA
|
|
|
|
|
Jul 15, 2012 20:22:37 GMT
|
 --Phil LLLOOOLLL I thought your GTA was RWD...    My mistake...  |
| |
|
|
|
|
|
Jul 15, 2012 21:29:12 GMT
|
LLLOOOLLL I thought your GTA was RWD...    My mistake...  Nope, it's essentially a R11 Turbo underneath at the back. |
| |
|
|
|
|
|
Jul 15, 2012 22:42:36 GMT
|
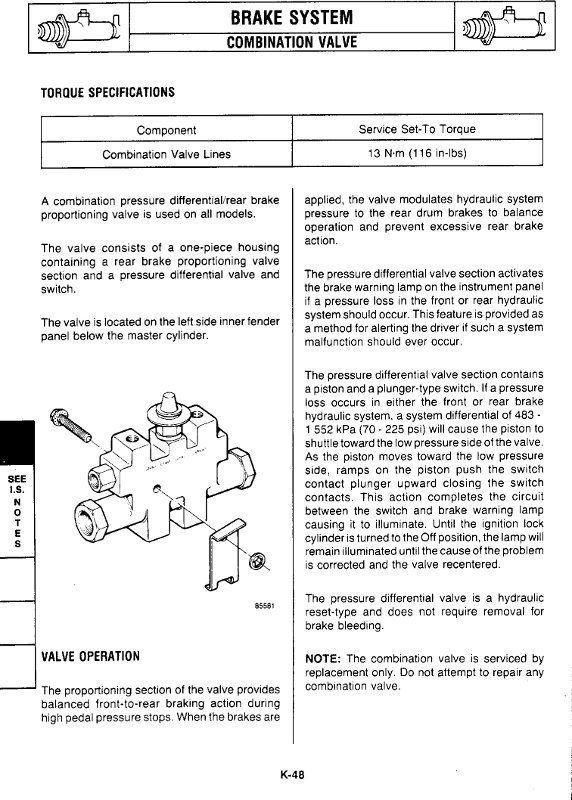 Manual has this to say about the valve. "If it's not working, replace it with a new one." Hahahahaaa. |
| |
|
|
|
|
|
|
|
LLLOOOLLL I thought your GTA was RWD...    My mistake...  Nope, it's essentially a R11 Turbo underneath at the back. I always thought so but when I saw that pic the tortion bar fooled me and I edited my comment with LLLOOOLL When I had my R9 I had a mechanic replace the front discs and pads and bleed the all circuit but He didn't do his job well because he forgot that the car as that porportioning valve at the back and I found that the hardest way... I had an accident with that... Blocked the fronts and the rears didn't even braked and busted the hole front... Then after a few months I discover that... And they are adjustable , I adjusted abit and the car broke like never before... I don't remember now what I did to adjust it... If you could put a pic of the actual part I might help... |
| |
|
|
|
|
|
Jul 16, 2012 12:03:07 GMT
|
|
Yeah, this one's a bit different. It doesn't have the lever arm at the back to proportion the brakes, instead a static pressure differential valve all incorporated into that device on the scanned manual page above.
My memory is being stirred by this as I was previously able to stamp on the brakes and the rear left wheel would lock up- the rear right at that point was seized solid so had almost zero braking effort.
-phil
|
| |
|
|
|
|
|
|
|
I just found a silly error in my soldering. 270 Ohm resistor where there should have been 1000, so it'd been draining the important ones and zeroes away! 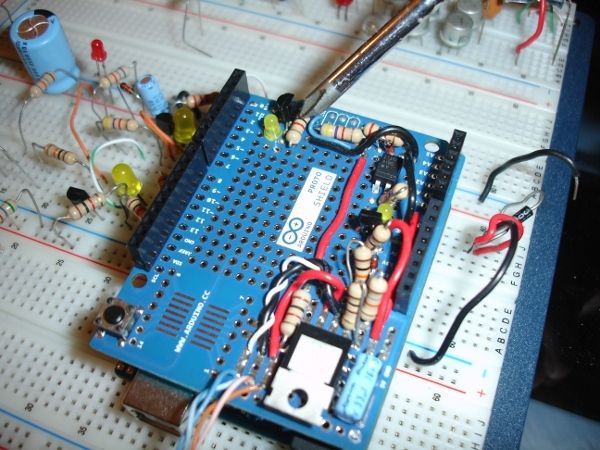 (That stripey bit pointed at with the screwdriver). I hope this fixes it. --Phil |
| |
Last Edit: Jul 19, 2012 1:03:00 GMT by PhilA
|
|
|
|
|
|
|
I just found a silly error in my soldering. 270 Ohm resistor where there should have been 1000, so it'd been draining the important ones and zeroes away!  (That stripey bit pointed at with the screwdriver). I hope this fixes it. --Phil I hope that tooo... |
| |
|
|
|
|
|
|
|
ARGH. 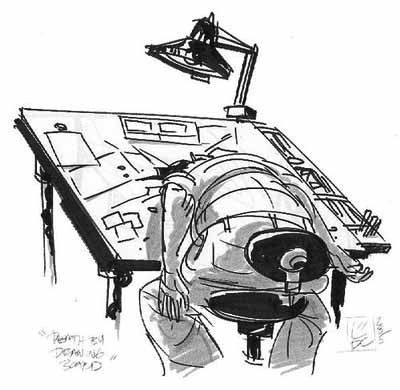 |
| |
Last Edit: Jul 20, 2012 2:09:58 GMT by PhilA
|
|
|
|
|
Jul 20, 2012 16:09:31 GMT
|
ARGH.  UHUHUHUH You are sleeping on the job?!?!?!?      You win some and you lose some but that's life... |
| |
|
|


