johnrh
Part of things

Posts: 958
|
|
Sept 17, 2009 21:26:23 GMT
|
Make a Watt linkage. I'd love to watch! Might do, but I'll try my Panhard rod idea first. But it will be a while... v. busy for a couple of weeks, then need to finish painting the Alpina wheels, so I can fit those and free up two of the 17" tyres, currently on the BMW, to go on the new Volvo rims. Cheers John |
| |
|
|
|
|
|
|
|
Sept 17, 2009 21:43:05 GMT
|
 sex wee!
|
| |
|
|
johnrh
Part of things
Posts: 958
|
|
Sept 20, 2009 20:47:40 GMT
|
Hi, I now have a plan to make a bracket to move the axle mounting for the Panhard Rod lower, so that I can fix my axle centering issues (as described before) but lowering, rather than raising, the height of the rear roll centre in the process. I think I can also make the Panhard rod several inches longer at the same time, which will reduced side to side deflection. The front suspension on the 164 is double wishbone, of course. From a scale drawing, it looks as through the front roll centre is approx 60mm above ground. I haven't done the measurements on the back of the car yet, but now that I'm learning about roll centres and the nice handling that a more "level" roll axis gives, I might also lower the height of the chassis Panhard rod mounting, so my rear roll centre is near to bottom of the diff cover. Here is a nice summary of some suspension principles. (It's for the development of human powered vehicles, but the geometrical stuff is all the same of course). www.speedpedal.com.au/cms/A_108488/title_HPV-Front-Suspension-Designs-Part-2/article.htmlI'm learning all the time with this stuff. Good brain exercise! Cheers John |
| |
|
|
johnrh
Part of things
Posts: 958
|
|
|
|
OK, we have good news! I now have 2 tyres mounted up and, after checking carefully today, the axle & wheels will fit! It's as close as it could possibly be, but with mods to the inner arches, a repositioned panhard mounting on the axle and careful positioning of the replacement wheel arches, it will work. 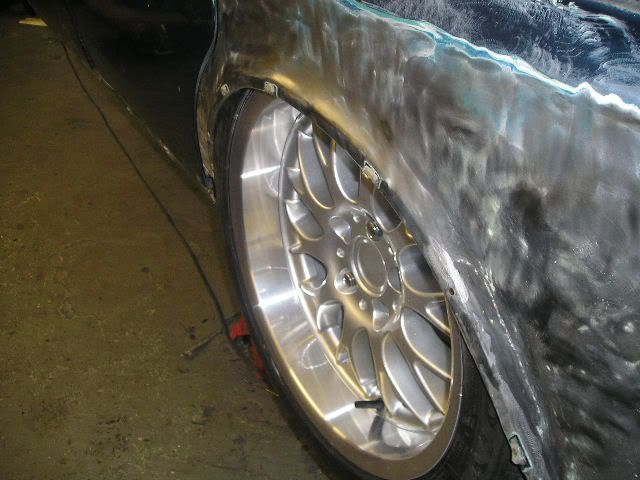 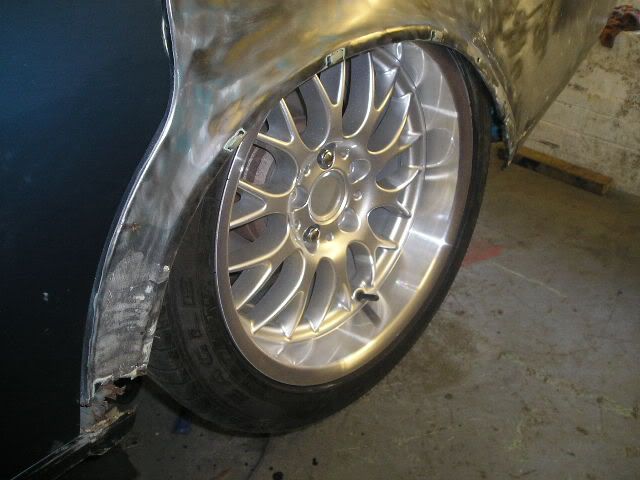 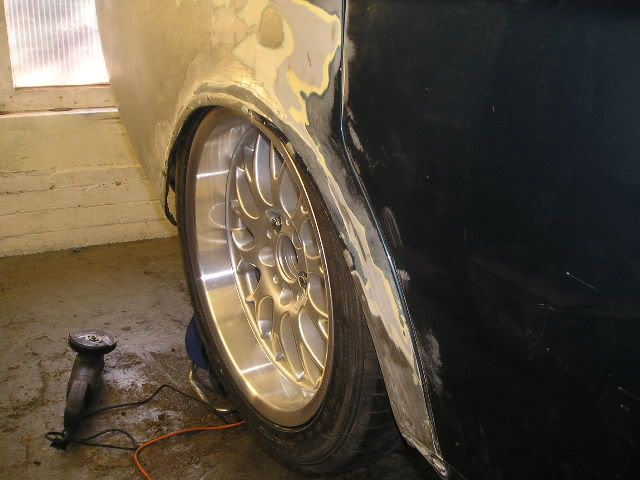 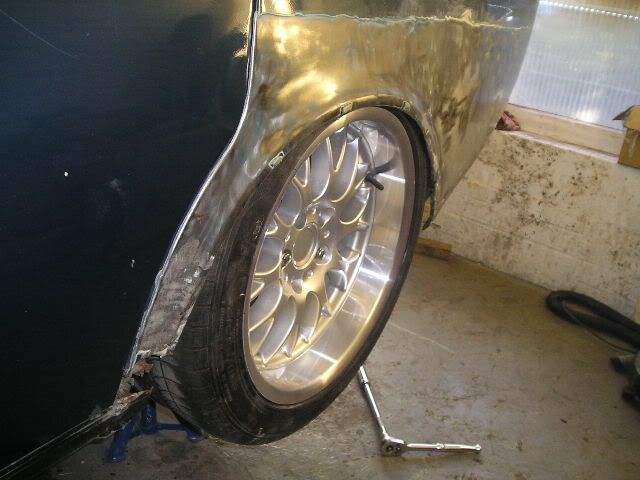 We also had a major clear out of the garage today, it had got into a real mess beforehand. Nice to see things with a bit less dust for a change.  Cheers John & Steve |
| |
|
|
mirafioriman
Posted a lot
My next project.......
Posts: 1,361
|
|
|
|
|
Ths is going to look awesome. I just love the wheels. Now I'm thinking about getting a similar set for my 130!
|
| |
|
|
will
Posted a lot
Posts: 4,023
|
|
|
|
|
Just caught up with this one too, gonna look fantastic I shall be watching developments now. Can't offer tech advise but somehow know that you don't need it. Well done sir and keep it up.
|
| |
|
|
johnrh
Part of things
Posts: 958
|
|
|
|
Ths is going to look awesome. I just love the wheels. Now I'm thinking about getting a similar set for my 130! Yes, I had my heart set on these DTM wheels, but they were really hard to get hold of! No-one in the UK sells them and the main supplier in Sweden will not ship abroad. In the end, after a lot of internet searching, I found a company in Norway that would supply them. What bolt spacing is the 130? If you're really lucky, it will match something like BMW or Mercedes where there's loads of choice. John |
| |
|
|
johnrh
Part of things
Posts: 958
|
|
|
|
Just caught up with this one too, gonna look fantastic I shall be watching developments now. Can't offer tech advise but somehow know that you don't need it. Well done sir and keep it up. Many thanks. I'm not an expert but plenty of trial and (esepcially) error builds up experience eventually! Cheers John |
| |
|
|
|
|
|
|
|
This is a great build - one of my favourites on RR. Great quality workmanship and I love the attention to detail like getting the wheels and arches just right. Brilliant.  |
| |
|
|
johnrh
Part of things
Posts: 958
|
|
|
|
This is a great build - one of my favourites on RR. Great quality workmanship and I love the attention to detail like getting the wheels and arches just right. Brilliant. Thanks for the kind words John |
| |
|
|
|
|
|
|
|
|
|
|
You just know this is going to be stunning when its finished
|
| |
|
|
mirafioriman
Posted a lot
My next project.......
Posts: 1,361
|
|
|
|
|
Just looked at the 130. It has five stud wheels but how do I work out/find out the PCD and offset?
|
| |
|
|
johnrh
Part of things
Posts: 958
|
|
|
|
|
|
| |
Last Edit: Oct 4, 2009 17:41:04 GMT by johnrh
|
|
johnrh
Part of things
Posts: 958
|
|
|
|
|
|
| |
|
|
village
Part of things
Always carries a toolbox. Because Volkswagen.......
Posts: 567
|
|
|
|
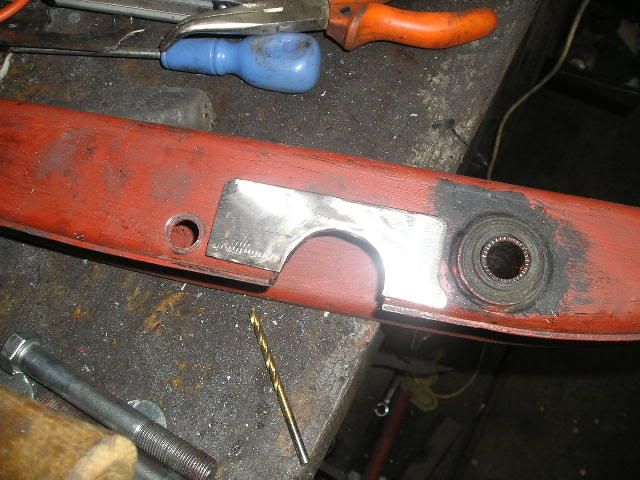
Is it my imagination, or does this repair plate have the same shape as the rear wheel arch? now that's what I call attention to detail!! |
| |
"The White Van is strong with this one...."
Chris "Chesney" Allen 1976-2005 RIP
|
|
johnrh
Part of things
Posts: 958
|
|
|
|
A quick photo... my repair panels arrived today 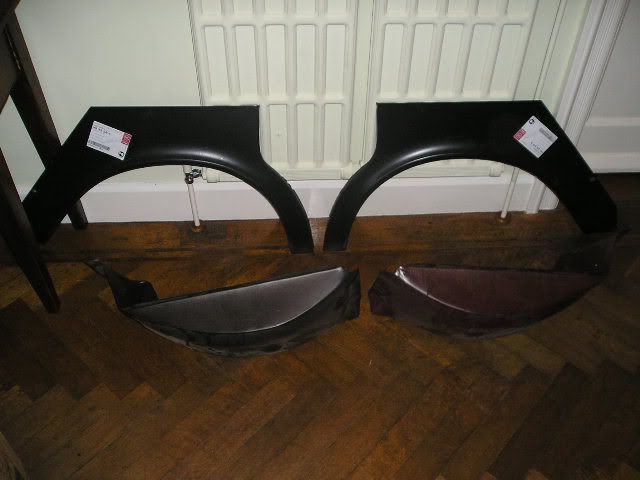 Cheers John |
| |
|
|
johnrh
Part of things
Posts: 958
|
|
Oct 10, 2009 18:41:43 GMT
|
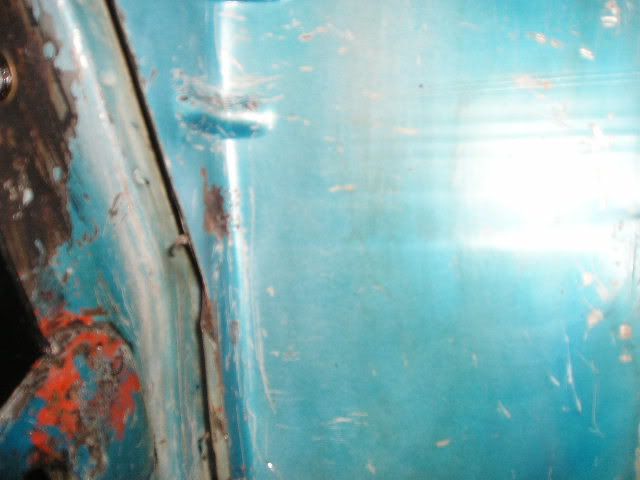
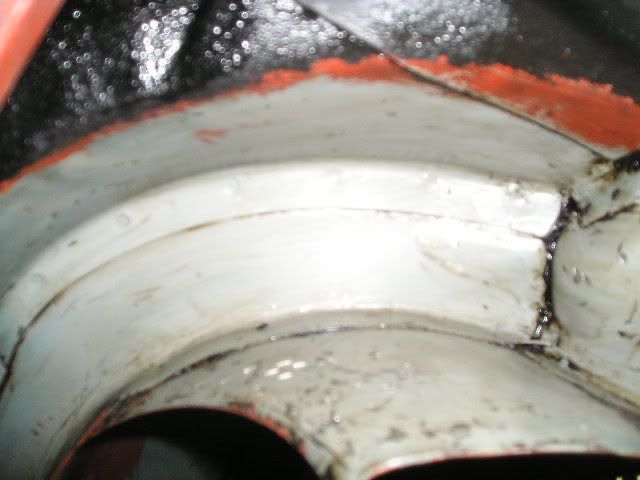
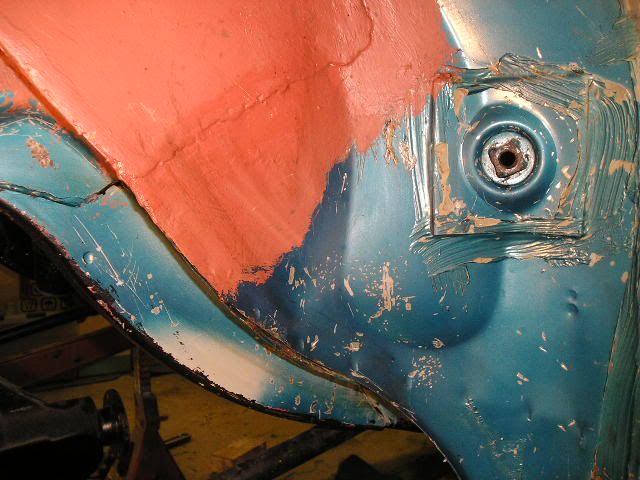
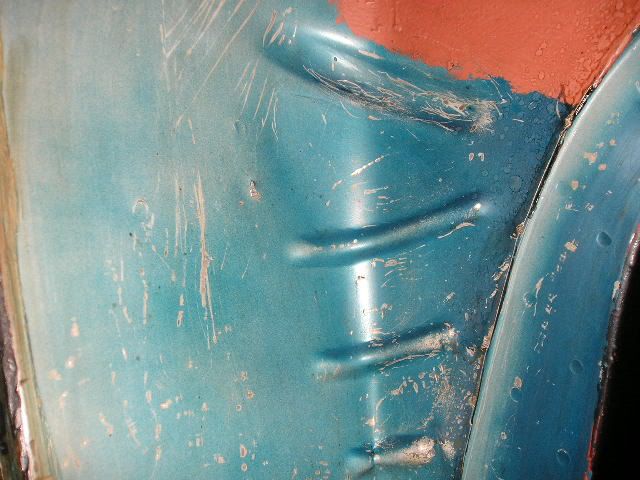
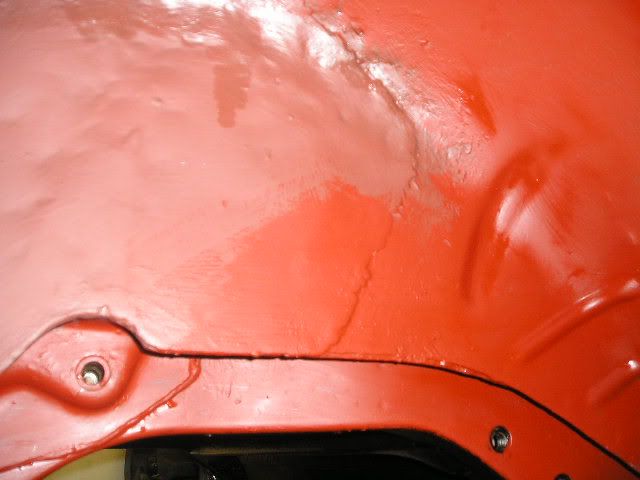
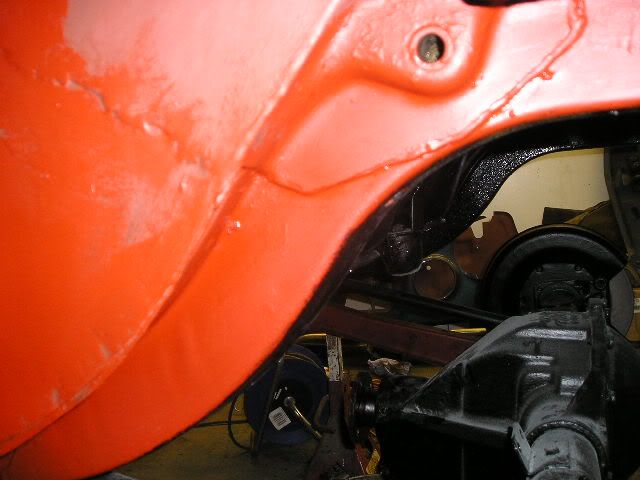
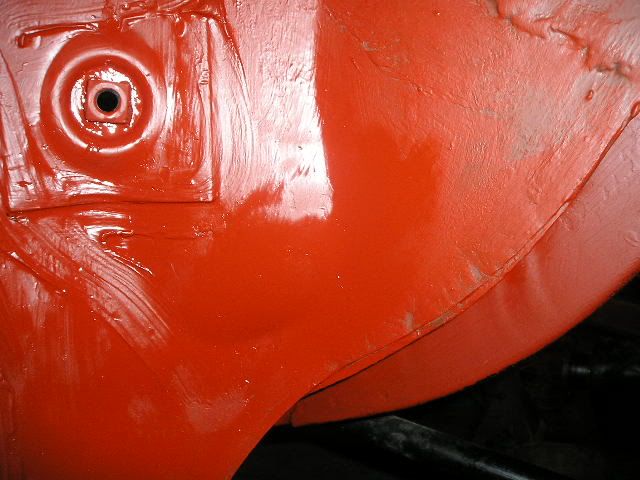
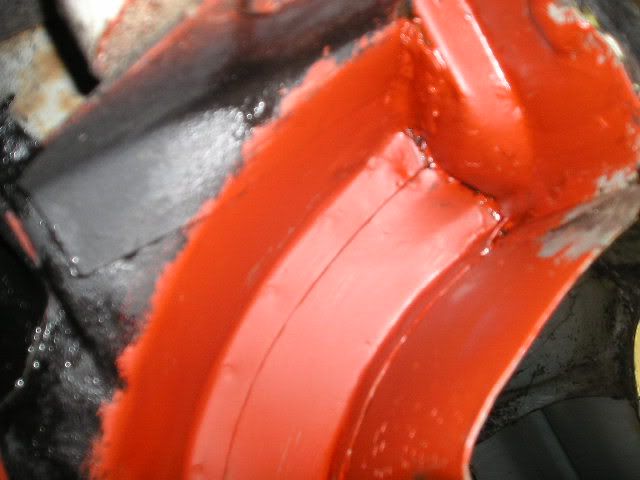
Hi, The next instalment... Rear suspensionI have calculated where my Panhard rod axle mounting needs to be for the geometry I want. Here is the new bracket being fabricated. 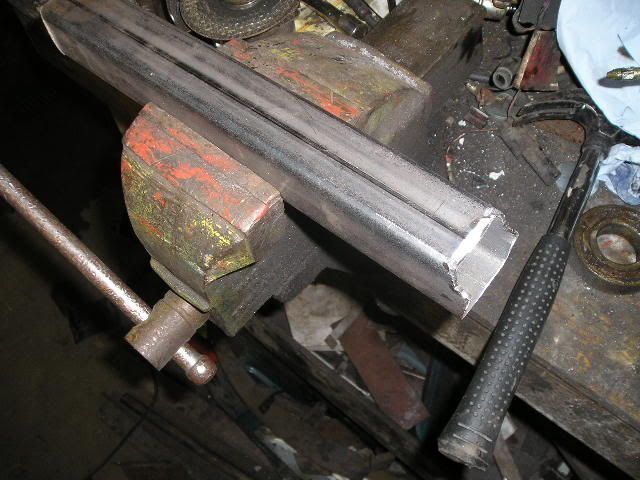  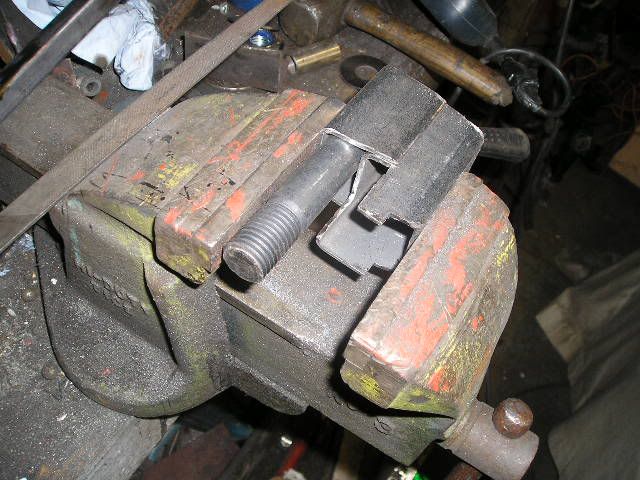 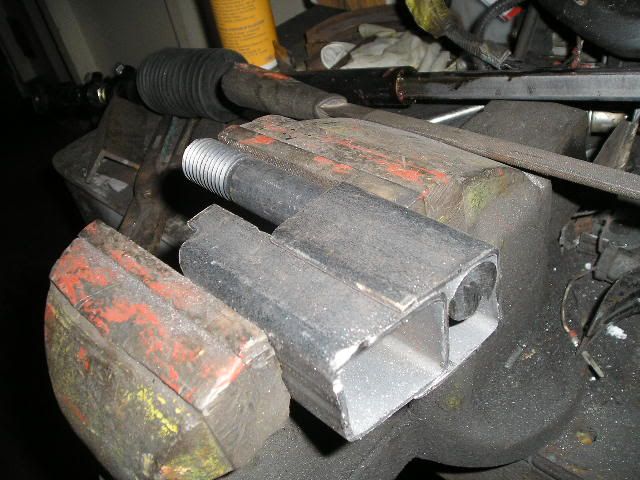 Test fitting to ensure it will clear the spring. 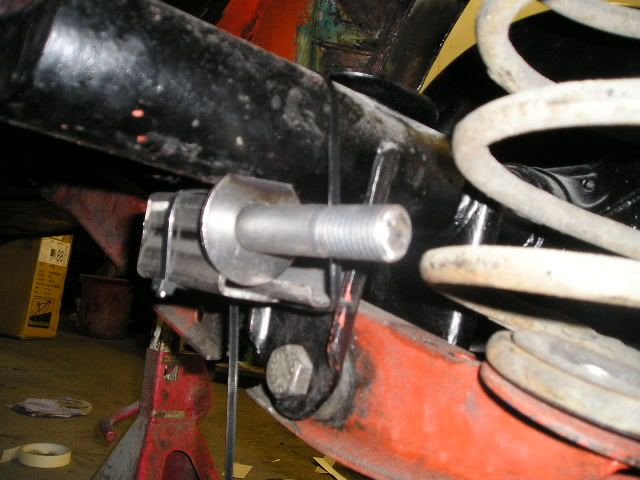 Used a template to make a strengthening plate... 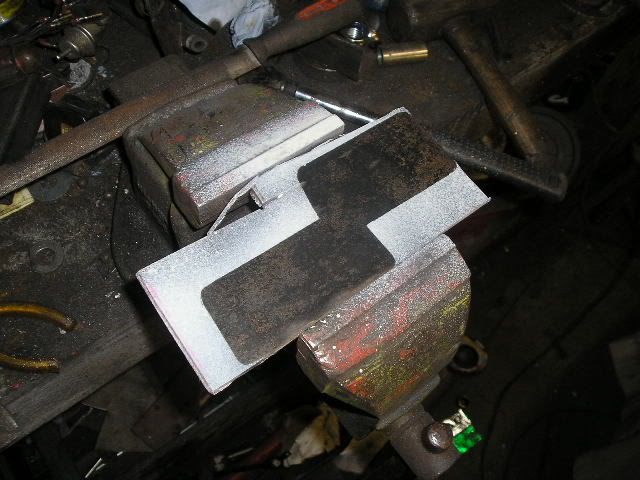 ... which will fit like this. The is an equivalent on the back of the axle as well (no photo) 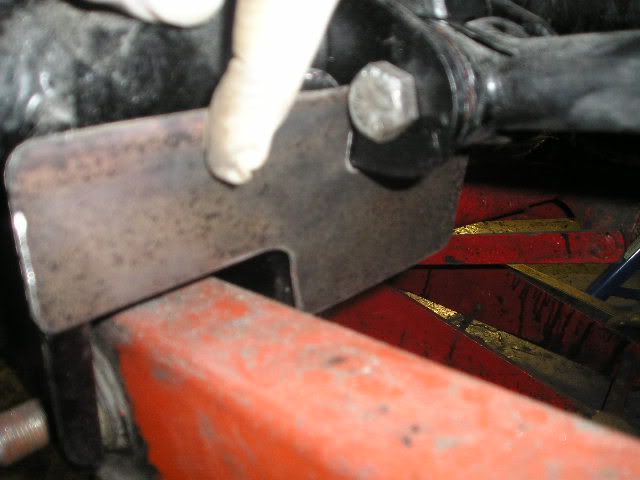 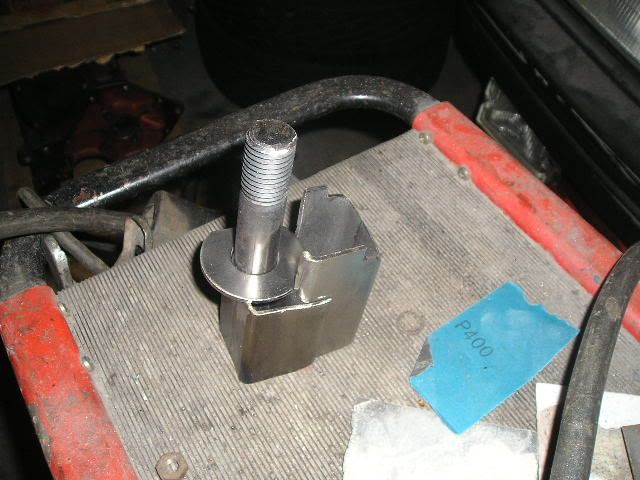 Welded together; that's as far as we got with that today. 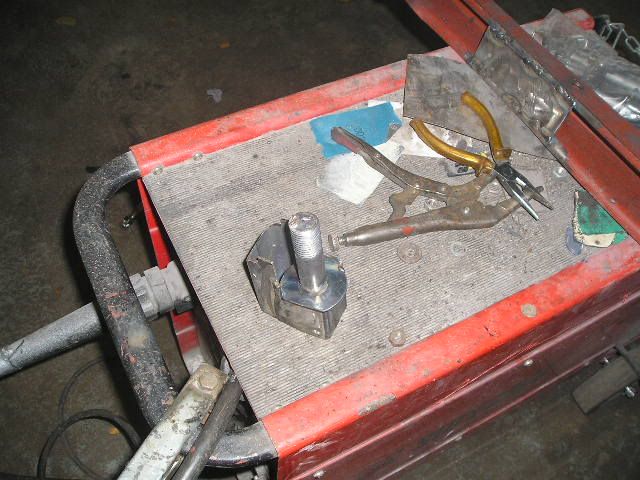 I’m finishing off the trailing arms; reinforcement plates welded in 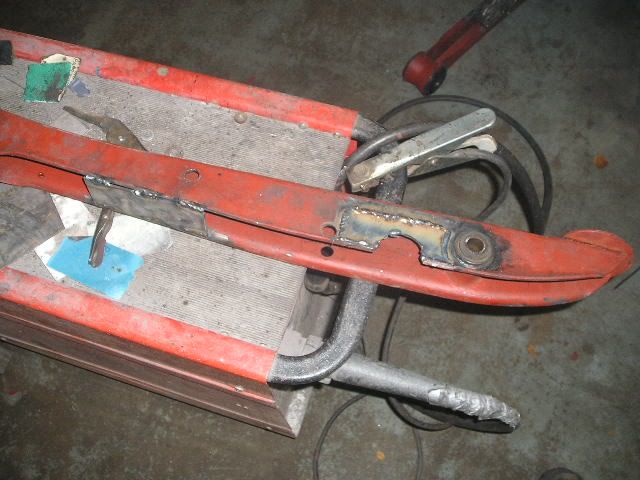 Cleaning up... 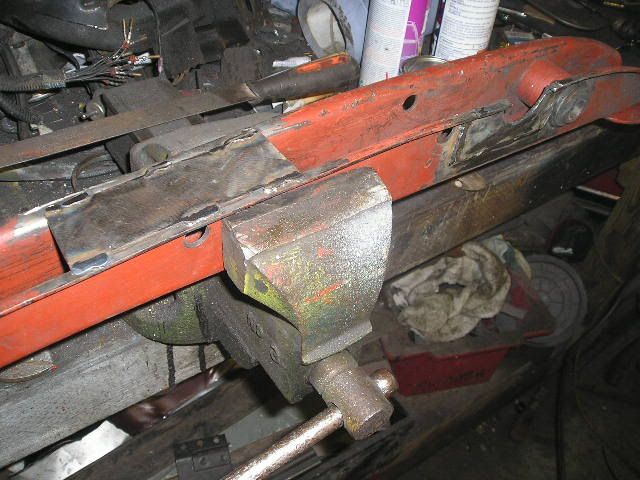 Removing the rear bushes. I didn't do this earlier because I needed bushes in the arm for test fitting the axle, but I didn’t want to damage my new polybushes by welding nearby. However, I've now lost the new bushes.... must be somewhere safe! 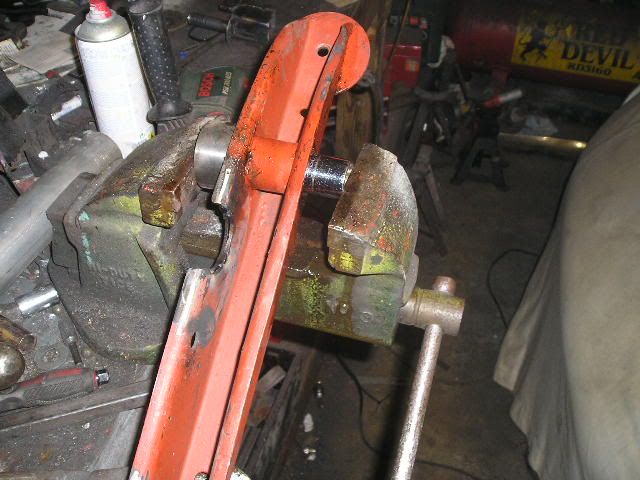 Primed 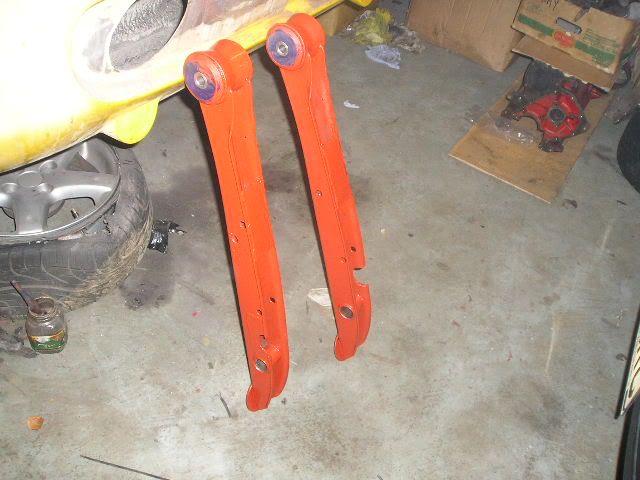 Rear bodywork Rear bodyworkSmall rust hole cut out near the back of the left rear wheelarch 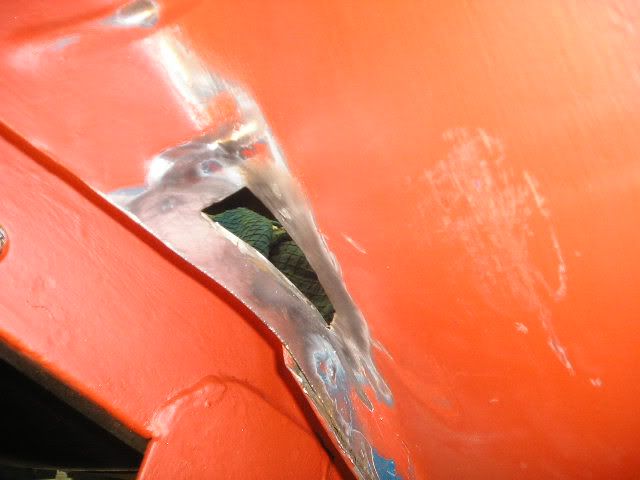 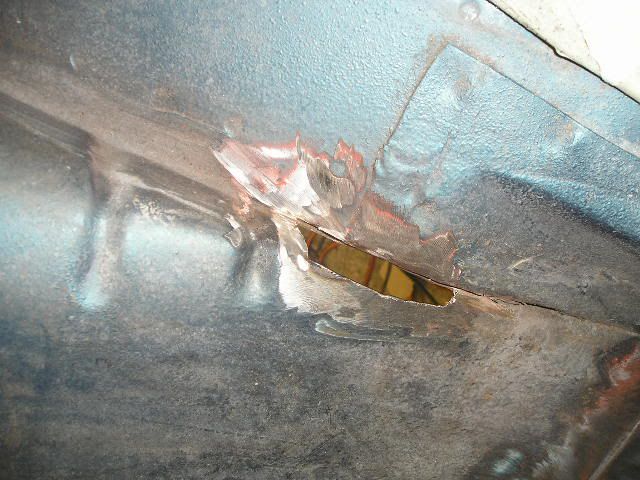 Repair section made to fit (to be welded later) 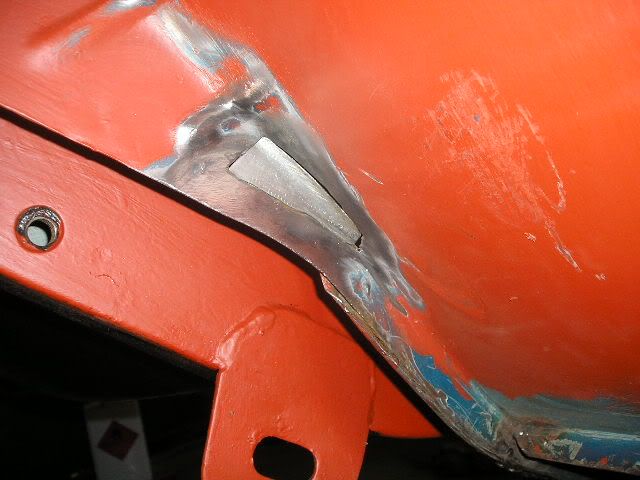  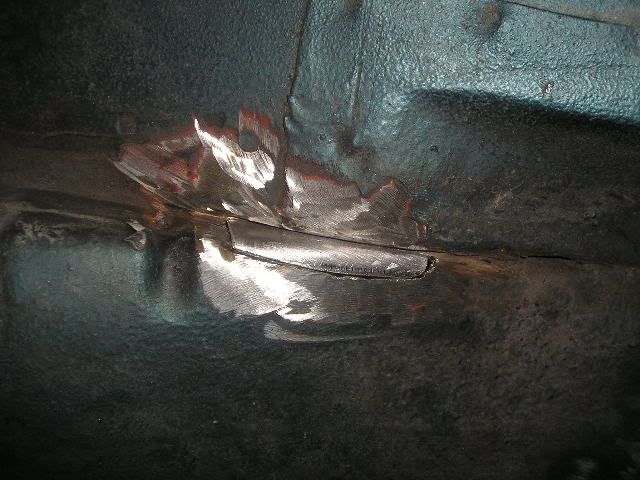 Cutting out the rusty spare wheel wells. 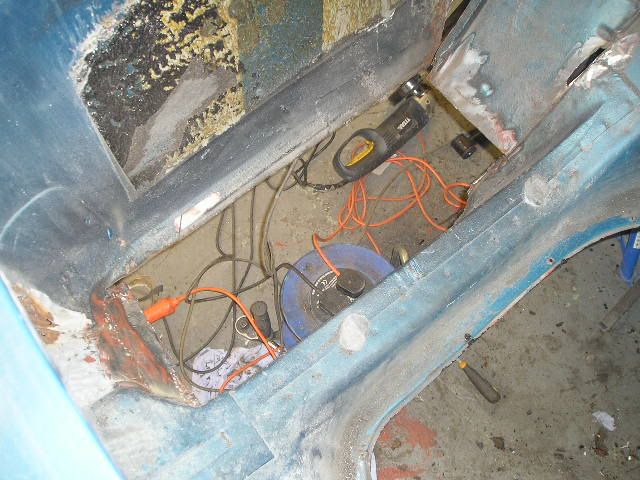 Pretty nasty! Some very crude old repairs 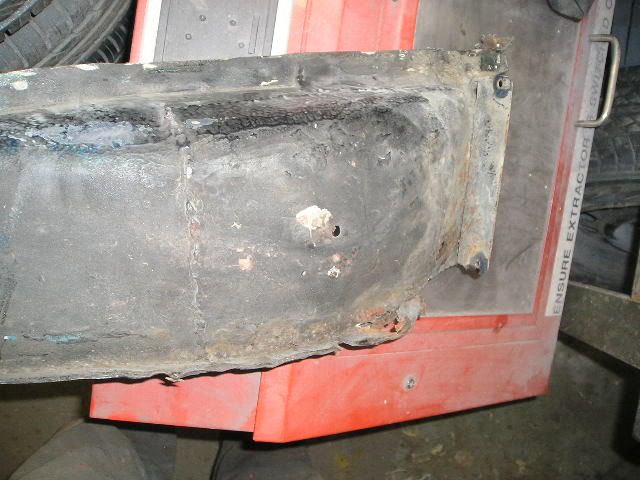 Old and new. I am replacing with '74-onwards wells because they are wider and a neater design. 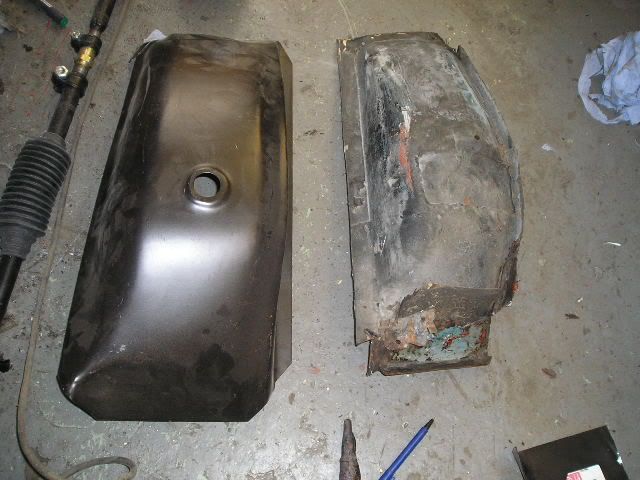 Initial test fit, with the wheel well trimmed as necessary 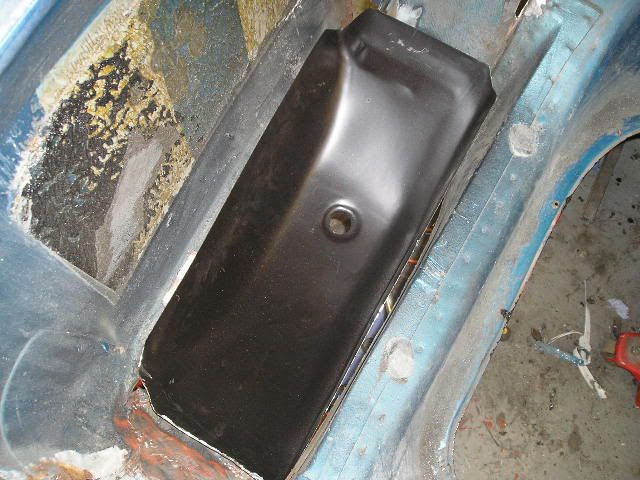 Steve cleaned out the boot, removing all old underseal and sound deadening and removing the paint wherever there is any trace of rust.  Found some new rust. There is a badly pitted area on the flat section just in front of the wheel well. It is not holed, and looks perfect from the other side, but I will cut this out and replace with new steel. 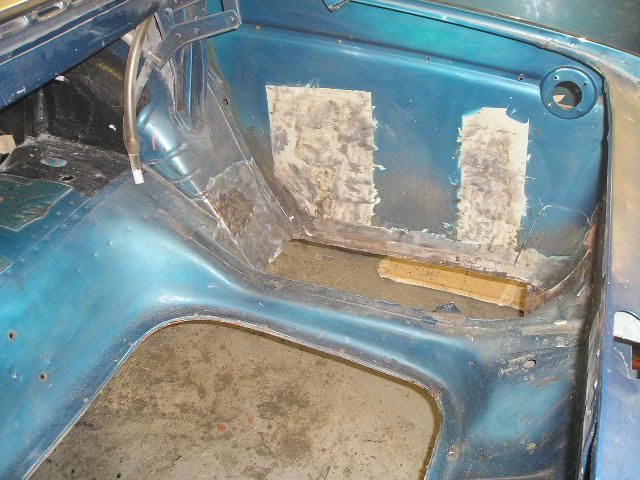 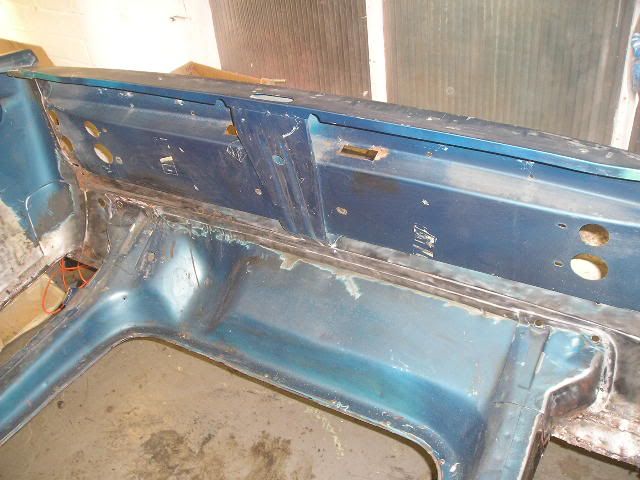 This side's had accident damage in the past. We're pretty sure the marks are where something was welded to the outside of the wing to pull out a dent. 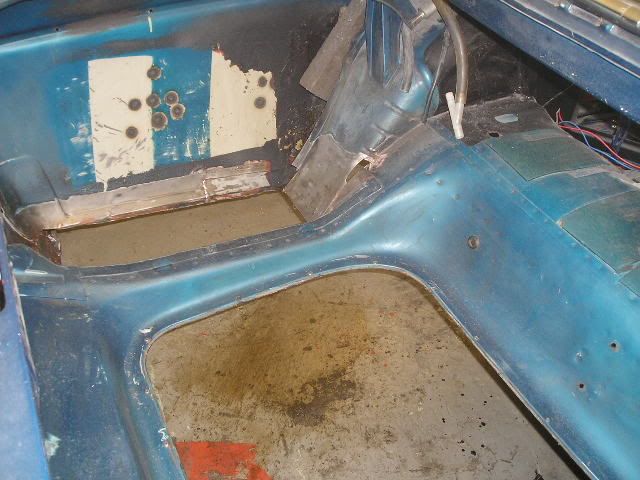 That’s all for today. Cheers John & Steve |
| |
|
|
cozjon
Part of things
Posts: 253
|
|
Oct 11, 2009 11:49:32 GMT
|
|
wow just read this from page 1 some amazing work here you've got some skills. keep up the good work.
|
| |
|
|
johnrh
Part of things
Posts: 958
|
|
Oct 11, 2009 19:35:31 GMT
|
wow just read this from page 1 some amazing work here you've got some skills. keep up the good work. Many thanks. I'm still really enjoying it, which is the main thing. John |
| |
|
|
|
|
|
Oct 11, 2009 20:13:45 GMT
|
Nice to see this progressing well! This is a very neat bit of cutting... What tool did you use? If that was my work I'd have grinder marks all around it and bubbling, scorched paint... ;D |
| |
|
|
|
|