|
|
1967 Morris Minor Robinxr4i
@robinxr4i
Club Retro Rides Member 143
|
|
|
Must be so gutting seeing all your hard work go up in smoke! I remeber chatting to you at RR07 too, I was on the same track session as you, my Sierra was gold back then ;D Your Minor is lovely! Hope you get your Mojo back soon  |
| |
Sierra - here we go again! He has an illness, it's not his fault.
|
|
|
|
madmog
Club Retro Rides Member
Posts: 1,160
Club RR Member Number: 46
|
1967 Morris Minor madmog
@madmog
Club Retro Rides Member 46
|
|
|
Must be so gutting seeing all your hard work go up in smoke! I remeber chatting to you at RR07 too, I was on the same track session as you, my Sierra was gold back then ;D Your Minor is lovely! Hope you get your Mojo back soon  I remember you. You still haven't got that bonnet to close properly then? ;D Just teasing. Thanks mate. That's quite a different colour you have now. Mojo more or less back. I think  That reminds me I still have to give away some vices I got from Rod a few years ago. |
| |
|
|
93fxdl
Posted a lot
   Enter your message here...
Posts: 2,019
|
|
|
|
|
my dealings with such scientific things such as "stand off" are pretty limited but straining my grey cells to the utmost to remember, there was an article by david vizard in hot car magazine back in the 70s which mentioned this and as far as i can remember it was caused by the inlet valve closing which created a reverse pulse out of the inlet which would carry fuel with it, and the answer was either longer ram pipes or an air box to contain the fuel vapour until the valve opened again and sucked it back into the engine
ttfn glenn
|
| |
|
|
madmog
Club Retro Rides Member
Posts: 1,160
Club RR Member Number: 46
|
1967 Morris Minor madmog
@madmog
Club Retro Rides Member 46
|
|
|
|
Hmm most useful to know thanks 93fxdl
|
| |
|
|
madmog
Club Retro Rides Member
Posts: 1,160
Club RR Member Number: 46
|
1967 Morris Minor madmog
@madmog
Club Retro Rides Member 46
|
Jul 22, 2009 16:51:39 GMT
|
To update, I've sent the bodyshell off to be strengthened and repaired. This isn't related to the fire but needed doing anyway. Since I have to strip down the engine bay, it's a good time to bite the bullet with the welding. The engine bay was Hammerited by me many years ago in some discontinued colour that was going cheap - then touched up as and when leaving a patchy finish. I'll paint strip that off when the shell comes back, in the meantime I'm cleaning and tidying other bits. Firstly I'll sort the braking system. I fitted a Marina pedal box many years ago, and there are two things to rectify. Firstly, the master cylinder and servo were toasted so I need to replace and secondly the corroded aluminium and hammerite on the pedal assemble casting looks awful. So....  Having paint-stripped and partly dremelled  Cardboard template of the shape I need to blank off the depressions  To make the Marina pedals fit the Minor footwell in the right places I had to heat and bend. Unfortunately the only source of heat I had in the old days was my arc welder. PIC HERE Angle grinder cleaned off this mess  0.5mm aluminium sheet to blank off the depression and old hydraulic clutch hole.  aluminium cut to shape easily with a kitchen scissors (hey I'm working in a spare bedroom not a factory!  ) Stuck in with epoxy resin and bolted tight into position. The plating isn't structural, purely to clean things up. So Epoxy is easily strong enough and the plate will be held firm by bolts anyway.  If I had more patience I could sand and polish the casting to a near mirror finish and lacquer it but I don't want a blingy engine bay so rattle cans it is. Etch primer, filler primer, light sanding then gloss black I've found that the post 89 Mini has a servo with the same bolt pattern to firewall as the Marina (not to the master cylinder but i'll replace that as well). Unfortunately that bolt pattern is 45 degrees out - the Master would be tilted over 45 degrees. However as I plan to pick up a servo and master secondhand and then rebuild, I think I will be able to re-assemble the two halves of the Servo at the correct angle for the new application. As stated in a previous posting, I was looking for a system that would have spare parts for some time to come. The Marina servo and master worked very well but are unobtainable new as far as I can tell and rebuild kits for the servo are expensive. The Mini servos and master cylinders are available new from several suppliers and their rebuild kits are considerably cheaper. I may need to fit a brake proportioning valve - or not. The original dual circuit Marina setup had a device that would set off a warning light if one circuit lost pressure. That had two inlets from the master cylinder and three outlets. As it happens it made bleeding the brakes a pain as it would set off the warning circuit and need to be dismantled to reset, meaning the brakes would need bleeding... I suspect it may have proportioned the circuits too. As it's Marina I'll design it out of the final system |
| |
Last Edit: Sept 21, 2011 20:54:05 GMT by madmog
|
|
madmog
Club Retro Rides Member
Posts: 1,160
Club RR Member Number: 46
|
1967 Morris Minor madmog
@madmog
Club Retro Rides Member 46
|
Sept 5, 2009 22:43:53 GMT
|
Now stripped everything out of the engine bay in order to paint strip and repaint...  Doesn';t look it but this is with most of the paint off. I orgiinally painted the engine bay with Hammerite - back when that it was the last word in rustproofing. To be fair it had lasted well where it hadn't burned but looked awful everywhere.  Rust took hold really quickly, as I finished off the paint stripping in the rain. On the right the paint had burned off and rusted anyway and a lot of the 'rust' in the picture is actually metal dust from the angle grinder.  Many hours later with a wire brush in an electric drill. Are the anglegrinder wire brushes quicker? More difficult? I've probably knackered my electric drill doing this.  Most of the holes and gouge marks will be filled.  Finnegans Number 1/Browsn Velvet followed by Halfords zinc primer. The Halfords stuff went on really nicely for rattle cans. Hope the Ford colour that looks like my Morris Minor colour goes on as well. Seam sealed and epoxied the holes from behind in preparation for filler tomorrow. Just to give an idea of time, paint-stripping the engine bay took a couple of evenings earlier in the week. Start to finish on these pics took most of the day today. |
| |
|
|
madmog
Club Retro Rides Member
Posts: 1,160
Club RR Member Number: 46
|
1967 Morris Minor madmog
@madmog
Club Retro Rides Member 46
|
Sept 17, 2009 22:15:40 GMT
|
  Quite a contrast:) I had tried a Ford colour which had a very similar colour on the cap to BMC Trafalgar blue but looked nothing like when applied. It also exposed lots of score marks and sanding marks which I didn't see with the primer. So I bit the bullet and got some rattle cans mixed up from Halfords. It was interesting watching these being made up. I imagined it would be done on a computerised machine like the ones in B&Q and the like but it wasn't. It was much more simple - pour specific weights into a plastic cup on a weighing scale, giving it a bit of a mix with a spatula then pouring it into what looked like an upturned dishwasher bottle with the top cut off pushed into the top of an aerosol can. These are put into a pump mechanism where the paint mix in the washing up container is compressed manually into the aerosol can until the back pressure equalises. Apparently one of the liquids in the mix is an accelerant so it's not just spraying off compressed air pressure. Hmm a lot simpler to watch than describe. So having done yet more sanding and vacuuming and masking with newspaper I got it finished. Still needs a bit of a T cut but at least I can get the suspension back on. and get the car back on its wheels. Al the remaining holes will be sealed with metal plates. I then aim to get some curvy metal or mold some fibreglass to create some false panels to hide some of the gubbins. Whatever it is will be body-coloured to look as standard as possible. The pedal box plate is too square and looks wrong. The curved panel might hide something like fuses, flasher unit, wiring, washer bottle etc.  I've seen the lever arm shockers polished up to a mirror finish before but they look good enough in dull aluminium. I re-oiled them. Since I use coilovers, the lever arms no longer dampen they just act as an upper mount. I did file off the rough casting edges just to tidy them up. Also chassis blacked the front half of the car underneath, wire brushing away old hammerite again. So next thig is to sort the brake system. I've settled on a Mini servo and master (left in the pic) as parts are more widely available and cheaper than Marina parts. The PCD of the bolts to the firewell is the same but the angle is 45 degrees out. I'll be stripping down the Mini and Marina servos with the aim of rebuilding one Servo that will work off Mini servicable items. The only part that I'll be using off the Marina is hopefully the pushrod that attaches to the brake. The Mini one is too long. I might also use the back of the Marina servo if it is identical to the Mini one but for the 45 degree angle.  |
| |
|
|
madmog
Club Retro Rides Member
Posts: 1,160
Club RR Member Number: 46
|
1967 Morris Minor madmog
@madmog
Club Retro Rides Member 46
|
Sept 19, 2009 23:42:36 GMT
|
The Mini servo is clearly designed to be twisted apart - I did it like this: 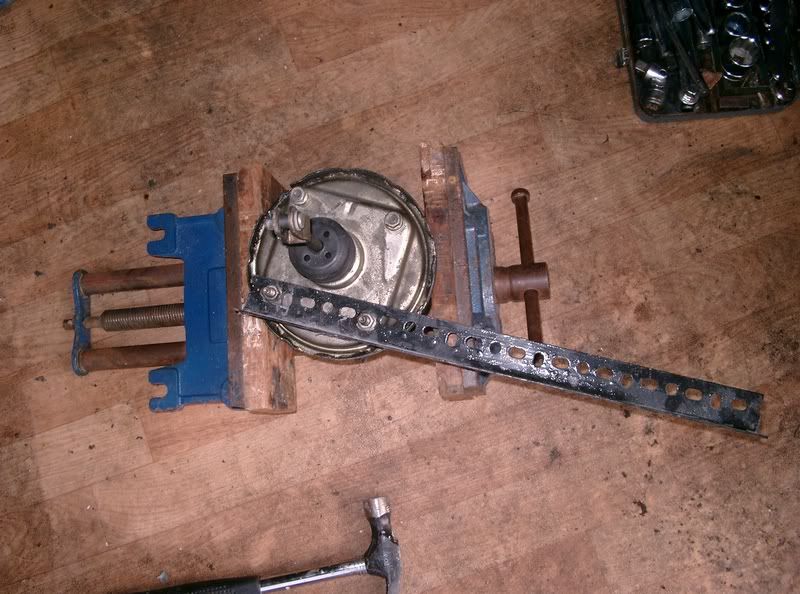 The Marina one isn't. No doubt professionals have a de-straking tool to do it. I thought I would need the rod that attaches to the brake pedal so butchered it apart to see what was inside... 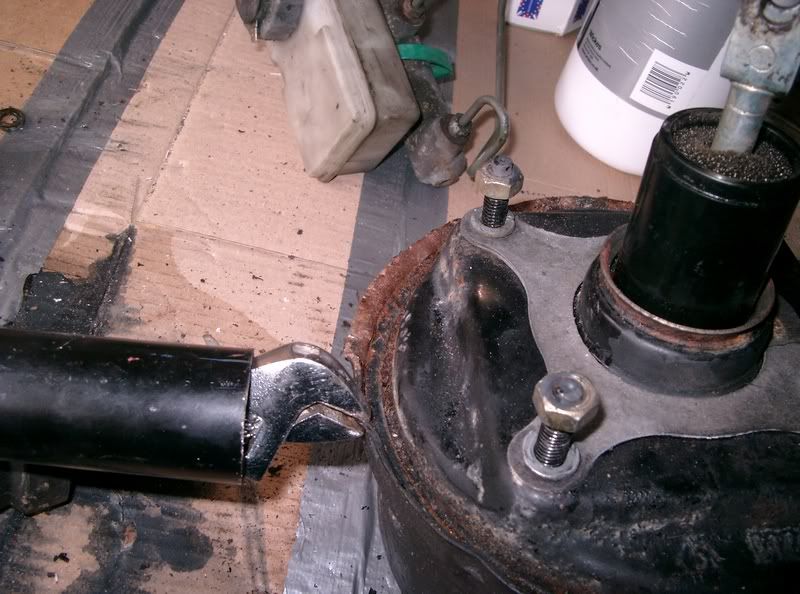 Interestingly, the rubber diaghpram was in good condition and as far as I can tell is identical to the one in the Mini - despite the servo pots and other parts being quite different. (I'm replacing as there was fire damage to the outside of the Marina servo pot and Marina parts are harder to find) 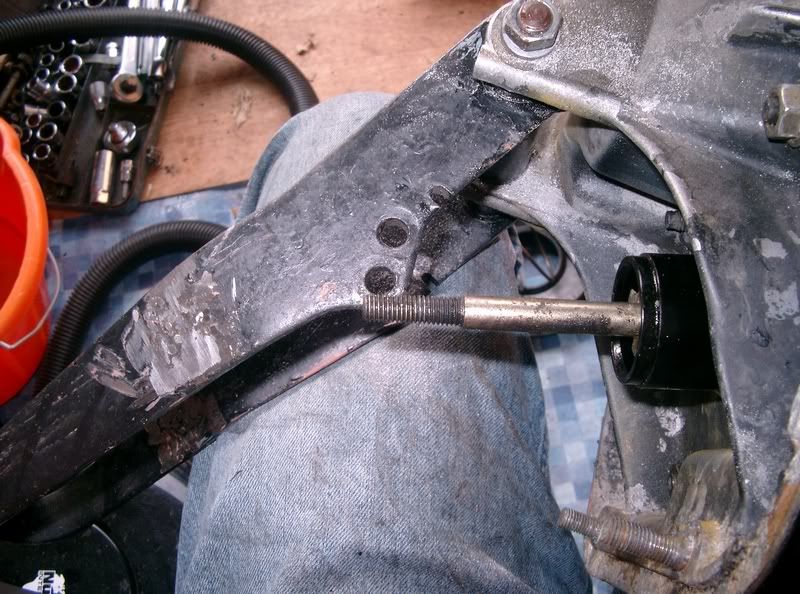 The Mini rod to the brake pedal isn't too far out so I can use the Mini servo pretty much as designed. This makes things easier down the line as I don't have to remember or document the differeing parts. I cut some of the thread out and re-drilled the end 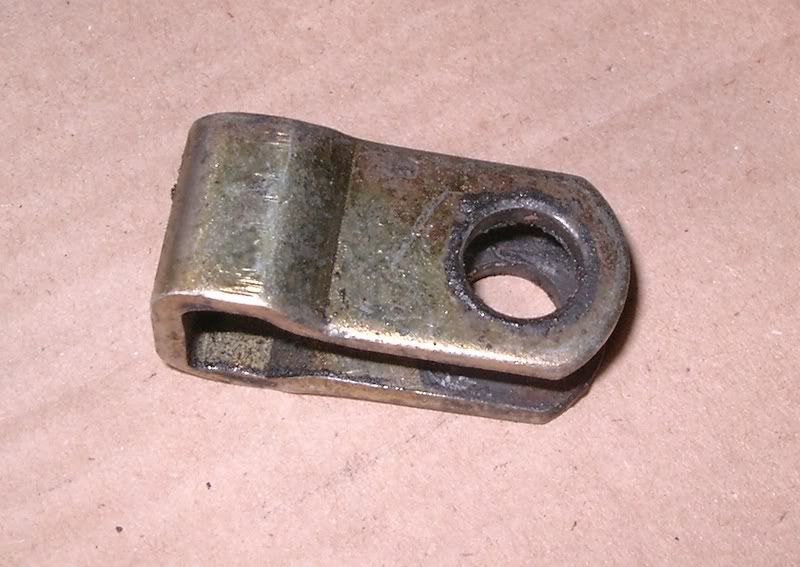 And then it's spot on: 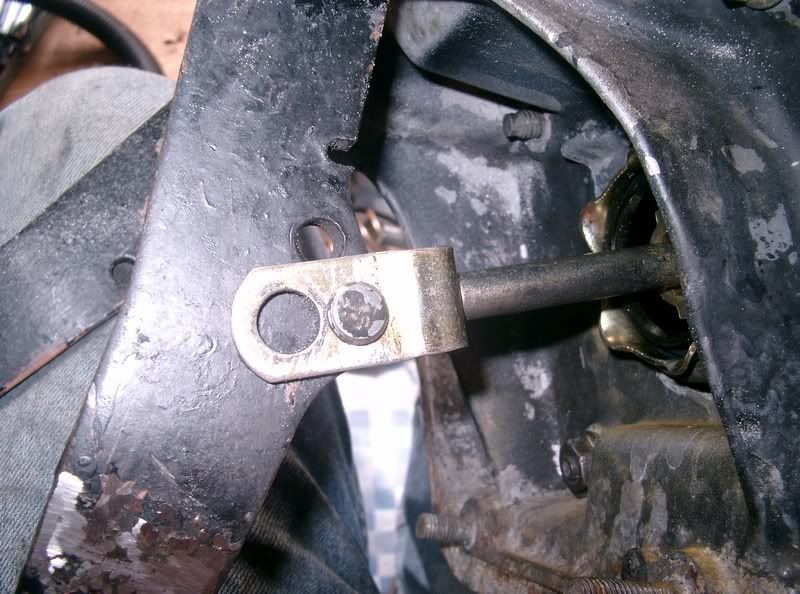 Much degreasing and derusting later 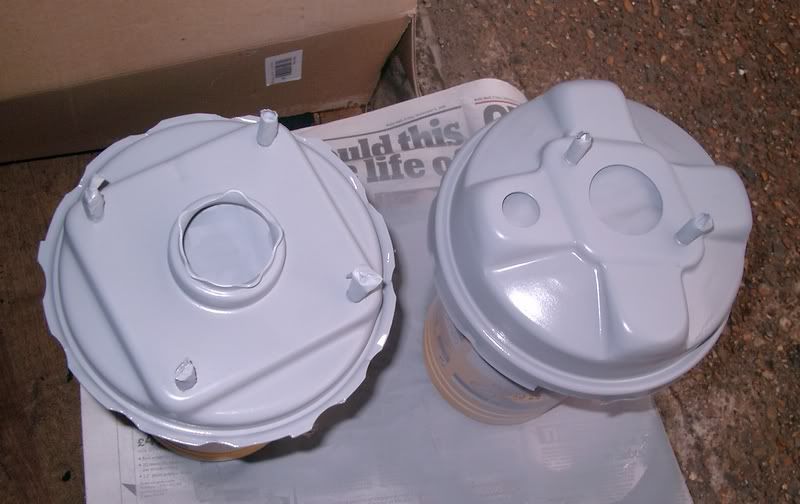 I'll spray black tomorrow and then just need the rebuild kit to turn up |
| |
Last Edit: Sept 19, 2009 23:45:50 GMT by madmog
|
|
mirafioriman
Posted a lot
   My next project.......
Posts: 1,361
|
|
Sept 19, 2009 23:57:47 GMT
|
|
Great work. The engine bay looks really good. The servo parts look good too now they are cleaned and primed up. I'm looking forward to future updates.
|
| |
|
|
|
|
|
Sept 20, 2009 3:04:46 GMT
|
Hmm a lot simpler to watch than describe. A lot simpler to watch than do too  Best thing about not working for Halfords anymore is not spending 20 minutes mixing paint, only for something to go wrong and it all to spray out of the bloody can as soon as you've finished pumping it up  ;D Back on topic: cracking thread, very informative. Some elegant thought-out solutions too, especially the wiring to your seats; looks like a lot of work to get a really simple-looking end product. Look forward to seeing you rebuilding it, better and stronger  |
| |
1989 Peugeot 205. You know, the one that was parked in a ditch on the campsite at RRG'17... the glass is always full. but the ratio of air to water may vary. |
|
|
|
|
|
|
Sept 20, 2009 3:04:53 GMT
|
Hmm a lot simpler to watch than describe. A lot simpler to watch than do too  Best thing about not working for Halfords anymore is not spending 20 minutes mixing paint, only for something to go wrong and it all to spray out of the bloody can as soon as you've finished pumping it up  ;D Back on topic: cracking thread, very informative. Some elegant thought-out solutions too, especially the wiring to your seats; looks like a lot of work to get a really simple-looking end product. Look forward to seeing you rebuilding it, better and stronger  |
| |
1989 Peugeot 205. You know, the one that was parked in a ditch on the campsite at RRG'17... the glass is always full. but the ratio of air to water may vary. |
|
|
|
|
Sept 20, 2009 10:57:41 GMT
|
|
That's very nice work, the engine bay is looking class now. I think I was chatting to you at the gathering? I was the Irish fella with the whiskey.
|
| |
|
|
madmog
Club Retro Rides Member
Posts: 1,160
Club RR Member Number: 46
|
1967 Morris Minor madmog
@madmog
Club Retro Rides Member 46
|
Sept 22, 2009 20:43:57 GMT
|
That's very nice work, the engine bay is looking class now. I think I was chatting to you at the gathering? I was the Irish fella with the whiskey. Thanks:) Skoda and Golf - yes? I remember talking about Benny Hill not realising that people under a certain age may never have heard of him. (The mad professor from the Italian Job) So I just spent an hour on Youtube looking at Benny Hill vids and other things set to the Benny Hill music:) |
| |
Last Edit: Sept 22, 2009 20:50:19 GMT by madmog
|
|
madmog
Club Retro Rides Member
Posts: 1,160
Club RR Member Number: 46
|
1967 Morris Minor madmog
@madmog
Club Retro Rides Member 46
|
Sept 22, 2009 20:59:08 GMT
|
Great work. The engine bay looks really good. The servo parts look good too now they are cleaned and primed up. I'm looking forward to future updates. Thanks the servo's black now but I've come to a stop due to a cold/chest infection. Lots of free time but no strength to do anything. Intreresting selection of big engined Mercs and Fiats there  |
| |
|
|
madmog
Club Retro Rides Member
Posts: 1,160
Club RR Member Number: 46
|
1967 Morris Minor madmog
@madmog
Club Retro Rides Member 46
|
Sept 22, 2009 21:06:15 GMT
|
Hmm a lot simpler to watch than describe. A lot simpler to watch than do too  Best thing about not working for Halfords anymore is not spending 20 minutes mixing paint, only for something to go wrong and it all to spray out of the bloody can as soon as you've finished pumping it up  ;D Back on topic: cracking thread, very informative. Some elegant thought-out solutions too, especially the wiring to your seats; looks like a lot of work to get a really simple-looking end product. Look forward to seeing you rebuilding it, better and stronger  Thanks rich606. Funny, I did a lot of things in a rush in the past but something has clicked where I try to do it slower and better now. Sometimes spend more time thinking and asking questions than in actual execution. Still anything that's novel still sometimes takes a few go's to get right. Not sure about the Mini master cylinder, the Marina pedal box angles it slightly and the reservoir isn't that big. Might see if there's something that's a better fit reservoir wise. that fits the ini master cylinder. Wonder if to separate reservoirs would work better. More research to do... |
| |
|
|
|
|
1967 Morris Minor poproddernot
@GUEST
|
Sept 22, 2009 22:43:45 GMT
|
hi, some excellent work there, not pig flu is it!!!  ;D |
| |
|
|
madmog
Club Retro Rides Member
Posts: 1,160
Club RR Member Number: 46
|
1967 Morris Minor madmog
@madmog
Club Retro Rides Member 46
|
Sept 23, 2009 18:02:36 GMT
|
hi, some excellent work there, not pig flu is it!!!  ;D Many thanks  Don't think so [cough] [spit] [wheeze]  |
| |
|
|
|
|
|
|
|
|
Nice work there. So what sort of power is the latest setup pushing out? I think I've finally got my Fiat twin cam to run properly without overheating, though the car still needs quite alot done (mainly wiring) before it can take to the road.
Out of interest, are you using the Fiat type split propshaft with centre bearing? Mine has worn out and new ones are £40 from E-bay, for a floppy bit of rubber that doesn't look like it will last long. I was wondering if there were any better alternatives?
|
| |
|
|
madmog
Club Retro Rides Member
Posts: 1,160
Club RR Member Number: 46
|
1967 Morris Minor madmog
@madmog
Club Retro Rides Member 46
|
Dec 16, 2010 11:32:41 GMT
|
Nice work there. So what sort of power is the latest setup pushing out? I think I've finally got my Fiat twin cam to run properly without overheating, though the car still needs quite alot done (mainly wiring) before it can take to the road. Out of interest, are you using the Fiat type split propshaft with centre bearing? Mine has worn out and new ones are £40 from E-bay, for a floppy bit of rubber that doesn't look like it will last long. I was wondering if there were any better alternatives? Oops, only just spotted your question. Don't know about power, I was due to get car rolling roaded and the carbs fine-tuned the day after the fire. Wiring is what I'm on too now, should take some photos and update this thread. As for prop shaft, mine is spline from Fiat gearbox welded to UJ, prop tube, 2nd UJ to suit Escort back axle. There used to be a rubber doughnut but it's a bit bulky in the trans tunnel and 2 UJs should be fine. Oh, this is with 131 gearbox that presents a spline. There's an almost identical Fiat 131 gearbox that has a flange rather than a splined shaft but principle would be the same. |
| |
|
|
madmog
Club Retro Rides Member
Posts: 1,160
Club RR Member Number: 46
|
1967 Morris Minor madmog
@madmog
Club Retro Rides Member 46
|
Sept 21, 2011 22:08:21 GMT
|
My it's been a while since I updated this thread. I've been putting off sorting out the many pictures. At least i can separate out things more logically rather than splicing simultaneous mini projects and losing continuity. The standard of engine bays I've been seeing at the Morris Minor National rally puts my hotchpotch effort to shame. Adding things in hotch potch over the years had taken its toll style-wise and hand-painted hammerite didn't help. Compare these wonders: 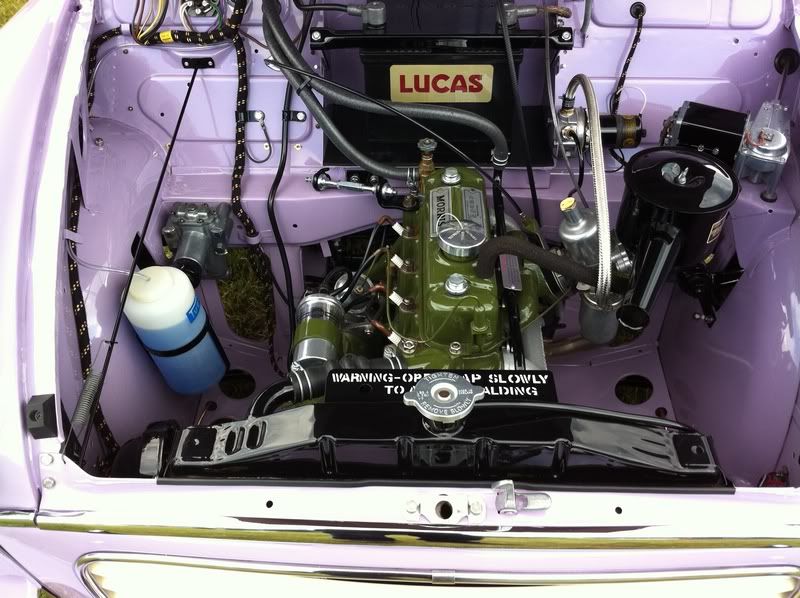 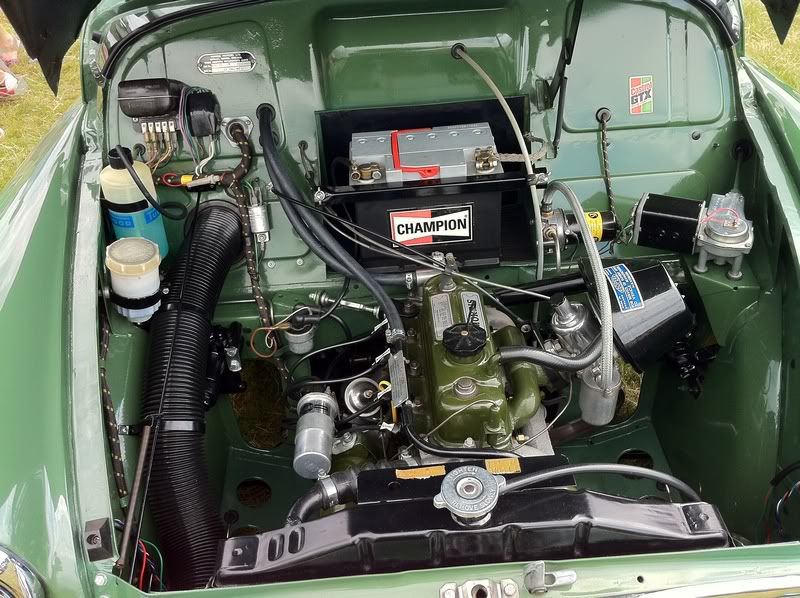 Very nice diesel conversion, massive inspiration to make at least a bit of an effort. Since the fire, I've become much more focussed on getting things right than getting rushed in time for some deadline. 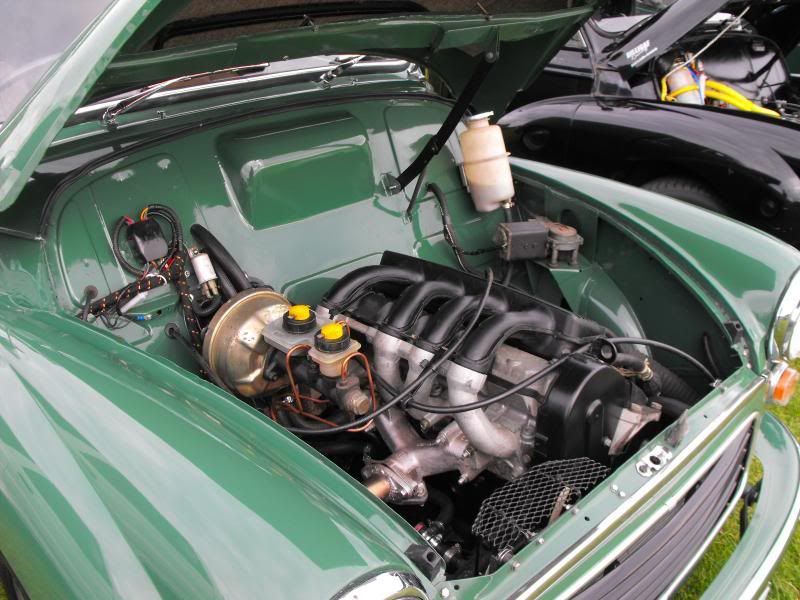 Contrast the former mess. I'm actually going to be fitting more into the engine bay but making it look less, look simple and uncluttered. I was thinking of hiding all of the wiring and brake lines for the super clean look but prefer to be able to run my eye and fingers over brake lines for safety. I might still add one false panel that is easily removable on the left to hide the bulk of the wiring - or not. 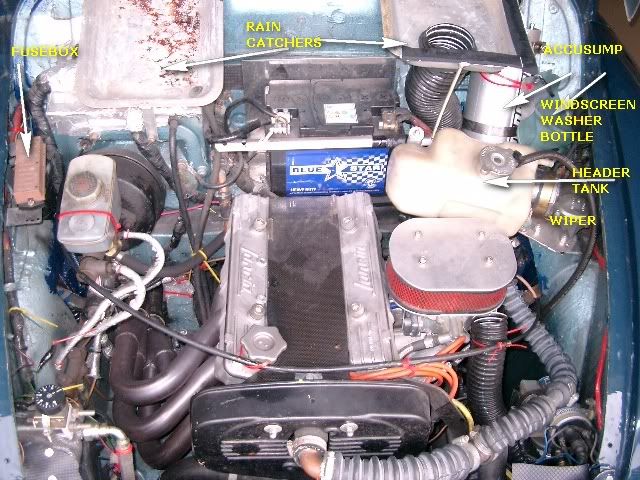 As I'm replacing anything that might be fire damaged, the cam belt will be coming off. It's an interference engine so the cams are locked with the official Fiat locking tool prior to removal. 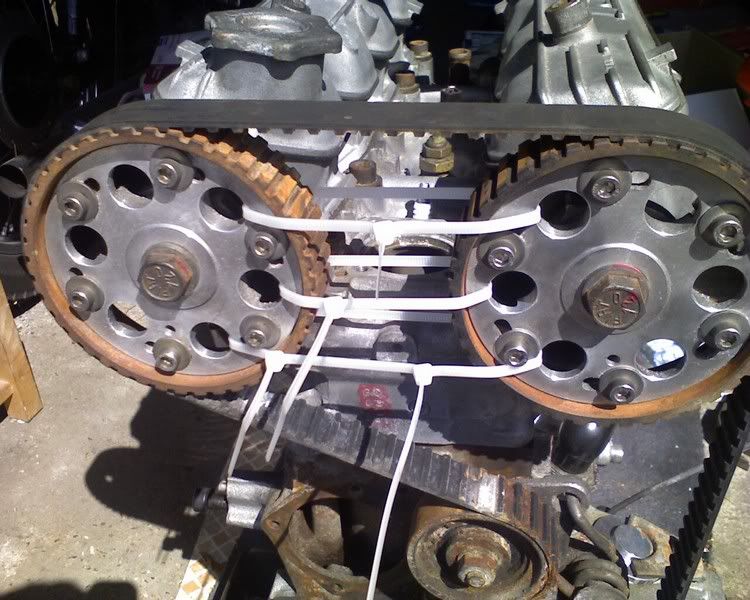 Lots of bits are crusted up with rust and fire extinguisher crud. Looks worse than it is though. 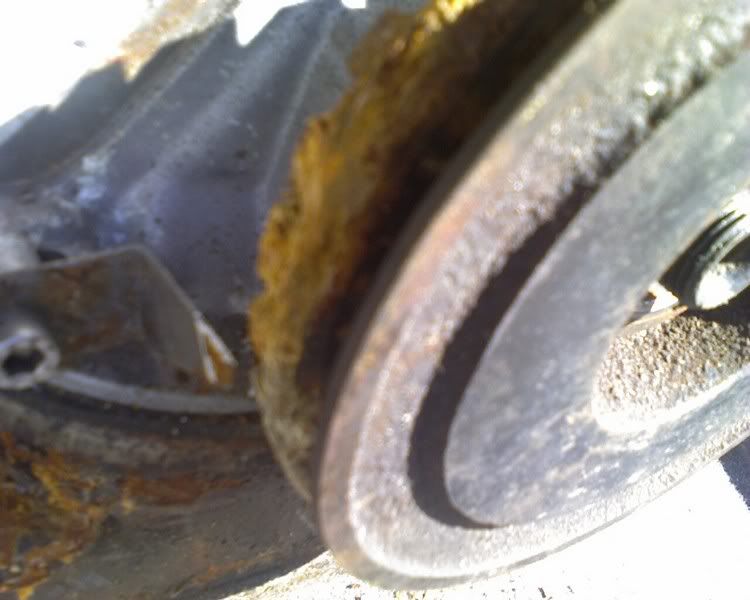 Anti-rust primer on the block 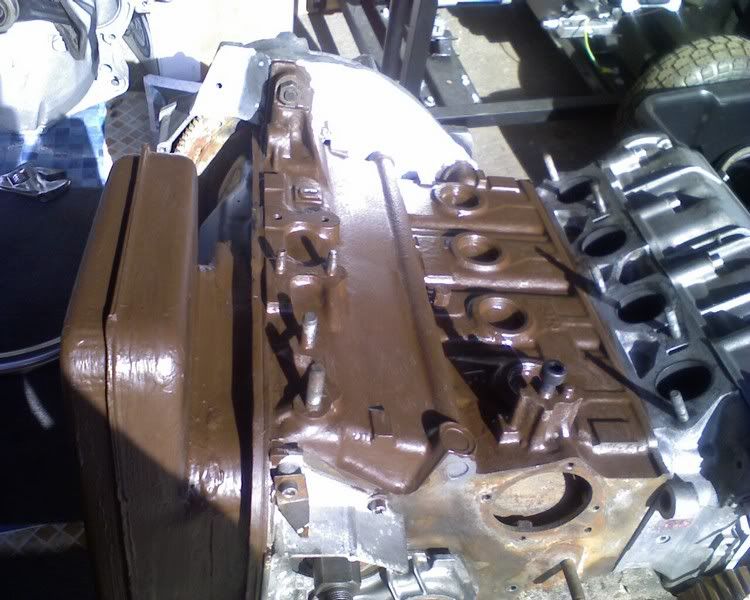 I've got into making up bits & bobs out of aluminium plate. A decent tin snips makes the job so easy compared to the old garden shears* I was using before. *I don't think they were really garden shears. 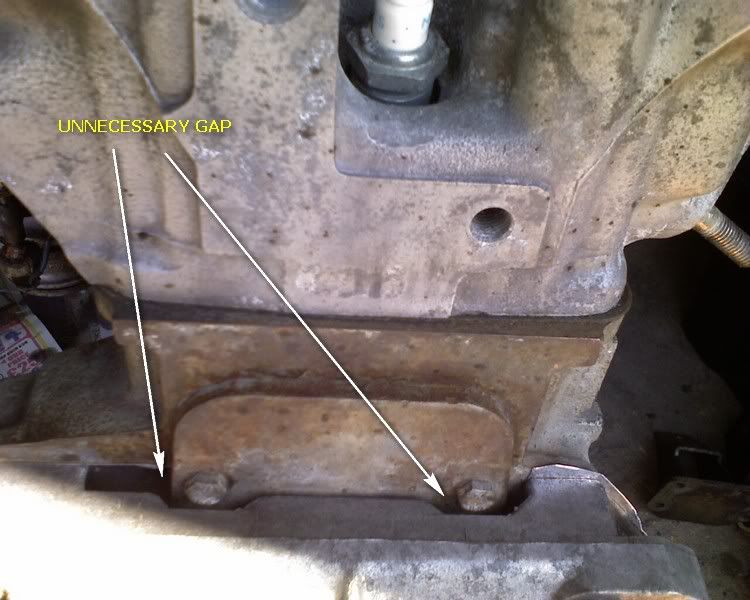 Old lever arch files from office clearouts make great templating material. 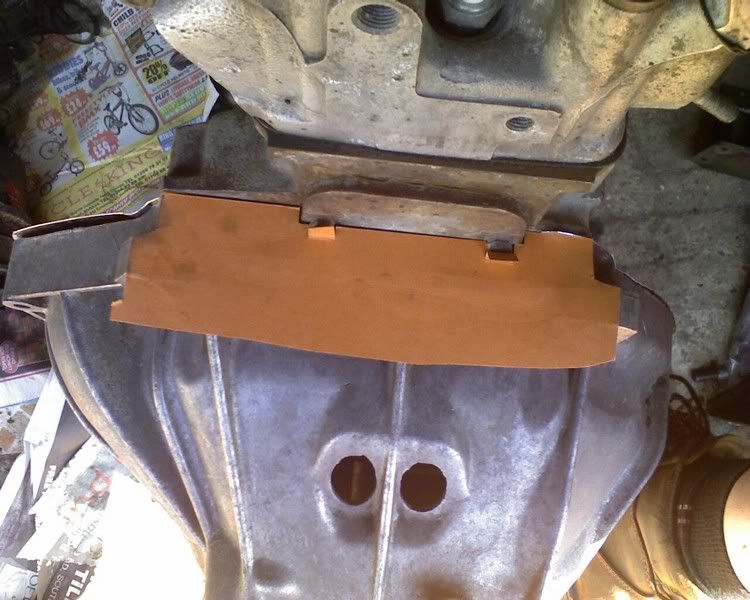 Finished plate. 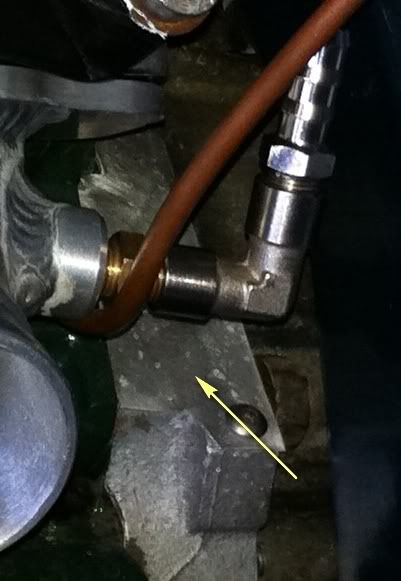 I'd read somewhere that this paint was the same colour as the stuff BMC A series were painted with but it turned out not to be right at all. Too late now. 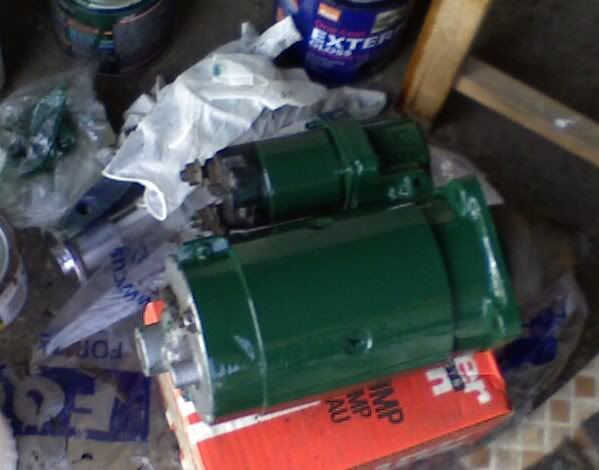 Some of the bits that were to be panted black I tried some household gloss that was lying around to see what it turned out like. Result was that it takes forever to dry and no other paint will stick to it without reacting. 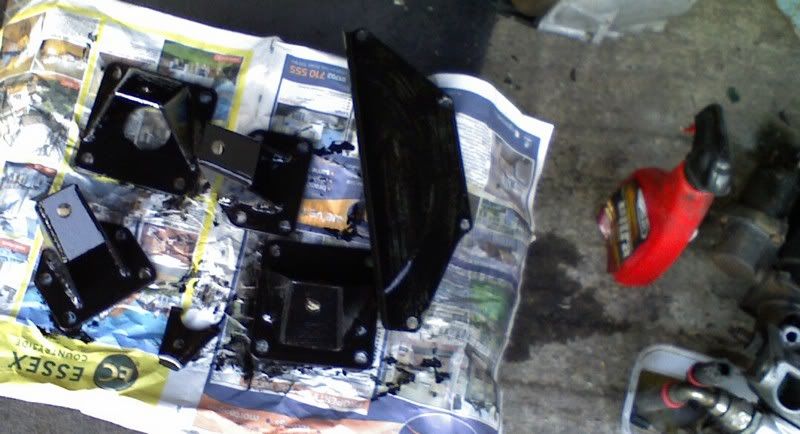 Engine block painted. Wonder if I can go into the congestion charge zone now that I've fitted a green engine ;D.... tumbleweed 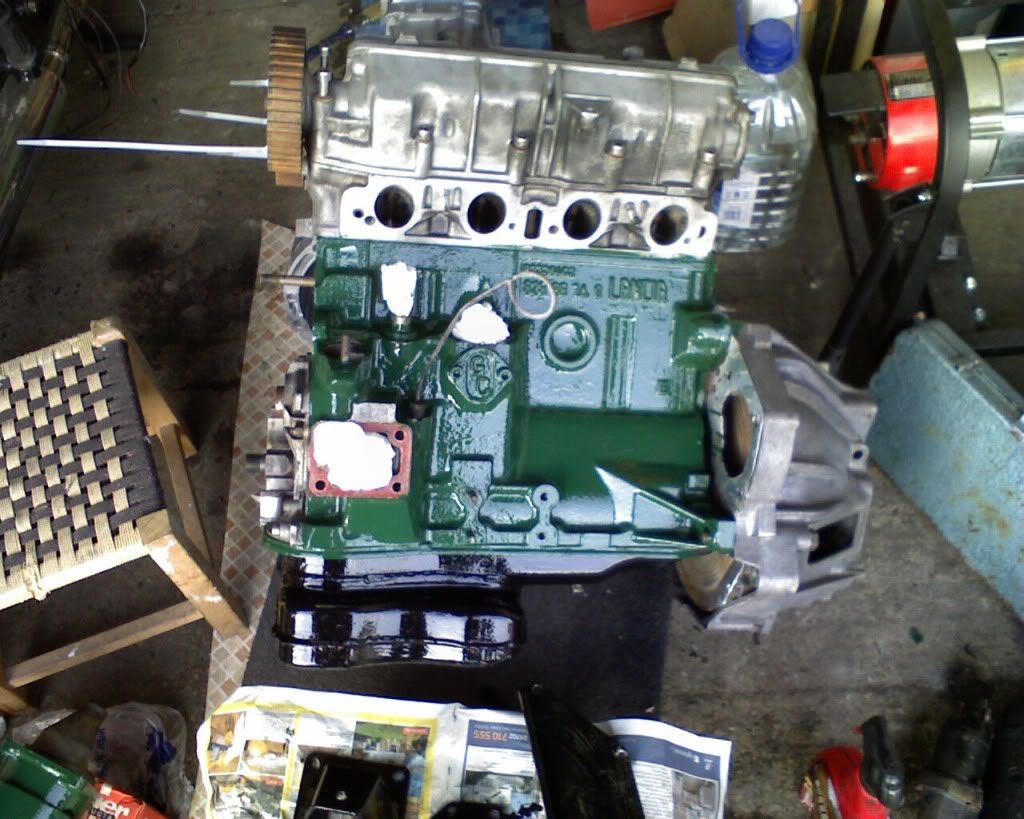 Official Fiat engine transportation device 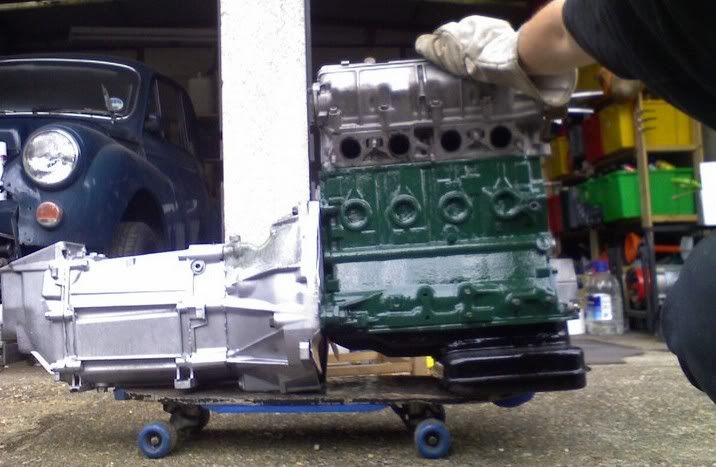 Engine in at last 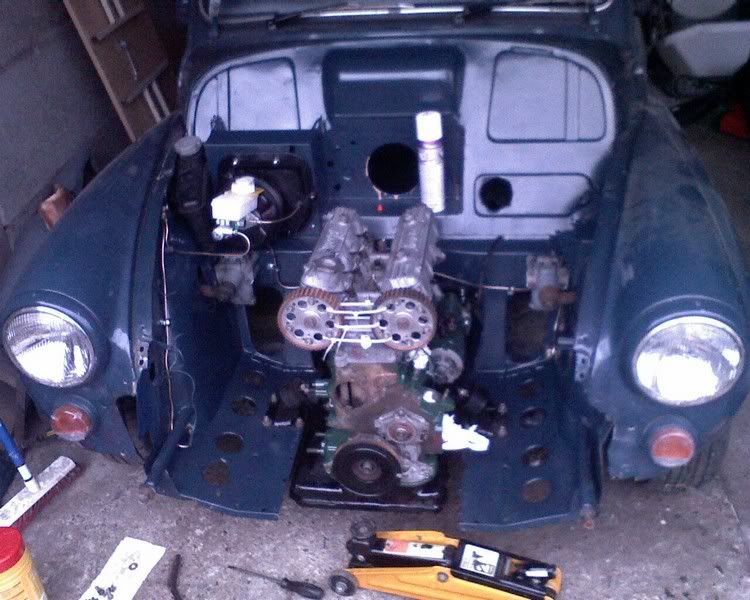 |
| |
|
|
|
|


 That reminds me I still have to give away some vices I got from Rod a few years ago.


 ;D
;D
 ;D
;D


