stevek
Yorkshire and The Humber
Posts: 728
|
|
|
|
I was a bit low about all this after the bank holiday as I had hoped to get more done. I wasn't able to do anything on Sunday because of rain and drizzle all day and I could only spend Monday morning on it and it rained then too! It came out lovely in the afternoon too when I had other commitments to keep. On the Monday I did get the spot welder out for a play on some scrap but I was getting poor results so I was pretty hacked off. After work yesterday I thought I'd have another try but I was still getting poor results, I was setting everything up by the manual but it just wasn't working. I found a post on a Mini forum where a guy had suggested to someone else to ignore the book settings and to set the gap smaller and increase the pressure 'so that you have LOADS of tension'. Low and behold I got some decent looking spot welds out of it. You can see the top half are the failed ones which were bubbling and blowing through. The bottom 8 are after adding more pressure... 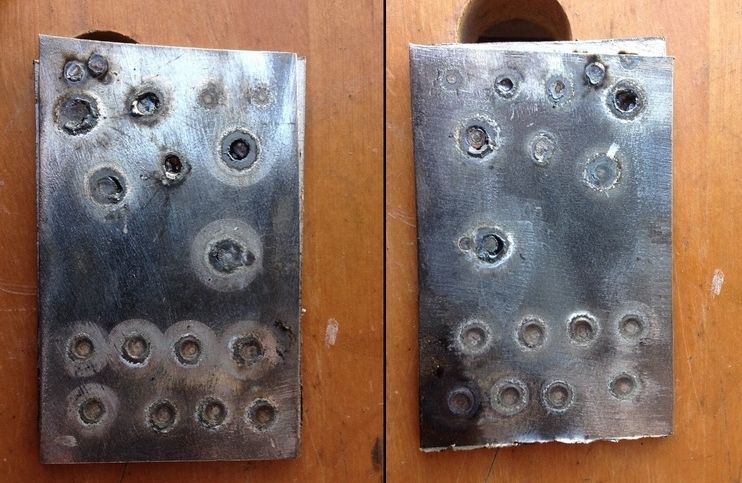 Then I tried destruction testing by battering a chisel inbetween the sheets with a hammer... 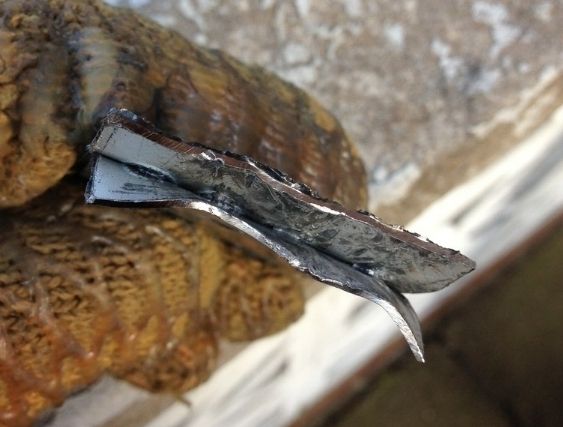 I couldn't separate them like that or by trying to peel them apart with pliers so I think they are good. Interestingly on the left most weld in the picture you can see how little the weld-thu primer has burnt off around the spot weld. It's only burnt back by about 1mm around the spot weld so it should provide some protection to the metal in the seam. -Steve- |
| |
|
|
|
|
razer
Part of things
  Getaway Driver
Posts: 79
|
|
|
|
|
Looking great! What kind of spotwelder?
|
| |
It's not what you drive, it's what drives you.
|
|
|
|
|
|
|
just did a huge 9 page catchup, excellent work  your original welded repairs, even though baby steps at welding, were so thorough i think they would pass the "new owner" acid test. i.e how curse word off the next owner would be at uncovering those repairs. in your case they would be very pleased ! |
| |
|
|
stevek
Yorkshire and The Humber
Posts: 728
|
|
|
|
razer - The spot welder is a Clarke CSW6T. The manual says it needs a 16A socket but I have been running it OK on a 13A plug (a 13A fuse will actually run 20A indefinitely without fusing (BS1362) which I didn't know till looking it up). I did check there was no other large loads on the house circuit I was plugging into and have used 3x2.5mm cable to the spot welder. darrenh - Thanks, I'm glad you think so. The new owner may be less happy uncovering my latest work though  , post coming up...
|
| |
|
|
stevek
Yorkshire and The Humber
Posts: 728
|
|
|
|
Well I have another update for you, last weekend certainly had its ups and downs! Part 1 (Saturday) - I decided to try another new technique and give brazing the a-pillar joints a go, after all what could possibly go wrong! I had my supplies... 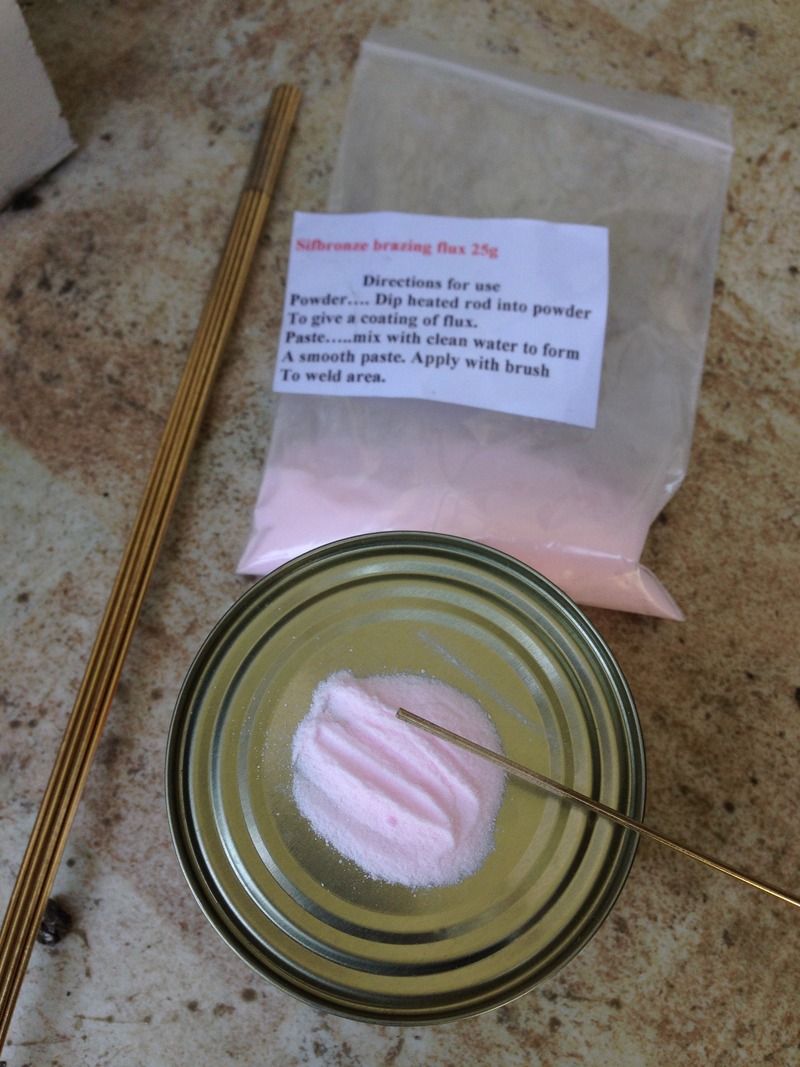 The plan was to use flux with the rods to tin all the surfaces then clean back the flux residue which is acidic while there was access. Hopefully I could then just use heat to bring them together, maybe adding a bit of filler rod too if needed. I only have a hobby type Map-pro (MAPP) gas blow torch which burns quite a bit hotter than regular propane but is definitely NOT proper Oxy-Acetylene. My research lead me to believe I could manage with this kind torch but it was going to be touch and go... 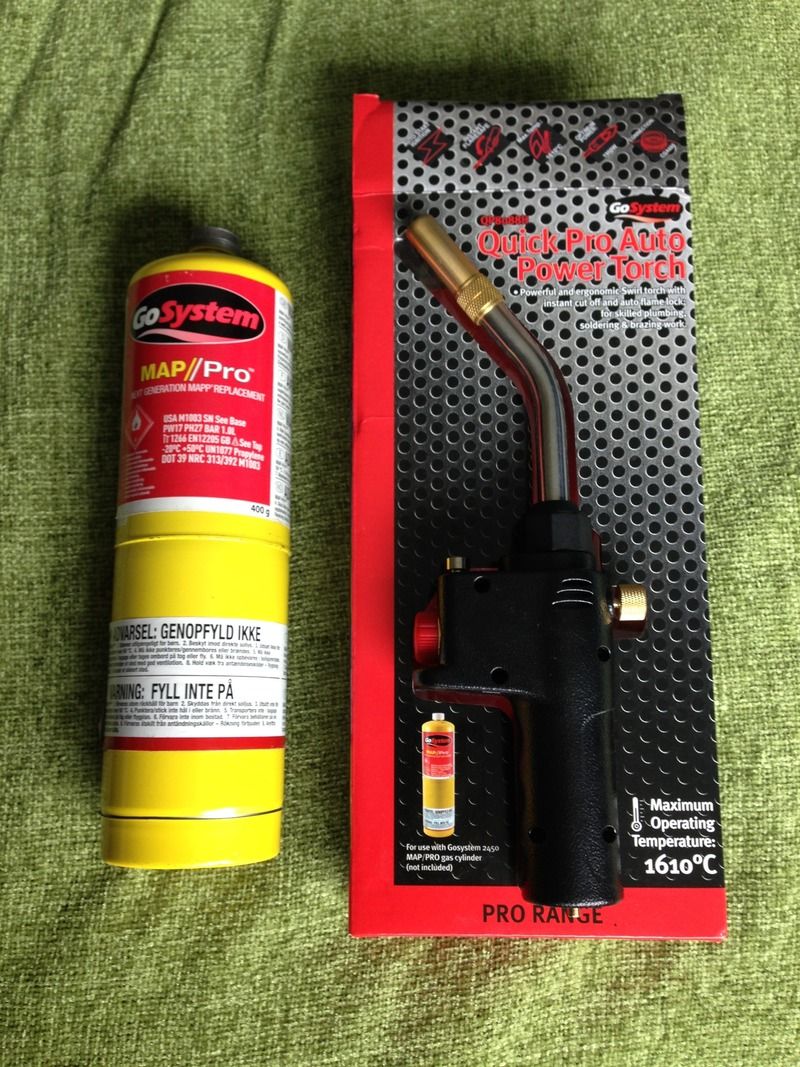 I warmed my rod and dipped it in the flux which kind of stuck to it, no idea how much is supposed to stick so I continued...  I tinned the ends of the 'new' skin OK and sprayed some weld-thru primer up near it... 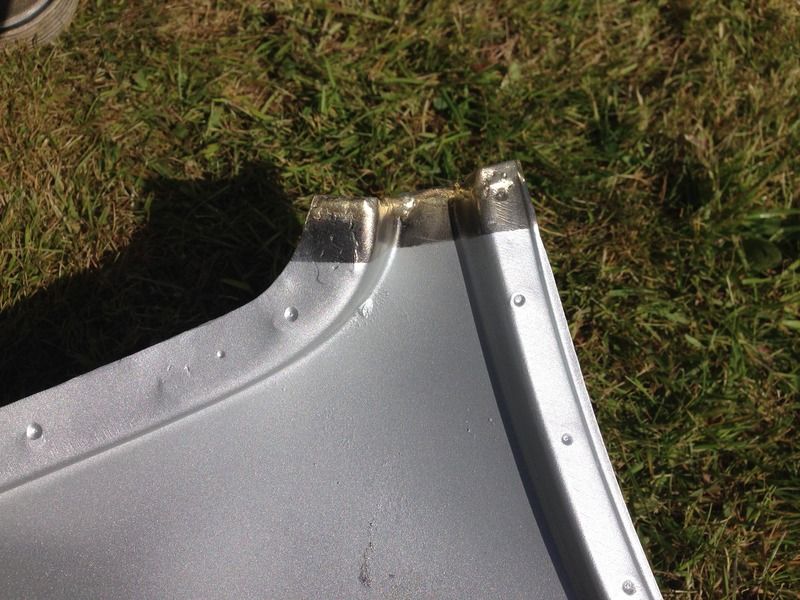 Then did the same to the a-pillars...  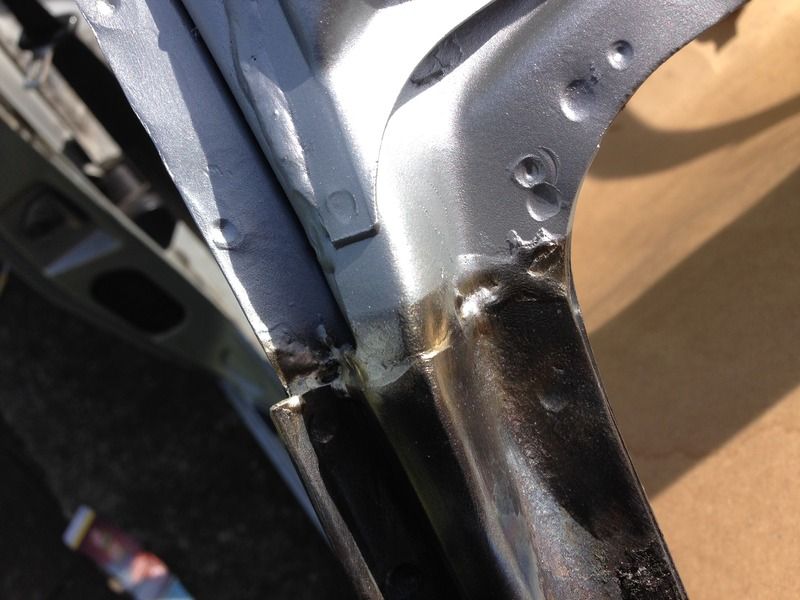 So now I just heat these together, right?... 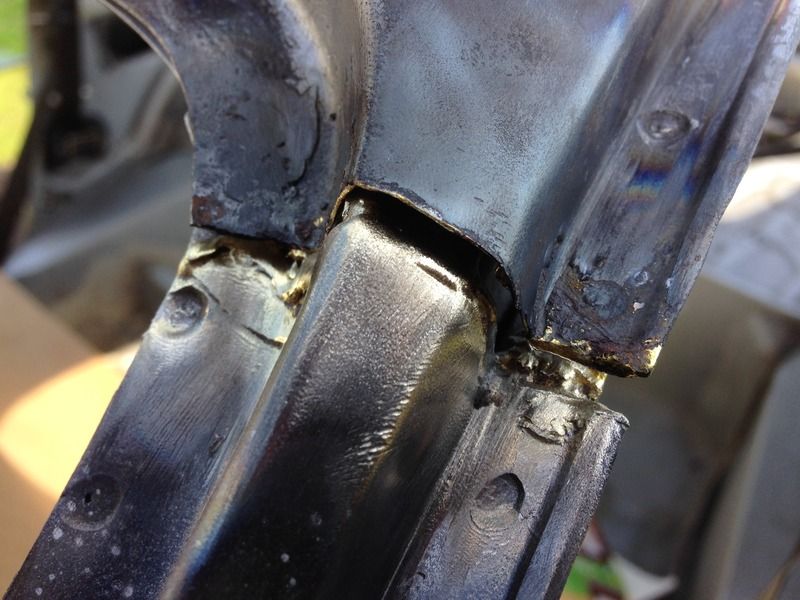 If only! Oh my, I made a mess of that!...  ...Where do I start. I haven't managed to 'stick' the joint properly and in trying to push the joint together I have created a crack in the sheet and to top it off I have already got heat distortion going on. Oh well in for a penny in for a pound lets try the other side... 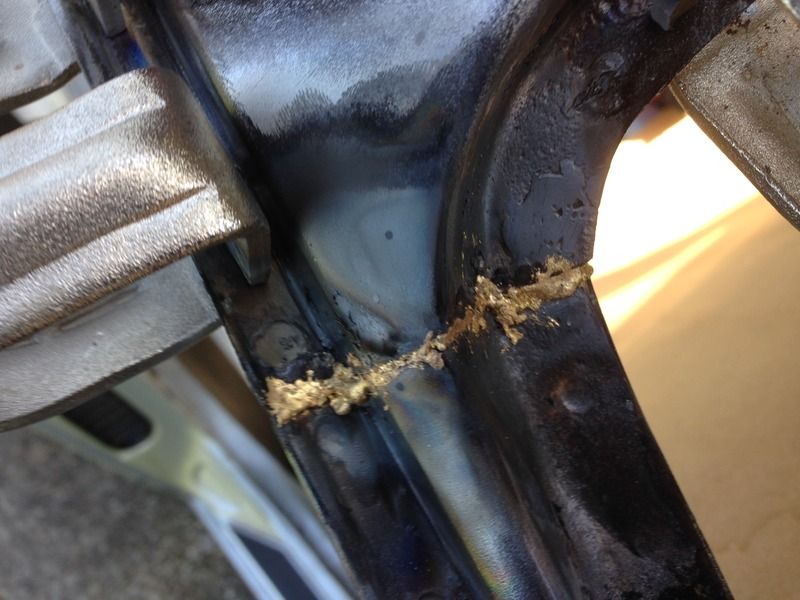 ... OK so that looks similar but I did get the brass to liquefy and it did wick a bit of filler brass in too which is good. I then let it loose too much heat and left more of the mess on the surface because it wasn't fully melted. Cleaned back with a knot wheel... 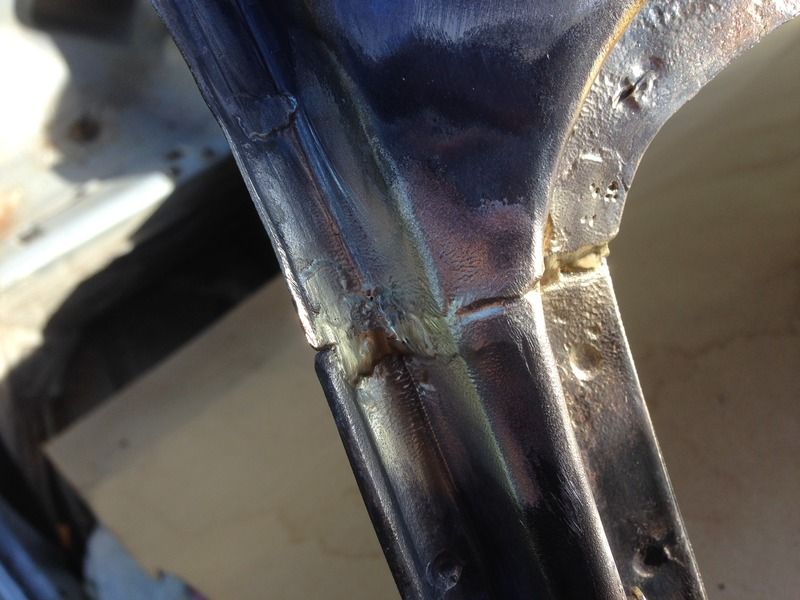 It was firmly attached but I had introduced another fracture on the inside, I decided to have another blast at that bit and managed to flow some brass over the crack so its sealed up... 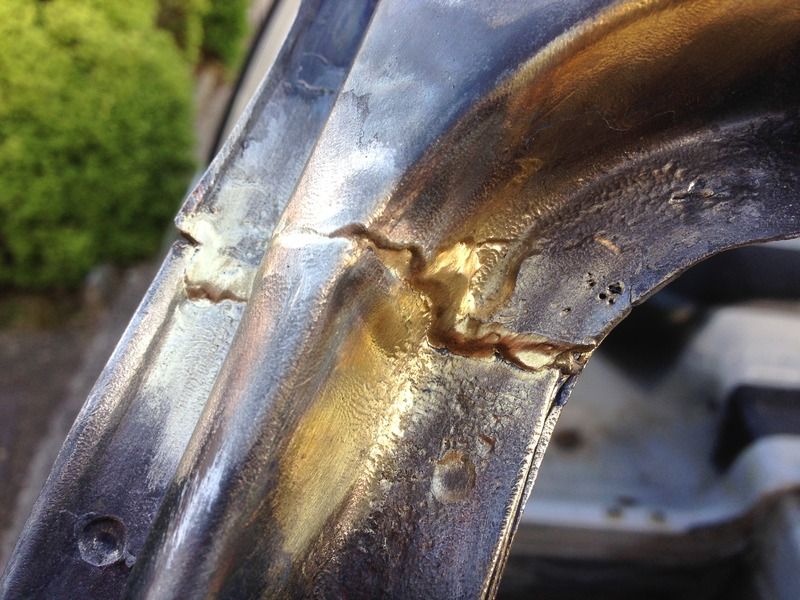 This side hadn't exactly gone smoothly or even particularly well either but at least its passable for a non-structural joint. I think it should be a stable base for some filler and paint without risk of cracking. So now I had to attempt to recover the first side to something sort of usable. I used some more flux with the rod and managed to flow brass into the joint. I tapped the cracked raised bit down to level and filled the crack. I just about recovered it I think... 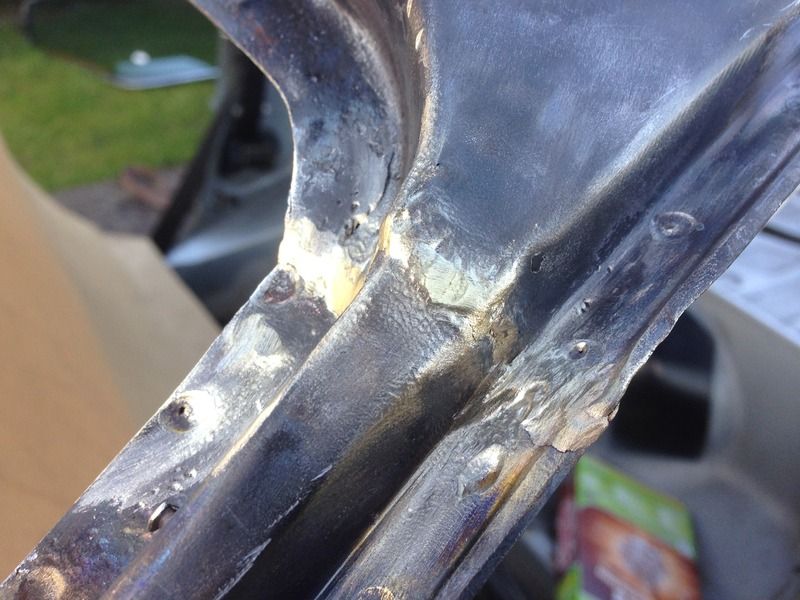 ...at least it all solid and fixed in place and the heat distortion is mainly concave so can be rectified with a little filler. I'm not very happy with my results but I'm glad I gave it a go. I was getting better as I was going along and starting to understand the process. If I could rewind back to the beginning and try it over again I could probably do a half reasonable job of it second time round. -Steve- Part 2 (Sunday) to follow... |
| |
|
|
razer
Part of things
  Getaway Driver
Posts: 79
|
|
|
|
|
Good job! Maybe not the perfect results your wishing for, but just to have the balls to try something you've not done before the way you do, is very impressive!
|
| |
It's not what you drive, it's what drives you.
|
|
|
|
|
May 10, 2016 10:10:53 GMT
|
|
if it sticks, fills the gap, and is workable to smooth out, i don't see the issue ! admitedly i've only ever brazed two fuel tanks though.
i think there are two types of flux, the type which draws the filler metal into the join by capillary action (think along the lines of copper plumbing) and another type where you dip, heat, wipe it off which leaves a bright acid cleaned surface for the filler metal to adhere to
are there spot welds else where, and this is just filler, or is it actually main structural bonding ?
|
| |
Last Edit: May 10, 2016 10:11:27 GMT by darrenh
|
|
shin2chin
Part of things
  Making curse word cars slightly better
Posts: 820 
|
|
May 10, 2016 11:58:45 GMT
|
|
That looks fine mate, don't be so hard on yourself.
|
| |
1977 PORSCHE 2.0na 924
1974 VW Beetle 1600
|
|
stevek
Yorkshire and The Humber
Posts: 728
|
|
May 10, 2016 18:56:49 GMT
|
Part 2 (Sunday) - A bit of a marathon day. The day started with sunshine and low winds, good weather for some welding. I had planned to do the spot welding first but when you have to weld outdoors you can't be missing these chances. First up this... 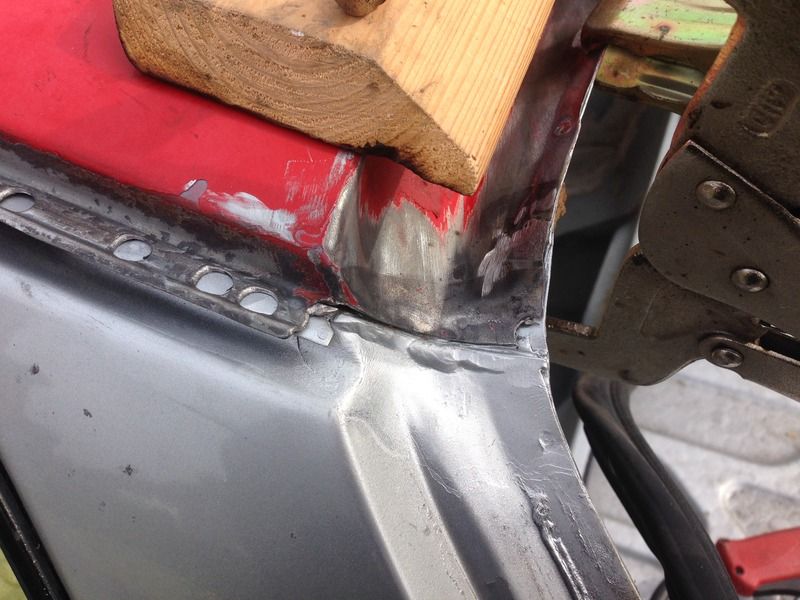 Got this far and the gas ran out and made the welds fizz...  But this time I was prepared! Quick swap and back to frazzling... 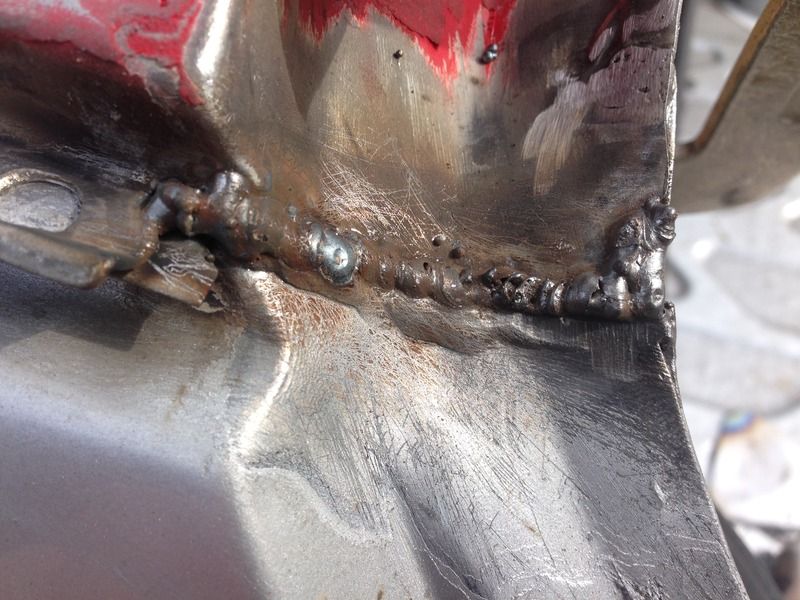 On a roll now so got the other side ready... 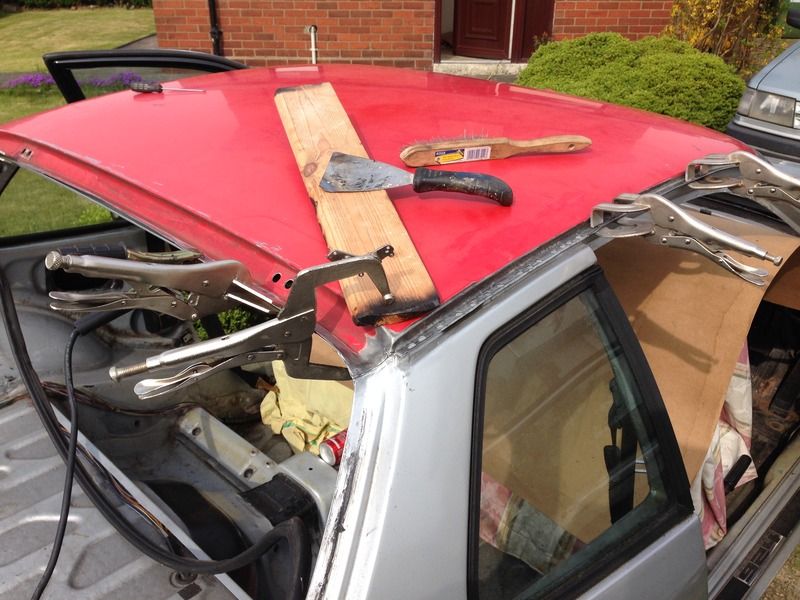 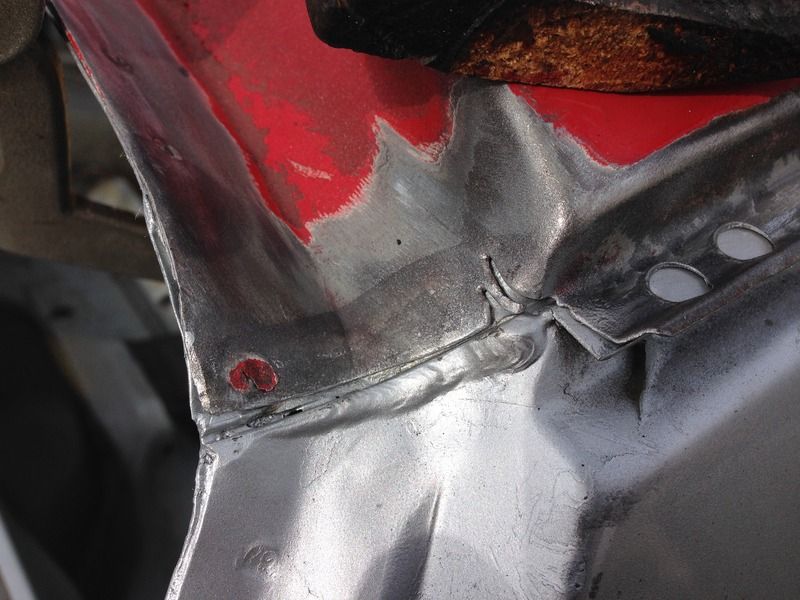 and rinse and repeat... 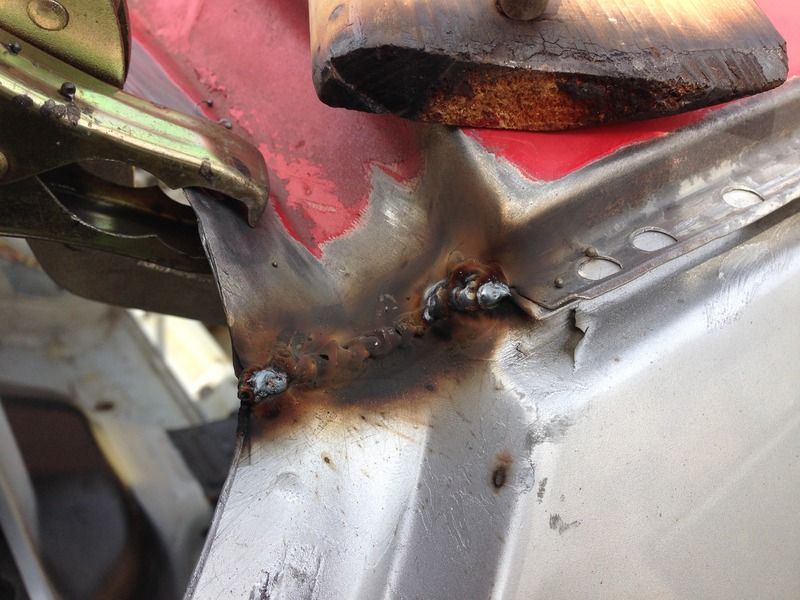 Woo!! Feeling like a pro today what's next. Lets do some plug welds. The 1st one was alright but then promptly blew a hole right through the 2nd one. Oops #NotPro...  I think the little gap and being right on the edge of the underneath lip was causing the pool to blow through... 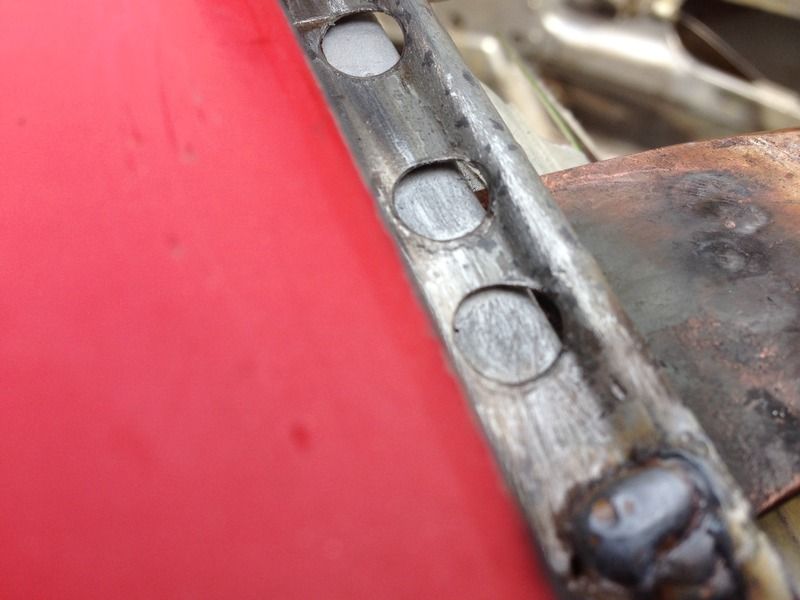 I started using the copper pipe as a backing and also changed tactics. I struck the arc on the inside (roof) edge and then 'walked' the weld to the outer edge flicking it off as soon as it bridged to the outer gutter lip to stop it blowing that out too. It made less neat 'plugs' but was working and doing the job so I stuck with it... 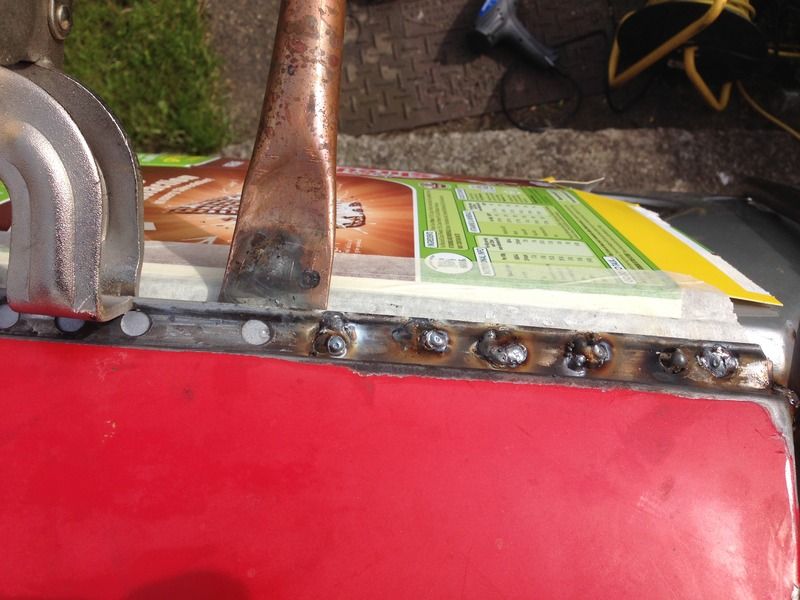 Came out OK...  Ground (flap disc) back and then a once over with a knot wheel...  I'm happy with that. Did the same on the other side too... 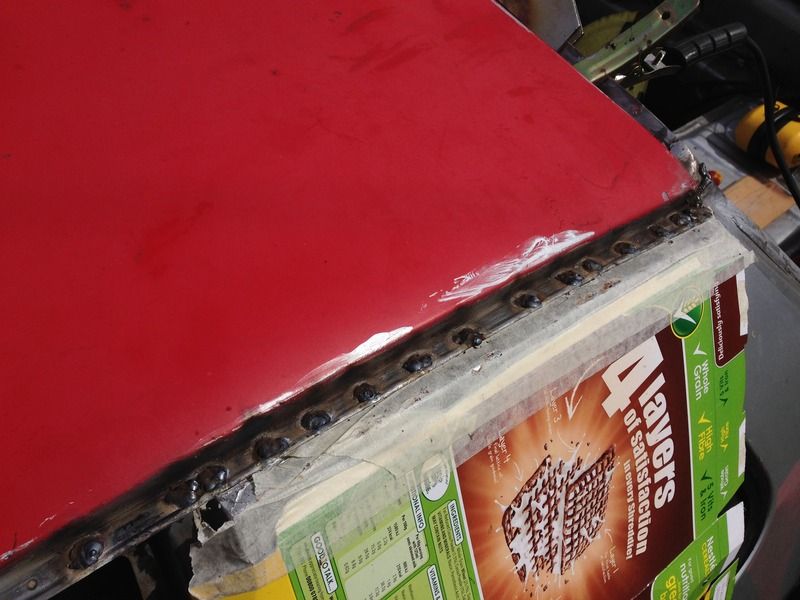  Starting to feel like a real actual roof and not just a floppy bit of tin now! |
| |
|
|
stevek
Yorkshire and The Humber
Posts: 728
|
|
May 10, 2016 18:57:44 GMT
|
This actually starts with a little play/test I had on the Saturday after the Brazing palava but it seems to fit better here. I got the spot welder out and had a play over the passenger door. Got about 4 perfect ones done followed by 4 in a row that fizzed out. I had hold the flipping heavy spot welder in place while I racked my brains trying to work it out and after a while I realised I could have a number of causes. 1) I may have let the welder sag a bit causing the bottom electrode to contact the inner door frame or 2) the radius of the electrode might have been double contacting with the lip on the edge of the gutter or 3) the top electrode could have been touching the edge of the roof skin. Solution: Be more careful! Got the rest done without a hitch. Result.  Back to Sunday this meant I could spot the rear window seam together pretty efficiently... 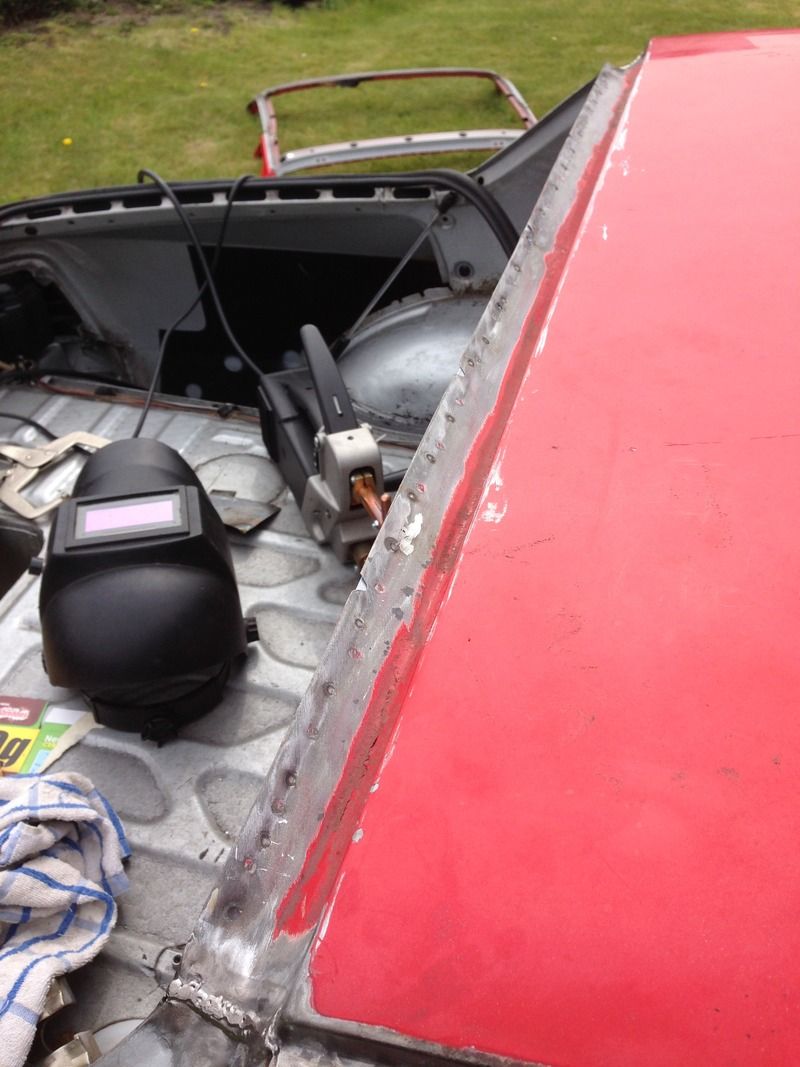 And the joy of spot welding is there's no dressing back to do. I breezed through the drivers door section without a hitch, so much so I don't even have a picture! I got started on the windscreen aperture and had it about 80% done when I had another batch of welds fizz out. A bit weird after such a good run too...  These were all grouped together too so they needed sorting out. I filled the holes with weld and ground them back and tried again, but first I added a bit more clamp pressure again. Success, that's more like it...   THE ROOF IS WELDED ON!!! WoooWOOO Spurred on I then cleaned the window aperture back to shiny metal and lathered it in a couple of coats of (non-porous) Epoxy Primer to protect it all...  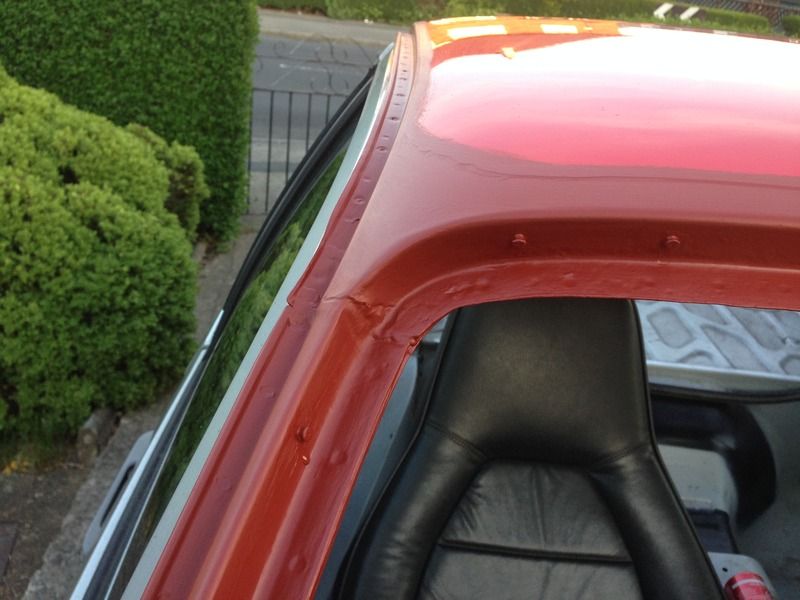 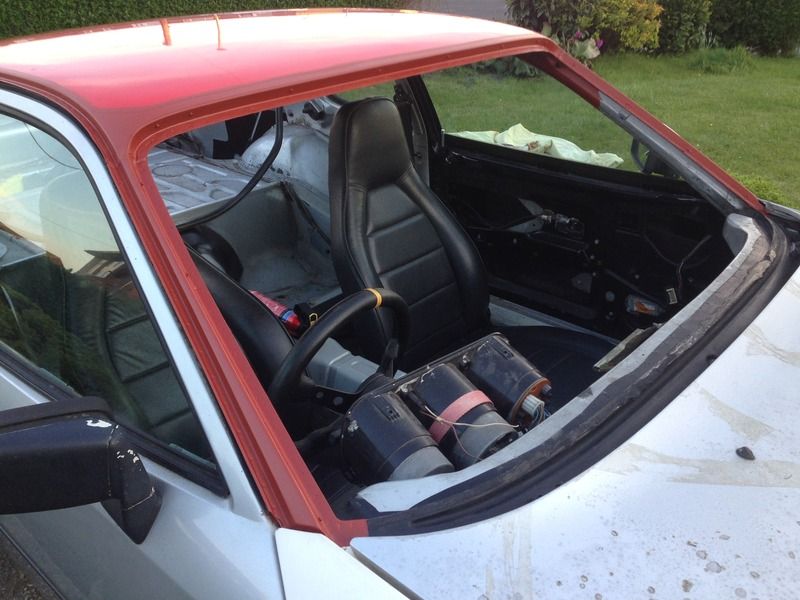 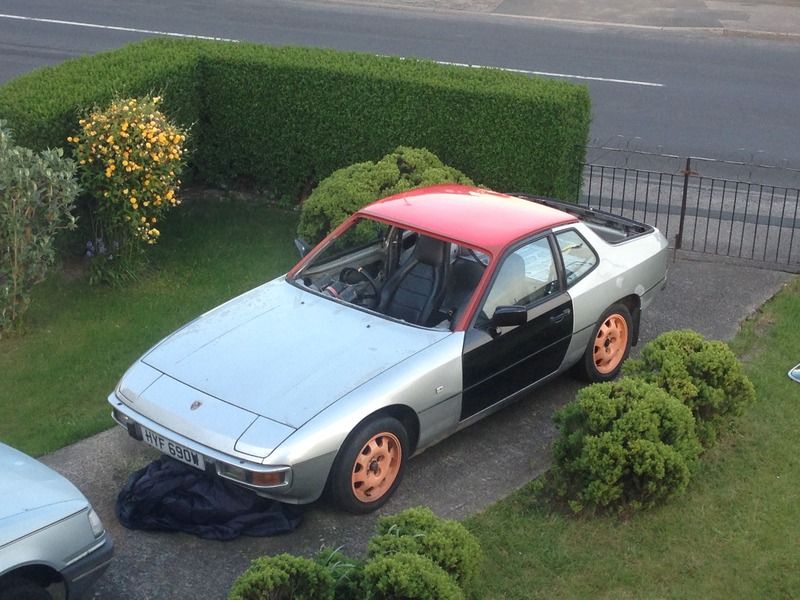 My minds turning towards getting the windscreen in now. -Steve- |
| |
|
|
|
|
Ray Singh
Posted a lot
   More German exotica in my garage now
Posts: 1,993
|
|
May 10, 2016 19:03:00 GMT
|
|
Fantastic work. My car could use your skills. My sunroof is driving me mad!
Good work, get the screen in and you can start to drive the thing.
|
| |
|
|
shin2chin
Part of things
  Making curse word cars slightly better
Posts: 820 
|
|
May 10, 2016 19:14:29 GMT
|
|
That's looking great Steve. Something I'd really love to do on mine but I haven't got your patience!
|
| |
1977 PORSCHE 2.0na 924
1974 VW Beetle 1600
|
|
|
|
|
May 10, 2016 19:37:40 GMT
|
|
Really enjoyed that, thanks! Keep on with the updates..
|
| |
|
|
bstardchild
Club Retro Rides Member
Posts: 14,976
Club RR Member Number: 71
|
|
May 10, 2016 20:02:05 GMT
|
|
oh jolly well done - that's really good progress
|
| |
|
|
|
|
|
May 10, 2016 20:19:23 GMT
|
|
so very impressed with your determination and results too...man thats a lot of work...
JP
|
| |
I know its spelled Norman Luxury Yacht, but its pronounced Throat Wobbler Mangrove!
|
|
|
|
|
May 11, 2016 11:49:45 GMT
|
|
top skills Steve. it's looking really good.
you just need to get a sunroof fitted and you'll be ready for summer! ;-)
|
| |
|
|
stevek
Yorkshire and The Humber
Posts: 728
|
|
May 11, 2016 16:26:55 GMT
|
shin2chin - LOL yeah I now what you mean. I still don't REALLY know why I did it, I just kinda wanted to. Sure I fancied a non sunroof and it was leaking but it would have been a lot easier to just buy a new sunroof seal. mrscruff bstardchild & 07lilredwagon - Thanks guys, your all too kind  catlotion catlotion - Ha Ha Toby. I'm going to start calling you Barney Rubble, Not because of Cockney rhyming slang but because you have a Flintstones car! 
|
| |
|
|
|
|
|
May 11, 2016 16:32:42 GMT
|
fantastic, that did it  also good tactic on the puddle welding blow through saga. i'm only self taught but did watch uncle dave dog (who makes a living out of it) directing the heat to the thickest part of the combo is exactly right. |
| |
|
|
stevek
Yorkshire and The Humber
Posts: 728
|
|
May 11, 2016 17:13:33 GMT
|
|
|
| |
|
|
razer
Part of things
  Getaway Driver
Posts: 79
|
|
May 11, 2016 17:36:05 GMT
|
|
Wow, great work. Inspiring too:-)
|
| |
It's not what you drive, it's what drives you.
|
|
|
|


 , post coming up...


