stevek
Yorkshire and The Humber
Posts: 728
|
|
Nov 30, 2014 17:50:41 GMT
|
Not a great deal to report in the last fortnight. I have taken it out for a few short blasts on the road and its running pretty well if a little tappety. It's noisy and shaky of course but great fun. It's letting quite a lot of water in (it always has) which is pooling up in the rear seat wells. The condensation inside the car is such that I usually have to squeegee the windscreen on the inside before setting off and sometimes again when stopped in traffic; that gets funny looks. The solution is to put a hat on and drive with the windows down. I have bought some 15"x6" Peugeot 205 GTi alloys that I want to use as track wheels. They are already adapted to have spigots rings fitted so I just had to get new 57.1 spigots to suite the 924... 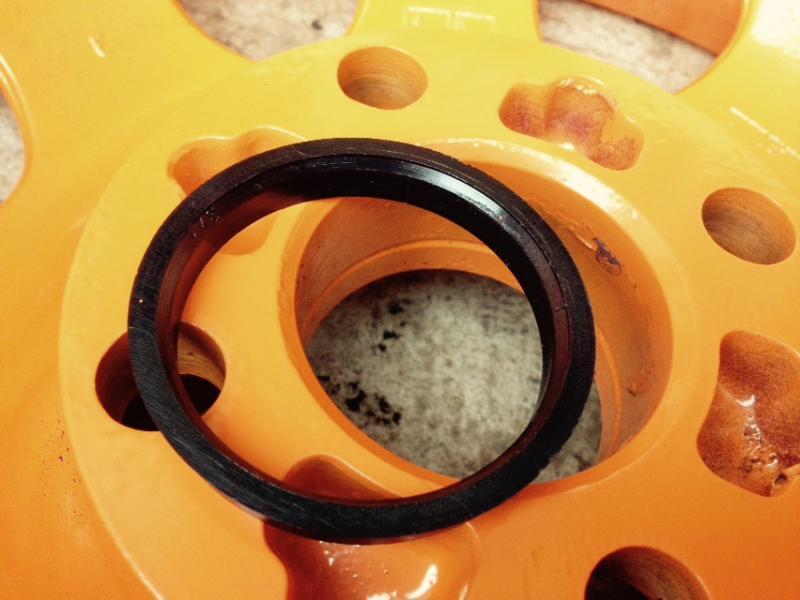 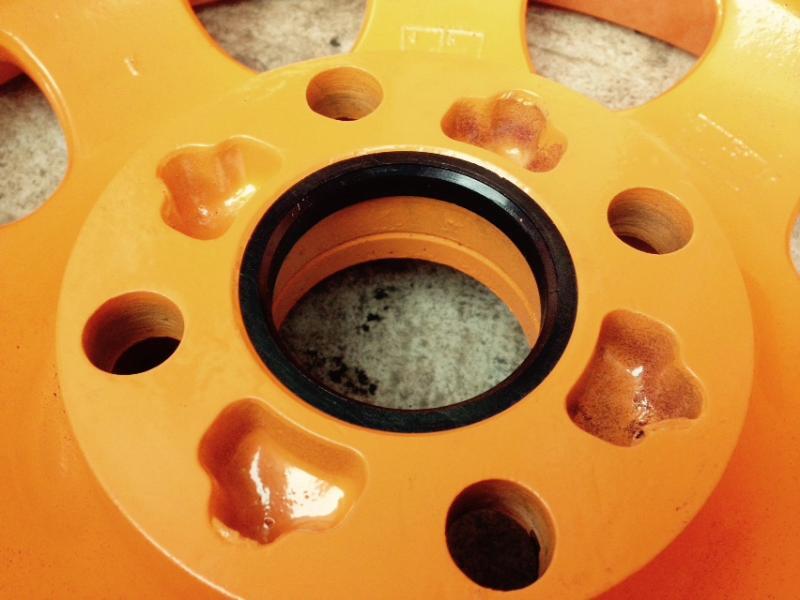 The trouble is I haven't been able to source any suitable wheel bolts yet. I need some M14x1.5 Flat Seat bolts 35mm long. The closest I have found are 27mm long. If I used those with a 2mm washer that would only only leave 7mm depth at the hub and I need at least 10mm there really. Anyway I did a trial fit of one today to check they are going to fit OK once I find the right bolts... 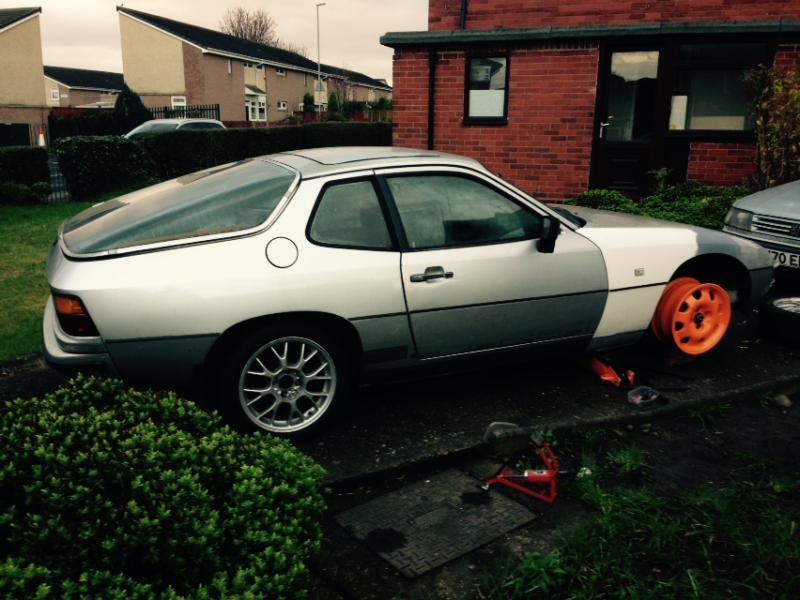 They sit pretty much the same as the factory wheels would... 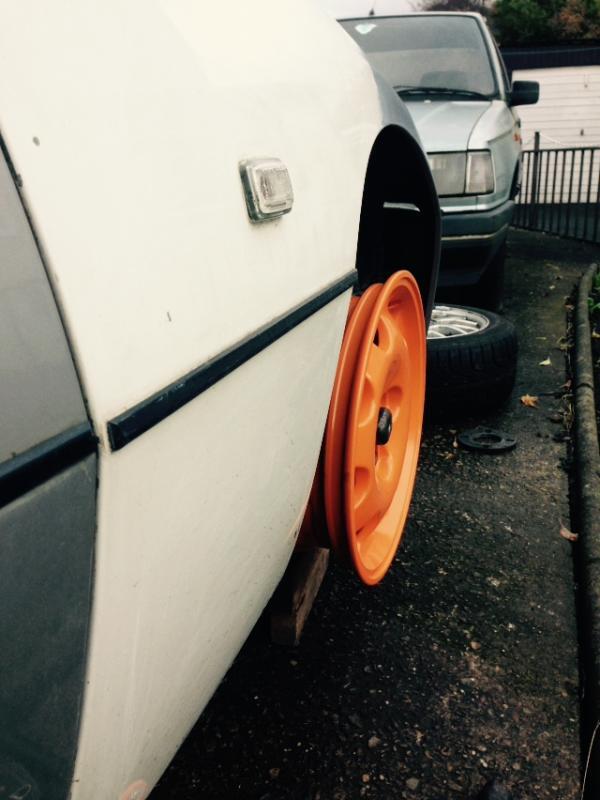 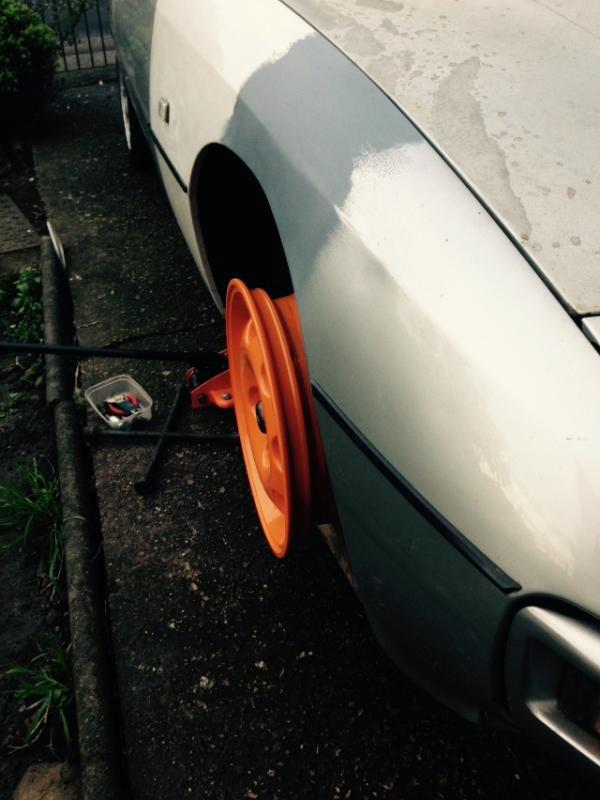 The colour keeps photographing differently, it's more like the colour in the spigot ring closeups than this but I think I like them... 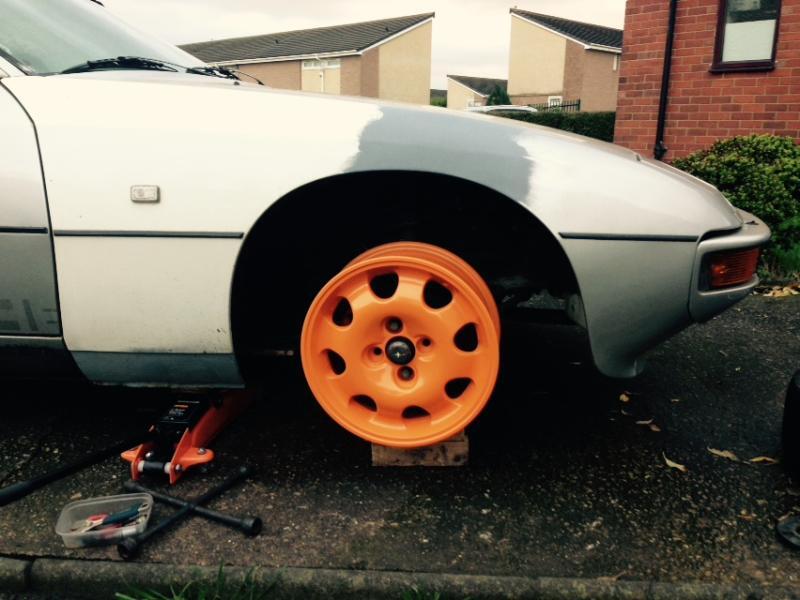 So I just need the elusive bolts and then some rubber, probably some 195/55/15 tyres I think. -Steve- |
| |
Last Edit: Dec 31, 2017 14:10:28 GMT by stevek
|
|
|
|
|
|
|
Dec 14, 2014 17:28:41 GMT
|
|
Hi Steve,
What a great write up and I read with great interest, thank god I found you!
I also have a 924 and the rust is in the similar place as your but minus the foot wells.
I have a few question if you don't mind:
1. weld tru - once I have the new replacement piece I spray on that and the area on the car to which the new piece is going to be welded to?
2. Also what d you mean when you say "krusted it" ,
3. My welder is MIG-NO GAS - this should be ok?
thanks
Manni
|
| |
|
|
stevek
Yorkshire and The Humber
Posts: 728
|
|
Dec 15, 2014 12:05:38 GMT
|
Yeah sure... 1) Yes that's right. The benefit of a weld-thru primer is that you can weld through it! haha. Basically it allows the weld arc to travel through it and as it burns off the gasses/fumes don't mess up the weld your making like burning regular paint would. It's not essential and many wouldn't bother but its a way of putting some protection on the inside surfaces of the lip you are joining and won't have access to afterwards. 2) Kurust is a Hammerite brand of chemical rust converter. There are plenty of others too, Vactan, Jenolite, Hydrate 80, Deox gel etc. These chemical converters are really only a backup process for getting the last 2% that the wire wheels couldn't get rid of. Cutting out the worst rust and cleaning back everything else to good shiny metal is the main way to sort out rust. 3) I have not used a no-gas welder but it should be able to do the job. I hear they are harder to get good results with but people manage just fine with them. I think a side benefit is that they are less prone to the gas (from the flux core of no-gas wire) being blown away when welding out doors. -Steve- |
| |
|
|
craig1010cc
Club Retro Rides Member
Posts: 2,998
Club RR Member Number: 35
|
|
Dec 15, 2014 20:02:41 GMT
|
Glad you liked the wheels Steve  I think they should work well  Might be worth trying some of the Rally parts places to see if they have them. I take it that Pug's are the wrong thread comp to the poker |
| |
|
|
stevek
Yorkshire and The Humber
Posts: 728
|
|
Dec 15, 2014 21:11:12 GMT
|
craig1010cc - I knew they wouldn't just fit straight up, but I really didn't foresee this much trouble finding suitable wheel bolts! Anyway I found these online... 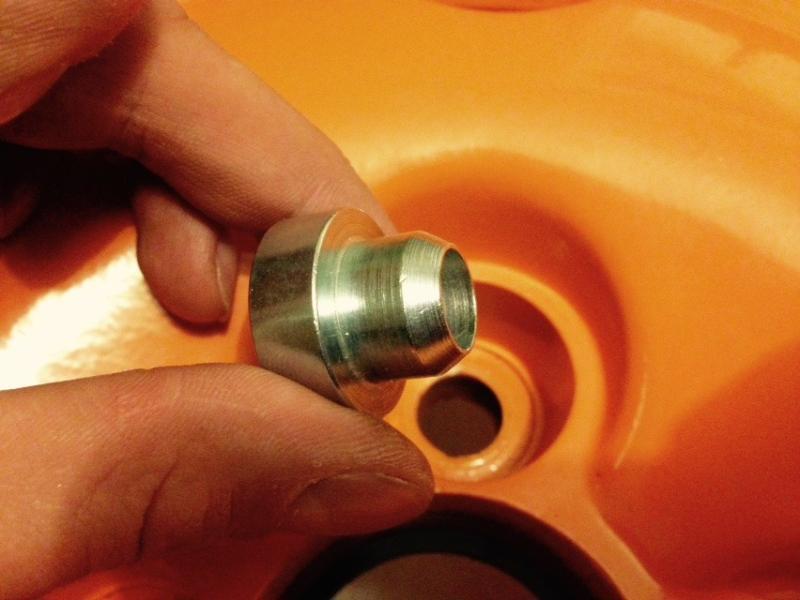 Which fit in here and give a 60° Taper... 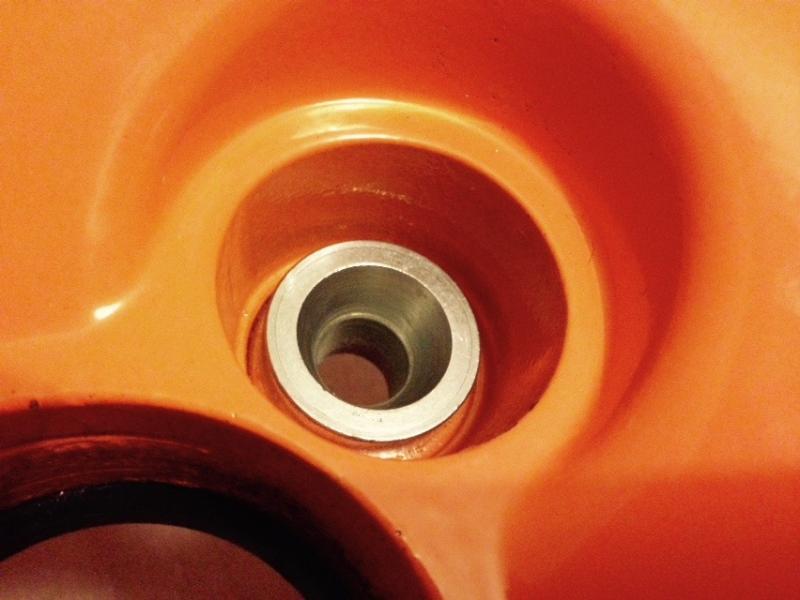 This is good because 60° taper bolts are available in many lengths and sizes as most aftermarket wheels use them. BUT (and its a big but) its made to take an M12 (Peugeot) bolt not a M14 (Porsche) bolt. So the middle hole needs drilling out IF there is enough material in it for that to be done. Somewhere I have an Aldi pillar drill tucked away (still sealed) from an impulse purchase many years ago. I guess that might do it if I can center the drill bit up and clamp the piece firmly somehow. -Steve- PS. Dear Santa, For being a very good boy (cough) this year I would very much like a metalwork lathe for Christmas. I promise to leave an extra can of RedBull out for Rudolph and his friends as it might make the sleigh a tad heavier than usual. Love stevek (age 32½)
|
| |
Last Edit: Dec 31, 2017 14:11:39 GMT by stevek
|
|
Midas
Part of things
 
Posts: 516
Club RR Member Number: 14
|
|
Dec 15, 2014 23:18:03 GMT
|
|
If you get stuck Steve I, or anyone else with a lathe, could sort you out with a 14mm hole in your adaptors. I think you may struggle with an Aldi pillar drill when it comes to chuck capacity.
|
| |
|
|
stevek
Yorkshire and The Humber
Posts: 728
|
|
Dec 16, 2014 20:16:50 GMT
|
Midas - That's a generous offer, but I see your a very long way away so I will see what I can manage more local first. I only bought the one at the moment in order to check that the taper didn't overlap into the reduced section. If it had it could have got too thin or even separated apart when the hole was enlarged. It doesn't so it should be fine to enlarge the hole out. First I'll ask whether the seller can sell me some 14mm hole ones, but I don't think they make them themselves so I'm not hopeful. I guess the Aldi pillar drill will be a 13mm chuck but 14mm reduced shank bits are available over the counter less than a mile away at Toolstation, maybe worth a go? I see the main problem being whether it tracks down the 12mm hole centrally and whether the drill has enough chuff to do it. I'm guessing you can't gear down a cheapo bench drill like the big old ones I remember from school, on those you could open the top hatch and move the drive belt to different pulley sets in order to lower the drill speed for bigger drill bits. Also are these step drills as useless as I predict? Ebay link because that would solve the 'keeping the hole central' problem. I can see them being good on plastic or maybe aluminum but steel!? -Steve-
|
| |
|
|
|
|
|
Dec 16, 2014 20:29:13 GMT
|
|
Those step drills are excellent but I would not consider this a suitable situation to use them in.
If you can get a 12mm piece of bar you can use this to centre the piece in a vice for the drill and then use one of the 14mm drill bits from toolstation. You will find out with the first or second how successful it will be and you will only have wasted a little if it does not work.
Good luck with Santa!
John
|
| |
|
|
craig1010cc
Club Retro Rides Member
Posts: 2,998
Club RR Member Number: 35
|
|
|
|
|
Another option would be to see if you could get some inserts fitted into the alloys, a wheel refurb place should be able to advise if its possible
|
| |
|
|
|
|
|
Dec 19, 2014 21:24:36 GMT
|
Hi Steve, i hope all is well. I have today uncovered the driver foot well, to my surprise the foot well is bent in, I have attached some photos below. I need to request some advise, I will repair the rust on the driver side wing at the bottom and remove the donut just like yours, but because the foot well metal behind the accelerator pedal is bent in - do I 1.cut in the middle and straighten and then weld? 2.or leave it? 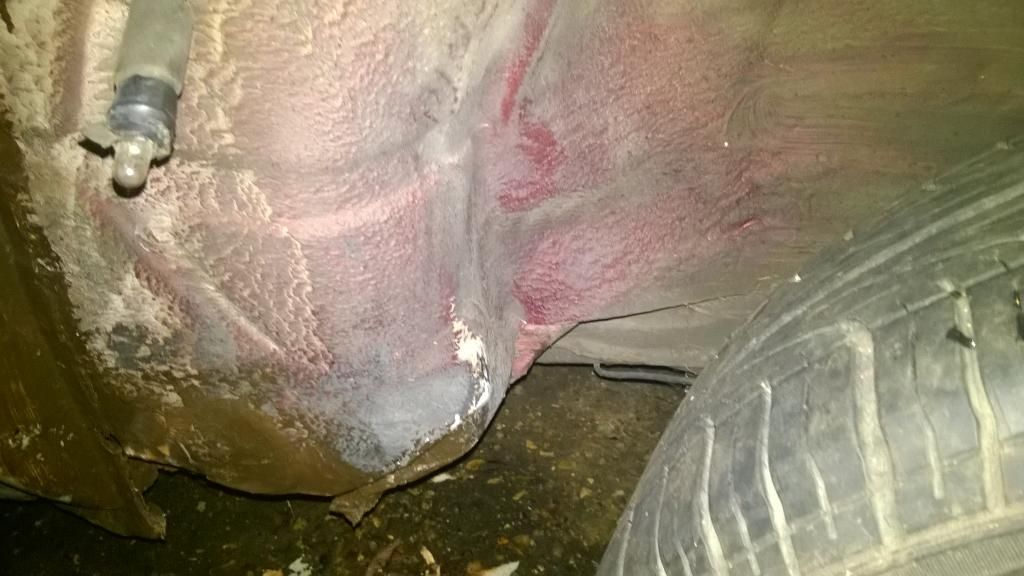  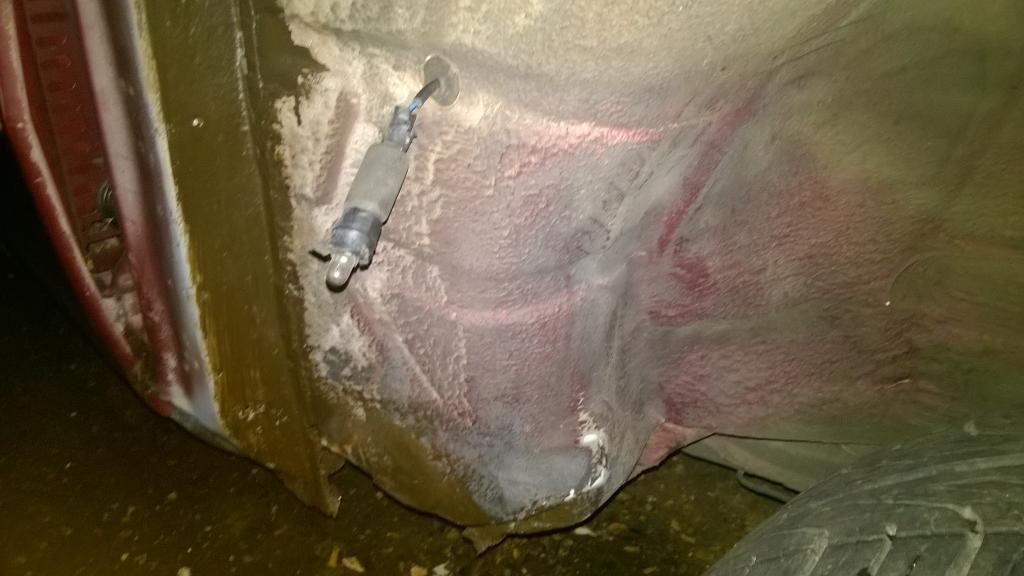 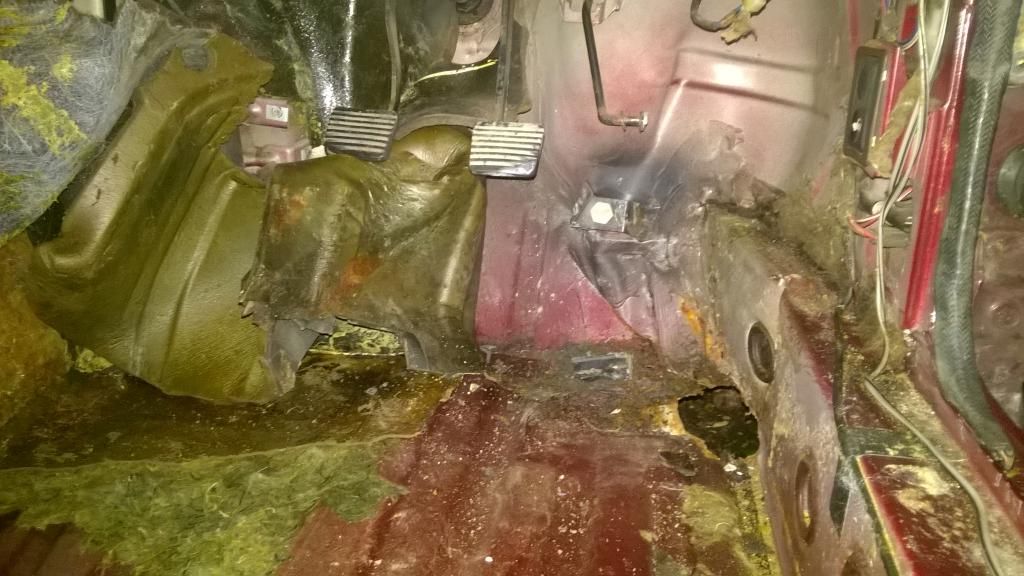 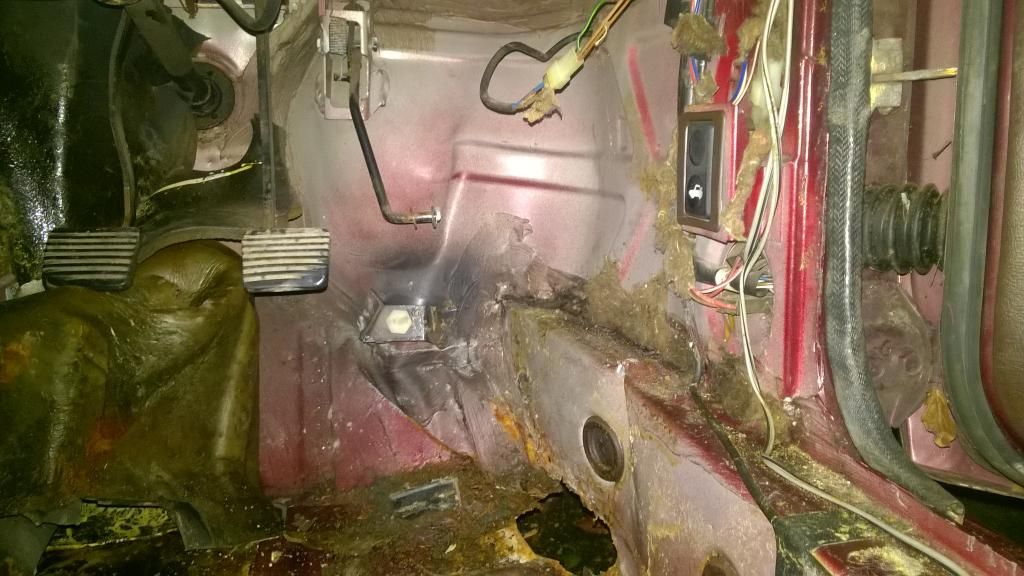 Thanks Manni |
| |
|
|
|
|
stevek
Yorkshire and The Humber
Posts: 728
|
|
Dec 23, 2014 22:00:30 GMT
|
|
Hi Manny,
That's a strange bit of damage. I don't think I could just leave it bent in although I don't suppose its doing any real harm. I would probably try hammering it straighter with a big hammer and some blocks of wood, its all fairly thin metal work so it might pull back OK. It would need to be well chocked on the wheel side to prevent it being bouncy to the hammer blows, you would soon get a feel for if that was going to work out or not but I would try that before resorting to cutting and welding it back up.
Good luck with the welding, be sure to cut the rust back far enough to good metal or it will be a nightmare to weld back up.
-Steve-
|
| |
|
|
stevek
Yorkshire and The Humber
Posts: 728
|
|
Dec 28, 2014 13:13:35 GMT
|
There hasn't been any progress over Christmas but I have been using The Shonky Rocket a bit. I was at my parents for Christmas (Nr. Scotch Corner) and I drove back to Leeds yesterday, but instead of taking the obvious A1(M) I decided to take the long way round going Richmond-Layburn-Asgarth-Kettlewell-Grassington. It's the first proper country road blast since its revival and it was really good fun, in fact it was the most fun I have had driving in a long time. The car behaved too, yes its noisy with a bare interior and the engine is a bit tappety, but I loved it! Nr. Asgarth 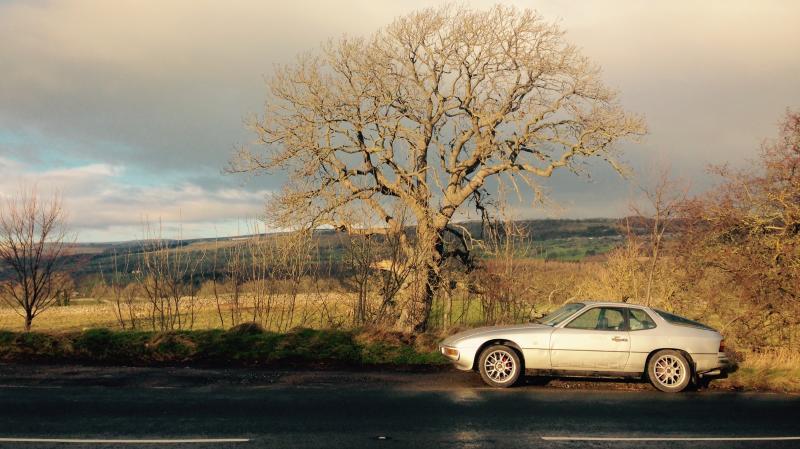 Nr Buckden 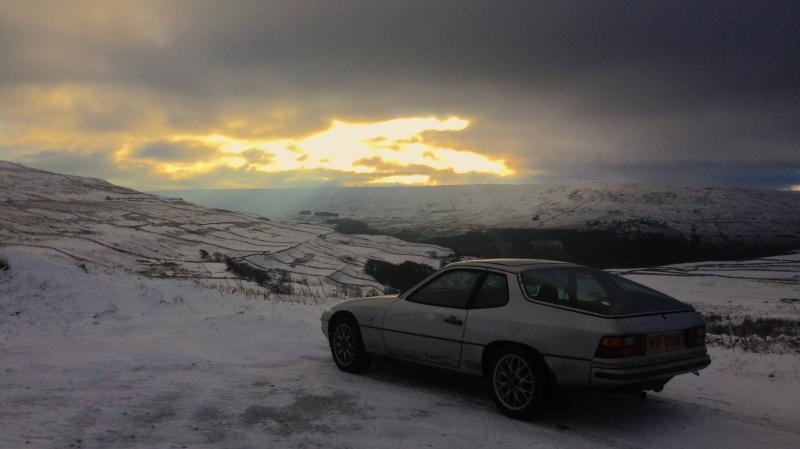 -Steve- |
| |
Last Edit: Dec 31, 2017 14:13:40 GMT by stevek
|
|
stevek
Yorkshire and The Humber
Posts: 728
|
|
Dec 28, 2014 23:41:30 GMT
|
This afternoon I decided to have a go with the Aldi pillar drill and drill out the wheel adapter. First I had to find it and dig it out from under the back corner of the work bench where it's lived for at least 5yrs unused. 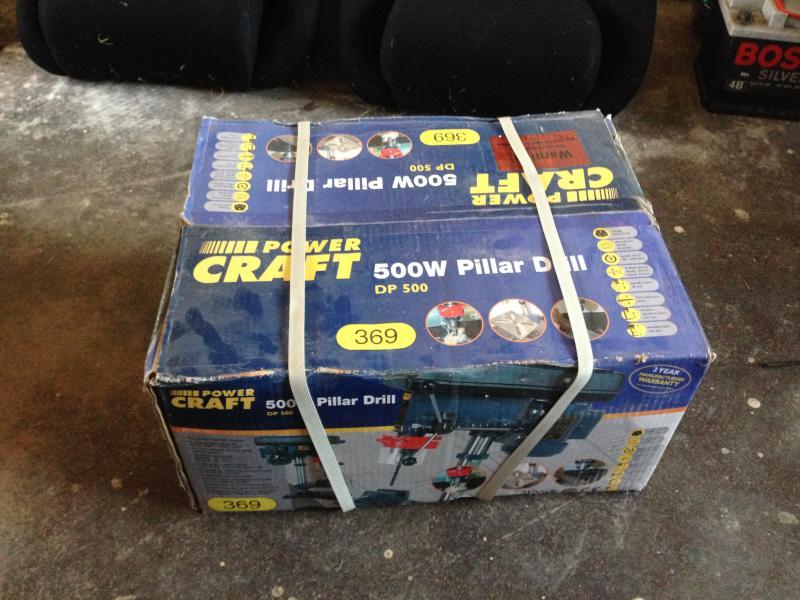 It took quite a bit of assembly but the quality is better than I expected given that it was only about £30. It does have movable belt gearing so I set it to 450rpm. And its a 16mm chuck so I needn't have bought the reduced shank 14mm bit. 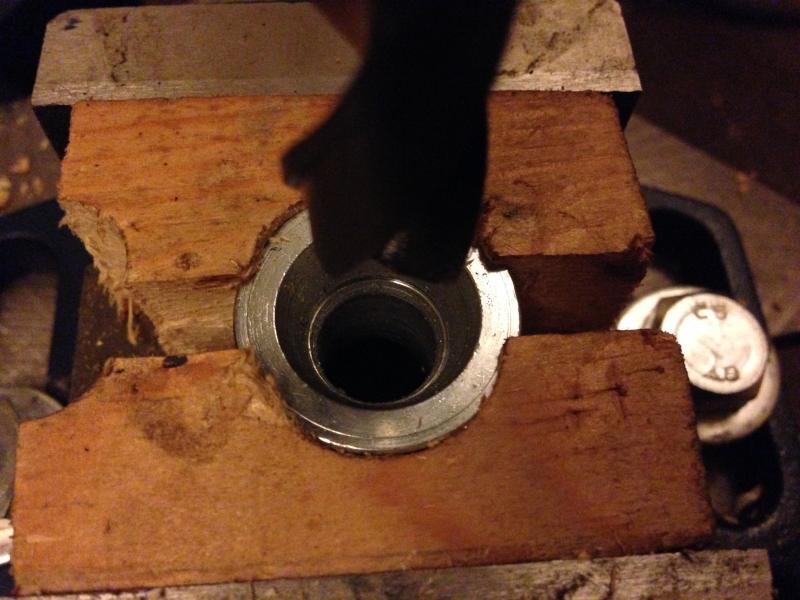 I drilled a bit of wood with the nearest wood bits I had but they were quite a bit too small really but I got the adapter clamped quite tight. I centered it as best I could by eye with the 14mm drill bit (I didn't have a 12mm piece of bar or a 12mm drill bit to hand to help with centering). I let the drill skim the surface and it left an even mark so figured it was pretty central. 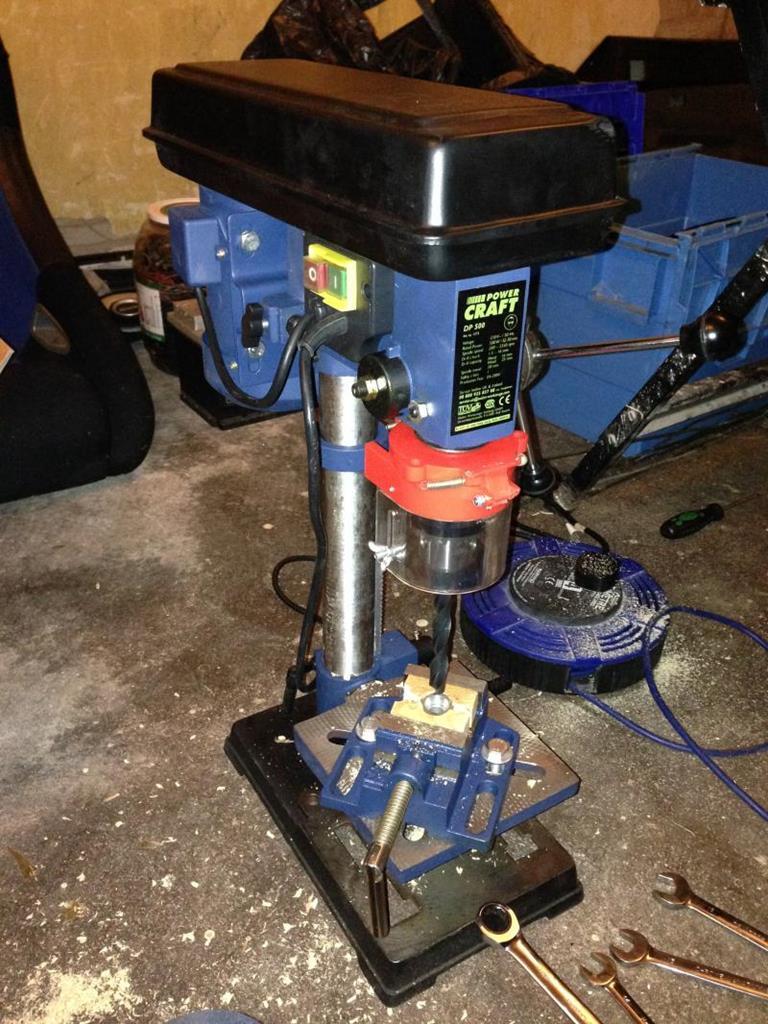 I was having trouble with the drill chuck coming loose from its taper despite having knocked it on as per the instructions. This meant I had to keep moving the table and loosing my positioning. But I persevered as it was looking fairly promising. 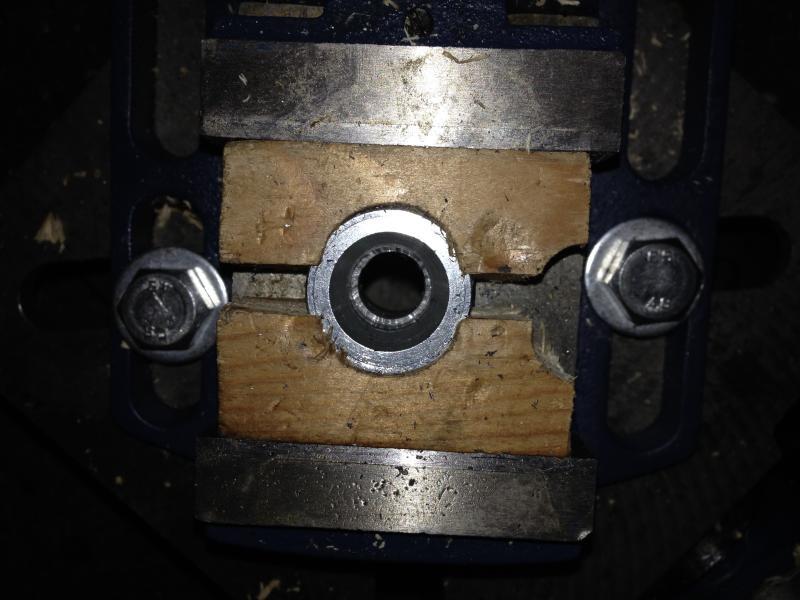 The M14 bolt now fits in the adapter OK... 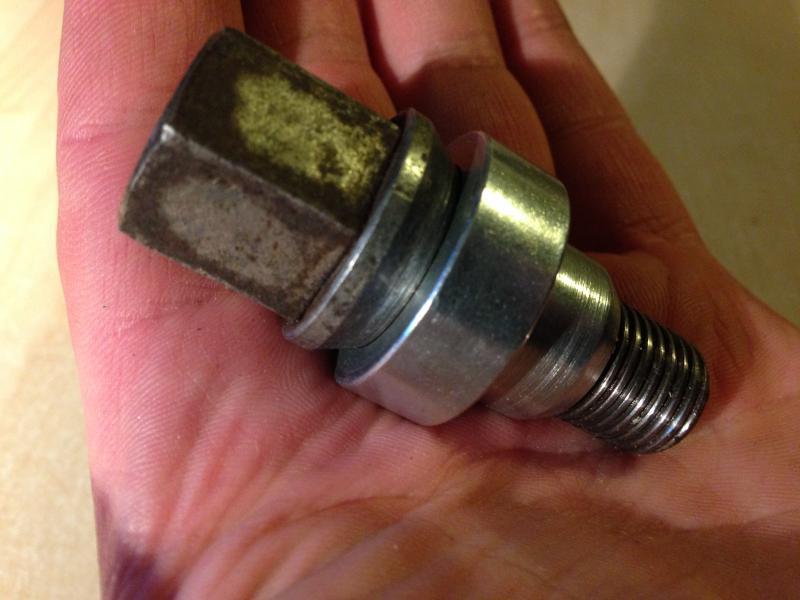 But it hasn't drilled through quite central... 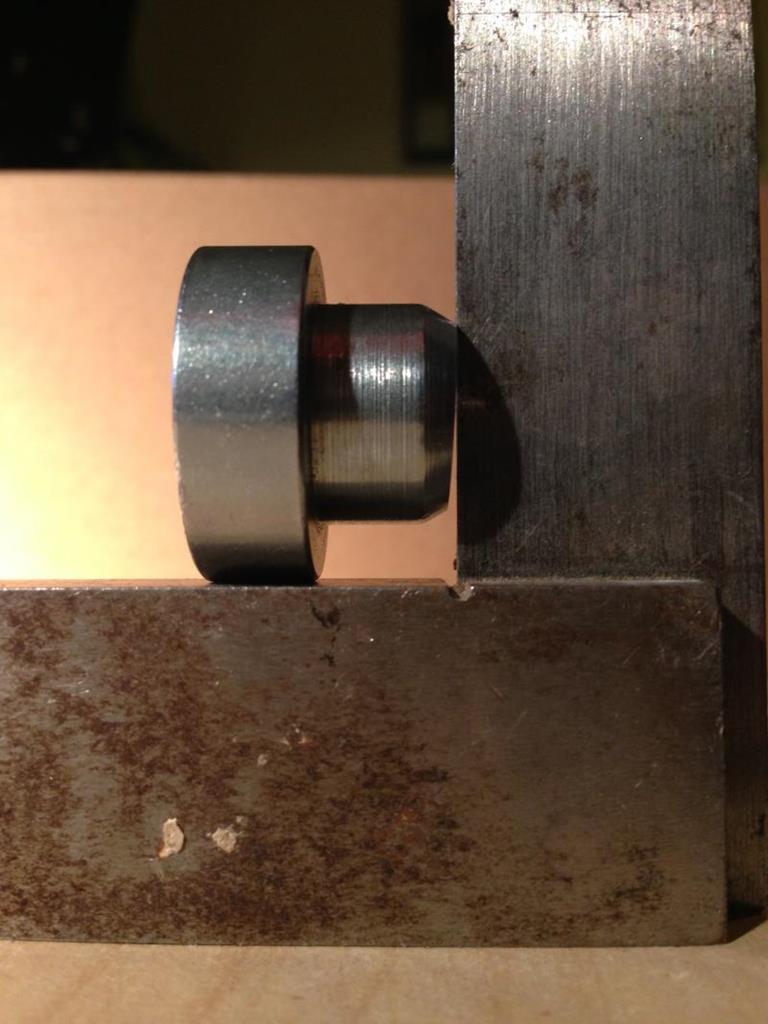 Its not out by very much but I'm not sure it's good enough to use... 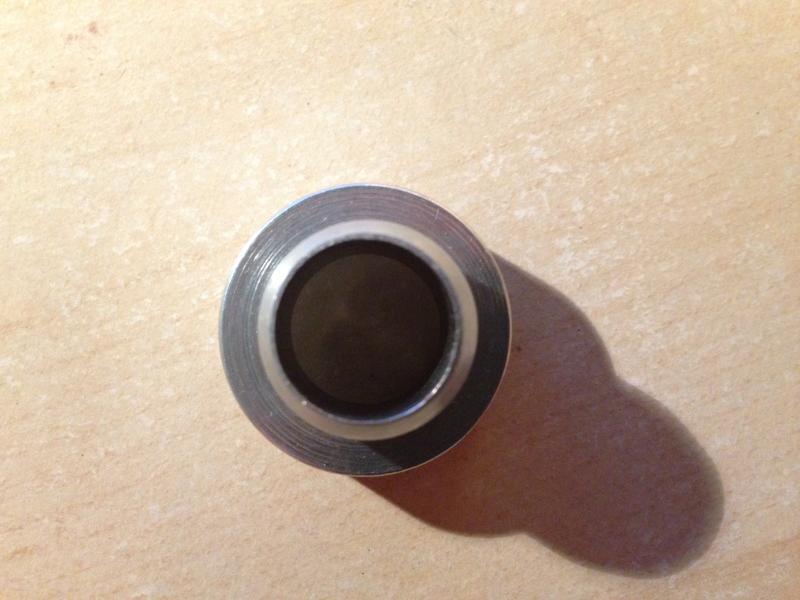 It lets me see how the bolts will sit and I can measure the required bolt length I will need to buy. 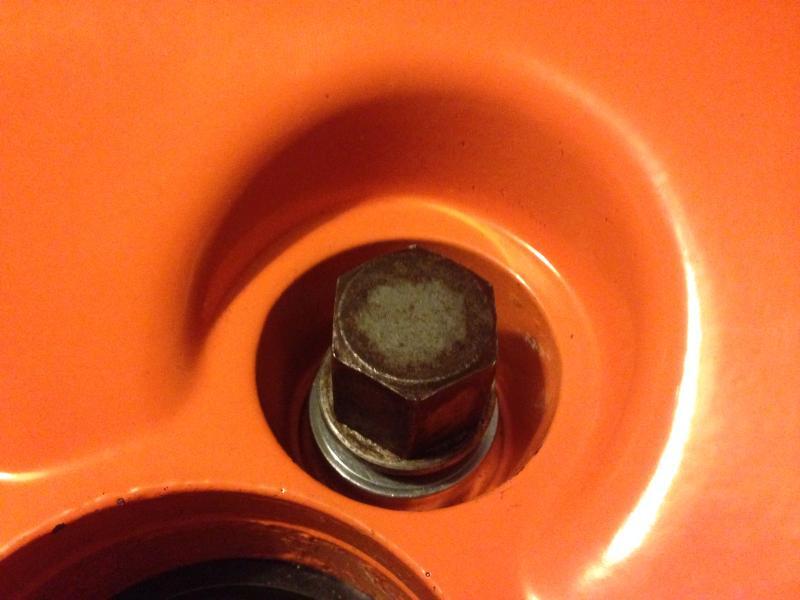 Overall it could have gone a lot worse but its a bit disappointing to be so close but not quite close enough. Maybe I could have clamped the adapter up better. The wooden blocks were bowing up and raising the adaptor slightly which may have caused it to not be level. And if I centered it using a piece of 12mm bar in the chuck first that may also have helped. I think these adapters can be made to work so I will buy a set of 16 and a few extra spares to have another go with. -Steve- |
| |
Last Edit: Dec 31, 2017 14:15:45 GMT by stevek
|
|
stevek
Yorkshire and The Humber
Posts: 728
|
|
|
|
Your order contains the following items: 20 x Peugeot conversion washer for OE fitment, 2000 onwards to fit longer bolts Yep, I'm ordering wheel bolt adapters at 1:30am doesn't everyone? -Steve- PS. Ordered 4 more as spares for the inevitable drilling c**k ups. PPS. Mmmmm Old Peculier  |
| |
Last Edit: Dec 31, 2014 2:07:50 GMT by stevek
|
|
stevek
Yorkshire and The Humber
Posts: 728
|
|
Mar 30, 2015 20:13:30 GMT
|
Is this really my 1st update this year! Winter can really take it out of us 'drive way' builders, I really do dream of a big workshop garage of my own quite regularly. So where was I last, Ahh tipsy on new years eve, well the early hours of the morning of new years eve. (i.e. the night before the big celebrations). I'll pick up where I left off. 9th Jan 2015 - The main batch of adapters duly arrived and I very carefully re-setup the drill to have another attempt at enlarging the 12mm hole to 14mm. I used a 12mm drill as a centering rod and a set square to check the platform was setup square. I redesigned my piece holder so it was 100% secure and flat... 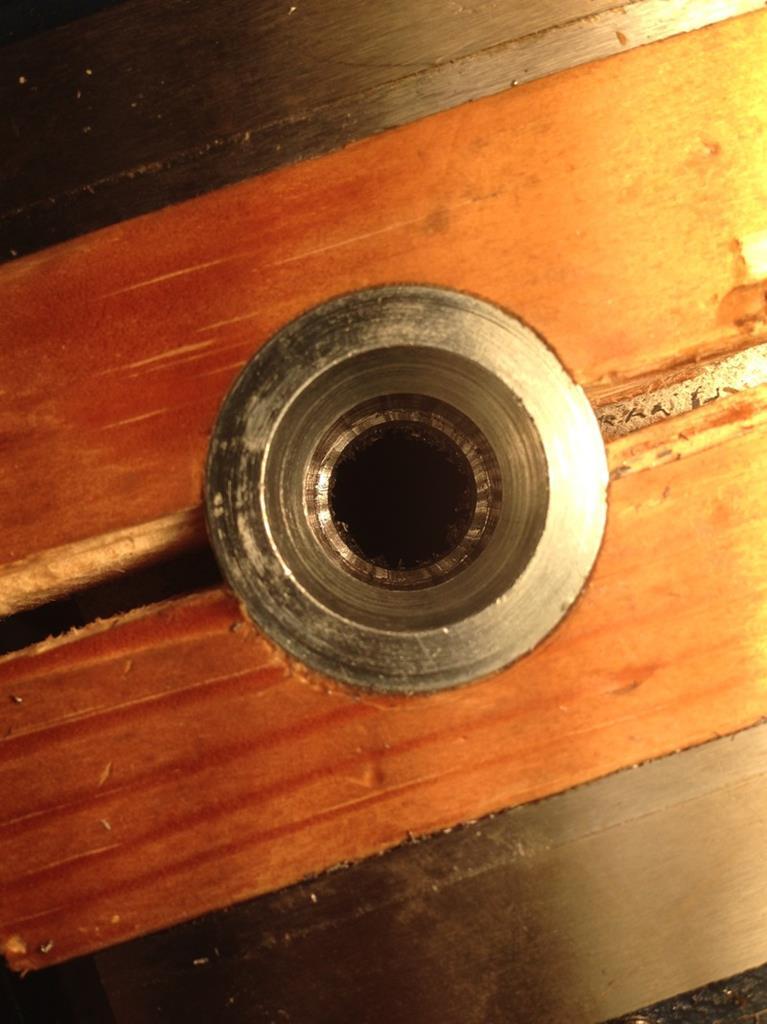 And VERY carefully drilled the hole out... 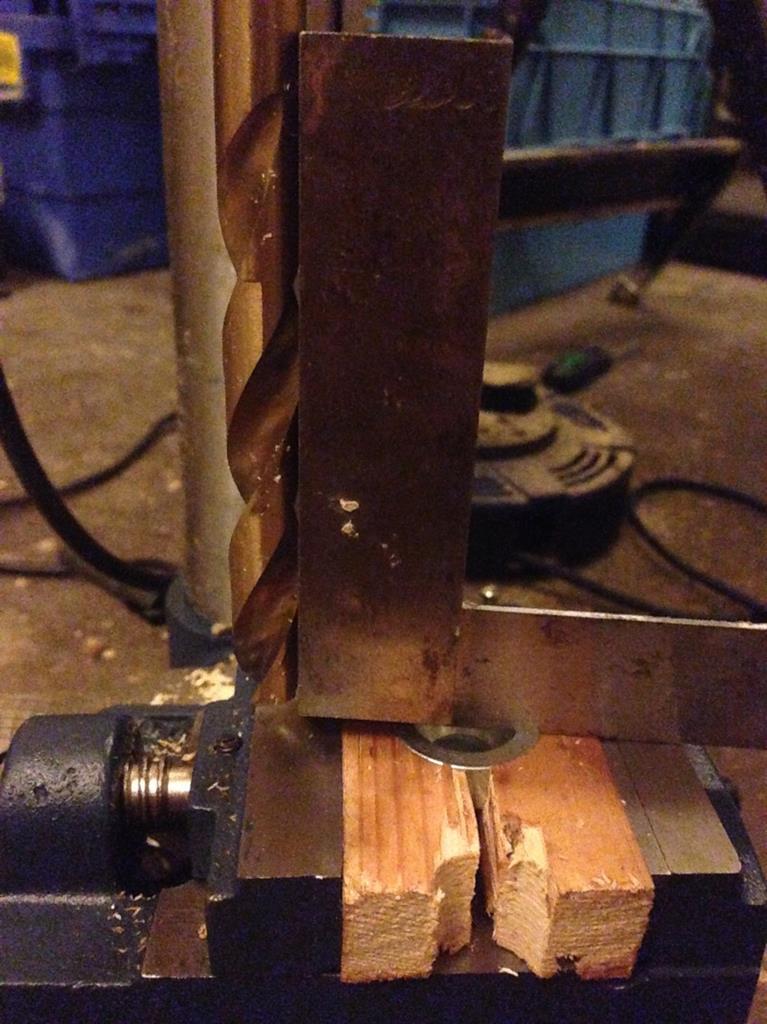 ...and it looked to be going well, but it still c**ked up! It was still off center by the time it had been drilled right through.  I lost interest for few weeks. 27th Feb - The banging exhaust had been getting annoying, and then it fell off in Leeds city center in the middle of the night. It was easy to road side fix but I though it ought to do it properly as Danai wasn't impressed. I got these which appear to both be identical despite the code being different... 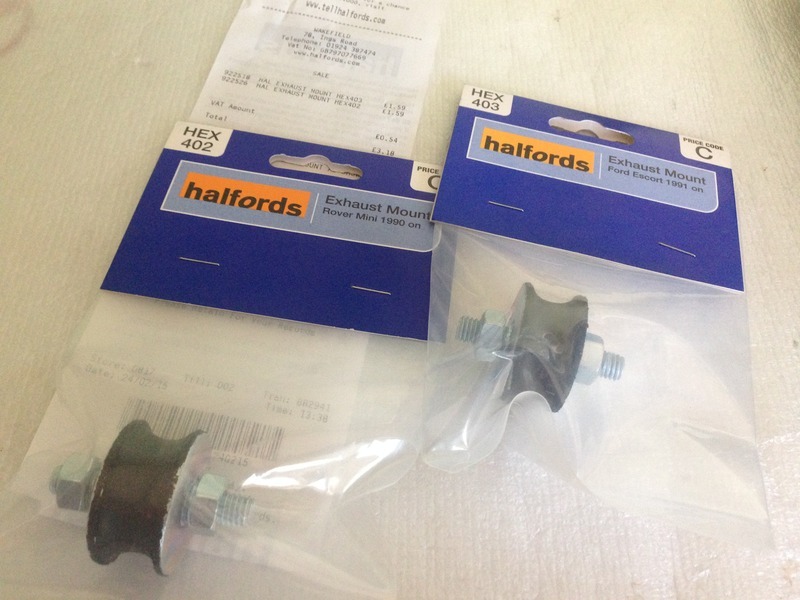 to replace these (1 had split)... 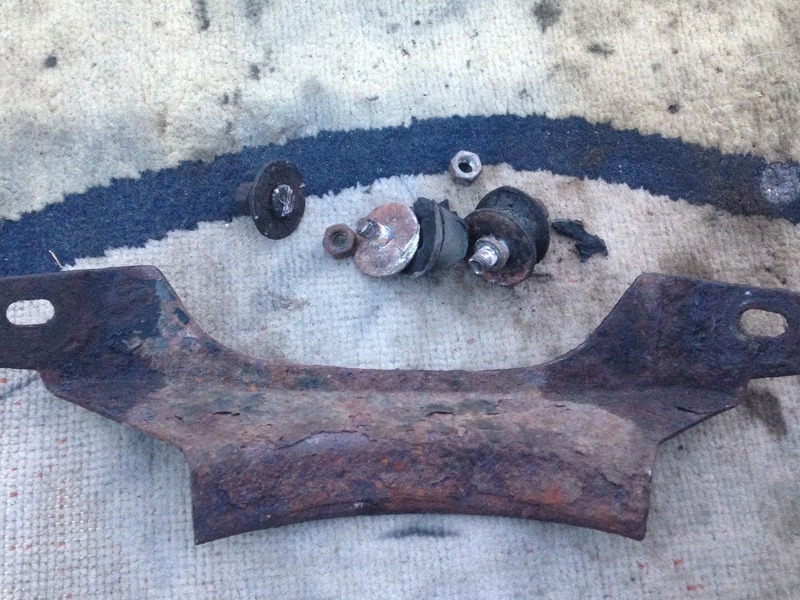 Tarted the bracket up... 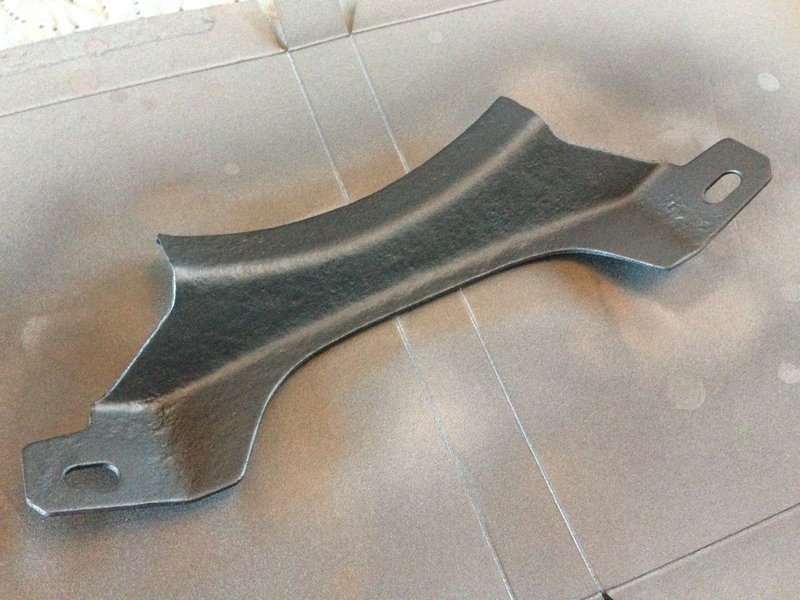 And fitted it back under here (rubber bobbin top right)... 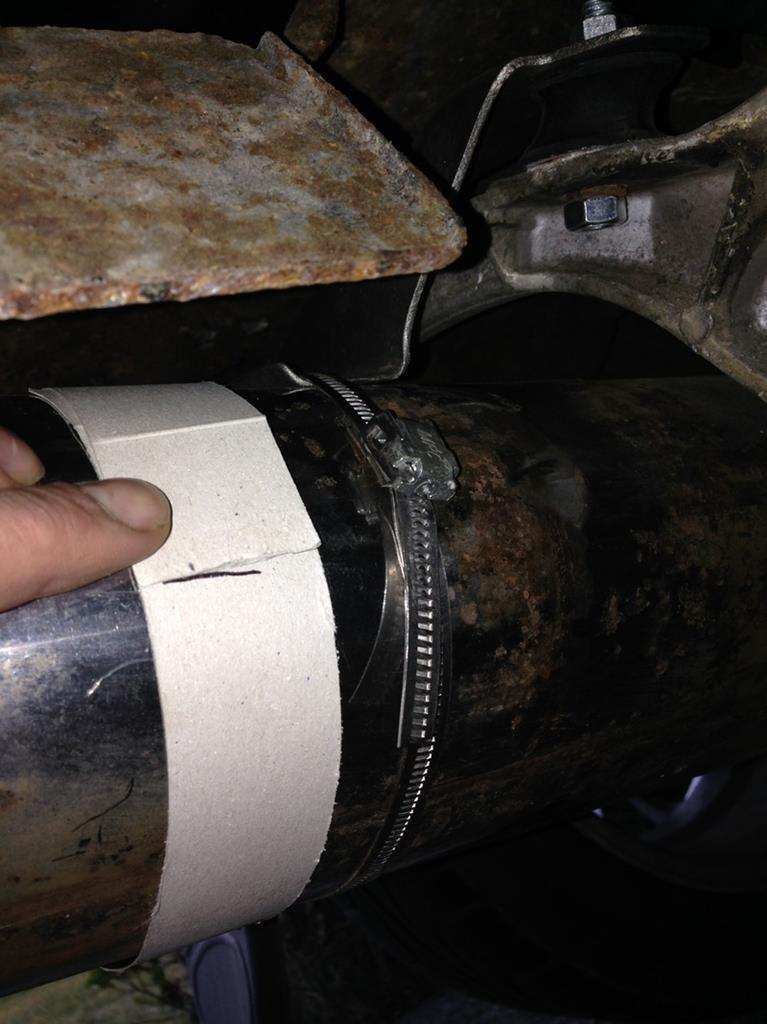 But that still squeaked (I thought) fastened with the jubilee band which is why i'm measuring the back box with cardboard in the pic. Chronologically that comes a bit later though, next update in a few more mins. -Steve- |
| |
Last Edit: Dec 31, 2017 14:24:41 GMT by stevek
|
|
stevek
Yorkshire and The Humber
Posts: 728
|
|
Mar 30, 2015 20:41:18 GMT
|
10th March - The fuel pump rubbers had disintegrated and the pump was loose dangling on the fuel lines, this rested it on the body of the car and caused a right buzzing inside the car. I got these off eBay for £4.19... 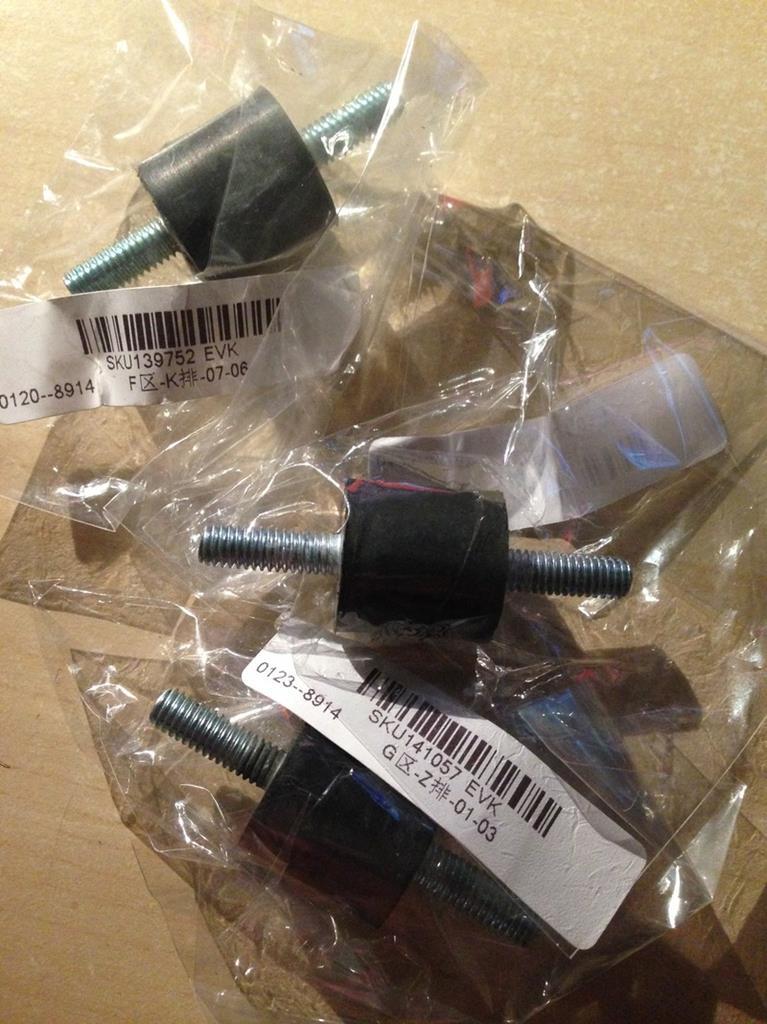 But I don't seem to have and after pics so you will just have to imagine them in place of the temporary screws here... 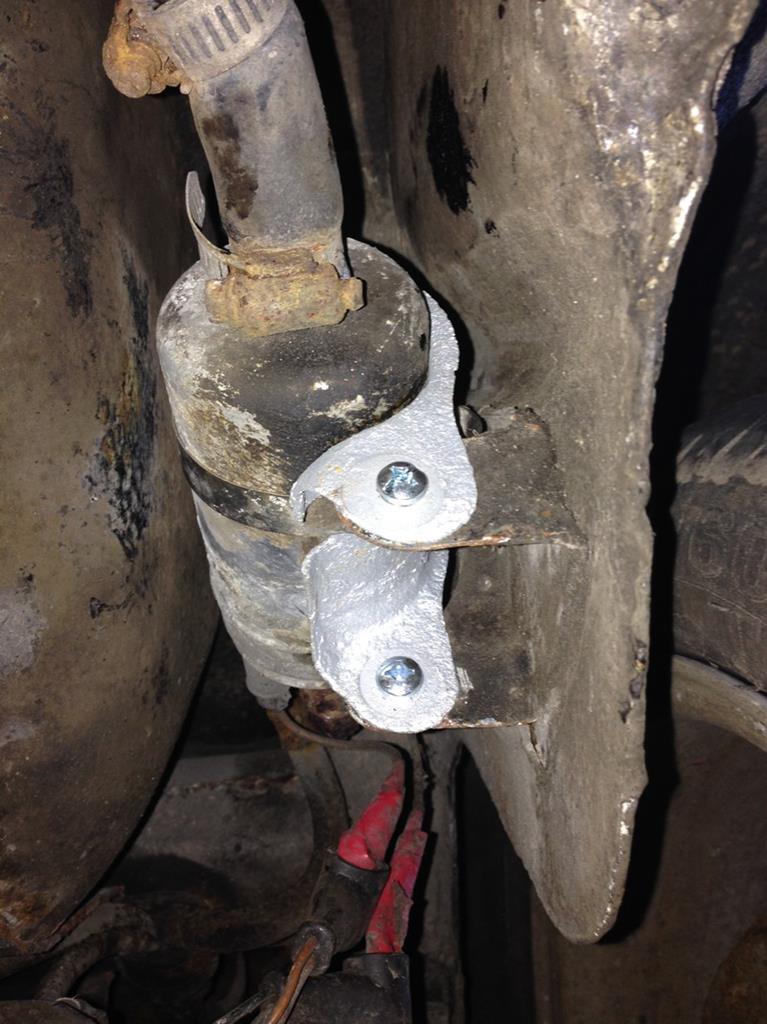 and make the inside of a fully stripped out car noticeably quieter! I seem to have forgotten to mention how frustrating it was junior hack sawing through each of the 6 old bolts while lying on my back. Skinned knuckles anyone? 13th March - Released the smelly gearbox oil... 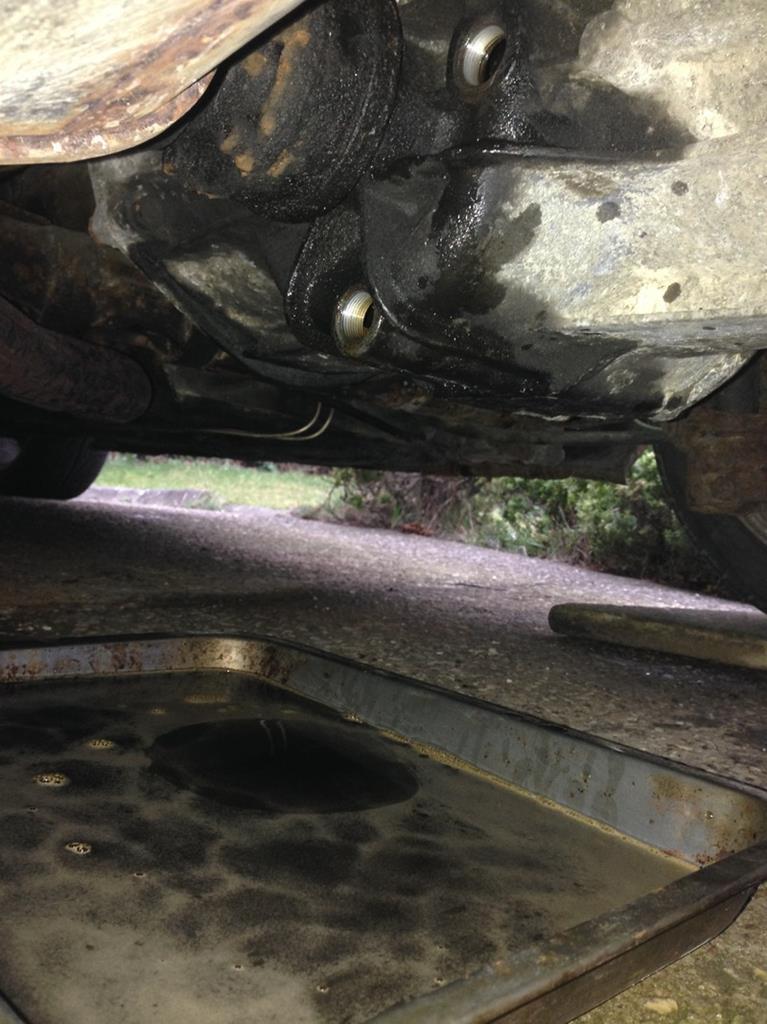 And put some new back in (handy spout)... 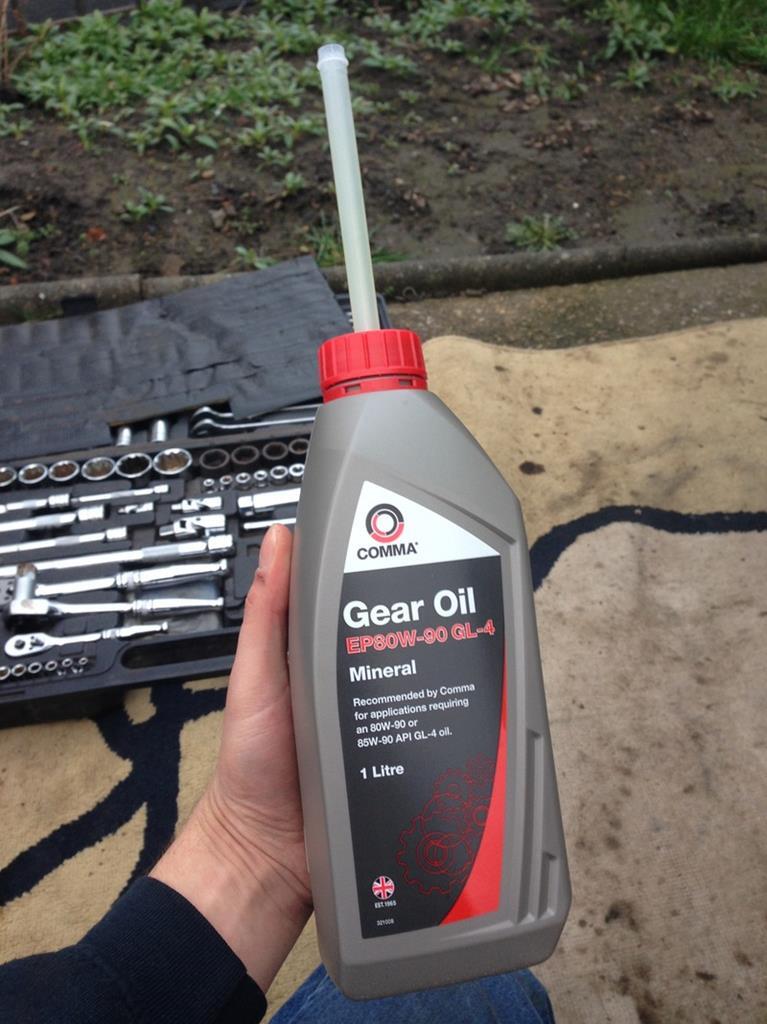 ... which also quietened the gearbox and diff down quite a bit. Don't get me wrong its still noisy in the stripped out shell and there is a fair bit of lash in the drive-train but its better than it was. -Steve-
|
| |
Last Edit: Dec 31, 2017 14:37:40 GMT by stevek
|
|
stevek
Yorkshire and The Humber
Posts: 728
|
|
Mar 30, 2015 20:56:47 GMT
|
18th March - In an attempt to stop the exhaust squeak I bought this... 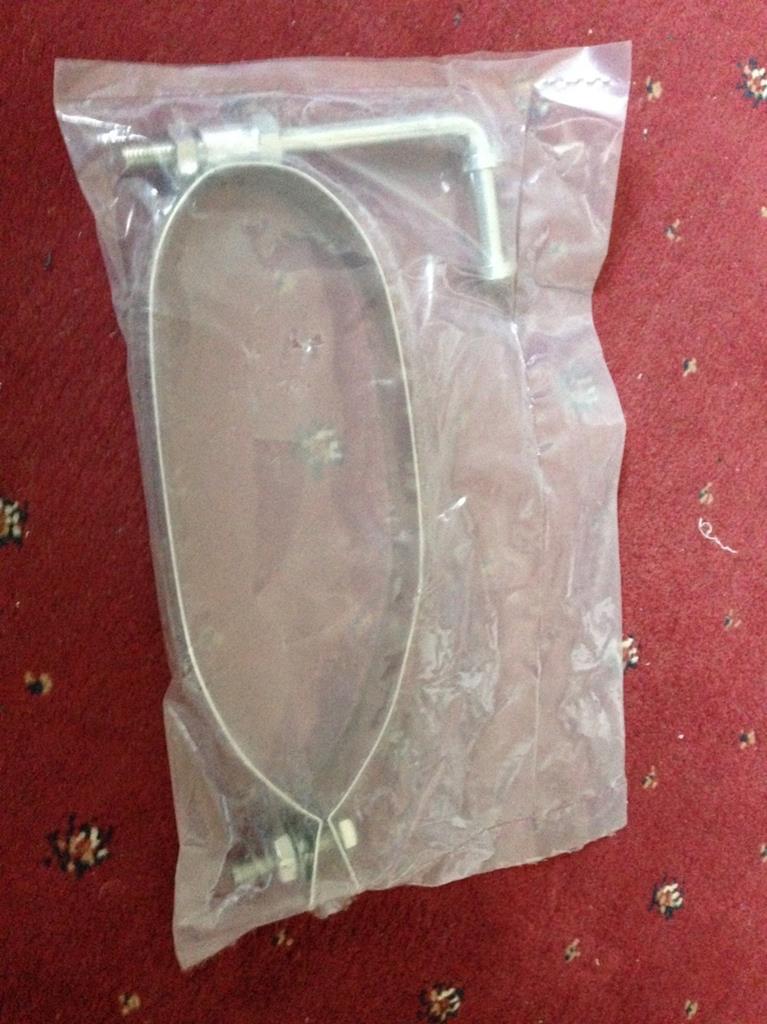 cut the hanger off... 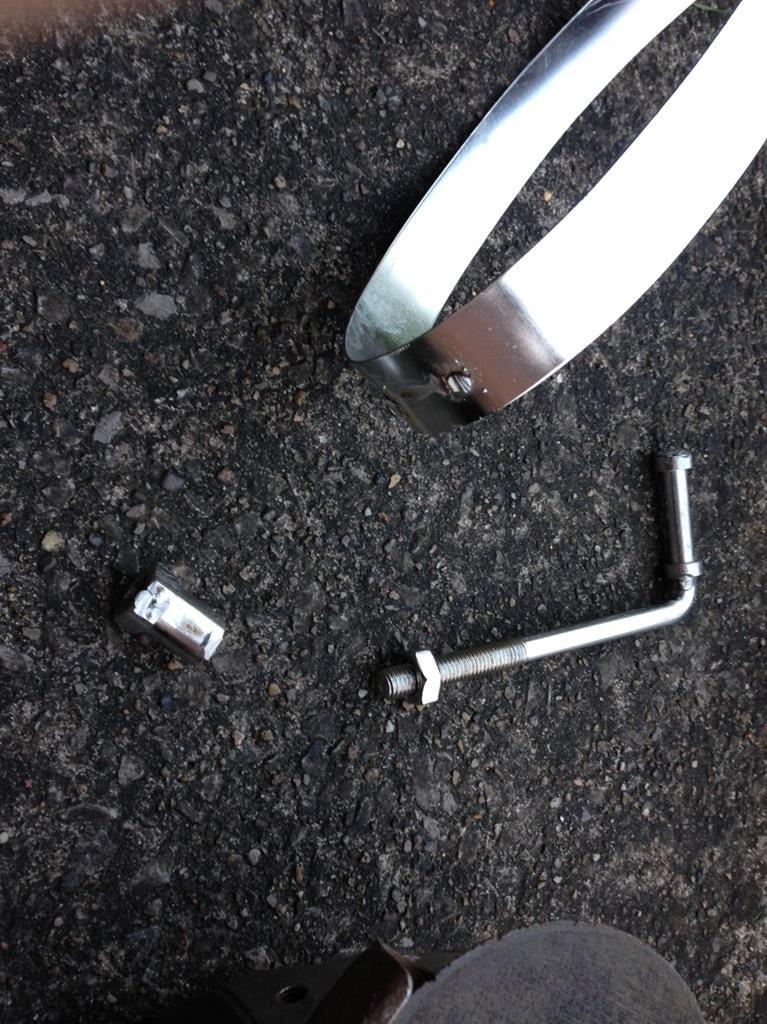 and put it here... 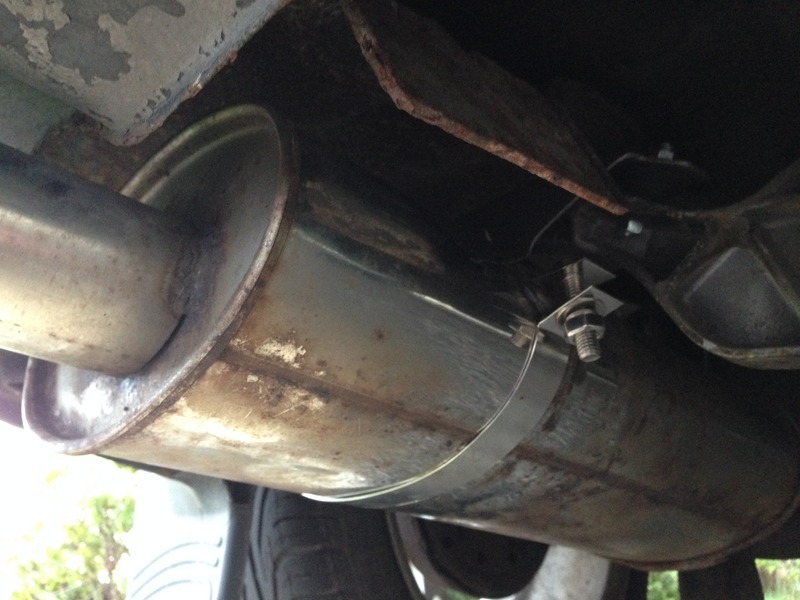 But it didn't stop the squeak.  19th March - 19th March - A simple after work oil and filter change... 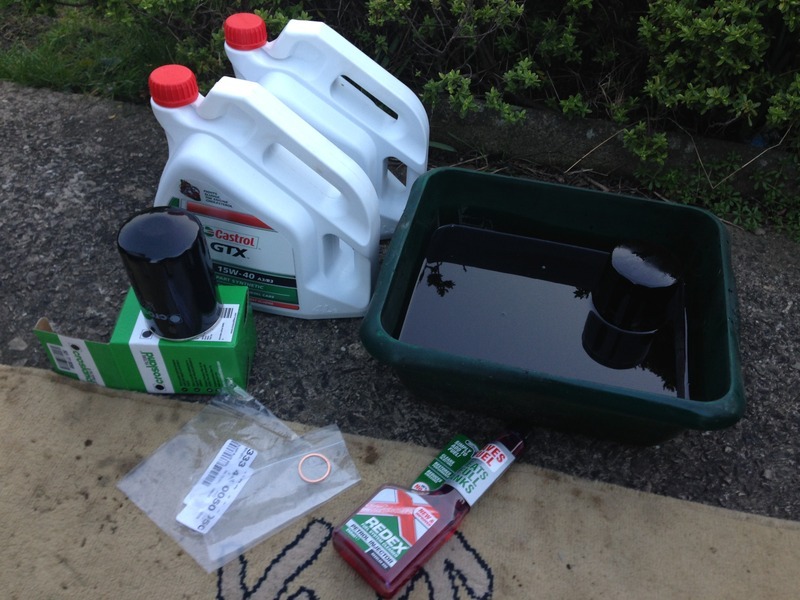 The old oil looked OK but it was probably worth a change. It's also on its 2nd tank of Redex in case that helps the injectors at all, It was on offer for £2.50 in Wilco's so I though why not. 20th March - Fitted a new thermostat, because I remembered it didn't have one! The engine temps wouldn't rise much on a cold drive. I removed it years ago; sometime before its long layup, because it failed closed but I wanted to keep using the car. 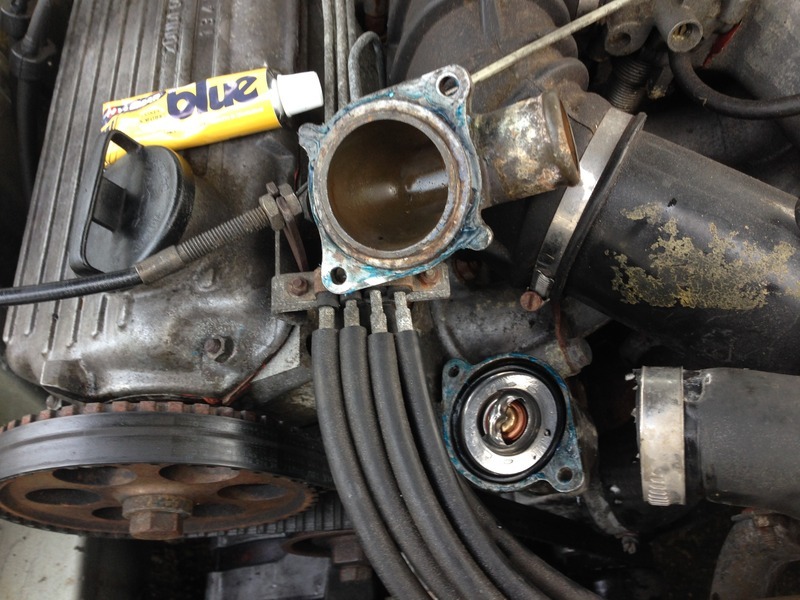 -Steve-
|
| |
Last Edit: Dec 31, 2017 14:40:30 GMT by stevek
|
|
stevek
Yorkshire and The Humber
Posts: 728
|
|
Mar 30, 2015 21:41:47 GMT
|
21st March - Still chasing the exhaust squeak I traced further back up the system to the missing hanger, missing because i didn't see the point refitting this... 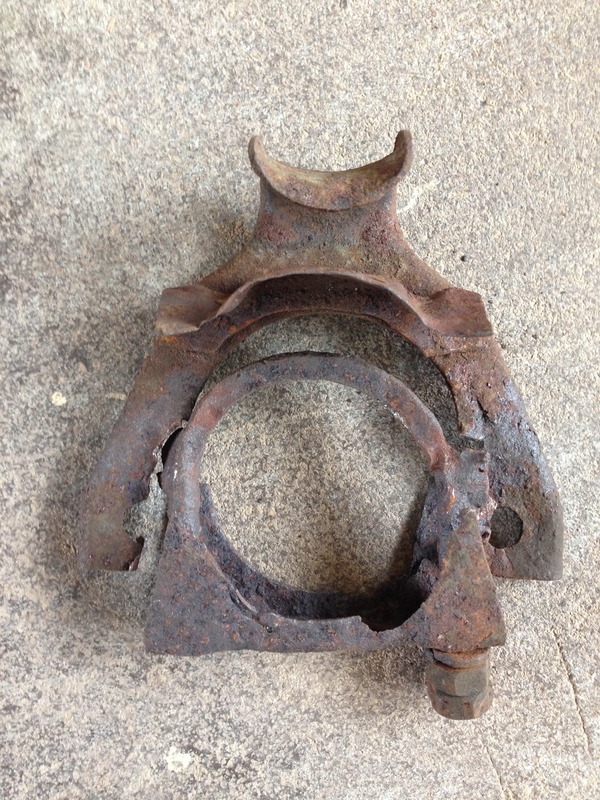 ...last time I fitted the exhaust back on. It's a standard exhaust clamp welded to the original hanger. The hangers are surprisingly expensive and my exhaust doesn't have the mounting tabs any more so I decided to use the same solution as before but as the bracket was rusted away it needed some modding... 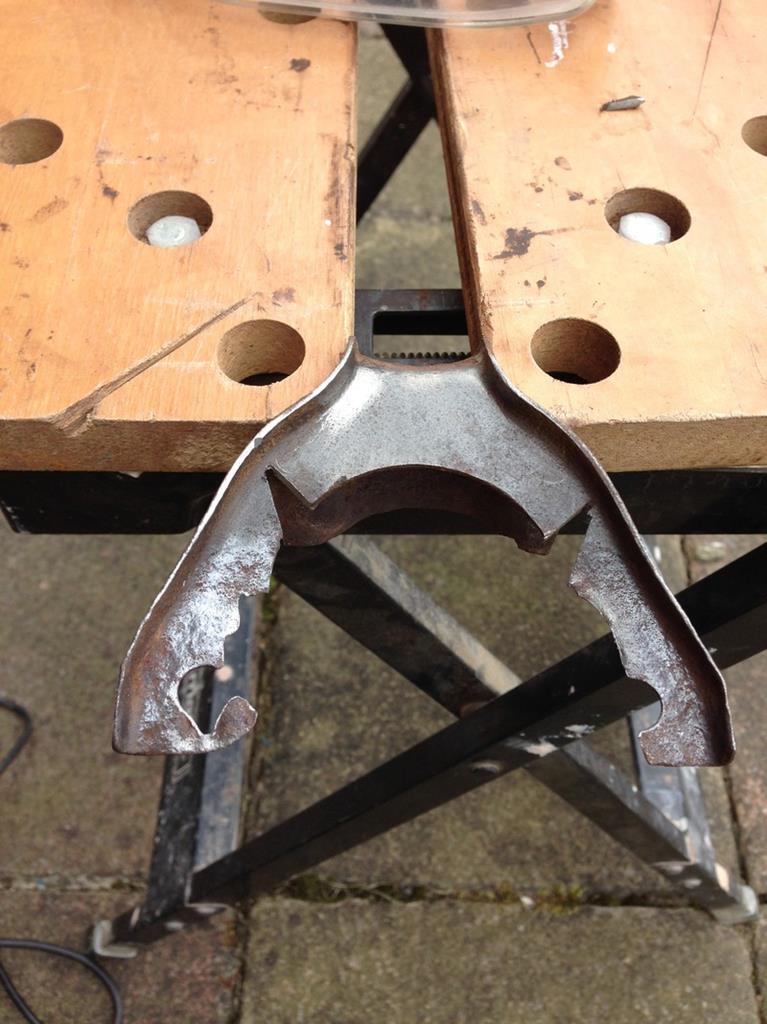 ...oops I cut it uneven, good job nobody except me is ever going to see it  A bit of melty-melty and some VHT spray... 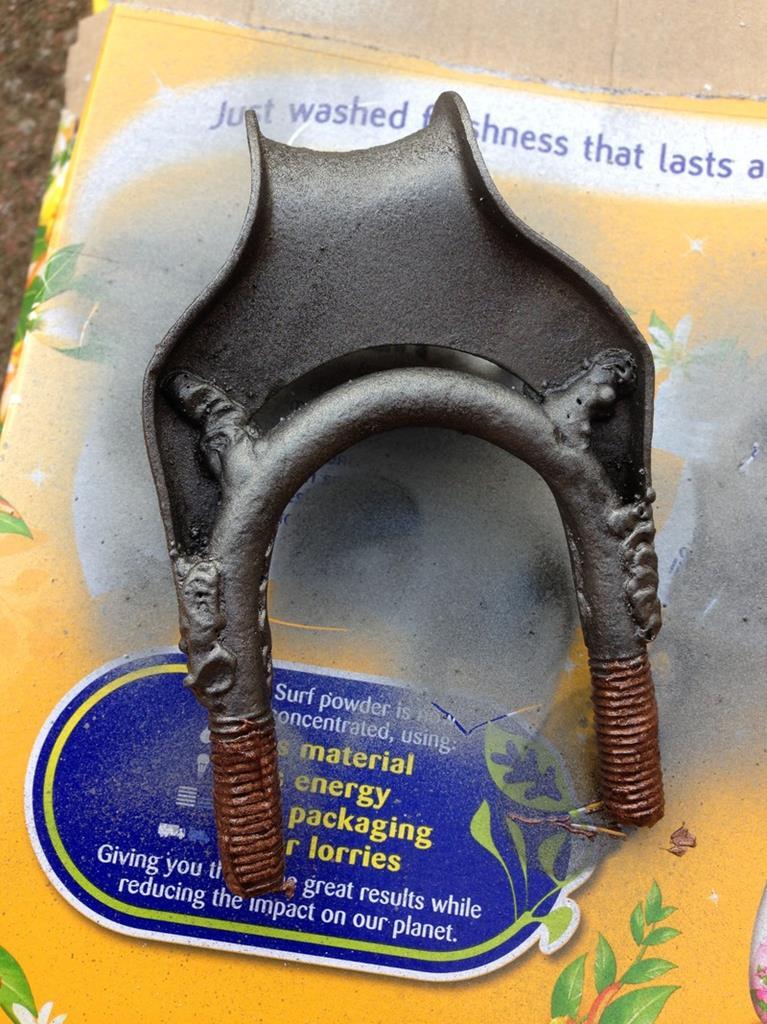 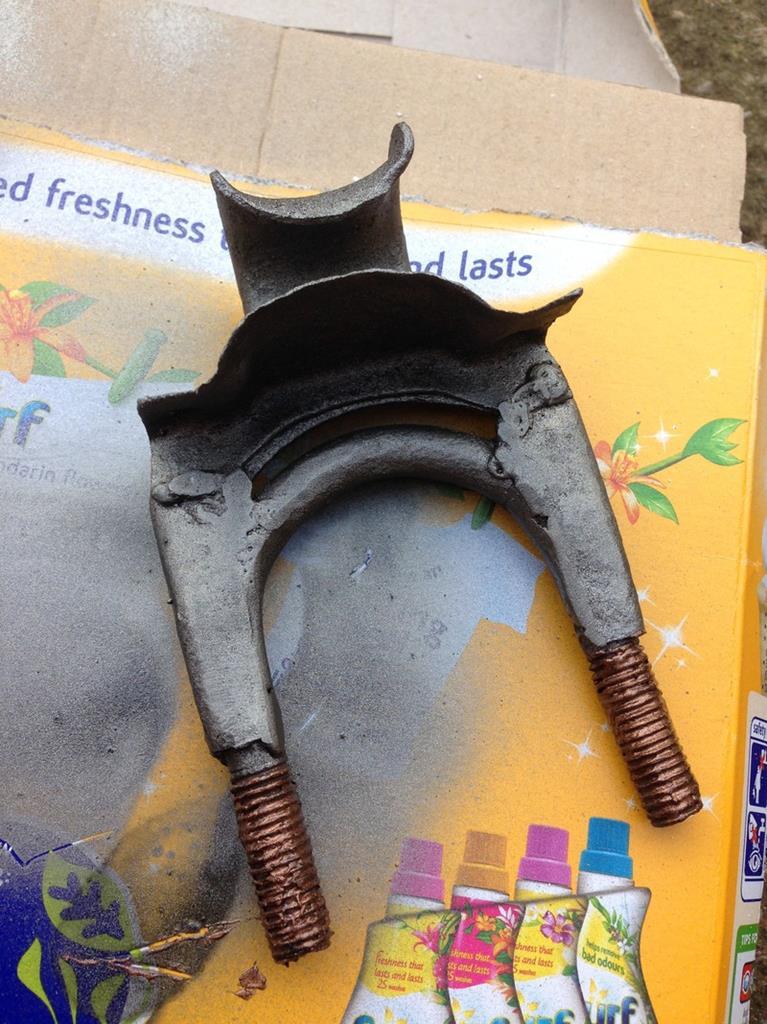 and it goes here to be forgotten for ever... 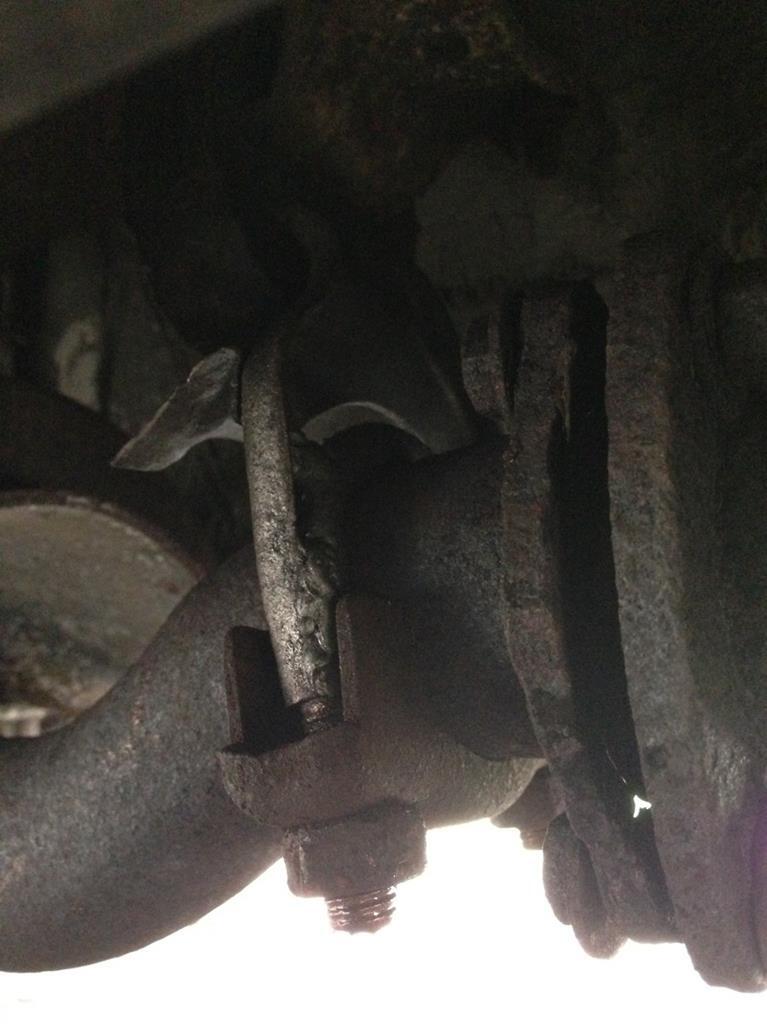 But what you really want to know is if that stopped the ANNOYING squeak. No, No it didn't. 23rd March - Mmmmm shiny spark plugs... 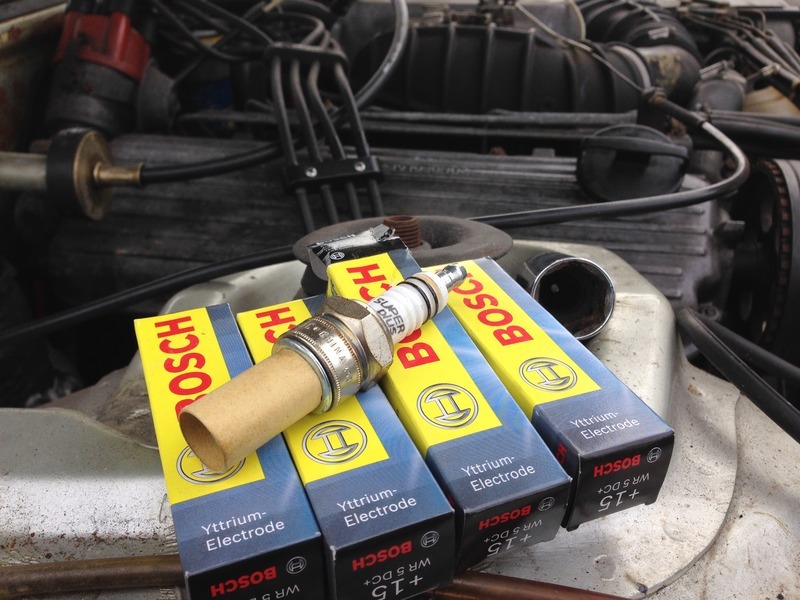 to replace the old ones... 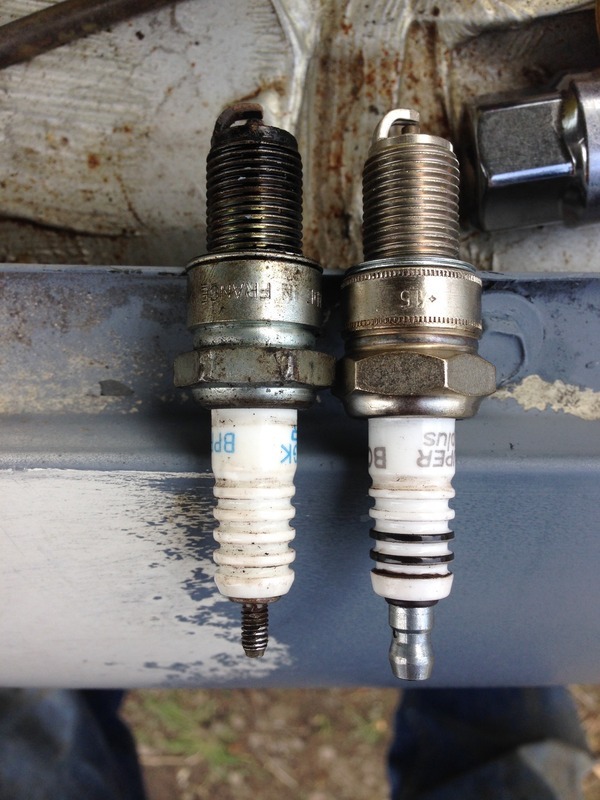 I thought the 'nipples' (or ferrules for the squares) were missing off my old ones, but it turns out (Thank you Retro-Rides technical) that many VW's including 924's don't use them. It's Ok I just had to screw my nipples off. I also put a new air-filter in (the cream one)... 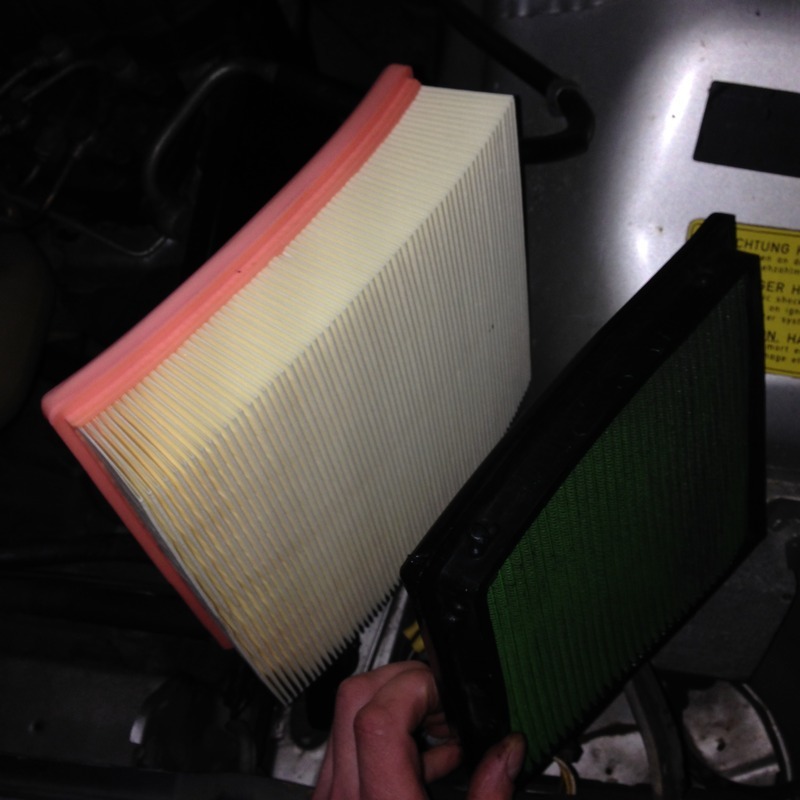 I don't know why the green one was so much smaller in depth, It wasn't a performance one was it? Working by magnetic led light... 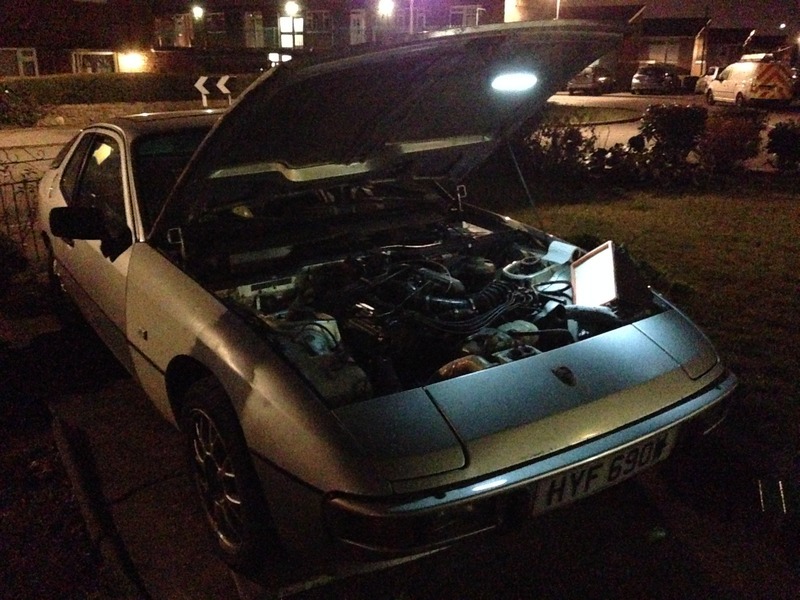 ... Darkness and poor lighting hide many sins. That brings us right up to date. The Shonky Rocket has now got 500miles under its belt, and surprisingly few bits have fallen off, yet. -Steve- P.S. The Exhaust squeak turned out to be the rear glass hatch, or more specifically the latches the hatch pins go into squeaking! Oh well, at least the exhaust isn't going to fall off again.
|
| |
Last Edit: Dec 31, 2017 14:48:02 GMT by stevek
|
|
|
|
|
Mar 31, 2015 16:19:28 GMT
|
Good to see the updates  re the old air filter, yep that's an aftermarket performance job (oiled gauze type that last a lifetime and give a few extra hp)....possibly a pipercross? Similar to a K n N but the wrong colour  |
| |
|
|
stevek
Yorkshire and The Humber
Posts: 728
|
|
Mar 31, 2015 23:02:16 GMT
|
baggabones - I'm glad someone out there is enjoying the sporadic updates. As for the air filter it was dark when I took it out but I didn't spot any obvious branding on it. It's in a box downstairs so I will have another look. Does this type of filter need any maintenance such as cleaning or re-oiling? It was looking a bit grubby but not excessively clogged up or anything. I guess I should put it back on if its a better part than the cheap replacement I bought! -Steve-
|
| |
|
|
|
|


 I think they should work well


