|
|
|
|
|
I started ferrying stuff over to the workshop today and i was going to drive the car over but it's SORN'd and i don't fancy the £2000 fine so i called Dixon and he came over with his trailer and we took the car over. Here it is in it's new home: 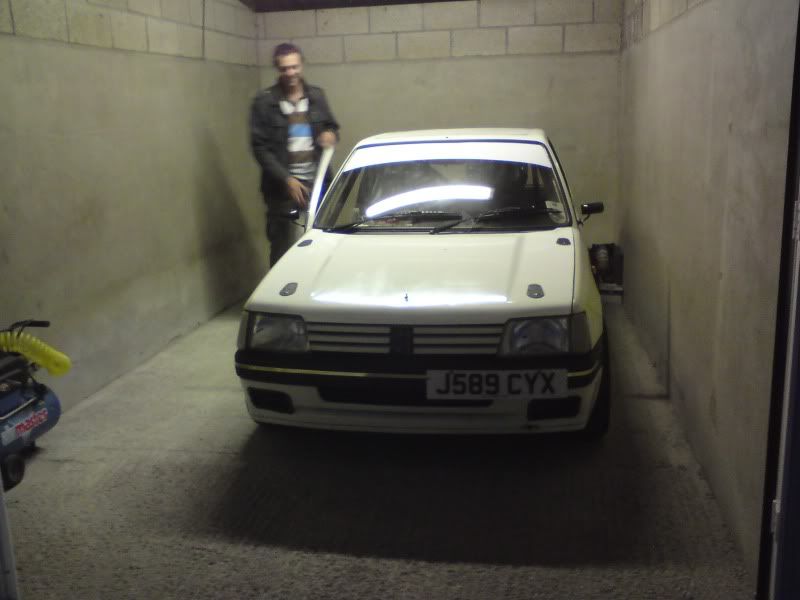 I'm going to borrow the van from work on Saturday and take the rest of my stuff over, the stuff that wouldn't fit in the Sedan and then i can start some work on the car. I'll probably whip the beam off and start doing that as i'm bored of doing electrics. |
| |
|
|
|
|
|
|
|
|
|
I had a bit of a manic day today, the agency i do some work for got me a job today dong some unloading, basically it involved unloading an entire 40ton container filled with boxes of doorstops in to a warehouse...and it nearly killed me doing that in 4 hours. Anyway i came home, had a meatball sandwidge and went to the workshop. I was going to do the electrics but i quickly lost my enthusiasm for that so i pulled the rear beam off of the car and started stripping that down. It came apart really easily using my now trusty torsion bar puller and i quickly had it all in bits. The thing that surprised me was that both of the trailing arm shafts are in really good condtion, prefectly servicable, so i breated a sigh of relief when they came out as i was worried they would be scrap. I stripped out the old outer bearings which wern't in bad condtion but i can't get the inner bearings out, real pain in the  so i'll have another go tomorrow, and start attacking the beam with some paint  Beam off: 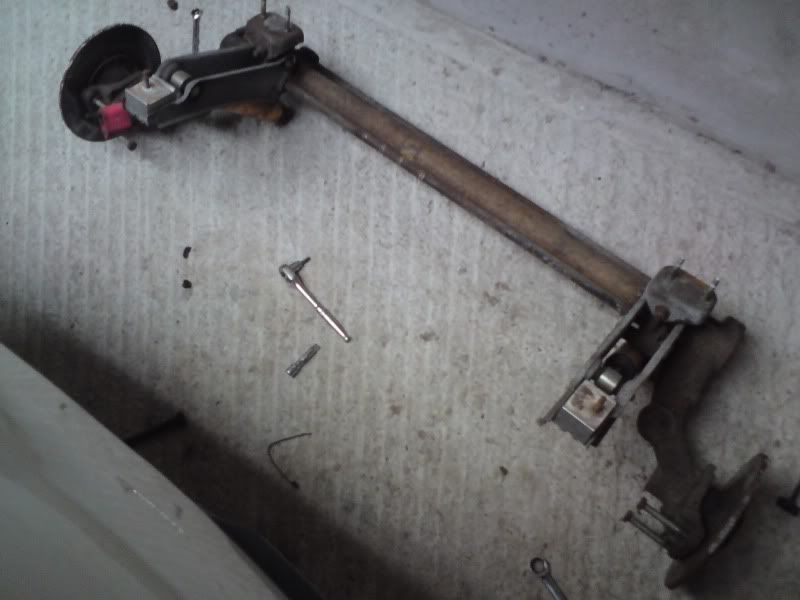 Old torsion bars: 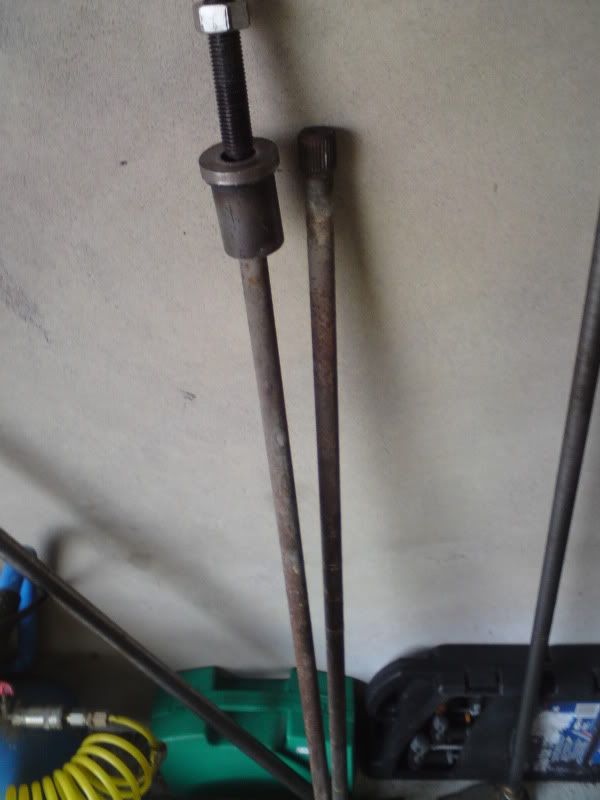 Stripped down with the new bars slid in: 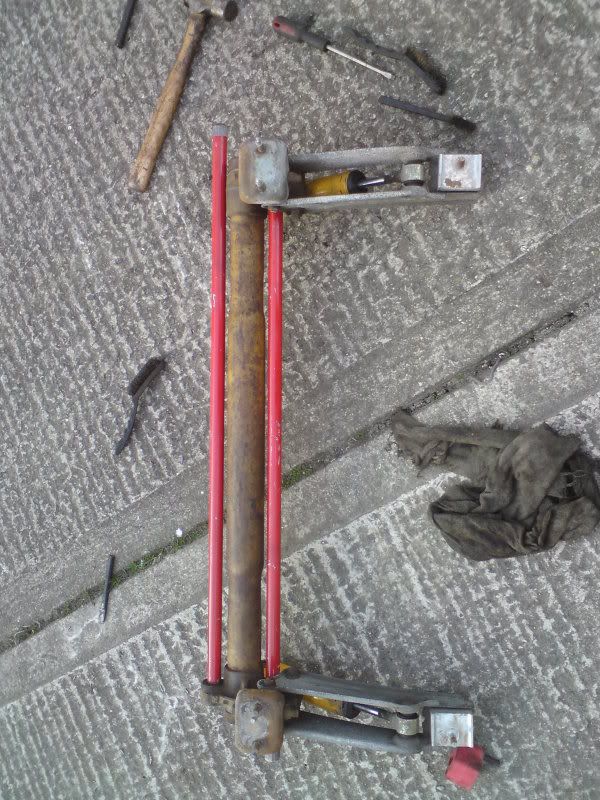 Thanks for reading |
| |
|
|
luckygti
Posted a lot
 I need to try harder!
Posts: 4,912
|
|
|
|
This is the next job on mine, I'm dreading it and have kept putting it off, but I'm at the stage where it needs to be done so..... Lowering tomorrow  Yours is looking really good, just suits the shape in white. Nice work  |
| |
|
|
|
|
|
|
|
|
The cut off switch should be on the drivers side scuttle area or upper wing and marked clearly. I found that the drivers side windscreen wiper mount was perfect, however single wiper conversions are useless on the road as I found in the lovely wet 12 car rally I did a couple of weeks back, just cant clear the screen fast enough!
|
| |
1997 TVR Chimaera
2009 Westfield Megabusa
|
|
|
|
|
Apr 10, 2010 13:11:57 GMT
|
This is the next job on mine, I'm dreading it and have kept putting it off, but I'm at the stage where it needs to be done so..... Lowering tomorrow Yours is looking really good, just suits the shape in white. Nice work Thanks for that mate. It's honestly not that bad. The thought of rebuilding a beam used to scare the curse word out of me but once you get started they're actually quite simple. It helps having the right tools like a decent puller and a dummy shock for setting the rideheight. |
| |
|
|
|
|
|
Apr 10, 2010 13:13:49 GMT
|
The cut off switch should be on the drivers side scuttle area or upper wing and marked clearly. I found that the drivers side windscreen wiper mount was perfect, however single wiper conversions are useless on the road as I found in the lovely wet 12 car rally I did a couple of weeks back, just cant clear the screen fast enough! Thaks for that Adam, mounting the box isn't on my priority list atm as my mate who's dremel i borrow has gone on holiday for a week  |
| |
|
|
Siert
Posted a lot
Posts: 1,104
|
|
Apr 10, 2010 15:17:32 GMT
|
|
About removing the inner bearings. This is how I did it:
If you have a worn trailing arm shaft you can enter it into the tube with the narrow end first, then hit it down with a hammer. This should make the inner bearings drop into the wider part of the tube. Once they're floating free in the center of the tube you can pull them back out with something that has a hook at the end or a piece of wire. They'll easily deform into an ellipse once you pull them back trough the narrow part of the tube sideways.
|
| |
Last Edit: Apr 10, 2010 15:18:20 GMT by Siert
|
|
|
|
|
Apr 10, 2010 16:36:39 GMT
|
About removing the inner bearings. This is how I did it: If you have a worn trailing arm shaft you can enter it into the tube with the narrow end first, then hit it down with a hammer. This should make the inner bearings drop into the wider part of the tube. Once they're floating free in the center of the tube you can pull them back out with something that has a hook at the end or a piece of wire. They'll easily deform into an ellipse once you pull them back trough the narrow part of the tube sideways. Thanks for that, only trouble is i don't have a scrap trialing arm shaft Both of mine were in good condtion so 'm saving them. I'll have another go at them tomorrow. |
| |
|
|
|
|
|
Apr 12, 2010 20:39:11 GMT
|
I went to the workshop after work today but i only had an hour before i went to the guy so i didn't get a lot done. I started off by giving the rear beam a bit of treatment with the blowtorch: 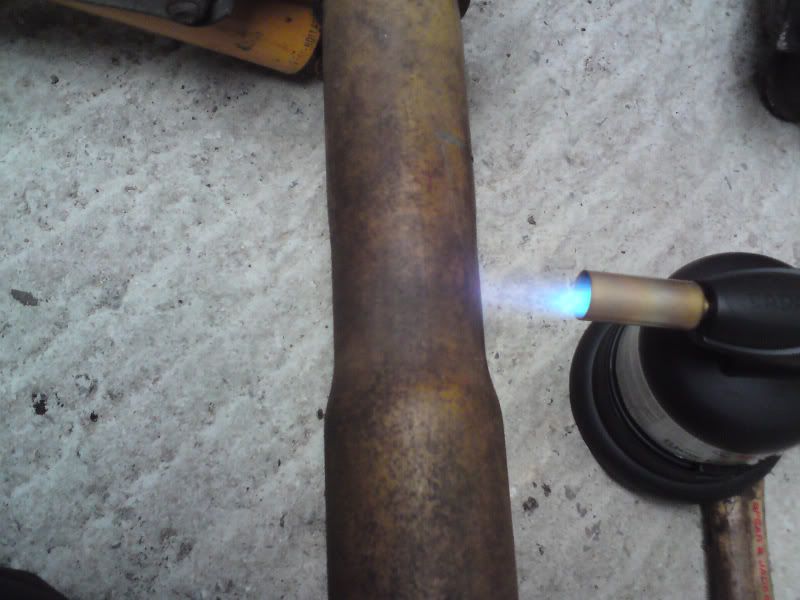 To loosen up the inner beam bearings, once i had them nice and hot i took Merions advice and dropped a 36mm socket in the tube and gave it some hell with the hammer and they soon dropped out:  I then greased up the new bearings and slid them in to the correct depth and then added the new seals: 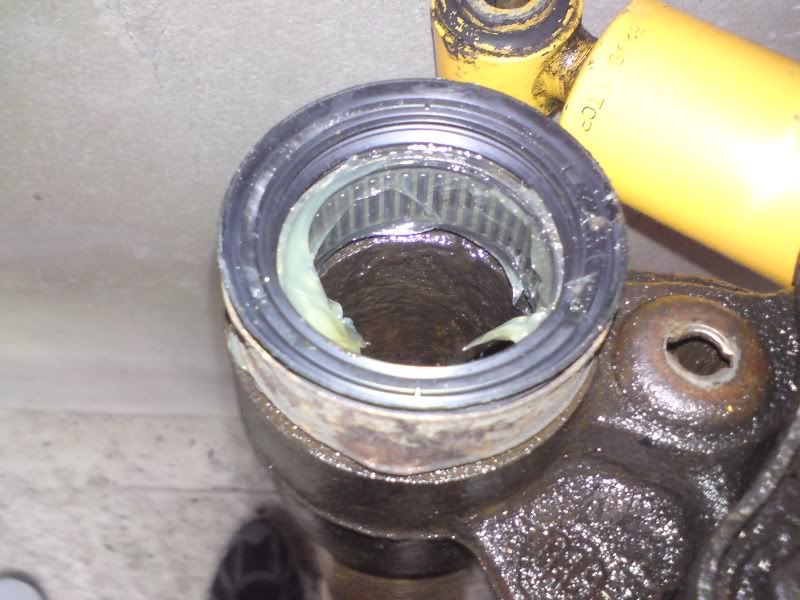 It was at that point that i nearly made a right cock-up. I got a bit carried away with my progress and allmost slid the trailing arms in without putting the torsion bars in and setting the ride height  Still, no harm done and i should have it all built up and ready for some paint on wednesday. |
| |
|
|
|
|
|
Apr 12, 2010 23:15:07 GMT
|
|
It may be obvious and I'm missing something, but why cant you slide the trailing arms in before the torsion bars?
|
| |
1997 TVR Chimaera
2009 Westfield Megabusa
|
|
|
|
|
|
|
|
|
The torsion bars i have are the big man sized 24mm ones and the diameter of the bar is just slightly larger than the diameter of the splines so it won't go in the traditional way Bit of a ballache but it should be worth it. |
| |
|
|
Siert
Posted a lot
Posts: 1,104
|
|
|
|
|
Good job!
|
| |
|
|
|
|
|
|
|
|
Wow, stiff stiff stiff! ;D
|
| |
1997 TVR Chimaera
2009 Westfield Megabusa
|
|
|
|
|
Apr 13, 2010 16:49:12 GMT
|
I went to the workshop this afternoon and did a bit more work on the beam. I first attacked the tube with some Nitromors and a wire wheel attachment on my battery drill to get the tube back to bare metal: 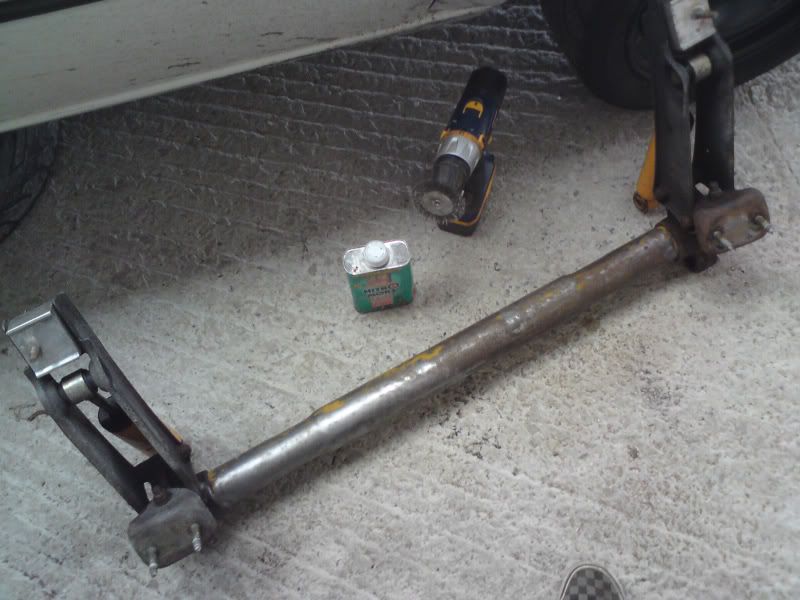 I then gave the tube a few coats of Hammerite smooth to bring it back to a nice yellow: 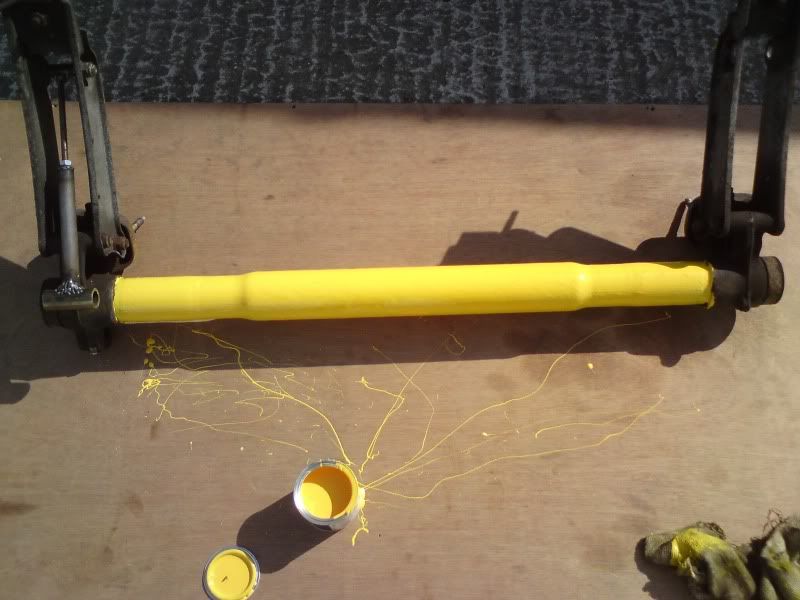 While that was drying i greased up the torsion bars at the trailing arms and fitted the dummy shock to the beam to measure the rideheight. I then slid the arms in and locked the torsion bars in: 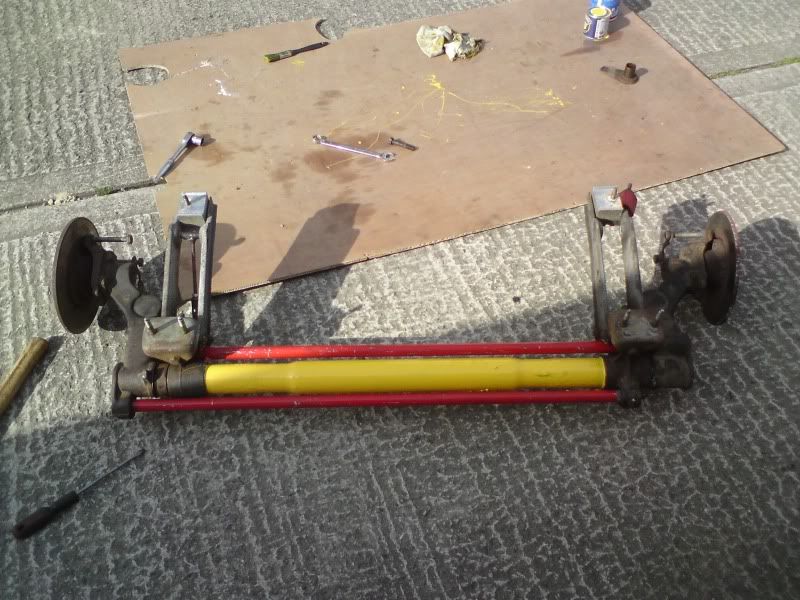 I've just got to set the clearances between the trailing arm and the tube seal and bolt it all up. I went to slide the ARB in but the end plates don't fit in the trialing arms and they are too short to fit the standard bolt holes in the arm? Has anyone ever fitted a Saxo VTR ARB to a 205 beam before? |
| |
|
|
|
|
|
Apr 13, 2010 17:08:42 GMT
|
You need 306 end plate and bushes They have the right spline for the ARB and the right fit for the 205 trailing arms. |
| |
1997 TVR Chimaera
2009 Westfield Megabusa
|
|
|
|
|
Apr 13, 2010 19:44:58 GMT
|
|
Ah ok thanks, one of the end plates on the saxo arb is welded on though, drill it out?
|
| |
|
|
|
|
|
|
|
Ah ok thanks, one of the end plates on the saxo arb is welded on though, drill it out? Really? I havent heard of this before! Any pictures of the weld? |
| |
1997 TVR Chimaera
2009 Westfield Megabusa
|
|
|
|
|
Apr 14, 2010 11:35:17 GMT
|
|
I was surprised too, i've never seen it before but it looks like a factory job as it's all rusted over. I'll get a pic when i go to the workshop later
|
| |
|
|
|
|
|
Apr 14, 2010 18:52:48 GMT
|
I went to the workshop today and got the beam back on the car, bit of a pain by yourself with only one trolley jack but i think i've got the technique down now. I then dropped it on to the floor to check the rideheight and it looks like i got it just about right the first time I used a 295mm dummy shock length to get it right. I the set the clearances on the trailing arms and bolted it all back togeather: 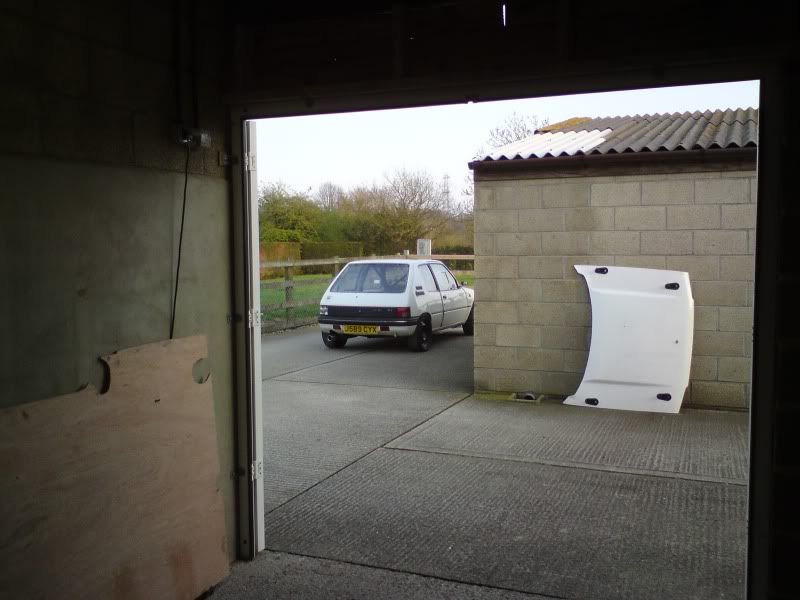 Adam, heres the arb end plate on the saxo arb:  Very strange  |
| |
|
|
|
|
|
|
|
;DWassup Ya'll I haven't had much time to work on the car lately as i've been working on my dissertation and the rest of my Uni coursework. I managed to get a bit of time on it though to do a few things. First off i managed to get the old ARB endplate off that had been welded on to the Saxo ARB i had, the splines look in perfect condtion so i just need some 306 endplates now and i can stick that in. I also made a new template for the CPS bracket that i want to make. I did make a bracket but i wasn't happy with it so i desinged a new one i just have to get in to the workshop at uni now and use the metal folder. I decided to switch to a small battery instead of the full size car one. I got given this neat battery tray by Jason as he has his very fancy laser cut one now, thanks again mate: 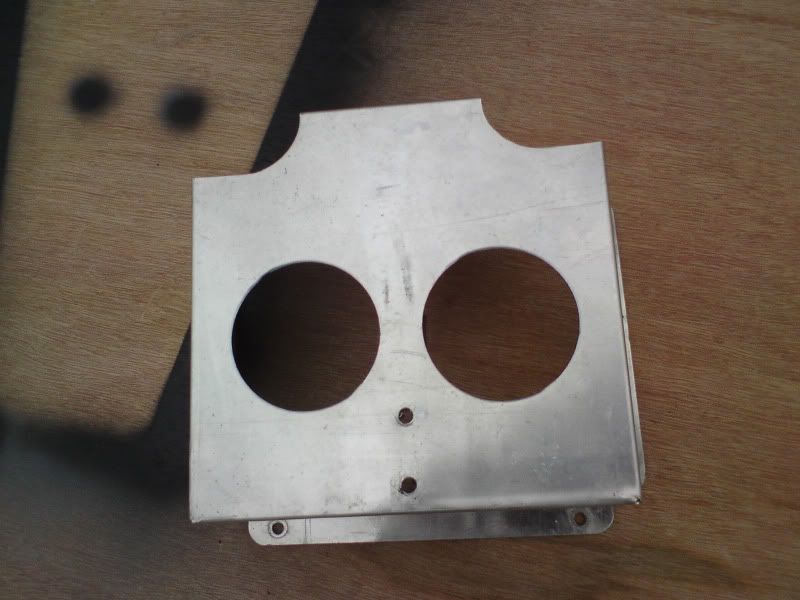 I've given it a good coat of Satin Black since taking that picture to tidy it up a bit. I also finished making my centre console, it just needs the cut off chord p-clipping on to it, the extinguisher pull chord mounting in and some stickers to lable the switches: 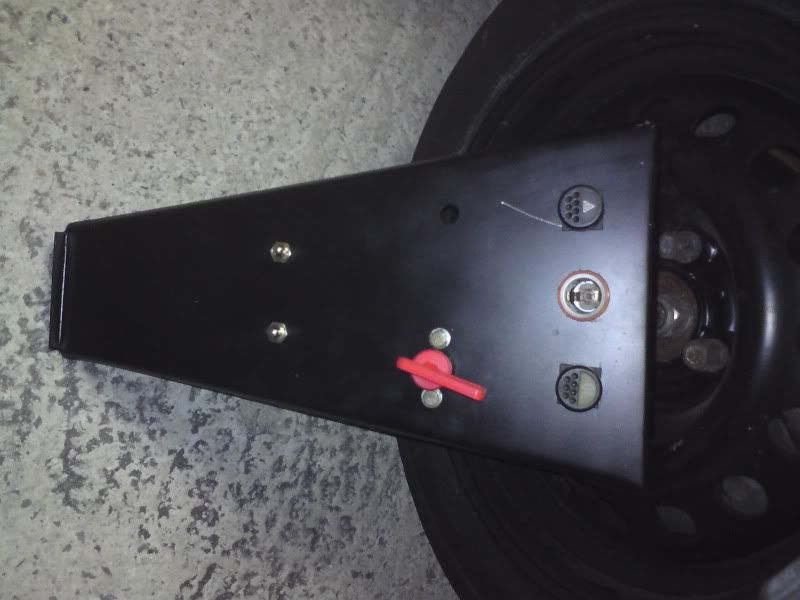 I also mounted the external pull chord mount in the front wing. The piece of wing that i cut out weighed more than the mount i replaced it with so that was a win ;D : 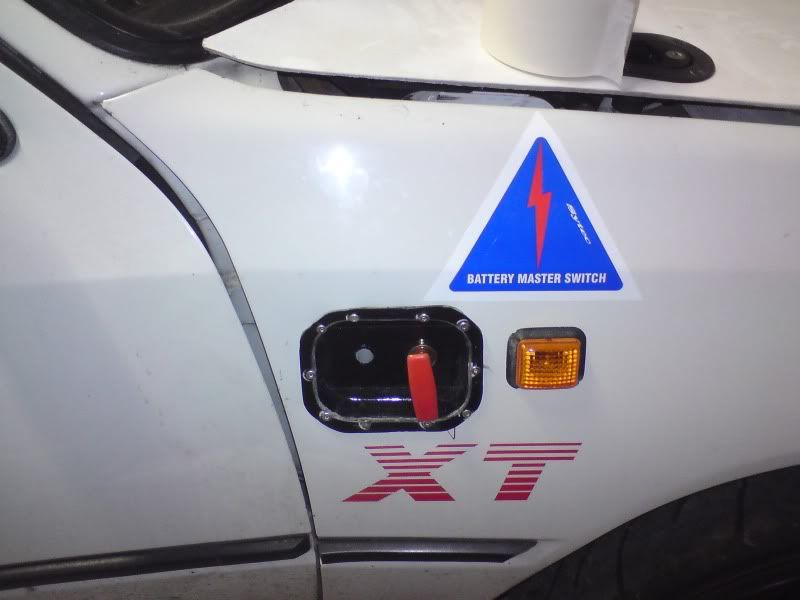 Should have some more updates the week after next. Thanks for reading. |
| |
|
|
|
|


 Yours is looking really good, just suits the shape in white. Nice work


 Still, no harm done and i should have it all built up and ready for some paint on wednesday.