|
|
|
|
|
Useful links to decode chassis numbers ... www.team.net/www/rootes/chassis.htmlwww.rootes.com/yourcar.htmlAll handy stuff but any idea how it relates to the engine number I'm trying to make sense of  Did Rootes use matching numbers for engine & chassis  Does anyone have a table like the ones above but for engine numbers  |
| |
|
|
|
|
fogey
Posted a lot
  
Posts: 1,621
|
|
|
|
Engine numbers and chassis numbers were different. |
| |
|
|
|
|
|
|
|
Engine numbers and chassis numbers were different. Thanks - that's something I wasn't sure of  |
| |
|
|
|
|
|
Mar 12, 2012 19:59:45 GMT
|
Managed to spend a few hours on this at the weekend and we have progress ;D Start with one of these 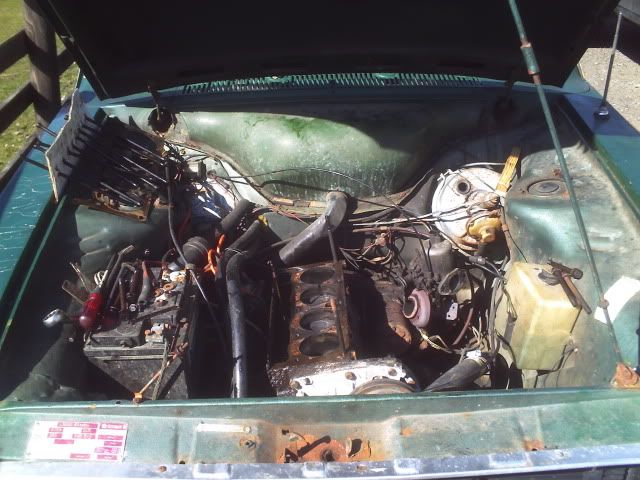 Add a clean and tidy headgasket thingy (the only shiney bit under the bonnet  ) 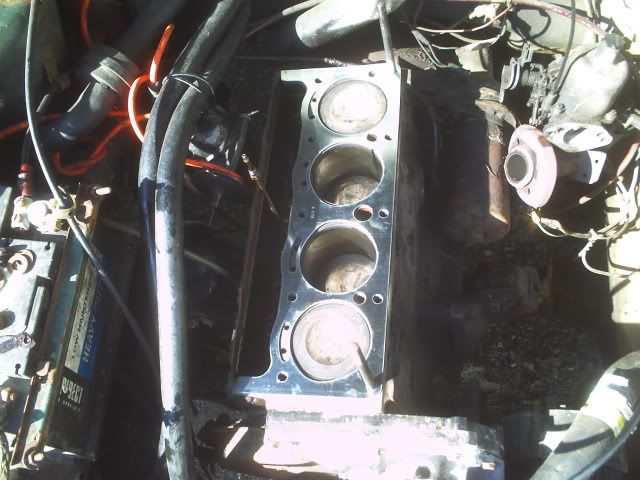 Add a spare bit we had ;D 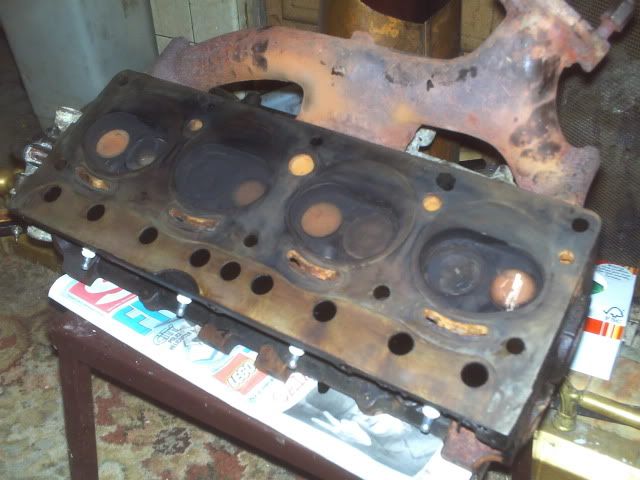 Stick it all together to hide the shiney bit - but then add a nice new radiator  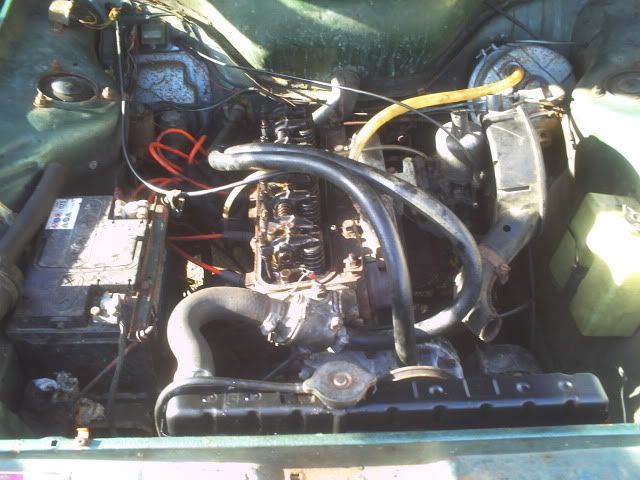 All came apart and went back together very smoothly. Not rushing took about 2 hours to strip it on Saturday eve, 3 hours to rebuild it Sunday. 1 snapped bolt on the thermostat housing, I'm hoping it's ok and no need to drill and tap it  rocker oil feed is an odd system (spot the oilfeed pipe sticking up when the head is off), seems ok but not much oil flowing from the rockers at tickover so I'll strip the rockershaft to check for blockages  Got it back together and took it for a run around the block then ran out of time  Tappets now need setting but I want to strip the rockershaft first. Temp is higher than usual which I'm hoping is just an airlock that has now cleared and radiator just needs a top-up. The other option would be a dead headgasket which wouldn't be good news  I still have the spare - new - engine in the boot but no time or workshop to fit it hence fixing up the original engine. Ho hum  |
| |
|
|
Seth
South East
MorrisOxford TriumphMirald HillmanMinx BorgwardIsabellaCombi
Posts: 15,542
|
|
Mar 12, 2012 23:13:14 GMT
|
Hope it runs OK for you  |
| |

Follow your dreams or you might as well be a vegetable. |
|
|
|
|
Mar 19, 2012 19:15:07 GMT
|
Hope it runs OK for you  It does ;D ;D ;D Had another shot at getting it sorted and back on the road at the weekend, found 2 main problems ... Lots of air in the radiator so it needed topping up (my fault for parking it nose-down on a slope when I was changing the headgasket, guaranteed to get an airlock when I filled it  ) Temp gauge is now working! This sounds like good news but for the past 3 years it has shown nothing (cold) or just-off-the-bottom-stop (when it's warm) Since the rebuild it now reads about 1/2 gauge (marked as "Normal" would you believe  ), to me it looks like it's overheating as it's never been that high before  60 miles later it's still running happily so I'm declaring it fit and well ;D Still needs tappets setting and a couple of other bits but nothing major. We're back in the game  |
| |
|
|
|
|
|
Mar 19, 2012 19:35:25 GMT
|
Remember the "new" engine I collected a few weeks ago? ;D An Ebay special - "removed from a working car less than a month ago" according to the seller ;D As I'm not going to get time to do much with the motors I decided to start pulling bits off the new one to see if I can use them to refresh the engine in the car and / or improve fuel economy  It's amazing how much crud can collect in a carb in the few weeks since it was last running  Apologies for the even-worse-than-usual camerphone pic (dodgy operator *and* a flat battery this time  ) - the stuff around the butterfly that looks like fluffy white corrosion with lumps in it is ... fluffy white corrosion wih lumps in it  Not in the pic is even more of the same that dropped off when I removed the carb from the engine  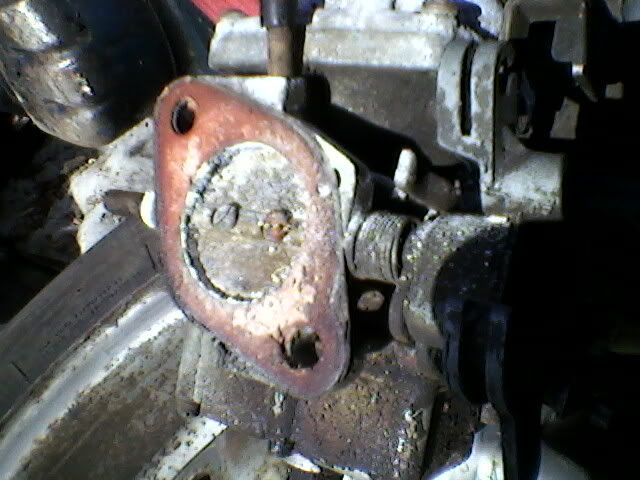 Found lots more interesting stuff inside the carb (and a cupfull of water in the floatbowl). Obvious problems (even to a non-carb person like me) are a torn diaphragm, lots of corrosion, and sticking throttle and choke spindles. It's a Stomberg CD150, Speedy spares offer choice of B5 or 6Q needles - any advice on which would suit best ?? Anything else I *need* before I fit it (I'm planning to try it - if it's better than what's on it might get a more detailed rebuild then)  |
| |
Last Edit: Sept 18, 2019 8:25:33 GMT by nomad
|
|
|
|
|
Mar 19, 2012 23:06:57 GMT
|
|
|
| |
|
|
|
|
|
Mar 25, 2012 13:09:25 GMT
|
Had a play under the bonnet in the sunshine yesterday, now know a bit more about Hillman engines than I did 2 days ago ;D Carbs  Fitted a new diaphragm (£2 ;D) to the Stromberg from the new motor, all went together ok once the crud was cleaned off it. No idea how somebody had managed to fit the "idiot proof" locating tabs on the diaphragm I removed the wrong way when they put the carb together in the past  I order a new needle from Speedy Spares - "B5.." found out when I received it there are 2 types (fixed and adjustable ), one has a small mounting, other is spring loaded and has a bigger mounting. One on the car is small, one I bought is large. Oops ! Top tip - undo the needle holder in the carb base a couple of turns and tap it to center the needle jet  With the new carb it fires and tickes over nice but as soon as I rev it the motor dies. Does this sound like the old needle is the problem, or what ?? Old carb is back on until I can sort out the right needle for the new one. Oil feed and rocker shaft / rocker arms  Each rocker has a small oil feed hole drilled in it facing upwards (normal OHV stuff) so oil will lubricate the rockers. I get no / very little oil from the holes when engine is running  Not good. The shaft is in 3 parts, center casting with oil feed into it from the block, then "front rocker shaft" and "back rocker shaft" plug into this to make a normal-looking rocker shaft. The front & back shafts look like they can only be fitted one-way (idiot proof locating tabs again  ), but on mine the oil feed hold point downwards. I'm wondering if they have been fitted backwards (or upside down) which is why I'm getting no oil through to the rockers. Does anybody know if the oil feed holes on the shaft should point downwards or upwards? (I had a look in my manuals but not found any answer yet) Noticed some fumes from the breather / filler neck, some handy info at : www.oldclassiccar.co.uk/forum/phpbb/phpBB2/viewtopic.php?t=10588&postdays=0&postorder=asc&start=0I'm guessing : blocked breather somewhere worn bore / pistons / rings worn topend (valves / stem seals / guides) A couple of pics as thanks-in-advance for any suggestions  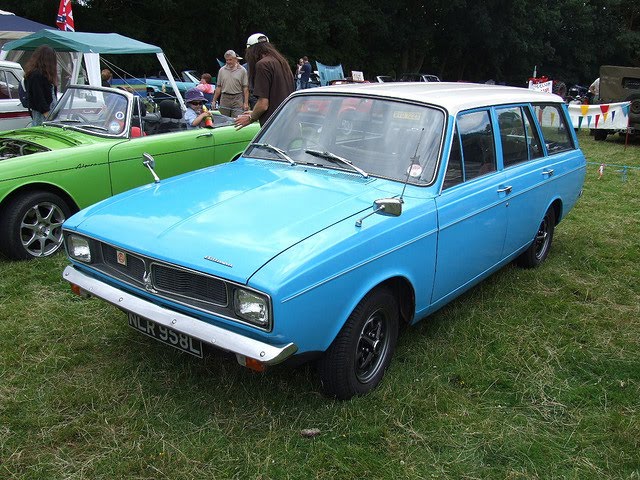  also ... www.flickr.com/photos/emdjt42/6093937920/ |
| |
|
|
Seth
South East
MorrisOxford TriumphMirald HillmanMinx BorgwardIsabellaCombi
Posts: 15,542
|
|
Mar 25, 2012 13:37:37 GMT
|
|
I was told by the chap I got my ally head and other bits from that it was possible to re-assemble the rocker gear upside down/back to front.
From the Factory manual:
To reassemble
Assemble the components on the rocker shaft in the order shown in Figs 5 or 6, locating the standards on each shaft to allow the oil feed holes to face downwards.
To refit
Make sure that each rocker shaft assembly is fitted with its open end towards teh oil feed "T" piece, which is then inserted between the two shafts withs its elbow facing the push rod.
The other ends of the shafts are plugged.
The rocker shafts are grooved and located by the rocker standard studs nearest to the valves. Upon reassembly, the grooves should be located on the side nearest the valves.
I've already had mine apart and found a fair amount of gunk in the rocker shaft bores and also the grooves on the inside of the rockers themselves and the drillings from them towards the pushrod end. I reassembled as I'd taken them apart but I think I might double check that they were right in the first place again now.
|
| |

Follow your dreams or you might as well be a vegetable. |
|
|
|
|
|
|
Mar 25, 2012 14:03:45 GMT
|
.... on each shaft to allow the oil feed holes to face downwards. Exactly the info I was hunting for ;D Mine is put together this way so that's one less thing that could be causing the problem  The rocker shafts are grooved and located by the rocker standard studs nearest to the valves. Upon reassembly, the grooves should be located on the side nearest the valves. Difficult (maybe not impossible) to get this wrong, the bolts holding the pedestal to the head pass though a notch on the rocker shaft - if the shaft isn't right, the bolts won't go into the pedestal  The plug in the end of the shaft is very obvious, if you can manage to remove the rocker cover - you can tell which end of the shaft is plugged ;D I've already had mine apart and found a fair amount of gunk in the rocker shaft bores and also the grooves on the inside of the rockers themselves and the drillings from them towards the pushrod end. I reassembled as I'd taken them apart but I think I might double check that they were right in the first place again now. I had a go at cleaning the inside of the shaft on mine but now thinking I need to totally strip it and do it properly ( I didn't know about the drillings in the rockers at the pushrod end, or the inner grooves on the arms  ) Many thanks for the info, I.O.U.  |
| |
|
|
|
|
|
Apr 11, 2012 19:45:32 GMT
|
I've already had mine apart and found a fair amount of gunk in the rocker shaft bores and also the grooves on the inside of the rockers themselves and the drillings from them towards the pushrod end. I finally managed to get the tappets stripped and cleaned  The rocker shaft was clean inside ;D, oil drillings to the top of the arms were ok  , oil-grooves in shaft cleaned up ok ;D, then removed the adjuster screws and found the "oil holes" to them blocked with tar-like gunge  A pint of gunk and a couple of hours stripping and cleaning and it's good to go  Put it all back together and fitted it up, set the tappets cold, warmed the motor up, reset them hot (gaps had opened up a lot from cold  ), then left it ticking over with the rocker cover off to see how it looked... Found a nice trickle of oil from the shaft, shame it was leaking from the joint between the center "oil feed" casting and the rocker shaft - not filling the shaft and lubricating the tappets as it should do  The lack of oil to the arms would explain why the ends of the valves have worn slots into the ends of the rocker arms then  Some advice for fellow Rootes owners :  strip & clean the rocker shaft and rocker arms, especially the oil drillings to the the adjuster ends and the drain slots cut into adjuster threads  check for leaks between the rocker shafts and the center cast section  leave the engine running with the rocker cover off (or look down the filler neck) and check you are getting oil through the rockers  make sure you put it all back together the way it came apart, note the 2 end rocker arms have larger oil drillings to cope with less oil supply |
| |
|
|
|
|
|
Apr 28, 2012 16:40:07 GMT
|
Helpful carb people : www.burlen.co.uk/Lots of good info on their site, and staff that know about carbs - very handy to know  We haz progress on the Stromberg CD150 carb from the scrap motor  Fitted a new needle, put it together, and it fired up sweet as a nut without any setting or tweaking ;D I ordered a B5CM needle as that was what the factory manual lists for a CD150 carb, made a point of asking for one with a "fixed" mounting to suit my carb. Needle turned up ok but had the wrong fitting (see earlier posts - you can get fixed or "bias mount" needles) Turns out the listed B5CM is only available with bias mounting so that was what I got ! A quick phone call to Burlen, they spent a while checking their spec-sheets to find a "fixed" needle with the same profile and posted it out - with a nice request to send back the "wrong" needle. No delays or surcharges. Very impressive customer service  choke being cleaned (the small drillings were furred up ):  Engine face ( any idea what the hole next to the pointer is for? ) :  Intake face (pointer showing vent to float chanber) :  Geting there :  end result :  Was it worth the effort ? OH YES ! "Crisp acceleration" isn't a term I can ever see myself using about this car but with the new carb it accelerates when going up some local hills in 3rd - in the past it couldn't hold it's speed and used to slow until you had to drop to 2nd  |
| |
Last Edit: Sept 18, 2019 8:27:36 GMT by nomad
|
|
|
|
|
Apr 28, 2012 16:53:03 GMT
|
|
|
| |
|
|
|
|
|
|
|
The new carb has been on for about a week and it feels like a new car ;D Spent a while last weekend randomly playing with ignition timing  From a standing start - accelerate up a local long incline - check speed at top. Go back down hill, tweak timing a few degrees ( a 30 second job thanks to the manual adjuster on the 25D distributor ;D), repeat. And again - and again - and ... Very odd results, timing affected the speed at the top a lot but never any signs of pinking or unhappy running  Now want to put a timing light on out of curiosity to see where the marks have ended up  Then had a play with the lifting pin on the carb to check for weak or rich mixture, found it close but 1/2 turn on the main jet adjuster improved it a fair bit ;D Impressions after about 150 miles of motorway + some local driving ? Cruising / coasting speed is up by about 10 mph ;D Fuel consumption is about 1/2 what it was ;D It's whole load happier accelerating just-above-cruise (the throttle used to be "Cruise" or "Accelerate", now it's much more progressive) ;D |
| |
Last Edit: May 5, 2012 16:23:30 GMT by nomad
|
|
|
|
|
|
|
|
Lifting pin? *envies*
Sounds like you're making progress. ;D
|
| |
|
|
|
|
|
|
|
It's a nice feeling being able to rebuild the car at the side of the road if needed, toolkit to swap carbs, set the mixture, and fine-tune the timing is... 1/2 spanner (airfilter and carb manifold bolts) errm ... that's about it ;D timing has a manual thumbwheel on the distributor  carb has a lifting pin to check mixture, a 2p piece makes it easy to turn the needle jet adjuster. a small'ish flat blade screwdriver is helpful for the fuel-line and throttle / choke cables but can be done without  If you want to change the cylinder head, you need to add a torque wrench and a bigger socket. Job's a good'un ;D |
| |
|
|
|
|
|
|
|
|
^Similar with the Imp - right down to the dizzy thumbwheel - although with the tight space around the manifold-to-carb nuts I've a special ground-down 1/2" spanner for those.
Unfortunately, Rootes didn't see fit to specify the Imp strombergs with lifting pins - so you need to take the air filter elbows off and lift the pistons with a tiddly screwdriver.
|
| |
|
|
|
|
|
|
|
Fuel consumption is about 1/2 what it was ;D So no more lifts to petrol stations then  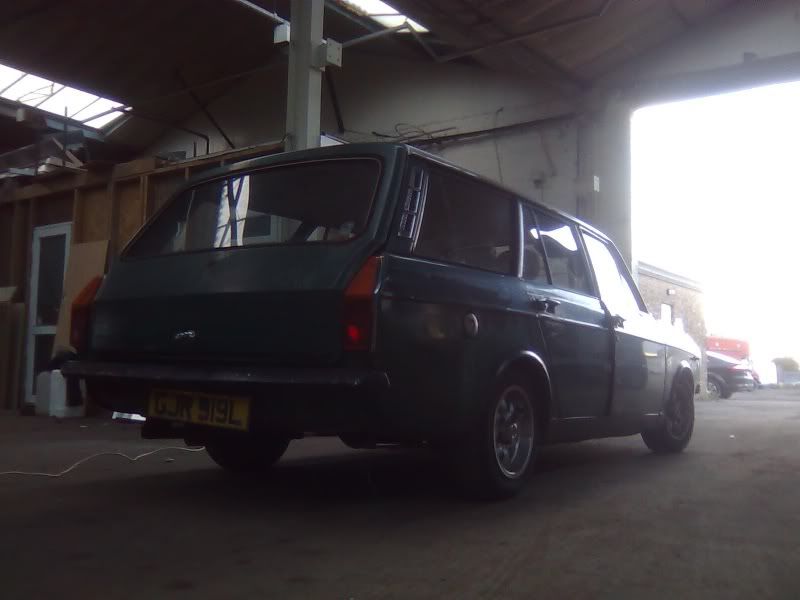 |
| |
|
|
|
|
|
|
|
Finally got around to sorting the oil feed to the rockers  It may be some kind or record - 2 years to notice the problem (plus how many years before I got it  ), 6 months to get around to doing it, 30 mins and a few turns of PTFE (plumbers  ) tape to fix it. No pics but I just reset the tappets and it's the first time I've seen oil on the valve springs and rocker arms - simple things please me ;D Living out of boxes just now while I get moved house, didn't have a manual for the Hunter but Google found a great list of specs for various Hillmans Worth a look, very handy for valve clearances and other stuff  www.lafhog.com/hillman/ www.lafhog.com/hillman/Have a look around, all kinds of other classic datasheets at the main index www.lafhog.com/classic.php |
| |
|
|
|
|


 )
)


 ) - the stuff around the butterfly that looks like fluffy white corrosion with lumps in it is ... fluffy white corrosion wih lumps in it


