|
|
|
|
|
Just a quick note to let you know we're still here  The wee beastie is still chugging along and earning it's keep as a workhorse - this week is the first time we've found something that's too big to fit in with the boot shut  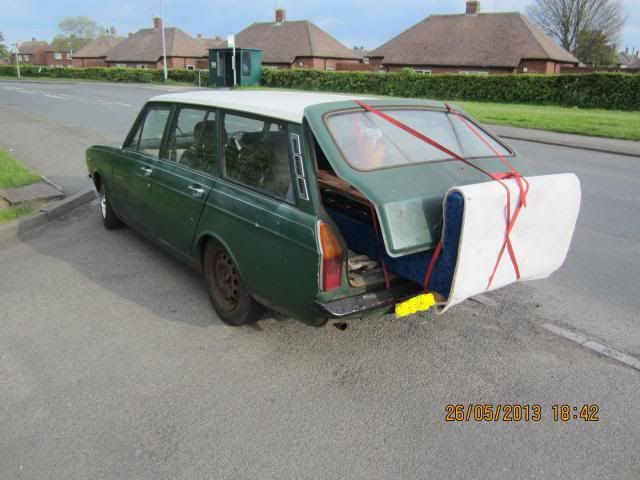 Also found time ( and a nice warm dry day  ) to change the colour of the new dash  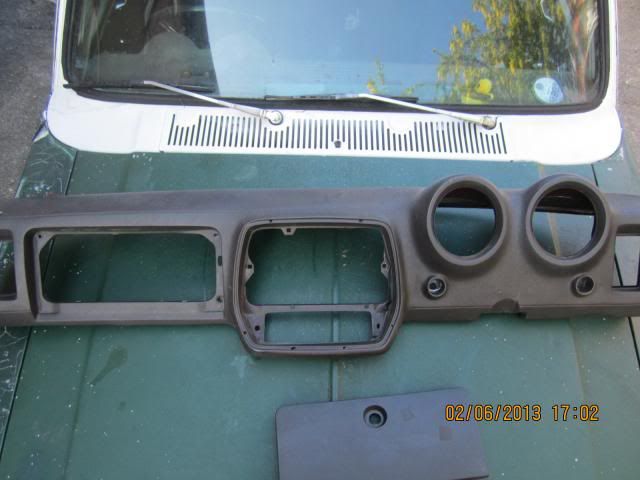 Very impressed with the finish. This might be a first for me - recommending Halfrauds stuff (vinyl paint) - very good results and it seems to dry almost instantly  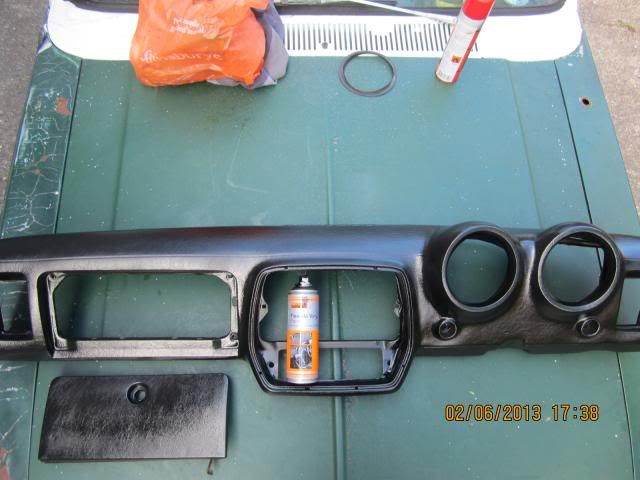 |
| |
|
|
|
|
|
|
|
|
|
|
I must say, i love this thread. Its nice to see an old car of my favourite vintage being used how it is supposed to be.
Bookmarked so i can keep up with things in future!
|
| |
|
|
|
|
|
|
|
|
What was wrong with the brown dash being brown? Not that it looks bad in black.
|
| |
|
|
|
|
|
|
|
You know the saying "It never rains - it pours"  ...this week is the first time we've found something that's too big to fit in with the boot shut  Errm - went shopping a few days ago and kinda ended up coming home with more than I was expecting  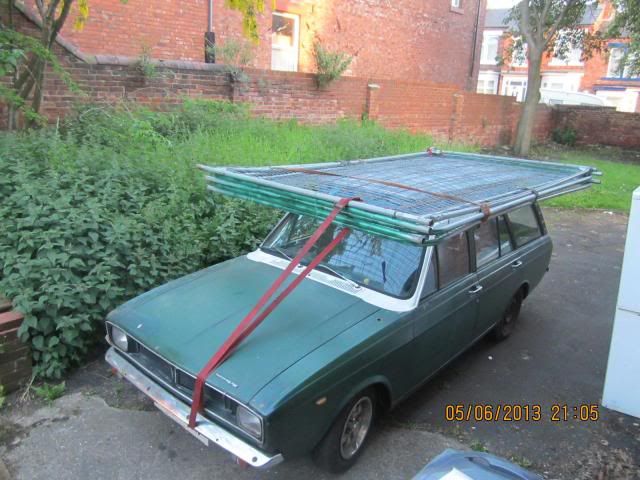 Final score was 5 matching 6"x13" fencing / crowd control fence panels. For scale - the smaller panels in the pic have been cut down to 6"x5" and look tiny next to one of the originals standing next to it  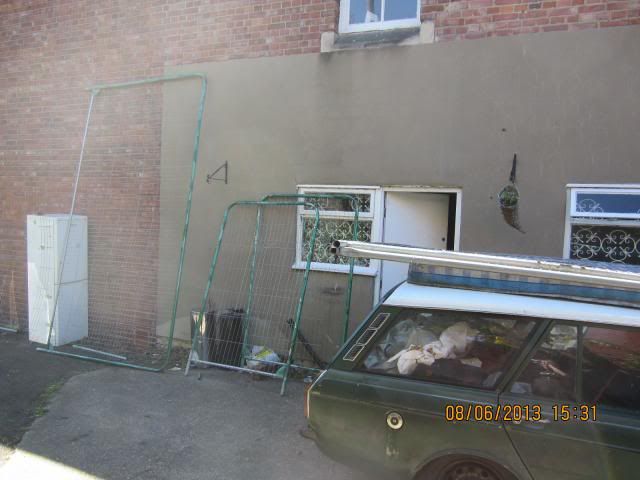 Just for giggles - the small panels on their way to their new home on a normal (-ish  ) car i252.photobucket.com/albums/hh36/Nomad_Geordie/IMG_0008_clipped_zpsa8f466c4.jpgSpecial offer : We have 2 full ( + a half ) panels leftover, now for sale as we used what we needed.
Collect from South Shields, all daft offers considered ... (for a guide - the cheapest I can see advertised are £15 each)Leftover Panels now all gone!Suspicions confirmed  If you have a Hunter estate + gaffa tape and plenty of bungee cords, you never need rent a man with a white van  |
| |
Last Edit: Jul 11, 2013 10:24:07 GMT by nomad: Update on panels
|
|
|
|
|
|
|
What was wrong with the brown dash being brown? Not that it looks bad in black. Hi. The brown was very flat and tired - but more important I fancied black and nothing else in the car is brown so it would have looked odd (should that be "Much odder that it already does"  ) It was also a good excuse to play with the new-fangled vinyl paint I'd been told about  |
| |
|
|
VND
Posted a lot
  
Posts: 1,224
|
|
|
|
|
Dude, the Hunter is awesome, but does it really draw crowds big enough to warrant control barriers?
|
| |
|
|
|
|
|
Jun 16, 2013 16:14:24 GMT
|
Dude, the Hunter is awesome, but does it really draw crowds big enough to warrant control barriers? You'd be surprised  |
| |
|
|
|
|
|
Jun 16, 2013 17:02:14 GMT
|
Close on 2 years after we had to replace a bottom balljoint, the other side has decided it has been getting ignored and wants some attention as well  The joys of working on old bangers low-tech Retro classics (especially if you've done the job once and know what's needed)  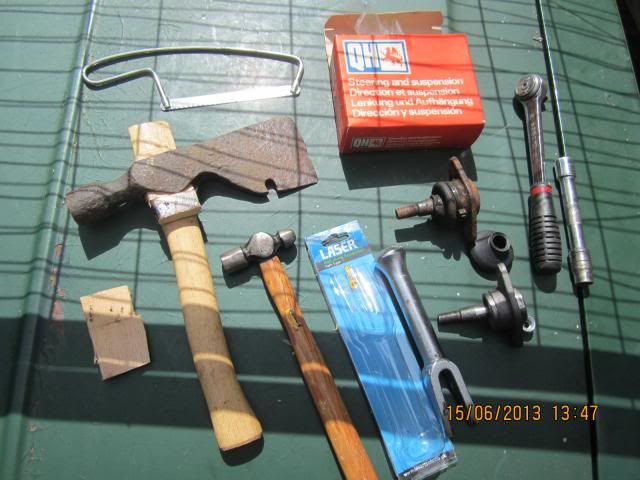 For info, a comprehensive "DIY bottom balljoint swap" toolkit requires : spare floorboard* (note. an offcut works fine, no need for a full floorboard  ) junior hacksaw* (to cut the floorboard) big old wood-axe* and new handle* Halfrauds "Professional" balljoint splitter old balljoint & new balljoint 1/2 socket set (you only need the 13mm & 22mm sockets  ) (*some items not needed if you have already have a large/FB hammer)The job can be done in less than 1/2 hour : jack up car & remove roadwheel (make sure you're working on the side of the car that needs changing!) realise you can't break the balljoint - trip to local motor factors (or Halfrauds if you're desperate) to get a balljoint splitter realise the small toffee hammer isn't going to do it, dig out the big heavy wood-axe with hammer head. dig out nice new axe shaft you bought but never got around to fitting cut down the floorboard to make a shim so axe is tight on the shaft loosen 13mm & remove 22mm fixings to loosen the old balljoint on the car clout the splitter with the axe pop old joint out, slip new joint in, refit old 13mm & new 22mm fixing refit roadwheel, remove jack - job's a goodun  Free to a good home - or anyone who wants it (priority given to anyone who is desperate/local/has upset me recently) : Free to a good home - or anyone who wants it (priority given to anyone who is desperate/local/has upset me recently) :
* pair of authentic Retro shabby-chic bottom balljoints. Slightly used, 1 careful owner (+ a lot of readers of this forum!) usual signs of wear & tear, should adjust up fine*
* Halfrauds balljoint splitter, 1 careful owner (maybe not 100% true*), comes from a smoke & pet free home (a cat lives here but it's not mine so doesn't count)cheers  |
| |
Last Edit: Jun 16, 2013 17:14:32 GMT by nomad
|
|
|
|
|
Jun 19, 2013 20:38:06 GMT
|
Mood Today = Well chuffed  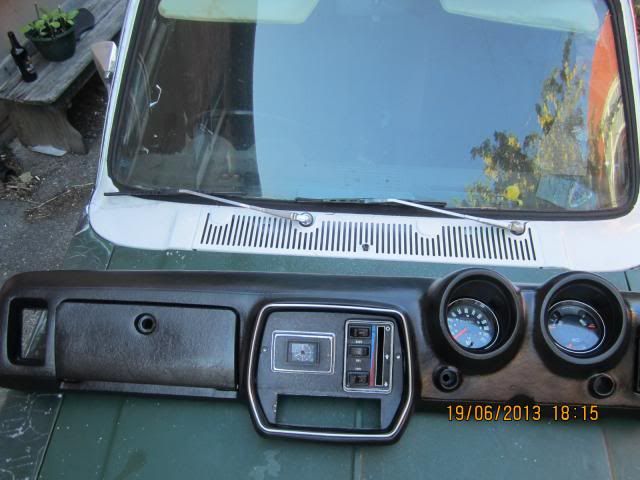 Before n After 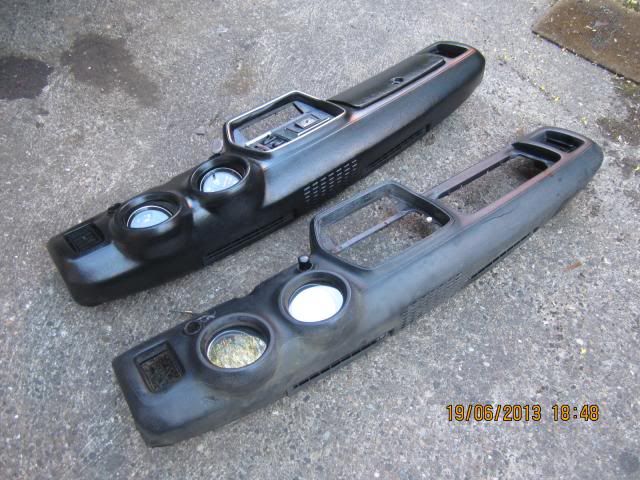 The only slight snag is the new one isn't fully fitted yet... 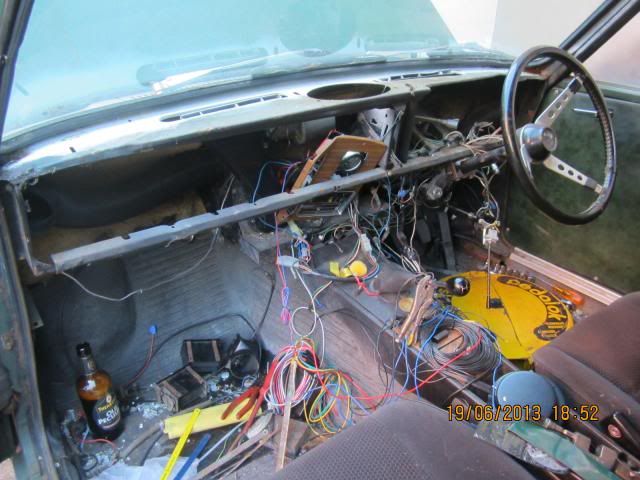 |
| |
|
|
VND
Posted a lot
  
Posts: 1,224
|
|
Jun 19, 2013 21:47:00 GMT
|
|
OP ftw.
Delicious.
|
| |
|
|
|
|
|
|
|
Jun 20, 2013 15:44:13 GMT
|
|
Looks quite smart does that new dash, just need to get a fork and a spoon to sort out the spaghetti in the cabin now.
|
| |
|
|
|
|
|
Jun 26, 2013 21:38:29 GMT
|
|
|
| |
|
|
|
|
|
|
|
You know that feeling you get when you think "I've got a couple of spare hours - plenty of time do do a few odd jobs"  A quick check around the car soon finds that both side repeater bulbs have stopped working - maybe time to fit new bulbs?  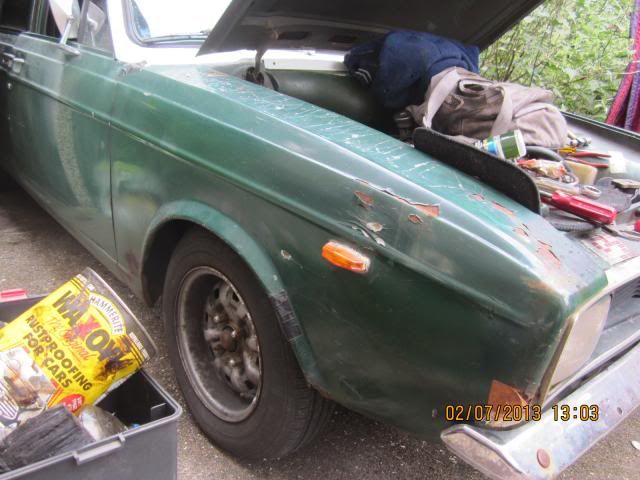 Errm ... but I don't have any white bathroom silicone in stock to refit them  This also reminded me that at the the last MOT the tester did say they were not very yellow  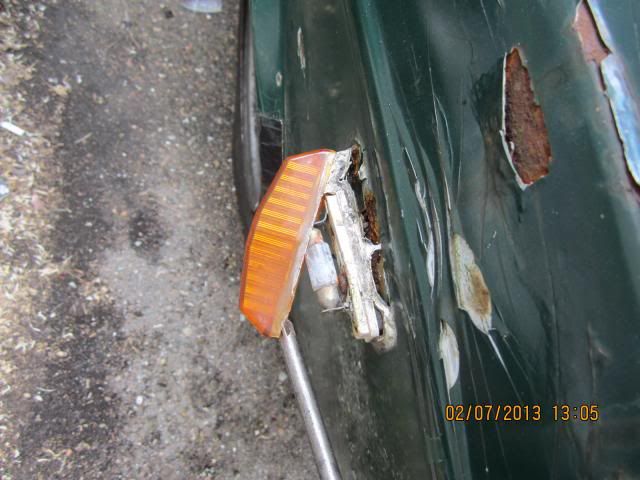 Then spent a while (about 30 seconds  ) wondering what to do, then decided to go for "Plan B"  (after raiding the spares box and finding a couple of yellow repeaters) Gotta love stepped hole cutters, they make such easy work of putting a round hold of any size just where you want it  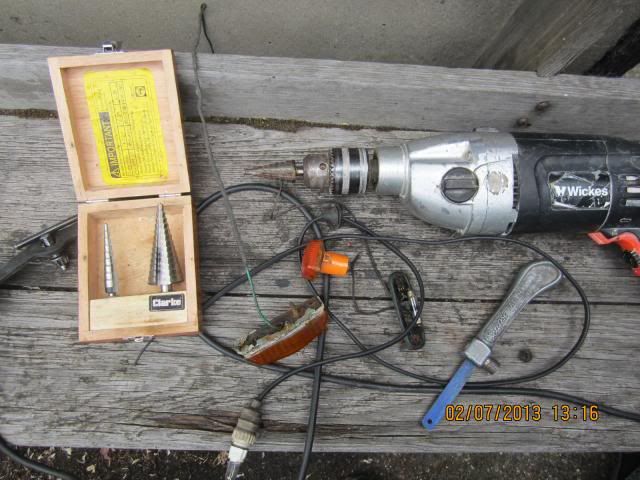 "Before" Plan-B 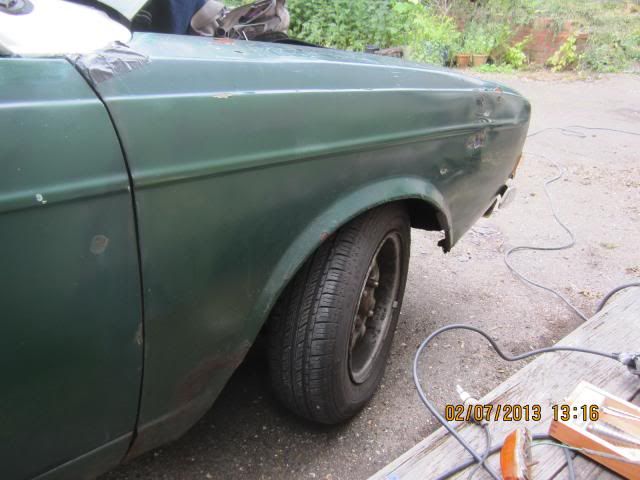 "After" Plan-B 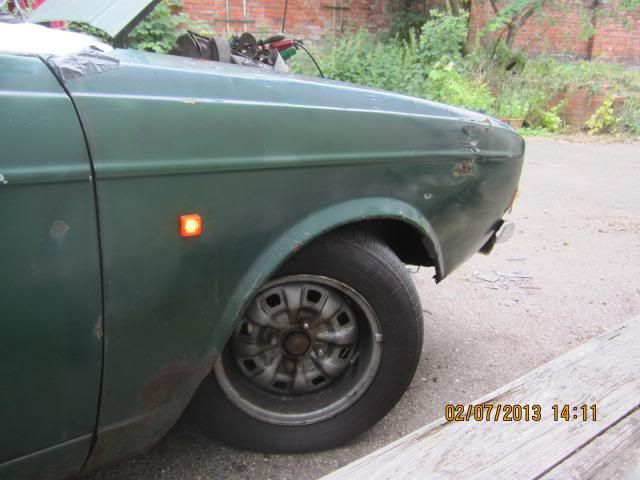 Personal choice, but I wish I'd done this when I first got the car  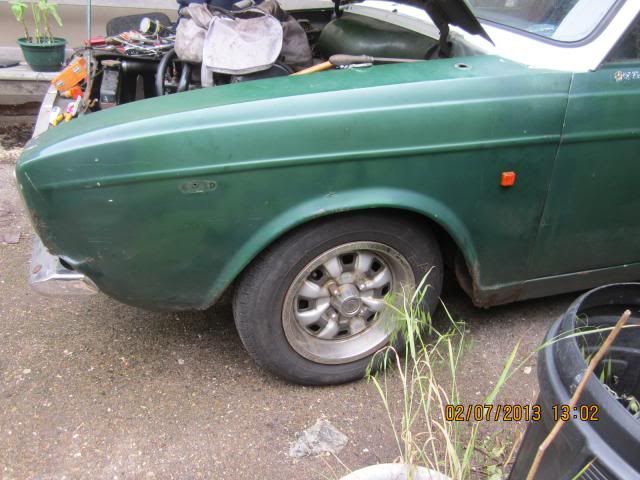 So there you have it, another cheap and easy way to drag a 70's retro kicking and screaming (sort of...) into the ermm.. 80's ?  |
| |
|
|
|
|
|
|
|
|
That's a very nifty solution, tidy too and better looking than what was there before. Given the age of the car, you don't actually need side repeaters at all.
|
| |
|
|
|
|
|
|
|
That's a very nifty solution, tidy too and better looking than what was there before. Given the age of the car, you don't actually need side repeaters at all. Interesting - I thought I knew what was needed after a quick look on WWW yesterday, have just checked again after reading your post and found out it's not the way I thought. Doh!  "Vehicles first used on or after 1 April 1986 must be fitted with one side repeater indicator on each side." (or a wrap-around light) More food for thought with future projects  "Vehicles first used before 1 September 1965 may have direction indicators incorporated with stop lamps, or combined with side or rear lamps..." MOT testers guide www.motuk.co.uk/manual/contents.htmConstruction & Use (interesting but hard work!) www.legislation.gov.uk/uksi/1989/1796/schedule/7/madeThis may be a first for me, but think I would have fitted them anyway as a safety thing  It would look better without them but as this is a daily I'll use anything I can that improves my chances of some dozy "sorry mate I didn't see you" type getting up close and personal (again)  |
| |
|
|
|
|
|
|
|
In no particular order we haz... Nice new office furniture (the center-console is next on the list)  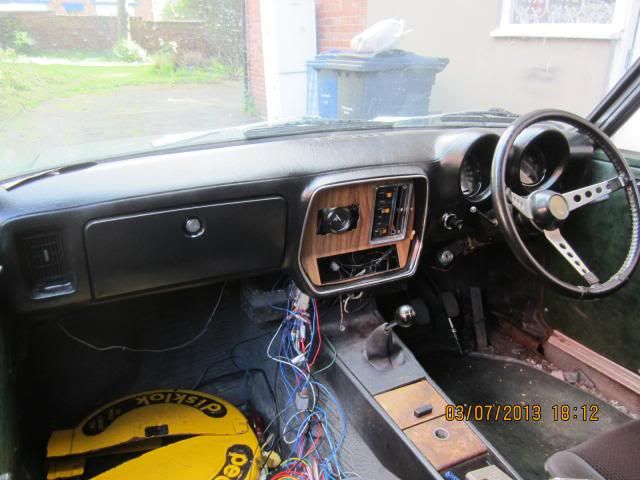 I also made a bit of a mistake recently  The steering has been getting worse for a couple of months especially on right handers, I spent a long time checking and replacing anything that looked not 100% : New bottom balljoint (no improvement) Adjusted wheelbearings (were slightly loose - no improvement) Fitted a pair of recon front struts with rebuilt dampers in case one of the originals had been kerbed (no difference) Gave it up as a bad job, called at a mates workshop, just a few minutes on the ramp and he points out the ARB bush I fitted less than 3 years ago had died  I hadn't noticed where the play was and never checked the bush as I knew that was the newest part of the front suspension. Lesson learned - don't assume anything ! An I.O.U. and lots of brownie points ( and a free plug for anyone who is looking for good solid car repair work done at very good rates) goes to my mates place : Just past Benton Hypermarket - Trembles yard, behind the car sales pitch. www.192.com/atoz/business/newcastle-upon-tyne-ne12/garage/whitley-road-garage/3c6ee8a84e5fb0bef882274e5b90a1ae7cf6d14f/comp/Whitley Road Benton Newcastle Upon Tyne, NE12 8BP Telephone: 0191 215 1660 Luckily the problem was easily sorted by our friendly postie who turned up with some Polybush bits and go-faster stickers  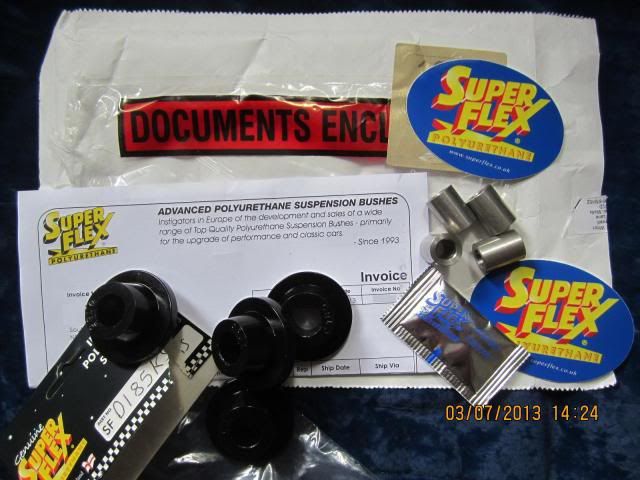 Any ideas why the pair of bushes on the right have gone oval in less than 3 years  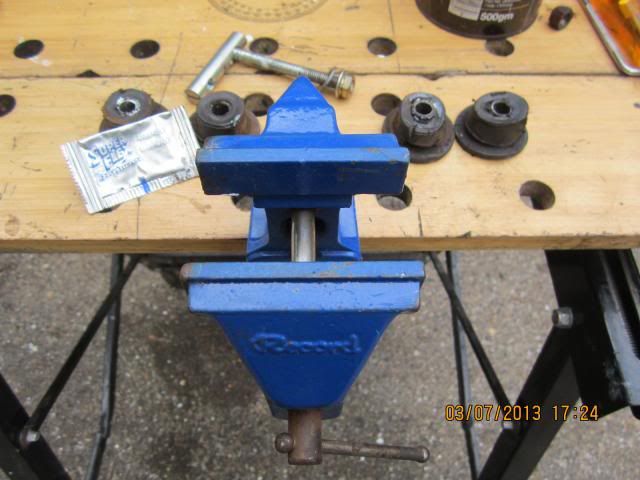 It took about 1/2 hour to change each side, didn't even need to remove the roadwheels - LOVE Hillman design  Went out for a testdrive later, it now goes around corners nicely - no need to slow down. Me is happy teddybear  |
| |
Last Edit: Jul 3, 2013 22:02:00 GMT by nomad: Typos! Oops..
|
|
|
|
|
|
|
|
Were they a reputable brand of bush? Might be worth getting back in touch with the supplier to see if they've had any other people with issues.
|
| |
|
|
|
|
|
|
|
|
I like the side-repeaters as it does add a bit of extra safety... I am thinking of adding some to my Toledo so I need to source something BL or 70's to keep the vibe as it were...!!!
Another job I need to undertake is changing some bushes in the front suspension. I have always put it off as it seems to be a rather difficult job but I think I'm just going to have to get stuck in...
I love your Hillman, it is a real 'everyday' classic gem and I hope it goes from strength to strength.
|
| |
***GARAGE CURRENTLY EMPTY***
|
|
|
|
|
|
|
|
hi there nomad pleased to see the old girl is still going strong don't know if you can remember me but you bought a few spares for a citroen ax from me hope you got sorted it was nice to meet you and a treat to see the old estate! keep up the good work
|
| |
|
|
|
|
|
|
|
3 PM's sent - thanks for the support  |
| |
Last Edit: Jul 4, 2013 22:45:47 GMT by nomad: Oops !
|
|
|
|


 ) to change the colour of the new dash


 ) to change the colour of the new dash





 ) car
) car


 For anyone curious about the fence panel collection, can I point you in the direction of


