bstardchild
Club Retro Rides Member
Posts: 14,885
Club RR Member Number: 71
|
|
Mar 26, 2015 23:58:01 GMT
|
Sterling work old chap. You'll get there. I'm sure Mrs Tea is a top drawer lady but I find most women just don't quite grasp the time it takes for true craftsmanship. Mrs Sweetpea doesn't anyway - or maybe I'm just inordinately slow. Just to drag you back to an earlier post...   Where do you get Cornflakes packets that are made of steel on the other side? I presume you just cut it out with scissors and weld it in. Dead handy that and much quicker than what I've been doing. James Now James stop ripping the proverbial and get back to finishing that bumper iron MR2 |
| |
|
|
|
|
eternaloptimist
Posted a lot
 Too many projects, not enough time or space...
Posts: 2,578
|
|
|
|
|
Good point there ^. There's something vaguely Herculean about the nature of the task. Or not; I'm not really that well educated around the classics.
But there probably is a book in there, one man's struggle to solve some almost unfathomable problem. Can I buy the film rights?
|
| |
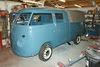
XC70, VW split screen crew cab, Standard Ten
|
|
teaboy
Posted a lot
Make tea, not war.
Posts: 1,921
|
|
Mar 27, 2015 21:49:47 GMT
|
simply amazing work, bravo Cheers pal. So you.... A. Fettled it and made it fit Or B. Chucked in the bin and started again as you learnt a lot and mk 456,389 will be much better My money is on B but I really want to lose At the moment I have done nothing, but option A looks like the best one to me. The swirl pot will physically fit in the space available, I just need to sort the plumbing to it. I am contemplating it at the moment. Sterling work old chap. You'll get there. I'm sure Mrs Tea is a top drawer lady but I find most women just don't quite grasp the time it takes for true craftsmanship. Mrs Sweetpea doesn't anyway - or maybe I'm just inordinately slow. Mrs Tea is indeed top drawer but her view on doing jobs is diametrically opposed to mine; she just wants it (whatever 'it' may be) done yesterday, and as long as it is done she cares not a jot about the quality. Myself, I would rather it were not done than do a cr@p job. Just to drag you back to an earlier post... Where do you get Cornflakes packets that are made of steel on the other side? I presume you just cut it out with scissors and weld it in. Dead handy that and much quicker than what I've been doing. They are very special, limited edition cornflake boxes. If you have the cornflakes logo facing you it can be cut with scissors and folded by hand, but when you turn it over it reverts to metal and behaves as such. It is very useful stuff but you need to eat lots of cereals as it is pot luck as to what sort of box you get. For me, it'll represent the end of an era, much akin to the death of Queen Victoria or the end of the Great War. A feeling that nothing will ever quite be the same again.  But then I'm sure something else will get the OCD treatment  Fantastic work though. As you say, there is plenty more stuff for me to spend months and months fannying around with once this is done. Now James stop ripping the proverbial and get back to finishing that bumper iron MR2 Ere Bstardo, leave poor old sweetie alone, his roof is falling off! Can I buy the film rights? Who would you get to play the Tea Boy? He would have to be a terribly handsome devil for it to be realistic! |
| |
|
|
teaboy
Posted a lot
Make tea, not war.
Posts: 1,921
|
|
|
|
I have been thinking about this territorial dispute. Ah, it seems we have a conflict of interest between the swirl pot and the filler neck.  After being prompted by Ginger, I know someone who used copper pipe fittings on a car's water cooling system and the vibrations in the car kept causing the joint to fail I have finally admitted to myself that I am not overly keen on using copper plumbing fittings in the tank. At the time they seemed like a quick and easy solution, but quick and easy solutions are not always the best solutions. Besides which, doing this tank has been, and still is, anything but quick and easy. So, the options were:- So you.... A. Fettled it and made it fit Or B. Chucked in the bin and started again as you learnt a lot and mk 456,389 will be much better After much contemplation, I have chosen to attempt option 'A', but with a bit of influence from option 'B'. There is enough room to move the swirl pot over away from the filler, it is then just a question of sorting out the plumbing. What I did was to sling my old swirl pot and start again with my last unmolested one.  You might notice that there is a cork in the end of the pipe.  That is because I filled it with sand. (Which I had dried in the Rayburn on one of Mrs Tea's baking trays)  Putting the cork in the other end inside the swirl pot was done by screwing a bit of wire coathanger to it with a self tapper then threading it up in there and prodding it in with a screwdriver. You can see the wire sticking out of the bottom here.  I then VERY carefully heated the pipe in the areas where I needed to bend it. The sand inside is supposed to stop the pipe collapsing or creasing. This is after I tightened the top bend where the pipe goes into the 'pot and then put another bend in the opposite direction a bit lower down.  Another couple of slight bends lower down left it looking like this.  It now nicely lines up with where it needs to exit the tank and the 'pot will also clear the filler neck. It was a bit nerve wracking warming and bending the pipe as I didn't have another one to fall back on if I messed it up. I think I just about got away with it. |
| |
Last Edit: Apr 3, 2015 18:57:20 GMT by teaboy
|
|
duncanmartin
Club Retro Rides Member
Out of retro ownership
Posts: 1,320
Club RR Member Number: 70
|
|
|
|
I think you just about got away with it. That looks great - superbly done. Cheers Duncan |
| |
|
|
|
|
teaboy
Posted a lot
Make tea, not war.
Posts: 1,921
|
|
|
|
I think you just about got away with it. That looks great - superbly done. Thanks Duncan. I wish my project was as far advanced as yours Ginger! Originally the stub of pipe on the outside of the tank on the feed up to the swirl pot was a separate piece with the main pipe swaged for the stub to slip inside it.  I don't have anything to swage the pipe so I can slip the inlet stub into it so I will have to leave the pipe in one piece and just form a bead on the end of it. The trouble with that plan is that I don't have anything to form beads on pipes either! After a bit of contemplation, and some tea, I came up with a plan. I found these.  Which I made into this.  Which should be a die to fit this.  When welded to a set of Lidl moldy grips with a few other tweeks.  Works like this.  First test piece was a bit lumpy and too close to the end.  But a bit of fine tuning of the tool means they now turn out like this.  It isn't as lop sided as it looks in the pic. I can live with that! |
| |
Last Edit: Apr 4, 2015 19:14:17 GMT by teaboy
|
|
eternaloptimist
Posted a lot
Too many projects, not enough time or space...
Posts: 2,578
|
|
|
|
|
Brilliant tool making skills there.
|
| |
XC70, VW split screen crew cab, Standard Ten
|
|
fer4l
Posted a lot
Testing
Posts: 1,497
Club RR Member Number: 73
|
|
|
|
|
Love it!
|
| |
|
|
|
|
|
|
|
madness - james bwhahahaha at the cornflakes comment respec |
| |
2001 HONDA CT110 (NOT RCV)
|
|
|
|
|
|
|
|
.
What a cool idea, 10 out of 10 for that one :-)
Ginger
.
|
| |
|
|
bstardchild
Club Retro Rides Member
Posts: 14,885
Club RR Member Number: 71
|
|
|
|
|
Brilliant - I've seen something similar before but I do believe you have achieved a much better quality swage
|
| |
|
|
|
|
|
|
|
|
nice tool you made there
|
| |
91 golf g60, 89 golf 16v , 88 polo breadvan
|
|
|
|
|
|
|
|
I'm especially impressed by the fact that you polished the jaw to a nice sanded satin sort of finish. Putting as much effort in to a tool you might only use once as into the finished product.
Mr Tea, you should work for Rolls Royce.
Anyway, would you hurry up and get it finished... I've got a bumper that needs your kind of love. I don't seem to be doing anything with it, thought I'd contract it out to you!
James
|
| |
|
|
teaboy
Posted a lot
Make tea, not war.
Posts: 1,921
|
|
|
|
Brilliant tool making skills there. What a cool idea, 10 out of 10 for that one :-) Thanks chaps, I am pleased with how it worked out. I'm especially impressed by the fact that you polished the jaw to a nice sanded satin sort of finish. Putting as much effort in to a tool you might only use once as into the finished product. I can get a little bit carried away at times, I had to stop myself from making a nice handgrip for the long handle... Mr Tea, you should work for Rolls Royce. I don't know how long it takes Rolls Royce to make a car these days but I'm sure it is a fair bit quicker than the speed I work at. Nice of you to say though. Anyway, would you hurry up and get it finished... I've got a bumper that needs your kind of love. I don't seem to be doing anything with it, thought I'd contract it out to you! Well James, it is not that I don't want to do your bumper for you, it's just that by the time I would be ready to work on it you will have restored your house, and your car... Brilliant - I've seen something similar before but I do believe you have achieved a much better quality swage Now you tell me! Can you imagine how much tea and contemplation time that could have been saved if only you had told me this before. Anyway... I have been really busy at work this week so I have not had much time to do much more work on the tank. There is some news, but it wasn't good news... Some time ago I was trying to sort out my speedo problem for the six speed gearbox. I don't know if anyone can remember, because it was a while ago now, that I need to fit a ring with magnets and a pick up in the diff cover for the speedo signal. This is because I have a 993 gearbox which has the advantage of six gears and is the same weight as the G50 five speed. The diff cover needs a hole and a boss for mounting the sensor. I could get a billet machined diff cover with the hole already in place, but they are quite expensive... If only I had one to copy...... Well, I have now managed to borrow a diff cover with the hole in it (from a G50 01) and a diff with the ring fitted. I have got all the bits together they are going over to a machine shop in Manchester where they are going to copy all the relevant bits onto my parts and basically do the job for me. I got word back from the machine shop the other day that it is not possible to modify the diff cover I have because the shape of it is quite different and there is no way that the speed sensor ring is going to fit behind it. This leaves me with two options, to cobble up some kind of external speed sensor or to stump up for a billet diff cover. As all the stuff I am trying to make all the stuff look 'factory' the first option is out so that leaves the billet cover. I managed to find two options. This one from Patrick Motorsports.  Or this from California Motorsports.  I am not over keen on the Patrick one as it looks like a huge slab of metal, almost home made. That means the CMS one is it. I did have a bit of luck insomuch that a friend of mine is having a gearbox case machined by CMS as we speak, he said I could get one and have it sent over in the same parcel that his bits are coming back in, so as to save on shipping costs. So that is the plan then. Also, the same mate bought a set of motorsport valve springs with titanium retainers for a 2.2 S rally engine he is building. Trouble is, the supplier in Germany sent him 993 parts instead of 911 parts. He said I could have them at cost price less 20% to save the hassle of sending them back. As I have already got lightweight rods, flywheel, clutch and front pulley I suppose it would be rude not to have lightweight Ti retainers. My mastercard account was in credit up until this. |
| |
|
|
bstardchild
Club Retro Rides Member
Posts: 14,885
Club RR Member Number: 71
|
|
Apr 11, 2015 10:03:00 GMT
|
Brilliant - I've seen something similar before but I do believe you have achieved a much better quality swage Now you tell me! Can you imagine how much tea and contemplation time that could have been saved if only you had told me this before. On the basis that you haven't seen it I can only assume this thread is not in your bookmarks (linked to the page with the swager tool) retrorides.proboards.com/thread/123485/toyota-celica-st205-update-2015?page=5It worth a read My mastercard account was in credit up until this. No pockets in shrouds |
| |
|
|
teaboy
Posted a lot
Make tea, not war.
Posts: 1,921
|
|
Apr 11, 2015 21:37:21 GMT
|
How come all week when you are at work the weather is like the Bahamas then you wake up Saturday morning and it is raining? Luckily the sun came out this afternoon so I thought I would go in the shed. Because I had to move the swirl pot and bend the supply pipe It no longer fitted through the centre baffle. That meant todays job was to make another.   I got it mostly done but I took a nibble out of my thumb with the grinder. That slowed progress somewhat.  |
| |
|
|
eternaloptimist
Posted a lot
Too many projects, not enough time or space...
Posts: 2,578
|
|
|
|
|
Ouch. Still, I expect your home plastic surgery skills to be sufficient to effect a flawless repair to the damage, even if you're self treating using just the one good hand. Injury photo's please.
|
| |
XC70, VW split screen crew cab, Standard Ten
|
|
teaboy
Posted a lot
Make tea, not war.
Posts: 1,921
|
|
|
|
Ouch. Still, I expect your home plastic surgery skills to be sufficient to effect a flawless repair to the damage, even if you're self treating using just the one good hand. Injury photo's please. Injury pictures make me feel terribly poorly, particularly if they are my injuries! |
| |
|
|
teaboy
Posted a lot
Make tea, not war.
Posts: 1,921
|
|
Apr 15, 2015 22:20:54 GMT
|
I put some of this on my thumb today. It is really goodstuff but it doesn't half sting when you first apply it.  That allowed me to go in the shed tonight. Now that the swirl pot is in its propper place I could weld up the little holes at the bottom and re drill them above the baffle. In an attempt to make them look nice and round I drilled a 2mm pilot, then 5.5mm and finished off with a 6mm reamer. Shame they will never be seen as they are nice and round.  The next job was to play with my dipstick. It is going to fit under the filler cap. To make it go inside the tank without fouling the sender float it will go down a 10mm brass tube. I started out by putting a notch in the neck for it to locate in.  Then to make it go where I wanted it needed a bit of a bend. I tried my brake pipe bender. (it does do up to 10mm)  The problem was that the pipe was too hard to bend, so I thought I would try to anneal it. The way I did that was to first rub some soap on the pipe. Then I warmed it up until the soap went black. I left it to cool then had another go in the bender. It worked beautifully.  So I offered it into place and measured up to drill the centre baffle for it to fit through.  It will look a bit like this.  I also needed to make a clearance slot in the other half of the centre baffle.  I am going to modify the original dipstick to suit.  But first I need to make the screw in top half of the filler neck so I know how high to fit the guide tube. That will then allow me to calibrate the dipstick. |
| |
|
|