funkyhunk
Part of things
 Old Ford's R Us
Posts: 265
|
|
|
|
I thought it was time to get started on the car, but I had to make room to work first. So me and the old man had a bit of a tidy in the garage last week. And, I thought I'd give a sitrep on the condition of the car. It's got a lot of surface rust mean stance.  Maybe a bit more poking with the magical lowering stick perhaps?   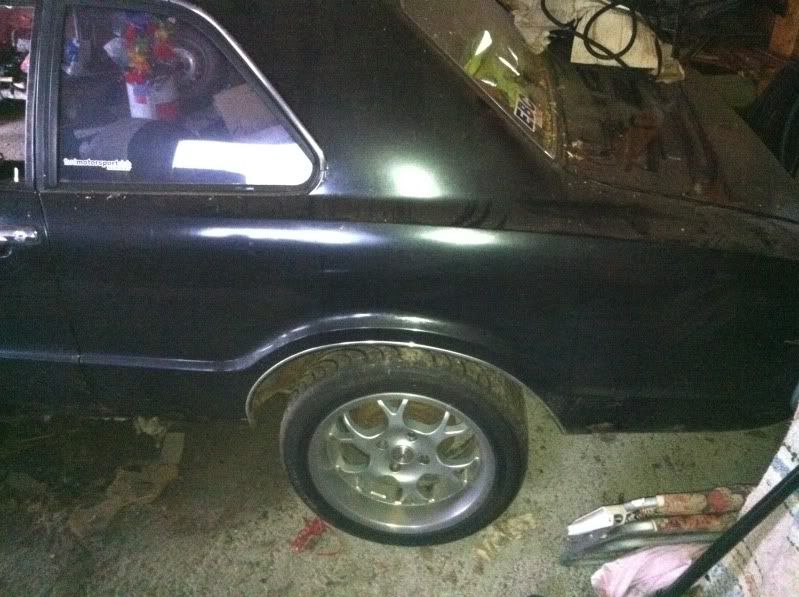 Interior:  This is the hole I have to tackle next in the right hand side footwell. 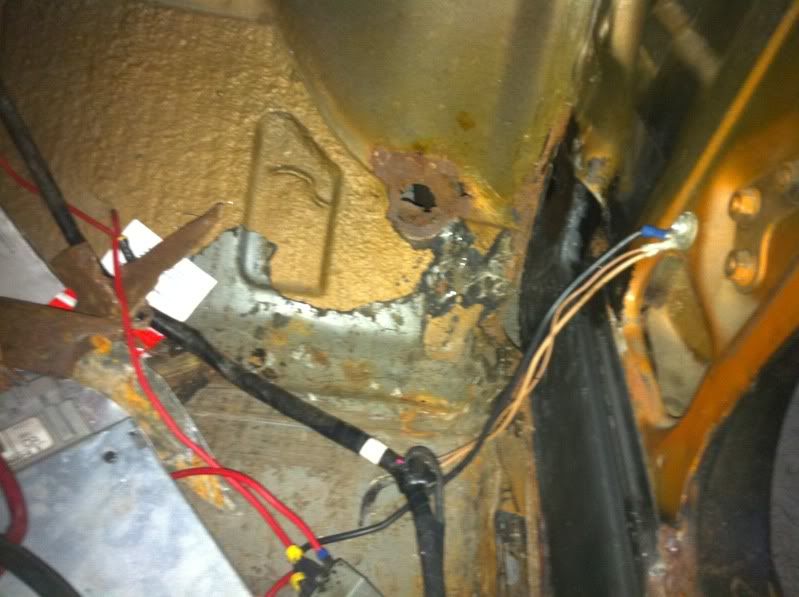 Bottom of the A-post came out good I think. Still have some spot welds to do. 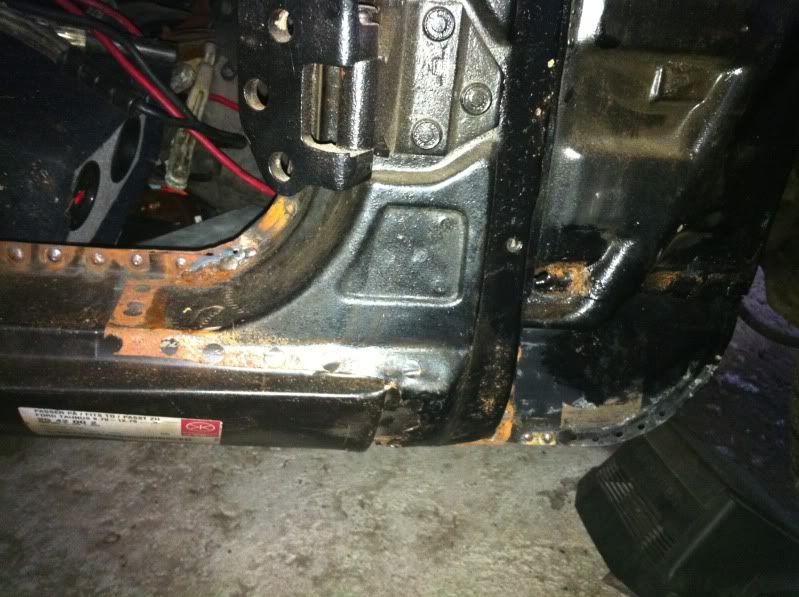 Engine bay:   Knackered left side sill. I'll have to replace both outer and inner methinks. I got both luckily  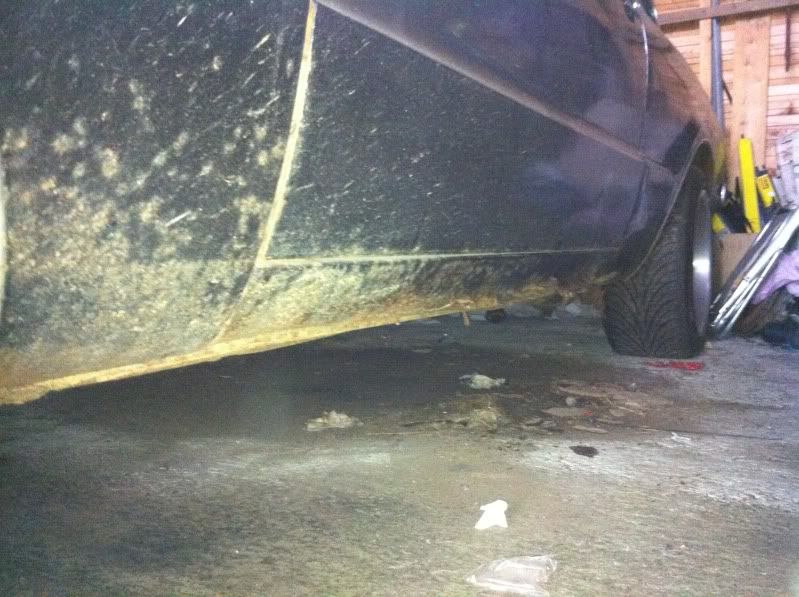 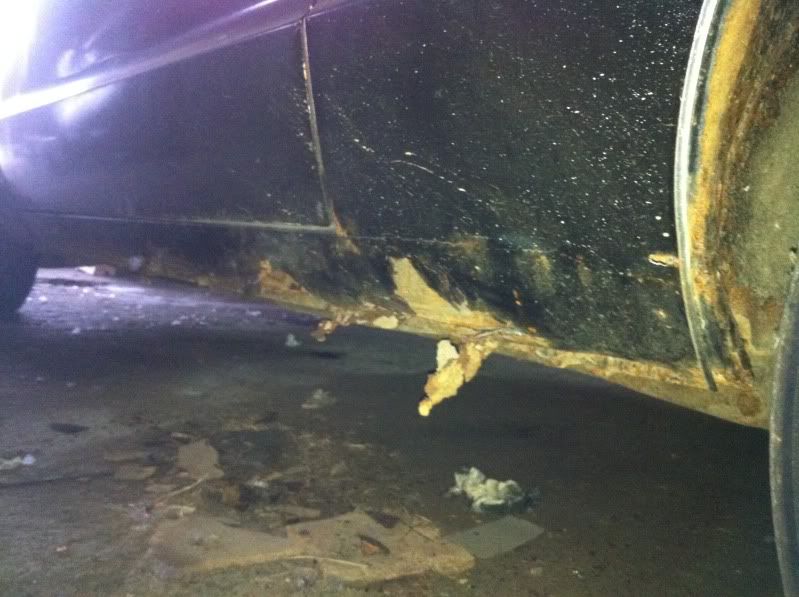 And a bit of a knackered left fender: 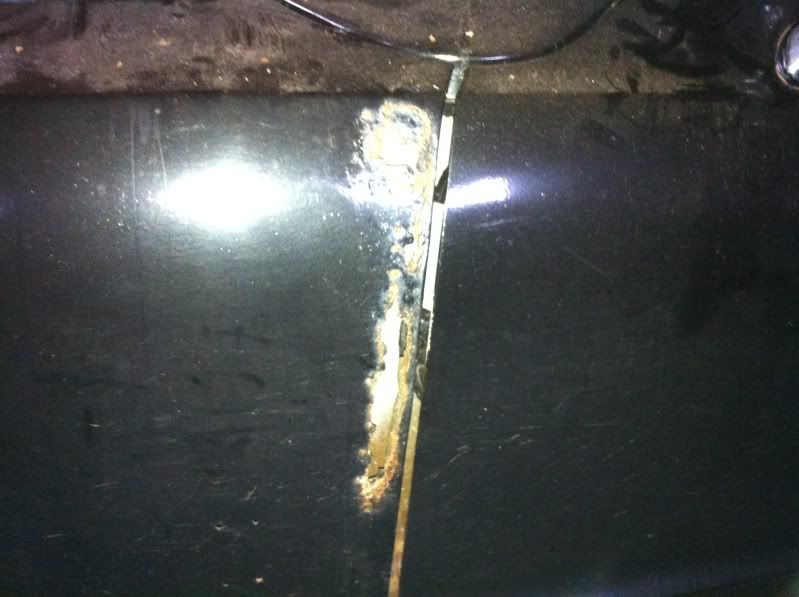 That's it for now, I have to do some small work on the Mustang and then I'll get cracking on the Taunus |
| |
|
|
|
|
funkyhunk
Part of things
Old Ford's R Us
Posts: 265
|
|
May 26, 2011 20:04:19 GMT
|
So, I managed to get started on the car now. I had to weld the bottom of the a-pillar and the b-pillar before I could move it, so that's what I did today. The old welder crapped out on me, understandably cause it was like 30 years old. The hose was full of holes, and the wire binded up on me all the time. I had problems setting up the new welder I bought last fall, that's why the welds were so crappy :/ I'll get the hang of it eventually I think. Here come the piccies. bottom of the B-pillar: 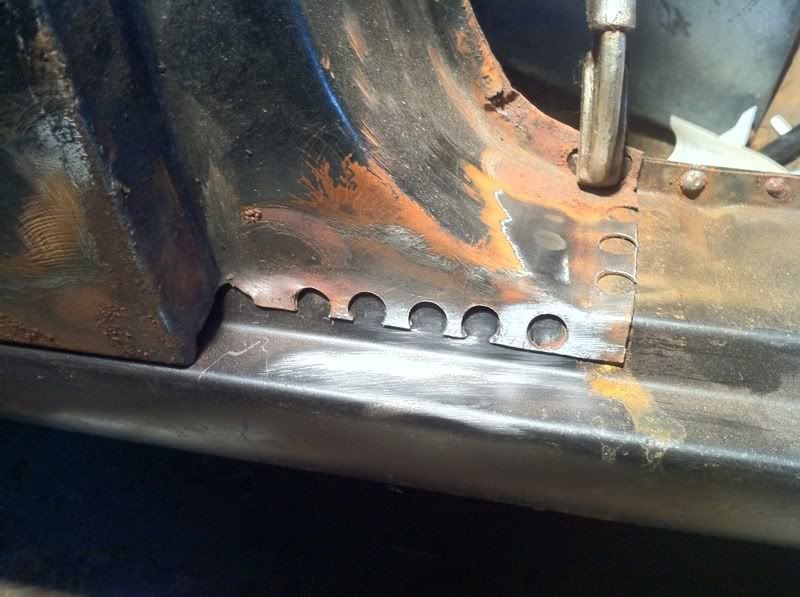 A-pillar: 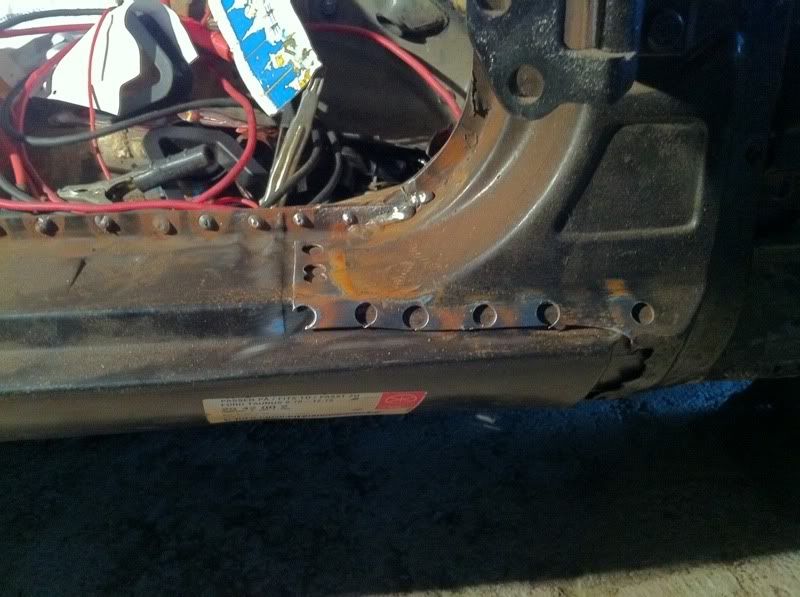 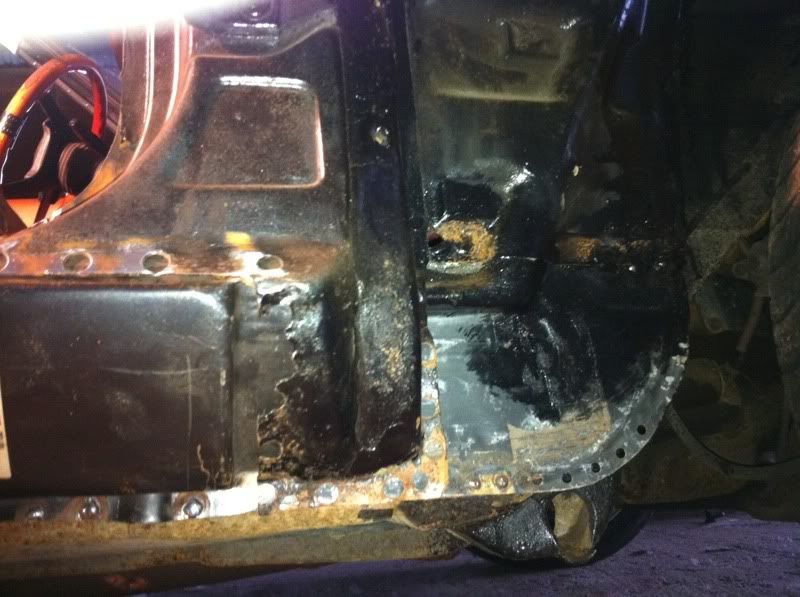 B-pillar welded: 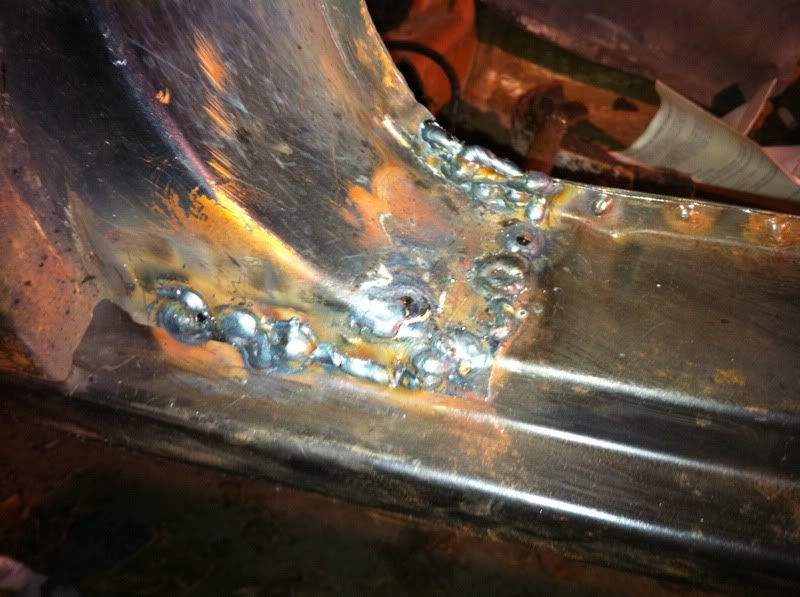 A-pillar: 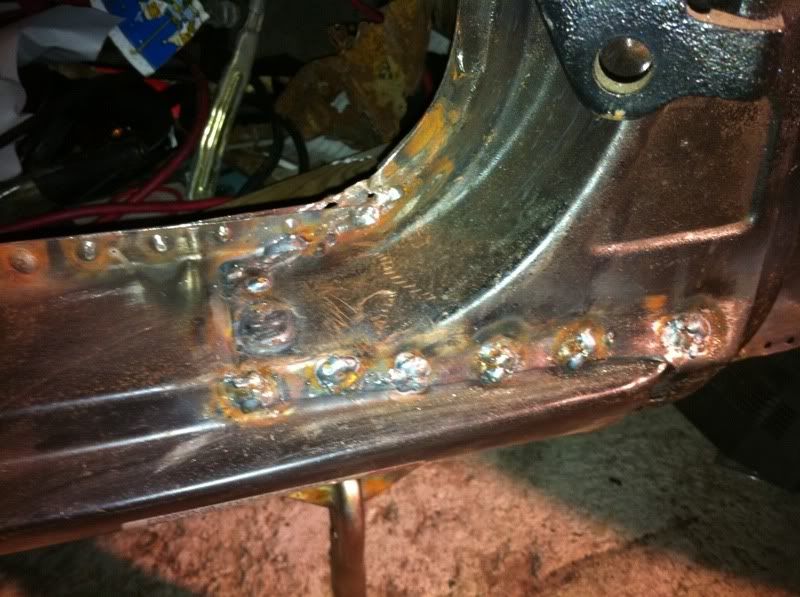 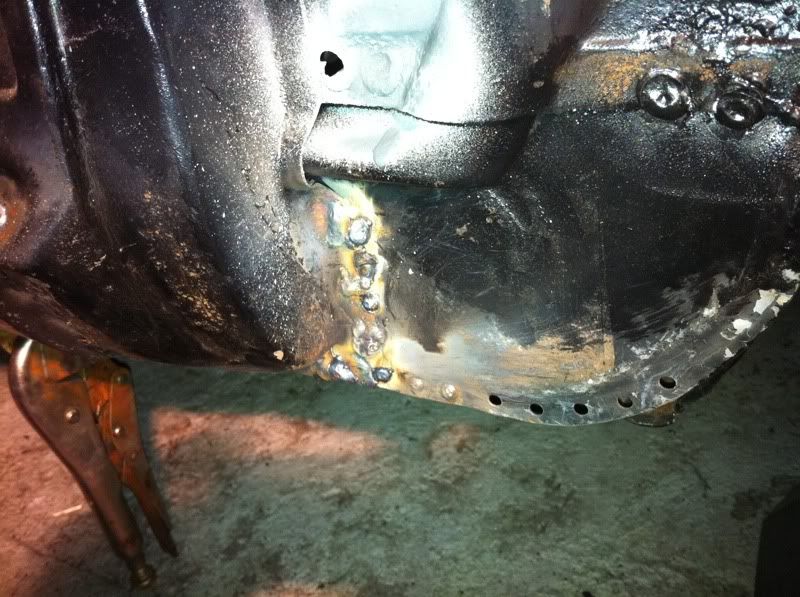 Setting up the welder proved to be more of a challenge than I had thought from the beginning. I'll get there someday. When I get the car repositioned and jacked up I'll start grinding the welds back down. It'll probably look loads better afterwards. I also made a closing piece for this hole, where the floor meets the inner sill, but I forgot to take pictures: I'm going to try to keep a track of the time spent from now on, because it would be depressing fun to see how long it takes. Yesterday I used 4 hours cutting/adapting/banging out a closing plate for the floor/inner sill area. Today I spent 2 hours welding and other stuff. Total time spent this year: 6 hours. Oh, and a big thanks to tonybmw for his tutorial on stretching/shrinking metal. It worked like a charm getting the bend right to follow the floor contour. Pictures maybe monday or something. |
| |
|
|
|
|
|
May 27, 2011 15:50:27 GMT
|
Great to see some progress And you really shouldn't count the hours you spend on cars, you'll just end up switching to a less time consuming hobby, like building pyramids or something.  |
| |
Last Edit: May 27, 2011 16:34:45 GMT by dude
|
|
funkyhunk
Part of things
Old Ford's R Us
Posts: 265
|
|
May 30, 2011 20:40:15 GMT
|
Great to see some progress And you really shouldn't count the hours you spend on cars, you'll just end up switching to a less time consuming hobby, like building pyramids or something. Haha, yeah I gotta agree with you there There's something wrong with us gearheads doing all this work just for an old car. But I guess it's better than going around drinking, stealing, or other activities So, I got some work done today, I got most of the welds on the B-pillar ground down. That was slow work cause I didn't want to rush things and make it look like he11. I used the angle grinder for most of the work, but I decided to try the air-dremel with a grinding stone attached to it. It worked like a charm, hadn't it been for my compressor who managed to keep the grinder with air for a total of 15 seconds before it started to charge air for two minutes. It's a small compressor though, so I'll have to look into buying a bigger one. Piccies: The welds on the b-pillar ground down: 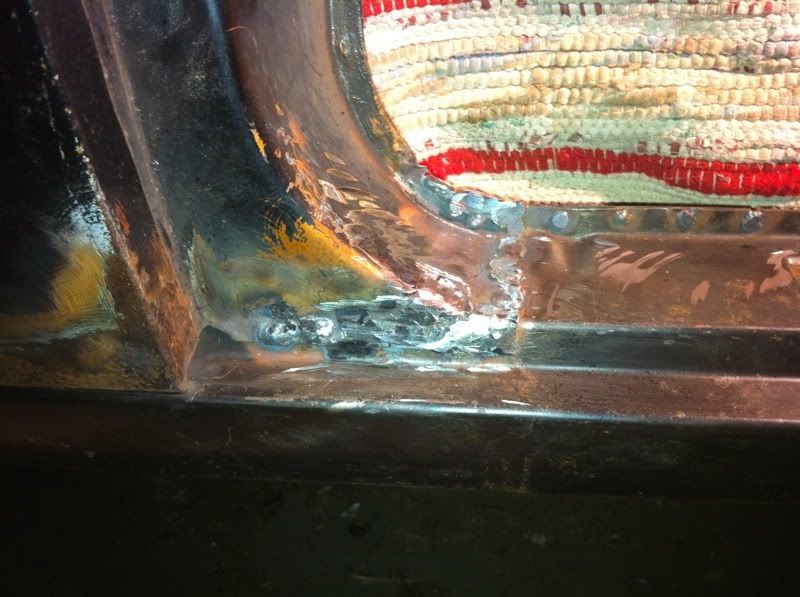 The ûber-small 31-year old compressor: 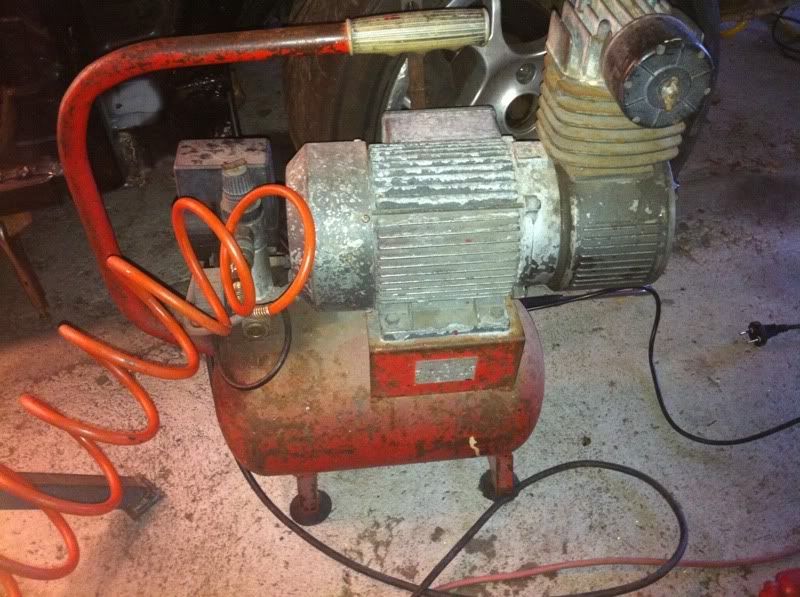 And the small air-dremel or watchamacallit: 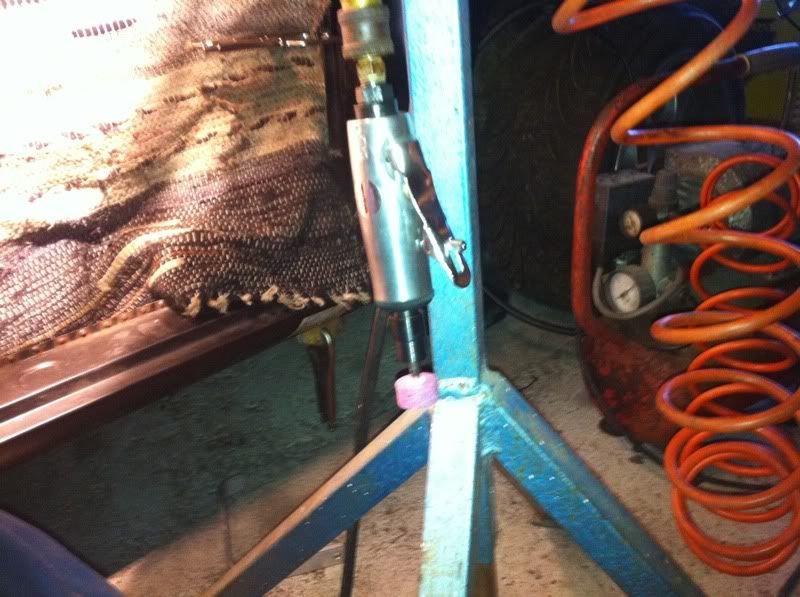 Here is also pictures of the closing plate for the floor-to-inner-sill area: 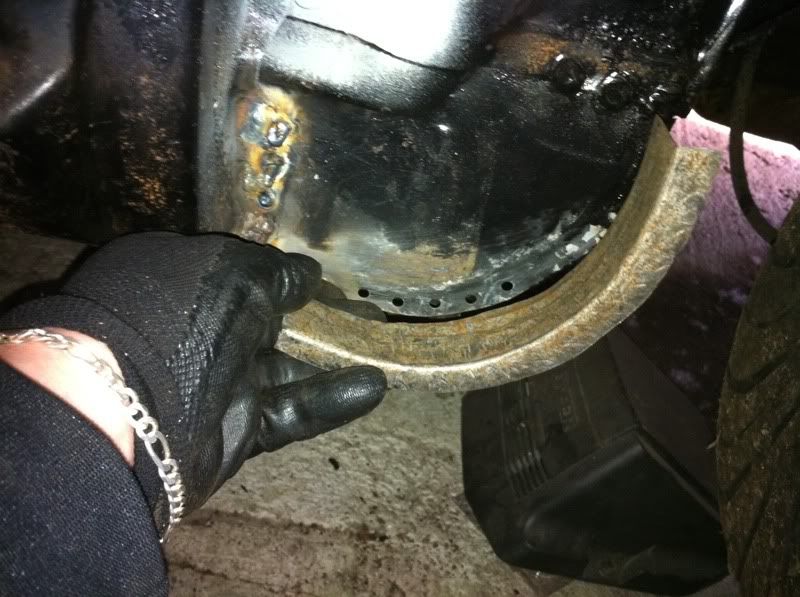 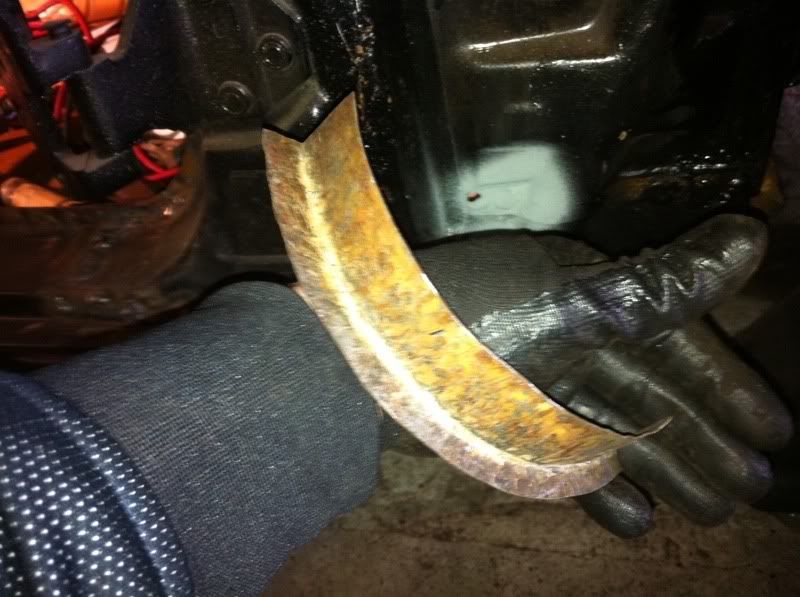 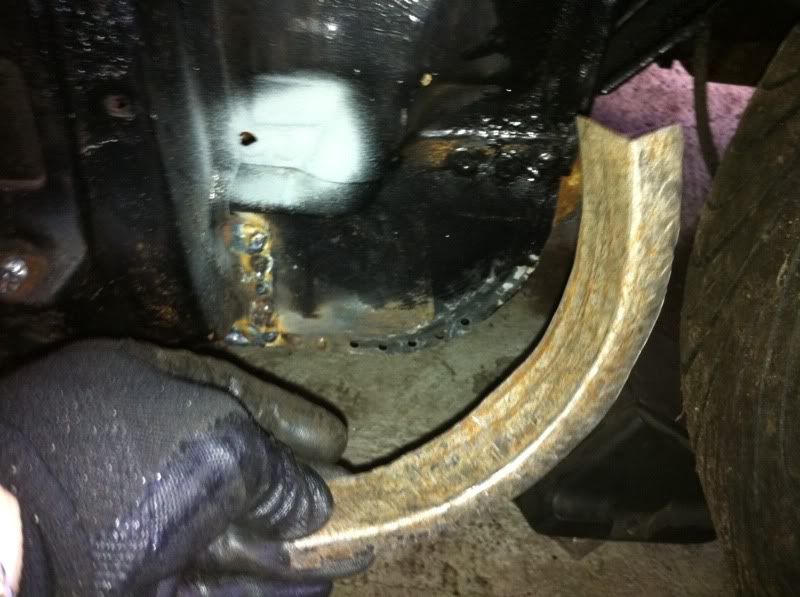 I was pretty pleased with that plate, it fit like a glove. I just have to cut off 1cm at the top part and cut out space for it in the floor. Then just seam weld it to the floor, and spot weld it to the sill. We'll see how that goes when I'm done with the A and B pillars. Thoughts anyone? Time spent: 2 hrs, one hour grinding and one hour looking for the right tools Total time spent this year: 8 hours Edit: spelling |
| |
Last Edit: May 30, 2011 20:48:12 GMT by funkyhunk
|
|
|
|
|
May 31, 2011 20:19:34 GMT
|
Lovely looking car, much better rear end than the Cortina's we had over here. Great work on the repairs, will be following with interest |
| |
|
|
funkyhunk
Part of things
Old Ford's R Us
Posts: 265
|
|
|
|
Thanks Tony, yeah the Taunus have a nice rear end  I managed to get 5 hours of work done today, with the help from a good friend. I finished grinding the spotwelds on the A and B-post, and gave them a coat of primer for now. 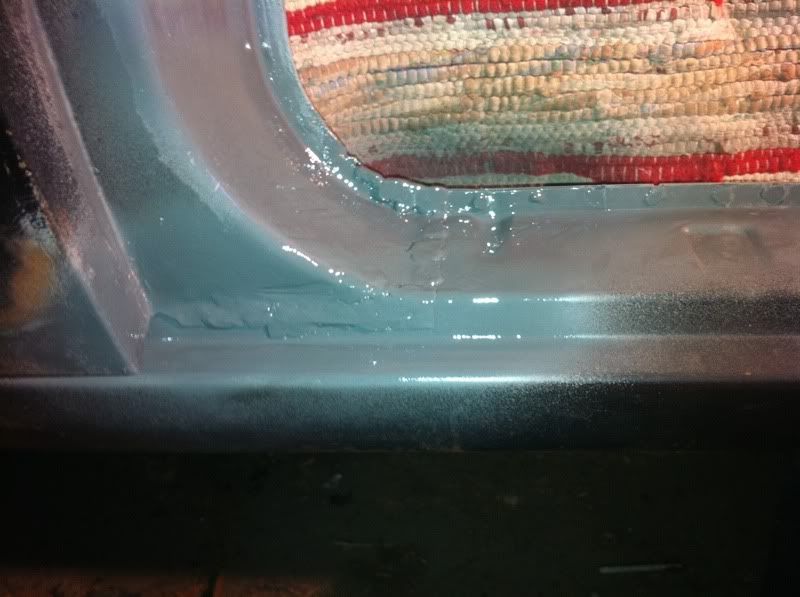 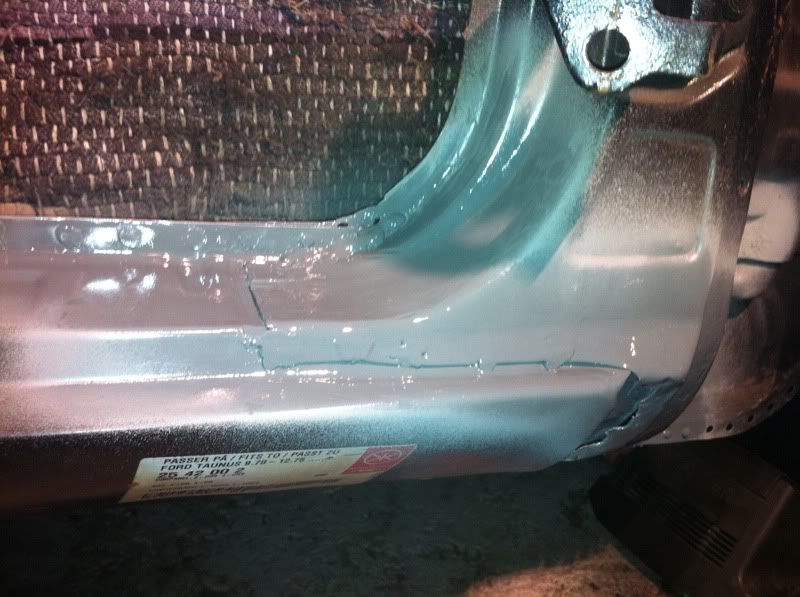 I also bought myself a new compressor, a 3hp one with a 50 litre air tank. 265litres per minute:  I thought you'd like some better pictures of the wheels, to show how awesome they are 9x16" with 225x45x16 tyres. 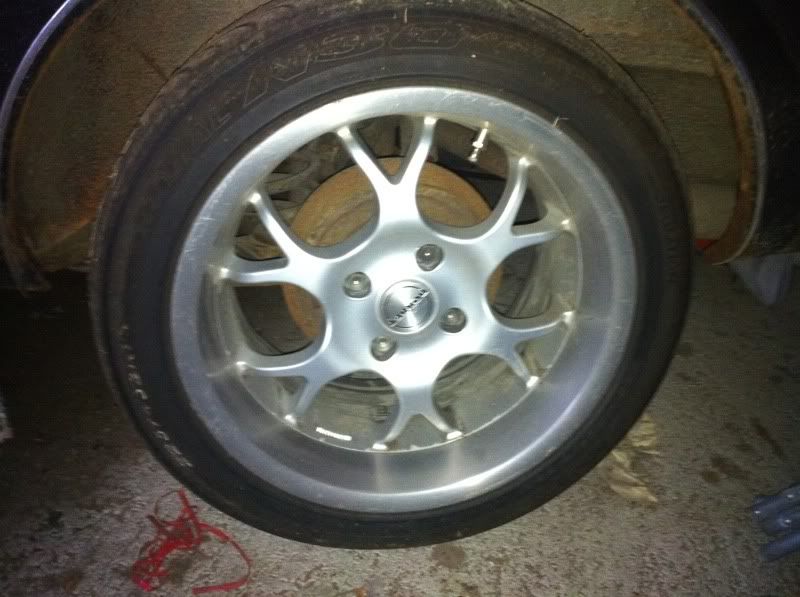 The dish (whitch is to be polished once the car is back on the road again) is quite awesome:  I also got to doing the piece for the floor-to-inner-sill-area today. The area in question: 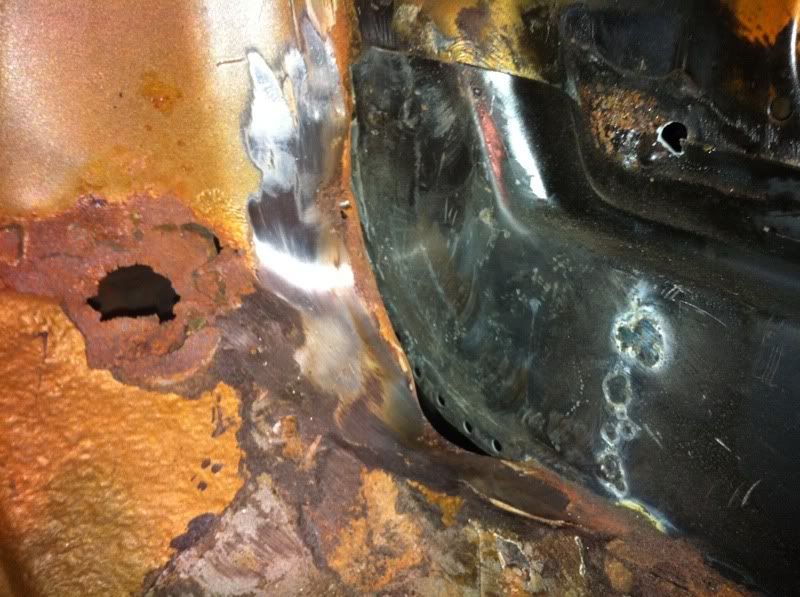 Here is the repair plate during adapting and cutting: 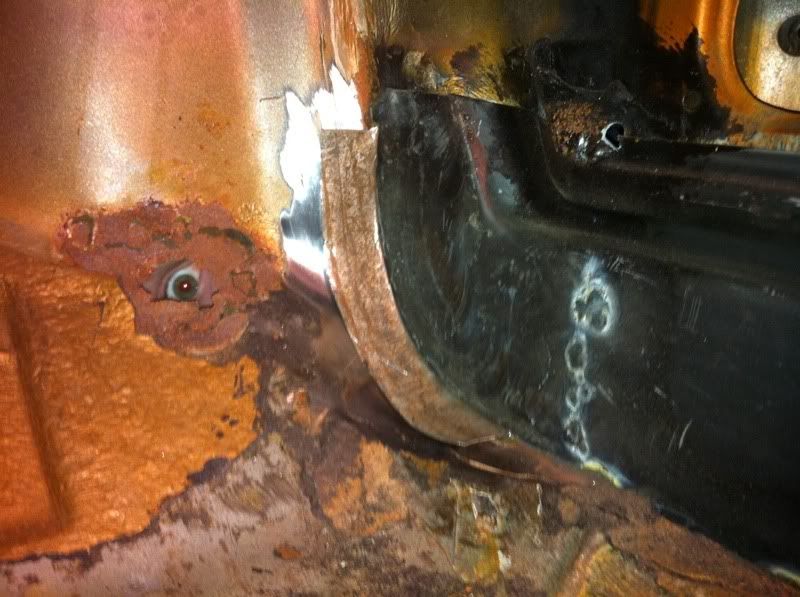 The spot welds on the lip is finished: 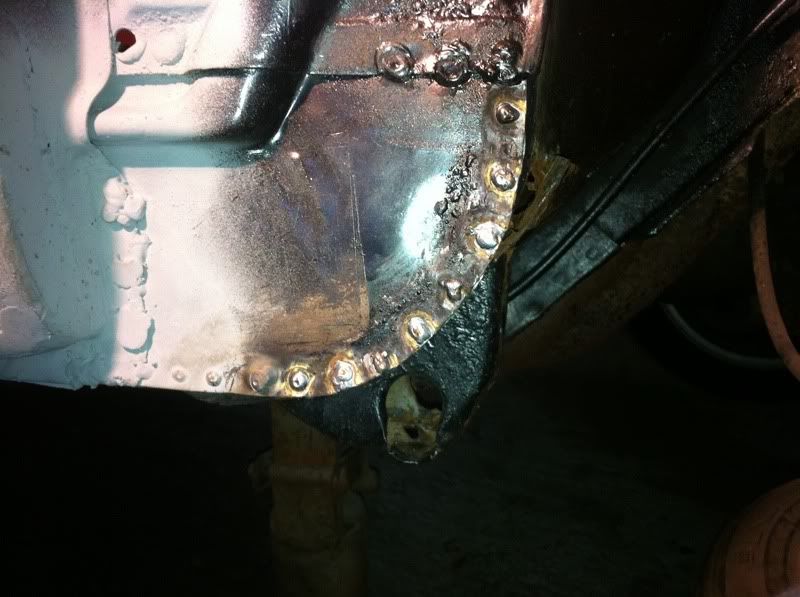 I welded these from the outside just to try. I will seam-weld this later. It was getting late so I had to wrap up for today. 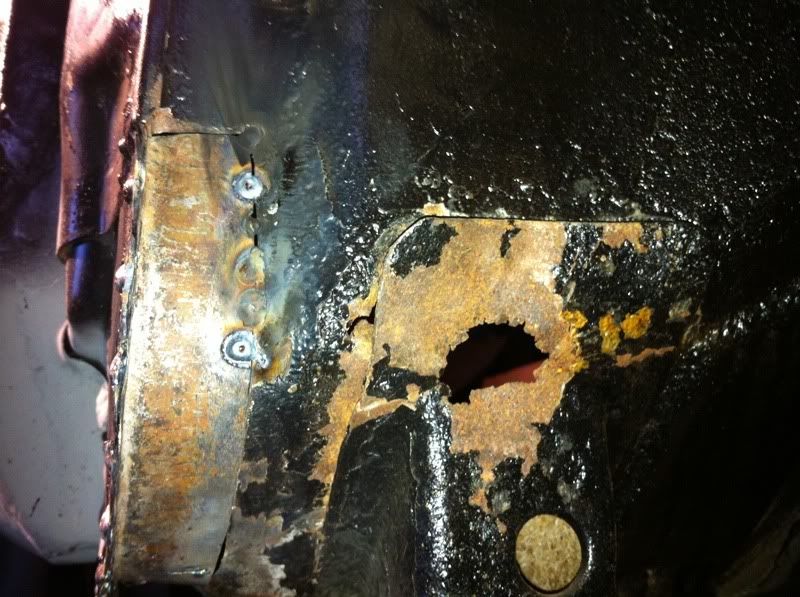  The repair plate fit quite good I think: 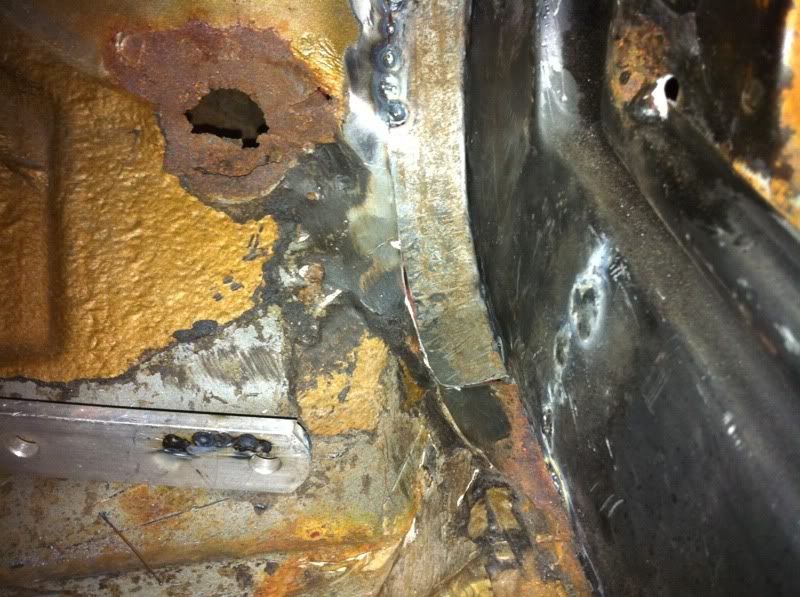 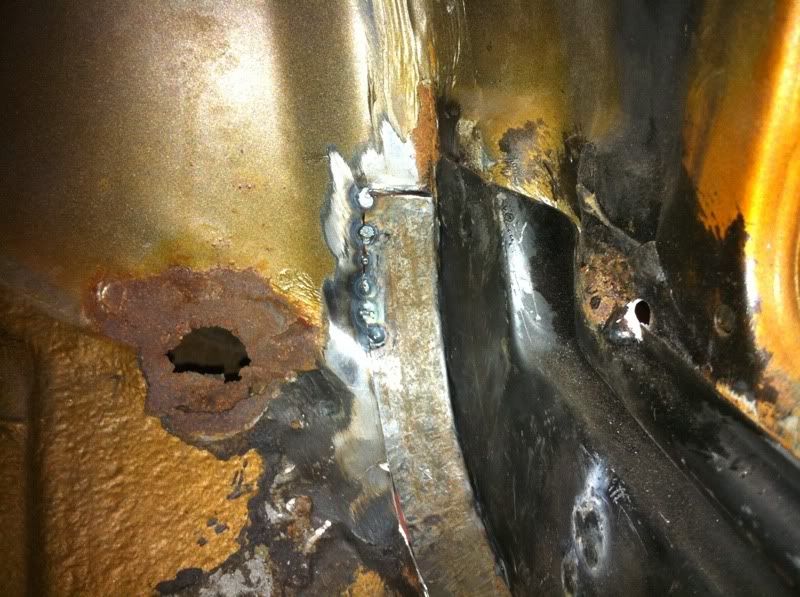 The edge of the repair plate sits flush with the floor plate, even though it don't show very well on the photos. I also kept burning holes through the metal when I was doing the spotwelds to the lip, but remembering tonybmw's making panels thread I used a piece of aluminium on the back side, and that made it so much easier. Why isn't welding as easy as making panels and beating metal?!?! I burned holes even with the weld-current on the lowest setting, and the wirefeed on 8 of 10 maximum. I don't understand why. Any clues anybody? Oh, and a big thanks to my mate Inge who helped me move the car around a bit, and helped me cut out the floor Today: 5 hours Total time spent this year: 13 hours. |
| |
Last Edit: Jun 2, 2011 21:33:02 GMT by funkyhunk
|
|
|
|
|
|
|
|
What thickness wire are you using, for best results you need to use 0.6mm on car panels
|
| |
|
|
funkyhunk
Part of things
Old Ford's R Us
Posts: 265
|
|
|
|
|
I'm using 0.8mm, as they didn't have any 0.6 in stock.
Is 0.8 too thick? I would think it conducts too much current maybe?
|
| |
|
|
|
|
|
|
|
|
O.8mm wire takes more energy to melt it, ie a higher power setting, you will get much much better results with 0.6mm
|
| |
|
|
funkyhunk
Part of things
Old Ford's R Us
Posts: 265
|
|
|
|
Right, so I got some time in the garage last night. I wanted to tackle the jack-mount-guide on the left side. The old one was weak, and rusted too much. This was the piece that I was going to replicate: 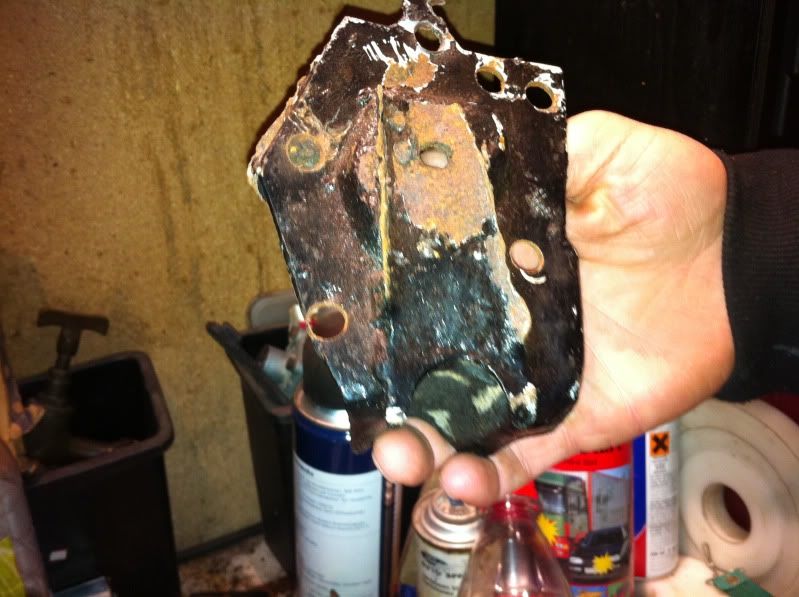 Which goes here:  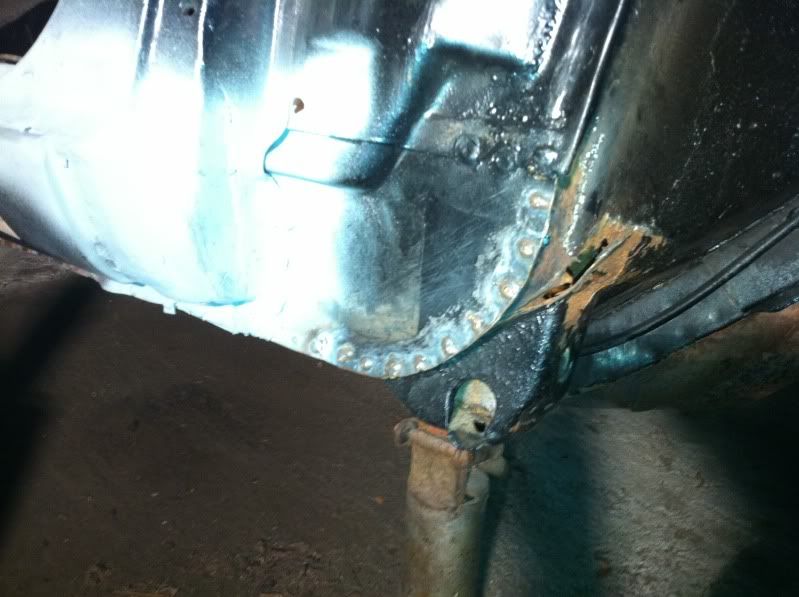 You can see where I stick the jack in the hole, and support the jack on that "guide". So, I started my awesome CAD-5killz0rz (cardboard aided design) and made some plate pieces from some stainless steel I got from the "throw-away-pile" at work: 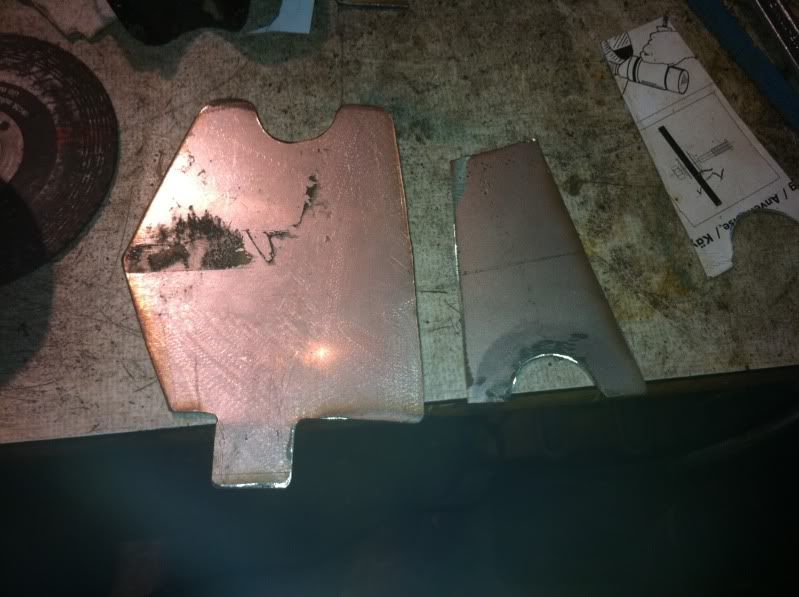 Here you can see all the finished pieces I needed to make this mount: 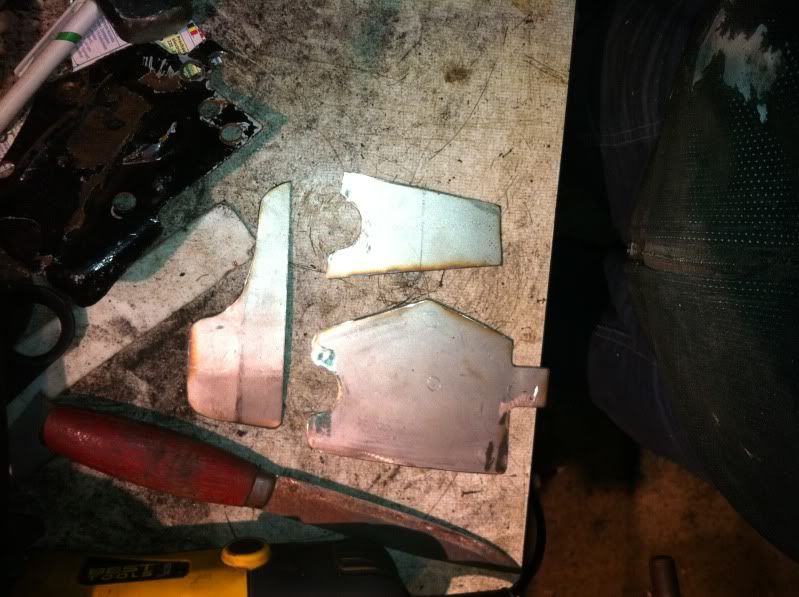 This is just mock-up to see how much it looks like the original. Pretty close: 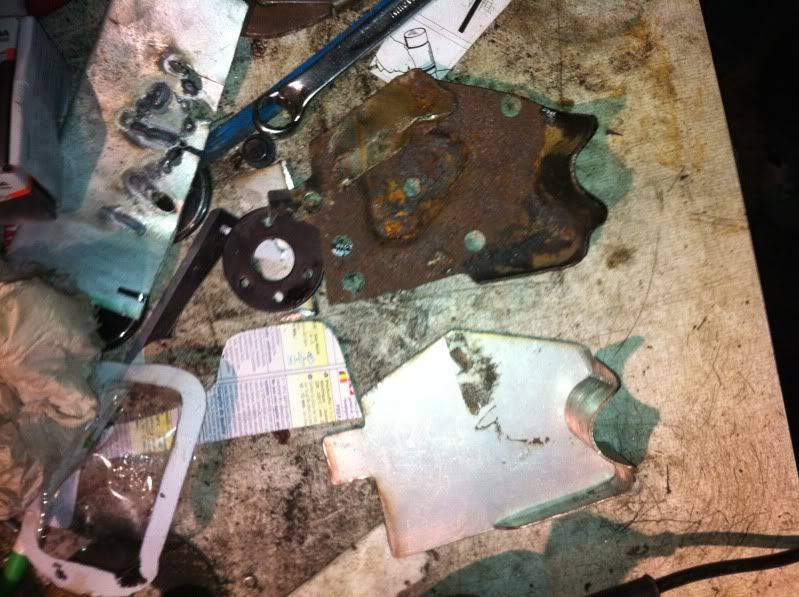 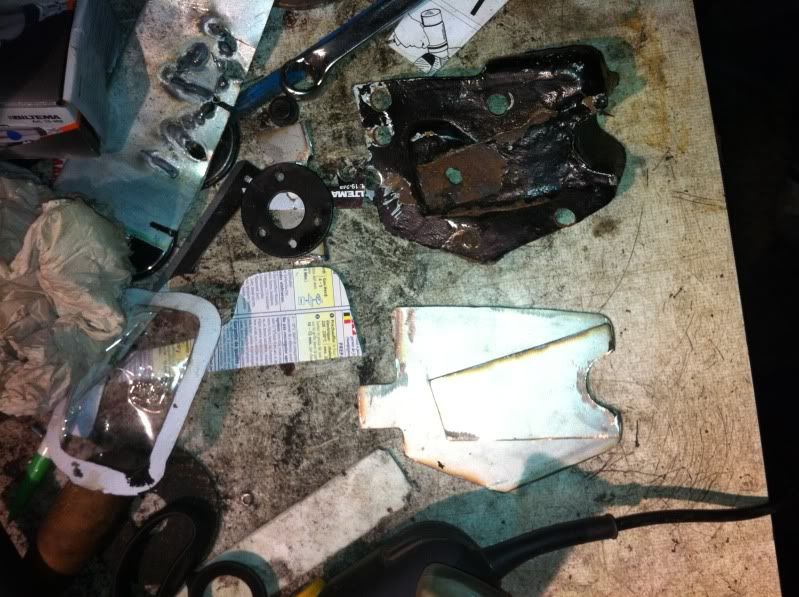 Here I welded it together from the back, it had good welds with good penetration and all: 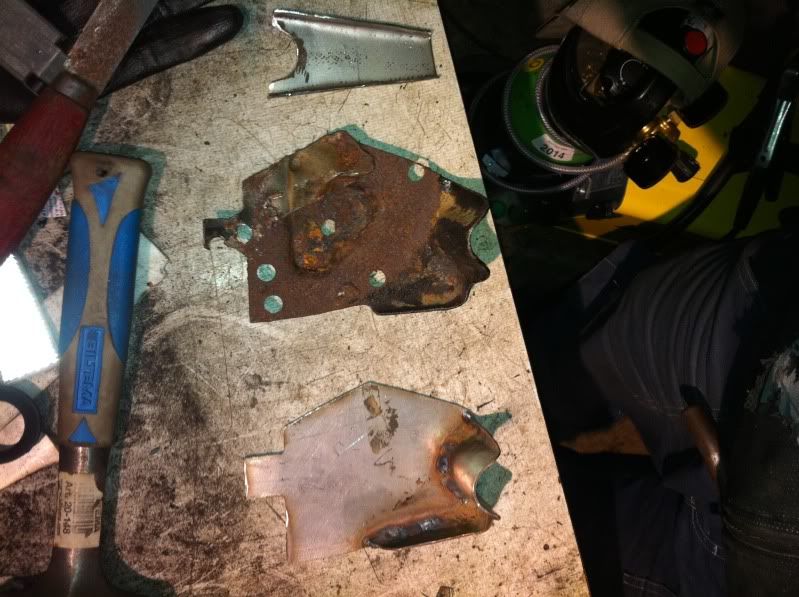 Here is the mockup of the finished support piece from the front: 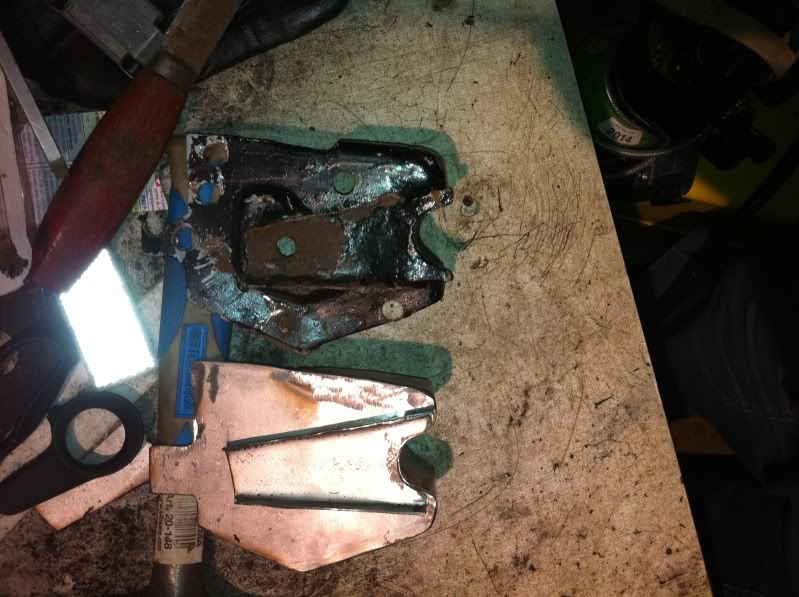 And here is the finished piece: 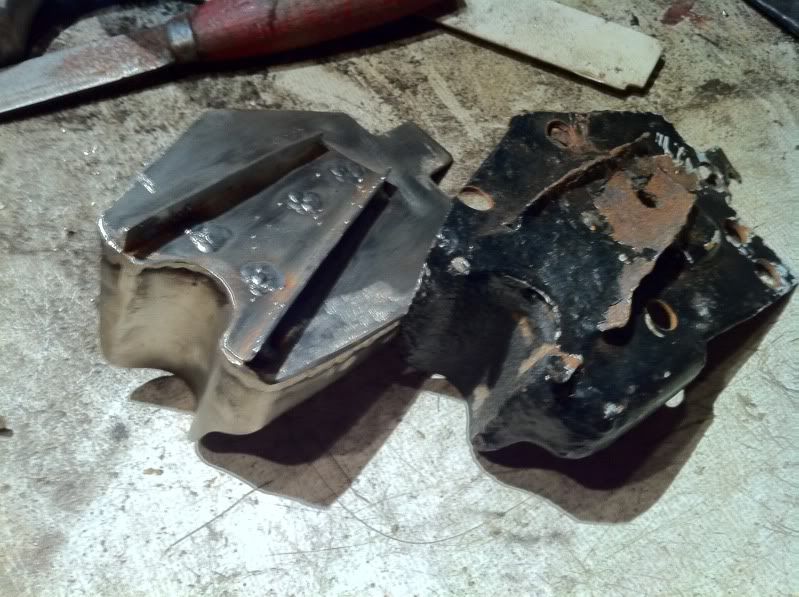 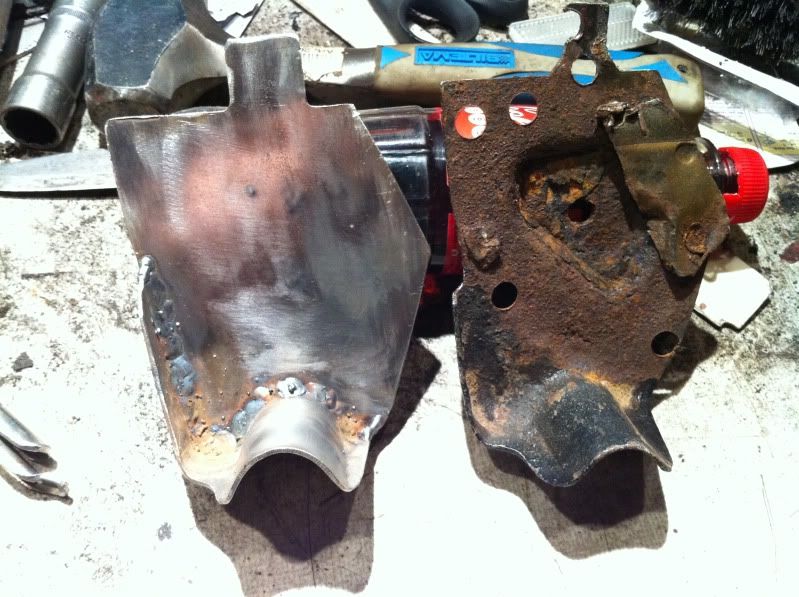 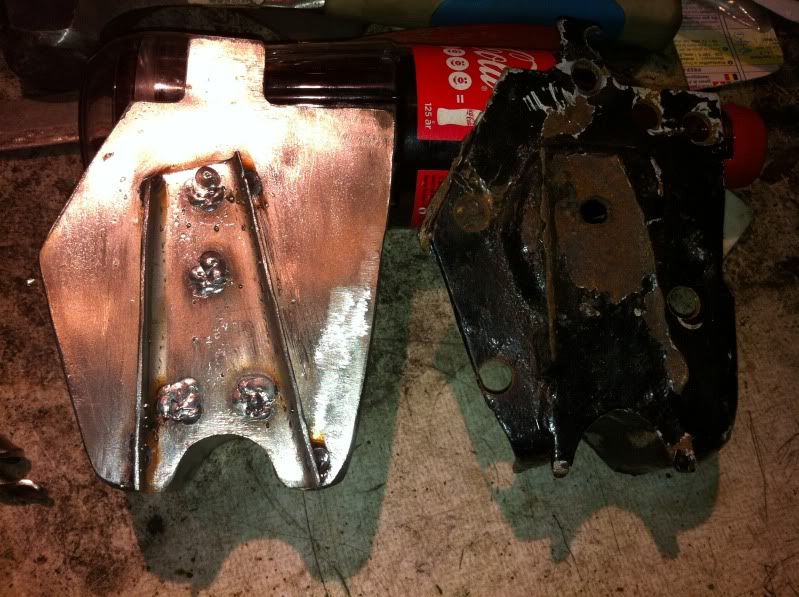 It looked good I think. Well chuffed actually I didn't make that indentation on the middle that shows on the original piece, cause that's just a water and dirt trap. The inner sill had rusted in the exact spot where that had been before I changed it. Also, I think my welding have improved, I've learned the welder much better now. I also switched to 0.6mm thread. The thing I did wrong the last time I welded is that I had too long intervals, I didn't let the welds cool down before I continued to weld. I also welded shut the piece in the floor. That didn't come out too well, but it'll have to do: 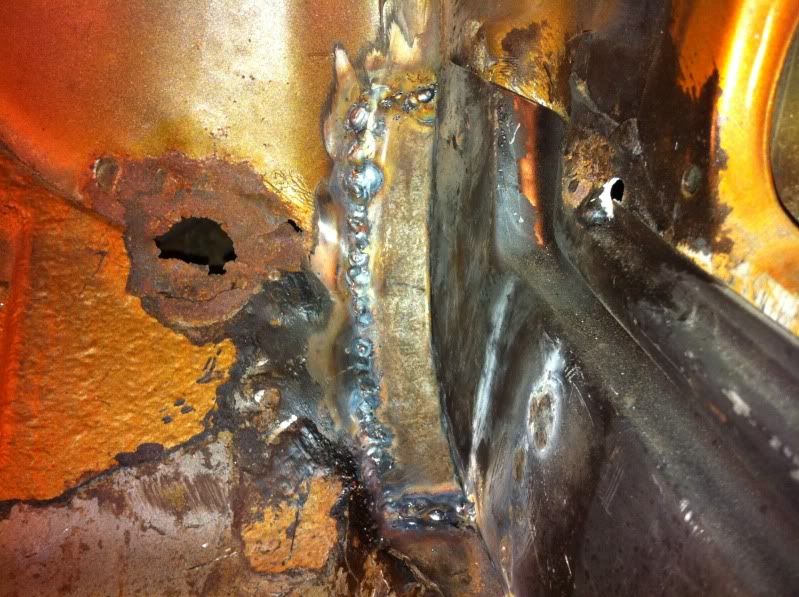 Next I'll have to tackle the inner jack-support and the hole in the floor. Feedback anyone? Time spent: 4 hours. Total time spent this year: 17 hours. |
| |
|
|
|
|
|
|
|
|
|
|
Excellent , better than the original
|
| |
|
|
funkyhunk
Part of things
Old Ford's R Us
Posts: 265
|
|
|
|
Sturdier than the original I can tell you that much This stainless steel is 1.1mm thick I think. It went through the cutting discs like there was no tomorrow though. Tough stuff. |
| |
|
|
funkyhunk
Part of things
Old Ford's R Us
Posts: 265
|
|
Jun 13, 2011 22:47:13 GMT
|
Well, I've made some progress the last few days. It was slow work though, we've had some nice weather and temps up to and around 25-30 deg c. It makes it kinda hard to work effectively when the sweat is dripping onto the inside of the protective goggles, or the welding mask. Or when your hands are so sweaty the gloves slip off your hand But I managed to get some work done though. I welded the jack support on, and ground down the spotwelds. It looked kinda ok, It's going to be prettier on the left side though, as I had some practise from this side. The welds are improving as well with practise. Jack support: 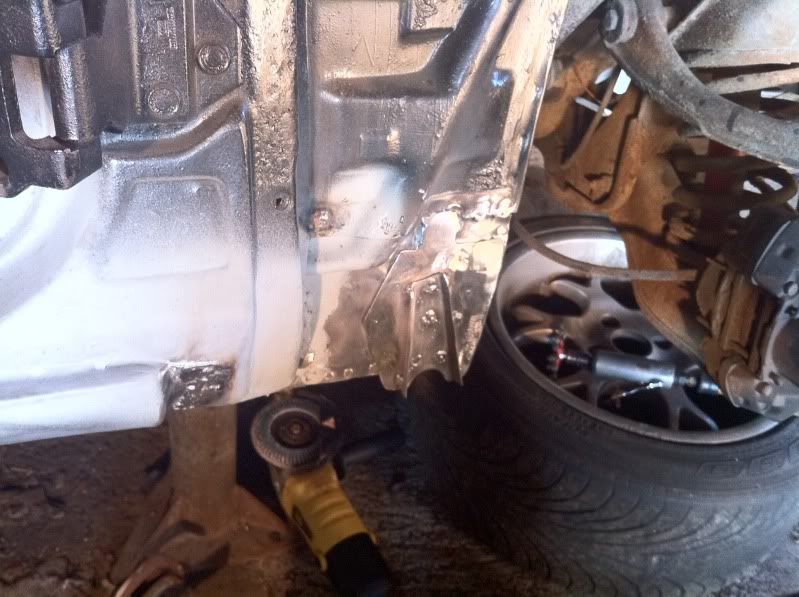 last welds to the front of the sill: 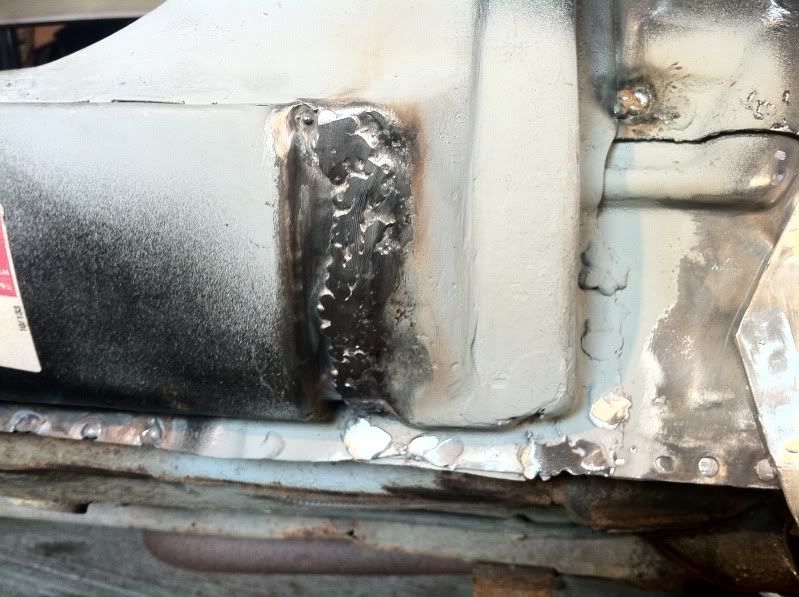 Good burn through of the jack support: 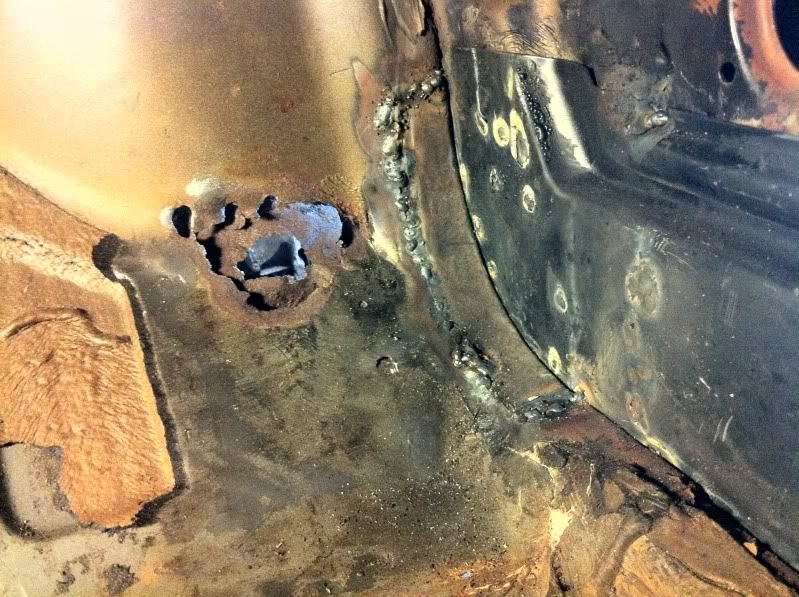 Ground down the welds: 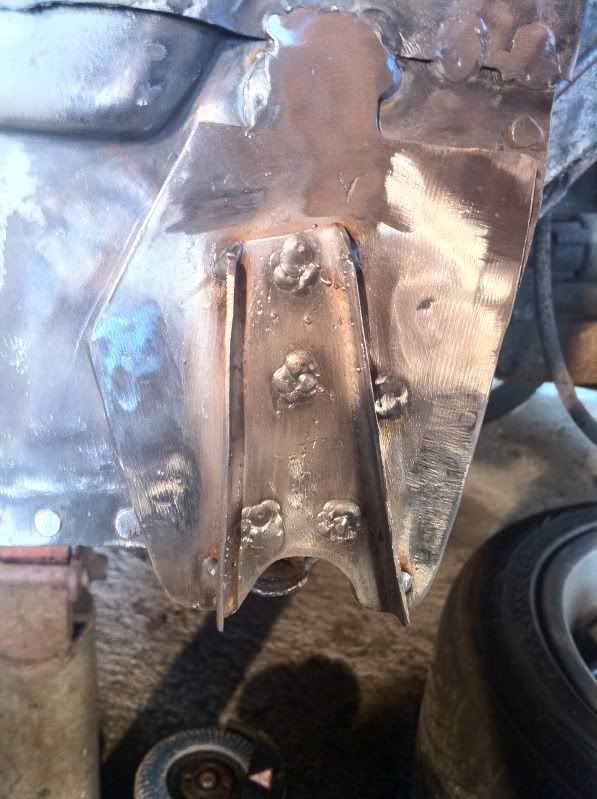 All Zink-primed up: 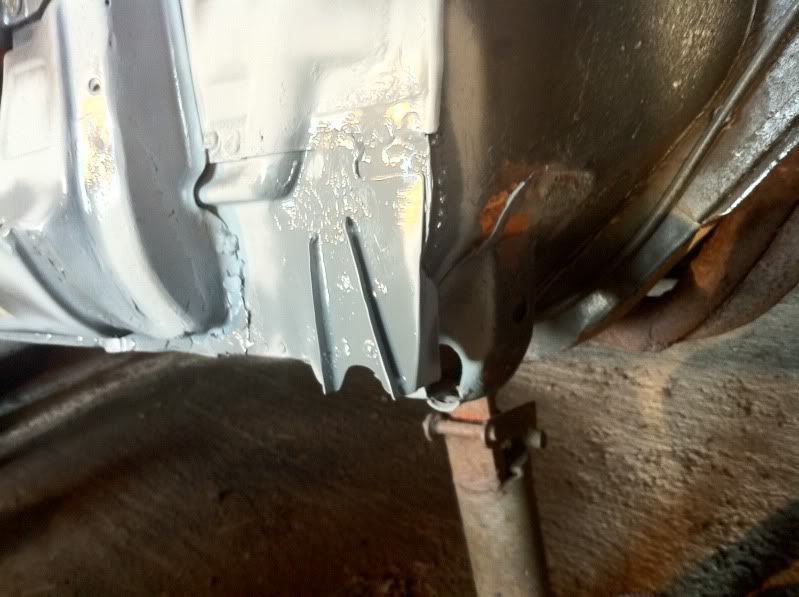 Next to be tackled was this, the inner jack support: 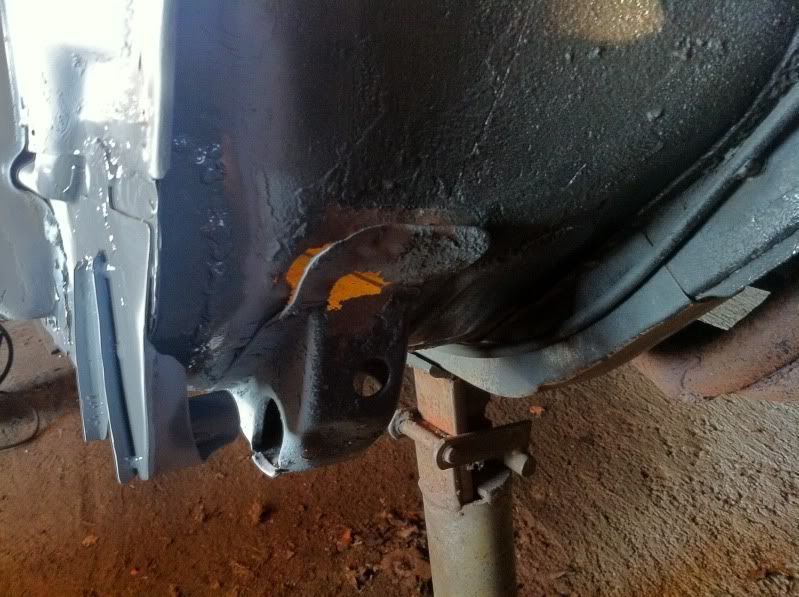 Drilled spotwelds: 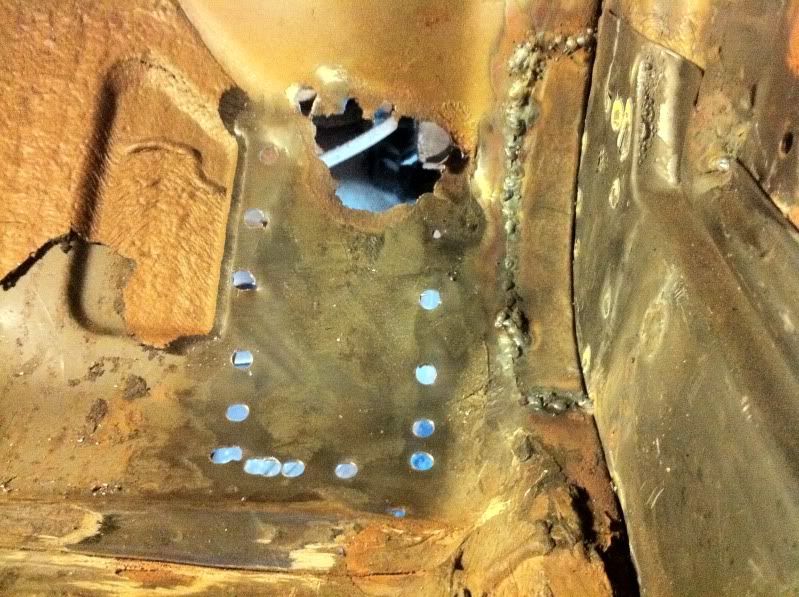 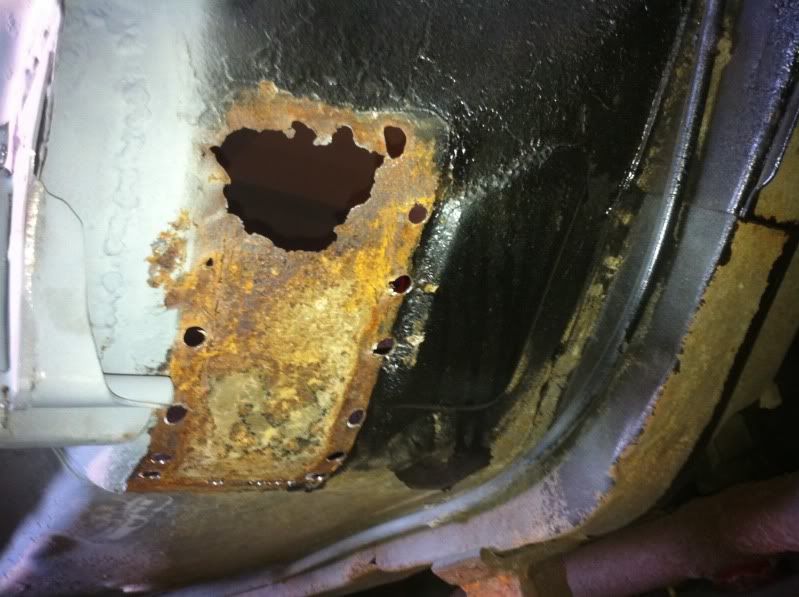 This is the piece I have to replicate: 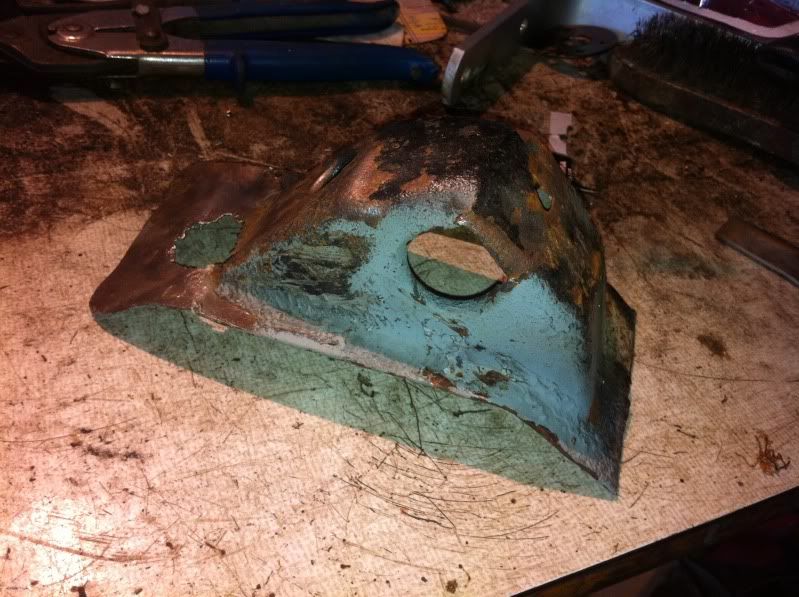 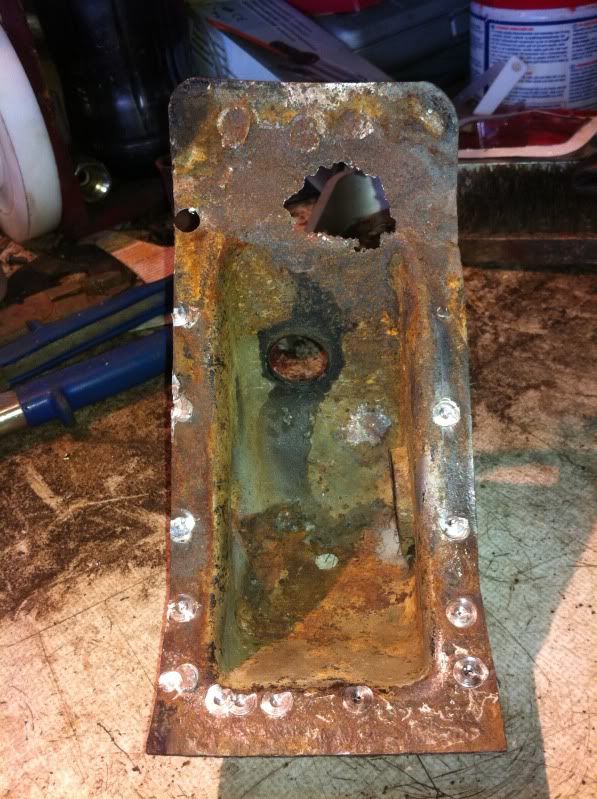 So, out came the CAD-equipment: 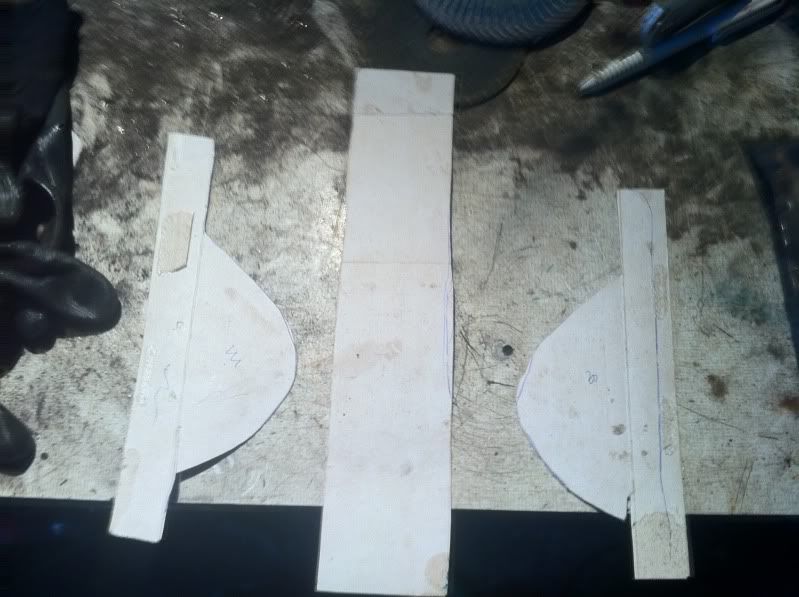 Measure twice, cut once: 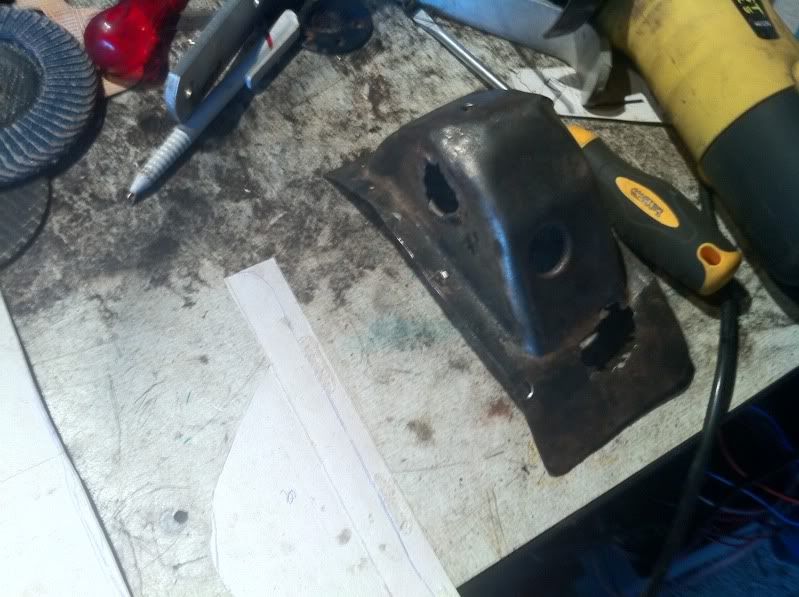 This was the donors, discarded 1.5mm stainless steel channels from work: 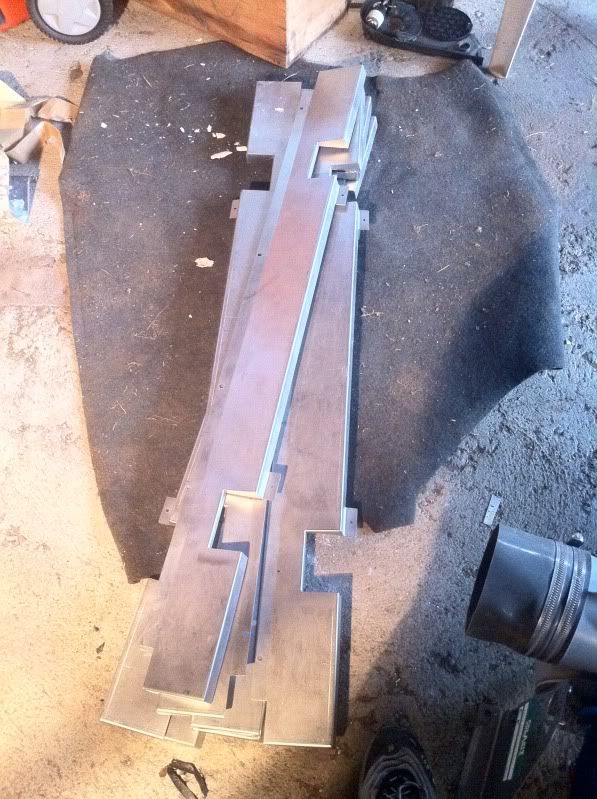 Mocking up: 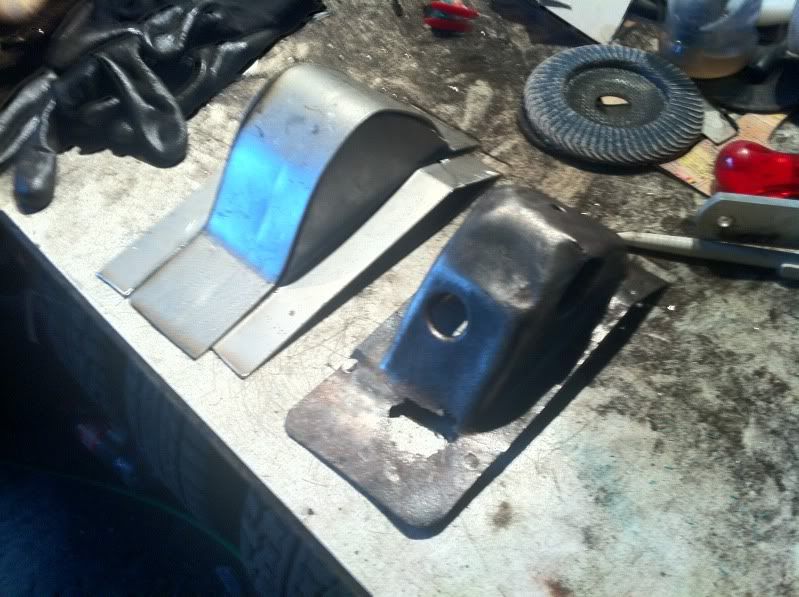 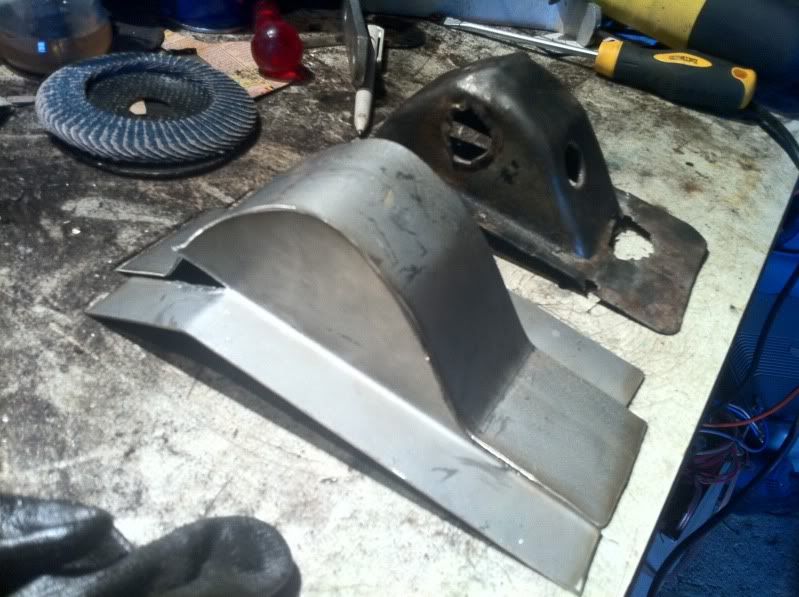 This one I had to fill with welds:  Here it is, almost done: 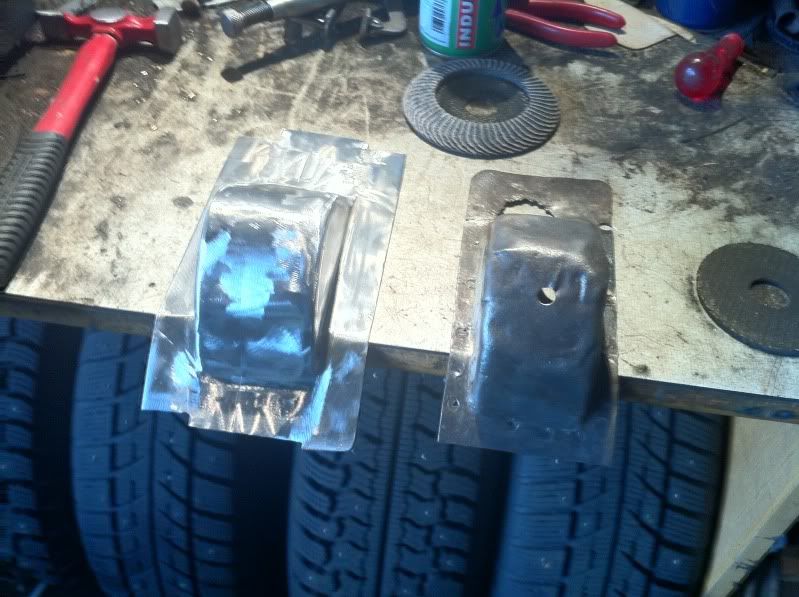 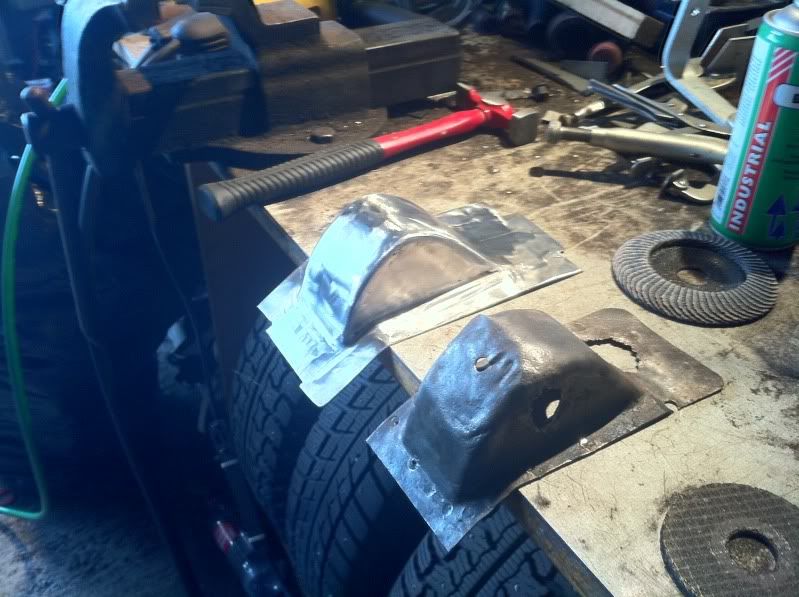 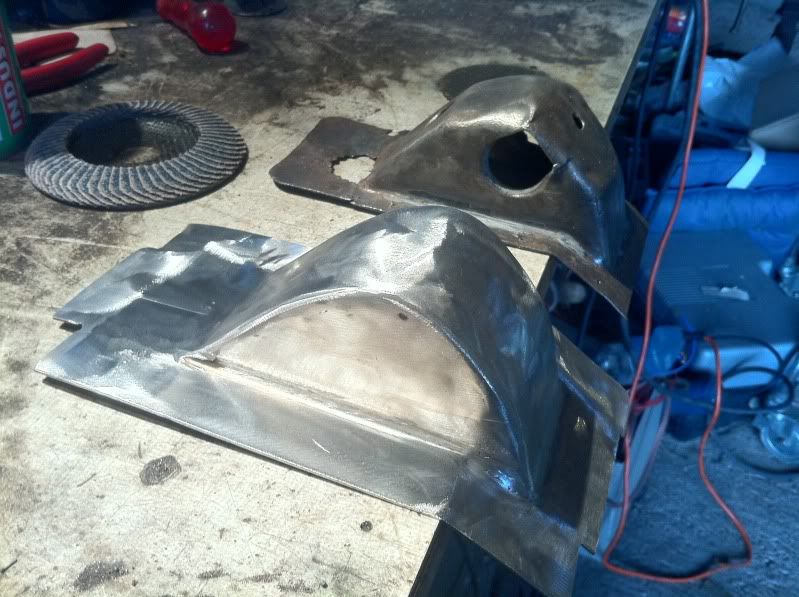 I still have to trim the edges, but toher than that they're done  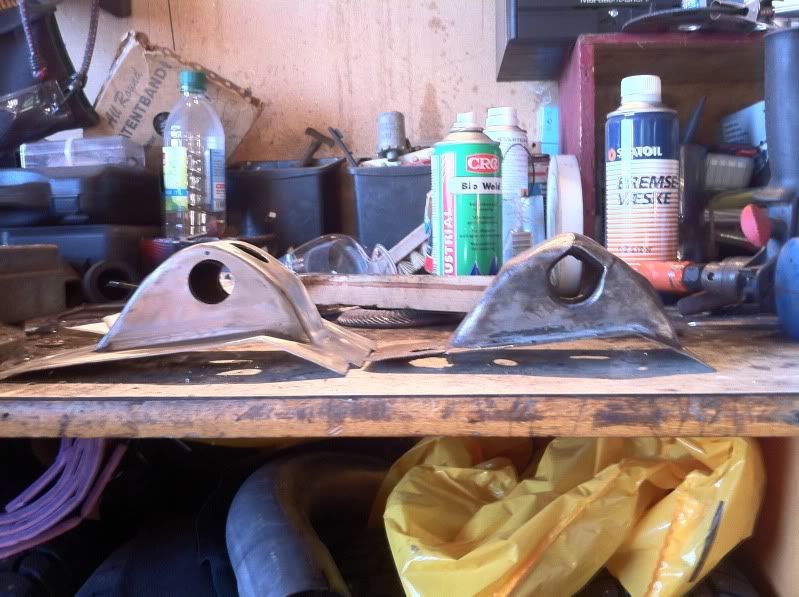 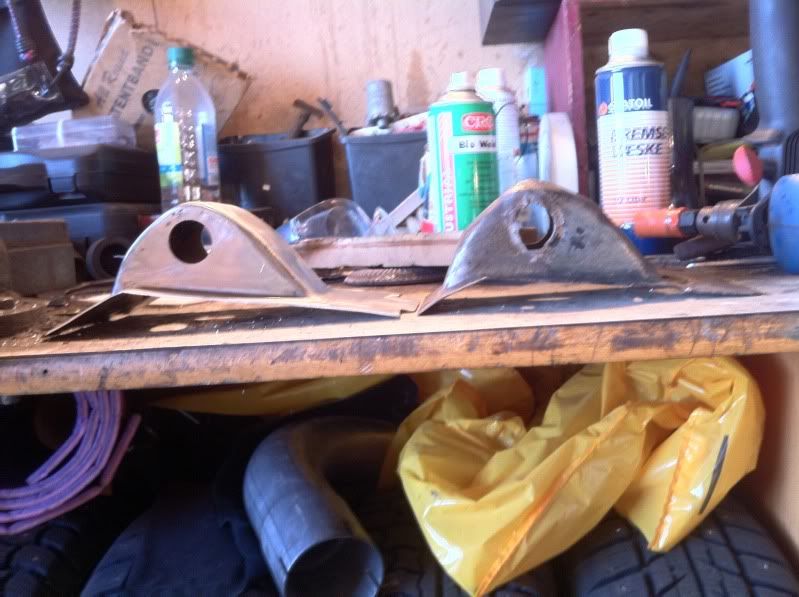 So, on to fix the hole in the floor: 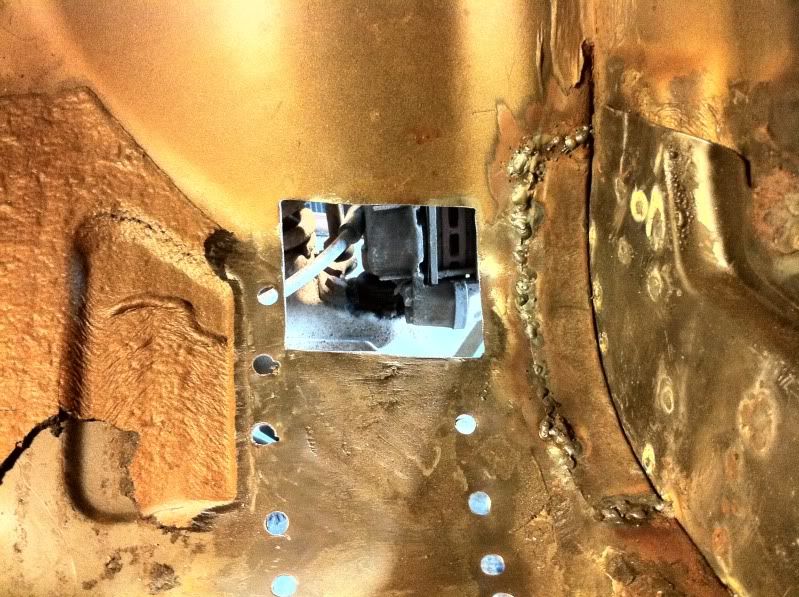 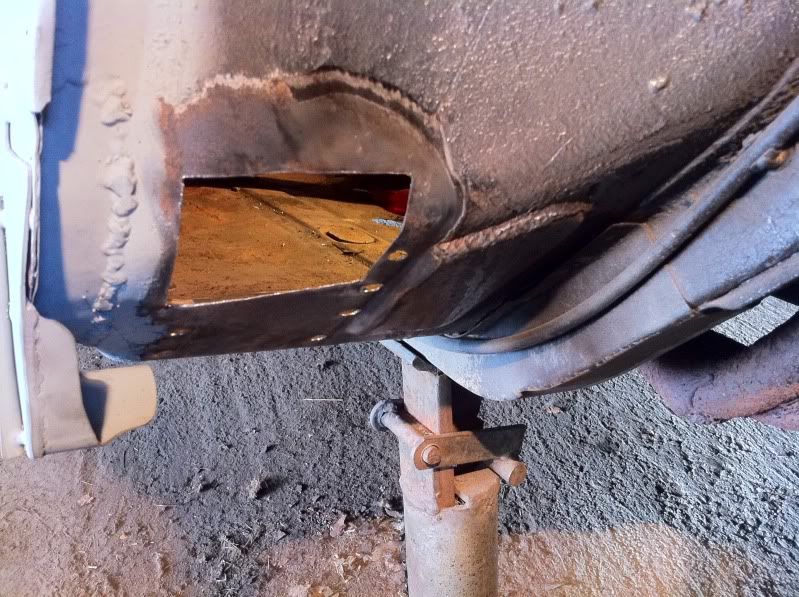 CAD: 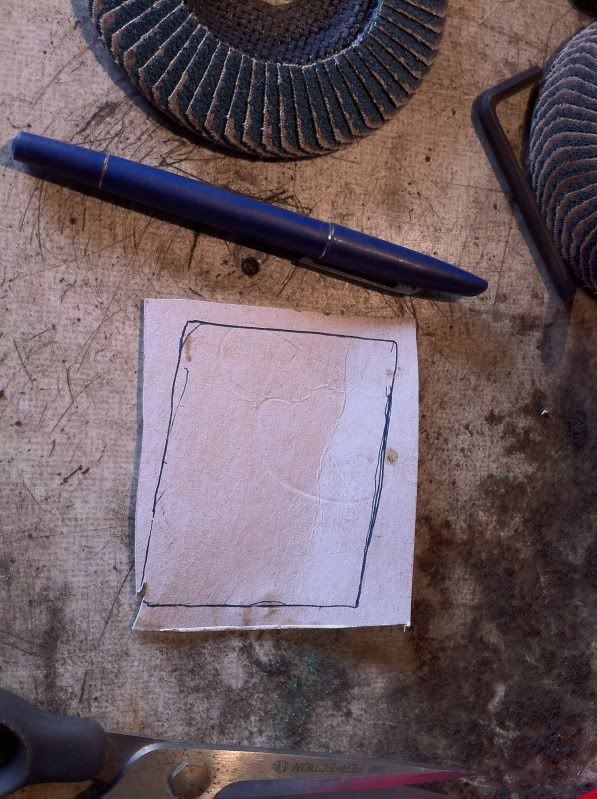 Stainless repair plate made and offered up after some adapting: 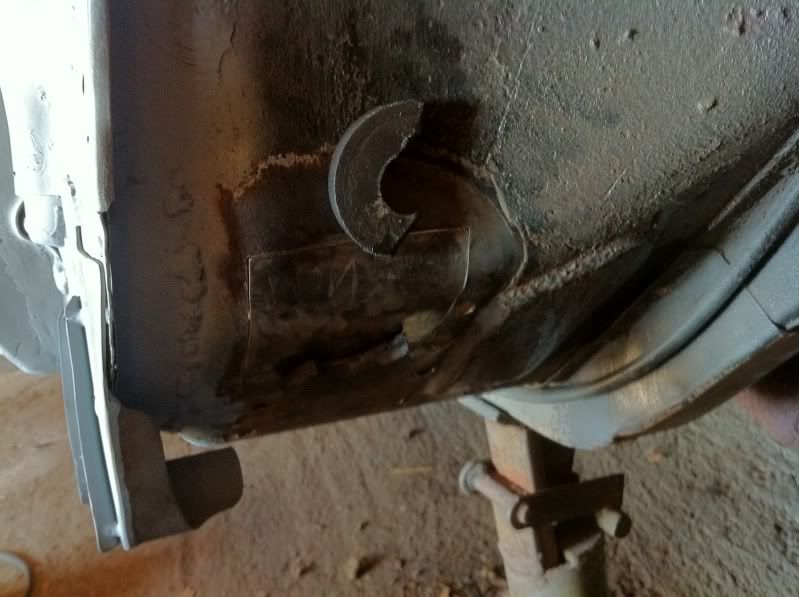 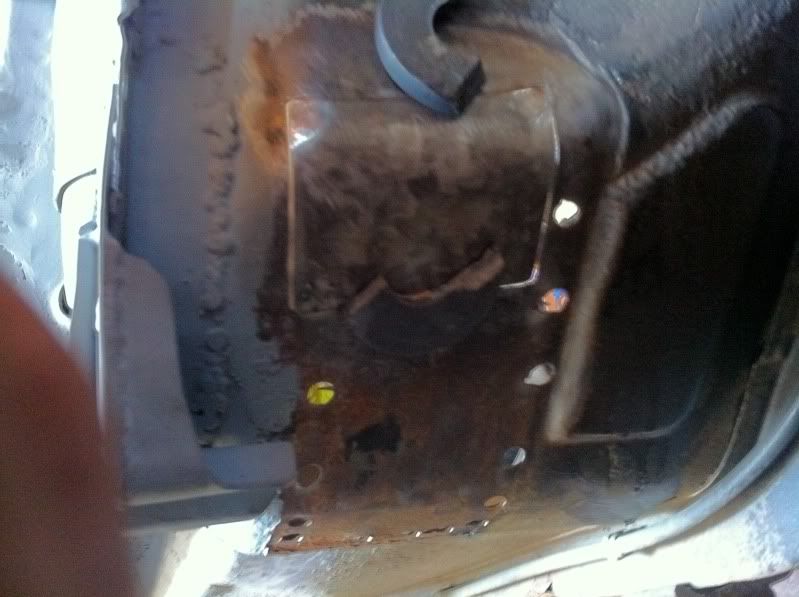 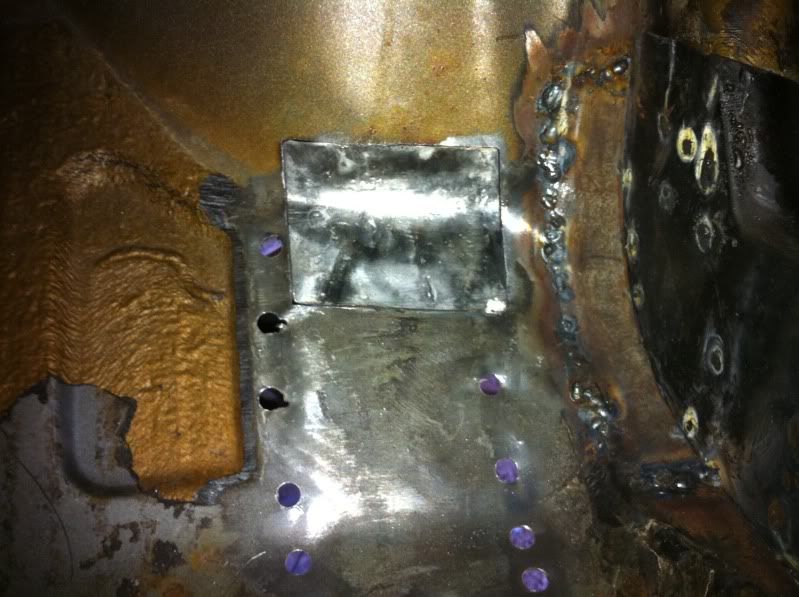 Welded from the outside: 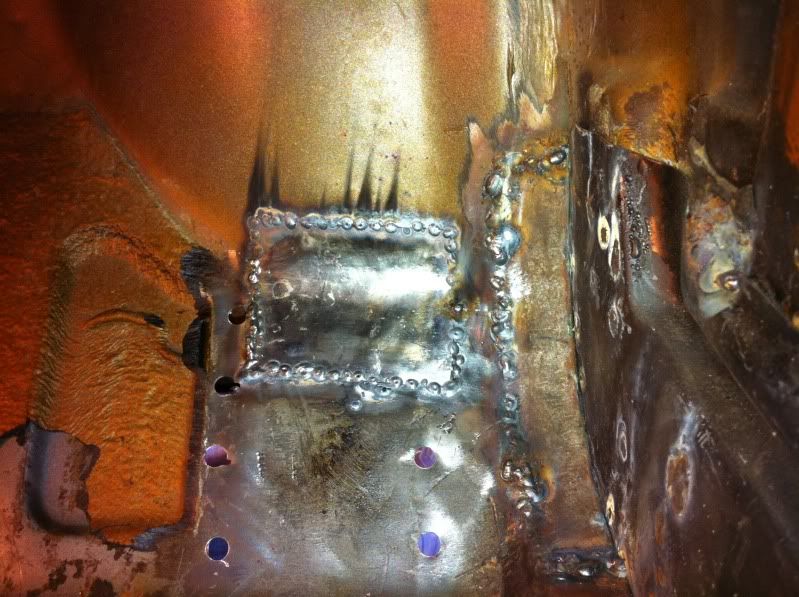 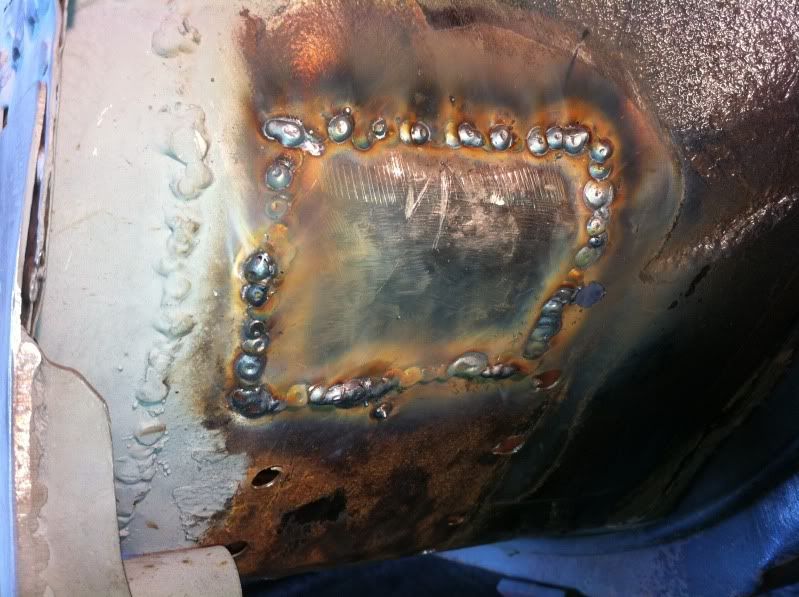 Slight grinding: 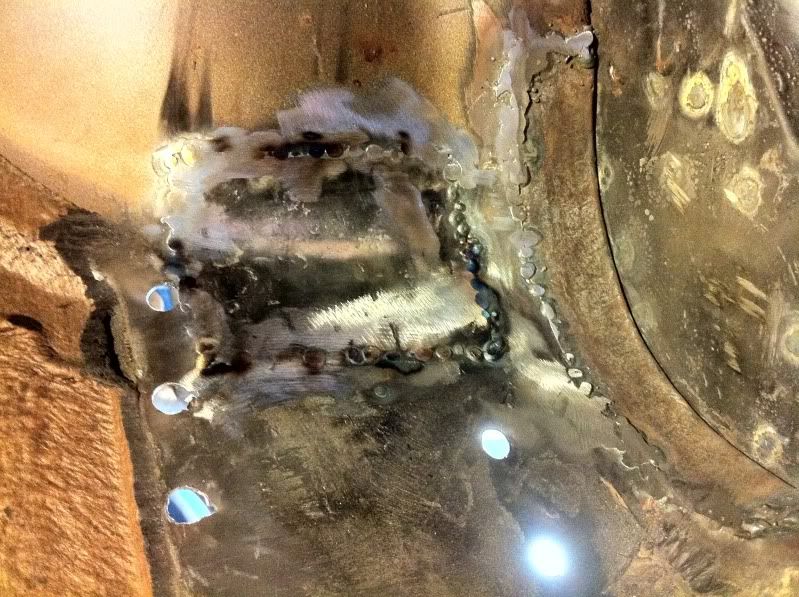 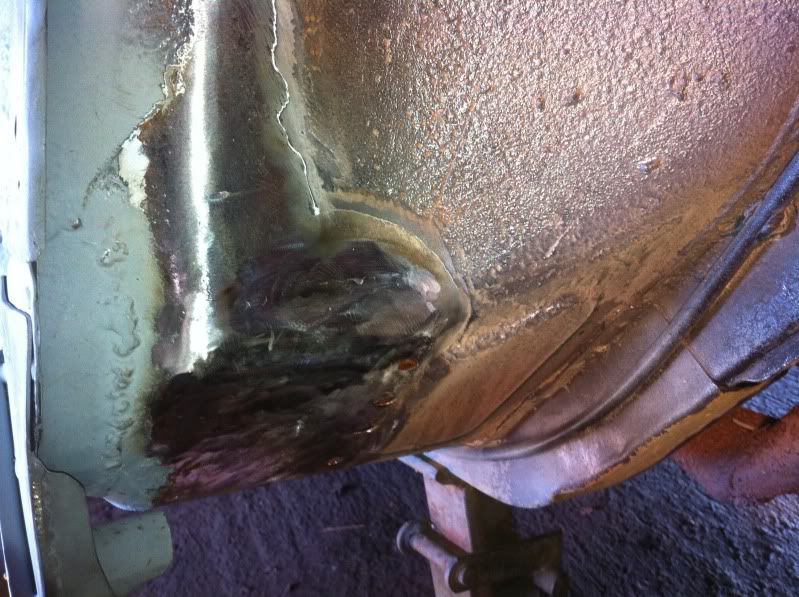 All zinked up: 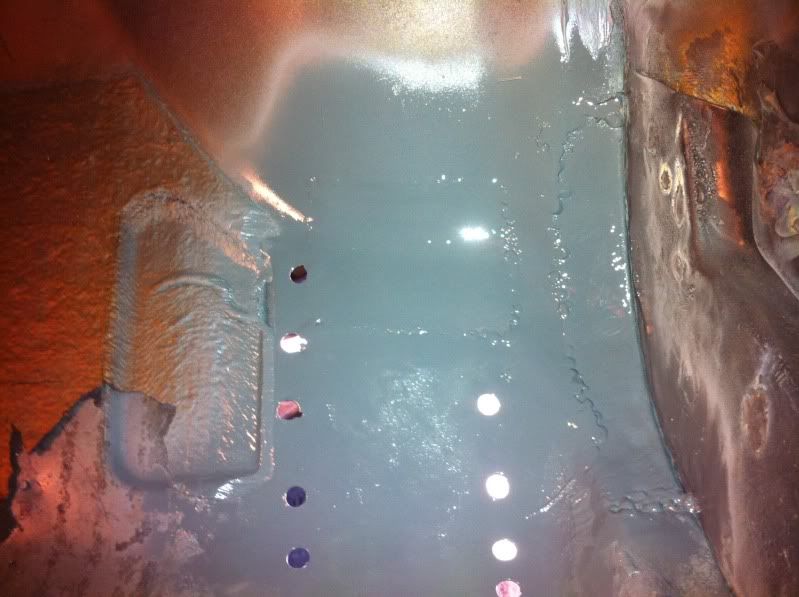 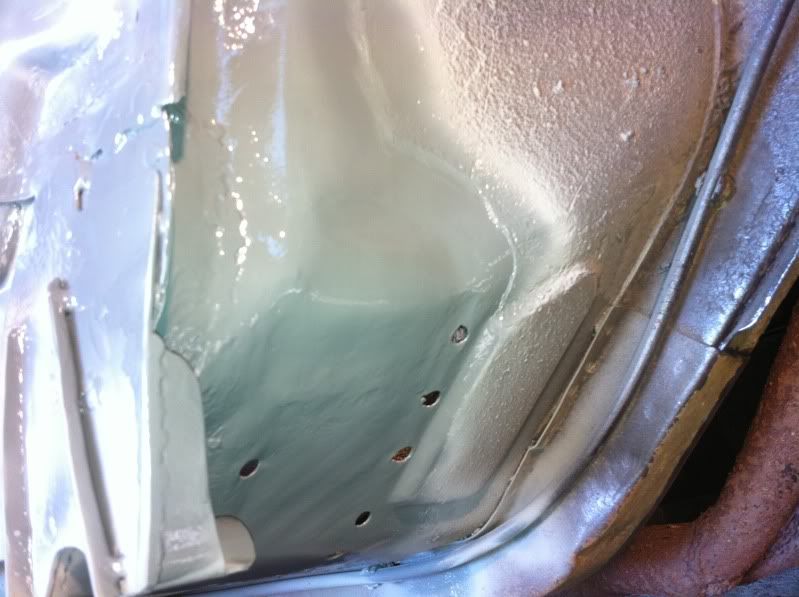 So just a general overview of the work area:  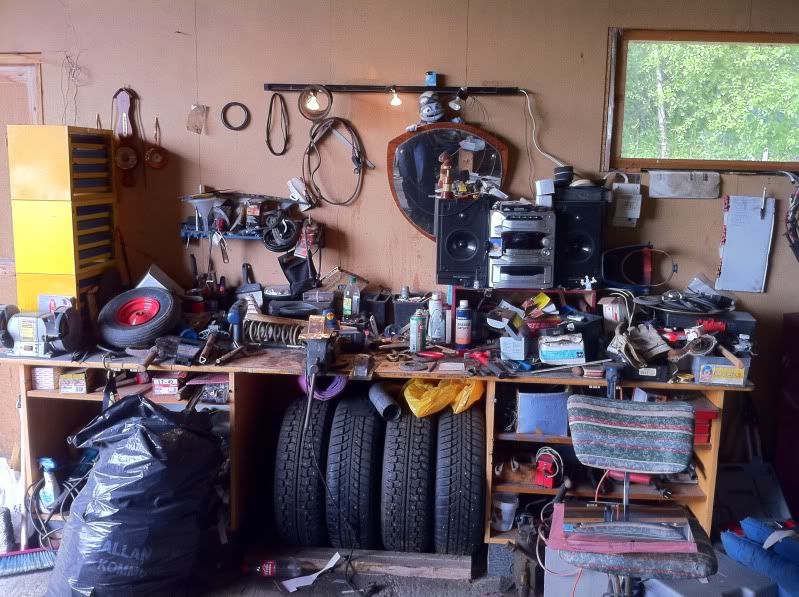 the last few days: 11 hours Total time spent this year: 23 hours. |
| |
|
|
|
|
funkyhunk
Part of things
Old Ford's R Us
Posts: 265
|
|
Jun 16, 2011 21:29:25 GMT
|
Thanks Tony, I'm well chuffed with the jackmount, it came out better than I expected. It fit like a glove as well I also welded it in, but I forgot to take pictures. They will come on the next update. Finally done with that corner of the floor! ;D I also removed paint and probably a kilo of filler on the panel between the b-post and the wheelwell, plus the wheelarch and the piece behind the weel. Somebody bodged this up may æons ago, and didn't bother with proper primer and paint on the backside, so it was rusted from the inside out. The new work area: 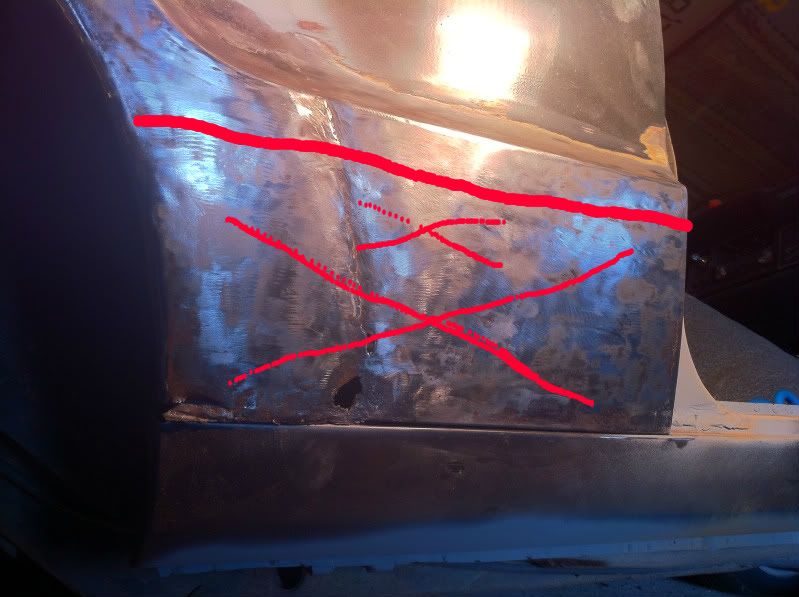 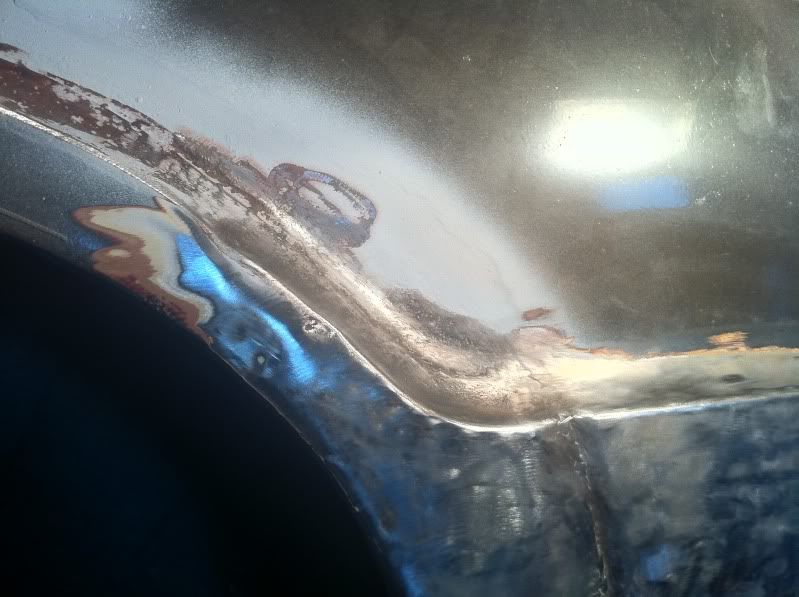 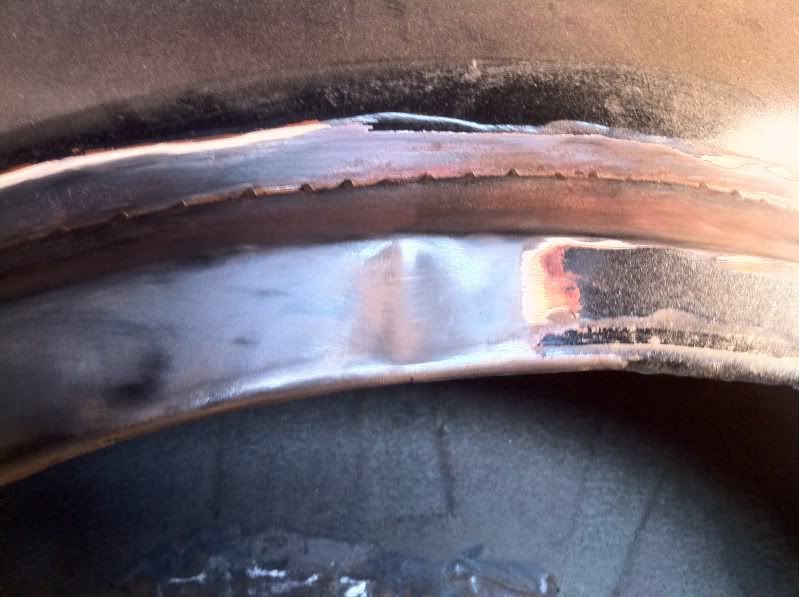 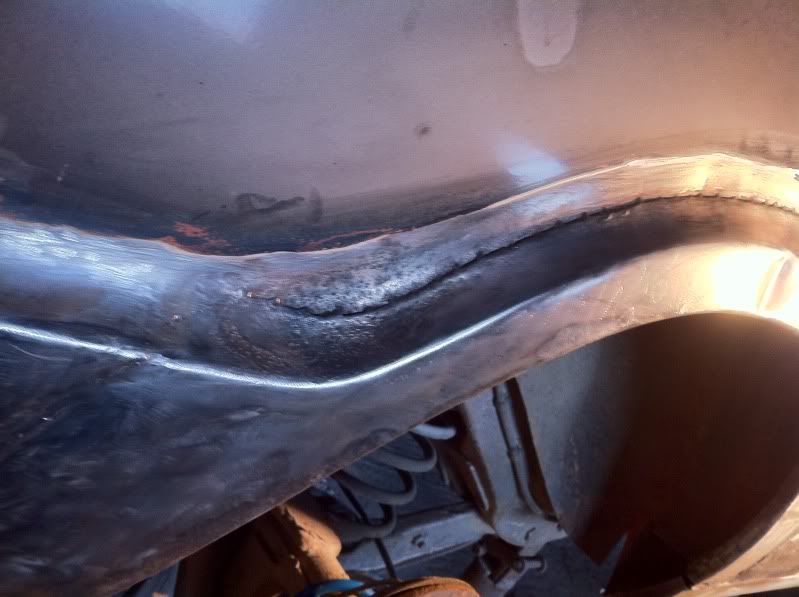 The area behind the wheel. This had NO primer on it what so ever, only filler slapped on bare metal: 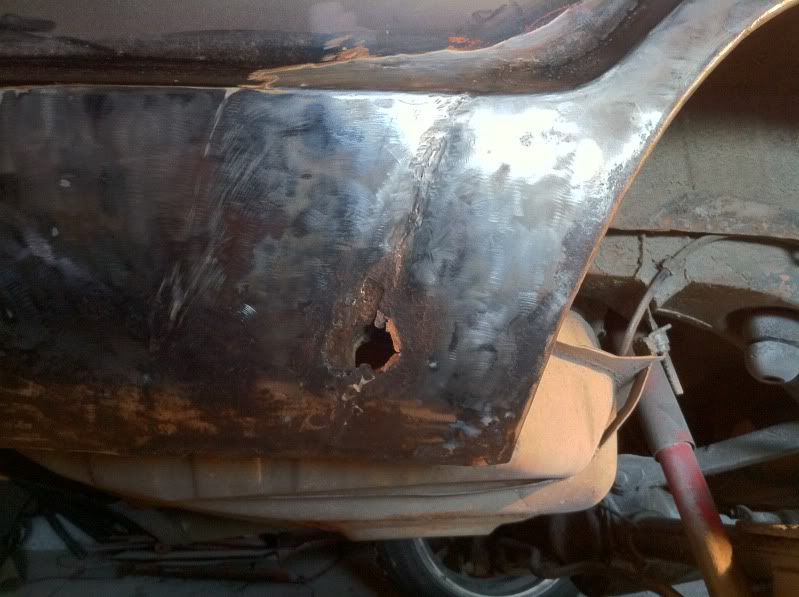 This is the backside of the area I'll have to cut out. I'll have to remove almost all of it cause it is so wafer thin. Oh joy, lucky me   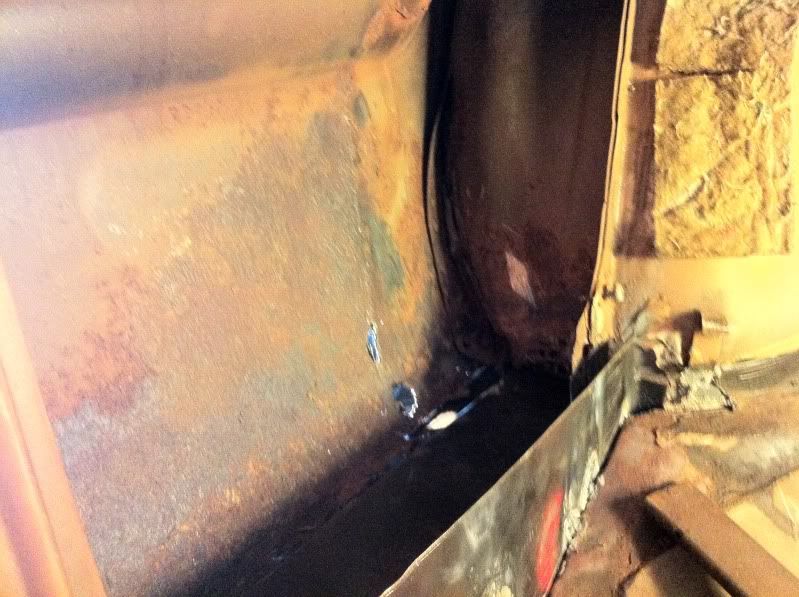 Does anybody know how to replace large plate areas like this? Tony, any good tips? I have a parts car, a 82 Taunus/Cortina 4 door sedan, who I think have roughly the same arch on the rear door as I have on this area on my Taunus. I was thinking of using the metal from that door to weld in, but how to do large surfaces? It's easy mounting it to the b-post and wheel arch with spot welds, but how about the rest? I know one method of bending the edge as to overlap the old with the new, and spot welding it on. (lap-welding?) It stays relatively strong and doesn't generate much heat, so there's little panel warping. But it will require more filler, and will be one more place for moist to form. Some say to lay the edges against each other, and spot weld them together with long intervals with cooling time in between the spots. And then to lay down many spot welds until the whole area is welded, with grinding of the spots lastly. This I would imagine wont require as much filler, and that it will be less of a moisture trap. It will also be more work, and take longer time to do it correctly. So, any suggestions? Time: 5 hours, Time spent this year: 34 Hours. |
| |
|
|
|
|
|
Jun 17, 2011 17:25:23 GMT
|
Using a section from a door sounds like an excellent idea and should save a bit of work Otherwise you want to make the repair panel almost all the way to the swage line and make the welded joint there, welding here will be better as the metal will be stronger and less likely to distort, or if you are very neat and accurate you could weld on the outside corner of that swage detail, that would then be quite easy to grind it off clean Both the methods you suggest would be fine, although there is nothing to stop you fully welding the overlapped joint as well and then putting seam sealer on from the inside. Either way, they should be welded in short tacks and left to cool between to prevent distortion, trust me it will be worth the effort |
| |
|
|
funkyhunk
Part of things
Old Ford's R Us
Posts: 265
|
|
|
|
Here's the pictures of the jack mount I promised earlier. Inside the front wheelwell: 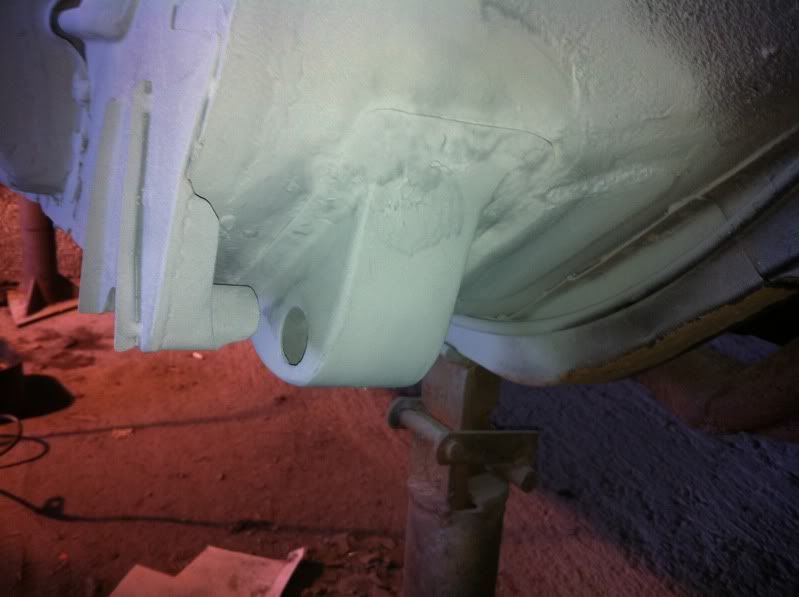 Underneath: 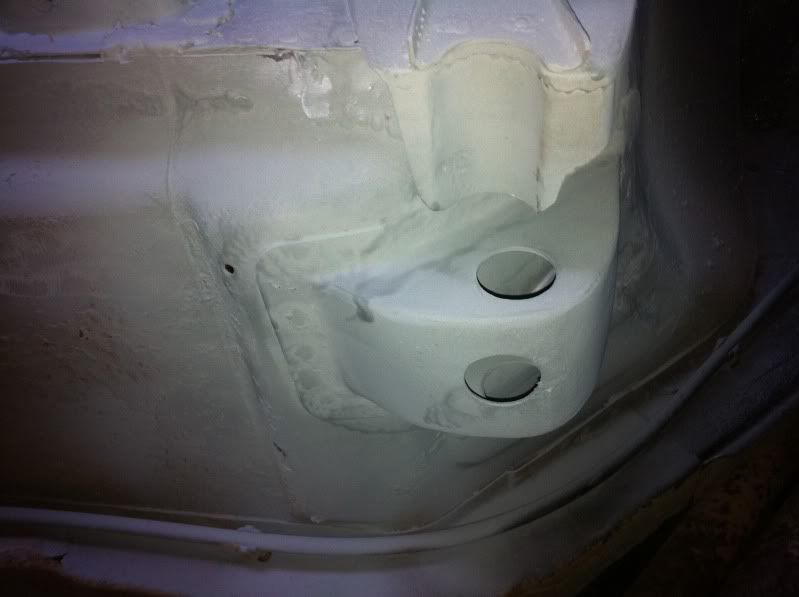 Inside floor: 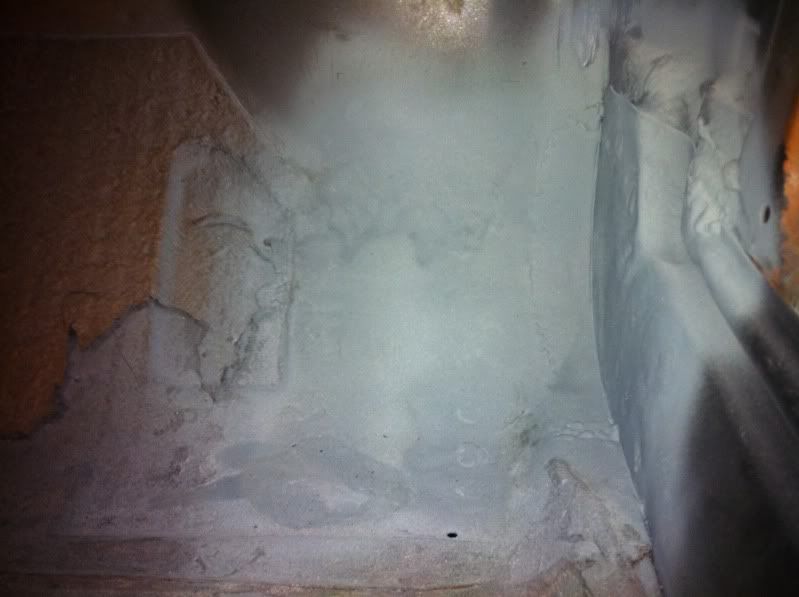 Looked quite allright all done up like that. I also sloshed a great deal of zink primer on it. Using a section from a door sounds like an excellent idea and should save a bit of work Otherwise you want to make the repair panel almost all the way to the swage line and make the welded joint there, welding here will be better as the metal will be stronger and less likely to distort, or if you are very neat and accurate you could weld on the outside corner of that swage detail, that would then be quite easy to grind it off clean Both the methods you suggest would be fine, although there is nothing to stop you fully welding the overlapped joint as well and then putting seam sealer on from the inside. Either way, they should be welded in short tacks and left to cool between to prevent distortion, trust me it will be worth the effort I'll try to see what I will do. By the swage line you mean the place where the contour starts? The "bendy bit" of the side panel? That is a good idea I think, I'll see what I come up with tomorrow. I was also wondering about whether I should remove the panel from the spot welds, and completely remove it from the b-post and the wheel arch? As opposed to cutting around the areas, and welding it flat to the existing metal without messing with the original spotwelds? Time will show. This is todays work. I started with cutting a preliminary hole in the side: 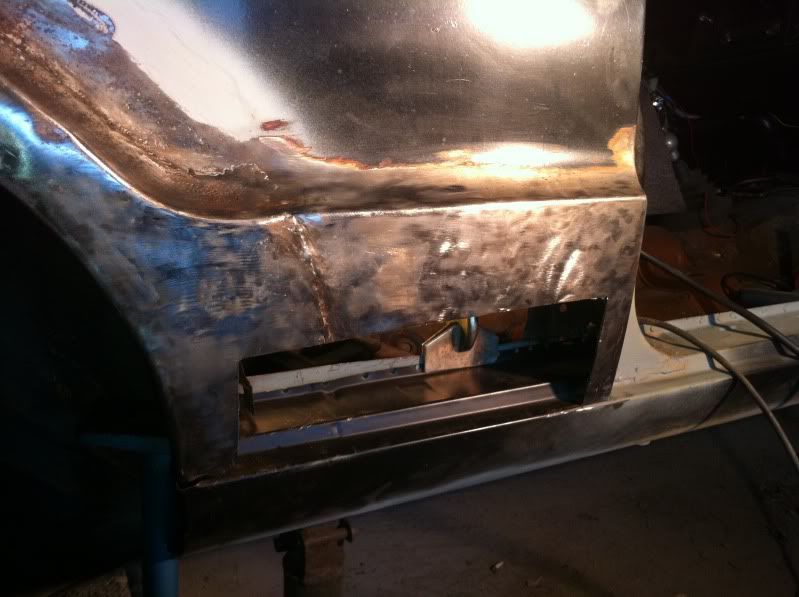 Here you can see how much it was bent inwards in and around the old weld. This is after I hit it with a hammer to straighten it out. I probably moved the joint outwards something like 1 cm. It'll save some money on filler that's for sure 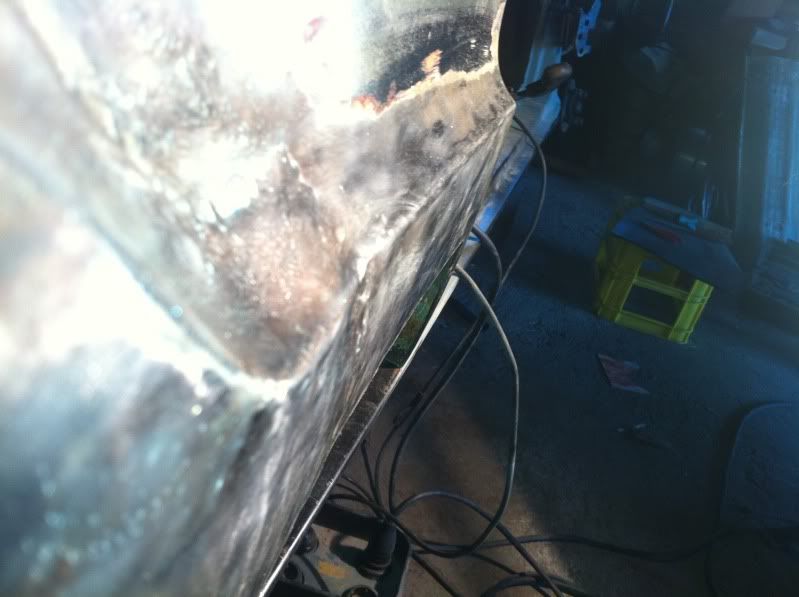 The rear valance (name?). It is also quite bent inwards. I'll have to cut out that hole and straighten that panel out some . 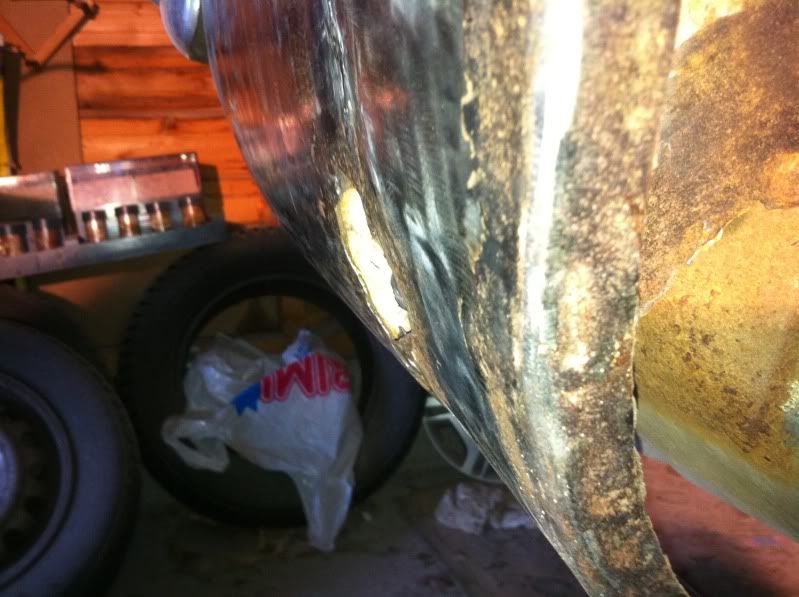 Here is the inside of the B-post, with the rear part of the sill aligned somewhat to prepare for welding. I haven't done this before since I guessed that I'd have to open the side anyway, so that's what I did. 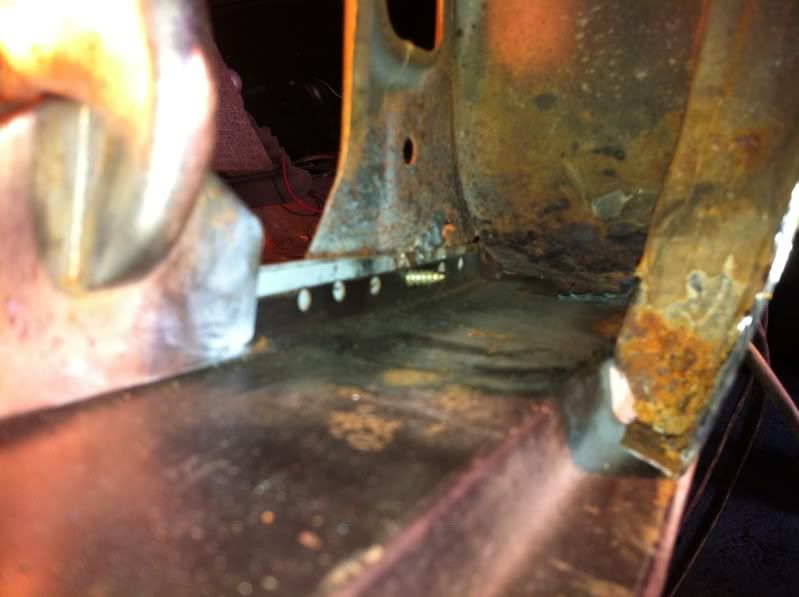 Done welding. This looked like curse word since I had forgot to grind the surfaces prior to fitting the outer sill :/ 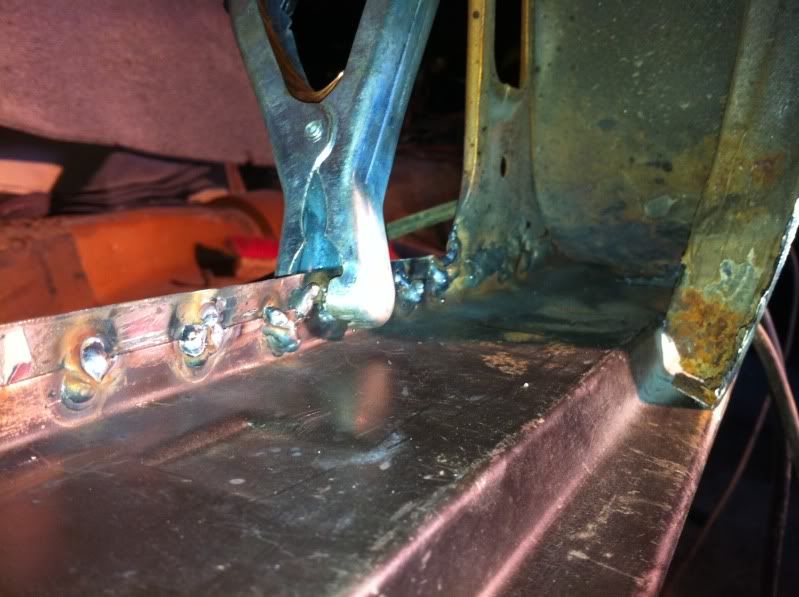 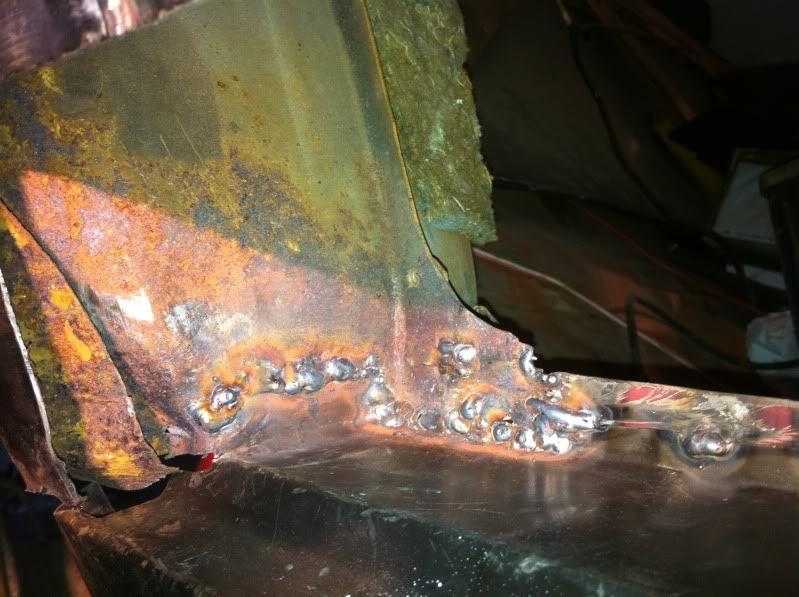 It is a lot of surface rust in these areas of the car because of the bodge job they did when the wheel arch was replaced some time ago. Sand and water leaked inside the wheelarch and leaked onto the top of the sill, inside the b-post and on the floors, causing moisture and rust. I'm going to see If I can remedy that now, cause the repair piece they made from the "inner wheelwell piece" was just tacked on, but they forgot to tack the last 30cm's down against the sill. There's where all the water leaked in. I will get pictures tomorrow. Now I'm just listening to Deep Purple, drinking a few Tuborgs, and looking forward to bed Today, 3 hours, Total time spent this year: 38 hours. |
| |
|
|
eternaloptimist
Posted a lot
Too many projects, not enough time or space...
Posts: 2,578
|
|
Jun 18, 2011 14:01:41 GMT
|
|
Great work - love the home fabricated repair panels
|
| |
XC70, VW split screen crew cab, Standard Ten
|
|
funkyhunk
Part of things
Old Ford's R Us
Posts: 265
|
|
Jun 21, 2011 16:25:24 GMT
|
Great work - love the home fabricated repair panels Thanks mate I made the Jack mounts firstly because the inner one cost new close to 80£, and secondly, I'm cheap The outer jack support isn't even produced new, so the choices were simple. Also, it's fun to make something with your own hands, it gives greater satisfaction than just buying stuff and installing it. Time for another update. I worked on the car a bit on saturday before I fell off the wagon, and I managed to get a few things done. I started with making a repairplate for the wheelarch on the piece closest to the sill. Spotted on: 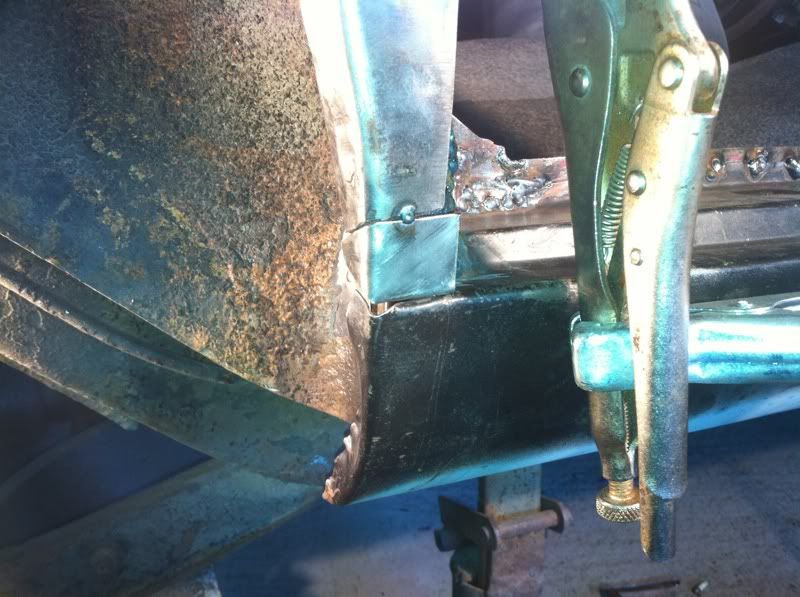 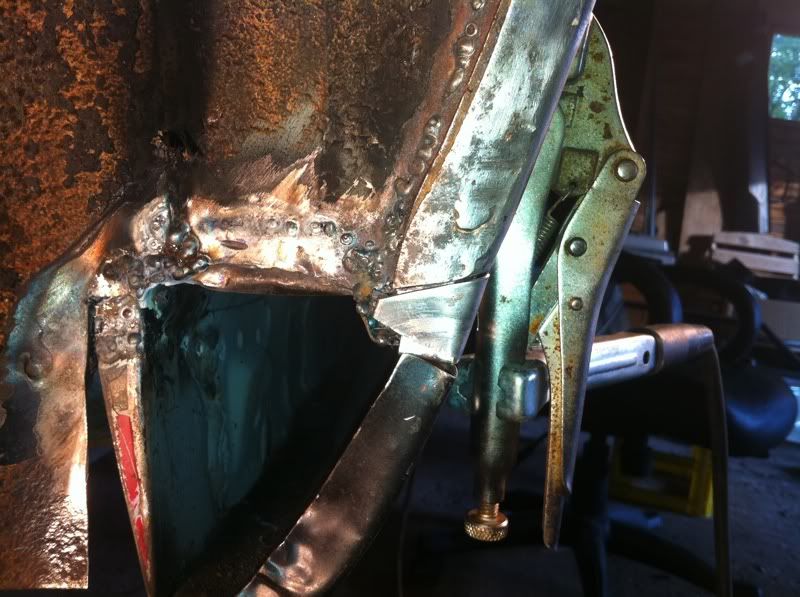 Welded in:  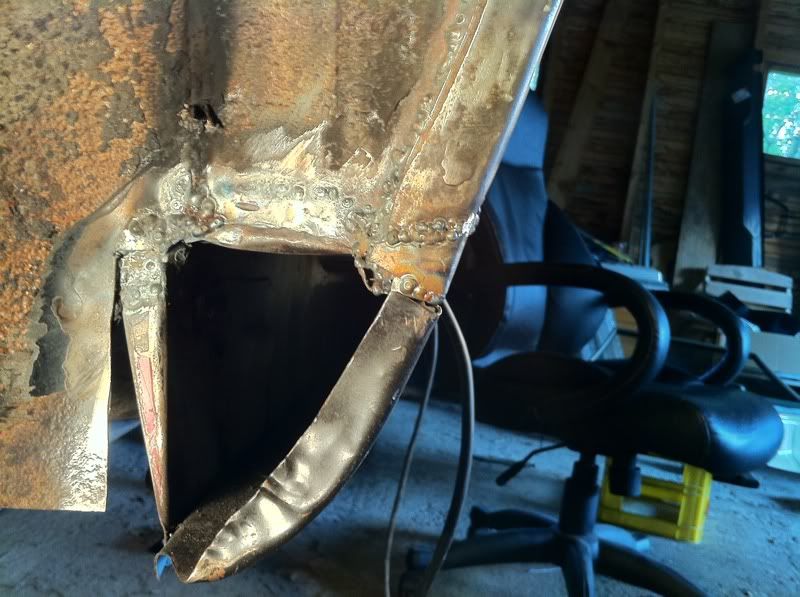 And ground off: 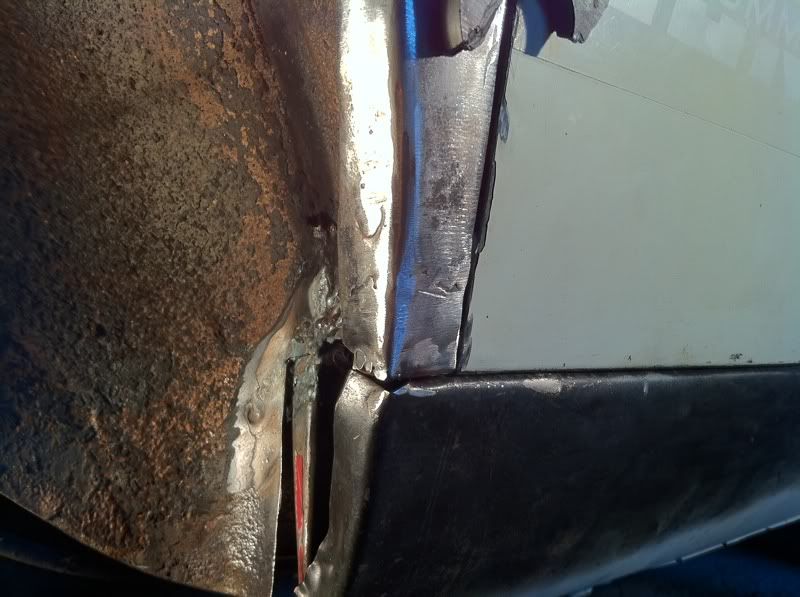 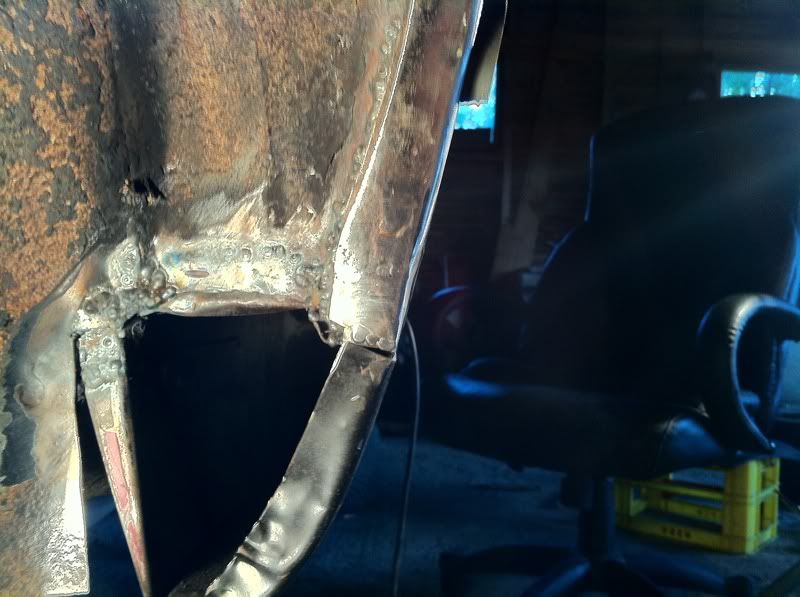 And this is the plate from the rr door of the parts car:  Mocked up to get an idea on how much chopping is involved: 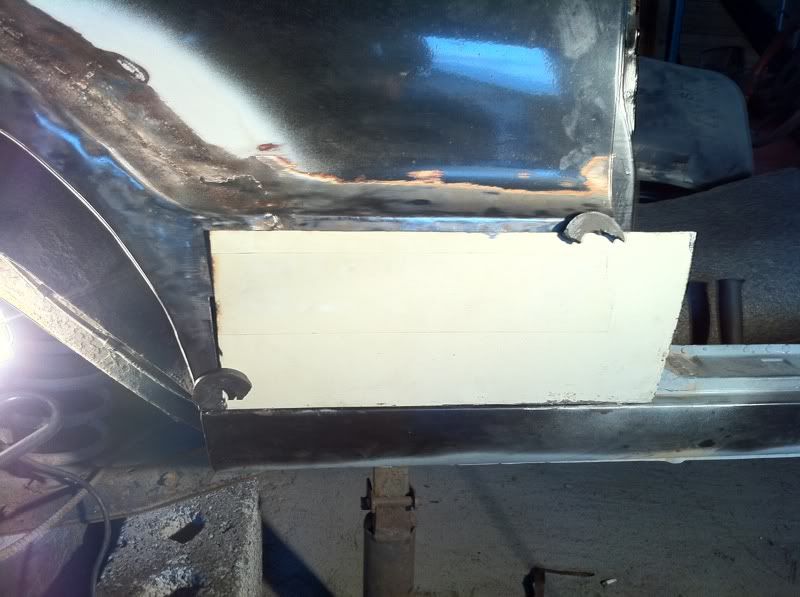 The lip on the door skin was no more than 1 cm or ca 1/2" long. That should be enough to weld against the top of the outer sill? This time: 3 Hours.
Total time spent this year: 40 Hours. I also went to the local Volvo/Ford dealer to buy some original Volvo Weld Thru Primer:) 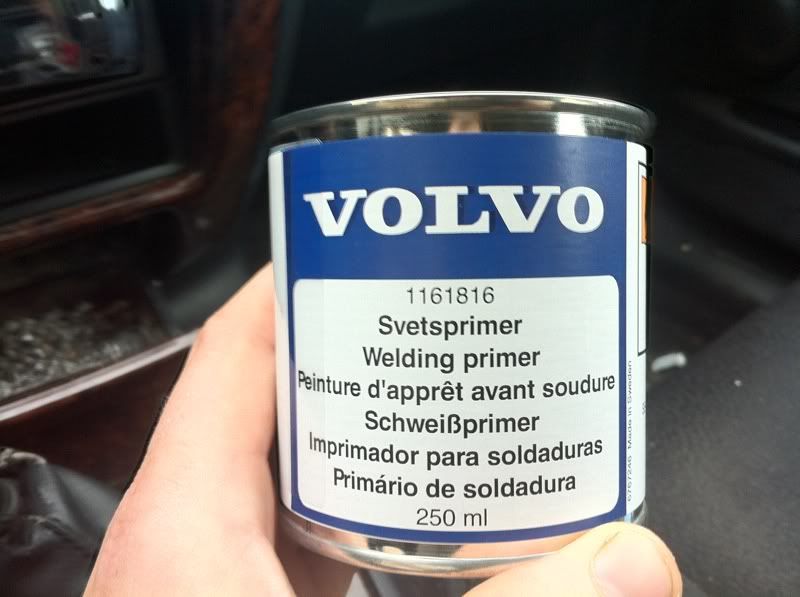 30£ for for 250ml, which was a bit steep if you ask me. It had the parts number: 1161816, if anybody else wanted to order some. It also had a small brush under the twist off cap, so no other brushes was required. Kinda cool. I was recommended this primer from guys I know on Norwegian forums that work with bodywork and such. I hope it works good. I also need to make some intergrips to make the welding of the side plate easier. They look like this, if anybody was wondering:  I got some square tube laying around, and it shouldn't be too hard to make those. And a view outside the garage door: 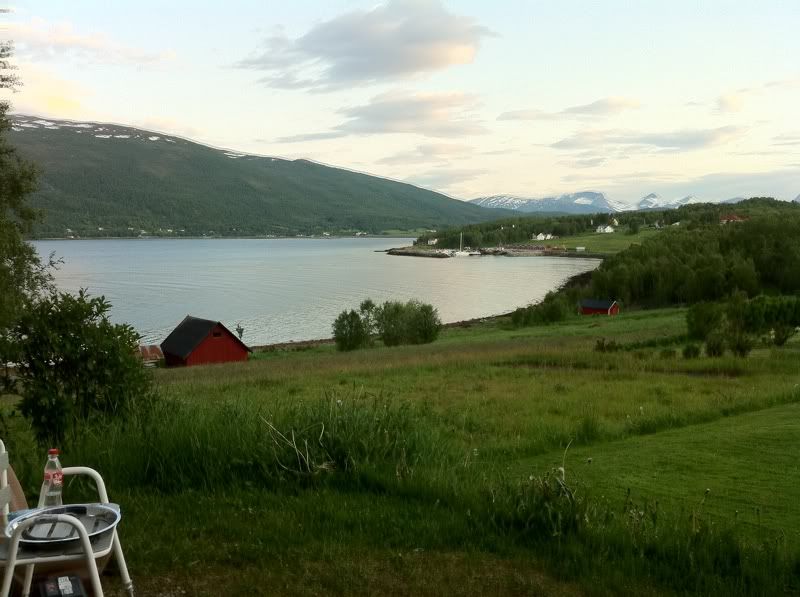 Stay tuned. This time: 3 Hours. Total time spent this year: 40 Hours. |
| |
|
|
funkyhunk
Part of things
Old Ford's R Us
Posts: 265
|
|
Jun 22, 2011 21:54:22 GMT
|
Time to make some tools. Firstly, I needed to make me some intergrips. Since no shops around my parts sell these, and I didn't want to order them and wait for three weeks, plus the fact that I'm cheap, I made some myself. So, step one. Get some square tube. This used to be some grocery shop shelves: 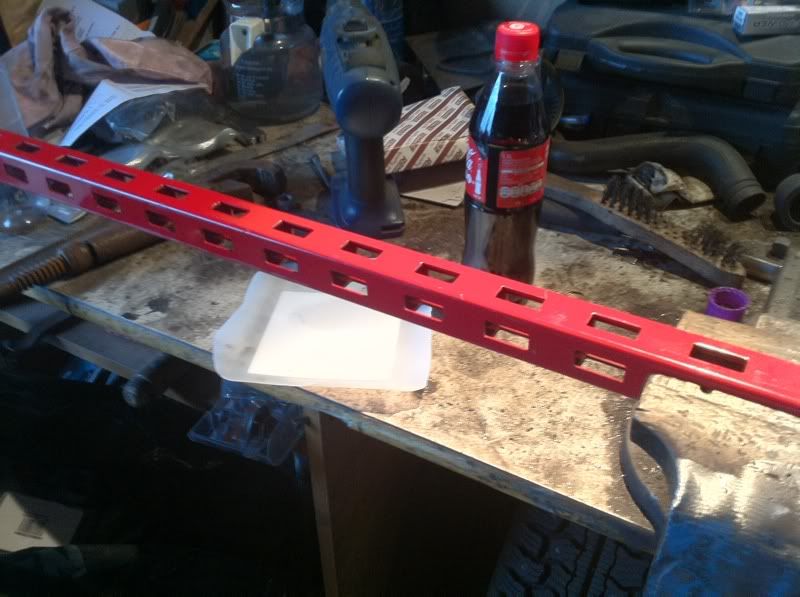 Cut up to desired length: 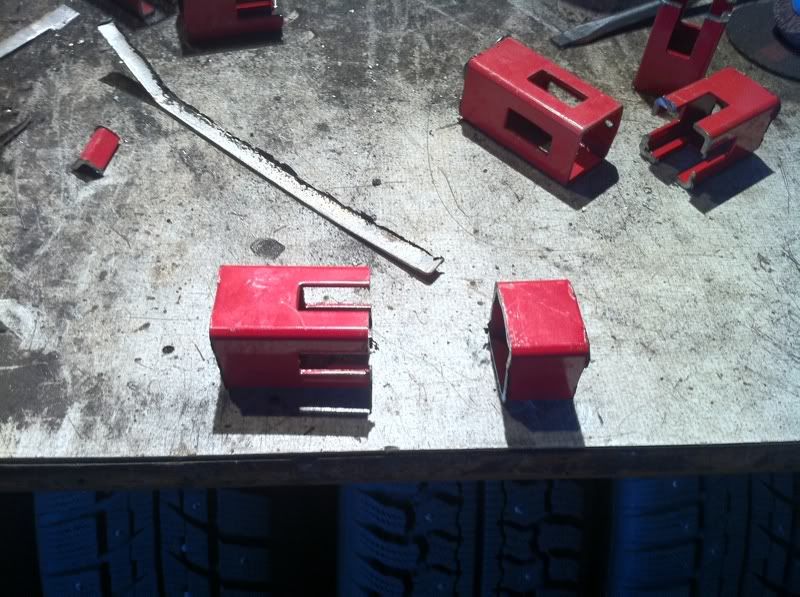 Only six is pictured, but since I was on a roll I cut up seven pieces: 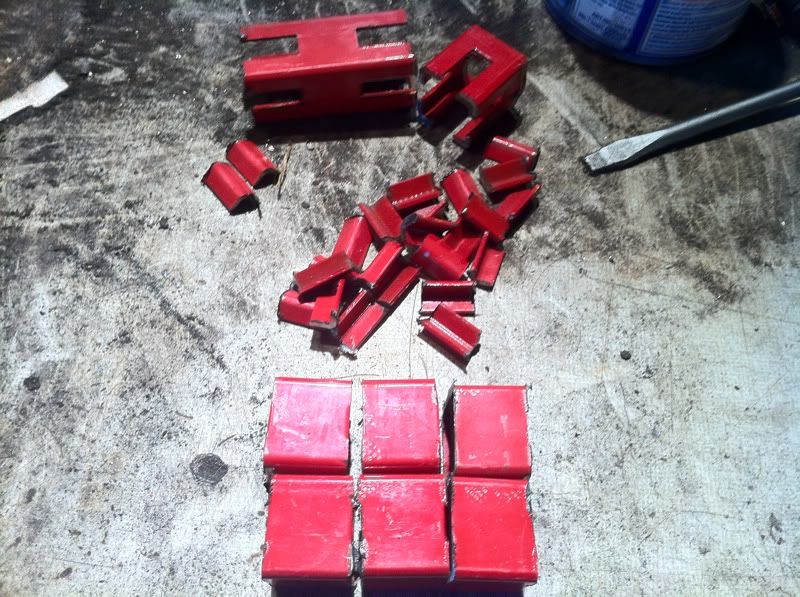 So, out with the stainless steel plate and cut up some strips: 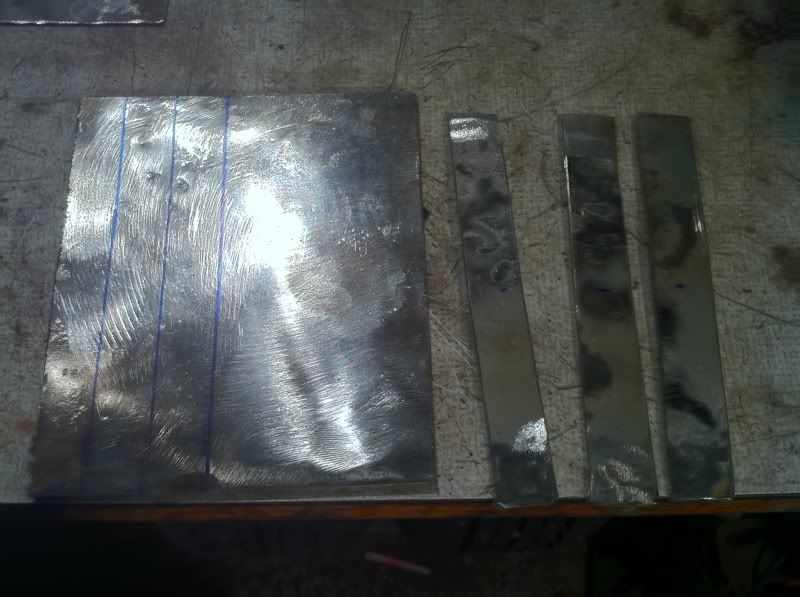 Which gives us this so far:  Then, all the bits ready made and ready for assembly: 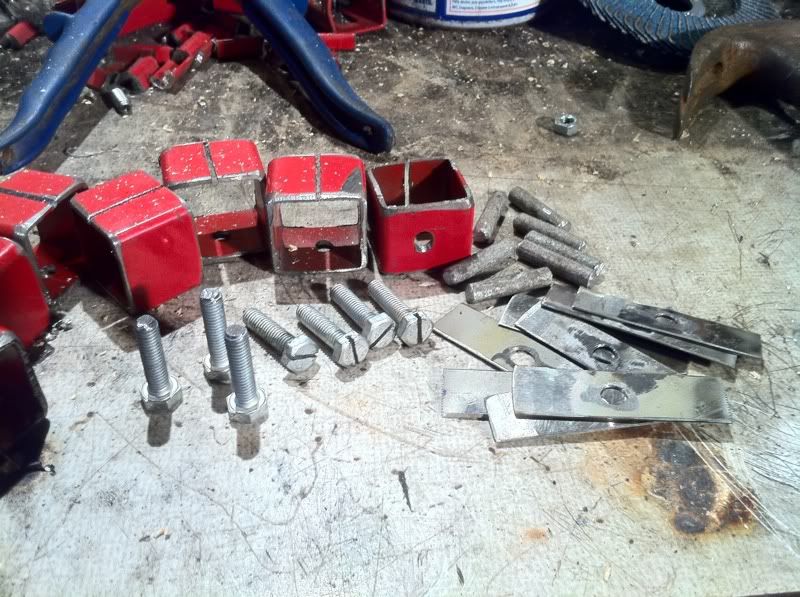 All the pieces for one Intergrip: 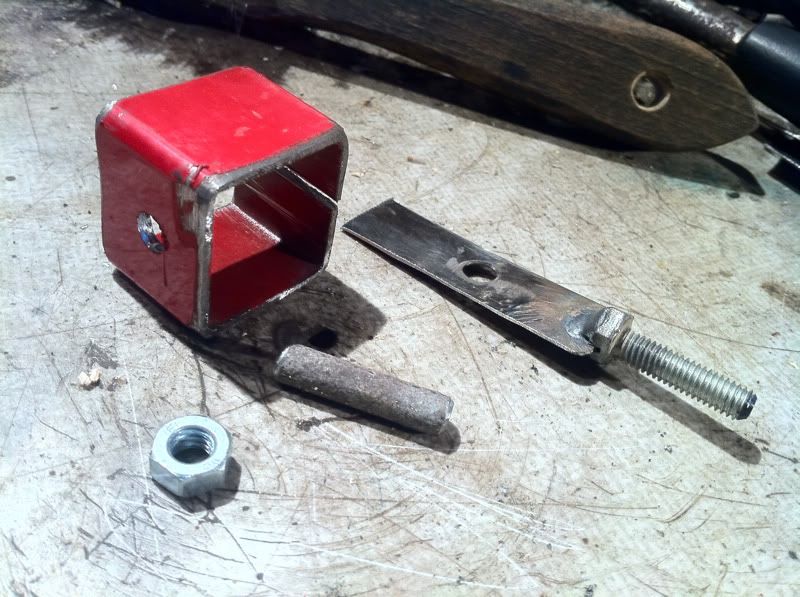 All seven done: 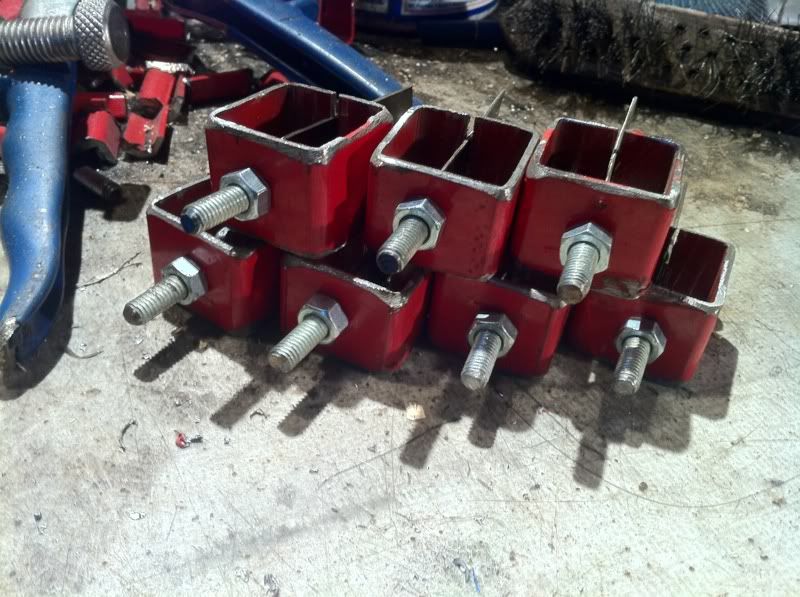 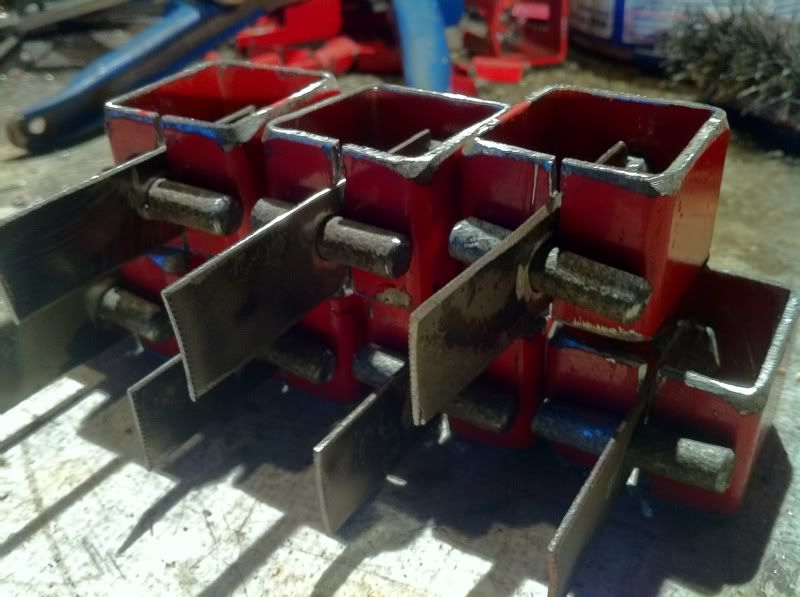 If you are wondering what these are for, check this out: 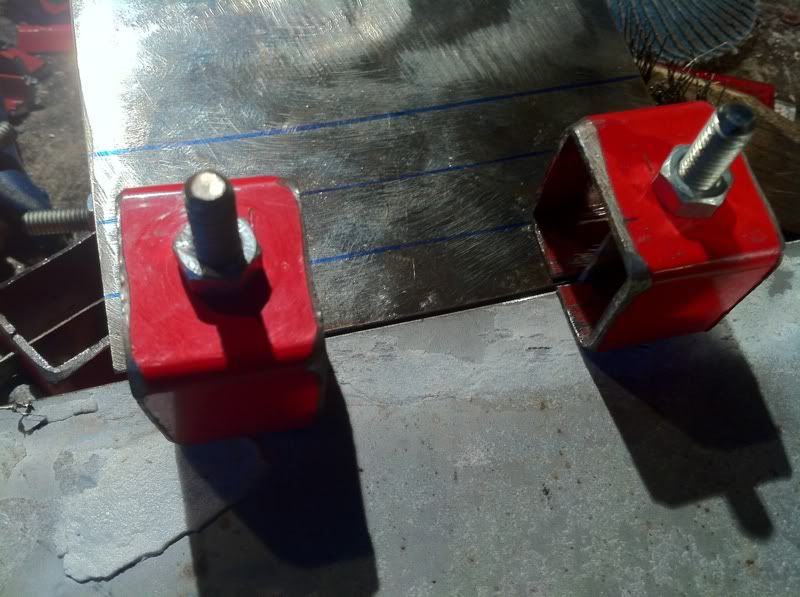 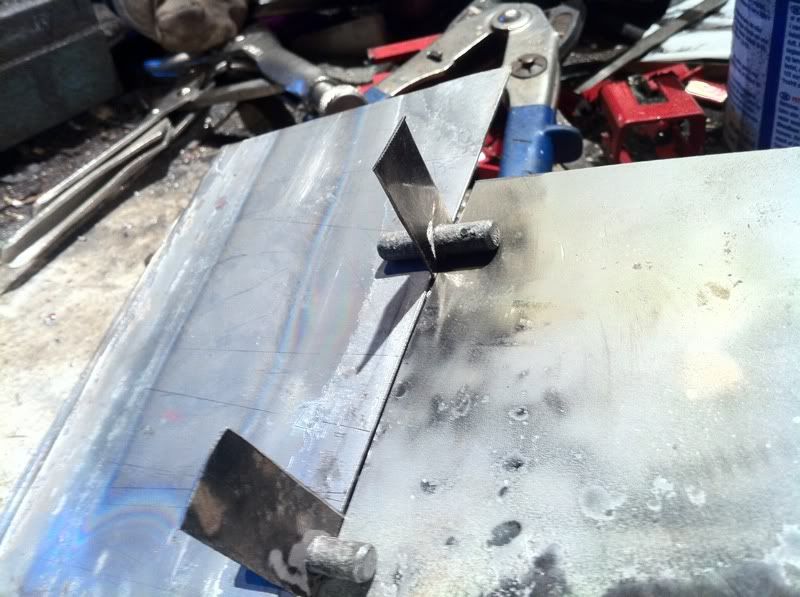 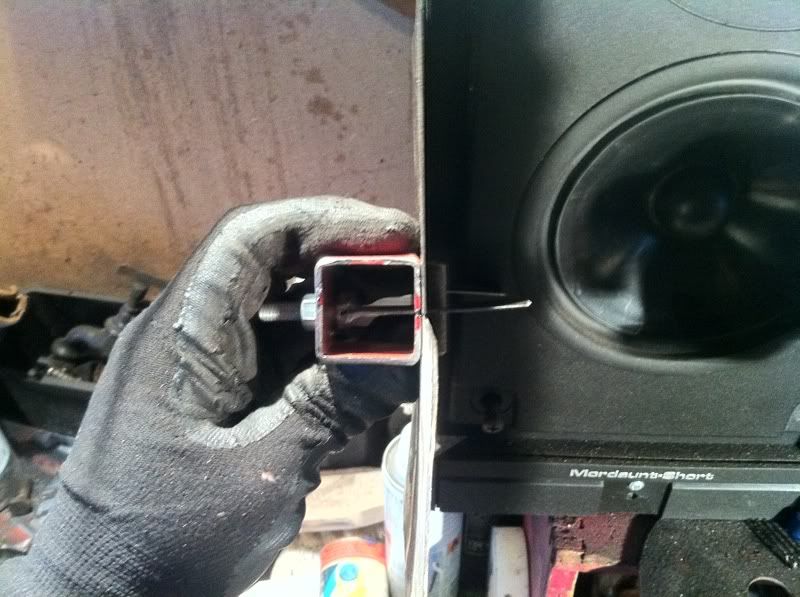 I was well chuffed with these, they worked perfectly, only thing now is to give them a lick of paint, fit some 6mm wingnuts instead of the nuts and Bob's your uncle! I spent 3 hours making them, but since it wasn't any work on the car I'm not going to count them towards the progress of the car. What do you think? |
| |
|
|
|
|