LowStandards
Club Retro Rides Member
Club Retro Rides Member 231
Posts: 2,714
|
|
|
|
I thought it best not to bother you as you looked quite busy, plus we only had the barstool, so it would have been quiet lonely out there  The barstool was exceptionally useful in the 2 hour litter picking jaunt round the campsite You know people? People are scum |
| |
|
|
|
|
LowStandards
Club Retro Rides Member
Club Retro Rides Member 231
Posts: 2,714
|
|
May 25, 2023 14:18:54 GMT
|
I now have 1 day to attempt to make at least a couple of panels But you wont see that until after RRW I left you on a cliff hanger there didn't I I booked the Wednesday off to make all the panels, they're all flat, it wouldn't have taken long. What actually happened was I put it all back together and it wouldn't start, nothing at all from the starter, zero, nada. Went through the whole wiring loom, still nothing. Tried a screwdriver across the solenoid, nothing Took the starter apart and spent an hour putting it's fiddlyAss back together. Nothing Finally put a meter across the battery and it was reading 9v Oh So, I put the jump pack on and it whirred straight to life. Great, now I need a new battery But wait, it was grand the morning before, so I stuck the meter across when it was running and I was getting 18v, that's not good I then smelt burning and notcied the regulator was smoking Now pit bike stuff is cheap, but what it isn't is available on the shelf. It's all eBay etc So I shelved it and took the barstool with me instead, which tried to kill me  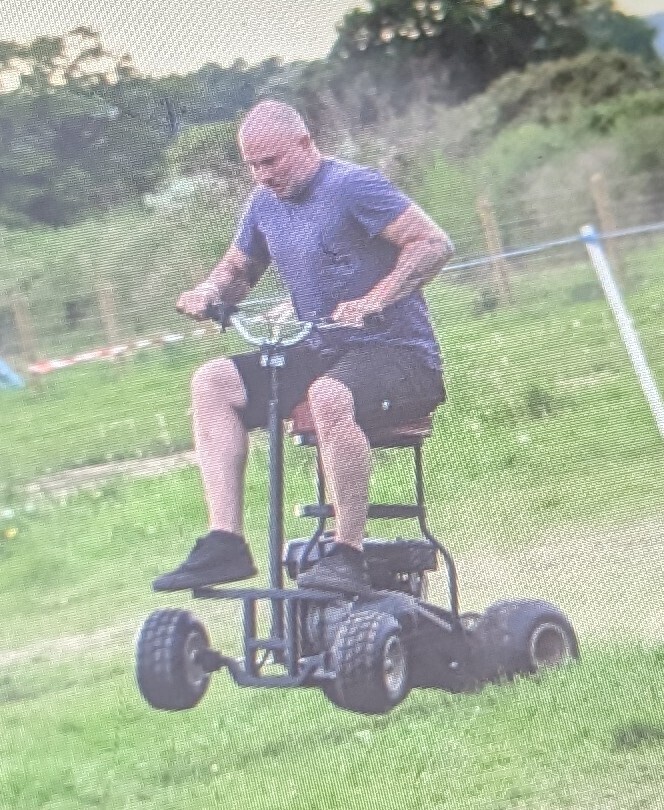 Home now after an epic weekend, I revisited it. Only things that could be wrong could be the stator, the regulator or the wiring loom The regulator was toast, but I had a spare, still 18v. Starting to think it's the stator I pulled the loom though, stripped it down and picked another wiring diagram from the internets which differed slightly Re-fitted it, engine started instantly, checked across the battery, 12.4v now. So I think i've solved it. 12.4v is on the low side, but it is a cheap chinese stator, so probably about right. So I now have a couple of months to complete her before RRG |
| |
|
|
LowStandards
Club Retro Rides Member
Club Retro Rides Member 231
Posts: 2,714
|
|
May 23, 2023 13:42:48 GMT
|
May I suggest suspension  |
| |
|
|
LowStandards
Club Retro Rides Member
Club Retro Rides Member 231
Posts: 2,714
|
|
May 16, 2023 13:40:36 GMT
|
2 days before RRW (we're going up on Thur, making a time of it) Sounds like the ideal time to strip her right down and paint it Shot her in primer 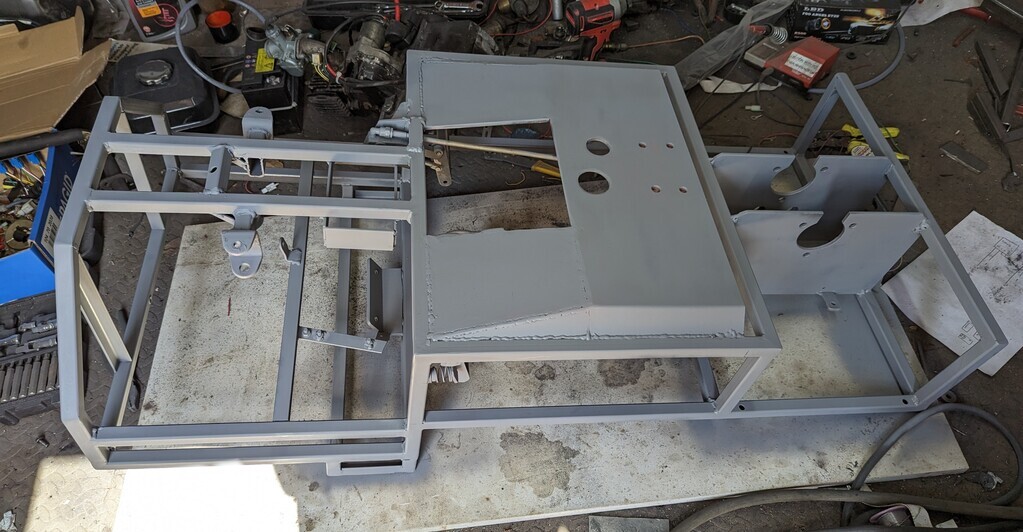 Then laid down the graffiti paint. I love this stuff, just covers so well 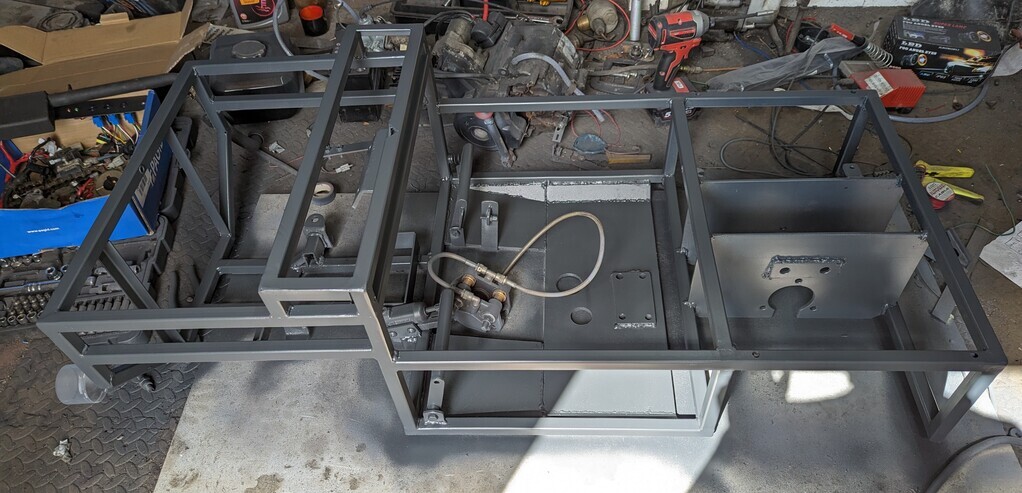 I now have 1 day to attempt to make at least a couple of panels But you wont see that until after RRW |
| |
|
|
LowStandards
Club Retro Rides Member
Club Retro Rides Member 231
Posts: 2,714
|
|
May 12, 2023 13:53:21 GMT
|
|
Today this happened (ignore the chain slap, i'm waiting for a tensioner)
Confident, I then took it up and down the road. Some notes i've made
It's uncomfortable, it's the pedals, I need to do something about that in the future, it will have to do for RRW though
It doesn't want to turn tight, lifts a wheel, though i'm pretty sure the Bar Stool did the same and was fine on grass
The carb is a bagg of balls, cheap chinese curse word, won't hold pressure from the vacuum pump and won't idle. I have a Mikuni to replace it
The wiring is, well, the less said the better. I've ran out of time, it's just loosely taped in place, doesn't charge the battery and I can operate the starter in Fwd/Neu/Rev when it really should only be in Neutral
The steering arms being so short make it rather squirrely to drive, not sure I can do much about that
It is on the otherhand a 1/3 version of an already smol car, so I don't think i've done too badly and hope to improve on things as time goes by
|
| |
|
|
LowStandards
Club Retro Rides Member
Club Retro Rides Member 231
Posts: 2,714
|
|
|
|
I have no idea what i'm doing here I used the machine that's under the stairs and it stuck the material together 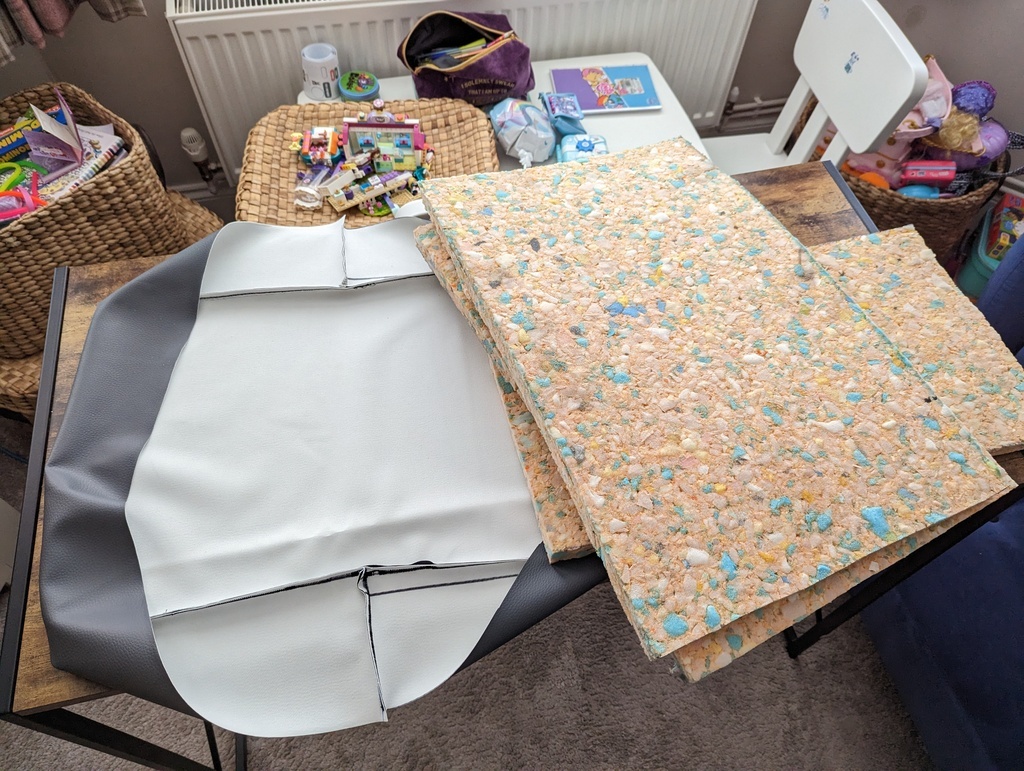 Stretched it over the base and the foam, I think it's turned out alright, won't win any awards, but meh 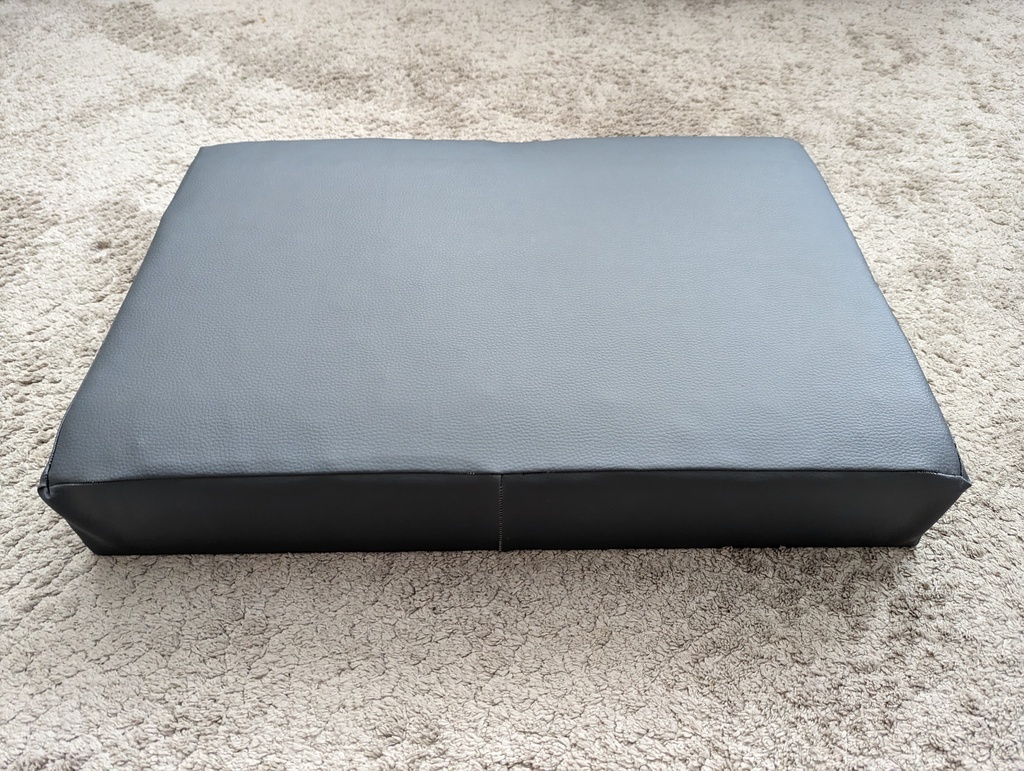 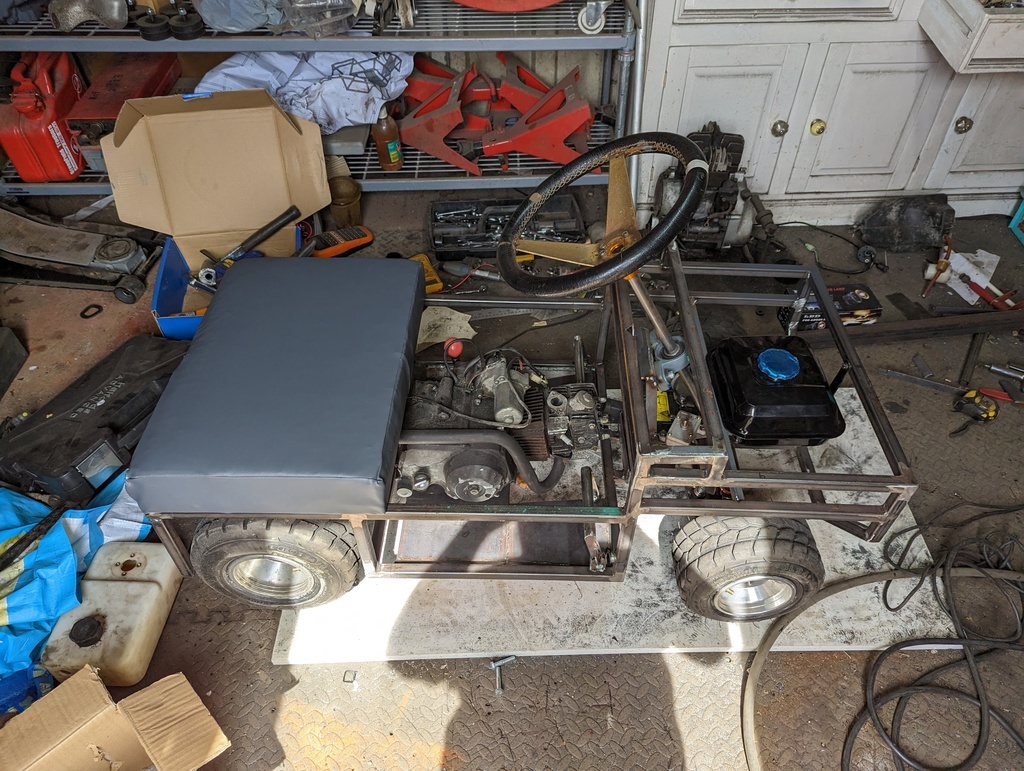 I got the spare fuel tank from the GX200, saved me a load of hassle Chucked together a quick bracket. Flat bar makes anything look good 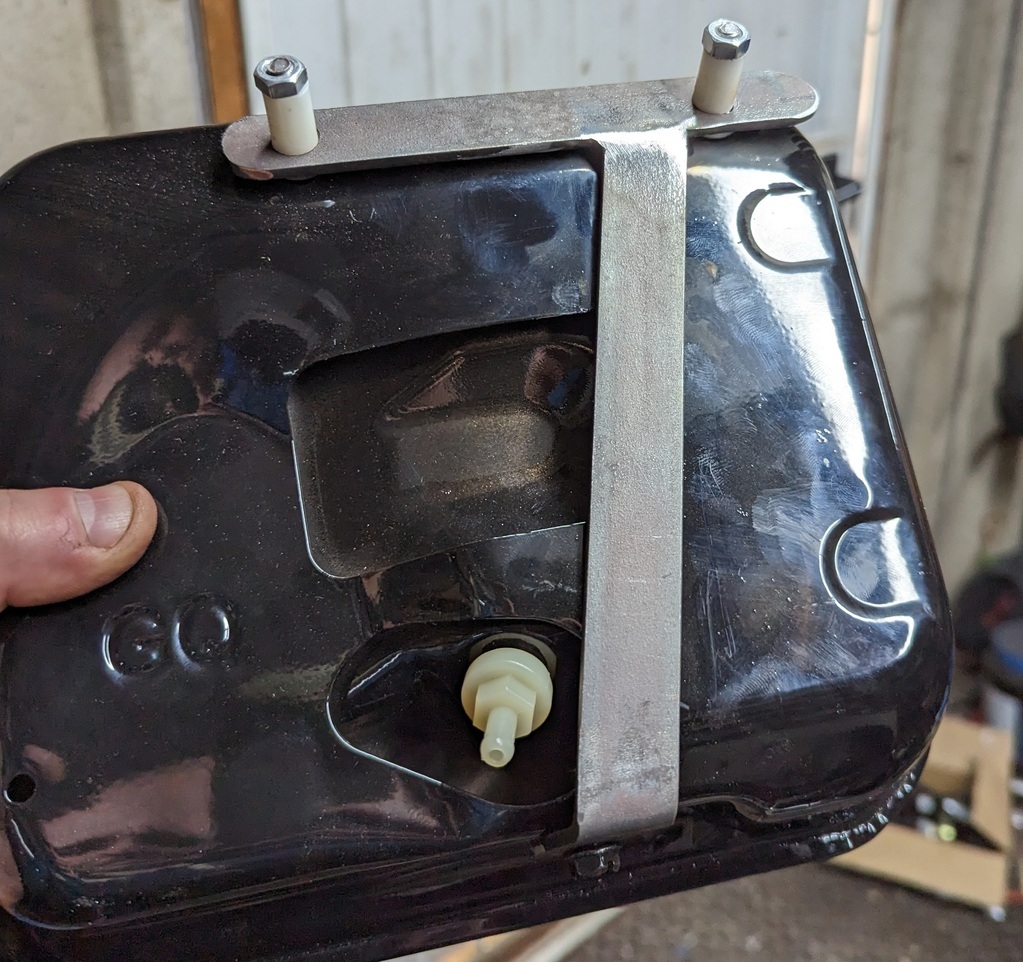 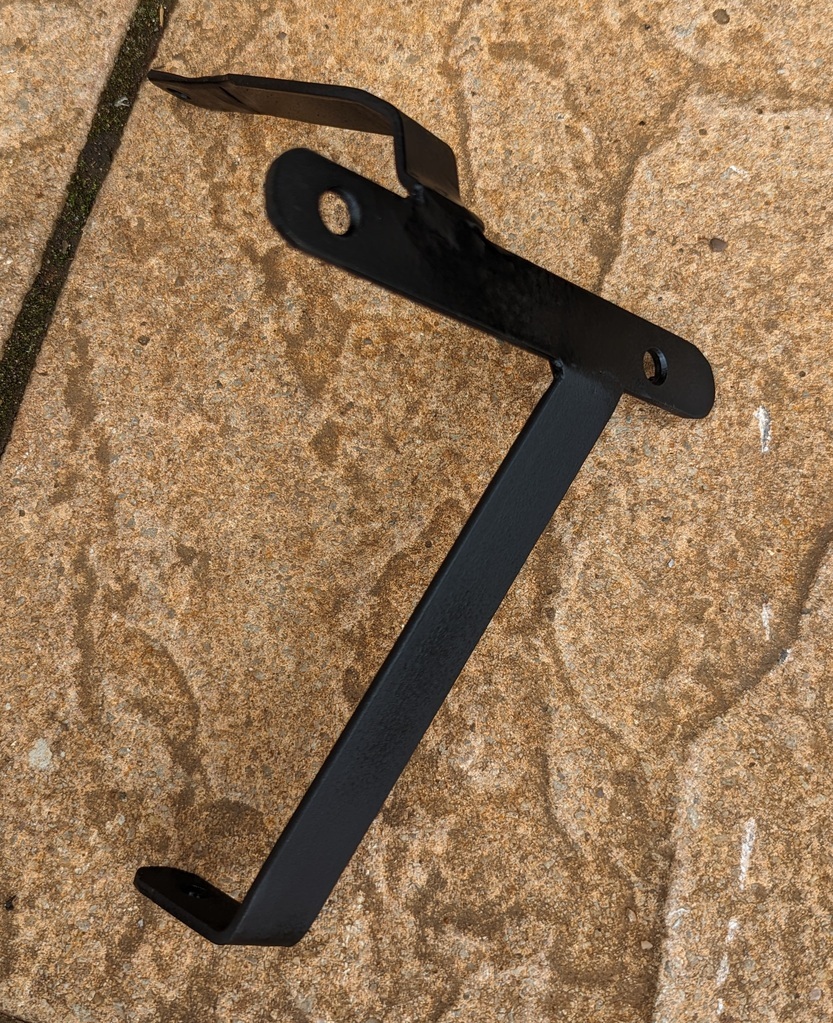 This allows it to sit here. 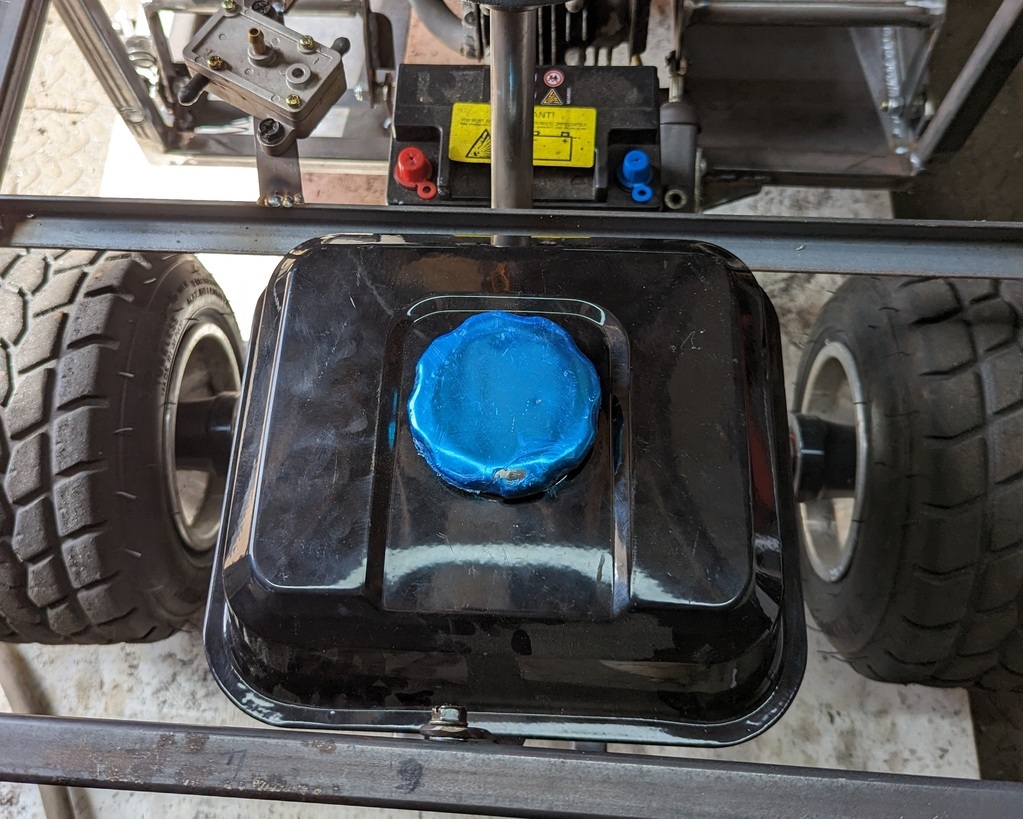 It will gravity feed there - if it was half full. So I mounted the vacuum pump 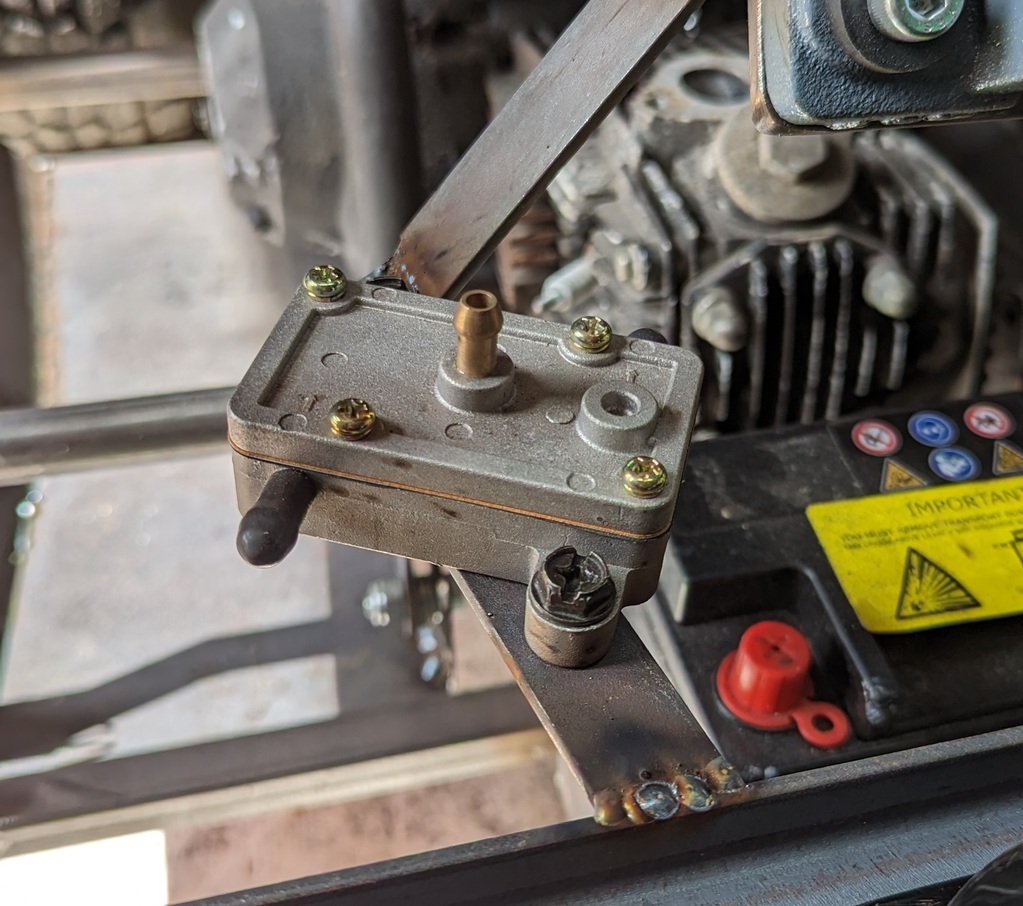 That concludes today |
| |
|
|
LowStandards
Club Retro Rides Member
Club Retro Rides Member 231
Posts: 2,714
|
|
|
|
I've looked at fuel tanks the past few days I have 2, one is a cylindrical Atco mower tank, the other a thin plastic one The latter would be ideal, but it turns out is has a hole in the side. Lets look at the Atco one, oh, it's gone that thin that water seeps through in random places. Booo and such Ian has a tank from the GX200, which cleary wont fit his, so i'm stealing that. Before I realised the plastic tank was holed, I moved the battery as it rested on top of it. I could move it back, but I probably wont 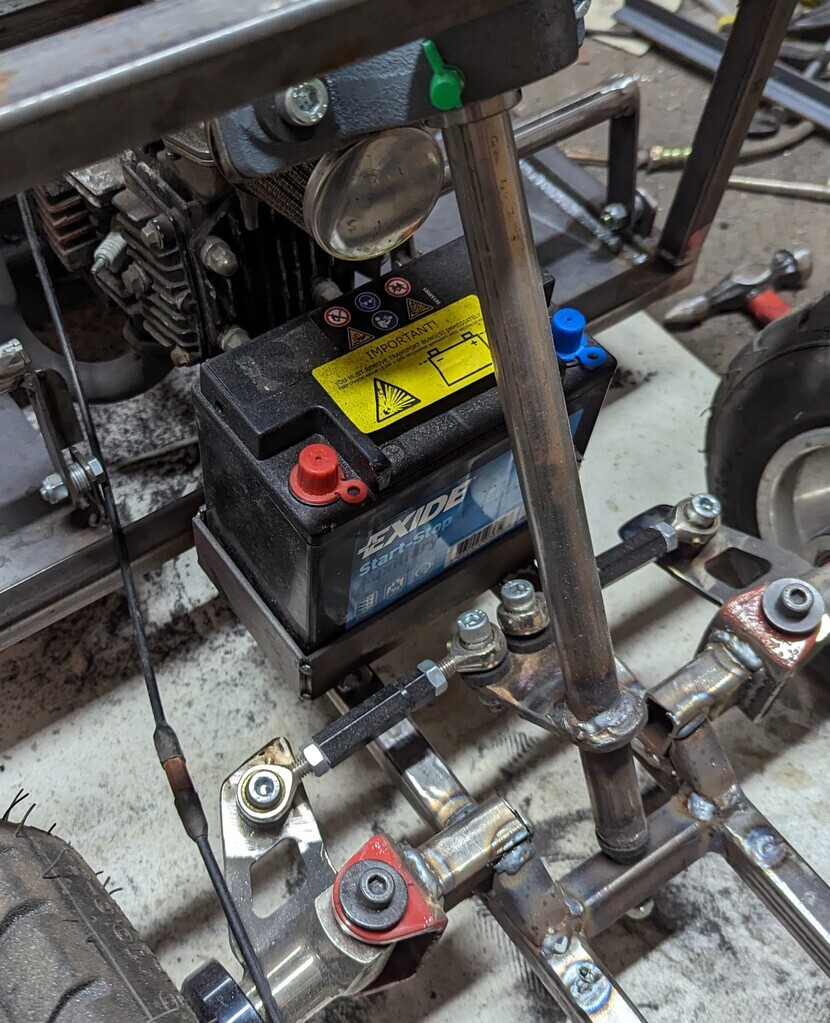 I've added what I think should be the last bit of chassis/bodywork to make up the dash area 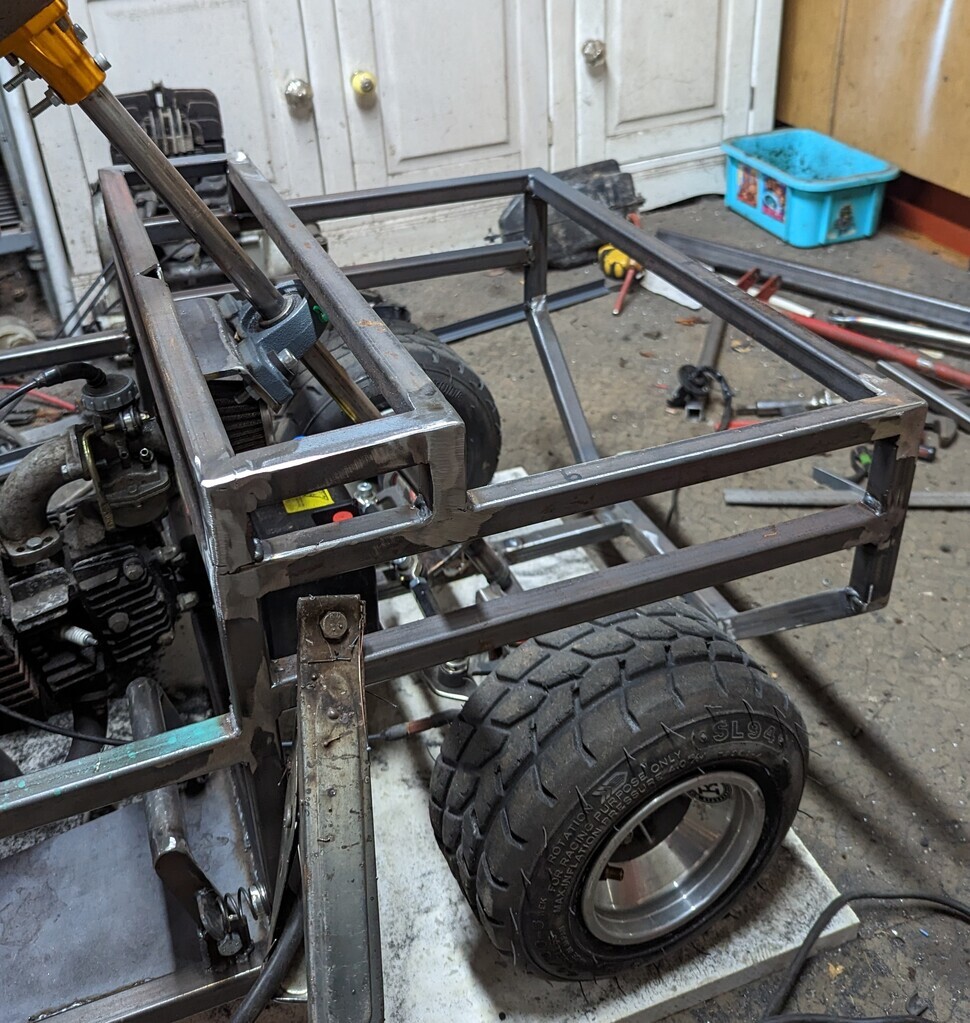 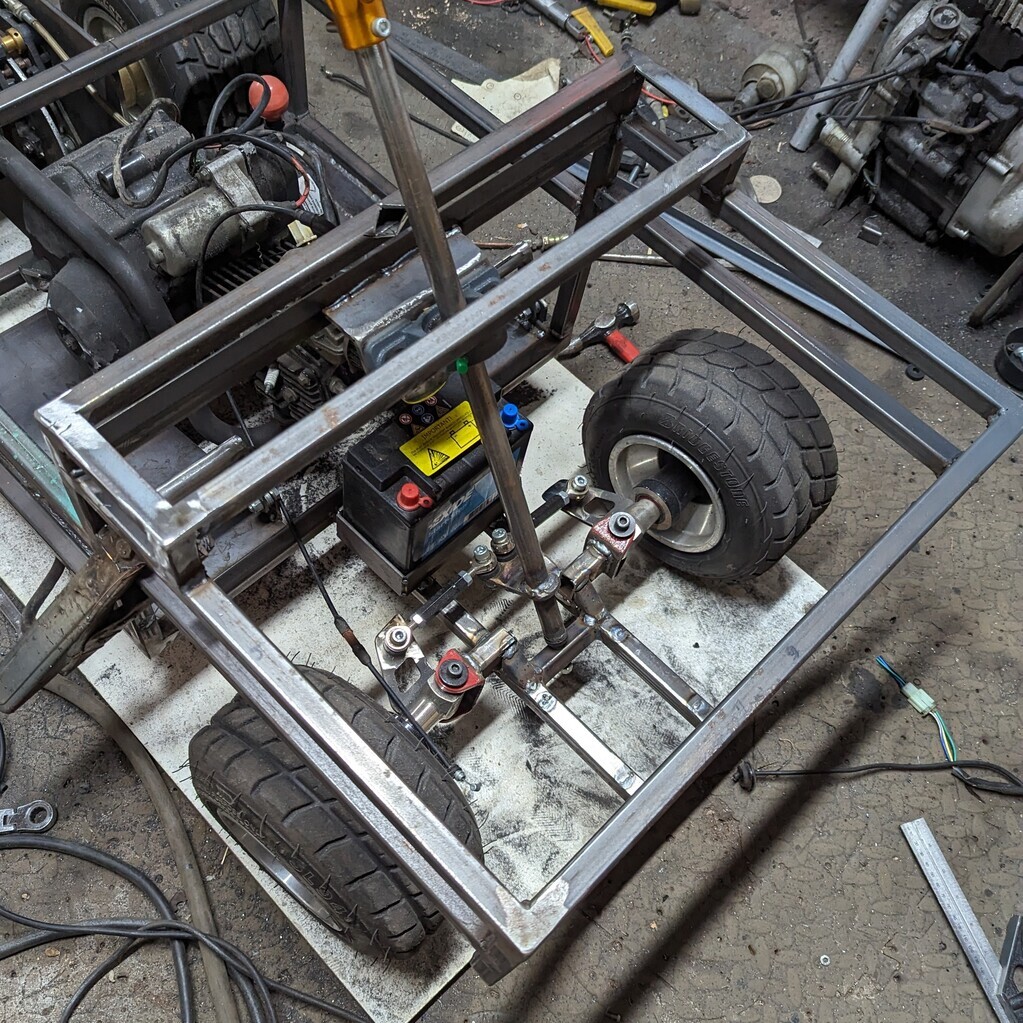 I got a new inlet which allowed the carb to be faced forward, giving a bit more room to get in and to keep it away from getting kicked. I drilled and tapped this for a brass barb. Whichever fuel tank I use, it will no longer be gravity fed, so i've got a little Mikuni vacuum pump 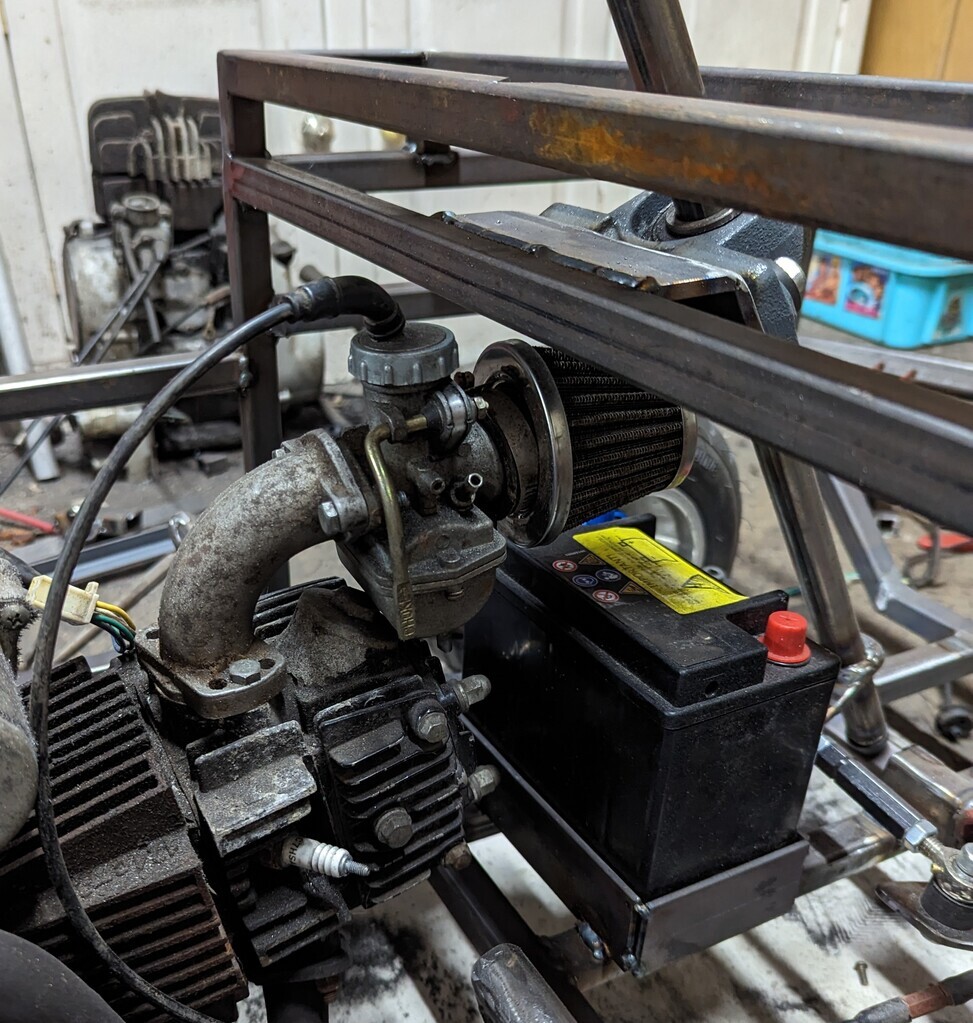 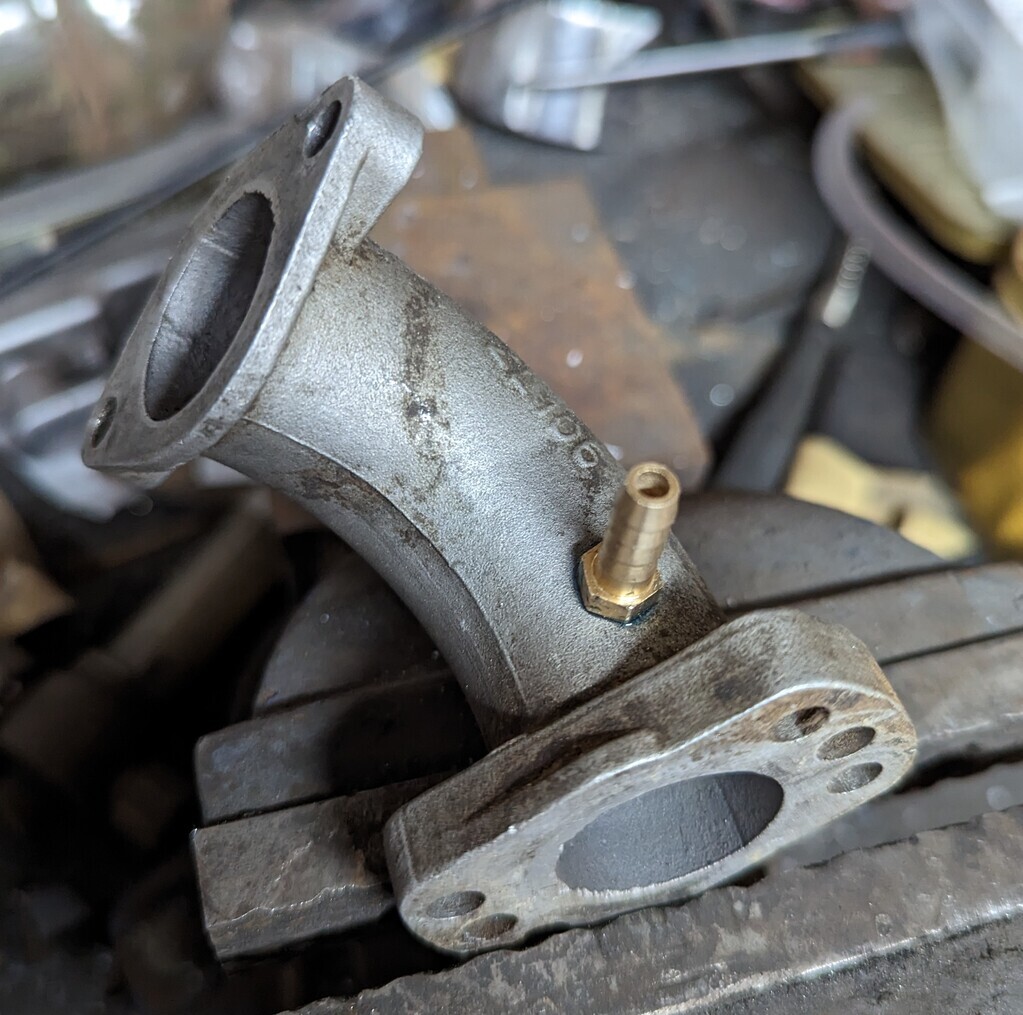 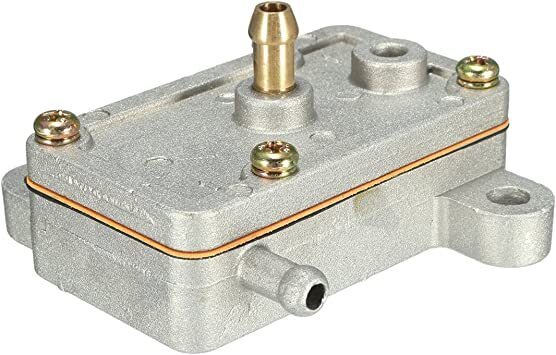 Sick of getting an 8mm slice of bearing carrier plate in the ring, I've started on the seat Cut a bit of mdf to size 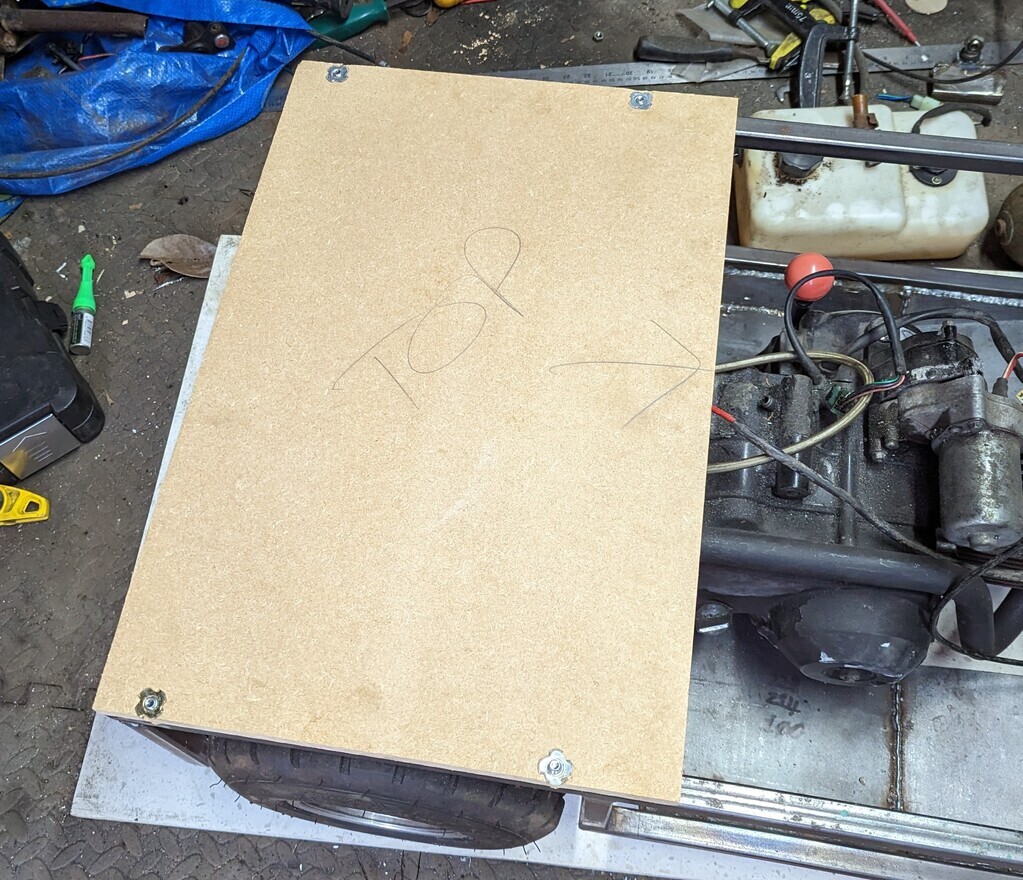 Stole the offcuts of foam from Ian's seat. I've since added another 2 layers, I want to be comfy 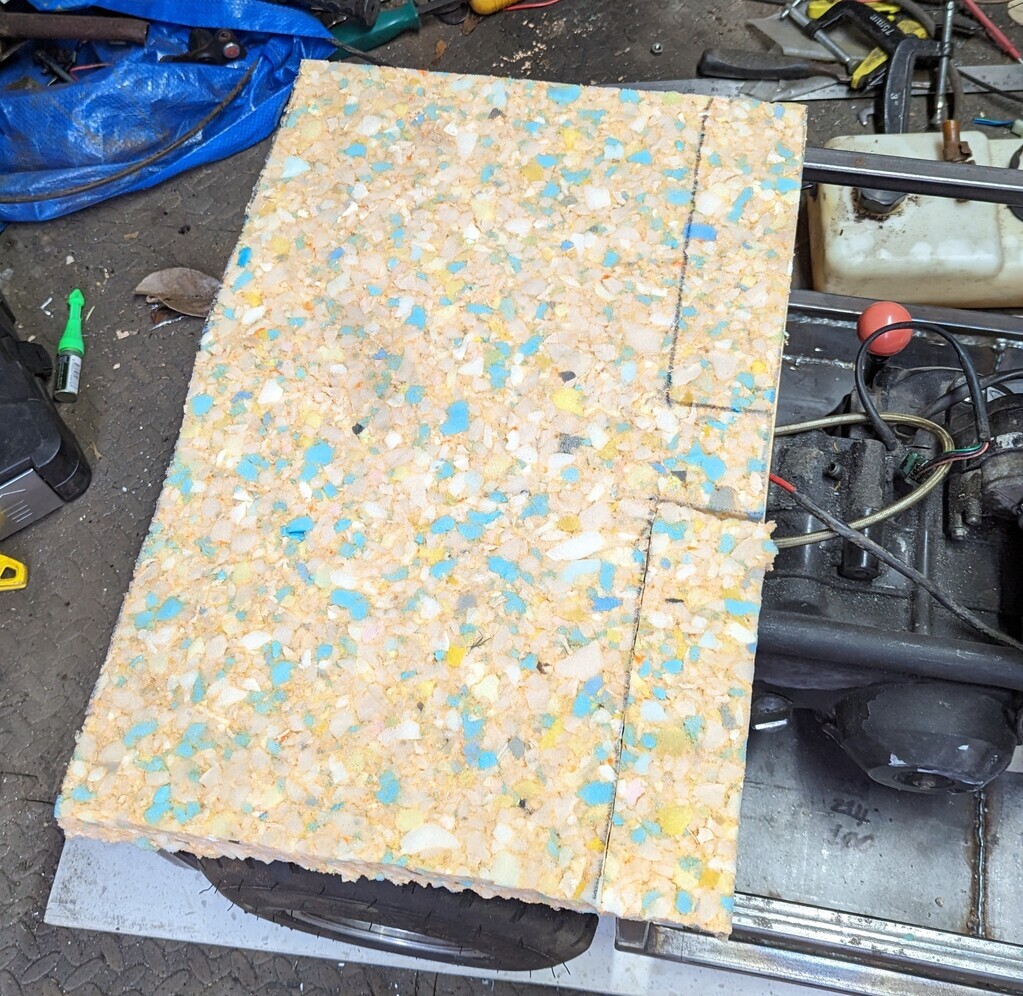 Ordered in some dark grey leatherette, now I have to play with the sewing machine. 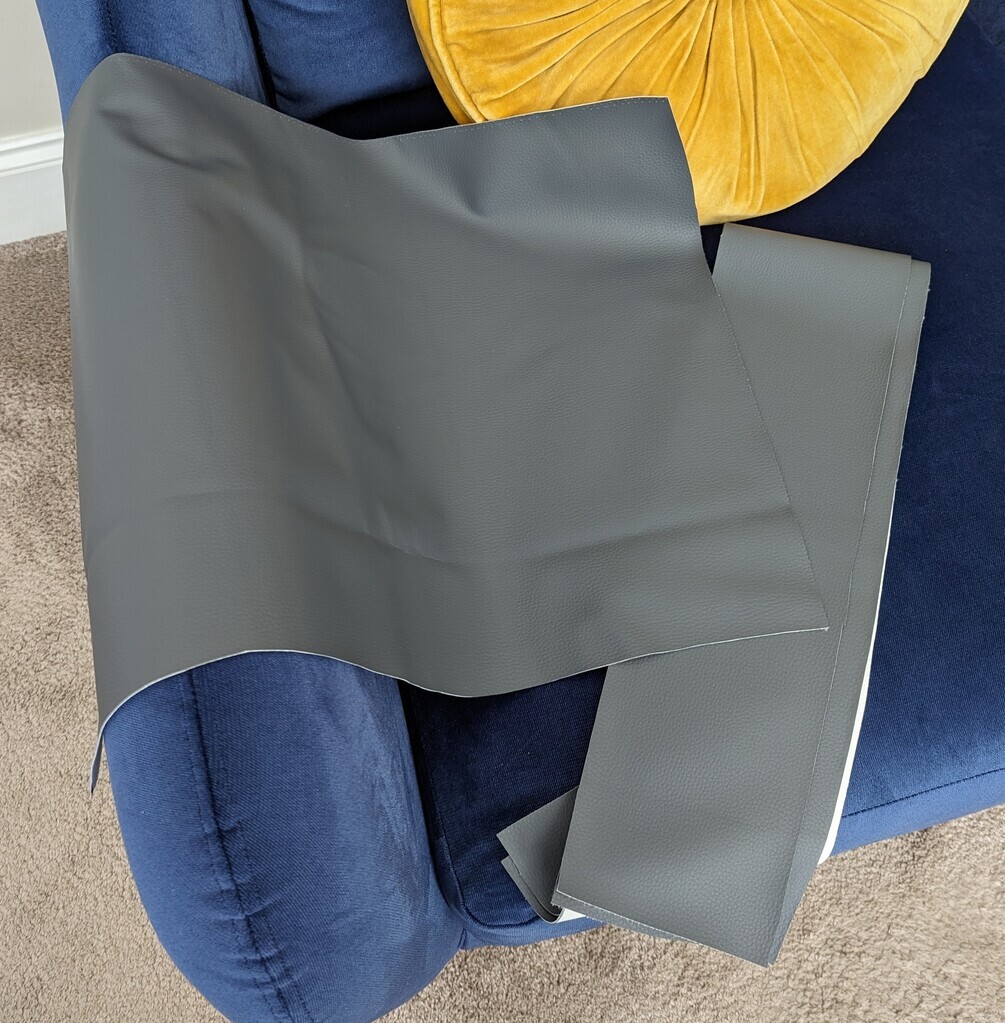 I went with dark grey to match the bodywork, I didn't want the seat to stand out. Partly because I've decided to sack off making the cage. I think it just wont look right as it will have to hang over the back and it will stop anyone larger than me getting a play |
| |
|
|
LowStandards
Club Retro Rides Member
Club Retro Rides Member 231
Posts: 2,714
|
|
Apr 30, 2023 19:02:36 GMT
|
I've done a lot. Well, me and barstoolracer have done a lot But it doesn't look at a lot But it took a lot of time So a lot... I really wanted my throttle and brake to be foot operated. There was talk about hand controls under the steering wheel the same as Army'Geddon , we also toyed with a push pull arm meaning one handed steering. But it turns out being clever there was enough room to have foot operated controls The brake master cylinder was where we started as it's the biggest piece of the puzzle. 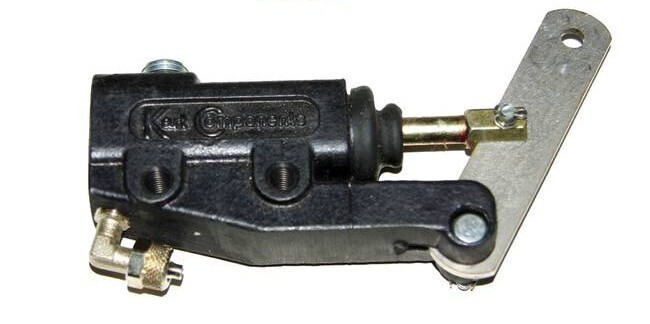 We managed to slot it into a gap where I could lose a little bit of the inner mudguard 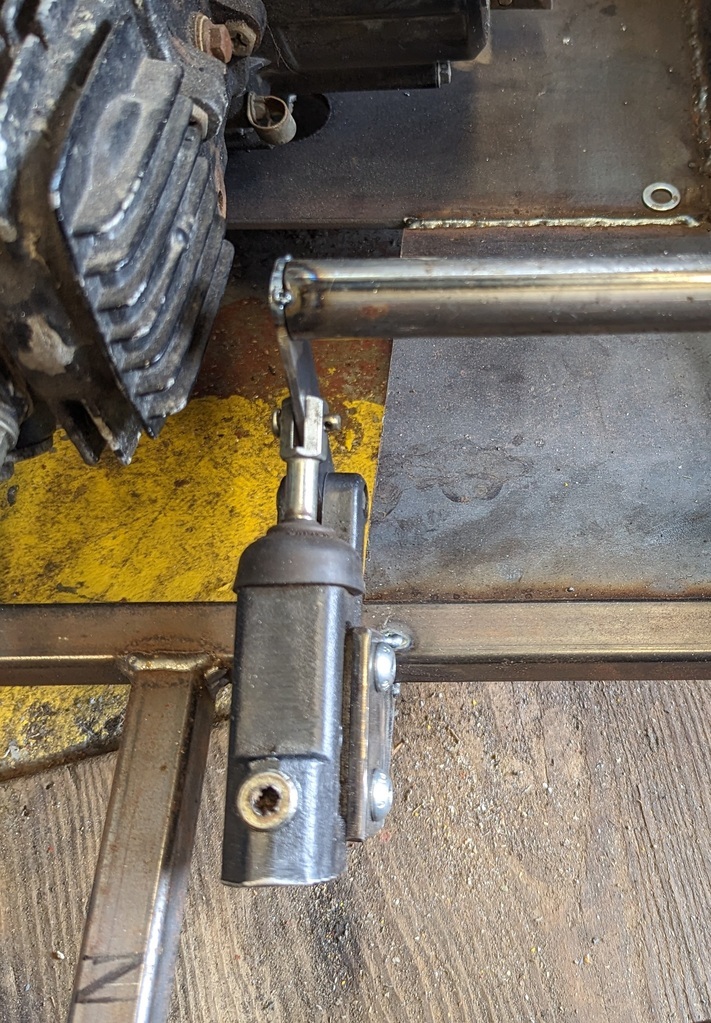 Next I thought about the pedal itself and how it would operate the cylinder. I made a couple of these (actually 4 as you'll see later) 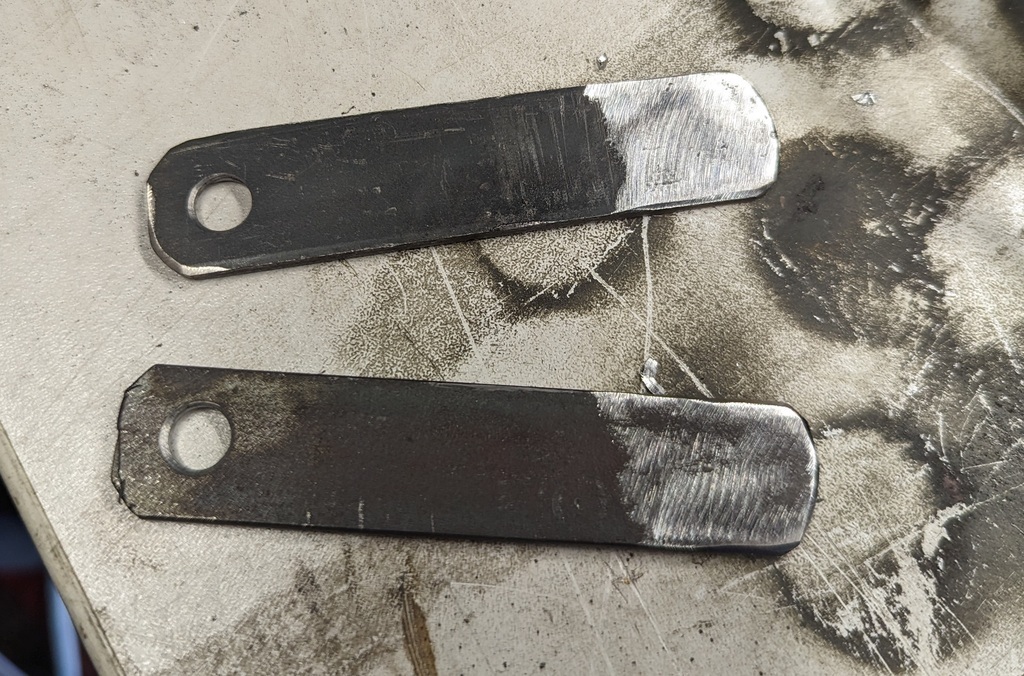 I used a bit of leftover 20mm tube, bit of welding, a bracket to match the pivot point of the cylinder and 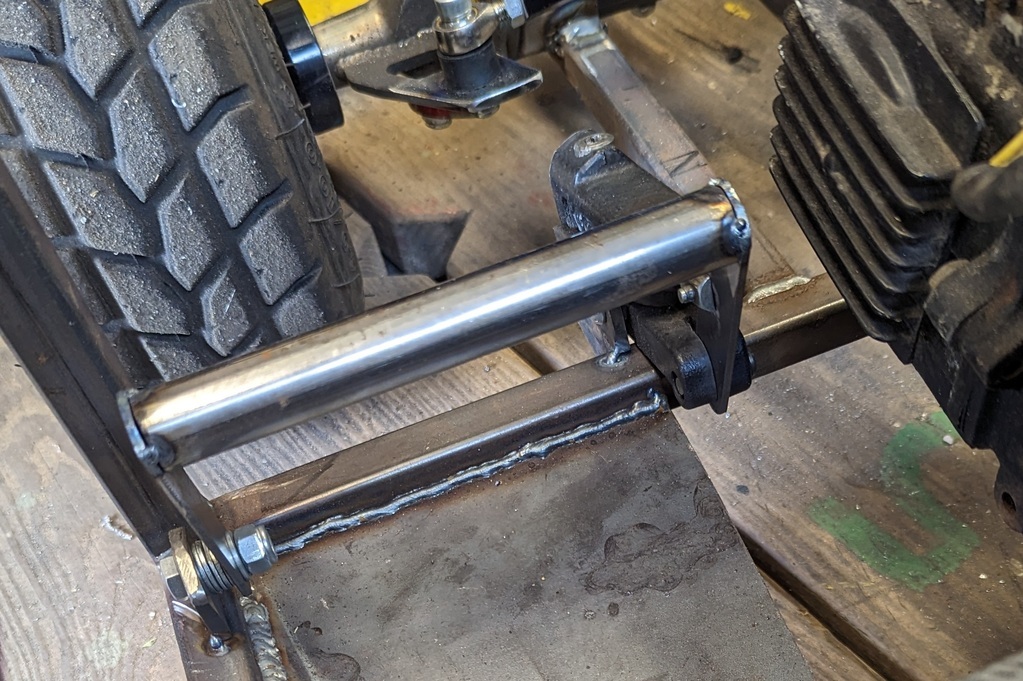 A working brake pedal. It's both comfortable on the foot, operates the cylinder smoothly and has enough give to hold your foot up, yet work with slight pressure. Throttle next. Hmmmm, the brake works so well, might as well replicate it 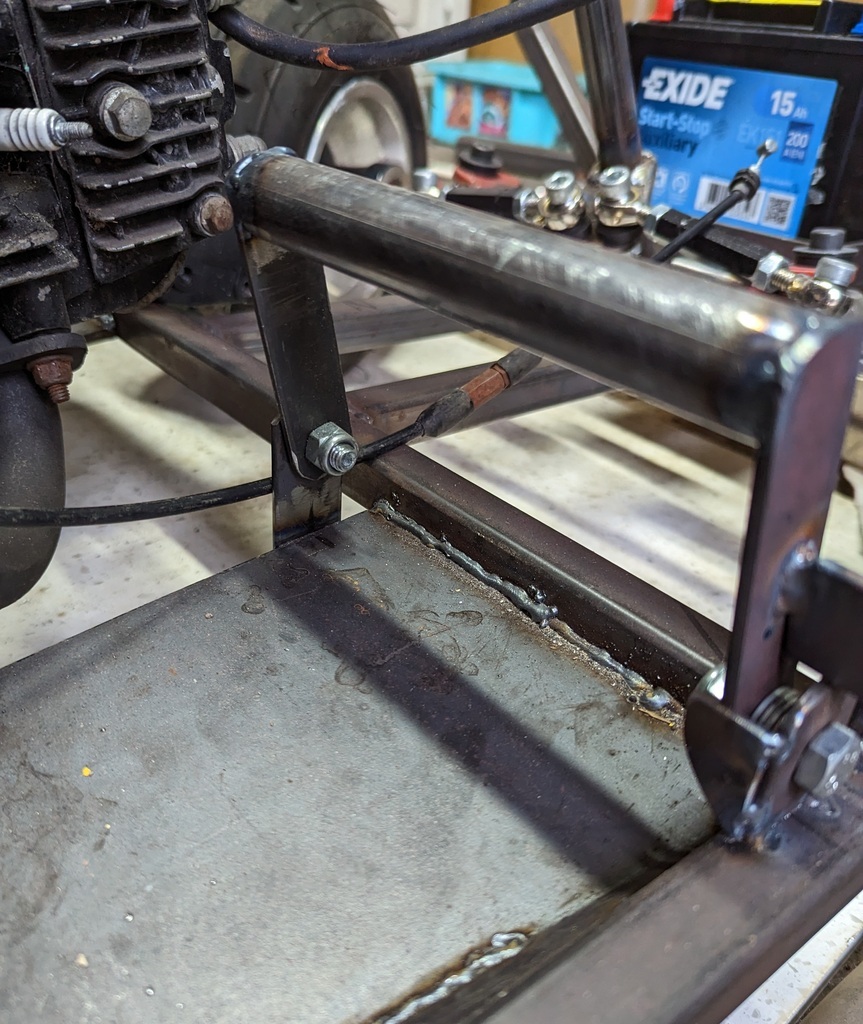 This doesn't return to it's original position or even have an original position (the cyclinder arm limits forward travel on the brake) Stopping it moving forward was easy, a little tab was made and welded in Looked around for pull springs, had a few, but they're all long and pretty weak. I did find something that resembles a valve spring, no idea where it came from mind. I drilled through the chassis and welded in a cap head bolt that fitted snuggly inside the spring, then welded a tab on the pedal 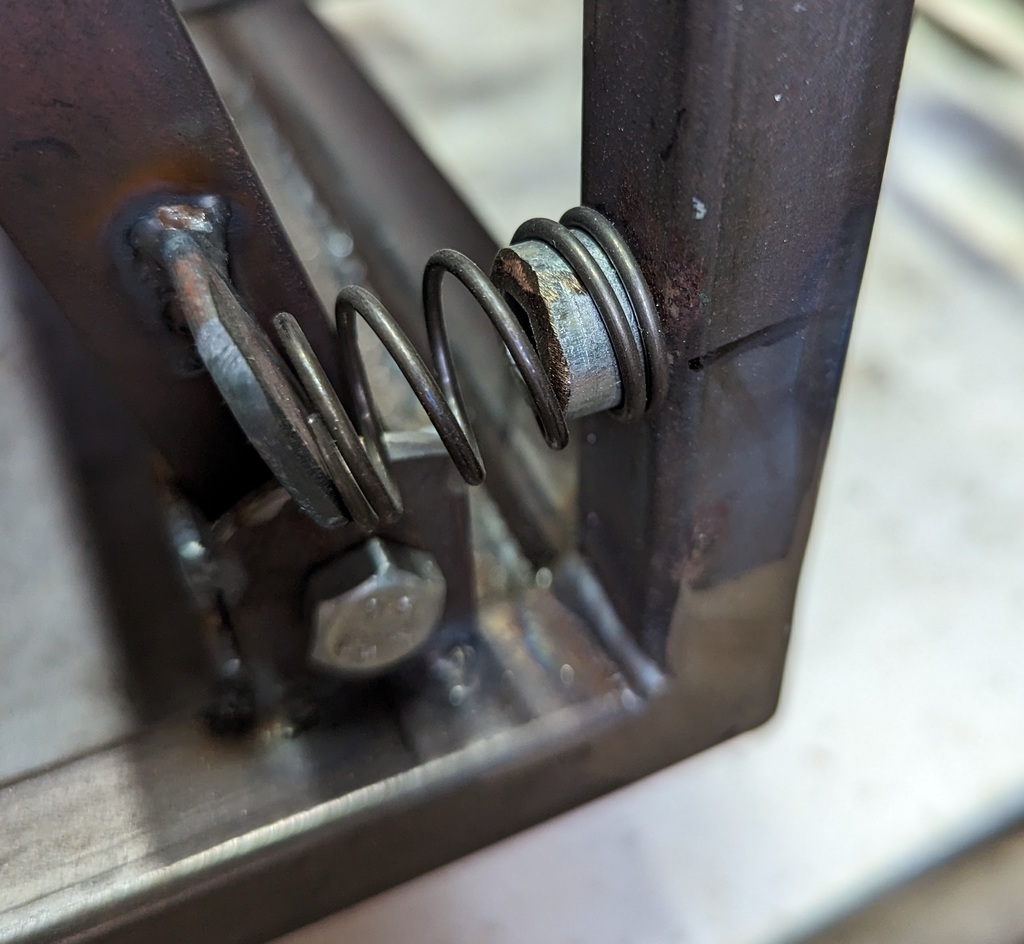 So there you can see the stop and the return spring, it all works great, again, great foot feel (that's a thing right) Finished up mounting the battery. All the weight is at the back so far, so I stuck this right up front. Just a simple flat bar bent round it then welded to the chassis. This is just going to be held in by a cam buckle strap - why make it difficult? 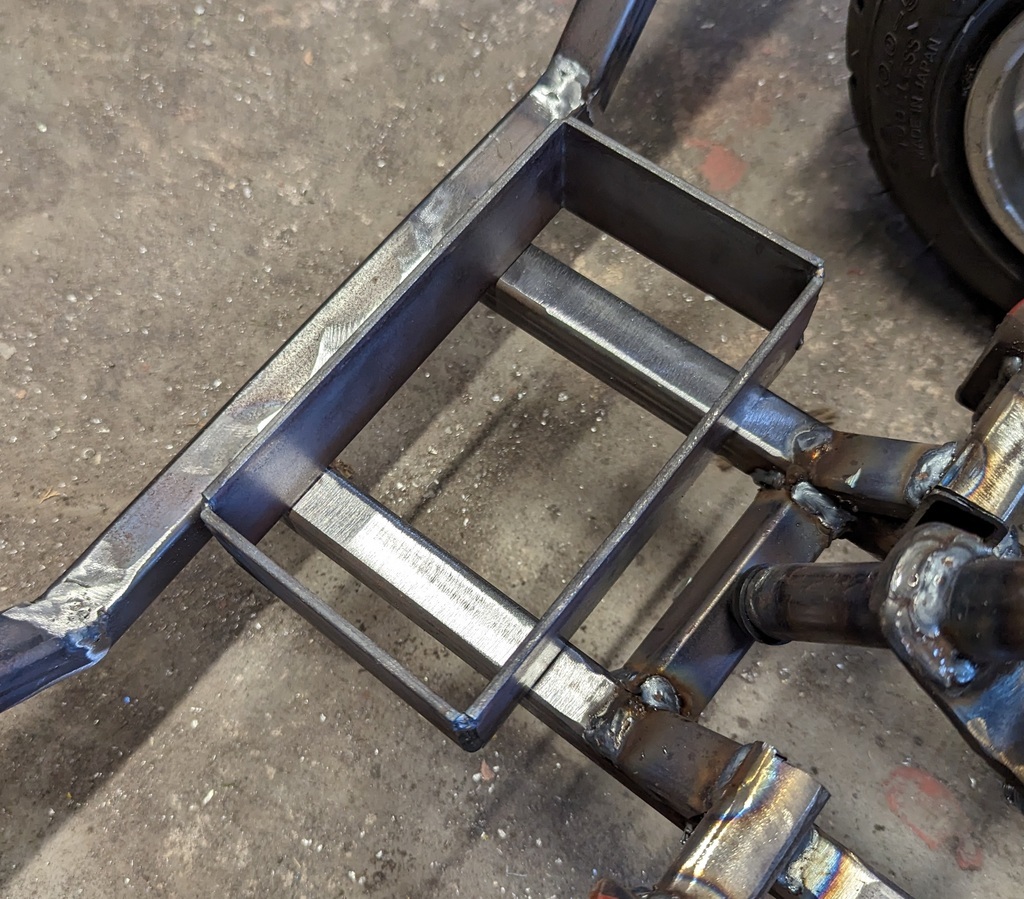 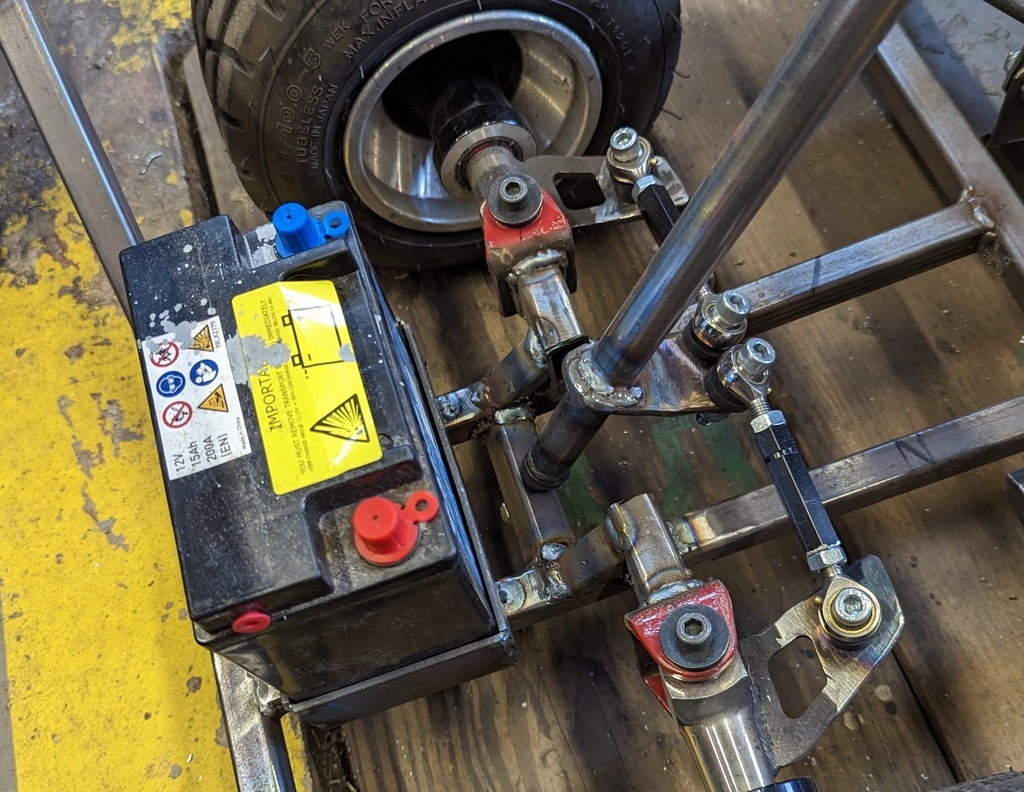 Really getting there now - What is it? 3 weeks till RRW. She should be going, in a non-complete fashion |
| |
|
|
LowStandards
Club Retro Rides Member
Club Retro Rides Member 231
Posts: 2,714
|
|
Apr 25, 2023 12:57:22 GMT
|
I really wasn't happy with the steering. I decided the issues all stemmed from the fact the column was behind the axle line. I don't know how I decided this or why, but it led me to cutting out the centre of the axle 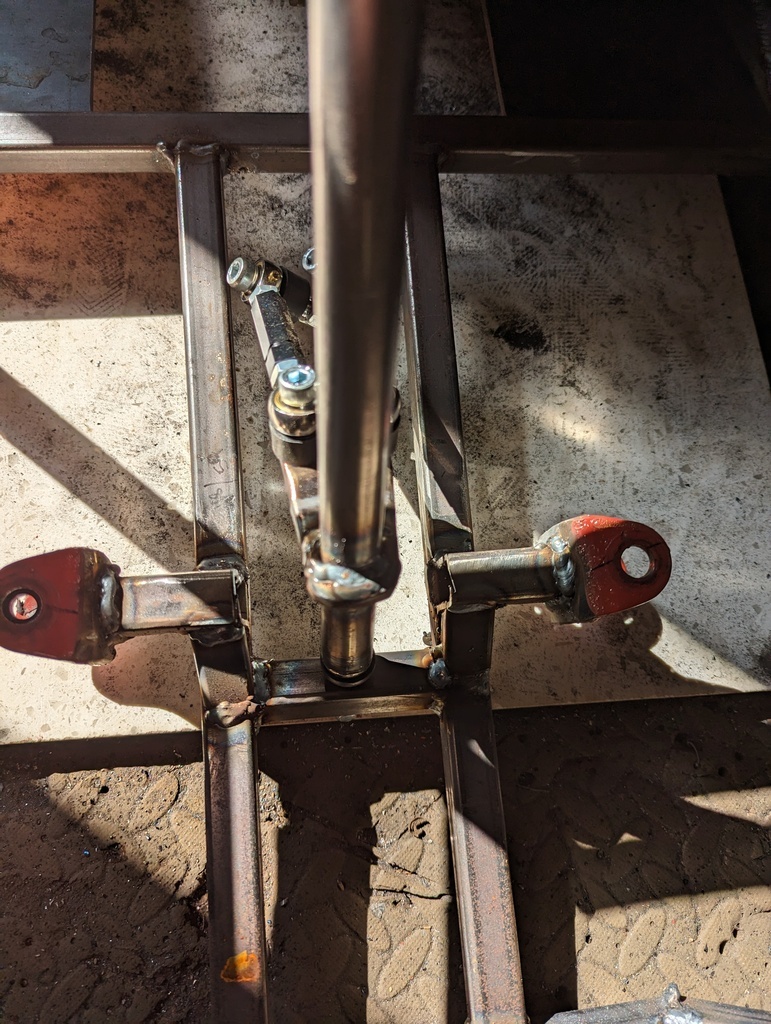 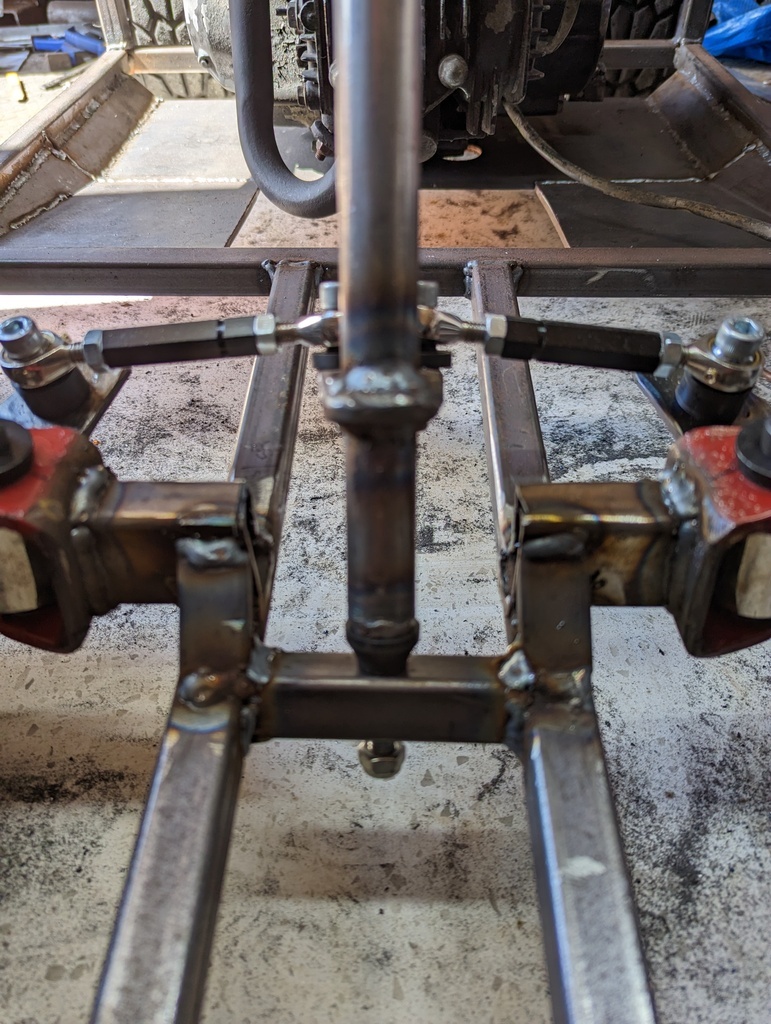 This allowed the steering arm to pivot more inline with the arms which in my head was just jolly. I welded up some more holes in the spindle arms, shortened them and redrilled them to get this Which now works flawlessly, so much lock now that the wheels hit the frame front and back - which is a good thing, I just need to add stops now 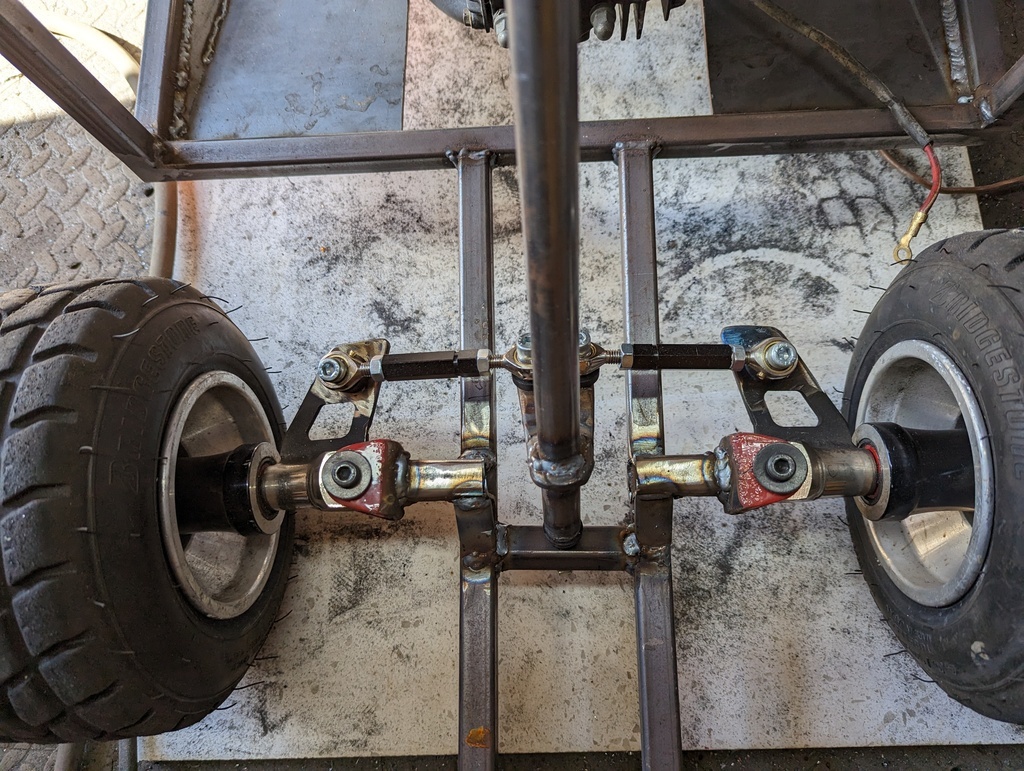 I've moved the brake slightly up, which meant drilling the current holes oversized then making up a location plate 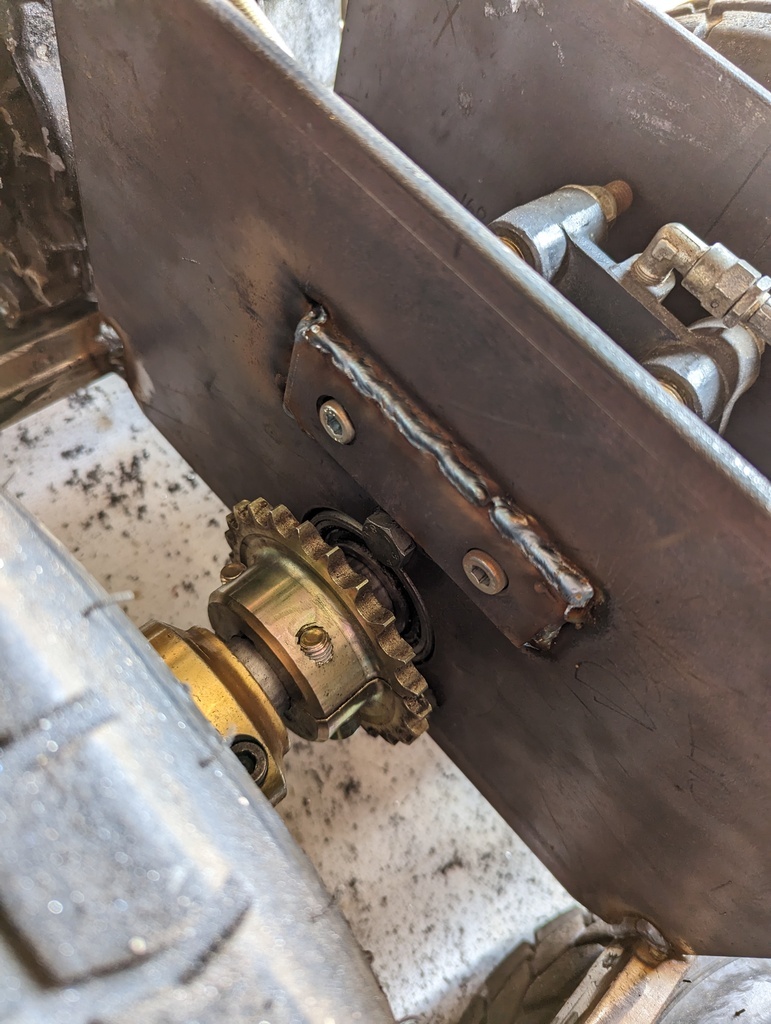 Exhaust is now complete and fitted, supported it in 2 locations, it's nice and solid 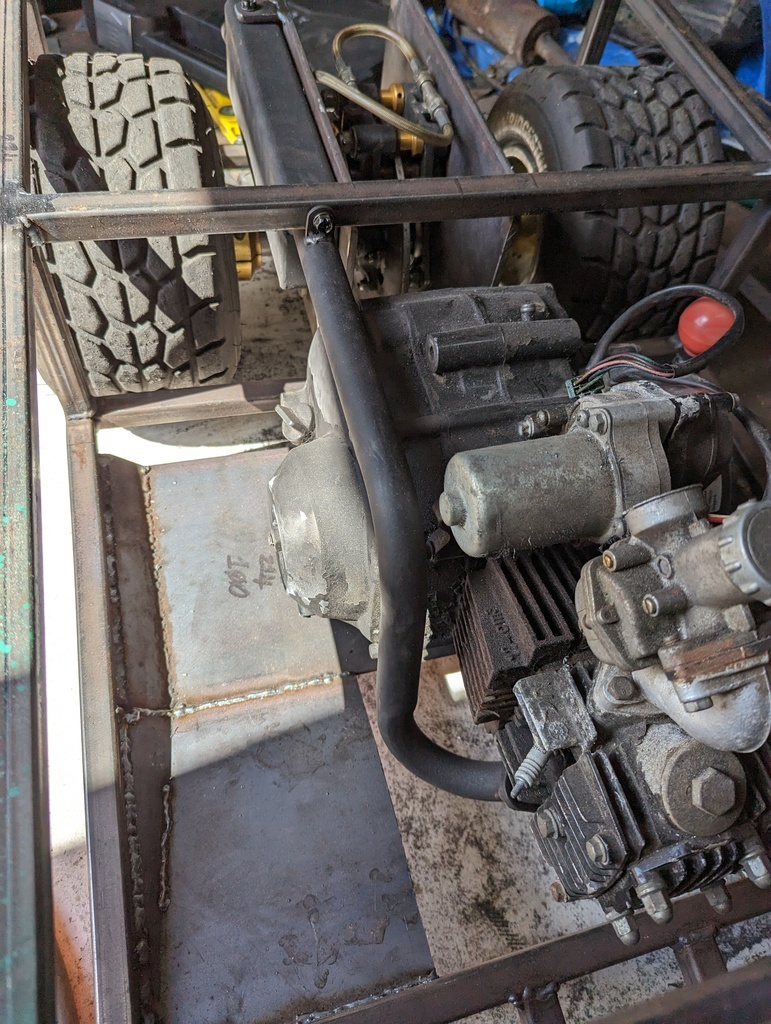 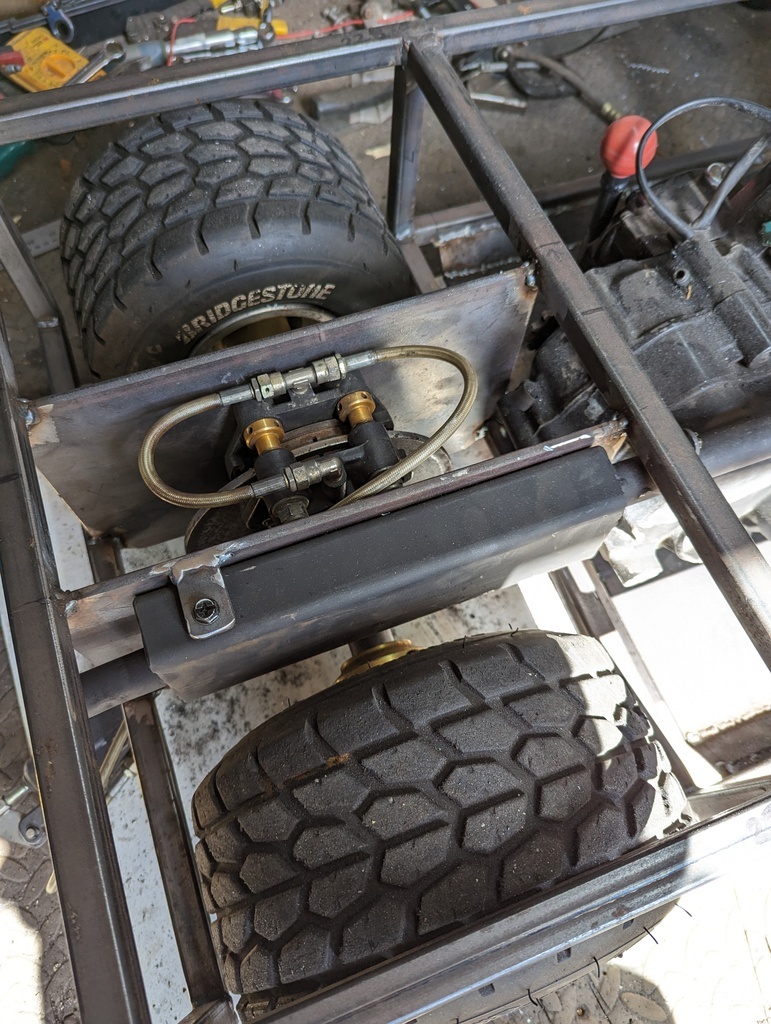 I've fitted the shortened Forward / Reverse knob, it's out of the way and as tight to the engine as possible 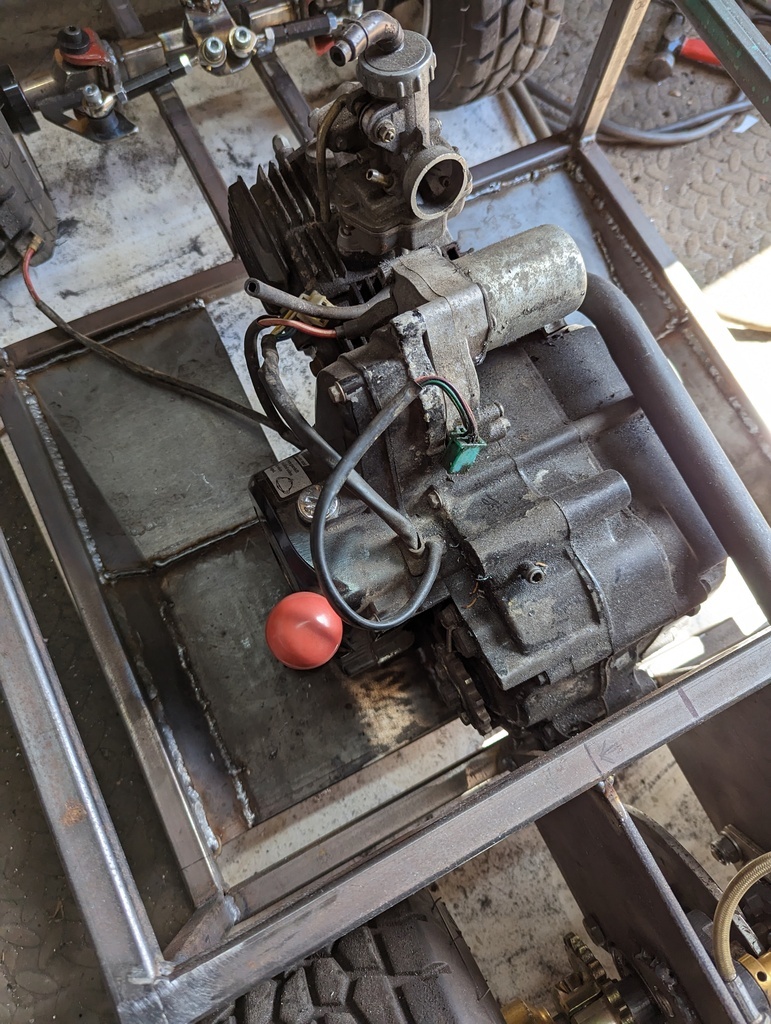 I need to tidy up where I've cut the centre out the front axle and do some bracing. I have the battery now which I plan to fit as low and far forward as possible as the front end is light comparted to the rest of it. I have a choice of a plastic fuel tank which requires a pump, or and old Atco cylinder tank, which needs some repairs I can't be fair off firing her up really - oh, I have to sort the throttle / brake out, but I think i'm going for a simple 1 handed affair just to get her to RRW. Talking of which, I doubt the bodywork will be done for RRW either |
| |
|
|
LowStandards
Club Retro Rides Member
Club Retro Rides Member 231
Posts: 2,714
|
|
Apr 20, 2023 15:26:22 GMT
|
I'm no dynamics expert, but your Ackerman looks a bit off in that pic ^^ Don't know what you're on about chap 🤔 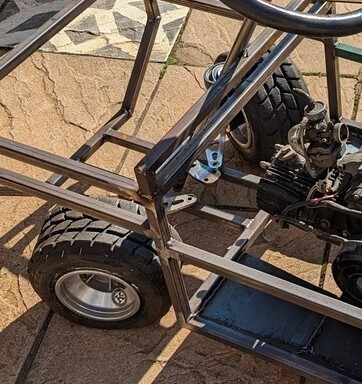 |
| |
|
|
|
|
LowStandards
Club Retro Rides Member
Club Retro Rides Member 231
Posts: 2,714
|
|
Apr 20, 2023 14:45:51 GMT
|
Oh, I threw on the steering wheel from an old mower, still a bit large, but it will have to do for now Chucked the seat on as well, I think I might not use this as it's a bit big. 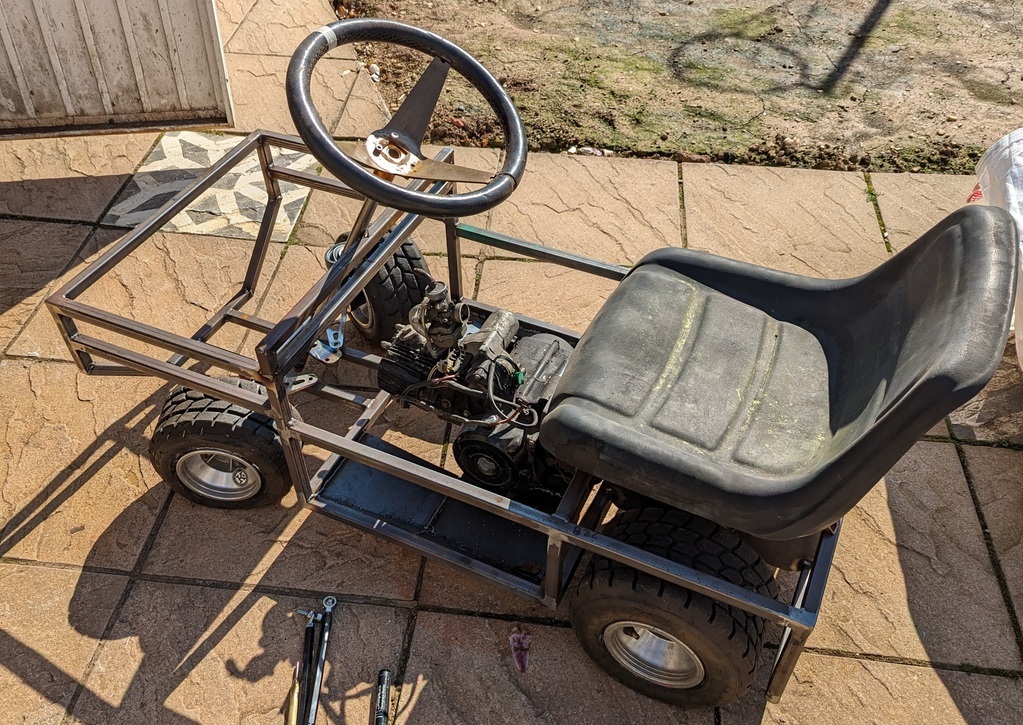 I'm thinking of just a seat pad, then a pad as a back rest on the cage??? 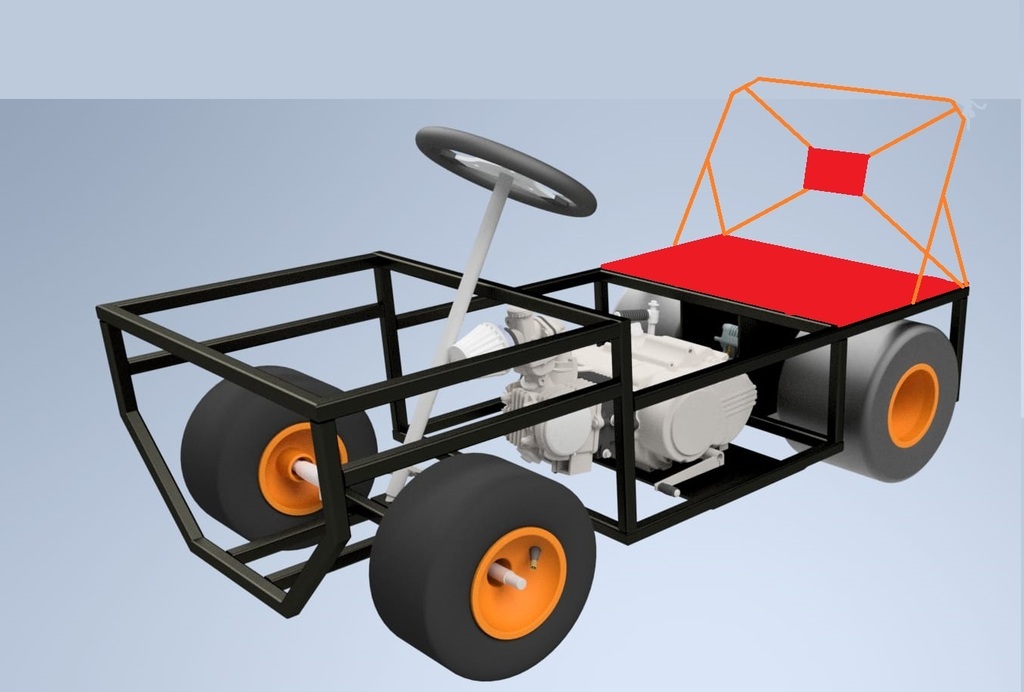 |
| |
|
|
LowStandards
Club Retro Rides Member
Club Retro Rides Member 231
Posts: 2,714
|
|
Apr 20, 2023 13:13:10 GMT
|
Lets talk steering No, lets talk steering when you're making a kart that's 550mm wide using components from something that's normally 1200mm ish wide. I've been reading up on akkerman angles, lots of calculations and all that jazz, but I basically figured out you're in the right ballpark if your steering arm holes fall on to a line drawn from the centre of the rear axle to the pivot point of the steering. 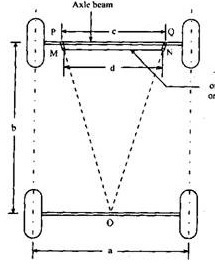 I flipped her over, laid out a long steel ruler and came up with the correct location to gain correct akkerman. I then went and welded some plate to the side of the arms so I could redrill the holes 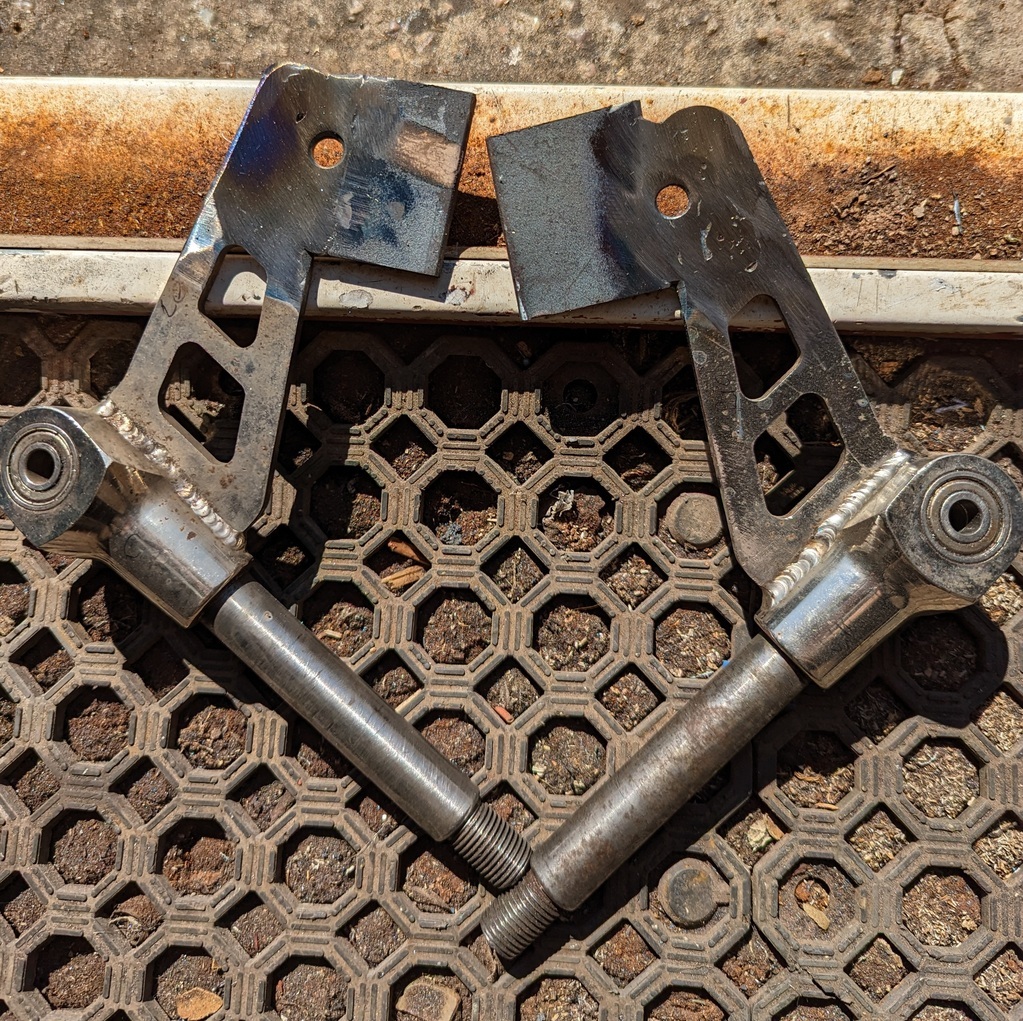 Made them look pretty, then bolted them to the kart, happy. I altered the length of some kart steering arms, fitted one side, then turned the wheel. I was upset to find that due to the short length as you got near full lock, the arm on the column would flick forward which just would'nt work. 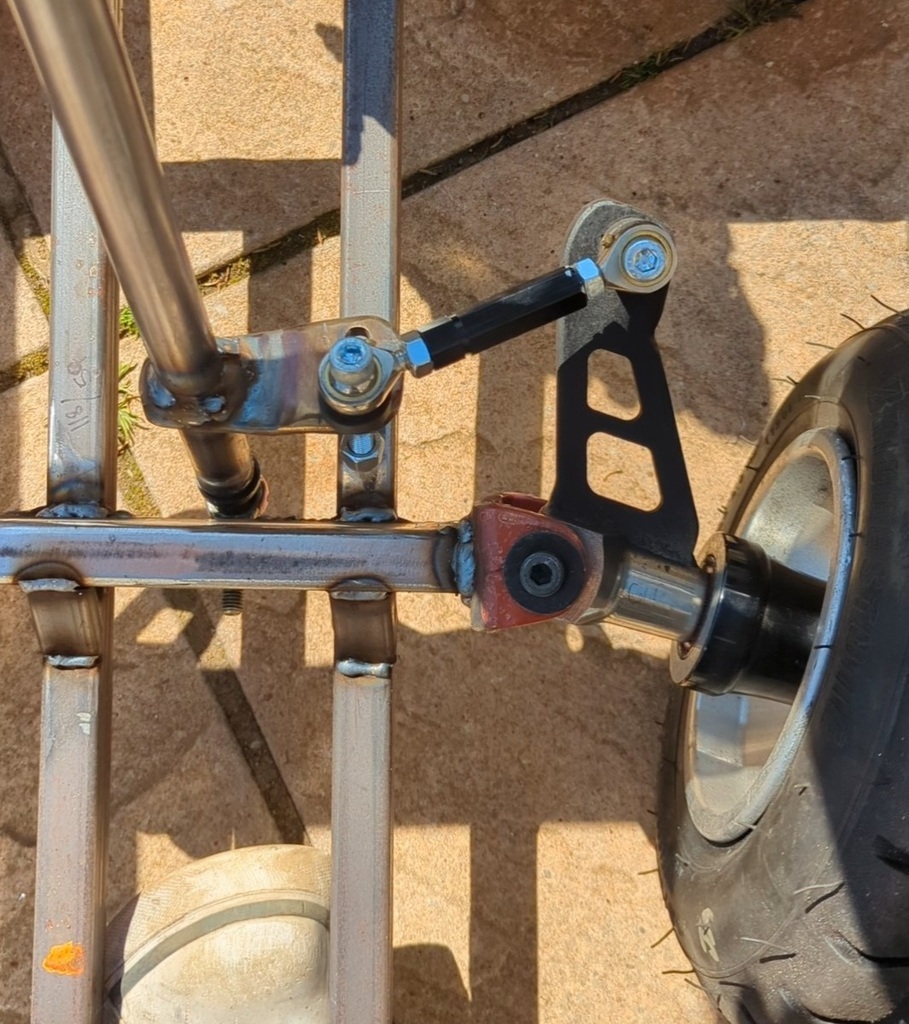 So I did what any self respecting engineer would do when faced with such a thing, got angry, drilled some more holes where I knew it would work and frankly Mr Akkerman can go f........ himself  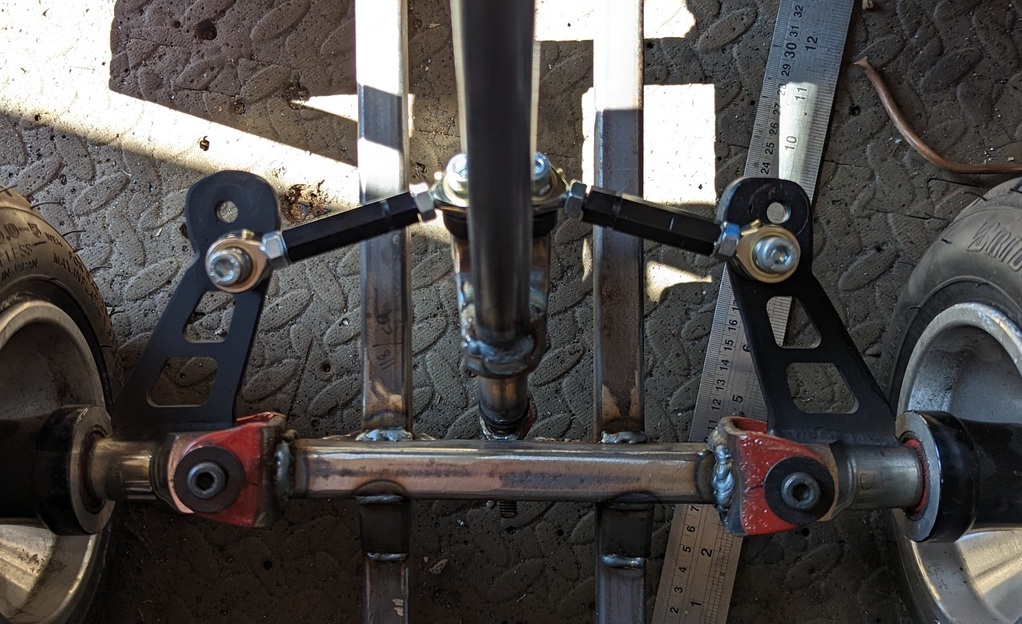 So I now have steering, it will probably push on tight turns at low speed but meh, I have steering |
| |
|
|
LowStandards
Club Retro Rides Member
Club Retro Rides Member 231
Posts: 2,714
|
|
|
|
|
I really don't understand what more these do than a fan in the garage wall, other than keep a bit of dust off maybe
|
| |
|
|
LowStandards
Club Retro Rides Member
Club Retro Rides Member 231
Posts: 2,714
|
|
Apr 14, 2023 14:05:06 GMT
|
I have these around my workbench, probably around 6 foot into my garage. The car doesn't get parked on them, but it's amazing the difference they make walking on cold concrete or just kneeling down. 7 years so far. Don't get me wrong, they're pretty knackered now, mainly grinder marks and full of welding spatter and hot offcuts of metal. Kneeling is not so much fun now actually  7 years of welding, grinding etc 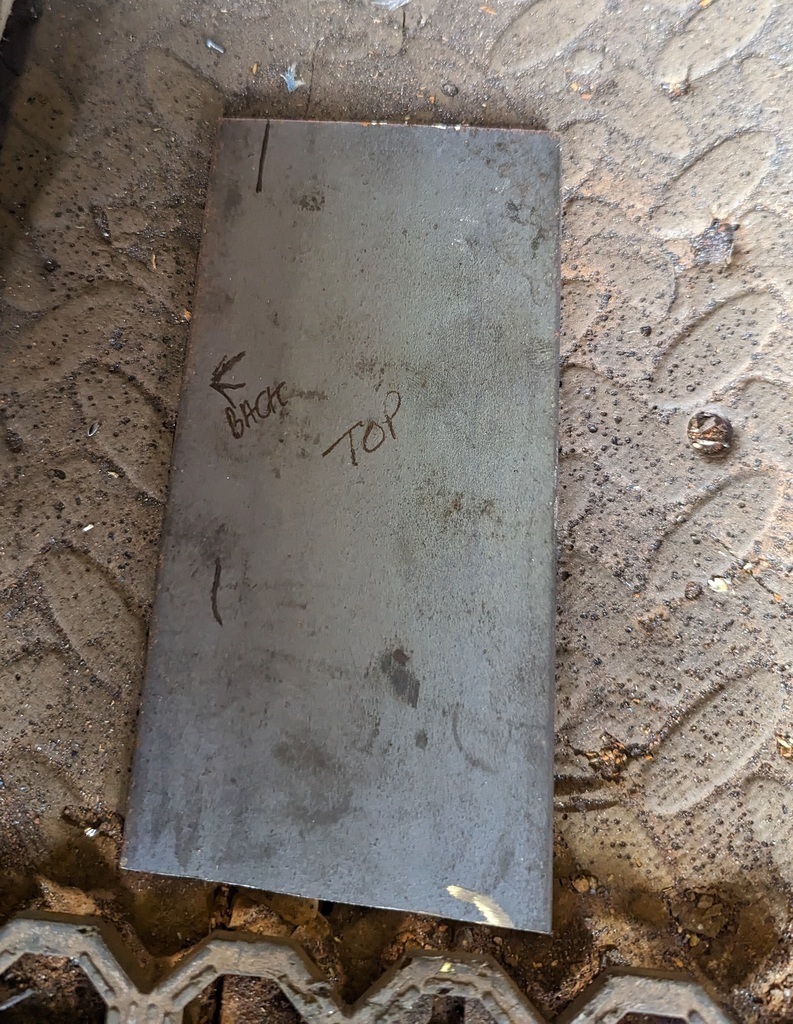 |
| |
|
|
LowStandards
Club Retro Rides Member
Club Retro Rides Member 231
Posts: 2,714
|
|
Apr 14, 2023 10:00:56 GMT
|
|
Fit a fan in the wall of your garage?
Instant - large carcoon
|
| |
|
|
LowStandards
Club Retro Rides Member
Club Retro Rides Member 231
Posts: 2,714
|
|
Apr 13, 2023 13:00:13 GMT
|
|
That would be lovely, thank you
|
| |
|
|
LowStandards
Club Retro Rides Member
Club Retro Rides Member 231
Posts: 2,714
|
|
|
|
|
Steering wheel?
I want a small one, a really small one, but I can't find any.
Well no, I like the Grant 829 classic, but it's way out of budget
|
| |
|
|
LowStandards
Club Retro Rides Member
Club Retro Rides Member 231
Posts: 2,714
|
|
Apr 12, 2023 12:35:07 GMT
|
Bit more done over lunch I sat where I need to sit and decided the steering wanted a slight bit more angle than I could currently get, so I notched the dash bar. This will get a fillet welded in and ultimately will be covered by the dash panel. 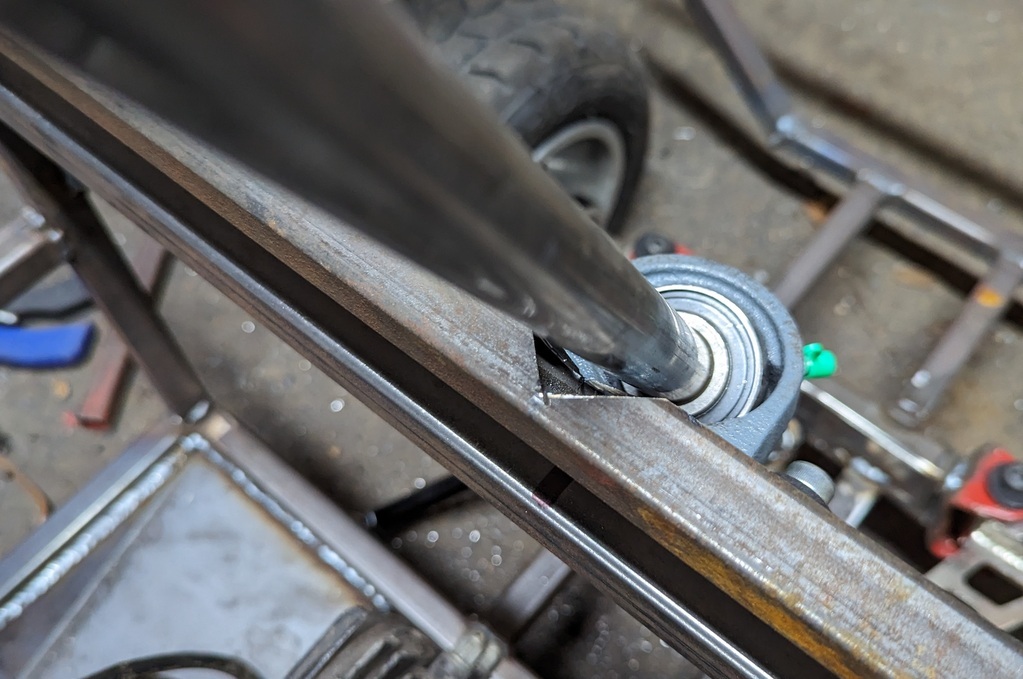 Racing karts use a plastic block to hold the top of the column, but I managed to buy a plummer bearing for the same price, so this got fitted here 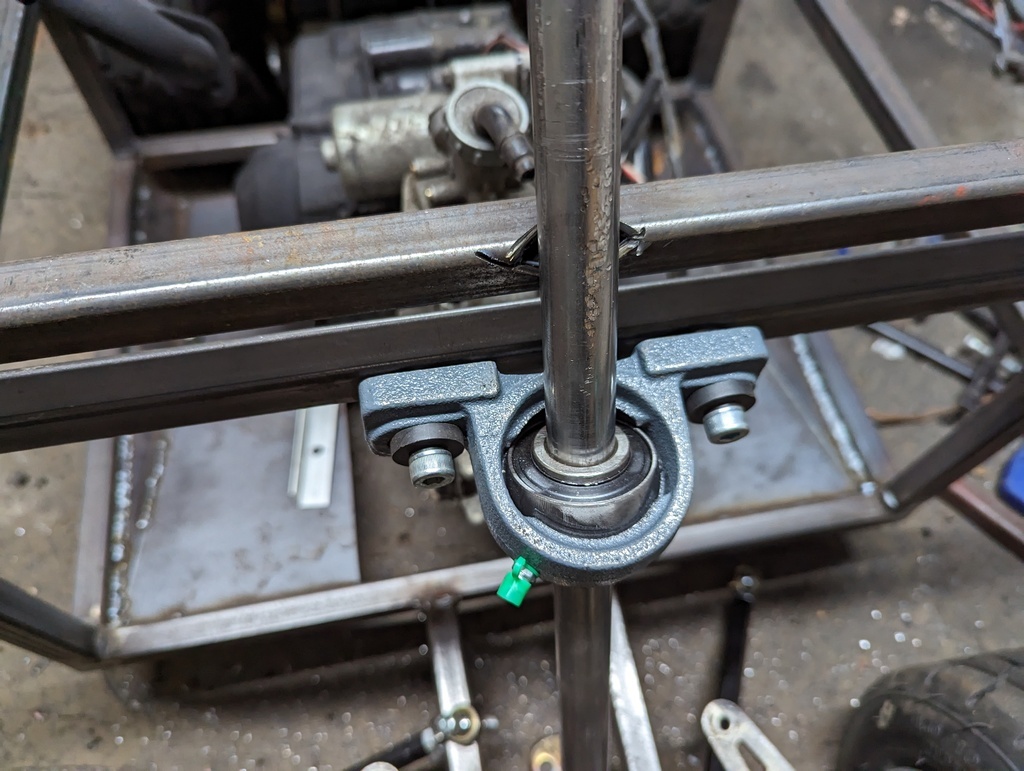 So once the track rods are sorted I should be able to steer... Well, I need a steering wheel first 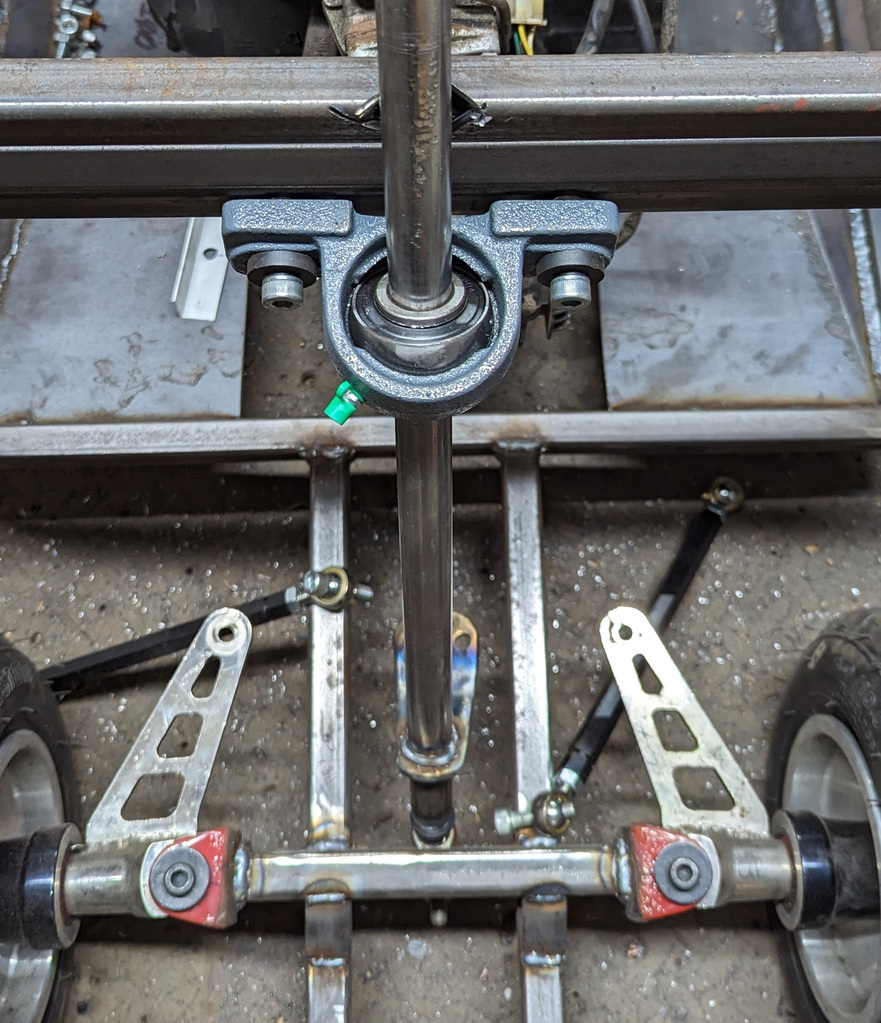 I shot the completed exhaust in some matt VHT paint the other day, so that's another bit completed  |
| |
|
|
LowStandards
Club Retro Rides Member
Club Retro Rides Member 231
Posts: 2,714
|
|
Apr 12, 2023 12:27:13 GMT
|
mr2fc, I'll drill some flat bar i've got and try it in the current position If I can get full steering and the angles look good i'll just whip some off the end of the rose joints, would save me a load of hassle merryck, I bought these complete track roads for £11 of eBay, can't beat that for a price. They're adjustable like you mention. I'll just have to shorten them to my required length then re-tap the right hand thread
|
| |
|
|
LowStandards
Club Retro Rides Member
Club Retro Rides Member 231
Posts: 2,714
|
|
|
|
More steering It's tight, Karts are a good 40cm wider First thing was to make a steering column, just a length of 20mm tube and an 8mm steering arm. There's an M8 bolt welded into the bottom, this fits into a rose joint, just as it is on racing karts. If it works for them, it works for me. 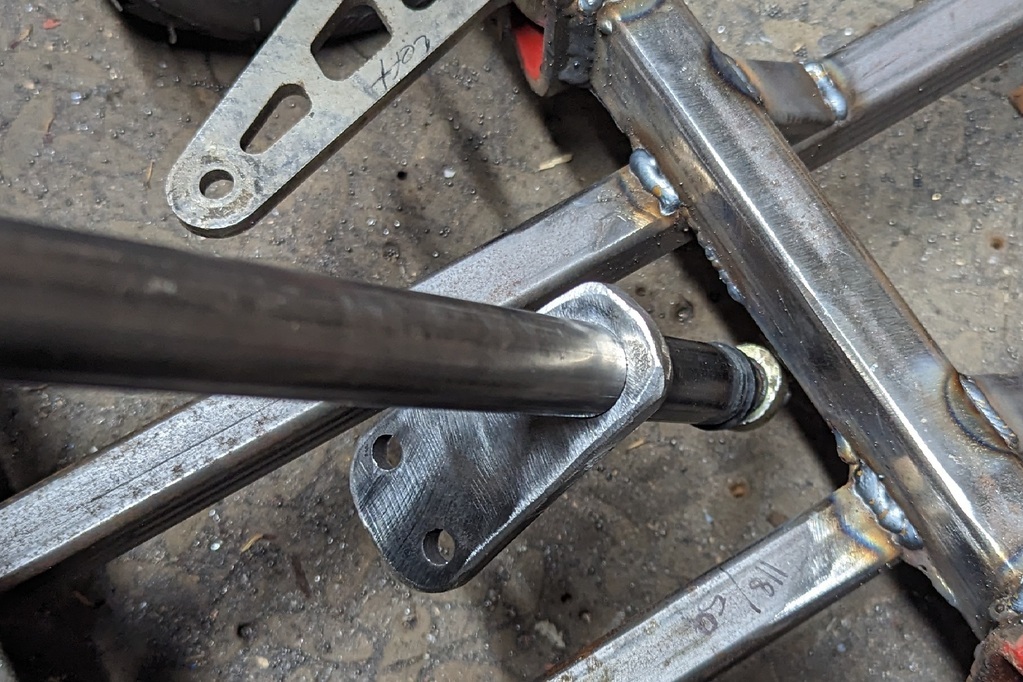 Here starts the next issue. As you can see here there's very litte room between the steering arm and the spindle arms, probably 3.5inches, 88.9mm or 1 Pixel 6 width (not Pro) I could use them, at this length, but I would have to cut down the rose joints as they have long tails on them and I think it would just get messy and when you turn the angles change and things might bind. 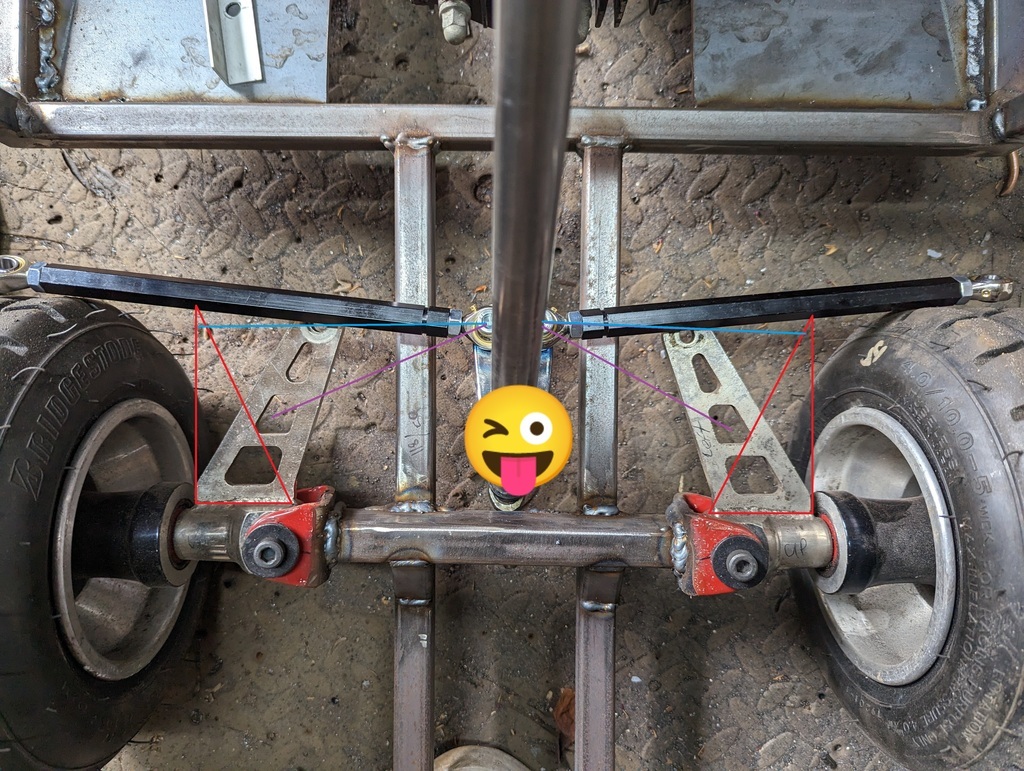 There was talk about having the arms at the purple angle, but I feel this would make the steering heavier. So the easiest thing to do is to cut the arms off the spindles and flip them over (red) and have the arms at the blue angle So a bit more work, but worth it I believe |
| |
|
|
|
|


