|
|
1967 Bond Equipe GT4SBenzBoy
@benzboy
Club Retro Rides Member 7
|
Mar 26, 2011 21:17:55 GMT
|
Cheers mdh! I've done a bit more, it's getting there. I really REALLY hate doing bodywork. I'm trying to be patient to get a good finish though. The paint will be Triumph Ice Blue, sorta like this:  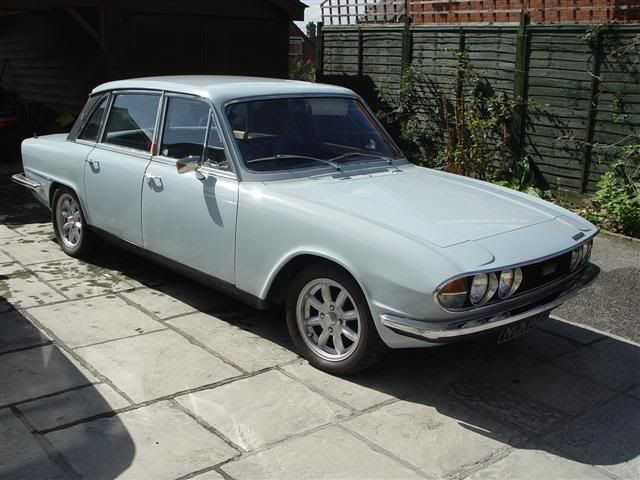 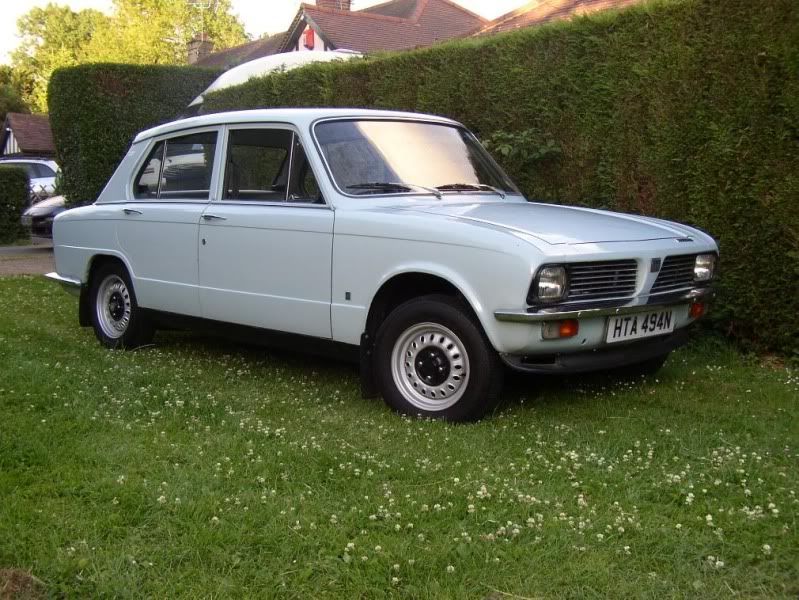 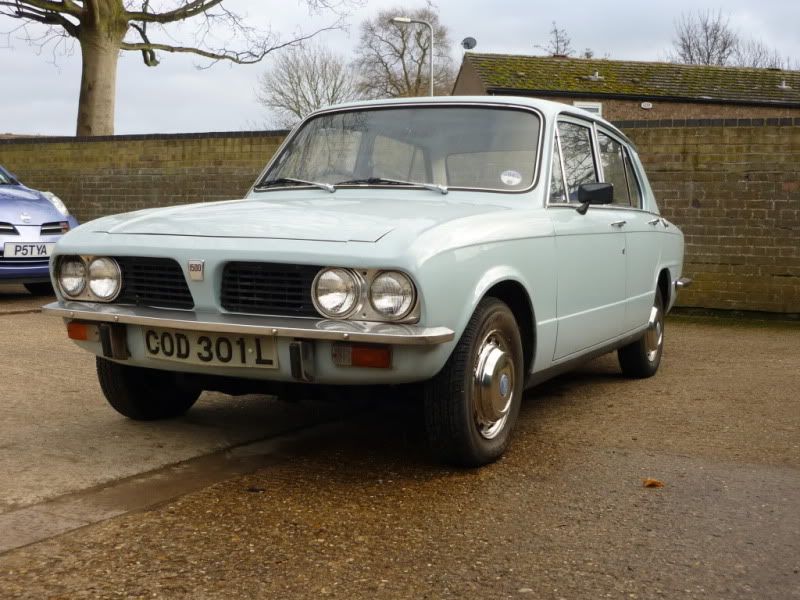 I'll be carrying on with the door tomorrow. Welding, welding, sanding, sanding, sanding, filling, sanding, filling, sanding... |
| |
|
|
|
|
|
|
1967 Bond Equipe GT4SBenzBoy
@benzboy
Club Retro Rides Member 7
|
Mar 28, 2011 16:18:44 GMT
|
I carried on with the doors, this one is almost finished now... 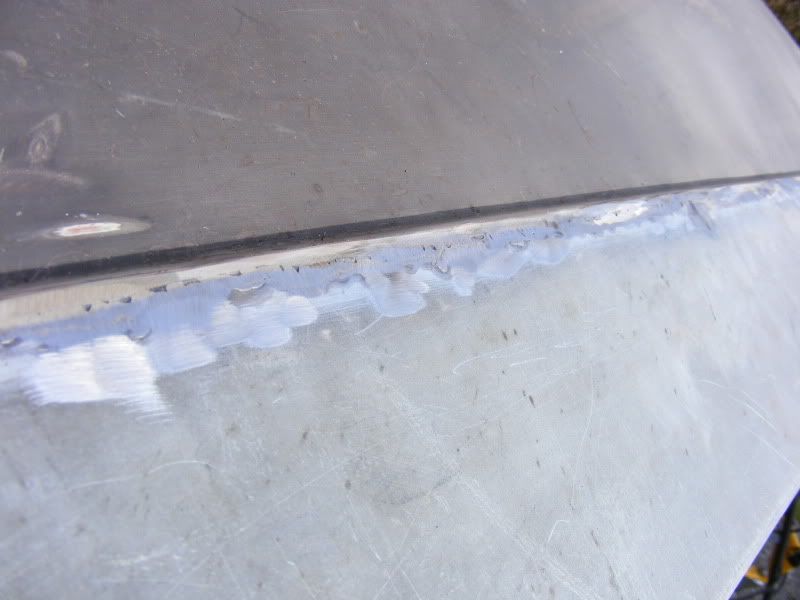 ^ Grinding the welds down. 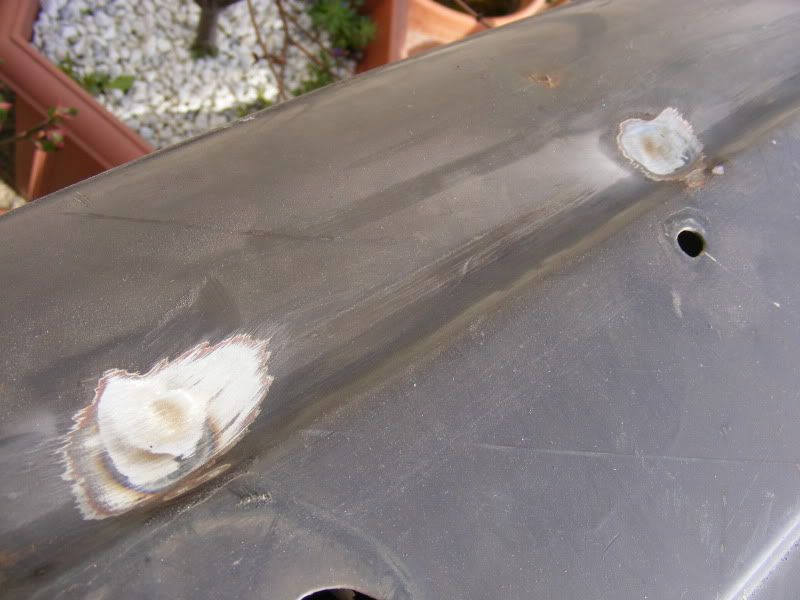 ^ I also welded up the trim holes. The Bond never came with the chrome strip on the doors. These are 13/60 doors so have the trim and accompanying holes. One (!) of the doors currently on my car has the trim on it but it looks a bit "lost" with no chrome on the panels either side of the door! Then came endless filling, sanding, smoothing, rubbing down high spots, applying more filler... it took a long while. I didn't take photos. 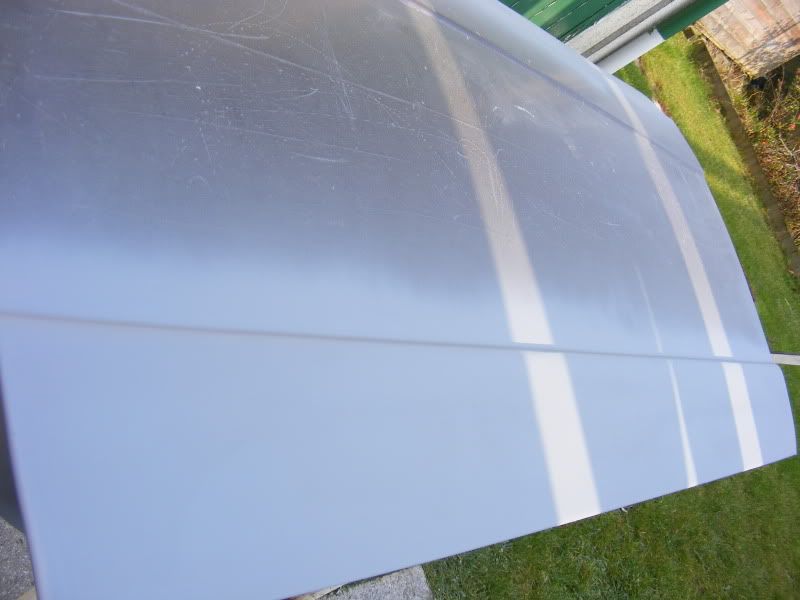 ^ After I got the door bottoms as smooth as I could, I gave it a waft of primer. 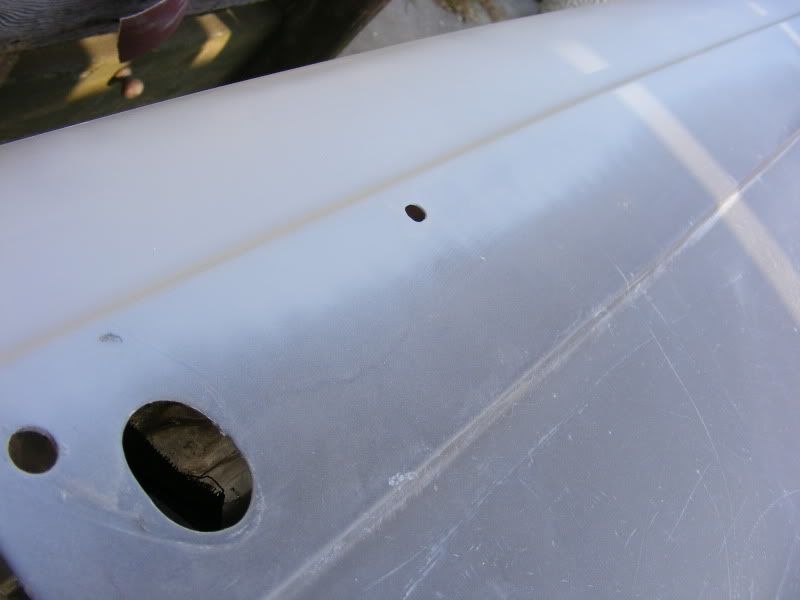 ^ The top section also had a tiny skim of filler over the welded holes and some primer. 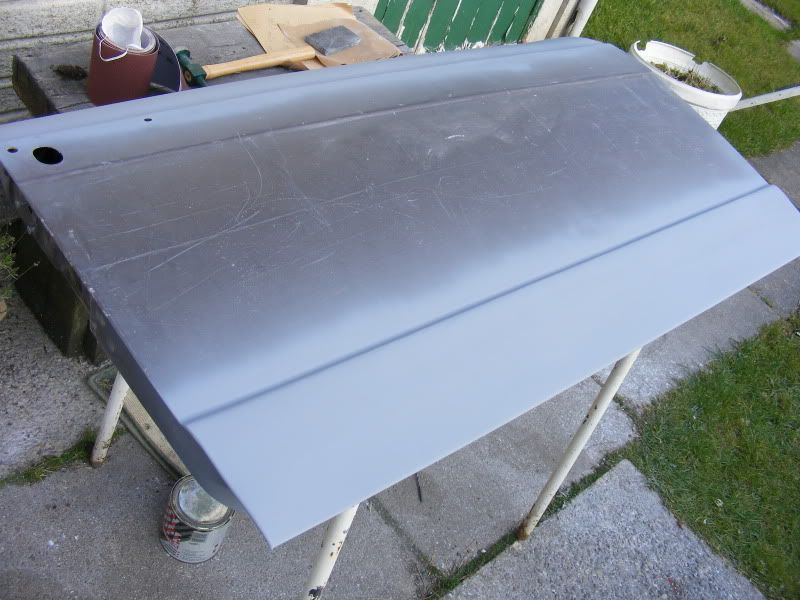 ^ And this is how it stands now. I need to do more tidying up - a couple of splits have begun at the top, and there are areas of surface rust in places which need seeing to. The whole door will be rubbed down and primed, and the shuts / inside painted in body colour so that I can bolt these doors on when the car goes in for paint! |
| |
|
|
Em
Part of things
 Fuel Injected? Carb Infested!
Posts: 601 
|
|
Mar 28, 2011 16:33:12 GMT
|
|
Looking good there!
Got to do the doors on my 13/60, umming and ahhing about full skins Vs repair panels....
|
| |
|
|
|
|
1967 Bond Equipe GT4SBenzBoy
@benzboy
Club Retro Rides Member 7
|
Mar 28, 2011 16:41:04 GMT
|
|
Thanks mate! In my opinion, if budget allows for full skins then do that. It'll be quicker (no filling) and you get fresh steel all the way up. The back of my door skins have quite a bit of surface rust which I'm going to have to treat somehow. Also the seams where the skin folds over the frames trap moisture, so it would be nice to take the whole skin off and treat the whole frame.
I'm on quite a tight budget so had to go for repair panels at £15 a door and strike a bit of a compromise. These doors will still last a long while when done but I would have loved to have re-skinned them!
|
| |
|
|
Em
Part of things
Fuel Injected? Carb Infested!
Posts: 601
|
|
Mar 28, 2011 17:00:31 GMT
|
|
Yeah, those are all good points!
I might blow the budget and go for full skins, but at £87.20 Vs. £15, your compromise makes a lot of sense!
Better raid the piggy bank!
|
| |
|
|
|
|
|
Mar 28, 2011 19:08:44 GMT
|
|
Looks good BB!
don't forget to drill holes at the bottom of the cracks before youweld them.
|
| |
Koos
|
|
|
|
|
Mar 28, 2011 21:05:20 GMT
|
I was just thinking today that it must be about painting weather by now fella...  |
| |
1937 Austin Street Rod - 1941 Wolseley Not Rod - 1956 Humber Hawk - 1957 Daimler Conquest - 1966 Buick LeSabre - 1968 Plymouth Sport Fury - 1968 Ford Galaxie - 1969 Ford Country Squire - 1969 Mercury Marquis - 1970 Morris Minor - 1970 Buick Skylark - 1970 Ford Galaxie - 1971 Ford Galaxie - 1976 Continental Mark IV - 1976 Ford Capri - 1976 Rover V8 - 1994 Ford Fiesta
|
|
|
|
1967 Bond Equipe GT4SBenzBoy
@benzboy
Club Retro Rides Member 7
|
Mar 31, 2011 15:15:51 GMT
|
Looks good BB! don't forget to drill holes at the bottom of the cracks before youweld them. Cheers!  I drilled as suggested. I dunno why these doors split so much but they all seem to do it! I was just thinking today that it must be about painting weather by now fella... Yes! Weather's getting nice and I'm getting closer to having it ready. Going to pick up some thinners soon and start planning how it's all gonna be done. Small update: I started working on the splits at the top of the door. The major one was quite far advanced and had rusted in the split. I drilled it out but found it better to chop out a section and let a new piece of steel in.  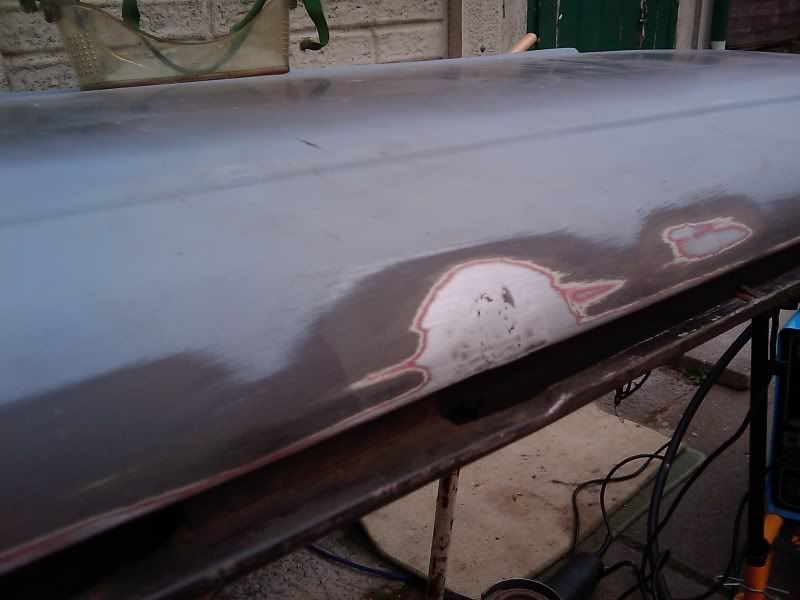 ^ Welded and ground down. After this was a thin skim of filler and a waft of primer. The rest of the cracks were fairly small and my work was really a "pre-emptive strike" to stop them turning into bigger splits, so they were stopped in their tracks with some drilling and zapping with the MIG. That's the driver's door just about done. I've got a bit more priming to do, and tiny scraps of rust to treat on the frame. I took a trip to the scrappy today - one of my tyres has an annoying slow puncture (all my bloody cars seem to have them!) and my spare is an ancient (20 years old) remould. I thought I ought to get that sorted so went and got a tyre put on the spare. The bloke couldn't do it straight away so I took a wander around the scrappy for a bit and left the wheel with him. I thought I'd have a look for a carpet whilst I was there - the Bond doesn't have any as I binned all the soggy rotten remains some time ago. Trouble was, I hadn't brought any tools with me, so I was hoping to come across a likely candidate that someone had stripped the seats out of. I came across a Peugeot 106 with the seats missing, and with a bit of wrestling and cursing, I liberated the carpet: 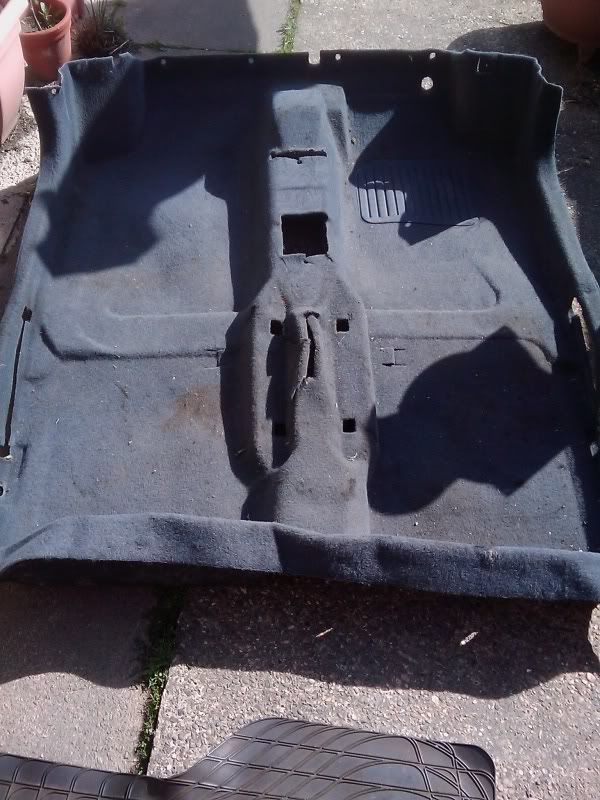 It's a mid-grey and I would have preferred black, but not many cars come with black carpet. Still, it'll be great I think. I'll obviously need to do some trimming and cutting but the floor of the Bond is a simple shape. You can get new carpet sets for Heralds but they're £90-odd quid and I can't really stretch to that at this point. I also found this for the boot: 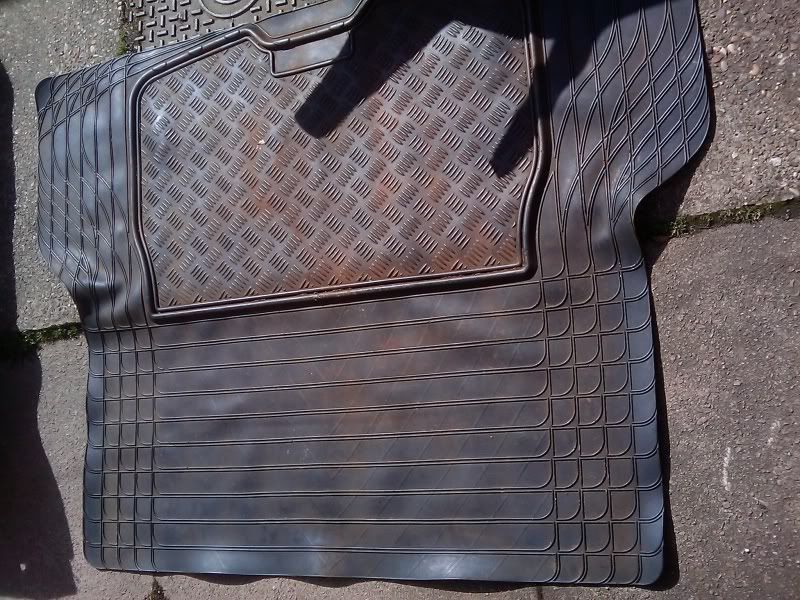 ^ It's the load liner from a Ssangyong Musso! When I make a solid boot floor to go over the spare wheel well, I'll trim the rubber to size and lay it over it. Will look pretty neat I think. Not sure what to use as the boot floor thing - wood or MDF just seems wrong, but I can't think of what else to use. The carpet and boot liner cost me a tenner all in. I'm pretty pleased with that, especially since someone else did all the donkey work of taking the interior out! ;D Thanks for looking. More soon. |
| |
Last Edit: Mar 31, 2011 15:42:08 GMT by BenzBoy
|
|
MrSpeedy
East Midlands
www.vintagediesels.co.uk
Posts: 4,786
|
|
Mar 31, 2011 17:29:16 GMT
|
|
Good work on them door repairs. Coming along nicely.
|
| |
|
|
Seth
South East
MorrisOxford TriumphMirald HillmanMinx BorgwardIsabellaCombi
Posts: 15,513
|
|
Mar 31, 2011 19:07:35 GMT
|
Neat work there Dean. That colour is going to look really nice too. |
| |

Follow your dreams or you might as well be a vegetable. |
|
|
|
|
|
1967 Bond Equipe GT4SBenzBoy
@benzboy
Club Retro Rides Member 7
|
Mar 31, 2011 21:46:28 GMT
|
|
Cheers guys, it's getting there! If the weather's half decent tomorrow I'll get a bit more done.
I'm not driving the car enough at the moment, I really want to put some miles on it this year!
|
| |
|
|
|
|
|
|
|
|
Be interesting to see how well the carpet fits.
|
| |
Koos
|
|
|
|
1967 Bond Equipe GT4SBenzBoy
@benzboy
Club Retro Rides Member 7
|
|
|
Be interesting to see how well the carpet fits. Me too! ;D The rear section is still in the car so I have a template for that bit. The front footwells are carpetless so I'll make up some templates and chop away. I'll be giving the floor a good coat of POR15 and fitting new door seals before putting carpet in. Don't want to be battling soggy carpets again! I got a bit distracted today and was playing with some ICE. I bought an old Kenwood KAC-820 amp (1988 vintage) which was advertised as not working and missing the plug. At £3.99 plus postage, I figured I'd take a chance. 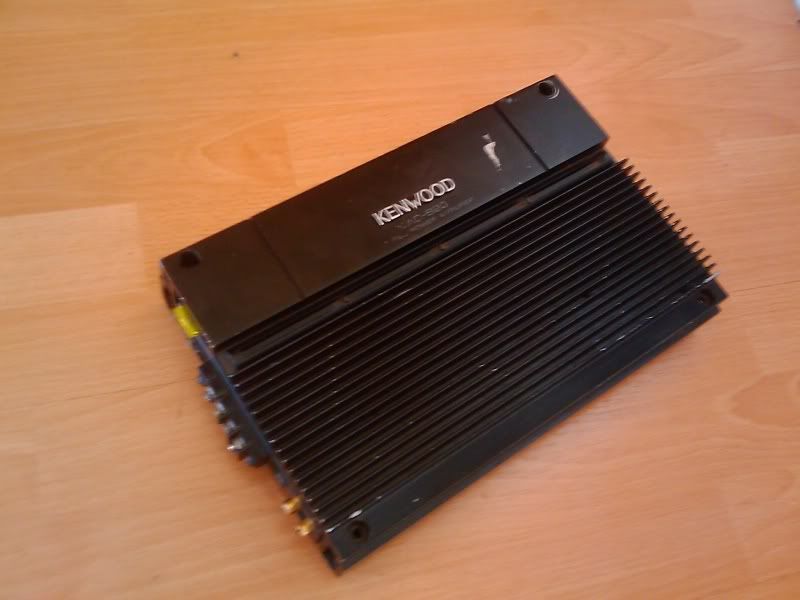 ^ Forgive the blurry phone cam shots. This amp is one solid chunk of aluminium. Good job it's solid as it was just wrapped in a sheet of bubble wrap and sent to me! It survived though. I downloaded the owner's manual and the service manual - I couldn't find a power lead anywhere so I thought I'd figure out what pins do what and make up a loom.  ^ Please excuse the choc blocks. Those are definitely temporary as I just wanted to hook it all up and see if it worked! 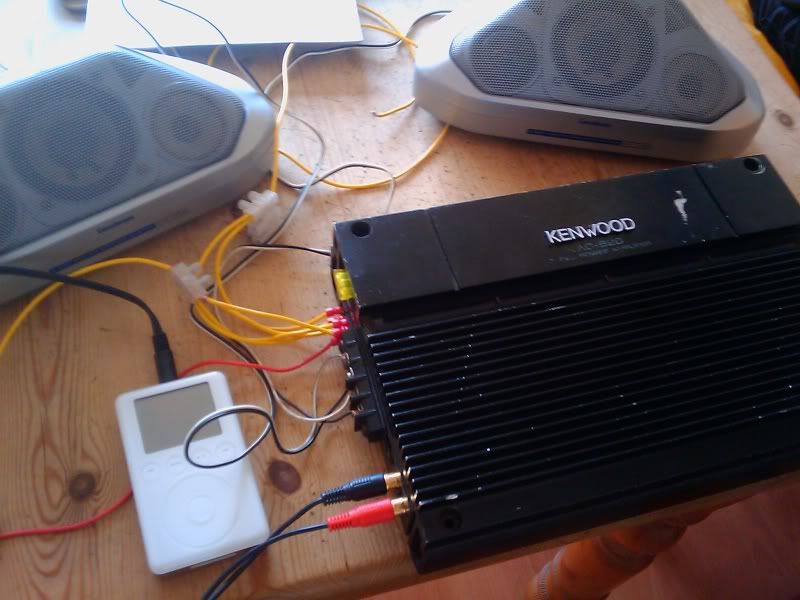 ^ Hooked the amp up to a battery, stuck some cheapo shelf speakers onto it, and put my iPod though it using a 3.5mm to RCA lead. It works! It'll be a fair while before I put it in the car, I've got loads more pressing things to do and I'm still enjoying the exhaust noise. I'll get some better speakers which won't get blown apart and make a proper wiring loom up. |
| |
|
|
|
|
|
|
|
|
great stuff. Theoretically I have a bit more time on my hands now, need to pop over and see how this is coming together.
|
| |
1937 Austin Street Rod - 1941 Wolseley Not Rod - 1956 Humber Hawk - 1957 Daimler Conquest - 1966 Buick LeSabre - 1968 Plymouth Sport Fury - 1968 Ford Galaxie - 1969 Ford Country Squire - 1969 Mercury Marquis - 1970 Morris Minor - 1970 Buick Skylark - 1970 Ford Galaxie - 1971 Ford Galaxie - 1976 Continental Mark IV - 1976 Ford Capri - 1976 Rover V8 - 1994 Ford Fiesta
|
|
|
|
1967 Bond Equipe GT4SBenzBoy
@benzboy
Club Retro Rides Member 7
|
|
|
great stuff. Theoretically I have a bit more time on my hands now, need to pop over and see how this is coming together. Sure! I was meaning to ask you about drilling the wheels too. |
| |
|
|
|
|
|
|
|
Be interesting to see how well the carpet fits. I bought an old Kenwood KAC-820 amp (1988 vintage) which was advertised as not working and missing the plug. At £3.99 plus postage, I figured I'd take a chance. Now thats my kinda price! I bought a graphic equaliser/amp for a fiver with the idea of plugging my iphone into it for tunes. ;D |
| |
Koos
|
|
|
|
1967 Bond Equipe GT4SBenzBoy
@benzboy
Club Retro Rides Member 7
|
Apr 23, 2011 19:10:03 GMT
|
My Wheels DayGood day today! I took a trip to see Nathan (BGTMidget) to use his pillar drill to widen the stud holes in my Weller wheels. I haven't been able to test-fit them properly yet as I couldn't fit them over the studs. Alex Lizardking kindly lent me a 13mm drill bit too. I did plan to use a step drill but drilling to 13mm gives a bit more play to fit the wheels over the studs. It was a bit nerve-wracking as I really like these wheels, and I didn't want to screw up. This is why Nathan left me to my own devices too! ;D It's been a while since I've used a pillar drill but after playing around getting the wheel set up, it all went smoothly! 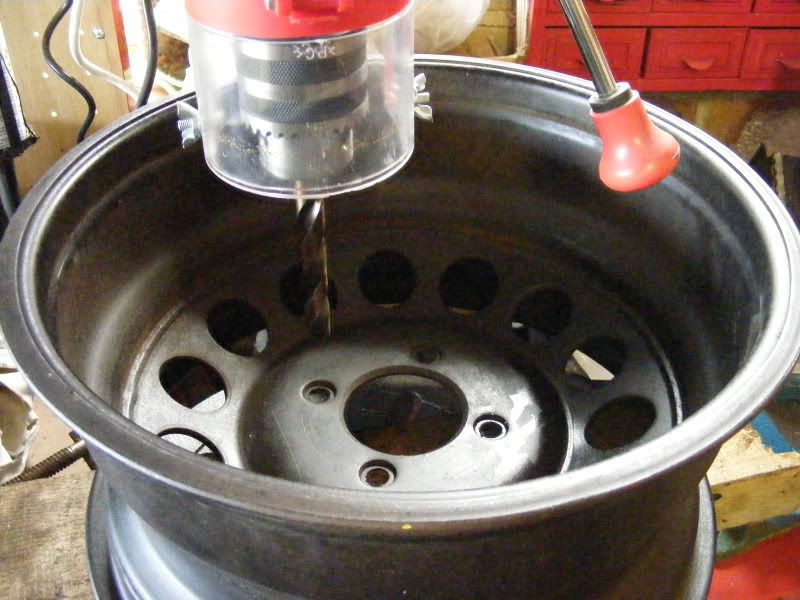 ^ The patient is ready on the operating table. I decided to drill from the back, to minimise damage to the seats. 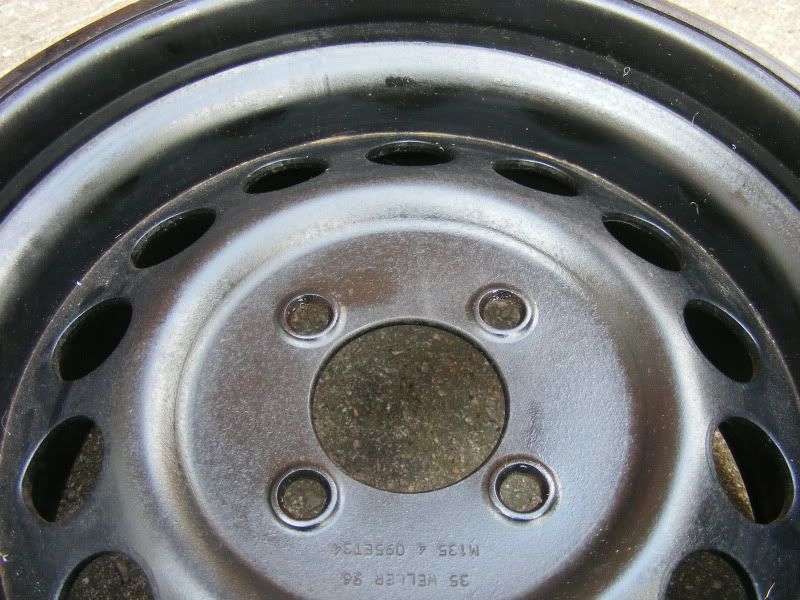 ^ Job done. Once they were drilled it was time to trial fit them! As expected, the wheels contacted the swing arms without spacers, but thanks to the awesomeness of Kevfromwales I had a solution! 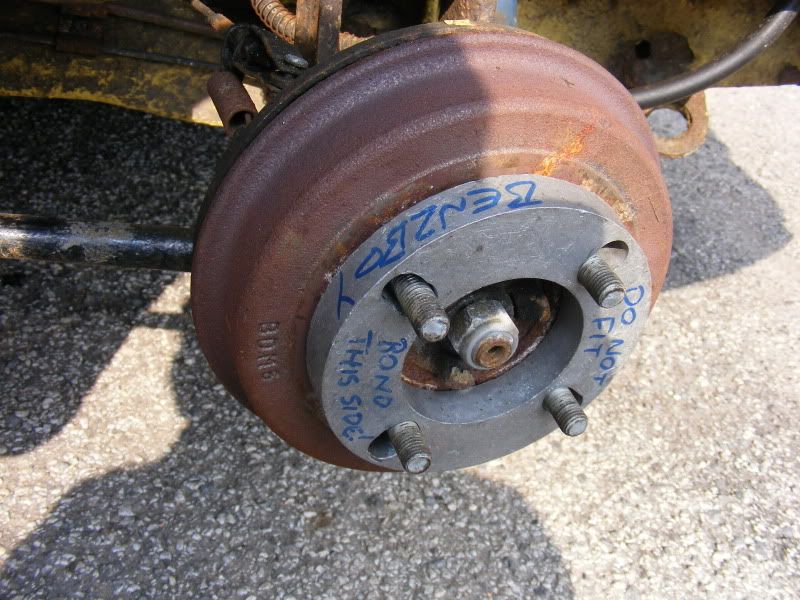 ^ Kev's 19mm spacers. 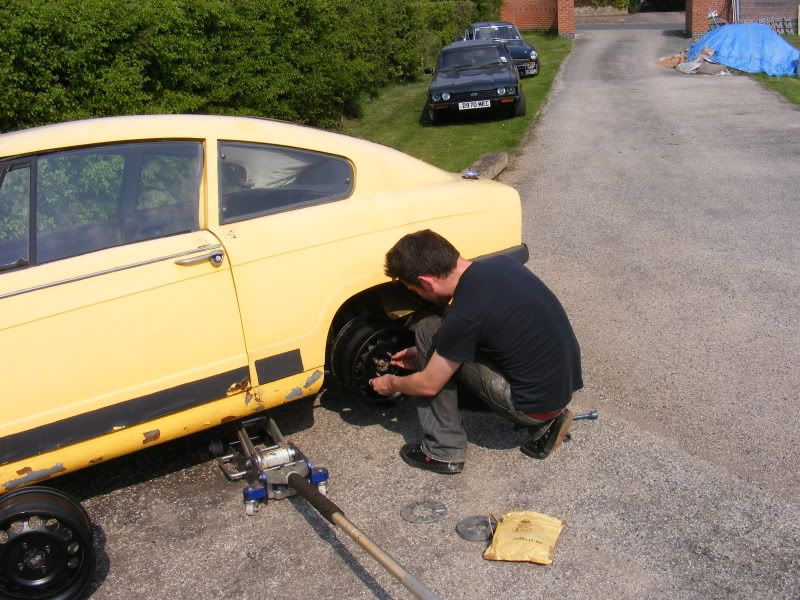 ^ Time to see what we're up against... 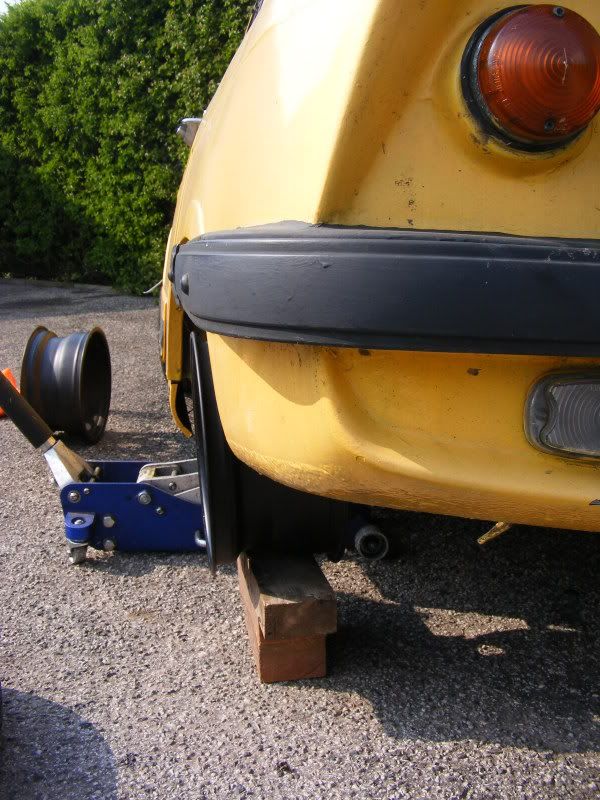 ^ We let it down on some wood and bricks just to see how the wheel sat. Looking good! 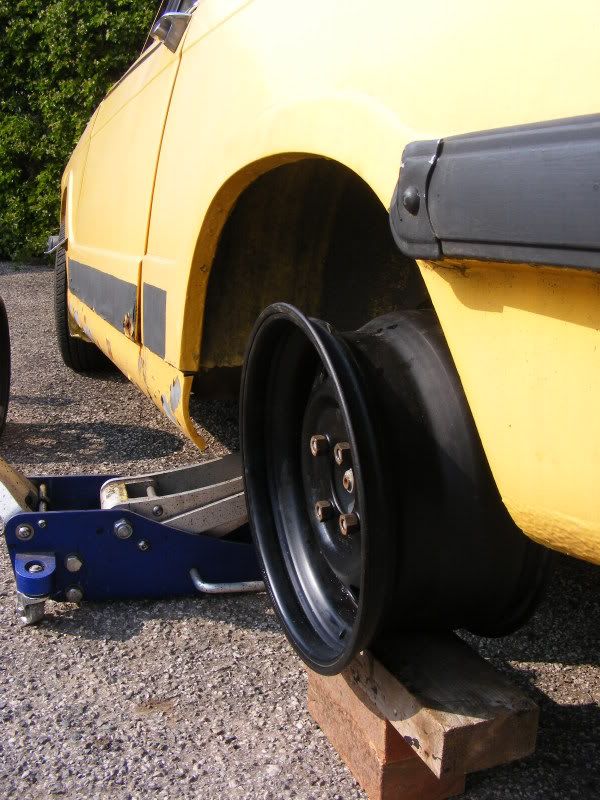 ^ Despite not being completely settled (lots of positive camber still), it looks like the wheel will sit inside the arch. 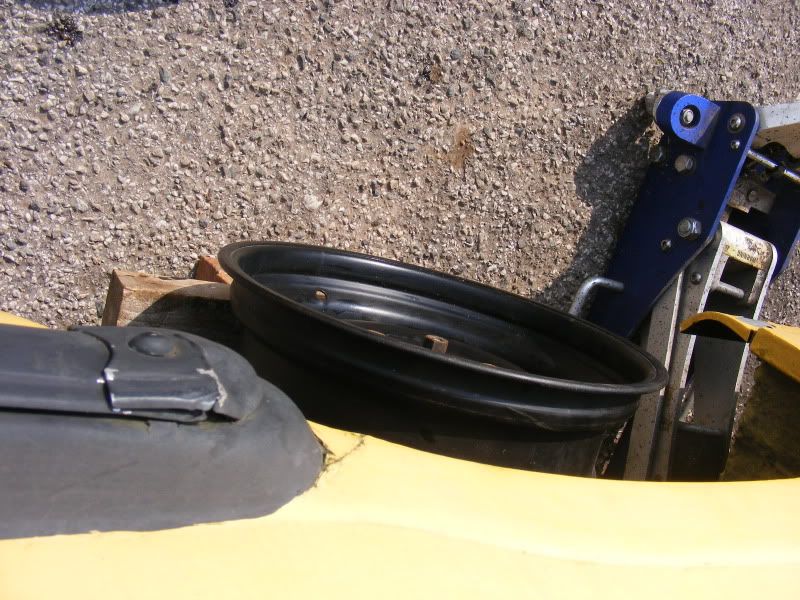 ^ Looks good from up here! But what's going on at the back?! 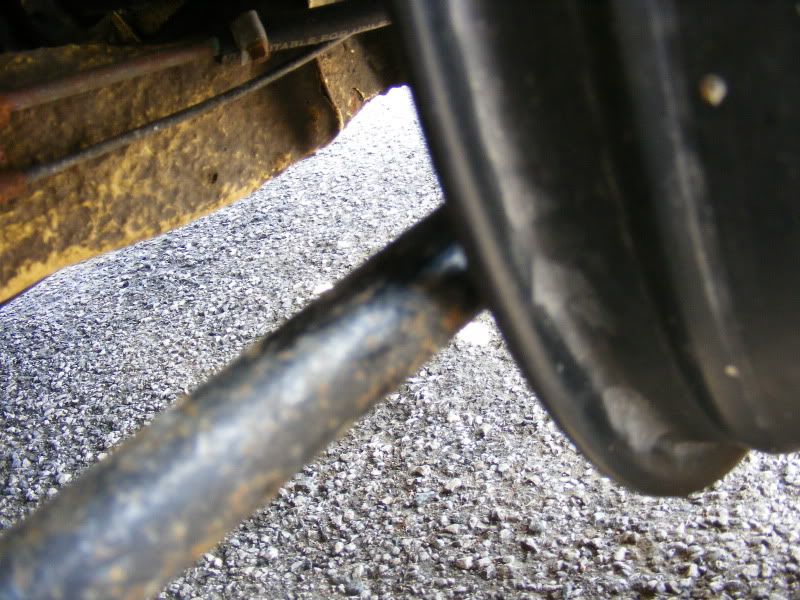 ^ 4mm clearance I reckon (sorry for the blurry pic). As the swing arm continues to get further away from the wheel from that point, I'm hopeful that tyres won't pose a major problem once they're on. I can always space it out a little more if necessary. 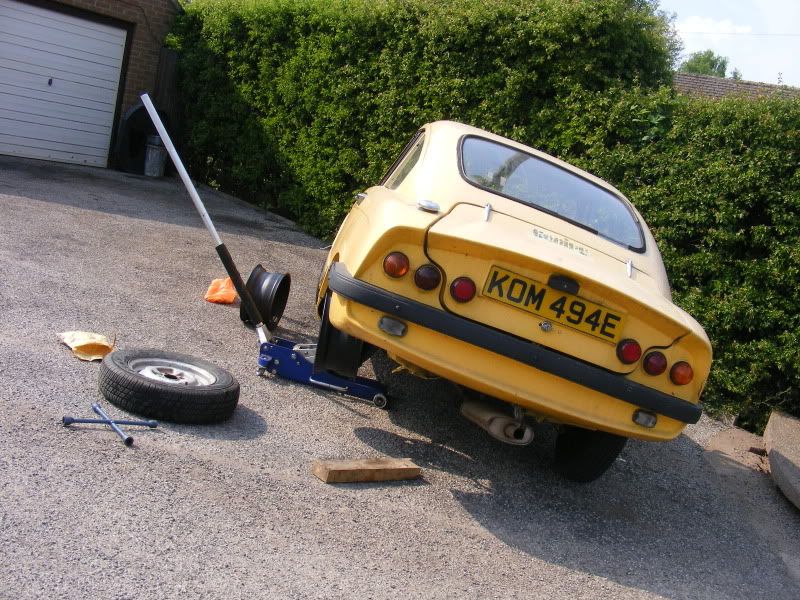 ^ I'm pleased about the way they fill the arches more. I think the Bond desparately needs that! Can't wait to see it with the wheels on the ground and sitting nicely. 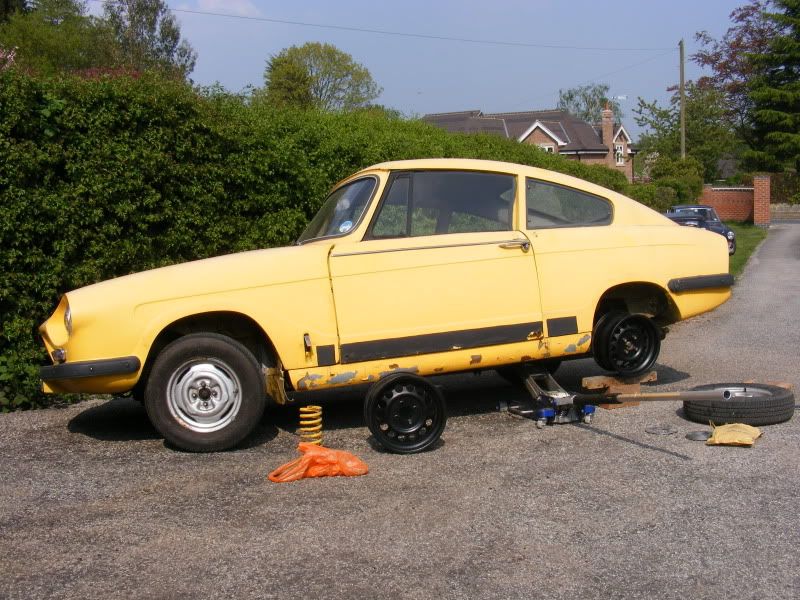 ^ Although the black looks great against the yellow, I'm painting the wheels silver for the "classic racer" look, which I think will go nicely with the light blue bodywork. In other news, the work on the doors continues... 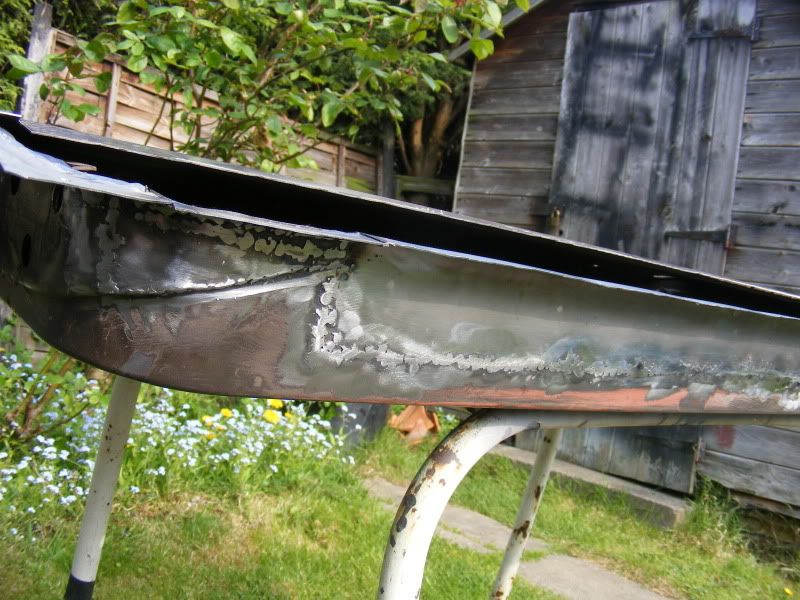 ^ Frame was chopped and welded 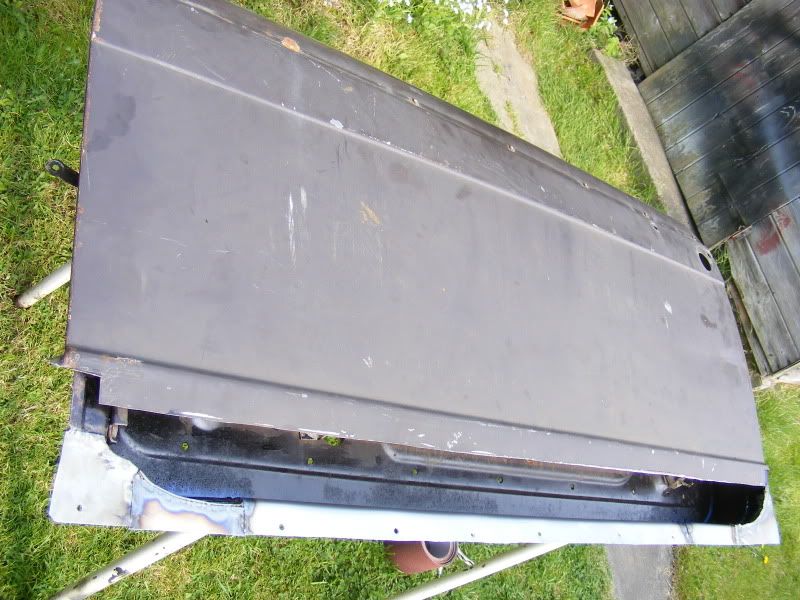 ^ Grotty door skin cut out. 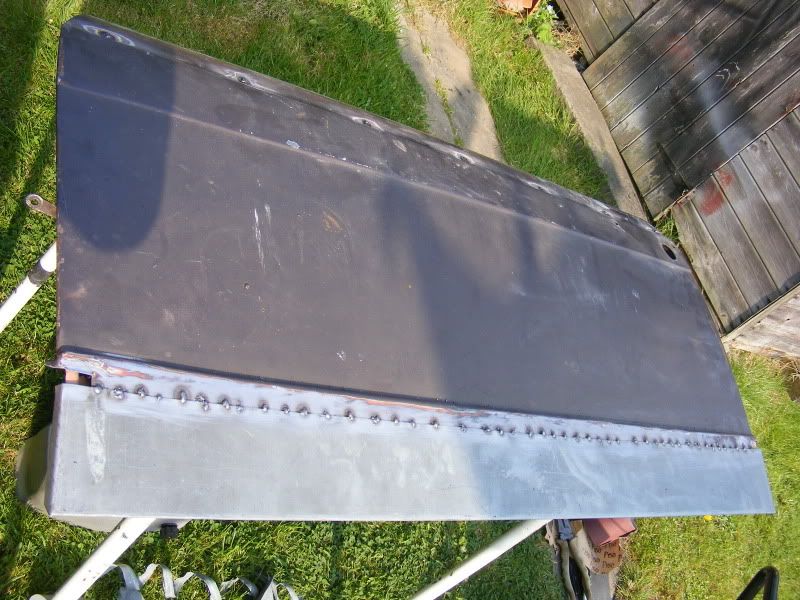 ^ New steel tacked in. This is part-way through the welding. All the welding is now done and the welds ground down, I've painted inside the frame and seam-sealed all the welding so next up is the joyful task of filling and sanding... I'll be glad when the doors are done to be honest.
|
| |
Last Edit: Apr 23, 2011 19:48:45 GMT by BenzBoy
|
|
|
|
Nathan
Club Retro Rides Member
Posts: 5,626
Club RR Member Number: 1
|
1967 Bond Equipe GT4SNathan
@bgtmidget7476
Club Retro Rides Member 1
|
|
|
|
As said yesterday dude, thats gonna look amazing on those wheels.
Happy to help mate, anytime.
|
| |
|
|
|
|
|
Apr 24, 2011 14:48:45 GMT
|
|
Could you reverse those wheels? They'd look awesome!
|
| |
Koos
|
|
|
|


 I drilled as suggested. I dunno why these doors split so much but they all seem to do it!


