|
|
|
Mar 15, 2012 20:26:03 GMT
|
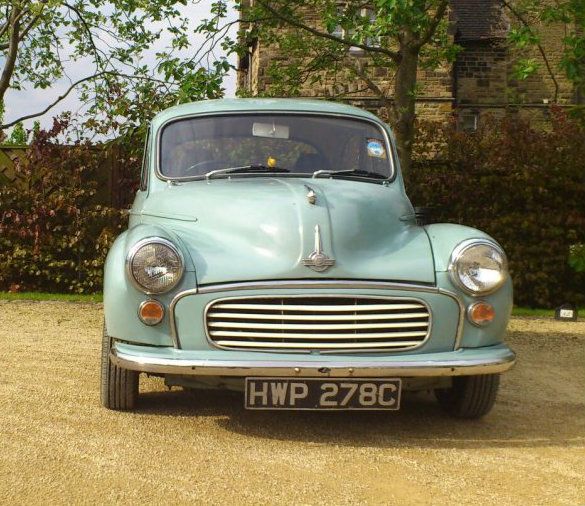
I finally had a chance to make a small start on Joannes '67 beetle resto today. After collecting and importing parts over the last year, getting Jack to make me a set of his amazing axle stands and re-roofing the garage that I will be working in it was time today to make a start. This is the last picture of the car complete and on the ground; 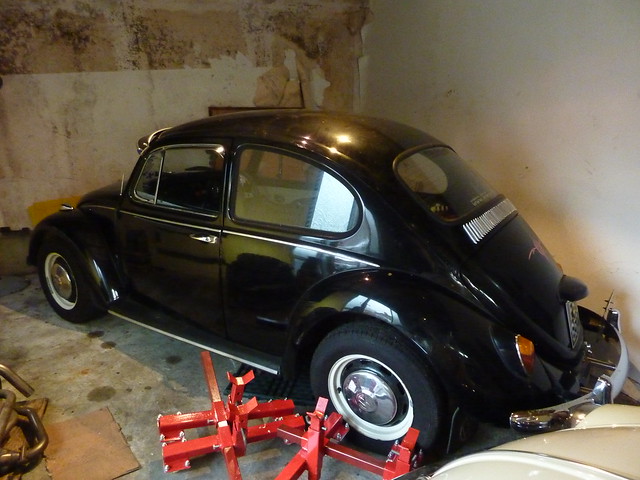 P1120983 P1120983 by route9autos.co.uk, on Flickr These are the axle stands that Jack is making and they will be incredibly usefull for the restoration. 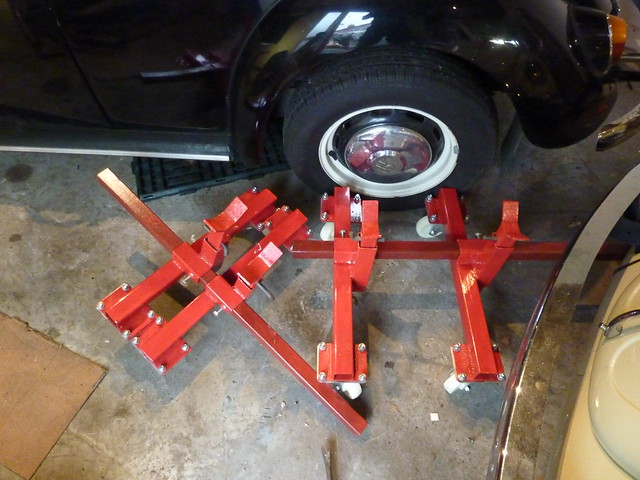 P1120984 P1120984 by route9autos.co.uk, on Flickr With the wheel bolts loosened and the car up on the stands it can be moved around very easily, important as the garage isnt the biggest and Marks 69 cabrio will be getting worked on at the same time. Here is the view of the stands from underneath;  P1120988 P1120988 by route9autos.co.uk, on Flickr  P1120990 P1120990 by route9autos.co.uk, on Flickr With it up off the floor I have more space to get underneath. The stands height is adjustable and they can go highter if I need them to. The car is not rotten but the pan edges are starting to go along with the rear corners and jacking points so its time to do it properly instead of patching it up only to have to cut the patches out at a later date. I'm hoping the floor pan bolts undo without too much of a fight but unlikely;  P1120992 P1120992 by route9autos.co.uk, on Flickr Plans for the resto are to; Fit the new 18 guage floorpans I imported from Wolfsburg west in California. Fit the heater channels I had cut from a rust free early Beetle and imported from California. Fit the '67 only rear vallance and engine side trays that came from a rust free bug in Cali'. Do any welding that comes up (thinking front bulkhead needs work). Prep and paint, Re-trim and new engine. Might not be the fastest resto in the world but I will try and keep this thread updated as I go along. Dave. |
| |
|
|
|
|
Onne
Part of things

Posts: 822
|
|
|
|
|
Very nice, looking forward to the progress
|
| |
1990 Mercedes W126 300SE
1997 Mercedes W140 S320L
|
|
|
|
|
Mar 16, 2012 10:37:37 GMT
|
|
bookmarked this one.
|
| |
|
|
jmsheahan
Club Retro Rides Member
Posts: 682
Club RR Member Number: 121
|
|
Mar 16, 2012 12:13:54 GMT
|
|
Bookmarked too. Your Fastback is stunning and no doubt this will turn out the same way.
Those stands look fantastic - any more details on them?
Best of luck with the resto.
|
| |
|
|
|
|
|
Mar 16, 2012 16:53:42 GMT
|
Bookmarked too. Your Fastback is stunning and no doubt this will turn out the same way. Those stands look fantastic - any more details on them? Best of luck with the resto. If I manage to get it close to the fasty I will be satisfied. I will get details on the stands, its a really good mate that is making them. Dave |
| |
|
|
|
|
|
Mar 18, 2012 14:57:00 GMT
|
|
|
| |
|
|
|
|
|
Mar 18, 2012 15:44:48 GMT
|
|
If the work on this is as good as the work on your Type 3, looking forward to following it !
|
| |
BMW E39 525i Sport
BMW E46 320d Sport Touring (now sold on.)
BMW E30 325 Touring (now sold on.)
BMW E30 320 Cabriolet (Project car - currently for sale.)
|
|
|
|
|
Mar 18, 2012 17:45:48 GMT
|
|
Spot on Tickman, thats Jacks listing.
I would have had more work done this weekend but a certain knot was tied on Friday and a honeymoon is now due to be taken next week.
I will crack on as soon as I am back.
Dave.
|
| |
|
|
Clement
Europe
ambitious but rubbish
Posts: 2,095
|
|
Mar 18, 2012 19:30:29 GMT
|
Congrats ! Too bad there's no church wide enough to drive to the altar with the Type 3 and the Type 1  |
| |
|
|
|
|
|
Mar 18, 2012 23:01:02 GMT
|
Congrats ! Too bad there's no church wide enough to drive to the altar with the Type 3 and the Type 1 True....... So I took my vans ;D  wedding day 14 wedding day 14 by route9autos.co.uk, on Flickr Dave |
| |
|
|
|
|
|
|
|
|
|
Wedding and honeymoon over and time to get some work done. Started the strip down today and not surprisingly the rear wing bolts were either seized solid or the captive nuts were no longer captive. One thing for it, grind 'em off. 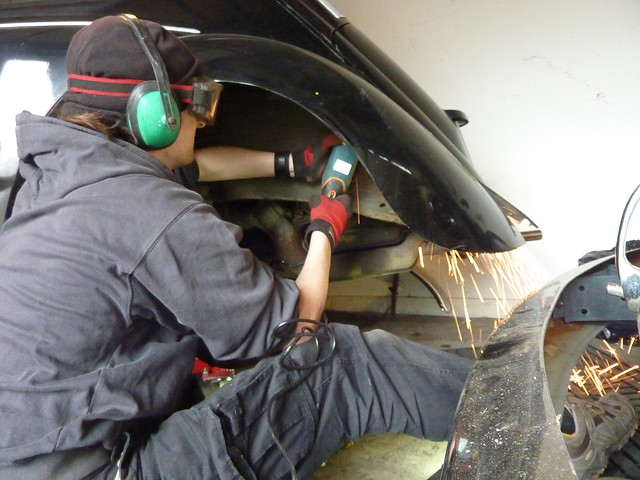 P1140450 P1140450 by route9autos.co.uk, on Flickr With both rear wing off, bumpers off and front offside wing off I could start to guage the tin worm; 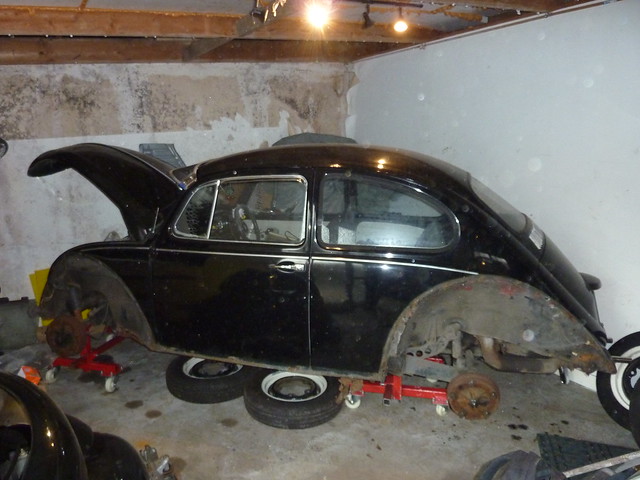 P1140459 P1140459 by route9autos.co.uk, on Flickr The offside rear 1/4 and inner wing seems to be pretty grotty; 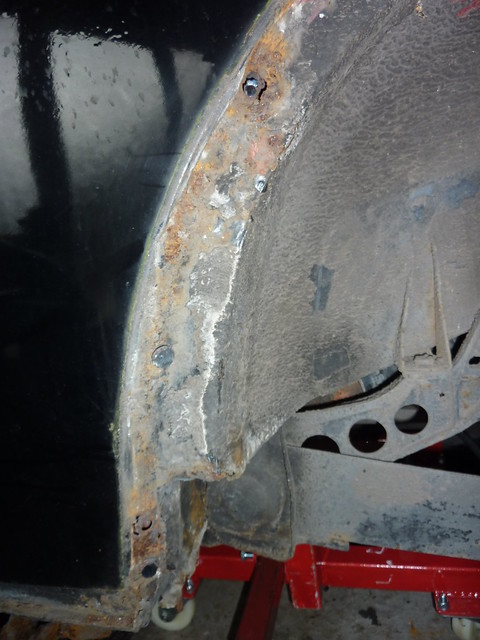 P1140461 P1140461 by route9autos.co.uk, on Flickr Jacking points and rear floorp and are a very common rot spot so it was no surprise that the jack point easily broke away in my hand. The new pans will not have jacking points fitted as they are just too much of a dirt trap and very hard to paint behind. 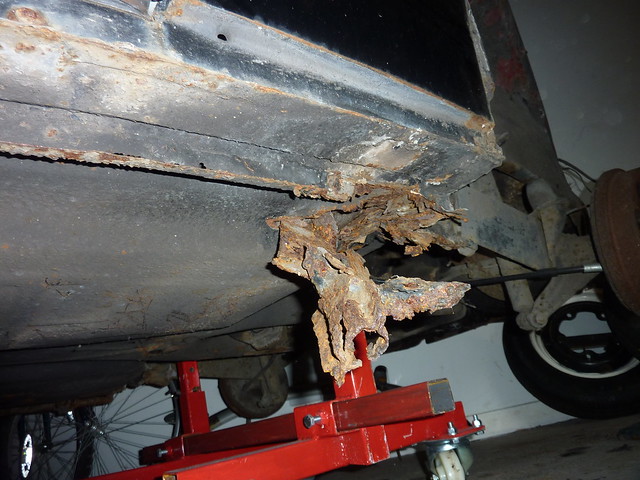 P1140462 P1140462 by route9autos.co.uk, on Flickr Rest of the sill and heater channel bottom plate don't look too bad but you can see the perforations in the floor pan edge in this pic; 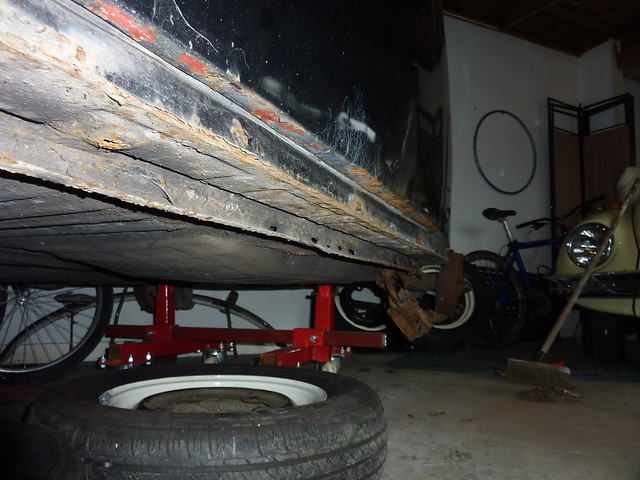 P1140465 P1140465 by route9autos.co.uk, on Flickr Front inner wing was pretty good but still a bit of work needed where the bulkhead has rusted through the corner; 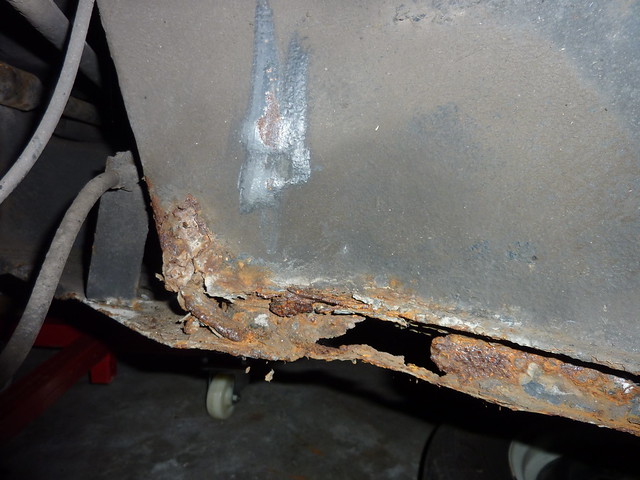 P1140463 P1140463 by route9autos.co.uk, on Flickr Not looking worse than expected which is a bonus so hope to get back to it soon. |
| |
|
|
dungbug
Posted a lot
'Ooligan!
Posts: 2,852
|
|
|
|
Looks like a very sound base for a resto, looking at your other Dubs it's in very good hands. Best of luck with the project, hopefully you'll get time to add some updates.  |
| |
Past: 13 VW Beetles from 1967 - 1974
Bay Window Campers (1973 & 1974)
Mini's (1992 Cooper lookalike & 1984 '25 Anniversary)
MK2 Polo Coupe S (1984 & 1986)
MK2 Polo Breadvan (1981 & 1984)
MK4 Escort (1989)
MK2 Granada Based Hearse (seriously)
Fiat Uno 60S (1986) Punto 60S (1998) Cinq (1997)
1998 Yamaha YZF600R Thundercat
2003 Ford KA
Current: 2004 Ford Focus (barely alive)
|
|
|
|
|
|
|
Cheers Dungbug. The car is generally very good but has isolated areas needing work so decided instead of chasing the rot and building up more work for myself later it was time to go for a full resto. I don't know that updates will always be this regular but with another day off for the bank holiday I got more work completed. Offside front wing came off first and the inner wing is better than the nearside;  P1140469 P1140469 by route9autos.co.uk, on Flickr Same can be said for all of the offside body but strangely the floor and heater channel on this side look worse than the nearside. With the last wing off and the tailpipes removed the car now fits perfectly (with the bonnet open and heater removed) across the garage. These stands are worth their weight in gold; 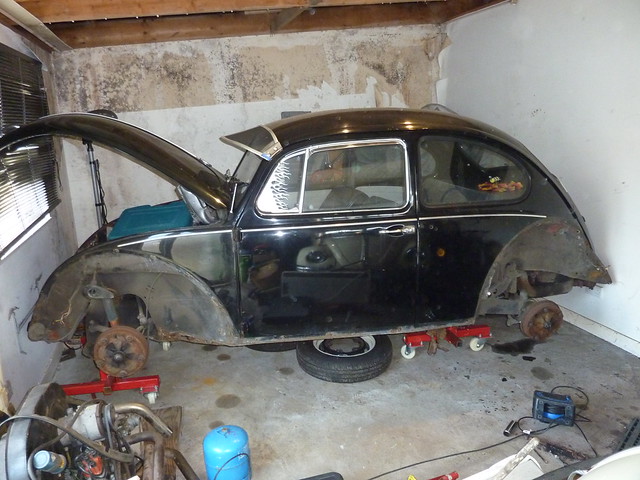 P1140468 P1140468 by route9autos.co.uk, on Flickr Inside the car the sill and floor look not bad, just a bit scabby round the edges;  P1140482 P1140482 by route9autos.co.uk, on Flickr 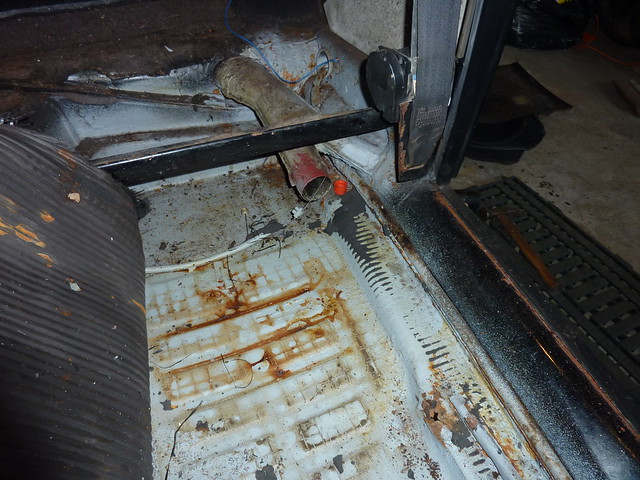 P1140483 P1140483 by route9autos.co.uk, on Flickr But going by the floor pan bolts there is a fair bit of rusted steel inside the heater channels. The top of this bolt would stick up inside the channel.; 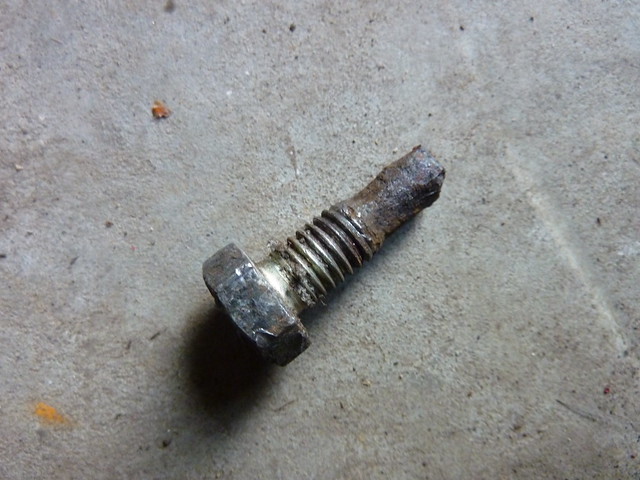 P1140485 P1140485 by route9autos.co.uk, on Flickr Wings arent in the safest place but at least they look pretty;  P1140488 P1140488 by route9autos.co.uk, on Flickr Next job is to strip out the interior then I can start getting ready to cut. Dave. |
| |
|
|
dungbug
Posted a lot
'Ooligan!
Posts: 2,852
|
|
|
|
|
Admittedly the condition looks pretty good........I've driven alot worse. ;D
|
| |
Past: 13 VW Beetles from 1967 - 1974
Bay Window Campers (1973 & 1974)
Mini's (1992 Cooper lookalike & 1984 '25 Anniversary)
MK2 Polo Coupe S (1984 & 1986)
MK2 Polo Breadvan (1981 & 1984)
MK4 Escort (1989)
MK2 Granada Based Hearse (seriously)
Fiat Uno 60S (1986) Punto 60S (1998) Cinq (1997)
1998 Yamaha YZF600R Thundercat
2003 Ford KA
Current: 2004 Ford Focus (barely alive)
|
|
|
|
|
Apr 11, 2012 17:39:06 GMT
|
Todays update; First job was to dig out the donor heater channel so that I had an idea how much of the car will come off; 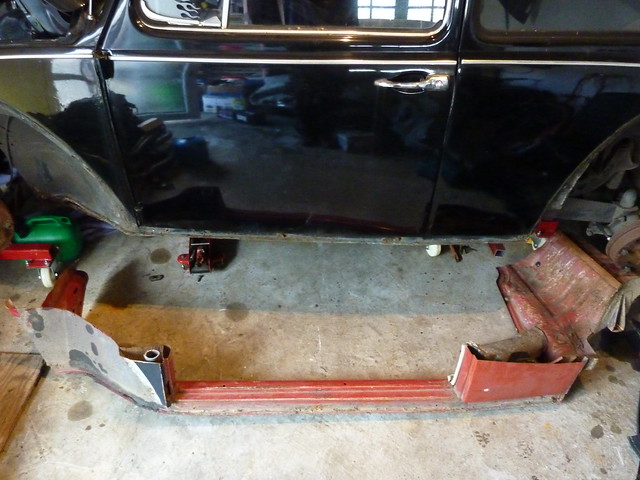 P1140490 P1140490 by route9autos.co.uk, on Flickr As you can see there is a good bit of panel work still attatched to the channels from California and I plan to use as much of this metalwork as I can. It also lets me paint the inside of the heater channels before fitting as I am never directly welding to the channel. This is the grotty rear 1/4 before cleaning; 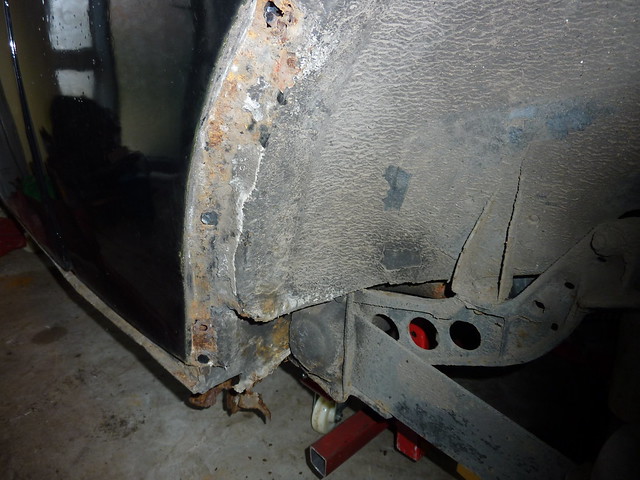 P1140492 P1140492 by route9autos.co.uk, on Flickr And after; 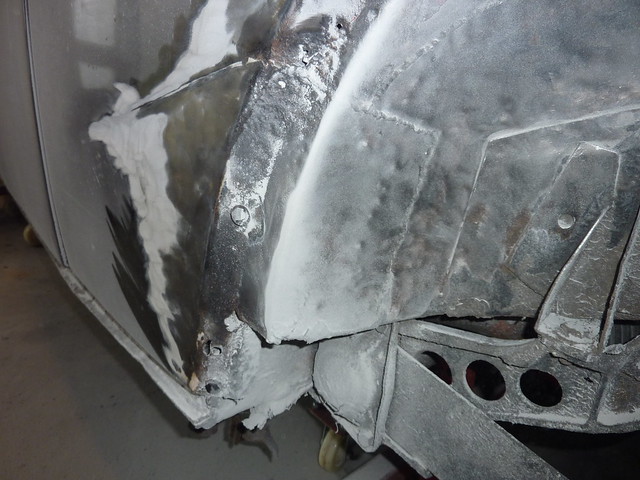 P1140494 P1140494 by route9autos.co.uk, on Flickr For some reason the weld inside the arch is a nice neat butt welded seam but where the panel is on the outside of the car its a messy overlap, spotwelded and sculpted in filler Its not just a skim of filler, I think the artex on my ceiling is thinner (pound coin for reference); 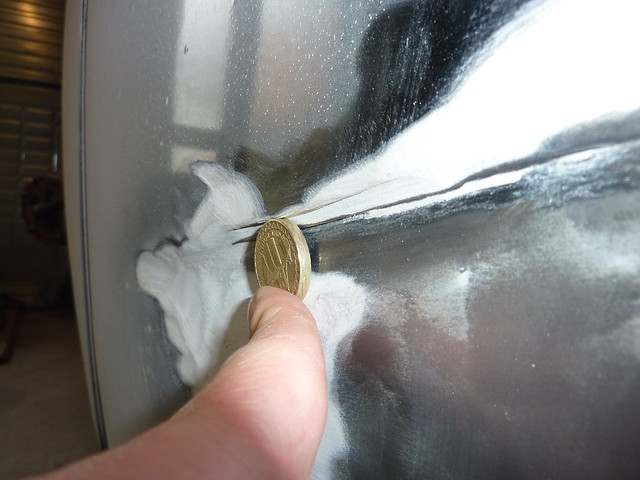 P1140495 P1140495 by route9autos.co.uk, on Flickr At least the dust saved me having to find a white pen to mark my line; 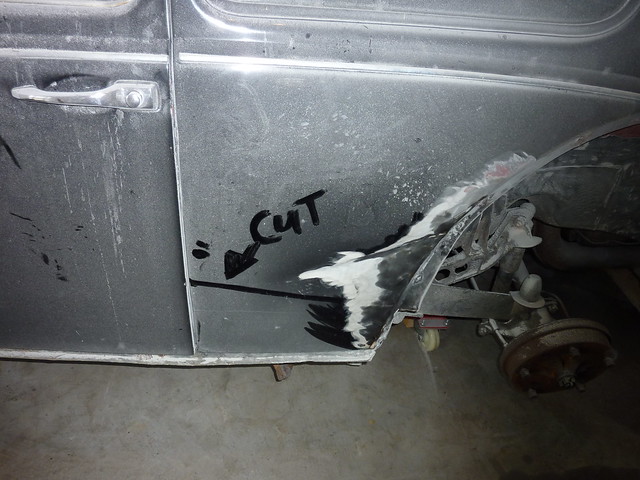 P1140498 P1140498 by route9autos.co.uk, on Flickr At the front it dosnt look so bad......Yet; 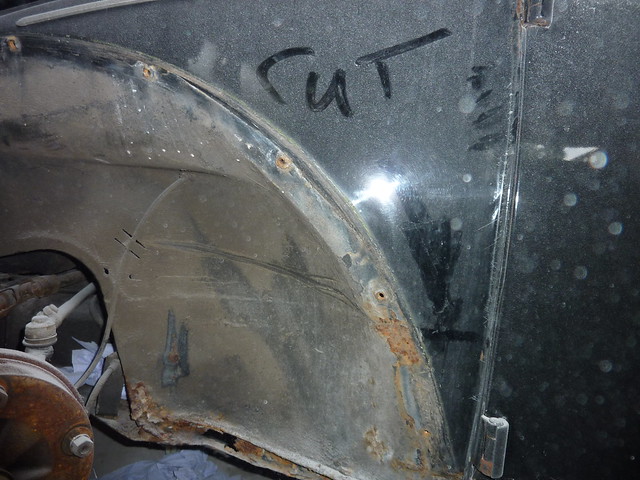 P1140501 P1140501 by route9autos.co.uk, on Flickr After a clean up the new panel should come higher than the previous repair which will make fitting easier and neater; 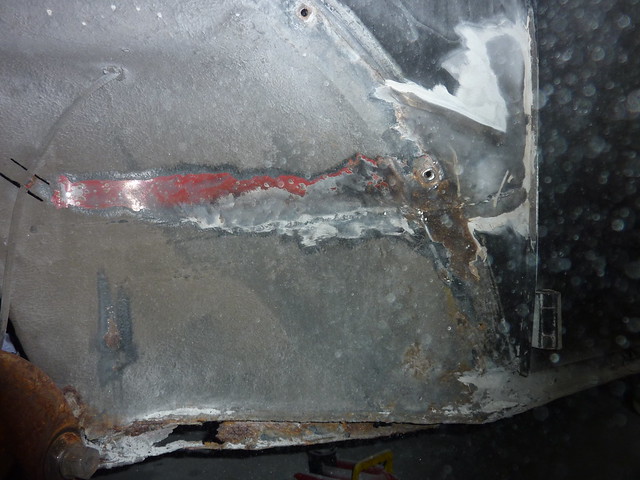 P1140503 P1140503 by route9autos.co.uk, on Flickr Except the same sculpter has applied his skills to filling the front 1/4 panel; 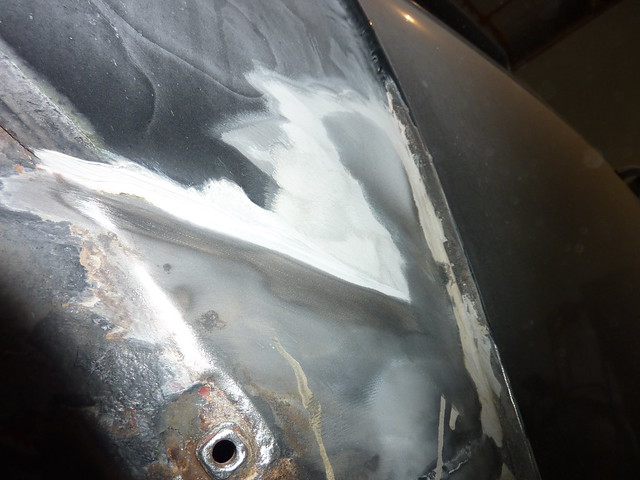 P1140504 P1140504 by route9autos.co.uk, on Flickr So here is where I left it tonight...... VERY dusty work so I think I will invest in a mask before my next session; 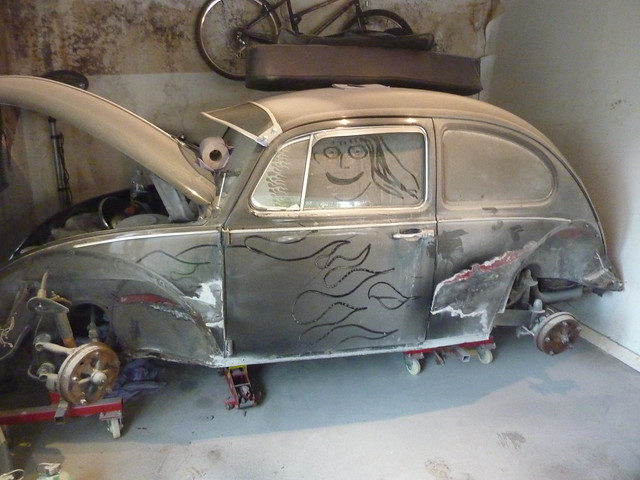 P1140507 P1140507 by route9autos.co.uk, on Flickr I think before I go on I need to go and find my welder, buy some steel for patches and some other supplies. Dave. |
| |
|
|
dungbug
Posted a lot
'Ooligan!
Posts: 2,852
|
|
Apr 23, 2012 15:16:26 GMT
|
|
Good progress, smart move to paint the inside of the channels as well. Is it staying black or are you going for a colour change?
|
| |
Past: 13 VW Beetles from 1967 - 1974
Bay Window Campers (1973 & 1974)
Mini's (1992 Cooper lookalike & 1984 '25 Anniversary)
MK2 Polo Coupe S (1984 & 1986)
MK2 Polo Breadvan (1981 & 1984)
MK4 Escort (1989)
MK2 Granada Based Hearse (seriously)
Fiat Uno 60S (1986) Punto 60S (1998) Cinq (1997)
1998 Yamaha YZF600R Thundercat
2003 Ford KA
Current: 2004 Ford Focus (barely alive)
|
|
|
|
|
Apr 23, 2012 20:37:15 GMT
|
|
It will remain Black this time. I didnt get work done on the car this weekend as I was servicing my welder, puting up new strip lights in the garage and enjoying the sun.
I have had a thought about visiting a galvanizers and seeing if they can dip the donor heater channels, my thinking being that I can clean off an inch of the coating along the weld line.
Dave.
|
| |
|
|
LambDrover
Part of things
Fuelling up the Firebird...
Posts: 764
|
|
Apr 23, 2012 21:13:39 GMT
|
I've MoT'd worse... This is by far the Best Beetle My MoT man would say he's seen |
| |
|
|
|
|
|
Apr 29, 2012 21:44:34 GMT
|
I finally have a proper update for the thread. I spent today cleaning off more of the filler, first of all on the front quarter. Here is a quick video showing just how messy this job is for anybody who has yet to experience the fun of filler removal; www.flickr.com/photos/route9autos/6979704176/That left me with an almost bare quarter panel.  P1140604 P1140604 by route9autos.co.uk, on Flickr All looks ok but there is a serious low area behind the wing mountin area which would explain all the filler. I cant work out if its accident damage or poor previous repair work. I also got on to working out how far up the rear quarter panel the filler extended and I am now left with a filler free panel with lots of original red paint left on it. 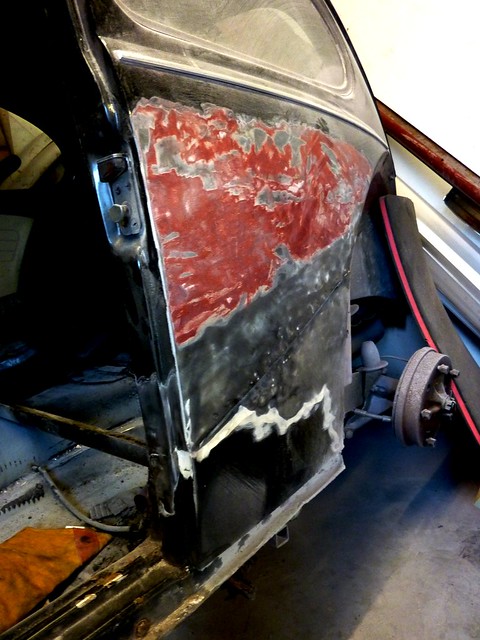 P1140605 P1140605 by route9autos.co.uk, on Flickr I then whipped off the door so that I could get better access to start stripping the paint and carpet glue from the inside of the car which has left me with a killer back ache as its a really awkward area to fold 6foot 3inch of dave into. 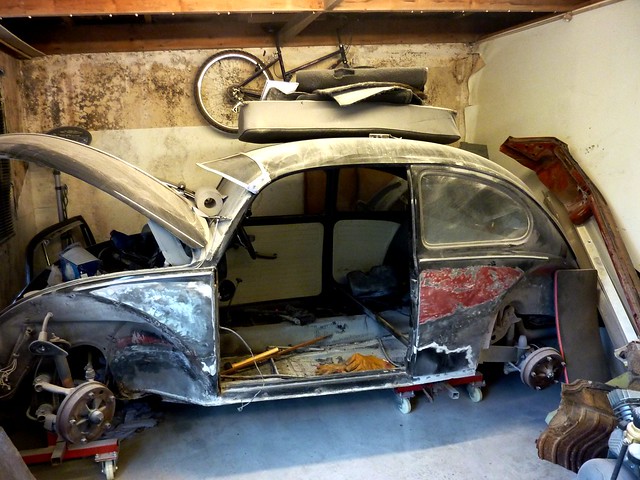 P1140602 P1140602 by route9autos.co.uk, on Flickr I'm not yet ready to start the proper cuts, I am still trying to decide on painting or investigating the galvanizing process for the heater channels. Dave |
| |
|
|
|
|
|
Apr 30, 2012 12:22:50 GMT
|
|
I know people have had entire 2CV shells hot-dipped - has anyone done that with a Beetle body (as they're rather larger and heavier, I am guessing it'd be an expensive process with few people able to handle it).
|
| |
|
|
|
|