|
|
|
|
|
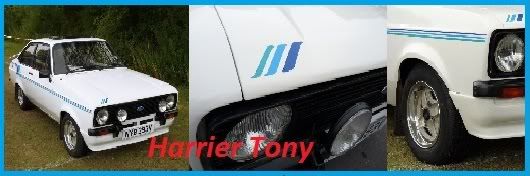
More stuff! this is the old escort, picture makes it look good but the chassis box sections and wheel arches had vanished! Completely stripped it out wiring loom, brake stuff, engine,steering. Ithink the neighbours all had a sterrt party when it left as property values went up!  This is the Escort MK2 auto box, l have had to rework the chassis rails to fit the gearbox between the rails, you'll notice the outer rail are now 2.5mm thick 40mm square box section much stronger than the original C section 1mm thick! ;D. That escort fuel tank has gone into the space behind the diff, so theres no spare wheel well and the fuel filler will be on the deck behind the roof flush fitting l think, the battery will go in the boot to make room in the engine bay for new heater box as the engine wipes out the old one! [ More welding!!this time the flip bonnet rust in usual places around the side/repeater lamp,D panel iner/outer wheel arches but new steel lit in, just need to finish inner arches. |
| |
Last Edit: Oct 14, 2015 14:51:36 GMT by Deleted
|
|
|
|
|
|
|
Jun 30, 2011 19:52:29 GMT
|
|
Good stuff!
How did you soften the rear arms?
|
| |
Koos
|
|
|
|
|
|
|
|
Hi, didn't appear to be hardened in anyway as they cut very easy with hacksaw, as l said had to make a jig so insure the make sure the pivots were inline. The drive shafts they are a different story they are hardened so going to sleve and weld them up when l've got the length measured.
|
| |
|
|
|
|
|
|
|
More pictures, just some shots of the chassis out in the open! this was first time chassis could we wheeled out for 2 years!! See the escort fuel tank in place. Note the snow!! this was errr...... winter 2010? i think!  And now safetly back in the dry.. not warm though were a hardy bunch working on out cars in all weathers!  This is the lowering of the rear buck onto the body to see what l need to cut away to allow room for the new chassis and rear suspension  [ Any way back to work post more pictures latter. Cheers ;D |
| |
Last Edit: Oct 14, 2015 14:51:56 GMT by Deleted
|
|
|
|
|
|
|
We had to cut a bit away from the rear buck for the sierra rear IRS and the coilovers ;D Ok so that cleared the chassis, now l need to cut a little away for the coilovers and the fuel tank.....opps! [ Dooh! ![]() i1141.phot i1141.photOh well it was all rotten anyway spare wheel well any one! [ Now what did l do with that 6'x3' sheet of steel as a little fabrication is required  |
| |
Last Edit: Oct 14, 2015 14:52:08 GMT by Deleted
|
|
|
|
|
|
|
|
Looks like my spare wheel well - holey!
|
| |
Koos
|
|
|
|
|
|
|
|
I reckon this will look really well when you have it done, good luck with the build.
|
| |
|
|
|
|
|
|
|
Cheers, yer don't care about the 'that's not original' brigade who turn up in their mgb with heritage shell and manufactured stuff, cars there to be used and enjoyed but didn't want the hassle of having to breath life back into it so wanted modern-ish running gear and get rid of some or the herald weaknesses eg rear suspension , front trunnions (got rose joints ;D) and brakes  . Build a bit slow at the moment as l can only work a few hours at the weekend as l'm working in Germany for ford doin' focus st. BBFN ;D
|
| |
|
|
|
|
|
|
|
Well l had a big hole to fill bring on the steel! First the rear seat floor little bit of cutting and bending  had to fabricate a couple of turrets for the coil overs, this will also be one of the points where the body mounts to the chassis. ] Next is void in the boot, had to fabricate the boot floor did try to but some sewage's in it bur looked very bad so just but flat panels in, plan to get some top hat section to stiffen it up a little and stop oil canning. But it looks OK with nice shinny steel in there ;D. Ah grinder one of my fab tools  real neighbour friendly good job there over 65 and hearing . Had to cut the rear edge of the old boot floor and weld it back on again, needless to say you had to keep measuring stuff and offer up the boot lid to make sure it still all fits as adding 10mm in after its all done is a shitter from past experience!  but got to learn Job done, it has all been welded up now, tend to weld an inch then inch gap weld again and so on, then turn it over and weld in between the welds sorted ;D. |
| |
Last Edit: Oct 14, 2015 14:52:26 GMT by Deleted
|
|
|
|
|
|
|
|
No front trunnions? Neat! Pics please!
|
| |
Koos
|
|
|
|
tontoe
Part of things
 Enter your message here...
Posts: 139
|
|
|
|
No front trunnions? Neat! Pics please! Canleys do them for the herald / vitesse /spit money well spent and piece of mind |
| |
life is just a game we play
|
|
|
|
|
|
|
Yer, made these ones myself with racing rose joints but will post some pictures next week. Don't forget that Heralds shared there suspension with some pritty rapid kit car companies if you go on the Caterham web site you can get uprated suspension stuff and brakes if you've got the money. I'm going to get their alloy hubs with uprated bearings and stub axles, these will have ford stud pattern and will not break up with the alloy wheels and higher cornering forces ;D. |
| |
|
|
|
|
|
|
|
cool got some seats ;D they were realy cheap two front seats for 99p each oh the power of ebay you can get stuff cheap if you're not in a hurry Yes they are grubby but they work and they tilt, a lot of people put MX5 seats in herald and vitesses but they have got realy expensive now and l don't think they tilt, these will do fine as l'm going to get them recoverd....um....black denim l think door cards to with door pockets that look like jeans pockets |
| |
Last Edit: Oct 14, 2015 14:52:38 GMT by Deleted
|
|
|
|
|
|
|
 the welder is dead, my trusty old migatronic went pop at the weekend and the wire feeds and we have gas but to snap crackle or pop  not sure whats wrong could be something on the pcb but these machines are geeting had to find parts for, looks like trawle over ebay for a new'un
|
| |
|
|
|
|
|
Jul 11, 2011 14:37:33 GMT
|
did get to fit engine and gearbox in, need to trim some of the chassis to clear the gearbox and starter motor well what do you do? do you chop the sump away or cut the cross member, ok so out came the cross member, wanted to mount the engine as low and far back as possible for better weight distribution. ;D hope to get something sorted for the welder, as l need to weld the chassis back up as all those holes has made it a bit weak now no one sit on it! l will put a dog leg in the chassis cross member and also fabricate a brace to go across the top of the front suspension. Also the engine will mount to the same mounts as the herald which is the top of the suspension turrets as this was designed like this to aid front suspension stability, but l will used heavy duty vitesse engine mounts. The gearbox will mount as it does on a ford with rear mount, and l will add a steady in the middle to stop too much torque twist. Got some 3mm plate now to fab engine mounts ;D
|
| |
Last Edit: Oct 14, 2015 14:52:50 GMT by Deleted
|
|
|
|
|
|
|
|
what flexplate & torque converter did you use to mate the eng & box?
|
| |
theres more to life than mpg & to much power is just enough.
|
|
|
|
|
|
|
Hi SCC (ho no you've become an acronym!) yes that will need a little work, the engine was from a manual escort, did try to find escort auto flex plate but ended up getting one from a 1.8 mondeo it will ofcoures fir the engine but not the sierra/escort torque converter so will have to be drilled for that . Then next l will have to sort the crank sensor as the feature on the flex plate is different to the old manual flywheel so will either move the sensor or weld new plate on the back of the flex plate to match the hole in the back of the flywheel, will have to fabricate this with paper template taken from the flywheel . Did read the spigot bearing from a cvh sierra will fit in the zetec for rwd conversion . Where there a need there's an A team plan ;D que the music |
| |
|
|
|
|
|
Jul 12, 2011 22:01:48 GMT
|
|
you'll not need the spigot bearing for an auto, got a 2.0 & 4 speed auto to join for a mates mk2 cortina but on hold due to life & parts soureceing getting in the way.
|
| |
theres more to life than mpg & to much power is just enough.
|
|
|
|
|
|
|
;D Yey won a welder only 30 quid on fleebey bit dusty as not been used for a while, will need new wire nib and wire tube but hopefully l will be back welding again! as at the moment its crazing me not being able to weld something l feel l may need to go to welders anonymous ounce this build is finished! Just a couple of random pictures?? This one is the underside of the rear buck showing the little bit of welding required floor,wheel arch step the usual herald places. This one is the sierra diff showing the diff chassis l fabricated from the sierra rear sub frame and the herald front diff mounts which support the diff at the front and the standard sierra diff Mount at the back. Will take some picture of the front suspension mods over the weekend. |
| |
Last Edit: Oct 14, 2015 14:53:04 GMT by Deleted
|
|
|
|
|
|
|
;D welder works ok after a bit of swearing  with wire snagging and stuff but it gives a good weld so i'm happy, that was about it though this weekend as was busy with life stuff But on a plus side did some ebay purchases got myself a new one of these for only 99p Have old thinner one which l might mount on the rear also got these also waiting for some 3mm thick steel plate to arrive to fabricate engine mounts. Got a couple of days off next week so hope to get some stuff done on her and get the engine in ;D dooh forgot to take photo's of front suspension |
| |
Last Edit: Oct 14, 2015 14:52:55 GMT by Deleted
|
|
|
|


 This is the lowering of the rear buck onto the body to see what l need to cut away to allow room for the new chassis and rear suspension


 . Build a bit slow at the moment as l can only work a few hours at the weekend as l'm working in Germany for ford doin' focus st.
 had to fabricate a couple of turrets for the coil overs, this will also be one of the points where the body mounts to the chassis.
 real neighbour friendly good job there over 65 and hearing
  but got to learn
  the welder is dead, my trusty old migatronic went pop at the weekend and the wire feeds and we have gas but to snap crackle or pop
  not sure whats wrong could be something on the pcb but these machines are geeting had to find parts for, looks like trawle over ebay for a new'un
 with wire snagging and stuff but it gives a good weld so i'm happy, that was about it though this weekend as was busy with life stuff