d4mjt
Part of things

Posts: 83
|
|
|
|
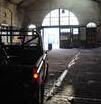
I'm not sure if this is a bit new or not being 1998, it's not strictly retro, but it might be of interest to a few folks, so I thought I'd post up my tinkerings with my Range Rover since I bought it last year. The posts might read a bit odd in places as some are borrowed, but I've done a bit much to type it all out from scratch again! I'm a bit of a Range Rover fan anyway, and I always had a bit of a P38 scratch. I'm pretty clued up about all the problems, roughly: Weak Blocks / Slipping Liners HEVAC systems Electrics generally BECM Problems Economy Air Suspension etc So I bought one. Best not to be bored anyway, if it breaks it breaks. I looked for a good while, and bought what (touch wood) has been a brilliant example. Toys wise, it's a 4.6 HSE, nicely specified, and came with these options: Full Lightstone Leather interior, with black piping. Heated Front Seats Electric seats inc headrests Sports mode gearbox *chortle* Cruise Control Harman Kardon 12 Speaker Surround Sound with 2 subwoofers and 5 amps and a 6 Disc Changer Electric Mirrors Electric Windows Tilt and Reach Steering wheel Multi-function steering wheel Electric Sunroof Air Conditioning Dual Zone Climate Control with the LCD control screen. Side Steps 18" Mondial Alloys with Pirelli Scorpions 2001 Light Upgrade kit to clear lenses Towbar Heated Front Screen Heated Rear Screen Memory Seats Remote Central locking and alarm Privacy Tints The only thing that let it down were the alloys, which were pretty badly corroded: 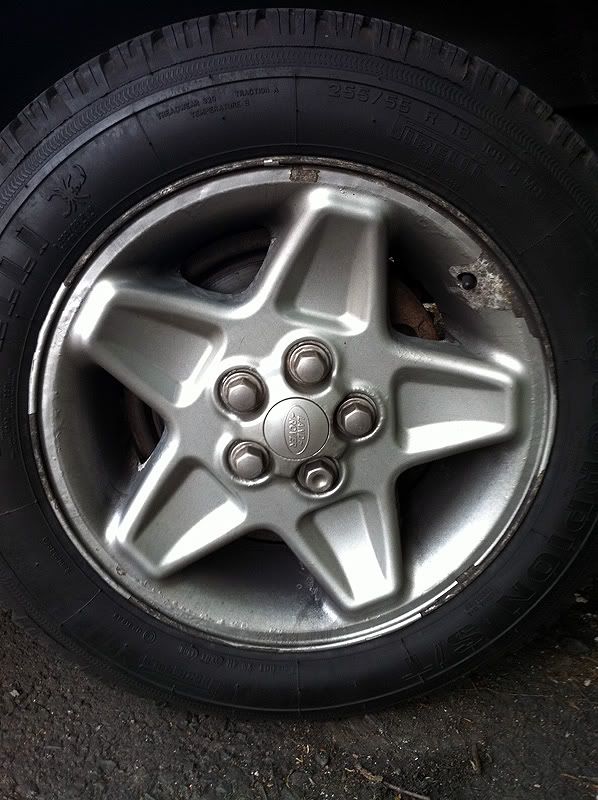 So I had them all powdercoated: 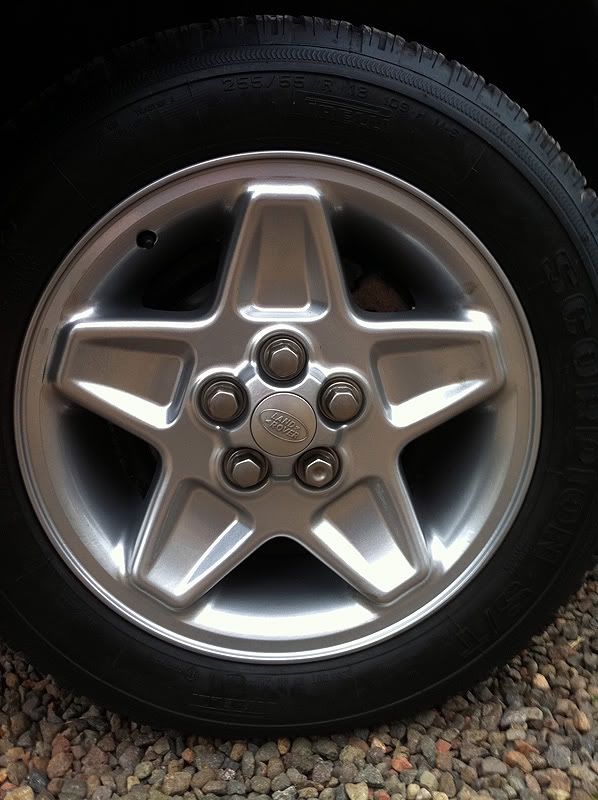 A few pictures of the car itself: 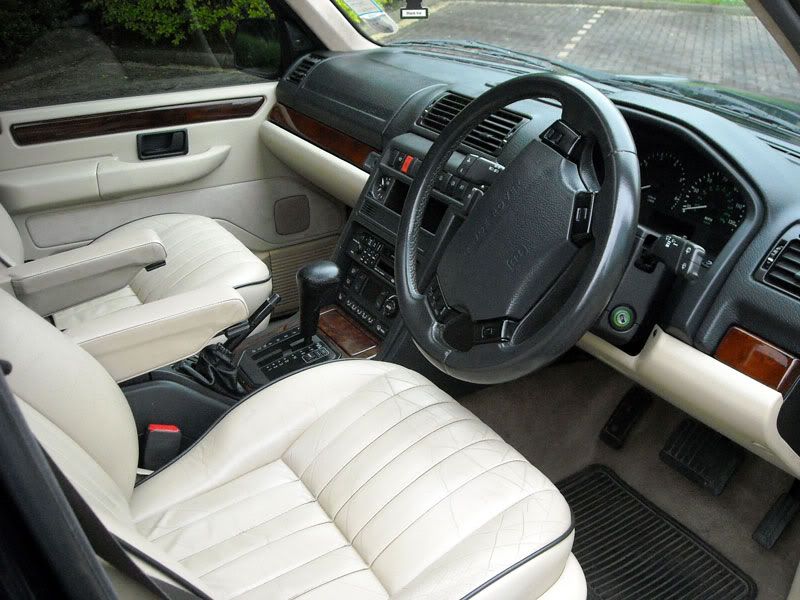 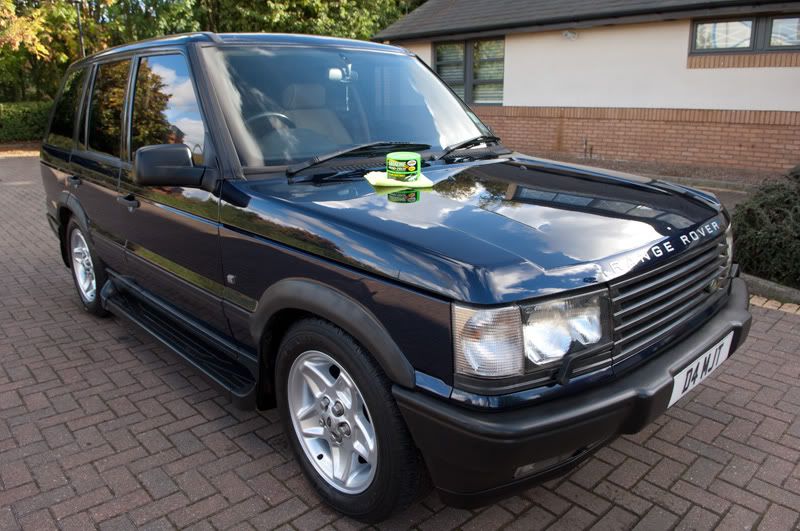 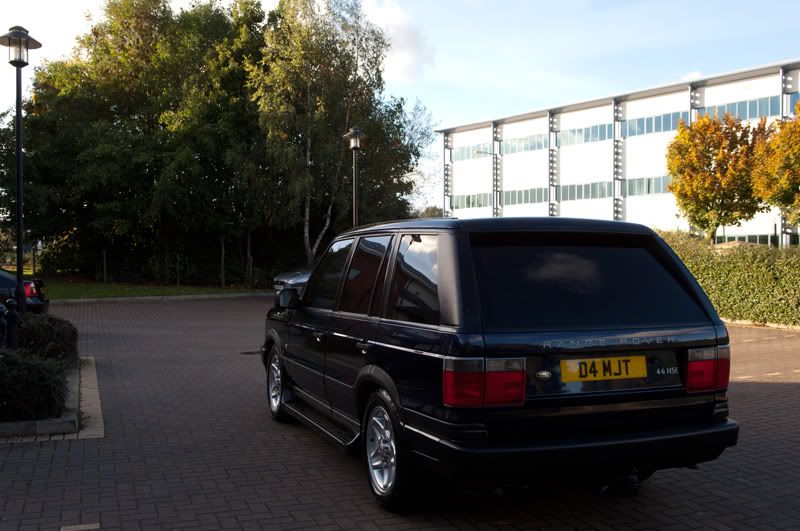 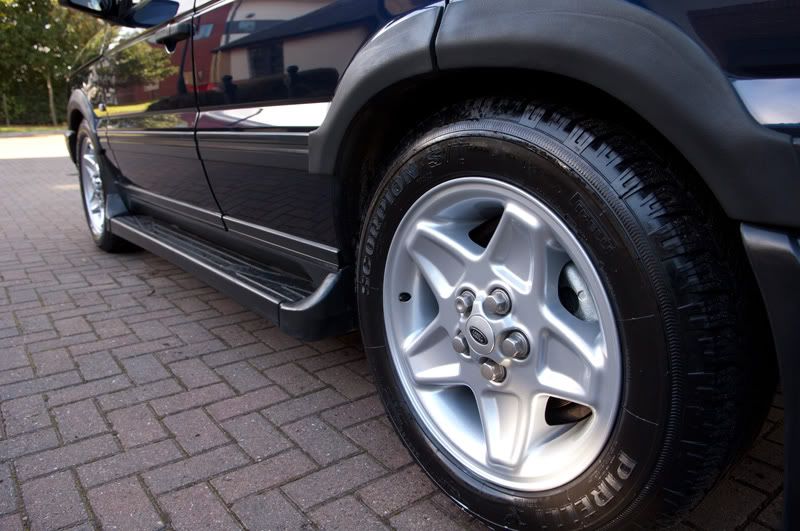 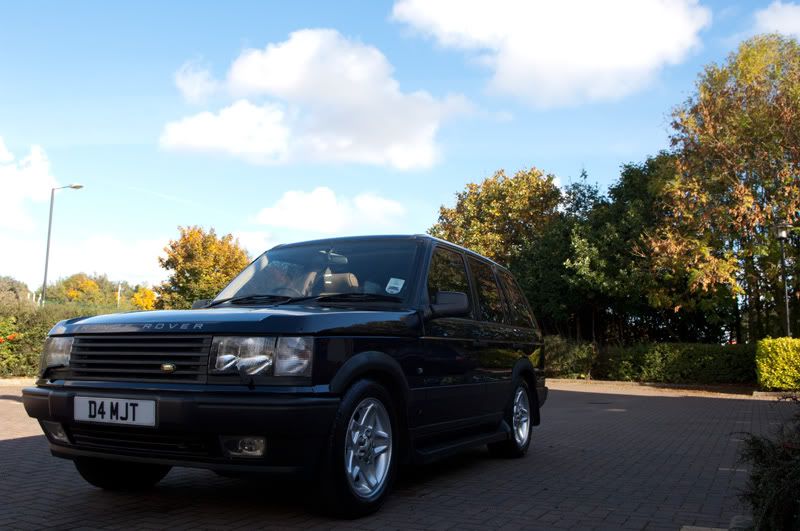  This car has also had a replacement engine fitted at a Land Rover dealer 30K ago with a reciept to prove (ouch), so no nasty liner problems, and it also has a BRC Sequential Injection LPG system fitted, which goes a little way to improving the truly horrifying fuel economy. Since then, I've added some 8mm High Performance HT Leads, LED sidelight and numberplate bulbs (not DRL's!) and I've just started upgrading the brakes, with some EBC Turbo front discs, and EBC Green Stuff Heavy Duty 4x4 pads. |
| |
|
|
|
|
d4mjt
Part of things
Posts: 83
|
|
|
|
shortly after purchase I fitted uprated EBC brakes and greenstuff pads: 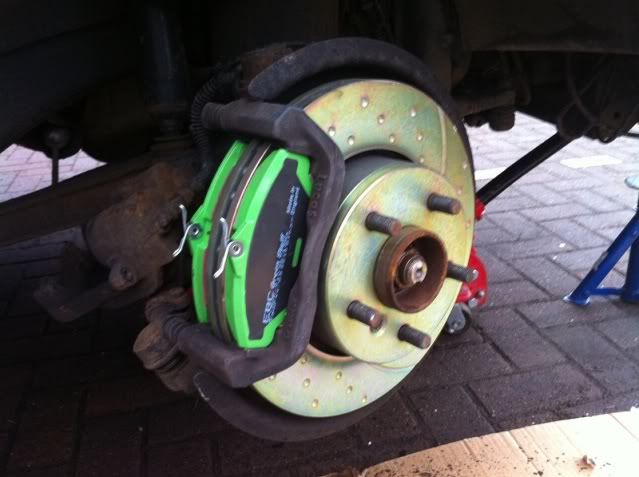 In March this year, the car started to show signs of head gasket failure between the cylinder and outside world. I needed to sort some time to pull it apart and see. In the meantime.... I decided it was time to tackle a few odd jobs that bug me. The ones that don't affect the functionality of the car so you never get round to :lol: My sunroof slide panel has been screwed since I got the car, the trim material has all come away and scrunched up inside the sunroof so it'll only pull half way forwards and it looks really tatty and drops old dried glue dust everywhere. Despite advice to the contrary from a few forums, I can now say it's impossible to remove that panel without pulling the sunroof out. Good news is it's a doddle to do. I started removing the pillar trims, these are easy to do, they just have pull clips on them, a firm pull away should see them all come loose: 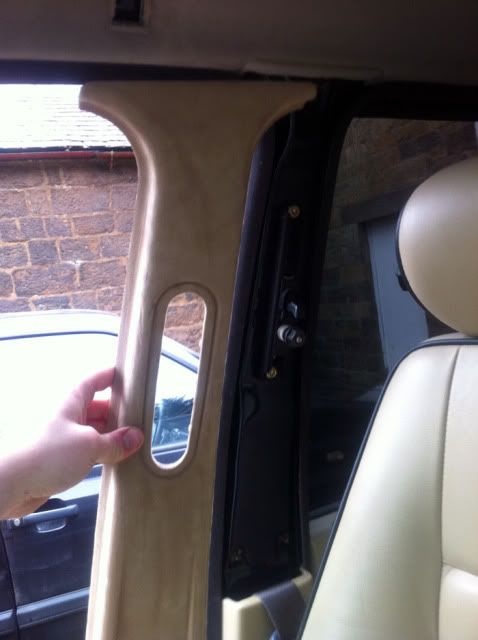 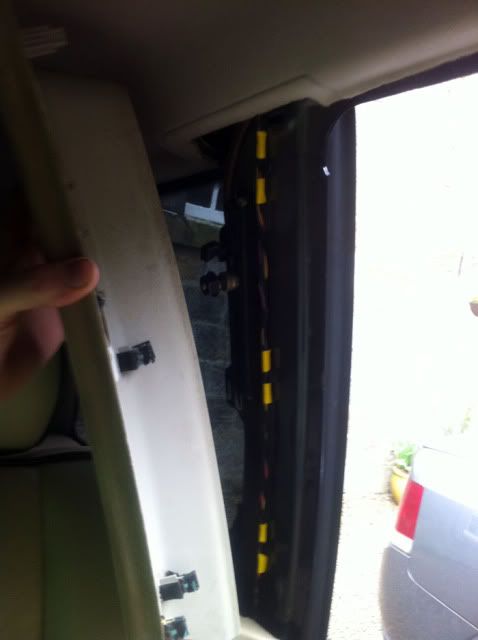 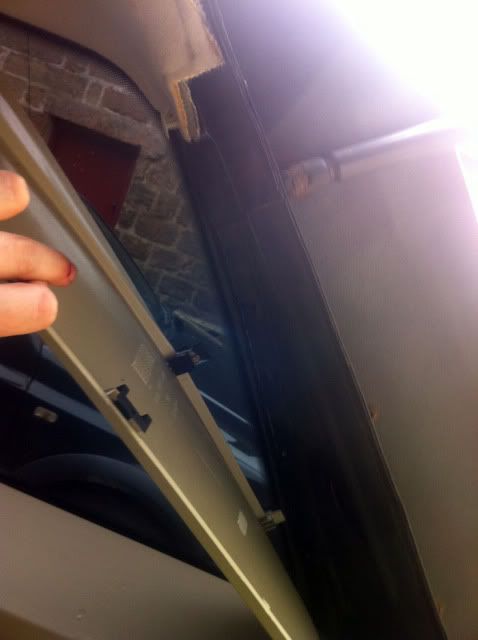 You need to remove the top mounting bolts for the seat belts to pull the trims clean away, I guess you could let them hang loose but it's easier to take them off imo. Then I removed the interior light, this should just pull down, and has a connection to undo for the light. Don't pull the loom to much as the wiring for the rear view mirror is spliced from it and it hasn't got much give. 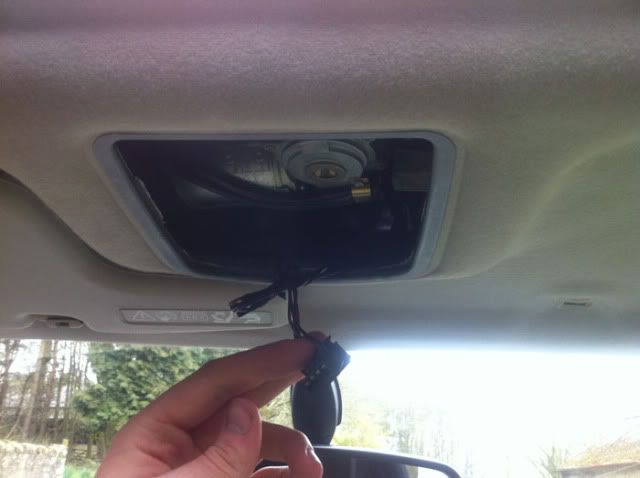 The sun visors are easy to remove, 3 philips screws in each one: 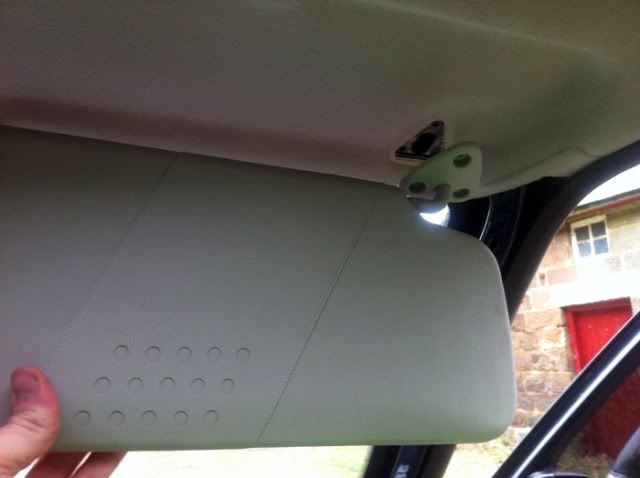 And the visor clips are located by a screw that presses a clip apart, they should just pull free after you've removed the screw: 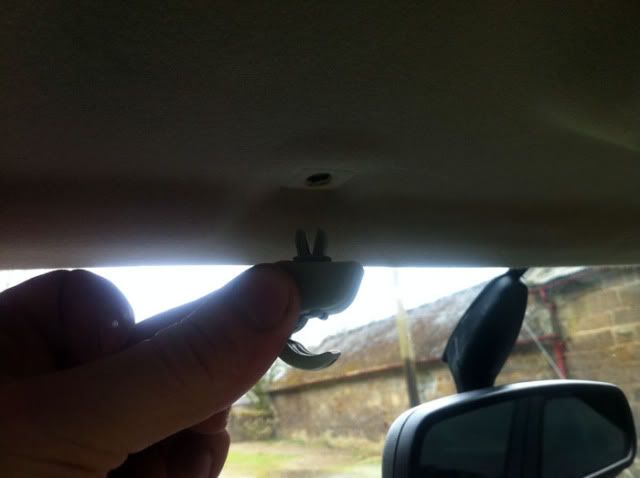 The Interior Grab handles have covers over the screws that flick off with a knife if you're careful. Then just unscrew them, and pull down and away to release them from the clips: 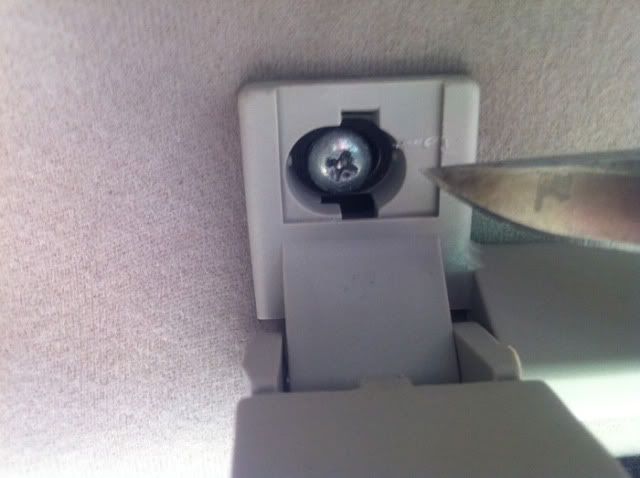 The rear interior lights are screwed into place, you need to lever the lense off with a knife, and then undo the screws and pull them away. There is a connection for the lights to undo behind them:  The alarm sensors just pop out with a pull:  The sunroof trim just pulls off:  At which point the headlining is only held in by the door seals, and 2 trim screws in the rear D pillars:  I found it easiest to remove the door seals at the front working back, and lower the headlining onto the headrests, undoing the trim screws at the back last. It should then just pull out from the back of the car, you need to be careful as it has to bend slightly to pull free, but it's a pretty tough headlining, the upperside is fibreglassed to give it strength. That should leave you with this: 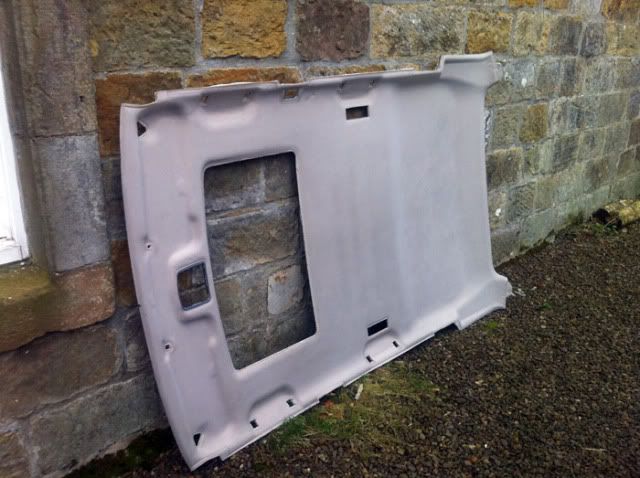 and this: 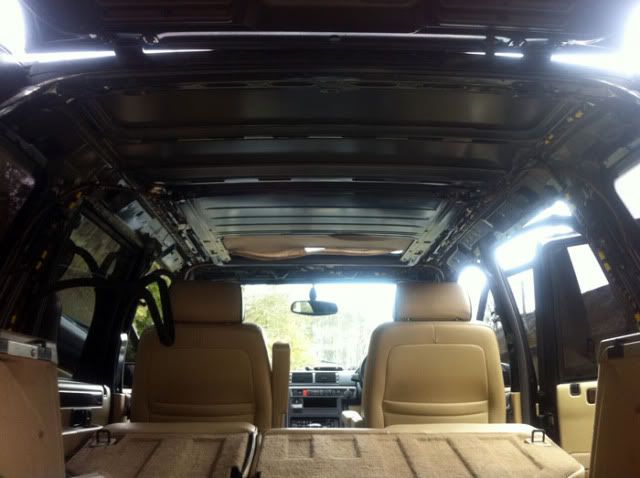 You can see here the sunroof panel trim is shot. Removing the sunroof is fairly straightforward. First off I opened it upwards to make it easier to maneouver out, this turned out to be a necessity later to across some crossbar screws, so do it. Then there are 8 bolts holding the assembly to the roof. Undo the two bolts at the motor bracket first, as the bracket is flimsy, and will just bend if the weight of the sunroof is resting on it as you undo it: 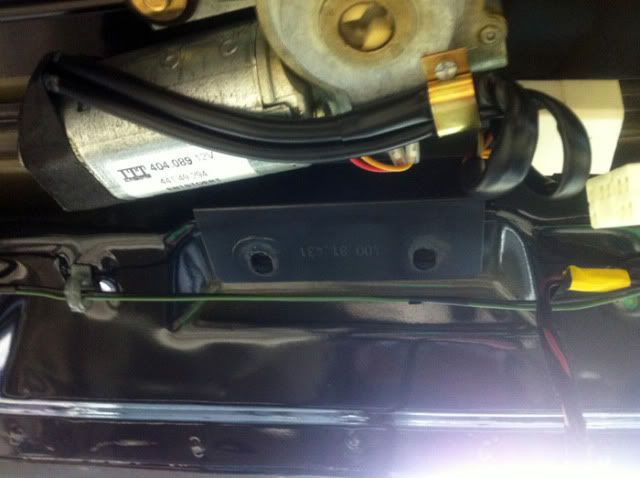 The sunroof drain tubes also need to be popped off, slide the cable ties away, and then slide the drain tubes off and out the way: 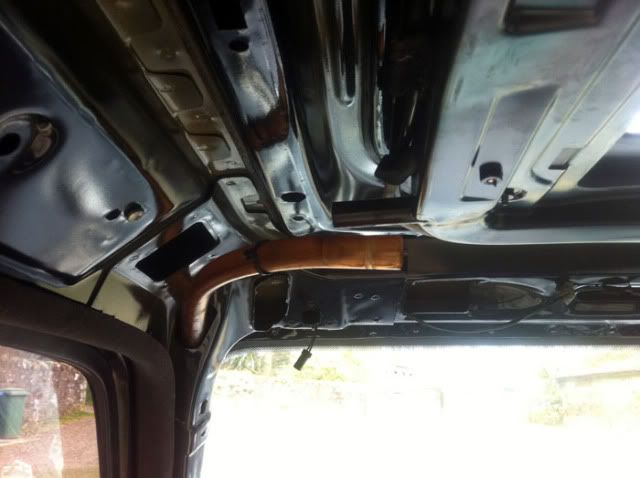 You need two people at least to lower the sunroof assembly out, as it's heavy and you can't position yourself in the car with access to all 6 bolts left to remove it. I got Tom to hold it while I undid the last 6 bolts, 1 in each corner and 2 in the middle, and then it just drops out, hopefully not literally:  Typically at this point it started to rain so I lashed the cover back on the car to stop it filling with water and took the sunroof assembly indoors to remove the trim panel:  You need to remove the crossbar below, there are 2 screws in each side:  and then remove all 4 of these small spring clips that press the panel onto the rails:  After that, you can push the panel to one side and lift it out of the runners, ready for re-trimming. I didn't get out for material at the weekend so that's stored ready to be done and I've just bolted the sunroof back in to the car for now until it's done. |
| |
|
|
d4mjt
Part of things
Posts: 83
|
|
|
|
Onto the head gasket then, first off get your tools handy:  I started off removing the MAF, air recirc gubbins and intake hosing to the throttle body:  My car has a sequential injection LPG system fitted, so the next thing I needed to do was disconnect the LPG feed to the injectors, I have 2 banks of 4:  Then I unplugged the harness for the fuel injection system to give a bit more freedom in moving the wiring about:  Also the water temp sensor on the thermostat housing: 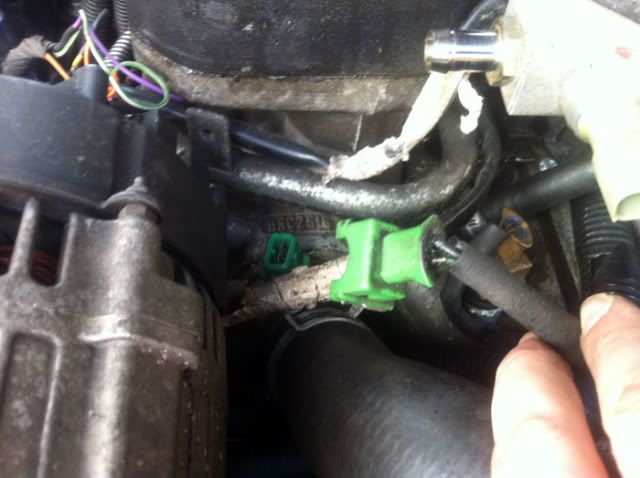 And after disconnection the throttle and cruise cables and unbolting the transmission dipstick, I undid the 6 bolts holding the plenum onto the intake manifold, and removed this. It's not necessary to remove this to remove the intake manifold, but it makes life far easier, and I'm nosey. 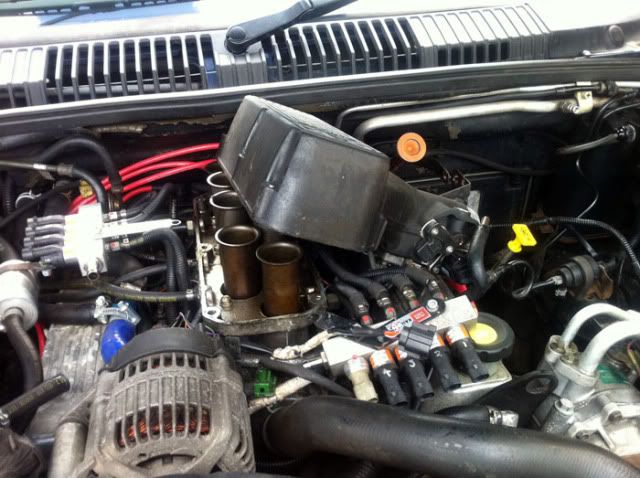 Time to drain the coolant system now if you haven't already, there's a handy drain plug in the bottom of the radiator:   Then it's a case of starting to get access and unbolt the inlet manifold, the wiring looks a bit of a mare but it's fairly simple, there are 10 bolts holding the inlet manifold down, 8 are easy to get to, the far front and back are more of a mare: 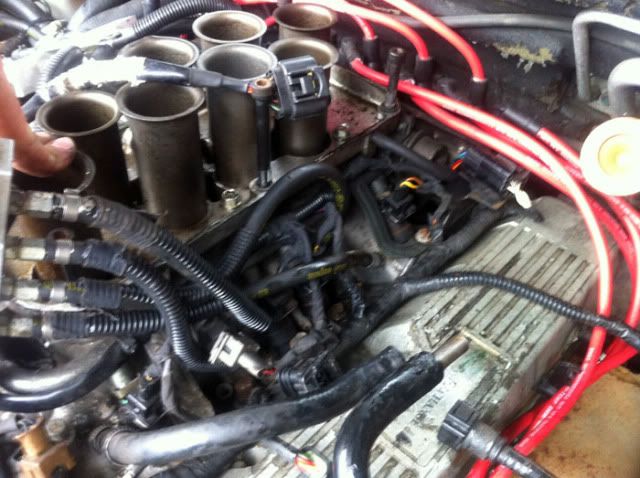 To get at the rear two, you need to unbolt and remove the coilpacks, and disconnect the fuel supply lines, as below:  The only real snag of the day, during this process I had to move my LPG injector hosing out of the way, and one has snapped, so I'll need to drill it out and get a new hose, gah.  With that done you can unbolt the coilpacks at the other side as well before removing and getting access to the rear 2 inlet manifold bolts:  The front two, to access these you need to remove the alternator and air con and powersteering pumps. Undo the serpentine belt tensioner, and release the belt, then the alternator just pulls out, and I decided it was easiest to just unbolt the bracket holding the air con and power steering pumps and set them down in the engine bay out the way, least hassle. 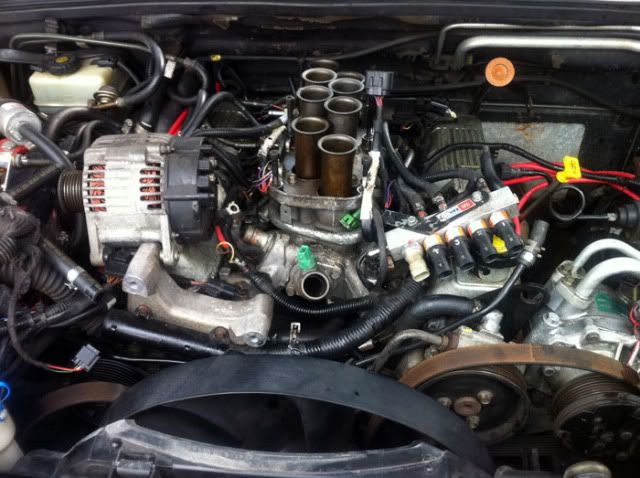 The inlet manifold should then lift off after you remove the last 2 bolts. 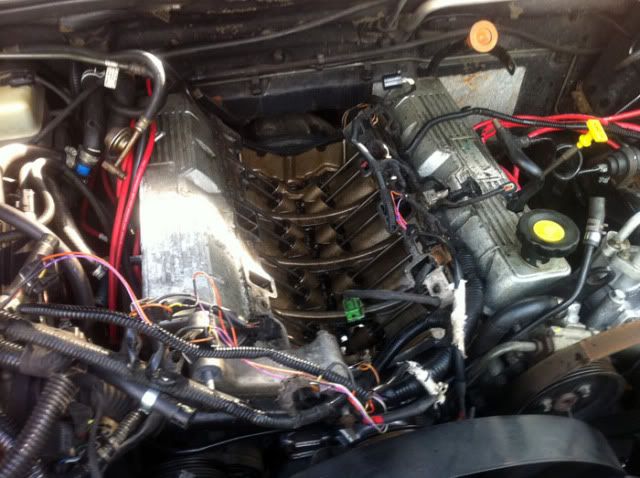 The inlet manifold gasket will still be present in the valley, I just removed it for a look at the cam, which thankfully appears to be in great order. I wanted to visually inspect it for scoring as the cams can wear causing poor running and performance. Although mine is a replacement engine and has very low mileage, I wanted to check anyway. Next it's time to unbolt the exhaust manifold, the heatshield is a bit of a mission to remove, and I think I may choose to heatwrap the manifolds instead when I refit, my experience of Rover V8's is that they can eat exhaust manifold gaskets quickly, and it's a 2 hour job for both sides with the heatshields in place, or 15/20 minutes without them. 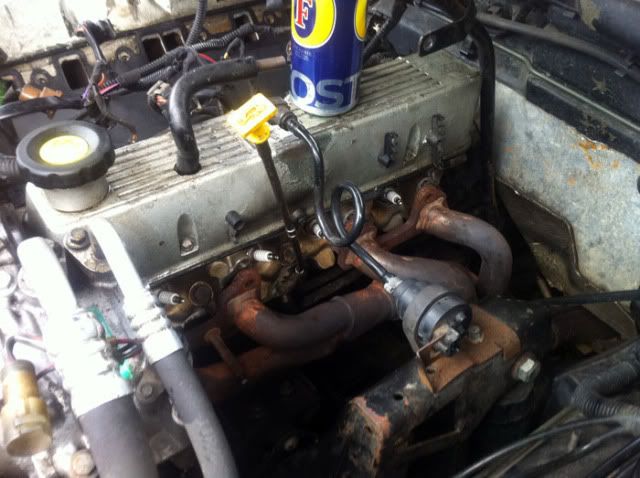 Next I removed the rocker cover, and unbolted the rocker assembly. Undo the bolts in sequence to even the load as you remove it: 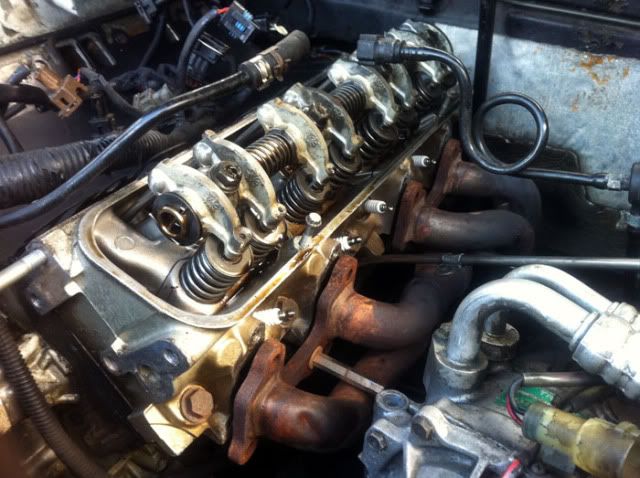 Next I unbolted the 10 head bolts in sequence, and pulled the head. It's clear straight away that the gasket has cracked / disintegrated around Cylinder 3: 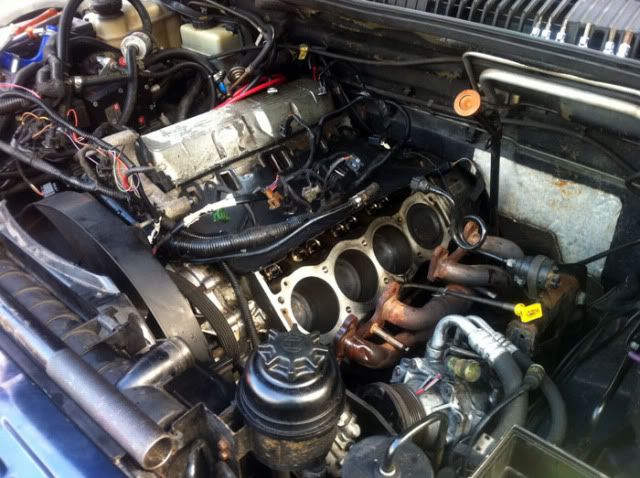 Ouch: 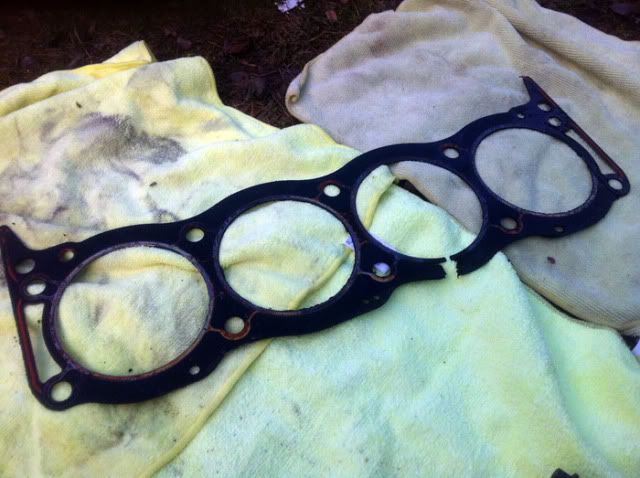 Ran out of time to pull the other side, so I packed the bores with cloths and covered everything up till I can spend some more time on it: 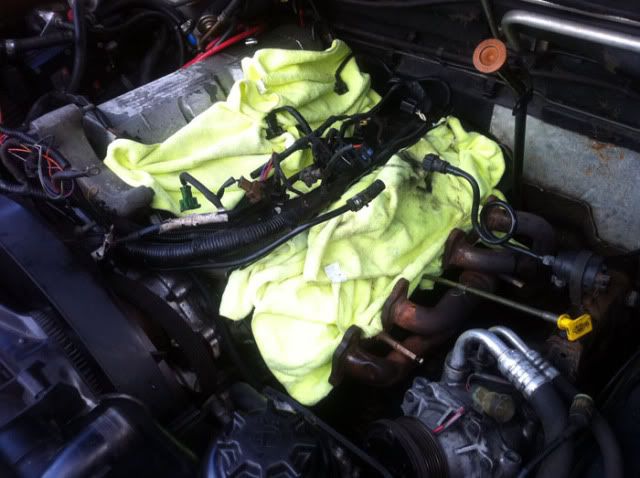 |
| |
|
|
d4mjt
Part of things
Posts: 83
|
|
|
|
I continued stripping down the drivers side bank, and removed the Cylinder head. Anyone who's done one of these on a P38 will know what a mission it is getting the lower exhaust manifold bolt out from Cylinder 8. It's difficult enough to get access anyway, but with the steering column in the way so you can't get a ratchet in cleanly, and the manifold preventing easily getting a knuckle in, it's a right mission, never mind with all the gas gubbins there. I reckon it took me about 2 hours to get that bolt out, and 10 minutes for the others :lol: one stripped block: 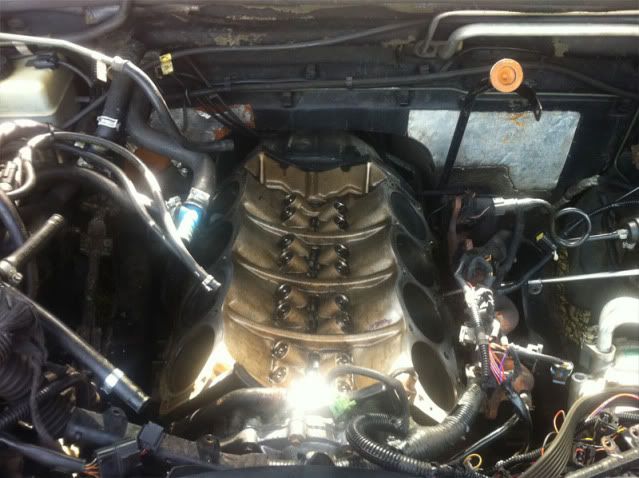 I started cleaning the decks of the block up ready for new gaskets:  And while I was on thought I might have a bit of a basic tidy up. So, I started cleaning down the cylinder heads: 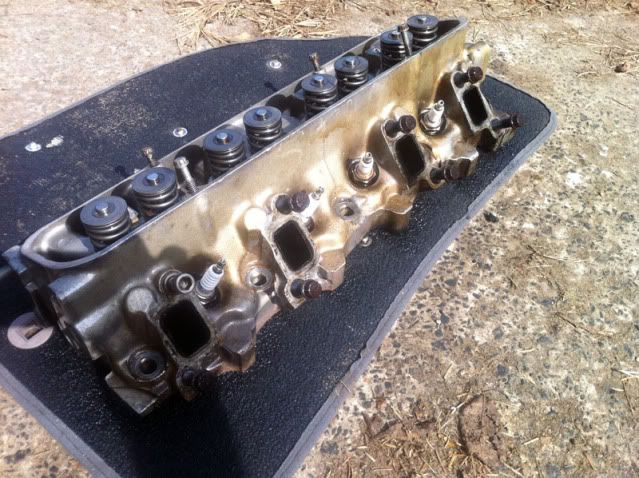 Then painted them and lacquered them with high temperature engine paint and lacquer: 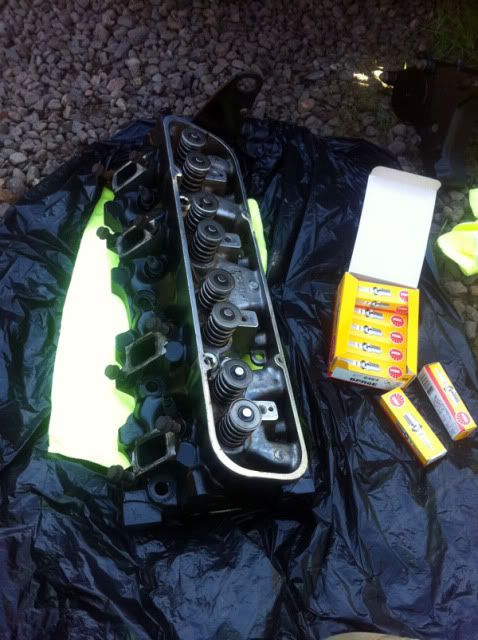 You can see the old plugs in there still, I left them in during painting to keep the plug holes safe and masked off. I also decided that during the strip down process, and having had classic's before that eat exhaust manifold gaskets regularly, there was no way in hell the standard heatshields were going back on, they're a nightmare to fit and refit and just hold the job up. So I set about tidying up the manifolds for refit, and ordered some heatwrap to use in place of the heat shields. 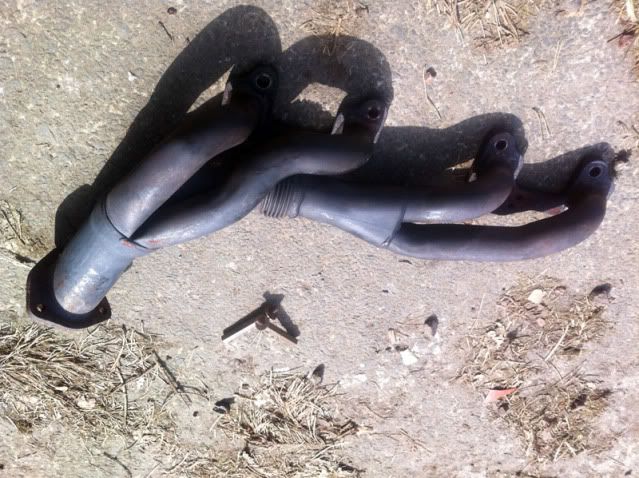 Manifold after tidy up: 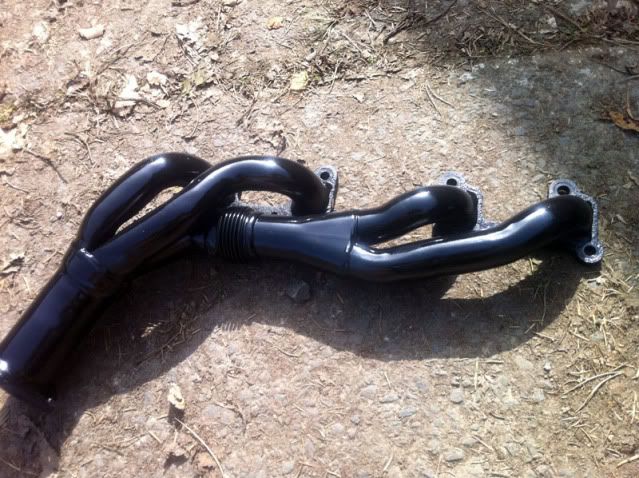 Then I set about wrapping them with the heatwrap: 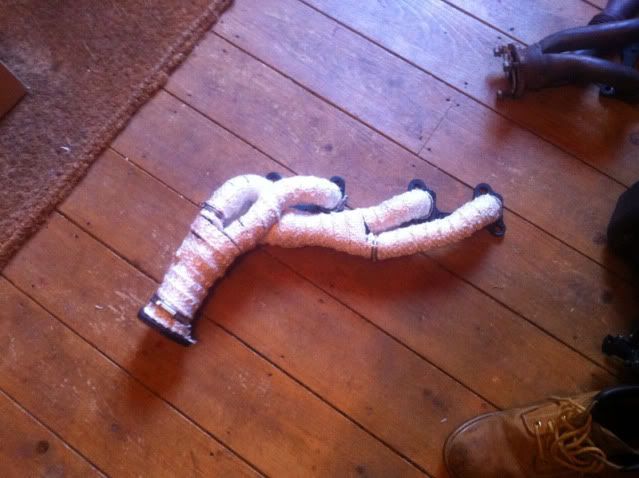 Thanks to a postal **** up I only ended up with enough heatwrap to do one and half manifolds, so I wrapped the drivers side bank as it's under the gas kit, and hardest to remove, and I'm waiting on more for the passengers side, which is pretty easy to remove and wrap at a later date. Carrying on with a basic tidy up, I started cleaning up the plenum chamber as well, as it was pretty mucky and corroded: 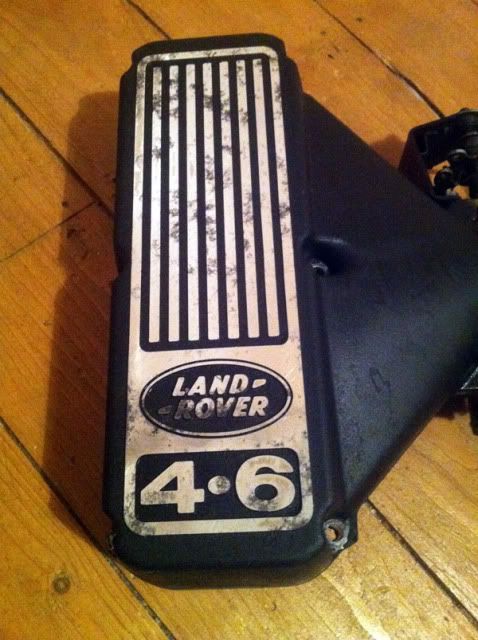 Looking a bit better:  Next up were the rocker covers, which were really tatty. 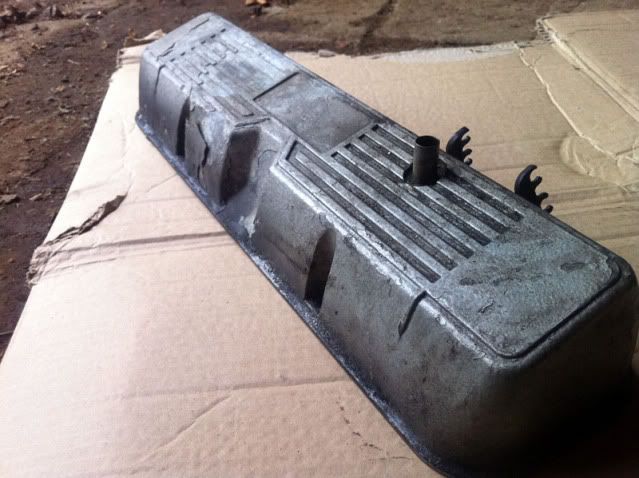 I nitro morsed them down, and removed all the old paint and crud: 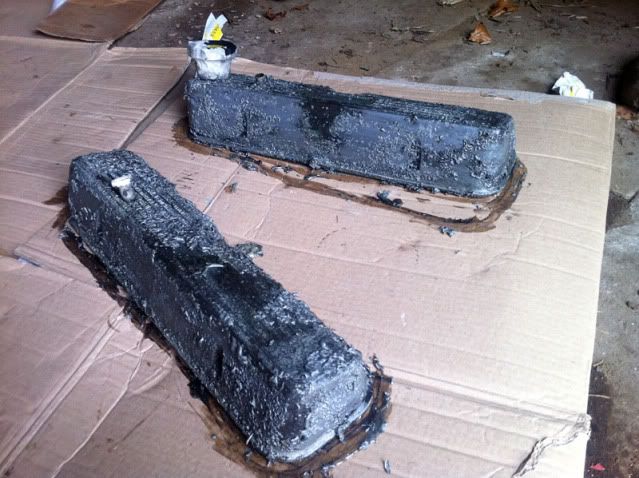 That left me with these, which already looked better: 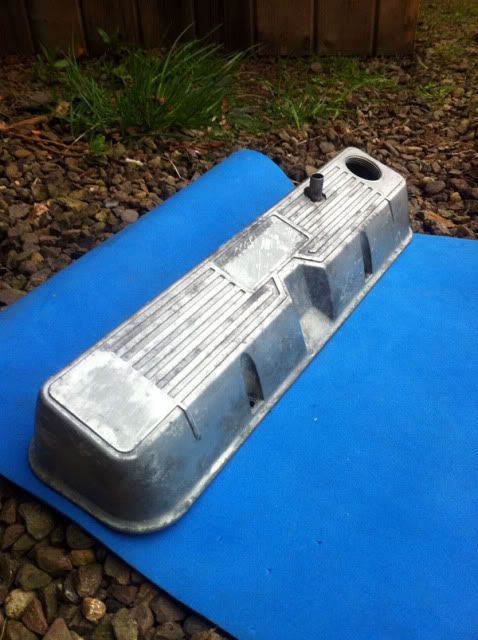 A few coats of primer lashed on: 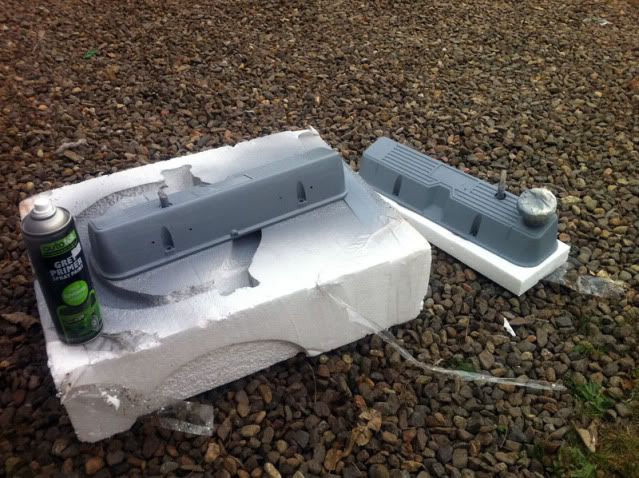 And some crinkle effect red high temperature paint tidied them up nicely: 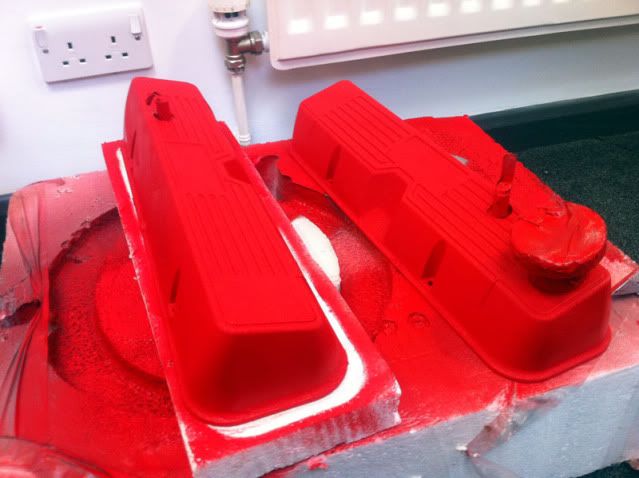 Next I started to re-assemble the engine, bolting the heads back to the block with new stretch bolts and composite gaskets. 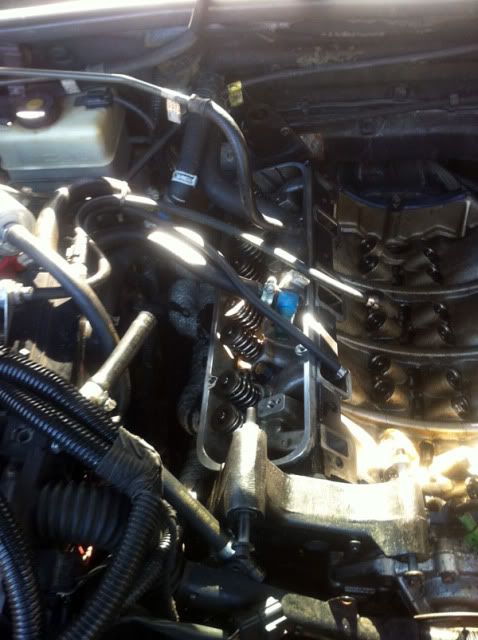 Test fitted the rocker covers: 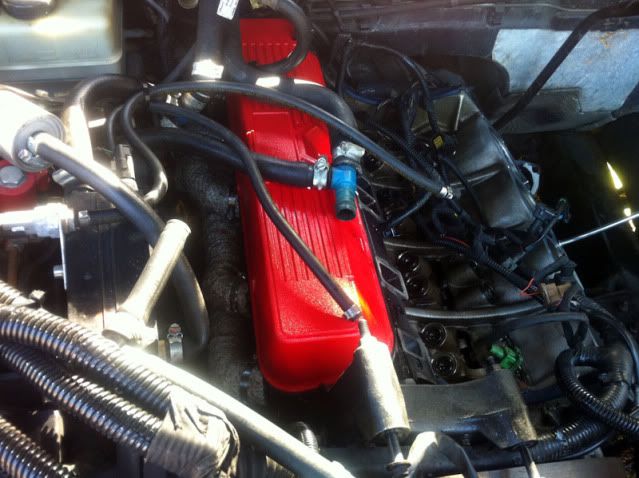 Then I refitted the passenger side cylinder head and rocker cover: 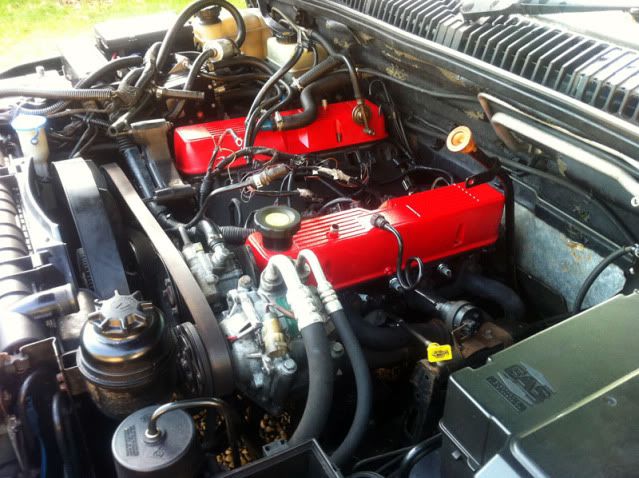 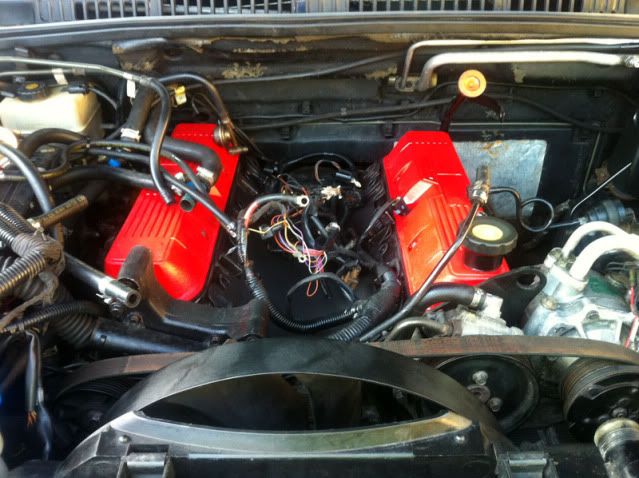 Then it was pretty much just a case of refitting connectors and bolting everything back up. I fitted a new inlet manifold gasket, as well as new rocker cover gaskets, stainless inlet manifold and rocker cover bolts, and fully serviced the car, fitting the correct NGK plugs, and doing an oil flush before fitting new oil and fuel filters, and firing it up. Fired up a treat first time, chuffed was I :-) Shamefully, I've just realised I've not actually got a picture of the completed engine bay, I'll grab one later on. It's looking a bit better anyway. The car is completely transformed, I suspect the head gasket has been slightly blowing since I bought the car, as it's far smoother and quieter now than it's ever been. The idle is back to perfect as well, whereas before I was having problems with random high idle issues.  |
| |
|
|
d4mjt
Part of things
Posts: 83
|
|
|
|
So, I'd done 1,800 miles now since the rebuild, and the good news is, the engine is sweet as a nut. Now that that's sorted though, I'd like to turn my attention to some other areas. Ideally before the end of the summer, I'll have these jobs knocked off as well: Lower Ball Joints (urgh) 4 x New Bilstein Shock Absorbers 4 x New Tyres Rear Discs and Pads Gearbox Flush and Filter Diff Oils Main Beam HID's Stainless Exhaust I can't see me getting through all of that yet, but we'll see, I've started piling bits up for it. This weekend though, it was raining so time for a bit of cosmetic rather than mechanical fettling. One of the things I find really boring about the car is the stock dashboard: 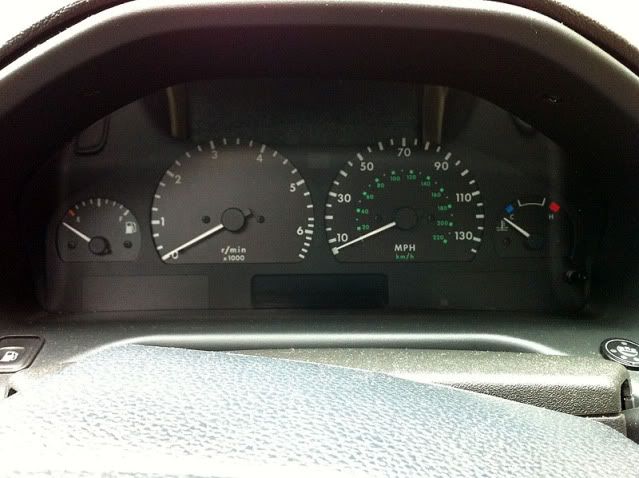 So, I've got a few bits to freshen it up, which I've fitted this weekend. First off, remove the clocks. To do this you can extend the steering wheel column fully to gain access, and unbolt 2 small screws on either side of the column: 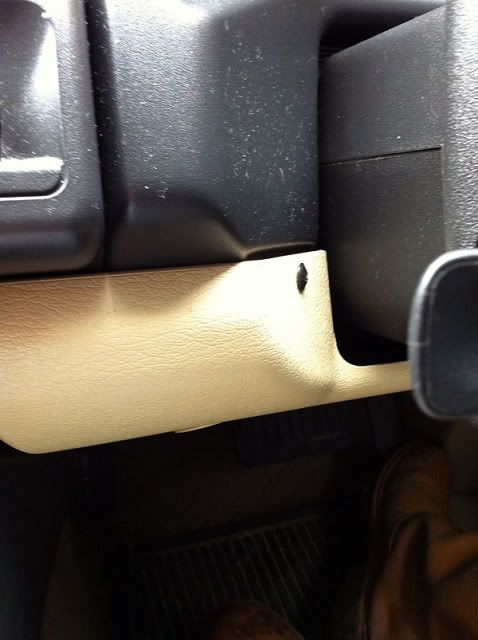 Then you can undo 4 of these bolts to remove the panel under the column: 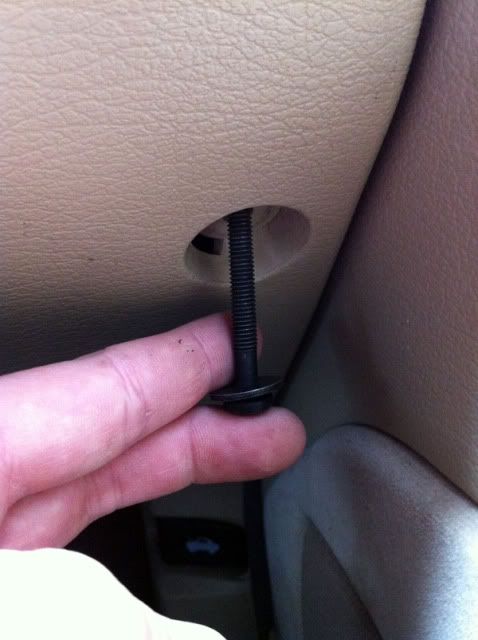 Leaving you with this: 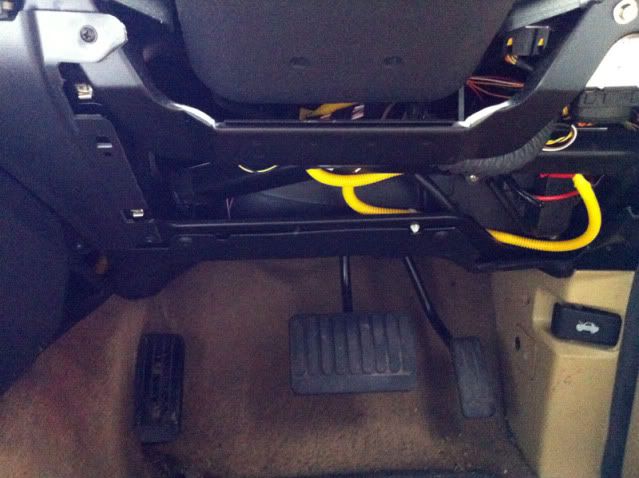 Now you can get access to undo the 2 lower screws holding the instrument shroud in place: 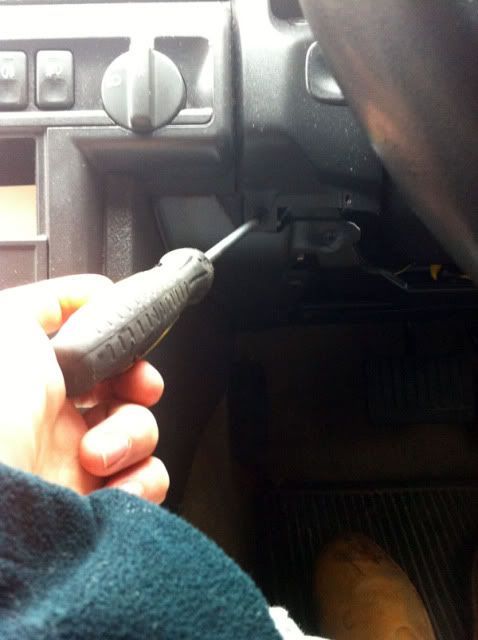 This should then lift out: 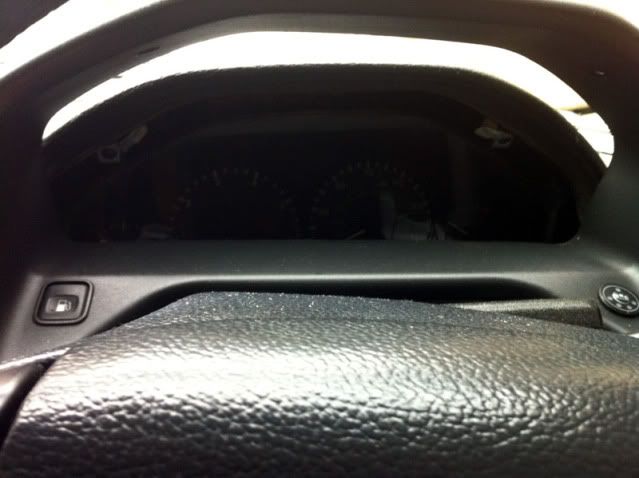 There are 2 multiplugs for the dash to remove, a blue one on the left, and a black on the right: 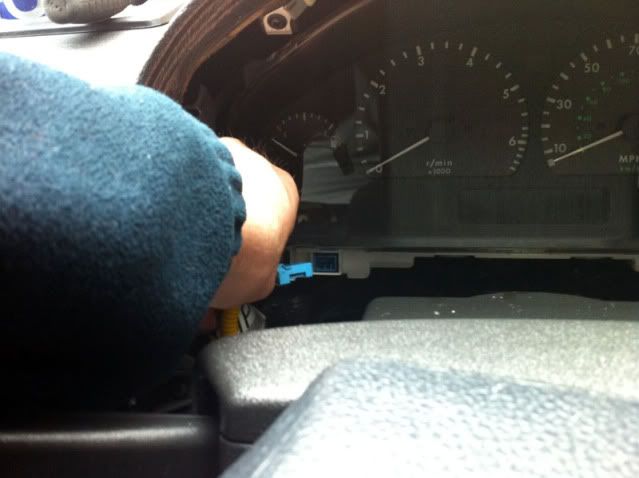 Then you can undo 4 screws to remove the cluster itself, leaving you with this: 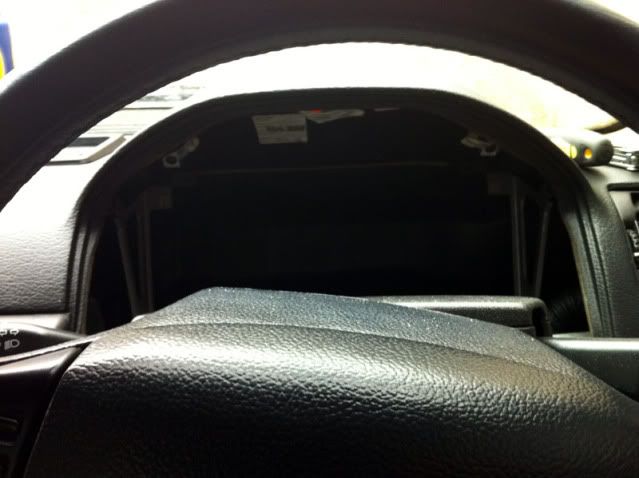 and this: 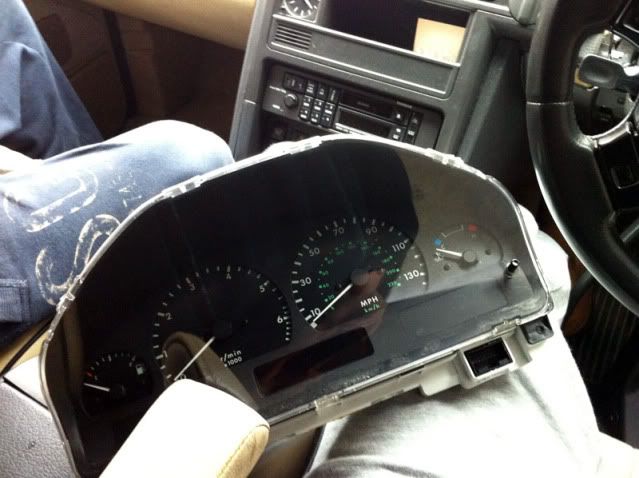 Having retreated indoors and cracked a beer open, it's then just a case of pressing some tabs out to take the instrument cluster apart: 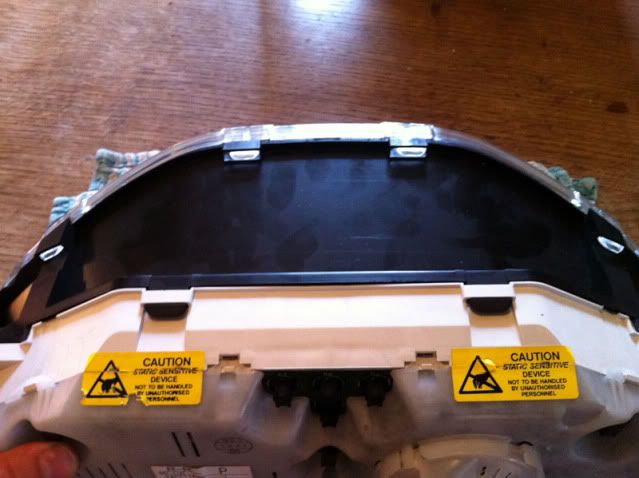 Which give you this:  I then carefully applied a walnut inlay to the dial panel: 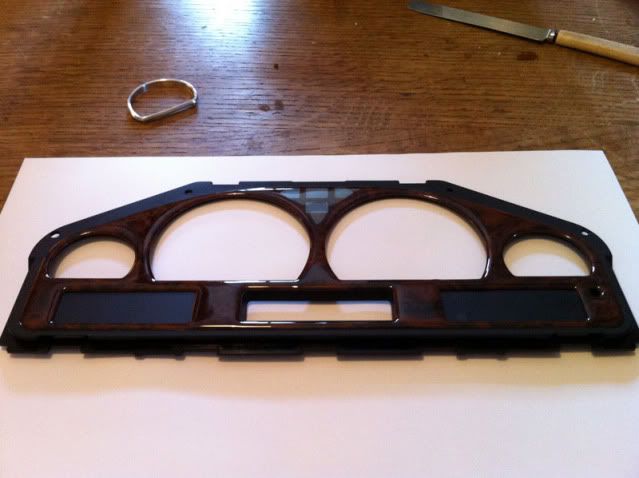 I also have some chrome dial rings I wanted to add to this, so I carefully trimmed out the inside of the dials / walnut inlay to fit the dials: 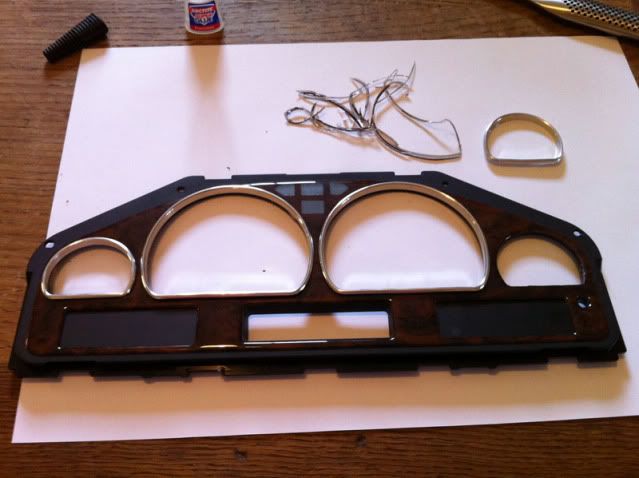 Then I applied a thin layer of superglue to the dials to make sure they didn't come loose over time, and let it dry: 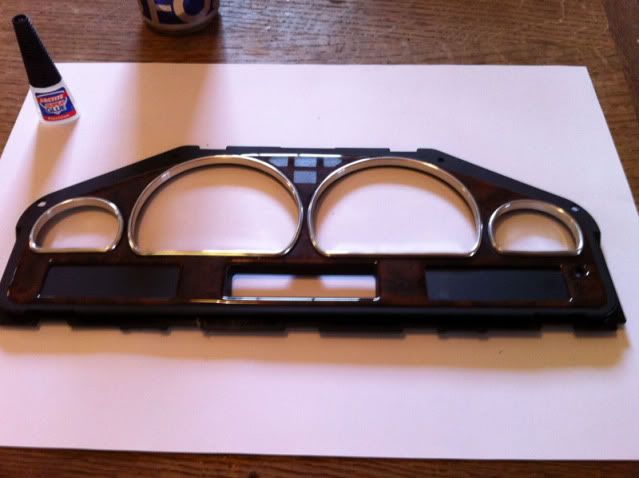 Then it was just a case of whacking it all back together: 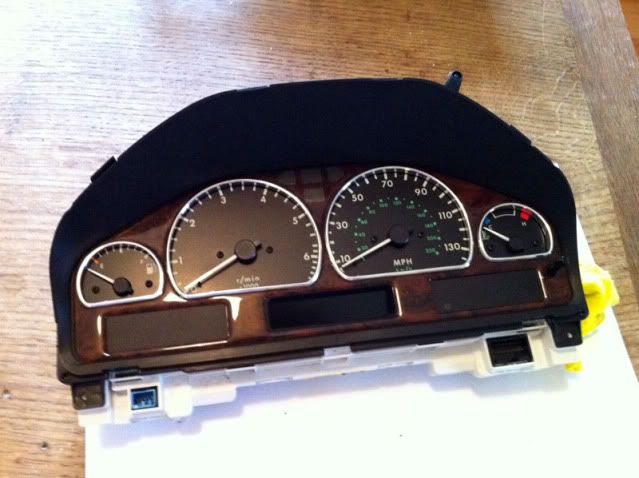 And fitting the plastic cover: 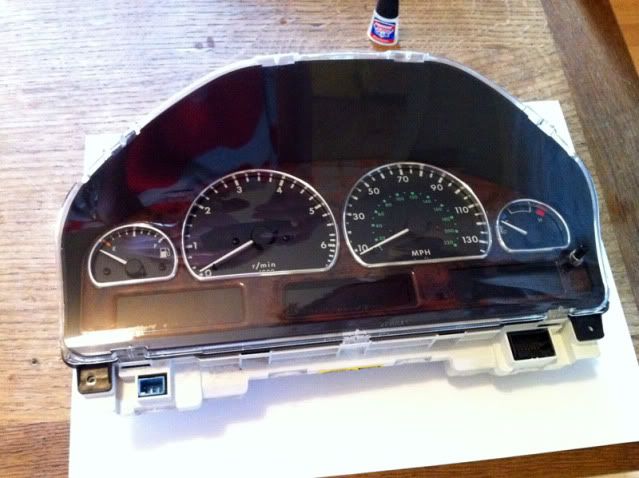 and then refitted: 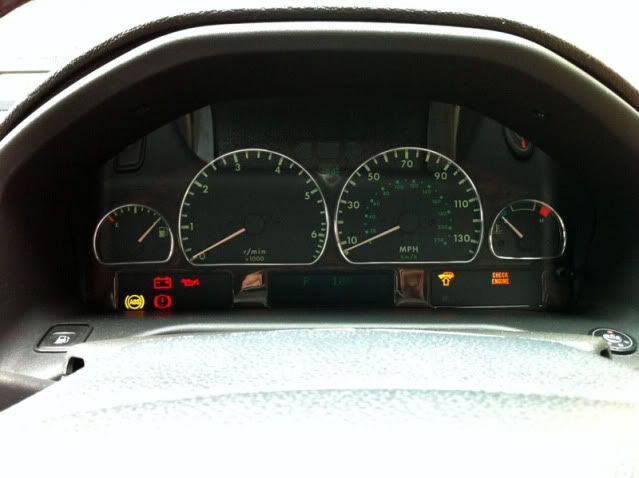  I like them, I think it just smartens the whole affair up a bit. The keen eyed will notice a light out in the cluster, I've removed this as I want to get some replacement LED's, I'm not keen on the green lighting, so I'm going to change it. Kept me out of bother for a few hours anyway! |
| |
|
|
d4mjt
Part of things
Posts: 83
|
|
|
|
Since the last update, the heater matrix o-rings failed. I was pretty much expecting this, as I had to put some decent force on the heater matrix pipes in the engine bay during the head gasket change. Not the nicest of jobs as the access is very limited, Land Rover's procedure is a 12 hour job involving removal of the dashboard, steering column, and disconnection of air-con etc. There are many documented ways to do the job with a few shortcuts, and I had a few other jobs / ideas up my sleeve at the same so I actually stripped the interior from the car before I started. I'd highly recommend this, it made being in the right place to get my arms up inside the dash far easier, I can't imagine how fiddly difficult it is to do with the seats in, and they're only 4 bolts a seat to remove. This is a classic symptom of o-ring failure, coolant dripping in the drivers footwell: 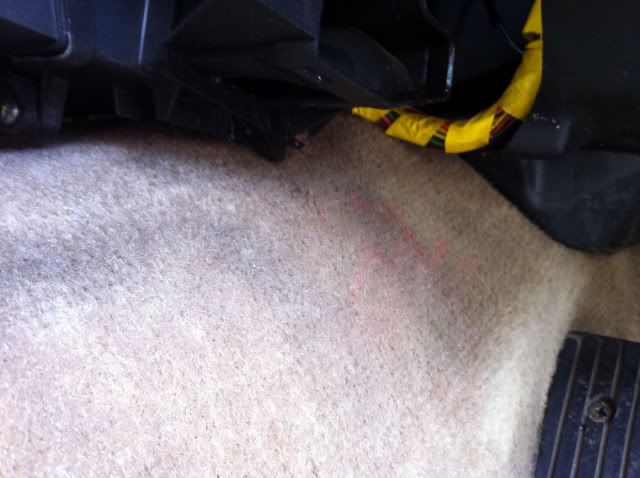 I also chose to remove the centre console and cubby box, as I have some new bits to fit, and I also wanted to clean the carpet properly. While doing this, I found the original leather pouch and nut cover removal tool for my locking wheel nut set, buried down in the depths of the cubby, god knows when it ended up there: 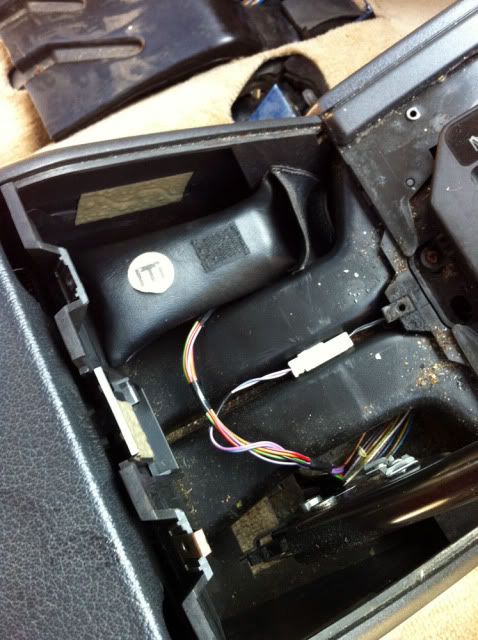 The interior comes out really nicely, no horrible jobs or brittle clips.  The carpet suffered over last winter and during the head gasket, and was looking worse for wear:  But after a good session with "George" the carpet cleaner, who's green instead of the red "Henry" ones, it came up a good bit better:  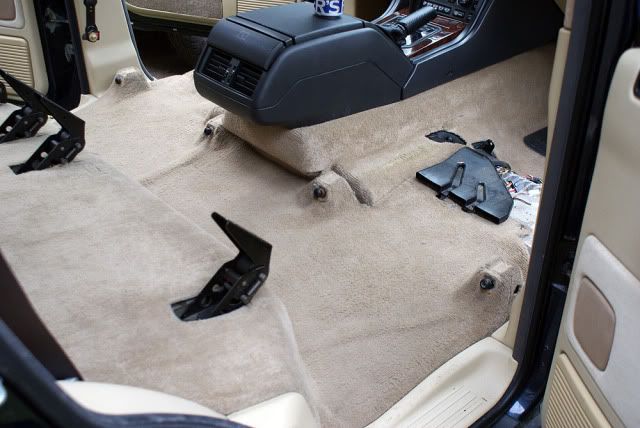 cracked on with removing the HEVAC unit and console: 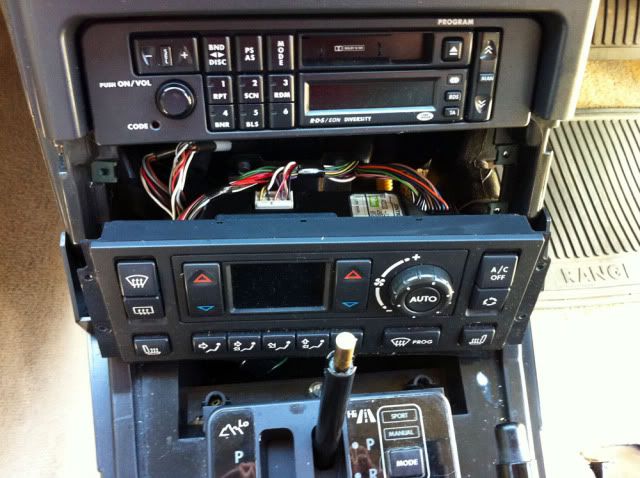 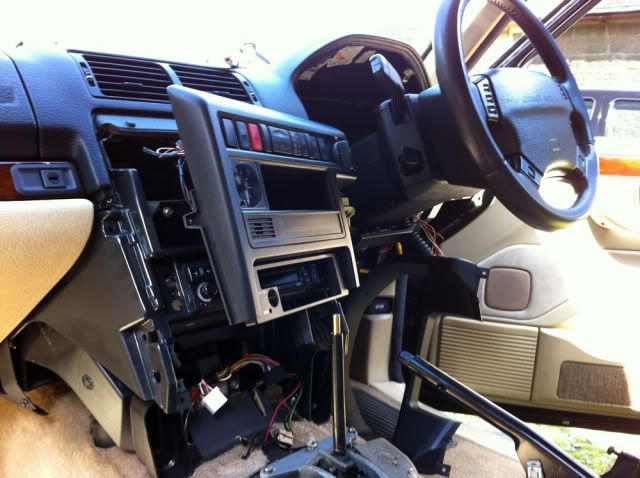 Which gave me plenty of room to work: 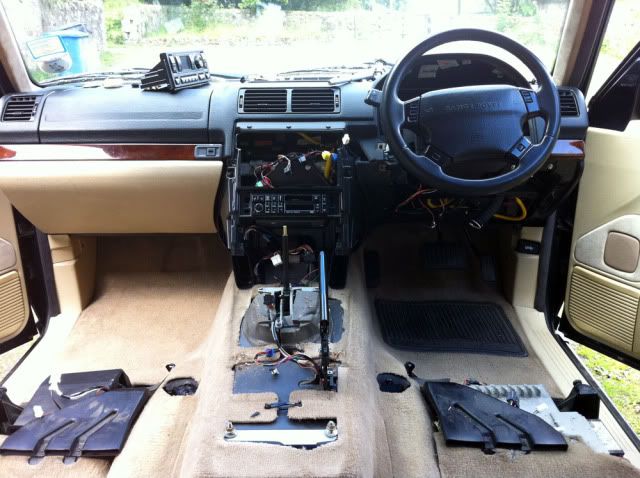 Old shot heater o-rings on the right, nice new ones on the left: 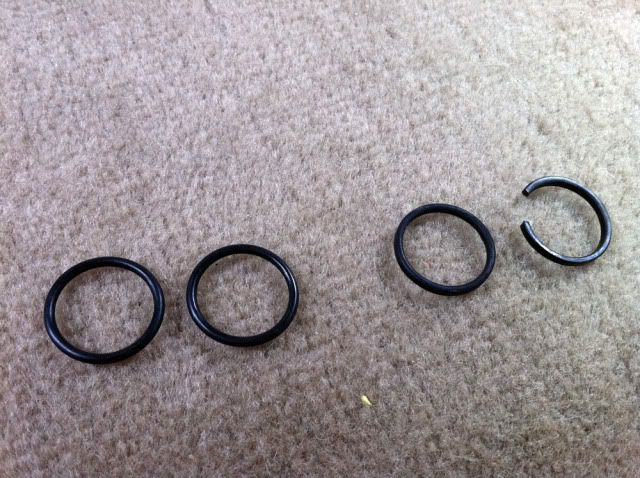 All in I think it took about 3.5 hours including bleeding the coolant system back up. Pretty happy with that. The reason I stripped the rest of the interior then. I've been wanting to tidy it up and make it a bit more special for some time, and I've been stockpiling parts to do this with. So, starting with the centre console cubby box, this got binned. The old unit as you can see is pretty plain and plastic: 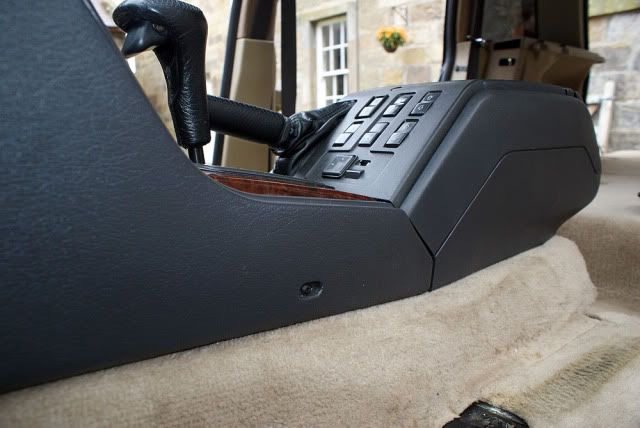 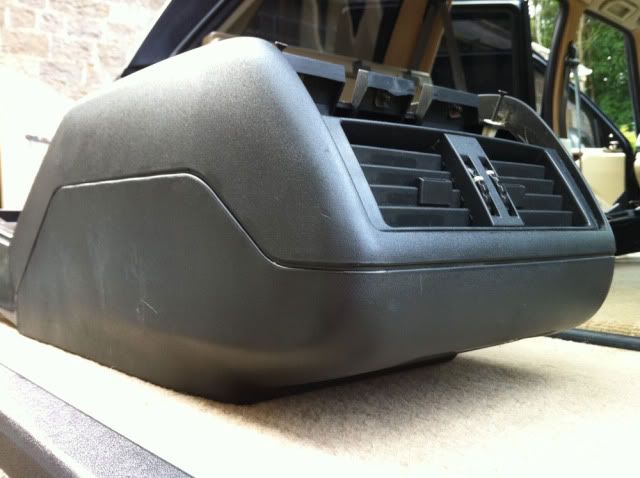 I've replaced this with a new genuine Land Rover Autobiography item, trimmed in Ash Grey leather: 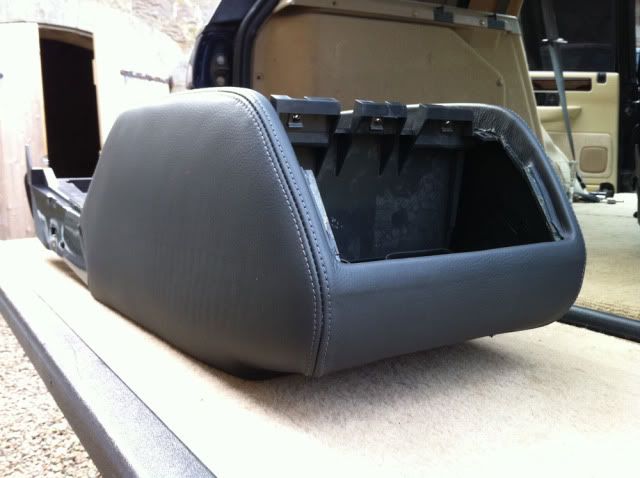 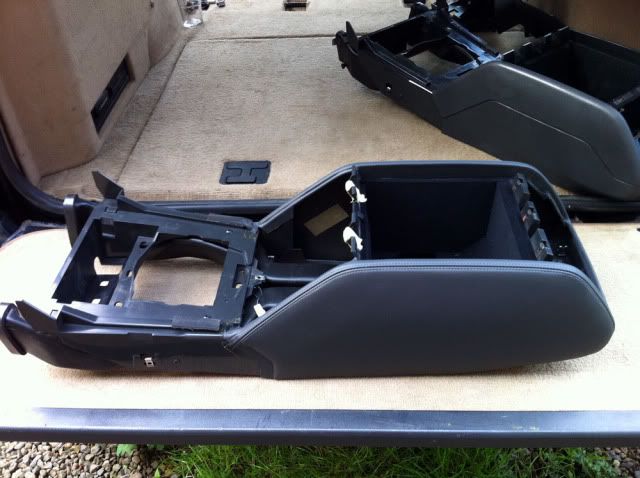 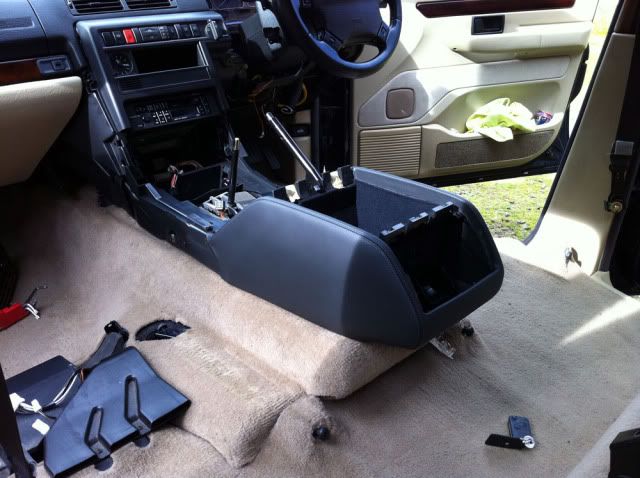 Along with this, I've also pulled together these, which took a while: 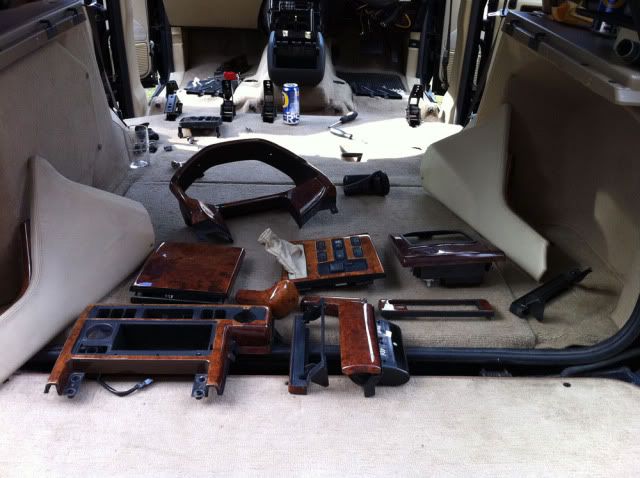 Now I've got some polishing and tidying up to do on them, so I haven't fitted them yet, but I did a test fit to see what it all looked like: 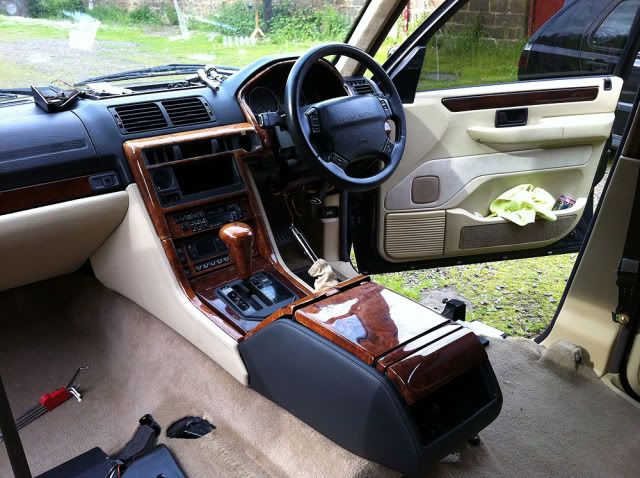 It should look far better when it's all finished, and a nice upgrade from standard. I'm on the look out for a half wood and leather wheel now. Also, since I've had the car it's been missing a parcel shelf, and trying to get hold of a decent lightstone one was nigh on impossible. I bagged one a few weeks back though, needs a good clean up but it'll do the job nicely. Typically I've seen about 3 for sale in this colour since then! I've also had a crack at colour coding the wing mirrors, I used a high build primer first, then plastic primer. A few coats of colour and then lacquer. They need another few coats of lacquer and a polish yet, but I've test fit one to get an idea and they look ok I think: 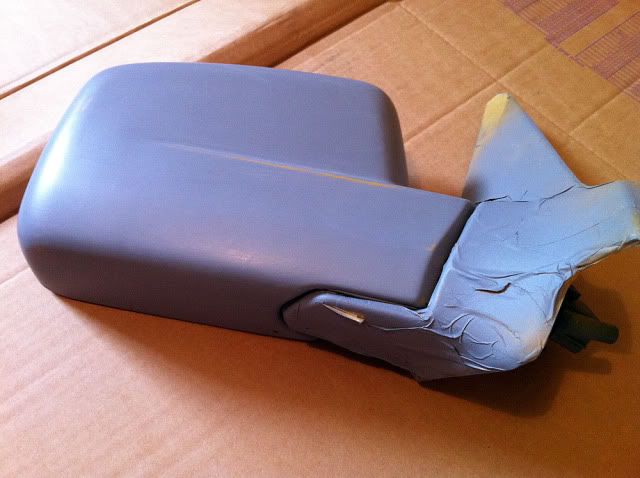 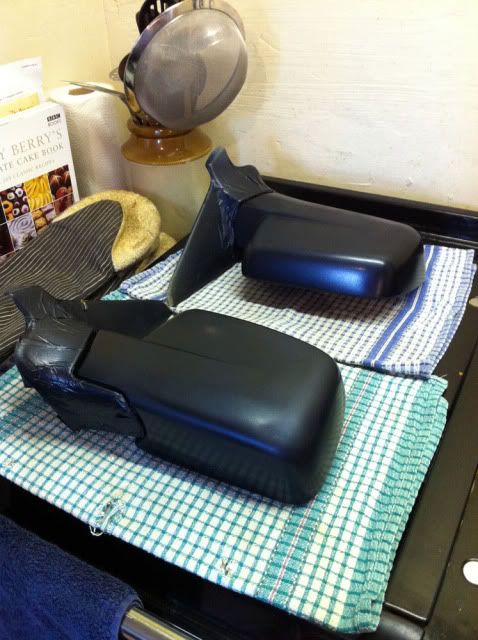 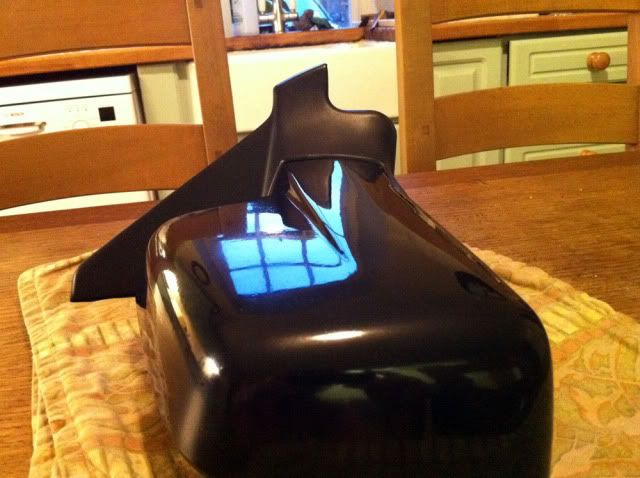 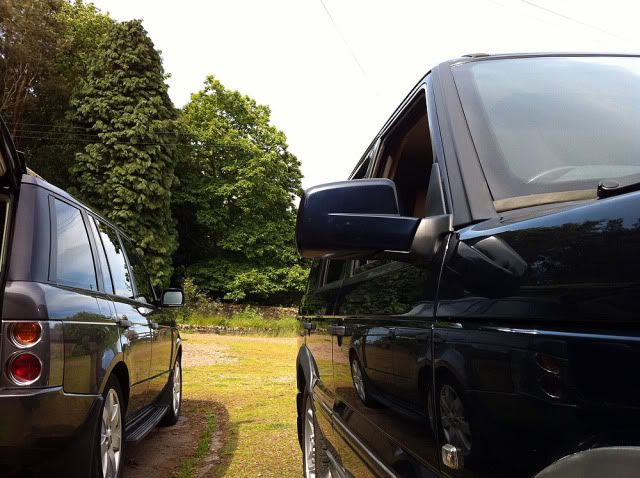 And finally, the reason the seats came out. The leather is in pretty good order for the year, but as with most P38's my heated seats don't work, and the surfaces are starting to crack, so out they came. I'm going to have a shot at re-trimming these myself. As they say, what's the worst that could happen? :laugh: 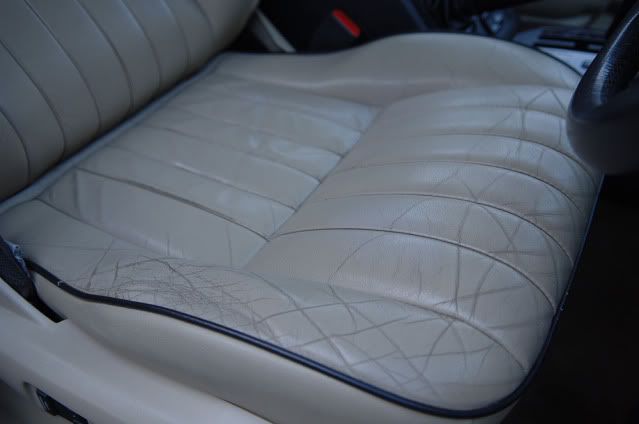 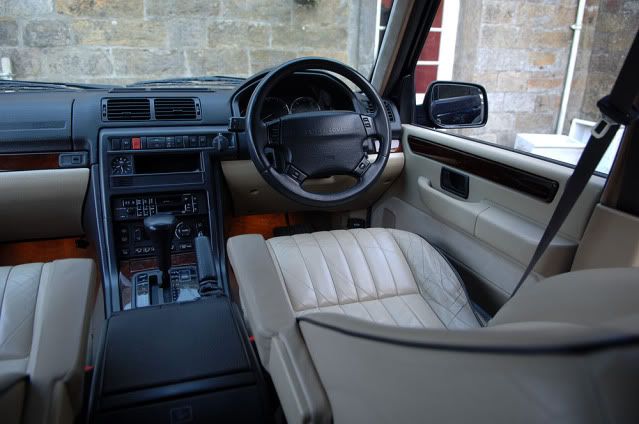 Think that's it since the last update! It's coming together slowly, I'm still stockpiling suspension parts too, I've got track rod ends and bar, steering damper and a few other bits here, I need 4 shocks and 2 bags and then I'll fettle that little lot. Keeps my idle fingers out of mischief anyway |
| |
|
|
d4mjt
Part of things
Posts: 83
|
|
|
|
Onto the re-trim then, at the moment it's about 75% complete. It's taken me about 3-4 days total to get to where I am now, over about a fortnight. It's good fun, and the end result, thankfully is looking promising and rewarding. I did the smaller split rear seat first, and this has been re-fitted to the car for about a week now, then I moved onto the larger split rear seat with the central armrest, and then tackled the drivers seat. I've got plenty of pictures but I'll concentrate on the drivers seat as the rears are pretty straightforward. Before I started, it was cracked and the bolster had broken down and was folded over under the trim: 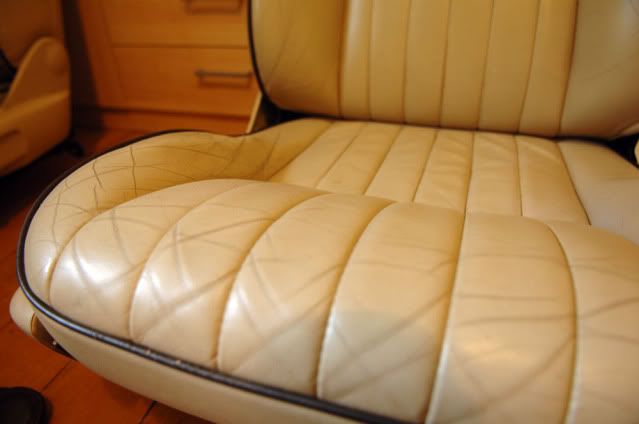 The hardest part was seperating the lower black clip along the bottom of the seat base which you can see in the picture below, it takes some force to remove from the seat base frame: 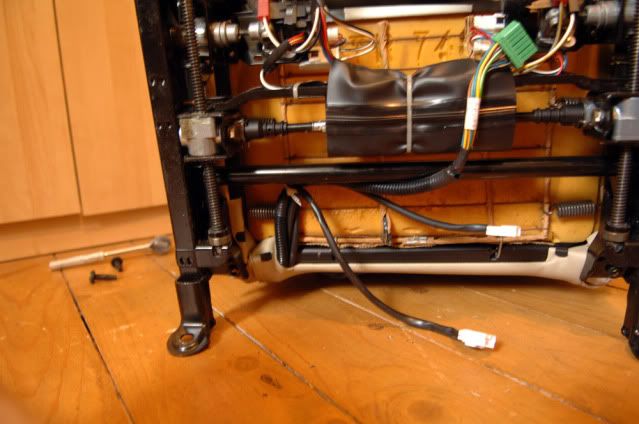 The seat frame is held to the seat base holding the motors etc by 4 bolts, this is the seat split: 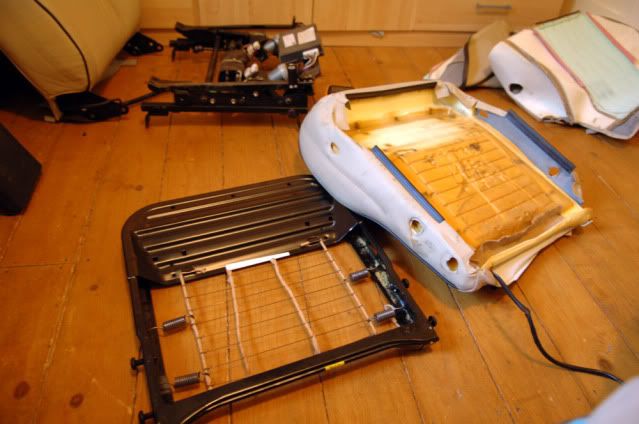 I didn't get any durings while I re-trimmed the back rest, as i got a bit carried away to see what it would look like, but here it is re-trimmed: 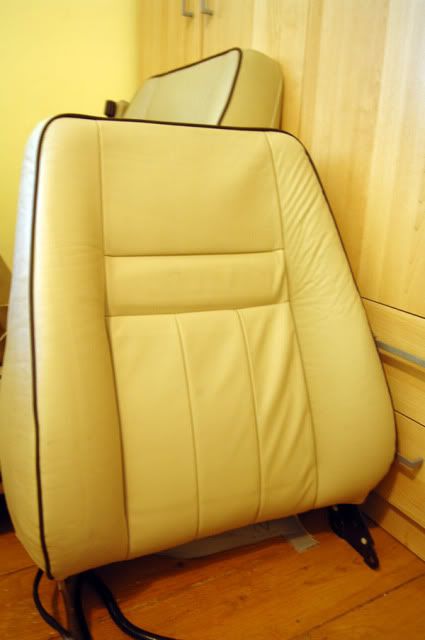 I had faulty heated seat elements. I was also a bit put off by the £200 cost of replacing all 4 elements, so I had a nosey. You can test whether they work easily by using a multimeter on the 2 connector pins. The seat back was fine, and was unbroken, and the seat base, was broken exactly where they all go, in the middle of the seat in the join. Easy to spot, I repaired the wires, and it works fine now: 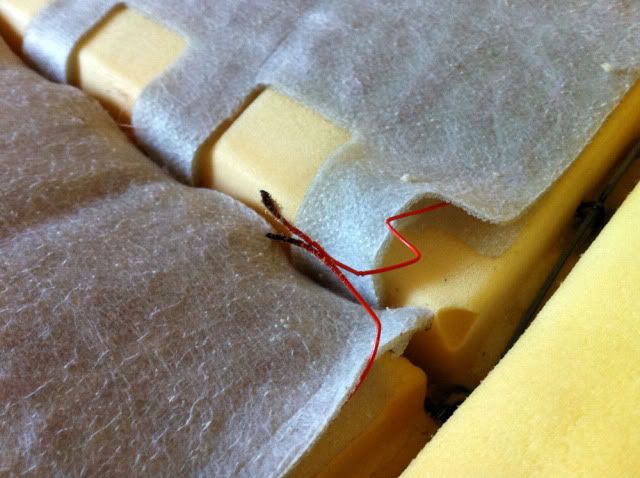 Here you can see the condition of the old drivers seat base: 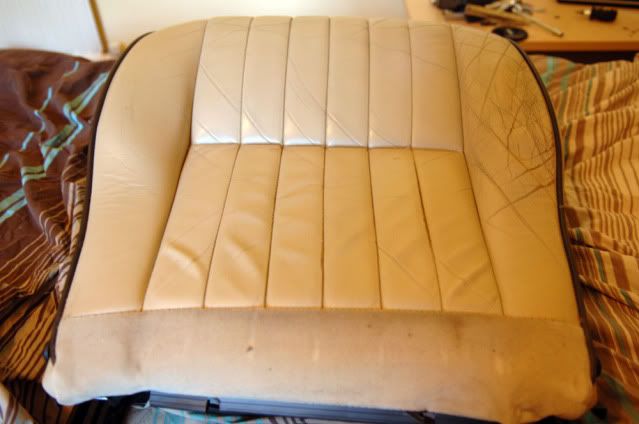 and now the finished trimmed base alongside the old leather: 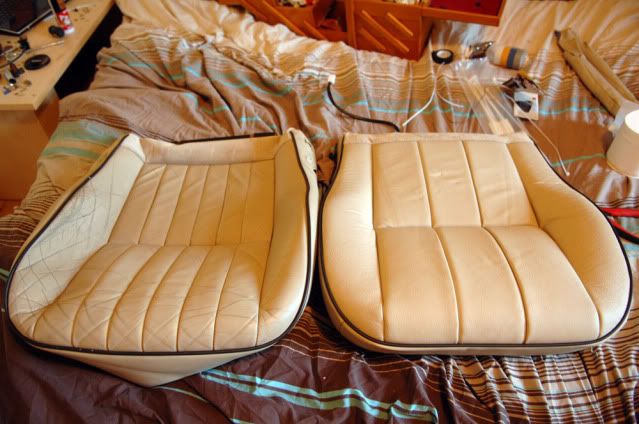 Happily, the bolster damage was also only to the old cover, the sponge on the underside of the trim had seperated and rolled in on itself creating a ridge. As they say in Haynes, refitting is the reverse of removal, so I lashed it all back together, and took a comparison between my re-trimmed drivers seat, and the still to do passengers seat: 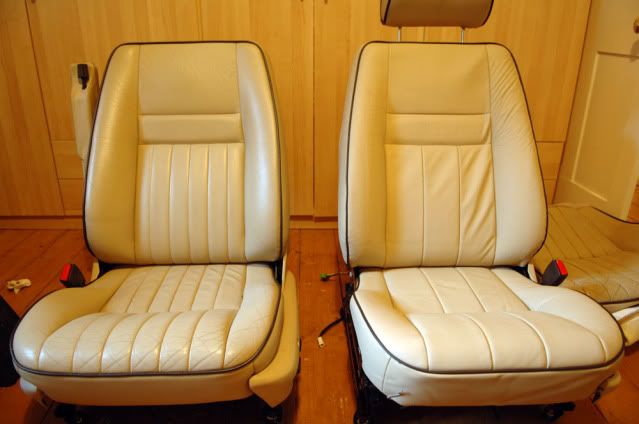 Here are some pics of the seat trial fitted back to the car: 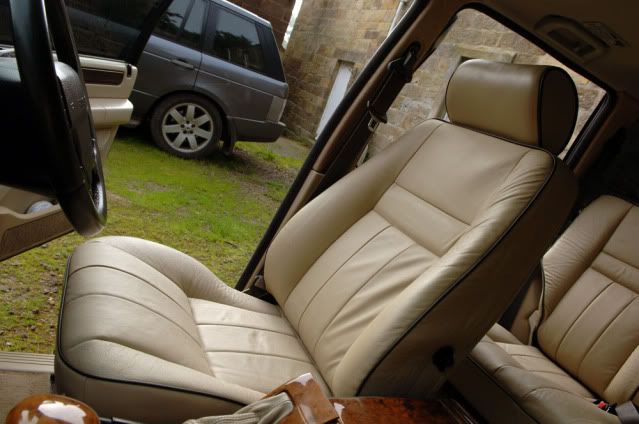 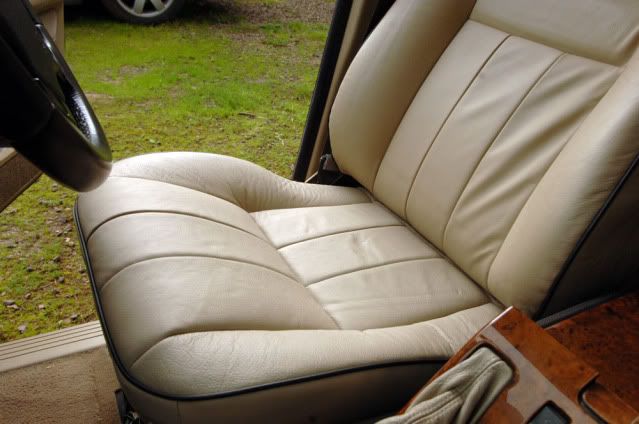 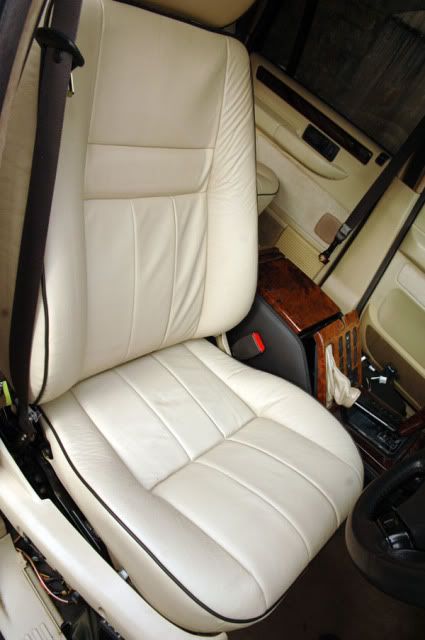 and the rear seats: 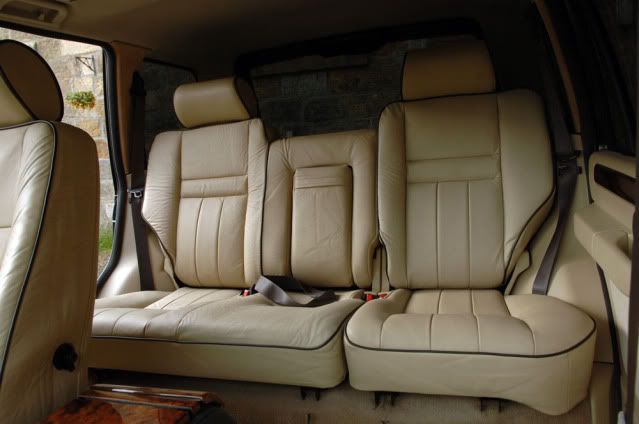 You can see in this shot, the single folding rear seat which has been in the car longest, has settled, and the creases and folds have dropped out of the leather. The other seats should settle out too, as they have a few creases etc in still. |
| |
|
|
d4mjt
Part of things
Posts: 83
|
|
|
|
So, I've now got pretty much all of the interior work done. To show best how it's come on, here's a before shot of the dashboard: 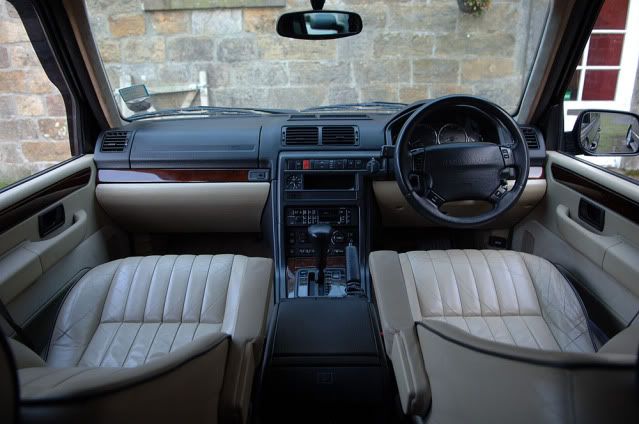 and here's how it looks today: 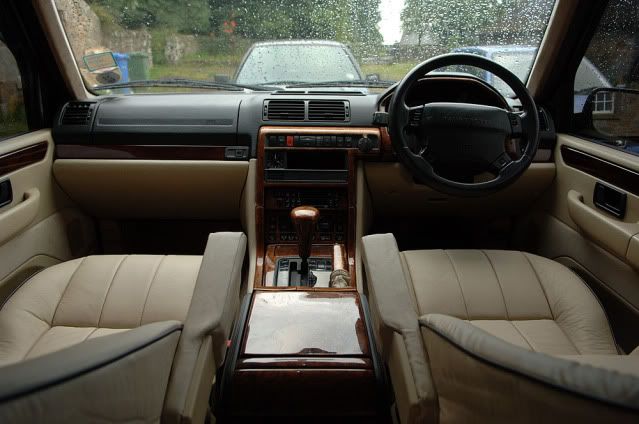 All in all, I'm over the moon. The heated seats now both work again as they should, in fact, I'm in the rare position of being able to say that currently, everything on the car works, cruise control included. The bolster damage on the drivers seat was the sponge in the cover, and actually has come up like a new seat. I'm just really happy with it. Here's some more photo's:        One of the things I'm most happy with is the stitched leather centre console that replaced the old plastic affair, the ash grey compliments the lightstone leather really well I think, and the wood looks great against it:  All in all, I'm really happy with it! Also, an engine bay picture:  |
| |
|
|
d4mjt
Part of things
Posts: 83
|
|
|
|
So, an update as to what else I've replaced / fixed / broke of late. First of all, I had a list of things I wanted to get done before the weather started to worsen, and winter arrived. If I can possibly get away with it, I don't want to be lying in a puddle on my back hitting things with a hammer this year. So, with that in mind, roughly what I had left on my list was: New Rear Discs New Rear Pads Full New Exhaust pretty much Decats for a bit of noise / torque / economy? 4 new dampers Track Rods and Bar Drag Rods and Bar Steering Damper Gearbox Flush and Refill + Filter change Diff Oil Change So I had a bit of a splurge on parts, and annoyed Parcel Force a bit: 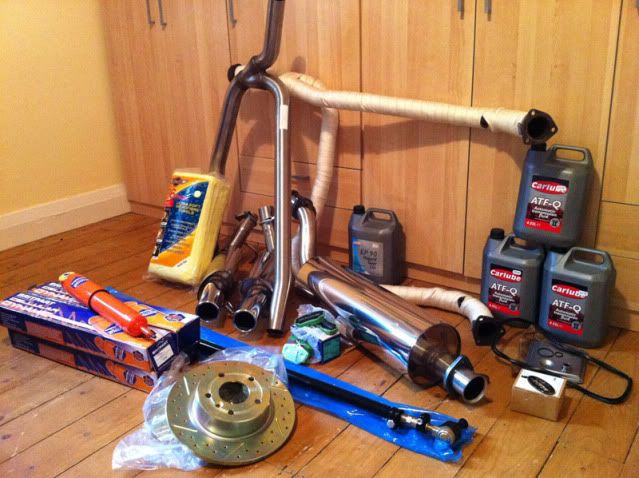 Shiny things First and easiest job, as you do, I replaced the green and gold Land Rover badge from the front grille. I've already debadged the rear, and I didn't really like the badge being the only green and gold on the car as it didn't really go in my eyes.  So I replaced it with a black and silver one:  Moving on to proper jobs, lesson number 1, it's all in the prep:  So I removed my old downpipes and cats, you have to remove the gearbox crossmember to get them out. Hindsight is a wonderful thing, and the best way to get it out after you've unbolted it is to use a jack to slightly press apart the chassis rails and it drops out. Or, you can hit it, and yourself, a lot with a hammer. 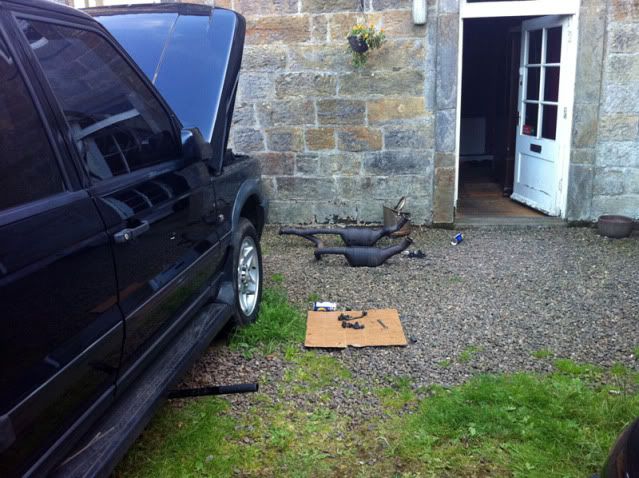 Gearbox supported with a jack, and the crossmember removed: 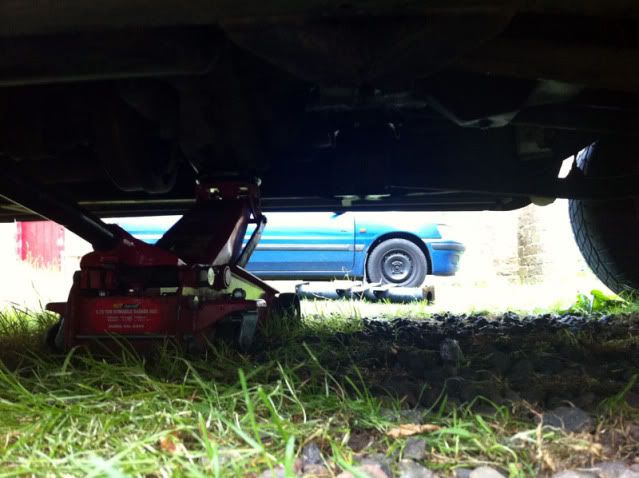 Downpipe unbolted from the manifold and removed: 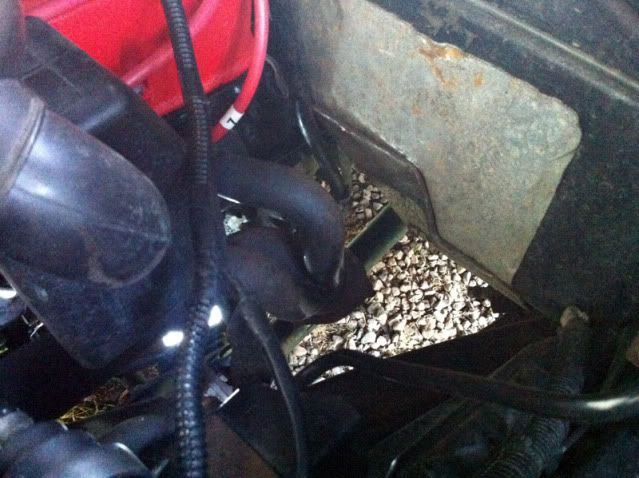 At this point I took the opportunity to heatwrap the passenger side manifold. I only had enough heatwrap to do one during the head gasket job, so I did the drivers side as it's a mare to remove, the passenger side is a doddle: 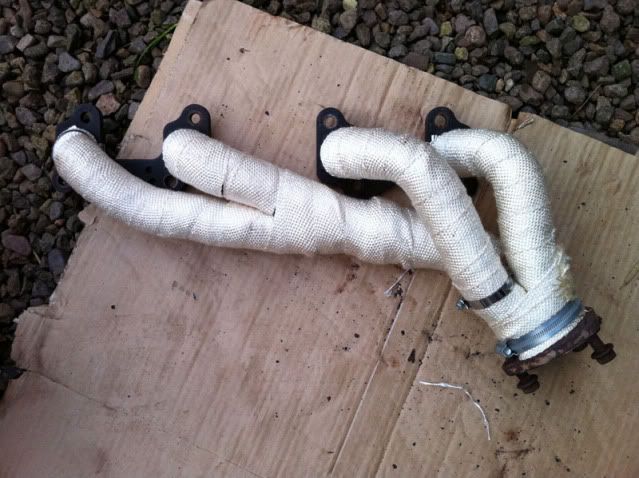 And refitted: 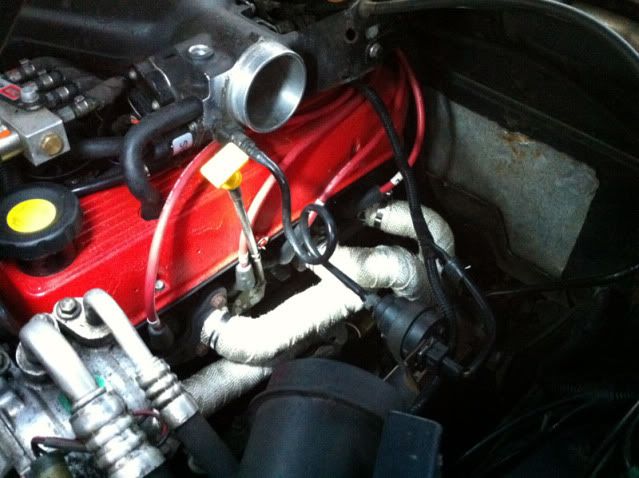 At this point I replaced the steering damper and track rod assembly, I did the drag link assembly when I replaced the front shocks, but I didn't take any pictures at that point. Old vs new:  Then I heatwrapped my decat downpipe: 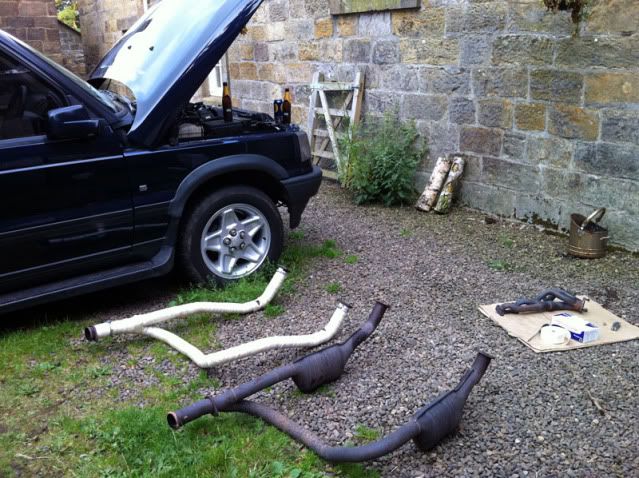 I did a quick mock up of how the exhaust will go together, I chose a Janspeed stainless steel catback system. The quality seems really good: 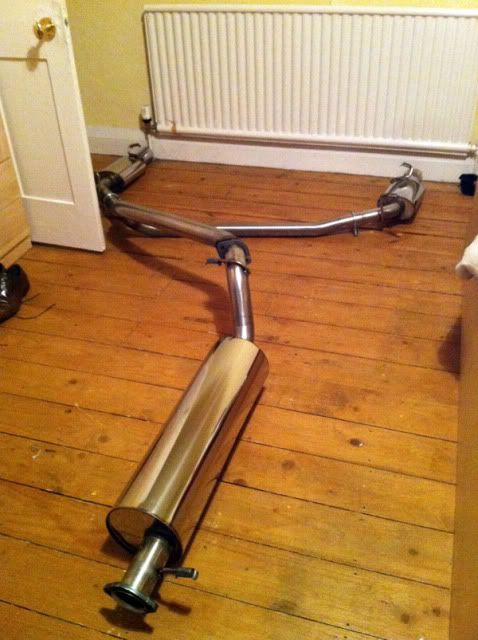 Then I fitted it, no pics apart from the completed one. The reason being, I decided to do all these jobs before winter arrived and the weather turned, so obviously, come the fitment weekend, it lashed down with rain :laugh: Excuse the umbrella stand ruining the picture: 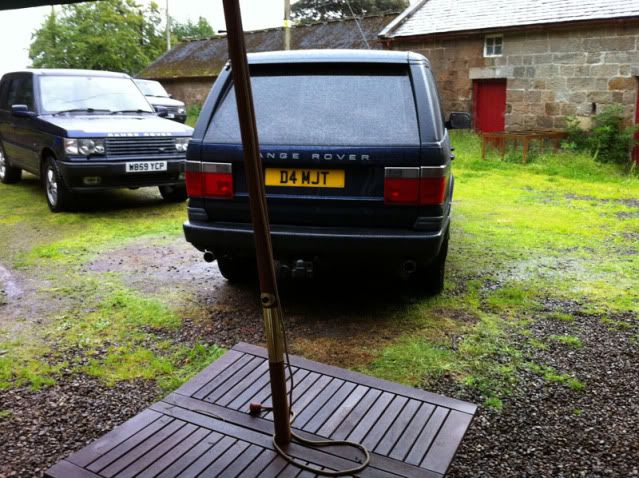 Anyway, I cracked on with dampers and brakes, with my makeshift weather solution 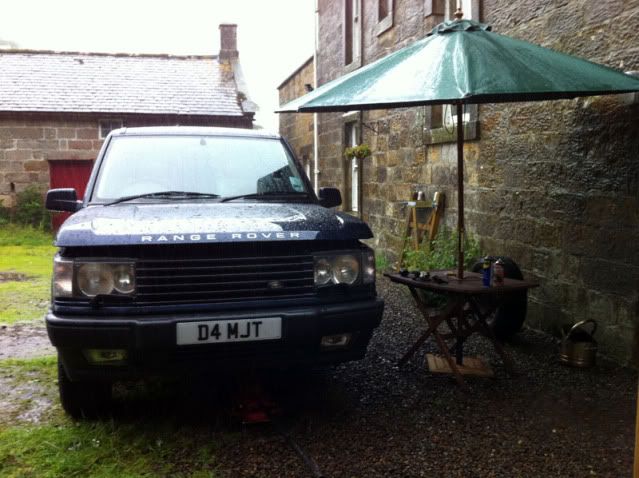 Shiny new drilled and grooved rear discs fitted, and EBC GreenStuff pads: 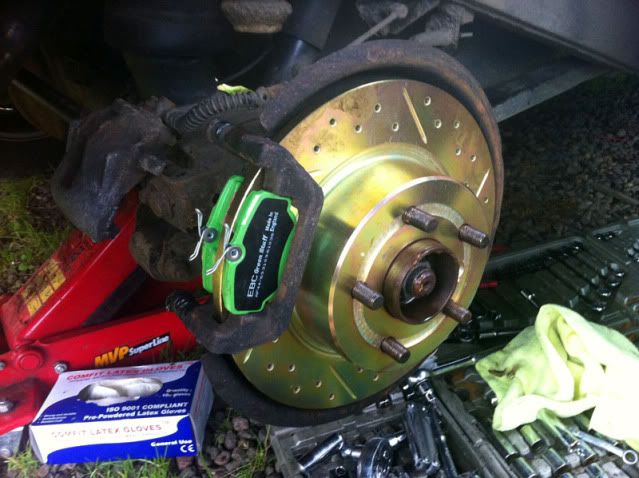 And old vs new rear dampers, I chose Britpart Cellular Dynamic's, as they're cheaper than the Bilsteins, but seem to have a good reputation, and my parts bill was already high enough lol 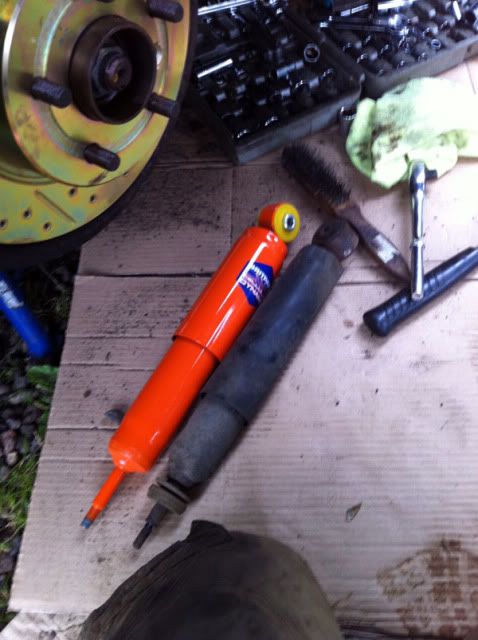 And fitted. That's the only picture I have currently, as it just got too wet to take any more pictures without risking my phone dying: 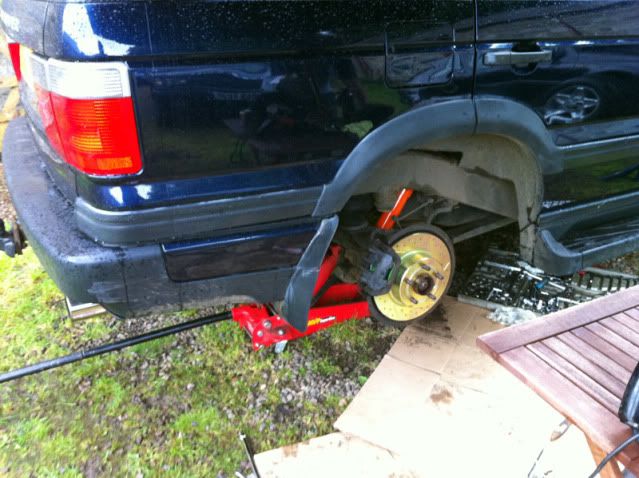 Last but not least, this is probably one of my favourite modifications so far, I wanted to relocate the LPG control unit. It was fitted to the dash in an easy to access, but not particularly useful place in the instrument binnacle. You have to lean forward over the wheel to see it the level easily, and I didn't really like how it looked like a bit of an afterthought. You can see it's old location in this picture I took a while back, it's the circular button affair out of focus in the bottom right of the clocks area: 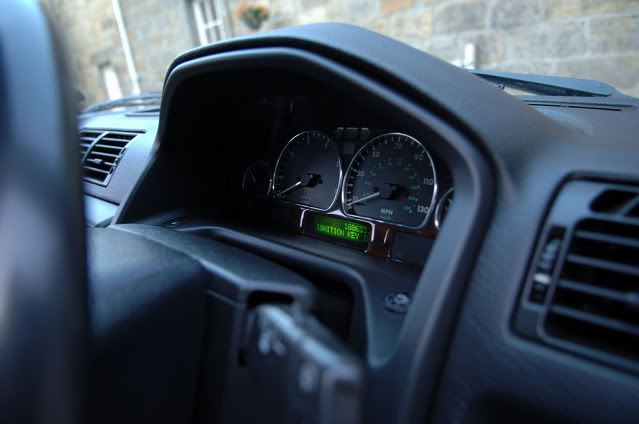 As I fitted a new clock surround with a walnut veneer, I had the perfect opportunity to move it, as I would have needed to redrill the surround anyway to fit the LPG unit in the same place as before: 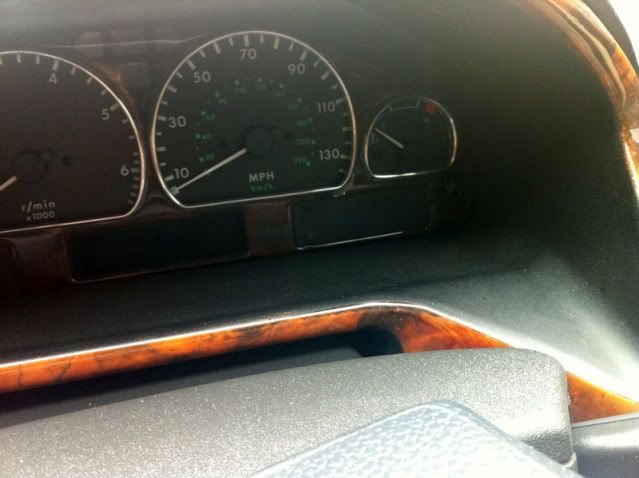 So here it is now: 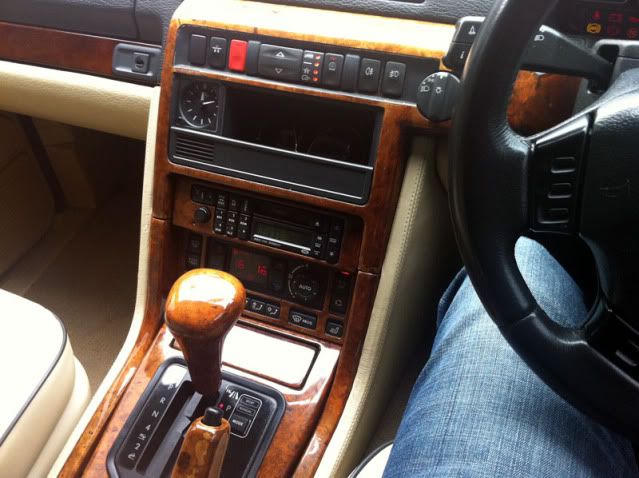 I like the location because it's hidden from view when the ashtray is shut, and it's easily accessible, and easy to see from the drivers seat. The ashtray lid and general dashboard shield it from sunlight so it's easy to see the LED's during the day, and it just happened to be a perfect fit after some slight modification for the cigarette lighter location. I've simply unwired this. I think I've used it twice since I got the car, I didn't like it's location anyway, as to use it you had to have wires lying all over the console and it looked messy. In time I plan to relocate a power source in the boot, and use it to power a Land Rover coolbox. Excuse the state of the ashtray area, it's been used to stash interior screws and all kinds while I've been tinkering, it's been cleaned now! 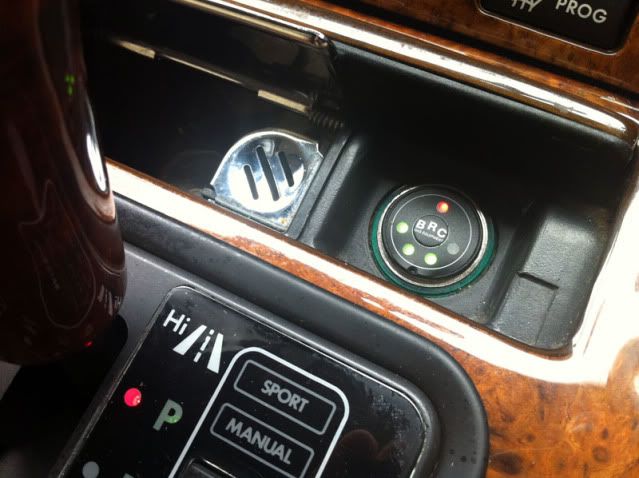 Finally, now it's in pretty good order for the winter, sounds the part and rides better, I had a mission about some fields in it to err, bed the shocks in. Or just because it's fun: 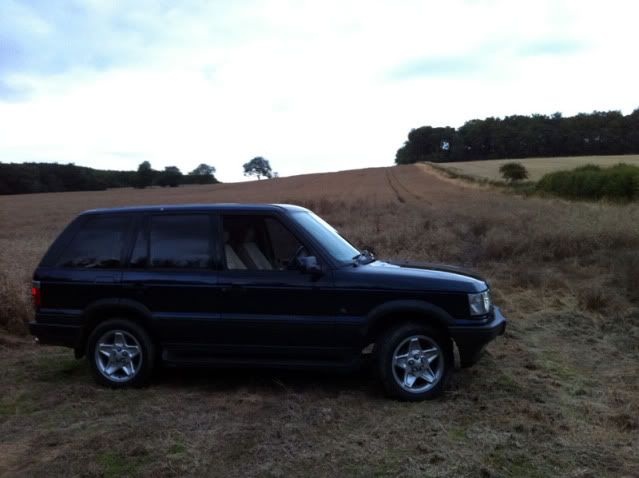 The exhaust is fantastic, I'm really happy with it. It's very throaty, and you can get a deep V8 rumble out of it, but if you're on the motorway, it doesn't drone at all, in fact it's only just noticeable. Unless you plant your foot.. I'll sort a video out of the sound, but it's pretty much exactly what I was after, it's quite throbby under load. The decats sort of suprised me. I've heard some reports that removing them improves fuel consumption slightly, less restriction and all that I guess. My experience so far is that it's definitely no better, probably slightly worse. I think I'm currently averaging 15.8mpg, whereas before I was probably getting nearer 18.7mpg. However, the difference in driveability is profound. The car just feels like it has far far more torque. It changes down gears far less on hills, and pulls itself along like a train. I'm happy to take the slight hit on economy for the improvement in performance. So that's where it's at now really, I've got a few more little things I'd like to do before winter, but not masses. Ooh, and a video of how it sounds now Range Rover P38 4.6 V8 HSE Exhaust - YouTube |
| |
|
|
Graham
Posted a lot
Posts: 1,282
|
|
|
|
Wicked job well done  |
| |
Maximum signature image height: 80 pixels
|
|
|
|
|
|
|
|
|
|
An absolutely fantastic read. You have transformed the car and it looks bloody gorgeous! Fair play to photographing all the steps and doing a write up like that....I know I wouldn't have the patience!
|
| |
'86 E30. '86 E28. '92 E32. '97 Laguna. '98 March. '00 A4. '05 Focus.
|
|
bryn
Posted a lot
Posts: 3,913
|
|
Aug 25, 2011 11:48:49 GMT
|
|
I love reading about stuff like this, good work on the write up and thanks for sharing ;D
|
| |
Volvo, Buggy, Discovery and an old tractor.
|
|
|
|
|
Aug 25, 2011 12:53:30 GMT
|
Really enjoyed that You've done a great job on the seats  |
| |
|
|
qwerty
Club Retro Rides Member
Posts: 2,410
Club RR Member Number: 52
|
1998 Range Rover 4.6 HSEqwerty
@qwerty
Club Retro Rides Member 52
|
Aug 25, 2011 21:07:14 GMT
|
|
Just echo others comments really. Thoroughly enjoyed the write up! You've done great work!
|
| |
|
|
|
|
|
Aug 25, 2011 21:54:06 GMT
|
|
Blimey you've got some patience and skill! Not bad with a camera either.
Brilliant work, keep going.
|
| |
|
|
task
Part of things
Posts: 374
|
|
Aug 25, 2011 22:31:27 GMT
|
Read this over on PH, nice P38 you obviously have a passion for them Your thread actually made me consider scratching my P38 itch |
| |
|
|
|
|
|
Aug 25, 2011 22:46:34 GMT
|
|
Excellent work, nice to see jobs done well, and completed! How good do you find the level gauge for the BRC, mine just seems to put up a random number of lights, depending on how its feeling, and where the moon is positioned.
|
| |
|
|
d4mjt
Part of things
Posts: 83
|
|
|
|
interesting you should mention that. Mine's actually been brilliantly reliable and generally spot on, with the level rising and falling very predictably tank after tank. However, over my last 2 tanks I've only filled up say £20 at a time and it's never lifted off flashing, so I wonder if it's perhaps because I generally just fill the tank to full? As a gas kit I can't give it enough praise though, there's very negligible power difference between running on LPG and Petrol, no matter how much you push on, it doesn't back off gas onto petrol on miss-fire, it's been brilliant. Thanks for your comments |
| |
|
|
|
|
|
Aug 26, 2011 12:02:05 GMT
|
|
bloody hell thats well nice!!
have you binned the cats? i could do with all that pipe work excluding the cats for my project.........................
|
| |
|
|
d4mjt
Part of things
Posts: 83
|
|
Aug 26, 2011 14:14:00 GMT
|
bloody hell thats well nice!! have you binned the cats? I could do with all that pipe work excluding the cats for my project......................... Argh no way! I literally got shot of them this time last week mate, taking up room in my garage  Sorry, you could of had them! |
| |
|
|
|
|