


Hi Guys
I promised in my other thread:
retrorides.proboards.com/index.cgi?action=display&board=readersrides&thread=121213&page=1#1505167
That I would put up a build thread on my Mini Marcos.
It is a mk.2 and built in 1967. It is on of 50 chassisnumbers, from no. 7006 to no. 7057, which after Marcos participation in Le Mans in 1967 were homologated for racing. This allows it to run in historic racing today, and that is what iam planning to do.
It will be built in FIA racing spec, but iam also planning to get it registred for the road, so that I can use it for Hill Climbing and so on.
In order for you guys to catch up, I have shamelessly copied my build thread from the Mini Marcos owners club.
The progress is, and will be, very much on and off, as I spend a big part of my time working abroad. Currently I am in Japan, but cannot wait to get home and continue the build.
In the future I will make sure to also update the thread on here.
BR
Dennis
------------------------------------------------------------------------------------
Hi Guys
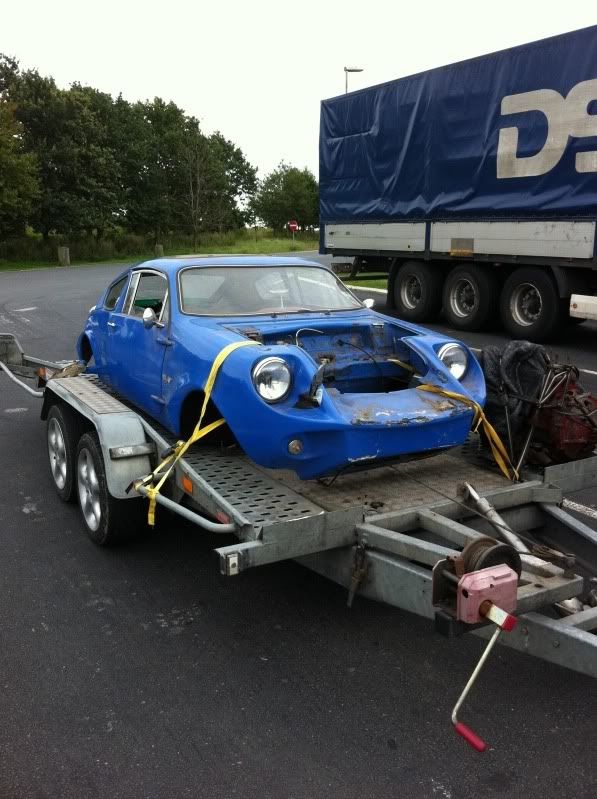
Decided I wanted to start this thread, as 7012 now is in my garage, and I have started tackling some of the smaller jobs. My plan is to get it running and registred. Then run it for a while and take it apart again.
I picked it up last Thursday
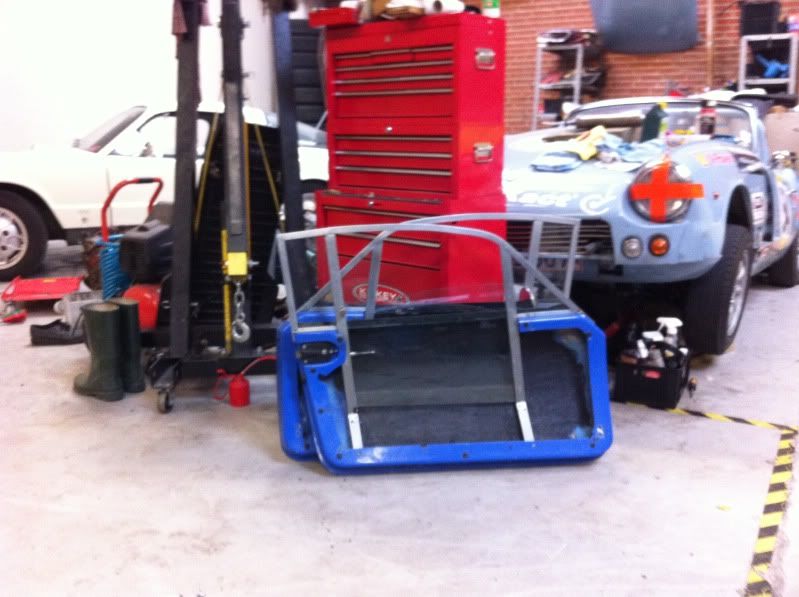
Sitting in the garage I share with a group of friends.
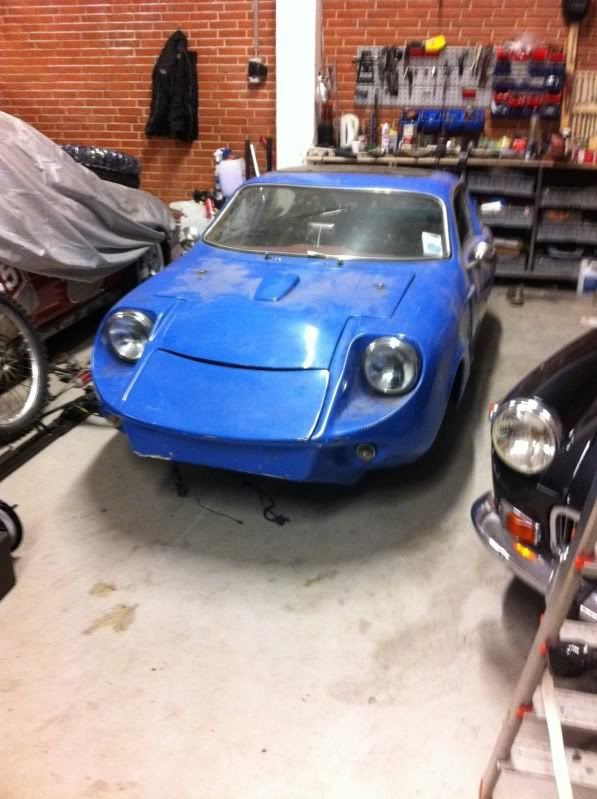
This weekend I have been fully occupied with my dads 60 years birthday. But yesterday when I got back home, even the hangovers couldn't keep me from the garage.
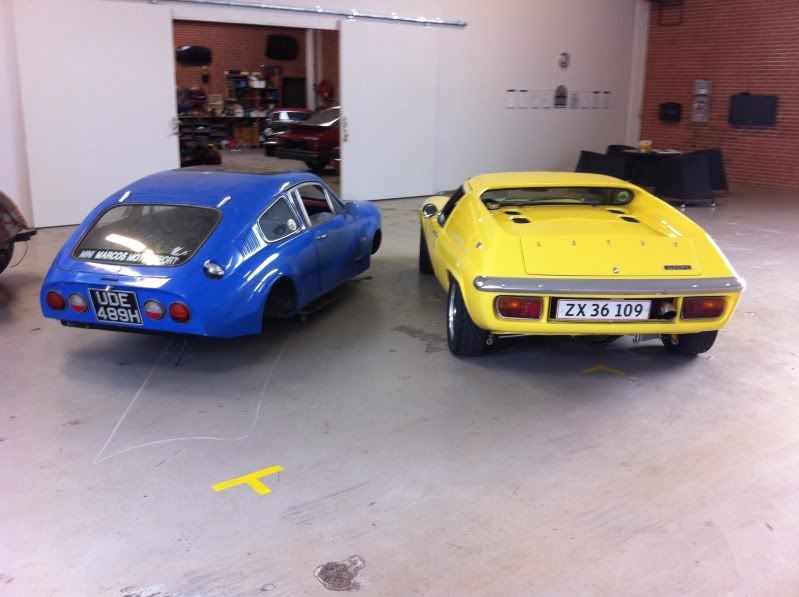
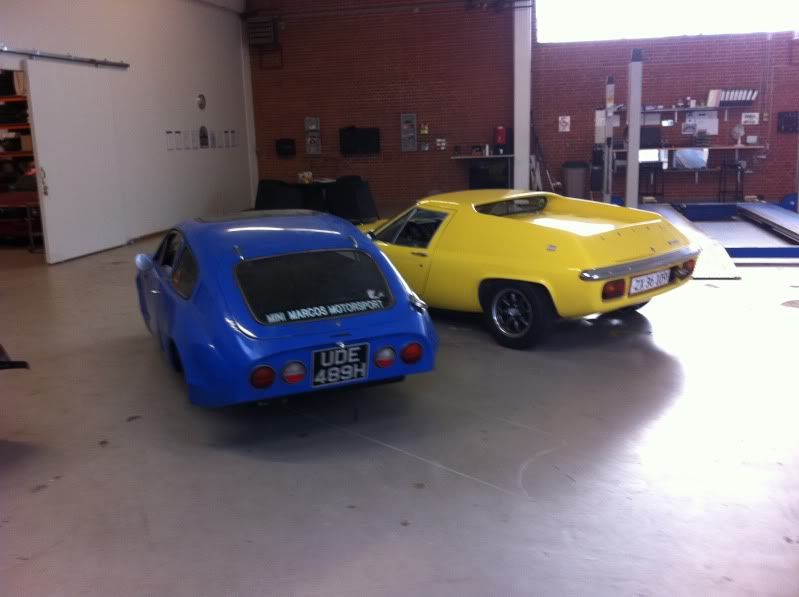
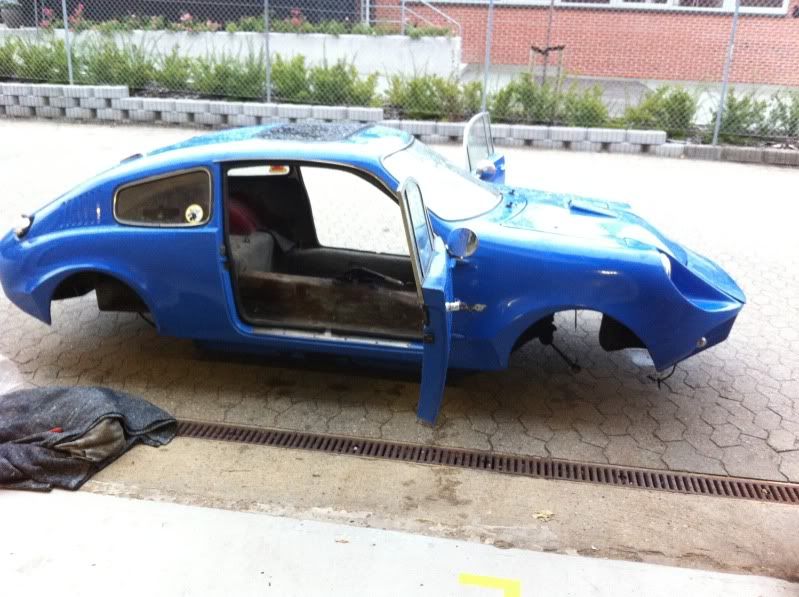
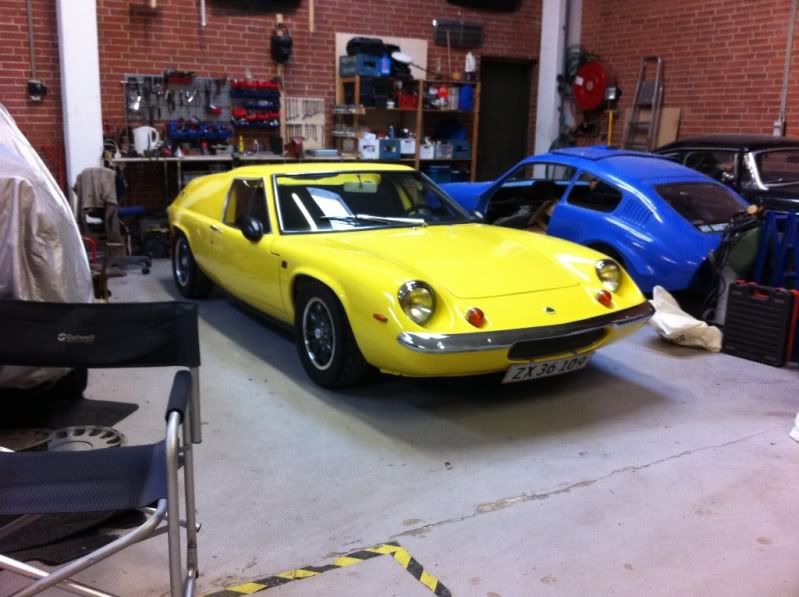
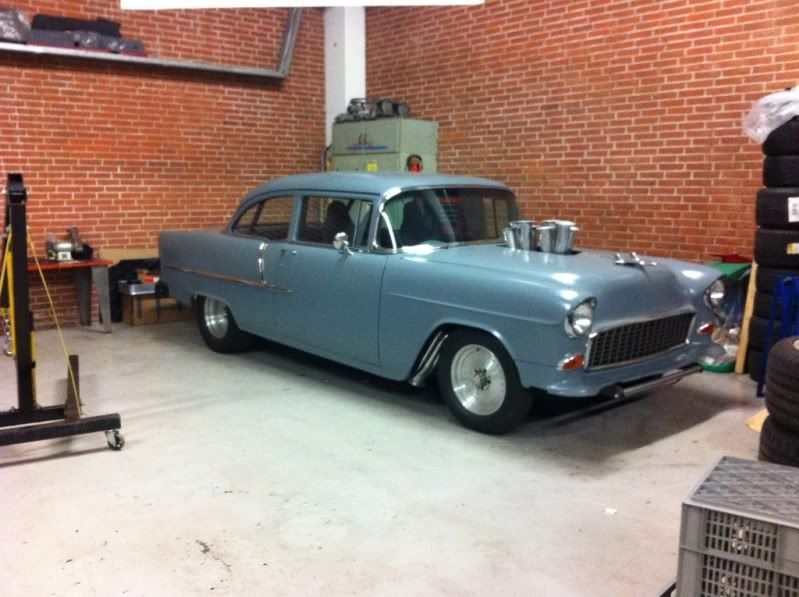
I started with rolling it out so I could get some pics of it together with my Lotus.


Then I decided to give it a quick clean.

Before I knew it, I was busy pulling out headliner and carpets. I think next up is the dashboard.


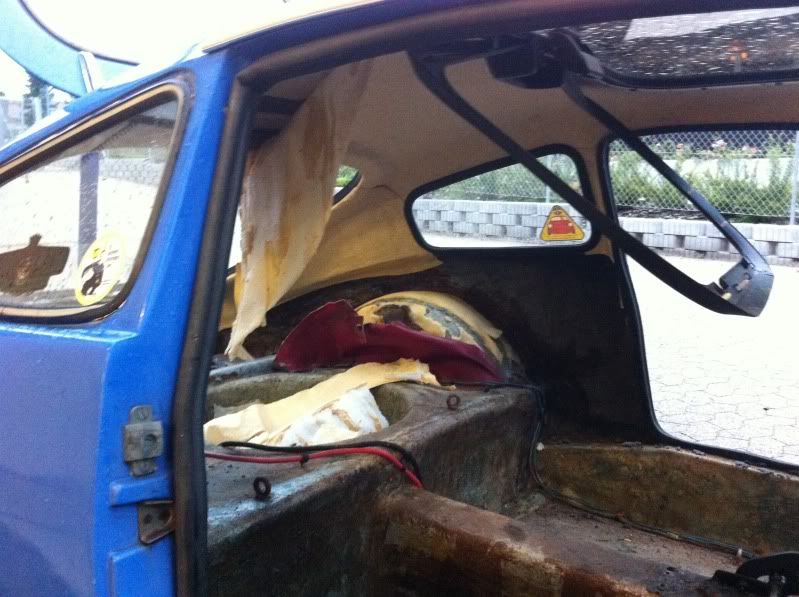
All these door covers were inside the car. I think they will look good once retrimmed.

It was nice to make a little progress yesterday. Iam off to Korea later today, and it will be a week before iam able to continue.
I was really pleased with how it looked after a wash, iam sure a really good polish will do wonders on the bodywork.

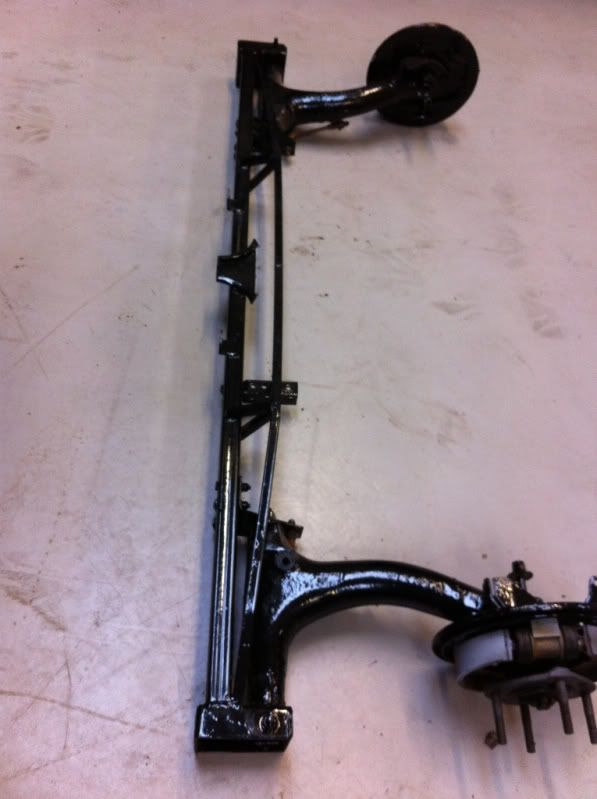
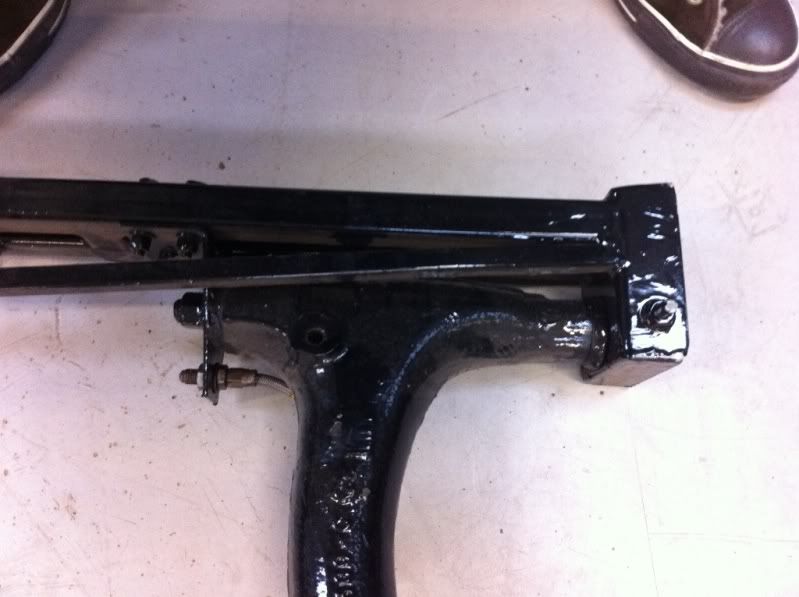
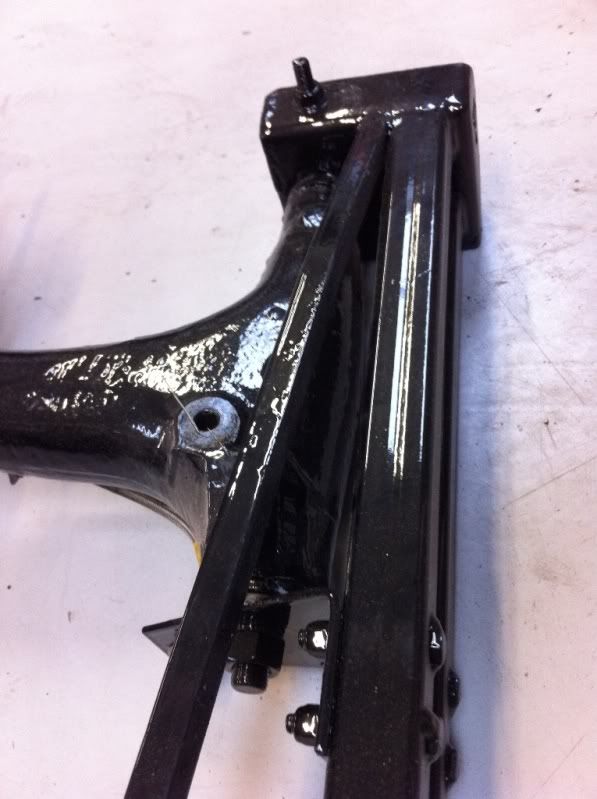
One of the first big jobs will be to assemble the rear subframe. I have the swingarms from the lightweight beam that came with the car. But I will have to buy the rest. Could any of you perhaps point me in the direction of the best place to buy these parts?
------------------------------------------------------------------------------------
Cheers guys. I guess boat paint must be the way to go as it should be durable and made for fibreglass? I would like a Satin/Matt finish, and idea where I can buy this?
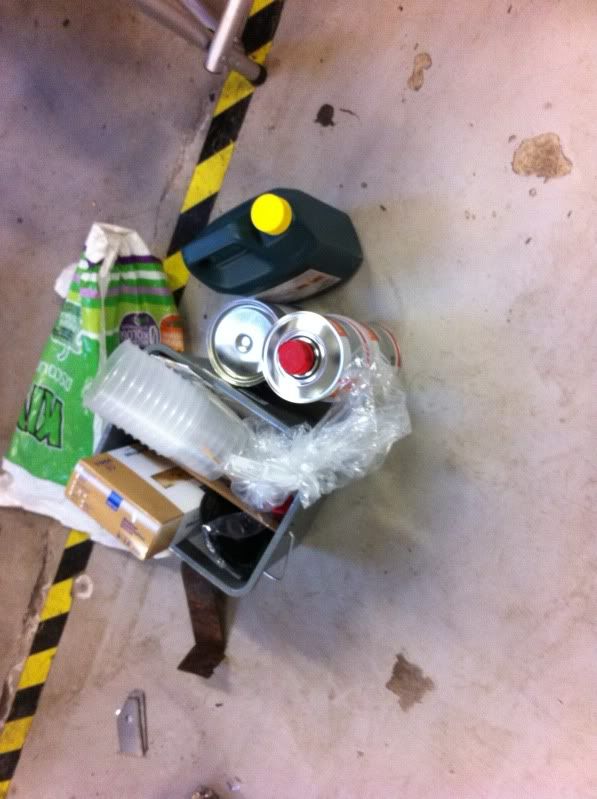
I have just returned back home after a trip to Korea, and while I was bored on the hotel, I accidentally bought these.
I might be getting a bit ahead of myself.
The plan is the get the fibreglass cleaned up, repaired where nessecary and get it painted.
Then I will start to build up the rear and front subframes. The front is almost complete, the rear is from the beginning.
But it just noticed that Mini Sport makes these kits:
www.minisport.com/mini-spare-parts/Mini_Sport_Sports_Suspension_Kits_with_Adjusta_Ride.html
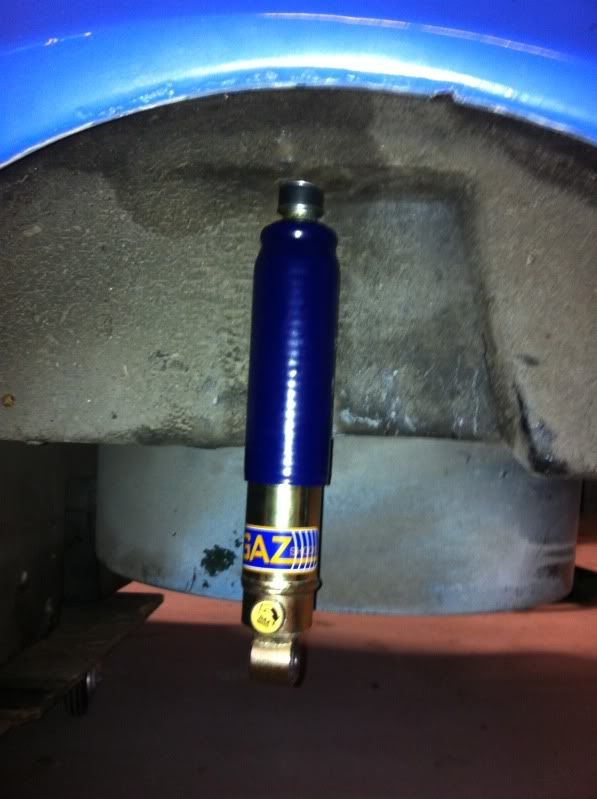
I am just not sure what shocks to go for. The car will eventually be used for hill climbs and historic racing, so would like some 2 way adjustable ones, iam just not sure about the GAZ's? Are they any good? I would really appreciate the hear some reccomendations.
------------------------------------------------------------------------------------
Hi Guys
Update on my quest.
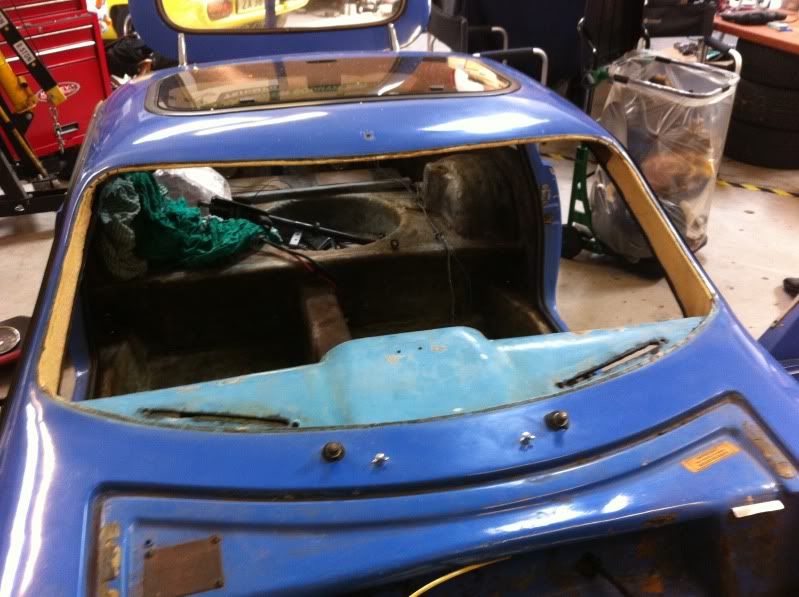
Yesterday I continued with pulling out dashboard, heater, steering collum and rack. Out came also the windshield, the rest of the headliner and the sound deadening.


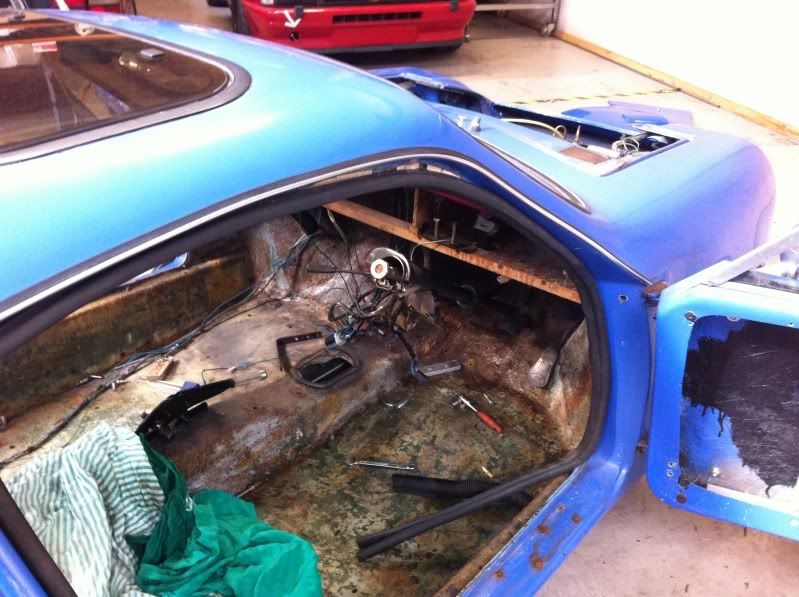
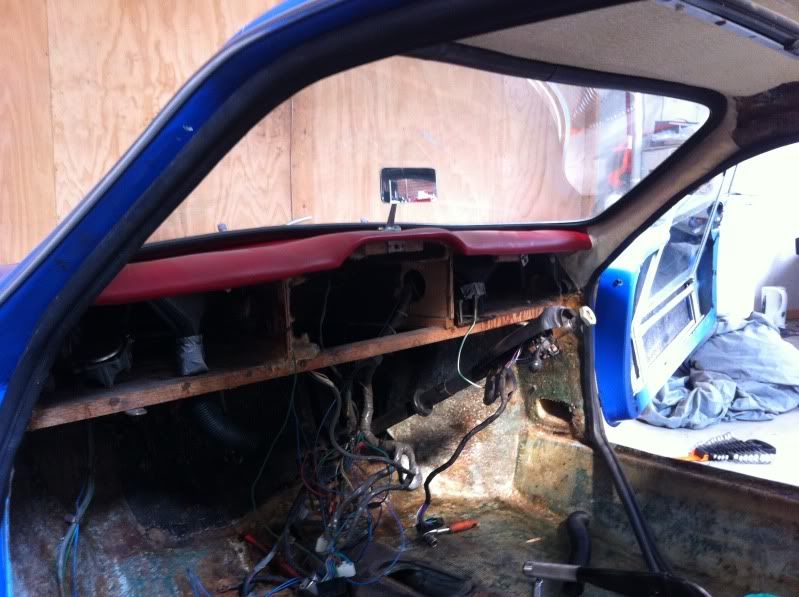
Under the dash, I found all this "wood work" can you guys tell me wether this is original?
It is my plan to fit a Works dash board from Rae Davis, do you know if it will fit over this?
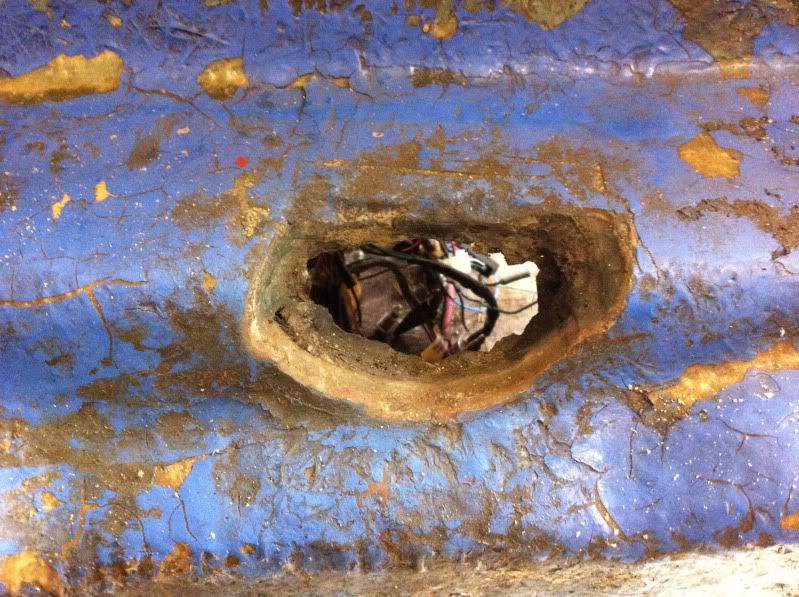
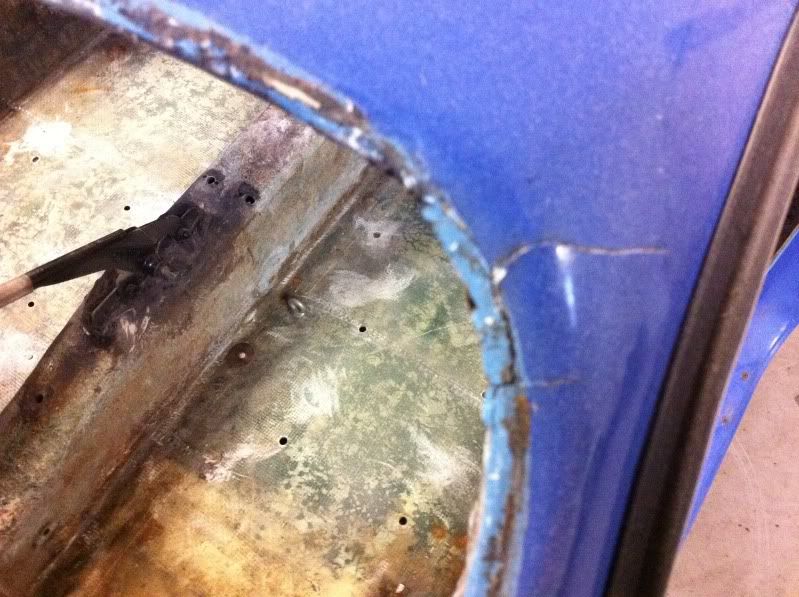
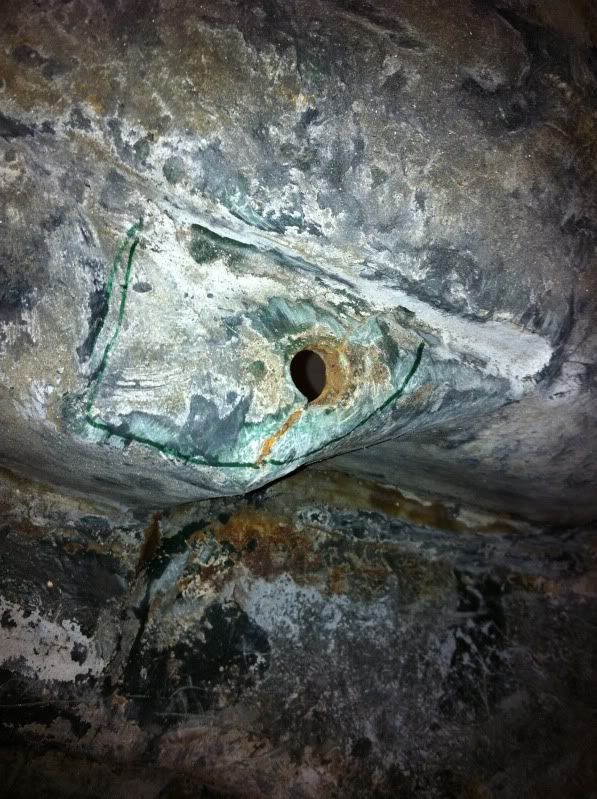
It also gave me a chance to acces this hole from the indside. It obviously need repair, and modification for a Weber DCOE.
This was the result of the sound deadening removed:
In the afternoon I took my Lotus to a local meeting, but it was a poor show to say the least:

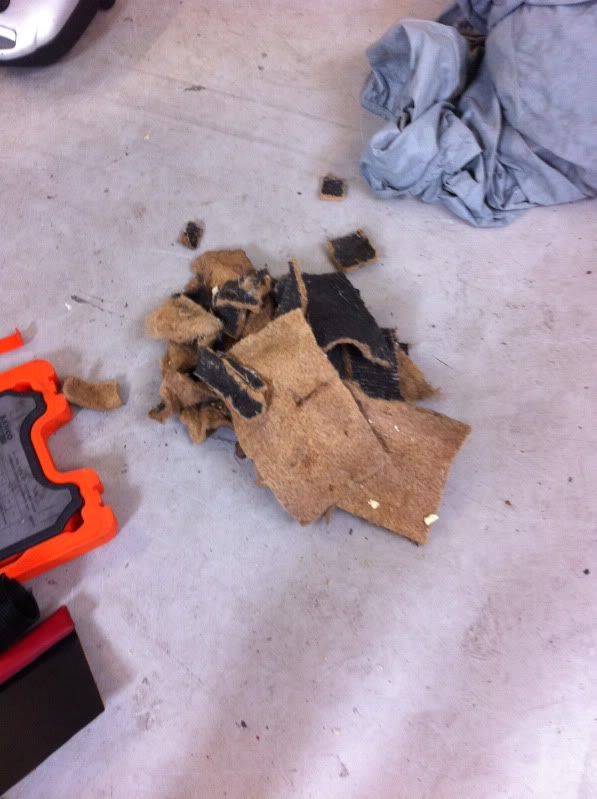
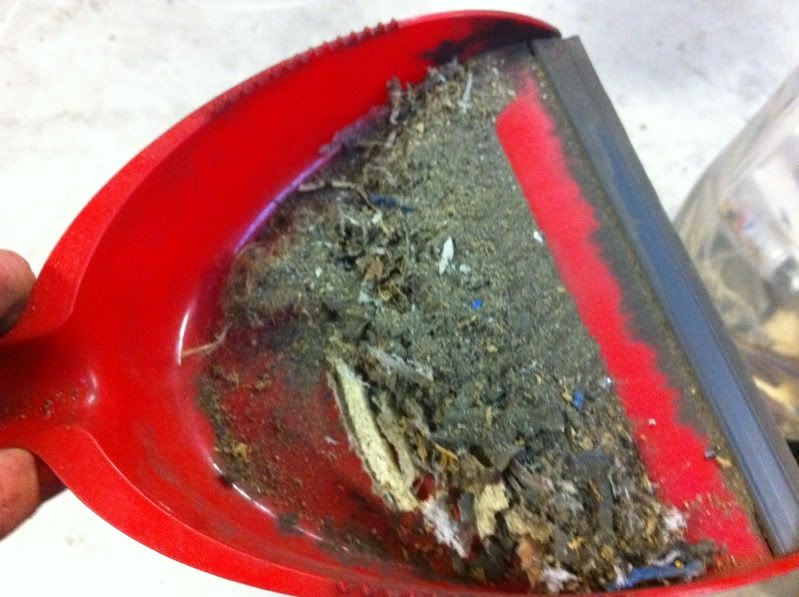
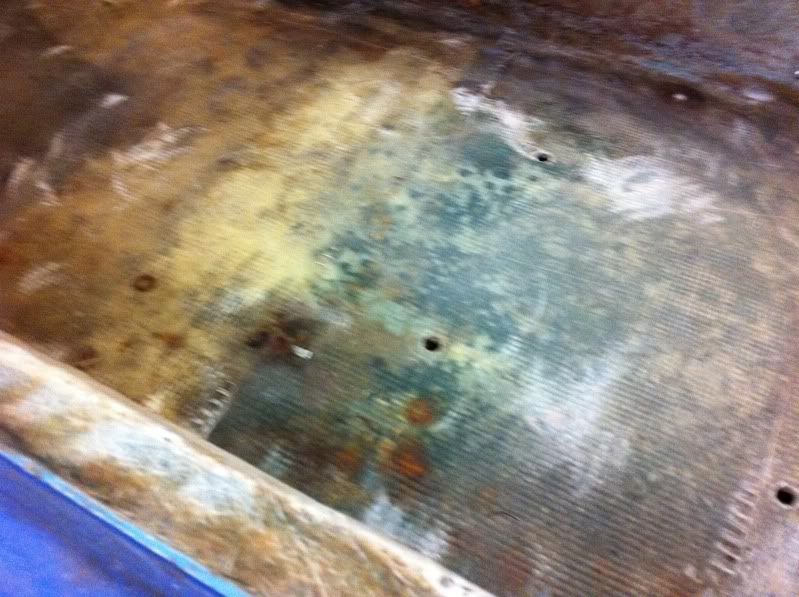
Today I started up again. My quest today was to remove all the glue from the inside of the roof. I tackled this job with a drill mounted rotating wire brush. this worked ok, but was a pain in the ass to do. I finished the roof today and need to tackle the floor sections next time.

This was what was on the floor around the car afterwards:
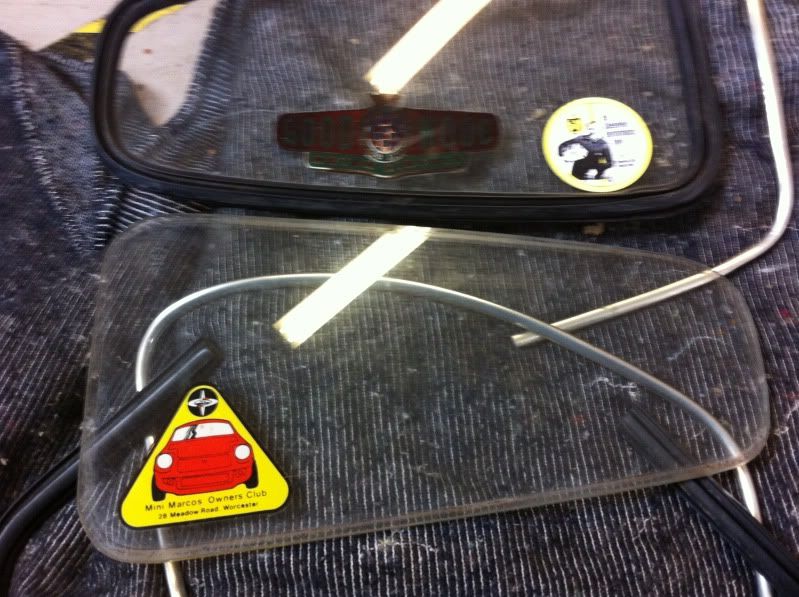
I also took out the rear side windows, these will be replaced with lexan windows, but I will very much like to maintain the stickers. I have found that you can still buy the Goodwood and Speedwell ones, but is the Mini Marcos owners club one still available?
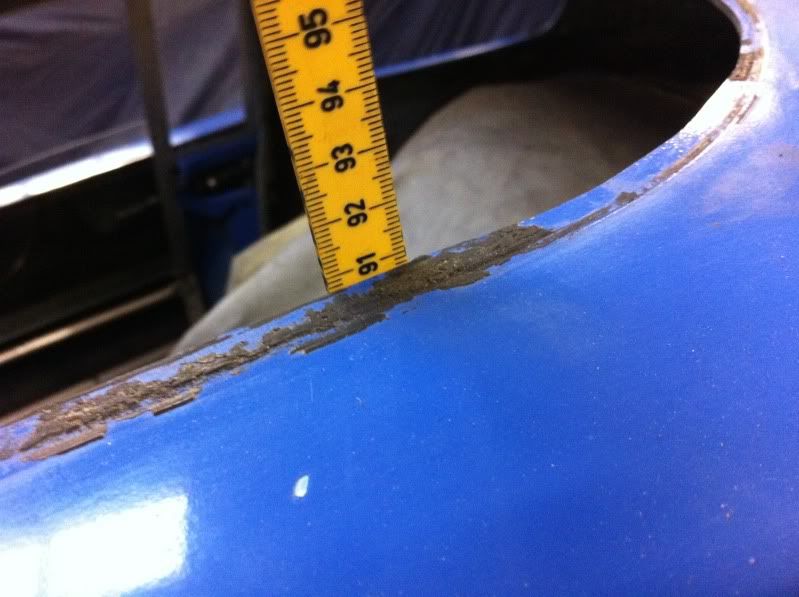
Afterwards for the fun of it, and to see which race seat will fit in there, I measured the roof height. 90,5 cm, boy it is going to be tight.
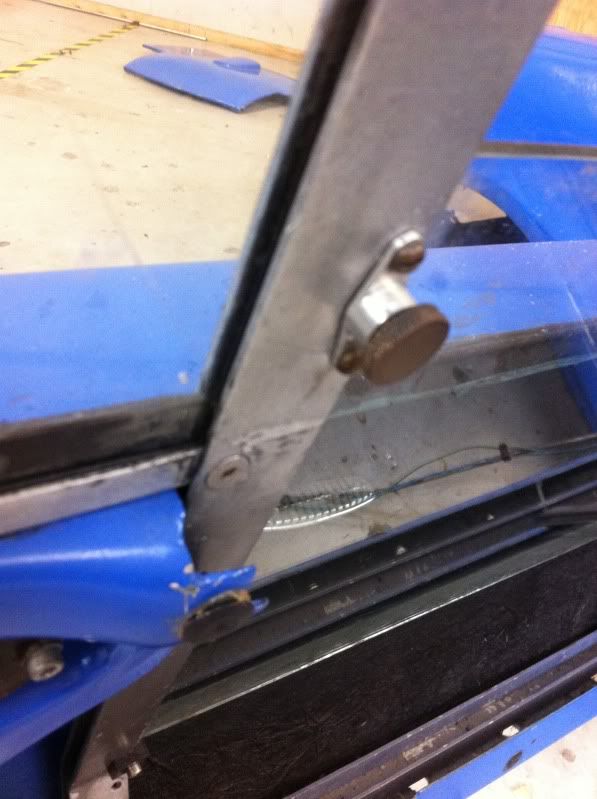
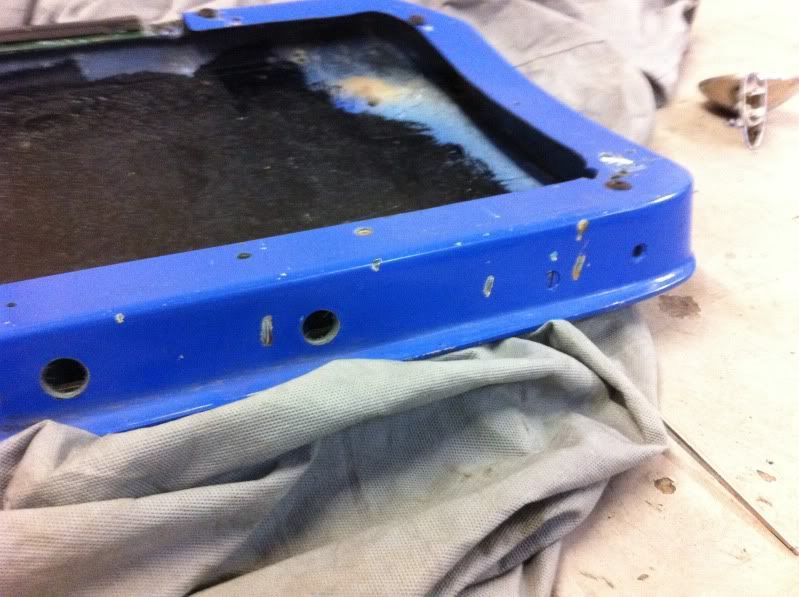
I also noticed iam missing one of these locking screws for the door windows. Any idea what they are from?
When I got home, this was waiting for me:

I will soon have to start tackling the glass fibre repairs. There is a shop very close to my garage, who specialises in this. My plan is to ask him if I can rent a space in his workshop for the grinding and lay up. I think I also need to check and probably replace all the steel reinforcements. If any of you guys could elaborate on how to do this, maybe there is a link to a forum post or something, I would really appreciate it.
This was all for this time.
BR
Dennis
------------------------------------------------------------------------------------
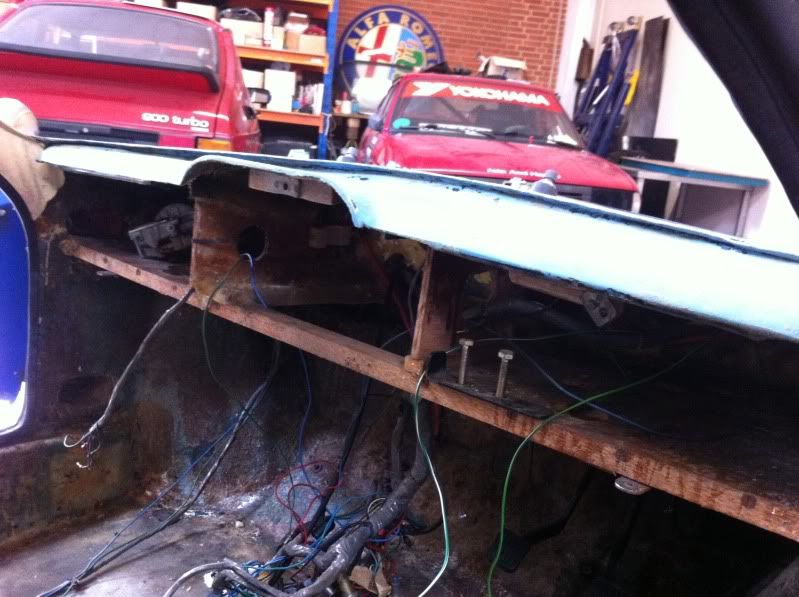
Thanks but I allready have a twinbolt subframe?
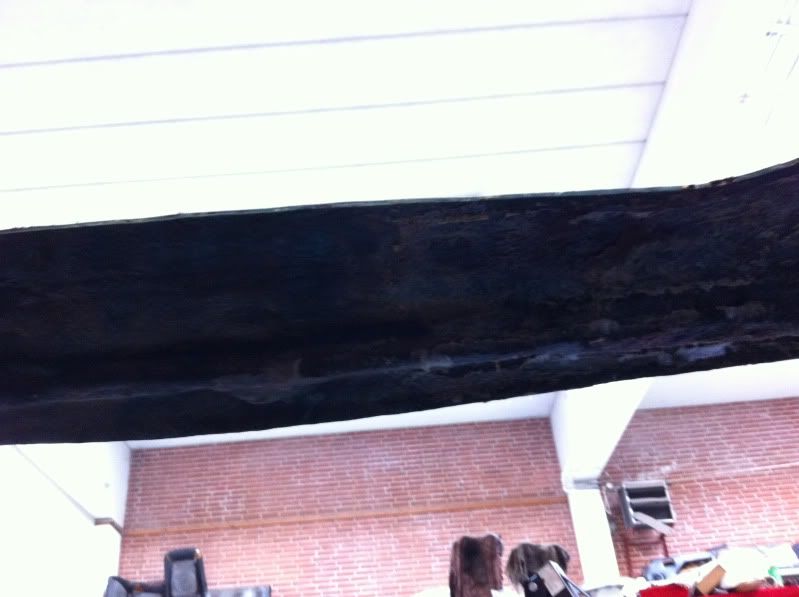
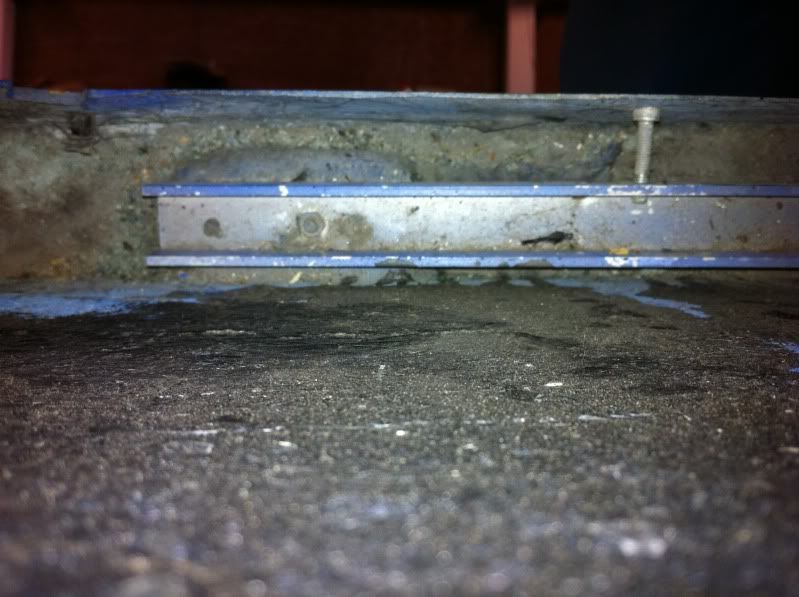
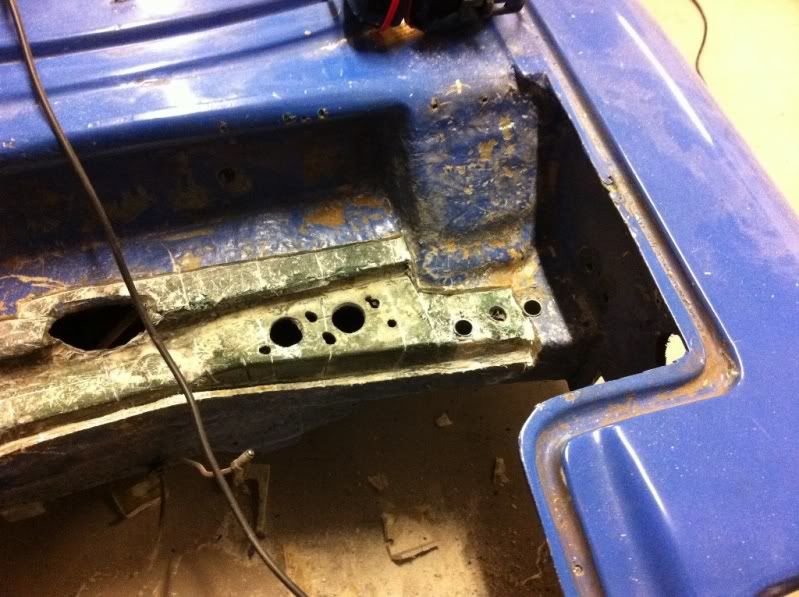
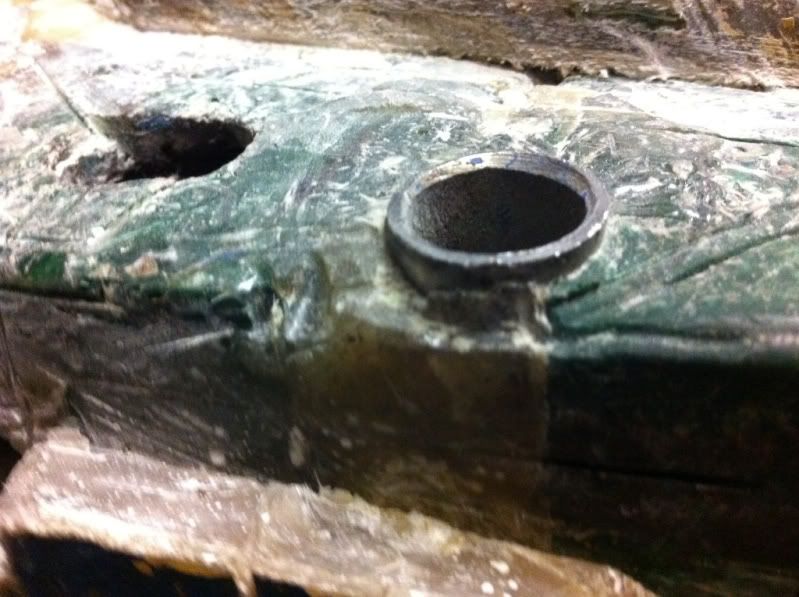
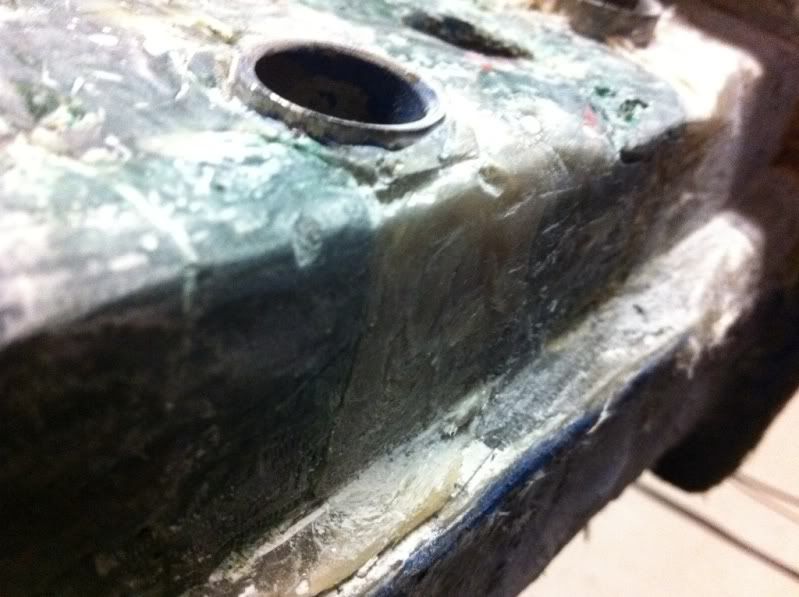
Looked a bit more at it today, and isn't there supposed to be metal here?
Seem like my car has no cross member, just very thick fibre glass.
Maybe it have been converted to run just two box sections like the later cars?
Will this be strong enough?

------------------------------------------------------------------------------------
Hi Guys
More progress.
Today I removed the rest of the glue from headliner and carpets. So it should be ready to go to the fibre glass doctor soon.
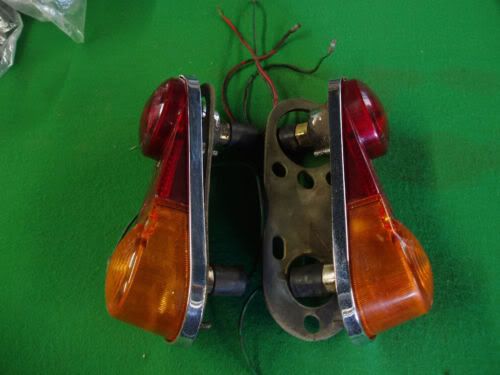
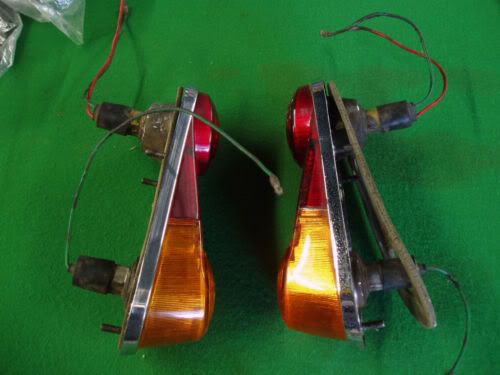
After this I started stripping the rest of the car. Took of the doos and rear hatch. The lights and indicators were also removed. The tank is also off the car, think I have decided to close the original hole for the tank, and go for a round one for the spare wheel well.


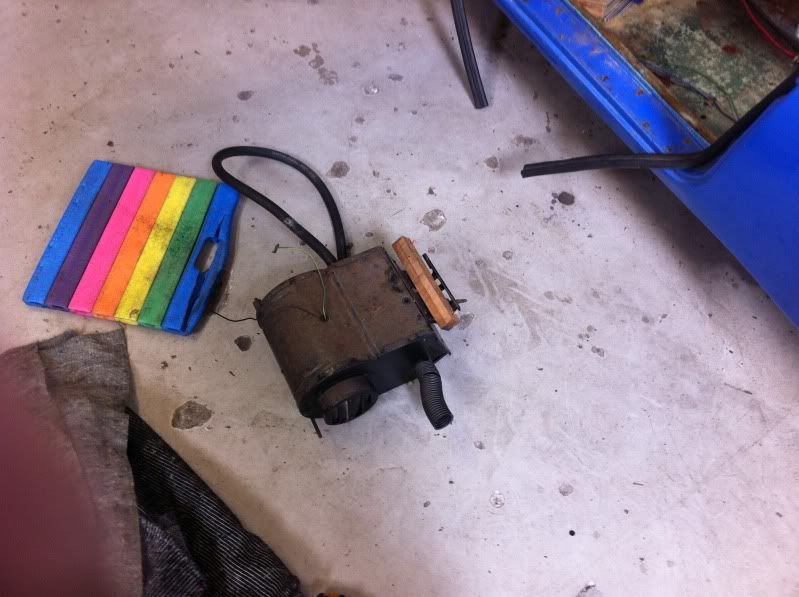
I also took out the wiper motor and are wondering wether I should put a saw to the wood work behind the dash?
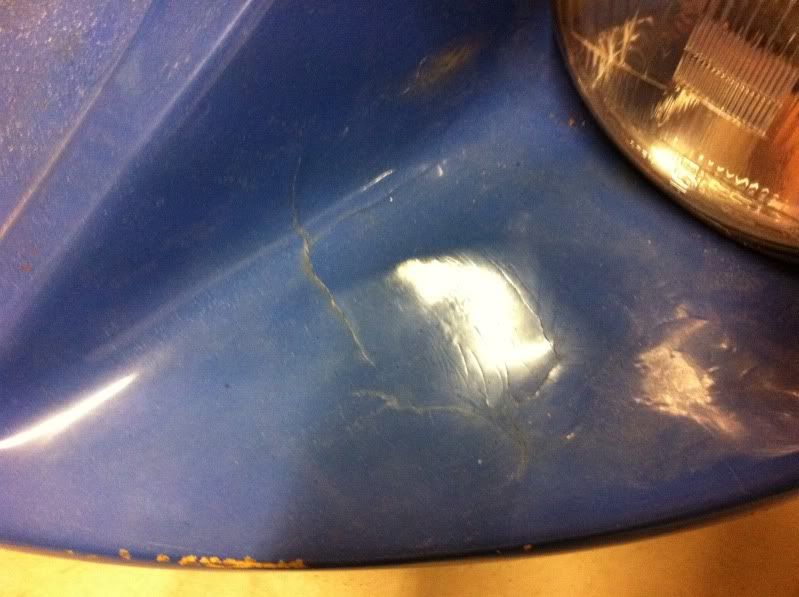
After this I took some time (between sitting in the bare shell making engine noises) accessing the fibre glass damage.
There is the odd hole in the floors, which is probably where I will start, as I have never worked with fibreglass before.
I have made a deal with a fibre glass company very close to my garage. They have agreed that I can come there with the car, and do as much of the job I can myself, and then they will help me along the way. We haven' agreed on a price yet though.
These are the places I found that needs repair.


Furthermore there are going to be quite a lot of repair to the steel reinforced parts of the body.
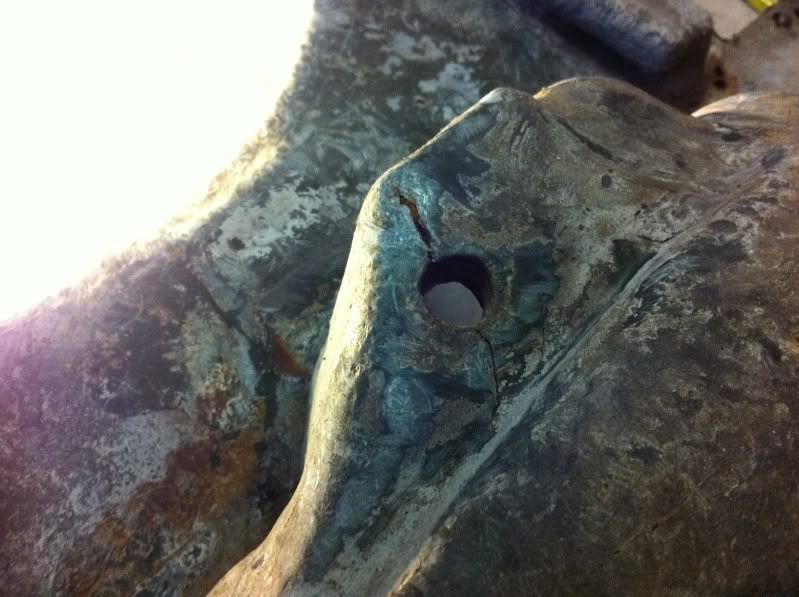
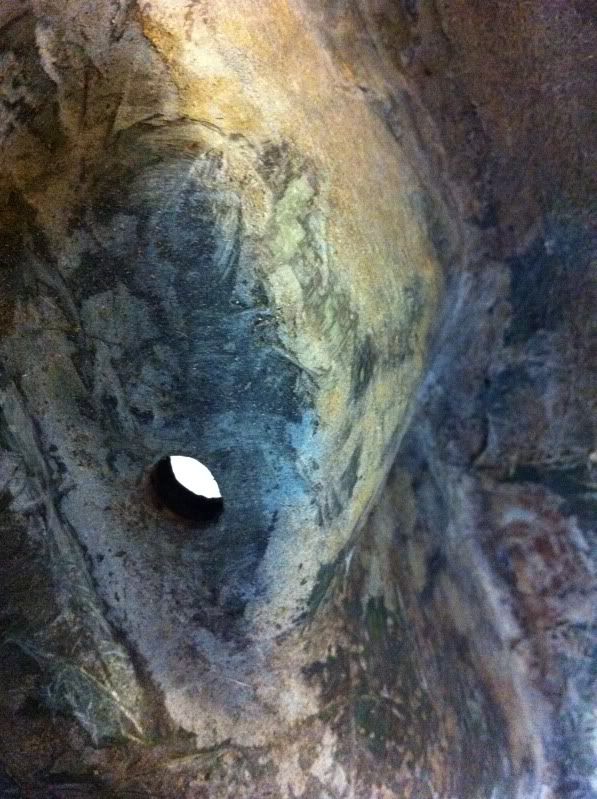
Shock towers in the rear, one is cracked, and both metal inserts looks to be rotten.
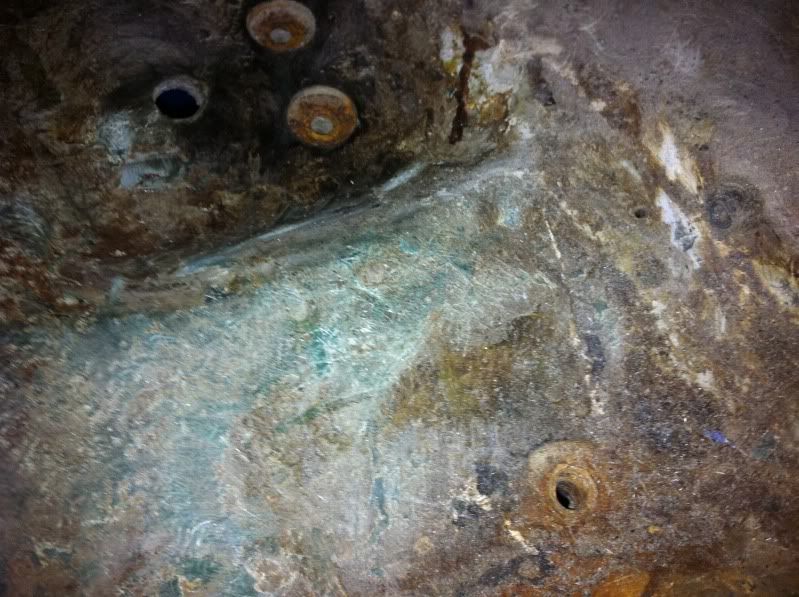
Steering rack mounts are also looking quite "red"

Door mounts on the front fender. Looks like theres also metal in there. A bit concerned about replacing this and make everything line up.

As for lining the steel inserts up, I think I need to get the rear subframe bought and assembled, so I can use that to maintain the position of the inserts. My plan was to bolt it all up to the shell, and then take on steel plate at a time. That way iam sure the geomtry doesn't slide? Any other suggestions?
As for the steel reinforcing plates, I have readily acces to stainless steel. I have thinking about making the plates in stainless, as it would basically last forever then. Is that a bad idea? I know that stainless is a bit more brittle than ordinary steel, but when it is laminatied in I guess its main purpose is to dispatch stress over a bigger area, and it doesn't really bend as such? What do you guys think?
------------------------------------------------------------------------------------
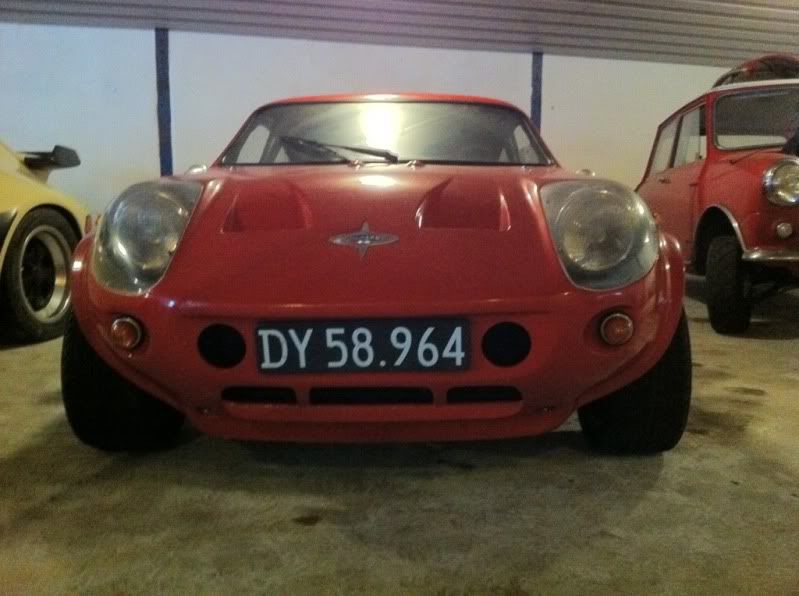
Today I got a picture of one of the other Mini Marcos's in Denmark.
The red one belongs to Per who also has a page on here:
www.minimarcos.org.uk/memcars/hahn/index.html
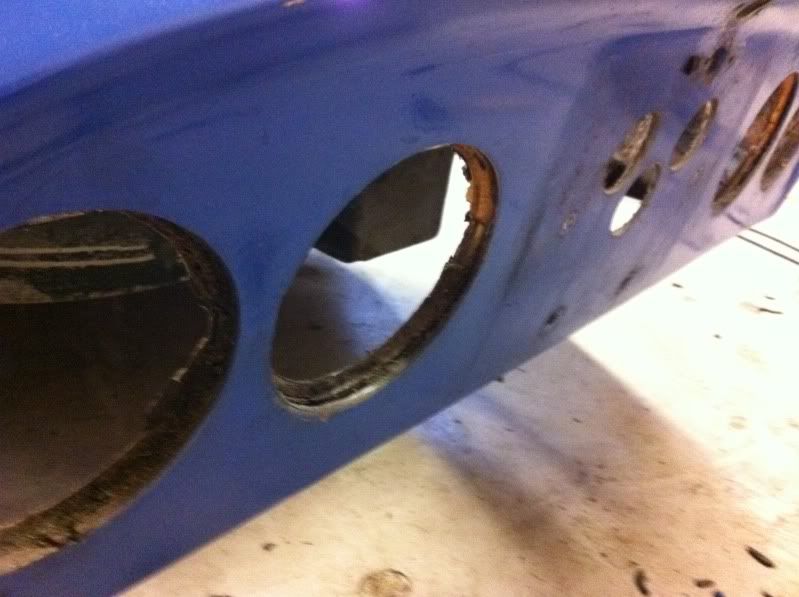
I think I might steal the details with the two big holes either side of the number plate, and also the matt black under the headlight covers.
------------------------------------------------------------------------------------
Hi Guys
A short update, iam going to Japan tomorrow for 6 weeks. No pleasure though only work.
I am trying to arrange a visit at a Classic Car dealer, they have a Deep Sanderson 301 there.
But yesterday and today I spent a little time to take the doors and windows apart.

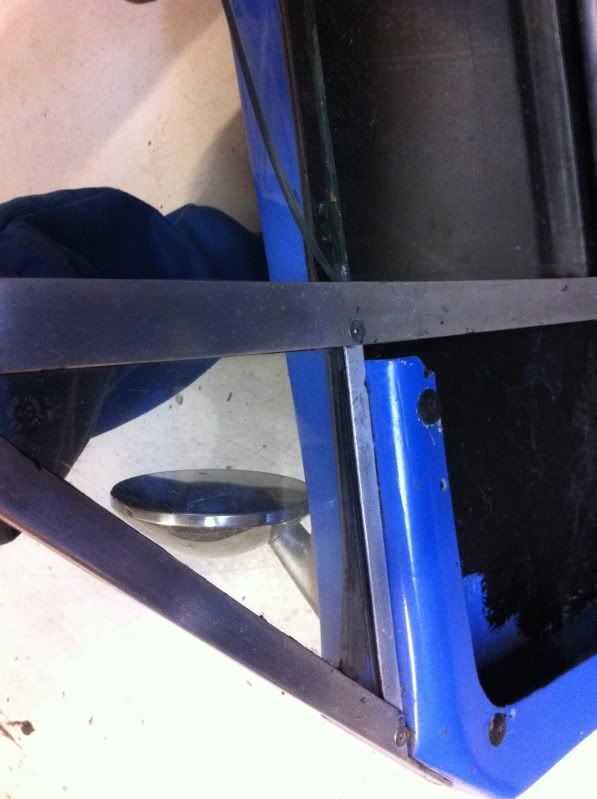

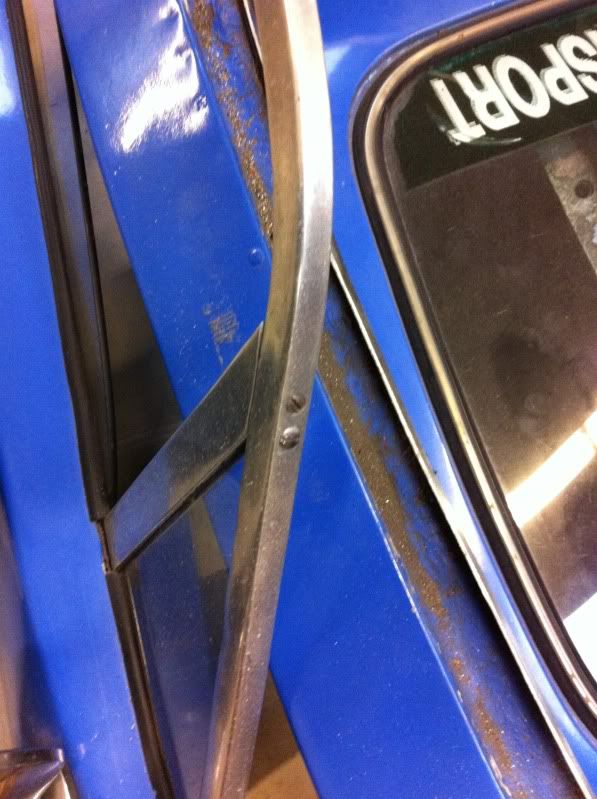
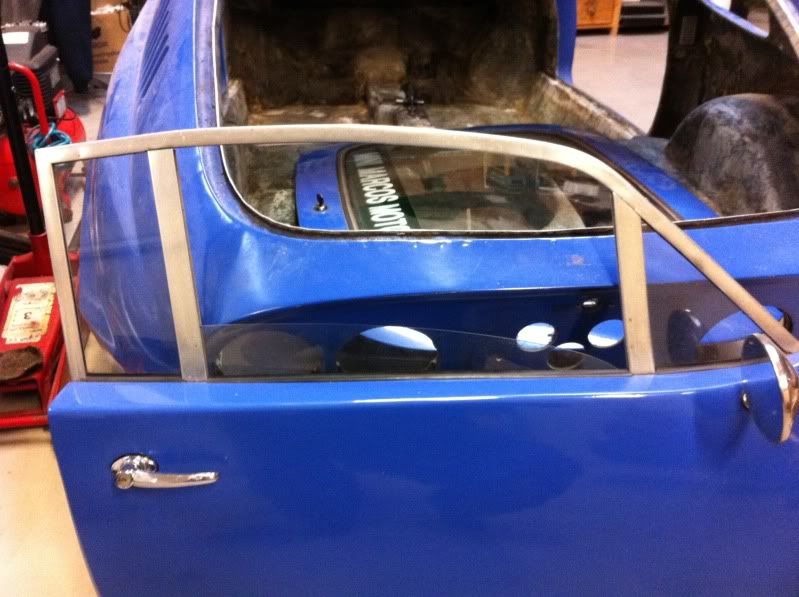
The window glass will be made of lexan, and all the rubber seals will have to be replaced.
Is it possible to buys the different seals through the Club?
Also the door lachtes and handles will probably also have to be exchanged. I allready have a bid in on Ebay for the interior handles.
BTW today when I was driving to my garage, I spotted this "blast from the past".

Pretty cool.
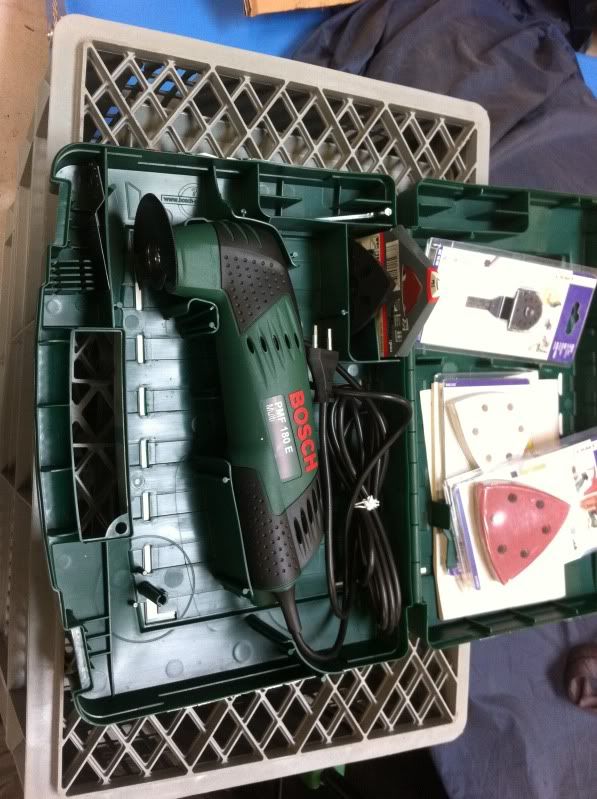
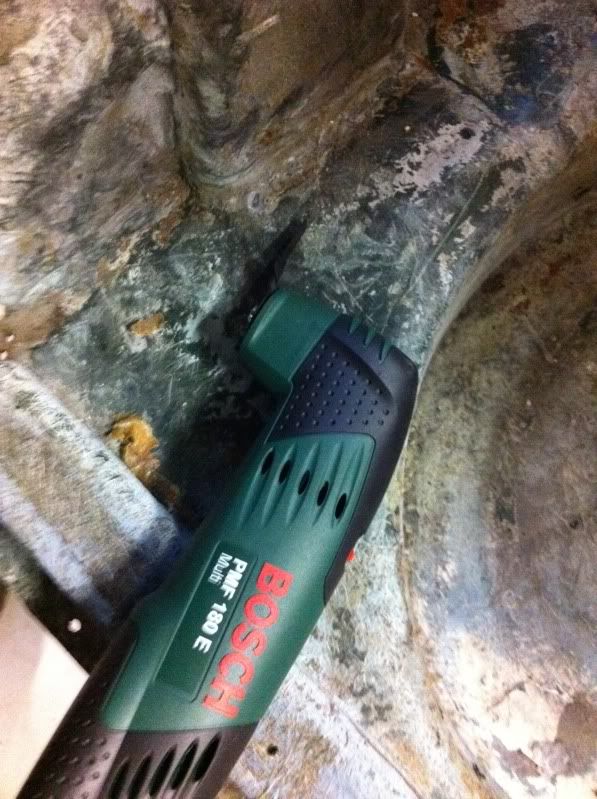
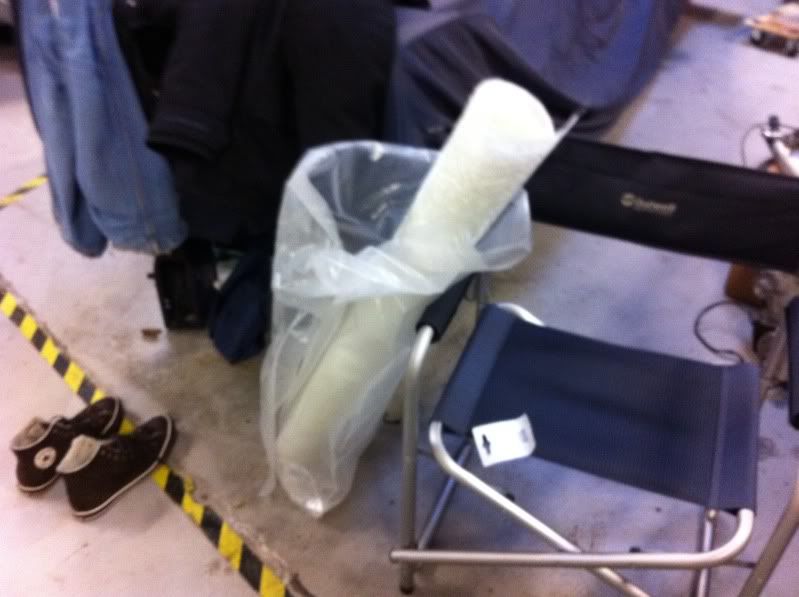
After the last disassembly, the car should allmost be ready for fibreglass work. Hopefully I will get that started when I return from Japan. I have also bought this Multi Cutter tool for the purpose. It is basically an oscillating saw, hopefully it will be usefull for cutting the fibreglass in narrow spots?
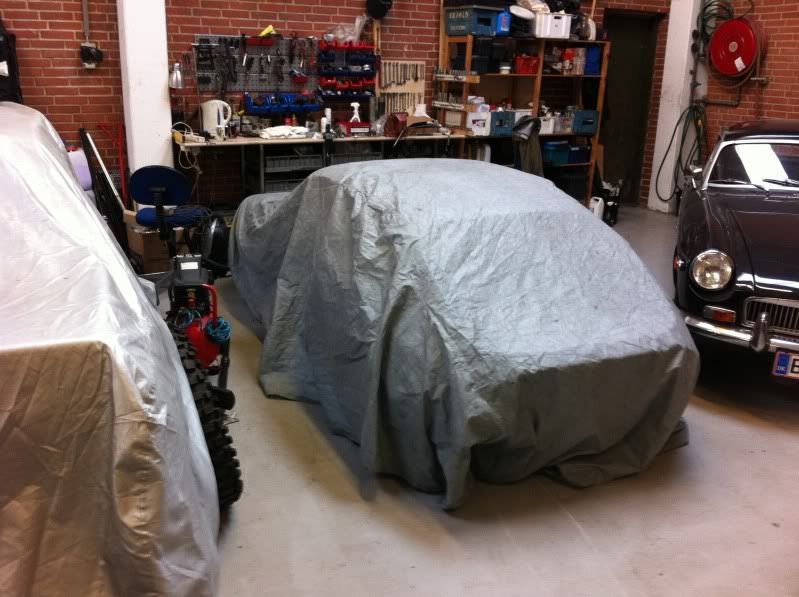
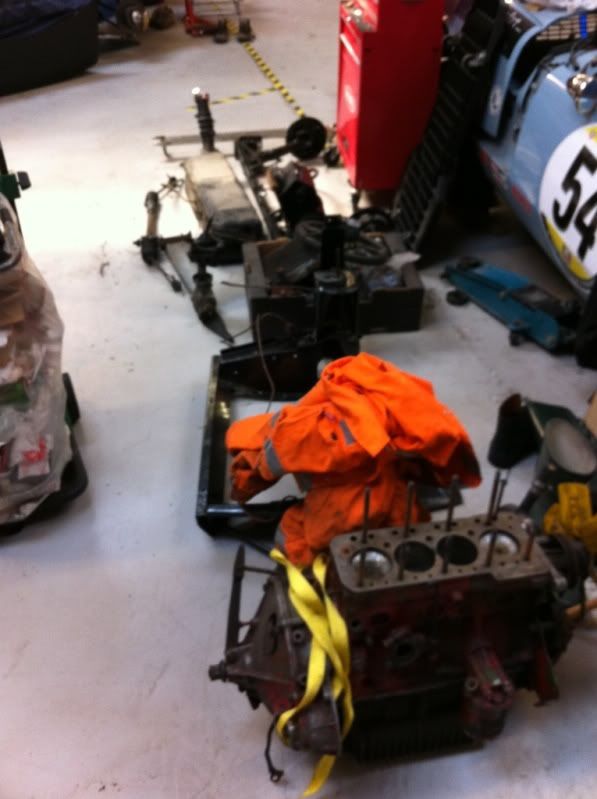
But for right now everything is wrapped up, and iam ready to leave tomorrow.

My plan is to get the dash board and rear subframe ordered while iam in Japan.
And then I can hopefully get the fibreglass work done before christmas.
That was all for now. Will be back in 6 weeks.
------------------------------------------------------------------------------------
Hi Guys
A little progress today. As mentioned above my fully equiped 200 hp Seat Altea FR sold while I was I Japan. I have been home for a good 2 weeks now, and have been searching for a cheap runaround, as I don't really drive that much. After a good deal of searching I ended up with this Fiat Punto.
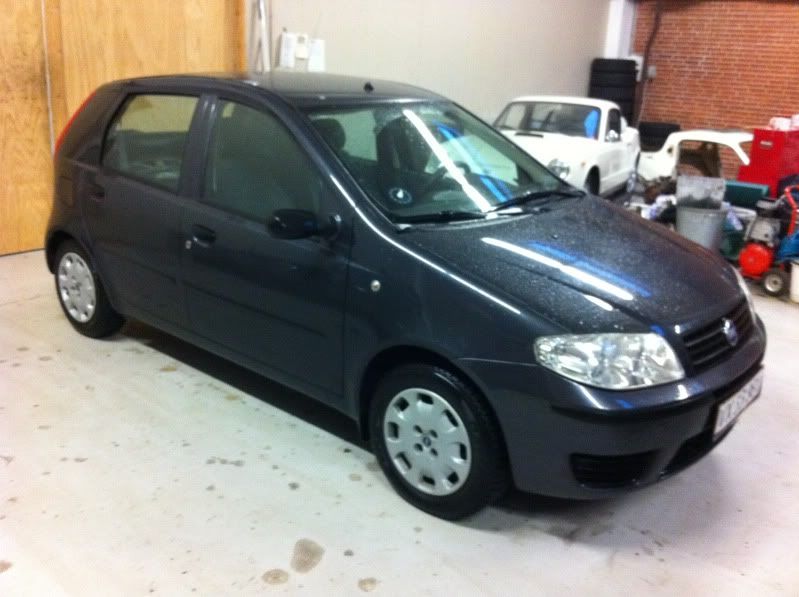
It is very basic (i better get used to it, for when the Marcos gets on the road), but it allows me to get to the garage.
So today is the first real progress since I came home. That is appart from collecting some parts at my parents place.
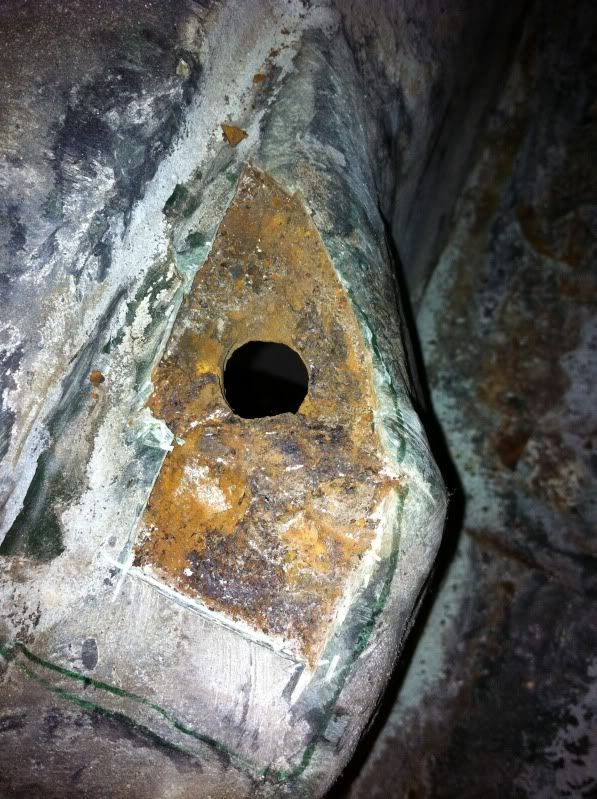
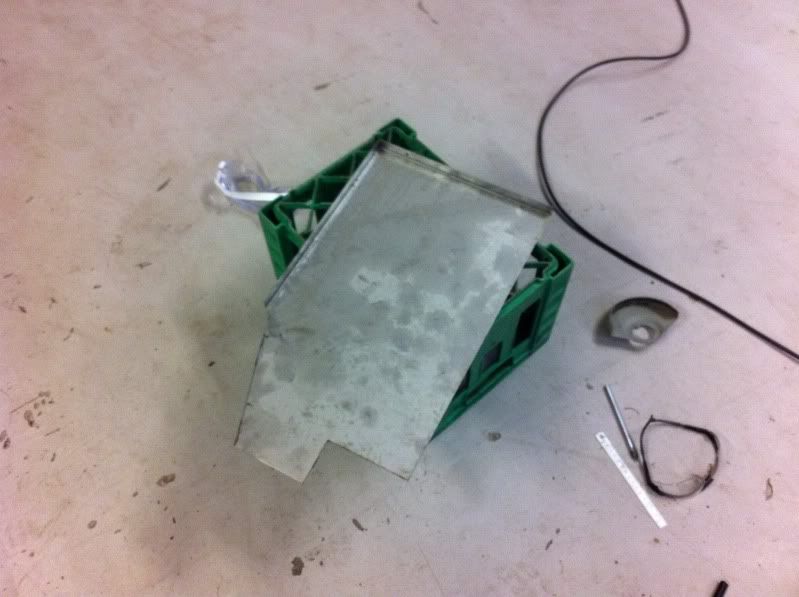
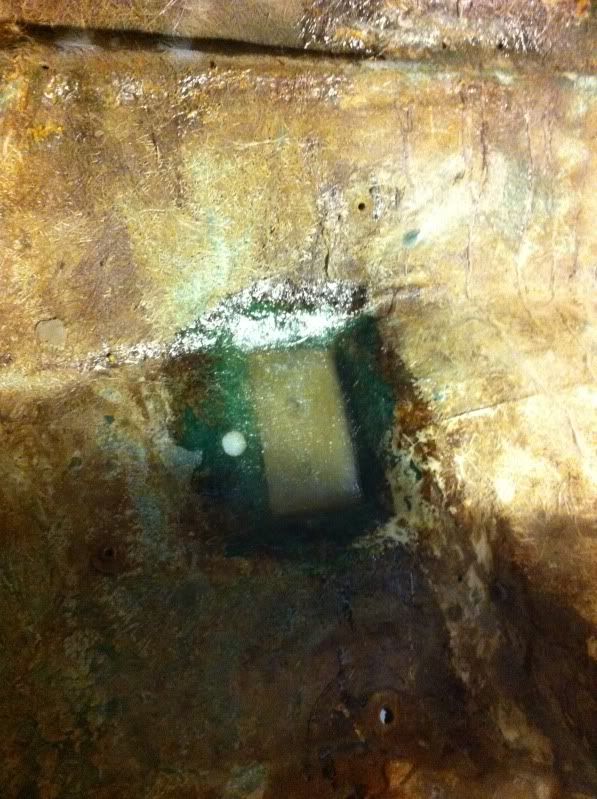
The plan for today was to try and cut out the metal in one of the rear schock towers, as it was very obivous that there was rust in there.
This also gave me a chance to test my new oscillating saw. This I genuinely the best tool I ever bought. Very effective.
This is how it looked when I got it "opened" up.
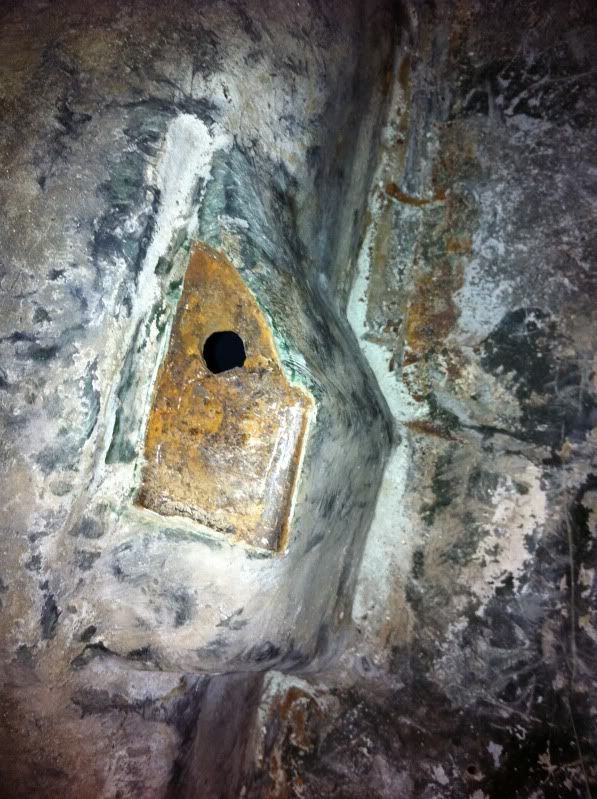
A bit more
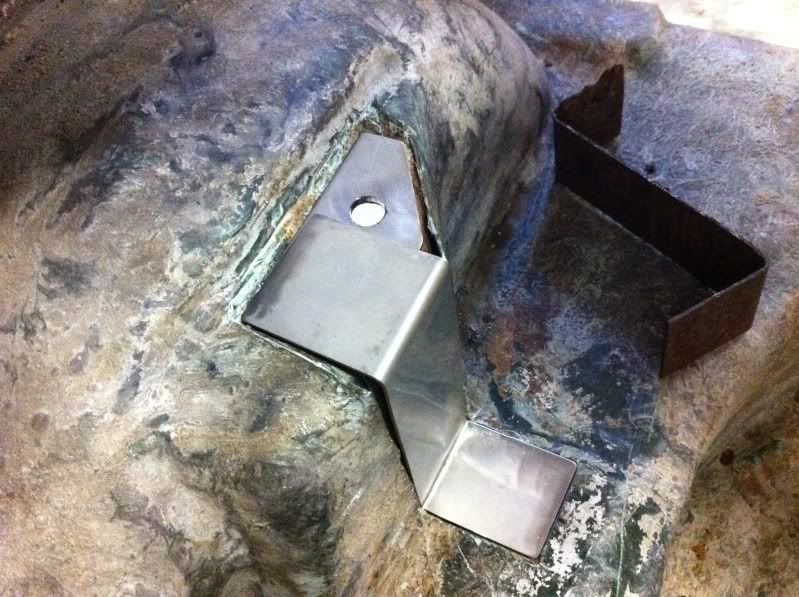
After more caerful cutting I finally got all of the metal exposed, and I could pull it out.
The new saw is really good for this, as I can cut very precise, so that the new piece will fit exactly where the old one was positioned.
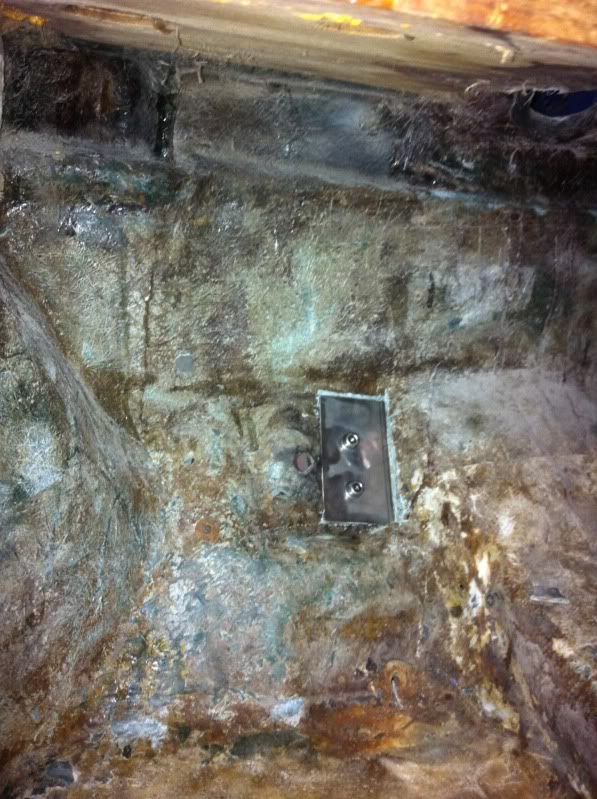
Top plate was in quite bad shape.
This is what it looked like underneath.
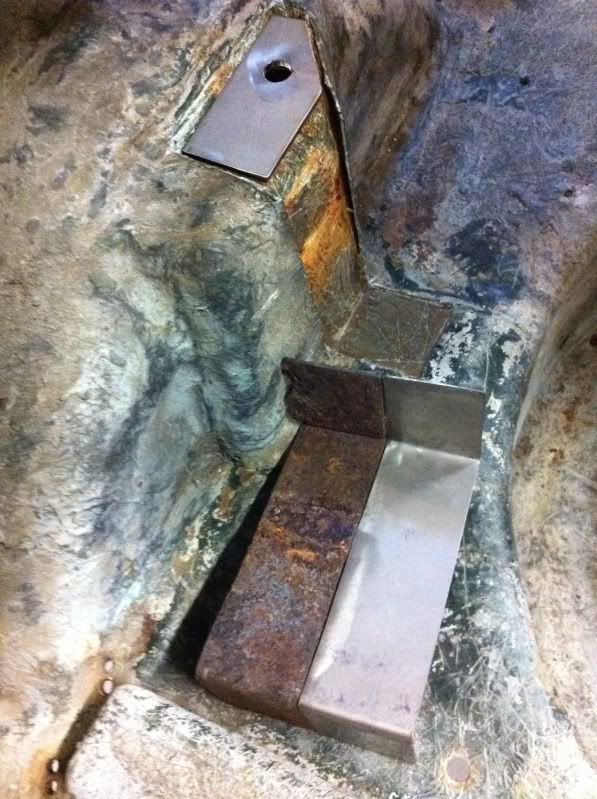
I then proceeded with making a template for the new topplate.
I had some stainless plate laying around, so I transfered the template to this.
The rest of the metal structure will also be made in stainless, but it need to get some from work tomorrow, as I don't have the correct thickness.
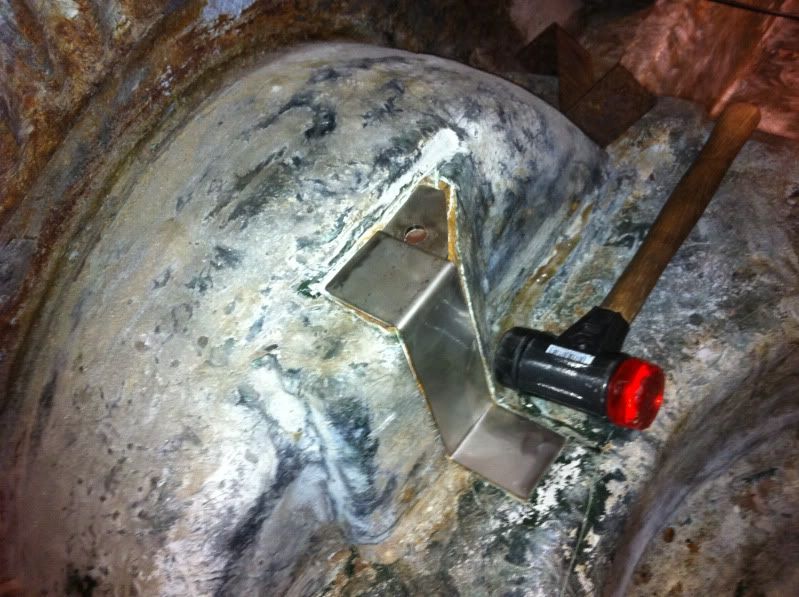
I did a quick test with my new schock absorbers, just to check that it didn't hit the inner arches.
All looked to be well, but the thread that goes through the tower seemed to be just on the short side. Any experiences with this? Do I need to trim the rubber bushings on the shock?
After this I decided also to cut out the reinforcement for the steering rack. This came out without any big troubel.
Tomorrow I will fabricate new plates for both shock towers and for both steering rack mounting positions. And on thursday I have to go pick up my new rear subframe.
So this I basically all for now. More to come probably on friday.
------------------------------------------------------------------------------------
Hi Guys
More progres yesterday. I went and bought some fibreglass supplies.
This is the first time ever I have tried working with fibreglass. But I have bought John Dickens fantastic book, and also have another handbook, from when I had my Super Seven and was thinking about making a hardtop.
But as this was the first time, I decided to start somewhere easy. I chose the steering rack fixing points. I made up a new stainless plate, and had a go with bonding it in. It worked out very well, and I am really pleased with the result. I does need a few more layers though.
My garage is pretty cold at the moment, and therefore I decided on using Polyester resin. Iam not sure wether I need to use epoxy when I start tackling the rear shock towers? Any experiences?
As for the shock towers, I also used yesterday for finishing the new stainless inserts for the towers. Just need to get a hold og a TIG welder to tack the together.

Hopefully I can get a permit to go to the garage tomorrow, and finish up on the steering rack mounts.
More to follow.
------------------------------------------------------------------------------------
Hi Guys
A bit more progress. I started up yesterday with repairing the other side of the steering rack mount. I also closed the RHD hole for the steering collumn, as the car will be converted to LHD. I also found that the hole was hacked totally up, and it had a bodge repair that was delaminating. All this was cut out, and closed up.
All to do here now, is to open up the top parts of the holes with a small hole saw, in order to allow the nuts to rest on the metal.
LHD side:
RHD side opened up:
New stainless plate:
Bodge repair:
Forgot to get an after pic, but it basically looks like the LHD side.
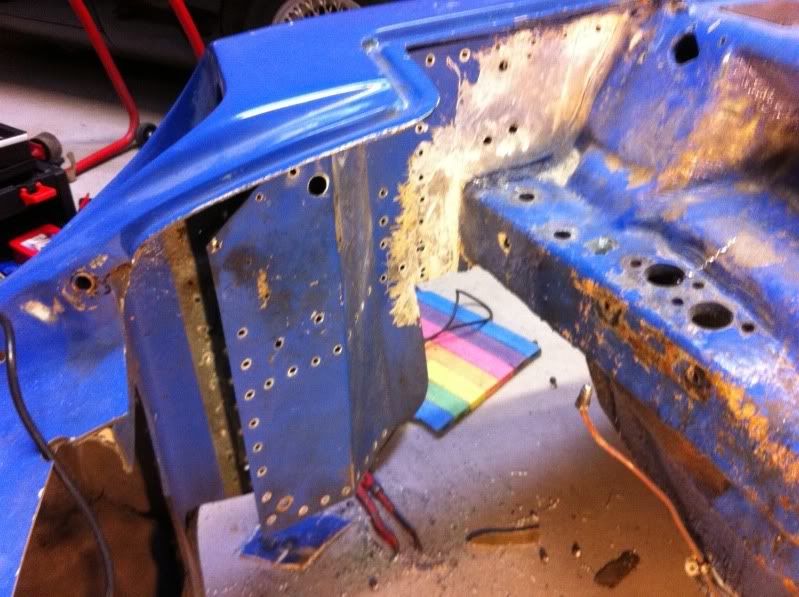
I then started to look at the front section of the car, and found something quite disturbing. First of all, all of the inner fenders and the bottom of the car was covered in under sealant. It was a pain in the *** of a job to remove it, but I got most of it off. Then I focused on an inlet for the heater, this was laminated into the inner fender (where the hole is). When I got it wrestled of, a big part of the inner fender started to delaminate.
Undersealant removed:
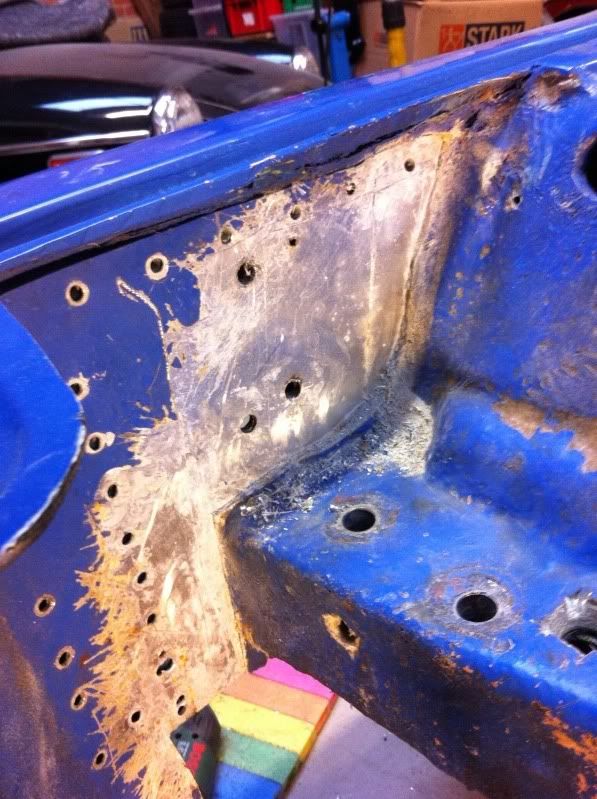
Hole in inner fender:

It is caused by some aluminium sheet, that has been bonded into the innerfenders.
When I chose to rip all of the delaminated fibre glass of, this was revealed:
Right now iam a little worried about how critical this is.
I have a few questions about this, that I hoe you guys can help me with.
1. Is is original to have aluminium sheet laminated in here?
2. How hard would it be to remove? Have anyone tried anything similar?
3. It somehow looks like this was done, at the same time as the front cross member repair. So now I don't really trust this either. So I am back at thinking about changing to a new replacement cross member? I have a few questions about this, do these come with cut outs for the master cylinders? Do I need to order one specific for LHD or RHD?
If any of you have pictures of these areas of your engine compartments I would really appreciate it.
Finally I have realised that me working I fibre glass in my own garage is a no go. It simply creates too much dust, and as I share the place with other people, it is not ideal.
So I have contacted a local fibreglass shop, hopefully I can get the car down there, and really get cracking. I could also do with a little help. It would also be nice to really press on and get all the fibreglass work done.
Again if any of you can help with some experiences of above, it would really help me.
I have just ordered a full Heritage crossmember. Wish me luck.
Kind regards
Dennis
------------------------------------------------------------------------------------
Cheers mate. I have allready bought his book, but I better buy the other one also.
I could really do with a few pointers on this.
Ohh yes one more thing.
This over laminating inside the arches, is this normal, does that hold some of the bodywork in place?
------------------------------------------------------------------------------------
Hi Guys
First of all hope that all of you had a great christmas.
This was my christmas present.

I love it, and it makes me want to work even harder on the car.
Today I made qute good progress. Even though I planned to fit some silicone cooling hoses on my Lotus, I could not resist working on the Marcos instead.
I started with tackeling the alumium arches. Got the rigth side completely removed.
After drilling out all the rivets, I could carefully cut out the laminated areas inside the arches, and out it came.
After this, I found a pleasant surprise. There is quite a lot of fibreglass left in the arches. So it looks like I can build on to this.
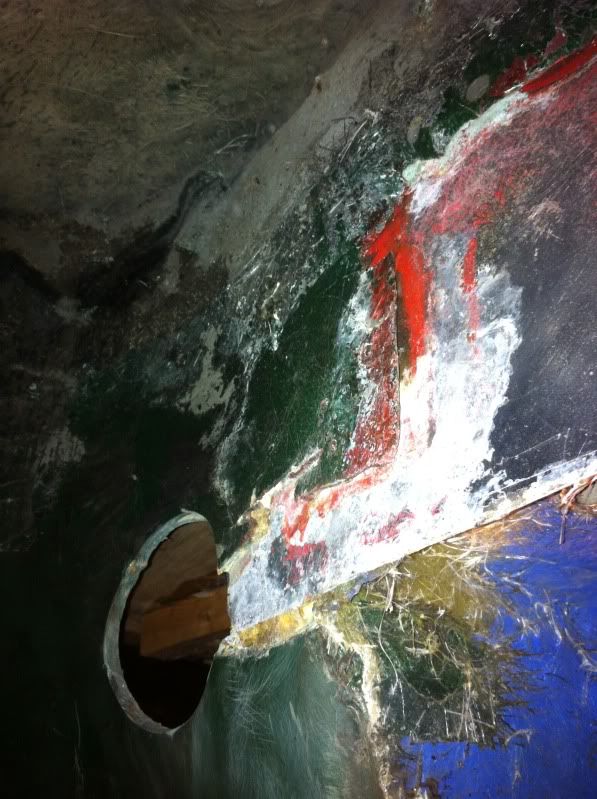
This is how it looked after the aluminium was removed. This is looking from inside the arch onto the side of the cross member.
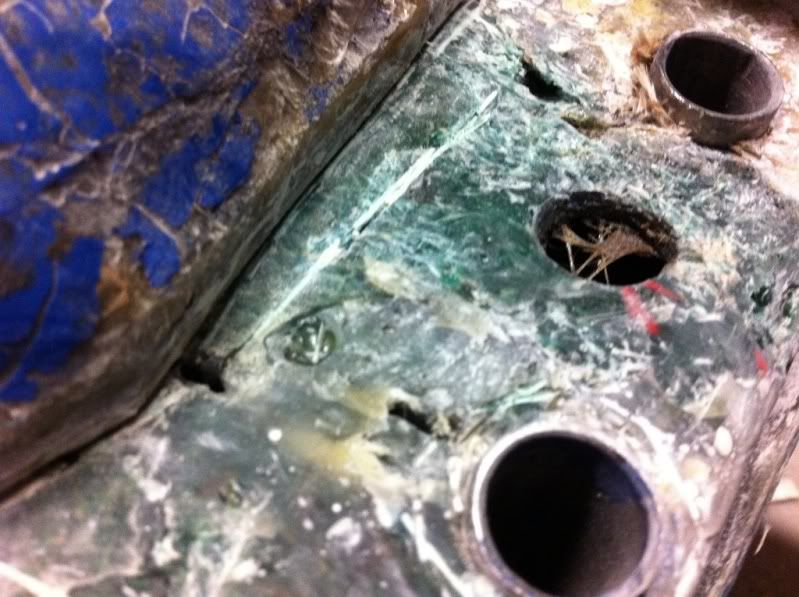
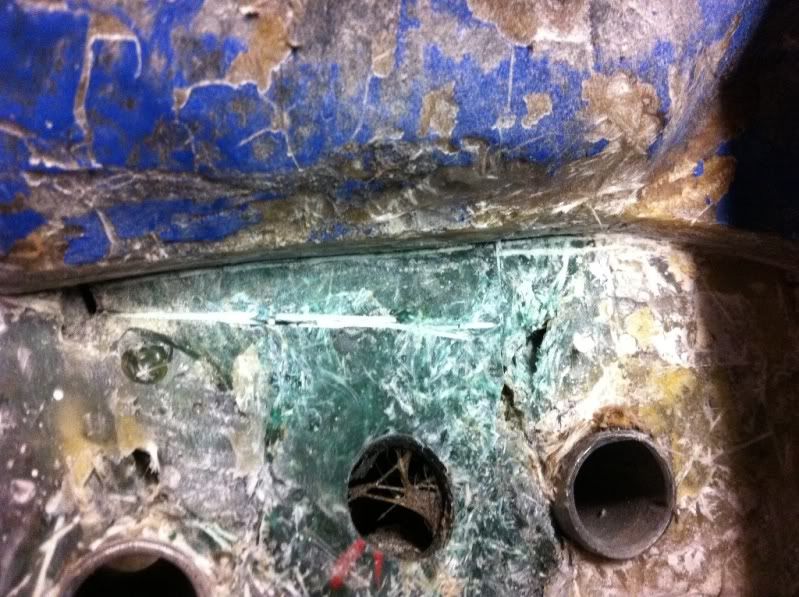
I have allready recieved my new BMH crossmember. And good thing I ordered one, because when I started looking at the subframe mounting points, I discovered that there wasn't any metal at all, where the cross member was supposed to be. Only thing is two steel pipes laminated/glued into a lot of fibreglass.
This is what I found when I started to cut.
The positive thing is, that I think, that with some careful cutting, I can possibly expose most of the original bulkhead underneath. That is the green GRP you can see underneath. I think this will be helpful when I have to laminate the new crossmember in.
But before this, there will be a lot of cutting to do.
That was all for now, I hope all of you have a great New Years party tomorrow.
------------------------------------------------------------------------------------
I promised in my other thread:
retrorides.proboards.com/index.cgi?action=display&board=readersrides&thread=121213&page=1#1505167
That I would put up a build thread on my Mini Marcos.
It is a mk.2 and built in 1967. It is on of 50 chassisnumbers, from no. 7006 to no. 7057, which after Marcos participation in Le Mans in 1967 were homologated for racing. This allows it to run in historic racing today, and that is what iam planning to do.
It will be built in FIA racing spec, but iam also planning to get it registred for the road, so that I can use it for Hill Climbing and so on.
In order for you guys to catch up, I have shamelessly copied my build thread from the Mini Marcos owners club.
The progress is, and will be, very much on and off, as I spend a big part of my time working abroad. Currently I am in Japan, but cannot wait to get home and continue the build.
In the future I will make sure to also update the thread on here.
BR
Dennis
------------------------------------------------------------------------------------
Hi Guys
Decided I wanted to start this thread, as 7012 now is in my garage, and I have started tackling some of the smaller jobs. My plan is to get it running and registred. Then run it for a while and take it apart again.
I picked it up last Thursday
Sitting in the garage I share with a group of friends.
This weekend I have been fully occupied with my dads 60 years birthday. But yesterday when I got back home, even the hangovers couldn't keep me from the garage.
I started with rolling it out so I could get some pics of it together with my Lotus.
Then I decided to give it a quick clean.
Before I knew it, I was busy pulling out headliner and carpets. I think next up is the dashboard.
All these door covers were inside the car. I think they will look good once retrimmed.
It was nice to make a little progress yesterday. Iam off to Korea later today, and it will be a week before iam able to continue.
I was really pleased with how it looked after a wash, iam sure a really good polish will do wonders on the bodywork.
One of the first big jobs will be to assemble the rear subframe. I have the swingarms from the lightweight beam that came with the car. But I will have to buy the rest. Could any of you perhaps point me in the direction of the best place to buy these parts?
------------------------------------------------------------------------------------
Cheers guys. I guess boat paint must be the way to go as it should be durable and made for fibreglass? I would like a Satin/Matt finish, and idea where I can buy this?
I have just returned back home after a trip to Korea, and while I was bored on the hotel, I accidentally bought these.
I might be getting a bit ahead of myself.
The plan is the get the fibreglass cleaned up, repaired where nessecary and get it painted.
Then I will start to build up the rear and front subframes. The front is almost complete, the rear is from the beginning.
But it just noticed that Mini Sport makes these kits:
www.minisport.com/mini-spare-parts/Mini_Sport_Sports_Suspension_Kits_with_Adjusta_Ride.html
I am just not sure what shocks to go for. The car will eventually be used for hill climbs and historic racing, so would like some 2 way adjustable ones, iam just not sure about the GAZ's? Are they any good? I would really appreciate the hear some reccomendations.
------------------------------------------------------------------------------------
Hi Guys
Update on my quest.
Yesterday I continued with pulling out dashboard, heater, steering collum and rack. Out came also the windshield, the rest of the headliner and the sound deadening.
Under the dash, I found all this "wood work" can you guys tell me wether this is original?
It is my plan to fit a Works dash board from Rae Davis, do you know if it will fit over this?
It also gave me a chance to acces this hole from the indside. It obviously need repair, and modification for a Weber DCOE.
This was the result of the sound deadening removed:
In the afternoon I took my Lotus to a local meeting, but it was a poor show to say the least:
Today I started up again. My quest today was to remove all the glue from the inside of the roof. I tackled this job with a drill mounted rotating wire brush. this worked ok, but was a pain in the ass to do. I finished the roof today and need to tackle the floor sections next time.
This was what was on the floor around the car afterwards:
I also took out the rear side windows, these will be replaced with lexan windows, but I will very much like to maintain the stickers. I have found that you can still buy the Goodwood and Speedwell ones, but is the Mini Marcos owners club one still available?
Afterwards for the fun of it, and to see which race seat will fit in there, I measured the roof height. 90,5 cm, boy it is going to be tight.
I also noticed iam missing one of these locking screws for the door windows. Any idea what they are from?
When I got home, this was waiting for me:
I will soon have to start tackling the glass fibre repairs. There is a shop very close to my garage, who specialises in this. My plan is to ask him if I can rent a space in his workshop for the grinding and lay up. I think I also need to check and probably replace all the steel reinforcements. If any of you guys could elaborate on how to do this, maybe there is a link to a forum post or something, I would really appreciate it.
This was all for this time.
BR
Dennis
------------------------------------------------------------------------------------
Thanks but I allready have a twinbolt subframe?
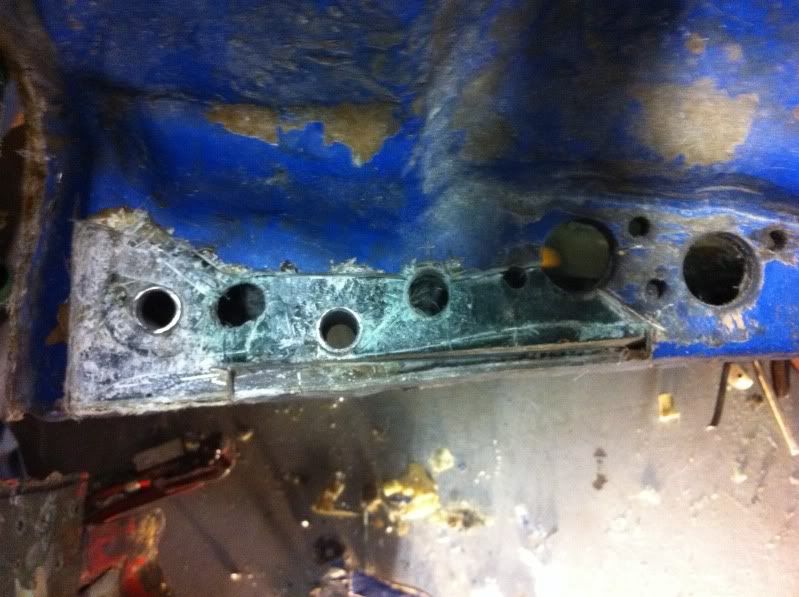
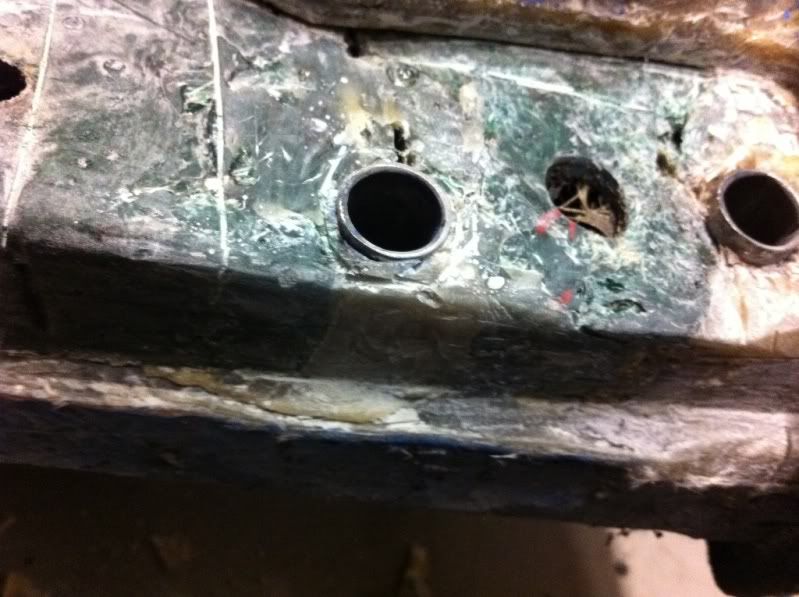
Looked a bit more at it today, and isn't there supposed to be metal here?
Seem like my car has no cross member, just very thick fibre glass.
Maybe it have been converted to run just two box sections like the later cars?
Will this be strong enough?
------------------------------------------------------------------------------------
Hi Guys
More progress.
Today I removed the rest of the glue from headliner and carpets. So it should be ready to go to the fibre glass doctor soon.
After this I started stripping the rest of the car. Took of the doos and rear hatch. The lights and indicators were also removed. The tank is also off the car, think I have decided to close the original hole for the tank, and go for a round one for the spare wheel well.
I also took out the wiper motor and are wondering wether I should put a saw to the wood work behind the dash?
After this I took some time (between sitting in the bare shell making engine noises) accessing the fibre glass damage.
There is the odd hole in the floors, which is probably where I will start, as I have never worked with fibreglass before.
I have made a deal with a fibre glass company very close to my garage. They have agreed that I can come there with the car, and do as much of the job I can myself, and then they will help me along the way. We haven' agreed on a price yet though.

These are the places I found that needs repair.
Furthermore there are going to be quite a lot of repair to the steel reinforced parts of the body.
Shock towers in the rear, one is cracked, and both metal inserts looks to be rotten.
Steering rack mounts are also looking quite "red"
Door mounts on the front fender. Looks like theres also metal in there. A bit concerned about replacing this and make everything line up.
As for lining the steel inserts up, I think I need to get the rear subframe bought and assembled, so I can use that to maintain the position of the inserts. My plan was to bolt it all up to the shell, and then take on steel plate at a time. That way iam sure the geomtry doesn't slide? Any other suggestions?
As for the steel reinforcing plates, I have readily acces to stainless steel. I have thinking about making the plates in stainless, as it would basically last forever then. Is that a bad idea? I know that stainless is a bit more brittle than ordinary steel, but when it is laminatied in I guess its main purpose is to dispatch stress over a bigger area, and it doesn't really bend as such? What do you guys think?
------------------------------------------------------------------------------------
Today I got a picture of one of the other Mini Marcos's in Denmark.
The red one belongs to Per who also has a page on here:
www.minimarcos.org.uk/memcars/hahn/index.html
I think I might steal the details with the two big holes either side of the number plate, and also the matt black under the headlight covers.
------------------------------------------------------------------------------------
Hi Guys
A short update, iam going to Japan tomorrow for 6 weeks. No pleasure though only work.
I am trying to arrange a visit at a Classic Car dealer, they have a Deep Sanderson 301 there.
But yesterday and today I spent a little time to take the doors and windows apart.
The window glass will be made of lexan, and all the rubber seals will have to be replaced.
Is it possible to buys the different seals through the Club?
Also the door lachtes and handles will probably also have to be exchanged. I allready have a bid in on Ebay for the interior handles.
BTW today when I was driving to my garage, I spotted this "blast from the past".
Pretty cool.
After the last disassembly, the car should allmost be ready for fibreglass work. Hopefully I will get that started when I return from Japan. I have also bought this Multi Cutter tool for the purpose. It is basically an oscillating saw, hopefully it will be usefull for cutting the fibreglass in narrow spots?
But for right now everything is wrapped up, and iam ready to leave tomorrow.
My plan is to get the dash board and rear subframe ordered while iam in Japan.
And then I can hopefully get the fibreglass work done before christmas.
That was all for now. Will be back in 6 weeks.
------------------------------------------------------------------------------------
Hi Guys
A little progress today. As mentioned above my fully equiped 200 hp Seat Altea FR sold while I was I Japan. I have been home for a good 2 weeks now, and have been searching for a cheap runaround, as I don't really drive that much. After a good deal of searching I ended up with this Fiat Punto.
It is very basic (i better get used to it, for when the Marcos gets on the road), but it allows me to get to the garage.
So today is the first real progress since I came home. That is appart from collecting some parts at my parents place.
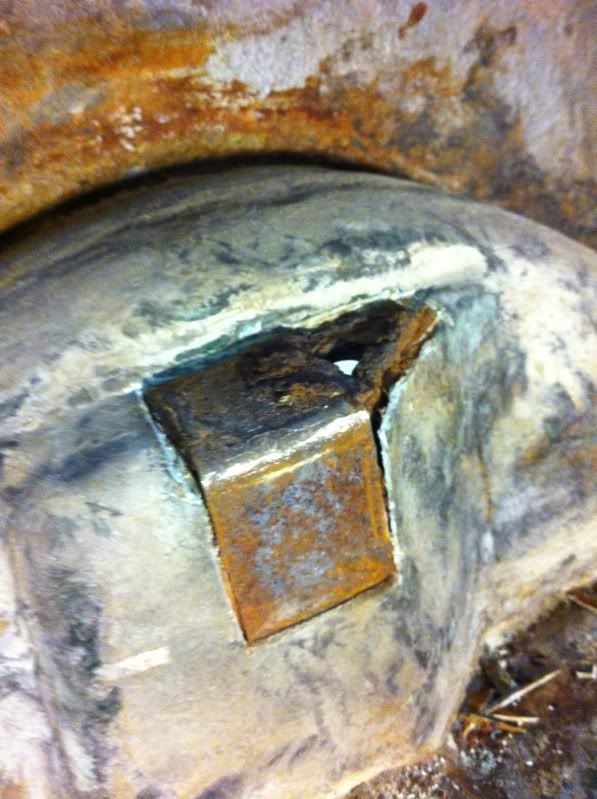
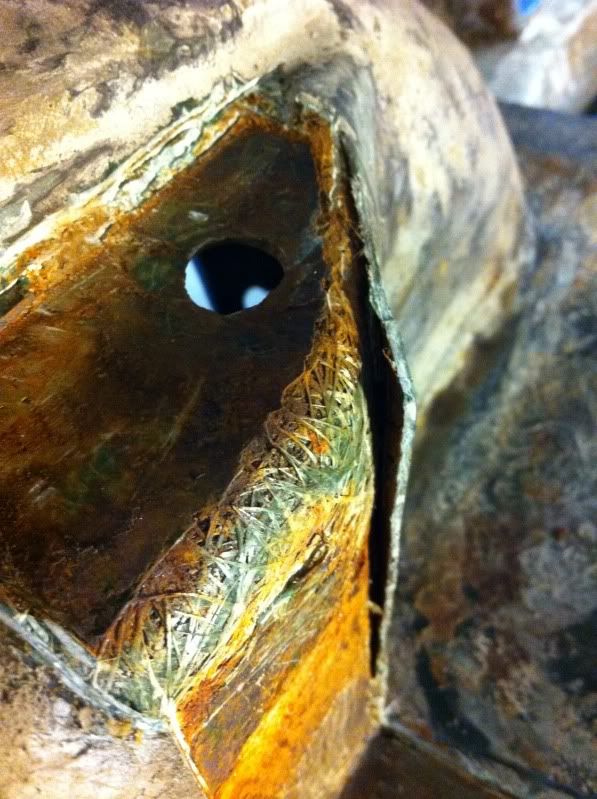
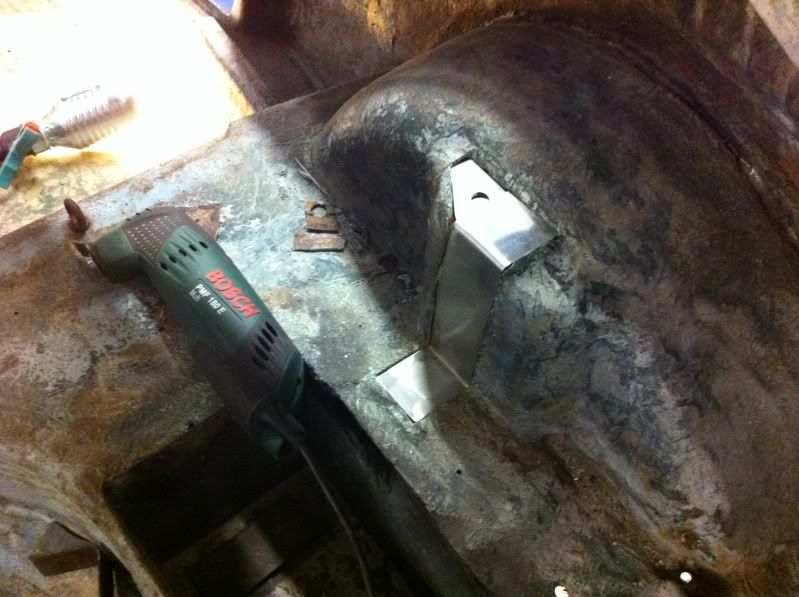
The plan for today was to try and cut out the metal in one of the rear schock towers, as it was very obivous that there was rust in there.
This also gave me a chance to test my new oscillating saw. This I genuinely the best tool I ever bought. Very effective.
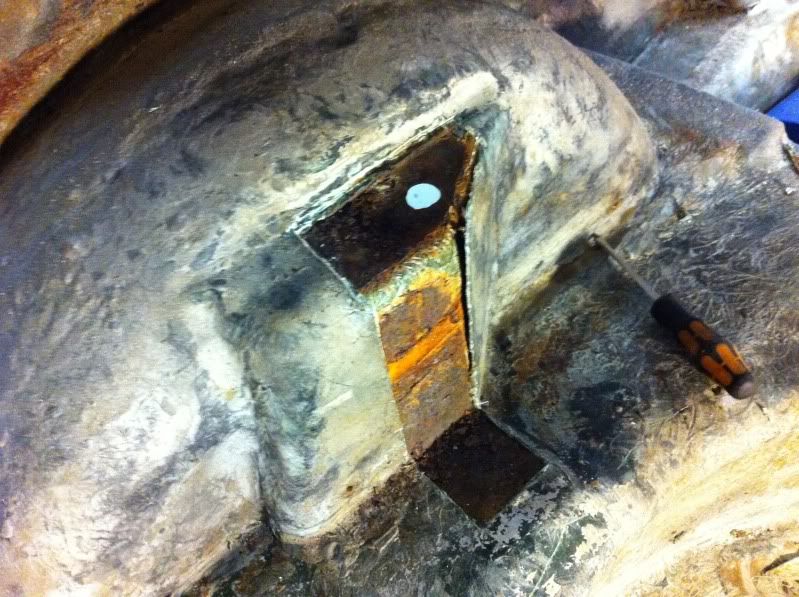
This is how it looked when I got it "opened" up.
A bit more
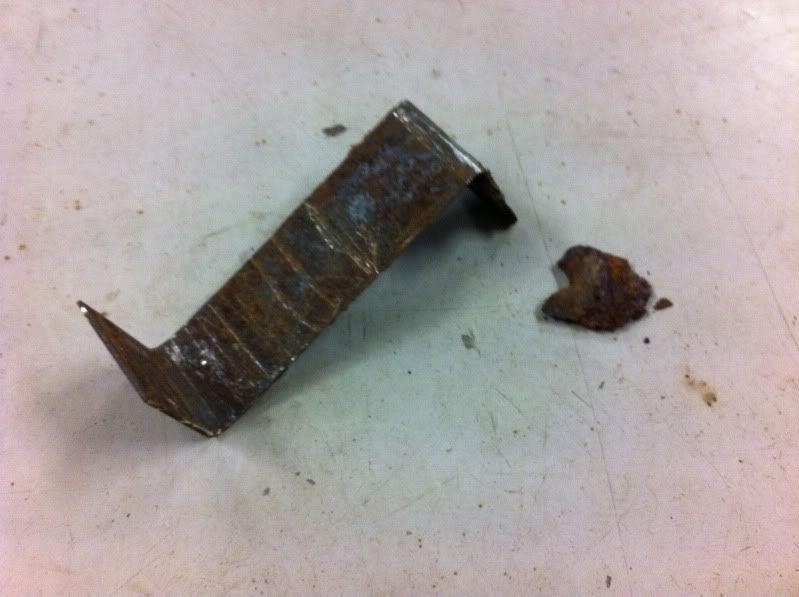
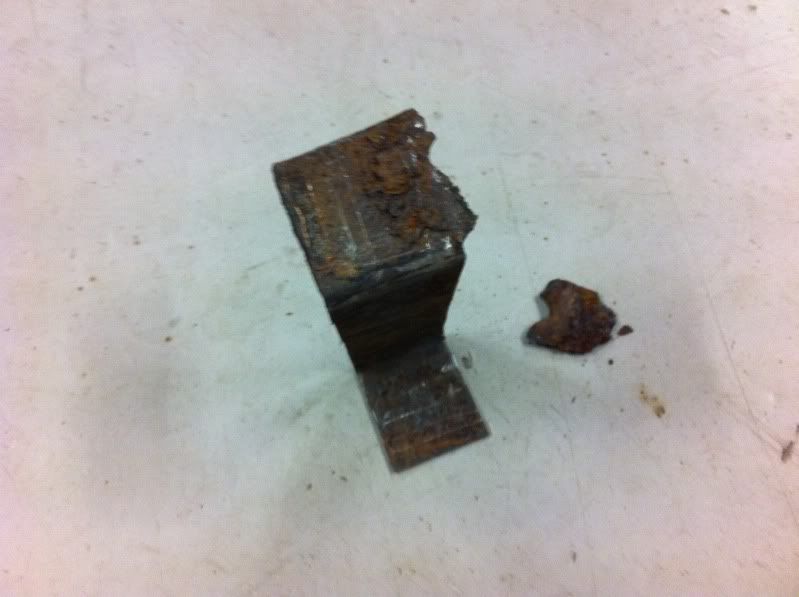
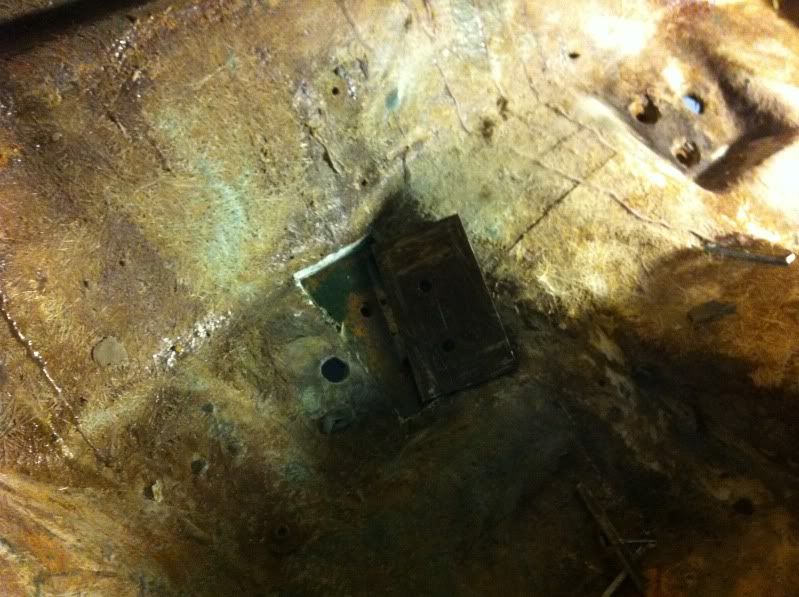
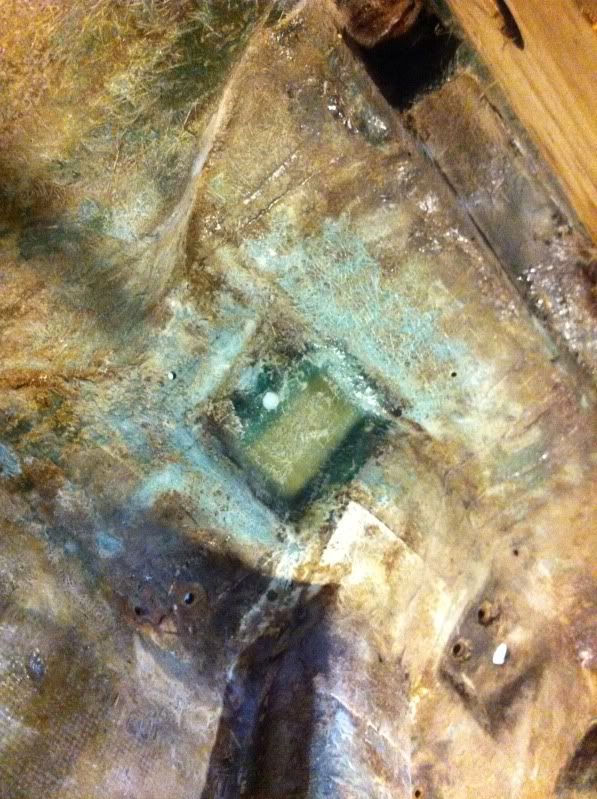
After more caerful cutting I finally got all of the metal exposed, and I could pull it out.
The new saw is really good for this, as I can cut very precise, so that the new piece will fit exactly where the old one was positioned.
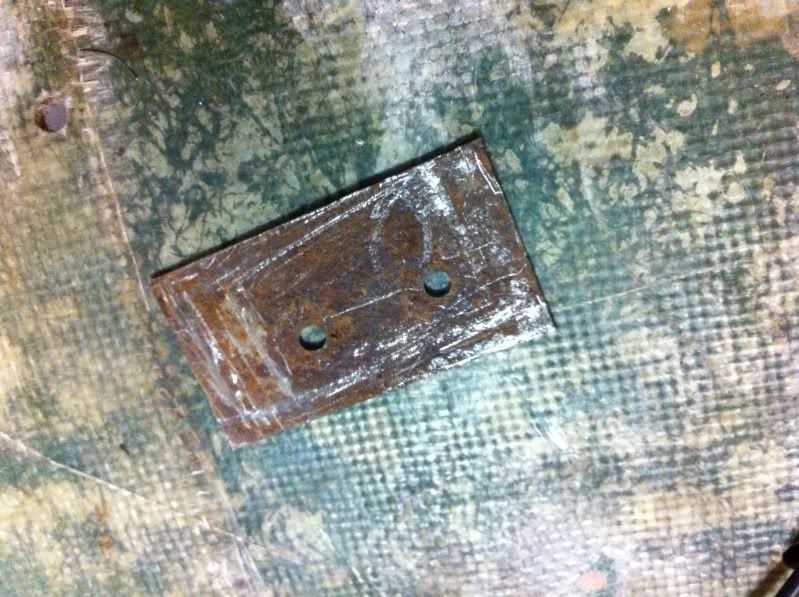
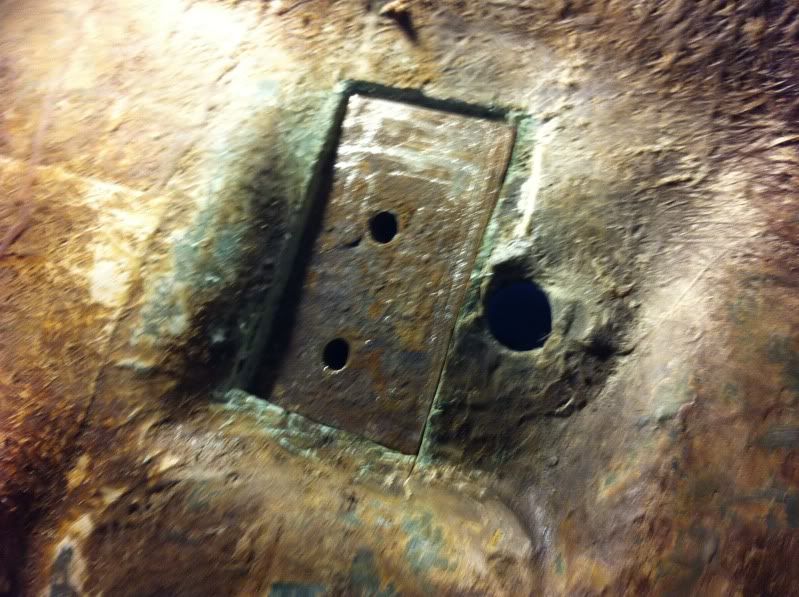
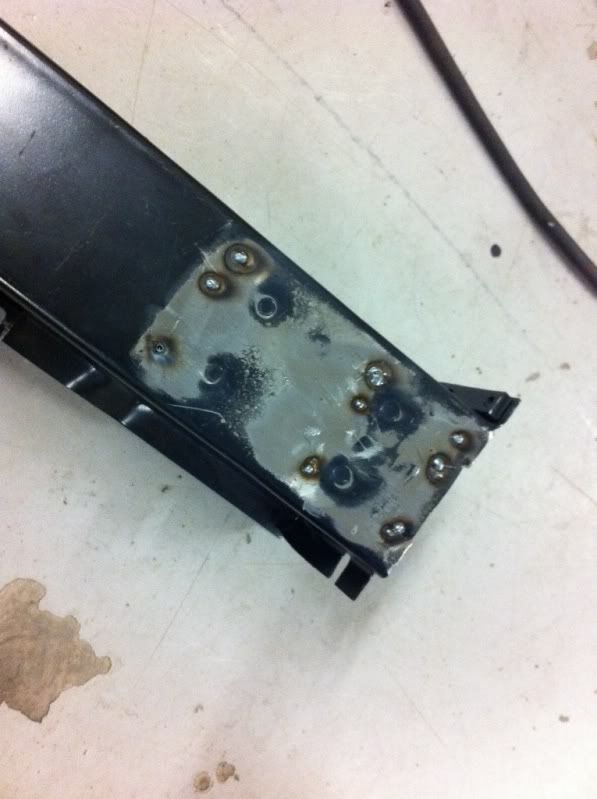
Top plate was in quite bad shape.
This is what it looked like underneath.
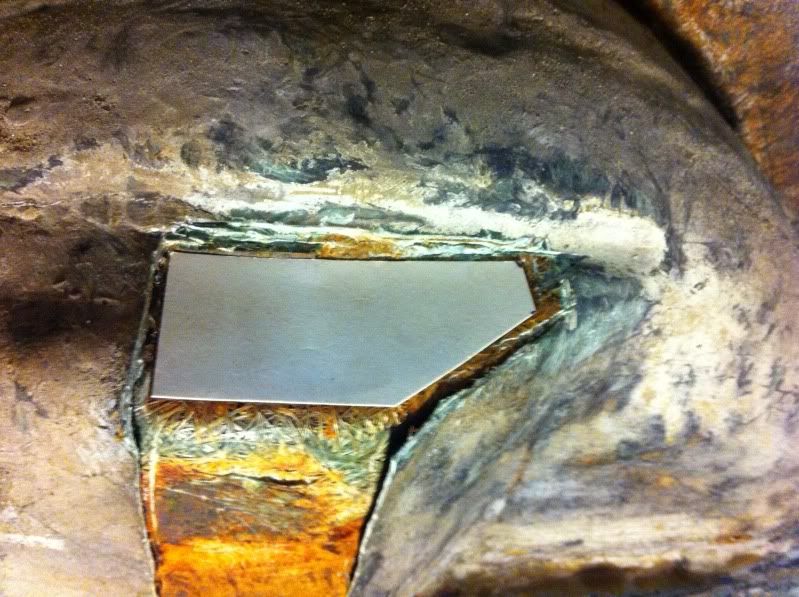
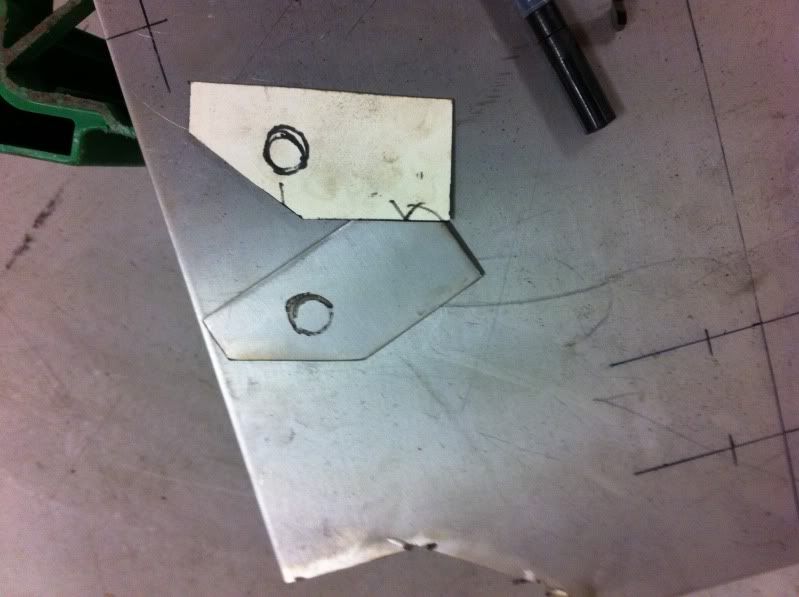
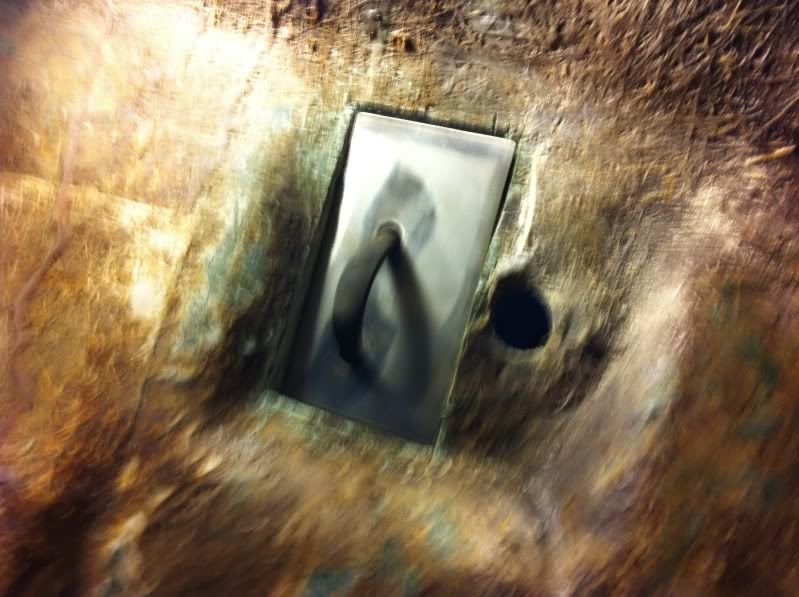
I then proceeded with making a template for the new topplate.
I had some stainless plate laying around, so I transfered the template to this.
The rest of the metal structure will also be made in stainless, but it need to get some from work tomorrow, as I don't have the correct thickness.
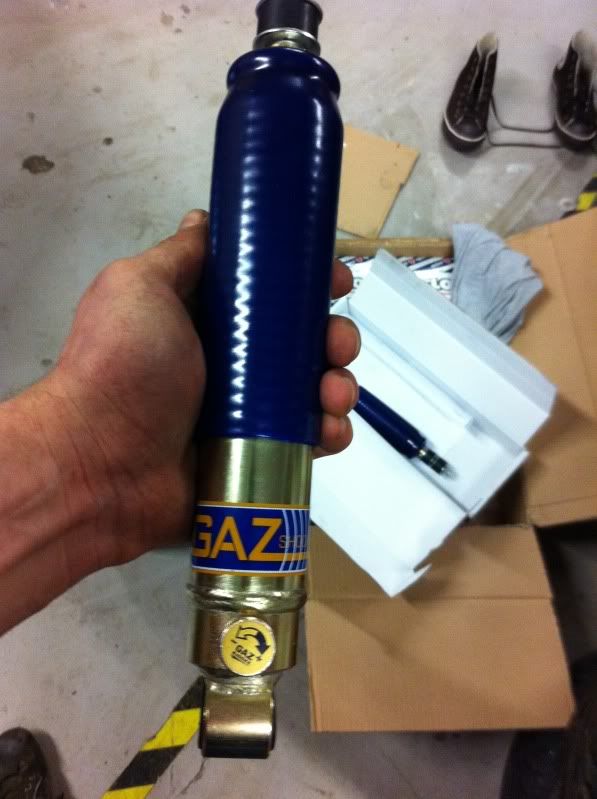
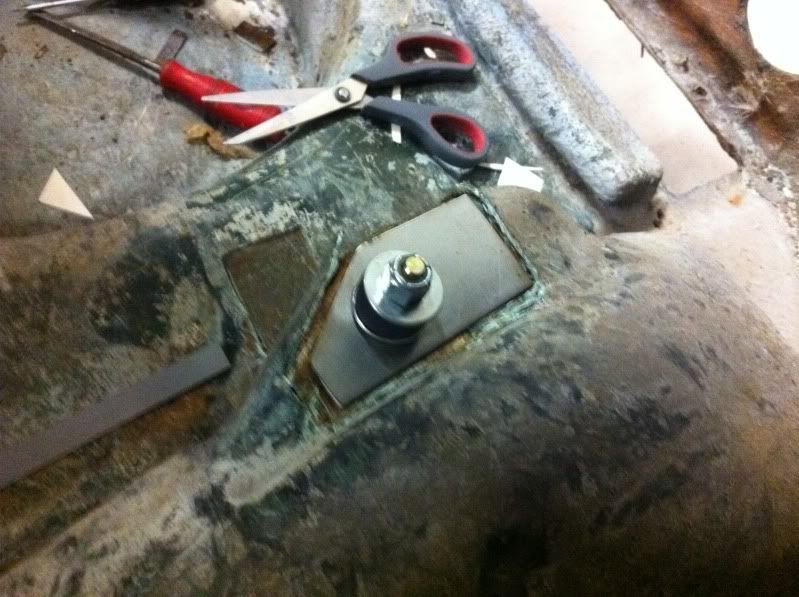
I did a quick test with my new schock absorbers, just to check that it didn't hit the inner arches.
All looked to be well, but the thread that goes through the tower seemed to be just on the short side. Any experiences with this? Do I need to trim the rubber bushings on the shock?
After this I decided also to cut out the reinforcement for the steering rack. This came out without any big troubel.
Tomorrow I will fabricate new plates for both shock towers and for both steering rack mounting positions. And on thursday I have to go pick up my new rear subframe.
So this I basically all for now. More to come probably on friday.
------------------------------------------------------------------------------------
Hi Guys
More progres yesterday. I went and bought some fibreglass supplies.
This is the first time ever I have tried working with fibreglass. But I have bought John Dickens fantastic book, and also have another handbook, from when I had my Super Seven and was thinking about making a hardtop.
But as this was the first time, I decided to start somewhere easy. I chose the steering rack fixing points. I made up a new stainless plate, and had a go with bonding it in. It worked out very well, and I am really pleased with the result. I does need a few more layers though.
My garage is pretty cold at the moment, and therefore I decided on using Polyester resin. Iam not sure wether I need to use epoxy when I start tackling the rear shock towers? Any experiences?
As for the shock towers, I also used yesterday for finishing the new stainless inserts for the towers. Just need to get a hold og a TIG welder to tack the together.
Hopefully I can get a permit to go to the garage tomorrow, and finish up on the steering rack mounts.
More to follow.
------------------------------------------------------------------------------------
Hi Guys
A bit more progress. I started up yesterday with repairing the other side of the steering rack mount. I also closed the RHD hole for the steering collumn, as the car will be converted to LHD. I also found that the hole was hacked totally up, and it had a bodge repair that was delaminating. All this was cut out, and closed up.
All to do here now, is to open up the top parts of the holes with a small hole saw, in order to allow the nuts to rest on the metal.
LHD side:
RHD side opened up:
New stainless plate:
Bodge repair:
Forgot to get an after pic, but it basically looks like the LHD side.
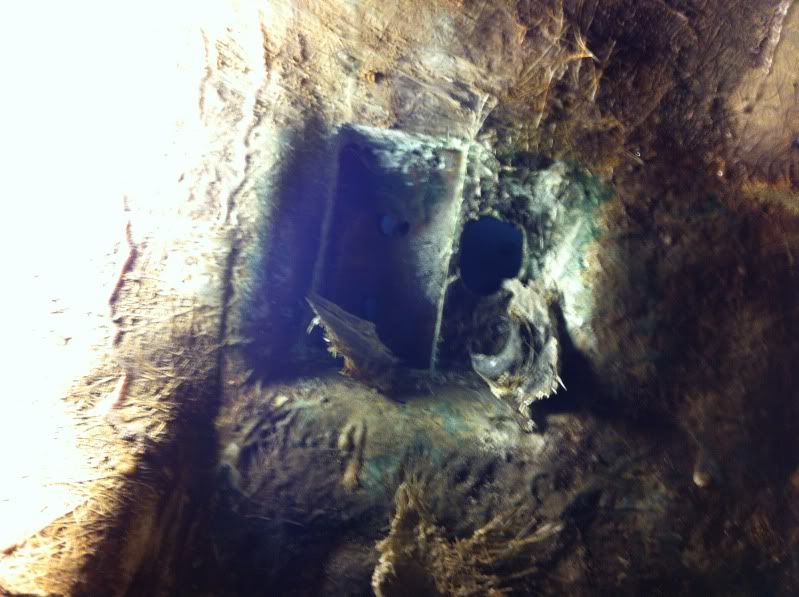
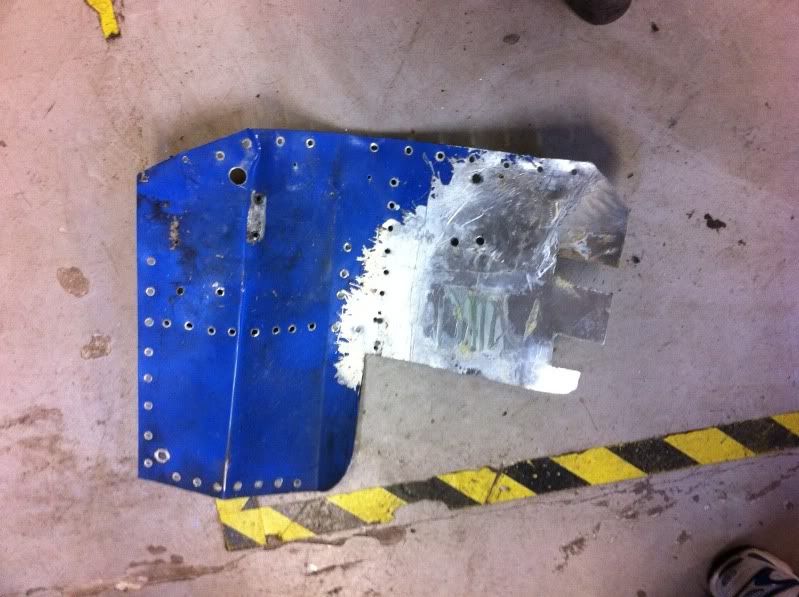
I then started to look at the front section of the car, and found something quite disturbing. First of all, all of the inner fenders and the bottom of the car was covered in under sealant. It was a pain in the *** of a job to remove it, but I got most of it off. Then I focused on an inlet for the heater, this was laminated into the inner fender (where the hole is). When I got it wrestled of, a big part of the inner fender started to delaminate.
Undersealant removed:
Hole in inner fender:
It is caused by some aluminium sheet, that has been bonded into the innerfenders.
When I chose to rip all of the delaminated fibre glass of, this was revealed:
Right now iam a little worried about how critical this is.
I have a few questions about this, that I hoe you guys can help me with.
1. Is is original to have aluminium sheet laminated in here?
2. How hard would it be to remove? Have anyone tried anything similar?
3. It somehow looks like this was done, at the same time as the front cross member repair. So now I don't really trust this either. So I am back at thinking about changing to a new replacement cross member? I have a few questions about this, do these come with cut outs for the master cylinders? Do I need to order one specific for LHD or RHD?
If any of you have pictures of these areas of your engine compartments I would really appreciate it.
Finally I have realised that me working I fibre glass in my own garage is a no go. It simply creates too much dust, and as I share the place with other people, it is not ideal.
So I have contacted a local fibreglass shop, hopefully I can get the car down there, and really get cracking. I could also do with a little help. It would also be nice to really press on and get all the fibreglass work done.
Again if any of you can help with some experiences of above, it would really help me.
I have just ordered a full Heritage crossmember. Wish me luck.
Kind regards
Dennis
------------------------------------------------------------------------------------
Cheers mate. I have allready bought his book, but I better buy the other one also.
I could really do with a few pointers on this.
Ohh yes one more thing.
This over laminating inside the arches, is this normal, does that hold some of the bodywork in place?
------------------------------------------------------------------------------------
Hi Guys
First of all hope that all of you had a great christmas.
This was my christmas present.
I love it, and it makes me want to work even harder on the car.
Today I made qute good progress. Even though I planned to fit some silicone cooling hoses on my Lotus, I could not resist working on the Marcos instead.
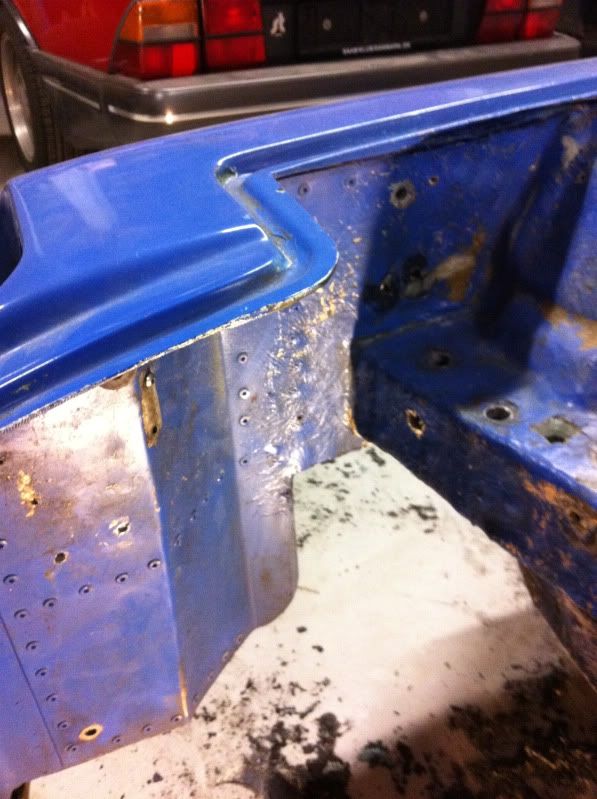
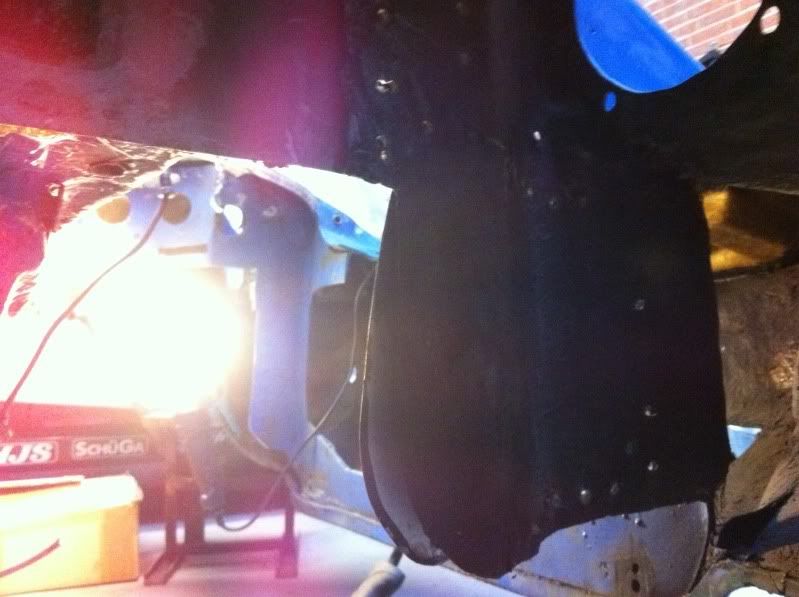
I started with tackeling the alumium arches. Got the rigth side completely removed.
After drilling out all the rivets, I could carefully cut out the laminated areas inside the arches, and out it came.
After this, I found a pleasant surprise. There is quite a lot of fibreglass left in the arches. So it looks like I can build on to this.
This is how it looked after the aluminium was removed. This is looking from inside the arch onto the side of the cross member.
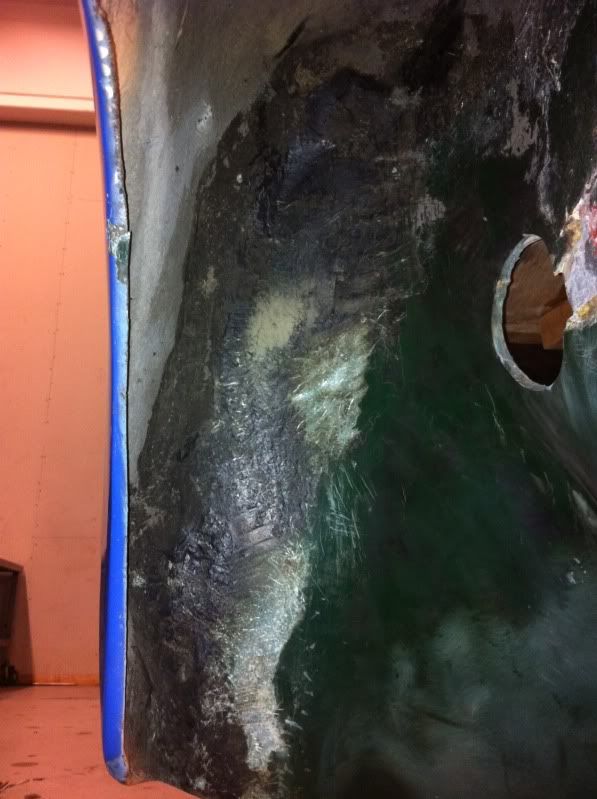
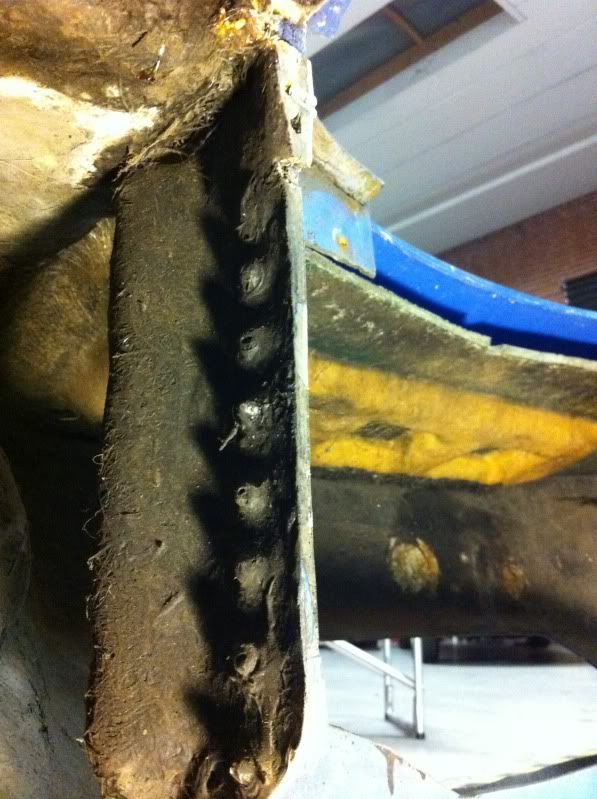
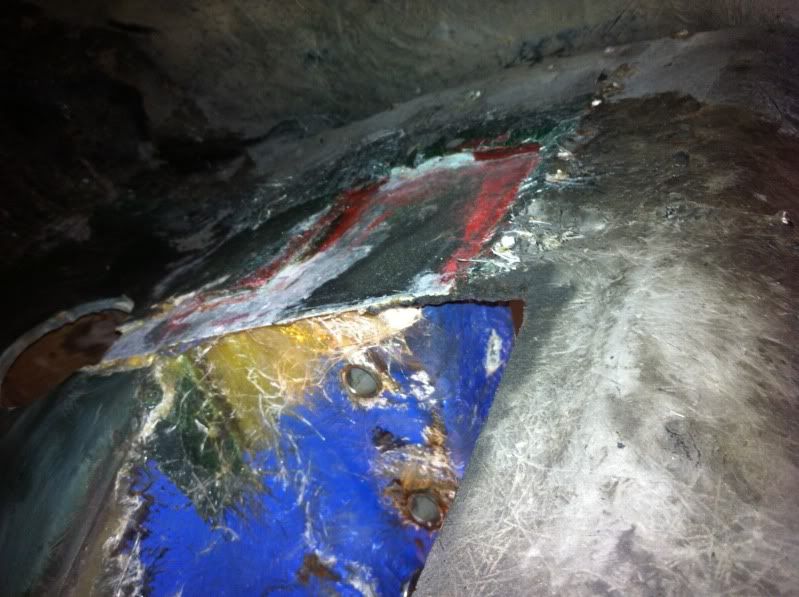
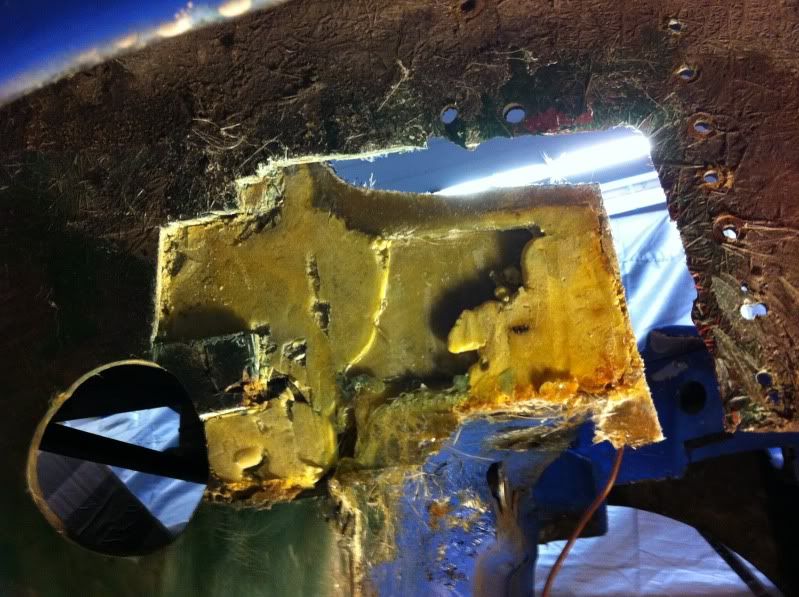
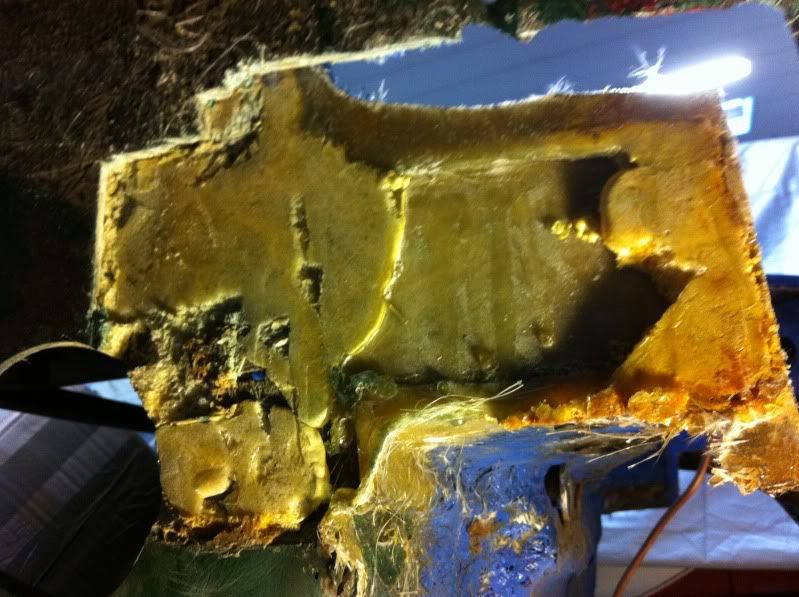
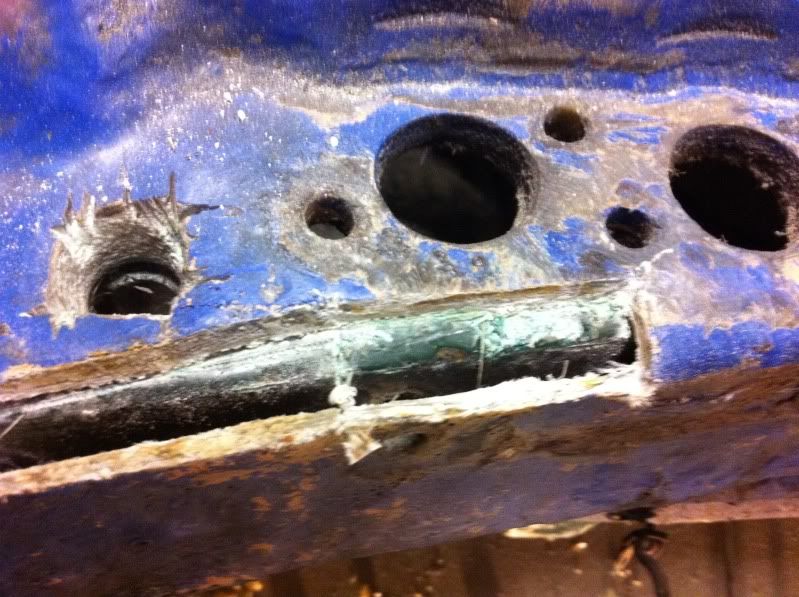
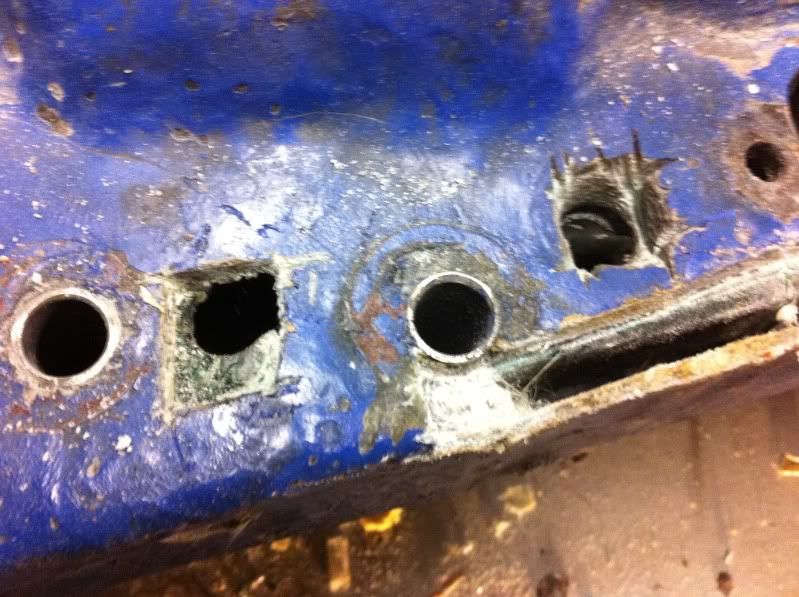
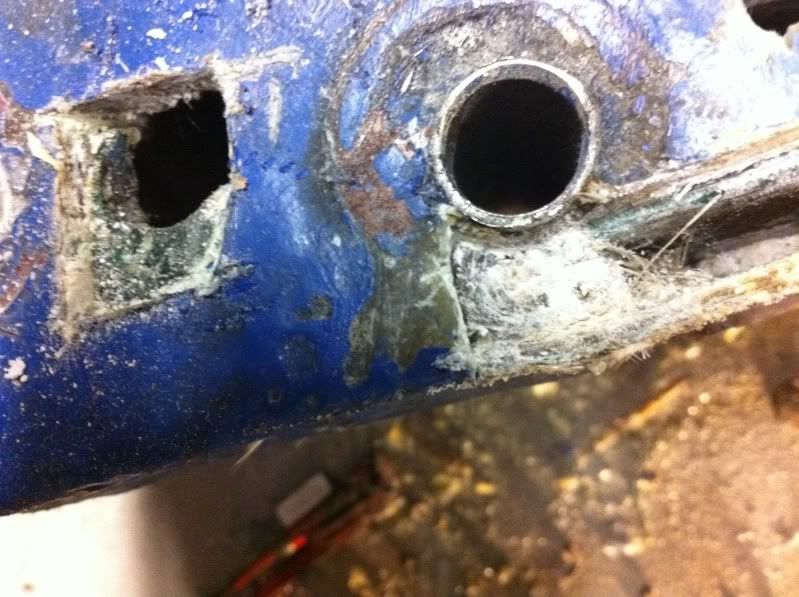
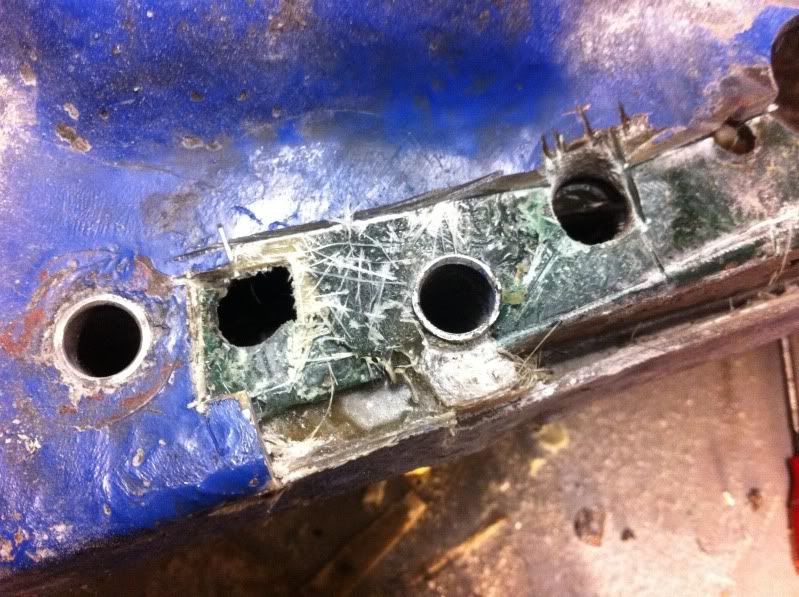
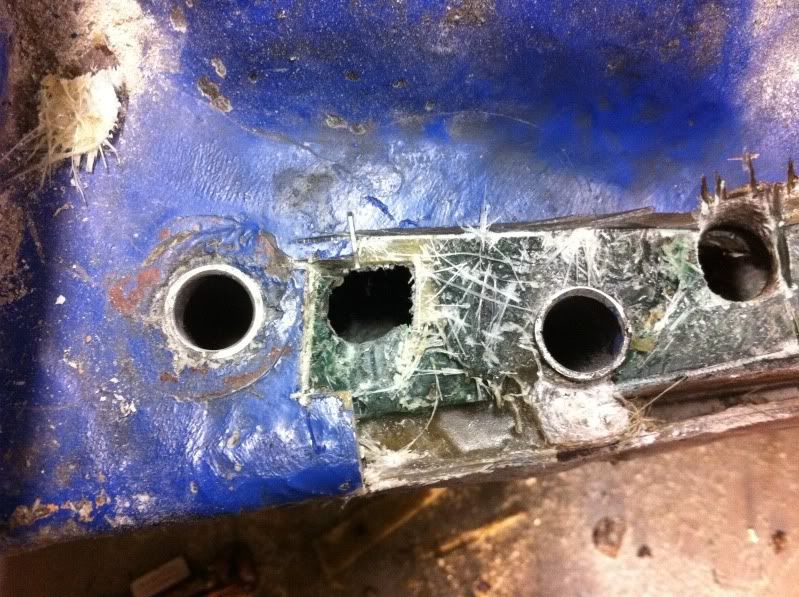
I have allready recieved my new BMH crossmember. And good thing I ordered one, because when I started looking at the subframe mounting points, I discovered that there wasn't any metal at all, where the cross member was supposed to be. Only thing is two steel pipes laminated/glued into a lot of fibreglass.
This is what I found when I started to cut.
The positive thing is, that I think, that with some careful cutting, I can possibly expose most of the original bulkhead underneath. That is the green GRP you can see underneath. I think this will be helpful when I have to laminate the new crossmember in.
But before this, there will be a lot of cutting to do.
That was all for now, I hope all of you have a great New Years party tomorrow.
------------------------------------------------------------------------------------


 .
.


 .....twin mount subframes on minis are solid mounted, so if you go to single mount (big bolt), then you'll need to buy alloy bushes for the top mounts and solid mounts for where the rear legs of the subframe bolt to the floor (where your feet are).