|
|
|
Nov 27, 2013 17:54:02 GMT
|
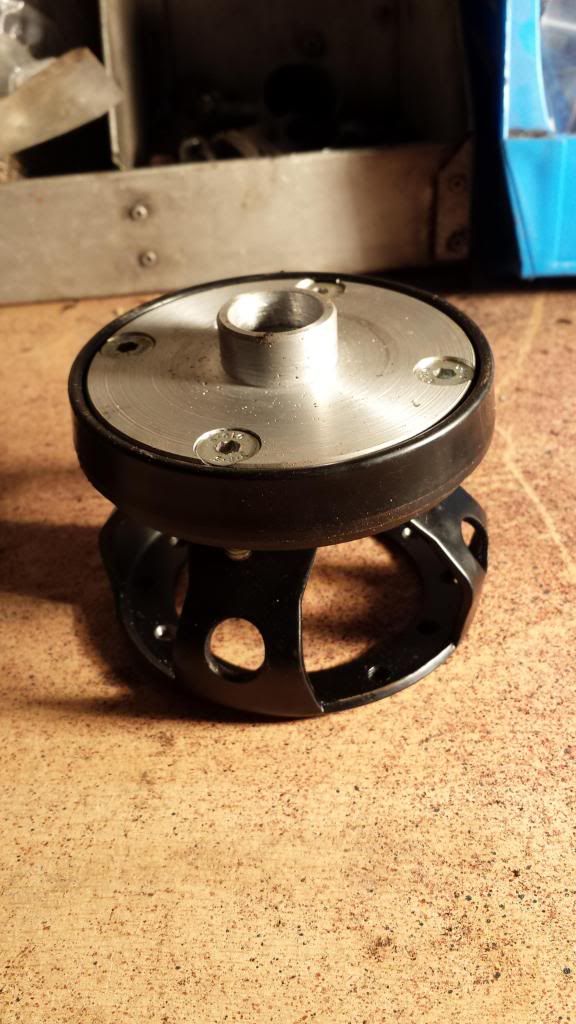
nice dude cheers for the sizes  i love the smooth hub caps btw. i've got 4 13" slicks which are useable if you want them for a track day or whatever. plan for my steels are get the 6j banded to 8j and the 8j banded to 10j as i wanna drag race mine and going for air ride so the arches will sit on the tyres but dunno i need to have a measure to 2bh as 9j might be the limit we'll see i'm planning a pd130 tdi engine from a passat to go into my mk3 golf |
| |
|
|
|
|
anden
Part of things
 Go low or go home
Posts: 180
|
|
Nov 27, 2013 20:32:27 GMT
|
|
sounds cool, will give you a nudge if i do need them, how wide are they ones you have?
PD 130 wouldve been my ultimate choice, the wiring is no more difficult but requires a manifold fabricating to mate everything up - fine for me now i have welding gear but 3 years ago when i did my tdi conversion i didnt have any welding gear so steered clear and went for the simpler option.
Done a little more on the 8, removed the wing on passenger side to allow me to make the battery tray deeper to make more room for the dcoe's in the bay.... made the battery tray around 3 inches deeper and finished the other bay mods to give clearance. Will add pics this weekend.
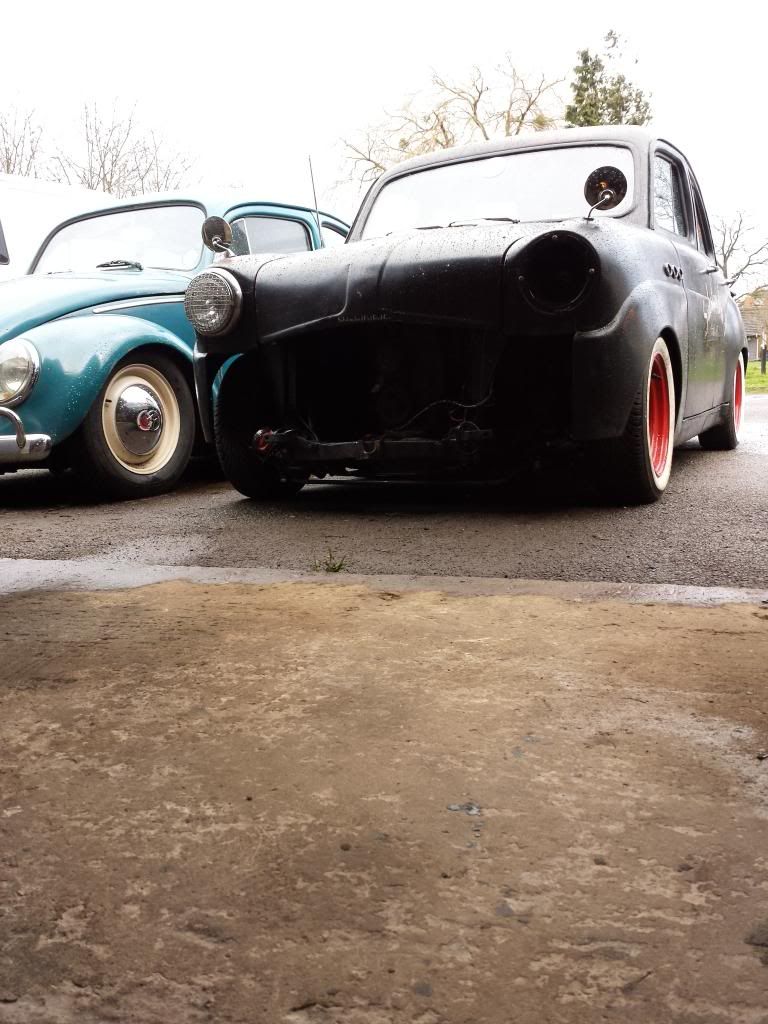
Taking the wing off however revealed the secret of how the water gets into the passenger footwell. The base of the A pillar needs attention. right where it meets the sill, so ive been busy fabricating the lower 3 inches of A piller, and around 4 inches of the inner and outer sill! must be the only area of rot in this car, its so surprisingly solid! The wing mounting faces can hide so much.
General plan is finish up the welding, get the wing back on, then dream up some magical method for the steering rack problems I'm having. Due to my chosen engine mounting location i have very limited space to run the necessaries past everything, I need to be able to get lower down to reach the spline on the rack as it is internal to my subframe - my steering box sat ontop of the subframe.
Raided car builder solutions for the correct uj's and splined bars but havent calculated what needs to be chopped where yet. going to machine a drive dog on the cut shaft and sleeve it as i don't want to rely on welds breaking over time. Unless anybody knows where i can buy straight lengths of fully splined bar rather than just a short section of spline at either end of the bar?
|
| |
|
|
LowStandards
Club Retro Rides Member
Bigging Up The Sum Sum Man Since '99
Posts: 2,647 
|
|
Nov 28, 2013 20:46:20 GMT
|
|
Fecking single make forums hey ;p
Try tractor suppliers for splined shafts, seem to have loads of different types last time i looked
|
| |
|
|
anden
Part of things
Go low or go home
Posts: 180
|
|
Nov 30, 2013 23:42:17 GMT
|
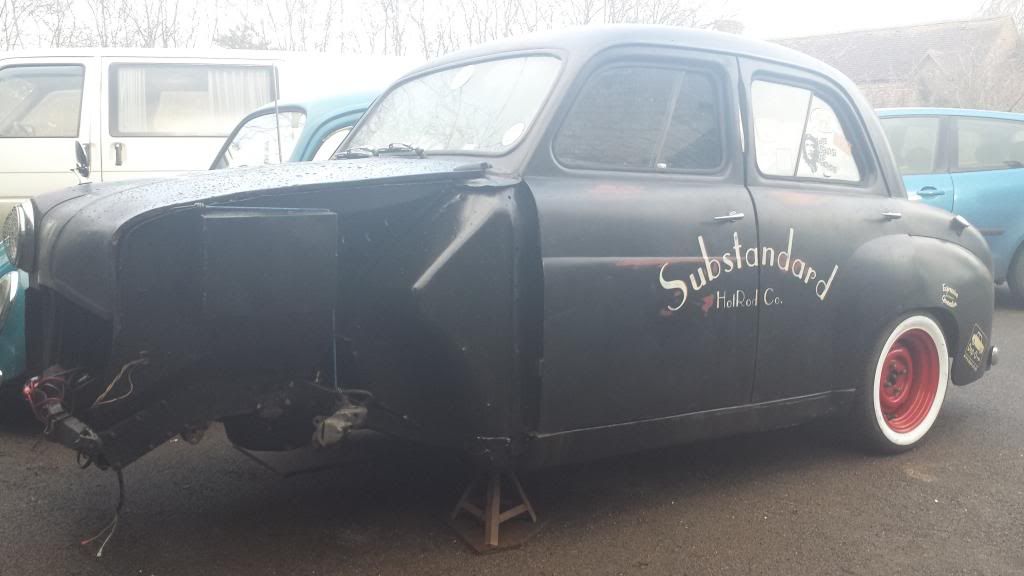
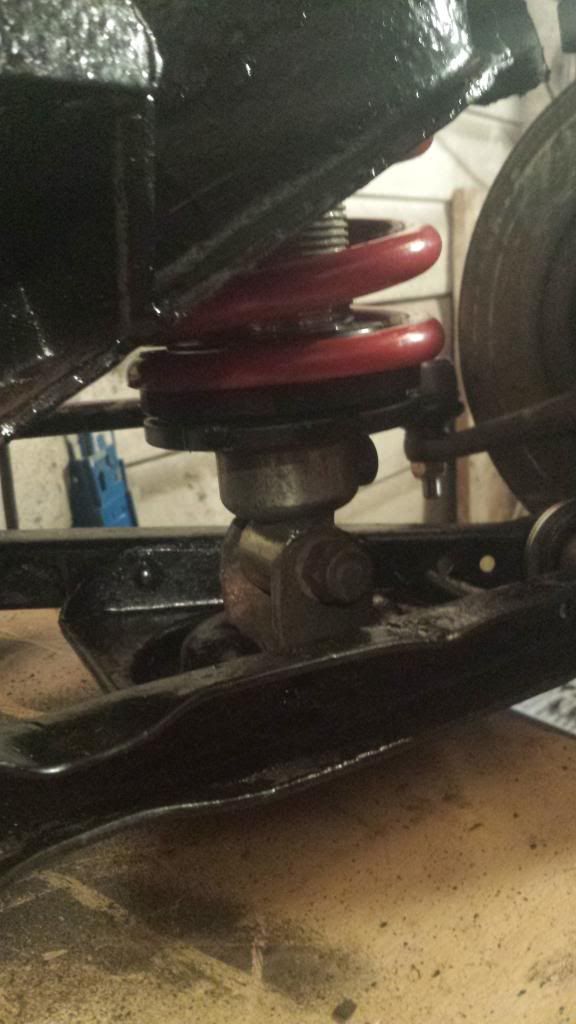
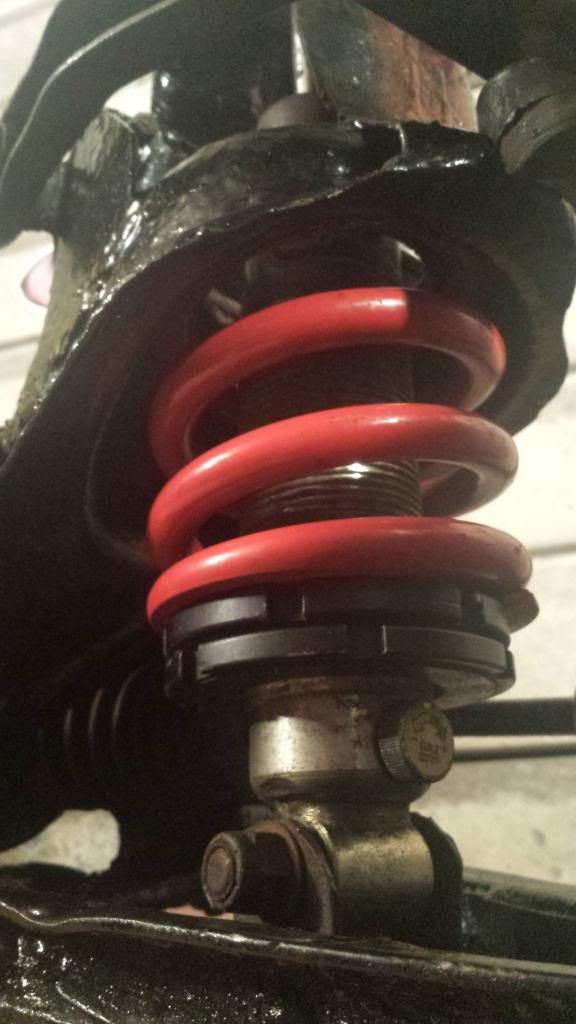
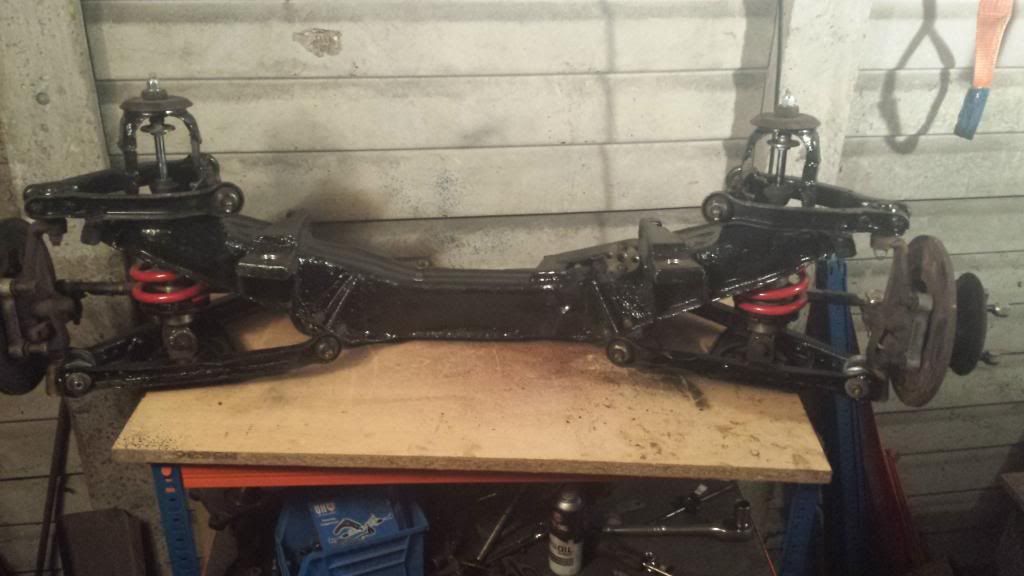
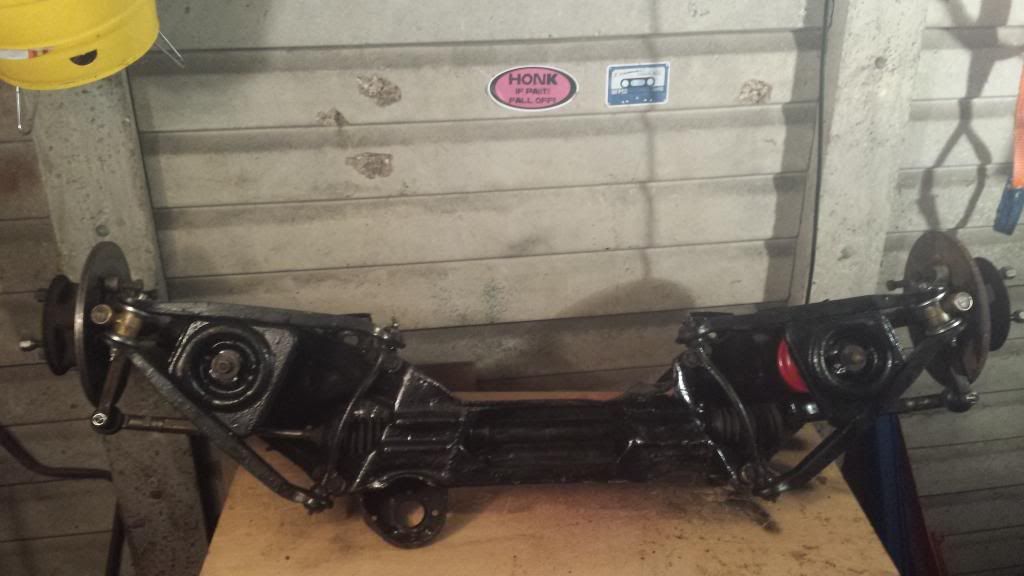
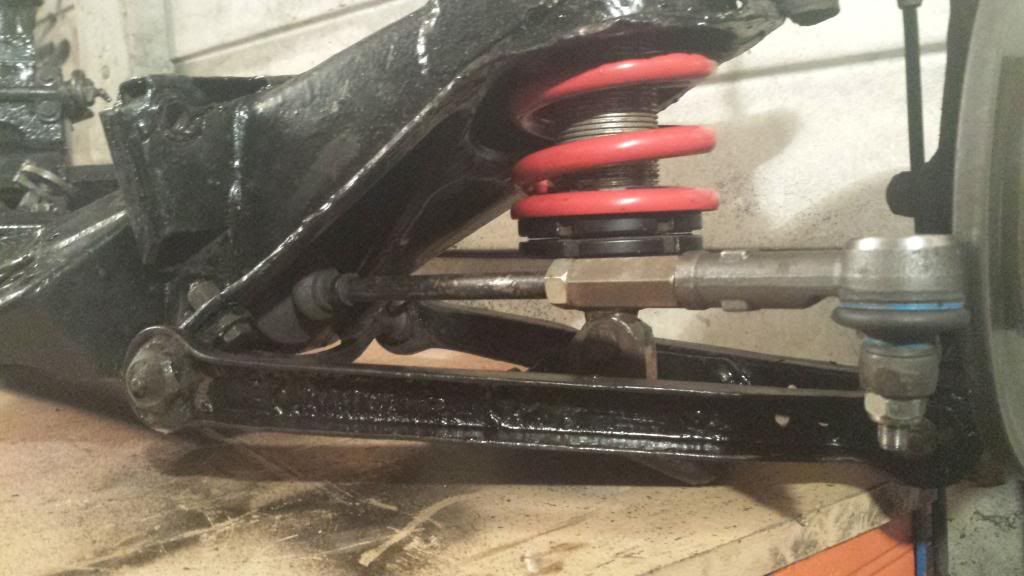
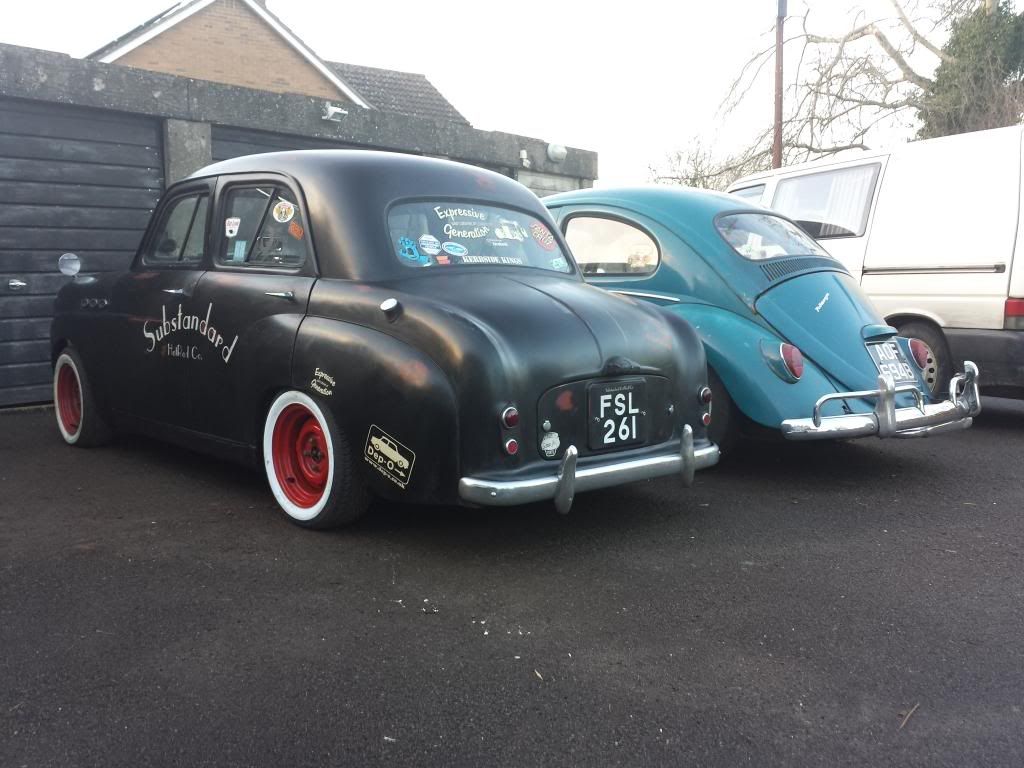
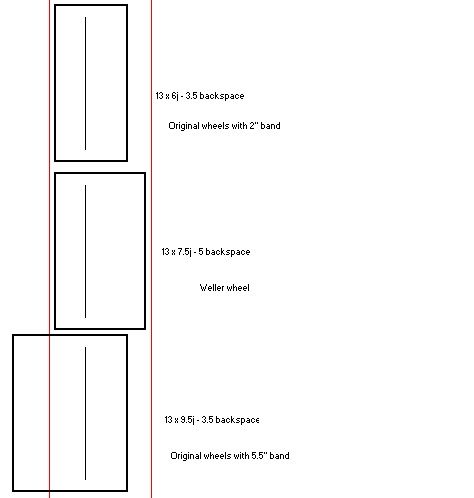 loose calcs for rear wheel fitments, left most solid line is outer edge of bodywork, right solid line is inner edge of wheel arch. All shown with original width axle. Top one is my current wheels which are snug but okay, middle one is the 7.5j wellers which look like they would go with a sensible tyre choice. Bottom one is the wide rims... Looks like its going to be a monumental amount of work to make them fit! The arch just isnt wide enough to narrow the axle that much, could tub the rears in a bit as I'm getting an axle narrowed to suit anyway so no additional cost there. might be a step further than I'm prepared to modify the car, cutting wings and doors is definitely a nono. Found a load of rot when i removed the wing too which is not so good. Had to fabricate the lower 2 inches of the a piller and 18 inches of the outer and inner sill as it was a state, didnt look bad at all when i started!!! Just got the lower wing section to replace and the bodywork is good to go again.  |
| |
Last Edit: Nov 30, 2013 23:43:37 GMT by anden
|
|
anden
Part of things
Go low or go home
Posts: 180
|
|
|
|
|
all been a bit quiet on the build thread front, will do an update soon. Its still in bits but ive made progress
|
| |
|
|
anden
Part of things
Go low or go home
Posts: 180
|
|
|
|
|
|
| |
|
|
|
|
|
|
|
|
absolutely love this car great to see thats its still around and evolving
|
| |
|
|
anden
Part of things
Go low or go home
Posts: 180
|
|
Feb 10, 2014 18:27:51 GMT
|
|
like so many its a never ending evolution!
|
| |
|
|
anden
Part of things
Go low or go home
Posts: 180
|
|
Feb 14, 2014 15:05:39 GMT
|
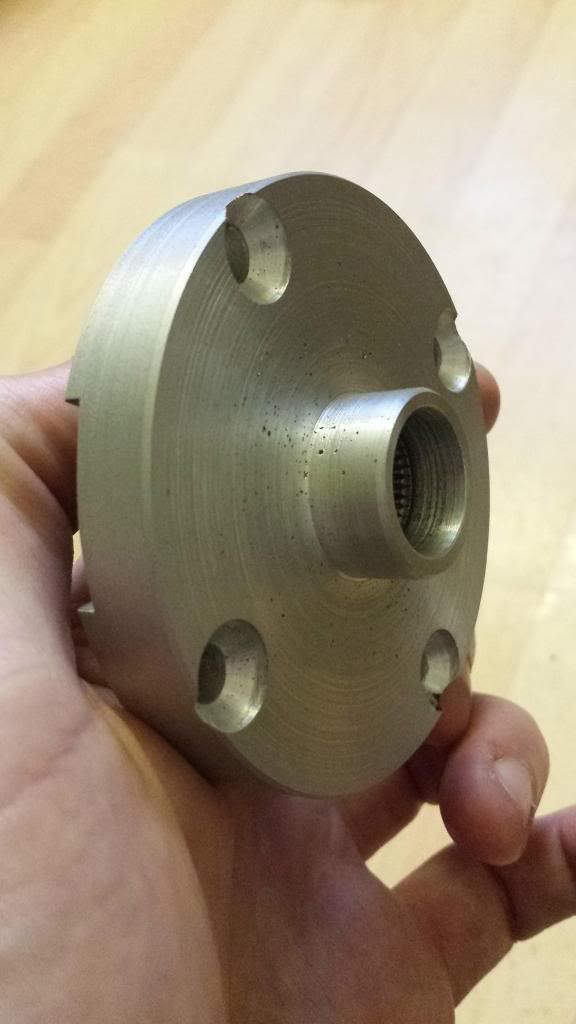
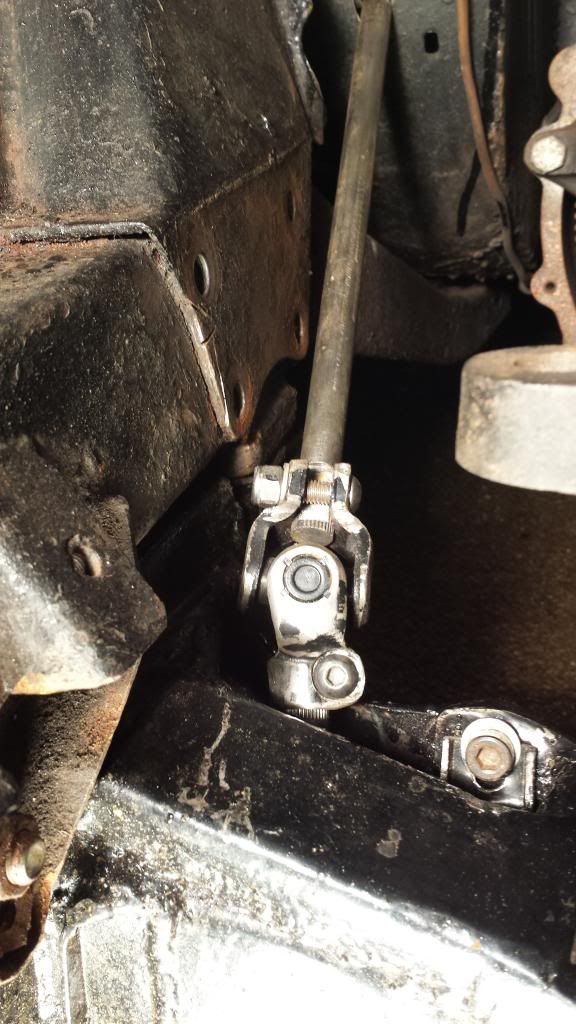
Decided to tackle the steering column this afternoon, chopped it to length last night, had to remove 125mm. I refused to cut and shut the bar as didnt want to rely on a weld when a weld really wasnt necessary so set about recutting a spline to the end of the bar. The spline used on the standard is identical to many cars of the era and some later things including early mk1 escorts. Its a 9/16 diameter 36 spline form which is great for simple maths - one spline every 10 degrees around the outside. Only had access to a manual mill so went off and found a manual rotary indexer and made a locking collar to allow me to hold the steering column in the indexer, luckily the vice on the bed was the right height to support and clamp the remainder of the column. before machining. 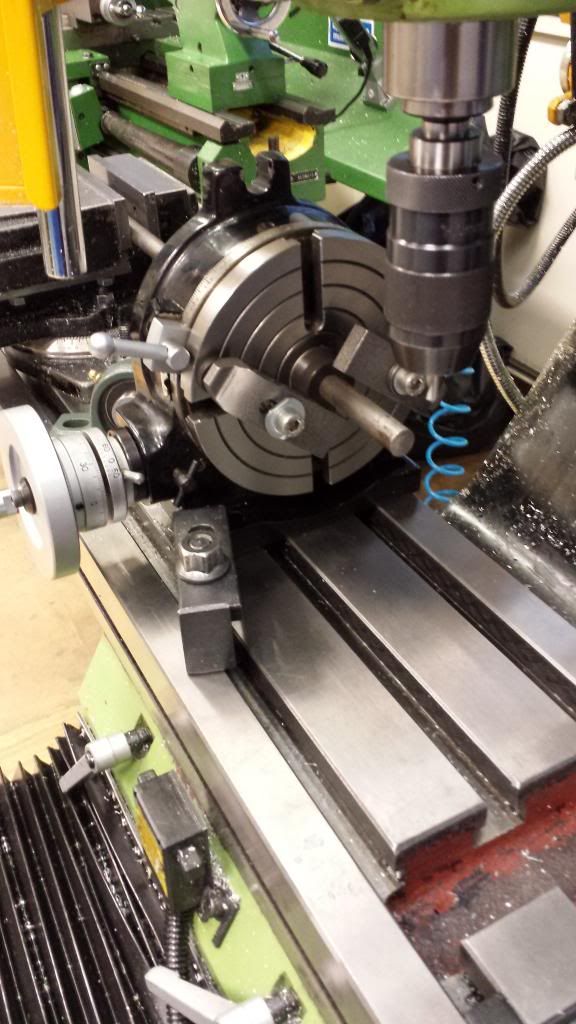 during, i machined around 20mm of length of spline onto the bar. 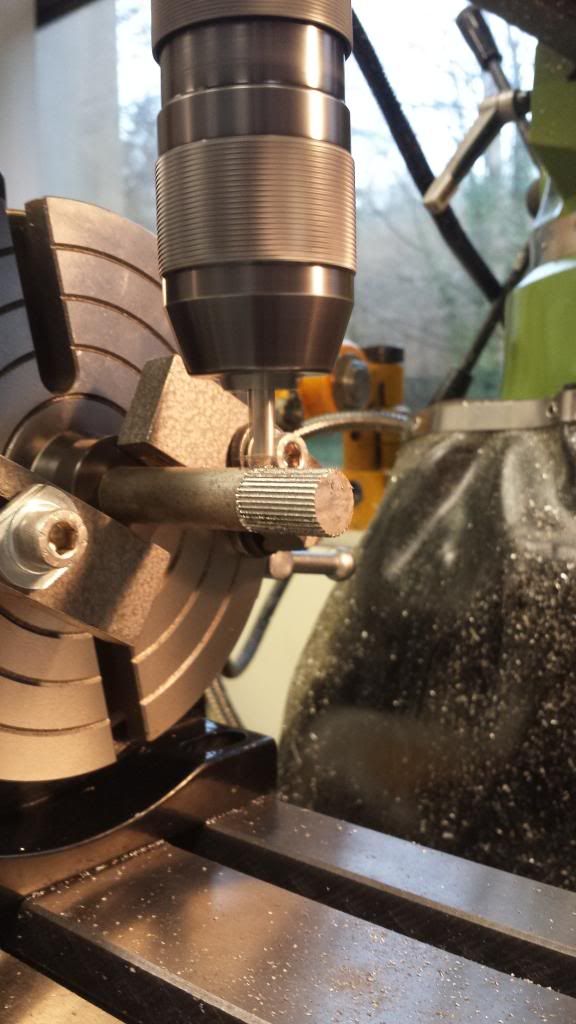 I then machined a flat onto the top to clear the pinch clamp in the uj, same as the original form of the bar i chopped off. Ready to put back on this weekend if it stops raining!! Then i can steer the thing back into the garage and work all weathers again :lol |
| |
|
|
anden
Part of things
Go low or go home
Posts: 180
|
|
Feb 17, 2014 22:55:47 GMT
|
|
|
| |
|
|
|
|
anden
Part of things
Go low or go home
Posts: 180
|
|
Feb 21, 2014 21:06:40 GMT
|
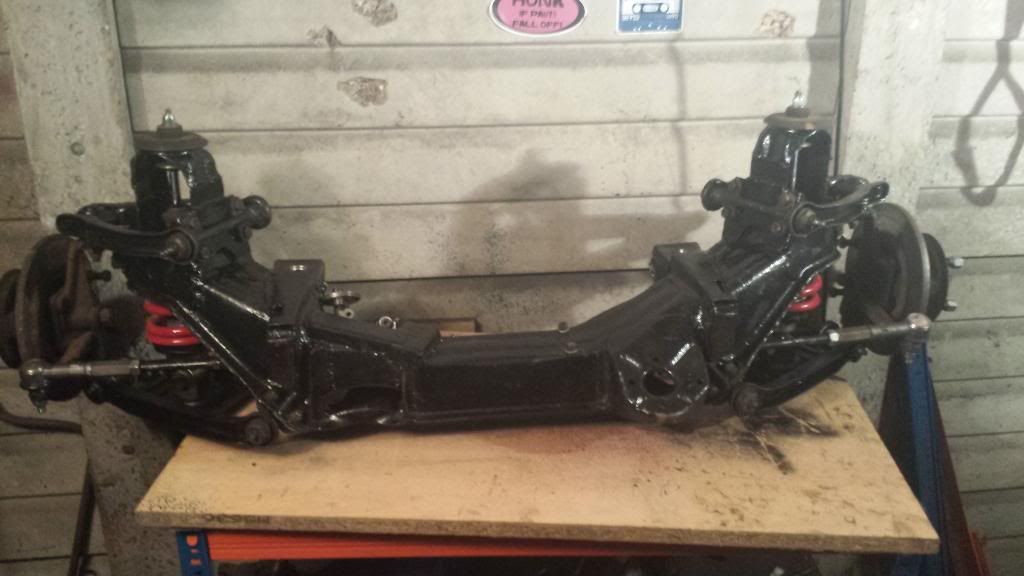
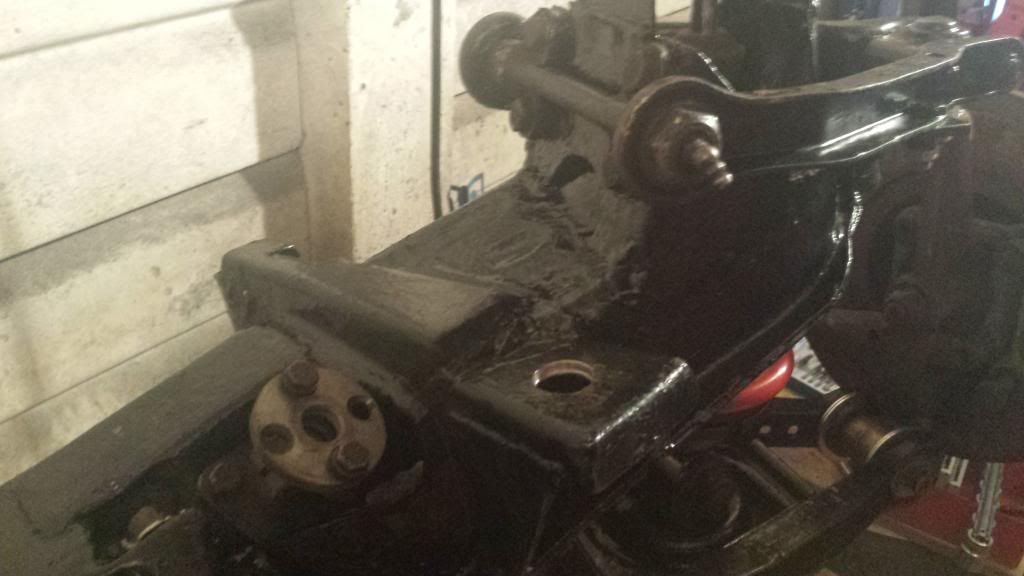
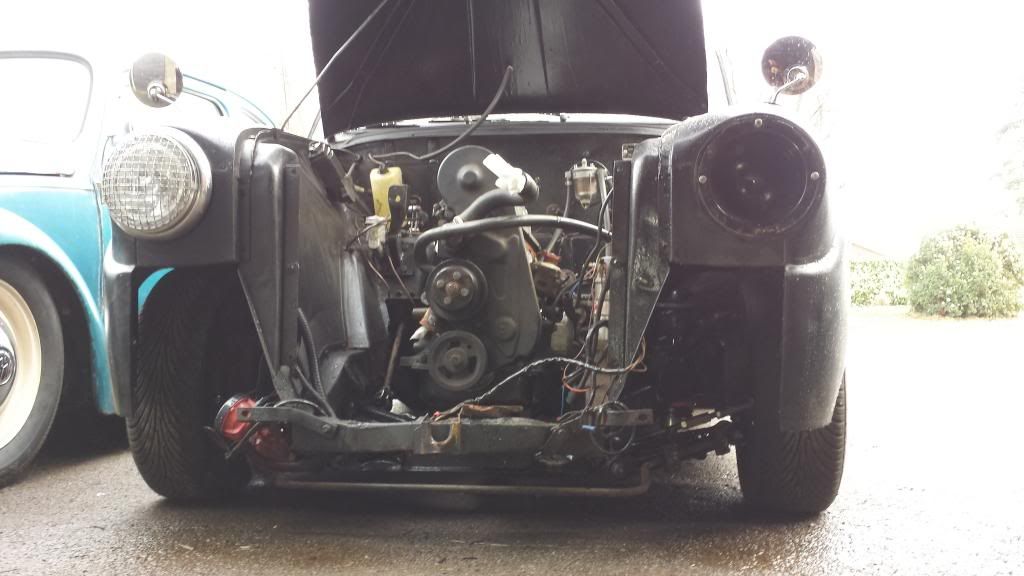
Made some good progress on the car today Fitted the battery clamp, welded up some pinholes in the exhaust manifold, repaired the crack in the sump, finished modifying the engine mount so the steering column can pass through the engine mount, real tricky for space but all fits realy snugly. The revised mount 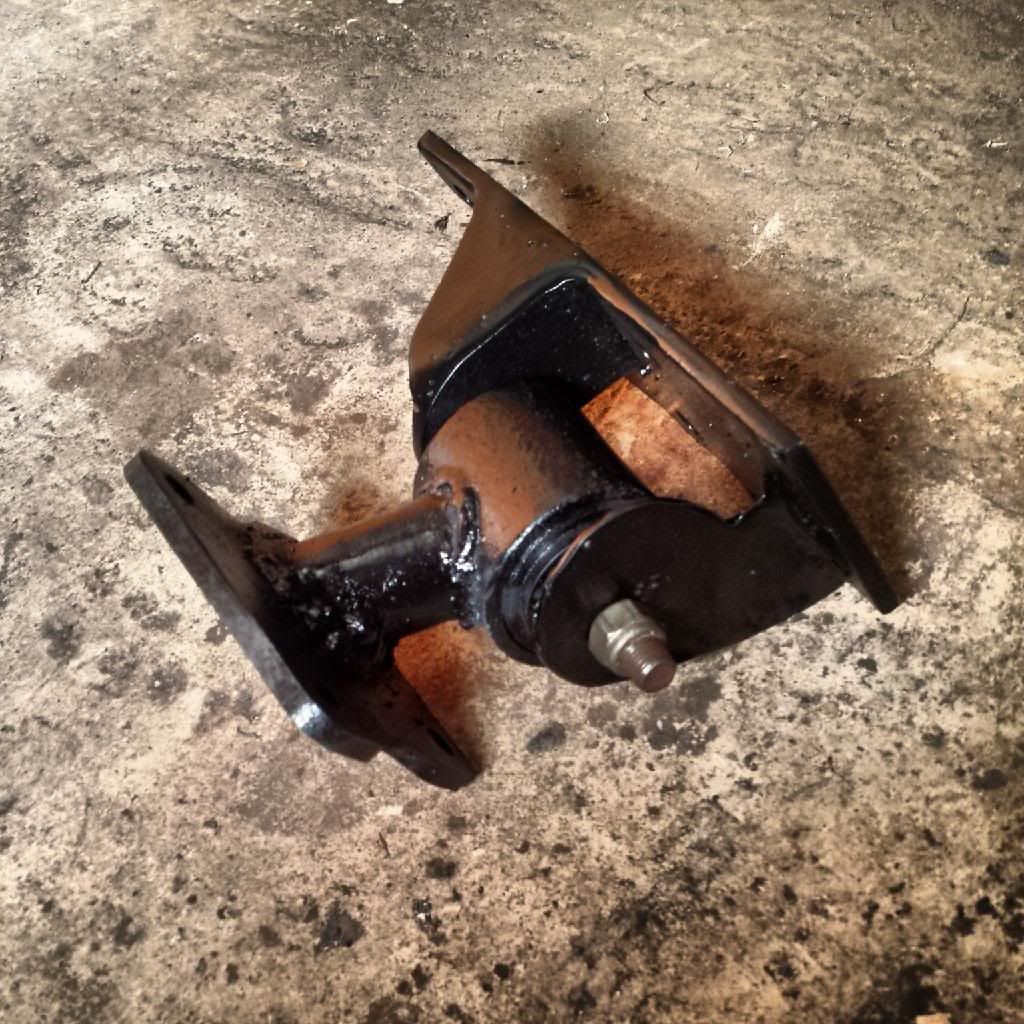 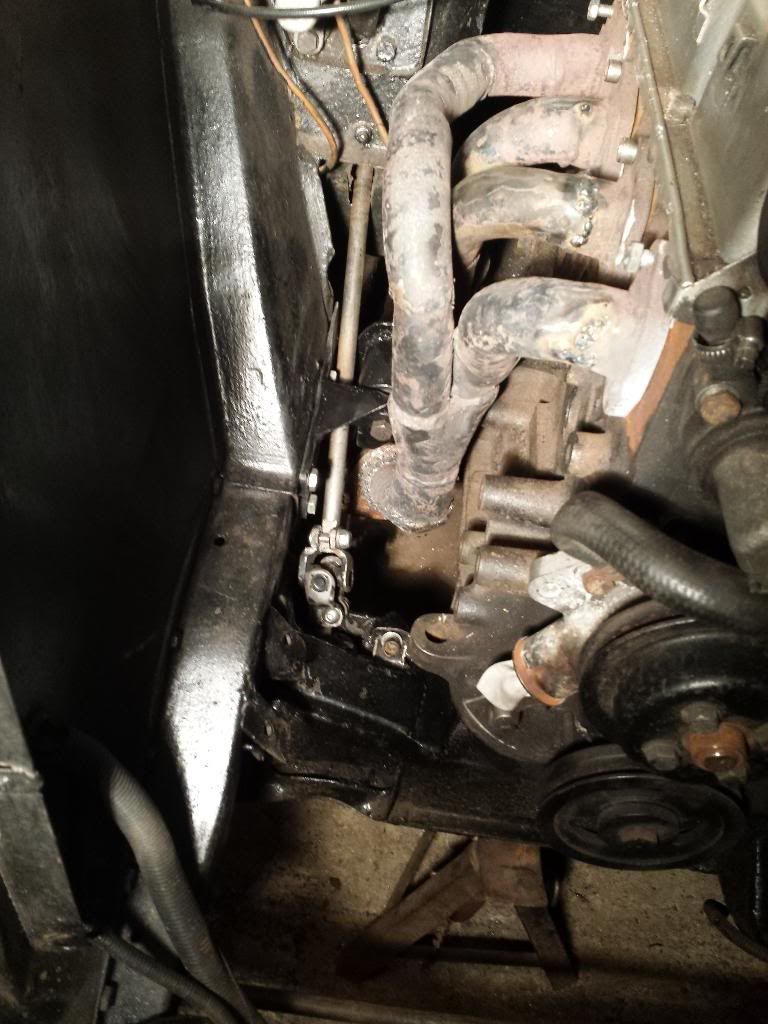 progress pic, wont be long now! 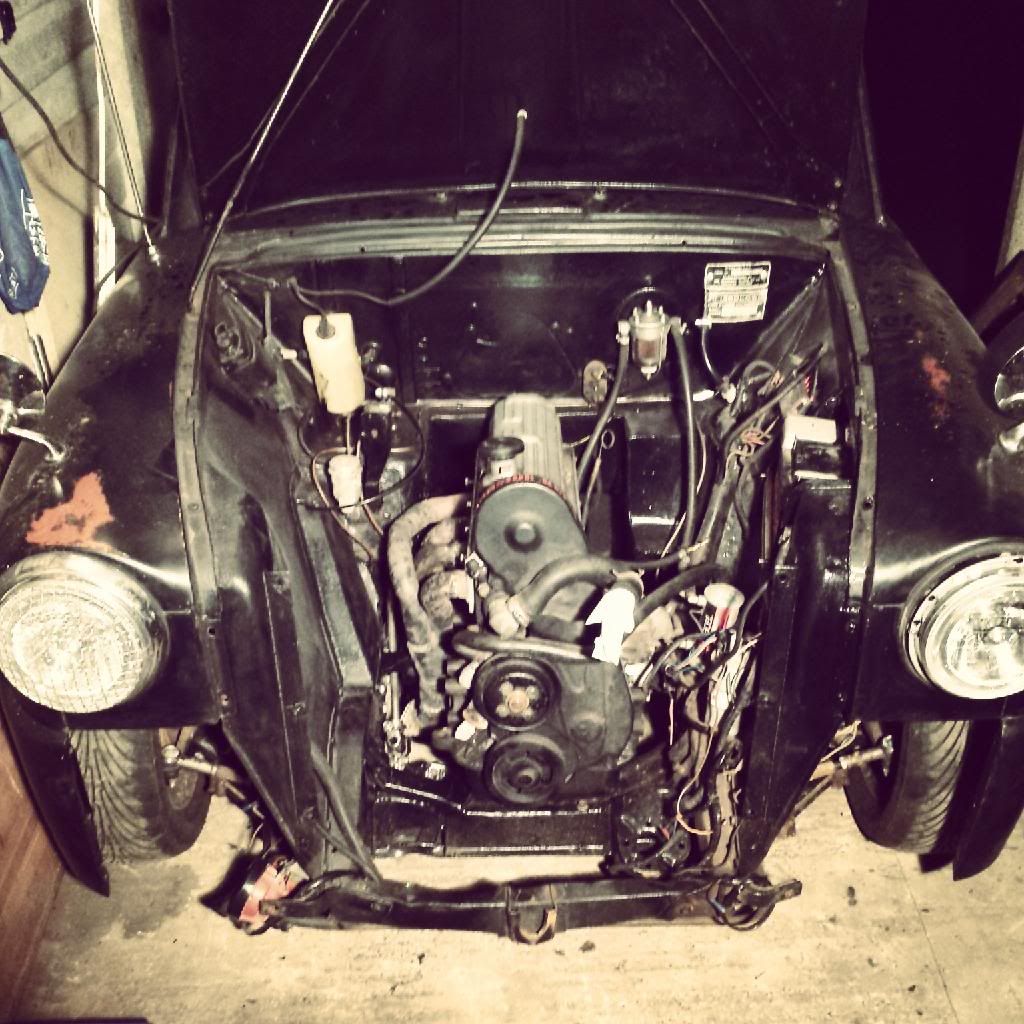 |
| |
|
|
|
|
|
Feb 21, 2014 21:41:17 GMT
|
Heh. I guess you'll know when the mount needs replacing because you'll lose steering a bit?  Looking good, nonetheless! |
| |
|
|
anden
Part of things
Go low or go home
Posts: 180
|
|
Feb 21, 2014 21:42:58 GMT
|
|
its tight but not as tight as it looks!
|
| |
|
|
|
|
|
Feb 21, 2014 22:16:48 GMT
|
|
Well you did say it did pass through the engine mount location, didn't expect it to pass through the engine mount itself.
Fantastic work, looking forward to the next bit.
John
|
| |
|
|
anden
Part of things
Go low or go home
Posts: 180
|
|
Feb 21, 2014 22:21:36 GMT
|
|
i had no choice with my exhaust design it left little freedom for any radical change of engine mount shape. its an ambitious concept! I couldve used two columns and a uj between them to lift it up away from the mount a bit but that wouldve meant cutting the inner wing which i really didnt want to do
|
| |
|
|
anden
Part of things
Go low or go home
Posts: 180
|
|
Feb 24, 2014 18:28:10 GMT
|
Making really good progress, Exhaust manifold is now repaired and it fitted properly, i modified it after repairing all the smash damage to be in two pieces so i can actually remove it without taking out the engine mount!! don't ask, the original one was lashed together too quickly (light at the end of the tunnel syndrome!) Alternator and starter motor are back in, plugged in about half the wiring. got a few repairs to do on wires that got snagged when the mount snapped. 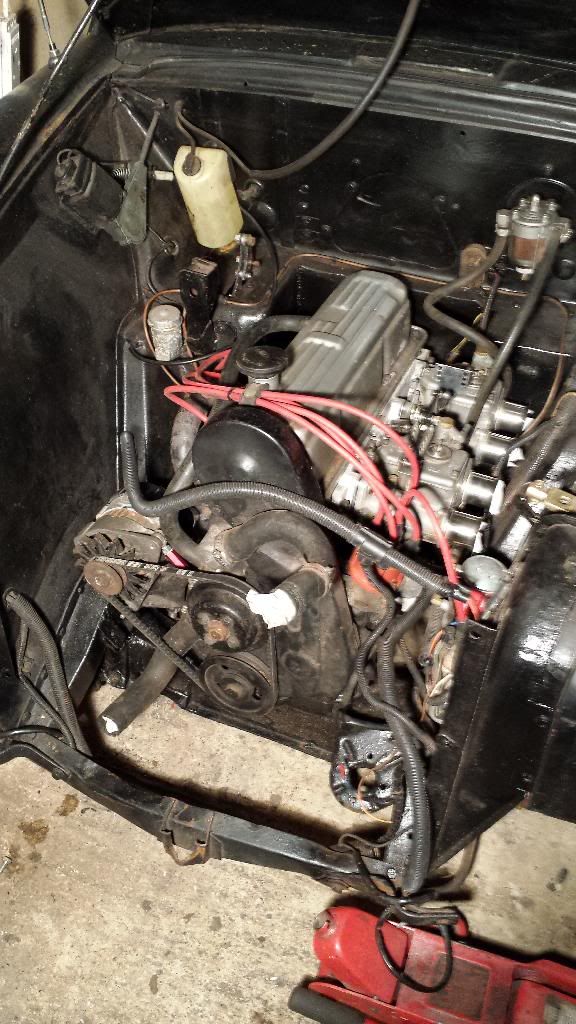 be back on the road in no time |
| |
|
|
|
|
|
Feb 26, 2014 12:50:52 GMT
|
|
good work dude!!!
|
| |
|
|
|
|
|
|
|
Apr 23, 2014 16:31:44 GMT
|
|
Hurrah!
|
| |
Too many projects, not enough time.
|
|
|
|
|
|
|
|
Literally just bought a copy because I recognised your car! Ace! Well done chap!
|
| |
|
|
|
|