avenga
Part of things
 
Posts: 182
|
|
|
|
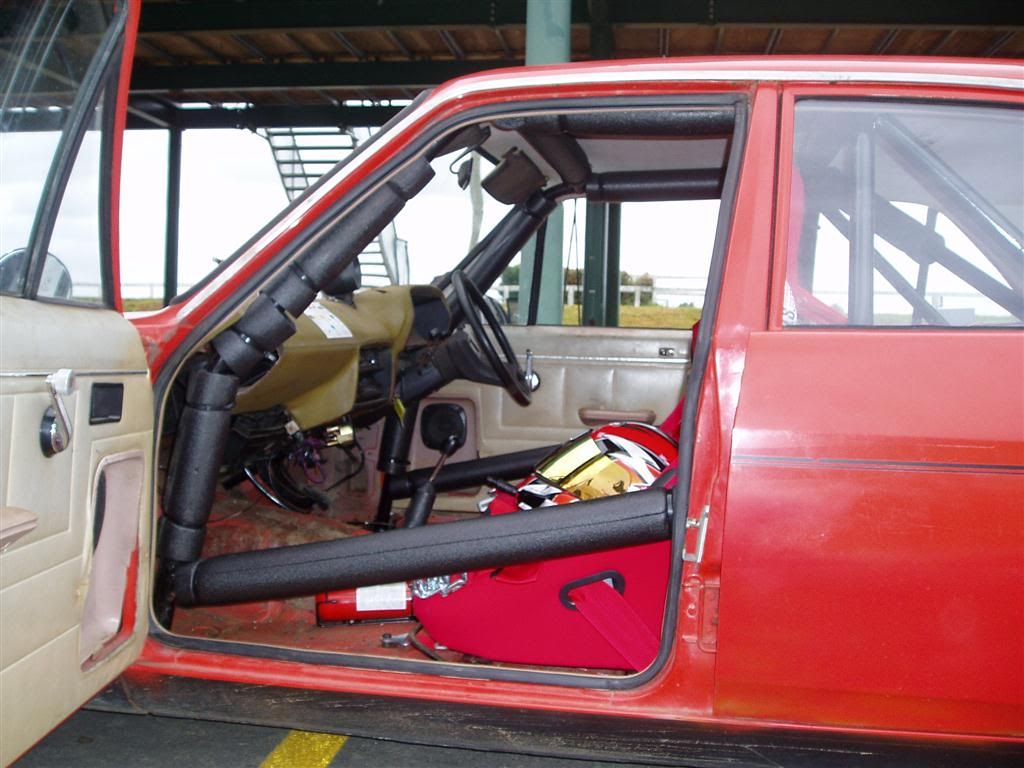
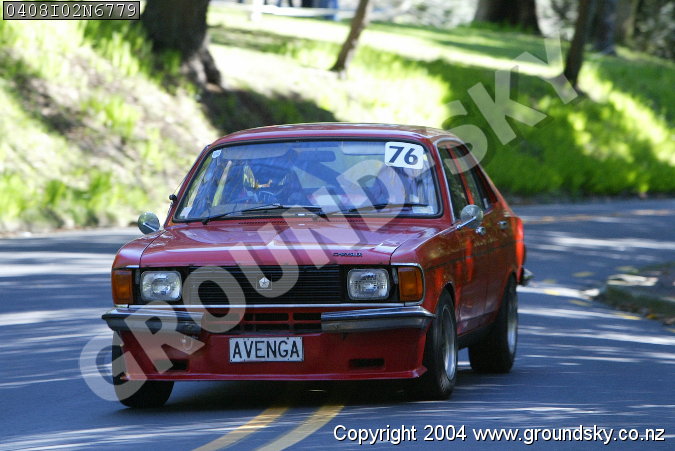
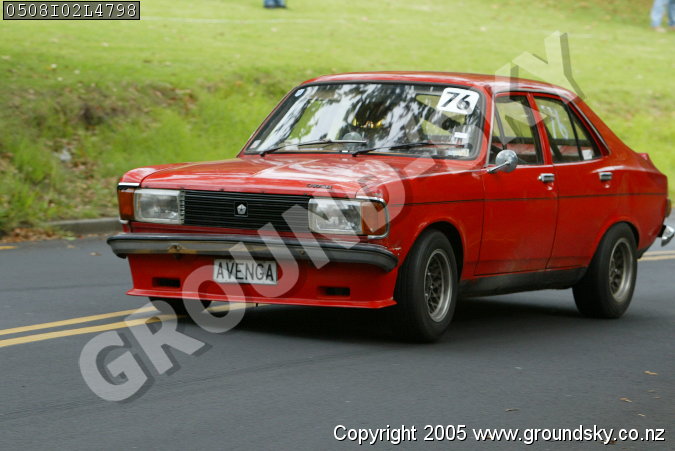
Hi Guys. My name is Richard, I am new to the forum and I thought I would share some of my projects with you. At the moment I have 2 Avengers and a Chrysler Valiant Charger. This thread is about my 1975 Hillman Avenger I have spent the last year restoring. I also have a 1972 Chrysler Valiant Charger which I have owned for 7 years and is mostly stock, I rebuilt the engine a few years ago and put drop spindles in the front and bigger tyres but other than that it is all original. My Last car is my 1980 Chrysler Avenger race car, I have had this car for about 15 years and it was my first car. I raced it from about 2000-2006 now it is sitting in my garage taking a back seat to my other projects. I have been a huge fan of Avengers since my teens and I run the New Zealand Hillman and Chrysler Avenger forum. www.avenger.co.nz/forumSo here are some pictures of my rides. My 1972 Chrysler Valiant Charger 770    My 1975 Hillman Avenger    My 1980 Chrysler Avenger race car      |
| |
|
|
|
|
avenga
Part of things
 
Posts: 182
|
|
|
|
|
|
| |
|
|
avenga
Part of things
 
Posts: 182
|
|
|
|
My first project was a bit of an interior dress up. I am still not finished this as I have an Alpine dash to go in but that is on my to do list. First thing I did was get rid of the steering wheel and gearknob.   After that I pulled up the ugly checkerboard they had on the floor. Once I pulled up the checkerboard I could see why they put it there in the first place. The carpets were completely rotted away. there was a few leaks which would have caused the carpets to get wet and rott. I guess the last owner just wanted to cover up the problem so I stripped out all the carpets and fixed all the leaks. I got a new set of carpets made for me by Autodec in Manakau and spent the weekend pulling out the old stuff and installing the new carpets. When I first saw the state of the carpets I was really worried thinking I would have heaps of rust on the floor to deal with but as you can see it was sweet once I got the carpets out. Drivers side front before  And after  Passengers side before  After  Passengers rear before  and after  Drivers rear before  After  Back section fully stripped  This is the only solid bit of carpet I got out of the whole car. anything touching the floor was just sludge.  Mostly clean, ready for the new carpets. I did some more scrubbing after these photos just to get it spotless before installing the carpets.   Installed some underlay to help with the road noise.   Then came the new carpets. I had to modify them a bit to fit but all the joins are hidden by the center consoles so it looks mint when everything else is in.    |
| |
|
|
avenga
Part of things
 
Posts: 182
|
|
|
|
|
|
| |
|
|
avenga
Part of things
 
Posts: 182
|
|
|
|
After sorting out the interior a bit I turned my focus to getting more power. I found the intake manifold new on Trademe for around $100 from aussie then the Dellorto DHLA40's were 2nd hand on Trademe for abour $500. also found a new fuel pump on Trademe. Next thing was to search for a good block to built the engine on. I was looking for a 1600 Avenger Alpine engine because they have a dual timing chain, double vavle springs and a better head to start with. I put a wanted ad in trademe looking for an Avenger engine. I got a few replies. the first was a standard 1600 from Hamilton for $200 which I passed on because the engine was pretty rough. Next offer was a pair of 1600 Alpine engines up north for $100 but they had been sitting outside for years so I passed on those. Finally I got the offer I wanted. It turned out to be only a 1500 but I bored it out so it is the same bore as a 1600 but just a slightly shorter stroke which can be a good thing. The engine was out of a 1973 Avenger Alpine, the only year Alpines had a 1500. It was the guys fathers car and the engine had been rebuilt in 2000 then put in a garage in 2004. I got the engine for $100 for the block and head only. I also brought some new headers and got them HPC coated. it was about $250 for the headers and about that again for the HPC coating but they look really great so they are worth it. When I pulled the engine apart it was mint inside, you could still see the hone marks on the bore from the last rebuild and all the bearings were mint. Because I was building this as a performance engine I decided to replace all the internals even though they were pretty good already. Carbs and intake manifold   New fuel pump. see it's demise in later posts  Shiney headers. they look soo cool. it is a real shame they are hidden by the carbs when they are in the car because they look awesome    The new 1500 Alpine in it's old home in Wellington before it was pulled out and sent up to Auckland   The new engine stripped and ready to start the rebuild   |
| |
|
|
avenga
Part of things
 
Posts: 182
|
|
|
|
|
|
| |
|
|
avenga
Part of things
 
Posts: 182
|
|
|
|
|
|
| |
|
|
avenga
Part of things
 
Posts: 182
|
|
|
|
I started off by doing my Sierra 5 speed gearbox conversion and installing an MSD 6AL. Here are some pictures of my latest purchases. MSD 6AL and MSD Blaster 2 coil.  Sierra 5 speed gearbox with homemade quickshift.    Got my MSD and coil fitted. Still running on points at the moment because my electronic dizzy was no good.    After much playing around trying to get the electronic dizzy going I have decided to give up on it and have gone back to running points which triggers the MSD 6AL and MSD Blaster 2 coil as pictures above. We did a lot of playing around on the electronic dizzy with the springs and weights and finally got it to looking right with a static timing of 8 degrees and a total of 32 degrees but there was a noticable drop in power so we gave up on it and went back to points. I finally got the jets and chokes I have been waiting for so I could do my final tune. The engine is running so much better now. Tons more low end power with the smaller chokes installed. Pulls well from down low now. Before it would bog down at low RPM due to the chokes being too large and not enough airflow. Now they are perfect. More progress on my 5 speed gearbox conversion. I dropped my Avenger off on monday for the start of it's 5 speed conversion. Here are some pictures of the bellhousing and gearbox all cleaned up.    The adapter plate looks amazing, it is a pity it will be hidden under the car because it is a pretty cool bit of engineering and shiny also. So far the bellhousing has been fitted and the gearbox mount made. They have had the 5 speed in the car to check the shifter placement. All that is left is sorting out the clutch pivot point, finish off the shifter and a few other bits and pieces. Here are some photos of the work to date. Adapter plate. Bygone Autos has done a great job fabricating this, it locates centrally against the gearbox and bellhousing so we won't have any problems with alignment.    Relocated shifter waiting to be welded  Bellhousing with the window cut for the clutch  New gearbox mount   |
| |
|
|
avenga
Part of things
 
Posts: 182
|
|
|
|
5 Speed gearbox conversion all done. Bygone Autos has done a really great job on the conversion, even finishing a day ahead of schedule. Shifter fits perfectly and I kept the original 4 speed gearknob so it still looks stock. Reverse is in the same place as it was on the 4 speed so it is just an extra overdrive gear on the upper right. That is good so I don't get mixed up with the position of the gears, they all feel pretty much in the same location as the old 4 speed. Ratios all feel good, 1st is lower but not stupidly low. There is a bit of a jump between 1st and 2nd then 2nd, 3rd and 4th are pretty much the same as the old 4 speed. Here is some pictures of it all installed.        |
| |
|
|
avenga
Part of things
 
Posts: 182
|
|
|
|
|
|
| |
|
|
|
|
avenga
Part of things
 
Posts: 182
|
|
|
|
This is the start of my major restore. It has been down in the shop since October but it should be pretty awesome when it is done. Pretty much finished most the mechanical stuff and it is down at the panelbeaters now. So here is some of the stuff I have been up to. First up was the brake upgrade & suspension upgrade. These are Volvo 4 pot calipers and BMW E30 rotors. I also swapped my race car suspension over to this car so I have adjustable Koni's all round and adjustable ride height and camber plates at the front. This is the caliper all rebuilt and restored. All new pistons and seals etc.   Here they are bolted up to the E30 rotors. You can see some of the plumbing is done and you can see my custom struts along with the camber plate in the background.    |
| |
|
|
avenga
Part of things
 
Posts: 182
|
|
|
|
|
|
| |
|
|
avenga
Part of things
 
Posts: 182
|
|
|
|
|
|
| |
|
|
avenga
Part of things
 
Posts: 182
|
|
|
|
|
|
| |
|
|
avenga
Part of things
 
Posts: 182
|
|
|
|
First round of photos of the panel work. It is looking good, heaps less rust that I thought there would be, heaps of dodgey repairs by previous owners but the body is really good otherwise. The back wheels look huge now they are fitted and they will fill up the flares nicely. The fronts are a different story, they don't stick out past the factory guards so I have some spacers which I will use to mock up the wheels then I will get the offset changed from a 4" backspace to a 3" back space. This is the rear wheel how it sits at the moment, they need to cut a bit more out, probably up to the blue line. I also need some harder springs but the ride height is looking really good. This is how the flares will sit in the end   This is how much they have cut so far, you can see the blue line which will be where the final cut will be.     Here are some little patches etc they have done This one is by the back window  This one is on the other side of the back window  Top of the back window  Front guard  Around the front window    Engine bay all stripped and all the holes welded up.  Battery is moved to the boot  Bonnet latch is removed because I don't need it with the fibreglass bonnet  Fancy pants adjustible front suspension, Ex-my rally car  tail lights   rear quarter, you can see a few rust holes that will be patched  They also did patches on the other rear quarter plus most the doors and the front guard. |
| |
|
|
avenga
Part of things
 
Posts: 182
|
|
|
|
The back of the car is now in primer  Latest progress shots. It is looking very cool. The rear wheel look so wide now with the factory guards cut back. They are having to extend the rear flares a bit to get them to fit over the wheels. Here are some more photos. I love this shot looking down the side of the car, shows how wide the rear wheels are.  Passengers rear   Drivers rear    Rear guards cut ready for the flares. We cut all the way up to the bottom of the doors.  Rear passengers door  Rear drivers door  Still got the front to strip and paint.  |
| |
|
|
|
|
|
|
|
|
Much as i love the avenger, show us some more of that charger!
what sort of power does the 1600 produce on twin webbers, and does it like to drink?
|
| |
|
|
avenga
Part of things
 
Posts: 182
|
|
Jul 14, 2012 14:18:18 GMT
|
Hi Ian. The Charger is a bit boring on the build side of things, I haven't really had to do much since I have owned it. I rebuilt the engine about 3 years ago, other than that she is pretty low maintenance. It is a 265 Hemi straight 6, NZ built (In the same factory as the Avengers), 3 speed auto, LSD. It is all pretty much original. I have done a little to the motor to make it breathe better, I put on an after market 4 barrel Cain manifold and Holley 390CFM, along with extractors and an MSD plus electronic ignition. I also did some suspension work, All new nolathane bushes all round, Koni adjustibles front and rear, big 28mm front sway bar, 2" drop spindles, later model VJ brakes and rotors. I brought it at around 76,000 miles about 7 or 8 years ago, it is at just over 96,000 now. Here are some more shots of the Charger.    The Avenger is only a 1500 and it got 78.1HP at the wheels at it's last dyno. So probably just over 100 at the flywheel. Just a bit more powerful than the Tiger. (I suspect that dyno reads low because it says my charger only gets 116HP, and I have had my Charger dyno'd at 160 at the wheels on another dyno) It has Dellorto DHLA 40's and they drink a lot, around 13L/100KM but when I put the 5 speed in it dropped to around 11L/100KM  |
| |
Last Edit: Jul 14, 2012 14:20:36 GMT by avenga
|
|
lae
Posted a lot
  
Posts: 1,045
|
|
Jul 14, 2012 20:09:37 GMT
|
|
Very nice - the blue/teal colour is exactly like how I wanted my old Avenger GT to be.
Are they common cars in NZ? I know they were built there. I will be moving there semi-permanently in April of next year, and it'd be nice to own one again. Very good handling and styling for a reasonably priced 70s saloon.
|
| |
Currently:
Mk1 Focus blandmobile
Formerly:
1969 MG Midget
1972 Avenger GT
1981 Datsun Cherry
1989 Corolla
1979 Mercedes W123 200D
1995 Ford Falcon
1996 Ford Telstar (bet you had to google that one)
|
|
avenga
Part of things
 
Posts: 182
|
|
Jul 14, 2012 21:18:27 GMT
|
|
Thanks.
There are still a few floating around and you usually have a couple for sale at any given time on the NZ equivalent of ebay (www.trademe.co.nz, there are 3 chrysler Avengers for sale in NZ ATM). You don't see them much out on the road anymore but there are still out there.
They are much cheaper in NZ than they seem to be in UK. My friend just sold his 1600 super for $3000NZD (~£1,500) which seems about the average price of an Avenger in NZ. We don't have as much problem with rust as UK cars have because Todd Motors who made the Avengers in NZ used better rust protection and we don't use salt/grit on our roads.
We have a really good local Avenger club running (www.avenger.co.nz) so we help each other out with parts and knowledge. Always good to see another Avenger on the road so when you do pop over to NZ, make sure to come over to the Avenger forum and say hi.
|
| |
|
|
|
|


