|
|
|
|
|
Great car and thread  , personally i'd keep it simple, lower it a bit and fit a set of MG Montego 6x15 alloys (or better still 7x15 Revolutions) but that'd be predictable, hats of to you for the individual approach. Always been fond of Maestro's, had an MG 2.0 EFI back in the mid 90's, drove fantastic and loved it, so much in fact that i spent a fortune on new panels and a full respray, would definitely get another some day, maybe with a 2.0 16V Turbo conversion. |
| |
72 Pontiac Firebird Formula 400. 95 BMW E34 525i Manual. 80 Lotus Elite, sold  86 Mk4 Escort RWD V8, sold |
|
|
|
|
|
|
|
|
I was hoping that today I would get the car well on the way to being as clean as I want it to. This, unfortunately, was not to be thanks to the weather, particularly the sporadic showers.  Unperturbed, I started nice and early with my first job being to get the wheel trims off. The second was hosing half-melted ice off the car.  Not so tidy the other side, I'm missing a mudguard so it kicks a lot of mud up the side of the car when going down the lane. I'm looking at fitting some slightly over-sized mudguards all round, but not rally spec.  Once I'd washed it all off, I set to with the clay bar and removed a lot of brownish dirt (not mud, I hasten to add). As with the other Maestro I worked on, I was astonished at just how much dirt came off, especially as this one didn't really look that mucky.  Then it was playtime. I think I'm going to be going for aluminium (real, or at least that sort of look) valve caps, wheel nut covers and centre caps but all I had kicking about were the Skoda caps. With some modification they could be made to fit, and they do look okay, but they're perhaps a bit too nice looking for what I'm doing.   I took the front grille off too. This was originally silver but I didn't think it fitted in with my plans. Got some satin black paint out and gave it a couple of coats after cleaning and sanding it, being sure to mask off the Maestro badge. I think it looks much better now and I'll be redoing the bumpers to match.  Finally, I set to with the Farecla G3 to get the paint work protected after having clay barred the whole thing. I got as far as the top of both front wings and the bonnet before the weather got the better of me and I had to call it quits.  The stuff I want to add is going to take a while for me to sort out. Finding a suitably scaled bull bar for the front is proving tricky and I doubt I'll have much fun finding a ready made one for the back. I'm already considering getting some metal pipe and have some bars made up that I can then have welded and/or bolted to the bumpers. I'm keeping an eye out for a pair of rectangular spotlights for the front, I've seen some that are close, but not quite right for what I have in mind. Other pointless things I'm considering are a sump guard/skid pan and some chunky steel tubes down the sills to look a bit like the side steps on proper 4x4s, but scaled down to suit and to actually protect the sills if I do decide to go all silly and play in an abandoned factory... or in case of zombies, I suppose. Pointless things I'm not considering are window grilles, snorkel, roof rack and knobbly tyres. Oh, and I'm tempted by some Maestro van lights.  ... I'm also tempted to tint the rear lights a bit and paint the recess in the tailgate satin black to match... you know me and ideas. I'm trying to be good with this car and not go too crazy, I don't really want or need another project, I just need a daily commuter... that people won't want to drive or park too near... and has the possibility of scaring small children. You know, that sort of thing. |
| |
|
|
|
|
|
|
|
"The stuff I want to add is going to take a while for me to sort out. Finding a suitably scaled bull bar for the front is proving tricky" Try and find one from a Seat Terra van? Terra camper on FlickrI had one of these vans new in 1994 |
| |
Last Edit: Nov 4, 2012 17:33:04 GMT by Deleted
|
|
|
|
|
|
|
|
Awesome tip! I never knew they existed.
|
| |
|
|
|
|
|
|
|
I like the angle here, makes it look like it's got extra ground clearance. RE the front bar:  |
| |
|
|
|
|
|
|
|
|
Looks good. Being a Ledbury it will already be on diesel-spec suspension with the 14" wheels, so I don't think you'll see much benefit from raising it as you can already change the oil on them without jacking them up! Wouldn't bother with sill tubes as there is nowhere particularly strong enough to mount the off. I'd put van head lights in, with the surrounds painted black to match (I have some kicking around, I'm only in Sheffield) the grille, and rather than bull bars, knock-up some light guards similar to Disco's etc. You don't want to go sticking to much steel on it, it's only a 1275cc remember! Other than, don't forget to sell it me when you've done with it!
|
| |
|
|
|
|
|
|
|
|
I don't have plans to jack up the car or change the dimensions of the wheels, it's all really good as it is and I think if I alter that side of things I'll just spoil it on this car.
I still don't know if this one is a keeper, it was bought much more with my head than my heart (believe it or not) because I needed something in good mechanical order that would get me to work every day reliably and still be an engine I could work on and maintain myself.
When I was at the unit it used to live at, Steve said he would have put it on the ramps were it not for the Celica he was repairing so that I could have a proper look. I told him there was no need as I could quite literally see the underneath of the car without even having to get a jack out, and I can report that it looked remarkably solid underneath.
I suppose, on the bullbar front, if I really wanted to I could knock something up out of aluminium pipe or even plastic pipe, but I have this suspicion that it just wouldn't look like anything other than it was, even if it were painted to match the bumper, and since I'd quite like it to be able to push shrubbery and whatnot out of the way, having it in steel would be stronger and better, I suspect.
The A bar is a nice simple solution, but I'm yet to see one in a shape I really like that wouldn't just look a bit odd and unfinished. Having the additional light guards finishes the look off better, in my opinion.
Oh, and with the van lights, I'm still not sure if the headlights themselves are a generic Halogen lamp, or if they're the harder to find square sealed beam unit. Additionally, I'm not sure where I'd get some other than when they turn up through the club forum.
|
| |
|
|
|
|
|
|
|
|
H4 or H7 halogen, can't remember which. Turn up on eBay quite often, though as I said I have lights and surrounds if you're interested.
|
| |
|
|
|
|
|
|
|
|
I am. Will you be at the Retro Rides South Yorkshire Meet (Meadowhall Retail Park, 7pm onwards) tomorrow night? I'll be there.
|
| |
|
|
|
|
|
|
|
|
Hmmm, I might be if I can get tomorrow's work done in time. I'll come down in my actual Streetwise!
|
| |
|
|
|
|
|
|
|
|
|
|
Hmmm, I might be if I can get tomorrow's work done in time. I'll come down in my actual Streetwise!
|
| |
|
|
|
|
|
|
|
customsinc: If you came down after 9pm I missed you at the meet as I had to get off home due to working earlies for the forseeable. I am still interested in the van lights and surrounds, if you can pm me a price we can go from there.
|
| |
|
|
|
|
|
|
|
|
I fell asleep as soon as I got back from work so I didn't make it down. Don't want anything for the lights and surrounds, they're of no use to me as my van now sports a Montego front end!
|
| |
|
|
|
|
|
|
|
|
In that case, we should arrange some sort of collection/delivery. I'm in Sheffield usually Mon-Fri because of work so I could meet you somewhere after work for the most ideal solution.
|
| |
|
|
will
Posted a lot

Posts: 4,023
|
|
|
|
I've a lot of love for these and for skud caps too. Looks good on them IMO. I let a set of these slide through my hands many moons back and have since regretted it tragically 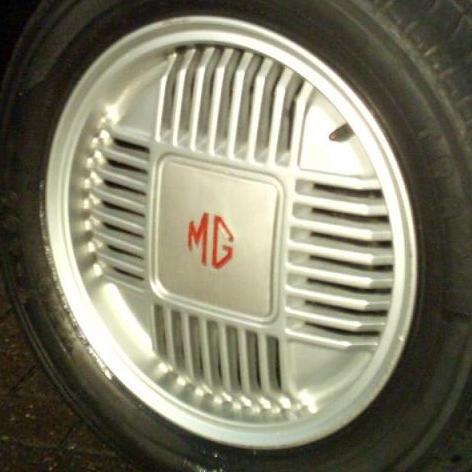 Can't keep them all I guess though I wish I had the space to do so. Have fun with it |
| |
|
|
|
|
|
|
|
|
Oh the old cheese graters!!!bought a set of flea bay years ago for a fiver!!!!!wish I'd kept them too.
|
| |
|
|
|
|
|
Nov 11, 2012 18:38:47 GMT
|
The cheese graters are a brilliant set of wheels, they could work for this, but they could also look too tame, I've not decided. They're not easy to get now though, seem to be quite sought after. ____ Since I had 2 dustcaps across 4 wheels, neither of which matched, I threw £2 at eBay and got these. They look very tidy on the car.  Then it was time to do the interior. Much of the vinyl in the car had a brownish look to it. It's fairly common for Maestro plastics to fade from grey to brown, so that's what I thought it was.   In the back, it's fairly clean apart from dog hairs and wood shavings.  We have the usual Bedouin Tent headlining. Easily remedied and it'll allow me to find where the pipe for the rear washer has broken when I remove the headlining to fix this.  A bucket of brown water later, and the vinyl is actually very not-faded and grey, all the brown was dirt. I still have to shampoo the seats and the carpets in a couple of localised areas, but overall the interior is quite good and now I've cleaned the gearknob and radio and steering wheel and anything else the driver touches it smells clean and not at all toolkit-y   Last job was the bumpers. The metal centre sections are a bit rough looking and the black paint/coating is tired and going grey. Likewise, the plastic end caps are very grey and wouldn't go black again, so drastic measures were in order. Popped the back bumper off. I took all the electrical tape off the rear number plate lights to find out there were damaged, but not broken enough to warrant the tape. I also found that one is a Mk1 and the other a Mk2 item so they're different sizes. I'm going to get a chunkier unit to bolt onto the bumper instead, just not yet.  Steve did tell me that one of the people he sold the car too (he's bought it back twice now) reversed into a lamp post, and while effort was made to straighten it out, it's a bit lumpen and I'll have to work my magic on this bit to make it how it ought to be.  This bumper hole is pushed in, I had to knock it back out by about a quarter of an inch.  With the bumper in bits and the rear panel a bit straighter, I could get to work keying the plastics for paint and the metal sections. The plastics I did with a bit of wet-and-dry in my hand while the bumpers had to be done with the flap wheel. I'm going to get the metal parts refurbished eventually and completely de-rusted, for now I just wanted to tart things up.   Finally, got them all back on the car. A before, and two afters for comparison.    I'm off work tomorrow so I hope to get the polishing finished as I still haven't been able to do that. |
| |
Last Edit: Nov 11, 2012 18:40:01 GMT by Deleted
|
|
|
|
|
Nov 12, 2012 12:50:57 GMT
|
|
hows about ripping off all the styling ques from a 6r4 and smashing on some wide arches and super dish wheels with a monster spoiler
yes! the rally car they ought to have made!
|
| |
|
|
|
|
|
Nov 12, 2012 12:53:26 GMT
|
|
If I were making a rally Maestro then yes, that would be a choice. But I'm not, I'm making a softroader/urbex thing instead.
|
| |
|
|
|
|
|
Nov 12, 2012 23:01:44 GMT
|
Nice build, good to see a maestro being tidied up! I drive past one of its Ledbury friends daily in Cheltenham! Its tidy and well waxed!  |
| |
|
|
|
|


 , personally i'd keep it simple, lower it a bit and fit a set of MG Montego 6x15 alloys (or better still 7x15 Revolutions) but that'd be predictable, hats of to you for the individual approach.


