luckyseven
Posted a lot
 Owning sneering dismissive pedantry since 1970
Posts: 3,839
Club RR Member Number: 45
|
|
Dec 18, 2017 11:07:00 GMT
|
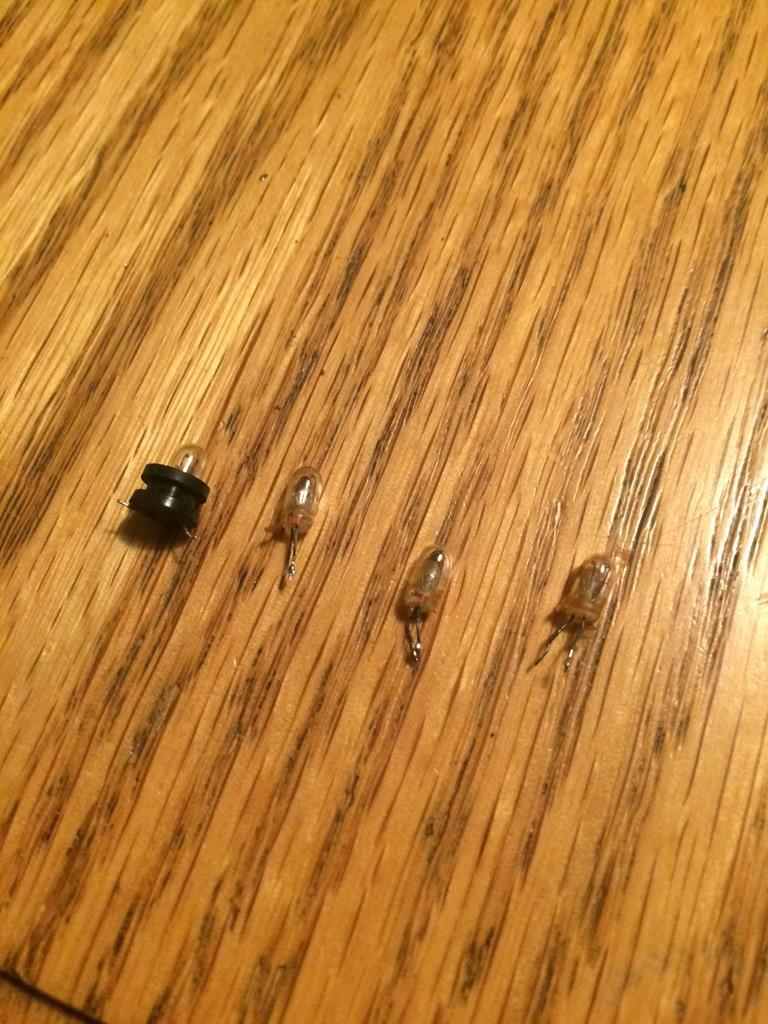
Welcome to the dark side, lol  Towbar on an RX-7? That's just plain wrong  Interesting that your car might have had an aftermarket turbo setup. What's the carb that's on it now, is it the stock four-barrel Nikki carb? Choke was always manual, btw. It has some little electromagnetic thing that's supposed to retract it when the engine warms up, though they rarely work well any more. A 12A-engined Series 2 like that wouldn't have had much in the way of rat's nest to remove, tbh, that only really came in on the big-engined 13B and fuel injected cars, none of which we got in the UK until the FC-model RX-7s. Check for rust in the rear seat pan and the plates for the axle arms, they're typical spots. These cars can hide quite bad rust quite well, sadly. Inlet blanking plate just means the emissions nonsense has been deleted at some point, and you're well rid of it, appalling rubbish. Judging by the previous turbo application, I'm guessing yours must be on headers now? Poor fuel flow might simply be a dodgy, clagged up fuel pump and/or filter, they're prone to it though the Nikki carb gums up easily too on stale unleaded. Sadly given the lay-up I fear you're right that it'll need stripping down. Good luck with that!  Lastly, may I point you towards www.rx7fb.com/ as the font of all 1st-gen RX-7 wisdom? Free to join, and all knowledge is there at your feet. Plus it's a nice place to be Do you know of what happened to this Elford Turbo, if it ever got back on the road? forum.retro-rides.org/board/12/readers-rides?page=2Eh? Who, me? ....I'm not sure your link goes where you want it to link  |
| |
|
|
|
|
|
|
|
Dec 18, 2017 15:44:36 GMT
|
|
|
| |
|
|
ChasR
RR Helper
motivation
Posts: 10,192
Club RR Member Number: 170
|
|
Dec 18, 2017 21:40:49 GMT
|
|
Good to see you are making progres on this again Will. It's been a while! The shotblasting sounds like a good result.
|
| |
|
|
Tepper
Part of things
Posts: 381
|
|
Dec 29, 2017 21:38:51 GMT
|
Got a few bits painted today, took longer than I thought to get 2 coats on but hopefully will be durable. Fuel tank and front crossmember: 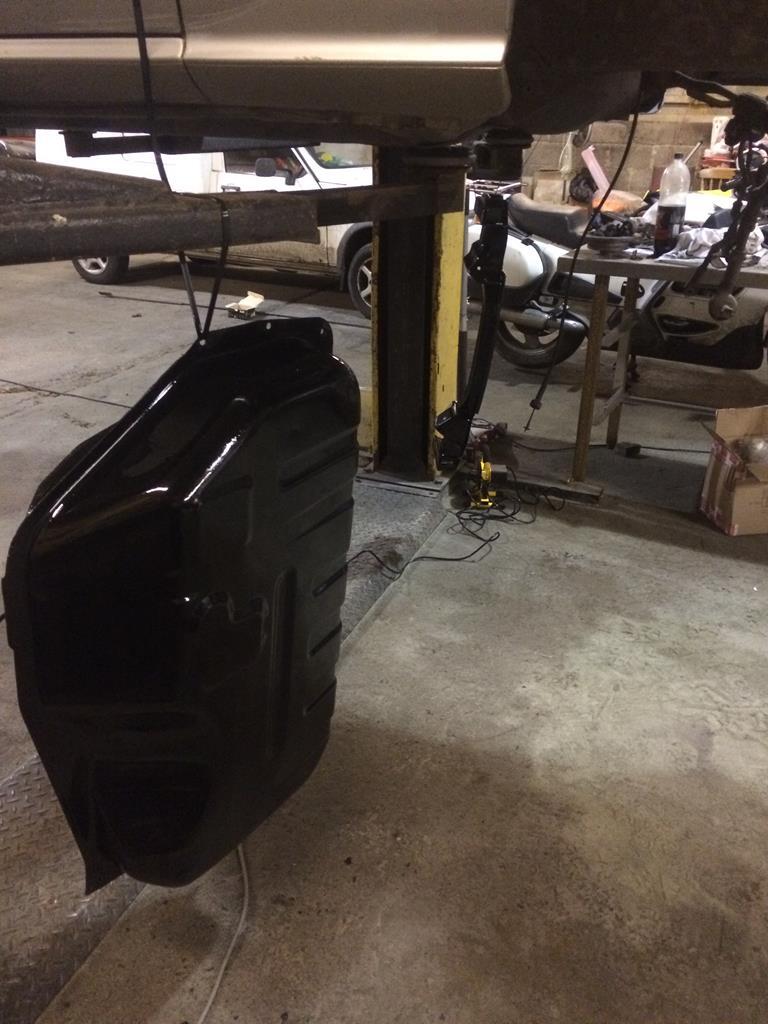 Axle: 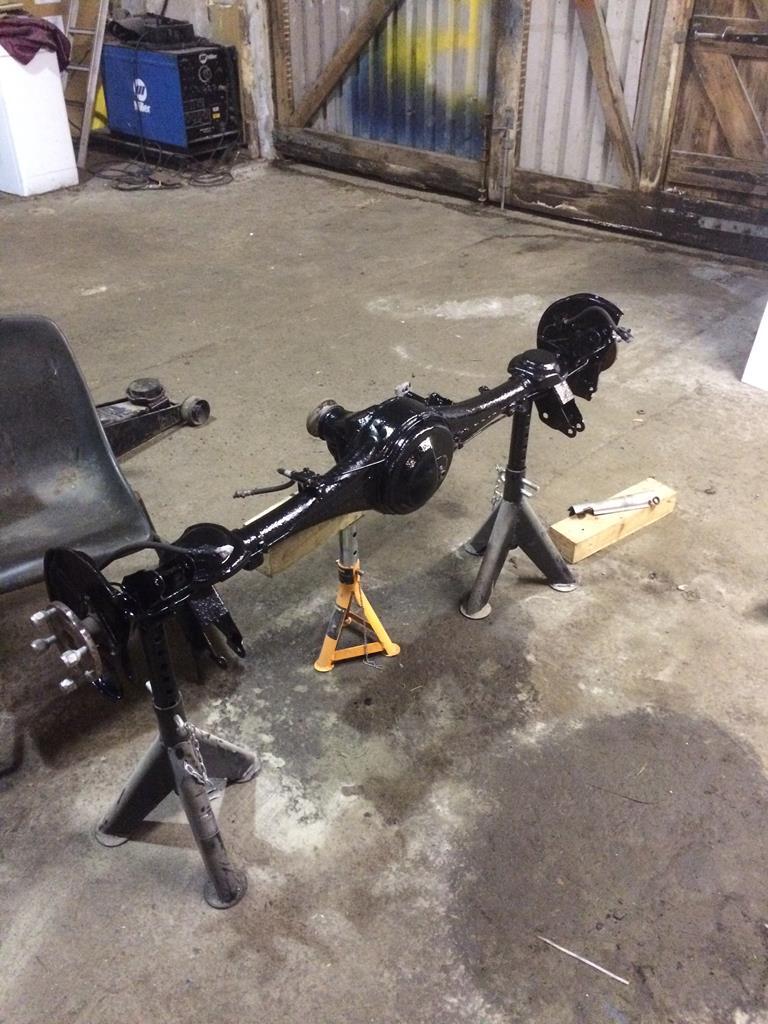 Also started stripping some of the unnecessary bits of the new engine:  I wanted to have a practice with the POR-15 before I do the underside of the car, once it cures on these parts and I'm happy with the adhesion I'll do the car. If it goes wrong, these smaller parts can be taken in for blasting but fingers crossed it'll cure properly. |
| |
1989 Peugeot 205 GTi - stolen!
1983 Mazda RX7
1968 Rover P6 - also stolen.
|
|
Tepper
Part of things
Posts: 381
|
|
Jan 12, 2018 17:27:36 GMT
|
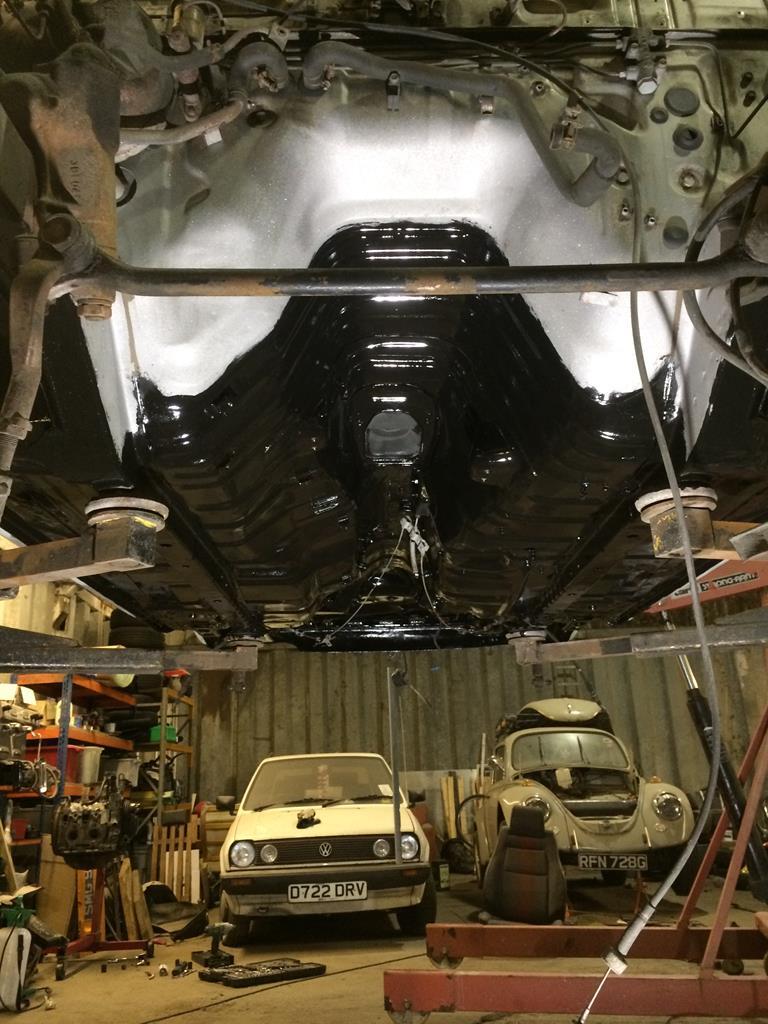
Started painting the underside of the car, surprisingly time consuming. Ran out of paint so will have to wait for another tin of POR-15: 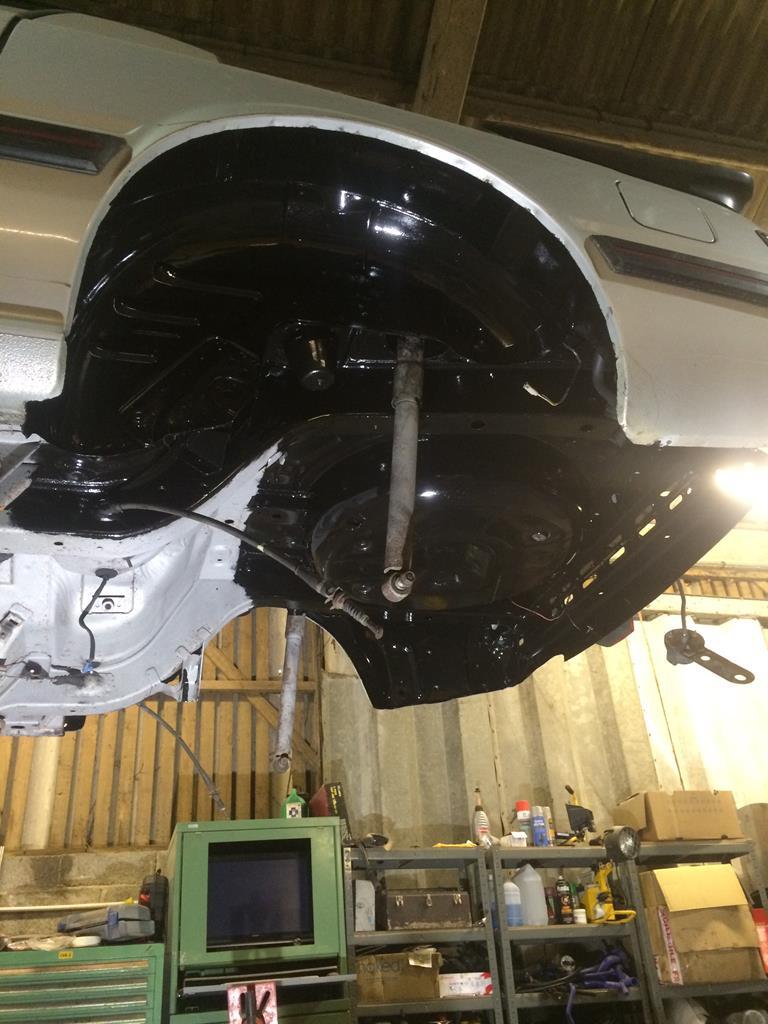 Also finished the in-tank pump installation - the kit from Aeromotive seems very good so far, will have to see how it performs: 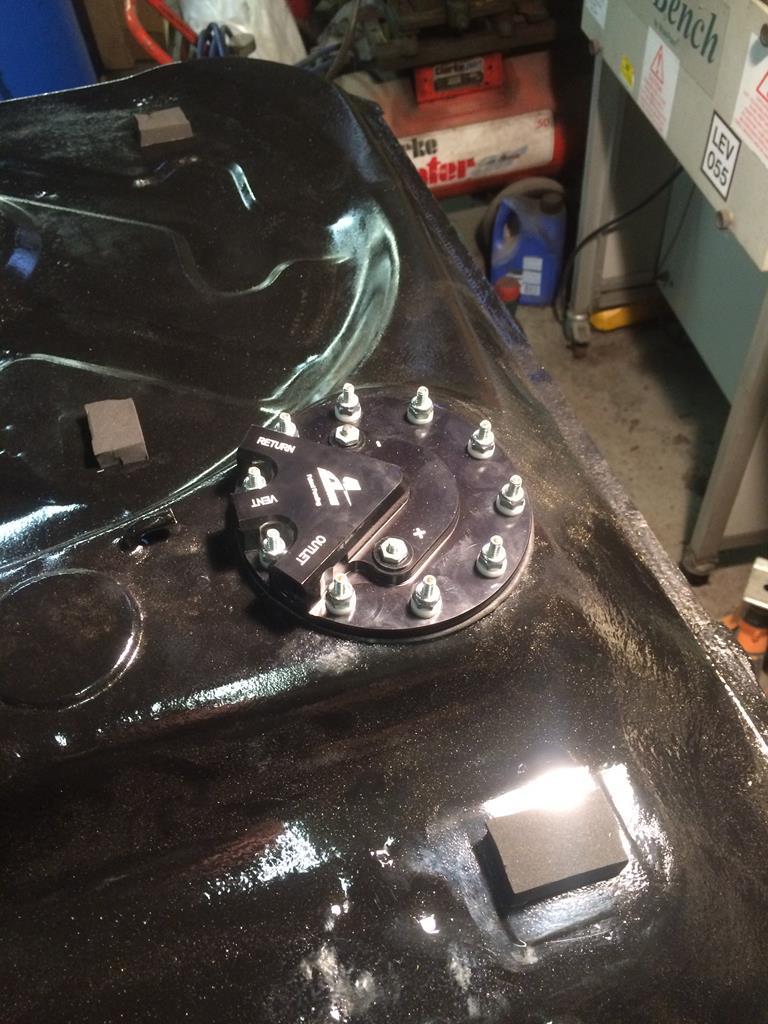 I need to repair the sender then the tank's all finished. I also need to start thinking about fuel lines, at the moment am leaning towards nylon braided teflon hoses with AN fittings from the tank to the filter then kunifer hard lines running along the original route from the filter to the engine bay. Any thoughts or recommendations? |
| |
1989 Peugeot 205 GTi - stolen!
1983 Mazda RX7
1968 Rover P6 - also stolen.
|
|
Tepper
Part of things
Posts: 381
|
|
Jan 25, 2018 21:02:39 GMT
|
|
|
| |
1989 Peugeot 205 GTi - stolen!
1983 Mazda RX7
1968 Rover P6 - also stolen.
|
|
adam73bgt
Club Retro Rides Member
Posts: 4,865
Club RR Member Number: 58
|
|
Jan 25, 2018 22:21:14 GMT
|
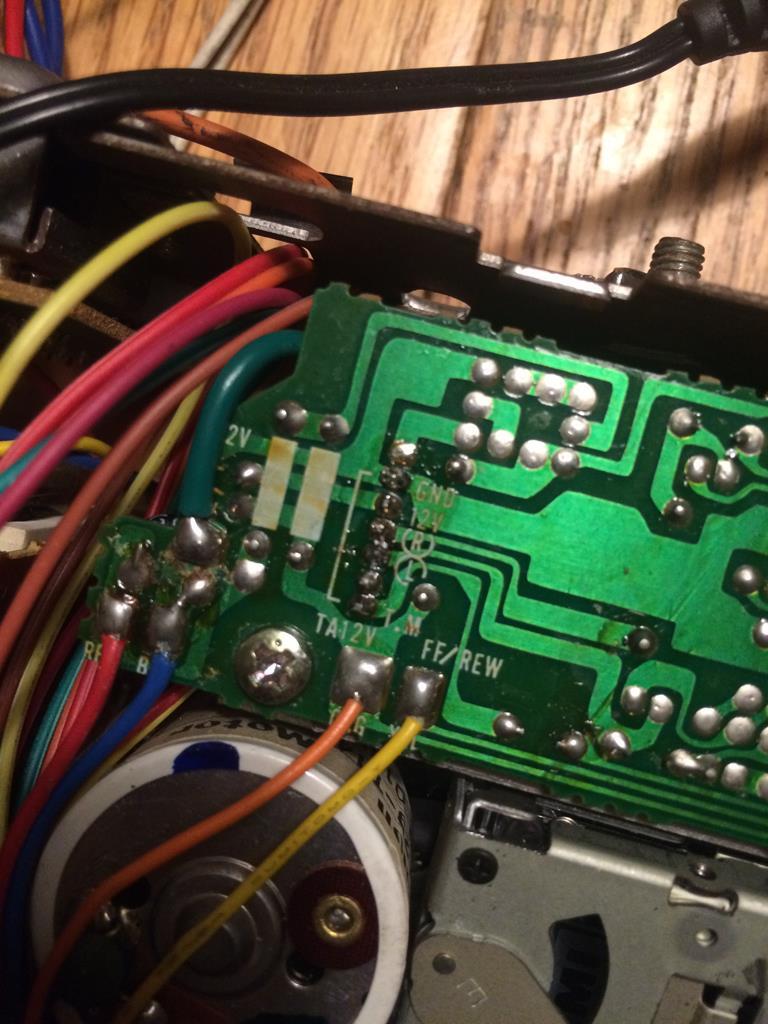
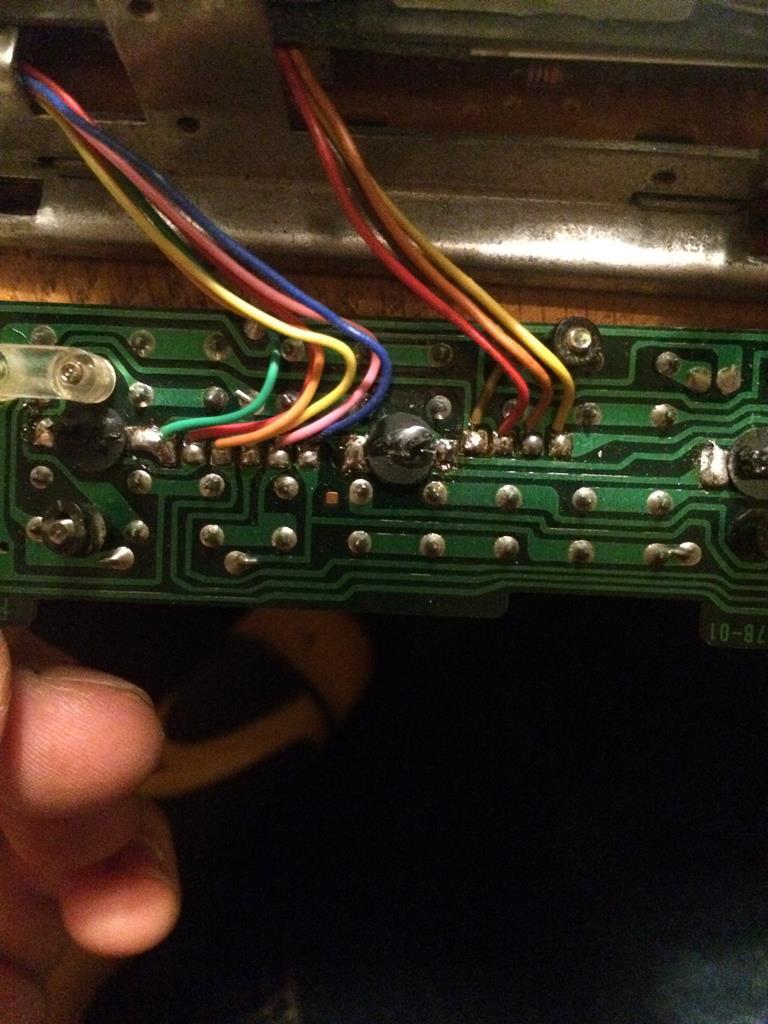
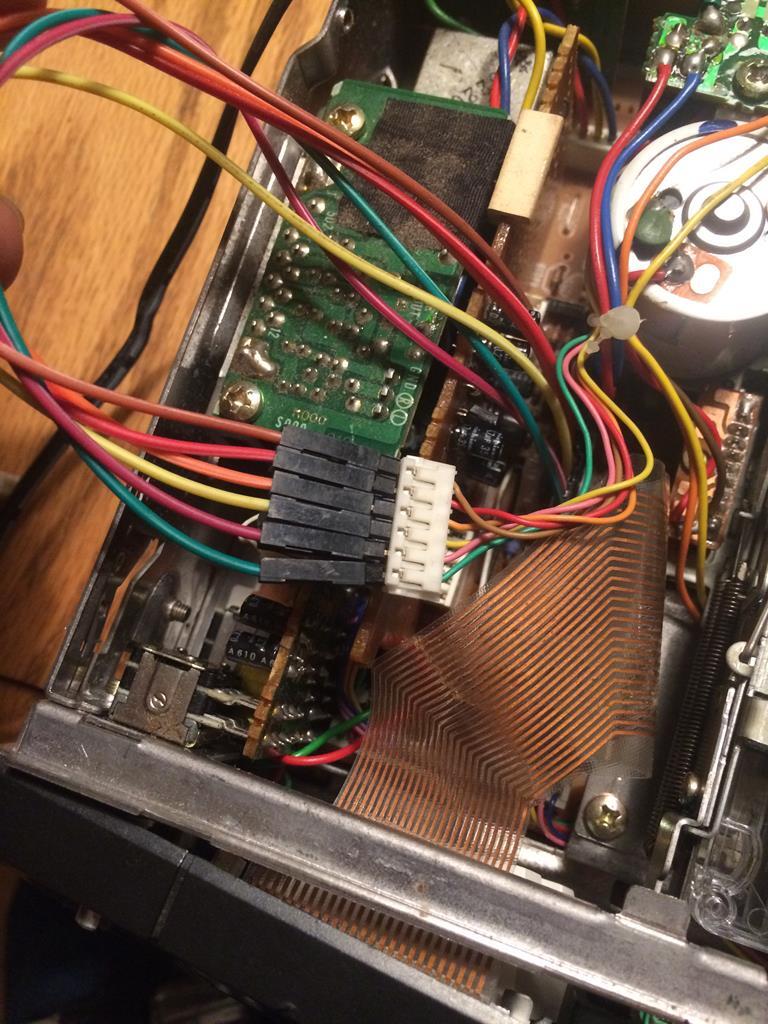
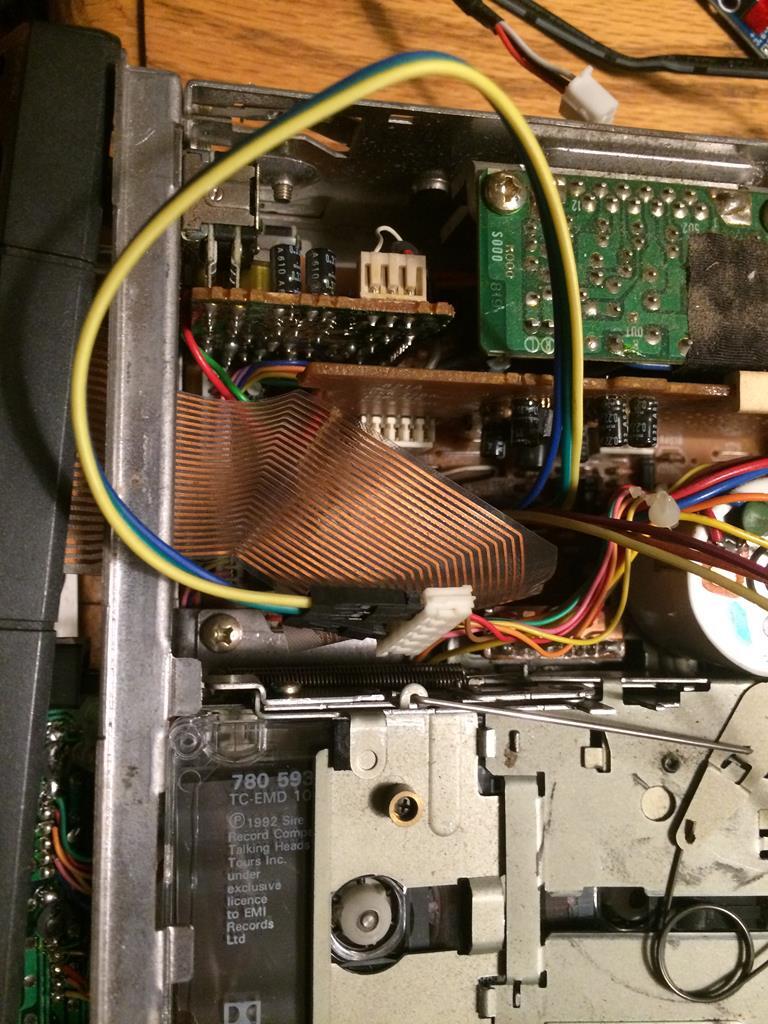
Loving that work on the head unit, something I'd love to try one day if I manage to get hold of a cheap period head unit or two Also you should be good with that Aeromotive setup, I've got one of their Stealth pumps on the FC (part of a fuel system upgrade that wasn't really needed in the end but couldn't be bothered to swap the stock pump back in) and its worked faultlessly and quietly in the time I've had it on there  |
| |
|
|
Tepper
Part of things
Posts: 381
|
|
|
|
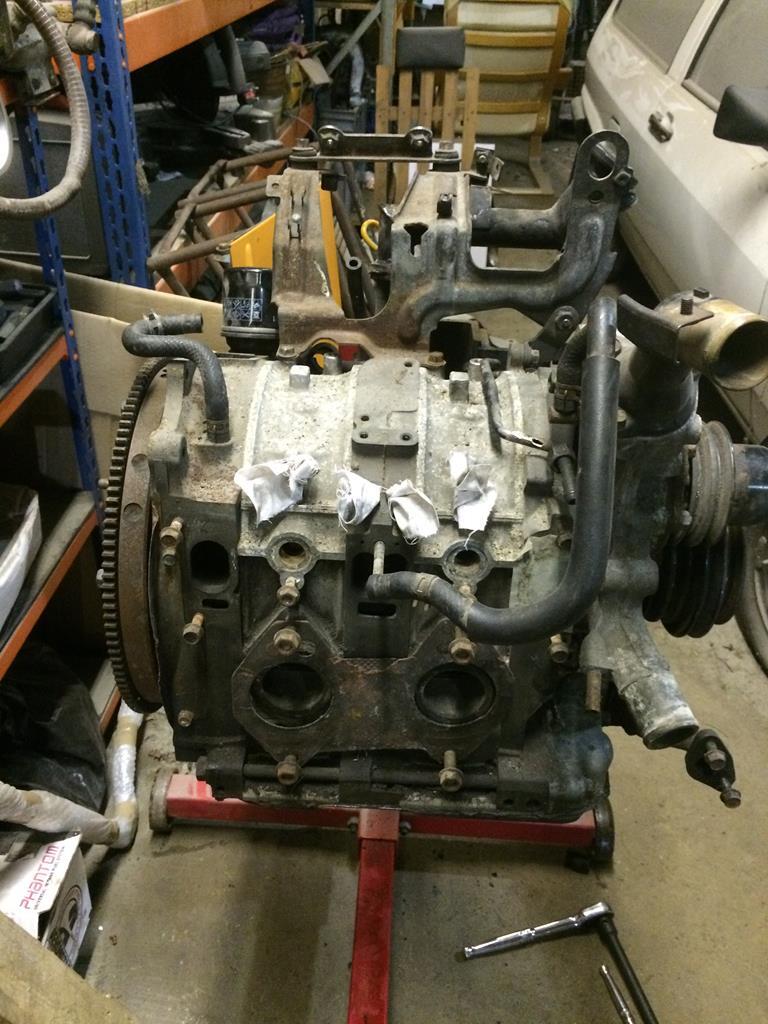
New front to rear brake line fitted today and made a start on the fuel lines: 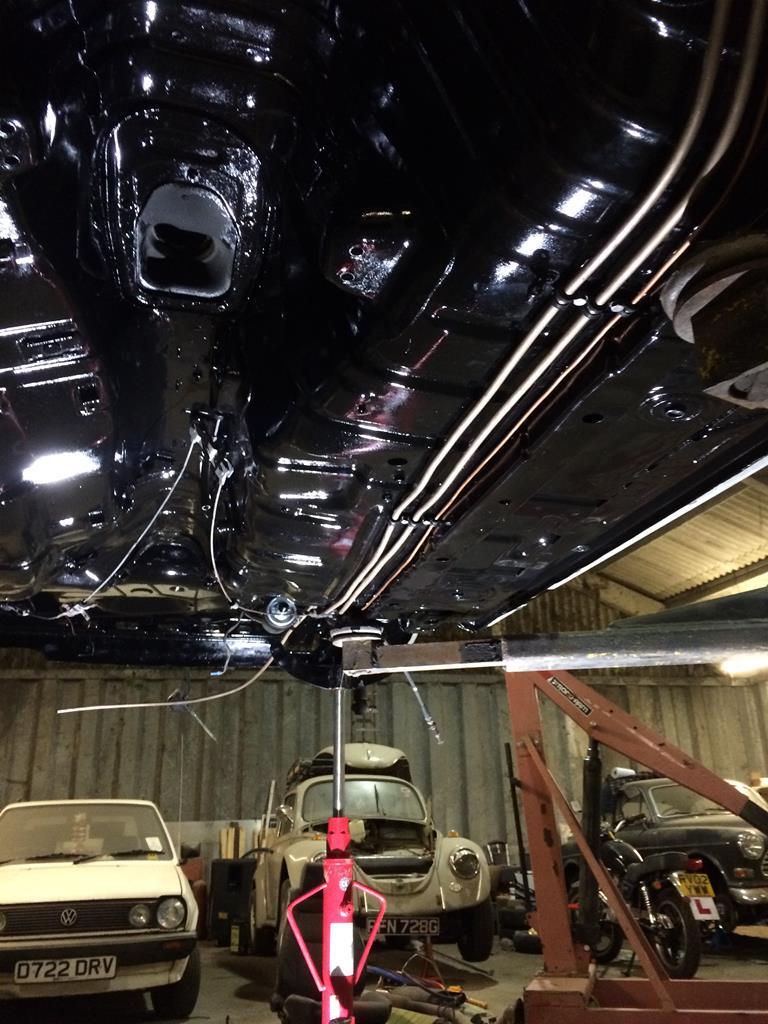 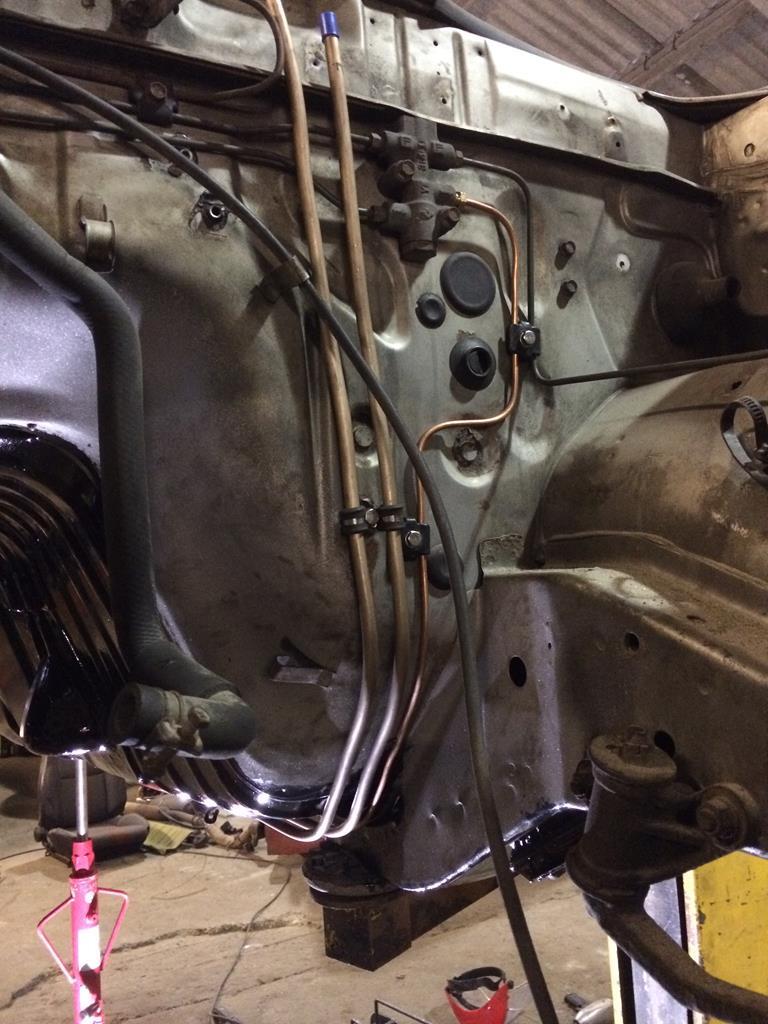 Also this turned up a few days ago: 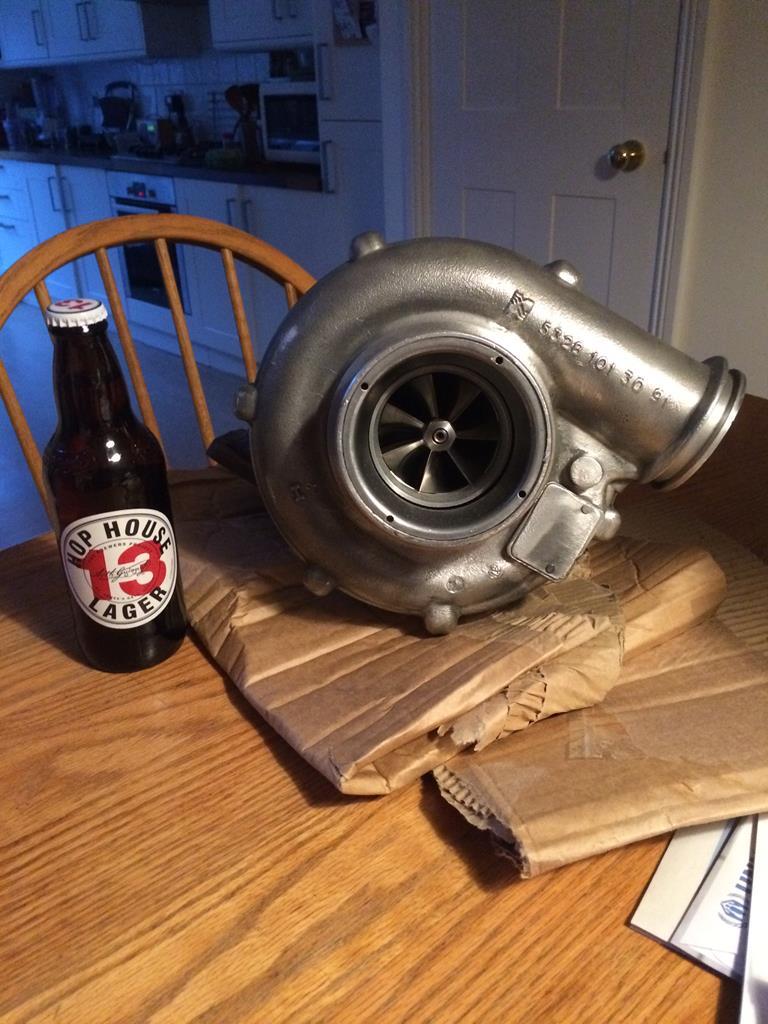 The guys I share the unit with are worried that it'll suck in the engine when it spools up  |
| |
1989 Peugeot 205 GTi - stolen!
1983 Mazda RX7
1968 Rover P6 - also stolen.
|
|
ChasR
RR Helper
motivation
Posts: 10,192
Club RR Member Number: 170
|
|
|
|
|
Now things have got exciting!
|
| |
|
|
luckyseven
Posted a lot
Owning sneering dismissive pedantry since 1970
Posts: 3,839
Club RR Member Number: 45
|
|
|
|
|
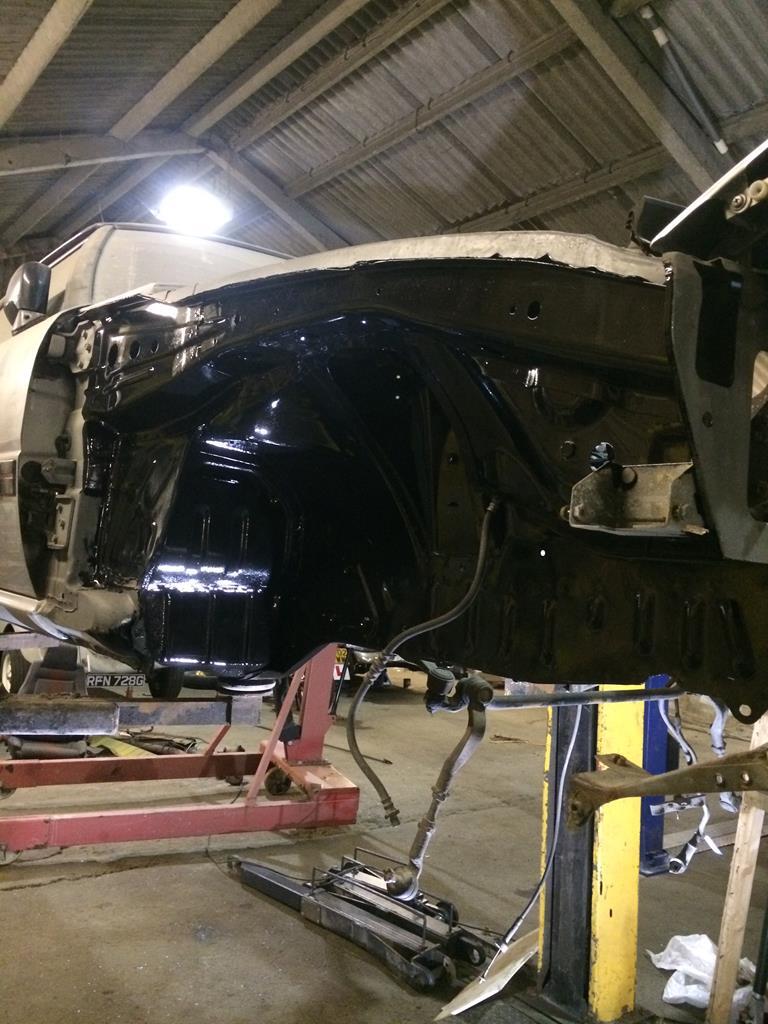
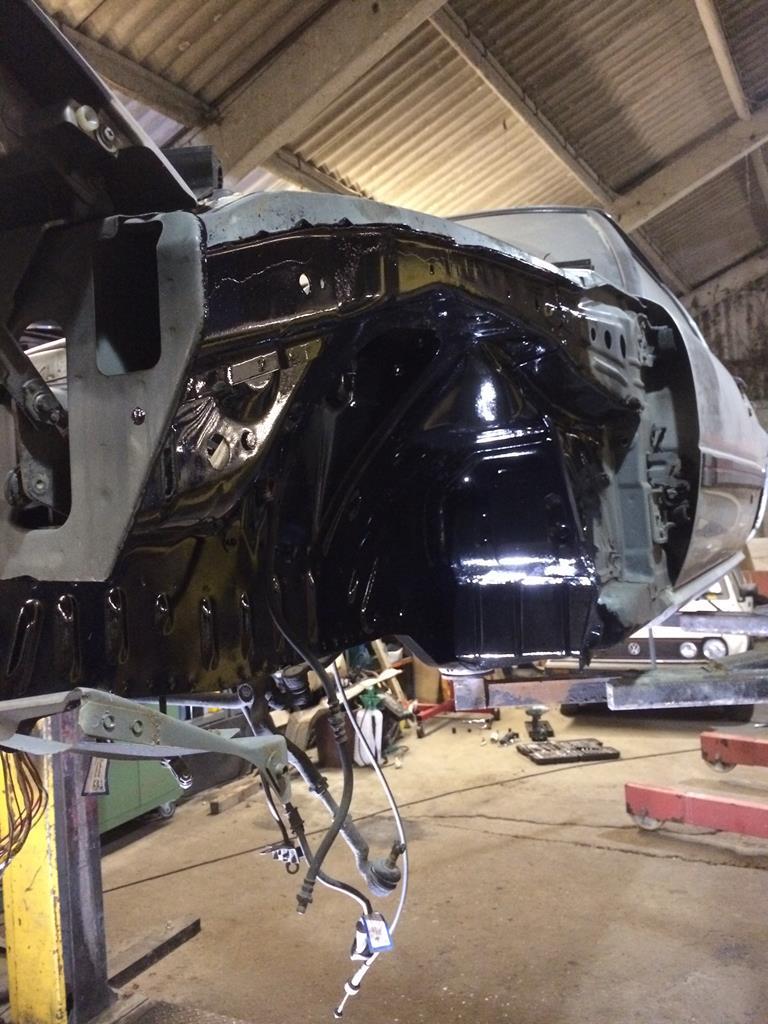
That Beetle seems to be levitating!
|
| |
|
|
|
|
Tepper
Part of things
Posts: 381
|
|
Feb 22, 2018 18:56:48 GMT
|
The flying beetle has clearly gotten a few ideas from a certain Disney film... Not a huge amount of progress to report, just a few bits and pieces. Fuel tank straps and front suspension arms painted: 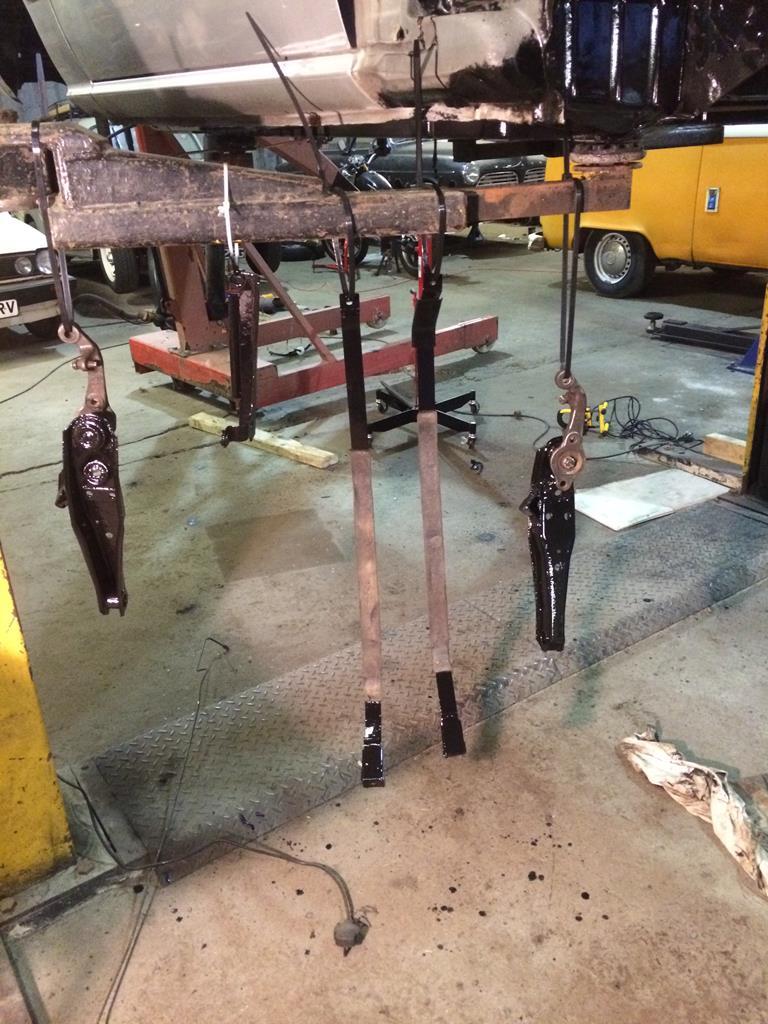 Most of the box sections have been treated with Bilt Hamber S50 cavity wax, waiting on another delivery to get it finished: 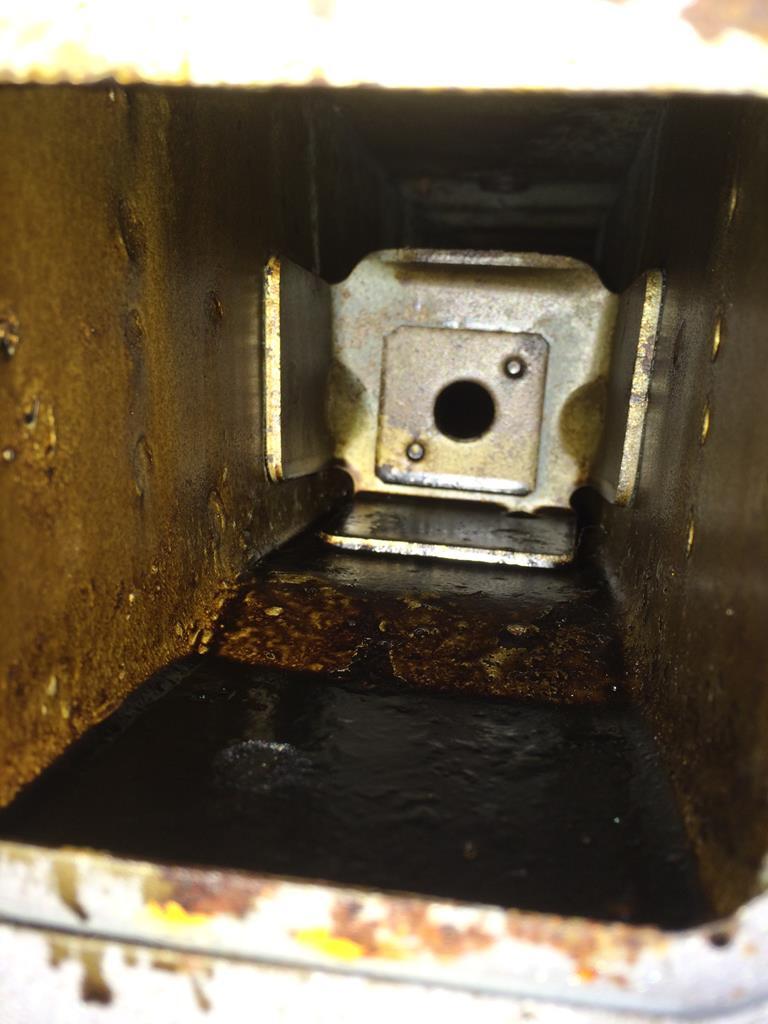 Remember a while back when I said there was no significant rust on this car? Err... yeah, about that. I noticed a little bit in the rear inner arches so started prodding. Before I knew it, holes had appeared. Balls. I figured I may as well get it sorted before it gets any worse, so here goes: Spot welds being drilled out of support plate: 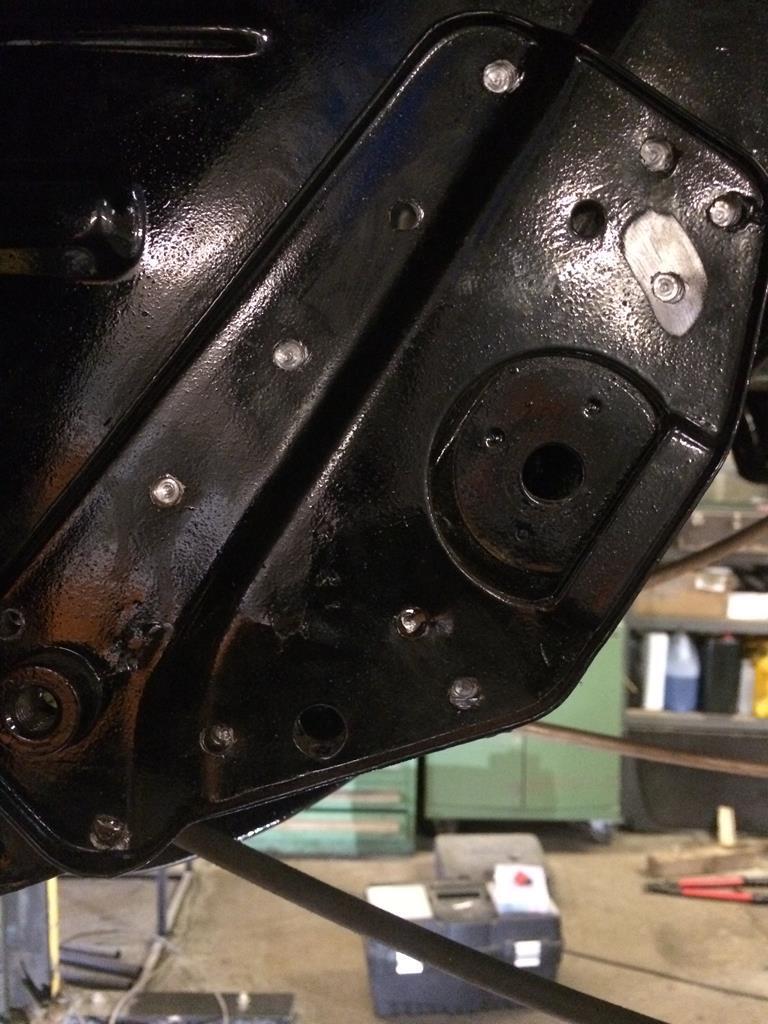 Underneath the plate: 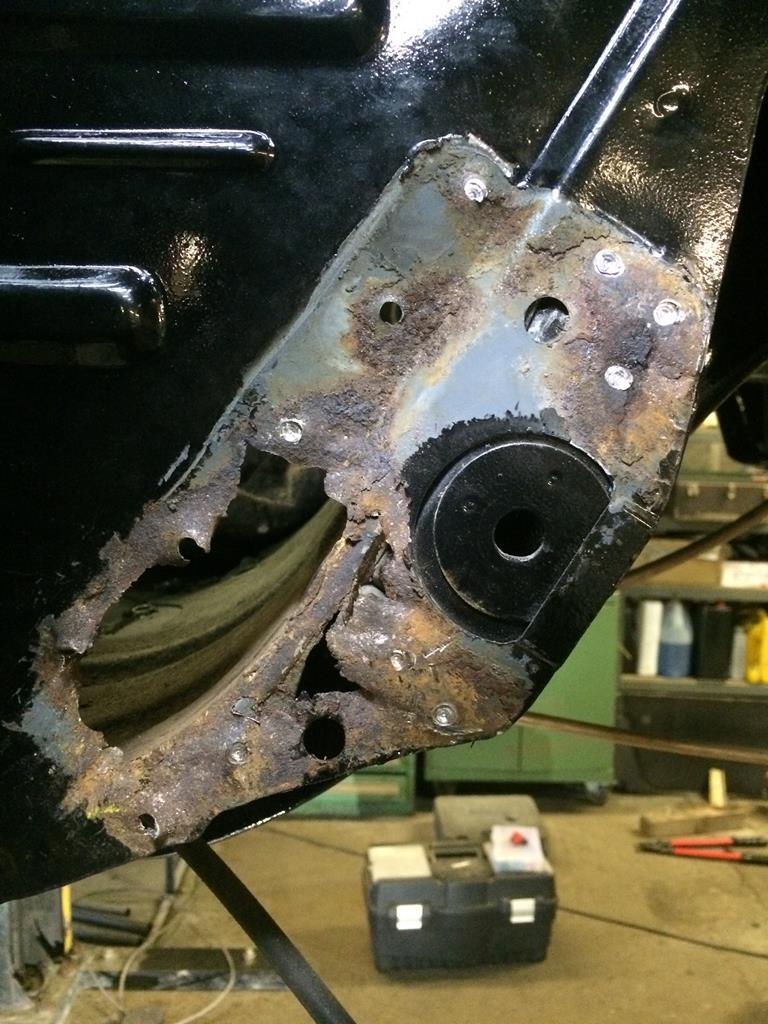 The rear of the strengthening plate - not sure if this can/should be repaired or if I should make a new piece: 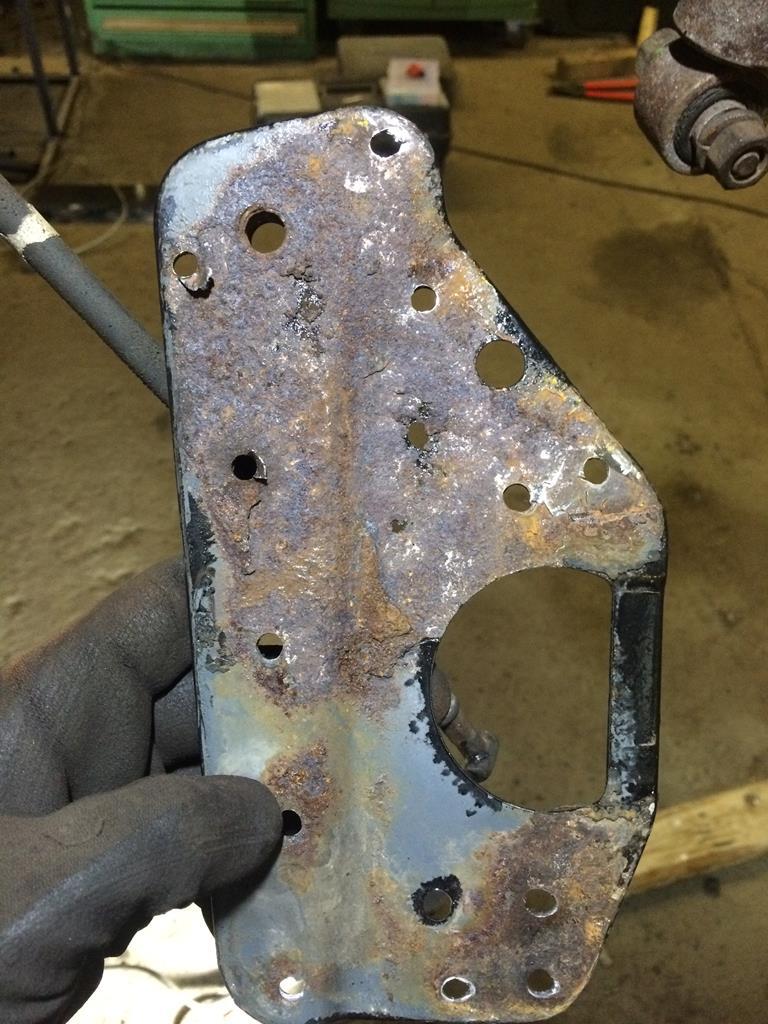 And the other side: 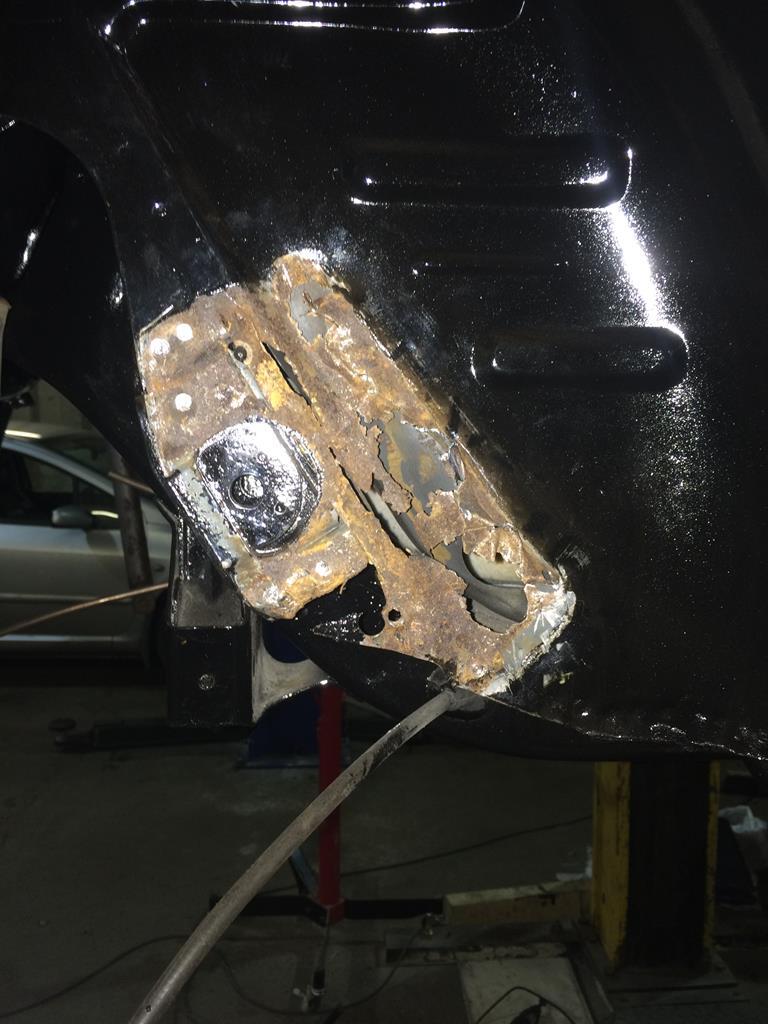 By all accounts this doesn't look too bad compared to most, I think I'm lucky to have caught it early. In terms of the repair, I think I'll probably end up cutting out most of the area underneath the plate, seam weld around the sides of the patch then replicate the original spot welds to hold the support plate with weld-through primer between the layers. Does this sound like the right way to go about it? Should I use seam sealer around the support plate to keep the moisture out? Any advice would be much appreciated as this is the first time I've tackled something like this. |
| |
1989 Peugeot 205 GTi - stolen!
1983 Mazda RX7
1968 Rover P6 - also stolen.
|
|
luckyseven
Posted a lot
Owning sneering dismissive pedantry since 1970
Posts: 3,839
Club RR Member Number: 45
|
|
Feb 23, 2018 11:40:08 GMT
|
Those plates for the trailing arms are about the worst place for rot on FBs. They're, not putting too fine a point on it, utter curse word  |
| |
|
|
goldnrust
West Midlands
Minimalist
Posts: 1,872
|
|
Feb 23, 2018 20:02:35 GMT
|
|
Looks like you're gonna have a well sorted FB by the time it hits the road. It will be worth it! Mine was so much better for having been properly stripped down and having the rust sorted and suspension rebuilt before I was able to take it out on the road properly.
Your plans for the radius arm mounts sound good. Make sure you're happy that the support plate hasn't got too thin where it's rusted, give it a going over with a knotted wire wheel on an angle grinder to clear off any remaining rust. If it has gone thin, then you would be better off recreating it. Seam sealer around any joins will help keep the moisture out as you mention, and seeing as you're using POR15, fairly liberal application of that around the area will help too!
It might be worth checking the rear edge of the sills and the front chassis rails behind the steering box and steering idler arm while you're at it, as these are both also classic FB rust traps.
|
| |
|
|
Tepper
Part of things
Posts: 381
|
|
Feb 25, 2018 17:54:22 GMT
|
|
Yep, I've seen pictures of some pretty horrific rust under those plates! At least I've caught it before it's caused problems with the suspension mount - I figure it'll be good to sort the rust while the suspension's dropped then I won't have to worry about it for a while.
With the support plates, one of them has rotted through and will not be reused but the other side looks alright - will have to take it back to metal to see what it's like but as you say the safest thing to do is probably to make new plates both sides. Did you have to fabricate plates for yours Steve? If so, how did you form the crease in the panel?
The sills look mostly OK - there's a tiny hole in one which I'll have to cut out and see how the rest looks but the other side looks solid. Is there a way to check them without using an inspection camera? The front chassis rails I think I'm going to leave for now. I'll check them when I look at painting the engine bay, which I think I'll do after the trial fit/fabrication's done and while the engine's being built.
|
| |
1989 Peugeot 205 GTi - stolen!
1983 Mazda RX7
1968 Rover P6 - also stolen.
|
|
goldnrust
West Midlands
Minimalist
Posts: 1,872
|
|
Feb 26, 2018 16:11:48 GMT
|
Mine was quite a bit more rusty than yours... 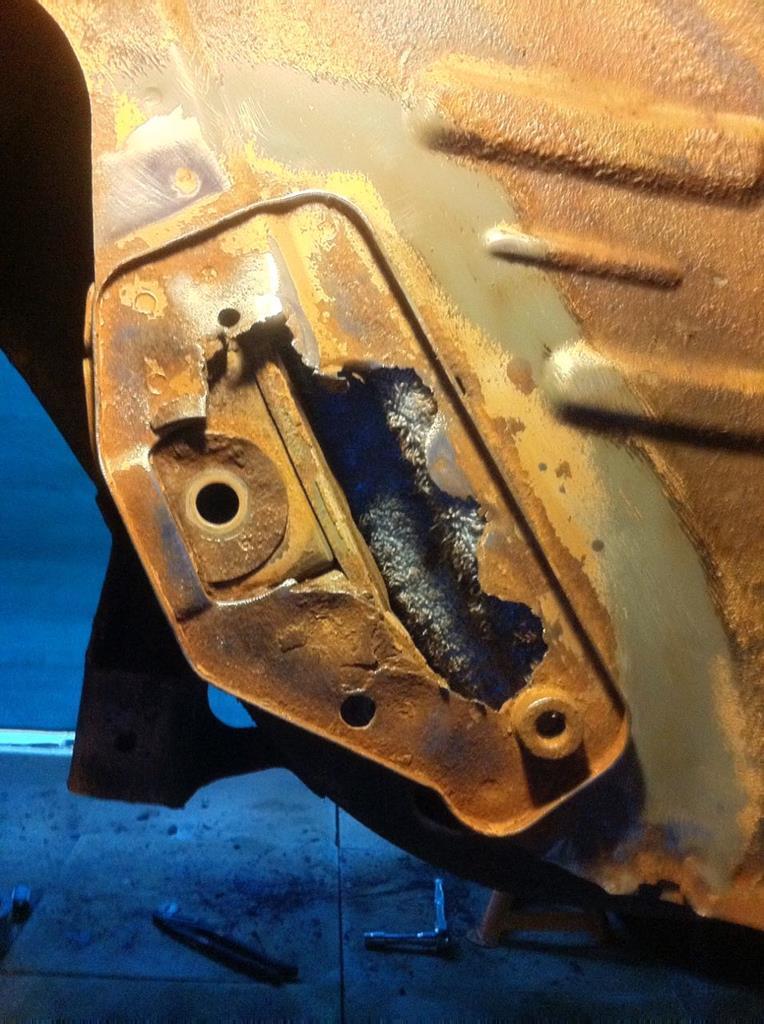 At the time I decided the easiest thing was to cut the middle out of the strengthening plate and weld in a replacement section.  I roughly formed the step using a vice, hammer and chisel, not high tech and not pretty! If you don't have a metal folder or anything you can do a neat enough job using a hammer and chisel with some G clamps and off cuts of steel bar, as I've been doing on the Triumph.  With more experience under my belt I'd probably suggest just remaking the whole plate, bending up the edge is simple enough, again either with careful hammer and vice or using a home made edge folding tool like on Project Binky. With the sills I'd go for the old fashioned 'prod it fairly vigorously with a screw driver' test, if it doesn't poke holes you're all good! |
| |
|
|
Tepper
Part of things
Posts: 381
|
|
Feb 26, 2018 21:22:16 GMT
|
goldnrust brilliant, many thanks for that is there any need to fold the edge of the panel or is it just for originality?
|
| |
1989 Peugeot 205 GTi - stolen!
1983 Mazda RX7
1968 Rover P6 - also stolen.
|
|
goldnrust
West Midlands
Minimalist
Posts: 1,872
|
|
Feb 26, 2018 22:22:31 GMT
|
|
The folded edges will add quite a bit of rigidity to the panel. Whether that's really critical by the time it's welded to the car and is part of a 3-4 layer thick steel sandwich... I've no idea.
Looking at the level finish you're aiming for elsewhere on the car, with tidy new brake lines and freshly painted underbody, I'd say that's reason enough to do it properly and fold up the edges.
If getting the edges right is looking like a bigger challenge than you're up for (as reading between the liens you've not done much welding/fabrication before?), then why not just cut the rot out and reuse the outline of the strengthener, similar to like in my pictures above. Nothing technically wrong with it, just maybe not as elegant a solution as remaking the whole section.
|
| |
|
|
Tepper
Part of things
Posts: 381
|
|
Feb 27, 2018 18:13:17 GMT
|
Thank you so much for the advice, much appreciated. You're absolutely right in thinking that I have done no welding and almost no fabrication before - gotta learn at some point but it's very helpful to hear from someone who has done exactly the same repair. The exhaust manifold and wastegate arrived yesterday from Aus and I couldn't resist giving it a trial fit: 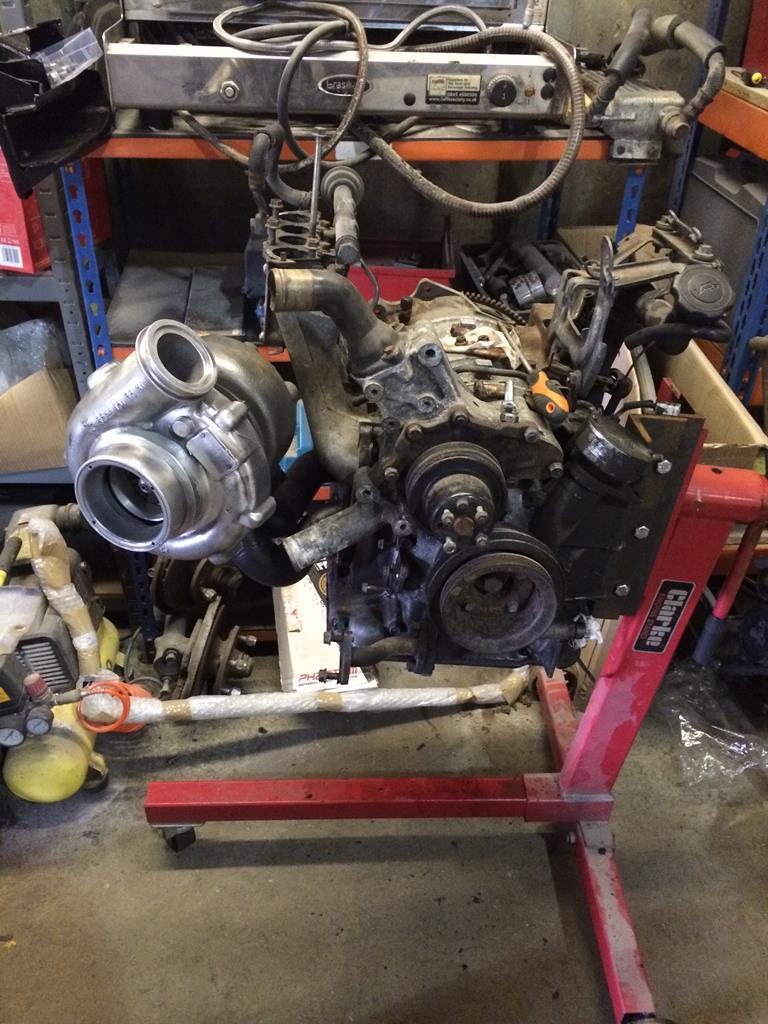 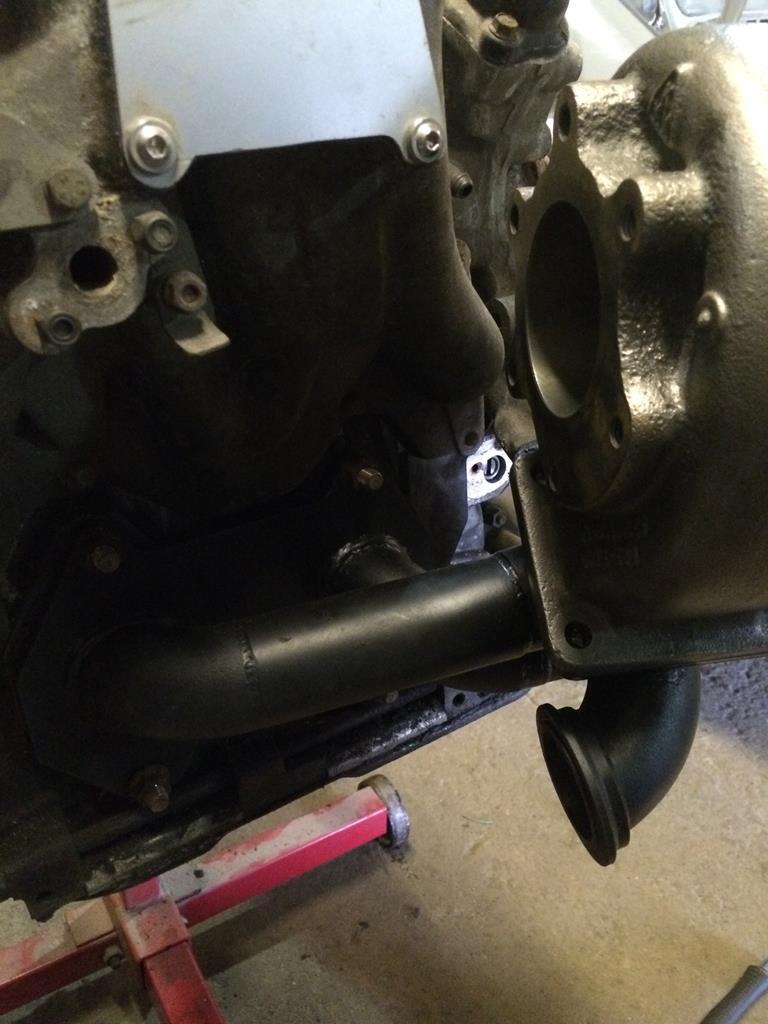 It fits! For some reason the holes on the manifold flange don't line up with the holes on the turbo - they're both supposed to be T4? May have to slot the holes a little bit unless I can figure something else out. Clearance on the downpipe is going to be tight! 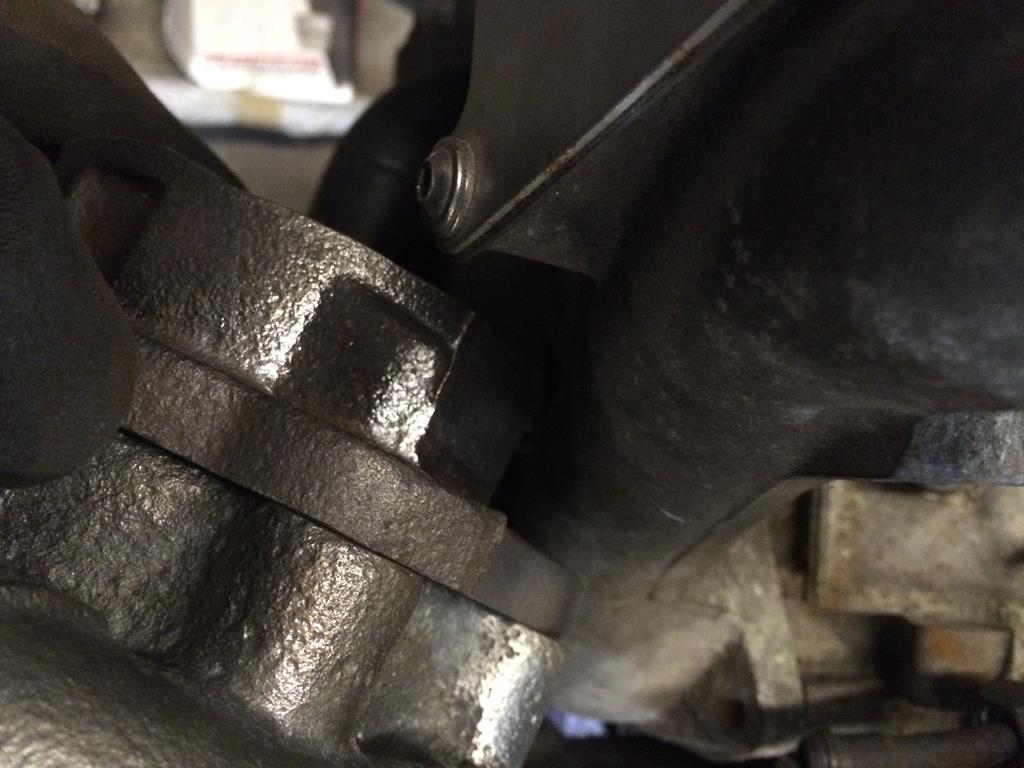 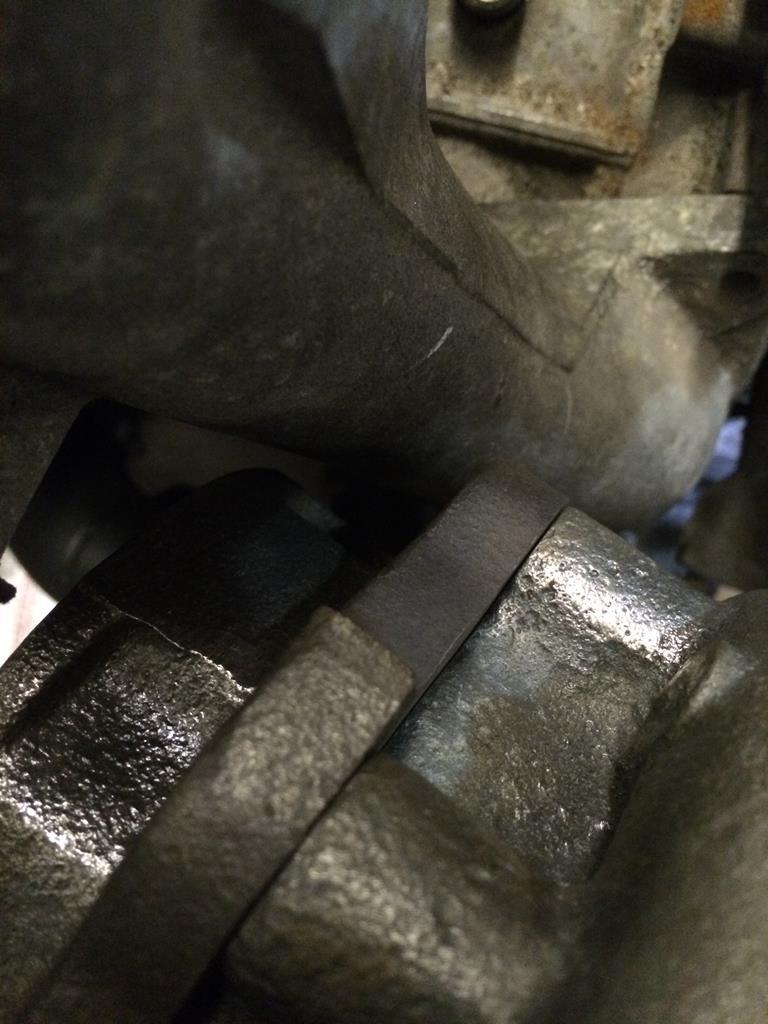 I was going to use a 6 bolt to V band adapter for the downpipe but may have to look at welding a V band flange directly to the turbo housing due to the lack of space. Also finished the cavity wax and got the front crossmember bolted back up ready to start getting the front end back together. |
| |
1989 Peugeot 205 GTi - stolen!
1983 Mazda RX7
1968 Rover P6 - also stolen.
|
|
Tepper
Part of things
Posts: 381
|
|
|
|
Starting to get the front end put back together, it's starting to look more like a car again! Front wings treated with wax:  Refitted with new stainless bolts:  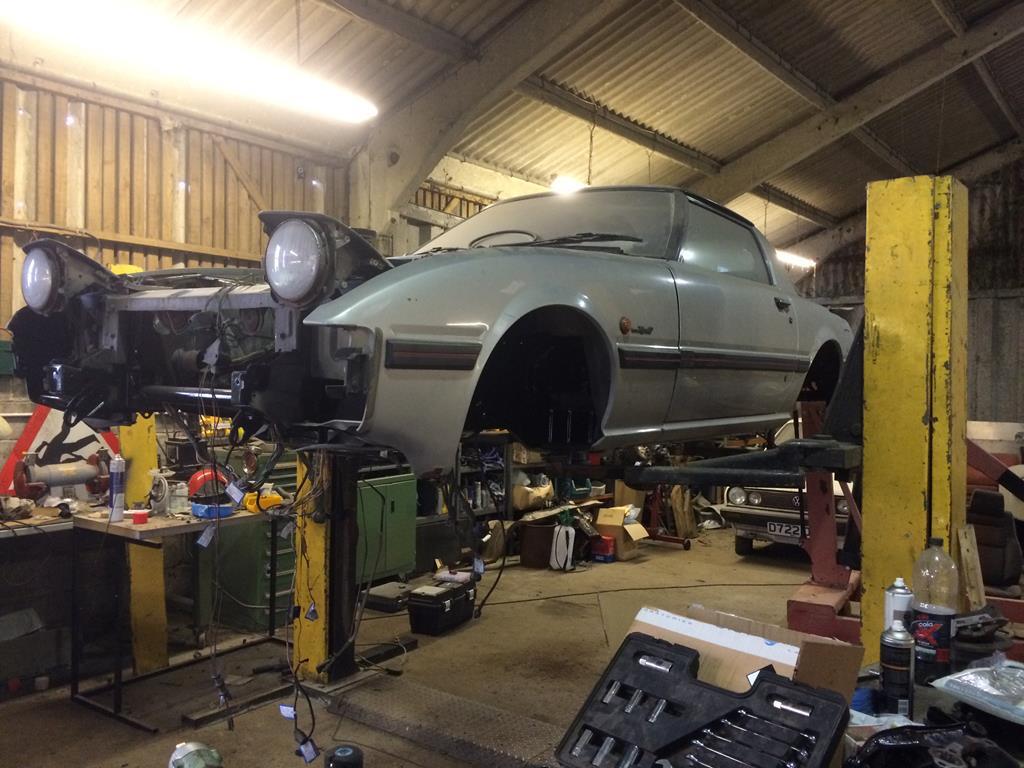 Front suspension back together: 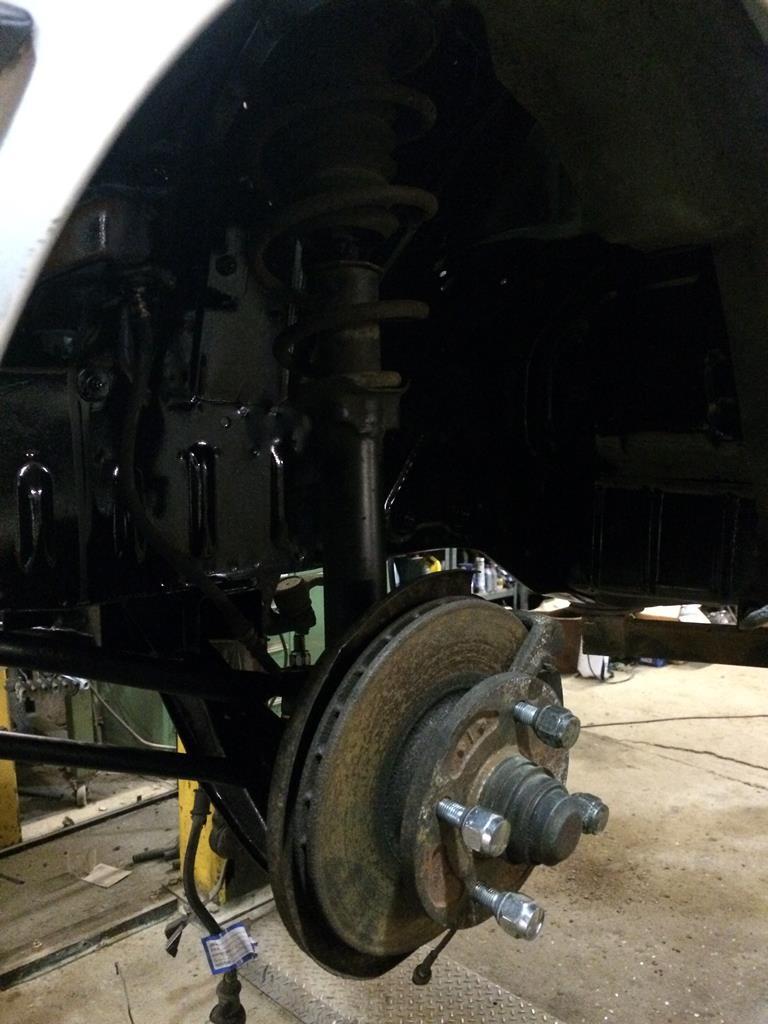 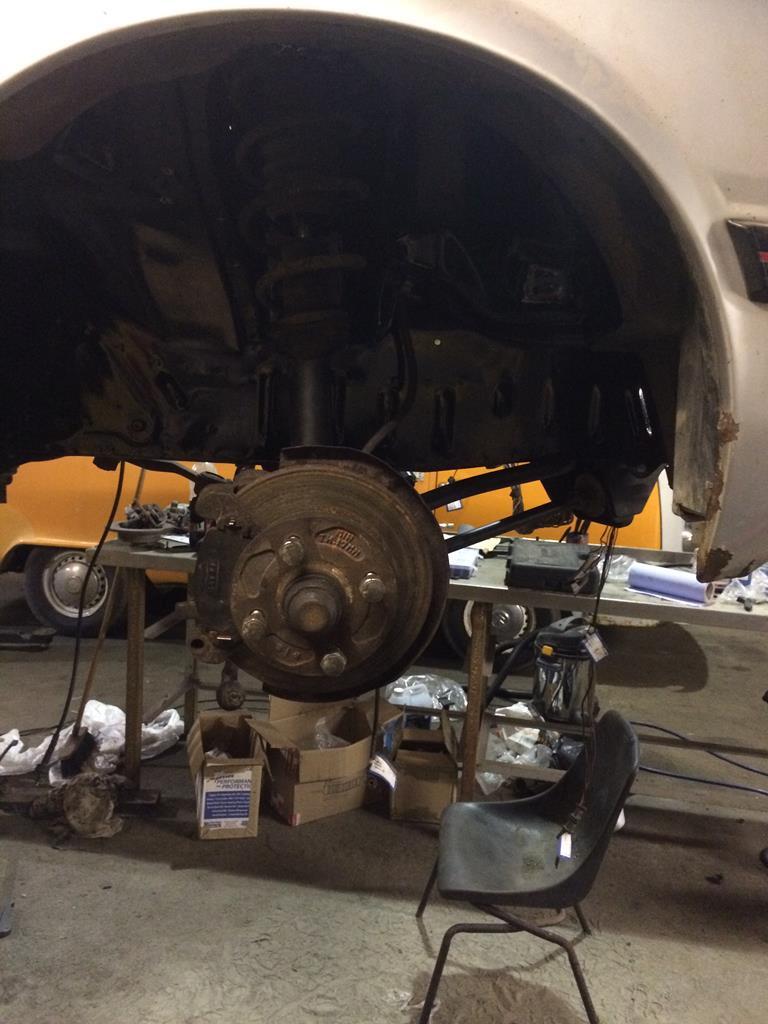 |
| |
1989 Peugeot 205 GTi - stolen!
1983 Mazda RX7
1968 Rover P6 - also stolen.
|
|
Tepper
Part of things
Posts: 381
|
|
Mar 10, 2018 15:19:45 GMT
|
Front end now all buttoned up. The reason for reusing/not reconditioning some bits (e.g. struts) is that it's likely that I'll change it once the car is on the road, but for now I just want to focus on getting it up and running - once I can drive it I'll be a lot more motivated to improve the handling. Work started on some of the rust. Chopped out: 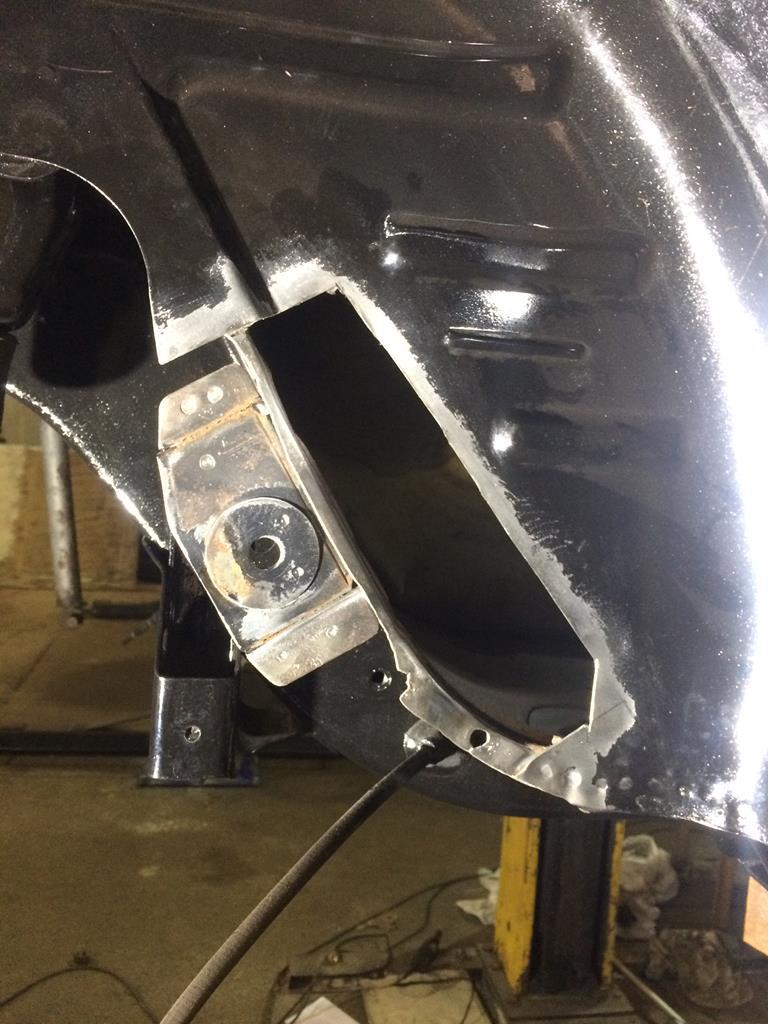 Bit of CAD:  Stopped there as I forgot to bring the new steel up to the unit. I'm new to all of this so it's going to be a steep learning curve but am enjoying it so far. |
| |
1989 Peugeot 205 GTi - stolen!
1983 Mazda RX7
1968 Rover P6 - also stolen.
|
|
|
|


 Interesting that your car might have had an aftermarket turbo setup. What's the carb that's on it now, is it the stock four-barrel Nikki carb? Choke was always manual, btw. It has some little electromagnetic thing that's supposed to retract it when the engine warms up, though they rarely work well any more. A 12A-engined Series 2 like that wouldn't have had much in the way of rat's nest to remove, tbh, that only really came in on the big-engined 13B and fuel injected cars, none of which we got in the UK until the FC-model RX-7s. Check for rust in the rear seat pan and the plates for the axle arms, they're typical spots. These cars can hide quite bad rust quite well, sadly. Inlet blanking plate just means the emissions nonsense has been deleted at some point, and you're well rid of it, appalling rubbish. Judging by the previous turbo application, I'm guessing yours must be on headers now? Poor fuel flow might simply be a dodgy, clagged up fuel pump and/or filter, they're prone to it though the Nikki carb gums up easily too on stale unleaded. Sadly given the lay-up I fear you're right that it'll need stripping down. Good luck with that!