edessex
Part of things

Posts: 514
Club RR Member Number: 42
|
|
Oct 17, 2016 17:26:46 GMT
|
Well, I've had oil running down the engine from the head gasket for a while now, not mass amounts, but it was dripping straight on the exhaust, and so filling the cabin with fumes. It went through the MoT nice and easy, so figured it was time to sort the oil leak. So, new head gasket, and while I was there a cambelt kit and water pump. I didn't take many photos while I was doing it, only a couple to show I at least attempted to clean the block...   One of the waterways wasn't far off of failing either!  So all done, and back to being a workhorse!   |
| |
|
|
|
|
|
|
|
Oct 18, 2016 10:06:16 GMT
|
At the risk of making you duplicate things, what are your plans for these: 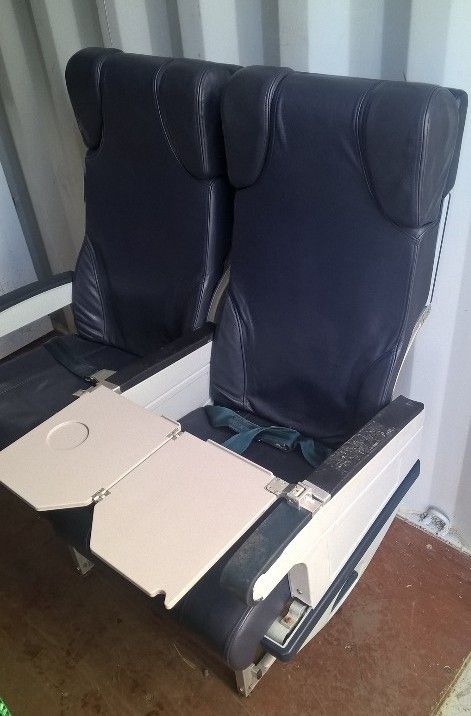 |
| |
|
|
stealthstylz
Club Retro Rides Member
Posts: 14,836
Club RR Member Number: 174
|
|
Oct 18, 2016 11:48:13 GMT
|
|
Love this, looks like a proper giggle.
|
| |
|
|
|
|
|
Oct 18, 2016 12:35:11 GMT
|
This is GREAT. I love what you've done, the snorkel, the tires- using it for a puddle jumper, a farm truck- Fantastic! I might take little runabout and make something similar because it just makes sense. And it's fun. Nice job catching that head gasket too.  |
| |
|
|
edessex
Part of things
Posts: 514
Club RR Member Number: 42
|
|
Oct 20, 2016 17:25:07 GMT
|
|
Cheers guys! It is a good laugh, slightly resenting having to pay out on parts for a 'banger', but I do enjoy using it.
As for the aircraft seats, I'm not entirely sure yet, but nothing Astra related!
I got offered them as folding seats, but I thought they were going to fold the other way (seat bases upwards), and was going to bolt a set in the back of my van.
But they are actually quite nice leather recliners, and I'm half tempted to bolt some heavy metal bars on the bottom and use them as household furniture.
They would be great for a stealth camper van conversion.
|
| |
|
|
edessex
Part of things
Posts: 514
Club RR Member Number: 42
|
|
|
|
There is a few followers of the Astra online, and I have decided to do something I'm usually against... I've opened a Facebook page. I'm intending to use it and the car for fundraising in the near future, and obviously it advertises my business as well. It's just launched, and has a lot more content to upload... www.facebook.com/2wdoffroader |
| |
|
|
edessex
Part of things
Posts: 514
Club RR Member Number: 42
|
|
Nov 12, 2016 19:02:17 GMT
|
|
|
| |
|
|
edessex
Part of things
Posts: 514
Club RR Member Number: 42
|
|
Nov 14, 2016 20:59:04 GMT
|
The misfiring issue got much, much worse of late. I thought I was going to have to call the RAC to get me home yesterday! So before work I nipped into a motor factors and grabbed some spark plugs and leads, on the off chance it was them. I've not even fitted the leads, it appears to have been the spark plugs which were responsible. There is a possibility that I didn't replace them as recently as I had thought...   |
| |
|
|
edessex
Part of things
Posts: 514
Club RR Member Number: 42
|
|
Nov 21, 2016 17:56:57 GMT
|
I'm quite sure I have a leak somewhere in the snorkel. So out came the silicone sealant!  |
| |
|
|
edessex
Part of things
Posts: 514
Club RR Member Number: 42
|
|
Dec 11, 2016 19:08:43 GMT
|
Started on a little side job today; load lamps. I have one LED load lamp in the boot, which is wired up to the rear screen heater (which is disconnected). It's installed on the inside as I figured some scrote would try and steal it if I mounted it on the outside, however I've needed to use it as a reverse light a few times when negotiating tight muddy turns and maneuvers in reverse. This involves getting out and opening the boot lid before I do so. Another irritating thing is that the feed is ignition live, so when using it as a work lamp I need to keep the keys in the ignition. So, things need to change slightly. The load lamp in the boot is round, and fairly large, so wasn't sure where to mount it. As LED lamps are now pretty cheap, I thought I'd just get some more. I had a browse on eBay and found some slimline units:  Now I was hoping I'd be able to bolt them under the spoiler, but alas that was a no-hoper! I was then tempted to take a grinder to the spoiler, but then settled on the easier option! Once I took the spoiler off, I realised why the rear screen wash never worked... 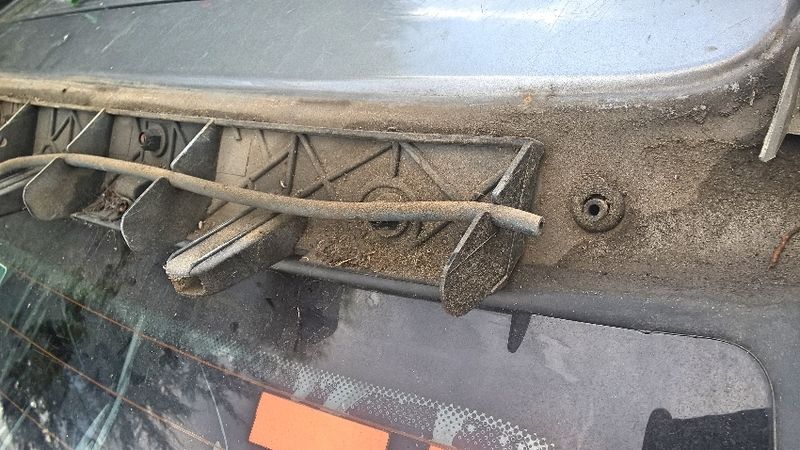 In my usual style, very little measuring or planning took place, I held a lamp up and when 'that'll do', needless to say I needed to take a knife to the spoiler to get the bolt in properly. 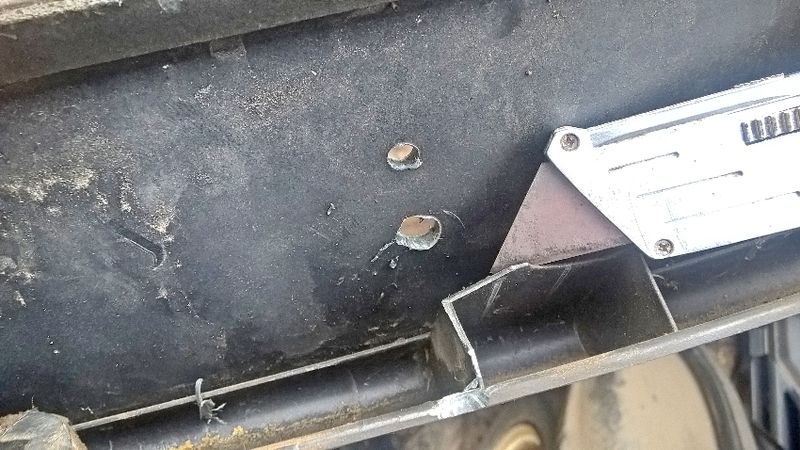 Some electrickery: 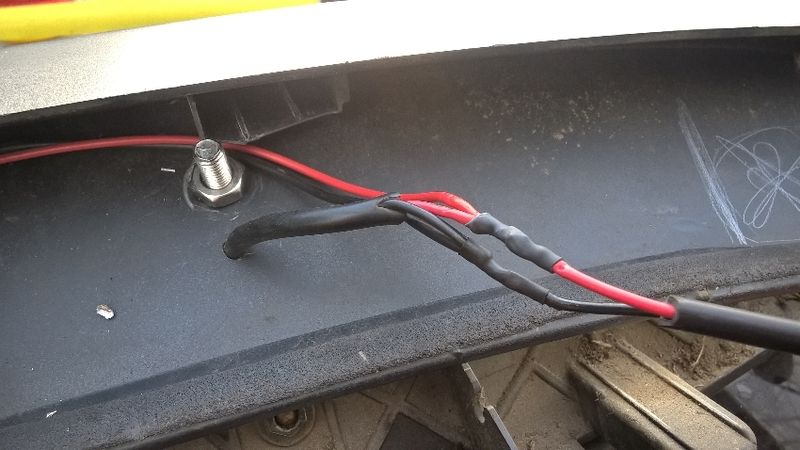 Spoiler re-fitted: 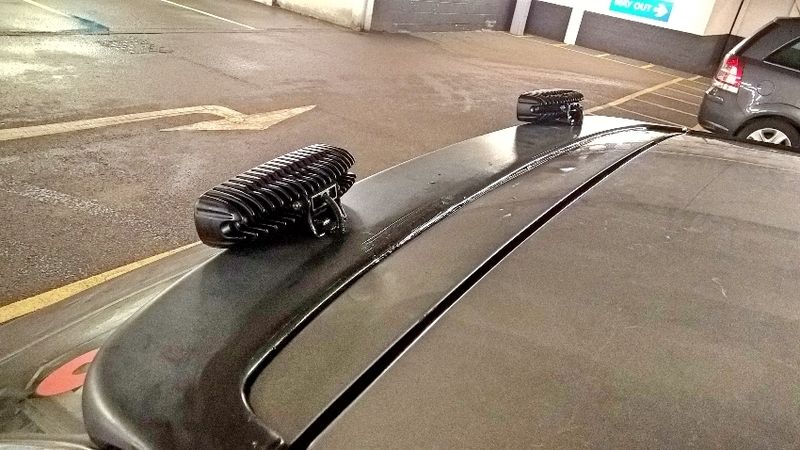   Dash switch and tell-tale, the trim almost fits on back properly too! 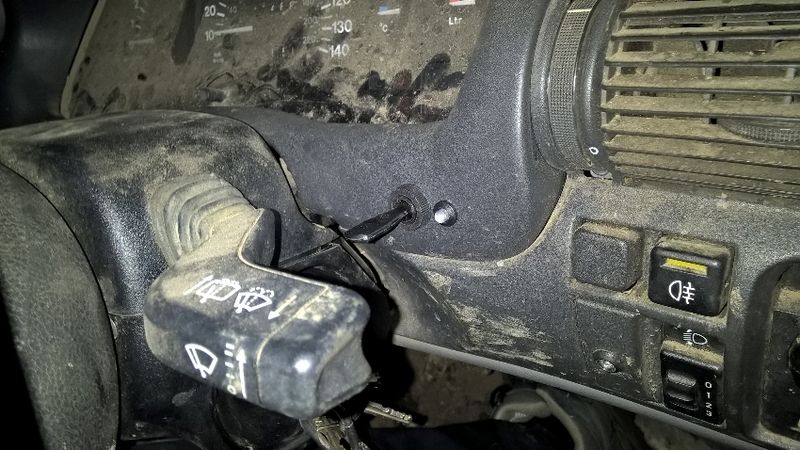 Got the lamps earthed, and got the power cable dangling in the boot, just need to run it up the front to the dash switch, and wire the dash switch in to the two power feeds. I ran out of light down the yard, and ran out of gas in the soldering iron, so the rest will have to wait.  |
| |
|
|
|
|
lord13
Part of things
Posts: 536
|
|
|
|
this is brilliant, I've had a few little astras in my time and generally they are solid little things, love what you've done to this one |
| |
 ] |
|
edessex
Part of things
Posts: 514
Club RR Member Number: 42
|
|
Dec 12, 2016 16:18:54 GMT
|
|
Thanks! I always seem to end up in an Astra when I'm after a runaround in a hurry! But I've never kept one this long before.
It might not be anything special, but it is fun...
|
| |
Last Edit: Dec 12, 2016 16:19:40 GMT by edessex
|
|
|
|
|
Dec 12, 2016 16:44:59 GMT
|
|
This is ace!
|
| |
1988 Ford Fiesta Popular Plus Daily
1978 Triumph Spitfire Project
2002 Nissan Almera Tino Budget Build!
|
|
edessex
Part of things
Posts: 514
Club RR Member Number: 42
|
|
Dec 12, 2016 21:44:13 GMT
|
Cheers. |
| |
|
|
edessex
Part of things
Posts: 514
Club RR Member Number: 42
|
|
Dec 17, 2016 19:58:12 GMT
|
I wired in the rear lamps the other day, still need to do the feed from the reverse lamps though. I need to get an inline fuse thing, so for now used spade connectors. The tape is to make sure it doesn't short out on anything. 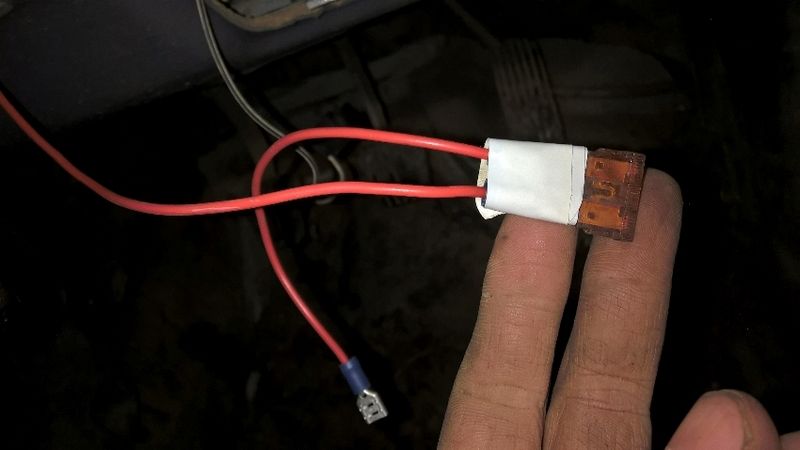 Some mass of terrible wiring: 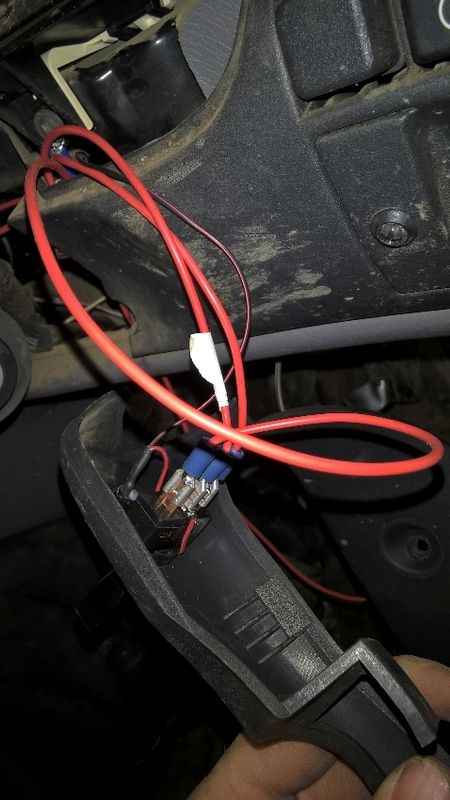 We saw the switch location: By fluke, the tell take is actually in a location where it ISN'T blocked from view (I didn't even think about it). But is unfortunately a bit bright!  But at least they work!  |
| |
Last Edit: Dec 17, 2016 19:59:25 GMT by edessex
|
|
edessex
Part of things
Posts: 514
Club RR Member Number: 42
|
|
Dec 28, 2016 18:41:44 GMT
|
I got round to wiring in the other part of the switch the other day. Now the rear load lamps can come on with the reverse lamps.  ....and yes, I did give it a wash! It lasted one day before getting muddy again! |
| |
|
|
edessex
Part of things
Posts: 514
Club RR Member Number: 42
|
|
|
|
Another wheel bearing went, quick swap to another leg last night:  ...fixed in time for a little towing job today!  |
| |
|
|
edessex
Part of things
Posts: 514
Club RR Member Number: 42
|
|
Jan 11, 2017 18:54:26 GMT
|
|
|
| |
Last Edit: Jan 11, 2017 18:55:26 GMT by edessex
|
|
edessex
Part of things
Posts: 514
Club RR Member Number: 42
|
|
Jan 14, 2017 22:01:06 GMT
|
As the suspension leg I quickly stuck on it the other day had a standard spring on, not a HD one, that corner was sitting 1" lower, and too soft. So I thought I better get my finger out and sort the one with the blown bearing. The last time I had a bearing changed, it cost me £40. I supplied the bearing, and took the leg off the car, so that was just for pressing the old one out, and the new one in. I also assisted the mechanic. So bearing changes quickly rack up the bills. I've seen these cheap 'hydraulic presses' on eBay, of Chinese build, which utilise a bottle jack. Obviously they won't be as good as a real press, but thought it was worth a go. If I successfully change two bearings, then I've broken even.  Getting the leg in place and suitably blocked up while having to hold it the whole time is a bit of a pain, but I managed it. However, the inner race stuck on the drive flange.  I didn't have any suitable tools to hand, so that stopped play. At the next opportunity... Before I broke the grinder out, I thought I'd just try a bit of gentle hammering (I really need to find that club hammer). 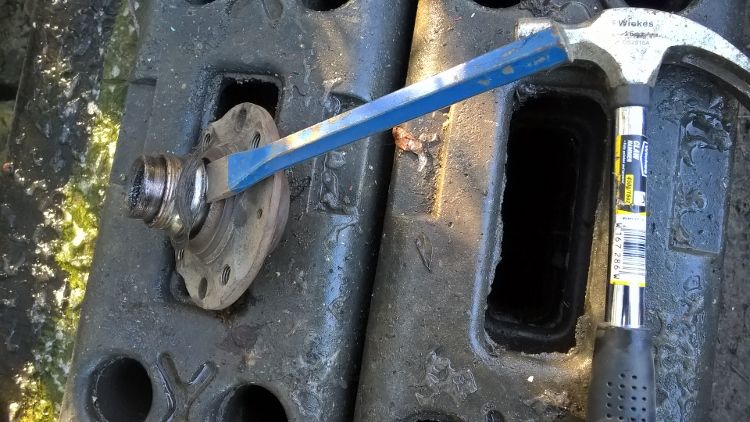 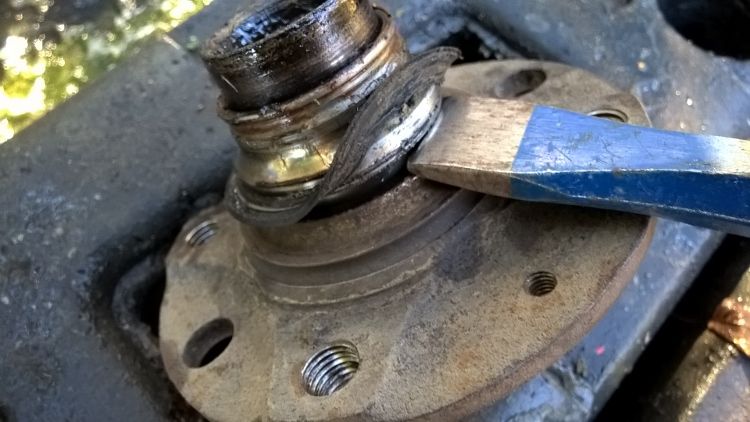 Bit of faffing about, but didn't take long. I see a previous grinder wound...  One press... 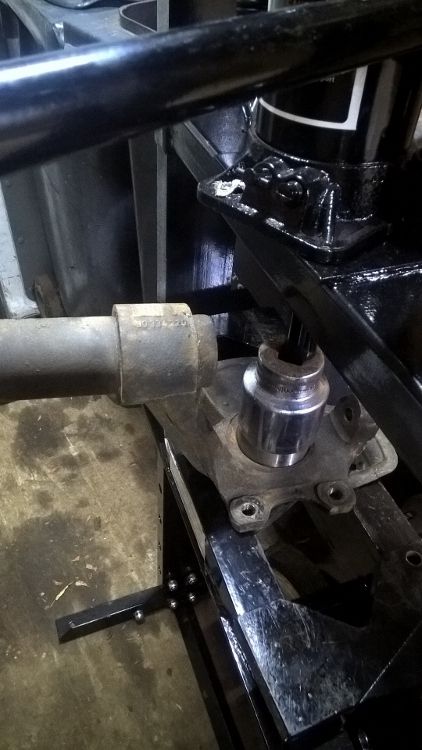 ...and one shiny new bearing! 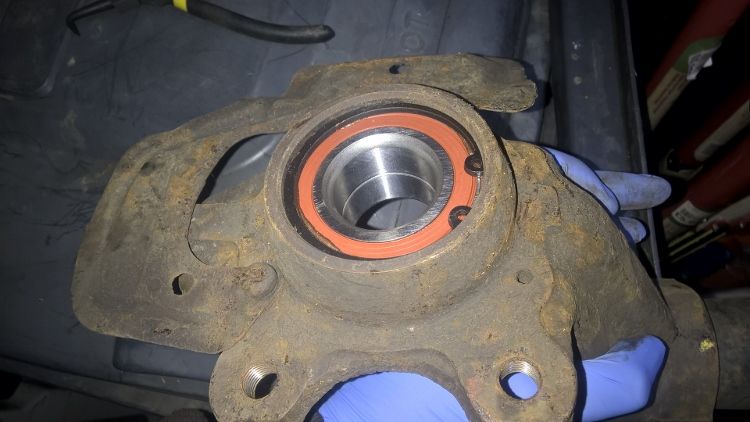 I then decided to swap the legs back, so this one is now back on. However, every part of the other one didn't want to let go! Was a bit of a mission, heat was required several times. In other news, I think I need new bushes on the tie rods... |
| |
|
|
lord13
Part of things
Posts: 536
|
|
|
|
this is such a brilliant thread, real grass roots mechanic-ing ...love it, it's how i maintain my cars, why pay someone else to do what you can do yourself...and if you can't do it, LEARN how to Brilliant |
| |
Last Edit: Jan 15, 2017 8:01:11 GMT by lord13
] |
|
|
|


