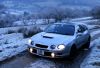
Hello, first time posting here. This is my mini project. Started with a New Heritage Shell and then bought the Red Donor mini you see below. The donor was named 'Rusty' by a previous owner and was fairly rotten but not the worst id seen.
Heres how its gone so far.
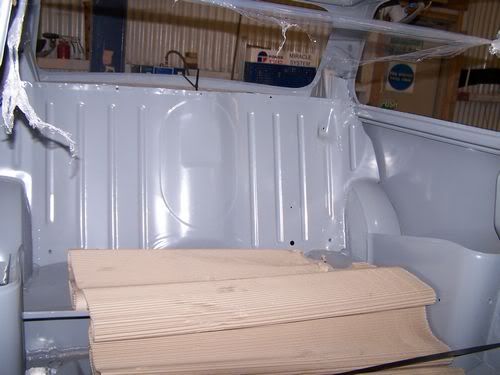
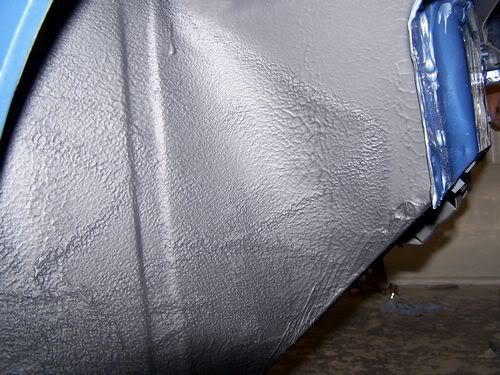
The underside of the boot


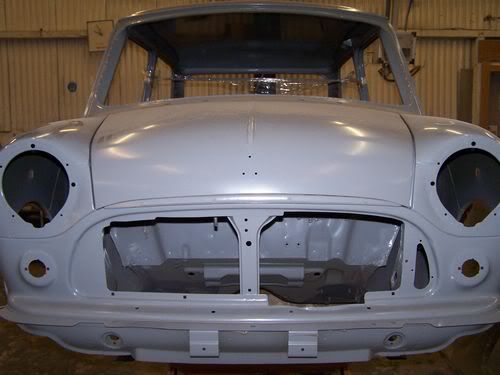
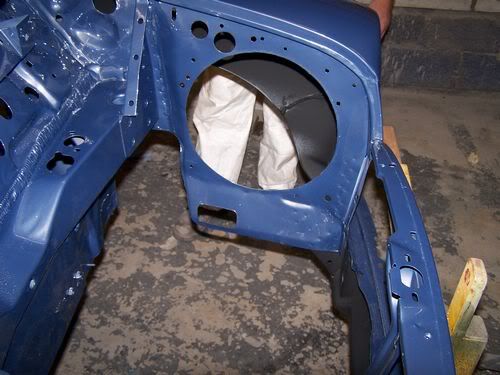
The inner wing: You can see where the outline for where we will cut and mesh for the sidemounted radiator

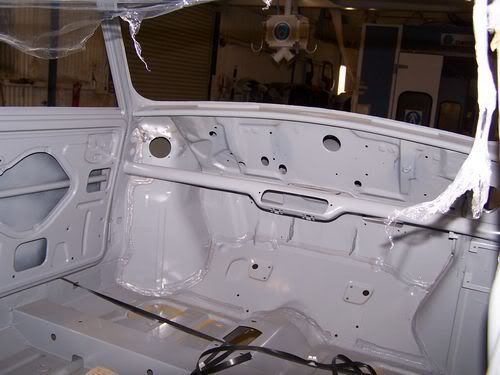
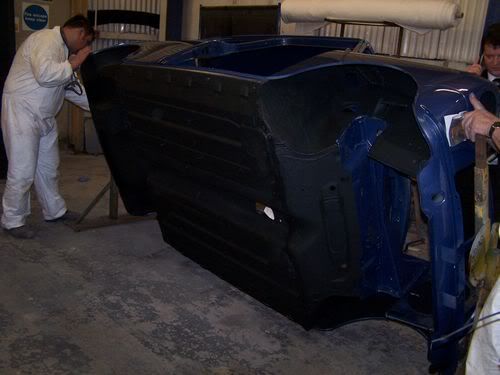
Bulkhead

Grrrrr!
Pretty Pleased to say the least!
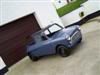
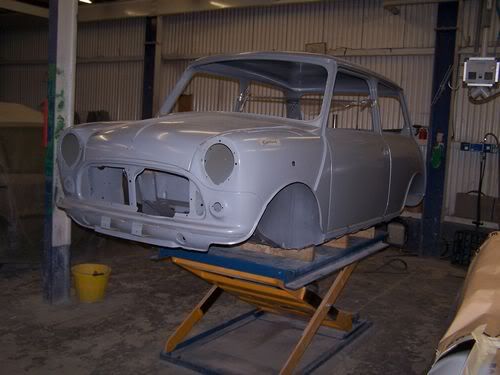
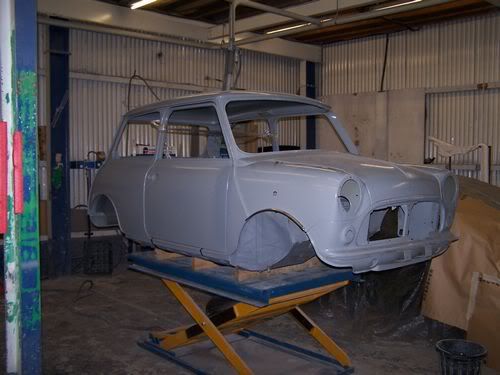
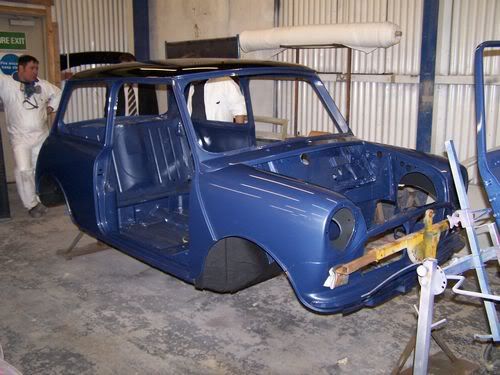
Then got it Sprayed before Christmas at Lloyd Cooke Motors in Drumahoe.


Then I bought the Donor Mini...an Austin Mini Flame Red..Standard 998 with a stage 1 Kit. Fairly rotten but not the worst ive seen!


The headlining had a surprising amount of water trapped in it causing this!


As you see it there...With rear seat cousin on the crossmember....thats how I drove it! Head level with dash was great! Wind and rust in my hair...


Then cut the wings off

What do I do next?

Colouring in my Haynes

Flame chatting with buddies before Death


Everything now is split into 5 or 6 of those big boxes all labelled in bags

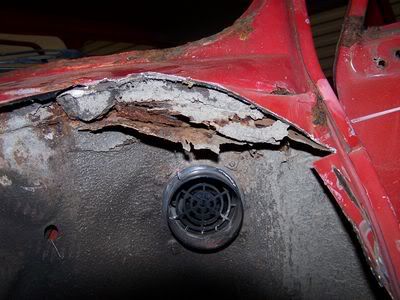
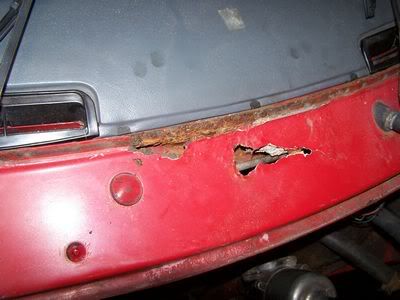
General Rule....If you see rust don't let me poke at it!


I poke this later and now I can get two hands in it

Lookie at the filler!

Not too clear but these are the wheel arches where door mounts to before I poked them with my magic screwdriver


Thats how much choke was needed to keep her going! And theres the can of brake cleaner needed to start her!

Representing!

First Night in the garage and Hes wet himself already!

Waiting outside overnight to have his front battered off for engine removal

Next Morning....Draining Rad


Cruel to be kind....Battered inner wings for easier acces to radiator hose


New Wheels

The source of the 'Power'


Engine out of the subframe


A little more poking and it got worse


Russsty

OOooooOooooOoo


Brutal...But it made getting at the subframe bolts easier...Had to use shifter because we were 1 socket size too small


Welding like bird poo


And yes it is lying on its roof!


Unofficially the funeral service for the flame


Last Few


A true Min Bin!


A Video of Rusty just before we took the Engine out..Timing is a bit out to say the least
Flame running badly video
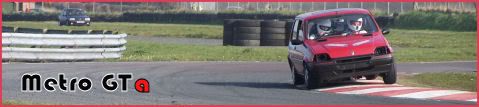
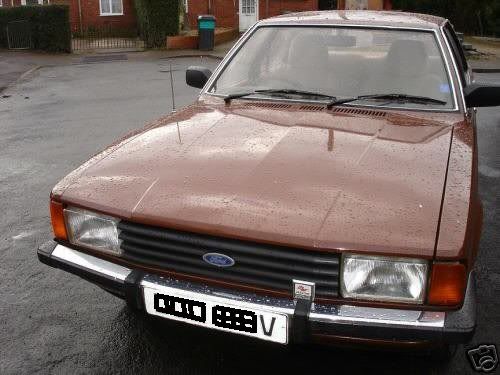
How Rusty used to look, pic from a previous Owner
www.miniresource.com/forums/index.p...=post&id=131149
Next the Subframes were Sandblasted


Then the Subframes were Powder Coated by Sperrin Metals Draperstown.


But theres 1 or 2 small things that will need touched up and smothered in Laquer

A few more pics of the Painted shell. Shows the true colour a bit better.
D.P (my brother) Cooper sport just in the background of some of the pics.


This is my new workspace until we get a proper workbench.

Sealing up the hubs for powdercoating

All Done

One radius Arm partly done

Various bolts etc to cover all the bearings/pins

Ready to Go

Then the fun really started. Ordering parts for the rear Subframe, along with a few bits that came as parts of kits for the front subframe.
Heavy Duty Adjustable Tie Bars
1.5deg Negative camber Lower Arms
Race Grade Bushings to cope with different suspension Geometry
Adjustable Rear Camber Brackets
Alloy Handbrake Quadrants (KAD)
Wheel Stud

New Hi-los with grease nipples
Rubber Cones
KYB Gas ajust Dampers
Rear wheel Bearings
SuperFins- A modified rear drum with extra cooling- Plus it looks the Nuts


Really pleased with these, not only do superfins look class, two of them really do weighless than one standard drum!


Hubs and Radius Arms done


Hubs look a lighter shade- just the Flash

Had it basically completely built but we've reversed alot of the work in favour of taking bits of and making them shiney :lol:
The effect isnt really noticable in this pic but ones been done throughly with Iron wool and some Brasso. There was like a cutting fluid from when they are machined and with much rubbing this comes off and give them a brilliant shine!

Much searching for brake ends and Fyfes came up trumps having plenty of Imperial ones in stock and dropped them round to work. Brake pipes polished with Iron wool

'Attention to detail' dad says, carefully splitting the split pin nicely! :lol:

KAD Handbrake quadrants...

...And Goodridge braided brake hoses

This came from a brown corroded mess of a brake union to this, again with Iron Wool!

The Best brake pipe flaring tool ive ever used- borrowed it from Work, some jobbie from Toyota. Makes brilliant ends!

Polished the trumpets like the Hi-Lo bars- Please don't ask why the cone is stuck to the trumpet :lol:


Got the old steels sandblasted and powder coated and they look the Bizz! Really pleased with them- Id drive proudly on them if I had to.


Cleaned up the Old tyres and got them fitted


When I said I was using Negative Camber arms I wasnt expecting this much :lol:

Hopefully have it on wheels for real before the end of the Year!


Sorry about some of the pics being slightly blurred, the aforementioned camera problem needs to be sorted soon!
Also I cant take all the credit here, Dad has buitl a big part of this Subframe- Most of it without me knowing :lol: Getting phone calls at crazy hours asking where such and such is and me returning home to find it half built :lol: So, Thanks Dad!
Bought....


And Made..


...Those Shine like Polished/Chrome!
Fitted a front to rear brake pipe but I'm going to buy a proper pipe bender, I hear they arent too dear, to do the job properly!
Need to fit the battery cable (as its in the boot in Minis for those of you that don't know) and petrol pipe aswell before the rear subframe can go in.
After that when funds permit but likely before the end of the year I will buy all the parts to build the front Subframe and fit it aswell, probably before the end of the year aswell.
Also I have to shell back up on the Jig again so I could turn the shell on its side to fit the brake pipe easier. Scary putting it on, havent been that afraid in a long time!
I maby already mentioned but ive dug out the Video camera and I'm keeping clips of video of the build as it goes along so there will be a video at the end of it all
Current State


So this is the progress so far in the project. Sorry about the size of pics. I have them that size for another forum I use, they’ll be bigger in future. I’ll have the back subframe finished tomorrow all being well.
Sorry if theres any comments that make no sense, I copied the links from previous posts on other sites I use.
I’ll give a brief idea of my Plans.
Exterior: Mk1 grille, Grp5 Works Arches, 10X6.5” Split Rims
Engine; Big! not too sure yet, Plans keep changing!
Suspension: Negative Camber front & Rear, KYB Gas-Adjusts etc
Interior: Nicely Trimmed, Bucket Seats, Multipoint Rollca99
Heres how its gone so far.
The underside of the boot
The inner wing: You can see where the outline for where we will cut and mesh for the sidemounted radiator
Bulkhead
Grrrrr!

Pretty Pleased to say the least!
Then got it Sprayed before Christmas at Lloyd Cooke Motors in Drumahoe.
Then I bought the Donor Mini...an Austin Mini Flame Red..Standard 998 with a stage 1 Kit. Fairly rotten but not the worst ive seen!
The headlining had a surprising amount of water trapped in it causing this!
As you see it there...With rear seat cousin on the crossmember....thats how I drove it! Head level with dash was great! Wind and rust in my hair...
Then cut the wings off
What do I do next?

Colouring in my Haynes
Flame chatting with buddies before Death
Everything now is split into 5 or 6 of those big boxes all labelled in bags
General Rule....If you see rust don't let me poke at it!
I poke this later and now I can get two hands in it
Lookie at the filler!
Not too clear but these are the wheel arches where door mounts to before I poked them with my magic screwdriver
Thats how much choke was needed to keep her going! And theres the can of brake cleaner needed to start her!
Representing!
First Night in the garage and Hes wet himself already!
Waiting outside overnight to have his front battered off for engine removal
Next Morning....Draining Rad
Cruel to be kind....Battered inner wings for easier acces to radiator hose
New Wheels
The source of the 'Power'
Engine out of the subframe
A little more poking and it got worse
Russsty
OOooooOooooOoo
Brutal...But it made getting at the subframe bolts easier...Had to use shifter because we were 1 socket size too small
Welding like bird poo
And yes it is lying on its roof!
Unofficially the funeral service for the flame
Last Few
A true Min Bin!
A Video of Rusty just before we took the Engine out..Timing is a bit out to say the least
Flame running badly video
How Rusty used to look, pic from a previous Owner
www.miniresource.com/forums/index.p...=post&id=131149
Next the Subframes were Sandblasted
Then the Subframes were Powder Coated by Sperrin Metals Draperstown.
But theres 1 or 2 small things that will need touched up and smothered in Laquer
A few more pics of the Painted shell. Shows the true colour a bit better.
D.P (my brother) Cooper sport just in the background of some of the pics.
This is my new workspace until we get a proper workbench.
Sealing up the hubs for powdercoating
All Done
One radius Arm partly done
Various bolts etc to cover all the bearings/pins
Ready to Go
Then the fun really started. Ordering parts for the rear Subframe, along with a few bits that came as parts of kits for the front subframe.
Heavy Duty Adjustable Tie Bars
1.5deg Negative camber Lower Arms
Race Grade Bushings to cope with different suspension Geometry
Adjustable Rear Camber Brackets
Alloy Handbrake Quadrants (KAD)
Wheel Stud
New Hi-los with grease nipples
Rubber Cones
KYB Gas ajust Dampers
Rear wheel Bearings
SuperFins- A modified rear drum with extra cooling- Plus it looks the Nuts
Really pleased with these, not only do superfins look class, two of them really do weighless than one standard drum!
Hubs and Radius Arms done
Hubs look a lighter shade- just the Flash
Had it basically completely built but we've reversed alot of the work in favour of taking bits of and making them shiney :lol:
The effect isnt really noticable in this pic but ones been done throughly with Iron wool and some Brasso. There was like a cutting fluid from when they are machined and with much rubbing this comes off and give them a brilliant shine!
Much searching for brake ends and Fyfes came up trumps having plenty of Imperial ones in stock and dropped them round to work. Brake pipes polished with Iron wool
'Attention to detail' dad says, carefully splitting the split pin nicely! :lol:
KAD Handbrake quadrants...
...And Goodridge braided brake hoses
This came from a brown corroded mess of a brake union to this, again with Iron Wool!
The Best brake pipe flaring tool ive ever used- borrowed it from Work, some jobbie from Toyota. Makes brilliant ends!
Polished the trumpets like the Hi-Lo bars- Please don't ask why the cone is stuck to the trumpet :lol:
Got the old steels sandblasted and powder coated and they look the Bizz! Really pleased with them- Id drive proudly on them if I had to.
Cleaned up the Old tyres and got them fitted
When I said I was using Negative Camber arms I wasnt expecting this much :lol:
Hopefully have it on wheels for real before the end of the Year!
Sorry about some of the pics being slightly blurred, the aforementioned camera problem needs to be sorted soon!
Also I cant take all the credit here, Dad has buitl a big part of this Subframe- Most of it without me knowing :lol: Getting phone calls at crazy hours asking where such and such is and me returning home to find it half built :lol: So, Thanks Dad!
Bought....
And Made..
...Those Shine like Polished/Chrome!
Fitted a front to rear brake pipe but I'm going to buy a proper pipe bender, I hear they arent too dear, to do the job properly!
Need to fit the battery cable (as its in the boot in Minis for those of you that don't know) and petrol pipe aswell before the rear subframe can go in.
After that when funds permit but likely before the end of the year I will buy all the parts to build the front Subframe and fit it aswell, probably before the end of the year aswell.
Also I have to shell back up on the Jig again so I could turn the shell on its side to fit the brake pipe easier. Scary putting it on, havent been that afraid in a long time!
I maby already mentioned but ive dug out the Video camera and I'm keeping clips of video of the build as it goes along so there will be a video at the end of it all
Current State
So this is the progress so far in the project. Sorry about the size of pics. I have them that size for another forum I use, they’ll be bigger in future. I’ll have the back subframe finished tomorrow all being well.
Sorry if theres any comments that make no sense, I copied the links from previous posts on other sites I use.
I’ll give a brief idea of my Plans.
Exterior: Mk1 grille, Grp5 Works Arches, 10X6.5” Split Rims
Engine; Big! not too sure yet, Plans keep changing!
Suspension: Negative Camber front & Rear, KYB Gas-Adjusts etc
Interior: Nicely Trimmed, Bucket Seats, Multipoint Rollca99


 )
)


 [*]
[*] [*]
[*]