|
|
|
Sept 29, 2010 19:44:13 GMT
|
|
Please don't say thats how your leaving the roof.
I love the chop and its the perfect hight now but the centre extention and rear looks horrible. I don't mean to sound like a dick and condecending but if it was me id cut that bit back out and re-do it. Its a really good attempt though.
please don't take offence, just a bit criticism.
|
| |
|
|
|
|
|
|
|
Sept 29, 2010 20:09:09 GMT
|
|
What's wrong with the back bit? I can see the dip in the roof that needs fixing (but it's a work in progress, so I saw no point mentioning it) but I can't see what's up with the back of the roof.
|
| |
|
|
|
|
|
Sept 29, 2010 21:03:48 GMT
|
 You can still see what looks like bodyfiller, from where its been welded and around the window, granted, that part may have just been sprayed for the effect of how it will look when complete. I still think the dip in the roof and joining piece is too much work to just beat out/body fill than to cut it out and redo that piece. |
| |
Last Edit: Sept 29, 2010 21:07:23 GMT by kevbarlas
|
|
|
|
|
Sept 29, 2010 21:56:57 GMT
|
|
OK, firstly thats for the comments guys but just a quick explination of things.
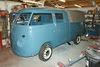
The metal insert across the roof is being removed and redone. I followed / praticed the slow cool weld technic but for some reason the roof has warped dramaticly, no pannel beating will solve this so I'll just try again.
Also in reagrds to the rear corners / window, No filler has yet been applied that just weld and a quick grind back ready to have filler applied, duties indoors stopped play so the paint was added to protect the metal until I could return to it.
plus it gave me a chance to test out my new / first spray gun and learn how to use before tackeling the task of painting the whole car!
More than happy to recieve comment's and advice both positive and negative and thoughs on how to go about things. I've not exactly done this before so it's quite a learning curve! slow and thought out is the way but advice and comments always welcome.
|
| |
|
|
Davenger
Club Retro Rides Member
It's only metal
Posts: 7,272
Club RR Member Number: 140
|
|
Sept 29, 2010 22:12:34 GMT
|
|
I reckon bracing the join with some 1" box section would help keep the warping to a minimum.
Tack the box section into place exactly where you want the roof to be and then weld the new piece over the top
|
| |
|
|
|
|
|
Sept 29, 2010 23:10:47 GMT
|
|
I'm learning by watching here, soaking up information for when I get around to sorting my own out next year. Does seem that one has to clearly label things as 'work in progress' if not finished, the number of times people have made comments about my back bumper and ugly wheels!
But yah, keep it up, shall follow with interest.
|
| |
|
|
eternaloptimist
Posted a lot
 Too many projects, not enough time or space...
Posts: 2,578
|
|
|
|
I've not exactly done this before so it's quite a learning curve! Hat's off to you sir. |
| |
XC70, VW split screen crew cab, Standard Ten
|
|
|
|
|
|
|
|
Its coming along nicely now dude! and the rear end by the window looks 100 times better now there has been some sanding! hopefully i can get some time off next month dude, and we can sort the roof top out to make it hump-free!!
|
| |
|
|
|
|
|
|
|
|
Fair play to you man, that's a brave decision to make but you seem to have pulled it off excellently. Few tweaks now alright but you have the proportions damn near perfect. Hats off to you!
|
| |
Club Retro Rides Member
|
|
|
|
|
|
|
Roy, you not keen on the Webasto roof idea? I told you that there would be a huge problem trying to get that join looking good.  |
| |
|
|
|
|
|
|
|
|
|
|
I was keen on the web roof but I suddenly realised how many chopped cars have them stuffed in to hide bad fitment and gap joins?? I reckon having a go at getting the roof right now is worth the extra hassel, if in 12months it's still not right then I'll put a webasto in.
Oh and just to advise people, when sanding a large flat surface and trying to keep everything running sweet, a belt sander works wonders! I'll get some fresh pics tonight.
|
| |
|
|
|
|
|
Oct 21, 2010 20:40:27 GMT
|
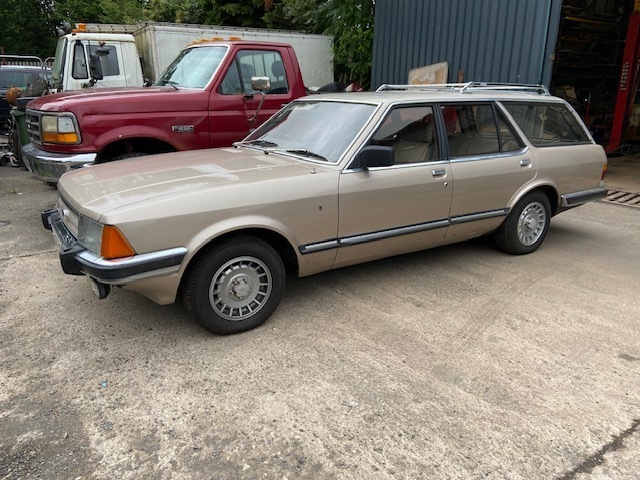
well, time for a bit of an update. It's been eventful few weeks. I said I was going to get pics of the revised roof but I continued to work on the roof to ensure it looks better by the time you see it. It's still no finished, but it's getting closer. then Phonexescort rang and a Journey was made to south coventry and collection of the replacement engine was undertaken. That was an intresting day. safely back at home afterwards the engine was slung in to esure it fitted and it does. Mount are next to be constructed! but for now (mobile internet connect working) pics should be here - - - First few pics show the sanded / skimmed roof the filler is only a few mm in places to take out the last of the imperfections. I'm happy with the rear now and a bit more fettleing should see the join section to a level where I'm happy it'll sit neat.     And this is the cosen power plant. 6cylinders like the original, 2.5l like the original, autobox similar to the original but BMW reliability to provide me with some good daily drive ability.    Next stop, engine mount and then removal of the body to construct the full running gear setup (Dez I'll be intouch soon) Oh and engine mounts need to look a bit like this but not made of cardboard, will take me neatly back to the standard mounts and I'll just be using some very thin rubbers,  EDIT:Stuip slow connection. . . finally got them pictures loaded, BB @ work, gotta love it! |
| |
|
|
|
|
|
Oct 21, 2010 20:49:54 GMT
|
|
I see no pictures
|
| |
|
|
Chops
Club Retro Rides Member
Don't touch me I've been somewhere
Posts: 454
Club RR Member Number: 36
|
|
Oct 21, 2010 22:54:38 GMT
|
Same here, I got excited about an update but I now feel bereft |
| |
|
|
PhoenixCapri
West Midlands
Posts: 2,684
Club RR Member Number: 91
|
|
|
|
Glad it fits  Sorry about the slightly interesting day, another one of my trying to fit too much into too few hours escapades! Oh and get the bloody photos up |
| |
|
|
|
|
|
|
|
|
Pic's up,
And yes a very intresting day mate. but hey engine with me and you got what you needed as well. Hope your got the engine crane back ok before anyone noticed. . .
|
| |
|
|
PhoenixCapri
West Midlands
Posts: 2,684
Club RR Member Number: 91
|
|
|
|
|
Well no one has said anything about various people hanging around with an engine crane in tow.......
And thats a bloody excelent fit, much better home for it than the Minx was. Nice job on the roof too, looks like its basically there - inspiring me to give body sectioning a go ;D
|
| |
|
|
|
|
|
Oct 22, 2010 16:49:10 GMT
|
|
Definitely looking much improved and, for this sort of work, not as much filler as one might expect. Engine looks lovely too, almost like it was made to fit. Looking forward to the mechanical updates now.
|
| |
|
|
|
|
|
Oct 25, 2010 18:30:52 GMT
|
|
I am building a '53 Daimler Regency MK2 with a drophead (allegedly Bentley) body and Rover V8 and autobox. Not sure how to upload pics.
John
|
| |
|
|
markmodifier
Part of things
if theres a will theres a way
Posts: 10
|
|
Oct 30, 2010 23:37:33 GMT
|
|
hi could you keep me updated on your daimler as you're daimler is the reason why i joined this site i like what your doing but I'm not brave enough to chop mine i have a Daimler db18 1946 not consort i have changed a few things on mine but just subtle things like filling the bumper holes in the wings etc keep up the good work you even had me doubting the original engine and opting for a BMW one too ha ha
|
| |
|
|
|
|


 Sorry about the slightly interesting day, another one of my trying to fit too much into too few hours escapades!