stealthstylz
Club Retro Rides Member
Posts: 14,836
Club RR Member Number: 174
|
|
Mar 29, 2010 22:00:54 GMT
|
Looking good. I like the way you seem to just quietly plod along with The Plan in your head and then reveal utter coolness. I never thought I'd say that about a Vauxhall Carlton ;D Awesome steak hauler. Cheers. I tend to do stuff before asking for others opinions lol. Damn, we must have been thinking along the same lines because my Carlton will shortly be getting a satin black makeover. In my case for no other reason because I need to make it look a little more respectable as i've moving into a shared house where the landlord lives in and I doubt if he'll be too pleased with it's current condition!!! Try and find somewhere to get the Promatic range of spray tins. They're the best rattle cans i've ever used. It took 6 cans of satin and 3 cans of gloss to do mine and they're only about 3 quid a tin. The best place to put intakes is quite often the scuttle under the windscreen, as on many cars it is a negative pressure area. That wouldn't work in the Carlton there isn't a gap under the scuttle panel. looks good in satin black kinda like one of the police cars from robocop ;D though I think I would have gone with some ducting and put the intake in one on the redundant fog light holes or behind an NACA duct in the wing big red round thing don't really jell with the rest of the car . not knocking it though just my opinion on the look The red intake will be modified when I can be bothered. Gonna chop the rim down so it doesn't stick out so far and then paint it black. My old Clio used to really suffer in wet weather with the intake in the fog light hole. Matt |
| |
|
|
|
|
stealthstylz
Club Retro Rides Member
Posts: 14,836
Club RR Member Number: 174
|
|
Apr 20, 2010 12:56:11 GMT
|
Been hugely busy at work so not got much done to this. First lunch time mod was to file the holes in the wings out to fit Clio side repeaters. A quick splash of satin black and they look much better 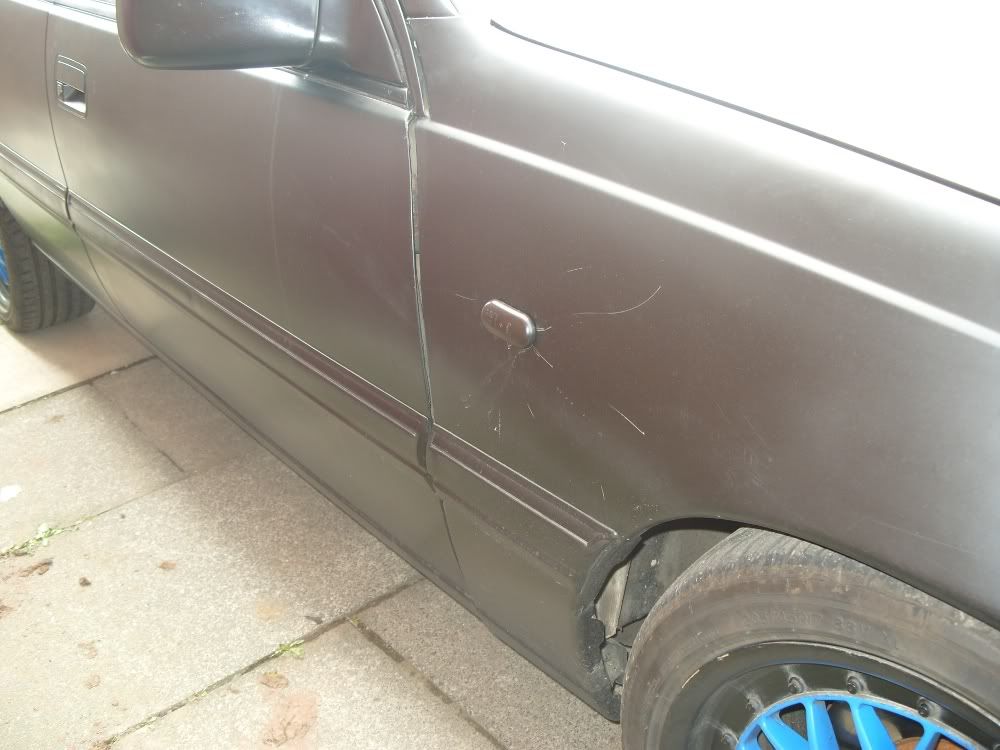 Then i've been busy buffing the roof up. Another couple of goes and i'll have nailed it I think. Not bad for cheap rattle cans. 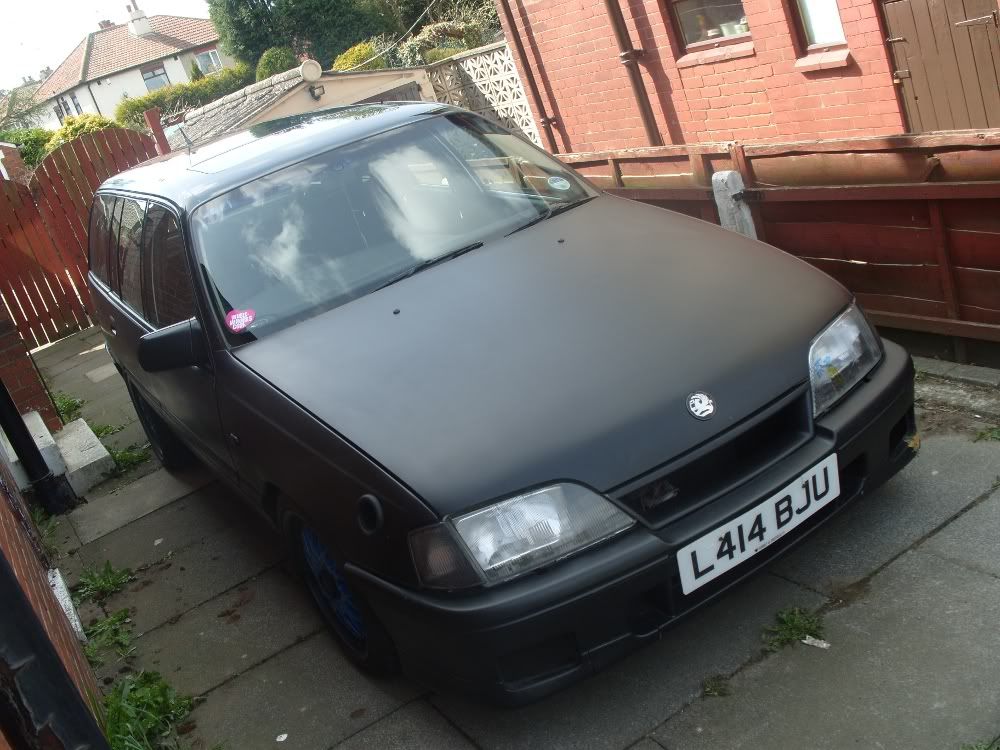 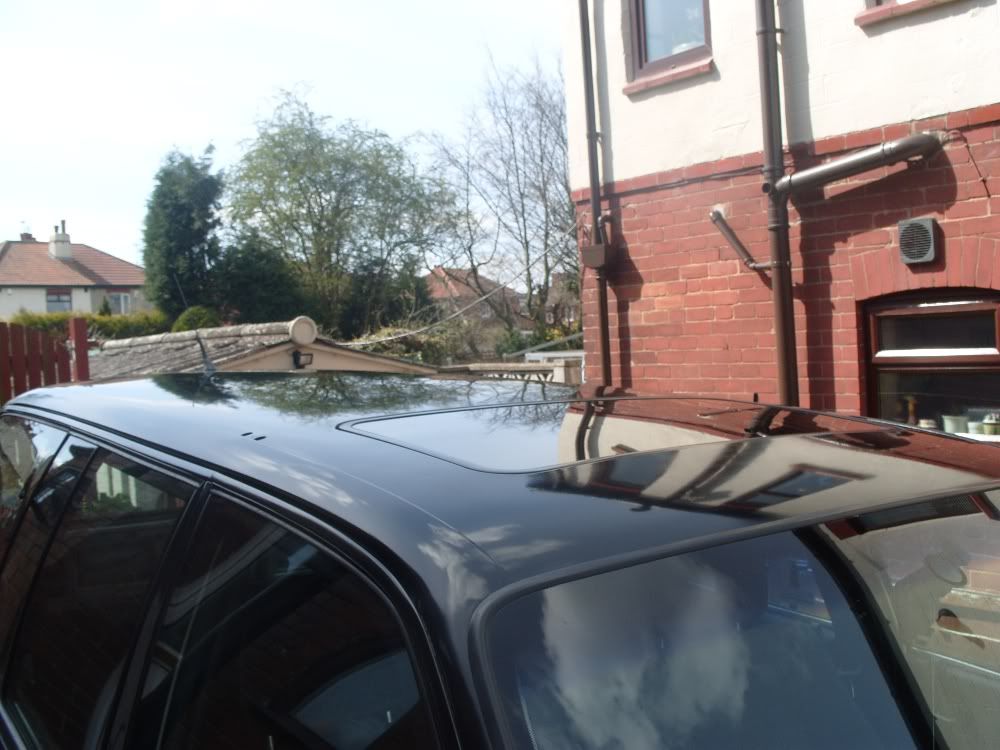 Then it was time to chop out some grot. 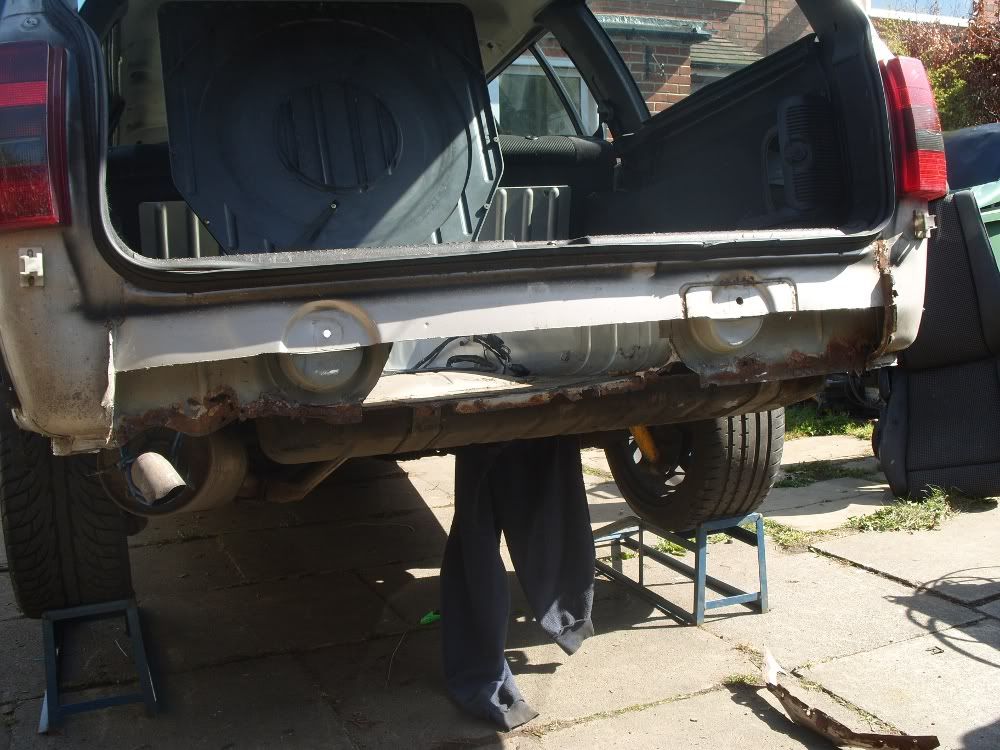 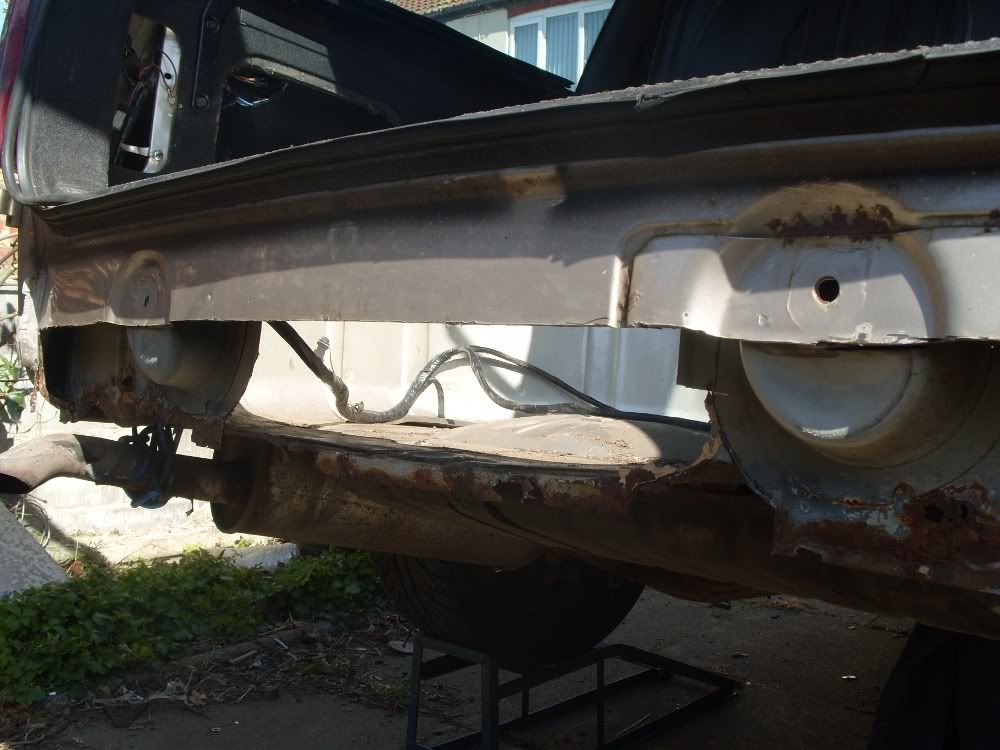 It may seem a lot of metal removed, but there is a plan to this, involving this  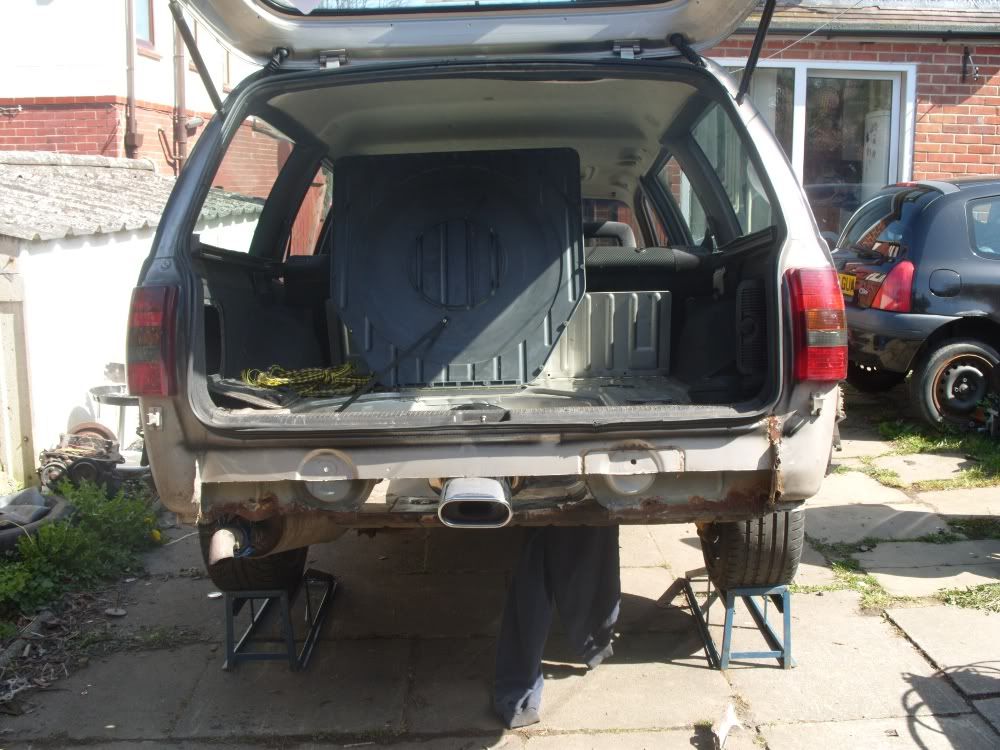 The spare wheel well will be going completely and a new smaller fuel tank fabbed and tucked away. Hopefully will be getting hold of a GSi 24v donor car this week too  Matt |
| |
|
|
stealthstylz
Club Retro Rides Member
Posts: 14,836
Club RR Member Number: 174
|
|
|
|
Dropped the back down a bit by cutting the springs. Had to do a bit of fab work to do it as Carltons run pig tails. I found some old spring cups in the scrap pile (off E30 325i front struts I think) which were nearly the right size. A bit of hammering later and they were the right size. I then cut the bottom off the springs and ground the end flat. By unbolting the rear shocker, I could then put the spring in the cup on top of the trailing arm, then jack the hub up till the spring was located at the top. I then put the spring cup at the right angle, hit it with the melty stick and welded a couple of strengtheners in. Results  77 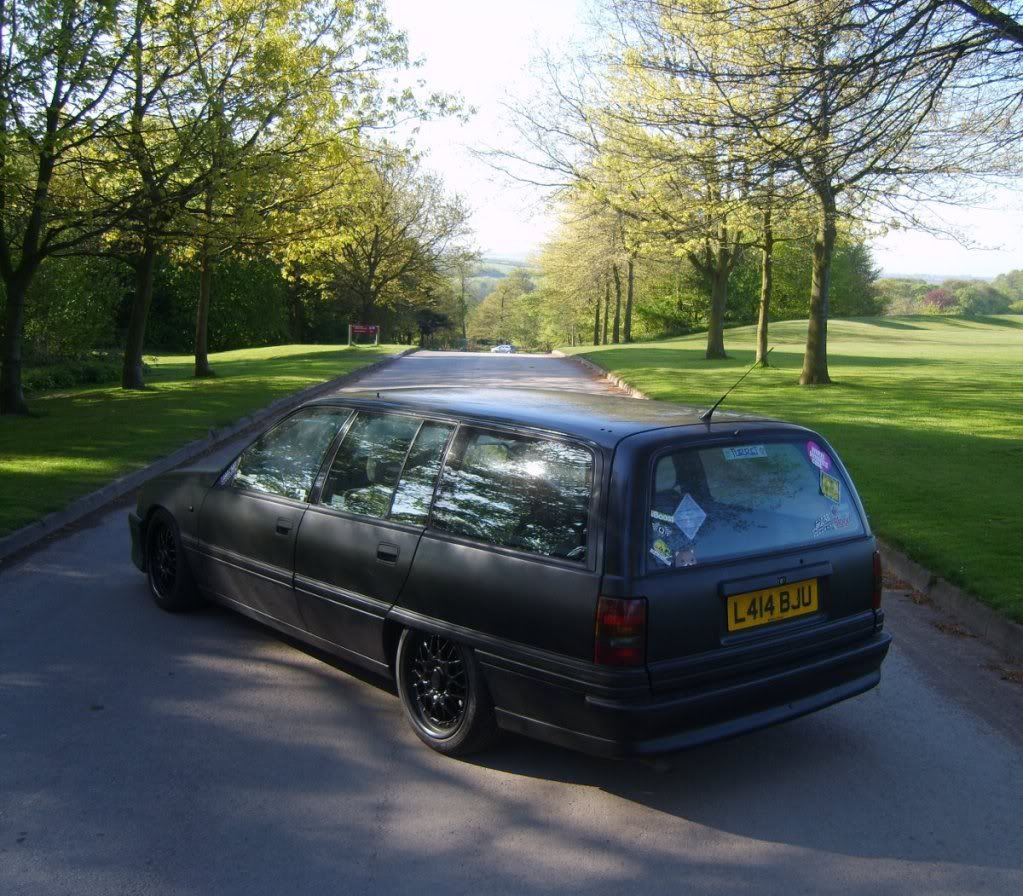 The stance is fail at the front as i'm waiting on some 205/40s so I can drop it down. It's not  dragging there's still 1/2" of rake to the front it just looks heavy.  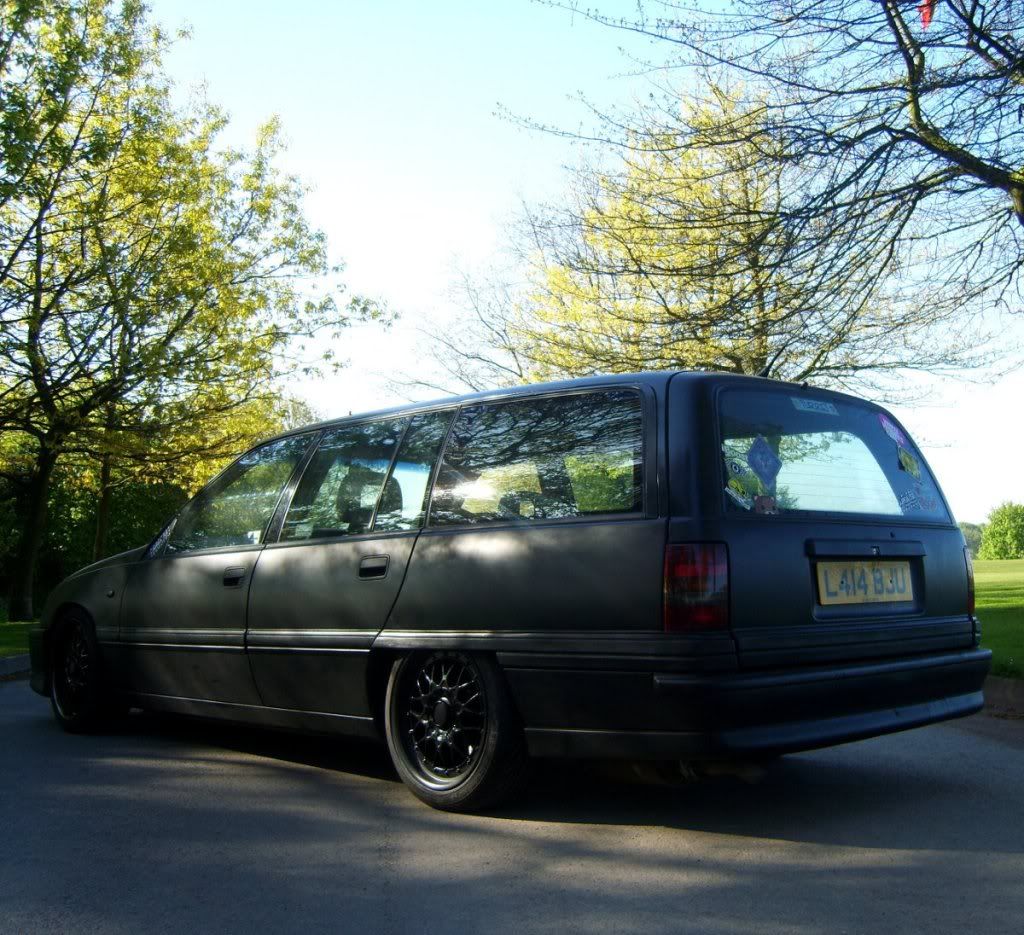   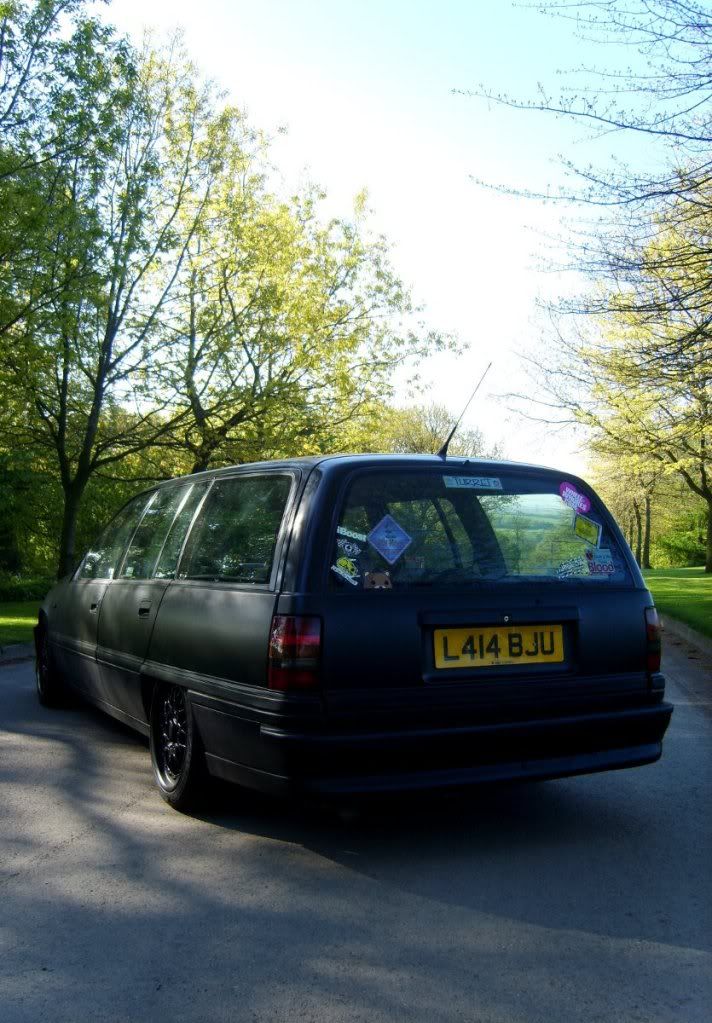 Matt |
| |
|
|
Chris™
Part of things
 This is clearly filler material.
Posts: 519
|
|
May 11, 2010 11:52:36 GMT
|
|
The tuck at the back is pure awesomes, like what you've done with it so far ;D
|
| |
1989 Volvo 340
1986 Suzuki SJ413
2000 BMW 318ti
2006 Lexus IS250
|
|
street
Posted a lot
6.2 ft/lbs of talk
Posts: 4,662
|
|
May 11, 2010 12:43:21 GMT
|
Nice work! Loving the lowering job, looks damn cool! Mad exhaust idea! Love it! The back box will be nicely tucked up out of harms way too which is always good. Really liking the way this is going  |
| |
|
|
stealthstylz
Club Retro Rides Member
Posts: 14,836
Club RR Member Number: 174
|
|
|
|
Not updated this for ages. The car is now MOT-less and SORN. Don't worry it'll be back bigger and badder, fitted with this 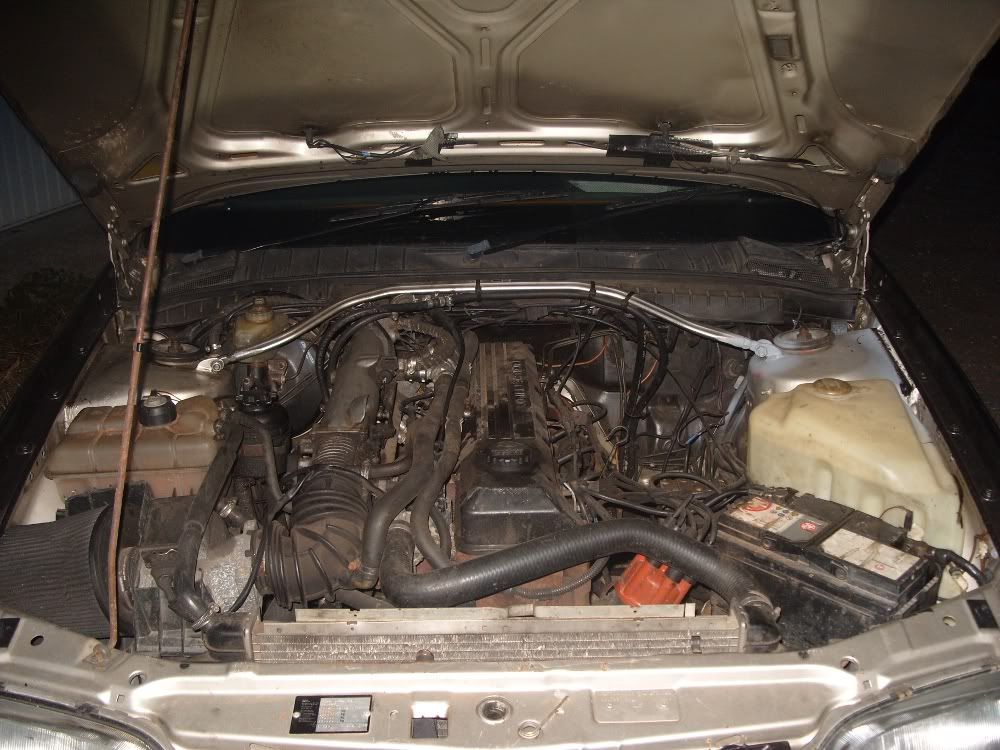 Just got to finish welding another Clio up then I can crack on. Currently gathering parts, got ajustable spax coilovers for the rear which will need a turret welding into the inner arch. I'll then be able to drop the back down for shows and keep it at a similar height to now so my girlfriend doesn't hurt her back getting Maisie in the car seat. I've also started bolting the wheels with the face on the outside of the barrel instead of inside. Gains me a handy 15mm extra offset so I can get more lows. Matt |
| |
|
|
bstardchild
Club Retro Rides Member
Posts: 14,888
Club RR Member Number: 71
|
|
Aug 18, 2010 23:00:45 GMT
|
The spare wheel well will be going completely and a new smaller fuel tank fabbed and tucked away. Matt Please don't throw the old tank away - 16 yr old Carlton Estate tanks fit 25 year old Monzas and are normally a lot (10 years) less rotten ;D |
| |
|
|
|
|
|
Aug 19, 2010 22:59:53 GMT
|
|
Am I right in reading you sprayed this car using just 6 rattle cans?
|
| |
Current retro - 1996 Alfa Romeo GTV / Daily - 2016 Nissan Qashqai
Previous retros - Prelude, Integra, XR2s, XR3s, Orions, CRXs, Sylvia S12, S13, Pulsar, ZX 16v, 205 Gti, MX5, MR2 etc
|
|
stealthstylz
Club Retro Rides Member
Posts: 14,836
Club RR Member Number: 174
|
|
Aug 19, 2010 23:03:59 GMT
|
|
The tank leaks like a sieve i'm afraid which is why i'm replacing it. The satin body took 6 rattle cans then 3 cans of gloss black for the roof.
Matt
|
| |
|
|
stealthstylz
Club Retro Rides Member
Posts: 14,836
Club RR Member Number: 174
|
|
Aug 20, 2010 20:23:19 GMT
|
As soon as I started stripping it the sky went black and it peed it down. Maybe that's a bad sign.  Matt |
| |
|
|
|
|
|
|
|
Aug 20, 2010 20:29:59 GMT
|
|
I gotta say I don't like Vauxhall Carltons Estates...but I do like that one, QAULITY!!
|
| |
Sig pic too big!
83 MK1 Golf 1.3 Driver-sold
83 Mk1 Golf GTI Pirelli-sold
95 BMW 520i Individual-sold
94 BMW 525i Sport-R.I.P
04 Audi A4 1.9TDI 130-55mpg:)
|
|
stealthstylz
Club Retro Rides Member
Posts: 14,836
Club RR Member Number: 174
|
|
Aug 23, 2010 10:47:11 GMT
|
Been dicking around with my camera, think i've got the hang of the manual settings now. 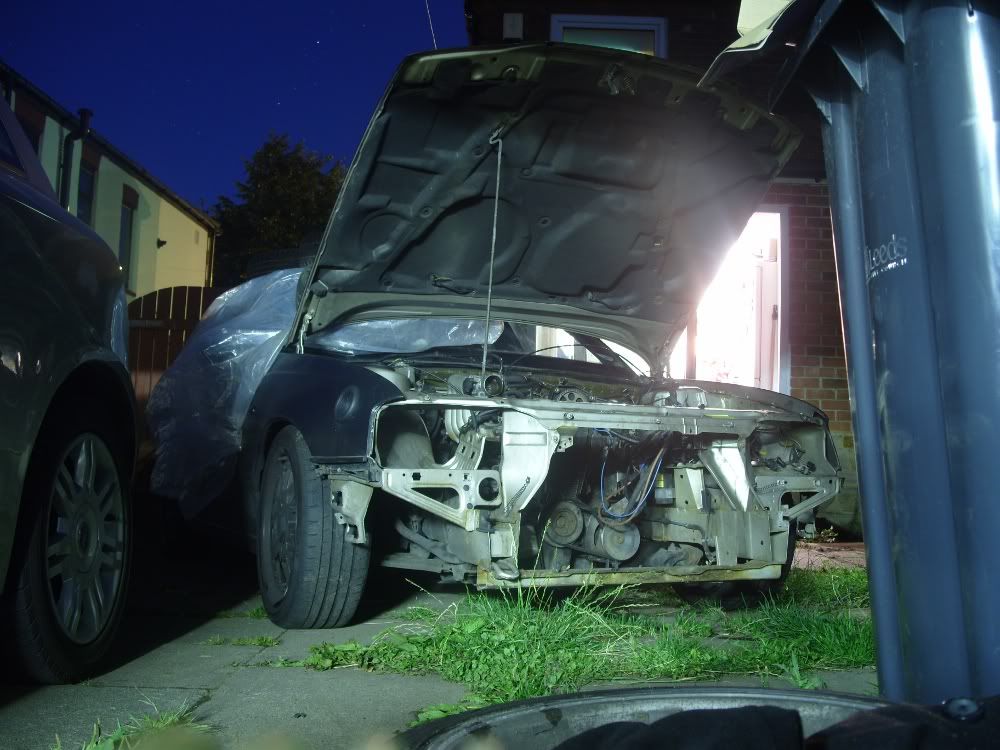  In other news, bolting the wheels reverse face has now made them ET62 instead of ET41. Coupled with the 25mm adaptor that gives me ET37 which is perfect for touring car tuck on the front. Rear will need a 20mm spacer or so to push them out into the arch again. Matt |
| |
|
|
stealthstylz
Club Retro Rides Member
Posts: 14,836
Club RR Member Number: 174
|
|
|
|
Yesterdays Progress Engine bay nearly stripped just servo and the a bit of loom to go. 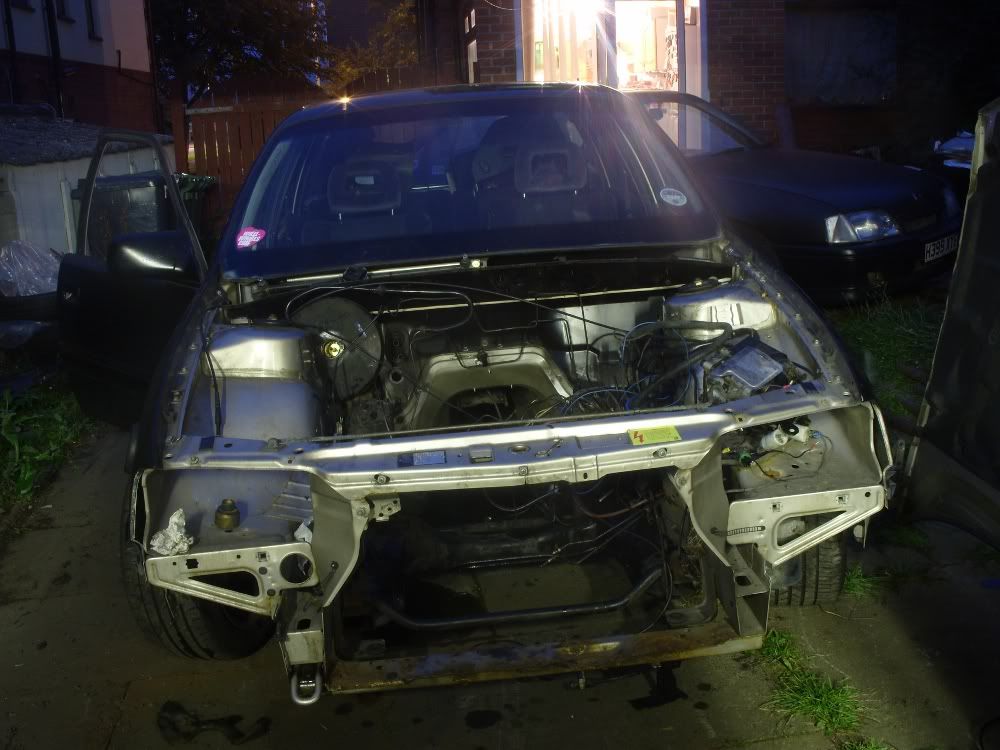 Dash out and loom removed. 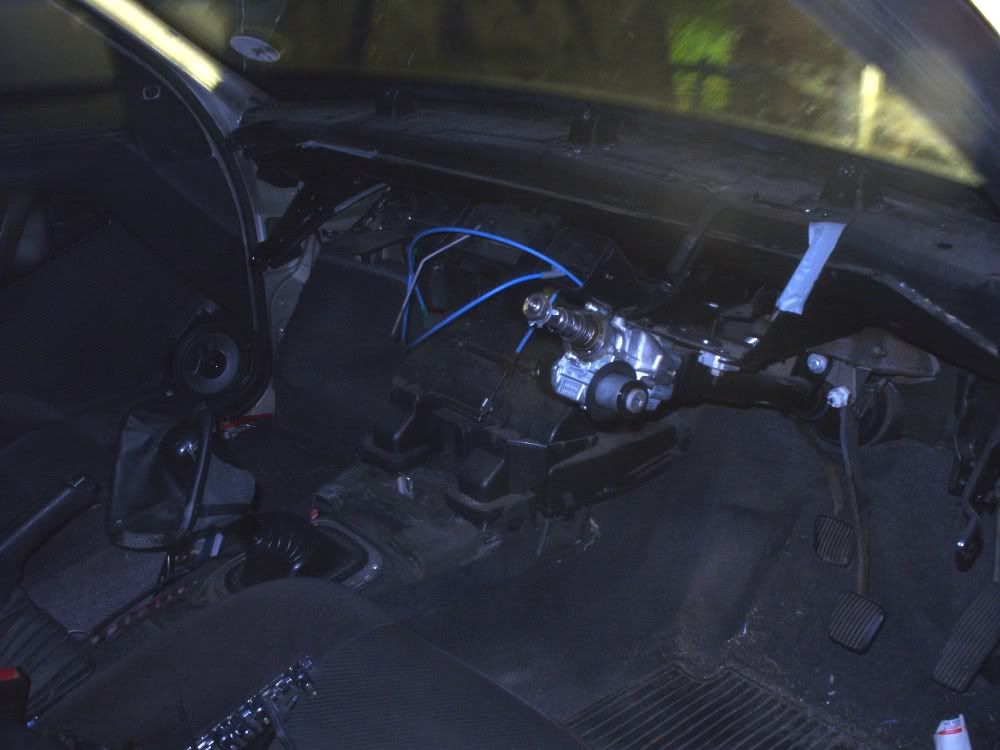 Matt |
| |
|
|
markbognor
South East
 
Posts: 9,968
Club RR Member Number: 56
|
|
Aug 26, 2010 10:29:03 GMT
|
|
Good work Matt.
I was just looking at the pics and it struck me that if you could somehow do away with the quarter windows in the rear doors it would really clean up the side profile.
|
| |
|
|
stealthstylz
Club Retro Rides Member
Posts: 14,836
Club RR Member Number: 174
|
|
Aug 26, 2010 12:22:29 GMT
|
|
Yeah i've thought that too. Would need to have fixed windows then though as they wouldn't wind down. Though there's only really Maisie sits in the back, so maybe could just do it and they'll just wind down a little bit which is enough.
Matt
|
| |
|
|
Colonelk
Posted a lot
Posts: 3,740
Club RR Member Number: 83
|
|
Aug 26, 2010 17:32:47 GMT
|
looking forward to seeing this done  |
| |
|
|
stealthstylz
Club Retro Rides Member
Posts: 14,836
Club RR Member Number: 174
|
|
Aug 26, 2010 21:16:04 GMT
|
Todays Progress Absolutely Bollock S be gone!!!! 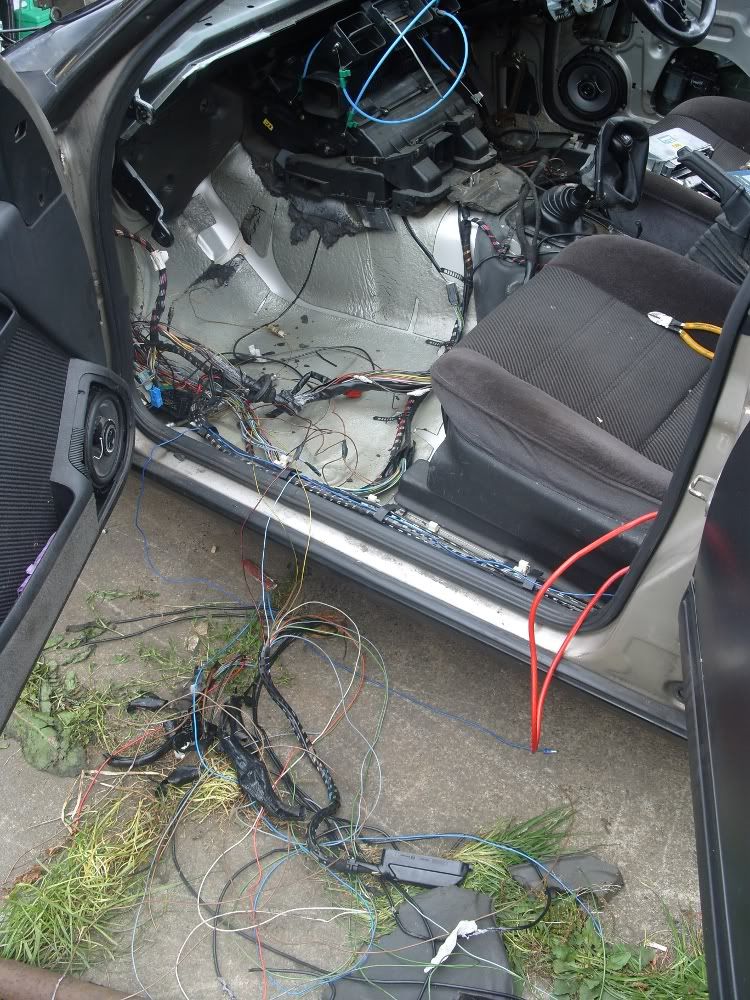 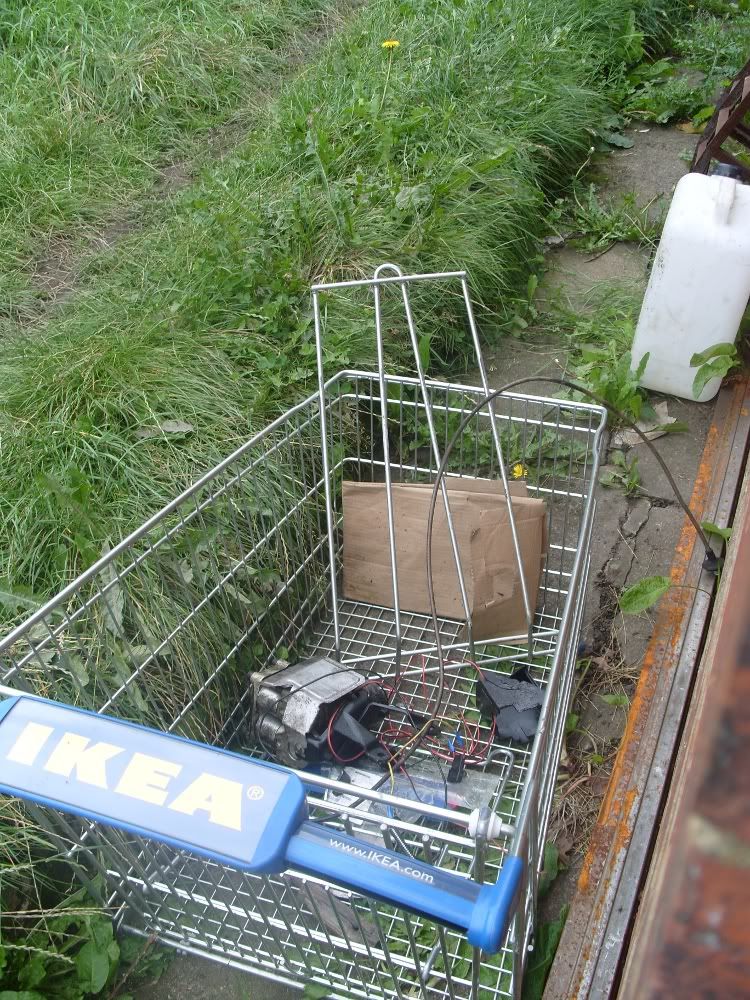 Which left me with this. 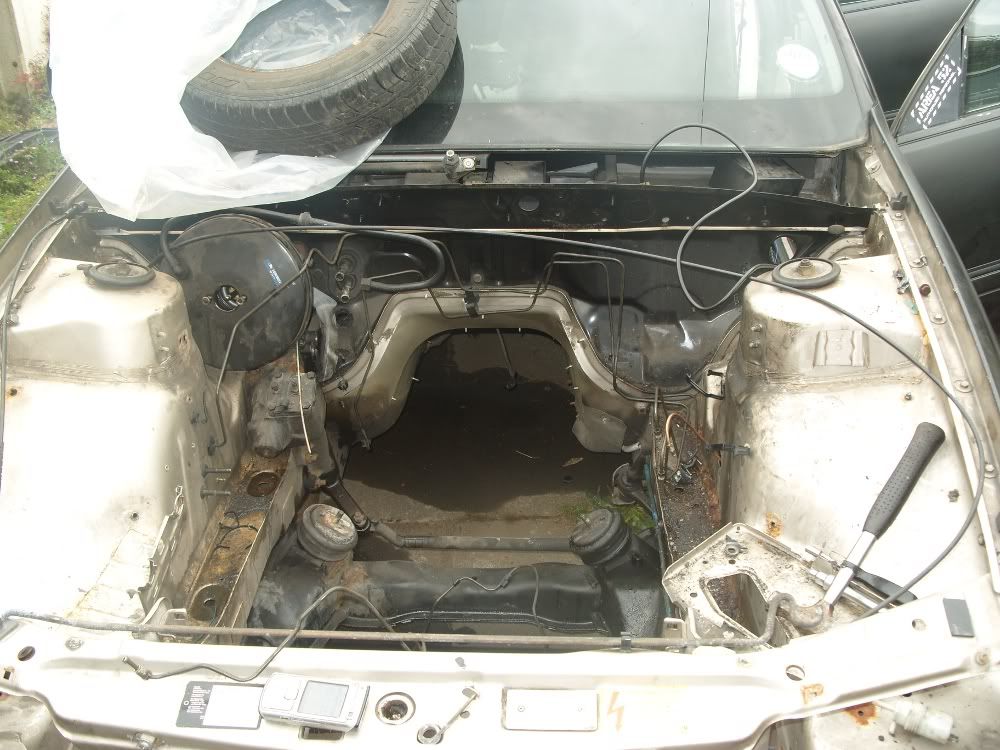 After spending ages faffing around getting the servo unbolted, then removing the steering column and steering box I then had an empty engine bay . Made a start welding all the holes up on the drivers side. Also stitch welded the turret and started cleaning the other seams for the same thing. 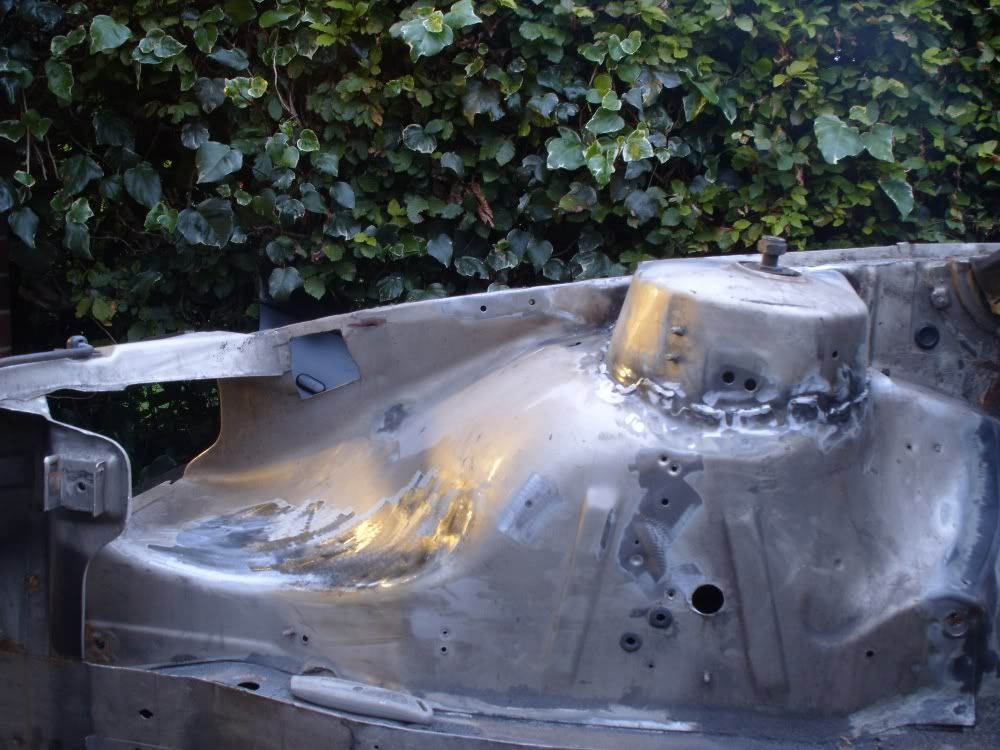 Plan is to fill all the holes, then i'm going to box the gap between the turret and bulkhead in and fit a small header tank in there. I'm also going to box the top of the chassis rail in which will leave a gap to hide the wiring through (where the stanley knife is). 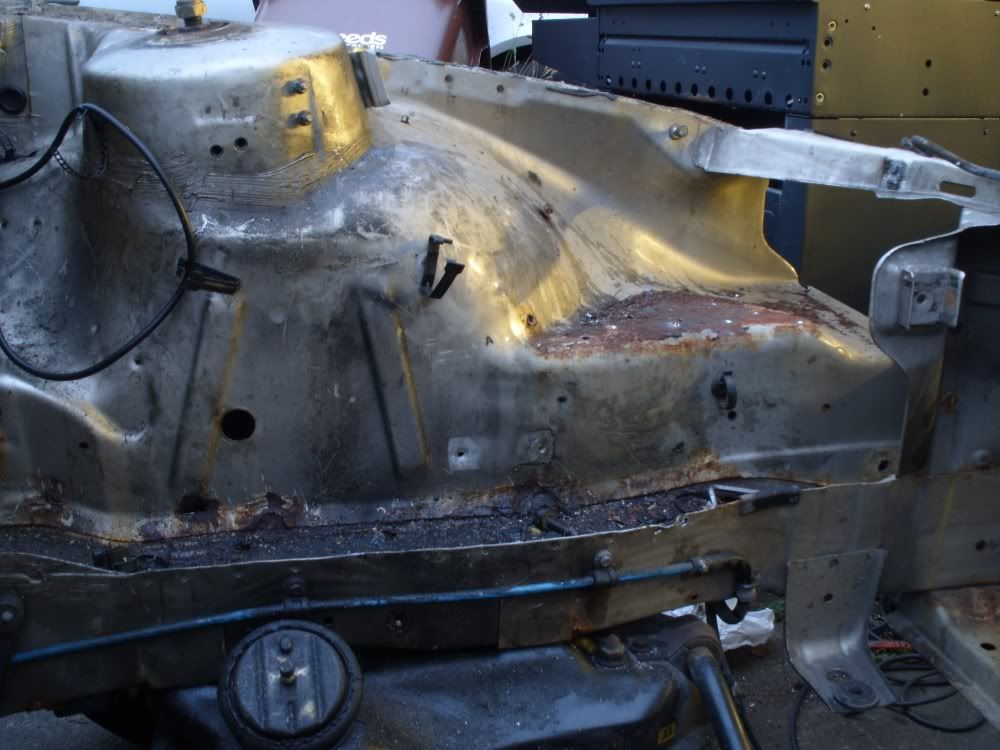 Drivers side is slightly more crusty. I'd advise Carlton/Senator owners to remove the battery tray (drill the spot welds) and check underneath. Mine wasn't painted from the factory and is pretty thin with rust though not actually holed. Looked perfect with the tray in place too. More welding tomorrow, and i've got to drop the front subframe off. Matt |
| |
|
|
Tim
Posted a lot
Posts: 3,340
|
|
Jun 10, 2011 12:06:47 GMT
|
|
Interesting reading
I'm bumming round in one of these whilst I sort the polo out.
Annoyingly (just put a new tank in the polo - well the garage did) its just started weeping petrol, so odds are my tank is shot as well - how hard are they to swap?
Also good to heat that the 2.0 petrol is non-intereference - saves me fretting about the somewhat ambioguous service history!
Diff whine - terminal or just a bit annoying?
|
| |
|
|
|
|
|
Jun 10, 2011 12:43:36 GMT
|
) its just started weeping petrol, so odds are my tank is shot as well - how hard are they to swap? No doubt it's leaking from under one of the retaining straps - they are covered with foam to stop rattles, but it just holds water against the steel of the tank. IIRC, my Dad used a Granville Petro-Patch to seal it up - lasted at least another coupld of years. We did have the fun of draining a full 60 litre tank of petrol into jerry cans through the rust hole though... Petro Patch: www.classicsagogo.co.uk/acatalog/info_UN1263.html |
| |
|
|
stealthstylz
Club Retro Rides Member
Posts: 14,836
Club RR Member Number: 174
|
|
Jun 10, 2011 14:49:55 GMT
|
|
All the tanks leak they're a curse word design. As James said it's usually under the retaining strap, though it can also be from the seam.
Tank swap isn't hard but it isn't easy. There are 4-5 tiny breather tubes on the top, and you don't have enough give to drop the tank on the floor then change them, so you have to prop the tank up on something then shove your hand on top and try to fit them.
Matt
|
| |
|
|
|
|