|
|
|
|
|
|
Nice one. Wonder if you will finish that before I finish my Range-trol
Didn't realise Vitaras had those axle balljoints like rangies do.
|
| |
Last Edit: Nov 15, 2010 1:16:44 GMT by datman
69 Plymouth Fury Convertible
75 Range Rover 2 door
82 Range Rover 4 door
84 Range Rover 4 door
78 Datsun 120Y 2 door
78 Datsun 120Y Coupe
78 Datsun 620 Pickup
81 Datsun Urvan E23
86 Datsun Vanette van
98 Electric Citroen Berlingo
00 Electric Peugeot Partner
02 Electric Citroen Berlingo
76 Honda C50
04 Berlingo Multispace petrol
07 Land Rover 130
15 Nissan E-NV200
15 Fiat Ducato
|
|
|
|
Mark
Club Retro Rides Member
Posts: 2,097
|
|
Nov 15, 2010 13:21:15 GMT
|
|
Ian, fantastic work! I think you need to publish a new theory in your sig though..
(Vitara+rideheight)-bodyshell+(J hatch+Massive wheels)=WIN
|
| |
|
|
|
|
|
Nov 15, 2010 17:09:11 GMT
|
|
Ian, you are amazing .
Great progress.
Continue to enjoy this build.
|
| |
|
|
BiAS
Club Retro Rides Member
 Insert witty comment here
Posts: 2,230
Club RR Member Number: 147
|
|
|
|
datman - who knows, I've scrapped my Xmas deadline now I've realised how much work there is! Mark - theory amended  Grizz - cheers dude, sorry to hear about your recent change of circumstances. Update! Knowing how tight the clearances need to be on the tunnel to get the seats to fit I knew that the Frontera gearbox mount was far too soggy for the job. I also needed to trim the o/s mounting lug from the gearbox as it was in the way of the front prop, so off with the crossmember and mount and out with the grinder to remove this 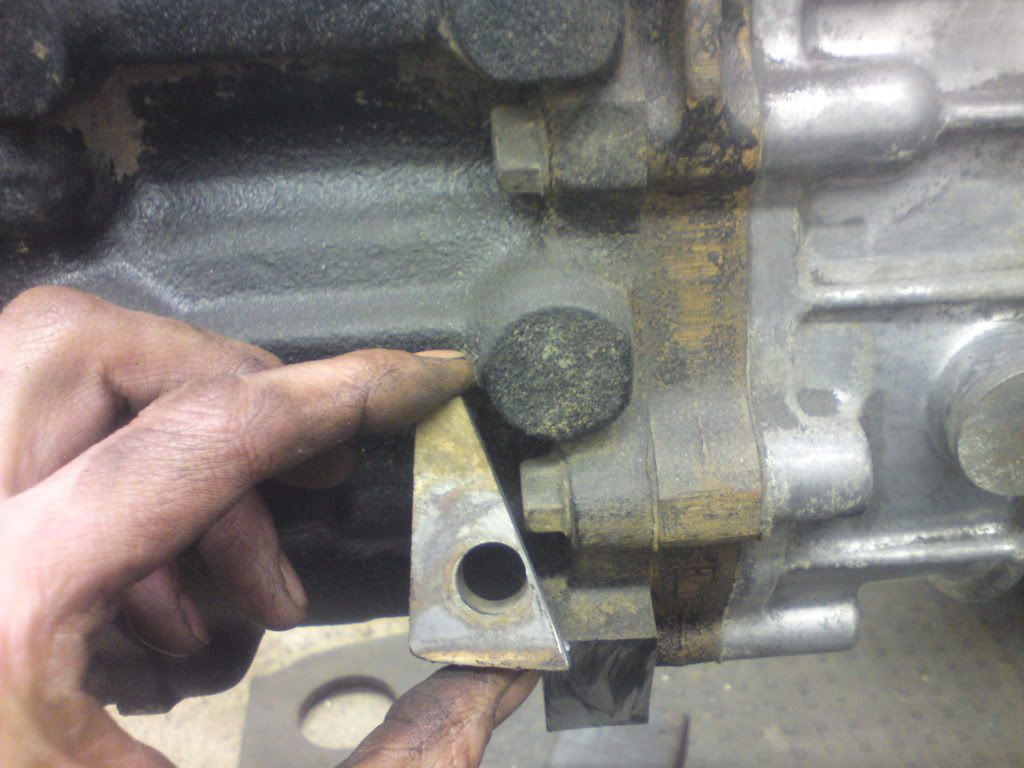 from here 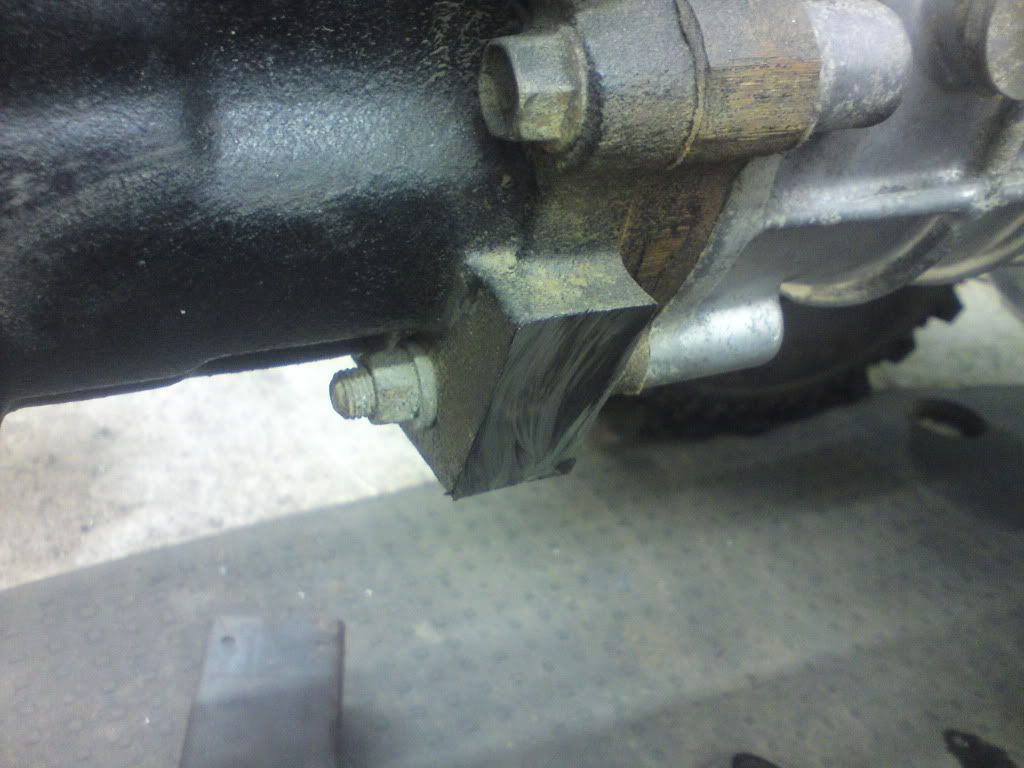 Ideal, then came a bit of playing with the frontera prop, held in position to figure where the cut was going to go. Unfortunately whilst moving the slide joint in and out to find the middle it all kind of fell on the floor, during this my thumbnail caught on the end of the clutch release arm resulting in this  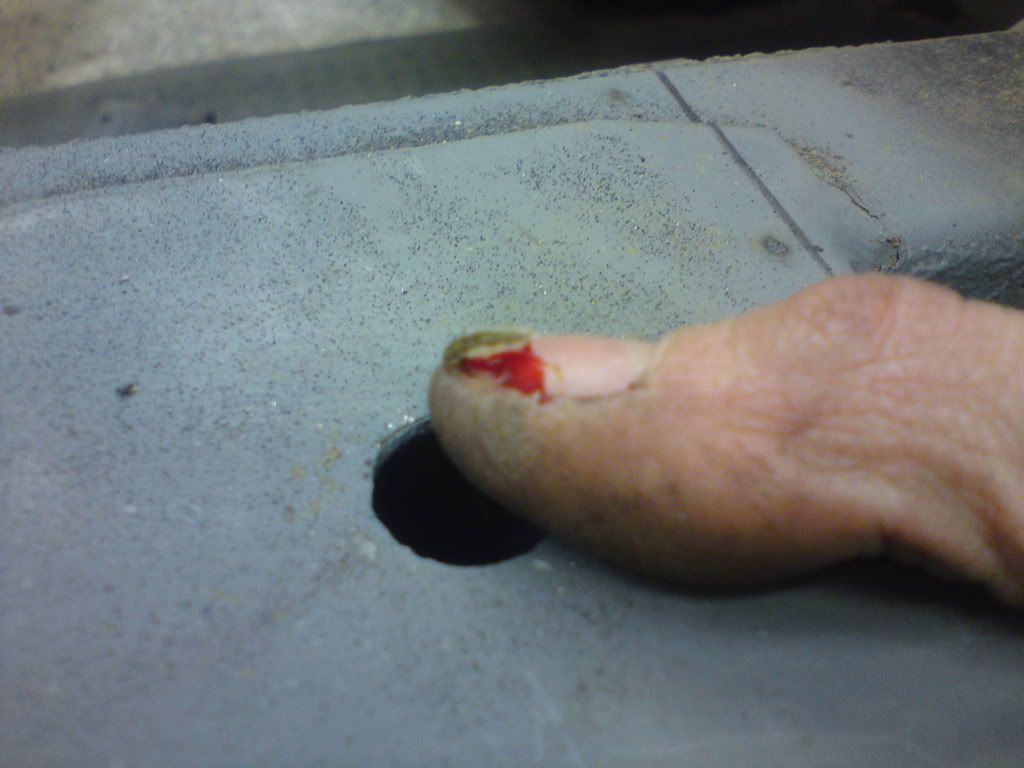 All the bits of sharp/rusty bits of steel I've been playing with and I injure myself on a rounded, powder coated, factory made component  A quick bit of stanley blade self surgery to remove the flap of nail, a trip to the kitchen to wash it out leaves me with this 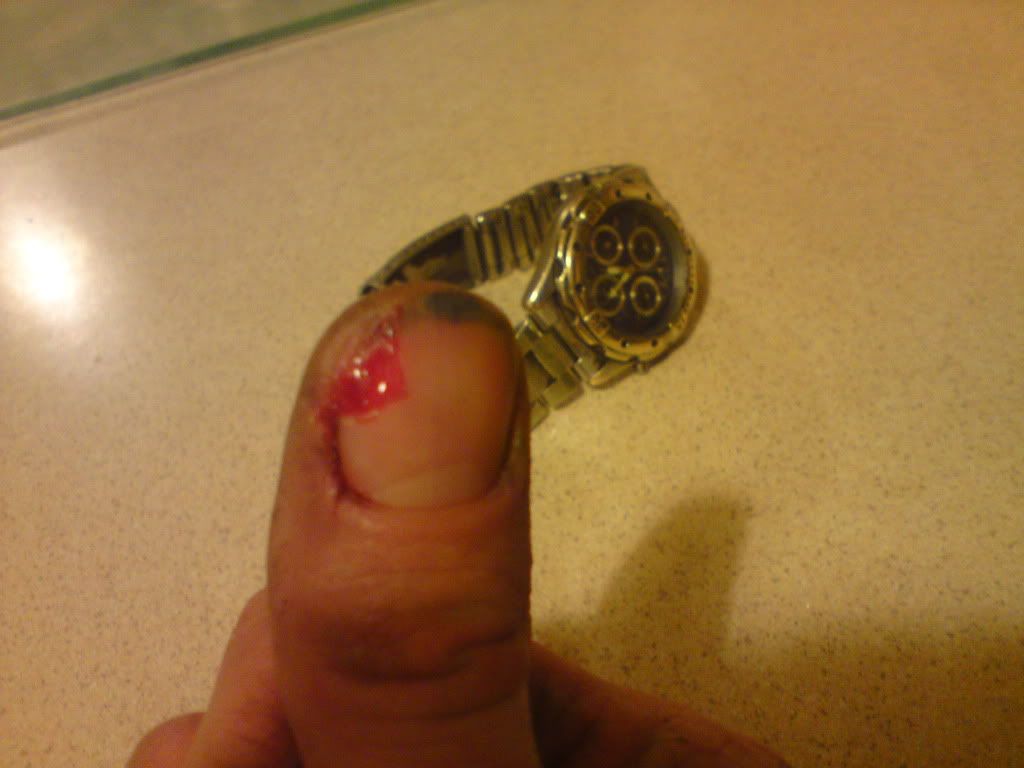 A plaster and some zinc oxide tape and I'm back on it. On the Vitara prop the slide is in the transfer box whereas the Frontera prop has a slide joint at one end, more specifically the bottom end. This is where the join needs to be and I don't trust the welding not to knacker the slide joint. After a quick trial reveals that the prop flanges have the same pcd and centring ridge, turning the prop the other way up, with the slide joint at the top end, looks like a winner. This should also tuck the slide joint up further away from mud. Both props are cut and I try the pushed together hybrid in place to determine the length. It's then that I spot the difference between the two flanges, the transfer box flange has 8mm holes and what was the axle end of the prop has 10mm holes. Mid way through swapping the flanges 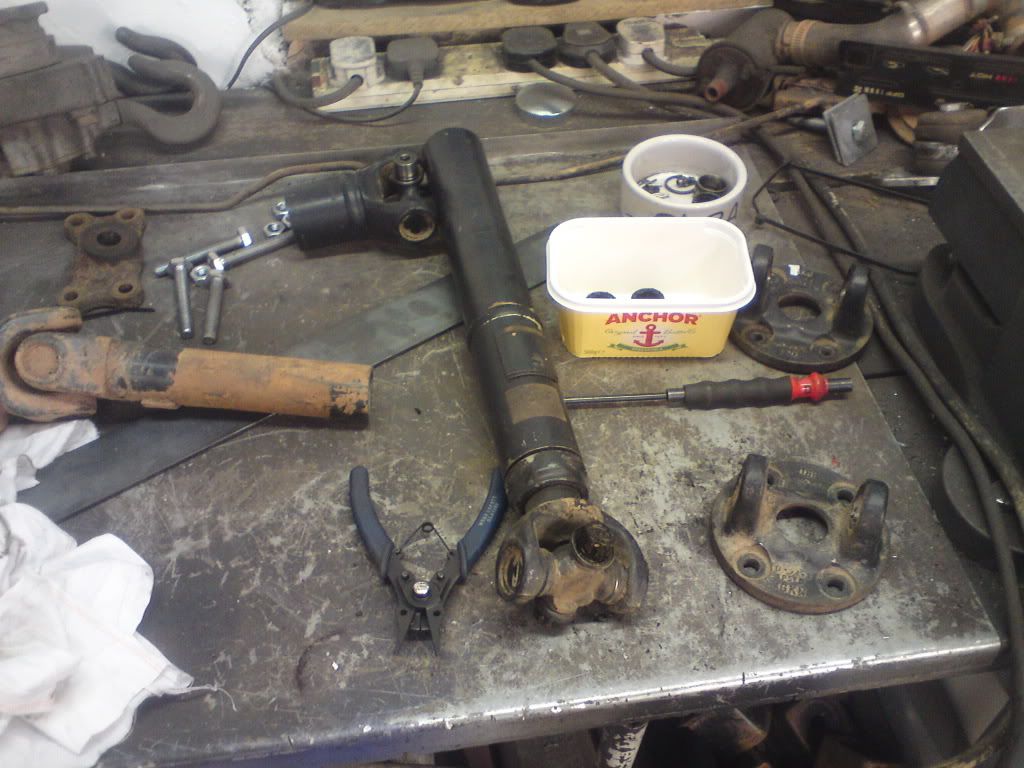 Trial fit  (clutch release arm is no where near as close as this picture makes it look, 40mm or so) 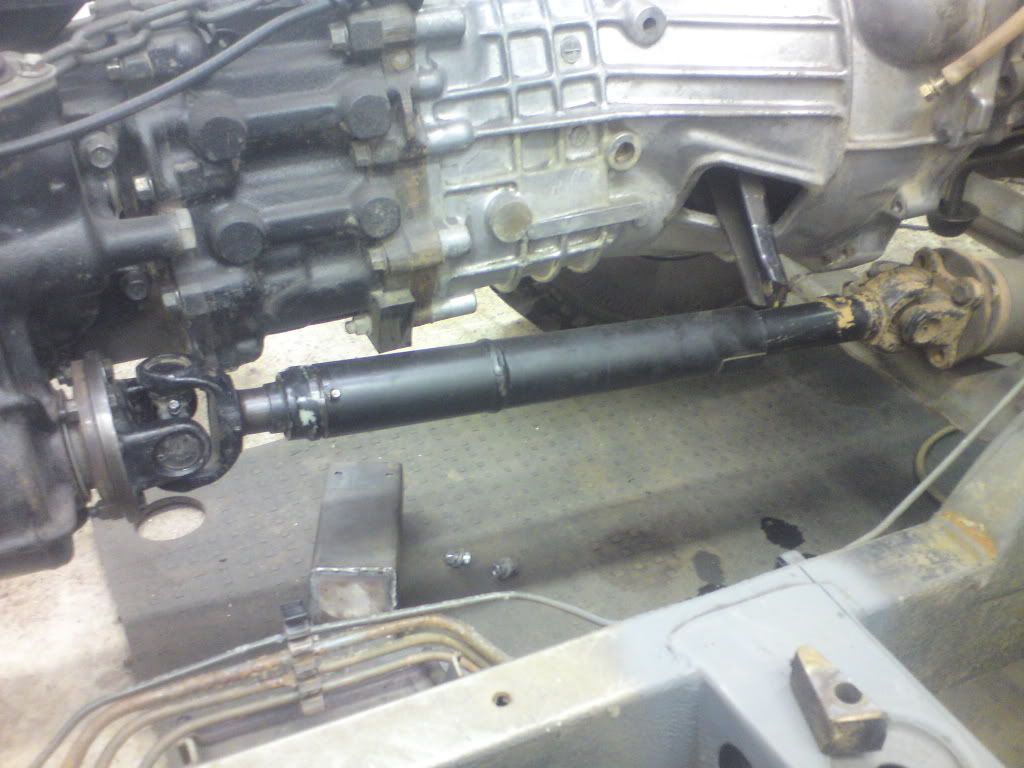 Tonight, having got 24vster to pick me up another of those Range Rover V8 engine mounts (£3.23 inc vat from the main dealer! ) I started trying to figure how I'm going to fit it. Here's what I've got 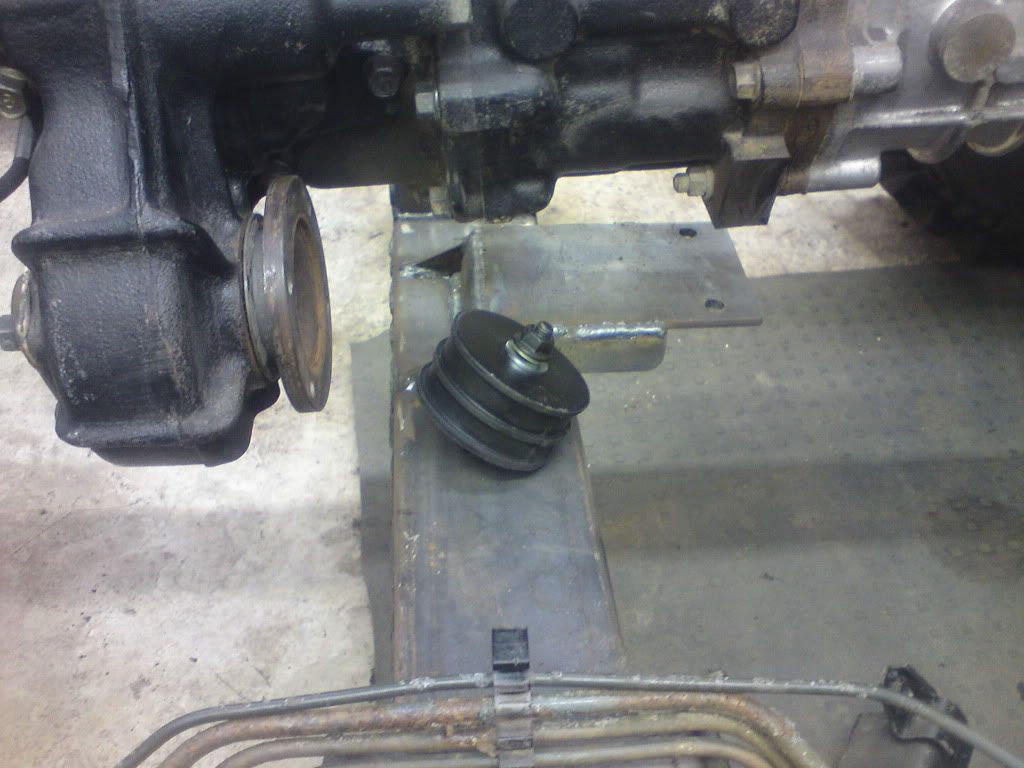 Could've made the gearbox bracket to fit the crossmember (that was made for the Frontera mount) but the more I stared the more I knew that it would bug me if I didn't do this 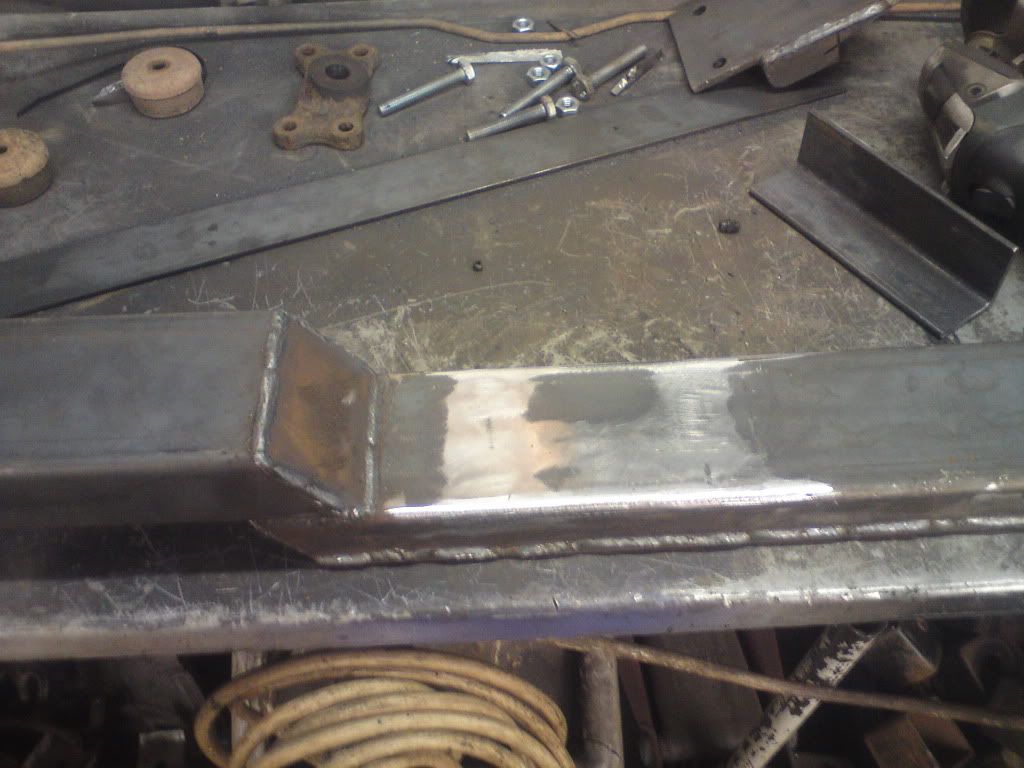 And start from scratch again  After some metal whittling, drilling and welding I've got this  Which bolts in here 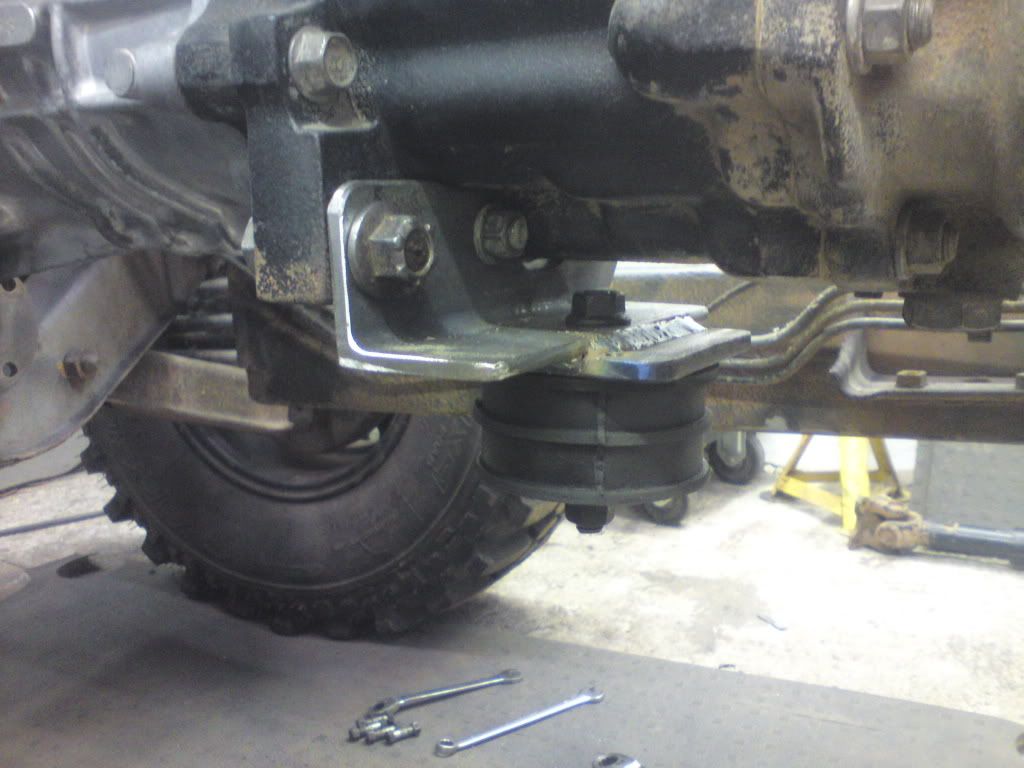 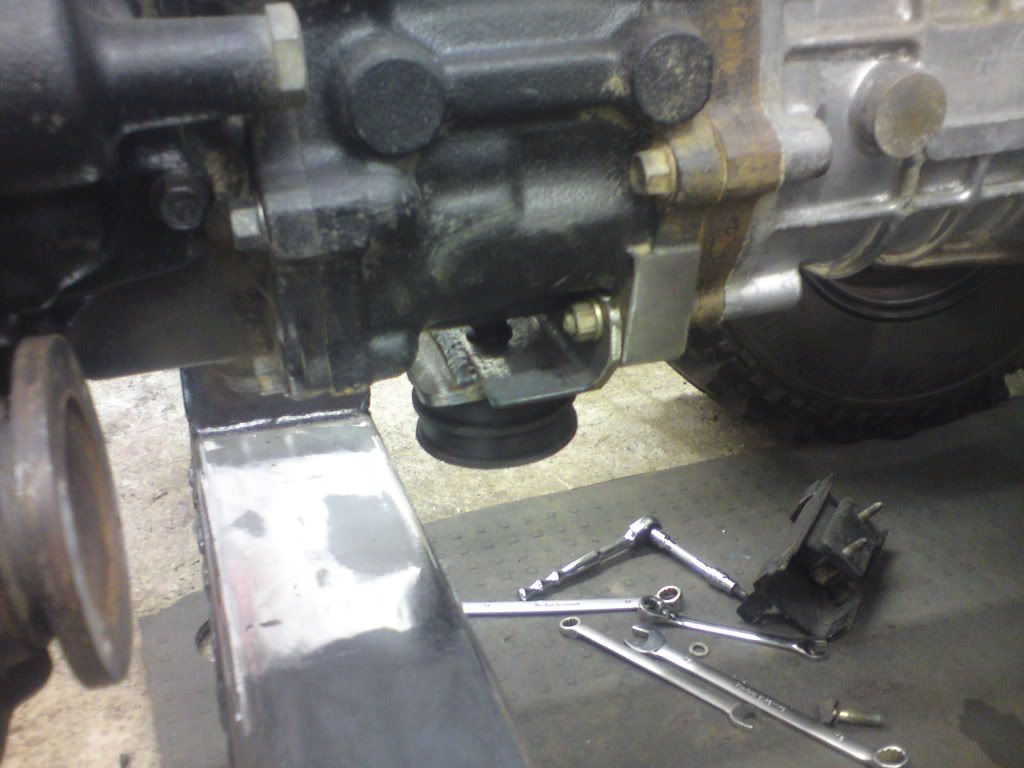 More soon! |
| |
(car+wheels)-rideheight=WIN
|
|
BiAS
Club Retro Rides Member
Insert witty comment here
Posts: 2,230
Club RR Member Number: 147
|
|
Nov 21, 2010 23:08:53 GMT
|
Update! Made the rest of the Mk2 gearbox box mount 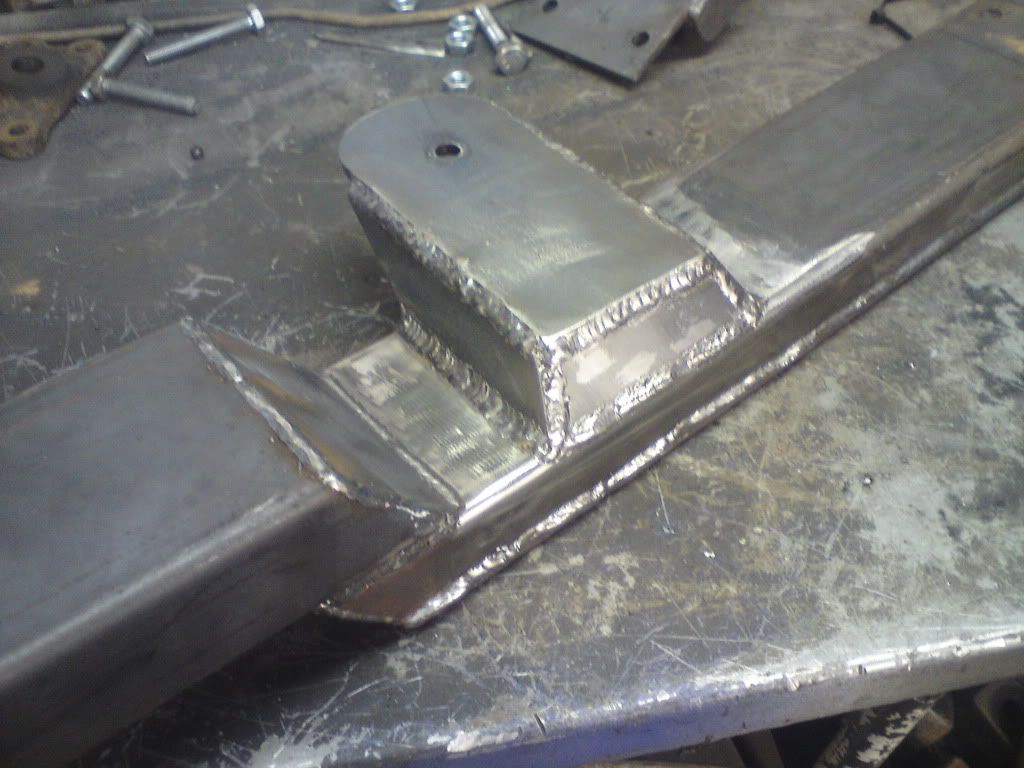 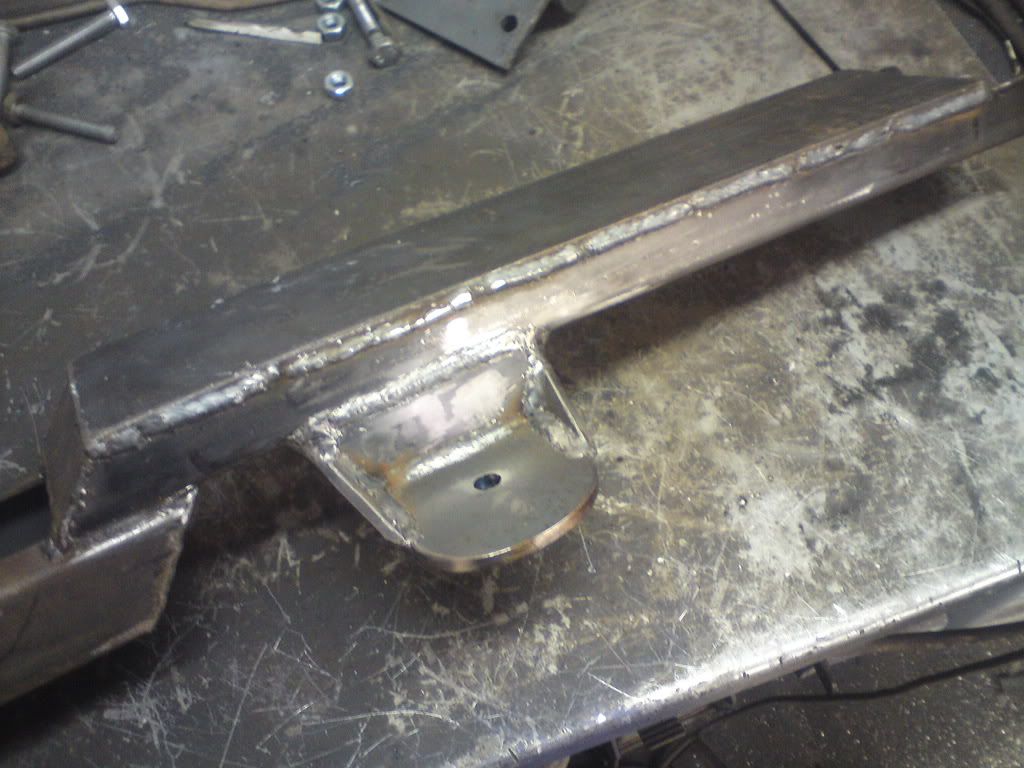 And bolted it on 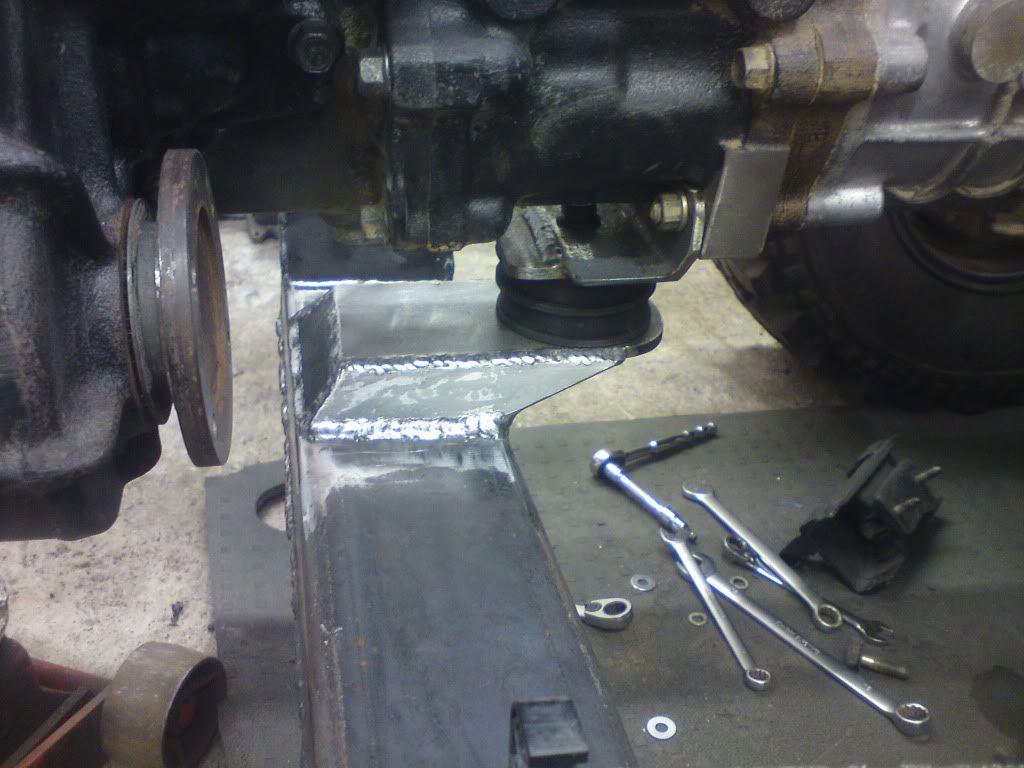 Cleaned up the sump I got off Mark (colon elk) Cheers dude! 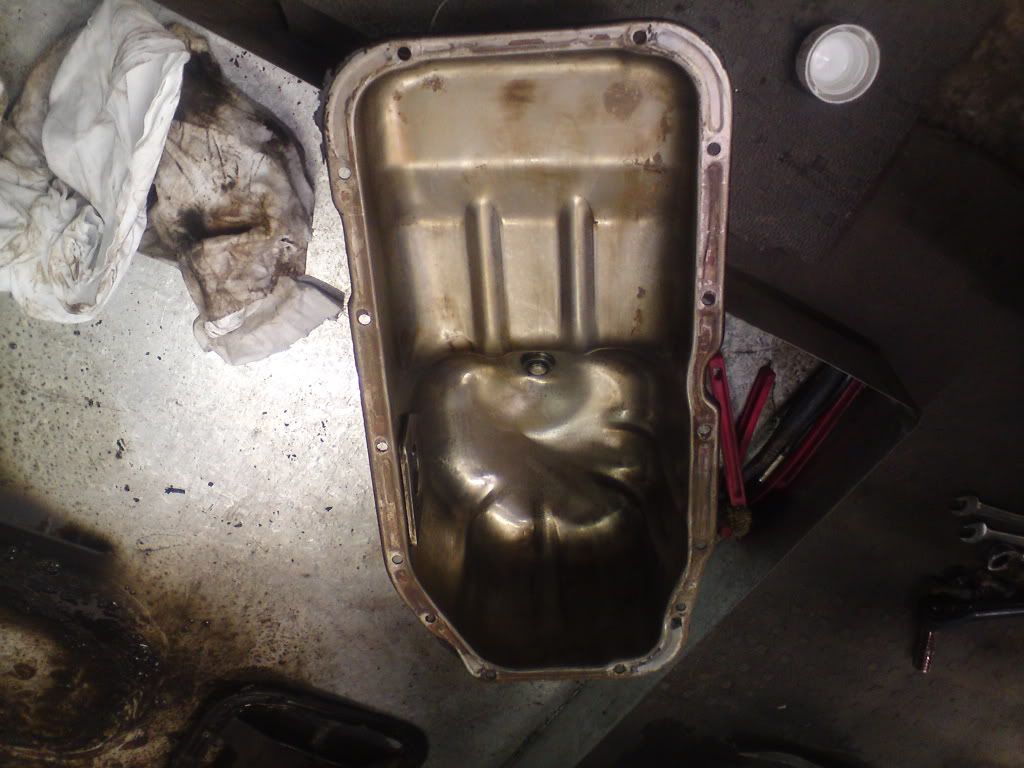 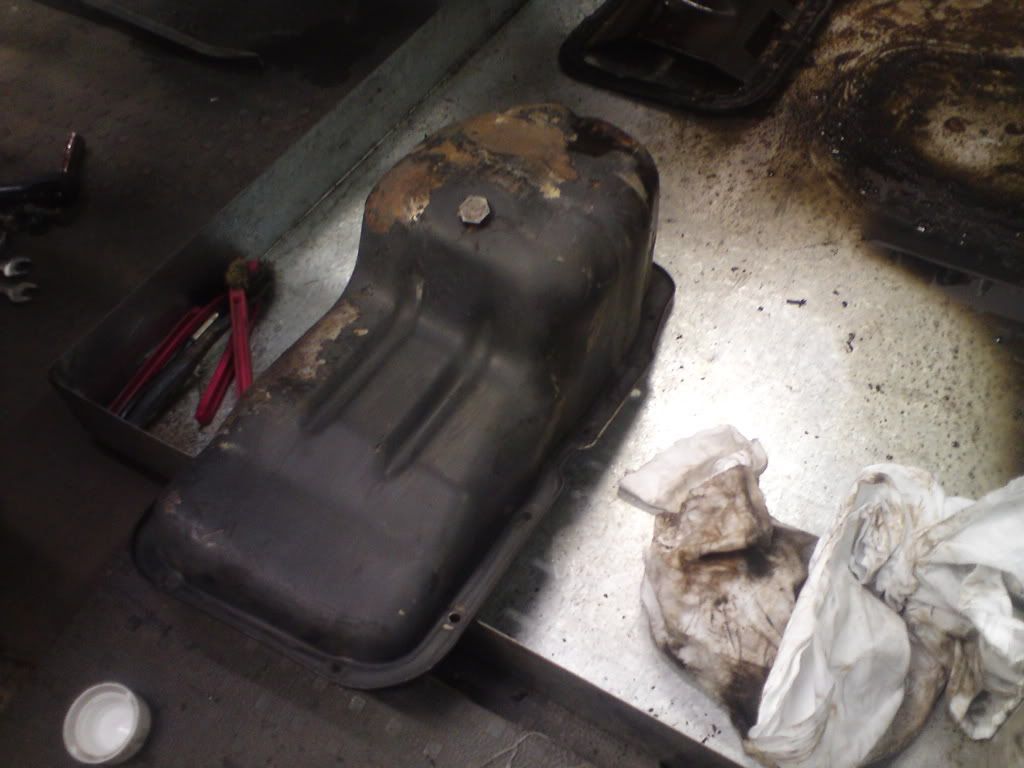 Would've only needed a minor bit of modding except that the bowl was at the wrong end. So, screwed it to a few bits of scrap ply to keep it flat 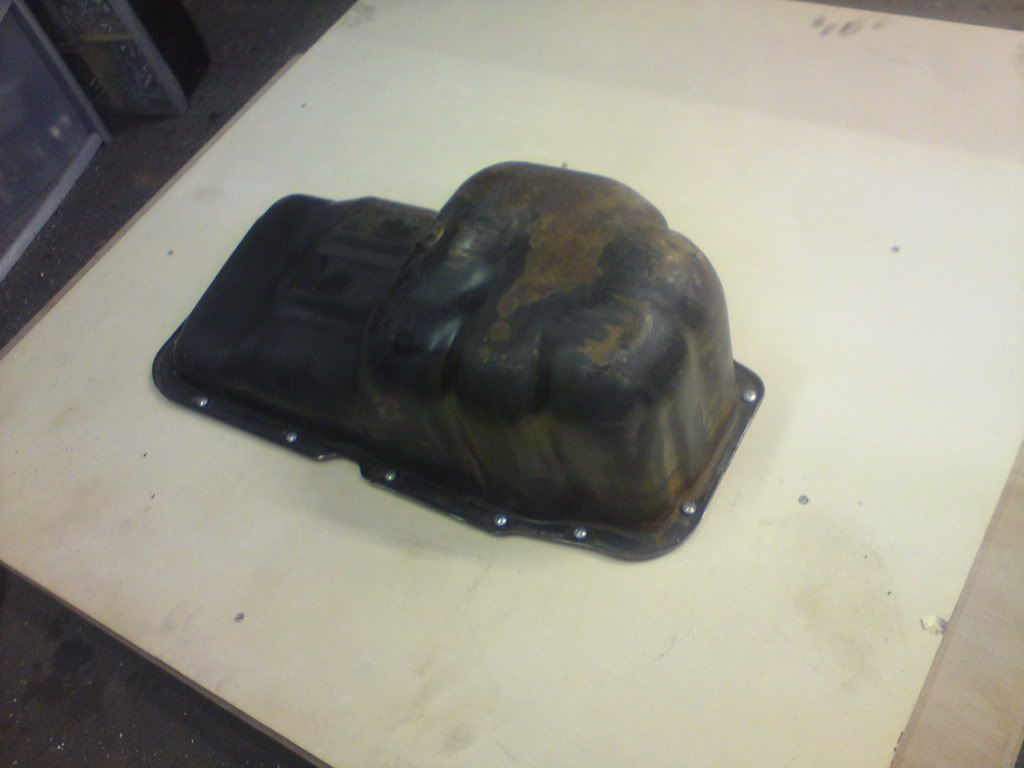 Chop it to leave only the flange 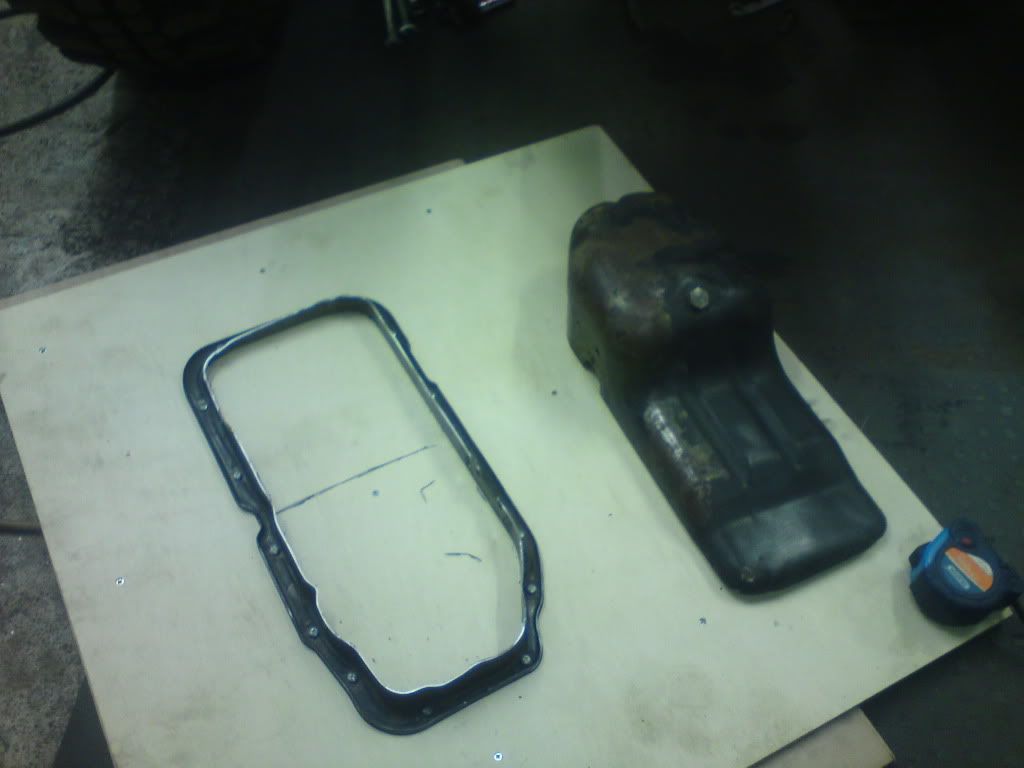 Batter some bits of steel around and buzz them on 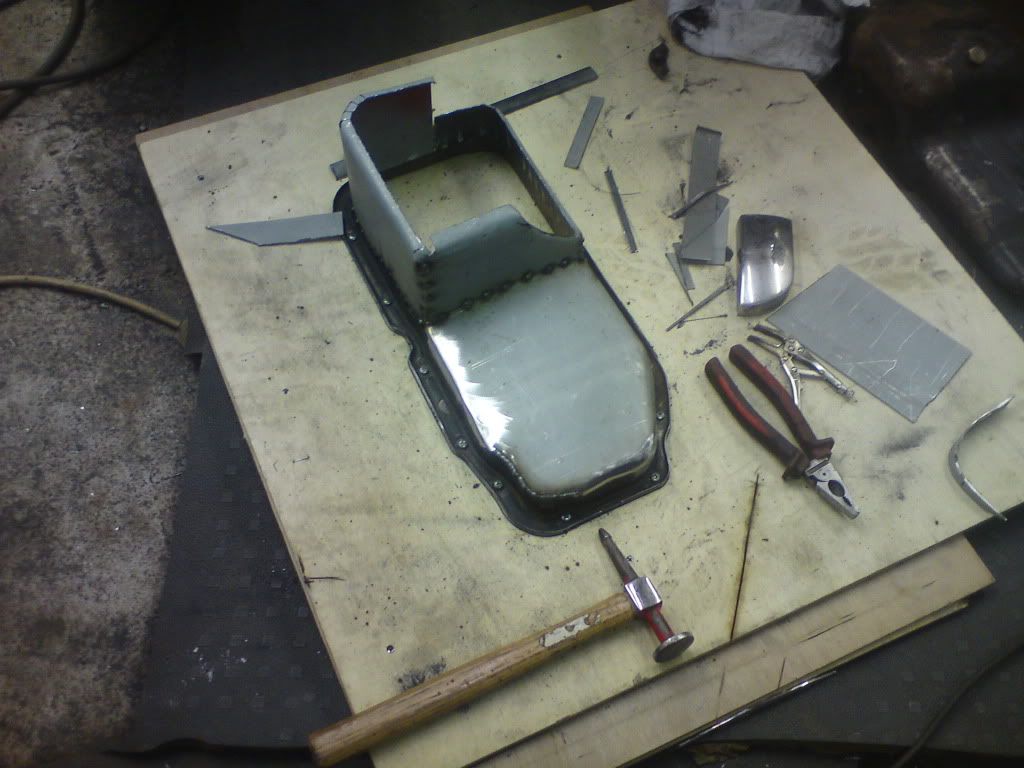 By this evening I've got something that looks like this 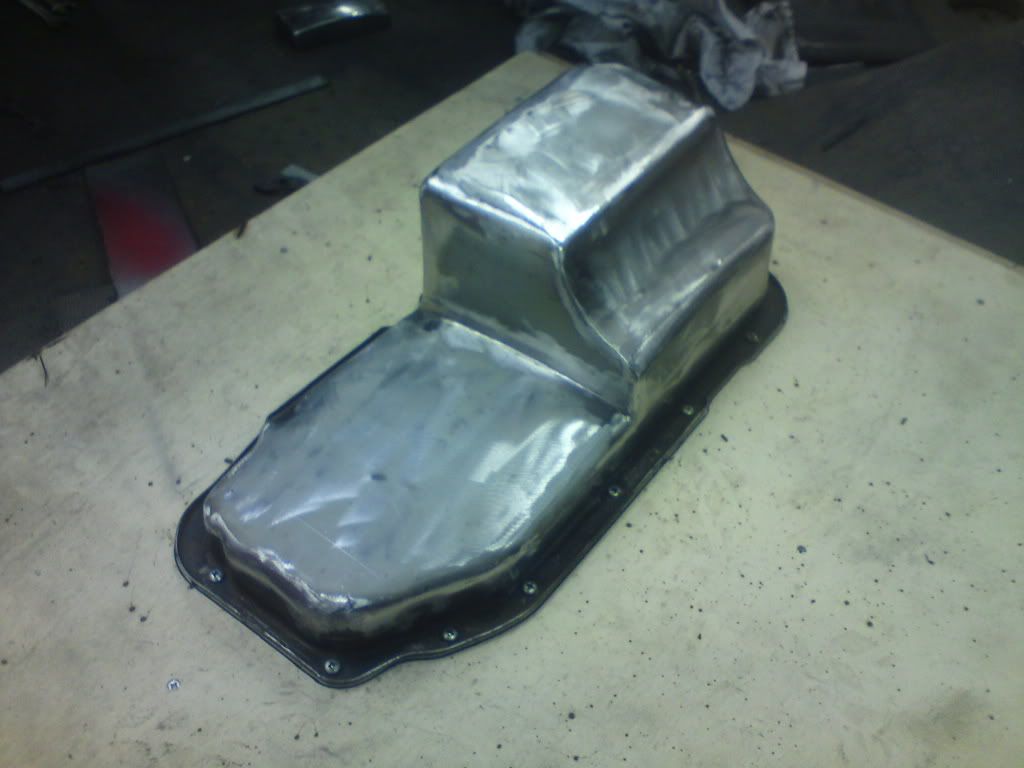 Which gives me enough clearance to fit around the axle and front prop 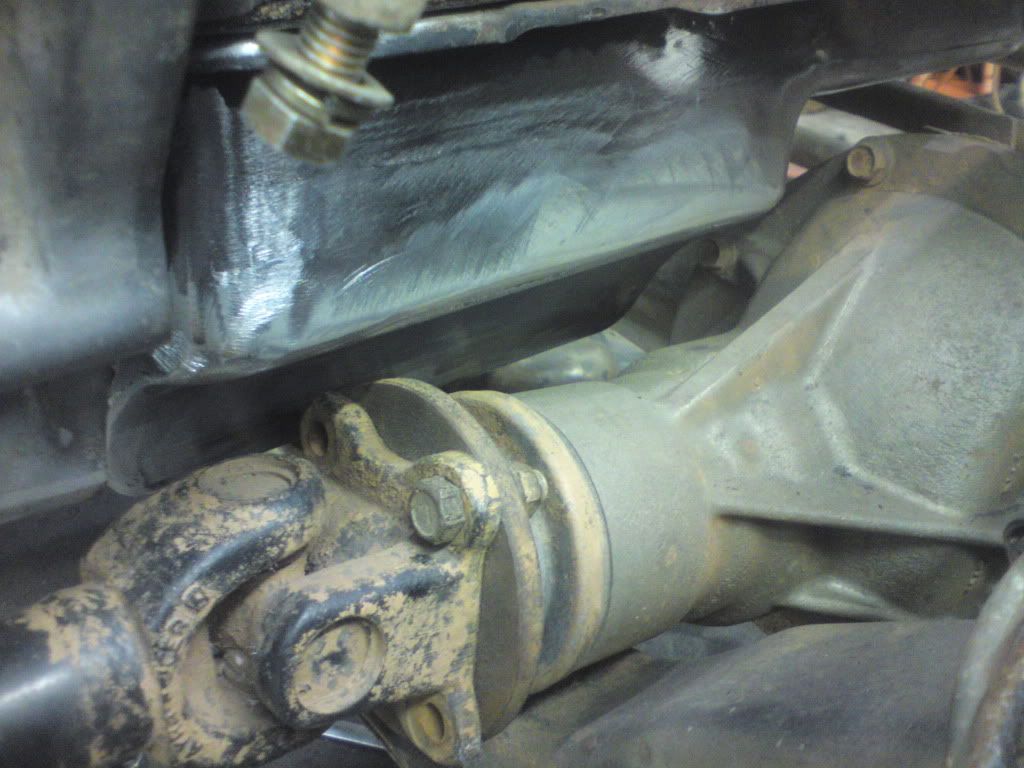 I'll take it off again tomorrow evening so that I can add a drain plug and give it a lick of paint before I fit it properly. More soon! |
| |
Last Edit: Nov 21, 2010 23:13:15 GMT by BiAS
(car+wheels)-rideheight=WIN
|
|
|
|
|
Nov 21, 2010 23:16:12 GMT
|
|
Simply awe-inspring - your fabrication skills, motivation, and speed of working are just incredible.
I can't wait to see this finished.
|
| |
|
|
rtlkyuubi
Posted a lot
 Low and Slow
Posts: 2,922
|
|
|
|
|
thats a hell of alot better than the sump i made! haha great work! ;D
|
| |
|
|
Colonelk
Posted a lot
Posts: 3,740
Club RR Member Number: 83
|
|
Nov 22, 2010 19:56:25 GMT
|
Doh! Damn bowl!  but bloody hell that "home made" sump looks sweeeeet. As does all the work as always! Cannot wait to see this rolling along |
| |
|
|
skinnylew
Club Retro Rides Member
Posts: 5,546
Club RR Member Number: 11
|
|
|
|
|
awesome welding as always!! The fabrication is immense!!
|
| |
|
|
|
|
|
|
BiAS
Club Retro Rides Member
Insert witty comment here
Posts: 2,230
Club RR Member Number: 147
|
|
Nov 23, 2010 20:12:17 GMT
|
Cheers folks, the pictures make the sump look better than it is in the flesh, main thing is that the flange is still flat and it fits Ryan - funny you should mention your sump, seeing the pictures of your one stuck in my head and made me realise that as long as I had a steel sump I could have it whatever shape I wanted it. Anyhow, pics of last nights efforts Chopped the sump plug and boss out of the sump 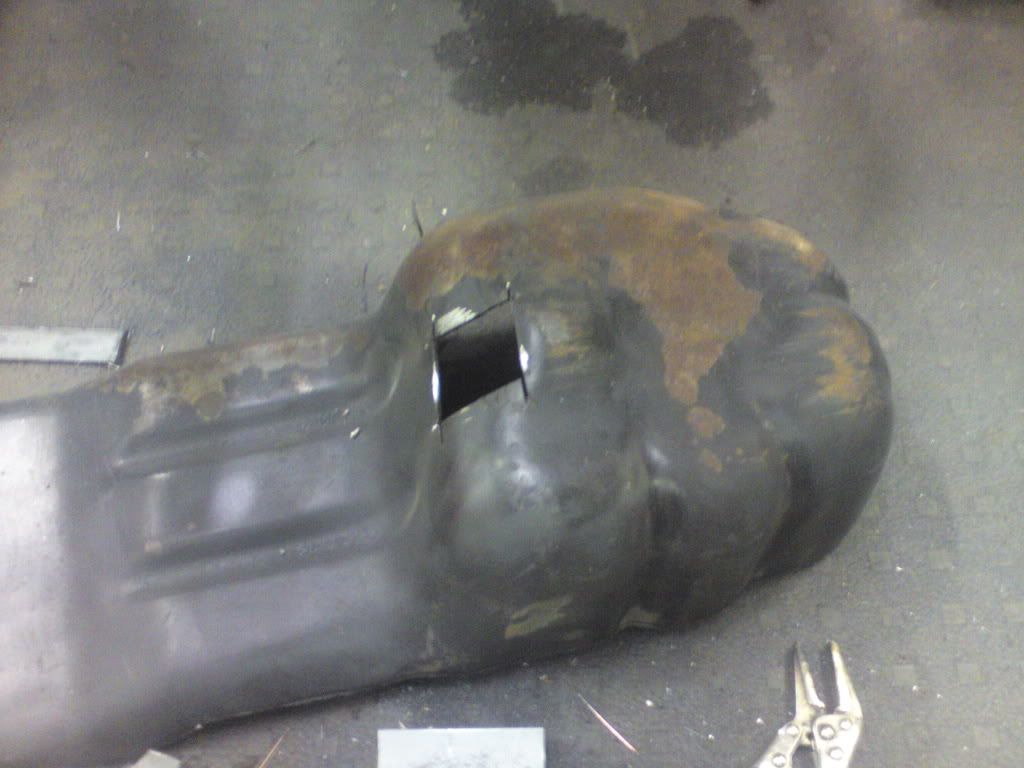 and welded it into my one, then welded all the joins from the inside as mig is porous and I want to stand some chance of it not leaking 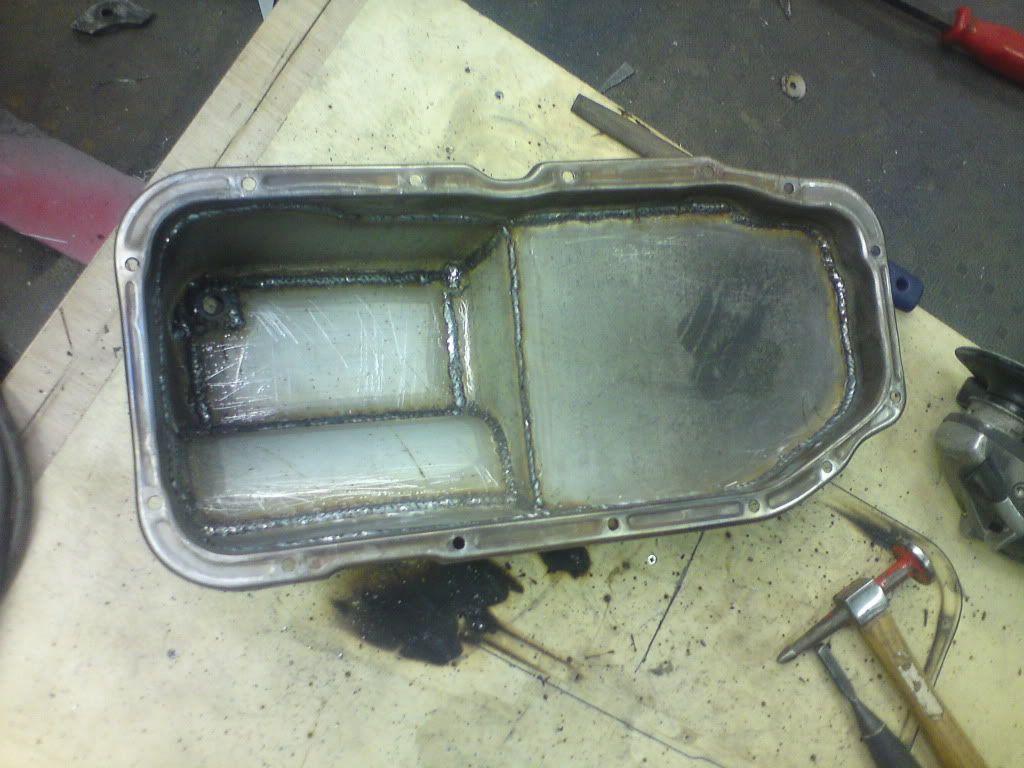 then re dressed the outside 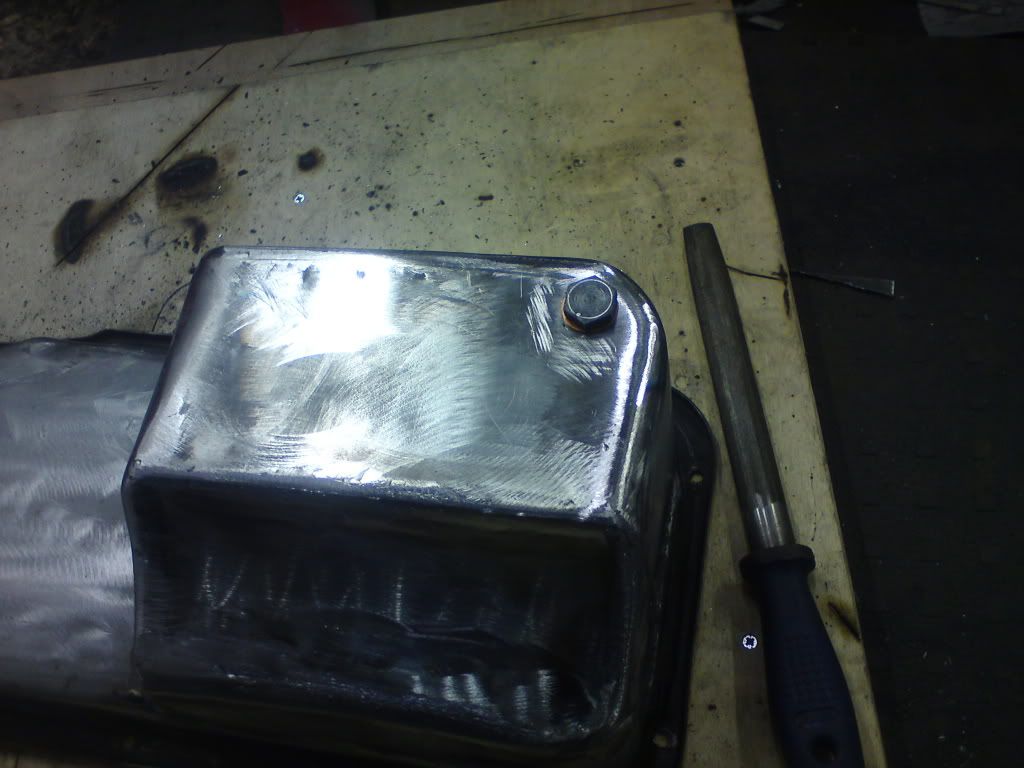 before filling it with white spirit to check for leaks and to establish how much it holds, which, as it turns out, is just over 4 litres, not too far off what the alloy one holds. Last thing was to chuck a couple of coats of zinc primer over it before retreating inside to spend a bit of time with SWMBO. 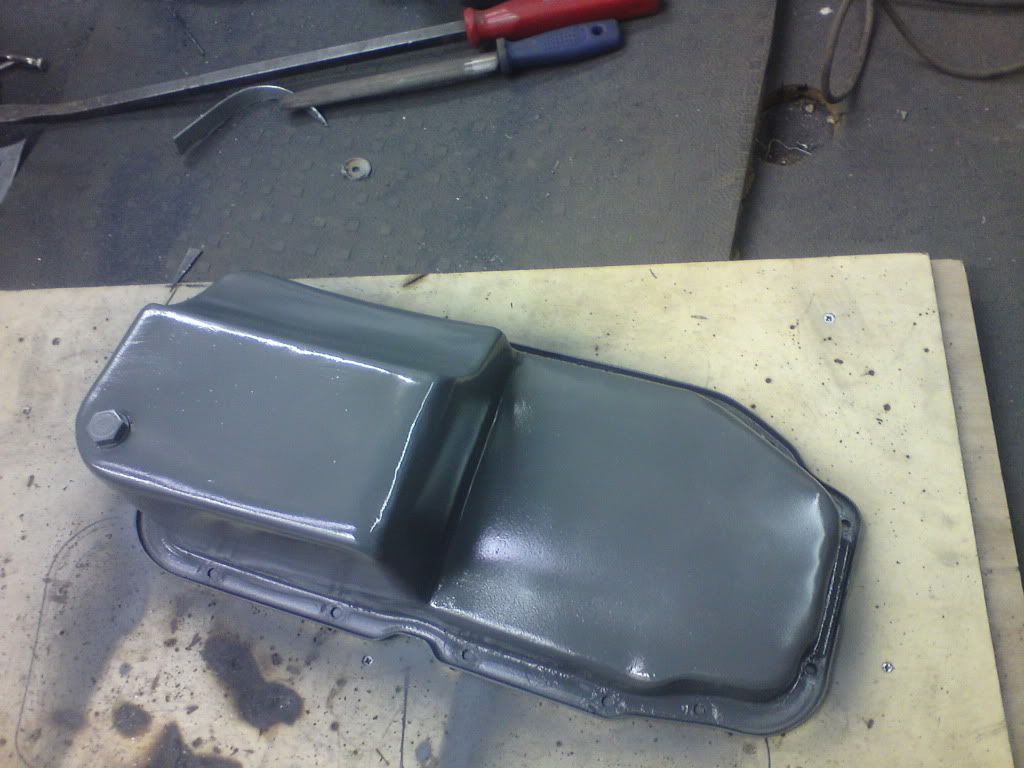 Took the props back off tonight so that they're ready to take into work with me tomorrow to get some collars measured and made up to make the joins a nice snug fit ready to be tig'd up. More soon! |
| |
Last Edit: Nov 23, 2010 20:14:14 GMT by BiAS
(car+wheels)-rideheight=WIN
|
|
Chris™
Part of things
This is clearly filler material.
Posts: 519
|
|
Nov 24, 2010 14:43:59 GMT
|
|
Love this, keep up the great progress too - some lovely fabrication going on in this thread ;D
Out of interest what are you doing to overcome the problem of the welds being porous?
|
| |
1989 Volvo 340
1986 Suzuki SJ413
2000 BMW 318ti
2006 Lexus IS250
|
|
BiAS
Club Retro Rides Member
Insert witty comment here
Posts: 2,230
Club RR Member Number: 147
|
|
Nov 24, 2010 22:44:45 GMT
|
|
Cheers Chris, I've welded it from both sides to try and minimise the porosity of the welds and the test with the white spirit was quite successful, a tiny weep on one of the joins and a little bit getting past the copper washer on the sump plug. I don't like painting the inside of sumps as if the oil gets under the paint it can flake off and block the oil pick up. I've put quite a few coats of the zinc primer on the outside, letting them go hard before I put the next few on, hopefully this and some top coat will hold it back a bit.
|
| |
(car+wheels)-rideheight=WIN
|
|
|
|
|
Nov 24, 2010 22:53:19 GMT
|
|
ian this is awesome! you don't hang about either!!
|
| |
yes ,it started badly ,petered off in the middle and the least said about the end the better!!!
|
|
BiAS
Club Retro Rides Member
Insert witty comment here
Posts: 2,230
Club RR Member Number: 147
|
|
Nov 24, 2010 23:26:48 GMT
|
|
Cheers John ;D
Tell you what I have been wondering though, does anyone reckon I should baffle the sump at all?
The Vitara sump wasn't baffled at all it just had the pickup in the very bottom of the bowl and that never suffered oil pressure issues, even when I used to leave it parked at jaunty angles at work.
Also, the pickup on the XE has a bowl round the gauze with a hole in the bottom, this should mean it will only be picking up from the very bottom of the sump shouldn't it?
Any thoughts or suggestion are more than welcome as I'd rather rectify some thing I've missed now rather than further down the line.
|
| |
(car+wheels)-rideheight=WIN
|
|
|
|
|
Nov 25, 2010 10:53:52 GMT
|
Ian i do hope that the suspension is as low as you can get it so the prop doesn't beat a hole in the side of the sump when you are articulated  other than that brilliant work wish my work was as good as your's |
| |
14042013738.jpg
|
|
DutyFreeSaviour
Europe
Back For More heartbreak and disappointment.....
Posts: 2,944
|
|
Nov 25, 2010 11:37:45 GMT
|
Ian - on the baffled sump - as I'm sure you're already clued up - mainly preventing oil surge at speed - in theory you'll be forcing the oil to odd angles/locations but over a longer period of time. IMO I'm not sure baffling would help all that much - it'll slow down the oil movement - but not that much and won't hold it for any prolonged period from flowing to the lowest point when you're rockclimbing. I'm sure someone will make me look dumb - but I'm working on fluid dynamic theory here...... and it's been a long time ;D I dread opening up yours and Dez's threads - they make me feel like a eunech in a free all weekend bordello......... This will be an absolutely fantastic article. The write up is a massive confidence booster to us 'wannabes'. Crack on fella. |
| |
Back from the dead..... kind of
|
|
|
|
|
Nov 25, 2010 15:09:45 GMT
|
|
Awesome, I love this.
Shame about not putting JDM arches on it, it would look bloody awesome.
Part 2 of this project should be putting the Vitara Shell on the Honda Chassis, to make something like a JDM Bryn's Landy.
|
| |
|
|
|
|
|
Nov 25, 2010 20:07:11 GMT
|
ian.. I just spent the last hour reading though all the posts.. ITs Awesome,!  I love it! I had a couple shitara's myself.. were'nt to bad offroad(not as good as my sj's mind ;D) but never thought about doing some like this to them!! keep the up date's coming qustion for you.. what rear springs and shocks you runing? and did you know theres a little mod you can do to the front CV's to stop them smashing them self's up?!!! (which they like to do.. that and front diff casing!! ) |
| |
Last Edit: Nov 25, 2010 20:15:14 GMT by petetong
|
|
|
|
|
Nov 25, 2010 20:52:07 GMT
|
|
this is some top quality fabrication work mate, your services will need to be permanatly moved to A52 methinks !
l
|
| |
|
|
|
|


 (clutch release arm is no where near as close as this picture makes it look, 40mm or so)


 but bloody hell that "home made" sump looks sweeeeet. As does all the work as always!
 Ax GTi Turbo


 I love it!
