|
|
|
|
|
just to add, those are 'staked nuts', peening is to strengthen a metal by working its surface, ie hammering, shot etc Thanks for this, I'm learning as I go.. Post edited accordingly! Thanks for the positive comments, it feels great getting the project going again. There's already another patiently waiting in the wings.. 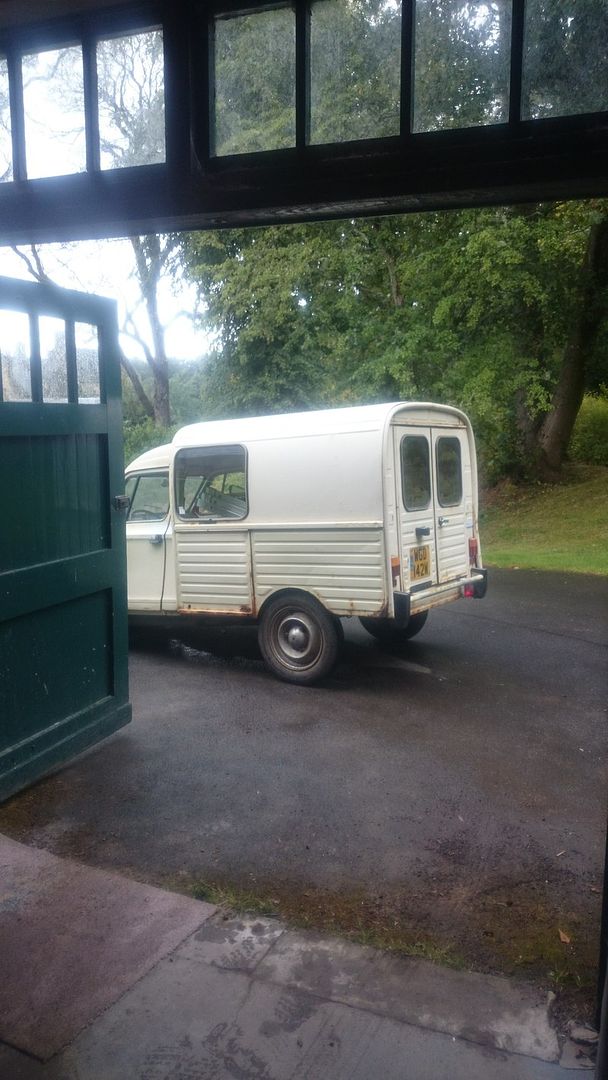 Stonio, I don't have the t25 pick up any more which is a shame as it was a cool motor, albeit unbelievably slow. Oh and yes I learned most of this stuff restoring air cooled VW's but I've been priced out of that game! |
| |
1989 Mini MG 1275 ~ 1987 VW Polo ~ 1989 Citroen 2CV ~ 1998 VW T4 ~ 2006 Volvo XC70
|
|
|
|
|
|
|
|
|
The valve seats cleaned up very well after a thorough lapping, after spending a couple of hours doing one side by hand I rigged up a bit of rubber tube with a couple of jubilee clips and a bit of threaded bar in the drill, worked pretty well and was faster than by hand. 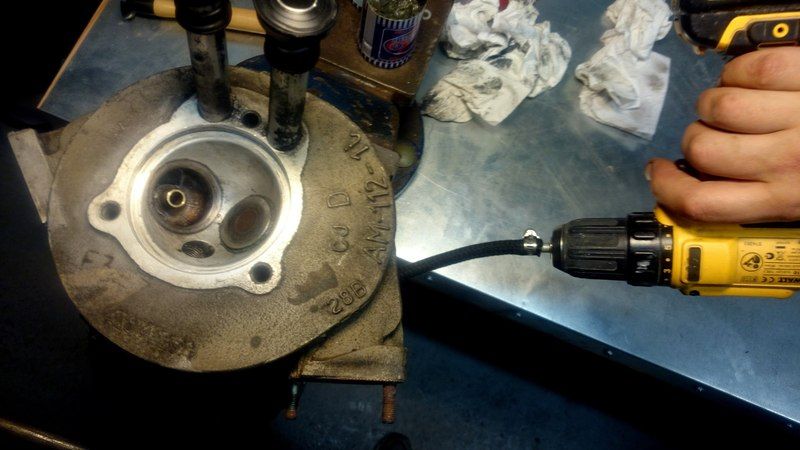 I bought a 9.0:1 cr barrel and piston set from Ecas, I was a bit begrudged spending so much money when I only really needed one side but in the end it wasn't much more expensive than all the standards bits for one side once you added it all up, plus it'll make the engine a bit more spritely. Nice quality bits from Ecas  Fitted the rings to the pistons, the three oil oil control rings set 120 degrees apart and then the other two offset. This makes for a better initial start up and bedding in and is more efficient at scraping oil from the barrel walls. This is information I learned after already fitting one side with the three oil control rings spaced the same and the other two just randomly spaced. Note my experimental ring compressor in the penultimate pic. This didn't work that well, I ended up putting a light oil on the rings and compressing them with my fingers, slipped in great with a bit of wiggling. Fitting piston rings is very much like making love to a beautiful woman. Etc. 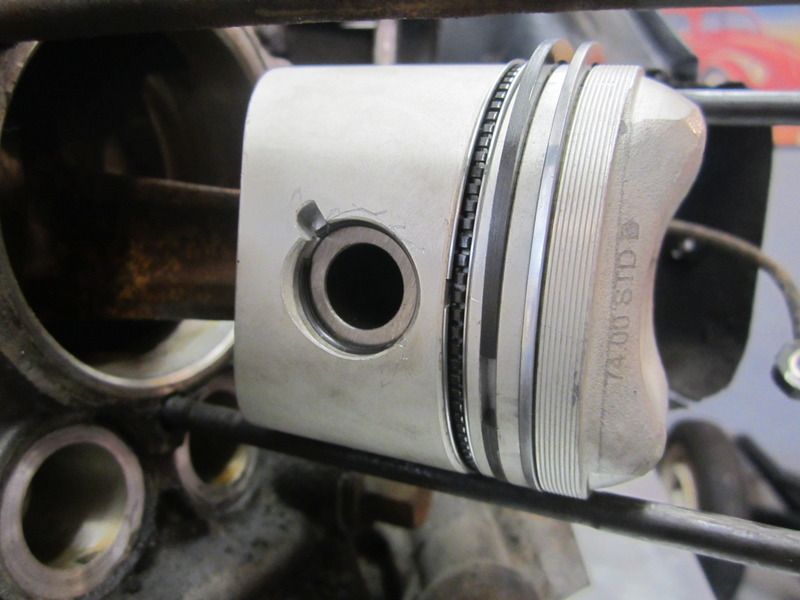 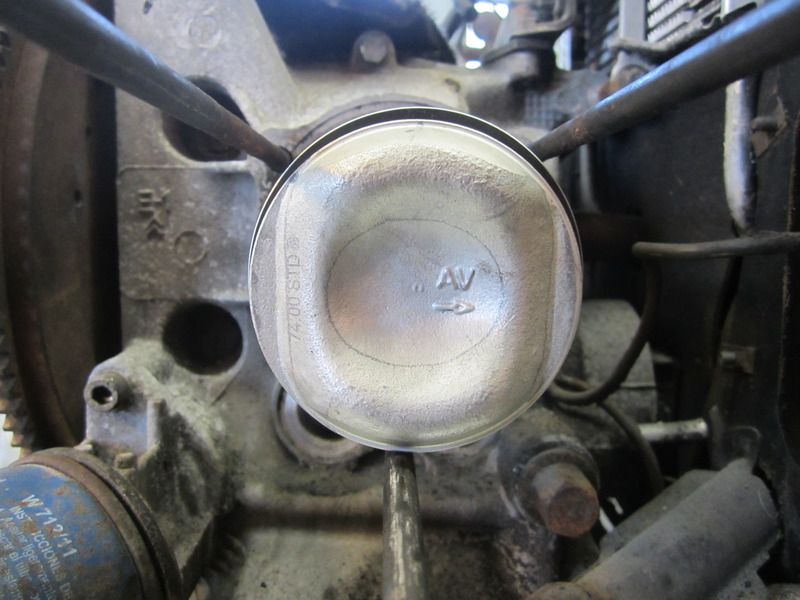 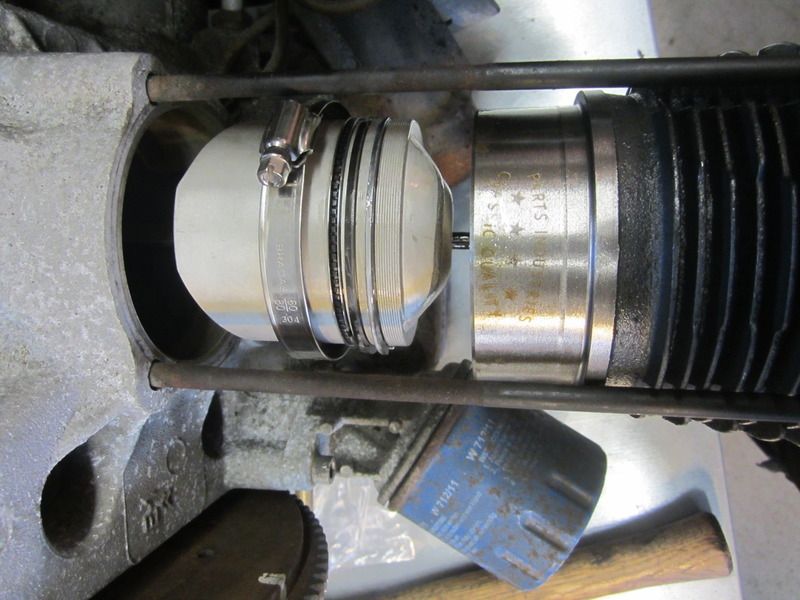 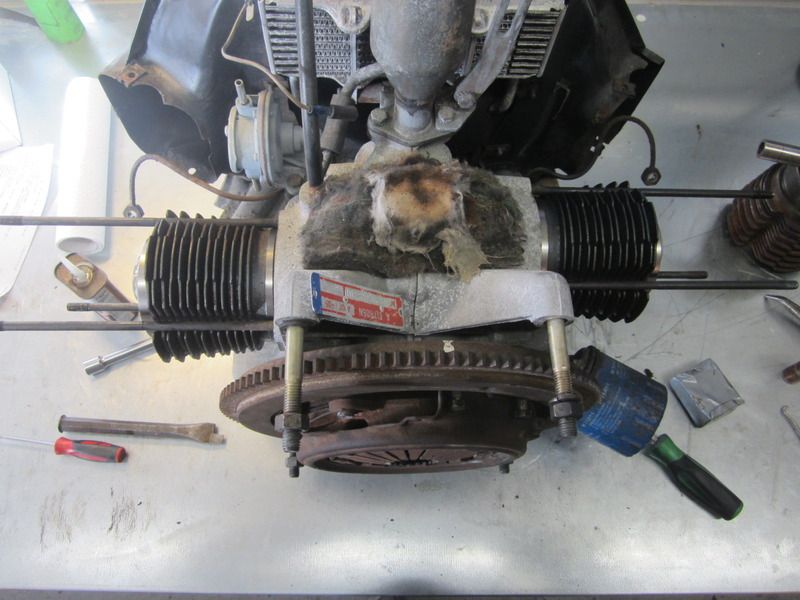 Next I changed the clutch for a new Valeo one 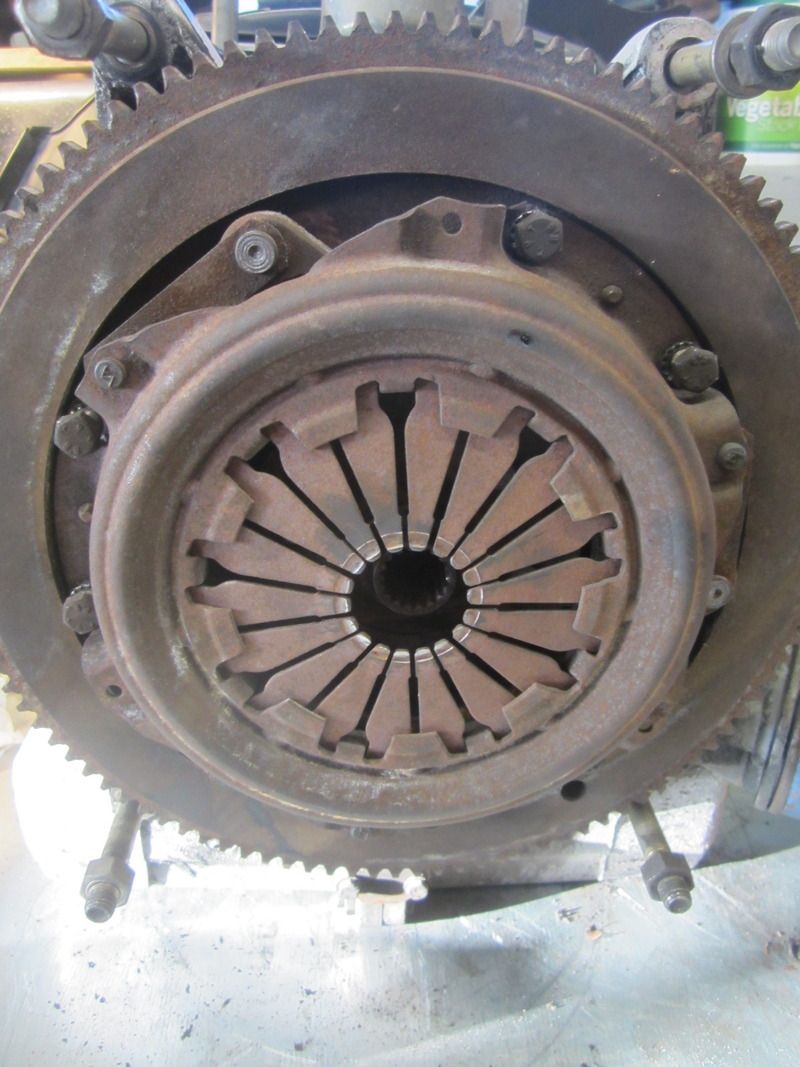 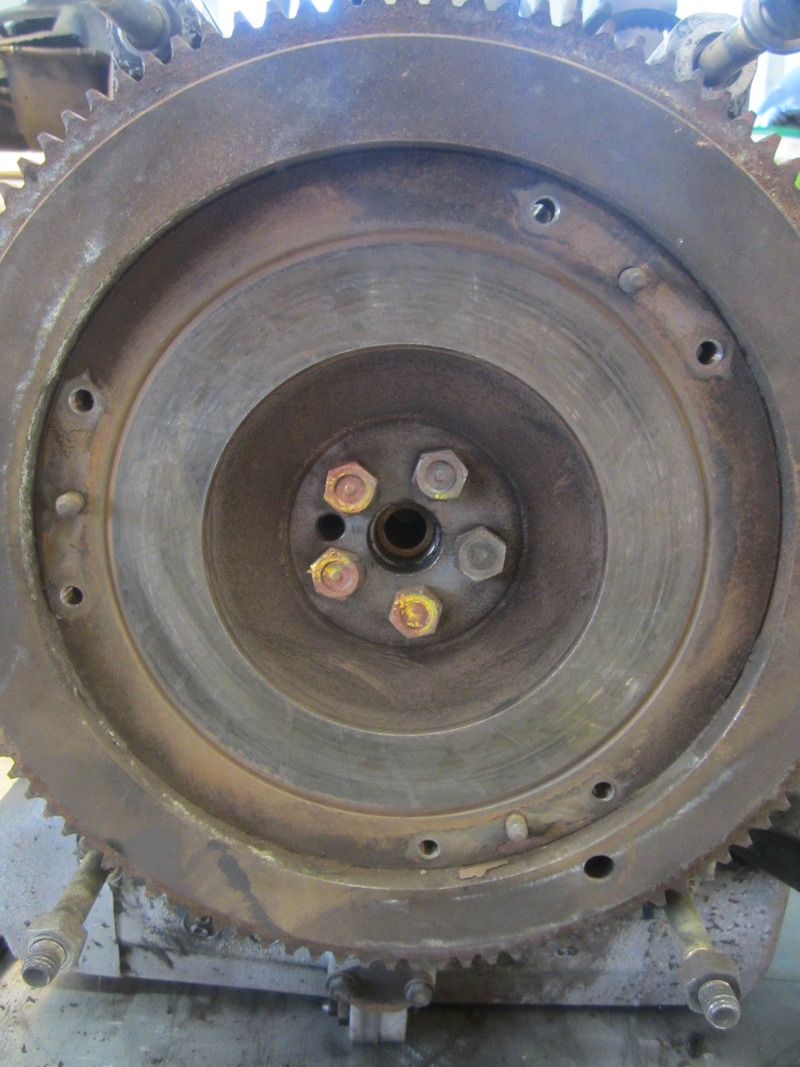 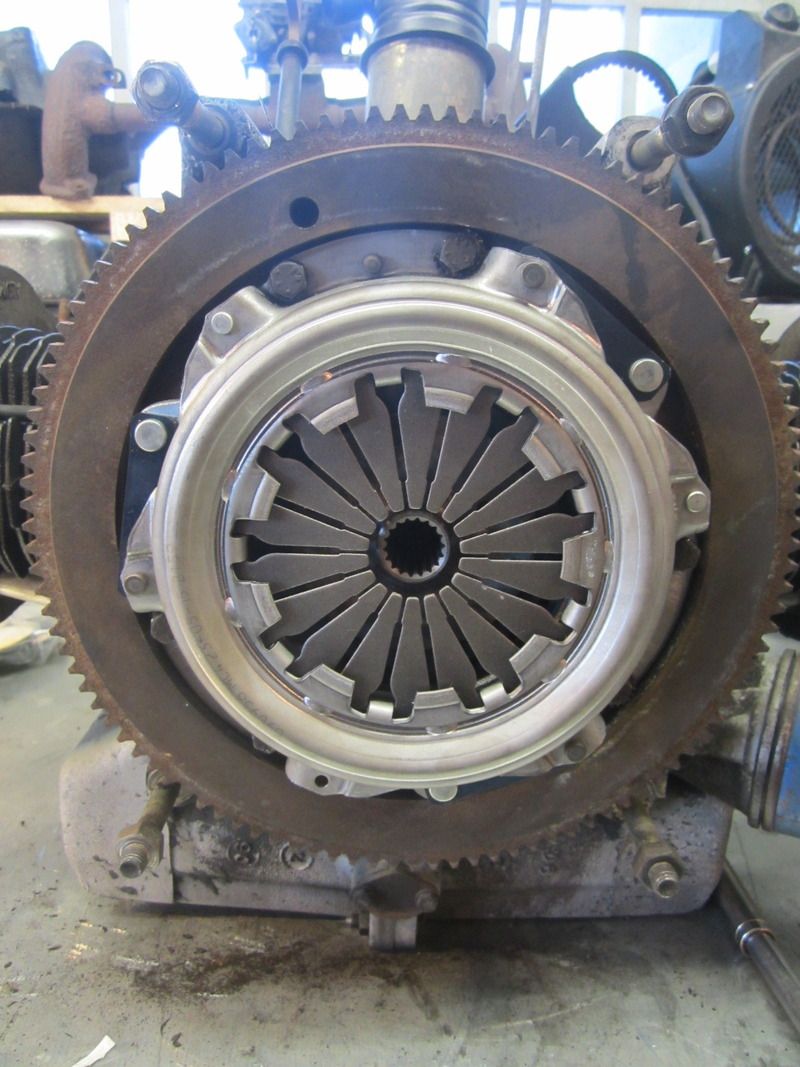 And fitted the heads with new valve stem seals, set the valve clearances and fitted new rocker cover gaskets. All went pretty smoothly, minus a slight mis-calculation with an online torque converter.  I only snapped one head stud but changed all three on that side as a precautionary measure. I now have a laminated torque conversion chart above my workbench... I then built up the rest of the engine, cleaning and painting bits as I went.  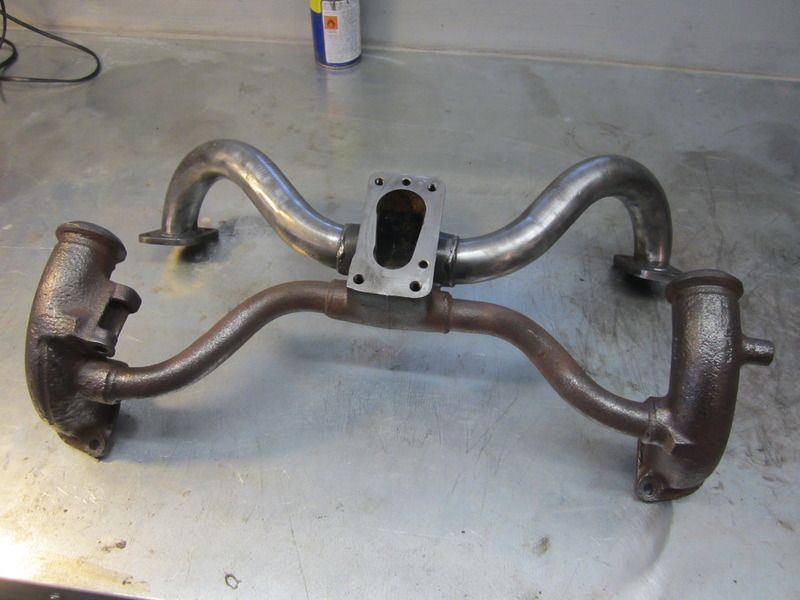
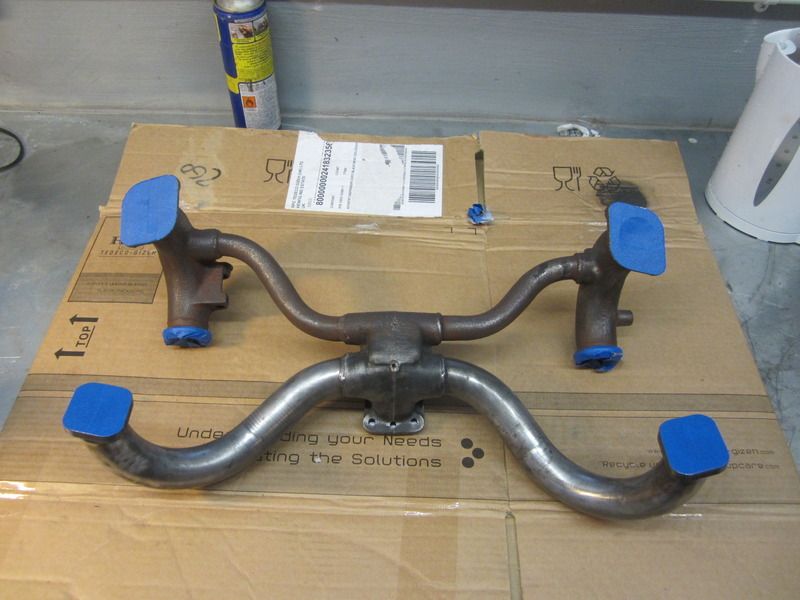 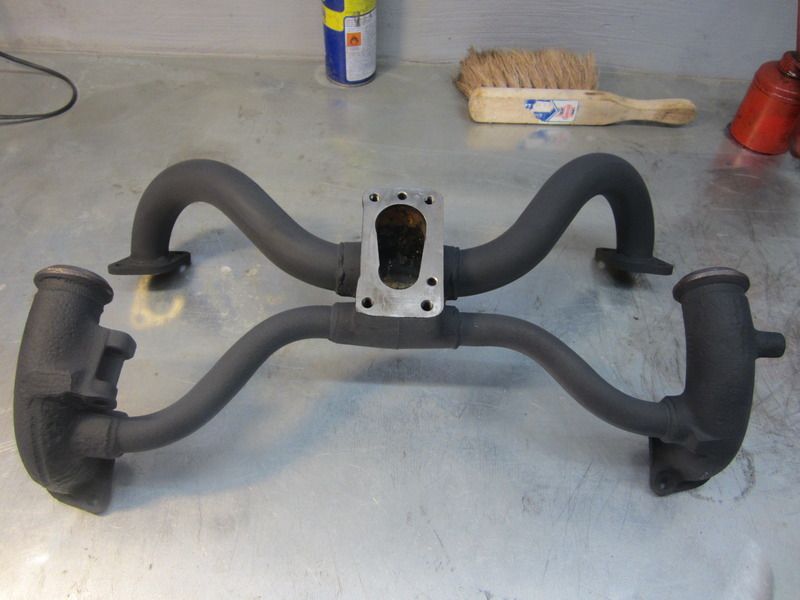  I then stripped and cleaned and checked over the carb, generally looked good, apart from a lot of curse word in the bottom of the float chambers. 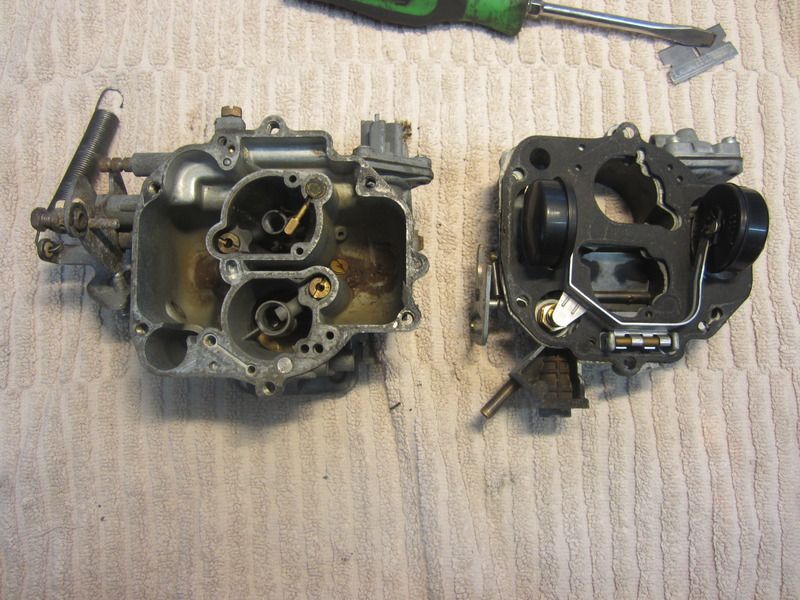 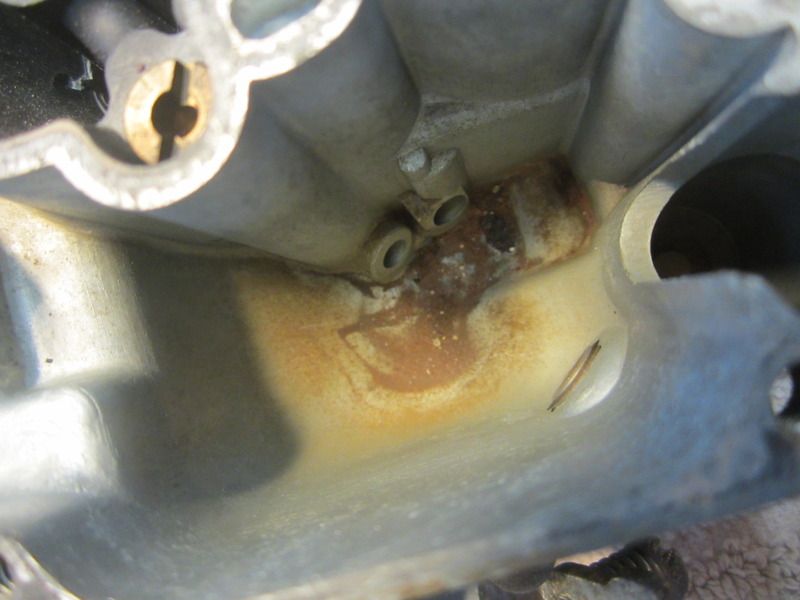 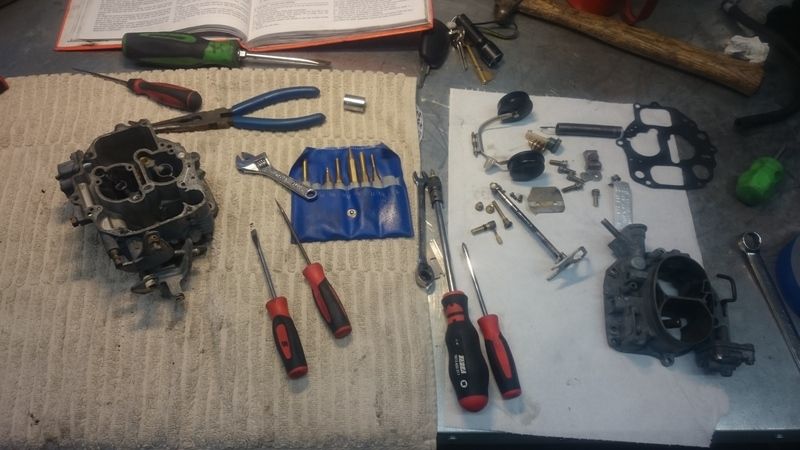 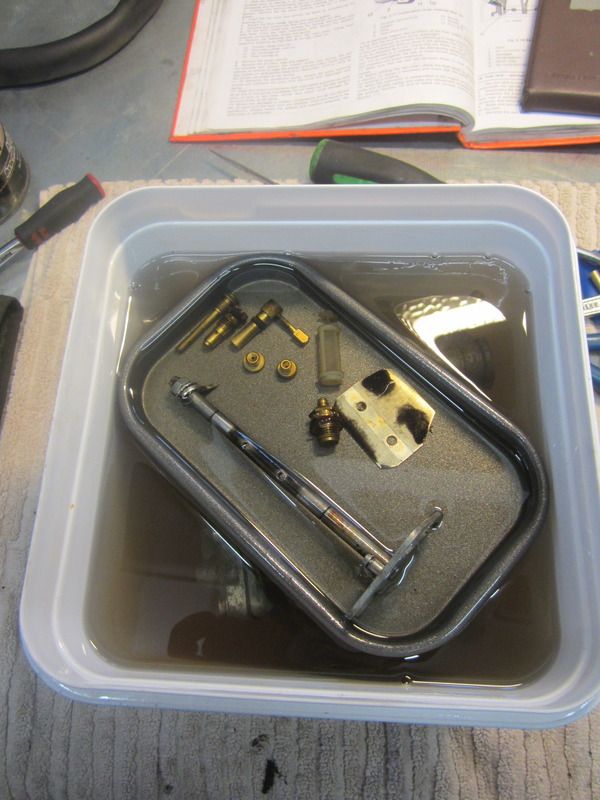 Made some new insulator block gaskets from gasket paper 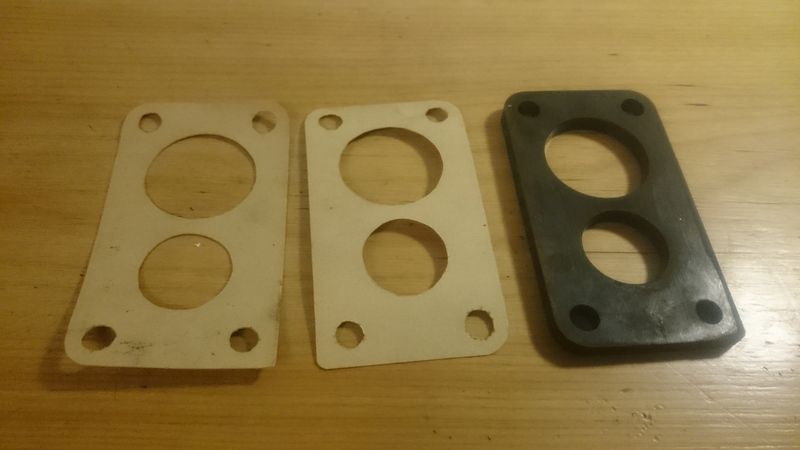 Just waiting for the carb top gasket from Ecas and it'll be ready to fit to the engine. Next my attentions turned to the gearbox.  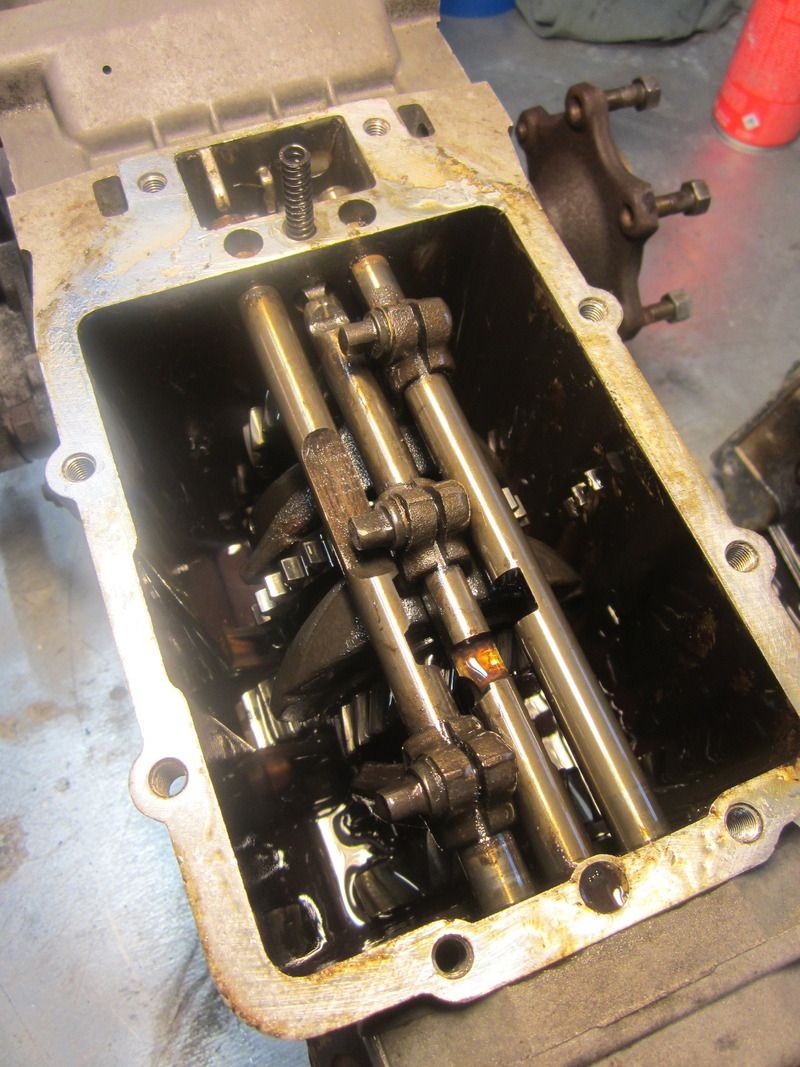 I had looked inside here before when a friend showed me how to peen over the selector ring to stop the gearbox unwinding when reversing, a common 2CV problem caused by half hearted factory peening of a selector ring, so I knew roughly what I was looking at. As usual, there were just three badly peened sections. I took a few videos as I went with the gearbox to show exactly what areas to peen as I struggled finding decent info on it. Video showing factory peening. Video showing additional peening I added. I then drained out the oil 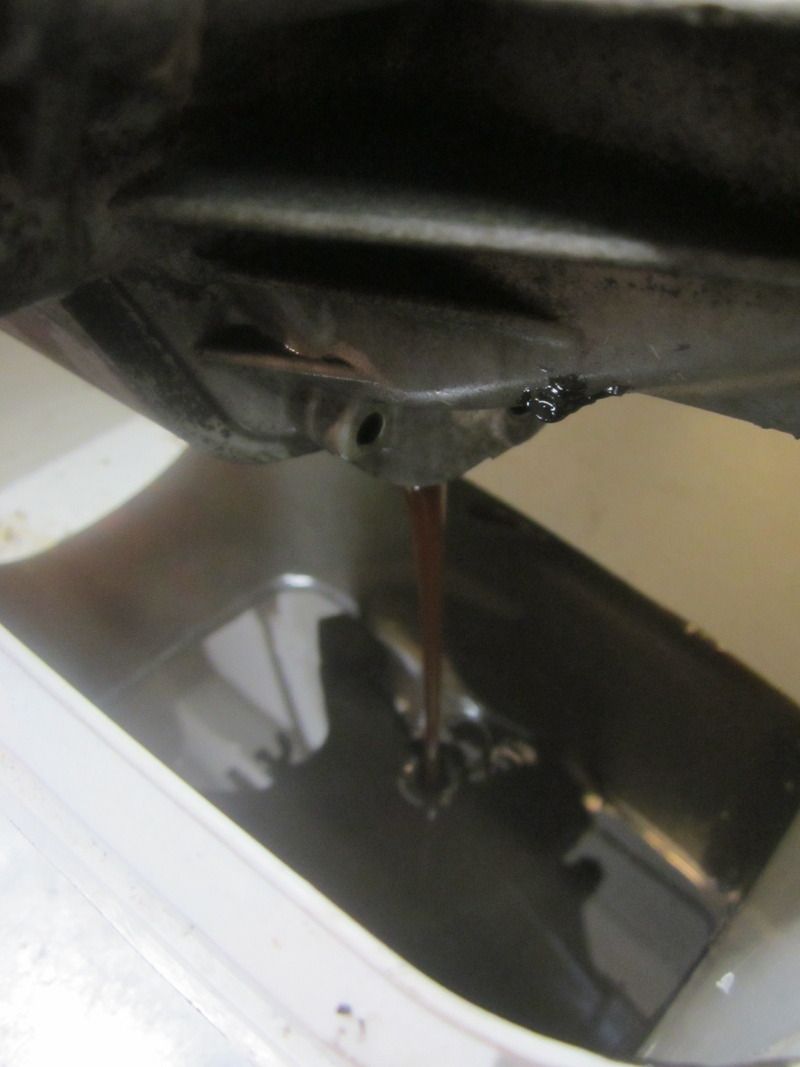 Which showed signs of water contamination, most likely from when I pressure washed it a couple of years ago. Luckily it doesn't seem to have damaged anything. 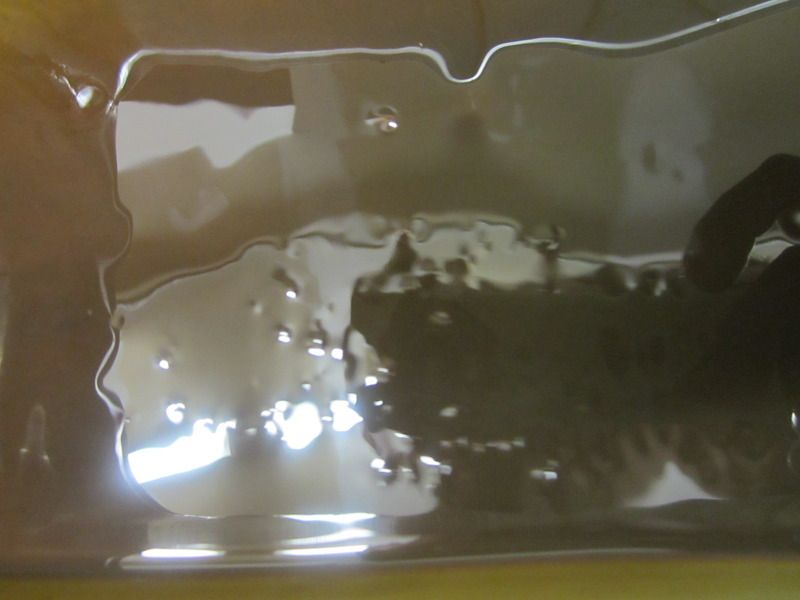 I then removed the rear cover to check the main shaft and pinion nut were tight. Signs of water ingress in here too, no damage caused though. 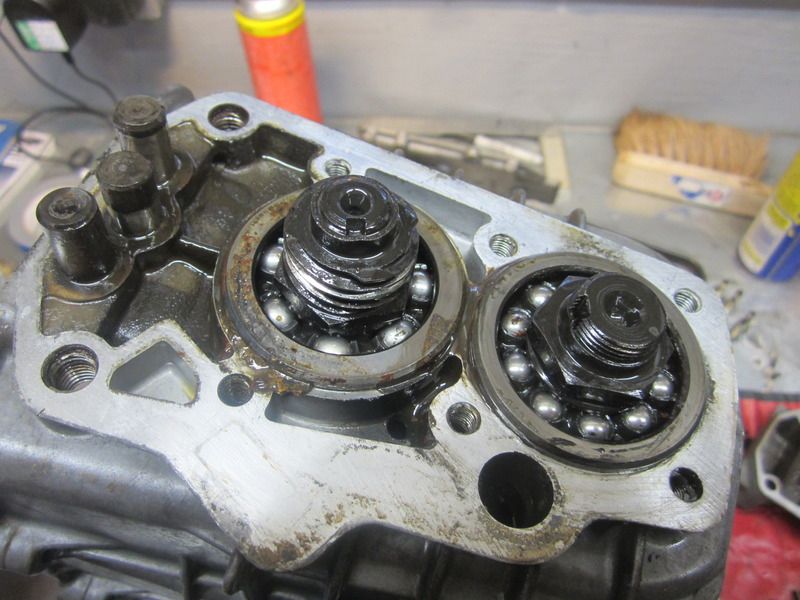 The nuts were both loose and showed hardly any signs of factory staking. 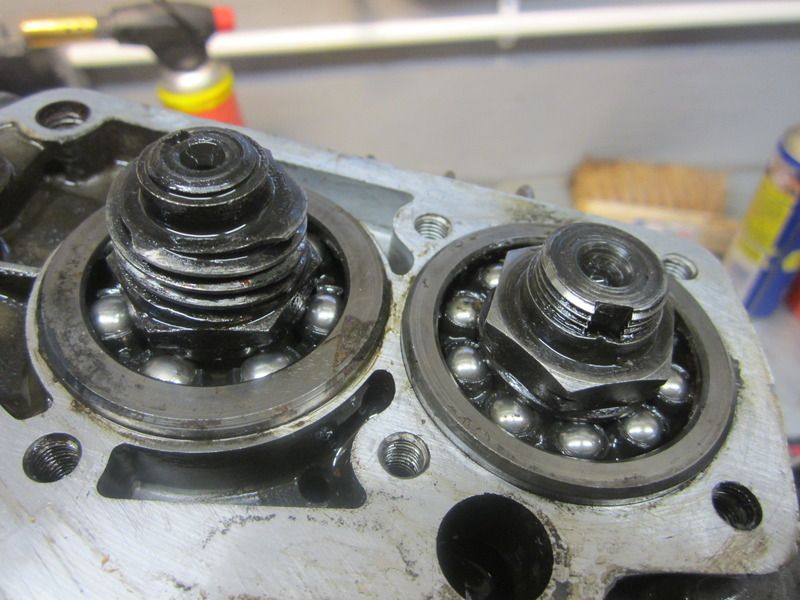 I made a wee "un staking" tool and knocked out the very slight indents left by Citroen, then removed the nuts. If anyone uses this as a guide, the lower (pinion) nut is a LH thread.  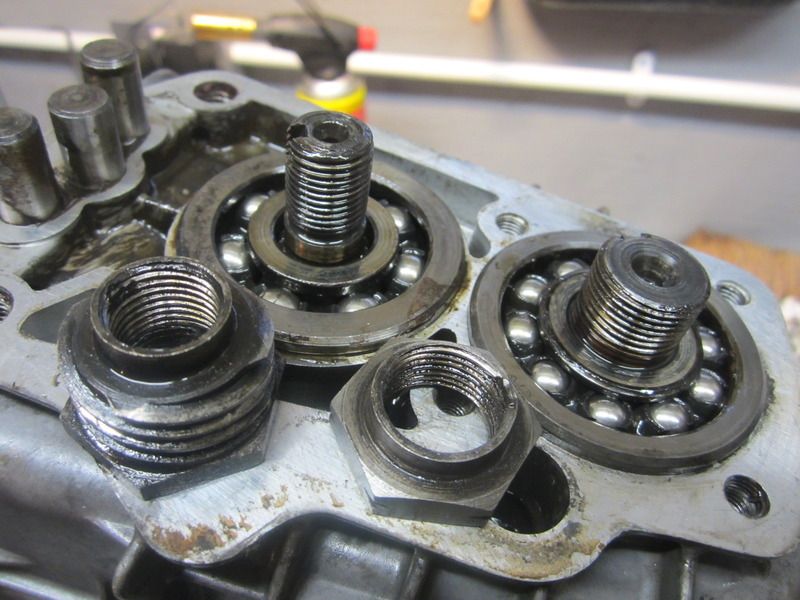 I next refitted the nuts set to the correct torque and using threadlock and more affective staking. 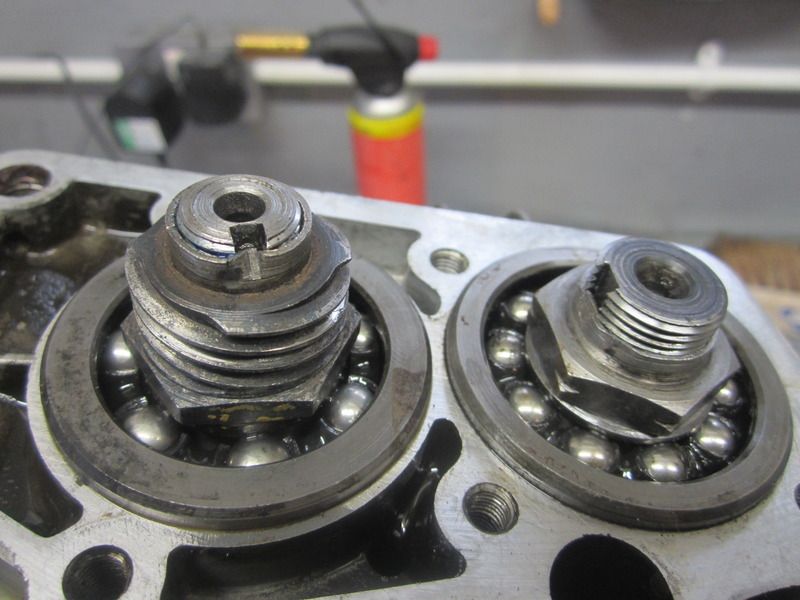 And cover refitted, sealed the join with a thin coat of Heldite. I used to use Heldite for leaky sump plugs before I learned how to anneal copper washers, but figured it would be good for this too. 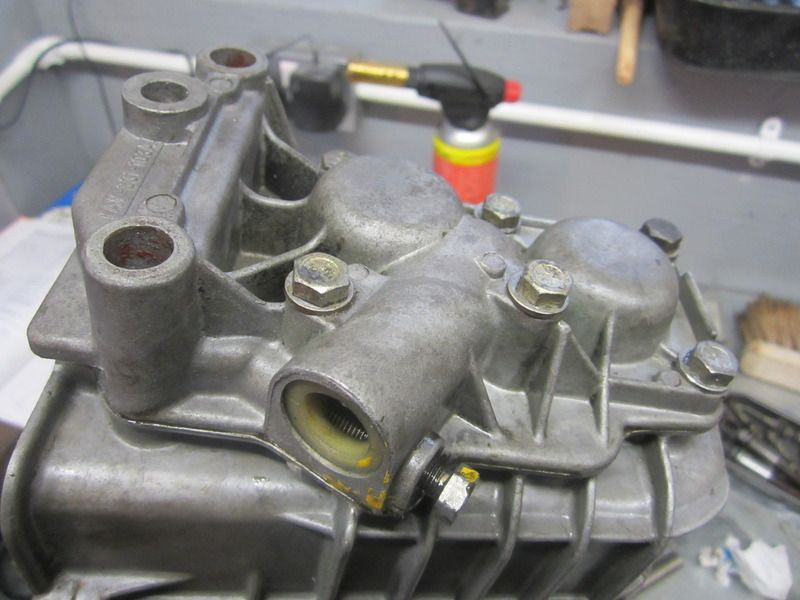 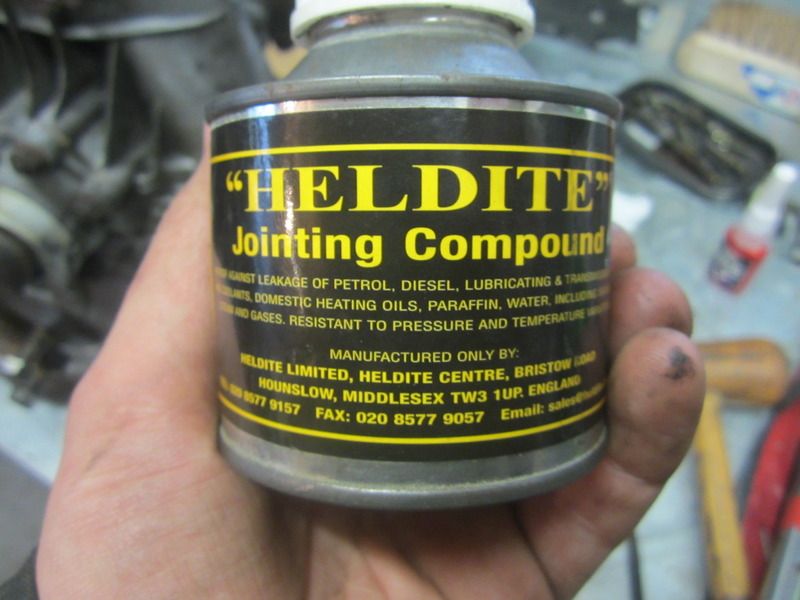 Same applied to the gearbox top cover 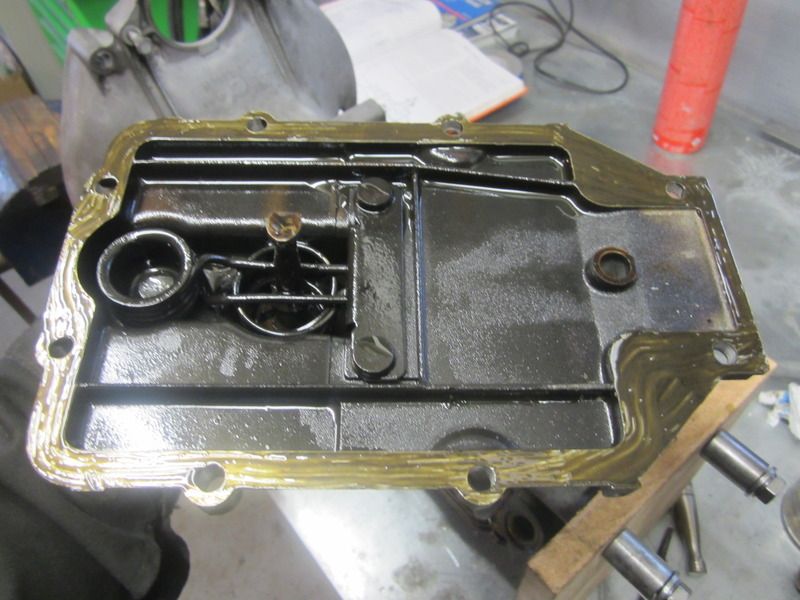 And the top was bolted back on after filling up 0.9 litres of semi synthetic 75w90 hypoid gear oil. Next I joined the gearbox and engine back together again. Slotted together very nicely, and was then plonked in position after fitting new CV joints and grease all round. 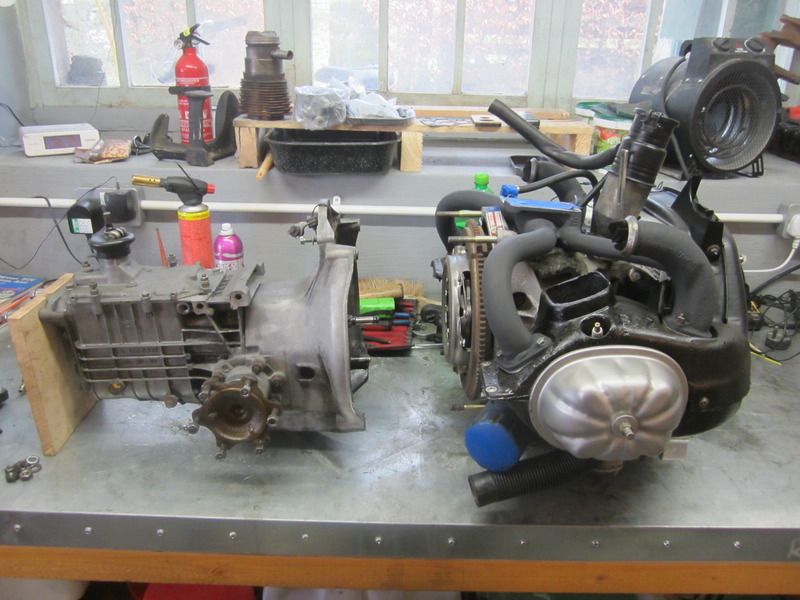 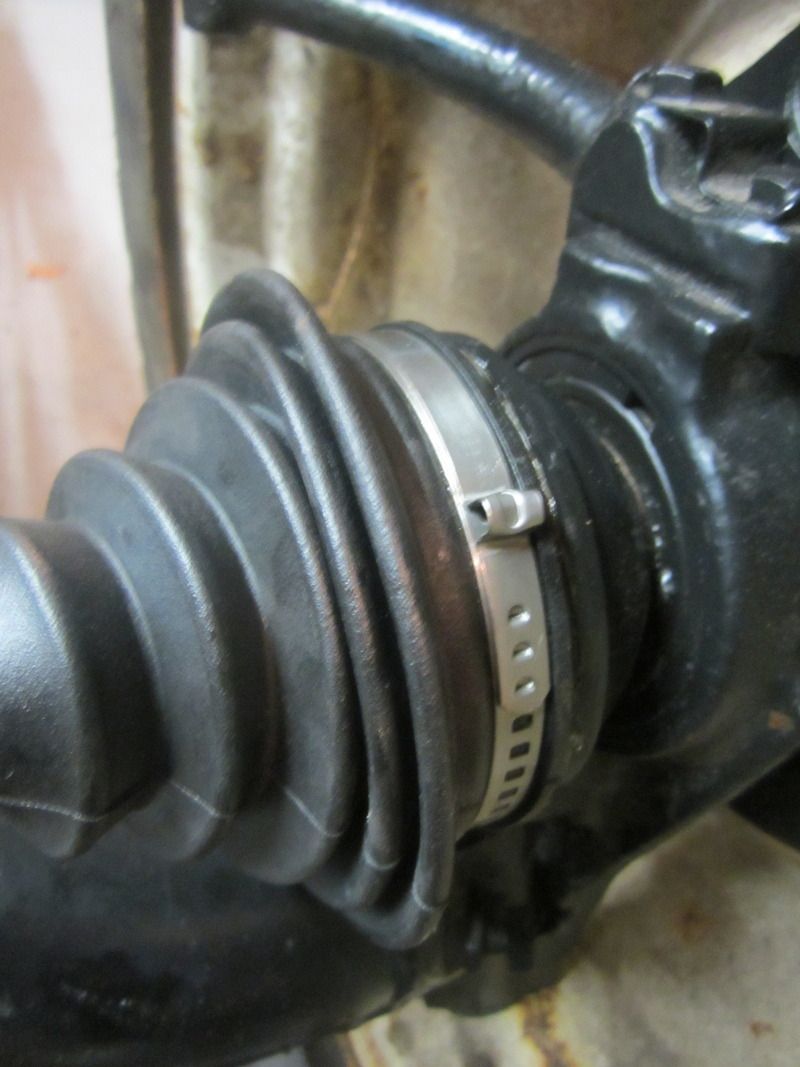  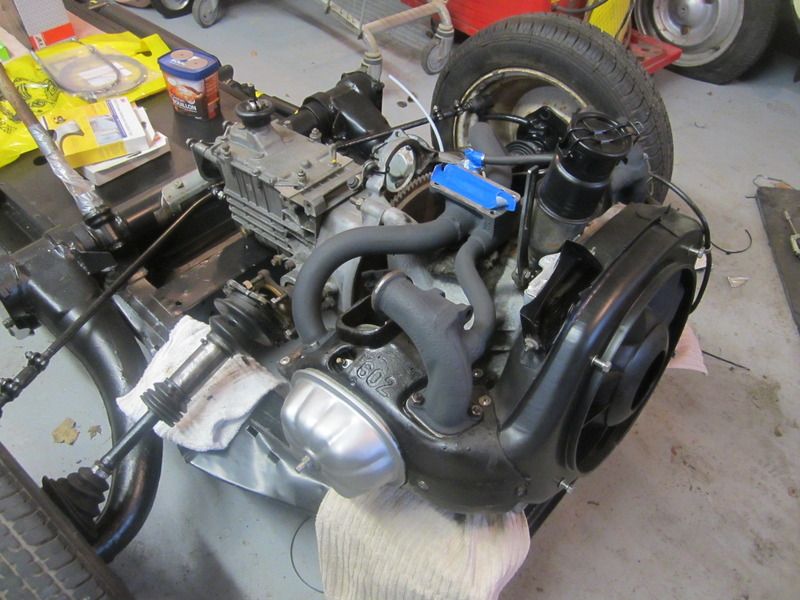 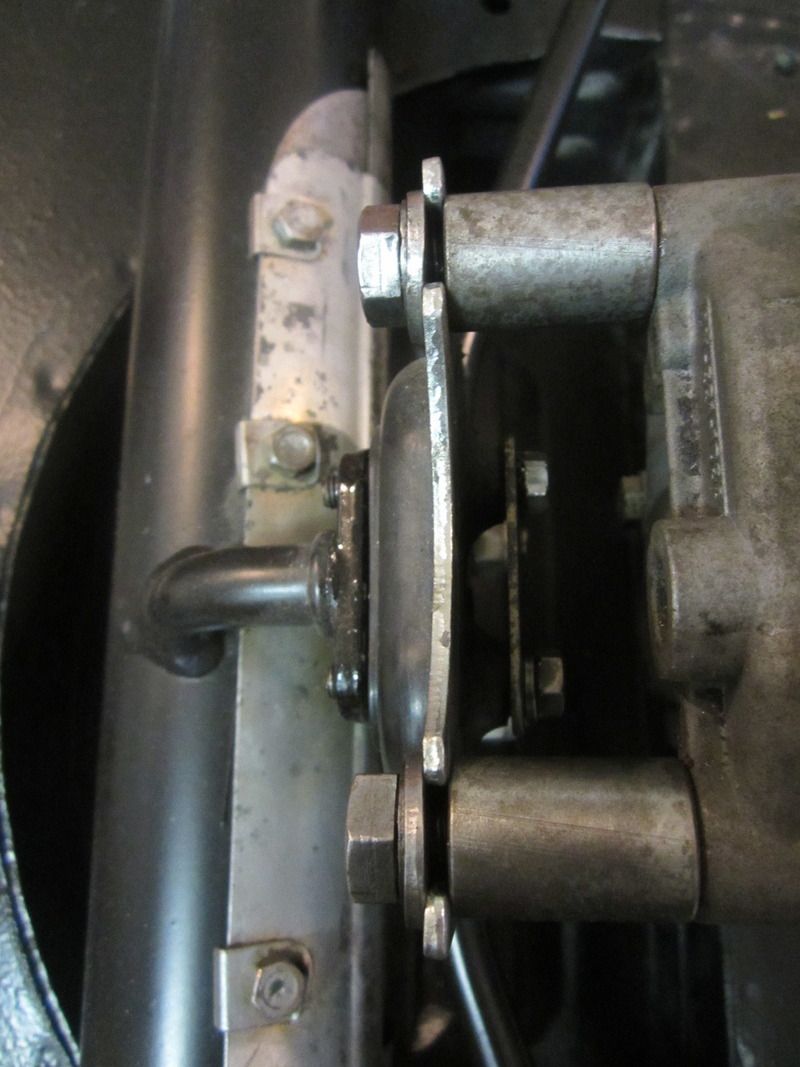  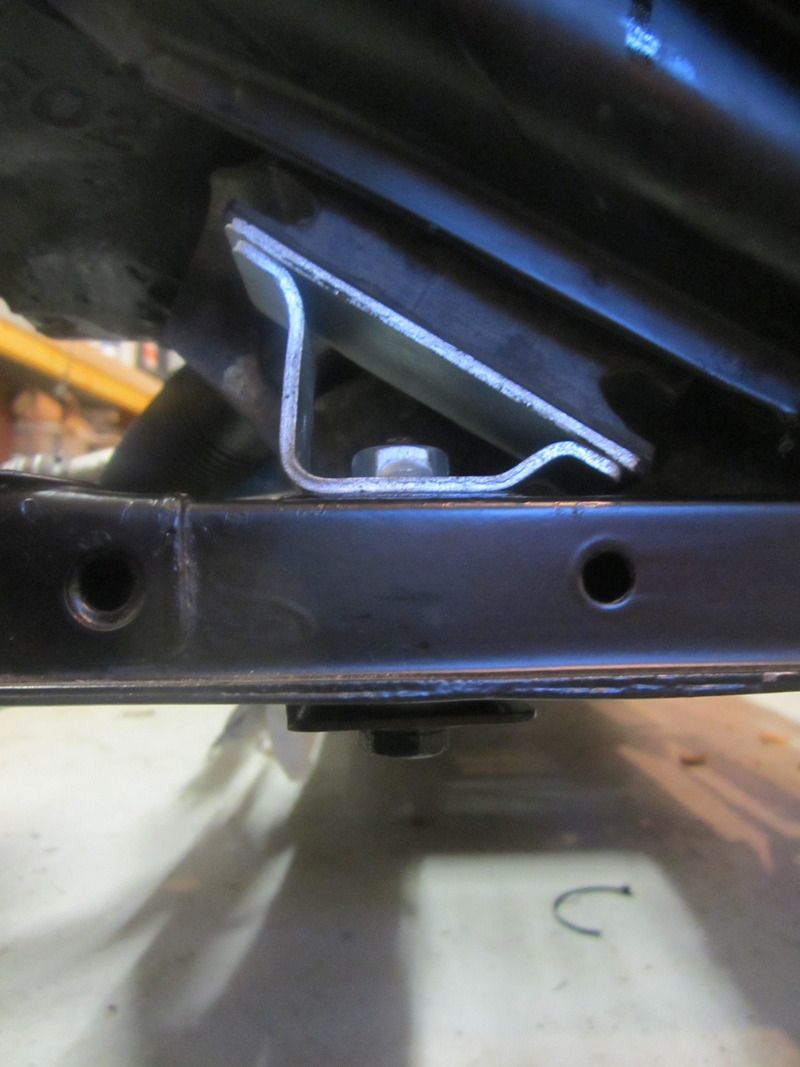 Next up I fitted new discs and attached and torqued up the driveshafts 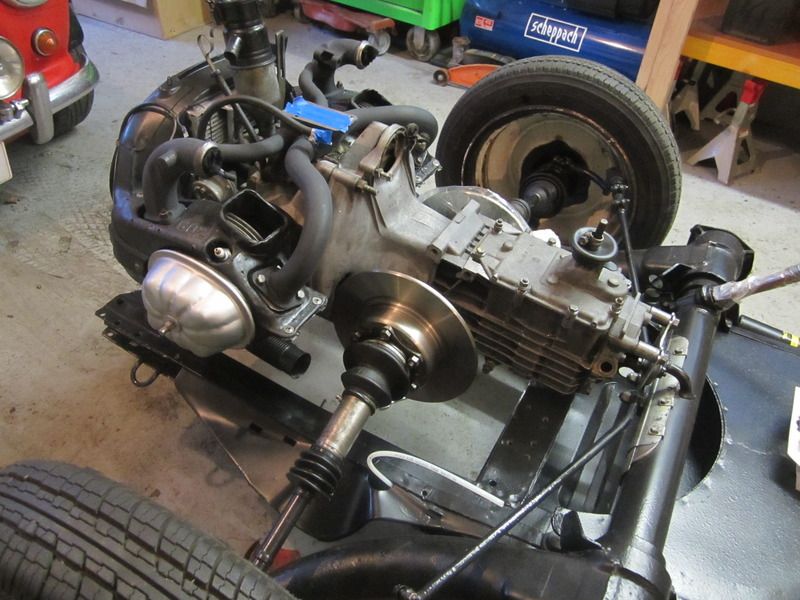 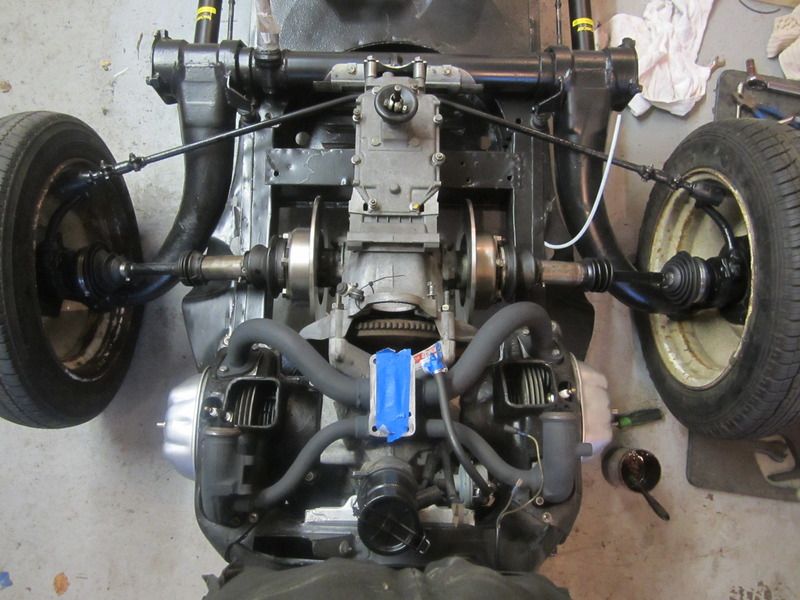 And checked over both calipers, and fitted with new Valeo brake and hand brake pads. 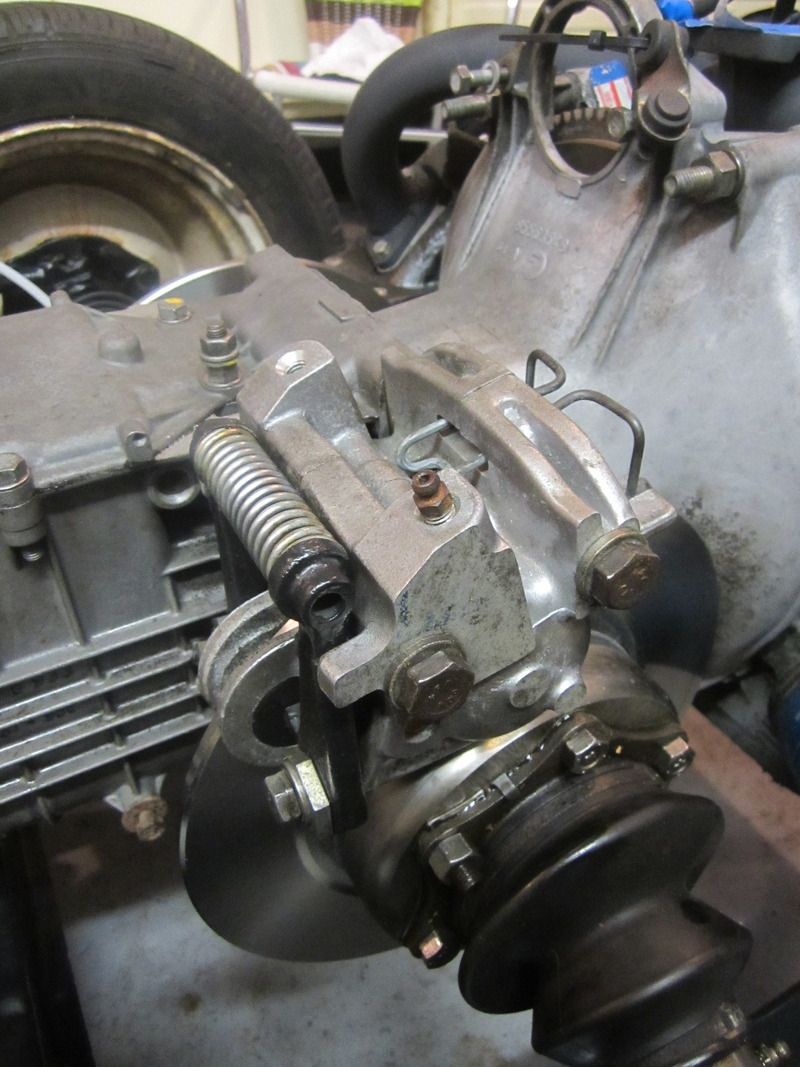 That's all for now, next job is to continue trying to source a set of these brackets that support the brake pipe coil in the rear axle. I can't find any for love nor money. I've tried both methods. 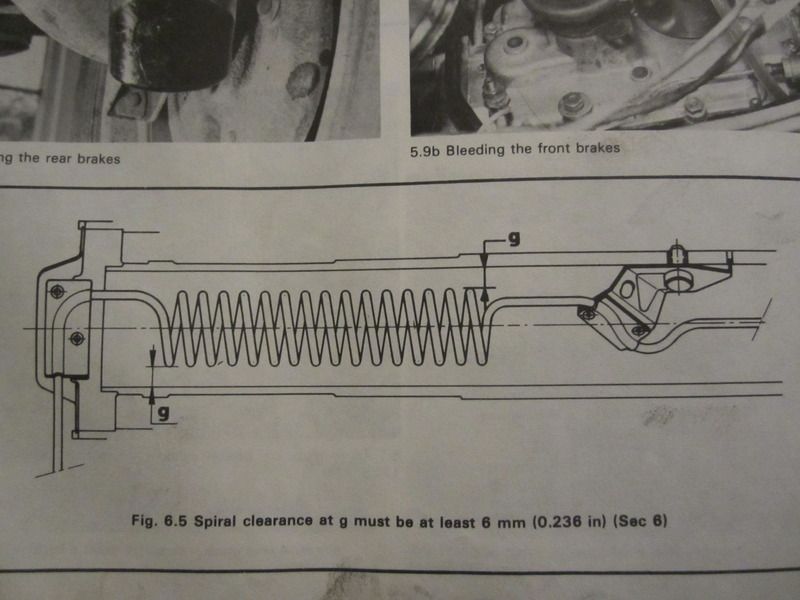 That's my Christmas break over now so progress will be slow again for a while, but once the rear brake pipes are done the body can go on the chassis... Soonies, dudes. |
| |
1989 Mini MG 1275 ~ 1987 VW Polo ~ 1989 Citroen 2CV ~ 1998 VW T4 ~ 2006 Volvo XC70
|
|
|
|
|
|
|
|
|
| |
1989 Mini MG 1275 ~ 1987 VW Polo ~ 1989 Citroen 2CV ~ 1998 VW T4 ~ 2006 Volvo XC70
|
|
|
|
|
|
|
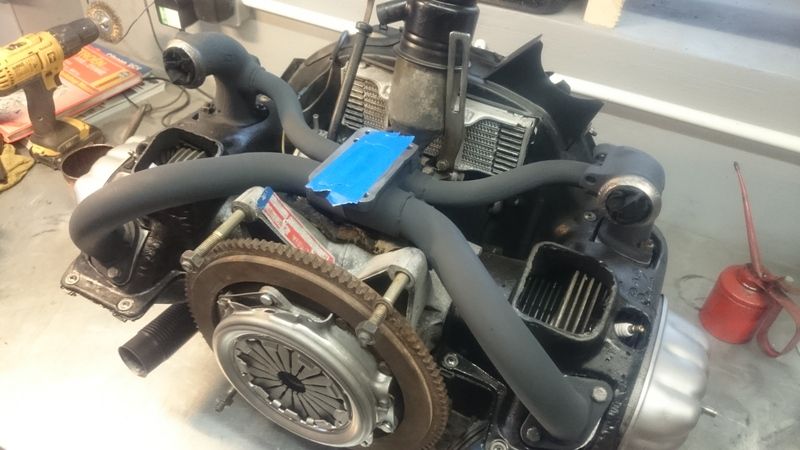
With the car in my garage at home I now carried on building up the chassis. Apologies for the curse word quality photos, I lost my camera. So I started off dusting down the chassis and trying to remind myself where I last left things, rebuilding the chassis ready to pop the body back on. First on the list was cleaning up the fuel tank and fittings, and attaching it to the chassis. 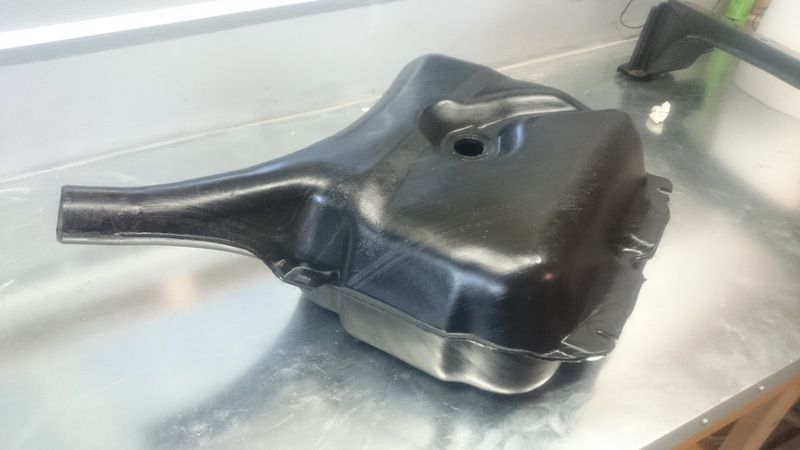 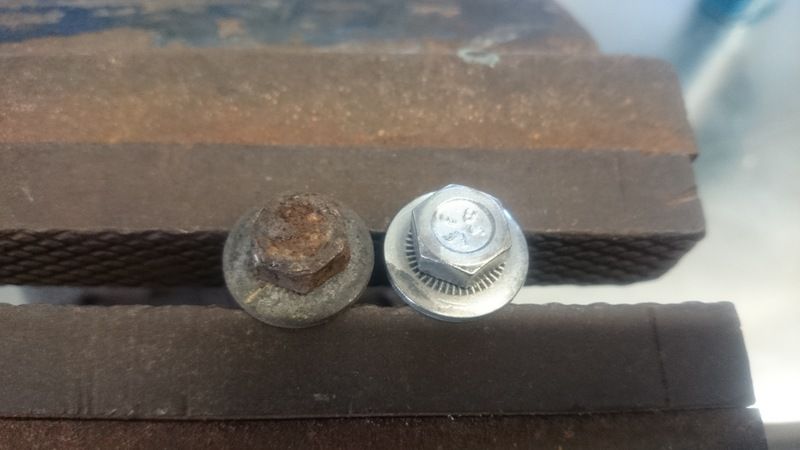 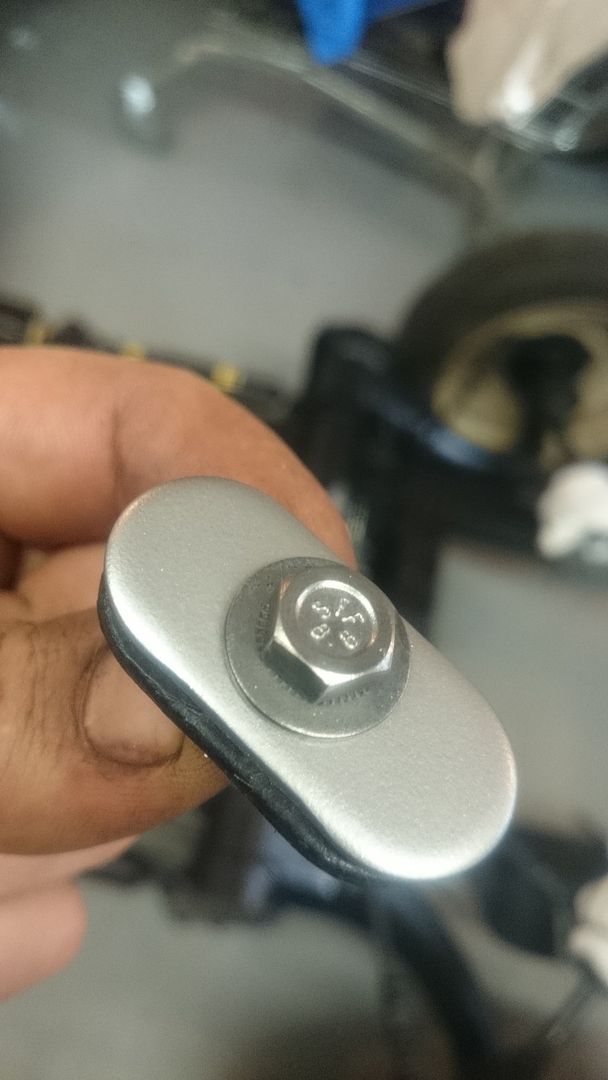 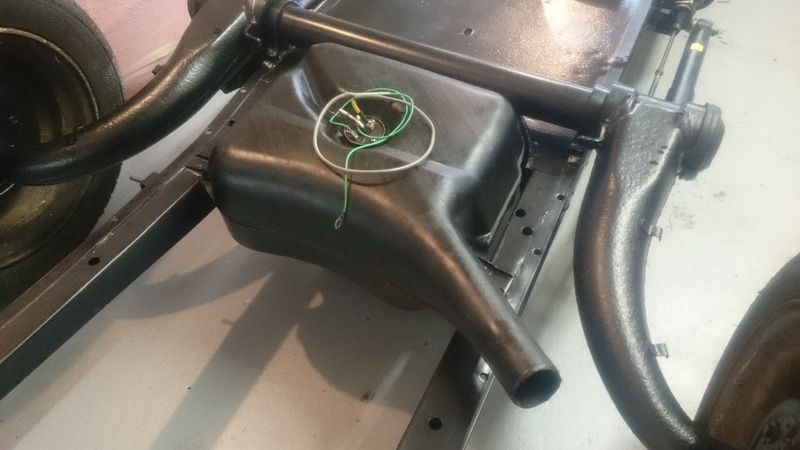 Next I got the engine up on the bench to check things over. 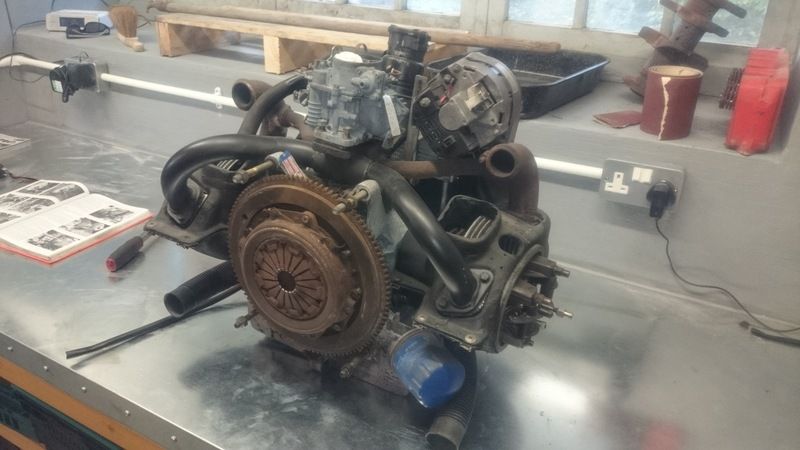 Bear in mind last time this engine ran was over 3 years ago. On trying to turn it over by hand it seemed to get stuck so I took out the plugs and shone a torch down the holes. One side looked fine, the other suspiciously rusty looking.. 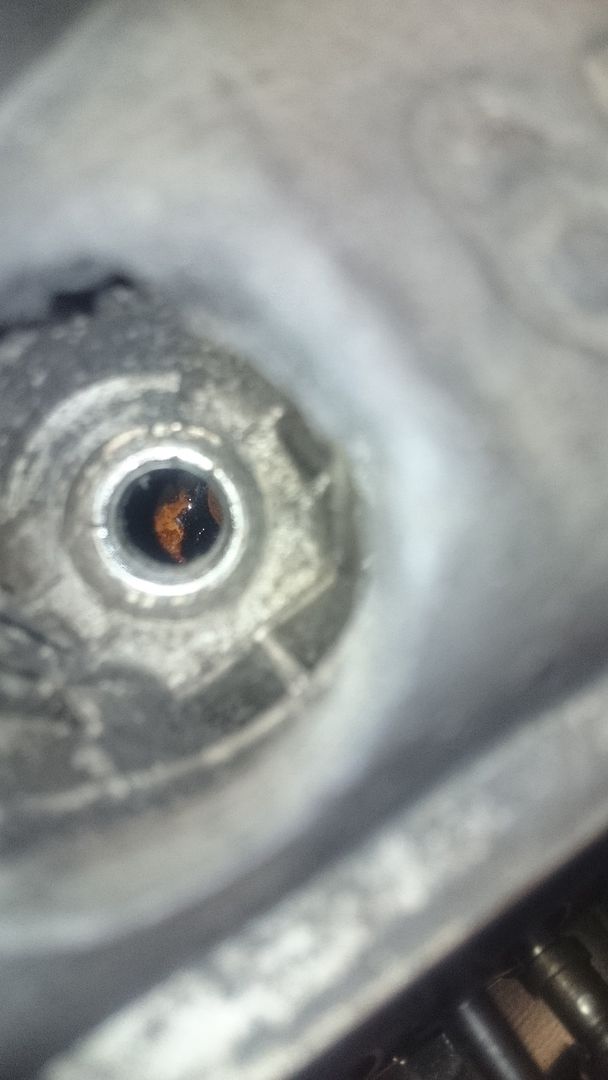 So off with the heads to see what's what. 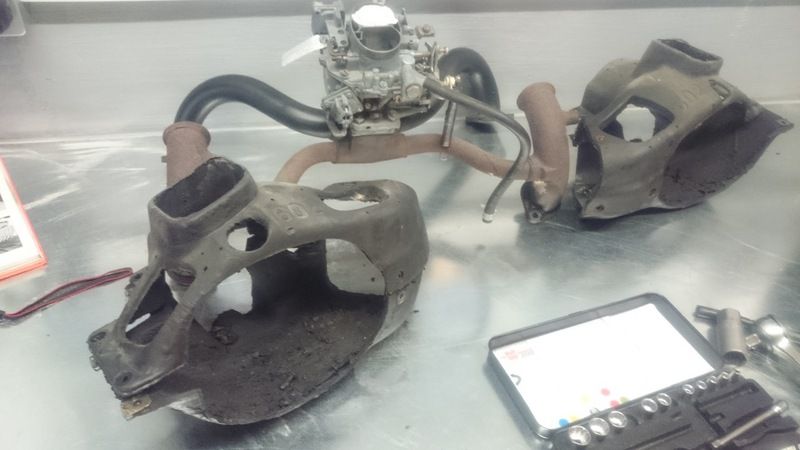 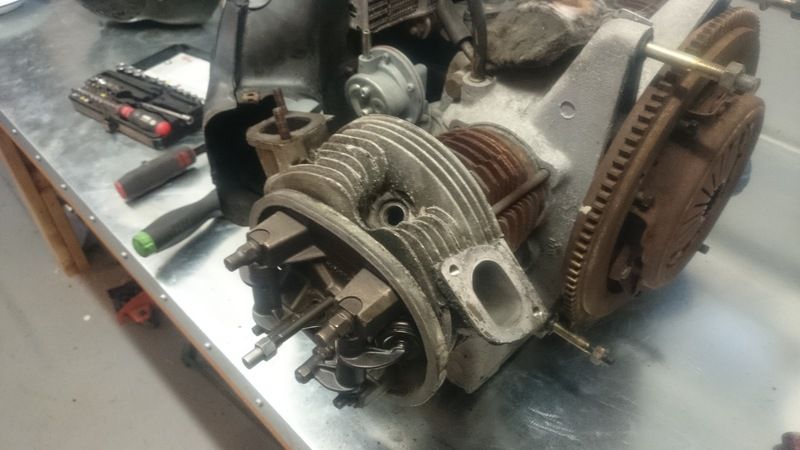 One barrel looked perfect but the other was a bit crusty. Evidence of water sitting in the barrel for a while, must have been when I pressure washed it before putting it away. Took the barrel off and cleaned it up, but I don't think it's salvageable. 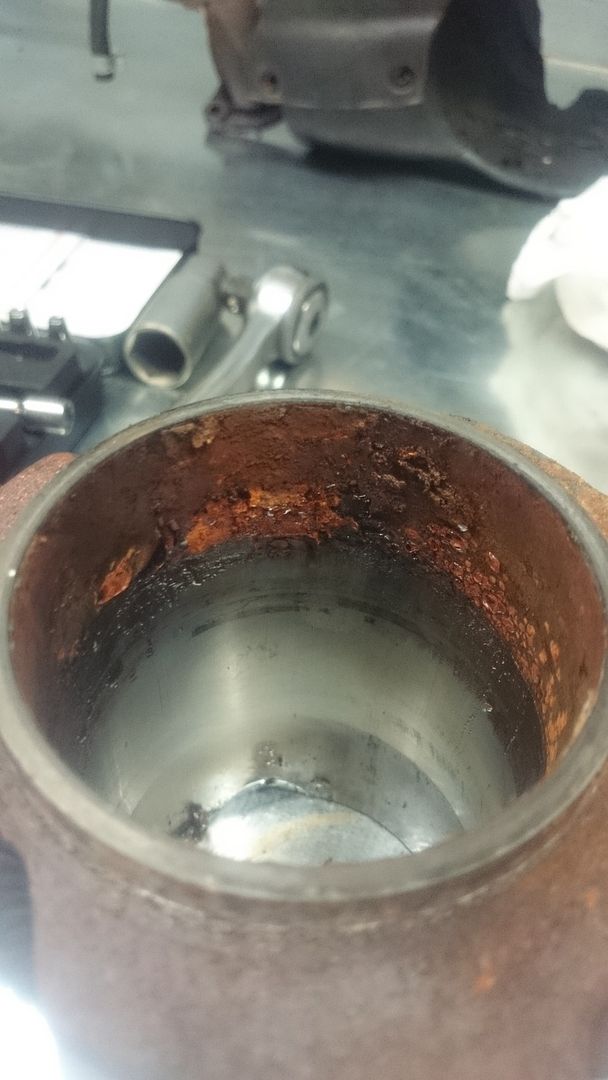 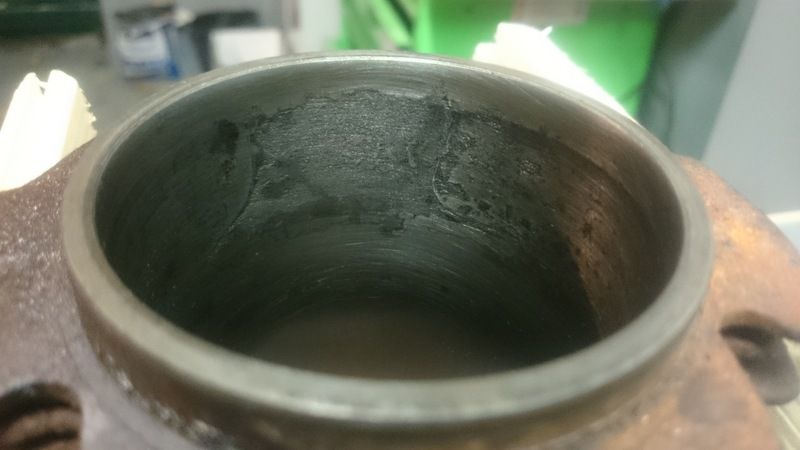 Luckily the piston looks ok, I've left it soaking in degreaser but all the rings move and it's not very corroded so fingers crossed. The cyl' head looks salvageable, I'll take the valves out and see how it is. 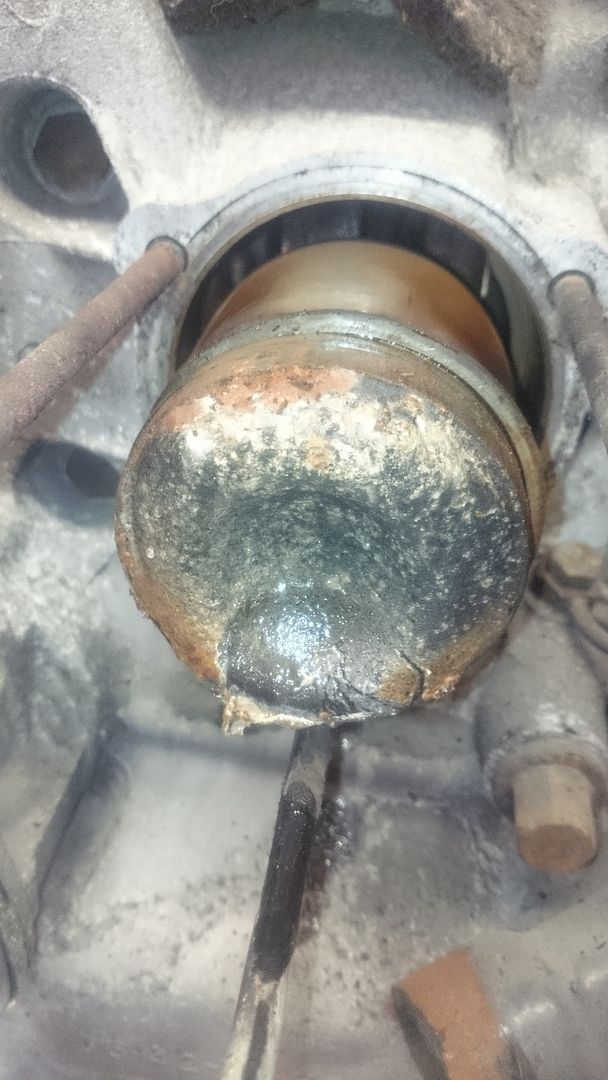 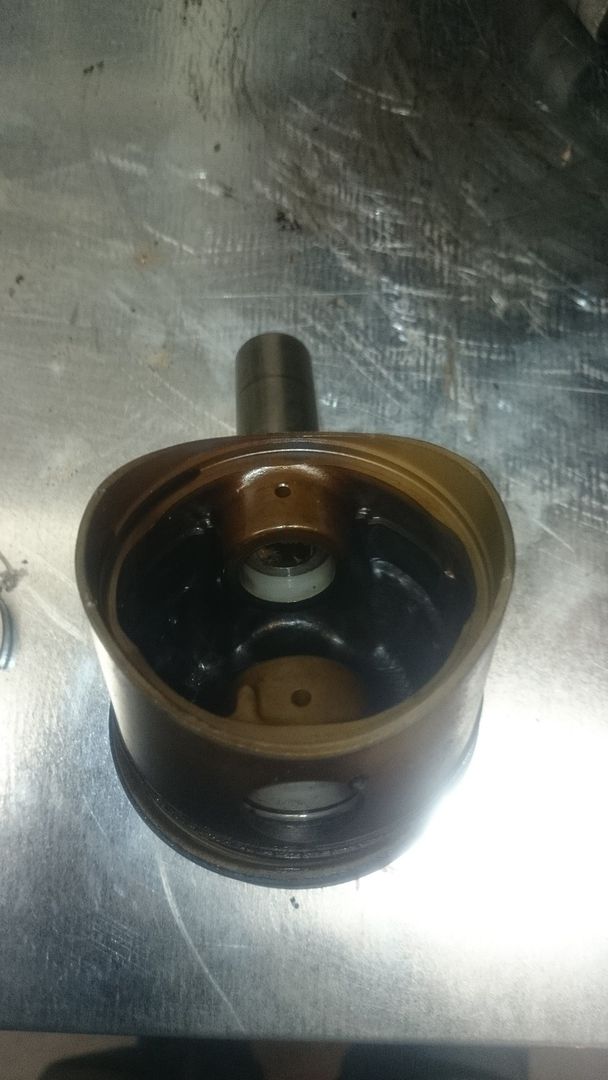 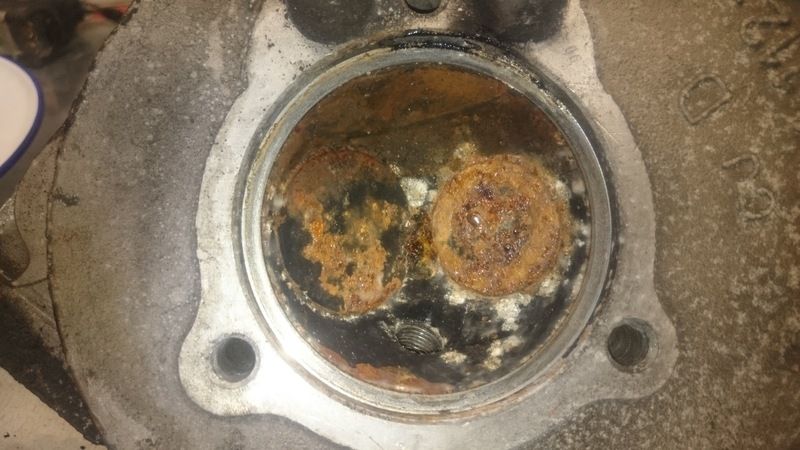 |
| |
1989 Mini MG 1275 ~ 1987 VW Polo ~ 1989 Citroen 2CV ~ 1998 VW T4 ~ 2006 Volvo XC70
|
|
|
|
|
|
|
Next up, it was time to split the engine and box to check things over. Removed calipers and discs 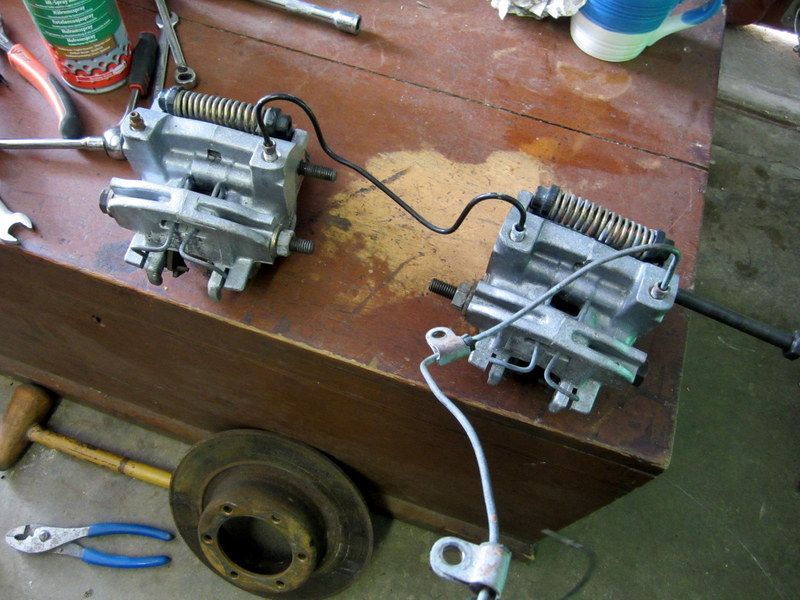 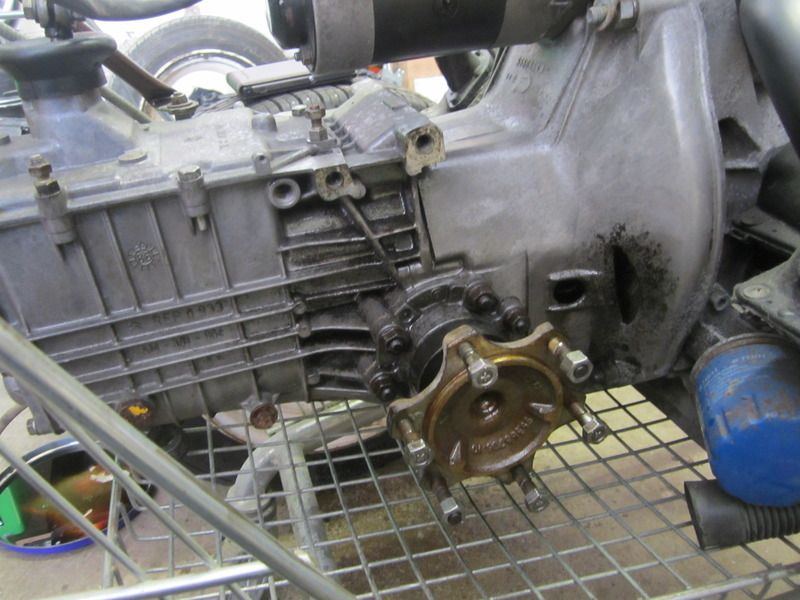 And removed the box from the engine. I removed the clutch to check for wear, It's Valeo, (original I think?) the thrust bearing and the clutch disc are pretty worn and although it drove fine before I ripped it to bits I think it could do with changing whilst I'm at it. 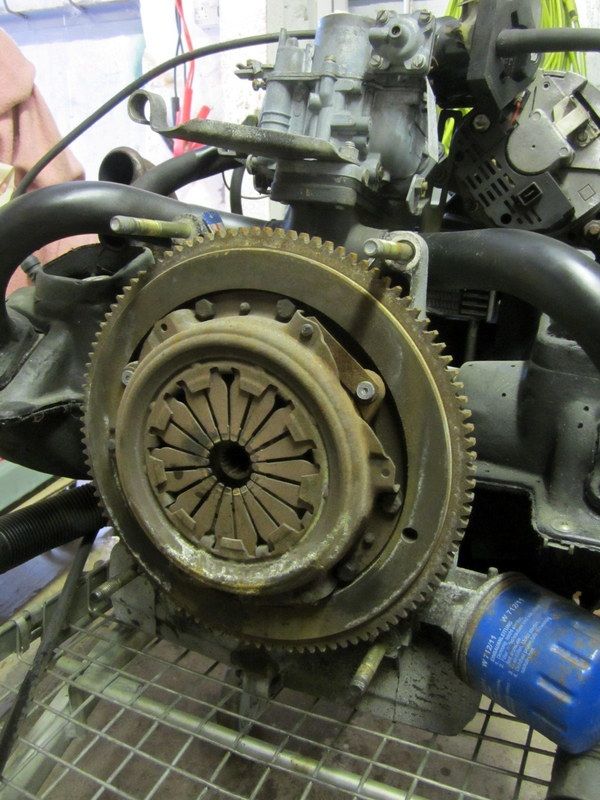 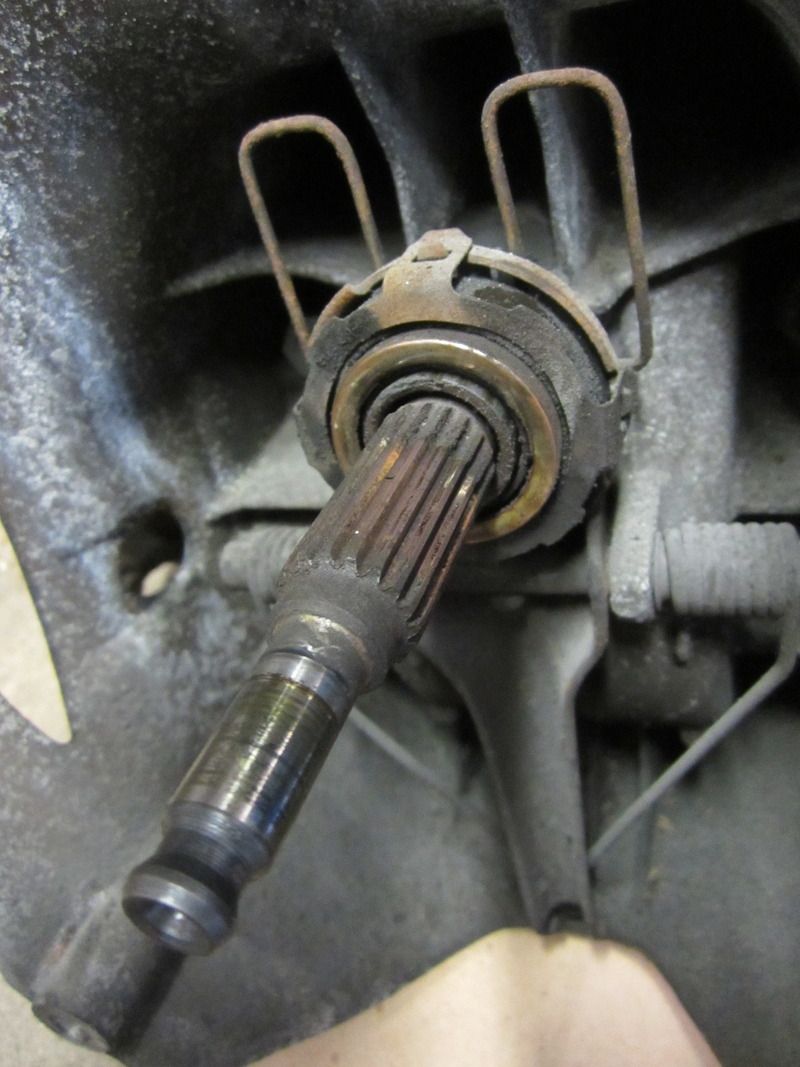 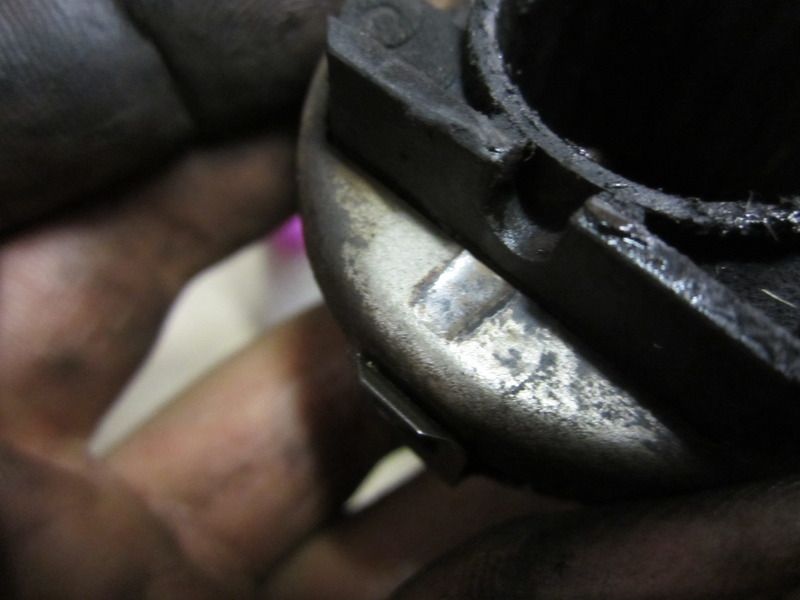 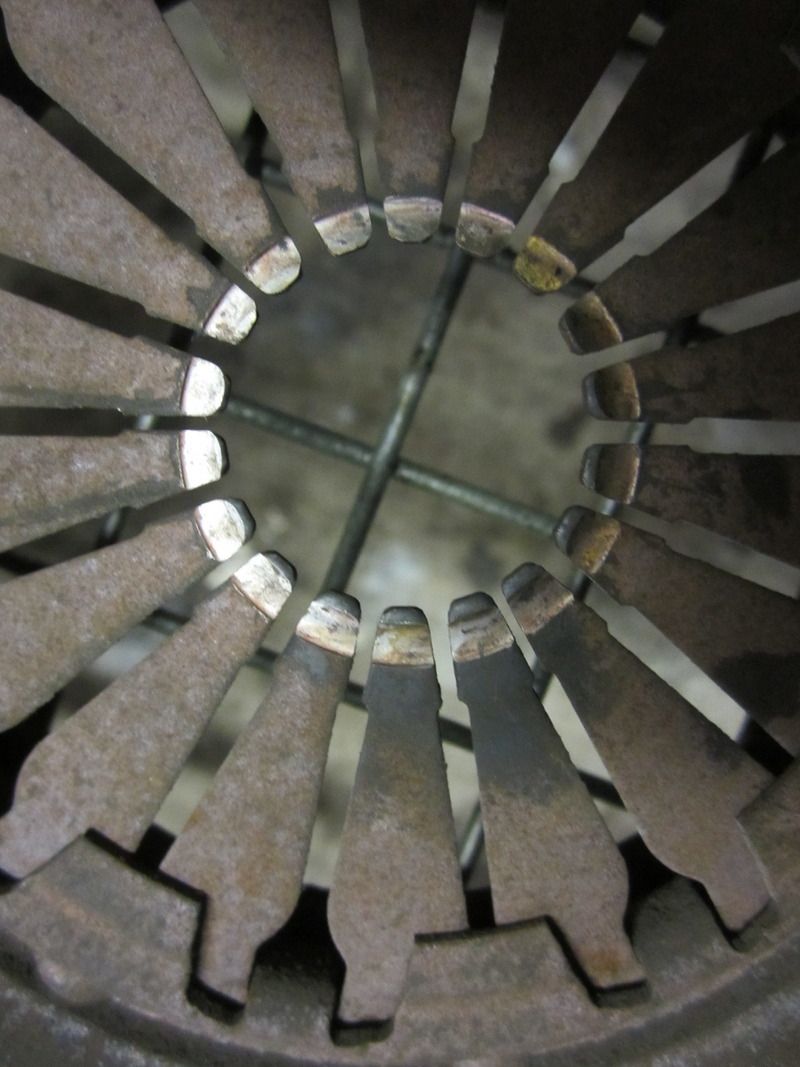 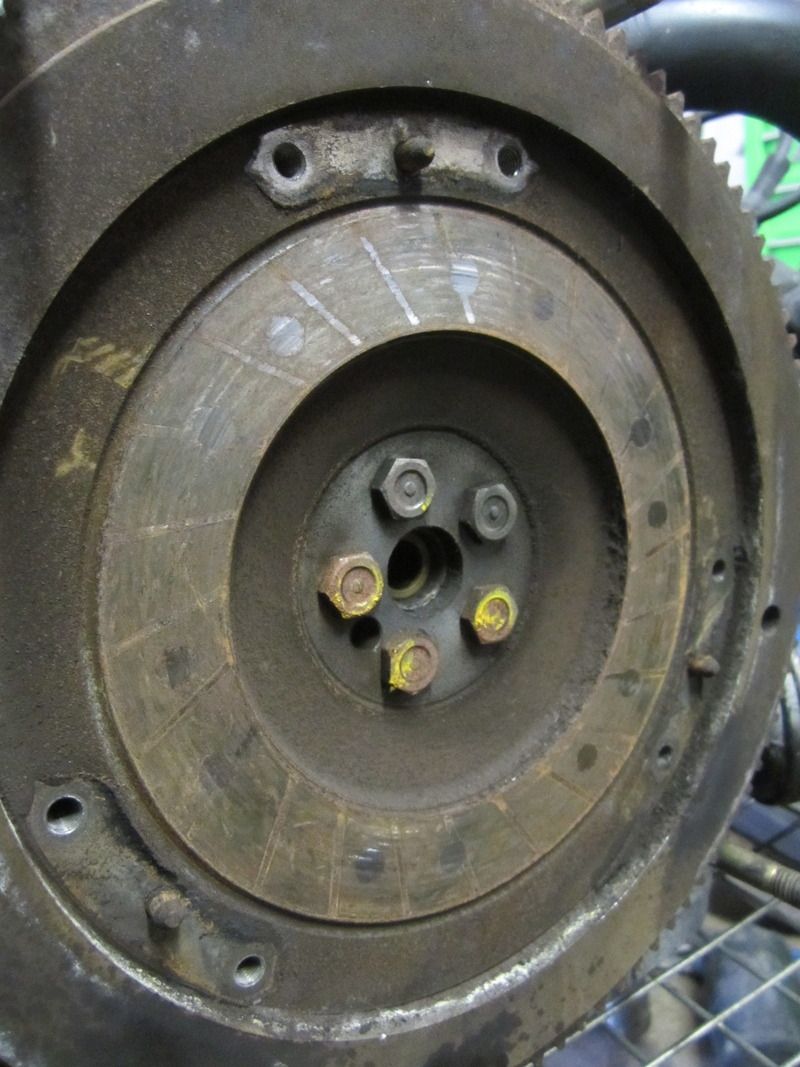 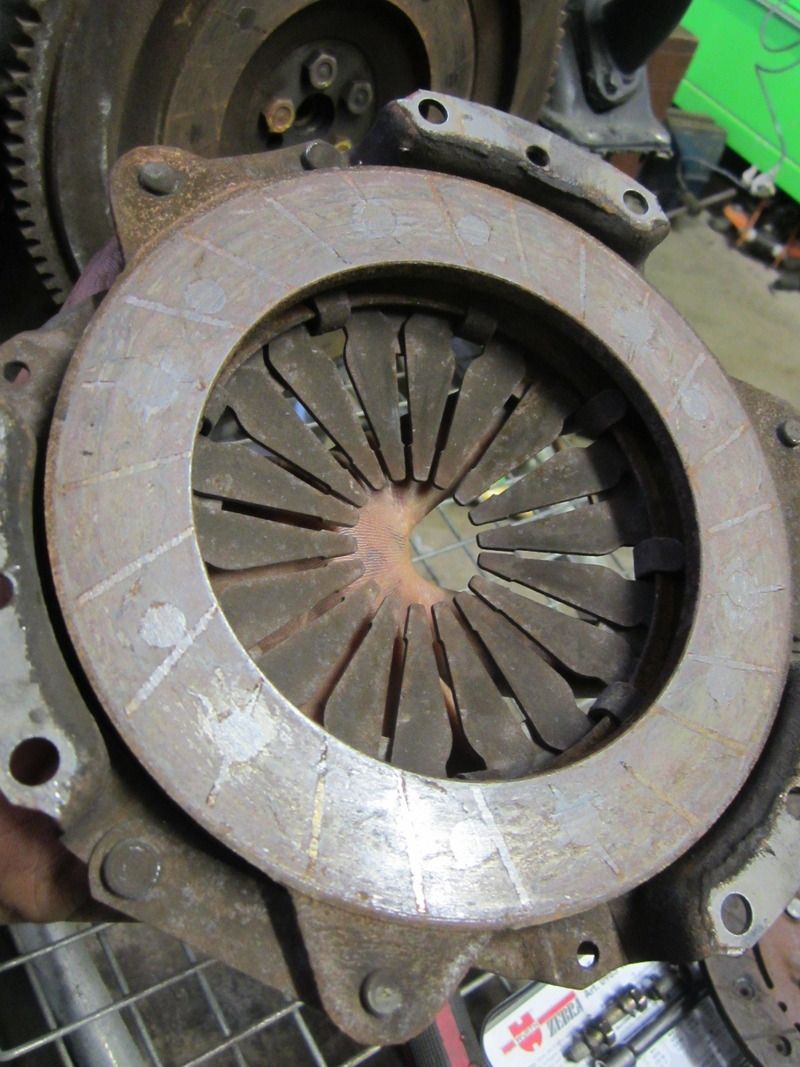 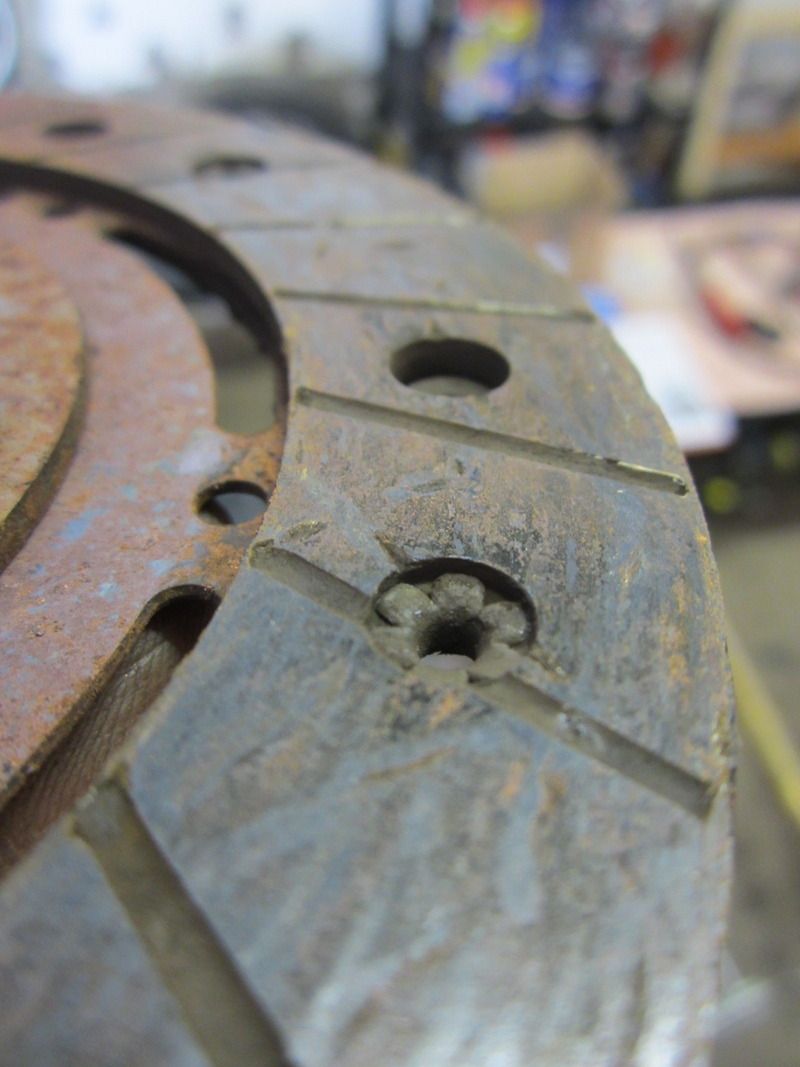 I also painted my brown rod. 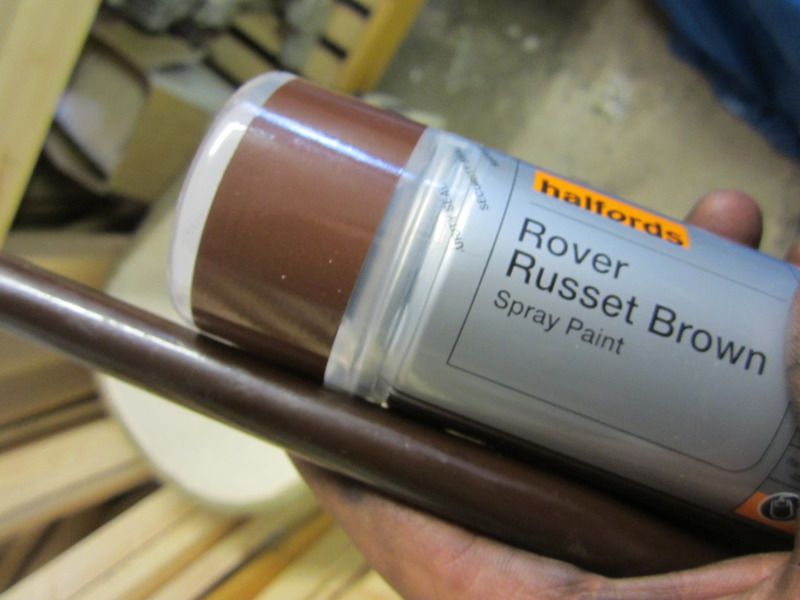 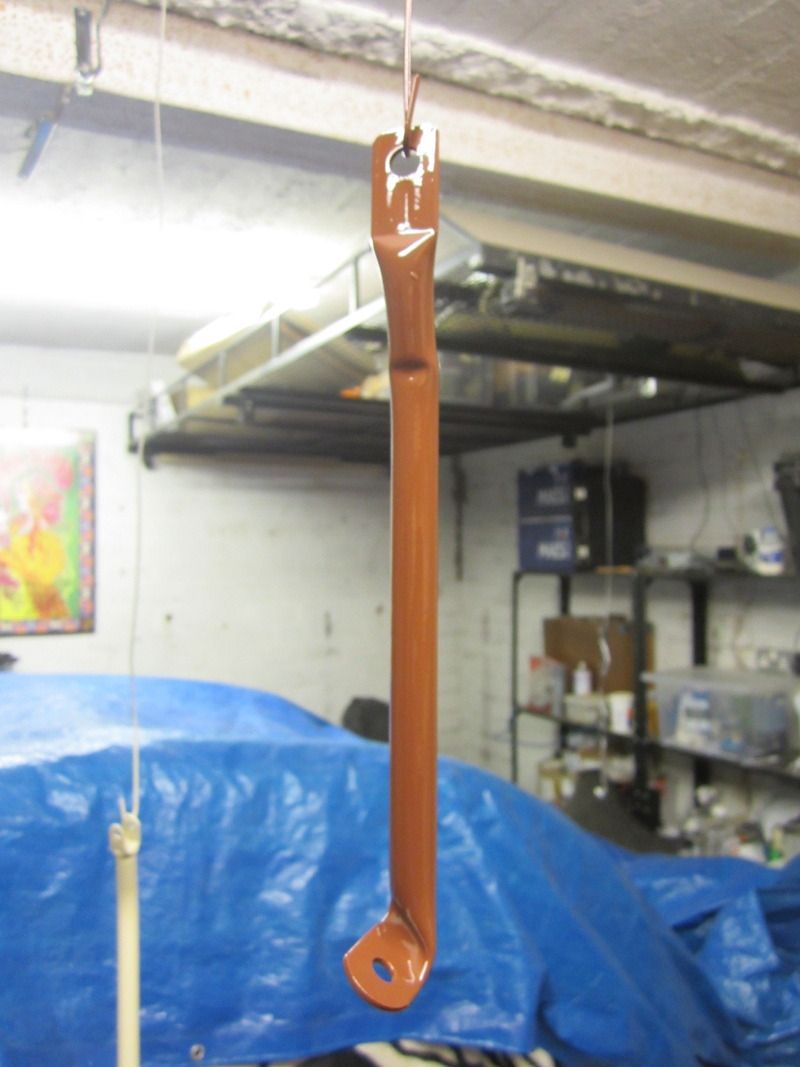 Pretty incredible I think you'll agree. I also pimped up some other bits 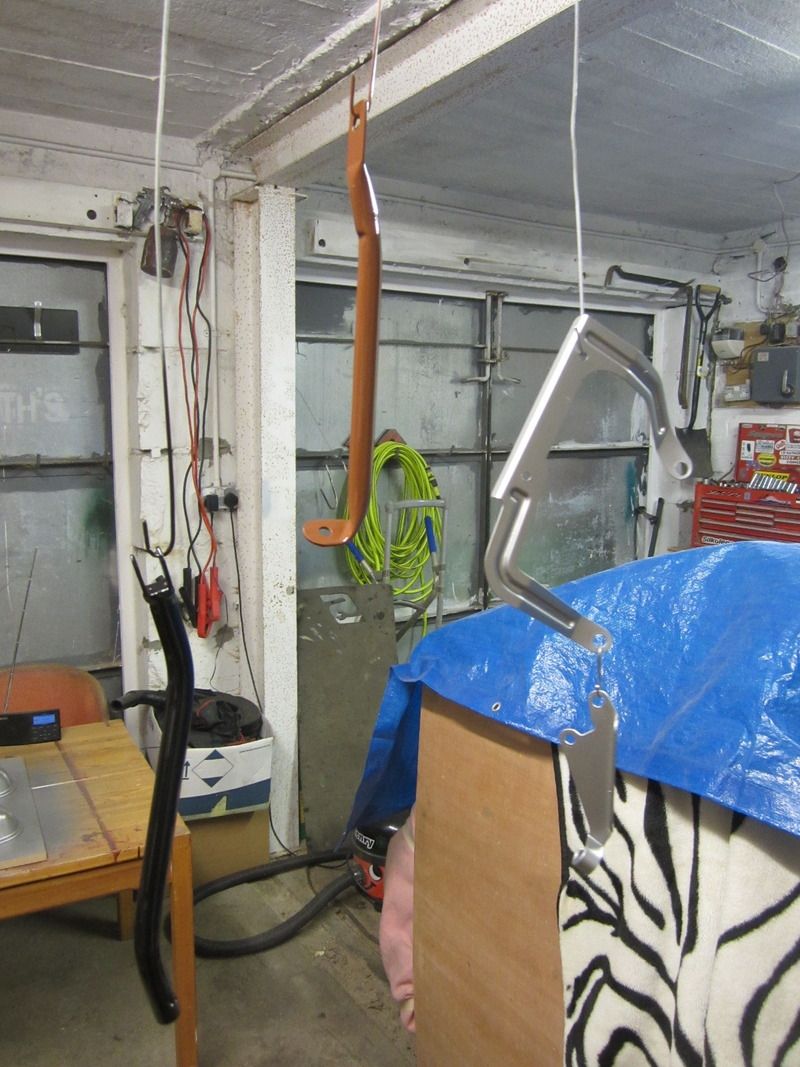  I started trying to fit the fuel tank but realised I had no m7 nuts and bolts or washers, so considering how many seem to be used on A series Citroens, I ordered a heap from eBay. On checking the fuel gauge sender I discovered why the fuel gauge wasn't working before 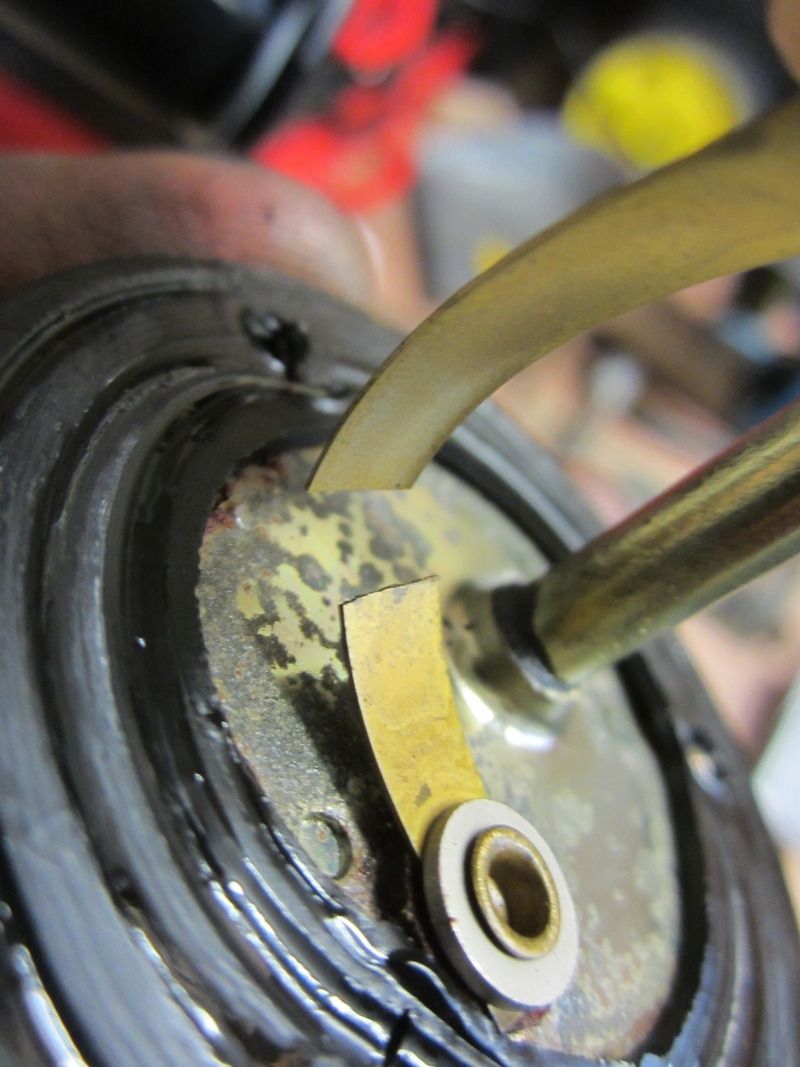 Soldered 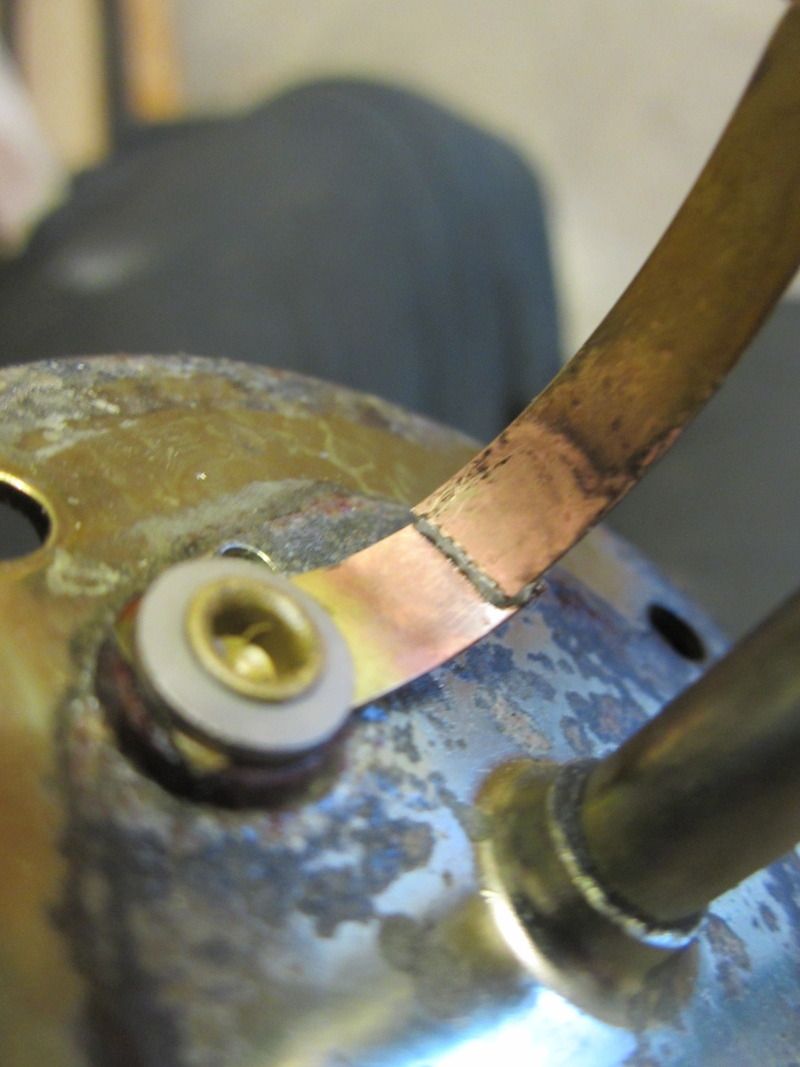 I also found a novel handbrake adjustment method utilised by a previous owner 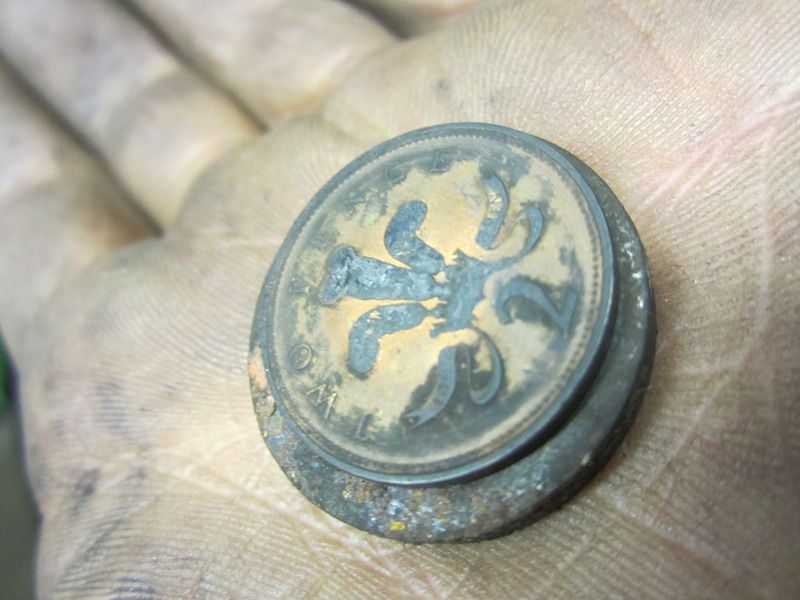 Quite impressed the handbrake has enough force to slightly squash a toupee. |
| |
1989 Mini MG 1275 ~ 1987 VW Polo ~ 1989 Citroen 2CV ~ 1998 VW T4 ~ 2006 Volvo XC70
|
|
|
|
|
|
|
Next job was to check the swing arm bearings. I've photographed most stages in an attempt to help others who like me, need to do a job like this but haven't done it before and so don't know what's involved. Sorry if it bores anyone to death. Removed the damper bracket to reveal the castle nut held in place with a spilt pin and accompanied by the suspicious lump of grease. All looked original and previously untouched. 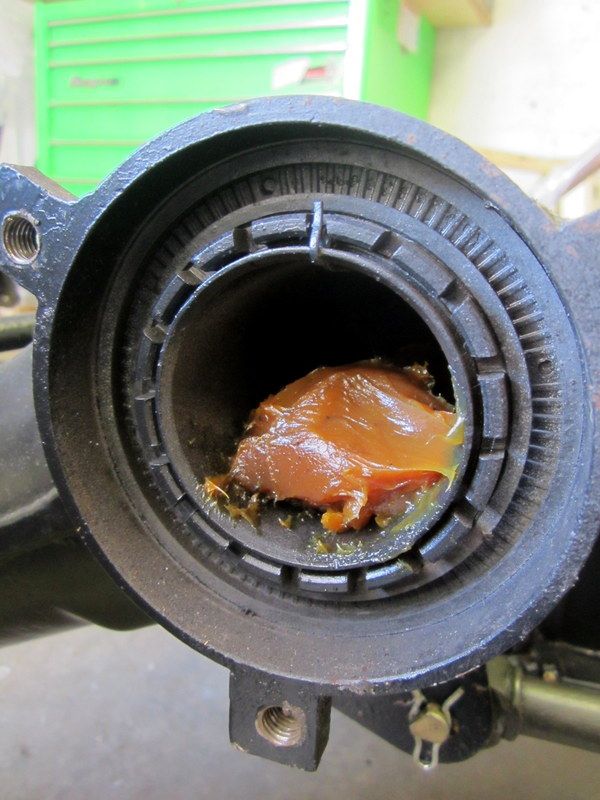 I next made a highly sophisticated tool by hacking up a cold chisel and filing it to the right size so it could be knocked into one of the notches in the castle nut and then belted with a hammer. 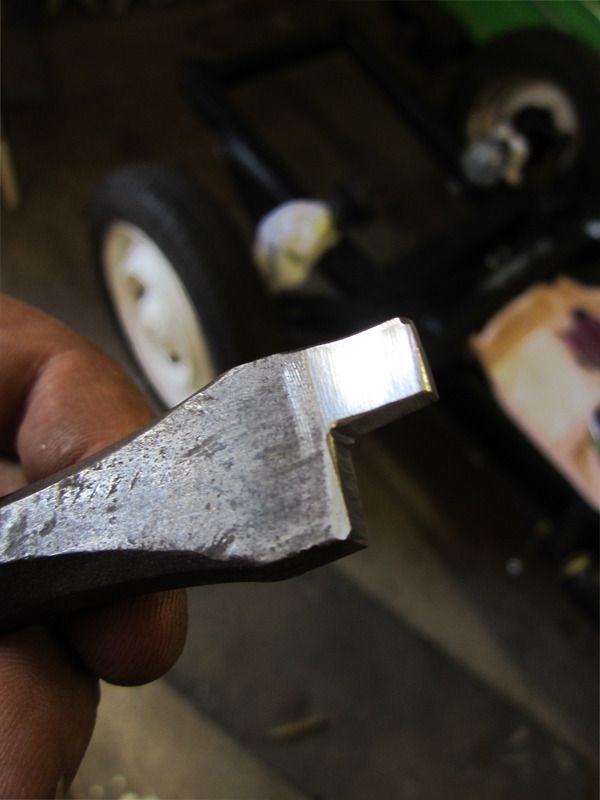 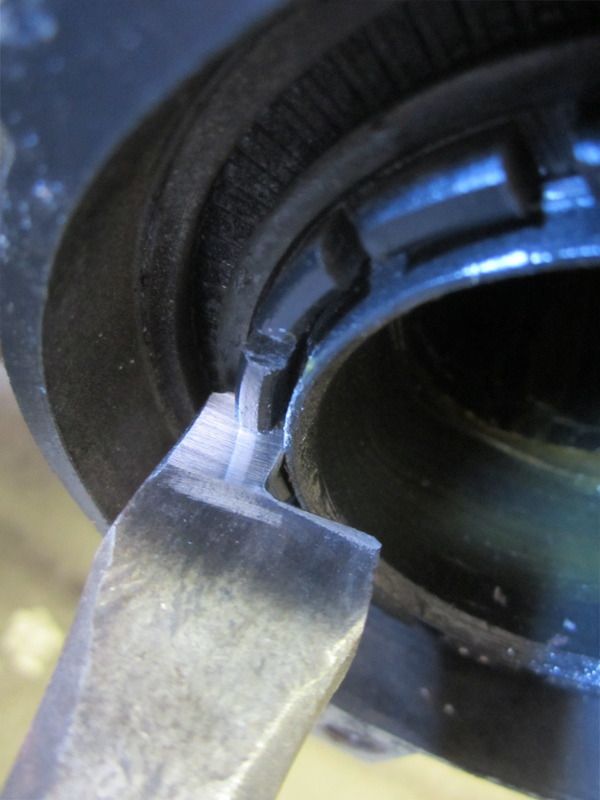 To my joy, it worked like a dream. Before loosening the nuts I marked their position in relation to the axle with a centre punch to try and put it back to roughly the same torque. 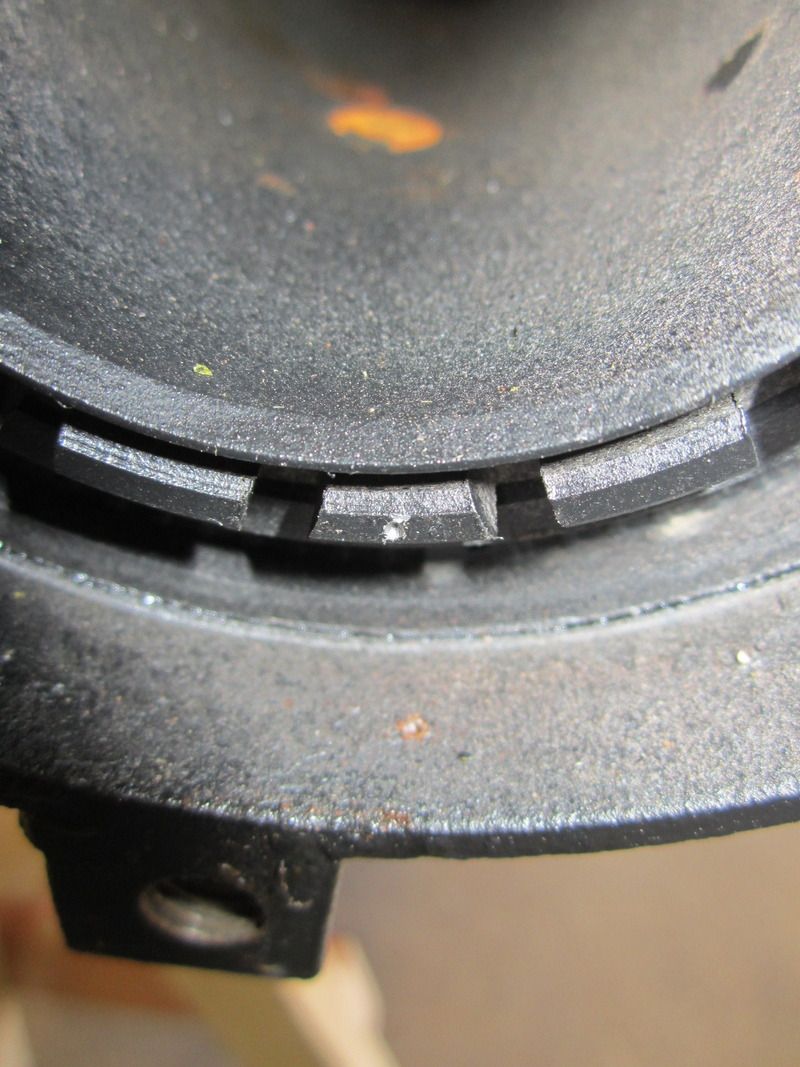 I realised that to remove that side of the front axle I had to either remove the steering rod from the rack or release the steering arm ball from the rod. I tried removing the steering rod from the centre of the axle first but it was stuck solid, I think I'll need a special tool for this, I don't have a ball joint splitter. I decided to remove the axle by releasing the steering arm ball joint. 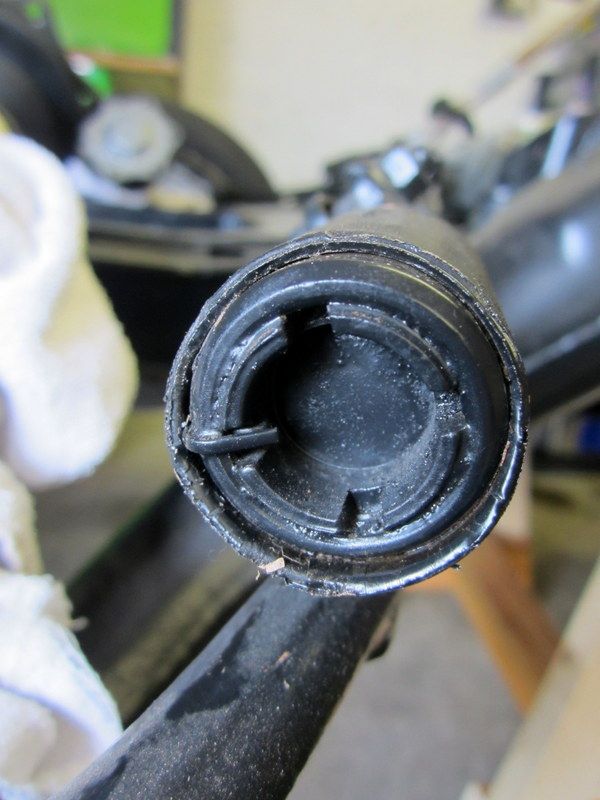 After taking out the split pin, I found that the chisel that I adapted for the castle nut fitted this perfectly too (Instant multi tool). 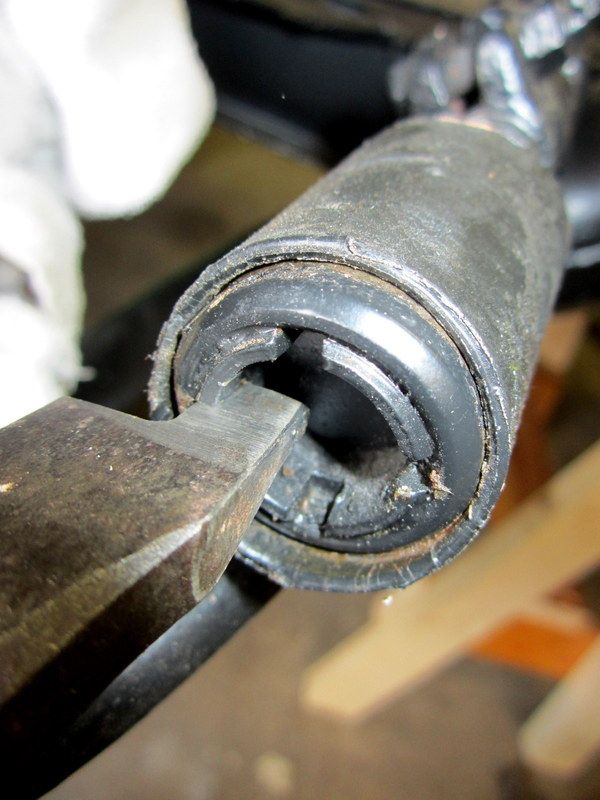 So I removed the castellated nut and the cup washer thingmy and tried getting the ball out. 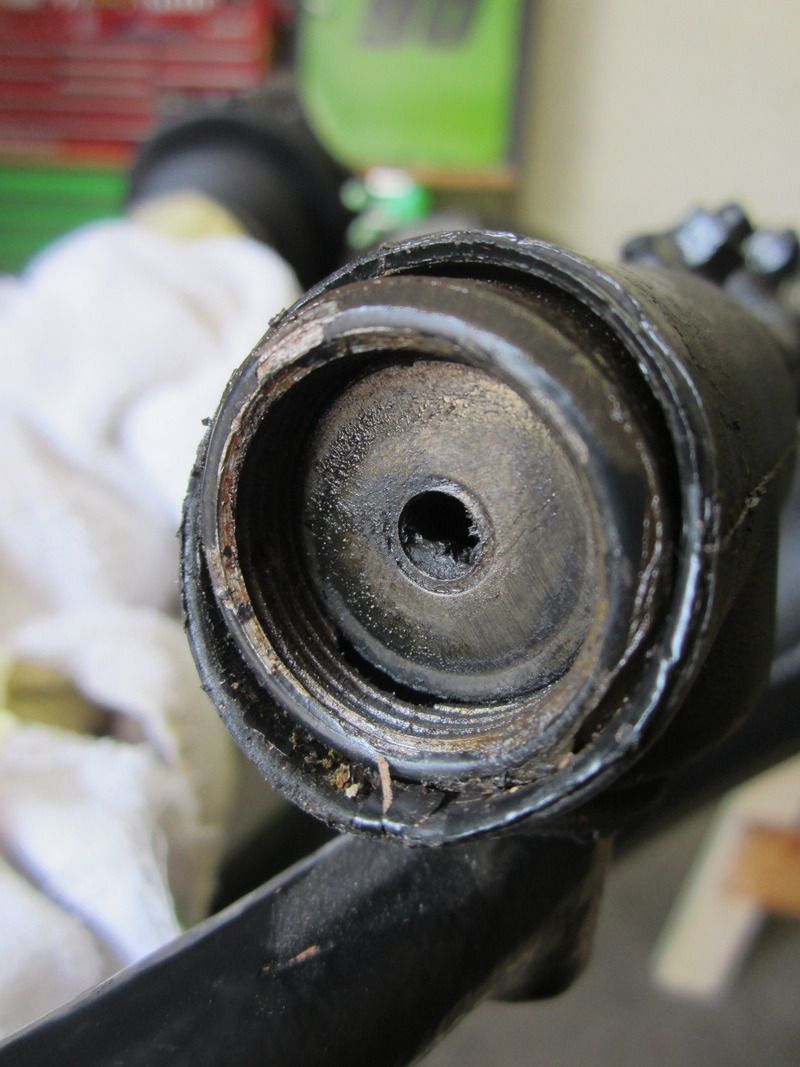 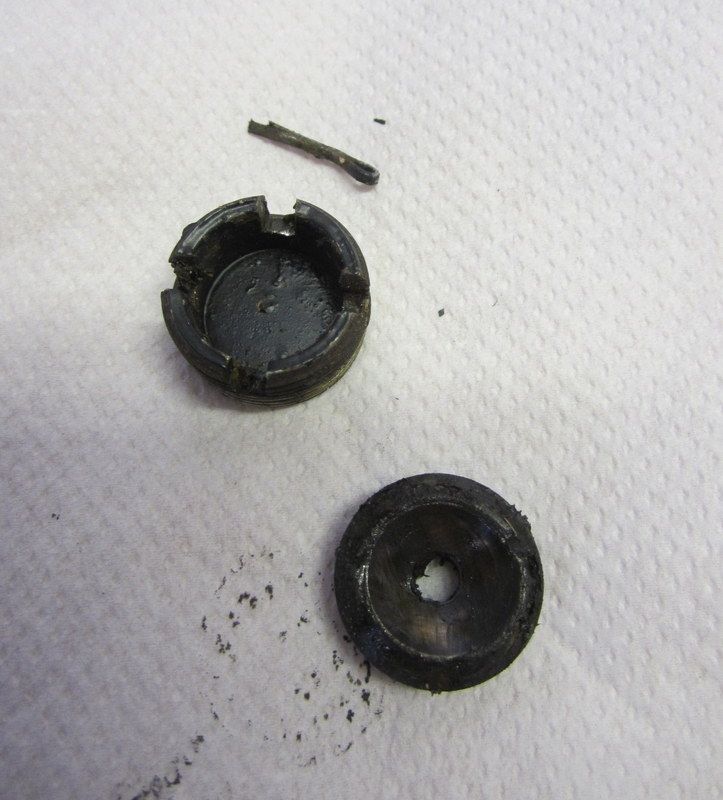 This confused me for a while until I realised the ball had 2 flat faces so it was just a case of turning the hub until they aligned with the slot in the rod and then it just fell out. 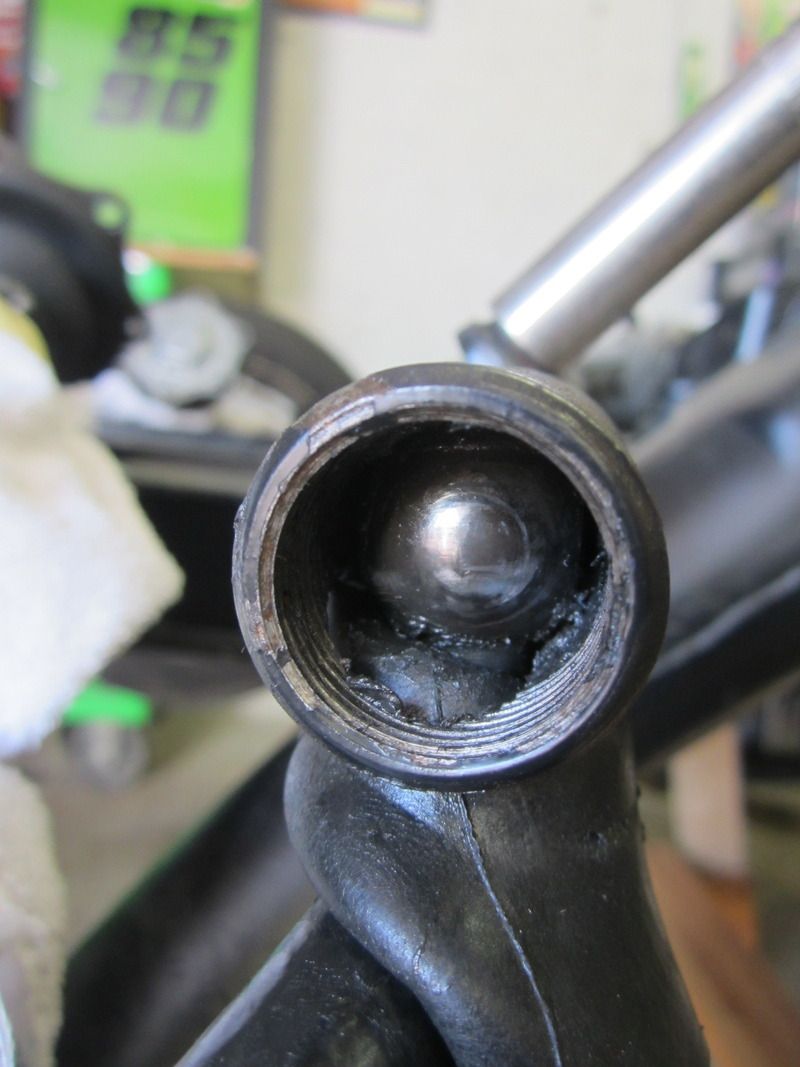 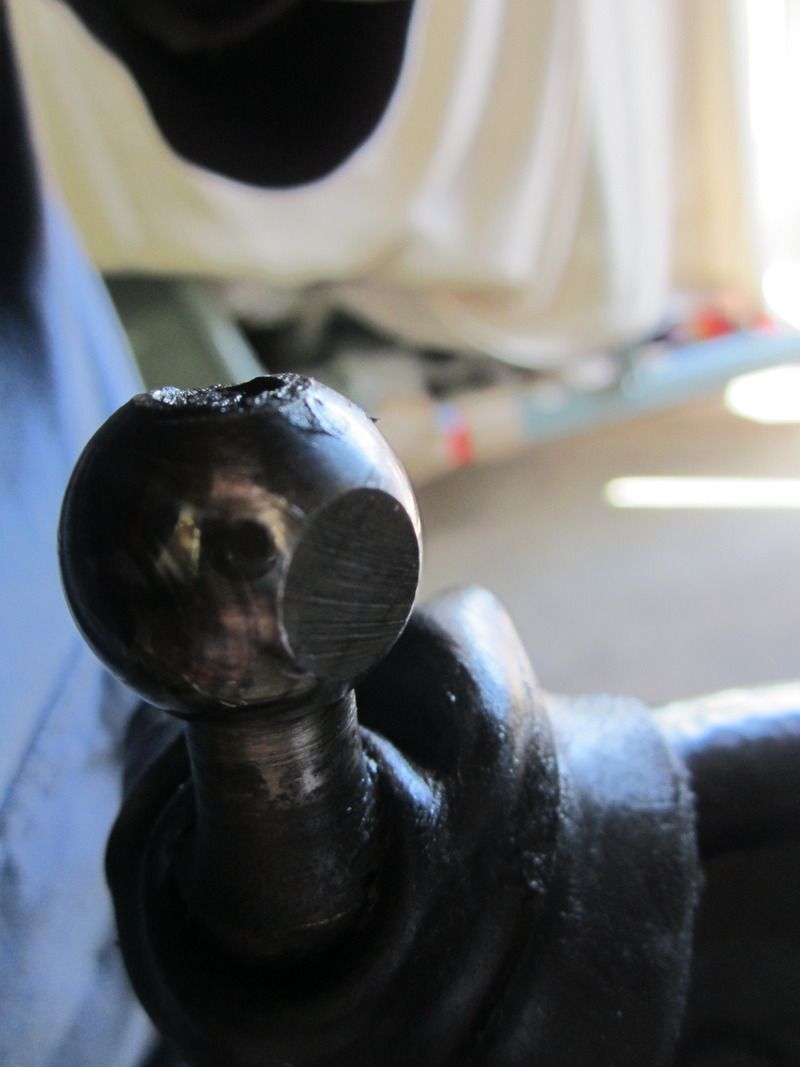 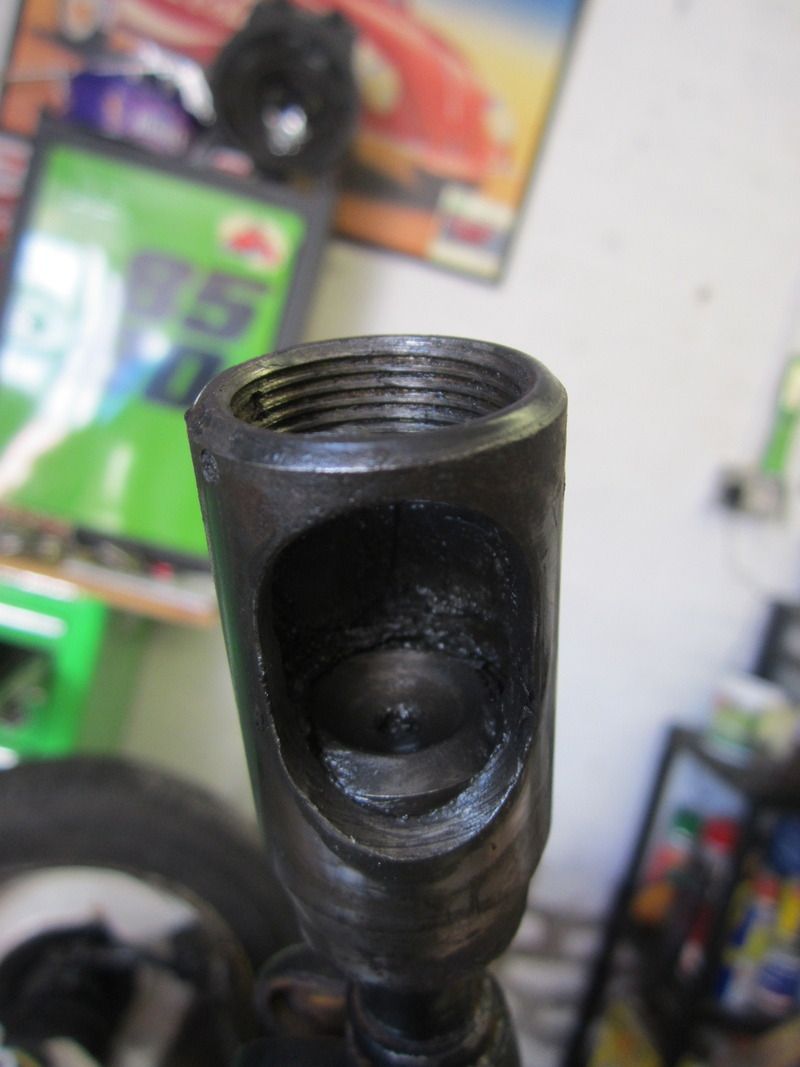 On fully removing the castle nut from the axle, initial signs were good on the grease front, these often dry out and the bearings seize up. 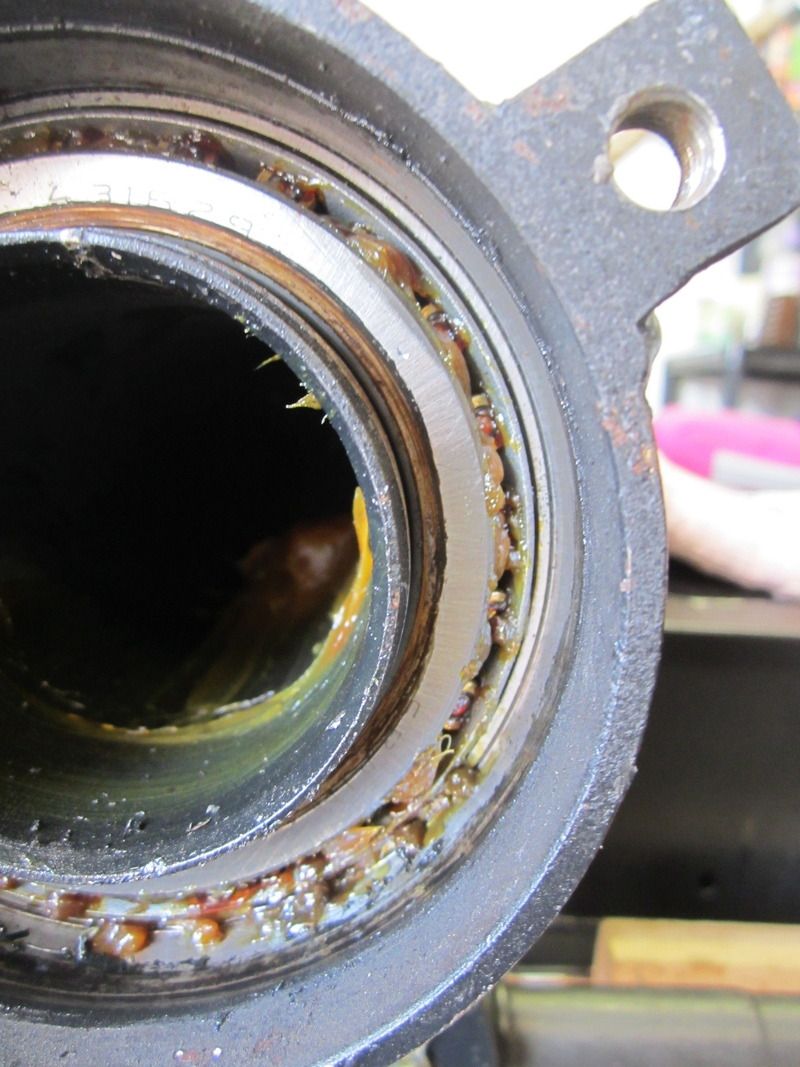 On pulling off the arm, everything seemed hunky dory. 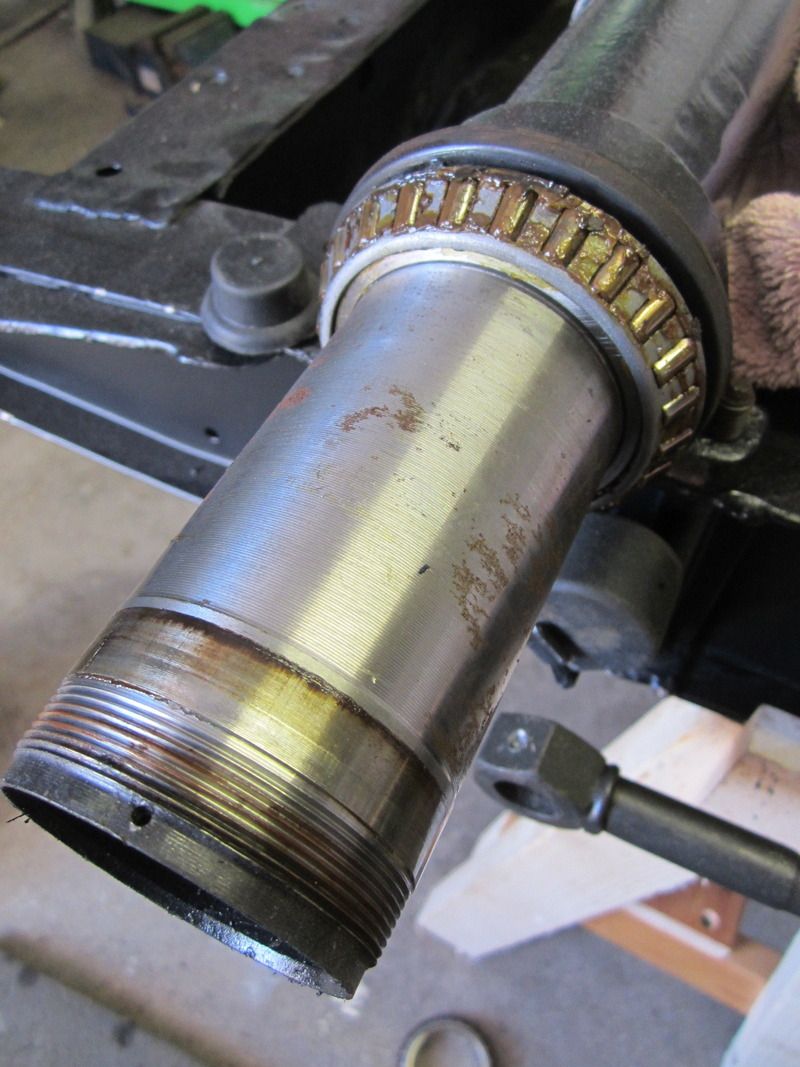 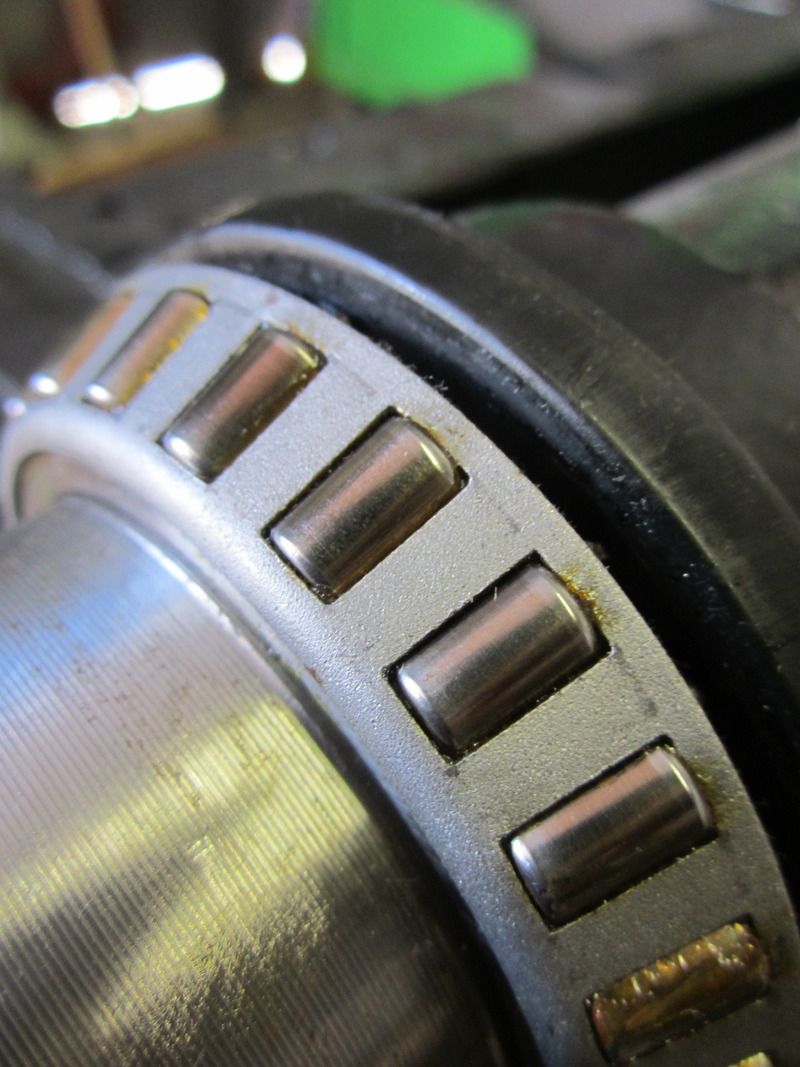 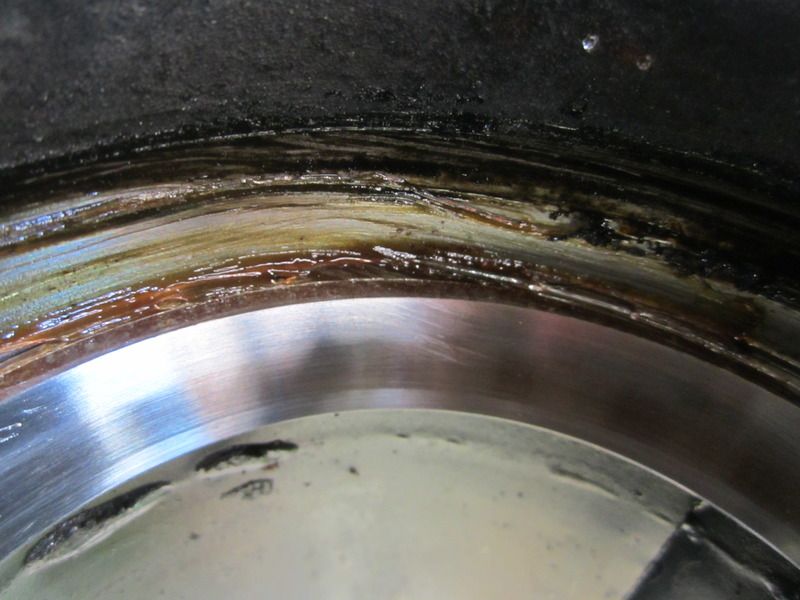 Both bearings were greased and seemed in good condition, they're all of the Spanish variety, I assume these are originals. 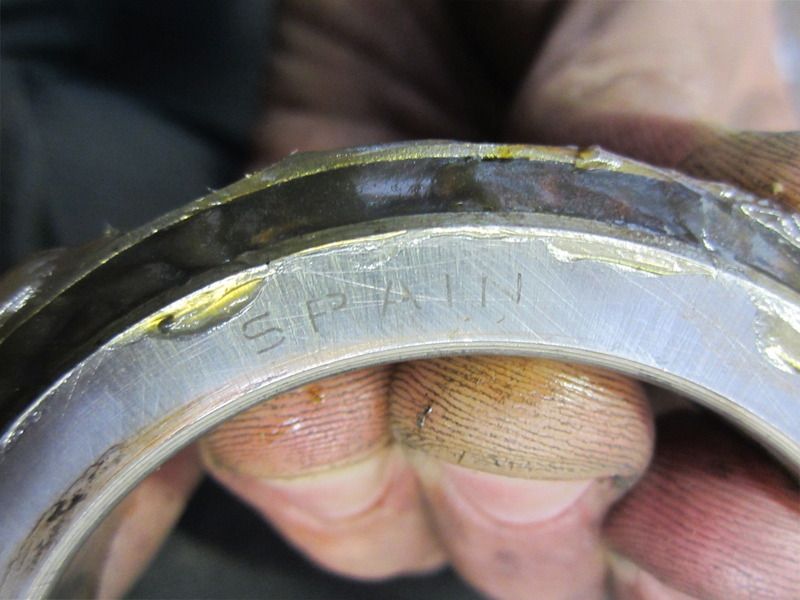 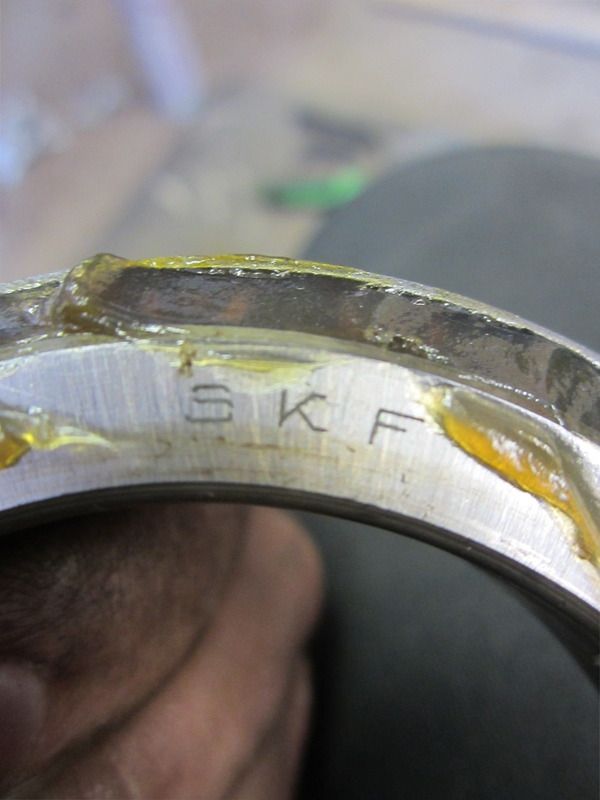 I cleaned them up and re greased thoroughly before refitting the axle and refitting castle nut with new split pin. 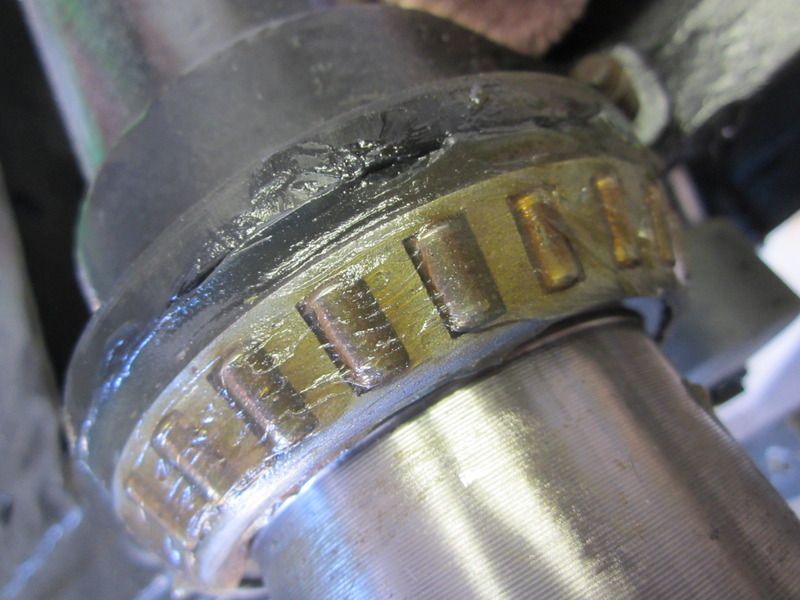 I carried out the same procedure on all 4 corners, all were the same. At the same time I removed the rear axle tube and flipped round the solid ally droop stops which I had mistakenly fitted backwards. 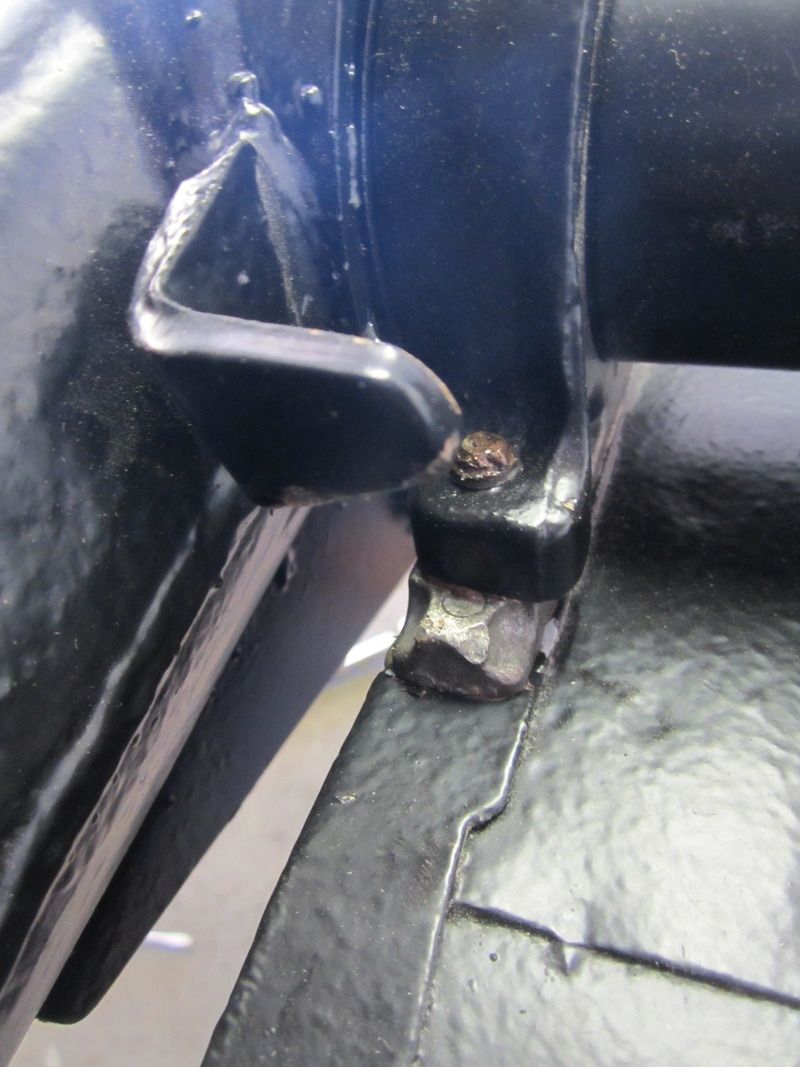 I then fitted 4 new shocks and the 2 new rod eyes to replace dodgy ones from ECAS. The only problem I had was with 2 new shock absorber nuts, again from ECAS, which appeared to made from some sort of soft cheese as the thread stripped before I could get them torqued up. One of them managed to hold, but at an odd angle. Not impressed, why sell such wibblepoo. Better not to sell anything at all. 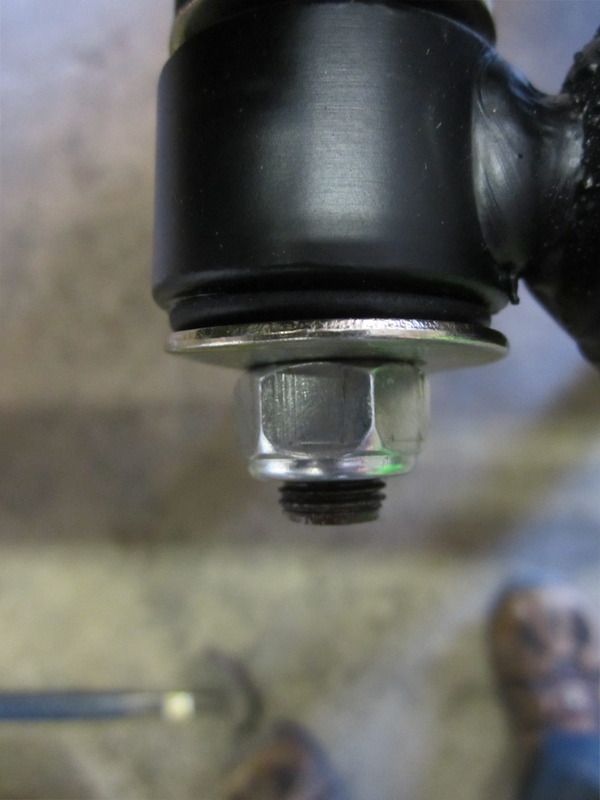 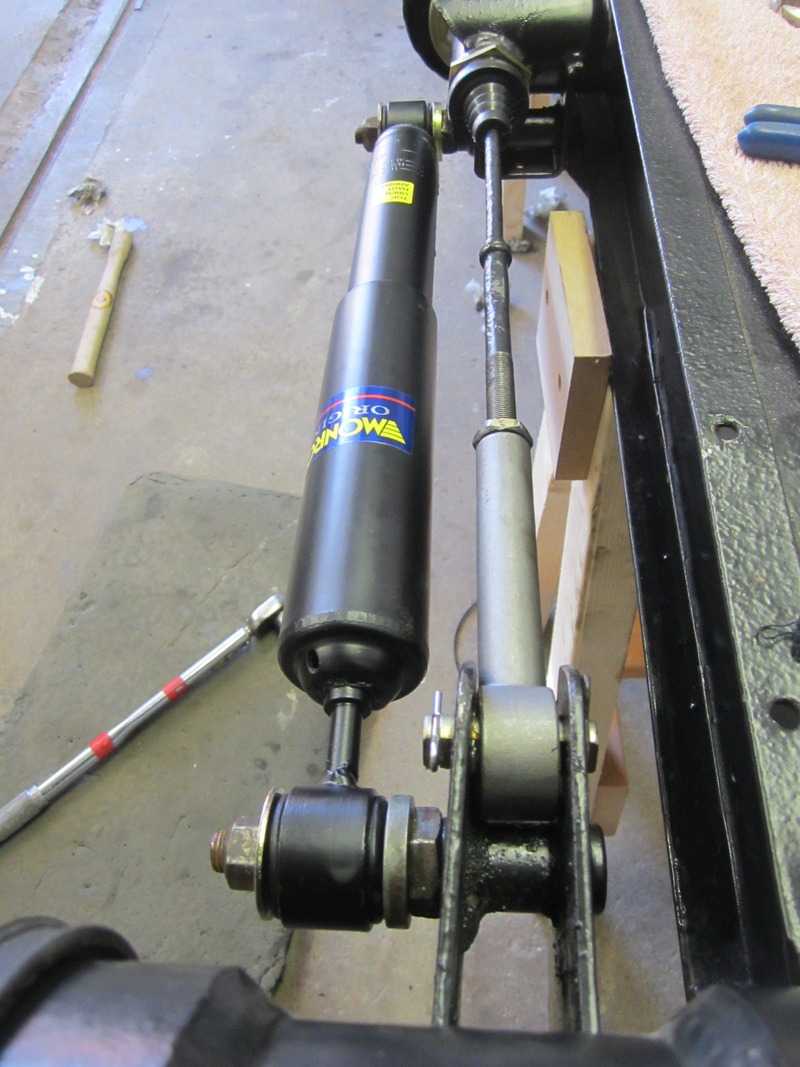 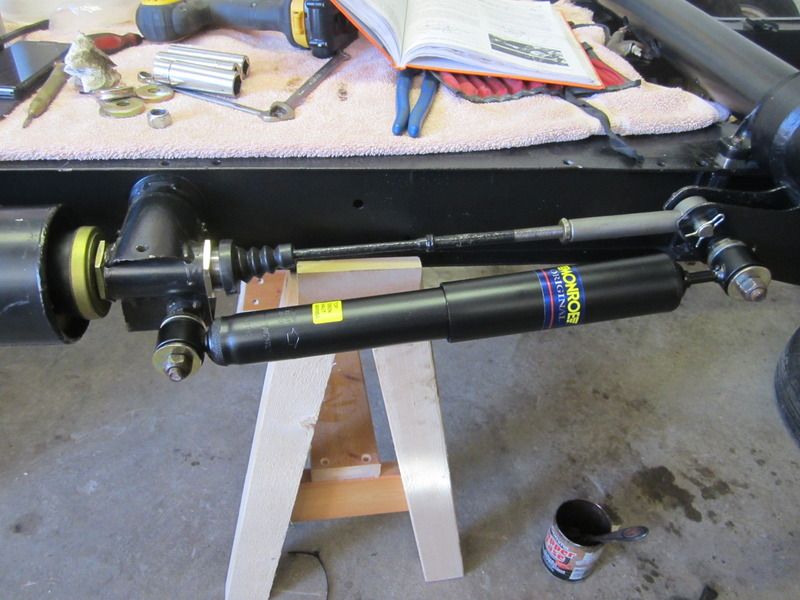 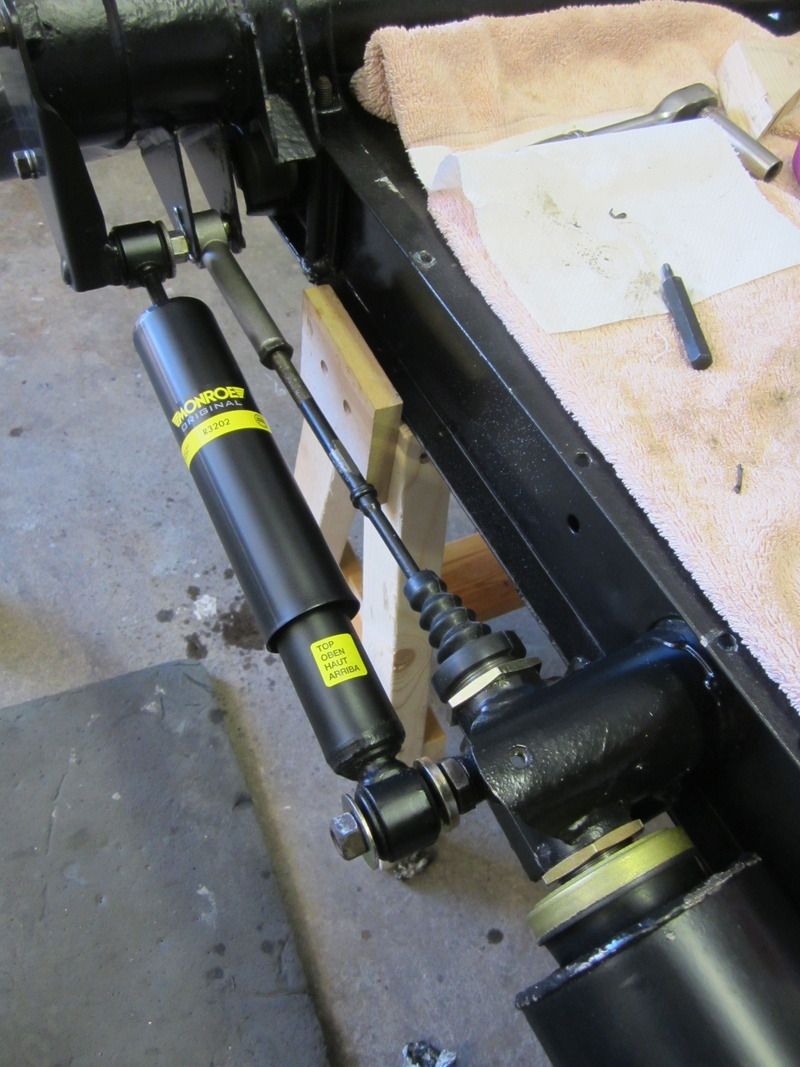  I also fitted new front axle bolts and lock washers. 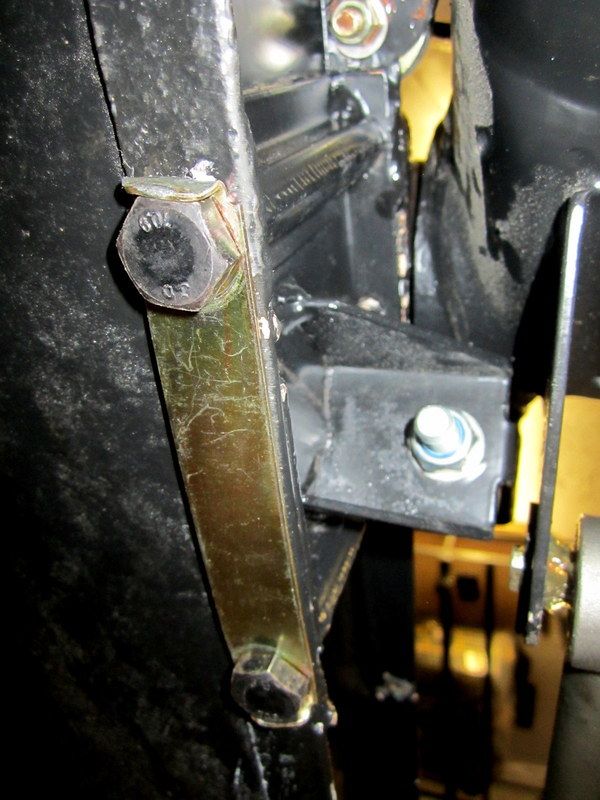 |
| |
1989 Mini MG 1275 ~ 1987 VW Polo ~ 1989 Citroen 2CV ~ 1998 VW T4 ~ 2006 Volvo XC70
|
|
|
|
|
|
|
Hmmm. I should probably update this... It's been about 2 years since I worked on this car. Around the time I was finishing off the bodywork and painting it, I was also building a VW camper for myself and my partner to go off travelling in, which caused the 2CV build to pretty much grind to a halt. I had handed in my notice at the garage I was working in and the plan was to finish my camper and the 2CV, put the 2cv in a lockup and curse word off into the sunset for a while. As it turned out I never got any further than painting the car, so resembling something like a massive Airfix kit, it was wrapped up in copious amounts of blankets and bubble wrap and bundled into a lockup with all of my other worldly possessions. My partner and I spent a year living in our van driving around Europe, returning May last year. This is our blog which may amuse those who have literally nothing else to do with their miserable lives. www.travelpod.com/travel-blog/tinyjuggernauts/1/tpod.htmlOn our return the the UK, I had a brief slip back into the world of air cooled VW's, helping out a mate with a backlog of about 10 restorations. At this time we had to sell the our van in which I was still living, before buying a £400 BMW estate and heading to Edinburgh with all our stuff to search for jobs and somewhere to live. We eventually found a place and I started my own joinery business which eventually brought in enough money for me to rent a small workshop, which is where the 2CV ended up, and how I was able to continue the build. It had become almost unbelievable in my head that I would ever finish the car, but after saving up and spending £400 at ECAS on the bits I needed to build up the chassis and suspension I now have a rolling chassis. Loads of space in a Luton! 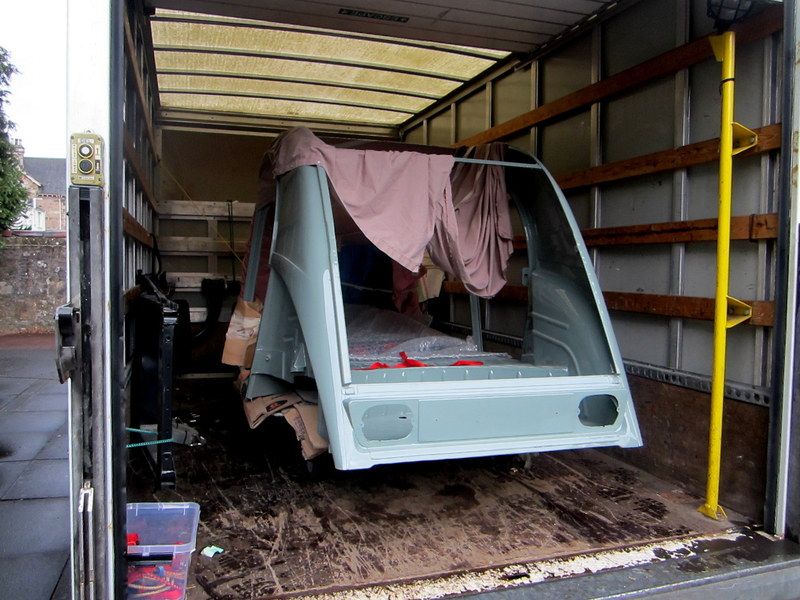 Chassis set up on trestles  This is what £400 gets you from ECAS.. 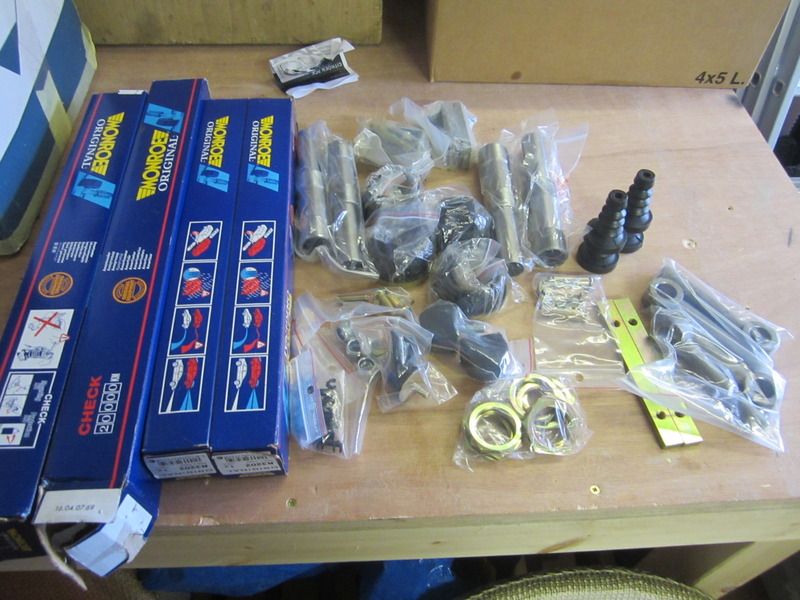 Started off by fitting the front axle, this plan quickly went downhill after remembering I had chopped up the front axle bolts when I originally removed them, but the axle was temporarily fitted with some spare axle bolts and a bolt from each of the brake callipers. They're a bit long but will do until the next round of parts arrives. 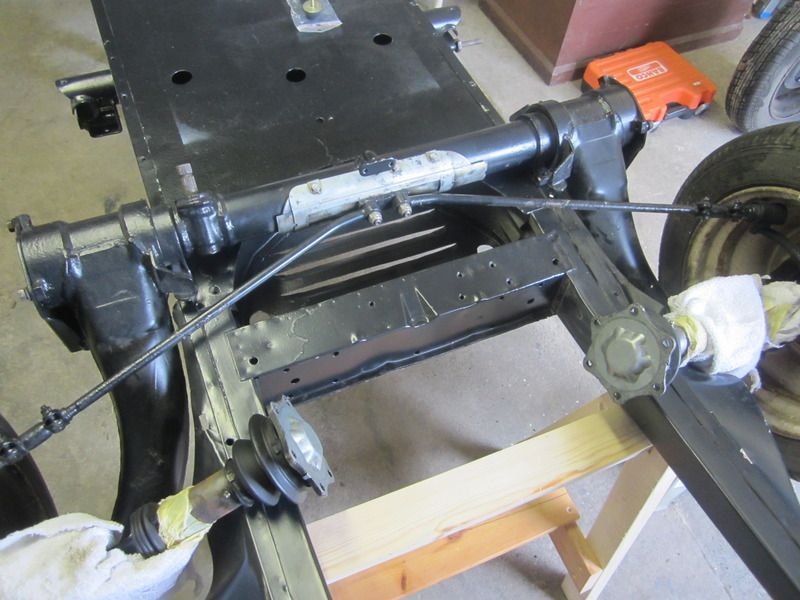 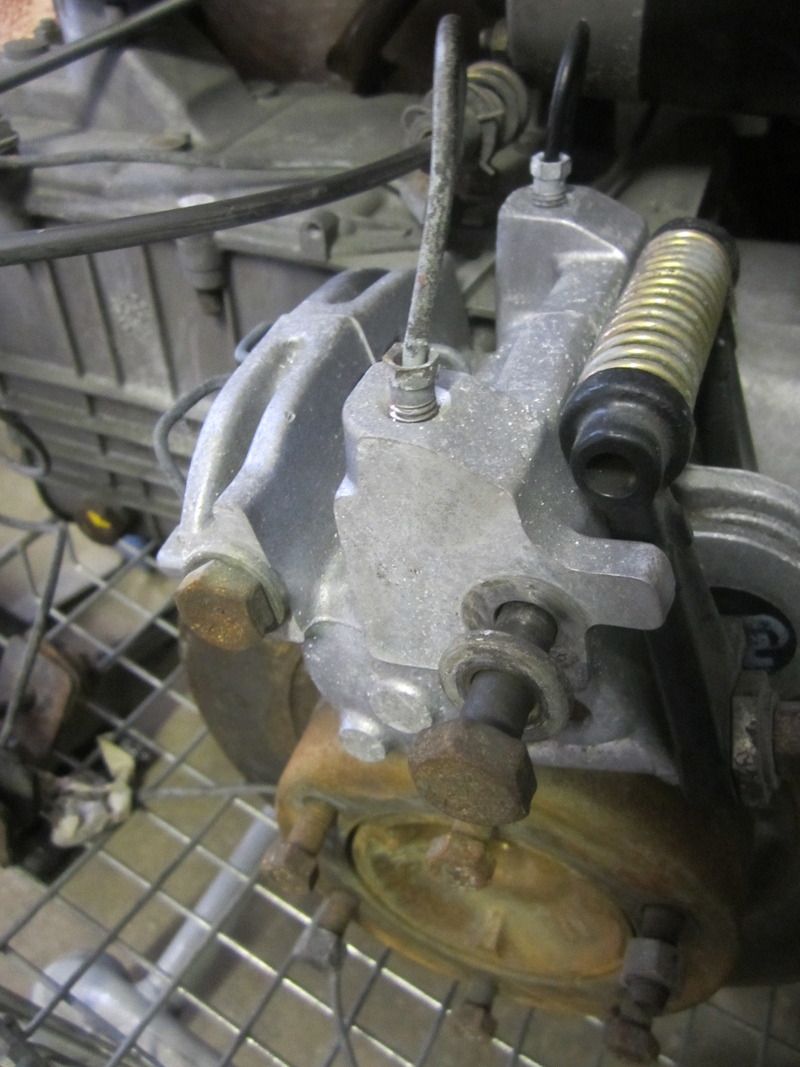  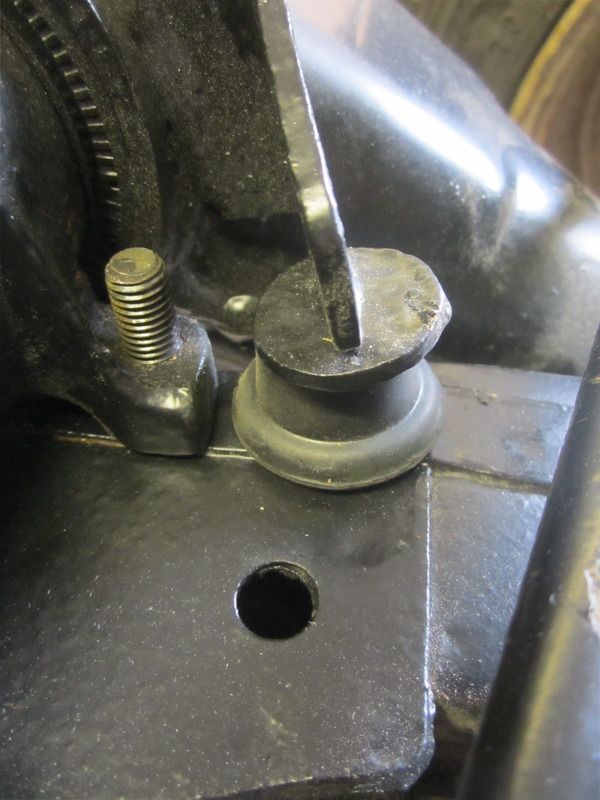 Someone has at some point been far too enthusiastic with a grease gun. 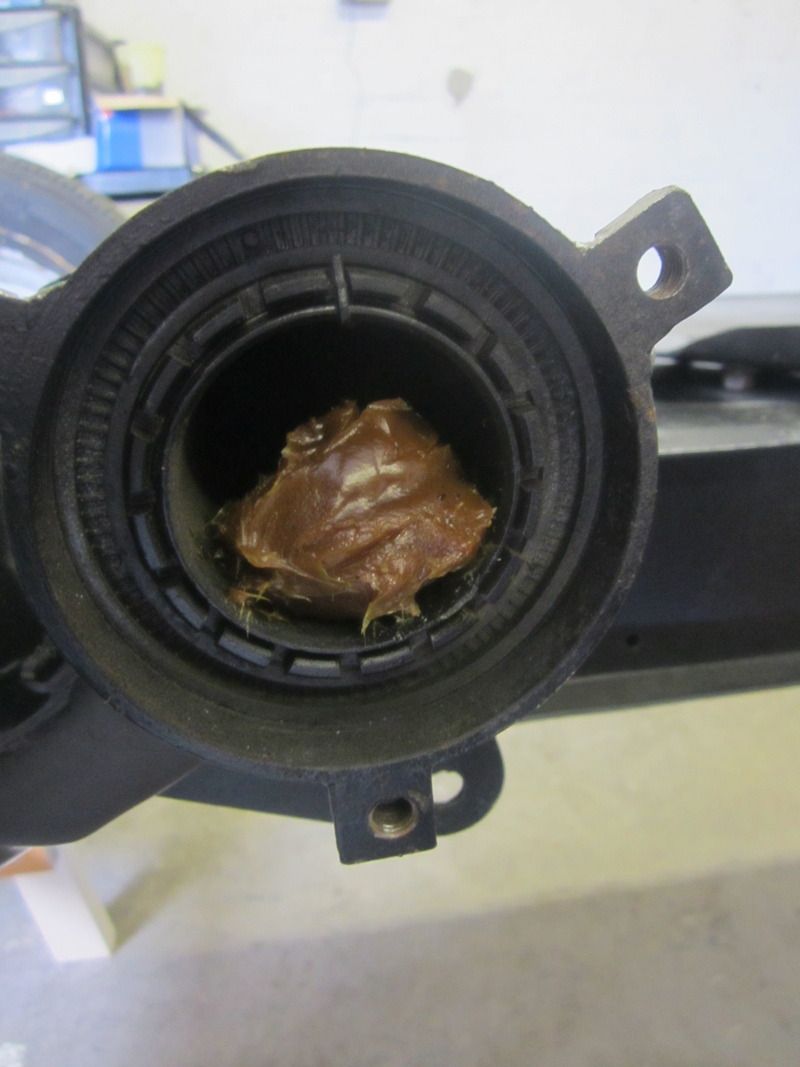 Next fitted the spring tubes 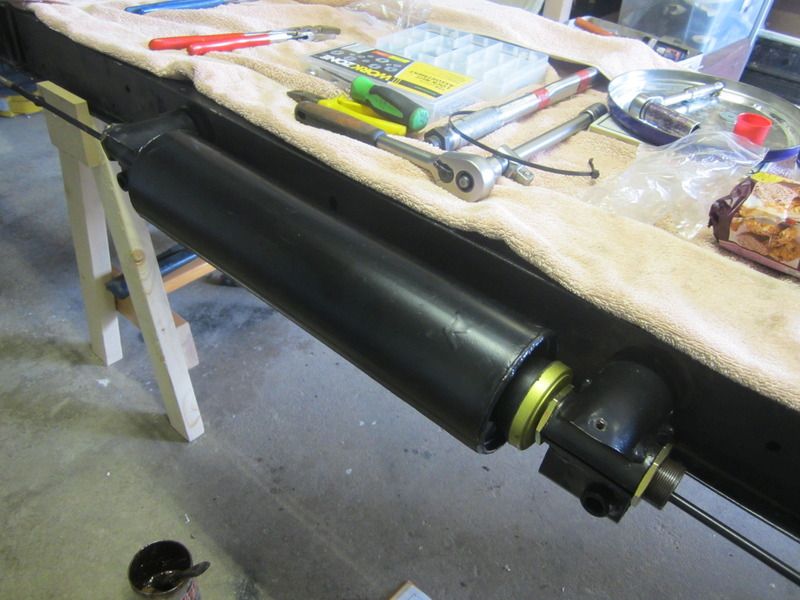 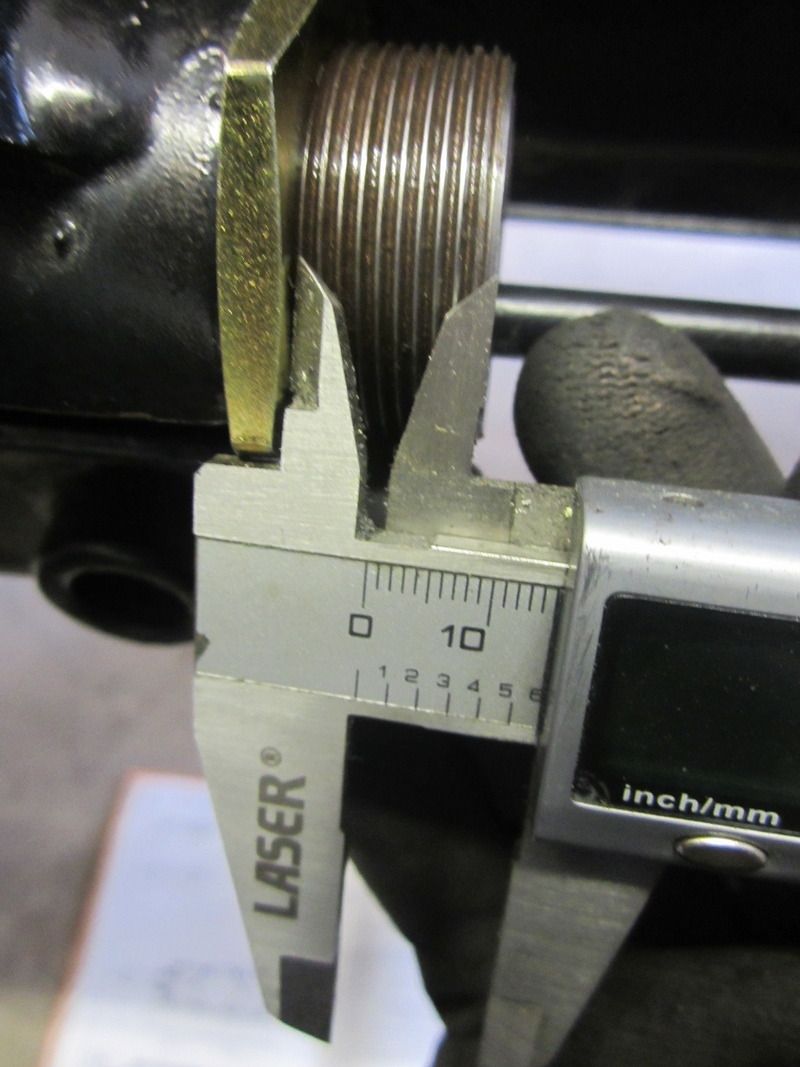 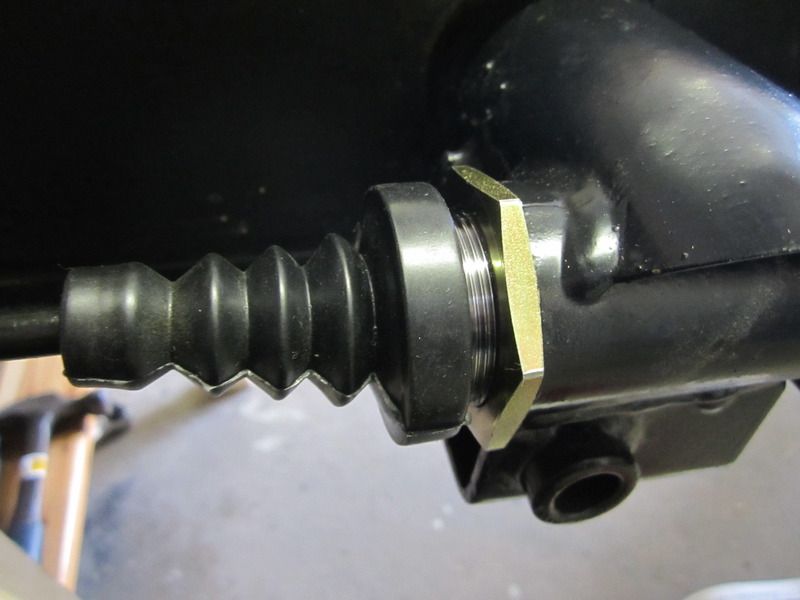 I decided to use longer tie bars as I needed some new ones anyway and these seemed like a good idea as the car will be a fair bit lower than standard. 2 of them fitted very nicely, 2 of them were faulty and would only thread on an inch or so, more have been ordered. Annoyingly this meant that for the N/S I had to use my "schoolboy error" rod eyes that I had tapped for grease nipples in a stupid place. 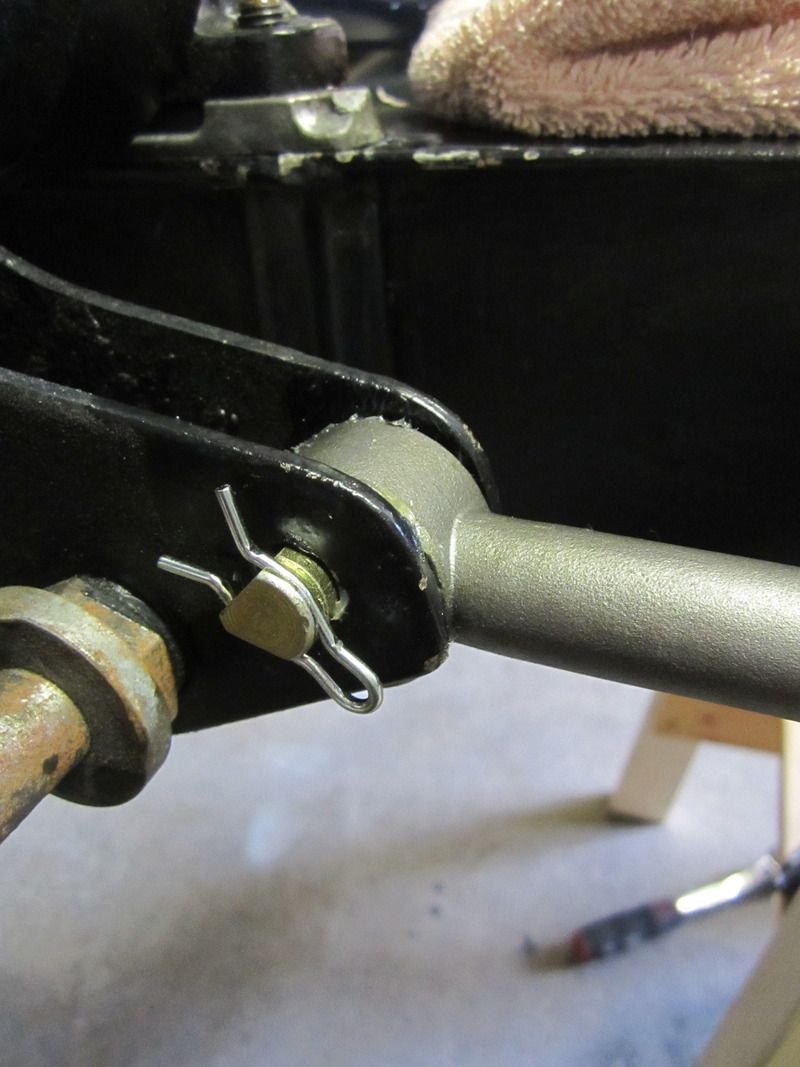 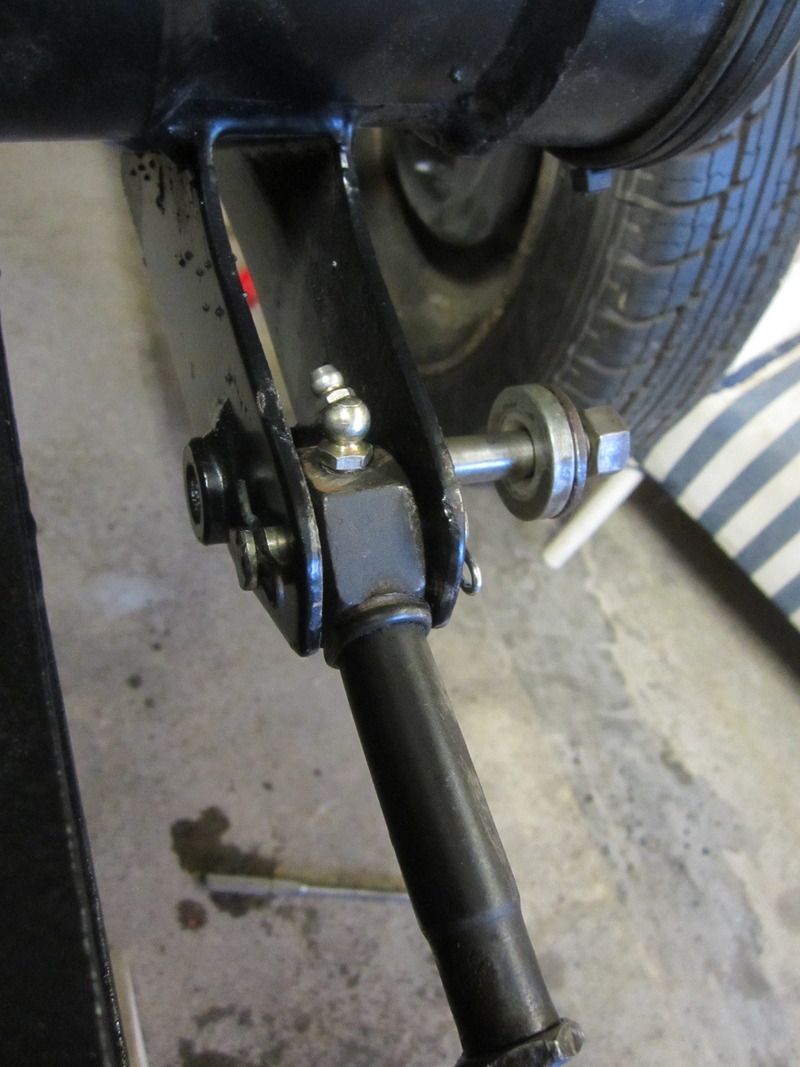 This is my new favourite tool, Burtons 9mm tie rod adjustment Spaniard.  It was utterly brilliant to get the chassis rolling, albeit minus the shocks as I forgot to order shouldered washers. I had lots of fun jumping up and down on it, watching the spring tubes do their thing! 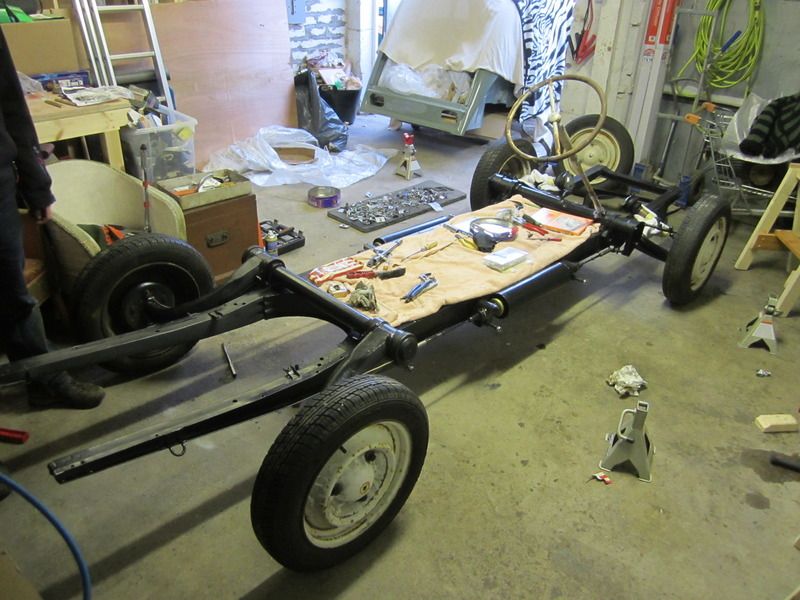 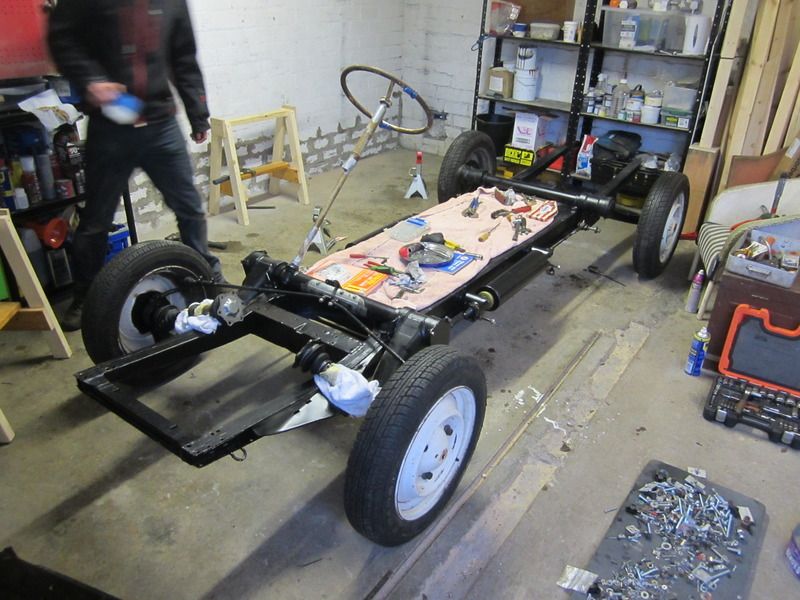 |
| |
1989 Mini MG 1275 ~ 1987 VW Polo ~ 1989 Citroen 2CV ~ 1998 VW T4 ~ 2006 Volvo XC70
|
|
|
|
|
Dec 31, 2015 20:22:42 GMT
|
|
Thanks for the offer, but I'm after a car not just the engine! Cheers
|
| |
1989 Mini MG 1275 ~ 1987 VW Polo ~ 1989 Citroen 2CV ~ 1998 VW T4 ~ 2006 Volvo XC70
|
|
|
|
|
Dec 30, 2015 11:27:38 GMT
|
|
Hi guys, looking for a VW with a td lump,ideally b3 passat estate or mk3 golf estate. Must be running or if local (mid Scotland) non runners would be considered.
Cheers, Pete
|
| |
1989 Mini MG 1275 ~ 1987 VW Polo ~ 1989 Citroen 2CV ~ 1998 VW T4 ~ 2006 Volvo XC70
|
|
|
|
|
Dec 29, 2015 18:53:53 GMT
|
|
Love this, keep up the good work! Nice bug in the background there too.
|
| |
1989 Mini MG 1275 ~ 1987 VW Polo ~ 1989 Citroen 2CV ~ 1998 VW T4 ~ 2006 Volvo XC70
|
|
|
|
|
|
|
Dec 28, 2015 20:19:30 GMT
|
|
As above, oil coolers on standard a series/a plus engines will negatively affect performance. I don't think it's fitted for performance reasons though..
|
| |
1989 Mini MG 1275 ~ 1987 VW Polo ~ 1989 Citroen 2CV ~ 1998 VW T4 ~ 2006 Volvo XC70
|
|
|
|
|
Dec 28, 2015 17:47:19 GMT
|
|
Nice to see a mk3, I must say I agree with various comments saying it looked better in the first pics. I remember when I first had minis and used to cover them in stickers, stupid exhausts and other curse word. I then realised that I was trying to make an already cool car look cool.. so took it all off and now cringe at the tat I put on my cars. Less is more. I know you're experimenting and I'm not gonna be too harsh or patronising, as we've all been there. Those KN's look great. Totally illegal without arches (according to plod, MOT will be ok) but they look wicked, I'll ignore the tyre paint. Rear louvre is awesome too.
|
| |
1989 Mini MG 1275 ~ 1987 VW Polo ~ 1989 Citroen 2CV ~ 1998 VW T4 ~ 2006 Volvo XC70
|
|
|
|
|
|
|
|
What a fantastic build so far! Great fabrication and vision. Proper welding too! I hope for your sake that gas in Canadia isn't as expensive as it is over here. Roll over jig makes lots of sense. Keep up the good work, you've inspired me to go and get in the garage and I'm meant to be on holiday! Cheers
|
| |
1989 Mini MG 1275 ~ 1987 VW Polo ~ 1989 Citroen 2CV ~ 1998 VW T4 ~ 2006 Volvo XC70
|
|
|
|
|
|
|
|
I was quite liking your idea of fibreglass corners. It's quite normal on caravans to have a fibreglass or ABS nose cone and metal sides. Easier to replace if they get damaged, and once you have the mould you can easily make more! Looking good whatever you end up doing though, keep it up!
|
| |
1989 Mini MG 1275 ~ 1987 VW Polo ~ 1989 Citroen 2CV ~ 1998 VW T4 ~ 2006 Volvo XC70
|
|
|
|
|
Aug 24, 2015 22:32:31 GMT
|
|
The Spider was car of the show for me.. totally mad. It was brilliant seeing it charging up the hill quicker than most of the other stuff, even in the wet! Felt sorry for the driver though, seemed to be getting a faceful of spray off the front wheels round corners!
|
| |
1989 Mini MG 1275 ~ 1987 VW Polo ~ 1989 Citroen 2CV ~ 1998 VW T4 ~ 2006 Volvo XC70
|
|
|
|
|
Nov 15, 2014 17:09:12 GMT
|
|
SOLD.
|
| |
1989 Mini MG 1275 ~ 1987 VW Polo ~ 1989 Citroen 2CV ~ 1998 VW T4 ~ 2006 Volvo XC70
|
|
|
|
|
|
|
|
Thanks for your reply, I have a fair bit of interest as it's advertised locally but try me when you sell the camry. If the sandwiches were included I might be interested. Cheers.
|
| |
1989 Mini MG 1275 ~ 1987 VW Polo ~ 1989 Citroen 2CV ~ 1998 VW T4 ~ 2006 Volvo XC70
|
|
|
|
|
May 17, 2014 13:05:36 GMT
|
|
Oops sorry guys, the 2CV is sleeping. I've been taking a year out. It will hopefully come out of hibernation later this year, I'll post updates when things start happening again. Until then...
|
| |
1989 Mini MG 1275 ~ 1987 VW Polo ~ 1989 Citroen 2CV ~ 1998 VW T4 ~ 2006 Volvo XC70
|
|
|
|
|
Jan 17, 2013 20:39:56 GMT
|
Hi all, I'm selling this good quality head unit I've had for a while, came with a car I bought but didn't ever fit it. It is still in it's box with receipt, hasn't ever been fitted as far as I can see. I have checked and it works. Comes with box and manual. Looking for £45 inc postage to UK. 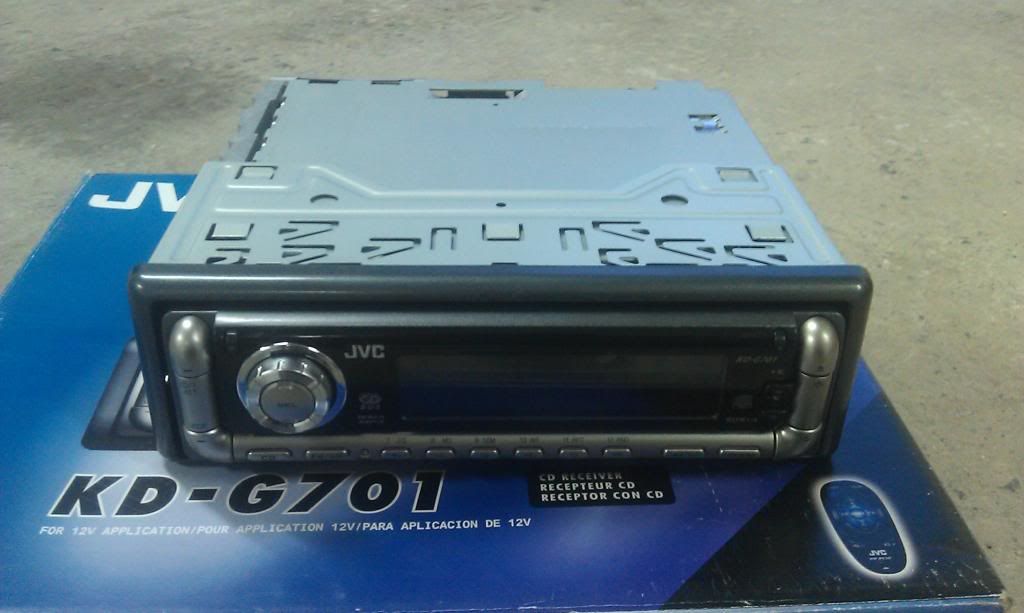 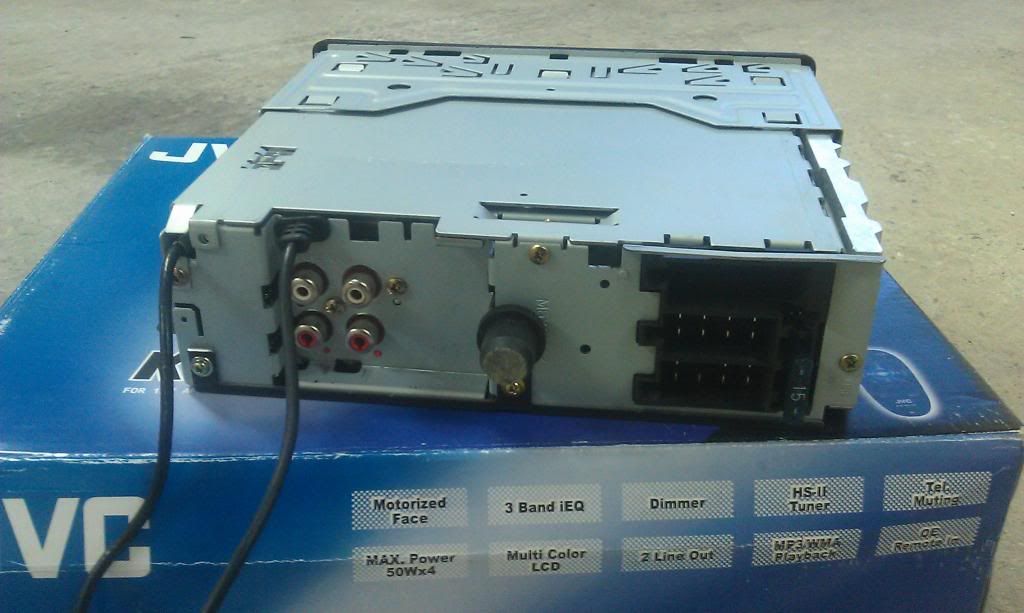 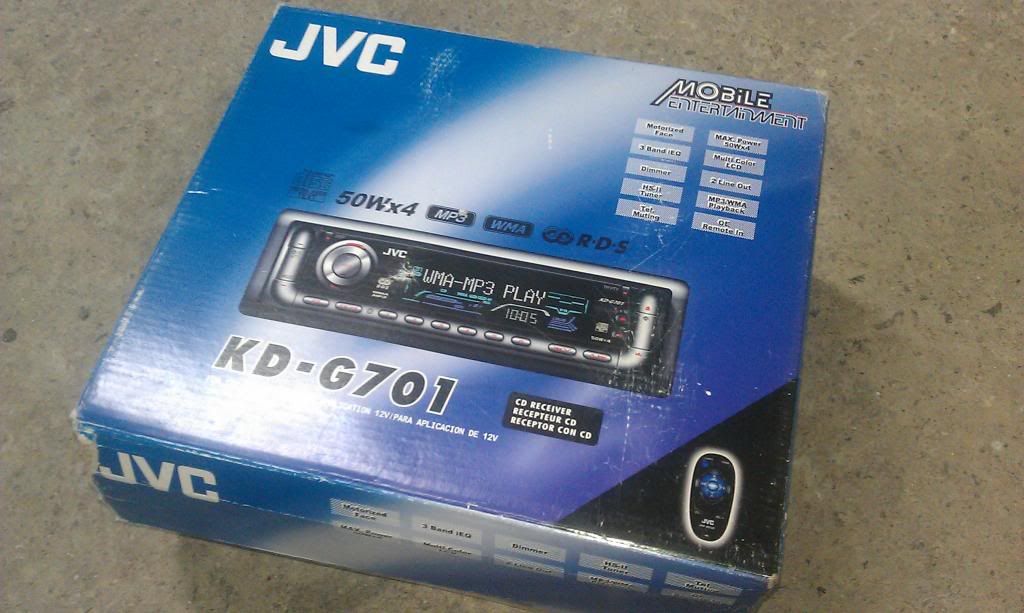 |
| |
1989 Mini MG 1275 ~ 1987 VW Polo ~ 1989 Citroen 2CV ~ 1998 VW T4 ~ 2006 Volvo XC70
|
|
|
|
|
Dec 28, 2012 15:02:18 GMT
|
|
Cheers guys, @ camerashy, I don't think there is a RAL code, I struggled getting it mixed as its such an old colour. I could only get it mixed in I.C.I MS solid gloss. I wanted High Solid or even basecoat, but no-one could get a formulation, even through RAL chips or matched from a colour box. It's an odd grey, looks greeny and bluey in different lights.
|
| |
1989 Mini MG 1275 ~ 1987 VW Polo ~ 1989 Citroen 2CV ~ 1998 VW T4 ~ 2006 Volvo XC70
|
|
|
|


