|
|
|
|
|
On to the left side corner, I’m keen to catch up a bit so not so many words, I’ll let the pictures do some of the talking. Good news first, see the damp area around the inner wing to chassis leg overlap, its had a power steering fluid leak since before I bought it and that’s soaked right through the seam to the other side and its rust free. That helped me to make a rust prevention decision, more on that later/ .  The oil hadn’t made it to the front unfortunately and it had had a lot of very nasty repairs to keep it on the road, there was no saving the end of this chassis leg.  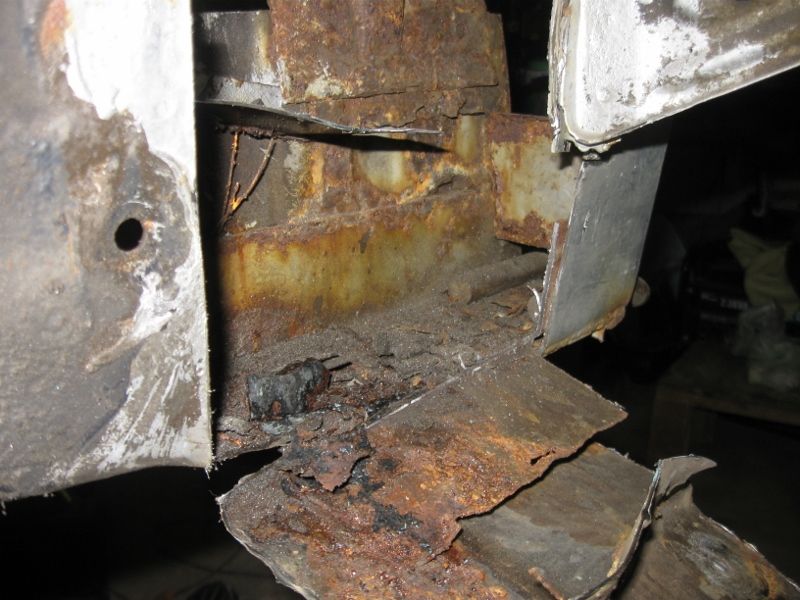 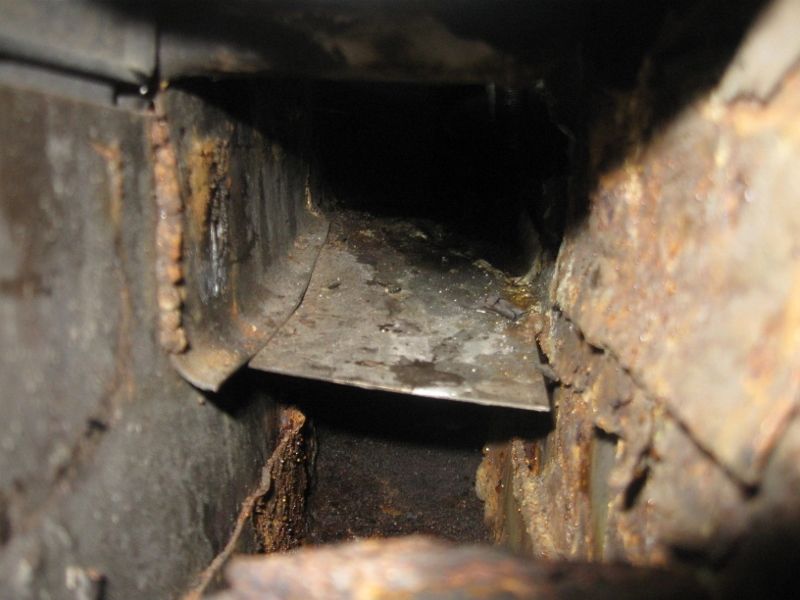 Chop the leg off doctor! 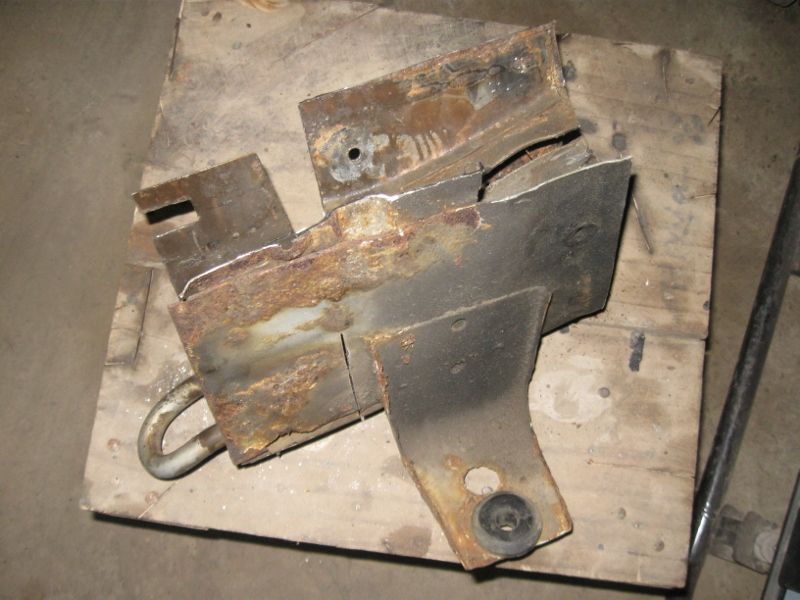 ….and lash up a replacement 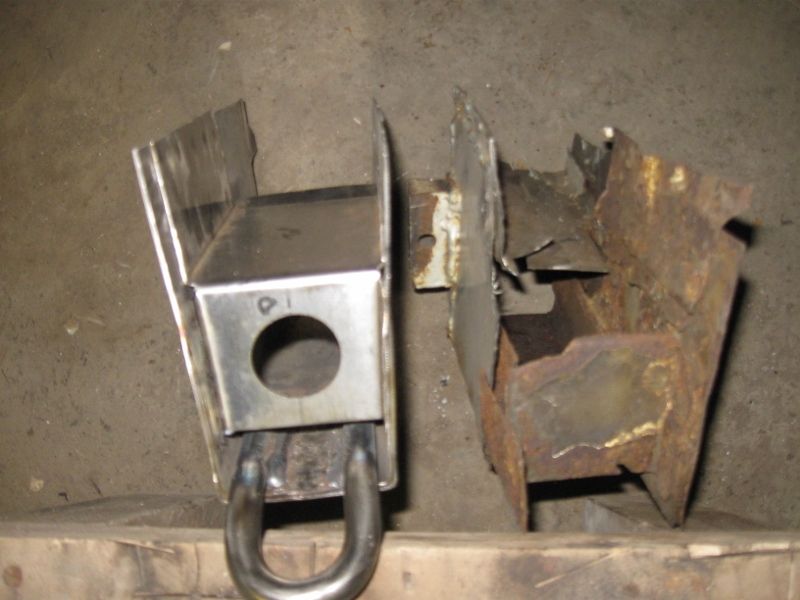 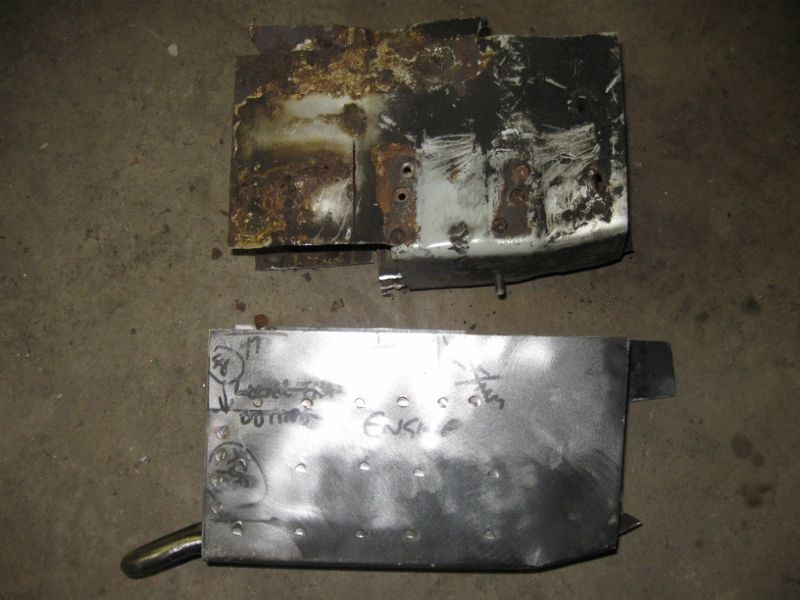 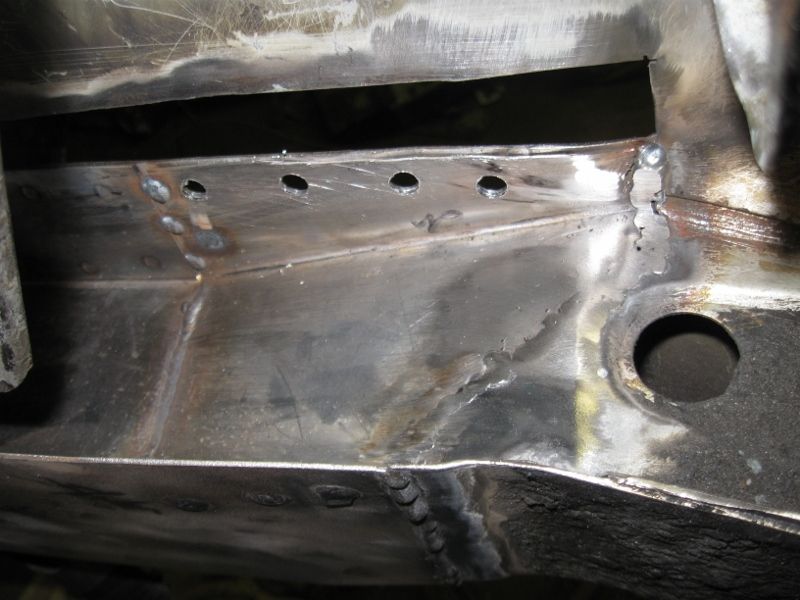 The bumper notch and radiator bracket were added later, a pic might turn up further on. 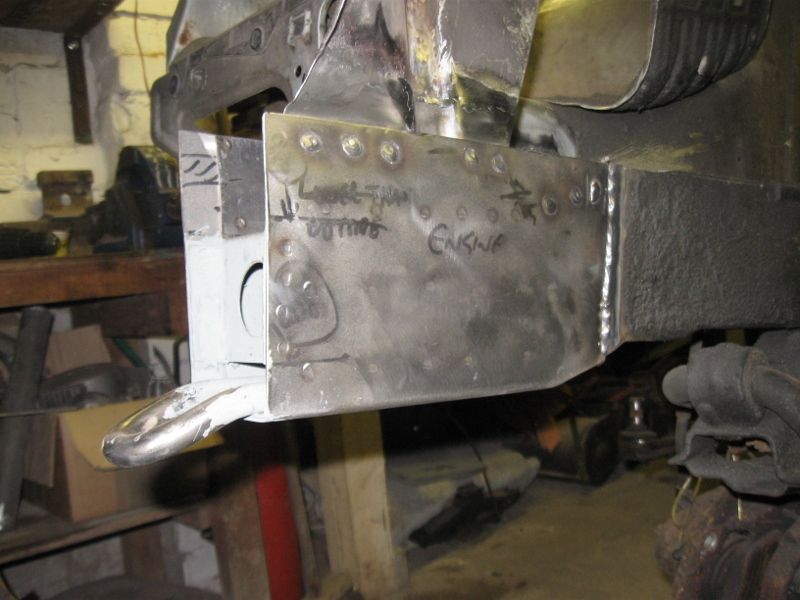 Look at how good the rest of it was when I cleaned it up later for paint. 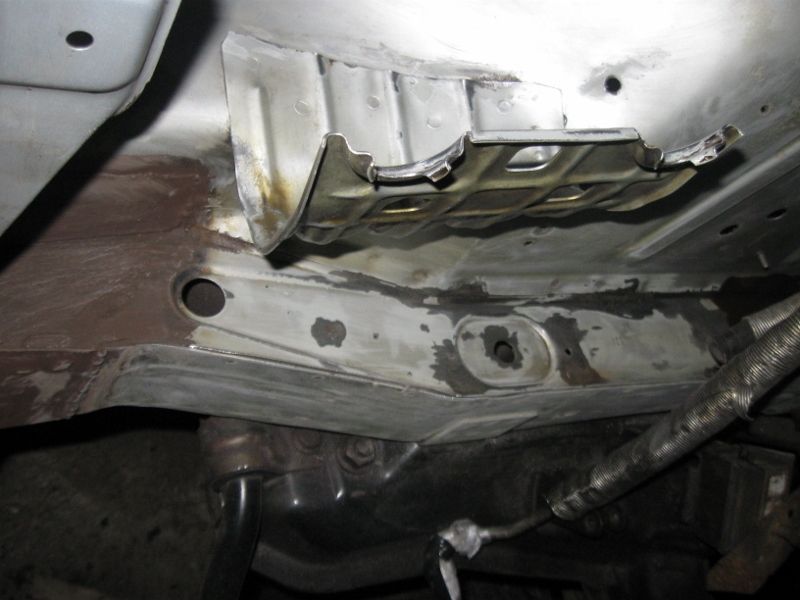 |
| |
|
|
|
|
|
|
|
|
|
Some more copy and paste - One comment from me about the work, I don’t consider it restoration, to me its repair, quite heavy repair to be fair but to me restoration respects how the factory built it and you will see more and more that I have taken a lot of short cuts, like not having the inner wing overlap with the chassis leg and leaving the detail out of the chassis leg top and leaving welds where they can be seen. When I work on my red car I think of that as restoration because where I can I like it to be impossible to tell anything has been done. What I’m doing to this will serve a purpose, be strong and lasting and extend the life of a car that many people might have considered past it. I do make a few of the repairs as original just for the challenge but generally I’m not bothering. note – I am highly confident that my work is structurally sound and that I’m competent enough with the welding to do safe structural work. Not much good stuff tonight, a few more pics of rust and repairs still in the first corner of the car. A bit of rot and old repair in the footwell directly above the replaced area of chassis leg. 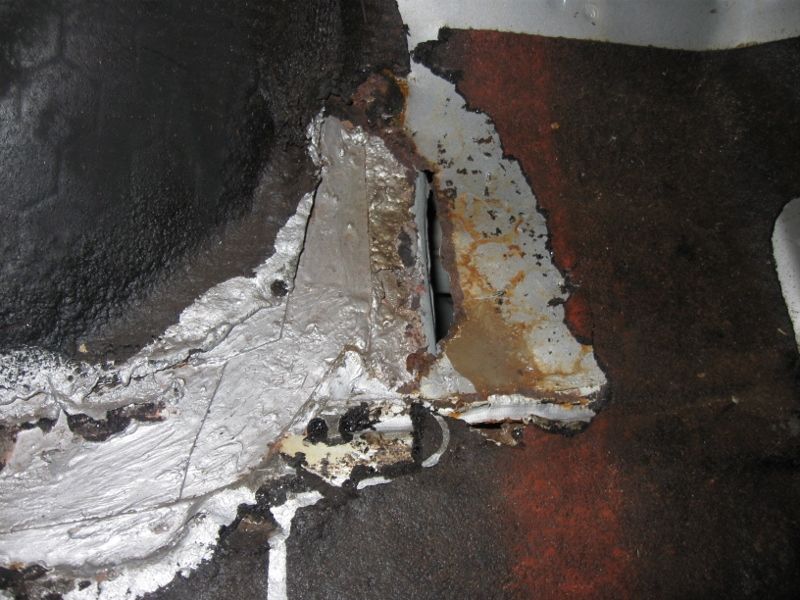 Cut out, so you could say that that’s all four sides of the chassis leg that were rotted. The blue is rust converter, used occasionally if I'm not sure I can get it all off bits that aren’t practical or necessary to cut out. 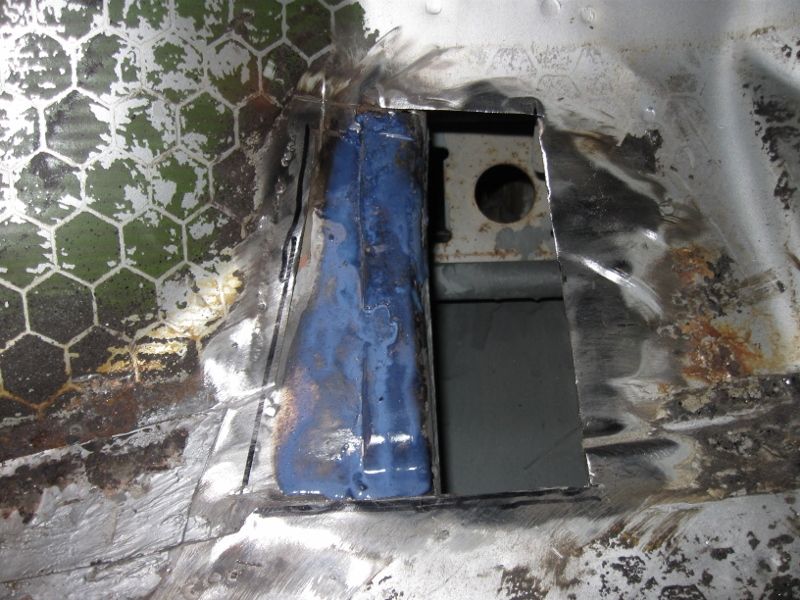 View through the hole, white fluff shows how much zinc this paint has in it, same as seen welding galvanised. 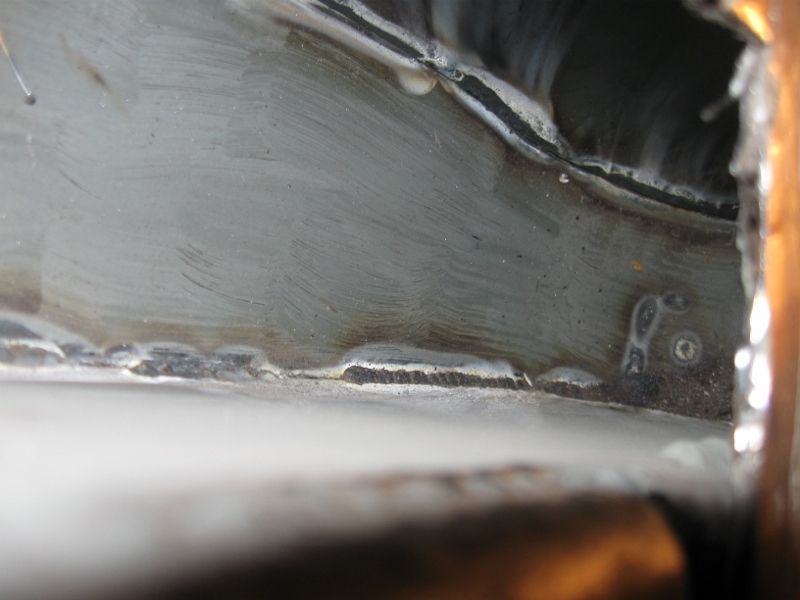 A bit of rot where the water likes to sit and rot the wiring. 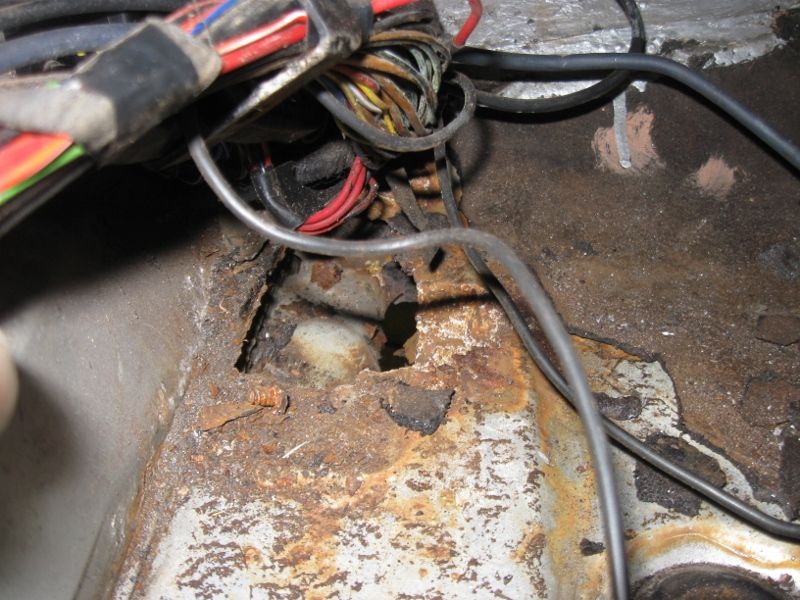 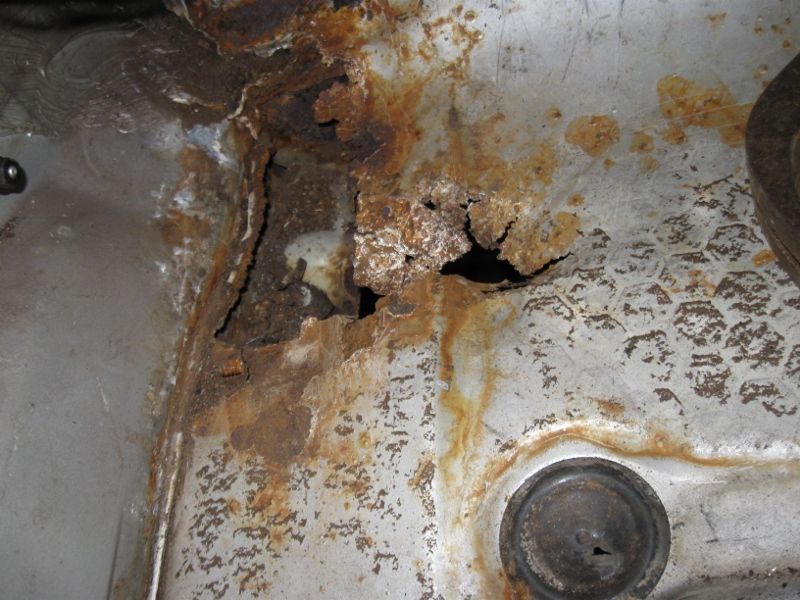 Chop chop 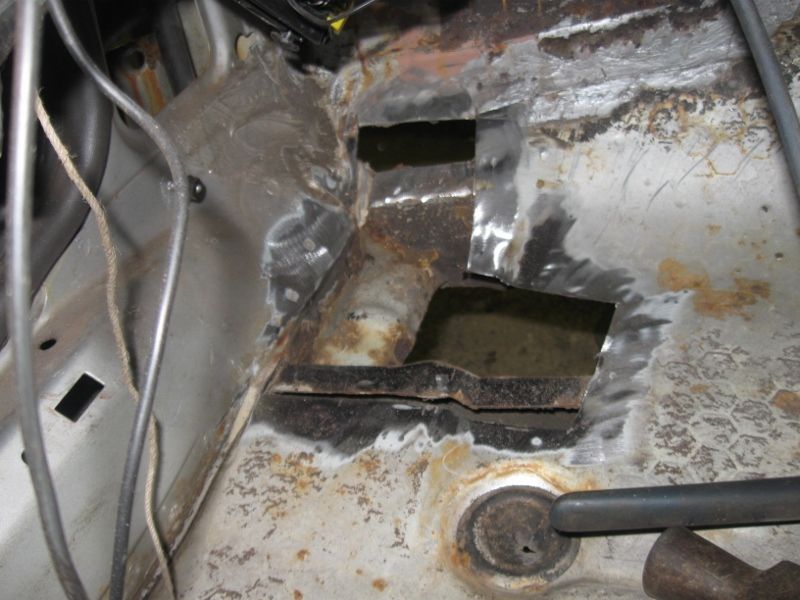 These two bits repaired – I had an idea here, where repairs include the plastic bungs I didn’t put the holes back, instead where the repairs cover chassis parts that have been repaired I holesawed new bung holes and used them for access to protect the cavities, more on that later. 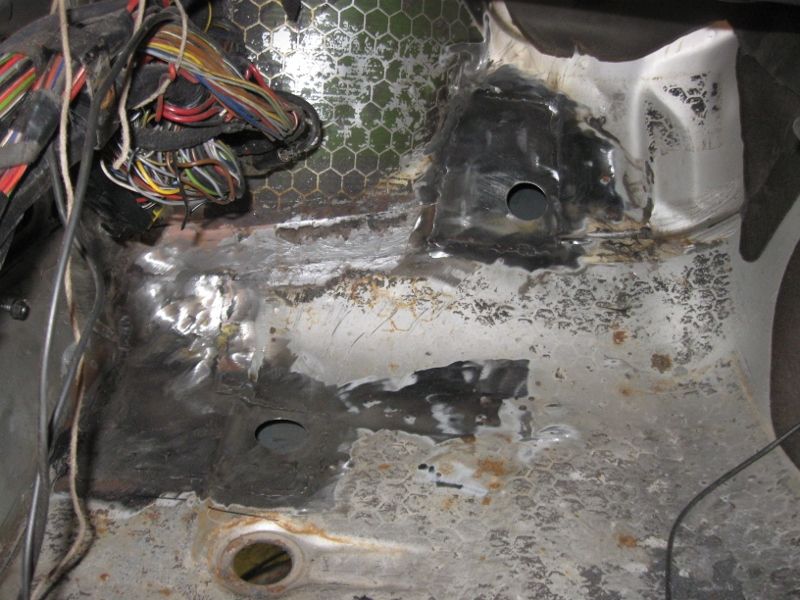 I hadn’t expected to see one of these rot out, but this one managed. 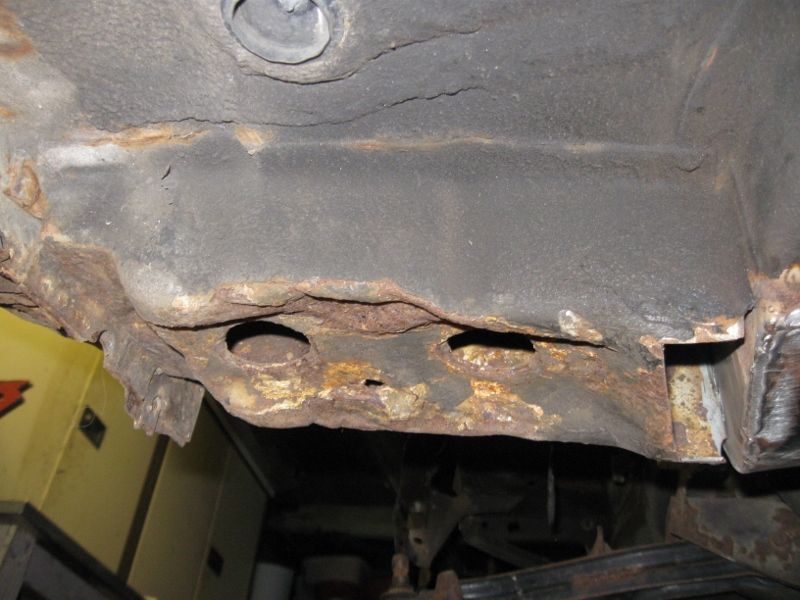 Here we go with a strong but non authentic repair. 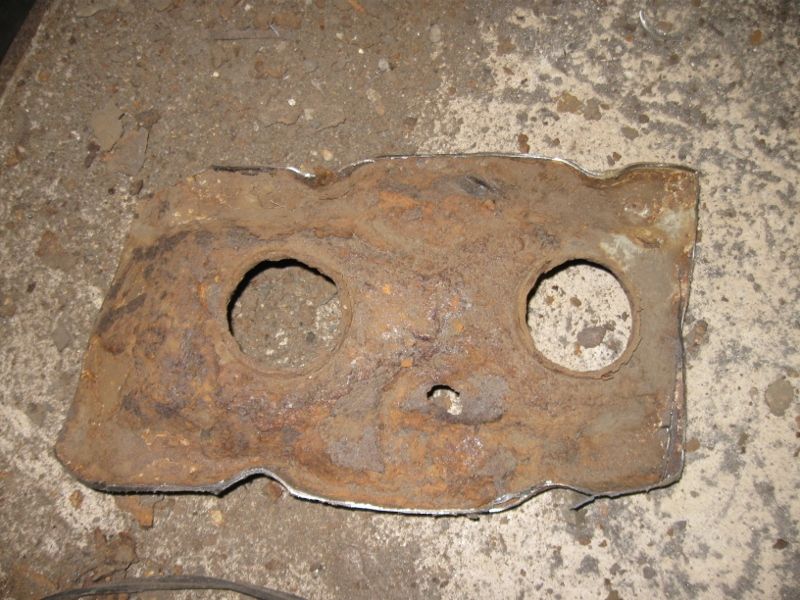 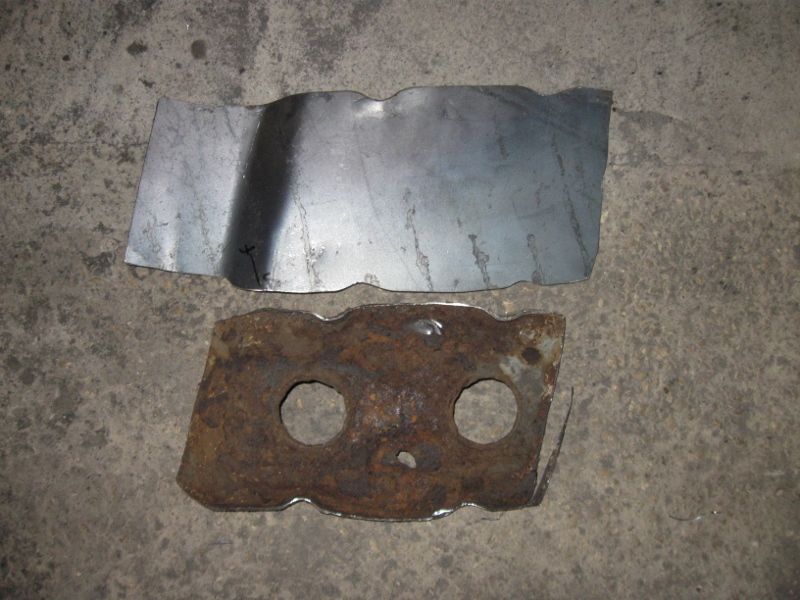 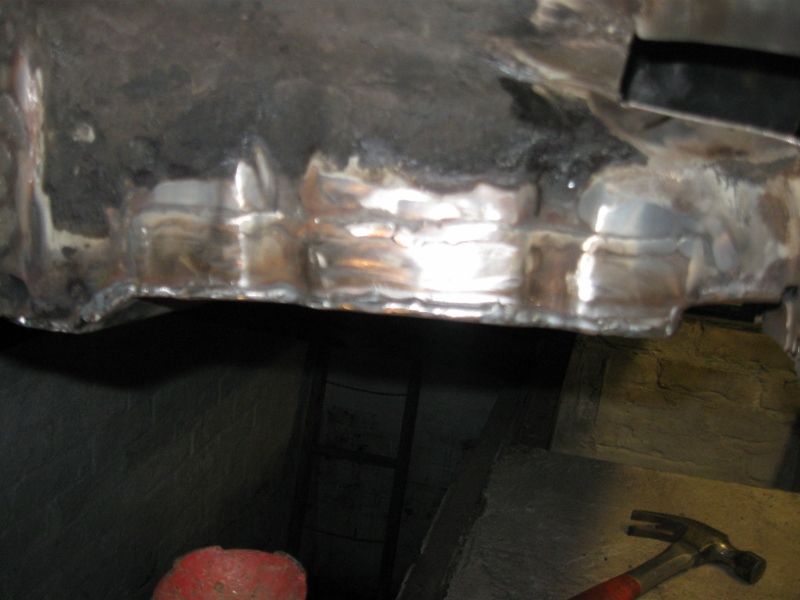 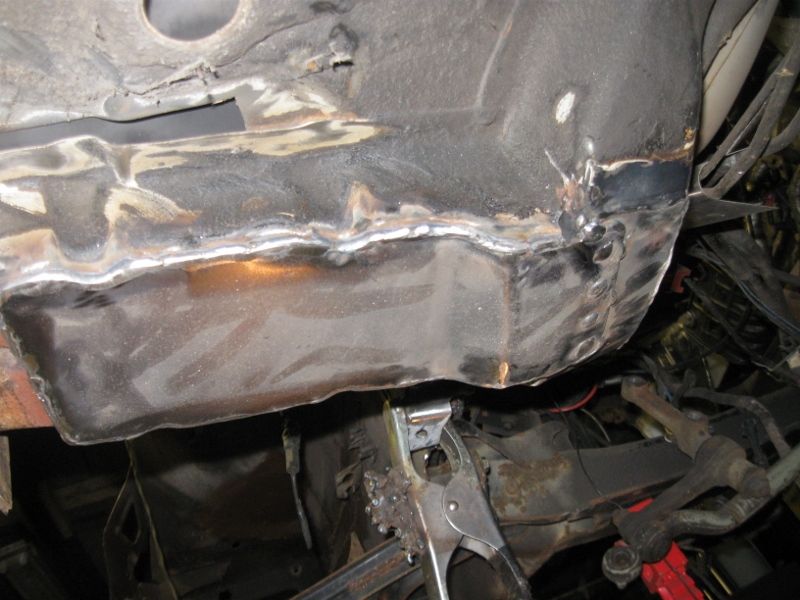 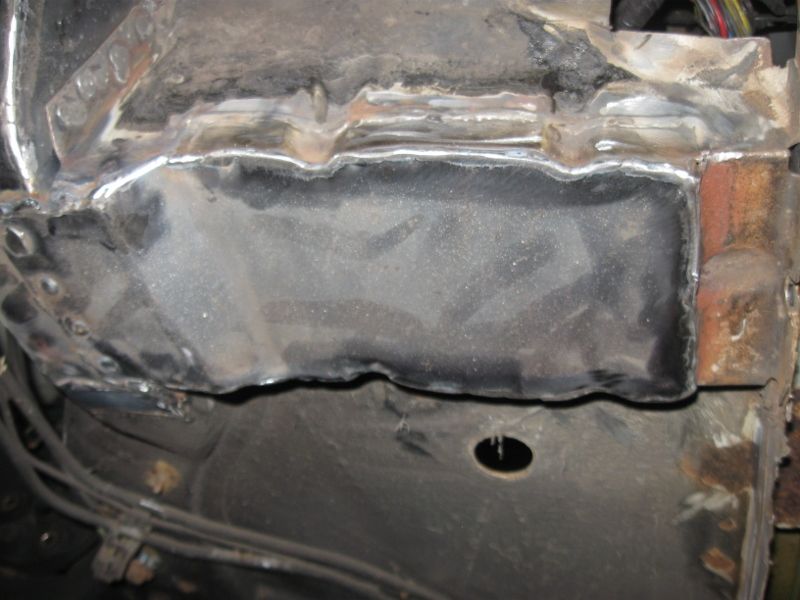 That’s the main features of the left front corner covered. I went to the right side next, hopeful that it was a lot better :roll: It turned out to be different, which is not the same as better. |
| |
|
|
|
|
|
|
|
Moving on, not many pics posted this weekend as I've been working on the body and don't mind admitting that the bits I have been working on have been quite a test of my ability. Its getting there though, patch count now 119 (edit, a lot more now as I’m posting here). My friends think its quite amusing that I'd done this because it was only the front end needing work, unfortunately I made this judgement without actually looking and using my rather woolly recollection of how rotten it was, and forgot that rust didn't stop when I stopped looking. The back end and everything in between wasn't so good, more later. If only it was like a Mini or Beetle and just about every panel was available and it was mainly an assembly job, with a rusty Carlton so much has to be made and repaired. I forgot this bit  Not great but loads better than the other side. Back to progress in the order it happened. Around this time inevitably I burnt out the generator, this was a real low point, I had to decide whether to have the car trailered home to weld with mains electricity but have to do it outside and have the nuisance of getting the gear out every time and being restricted by weather. Instead I had a stroke of luck and found a local generator, I think 3.8KVA, not theoretically big enough but a lot bigger than the one that lasted for quite a while, I got it for only £100 and decided that if I only weld for a time then let it cool it should be OK. So far it has been, fingers crossed. My electric bill (read petrol) is quite significant with all of this welding. Anyway, still in the same corner, the chassis leg didn’t look great, swelling between spotwelds, so I poked it. There was get an MOT patch I’d stuck on years ago 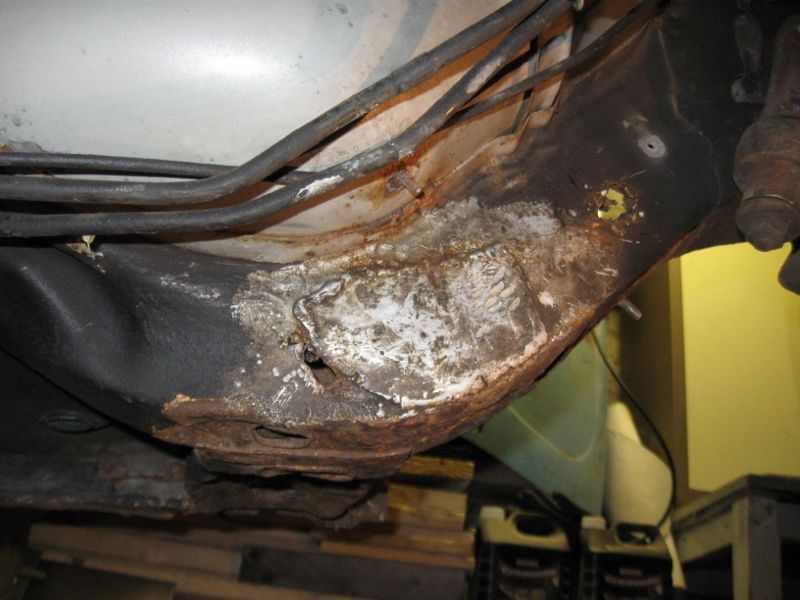 Poke prod etc 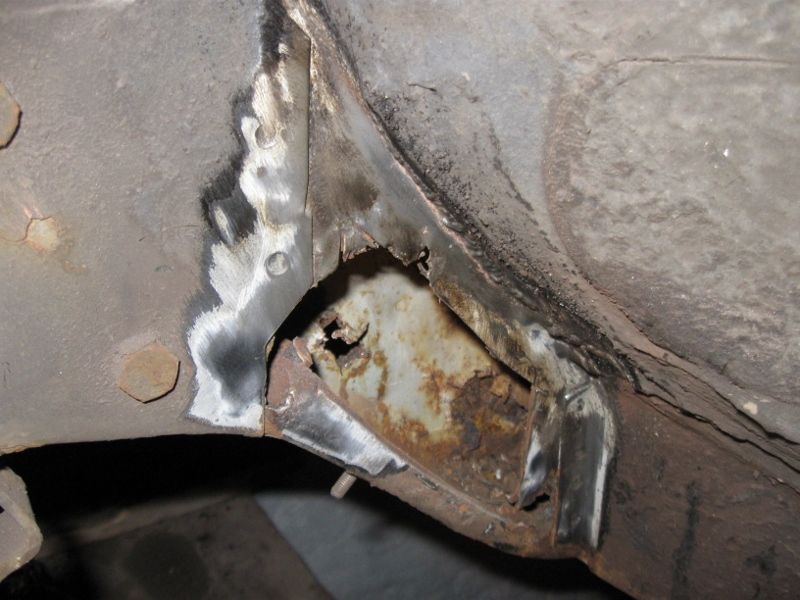 Inside  Chop chop 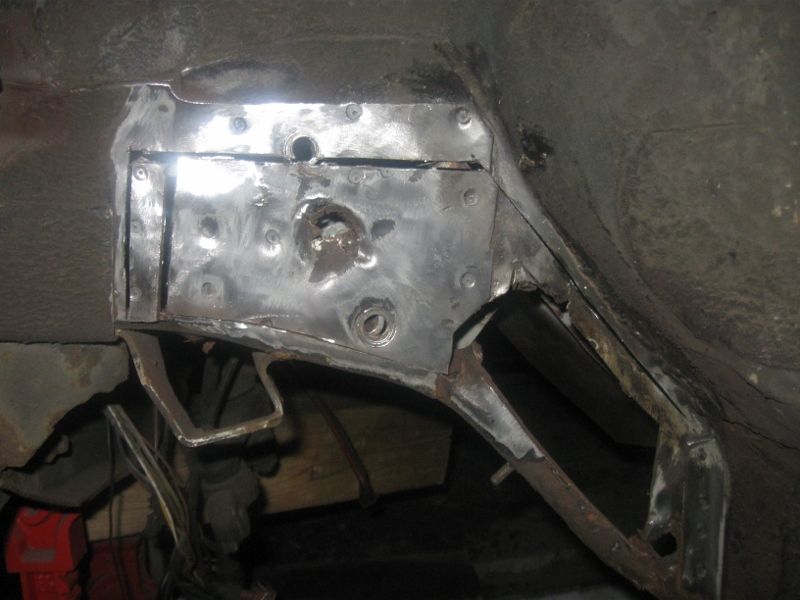 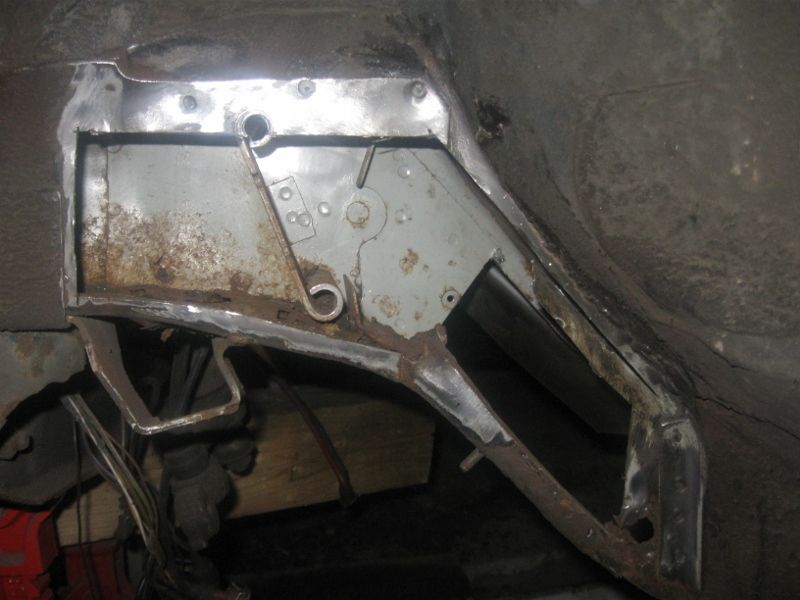 The bottom isn’t left in because its made of metal, it isn’t, I just left it there temporarily to copy the shape from. 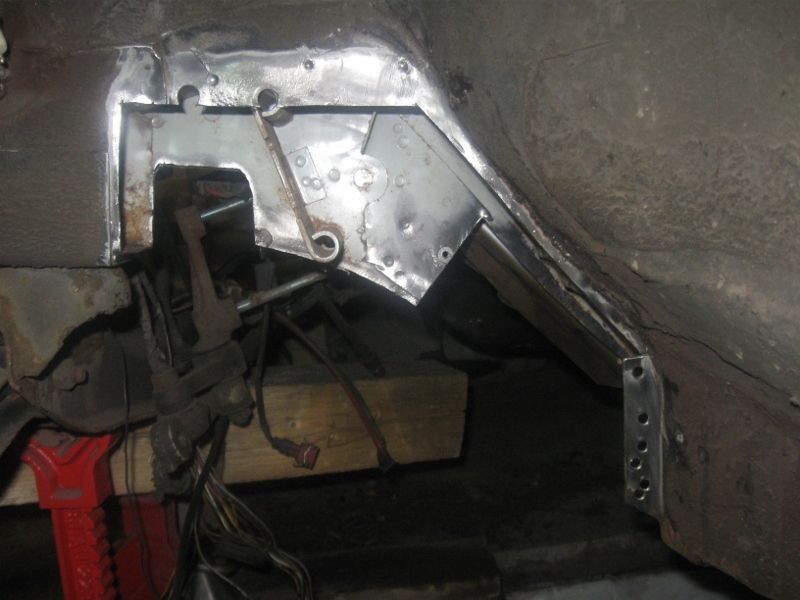 More out, for a distance right down to the bottom there has effectively been no chassis leg inside, outside or bottom, when I got to the floor it turned out to have no real top, so basically no chassis leg due to rot, just rust held in shape by paint. Small repair to rear 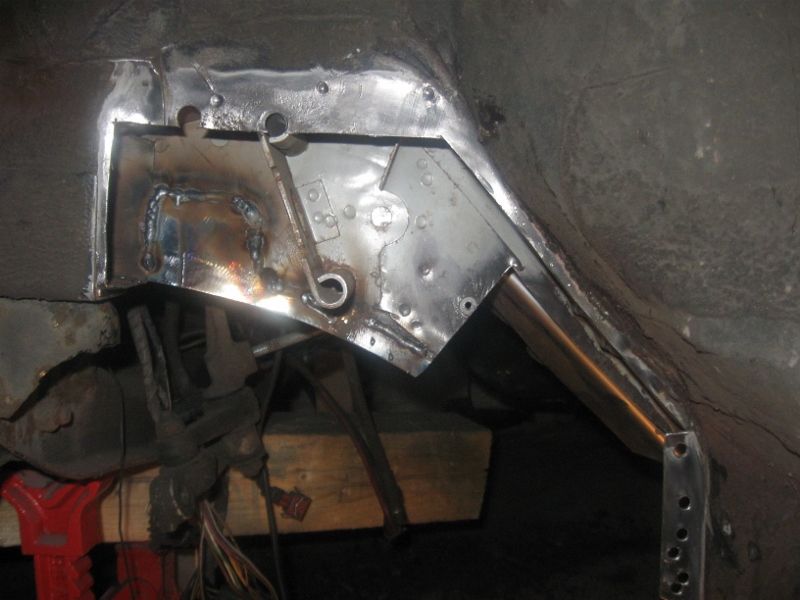 Patch for front 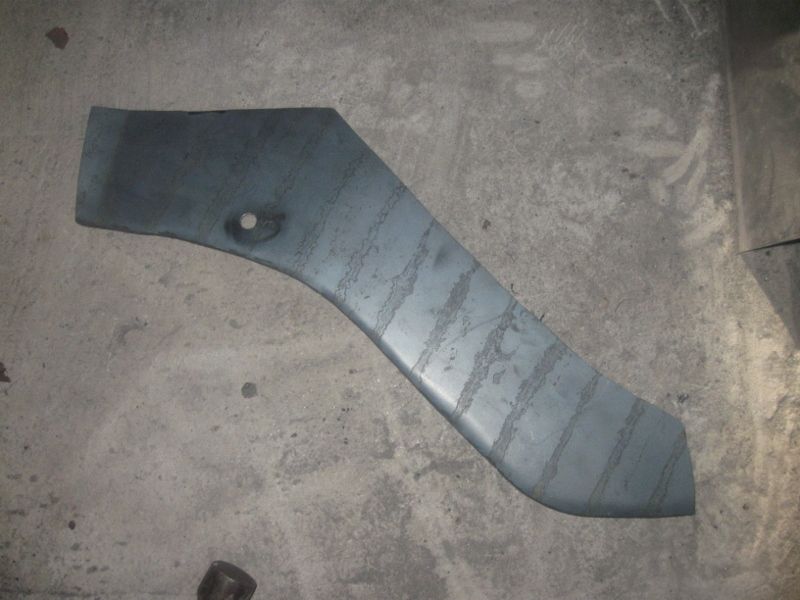 I’ve been very lucky that the strengthener for the steering idler was still solidly mounted, it made it easy to put everything back in the right place. 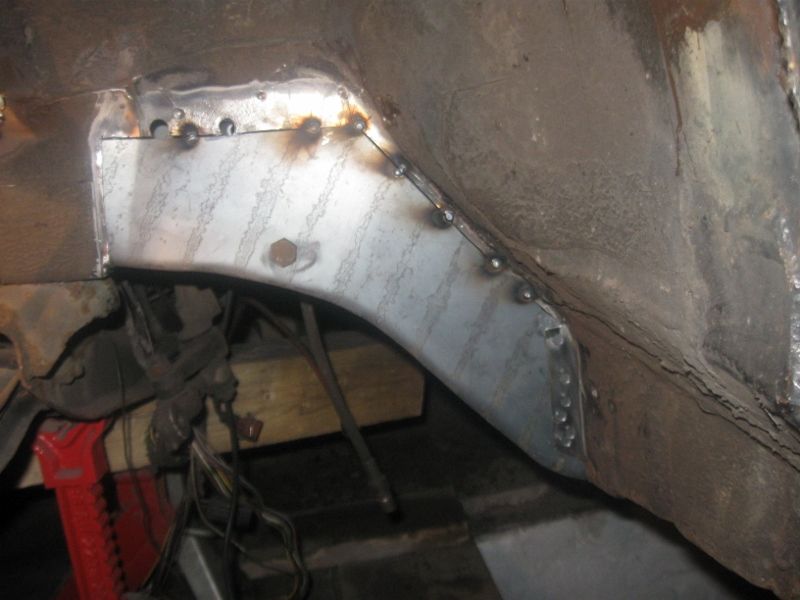 Thick material, still no problem with weld penetration.  Wherever possible the inside of everything gets painted in zinc rich primer. 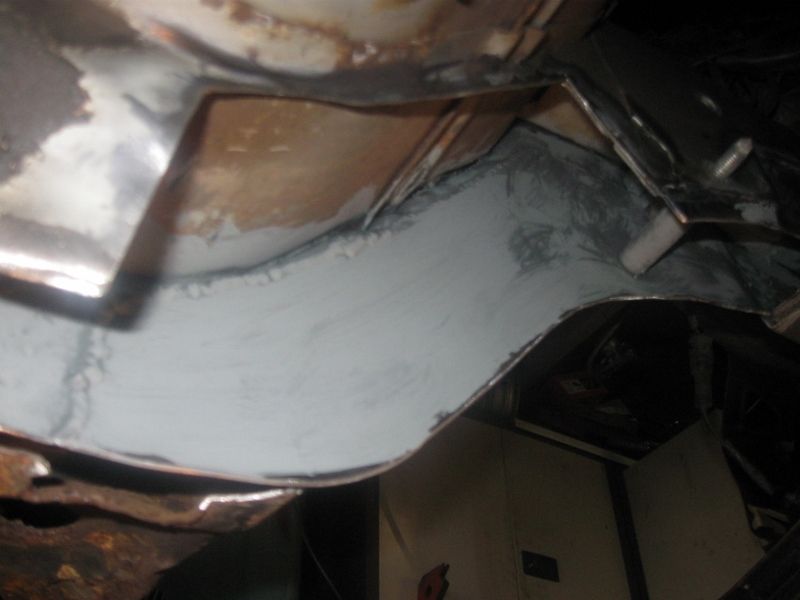 Inner repair, I should have removed the fuel pipes I suppose but instead put some temporary covers over. 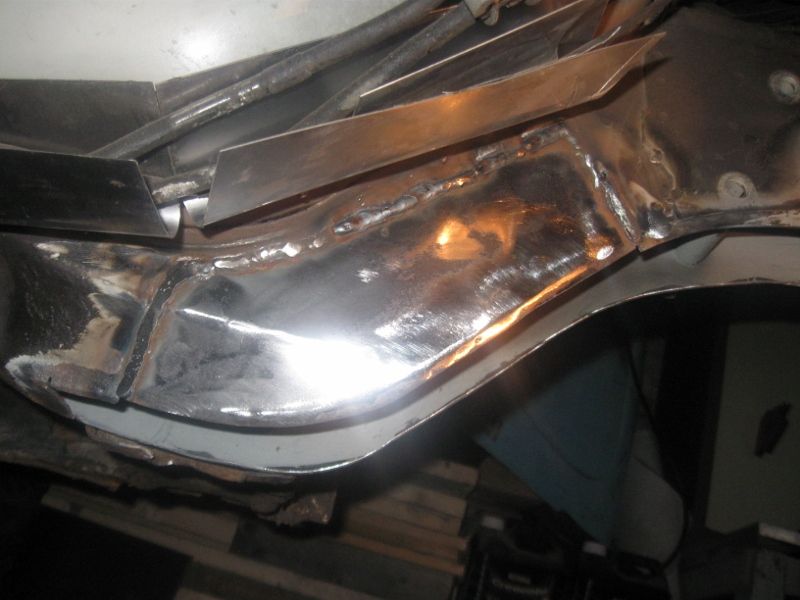 Bottom in  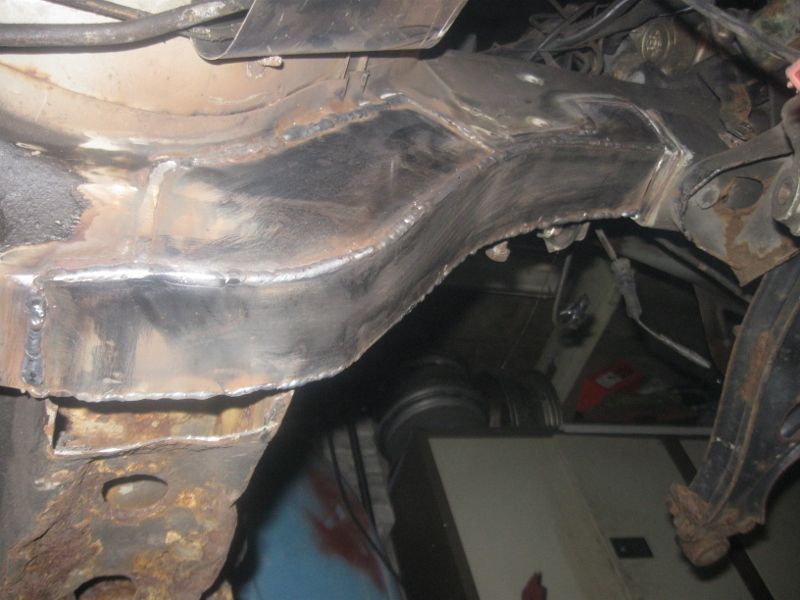 Outer layer which is actually the overlap of the front leg over the downward section. 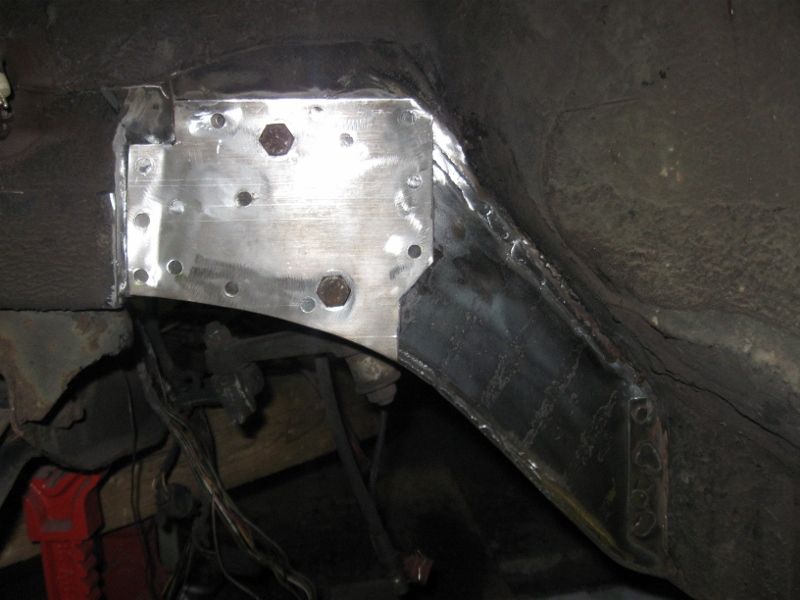 Done on all three sides as it should be. 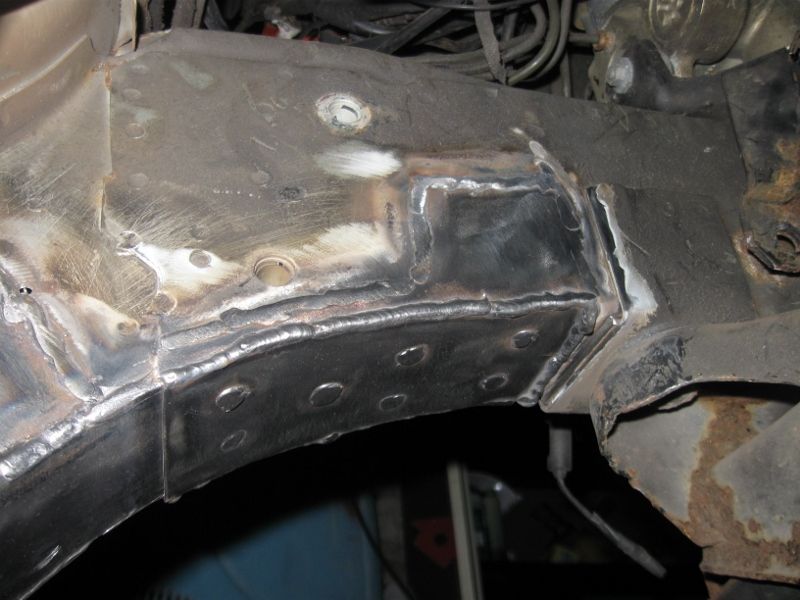  More asap. |
| |
|
|
|
|
|
|
|
More copy and paste I’m going to have to speed up the progress in this thread or it’ll never catch up with the car, I got another 8 patches welded in tonight (edit – a few weeks ago), making the patch count 112. I’ll try to limit how much detail I post, its not possible to post every repair so just the main steps. One thing I forgot to mention, at the start of the project I went to BOC and changed my welding gas bottle for a larger size, it was a very good idea for both cost and inconvenience of exchanging it, so far I haven’t finished the second one (edit - as I’m posting this now I’m well into a third bottle of Argoshield). Until a couple of years ago I always used pure CO2 from the fire extinguisher company as it is very cheap but changing to Argoshield light has made welding much more of a pleasure. Anyway, I had no intention of taking off the triangle panel as I had no reason to expect problems behind there, the rust stains at the bottom tempted me to trim the bottom edge off a bit at a time until the true horror became obvious and I had to remove the panel. 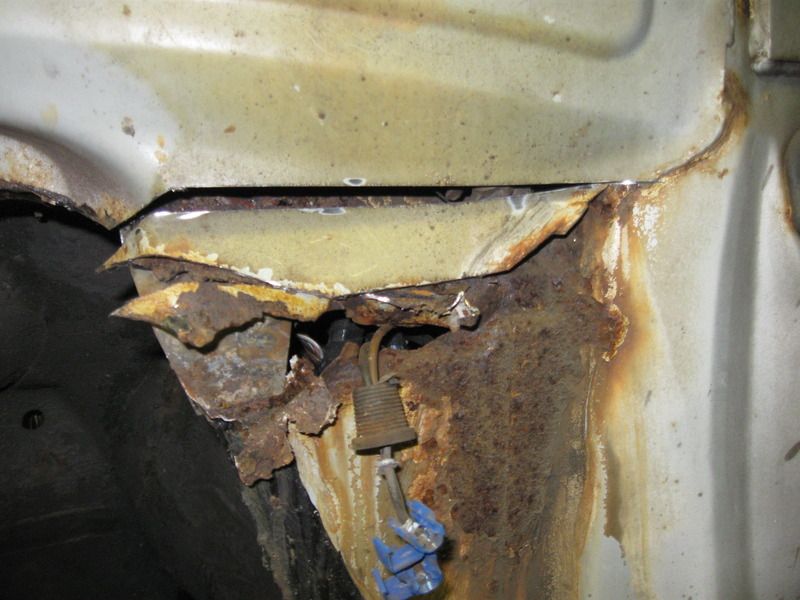 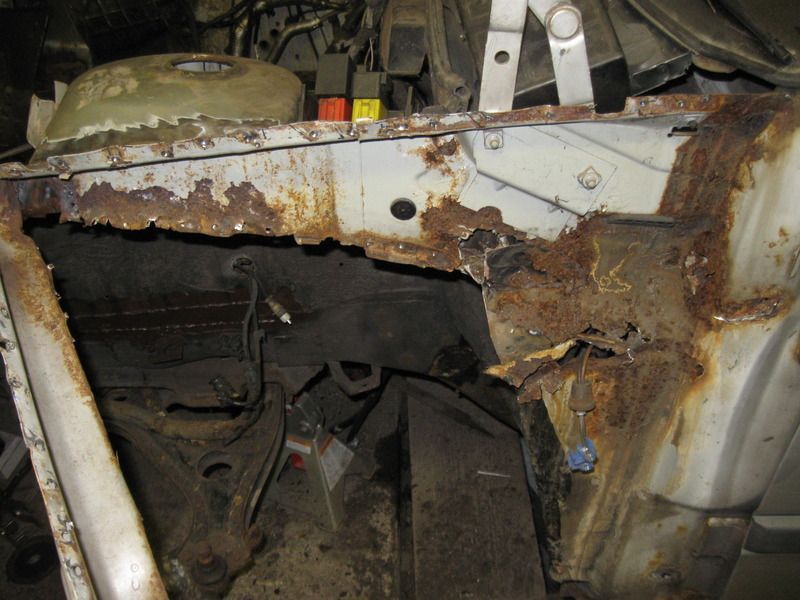 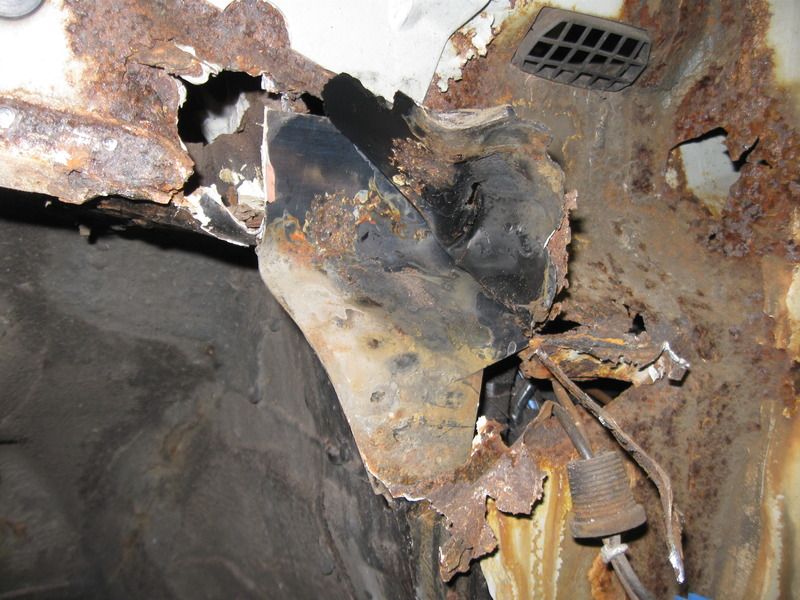 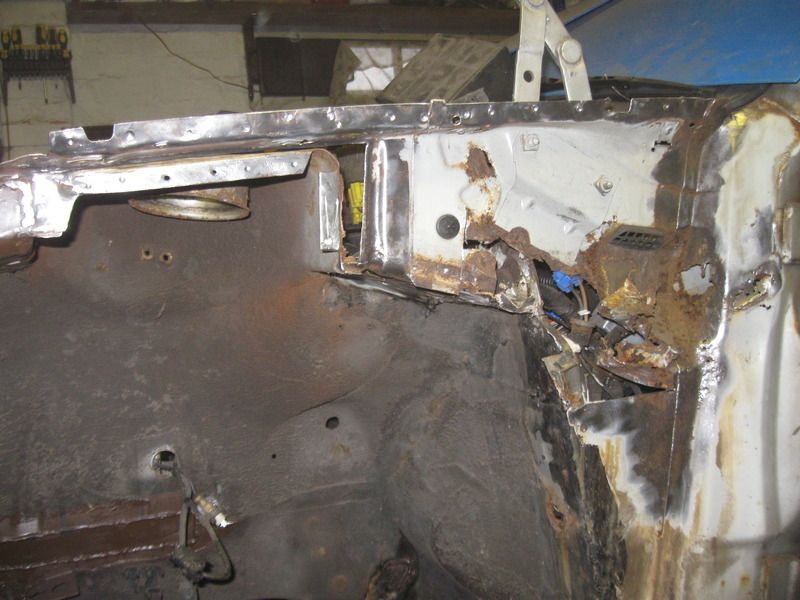 With some of the very rotten bits cut out the turret could be moved with finger pressure, I’ve heard of peoples turrets moving away from the inner wing and its obvious why it could happen with this going on completely unseen, it wouldn’t have been long until the handling would have been like driving a jelly. 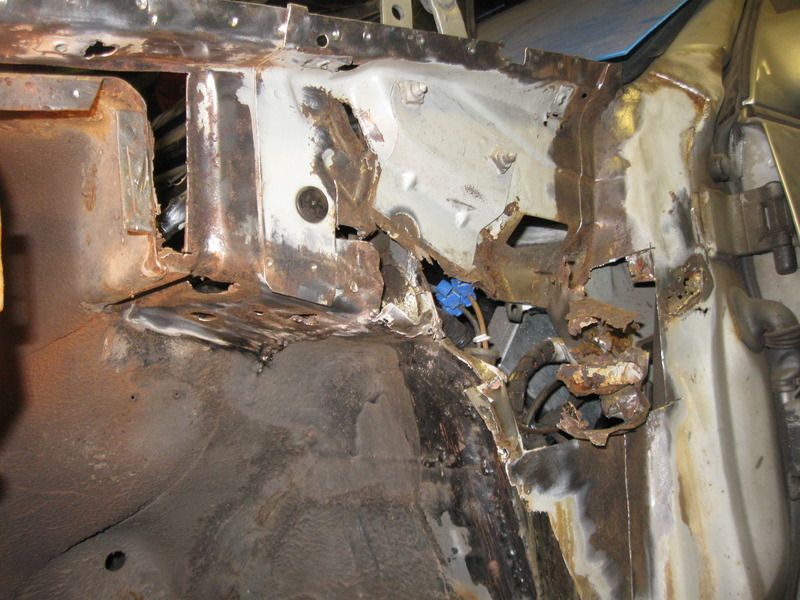 I lashed in some repairs. I know the bulkhead repair isn’t correct but it was bloody difficult to get access so anything strong and watertight would have to do. Those two unsightly welds got left un ground because I would have needed compressed air for the tools I have that could reach in to grind them and I didn’t have air in that garage at the time, I regret that because the spoil the finished job. You can see welds from some older repairs left here too. 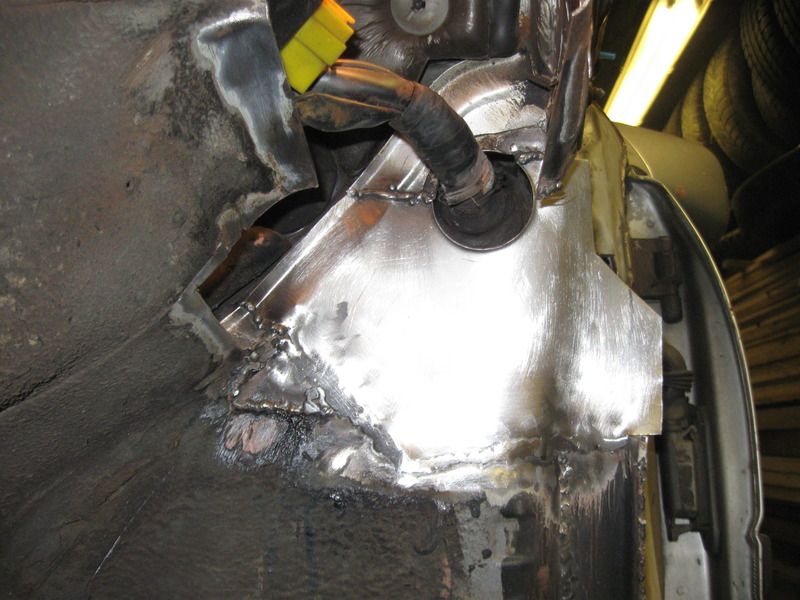 In no particular order to save sorting pics, lots of pieces welded in. 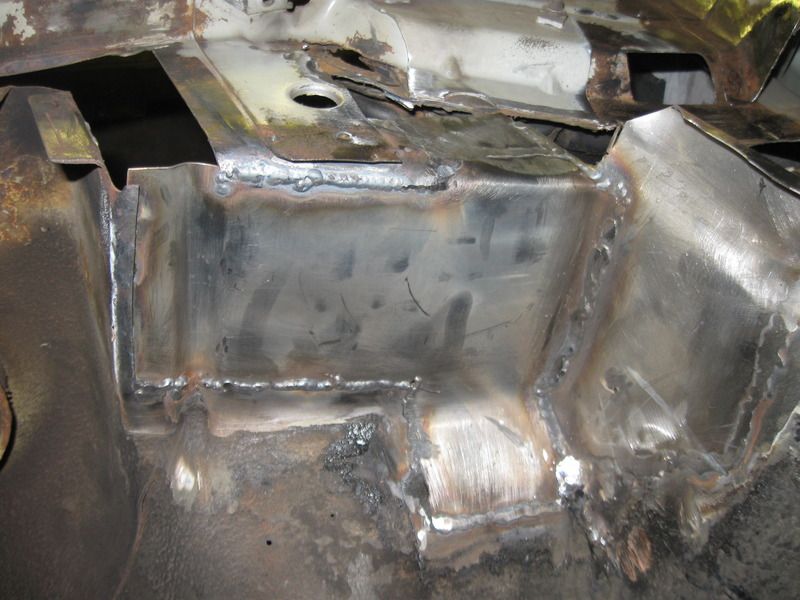 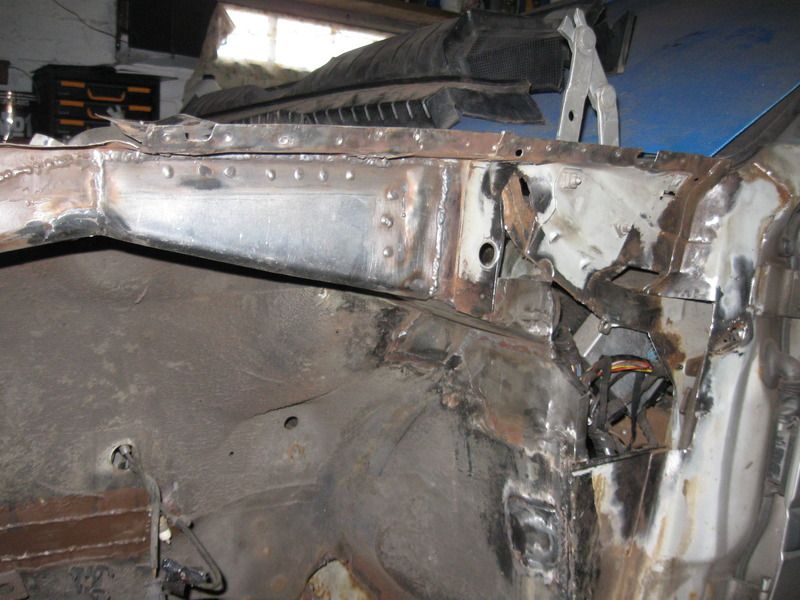 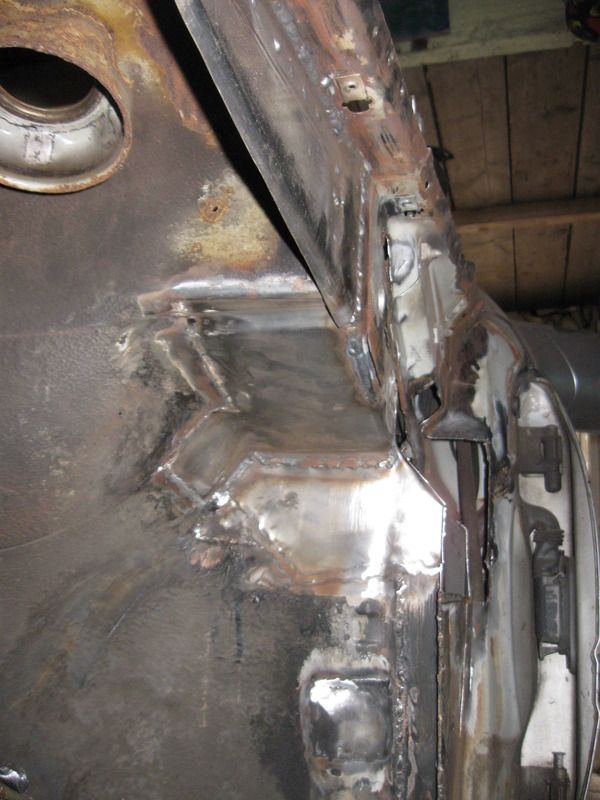 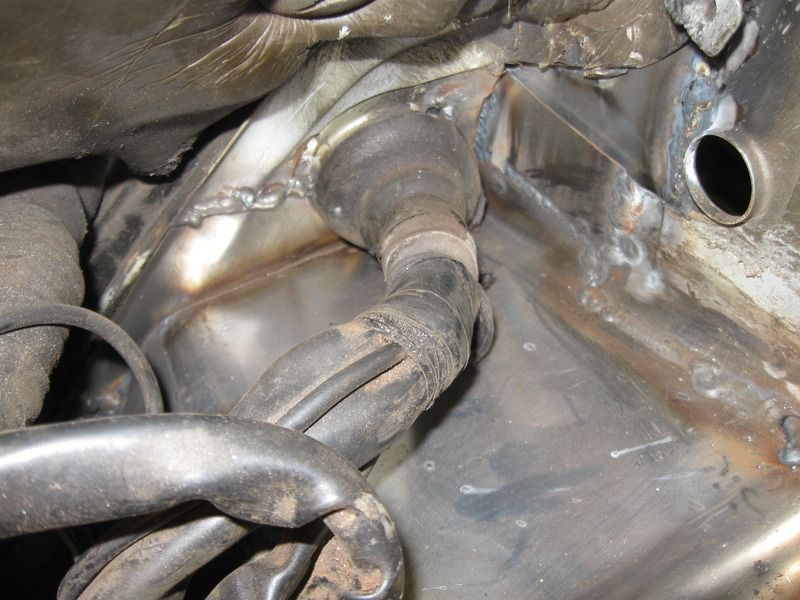 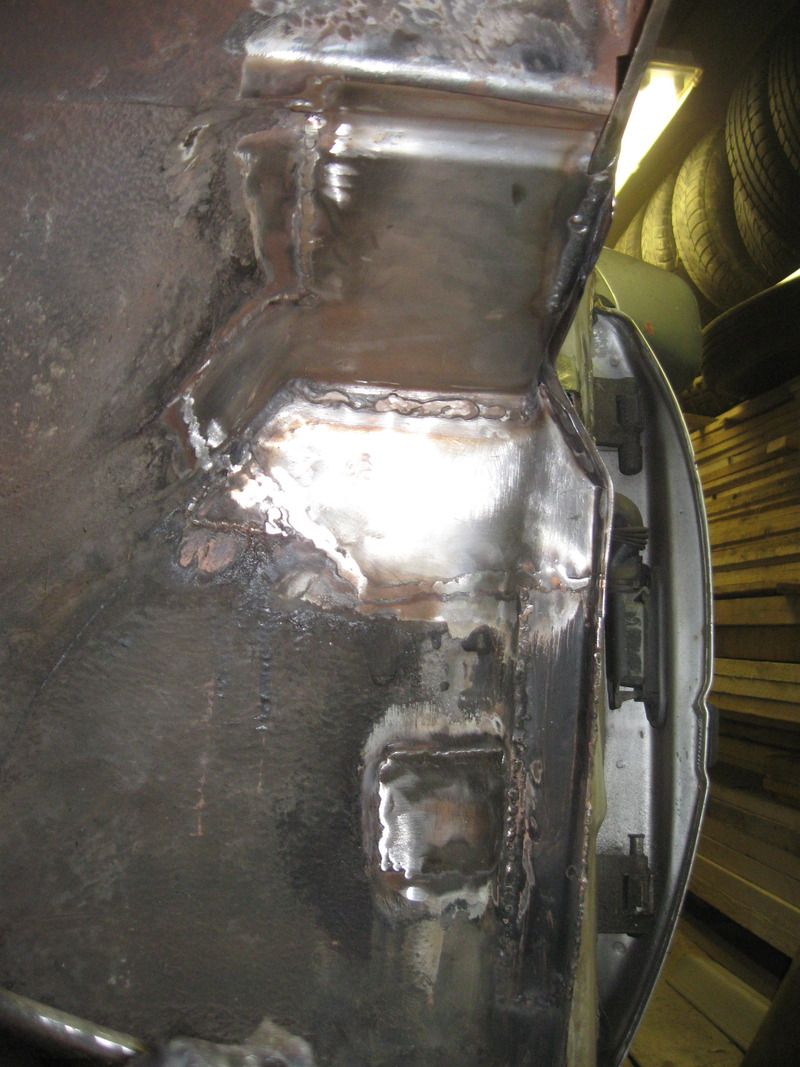 A large number of pieces later it was all built up again and primed but I had an idea to slow down the repeat of the rot here, it seems like the scuttle drain feeding everything including salty water into the traps behind the triangle are the main cause so I added a tunnel to take the water directly into the wheelarch area. We shall see how that works. 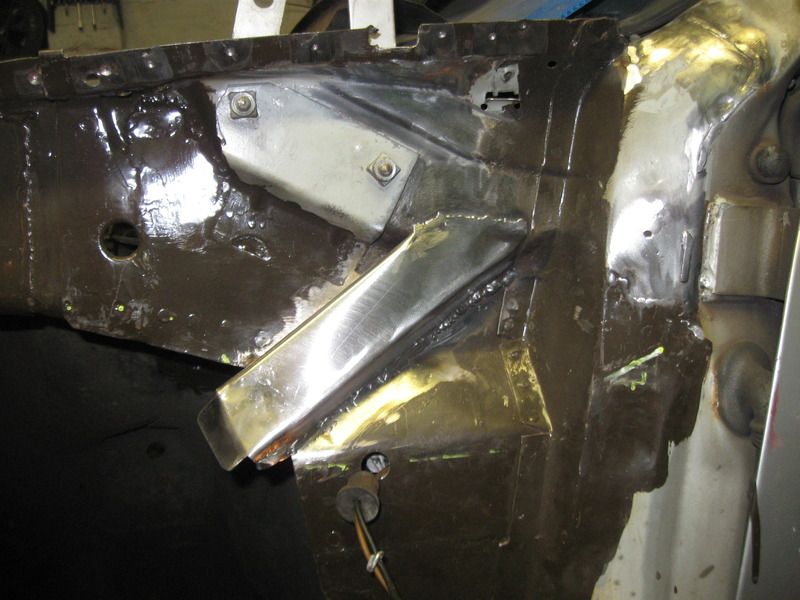 I added a bit back to the triangle and welded it back on, no pic welded on.  |
| |
|
|
|
|
|
|
|
A few more pics but first a tale of the electricity nightmare that cost a few months of progress last year. I had to choose whether to transport the car home and work outside when the weather was OK or find a way to weld in the allotment garage, fortunately a friend offered unlimited loan of his diesel generator, with the slight catch that it had never run since he bought it at a bargain price but he knew that the previous owner had been fiddling, just needed a little adjustment apparently. At this time I managed to get my work to pay for a qualification (NEBOSH) I had kind of pushed them into as part of accepting a job deal, shame it should have happened in winter not spring. Anyway, that was the toughest 7 weeks of education of my life, every waking minute not at work was spent studying so no car progress. I passed by the way so worth it. After that we went to work on the generator, eventually diagnosed a knackered pump and waited for parts. That fitted it kind of ran, and the welder worked but the generator didn’t run right. One day I fired the heap up and had a think about its unstable speed and its smoke, then it started to rev and rev, I turned off the key which didn’t help and eventually it stopped itself. It had run on its own oil and luckily a pushrod had jumped out and saved complete disaster but when we took it apart the piston was shot. My mate couldn’t get a piston (still hasn’t) so no welding ability. I got very frustrated at this point and decided that I would try welding using my own clearly undersized 2.3KVA generator and to my surprise it worked so I got stuck in. You can guess how the generator story went on but for now I was welding, with much of the summer wasted. Back to work The front crossmember was always going to be binned 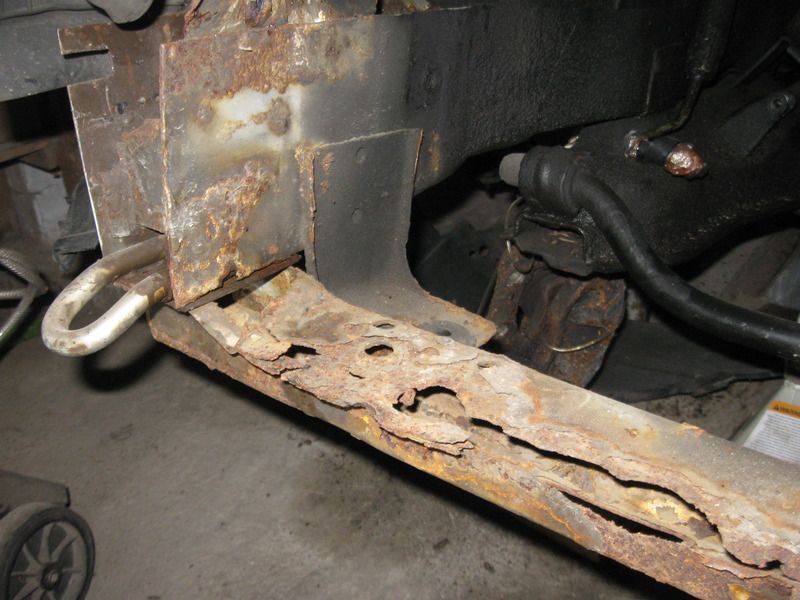 It came off years ago due to extensive rot in it and the chassis leg and was attached back on with some crude patches. 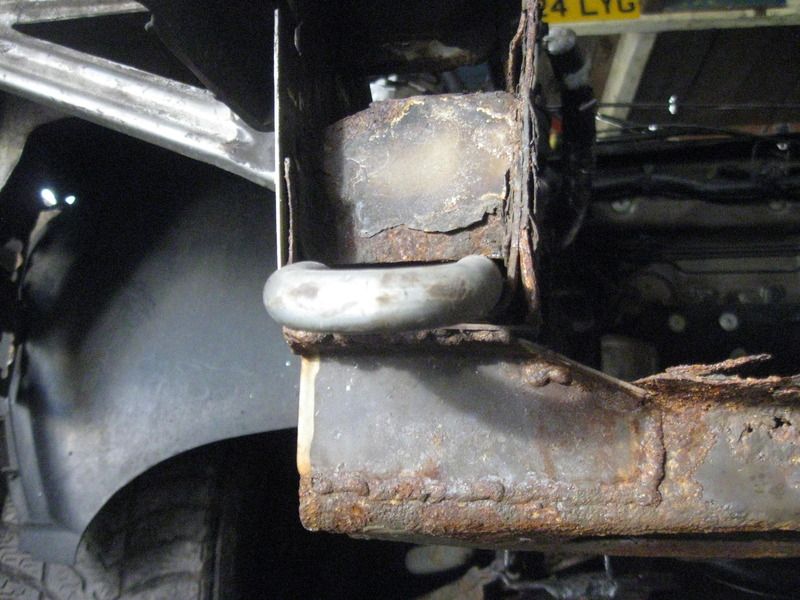 The first welds using the generator were a minor repair to the chassis leg 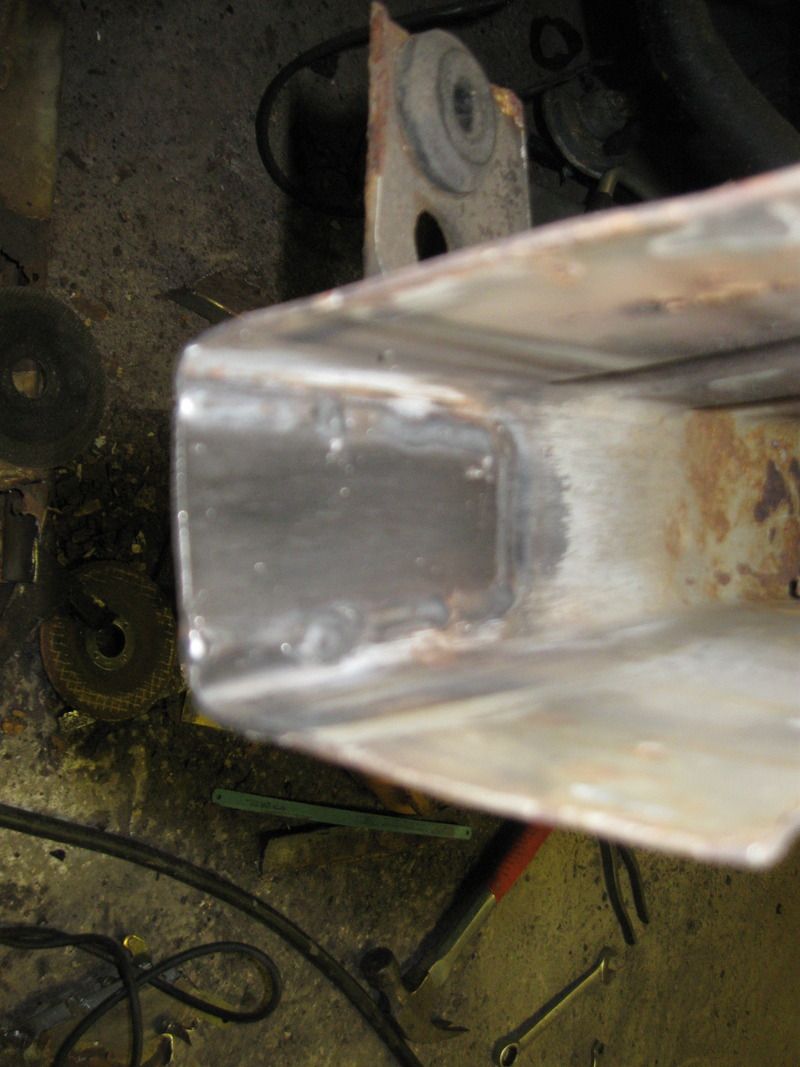 Underneath shows good penetration, all of the welding has good penetration, some of the repairs might be a long way from factory but they are all strong and will last. 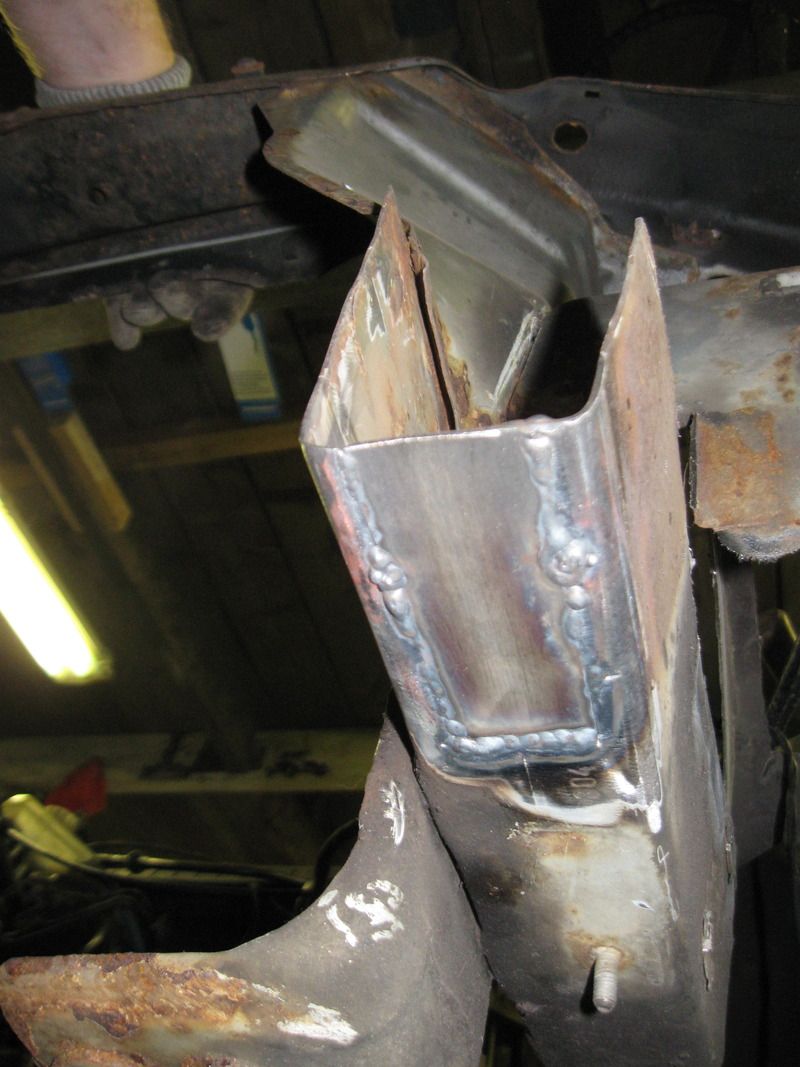 Next another easy one to the bumper bracket 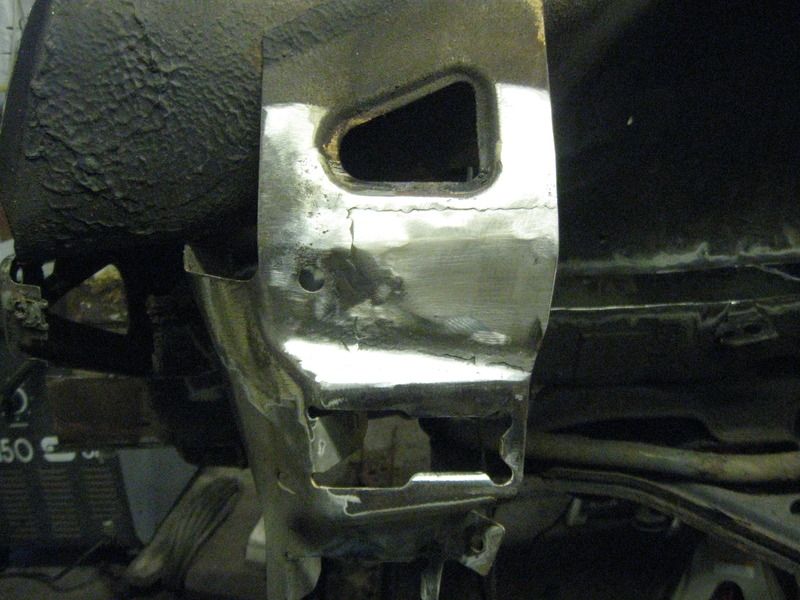 A quick fill of the battery tray hole 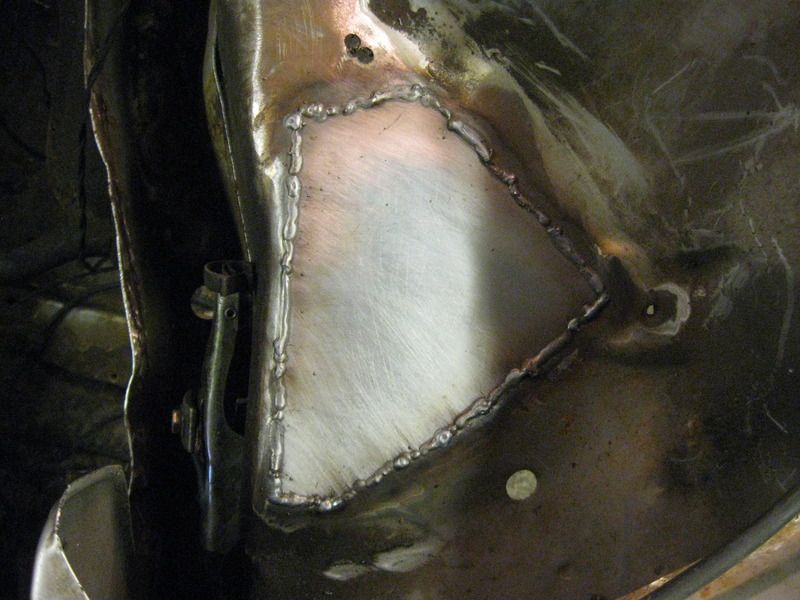 Then the chassis leg, only working on the passenger side until its done before discovering the horrors of the other side. The top wasn’t great and the overlap with the inner wing was rotted along its length. 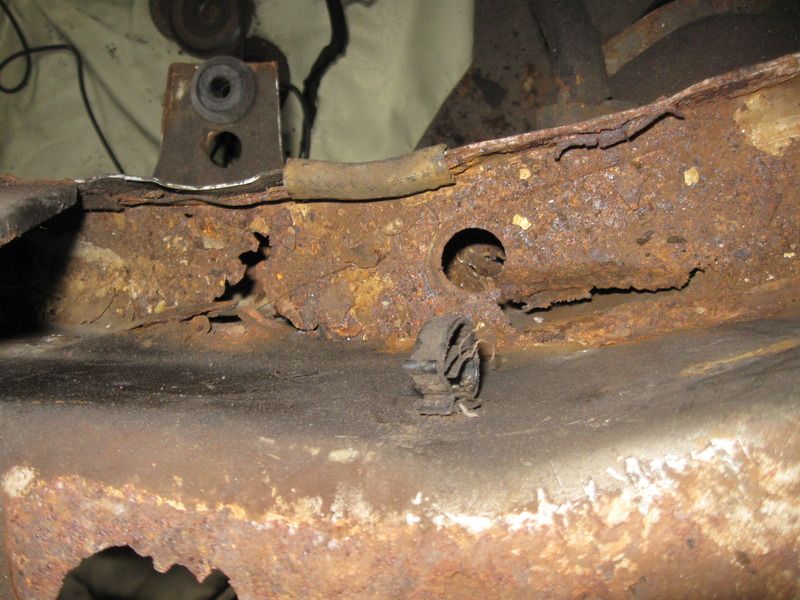 I cut out the overlap, now at this point it was still to be a quick but strong repair job so I didn’t bother at all with replicating the factory seams, I just wanted the rust gone and a strong repair that wouldn’t need doing again. Throughout the car I keep switching between quick strong repairs not respecting the factory joins and restoration style repairs with the correct overlaps etc, no consistency, just what seems like fun at the time. When I painted the front end I wished that I had done a better job because it started to look half decent but that’s a lot later. Repaired like this 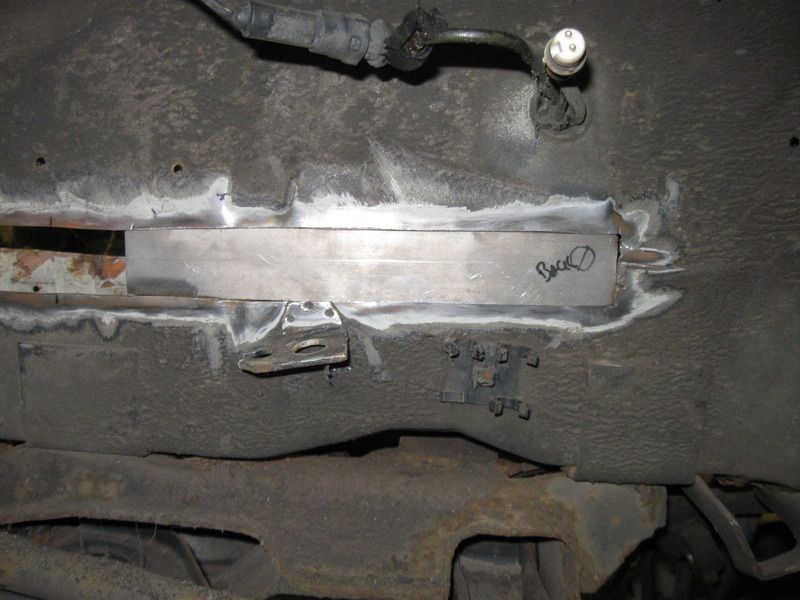 Here the inner wing to chassis leg plates are in as is the battery tray area and some repairs in front of the turret. 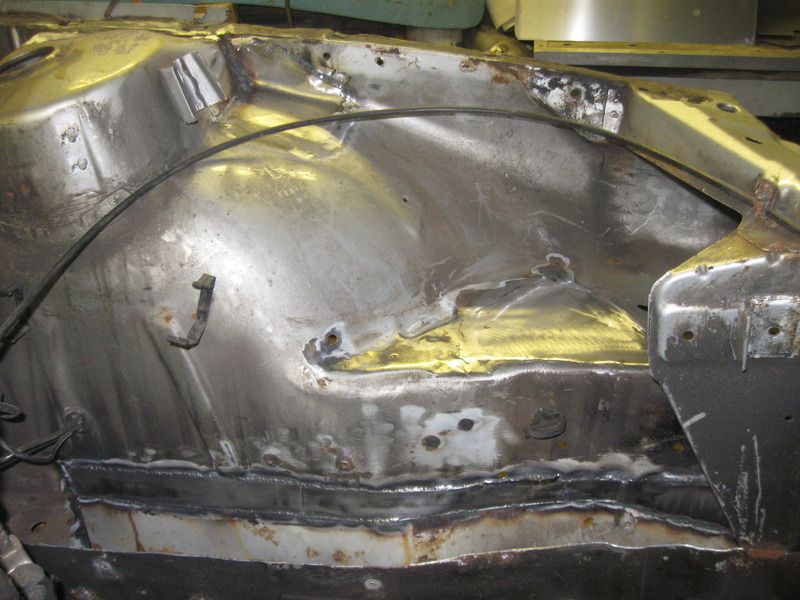 Then the chassis leg top replaced with bolts welded in for the ABS unit, the inside was painted first and much later waxed. 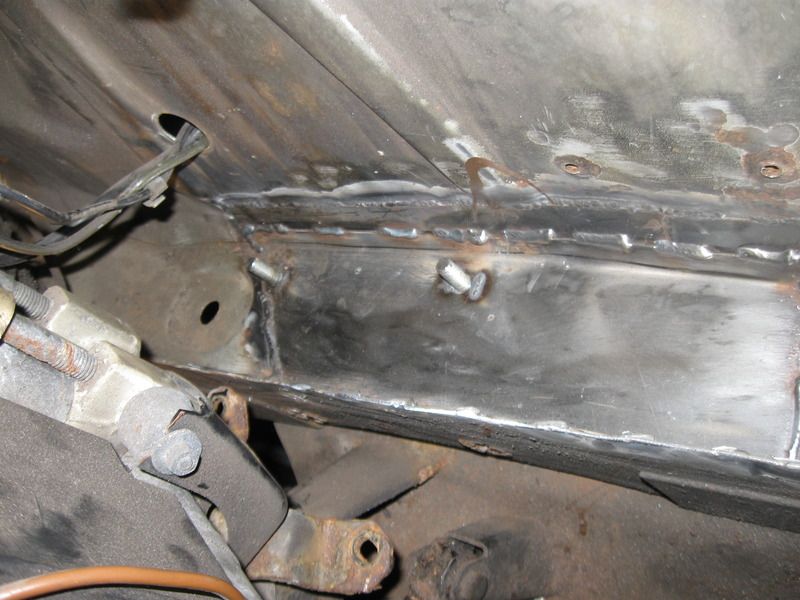  That was the easy bits in that corner, some of the more painful and unexpected bits next time I have a chance to look for pics. |
| |
|
|
|
|
|
|
|
A few small jobs that could be progressed while welding was impossible at the allotment. The car had its carbon canister left in place although not connected for years so that the MOT man couldn’t see the bottom of the battery via the inner wing. I binned the carbon can and drilled off the battery tray.  I left it in a bucket of vinegar for a while to get rid of the rust 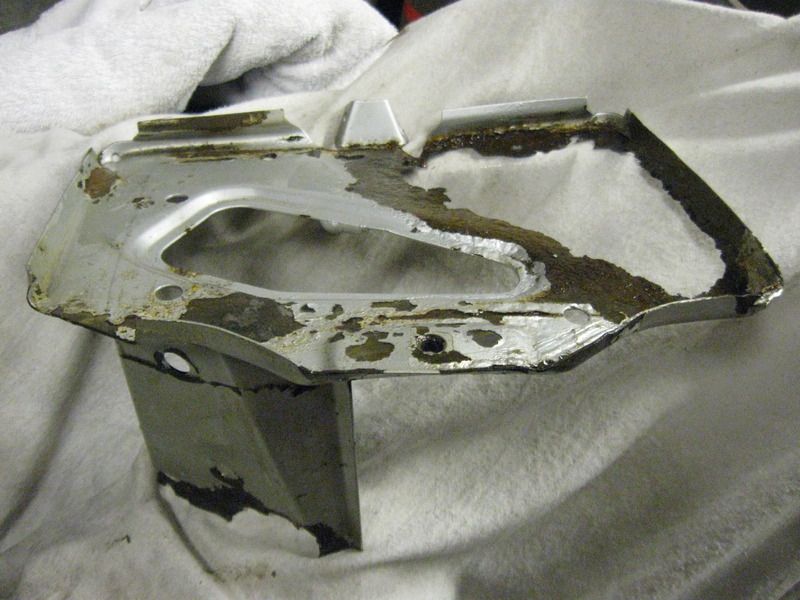 Then made and attached a new half. 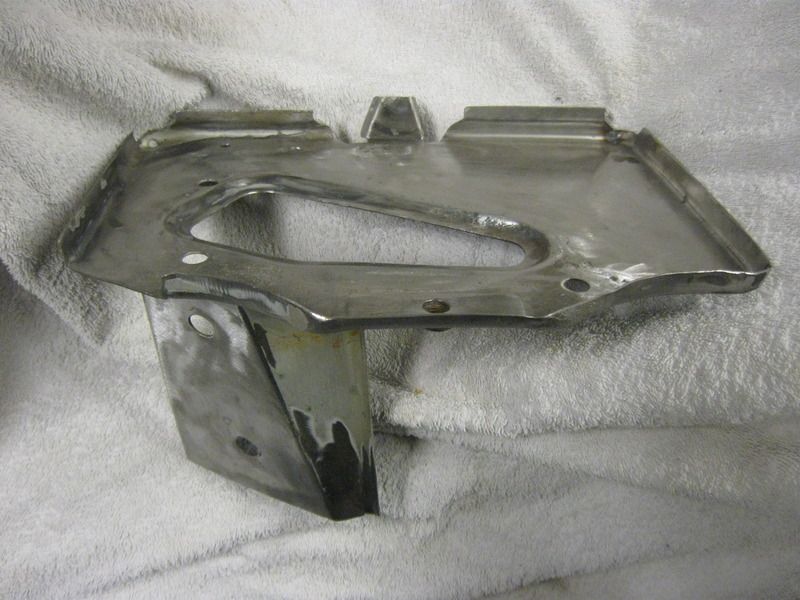  The lambda sensor was the worst seized I have ever seen, and the mounting bracket had snapped off the downpipe, 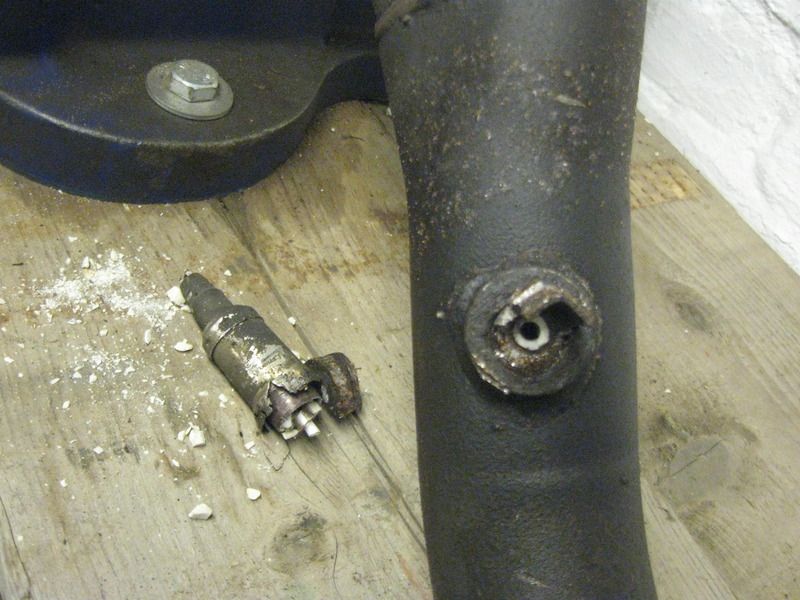 I work for an automotive manufacturing company, one of the products is exhausts so getting a new sensor boss was no problem. I didn’t weld it on, I took it to work so it would be welded with stainless wire and the prototype tech welded it on, as well as repairs to the bracket, he also decided to paint it with the stuff we put on the welds of warranty parts. 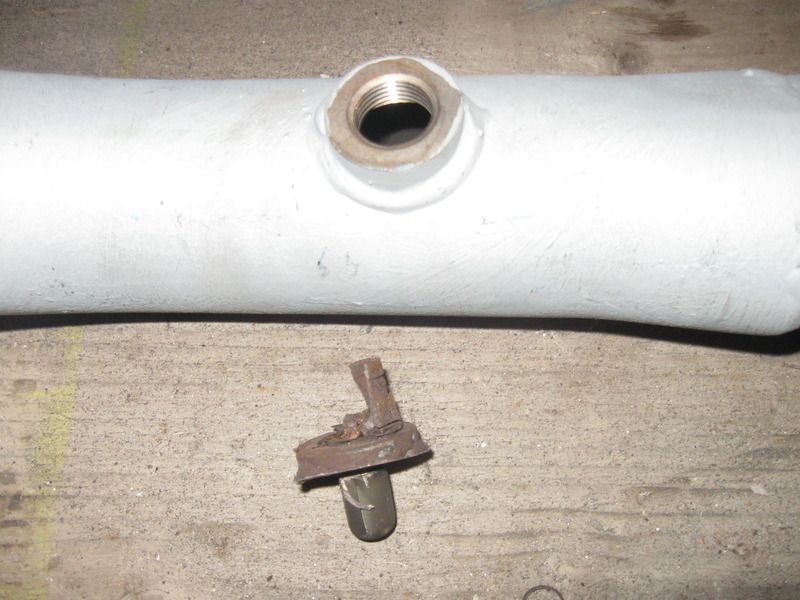 The wings were shot, nothing much left for the plastic inners to hang onto and holes at the bottom edges. I bought a pair on ebay from that car that had the back of the roof destroyed. They were not well packed and one was damaged where it had filler in it, to be fair the seller wouldn’t have known about the filler but didn’t make a reasonable effort to pack them. He offered a refund if I returned it but it was still much better than what I had so I kept it. They were described as rust free which wasn’t quite true although they were good compared to many.  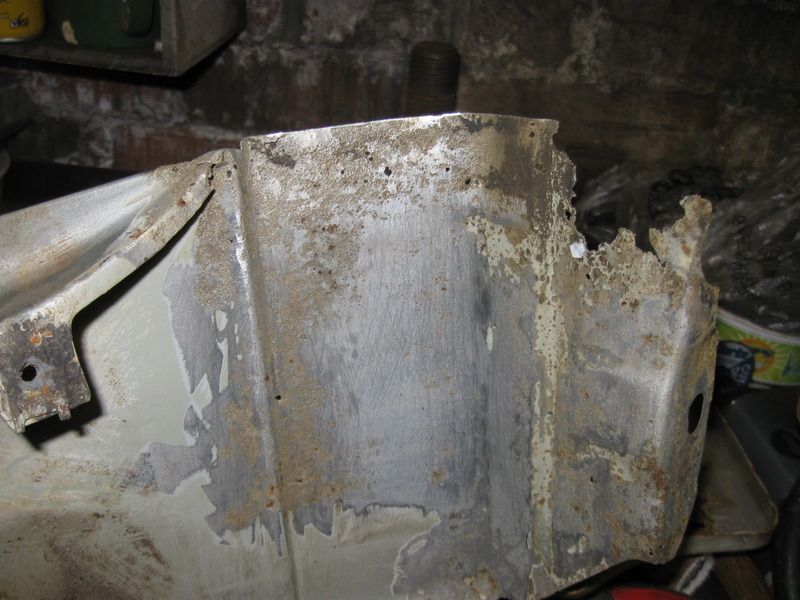 A small patch on the inside (just tacked here but welded next) 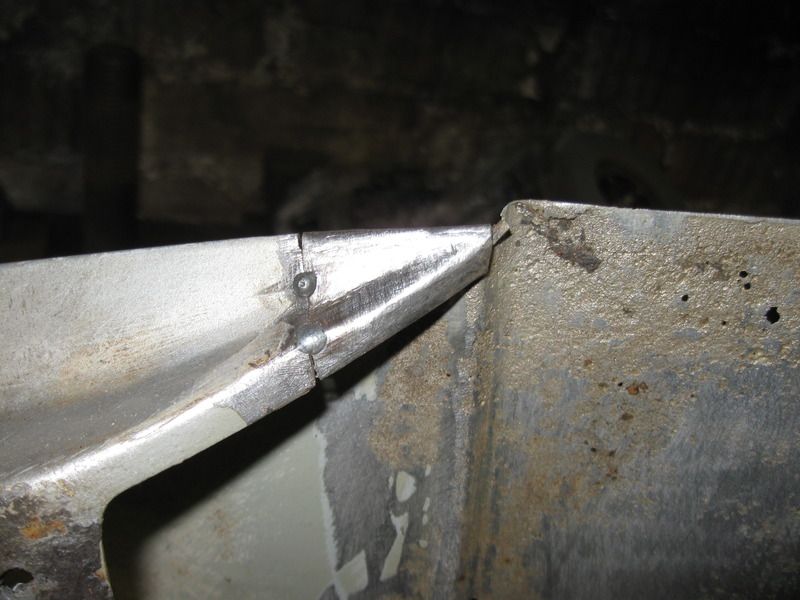 And one at the bottom 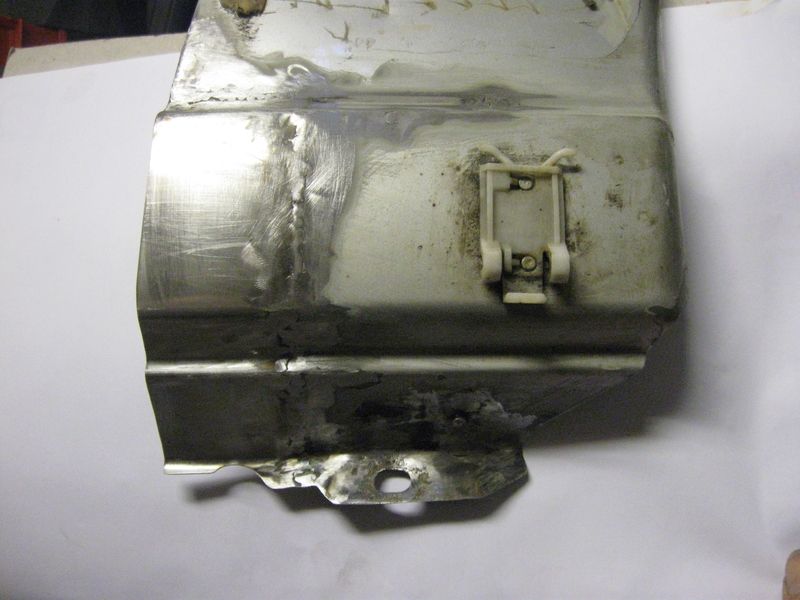 That’s it for now |
| |
|
|
|
|
|
|
|
Firstly apologies for this belated thread starting, I started work on this car about a year ago (or more) I only posted pics at all in the last couple of months or so on Autobahnstormers and Total Carlton. RR is the only non manufacturer specific forum I bother with, full of the stuff I like and I’ve recently started to enjoy the build threads so thought that the least I could do was contribute a bit. Apologies now for whats below maybe not completely making sense, its because the only way I will catch up here is to do some copy and paste and therefore it might have bits of comments in reply to other things not written here, a bit of a mess but I thought better than not posting, Anyway, here goes with lots of copy and paste probably over the next few days to get this thread caught up to the other two places its posted. – I’ve been meaning to start a thread about giving this car a chance of a new life for a long time but once I’d left it too late it just seemed to become a bigger task to backtrack and I never got to it, lots of other pressures didn’t help. Anyway the car had reached the end of a tough life and was about to be scrapped and the few not broken parts left kept for spares. I liked the car so much that I decided to do something with it. The idea initially was to just give it a quick & dirty repair, stripping it of everything non essential to leave a lightened car with only the bare essentials. It didn't quite work out that way and to be honest the project doesn't really have any direction regarding the aim of the result, I'm just doing whatever I feel like at the time, just for fun really. You might ask why it was almost scrap, well when I bought it in 2010 for £300 unseen it was to run for a while then break, it had a lot wrong with it including a lot of rot and a lot of badly repaired rot. By the time I’d done a lot more ropey repairs to keep it on the road for a few more years it was in a pretty shocking state, but I always liked it. At the point of starting this project it had lots of rot, knackered gearbox, the usual headlining issue, two not working windows, collapsed rear suspension, was barely driveable due to juddering and absolutely countless other things I cant remember broken or faulty. Genuinely what most sane people would call beyond repair. So why have I finally got around to posting about it, well, I reached a dubious milestone with the project on Sunday (edit, this was a Sunday a few weeks ago) that made me realise the size of the job and that it was about time to post a few pics. I passed the 100 mark in the patch count (yes, I’ve been sad enough to mark every patch in tally charts as I’ve gone). That’s not counting any panels cut off for access and welded back on, just new pieces I had to make and weld in to make it solid again. I’m hoping that I’ve broken the back of the metalwork now as I think it might be complete at around the 130 patch count mark. Unfortunately because I’ve left it so long to start a thread I’ve got too many pics to sort through and cant even remember the sequence of events so I’ll be leaving out a lot of the detail to catch up. Anyway, it got driven into this garage at the end of 2013 I think and nothing much happened until last summer.  Except that we relaid some of the floor behind it and reinstated the extremely handy T shaped pit which had become dangerous. 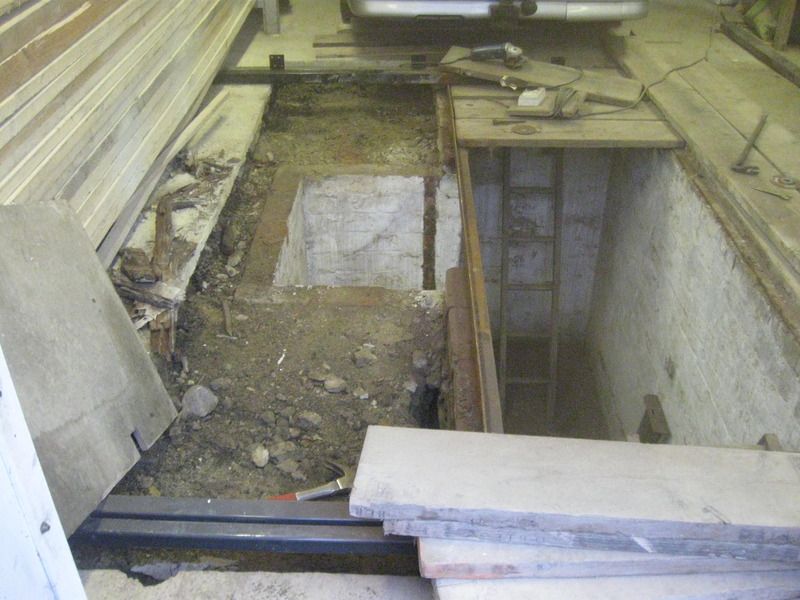 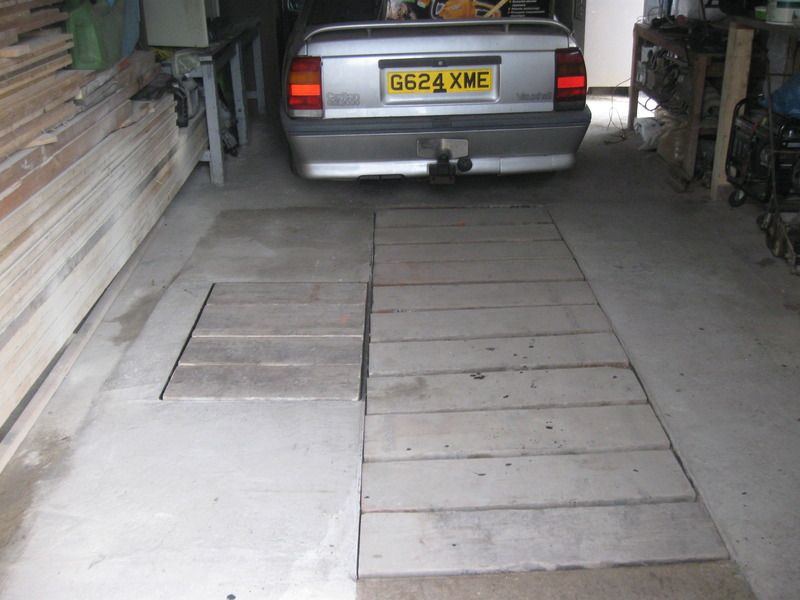 One of the challenges of the project is the garage, I had no room at home but I rent an allotment with this garage in it, it was a derelict shell when I got it but with a new roof, steel doors, brickwork and recommission of the pit, wiring etc etc it was ready for its first project car. The garage location means no mains electricity by the way which has been a huge challenge for a car needing so much welding and considering that I mainly only get to it on a night. More about that later. The next thing that happened was to remove the engine, which was difficult because whoever last had the engine apart had left off the front engine lifting bracket and it cant be refitted without removing the inlet parts. 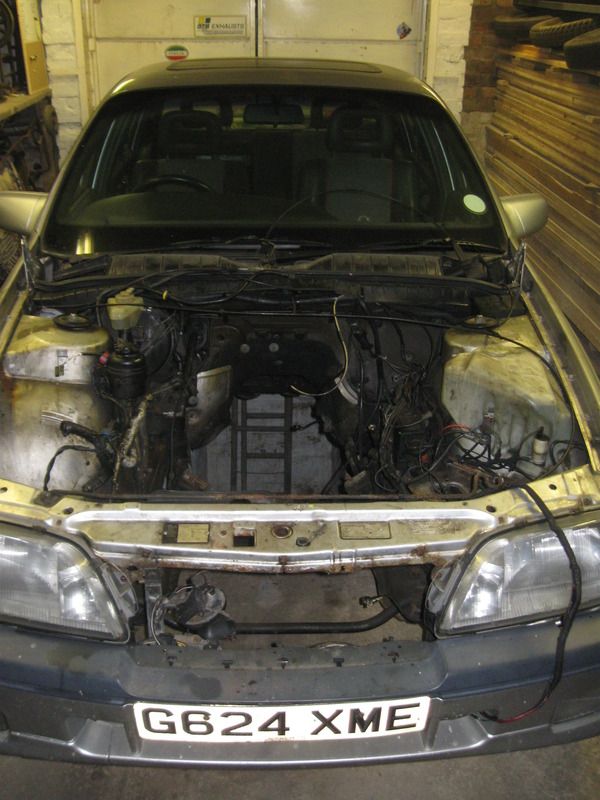 The idea of removing the engine was to make it easier to fix some odd bits of rust. I had no idea just how much rust was waiting but made what might seem like a silly decision to intentionally not look any further than I was working in case what I saw put me off taking the job on. I was right not to look, had I known what I know now it would definitely not have been repaired. I have stuck to that decision to not look any further than where I’m working and it has never ceased to amaze me. I will try to add a few pics of the progress as often as I can until I catch up. Have a little teaser to help you see why I’m surprised the car hadn’t collapsed into a mis-shapen heap on the floor. See through chassis leg. 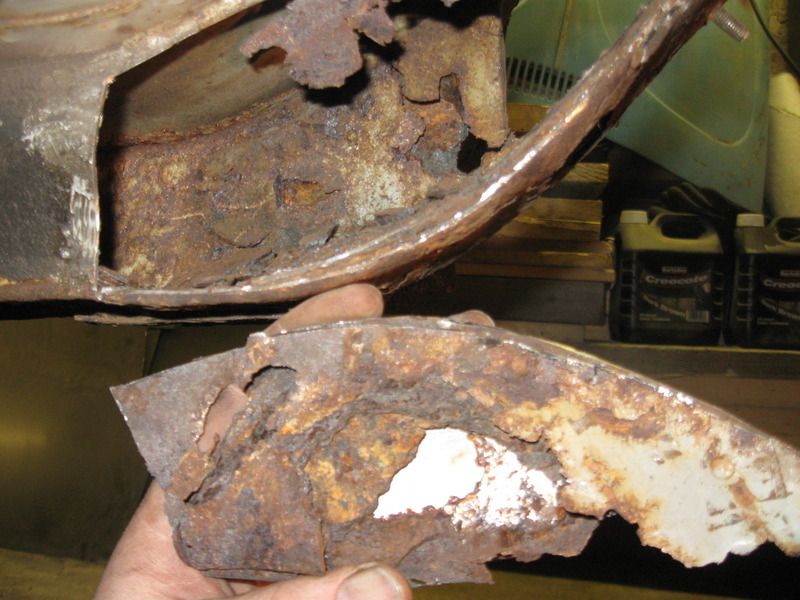 |
| |
Last Edit: Aug 2, 2015 8:52:04 GMT by chris y
|
|
|
|
|
Jul 22, 2015 23:03:16 GMT
|
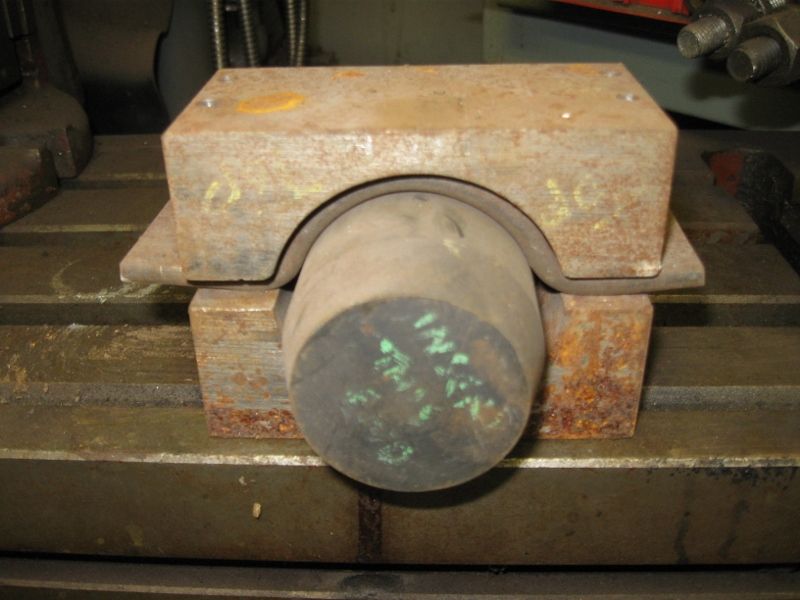
That wooden roller is fantastic, I'd never have thought of trying that.
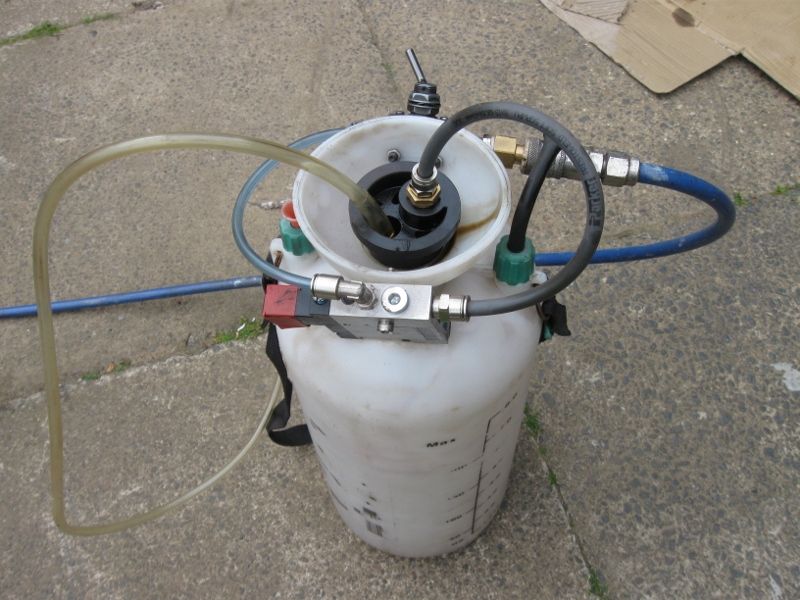
A couple I can remember. I used a garden sprayer to make an oil suction tool for sucking oil out via dipstick holes when the sump plug is fragile or for a diff with no drain plug etc. It works very well.
This was a press tool to make beam clamps for the front suspension beam on my rail because the front end was so mangled I had to start again. There is one still in it about 10 years after it was last used.
 |
| |
Last Edit: Jul 22, 2015 23:04:24 GMT by chris y
|
|
|
|
|
Jul 16, 2015 22:30:52 GMT
|
|
Having parked a Carlton GSi 24v "My Dad had one of those, but his was a real one"!
Someone walking past my rail (see avatar), "that's a landrover with the body taken off". It doesn't even have an engine at the right end.
I cant think of any of the fascinating true stories at the minute.
|
| |
|
|
|
|
|
|
|
|
I've just read pages 1 to 5 and its far too late so I have to got to bed, I cant wait to read the rest.
Up to page 5 alone this is a superb thread, the workmanship and ingenuity, the amazing adventures, and the way you tell a story too. Brilliant.
It also made me realise that I don't try hard enough to source parts, I've never even tried other continents and epic road trips, just not trying.
|
| |
|
|
|
|
|
Jul 12, 2015 23:34:28 GMT
|
|
Excellent thread, I'm really looking forward to seeing this progress, and I approve of your idea of a sensible daily driver.
|
| |
|
|
|
|
|
|
|
|
12" Mini have the wrong offset to go straight on the rear, the tyre will hit the spring before the wheel is on. I have used them and had to fit spacers. I had 155 70s on to fill the arches.
Cutting out and rewelding the centres would be my choice now.
I think Hillman Imp wheels go straight on but its a long time ago so couldn't be sure.
I always left the front standard although I suppose you could go fatter if you keep it central.
|
| |
|
|
|
|
|
|
|
|
I turned up at hospital on my motorbike to have a plaster cast on my leg changed as it had gone a bit mushy having been caught out in the rain previously on said bike.
On finding out that I was planning to ride home hospital staff said that if I rode away they would call the police immediately as I shouldn't be riding a bike with a plastered leg.
I called the AA and they took me and the bike home once the girl on the phone had stopped laughing.
They had also took the same bike home a couple of weeks earlier following the accident that lead to the afore mentioned plaster.
That was 1989 though when I was a bit stupid and the AA were a lot more flexible.
Not much help I know, just an amusing story.
I've been a member ever since and have used them rarely and am happy with the service.
I think last time would be about five years ago for a broken immobiliser on my Carlton while on holiday, their computer system had full instructions on how to bypass it which we did and I was on my way.
Most of their people I have met have been car people and have shown a real interest in retro stuff.
|
| |
|
|
|
|
|
Jun 27, 2015 23:26:02 GMT
|
I've just read this thread for the first time, right through, marvellous work, I will be following progress for sure.
Edit to add -
I was interested to note the sunroof drains, I'm working on a Vauxhall Carlton at the minute and was surprised to find its sunroof drains exit into the sills too and coincidentally I went for much the same solution of taking them out into the wheel well. Its a mystery to me why so many car designers did that, it seems completely bonkers.
I was also interested to see you using some Bilt Hamber products, I'm using several of them myself and rate them quite highly, I'm using Deox gel, Hydrate 80 converter and Electrox zinc primer, good stuff. |
| |
Last Edit: Jun 28, 2015 23:33:39 GMT by chris y
|
|
|
|
|
May 23, 2015 17:29:44 GMT
|
|
There is a car just round the corner for me with what I think is its original standard modern plate, but to me it always says one thing.
You know that thing where you can read a sentence of words as long as the first and last letter of each is on the right place, the others jumbled, its like that.
BJ10WOB
Only the J out of place, when you see it in real life it works.
|
| |
|
|
|
|
|
May 18, 2015 16:39:36 GMT
|
Don't think I will be attending anymore in my pug309" I know I won't be missed but I will miss seeing the decent motors that do turn up. Personally what is needed is a few proper organised shows in the north east area. As general meets like the metro get out of hand all to quick, The Metro one didn't get out of hand quick, I really don't know when it started but I bet its taken at least 15 years to get where it is now, I think maybe the use of social media means that nowadays things will grow a lot quicker but not always for the better. I think it was started way back by the Tyneside hotrod club, they would know the history.
The venue for this one was great when it was smaller but its not suitable at all now, I think the public perception now will be a load of rowdy car & bike people no different (in their eyes) to the young uns cruises with modern cars making a noise and burning rubber etc. Remember a lot of non car people just see modified cars, they don't know about different scenes etc.
Until recently a lot of surprised shoppers would be seen wandering around to see the cars, now the crowd on the way in makes it seem a bit intimidating in my view.
If it moved to a much bigger location I'd definitely still go, I can walk past cars that aren't my thing but I'm not that keen on what this one has become.
|
| |
|
|
|
|
|
May 17, 2015 23:03:42 GMT
|
Some nice cars on a more positive note, I particularly liked the low XJ6. Hey if that's the old Beige Xj6 your talking about its mine I only remember one XJ so that's probably the one. My 11 year old Daughter didn't understand my appreciation, don't be offended, I'm trying to educate her.
|
| |
|
|
|
|
|
May 14, 2015 23:29:47 GMT
|
|
I went this month and also think its becoming a victim of its own success. Quantity of cars doesn't equal quality of event, its become difficult to park, more uninteresting cars, too crowded with spectators which has got to be intimidating for regular shoppers as its difficult to even drive in or out due to crowds of people standing on the road.
When the Metro centre wanted to stop it a few years ago I thought they were being a bit unnecessary but now it will really affect the normal operation of the place, shoppers will even find it difficult to park and to be fair to them they don't need to understand our hobby or enthusiasm and might find it a bit unnerving.
Filling all of the disabled spaces with cars is also not cool at all and gives people ammunition, I apologise deeply if all of those cars were brought by disabled folk but I'm going to hazard a guess that they weren't.
Everyone should show respect for rules and the public if they don't want opposition to meeting there.
A different location might be a good thing, for example the back of Ikea car park round the corner which is immense and has hundreds of empty spaces away from the shop door during the week. Unlikely to happen.
Some nice cars on a more positive note, I particularly liked the low XJ6.
|
| |
|
|
|
|
|
|
|
|
That's a great job, I'm fairly experienced on a lathe but I'm not sure I could do that good a job of those.
|
| |
|
|
|
|
|
|
|
|
I love the truck, the little one isn't for me though, lots of brake lights and poorly done signwriting don't help.
That's just my opinion and taste, I don't mean to knock someone elses work.
|
| |
|
|


