skinnylew
Club Retro Rides Member
Posts: 5,719
Club RR Member Number: 11
|
|
Oct 27, 2011 17:00:44 GMT
|
Awesome!! Love reading threads like this, inspire me to do my* garage myself when I need to rebuild it.... *ok the house and garage aren't yet in my possession but they will be soon although garage rebuilding will be low down the agenda I fear  |
| |
|
|
|
|
|
|
|
Oct 27, 2011 20:18:47 GMT
|
Thanks for the comments guys, bladerunner30 this is partially your fault too! Looking at the end of the added on shed section I had an idea! A week before Matt (the farther in law) had done some windows for a landlord friend of his. Amongst loads of old crusty sash windows was a rather large unit. I wondered if it would fit?  Like it was made to fit! Saves me putting it in the skip! Toughened glass too! Earlier in the year he replaced his old back door, again out came the tape measure! With a bit of chopping about in she went! Loving that recycling!  It solved a couple of problems. The garage came with two side doors neither very good. A wooden one that had seen far too much damp the frame starting to give up and a metal one that was ugly as hell but pretty strong. I only needed one door and it faces south without much in front of it so something weather proof was ideal! The other side is now internal and just provides access to the storage area.  This is all the photo's upto date now although more progress has been made! Half of the roof is now complete and Matts completed the cladding while i've been at work and today he's almost finished making the front door for the shed area. This weekend should see the roof complete guttering on etc and hopefully the big main door on. As you can see from the above photo something with roofs not quite right! We forgot to level the brackets on the end of the trusses! Its been a long time since we put it up and forgot we hadnt quite finished it! One had to go up and one down. Luckily Matt has some ackros so was easy enough to rectify. I've also painted this side. I wanted a colour that blended in with the surrounding environment so it blends in as much as possible. I had B&Q mix up a dark shade of green Woodland Fern I think in Dulux Weathershield. Its the nearest I could find that matched Ivy and our daughters called Ferne so it won! More updates on Saturday with some luck! |
| |
Last Edit: Oct 27, 2011 20:30:04 GMT by ashley115s
|
|
|
|
|
Oct 28, 2011 17:49:15 GMT
|
|
what a thread to read after my weeks holiday, epic work there fella, eagerly awaits sunday now
|
| |
|
|
Mr S
Posted a lot
   10-4 Good buddy.
Posts: 2,654
|
|
Oct 28, 2011 19:05:18 GMT
|
Thanks for the comments guys, bladerunner30 this is partially your fault too! Glad to accept partial blame and keep up the good work ;D ;D ;D lol |
| |
Suzuki GSXR1000 K2
BMW R1150GS
BMW K1200RS
Chevy K5 Blazer
Chevy Suburban LT
Jaguar XKR
|
|
mt2man
Posted a lot
  
Posts: 1,366
|
|
Oct 28, 2011 20:28:04 GMT
|
This is awesome! I'm only in Portchester and have done some labouring on a few houses on Porstdown hill and there are some lovely houses up there  I'm jealous! |
| |
|
|
marksparks999
Part of things
  I aim to live forever, or die trying!
Posts: 656
|
|
Oct 29, 2011 15:05:18 GMT
|
|
oh for a bigger garden....
|
| |
Retroless at the moment... but on the hunt for something old!
|
|
|
|
|
Oct 29, 2011 21:13:12 GMT
|
 The first coat of Woodland Fern. Some of the old white paint on the panels was flaking so I wire brushed the lot. I started with a normal wire brush then looked down the length of the garage and thought it might take a while! I remembered Id bought a wire brush attachment for the drill! I started with the Makita but I didnt want to wear out a good drill on this plus I didnt want to have to charge the batteries so I dug and old electric cheapo that someone gave me. Next I needed to caulk all the gaps in the panels. This side must have taken me a good afternoon to prep and a good morning to paint. I wanted the garage to blend into the environment and not be an eye saw for the neighbours.  If you look straight ahead hopefully its starting to blend in. While I was at work this week Matt finished this side of the roof and the cladding  He also started work on the door for the shed. Using the off cuts where the window is and the old door from the garage. We were going to have the cladding the other way round but after discussing it the off cuts worked out better this way, the only thing I asked was that they lined up with the rest of the cladding. Its going to be a big heavy door so we'l have to find some decent hinges and maybe even add a gate wheel at the bottom.  After a some searching on the web I found Katepal the cheapest source for the roof shingles. They came to £827 but that should be enough to cover the games room too. Delivered within two days and the website has really good instructions on how to fit them. Not that we used them! After struggling to get going we finally found a rythymn and I had down to about ten minutes per row doing it on my own. I thought it was going to take weeks initially but the big side took about a day.  Today we finished the other side and completed it. A good 5 hours for the shorter side.    I'm really happy with results. I think it looks better than a grey corrugated roof and less industrial than a metal one. I went for green again to blend in but also because it surrounded by trees and bushes it will probably turn green anyway!  We checked stocks then went to the wholesalers for some upvc facia and sofit material so we could the guttering on. Matt removed some guttering from a house years ago and always new it would come in handy for something. This is that project!  So this is the final photo of the day. Hopefully we'l get the fascia and sofits done on the front tomorrow.  |
| |
Last Edit: Oct 29, 2011 21:53:39 GMT by ashley115s
|
|
Mark
Club Retro Rides Member
Posts: 2,097
|
|
|
|
|
Fantastic work - keep it up!!
|
| |
|
|
|
|
|
Oct 30, 2011 12:23:25 GMT
|
|
What can i say, but WOW ! blends in brilliantly and roll on getting it finished and projects started, if you don't just fill it with stuff that the house wont take
|
| |
I don't WANT TO DIE A GROWN UP!
|
|
|
|
|
Oct 30, 2011 12:40:23 GMT
|
|
If the Tree wasnt there Id have moved it over and put a timber clad shed both sides. Anybody else thinking of using one might want to do the same, a cheap building if you can find one at the right price and you can wrap it cladding!
|
| |
|
|
|
|
iant
Part of things
 
Posts: 155
|
|
Oct 31, 2011 19:39:52 GMT
|
|
Amazing build! Love what you have done there. Watch for water ingress under your shingles as you have a low pitch on the roof and could get water going by capillary action. I know I had a few problems with my summerhouse tiles
Are they stuck well with adhesive? Might be worth going over with blow torch to make sure that it's water tight?
|
| |
|
|
bailey
Part of things
 
Posts: 125
|
|
Oct 31, 2011 19:48:24 GMT
|
|
this is awsome i really wish i had the time, money and ingenuity to build something like this.
|
| |
|
|
|
|
|
Oct 31, 2011 21:46:13 GMT
|
|
The shingles have stuck well, we did run over the ridge with a hot air gun. The felt underneath which is breathable keeps it water tight on its own. This is the 4th project we've used these on.
|
| |
|
|
|
|
|
Oct 31, 2011 22:31:52 GMT
|
 Now that the roofs finished we're concentrating on the facias and soffits. I'm not overly keen on the white but I'm very keen on the lack of maintenance in the future! 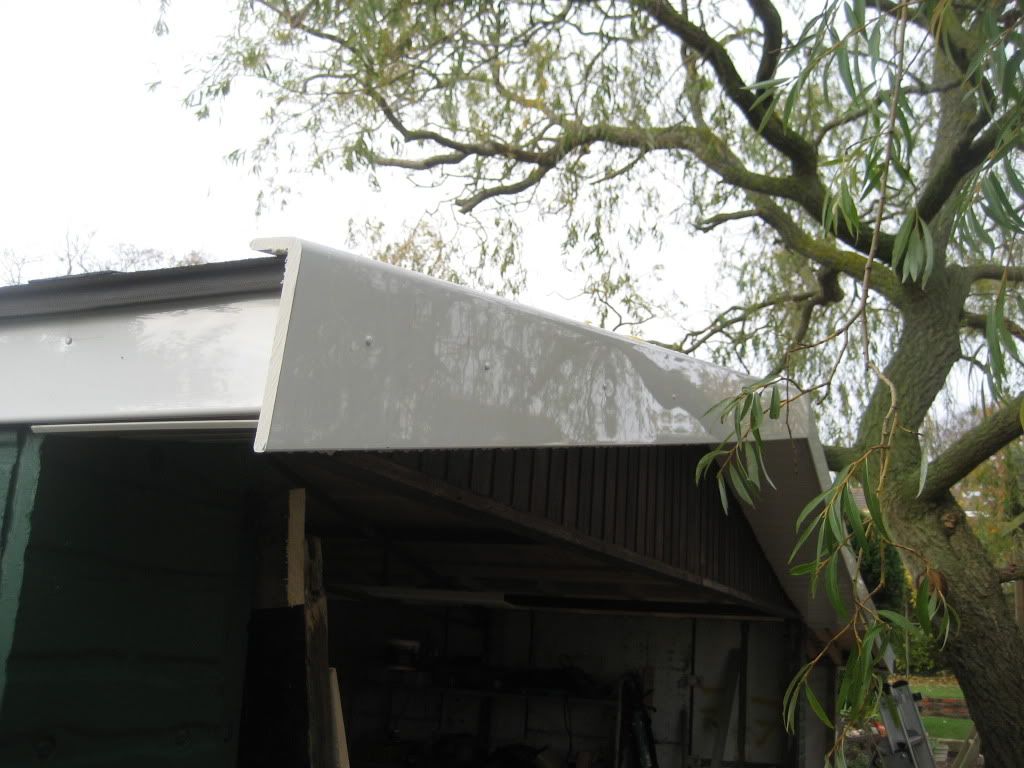 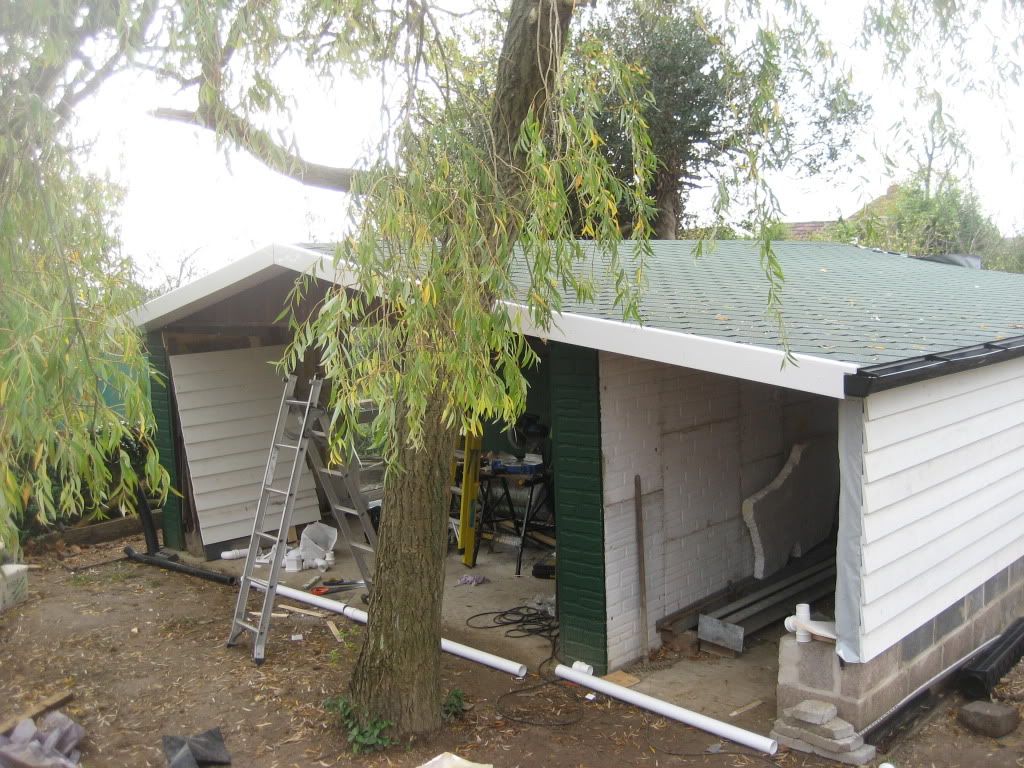  Using the Capit fascia this way round enables us to double it up a weather proof strip for the ends of the tiles to stop the wind lifting the corners. I need to get up there tomorrow and run some more clear silicone down the edge to completely seal it. We managed to get the long side done in one length and taking the shape of the bend in the two joing roofs. The soffits were free, a friend of Matts gave him this tongue and groove material about 5 years ago and its been sat in the shed. We keep going to the store to see what old stock and can be used on this!  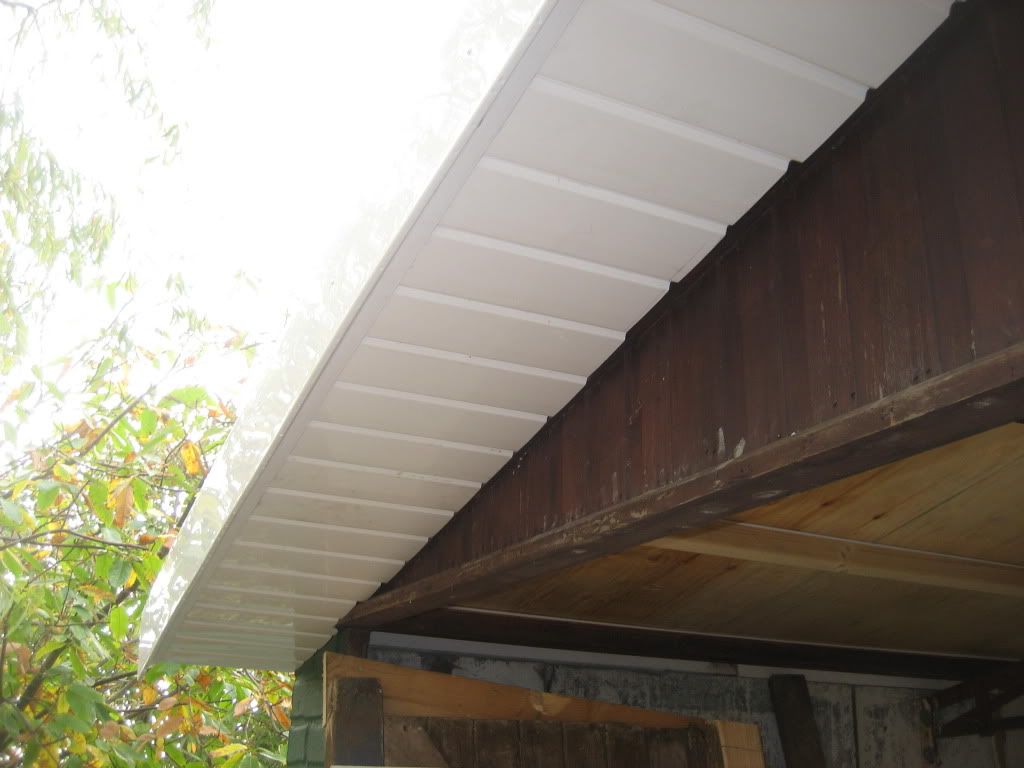 Even though we're using as much salaveged material as possible I still spent another £100 on upvc material today, some guttering drainage and a cut of polycarb. I wanted some natural light coming in so if I wanted to pop in to grab a screwdriver I didnt need to put the lights on. I was going to put four sheets of polycarb in the roof, like a conservatory. Matt some Alley bars and covers for this but after a closer look none of them really matched up so it would have been a pain. I'm not sure if it would have made it too hot in the summer? I'l probably insulate the roof too so it was easier to just ply and tile the whole roof. I had a flash of inspiration! The original wooden tongue and groove fascia on the rear was pretty well rotten and needed replacing. I decided we'l replace that with polycarb so it gives some natural light, it also faces west so it gets the evening sun.   We should have this finished tomorrow weather pending. Now that the roofs on we need to get the guttering and drainage sorted pretty soon, After an hours light drizzle I collected nearly a quarter of a bin of water. I reckon heavy rain and I could fill that in a couple of hours! I be collecting rain water in water butts but I need to find some narrow ones so they don't take up too much of the path. I got the water butt valve for the downpipe today too so when its full it'l go into the soakaway. Matt had a driveway drain pack left over from his drive and I bought another one today so that'l be 6m worth of drainage along the path that will be connected to the soakaway. Another full day tomorrow! |
| |
|
|
iant
Part of things
 
Posts: 155
|
|
|
|
|
Great progress on this excellent build. Like the planning with the water storage and drainage.
|
| |
|
|
woodenspatulas
Part of things
  Retro in ways you can't imagine
Posts: 448
|
|
|
|
what a great build! Makes my little single preface rescue and resto look tiny  |
| |
1999 Vectra Estate + 1995 Saab Engine = Good Times
|
|
|
|
|
|
|
|
Great work. Nice move sorting the kids out 1st, keeping the misses happy!!!! It's great having a space the misses couldn't care less about, enjoy m 8!!!
|
| |
|
|
|
|
|
|
|
|
The mrs couldnt care less about the garden! Its all mine!!!!
|
| |
|
|
|
|
|
|
|
Todays progress...  Let there be light! 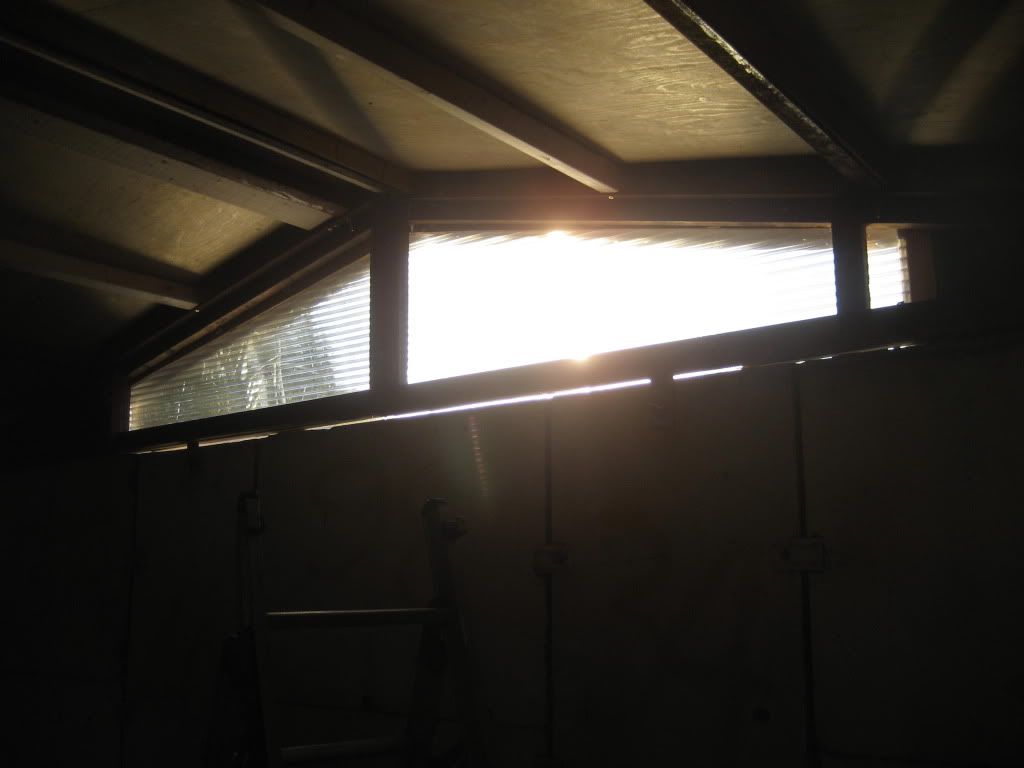 This is the back of the garage. A 25mm thick peice of off cut polycarb sheet for £30, the cladding was off the shelf. 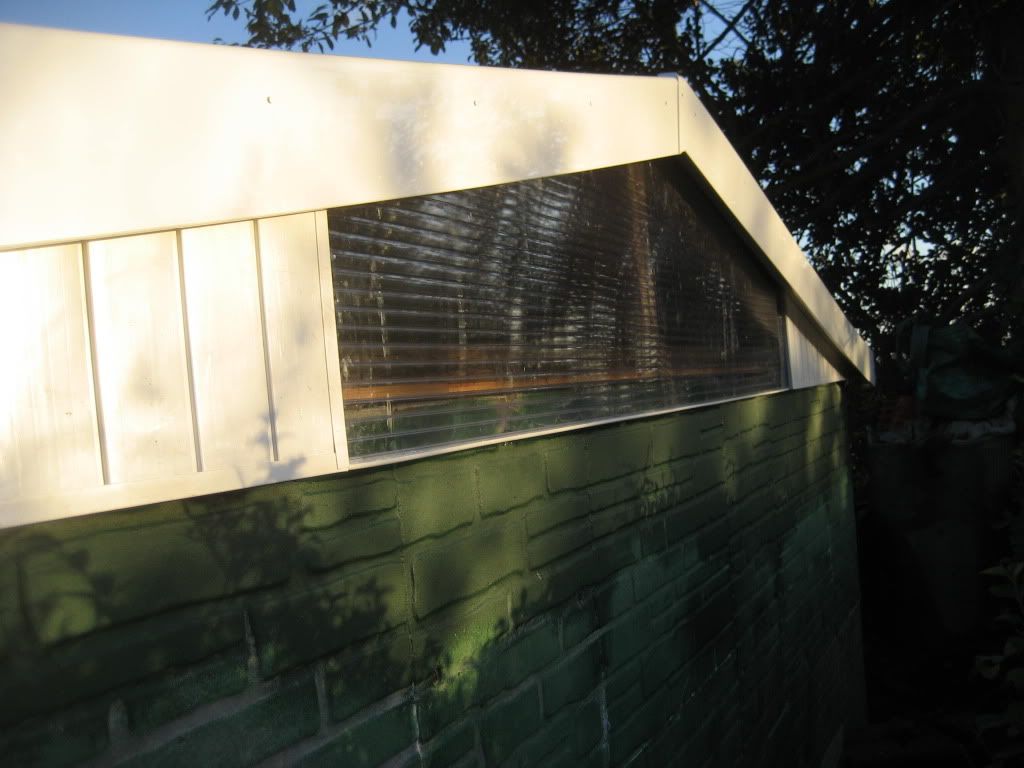   Tidys it up and shoud prove maintenance free. Hopefully I can paint the back tomorrow. Theres still a bit of trim to finish on the back. Time was running out but we managed to get the guttering up on the south side. Needs a bit of tweaking but its up there, I find it really hard to see in the failing light but I hate not finishing what we set out to do! All the fascia and soffit work is slow progress and frustrating yet equally important as the rest. If we didnt get on with it now I don't think we'd ever get round to finishing it later! When I look out of the window it doesnt look like we've done anything today! 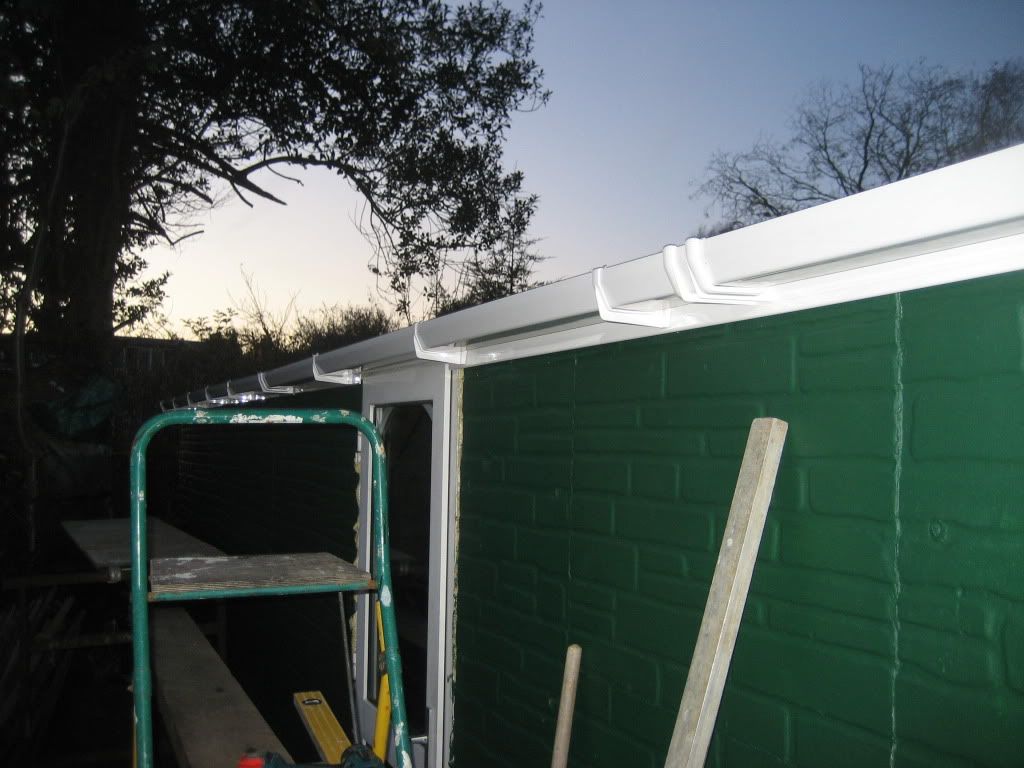 |
| |
|
|
|
|
|
|
|
|
Some nice work there, and a fantastic sized manspace.
|
| |
|
|
|
|


 Ax GTi Turbo


 I'm jealous!


