eurogranada
Europe
To tinker or not to tinker, that is the question...
Posts: 2,556
|
|
Sept 3, 2013 14:41:31 GMT
|
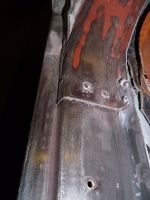
Ok then, I hope no-one beats me to it, but if they do, I'm still claiming to be the first to use this colour on this car... I have always liked metallic colours. Having changed the car from white to sea gray metallic 2006 ford colour in 2006, I kept coming back to the white pearl metallic of the new ford Ka for this time around. I really like that and think it is posh, but... it's a three stage paint, which means big €€€'s. Prepping the car (not my cup of tea especially since I am very precise and spot virtually any imperfection in the finished product) itself is an expensive undertaking (and a genuine craft!!), and painting it that pearl white would add at least €1500 more than using a more common waterbased or 2k colour. Mostly because it's hard to predict how many layers of paint are needed when using those three stage very transparent pearl colours, besides that the paint itself is costly. So not wanting to spend a very probable €6000 on paintprep and paint just to stick to that colour I had to look at something else. While doing so I also noticed how many cars these days came in similar pearl white colours. Even the aixam moped based "cars" are seen in these colours nowadays. That sort of put me off even more. After struggling with a colour selection for ages, I finally found one that immediately was to my liking on pictures. But the car you usually find this colour on is very exclusive in The Netherlands so I asked for a sample to be painted. Not a small metal card, but a genuine car part so I could see how the curves etc. worked on the colour under different lighting.... Last friday they had it done! It was just the basic colour as from the recipe, but it looked amazingly fresh. I'm very positive about this colour and we're also going to create a custom mix of it as well, as I still have a thought in my head that I want to be able to visually judge. Here it is then: Ford Grabber Blue (1970-2013) 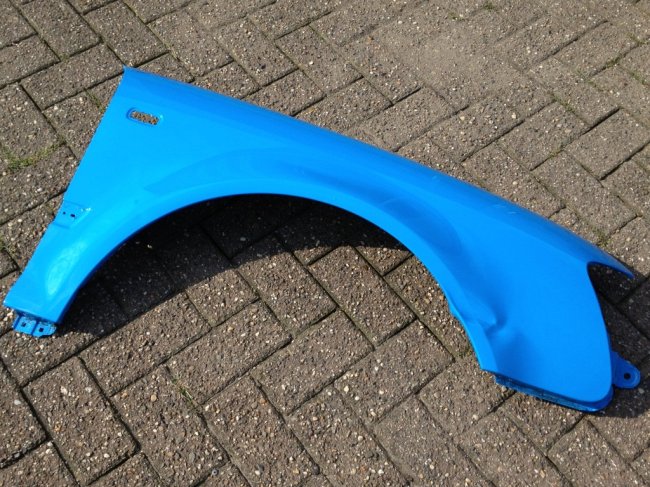 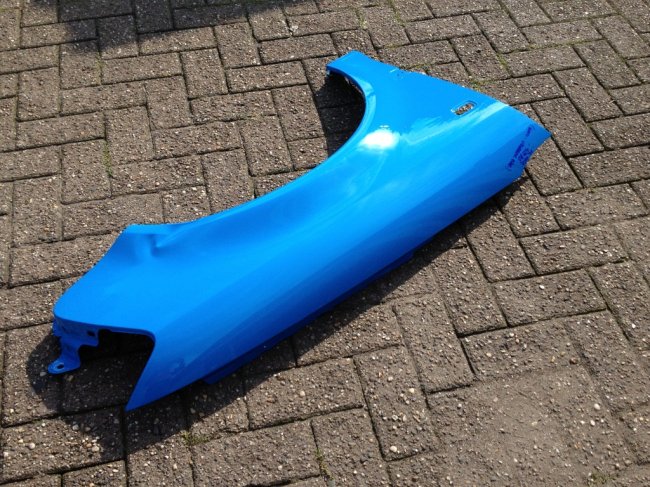 I love it and when you google the colour on mustangs, you'll see it is capable of looking different shades of blue (even pearpleish) in different lighting situations. That was definitely a mojo booster. The fact that I'm actually thinking colour means there is real progress on the body front. That said, there is plenty of welding still to do. Some very smaal patches, others a lot bigger. But the fact is I've got quite a few patches ready to be welded. So hopefully we can find an hour or two to make some headway again. So just to show you: Thin metal 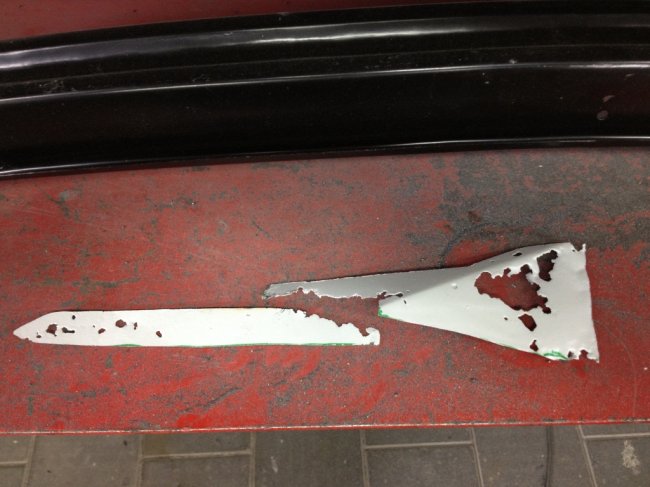 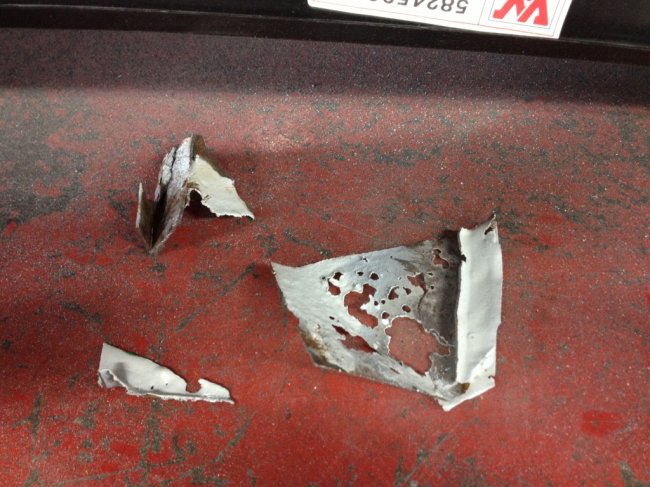 Leading to 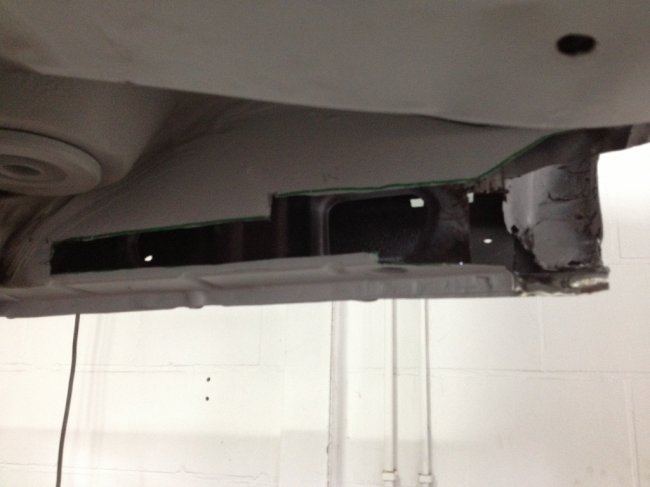 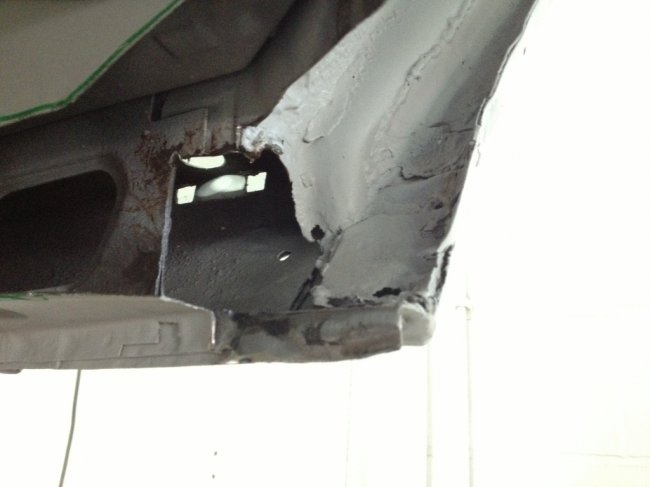 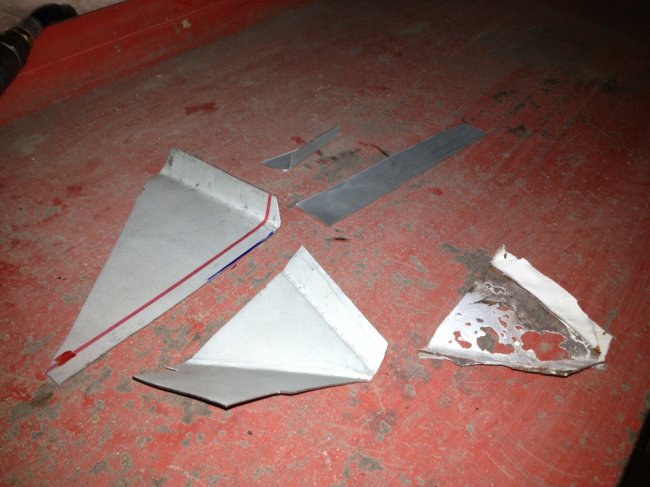 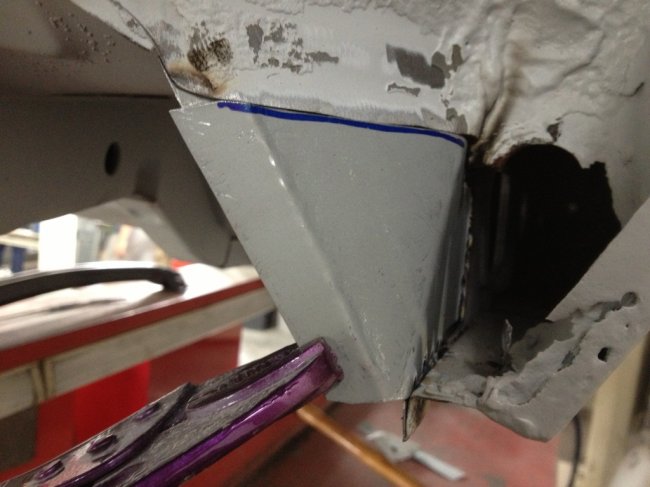 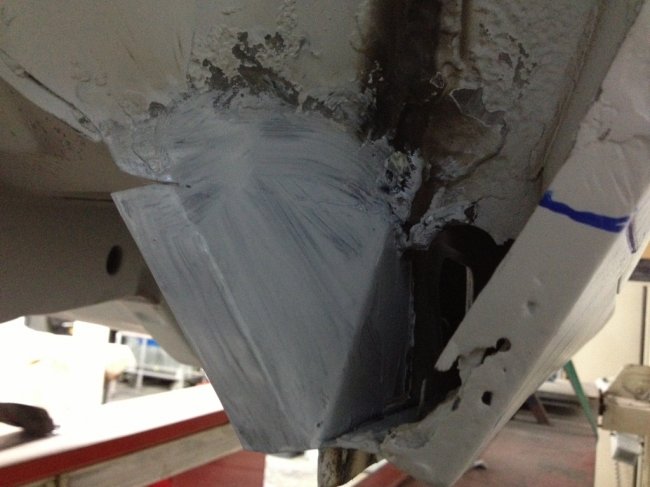 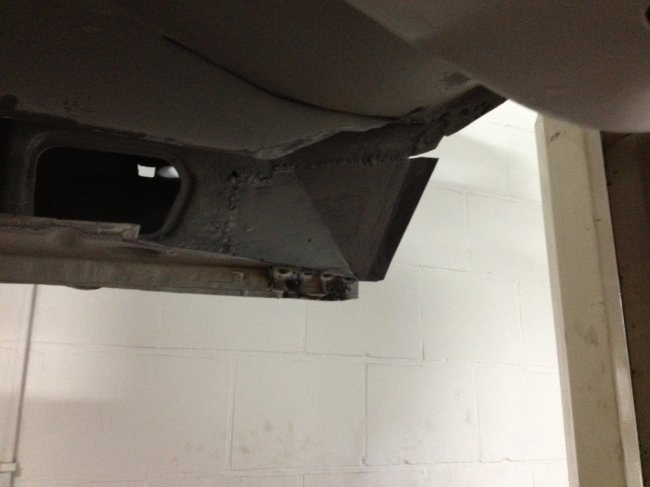 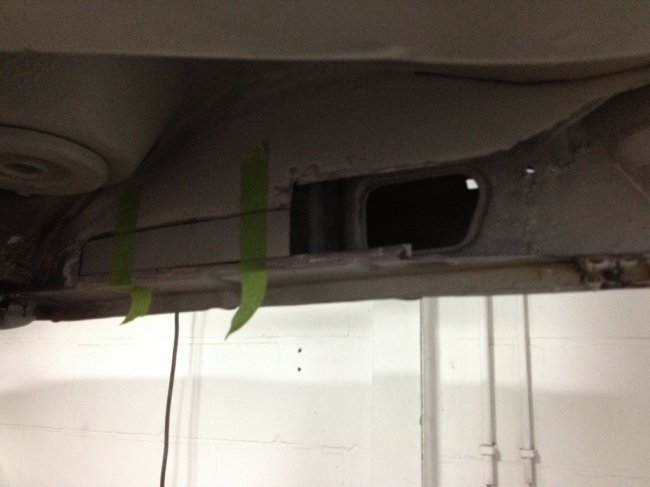 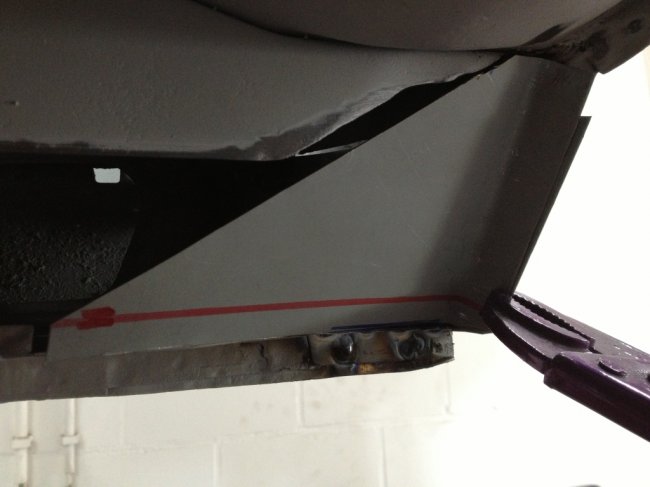 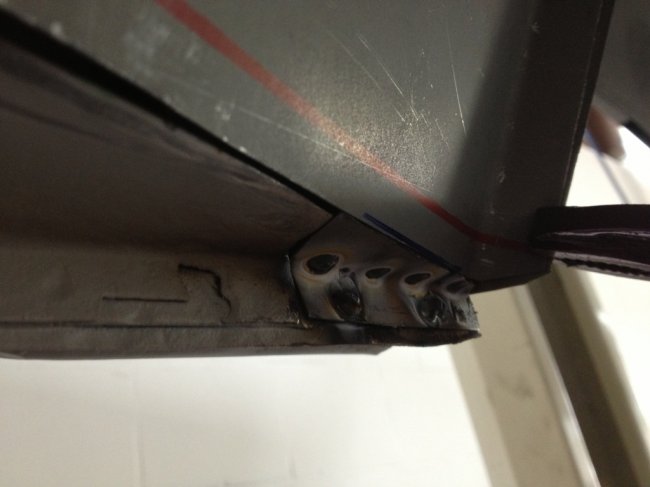 Rear wheel arch 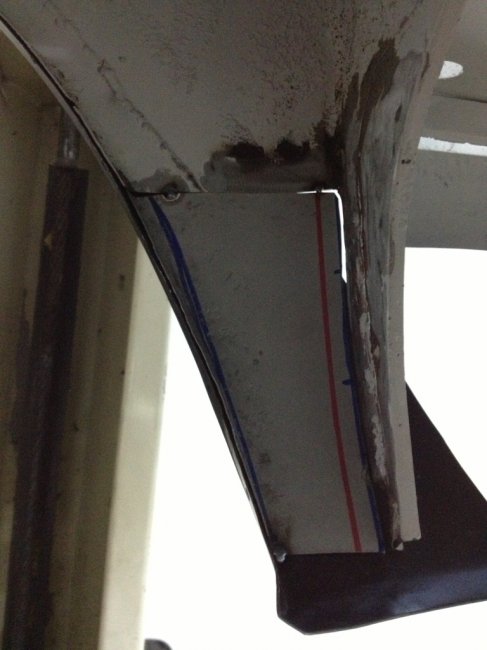 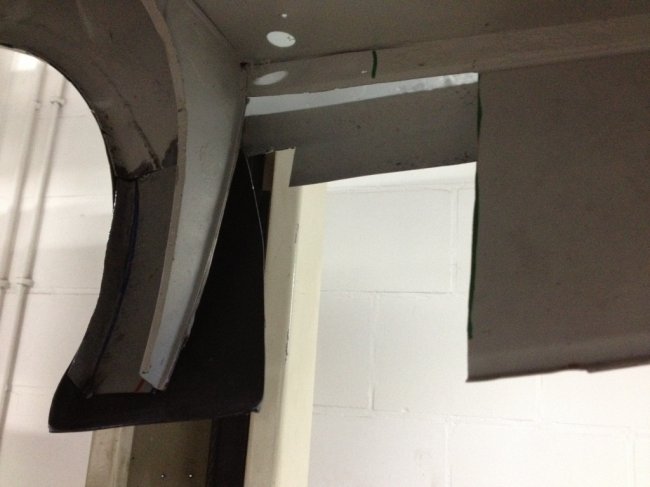 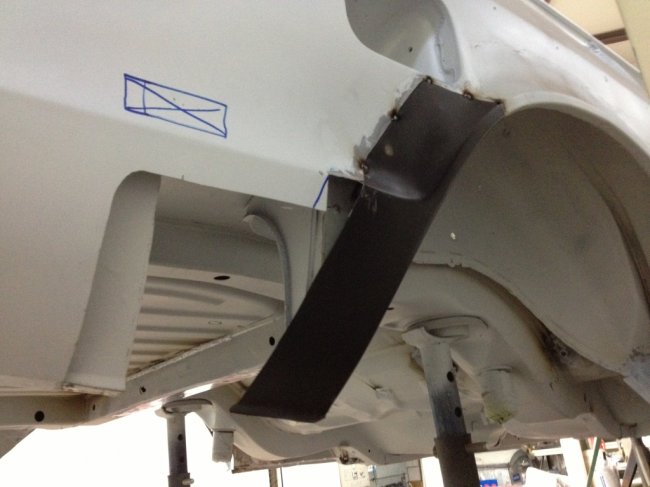 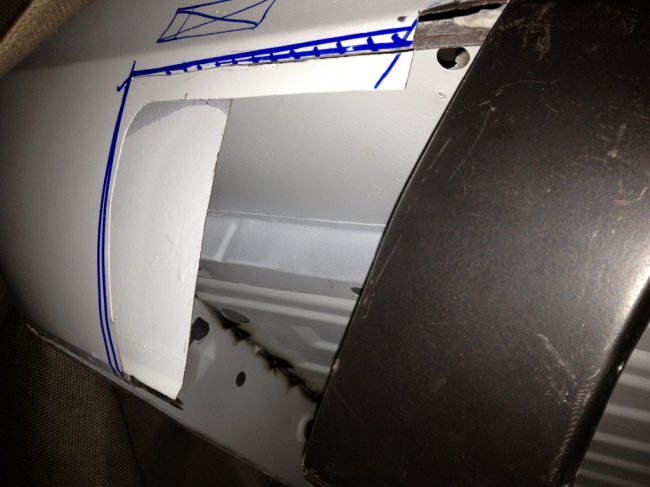 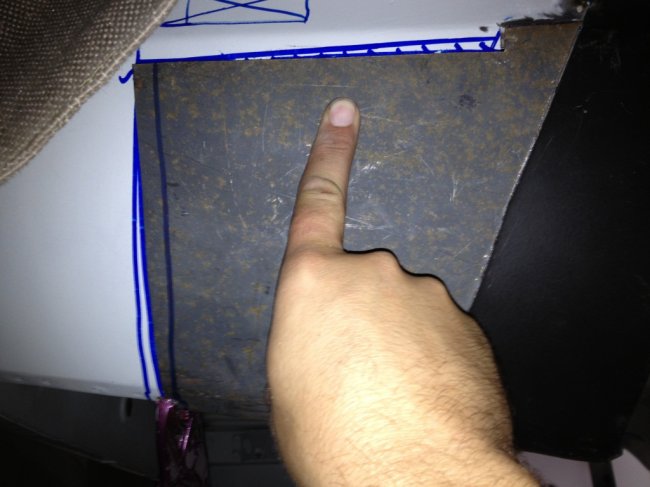 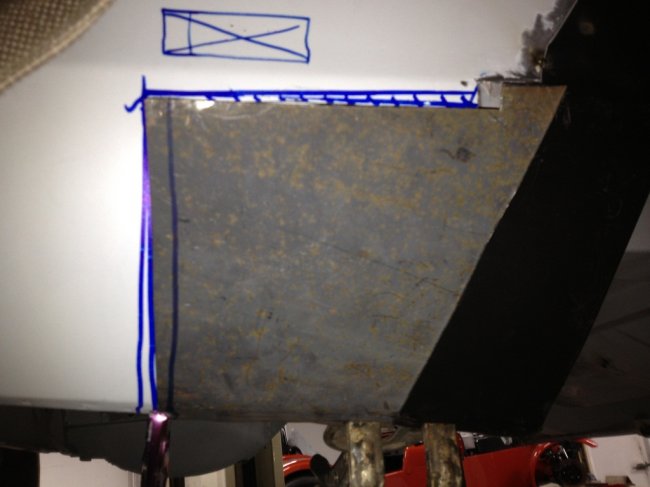 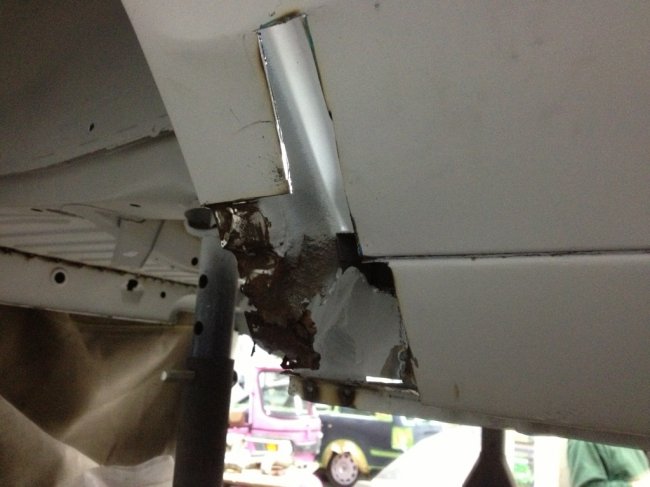 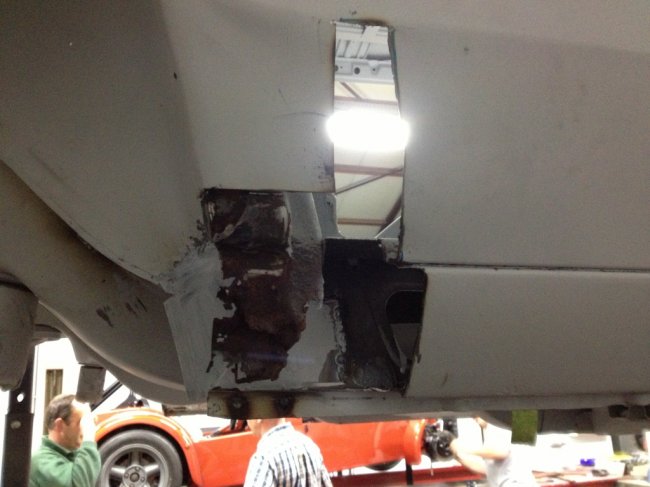 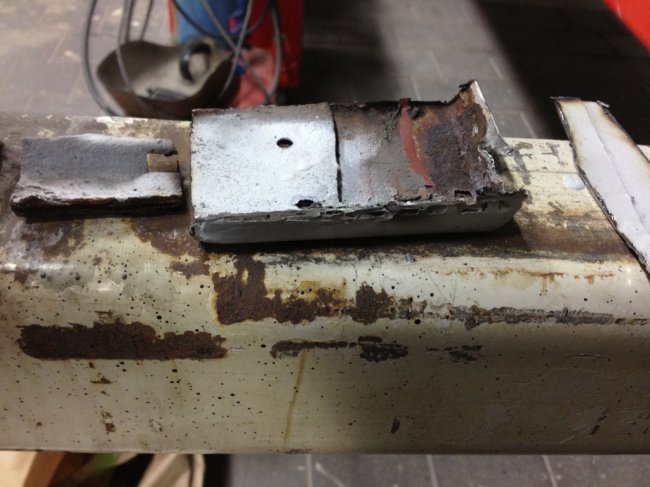 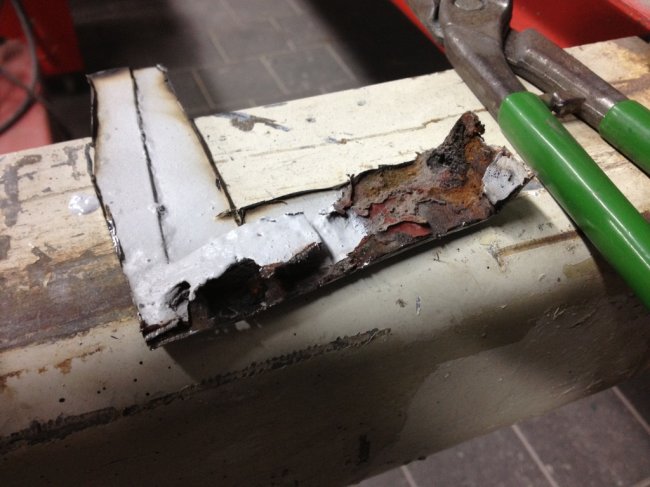 Outer sill 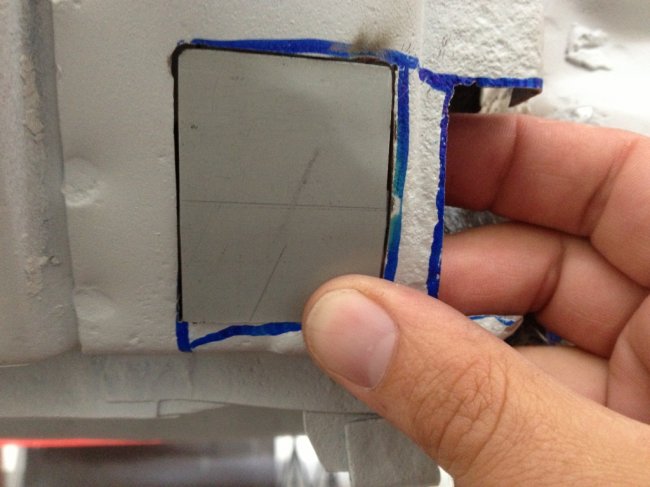 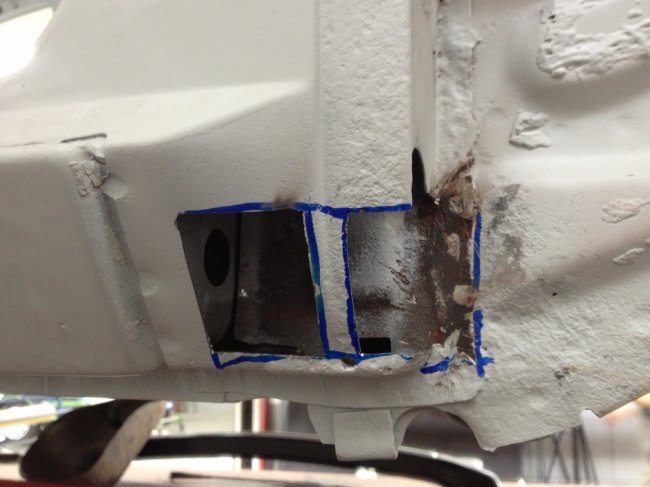 So there you have it, the new colour to be and my weeks progress. Hopefully we'll be able to glue some of the pieces in permanently with the hot metal glue stick. Hope you enjoyed... |
| |
|
|
|
|
|
|
|
|
|
|
Your Granada is going to look amazing in that colour, just amazing...!!!
|
| |
***GARAGE CURRENTLY EMPTY***
|
|
eurogranada
Europe
To tinker or not to tinker, that is the question...
Posts: 2,556
|
|
Sept 4, 2013 11:50:52 GMT
|
|
I certainly hope and think so. It'll be hard to not notice in the streets...
|
| |
|
|
|
|
|
Sept 13, 2013 10:50:10 GMT
|
Ok then, I hope no-one beats me to it, but if they do, I'm still claiming to be the first to use this colour on this car... Here it is then: Ford Grabber Blue (1970-2013)   I love it and when you google the colour on mustangs, you'll see it is capable of looking different shades of blue (even pearpleish) in different lighting situations. Hope you enjoyed... Nice to see some progress. Colour looks great, but I think You have to add some black stripes too, just like those tuned Mustangs. Otherway it's look too plain, at least in my mind. And You can use tape, so no need to paint and they are removable too.  Keep up, and hey, if You could use a another welder, why You don't try to weld some patch on your self? It's no that hard. And You welder could setup the mig ready, so You have to only pull the trigger and let the metal burn. |
| |
|
|
|
|
|
Sept 14, 2013 5:24:43 GMT
|
Glad to see that you can be thinking about paint - means you´re getting there slowly.  That blue will look great on the the Granada. |
| |
|
|
eurogranada
Europe
To tinker or not to tinker, that is the question...
Posts: 2,556
|
|
Sept 16, 2013 9:35:04 GMT
|
Nice to see some progress. Colour looks great, but I think You have to add some black stripes too, just like those tuned Mustangs. Otherway it's look too plain, at least in my mind. And You can use tape, so no need to paint and they are removable too.  Keep up, and hey, if You could use a another welder, why You don't try to weld some patch on your self? It's no that hard. And You welder could setup the mig ready, so You have to only pull the trigger and let the metal burn. Thanks for your interest! I didn't want to fully divulge the paint scheme of the car yet, but rest assured it will not just be blue. On the mustangs, wether 70-ies or current models you basically see about four accent colours: black, red, white and argent (silver). Personally I totally don't get the red on this colour. But beauty is in the eye of the beholder. So I myself am leaning towards black or argent. Black as the interior is black, the wheels would look killer in black with a blue line around the rim, argent because it might match the chrome on the car a bit more and is slightly less in your face/agressive. Argent would make wheel options more difficult in my opinion. The accents I will do are two pretty big U-schaped stripes on each half of the hood not extending fully tot the front but to where the hood drops down only. They will have a simple 5-8 mm line around them. And on the doors from front wheelarch to rear wheelarch and beyond to the end of the car I will put a classic inspired three piece striping with big centerstripe accompanied by two narrow stripes. Possibly with a text in them... I was offered to stick them on with very fine film, but I'm hesitant. When waxing, polishing etc. it's always going to leave marks around the edges I'm afraid. And painting them on means I can wash and wax etc. the car in one go without any worries. But the jury is out on that. As you say, an advantage would be that the livery is removable in that case. |
| |
|
|
eurogranada
Europe
To tinker or not to tinker, that is the question...
Posts: 2,556
|
|
Sept 16, 2013 9:52:21 GMT
|
Glad to see that you can be thinking about paint - means you´re getting there slowly.  That blue will look great on the the Granada. Thanks Oldbus, you're absolutely right. Although off course after a high of getting quite a lot of welding done in a short while, it now seems to take forever to get anything done. Generally speaking though, I sure am getting nearer. At the moment, the right wheelarch and rear wing repairs are all tacked and ready to be welded in permanently. The end of the sill I've remade as well, but I need to get two awkward corners done. The inner corner from wheelarch to end of sill which curves in two directions and the rear end edge where the bumper mounts. It too curves in more then one direction and I have a hard time making the piece. Will be working on both of these areas tonight and next friday. Then there is some work to do at the front and some pieces in the boot to be tacked/welded in. Guess I really am advancing well now. I think with a bit of luck in three weeks all welding should be done. But then there are desicions to make: Should I? - finish the floor of the car internally and externally, sealing al seems, repriming where necessary and finally bodyshutzing it all and - paint the interior black to - get the car rolling on it's mechanicals or - putting in the subframe and engine to locate the neseccary aircon parts and do any welding and cutting required for that? I understand why my body man would like the car to be movable, but I want to do things right this time around... |
| |
|
|
eurogranada
Europe
To tinker or not to tinker, that is the question...
Posts: 2,556
|
|
Sept 17, 2013 7:50:36 GMT
|
Keep up, and hey, if You could use a another welder, why You don't try to weld some patch on your self? It's no that hard. And You welder could setup the mig ready, so You have to only pull the trigger and let the metal burn. I forgot to reply to this part of your response. I actually tried welding on this car myself. At the first address this car was worked on I did everything myself, including making patches and welding them in. But whenever i would weld it would just be a splatter fest, no decent weld made. Usually ended up with holes burnt that take a bit out of my patch and the original metal. I got soooooo frustrated welding that I had a friend do it. Unfortunately although he did better, the welding was not to my standard and took way to long as that person was always busy with other projects. But I remain thankful that he was willing to help. I then moved the car to it's current shop location. I had it media blasted and primed. So now I thought the metal is clean, I can do some welding too. It has to go better then before. But even when the machine is set up right I still had a load of trouble. Still spattering and holes burnt. Part of the reason: my eyes seem slow so adapt so I don't see well enough. By the time I can see what I'm doing I've already created a hole. My body man always says welders aren't schooled, they are born. Meaning as much that if the feeling isn't in your genes you'll never really learn. This is frustrating to me as I'm pretty usefull with most any tool and do anything myself from car maintenance to home remodelling and diy jobs. So realising that welding all those pieces to the granada was not my forte, I bit the bullit and agreed to pay an hourly special rate for this work. Ok, it's more expensive, by the time it's done I'll have 500 euro's in it in welding, but on the other hand, it's far less frustrating, the results are so good that dressing the welds is easy and progress is also helped. So to me it's well worth it. I can weld clean fresh metal though, but my car I can't. We're now very far along so hopefully in three weeks all will be done. |
| |
|
|
eurogranada
Europe
To tinker or not to tinker, that is the question...
Posts: 2,556
|
|
|
|
So, some time has passed again and some more work was done. Actually progress is quite good at the moment. So good that I'm starting to feel somewhat overwhelmed with on the one hand getting so far and on the other hand having to deal with a really hard issue. Lets first bring you up to date. The focus still is on welding, welding and welding. I had made all repair pieces for the right rear and sill. But I had to wait on getting them put in. Last weekend real progress was made, because with just one and a half hours of continuous welding, the full right side repairs were finished. Well, 99% then. Still left is welding up the inner sill from the rear. But that can't be more then 15 minutes of work. I even found the time to dress the welds and temporarily spray some inox spray on to keep everything from flash rusting. Total level of completion on rust repairs/weldathon is at about 85-90% now. Some piccies of work done: 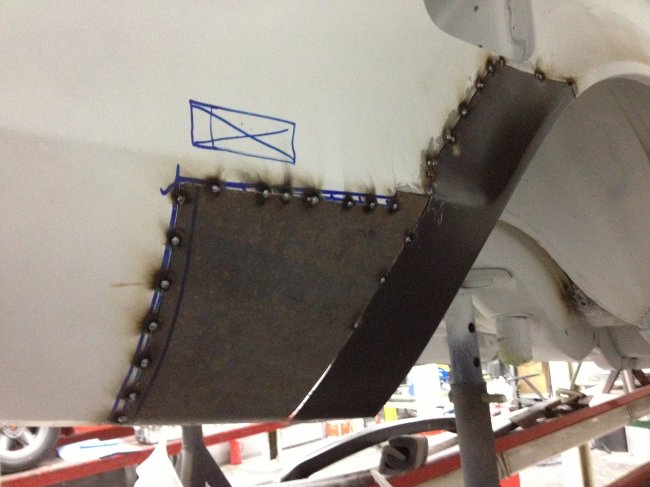 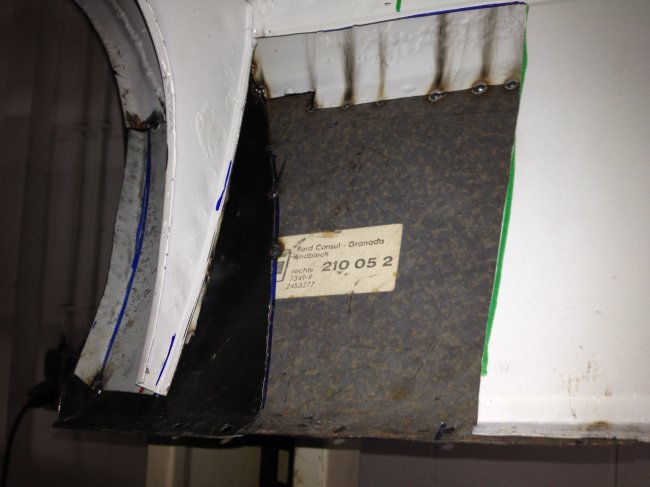 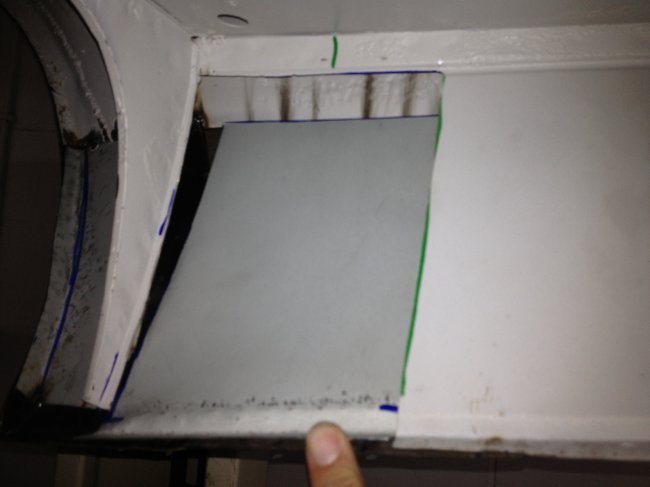 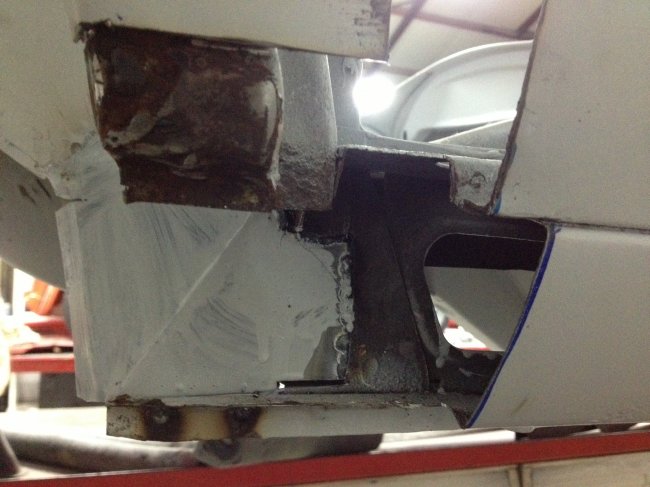 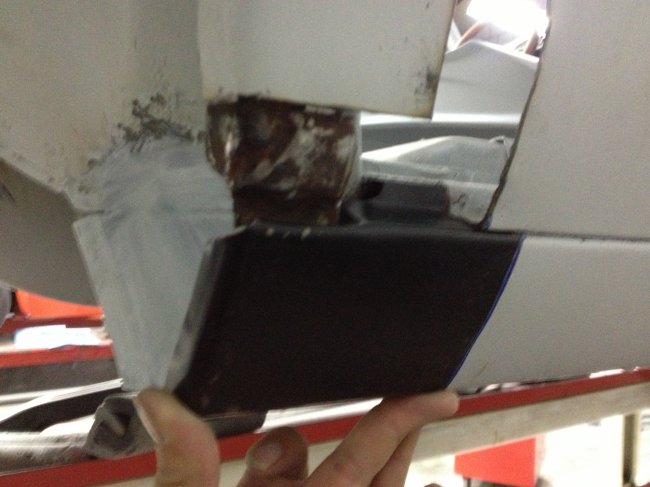 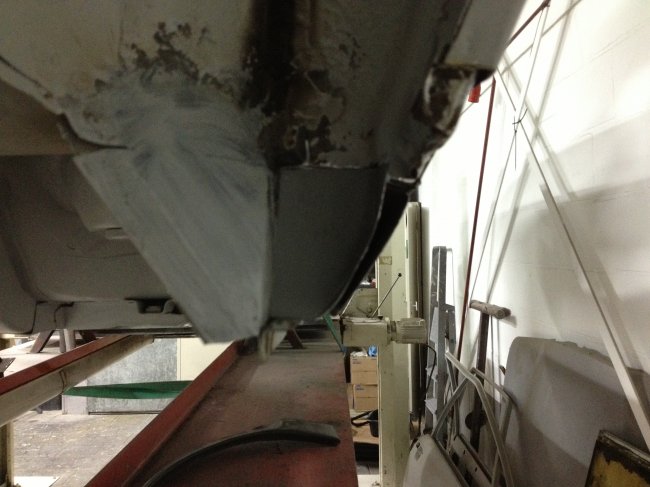 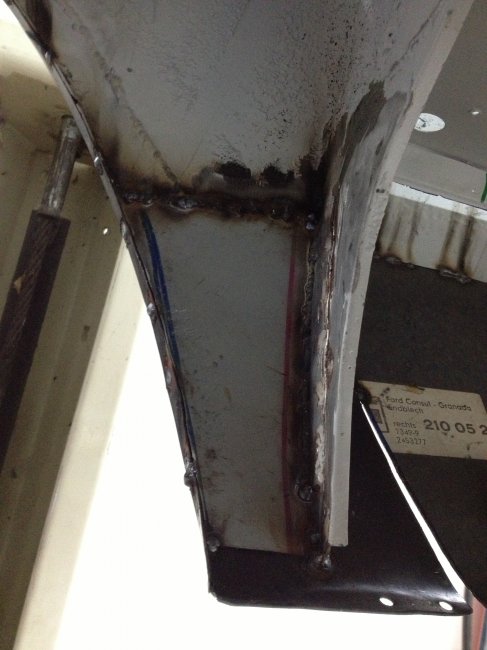 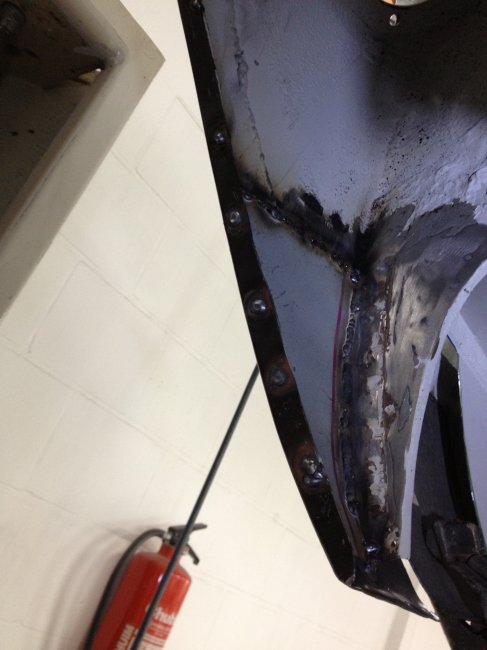 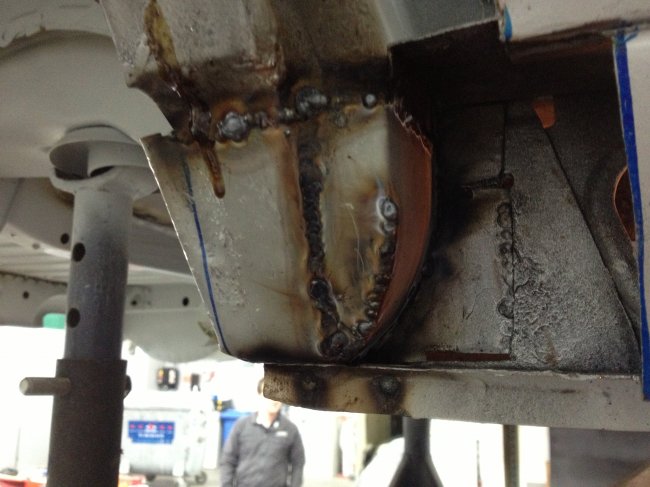 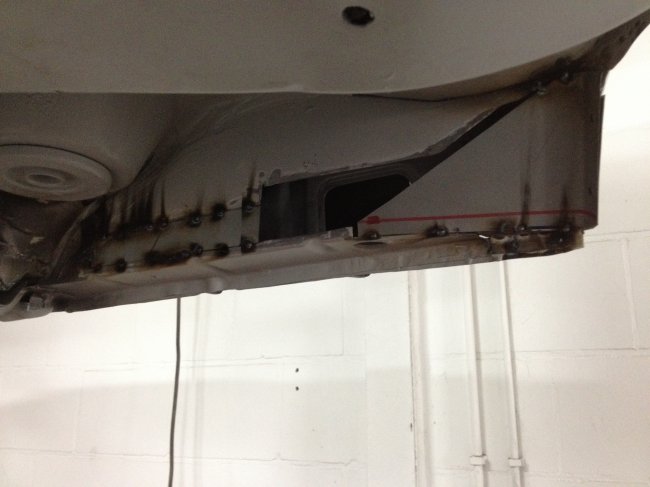 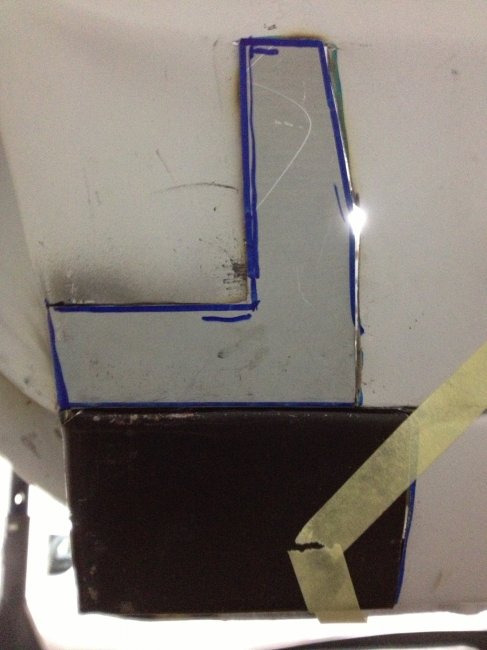 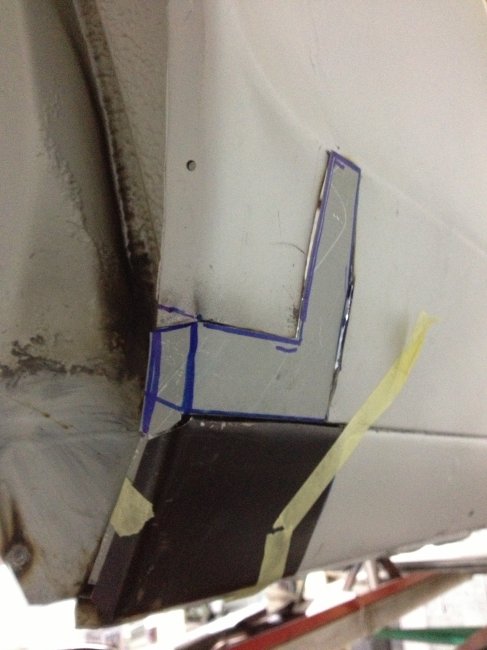 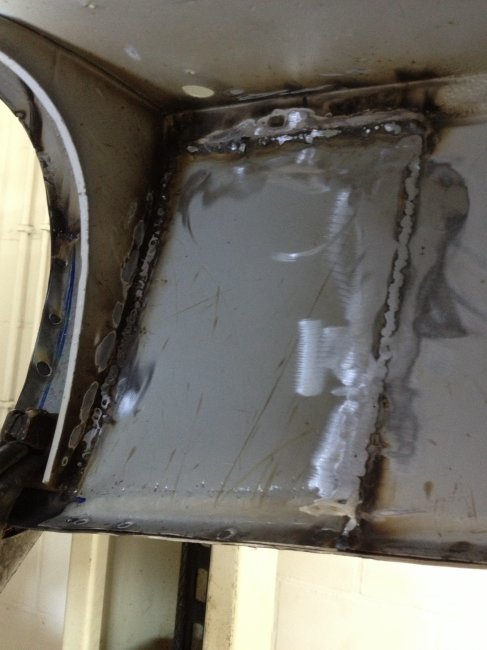 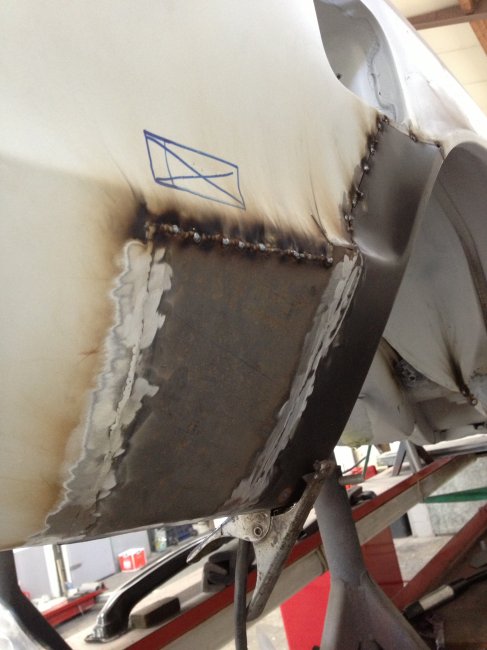 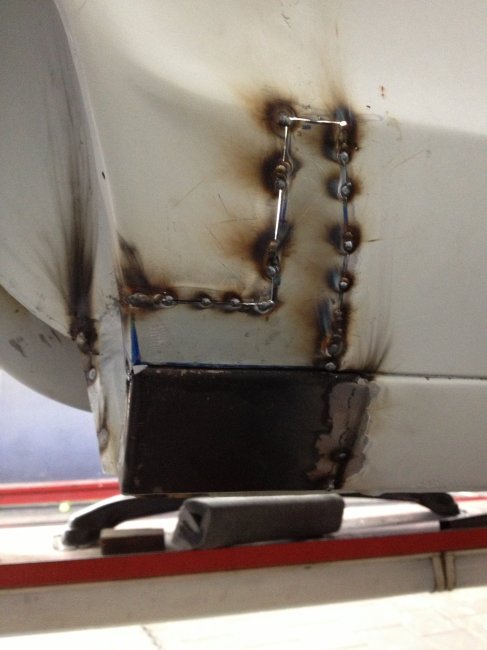 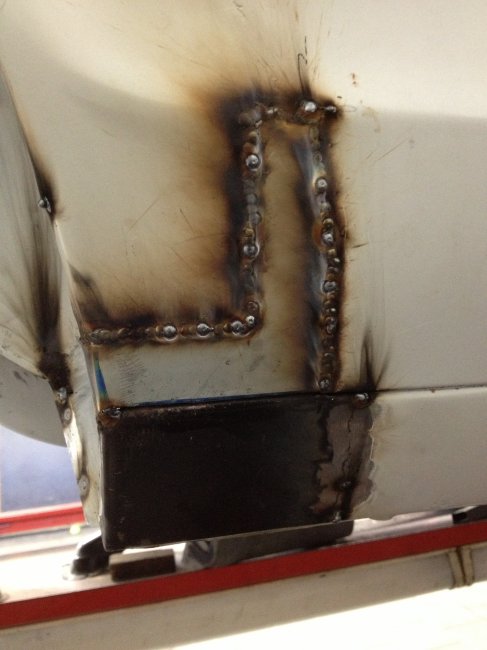 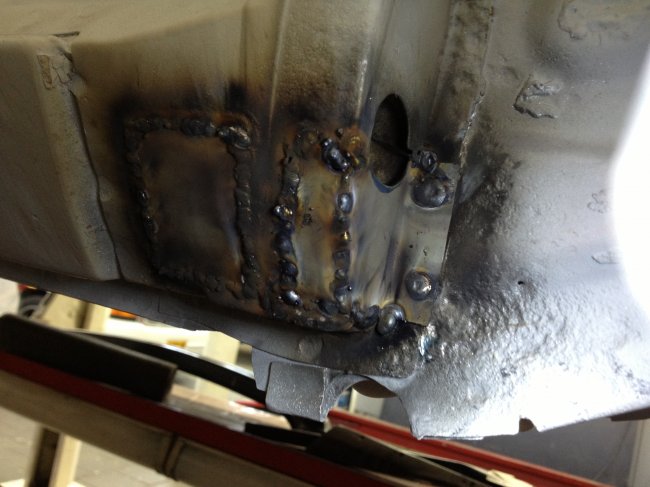 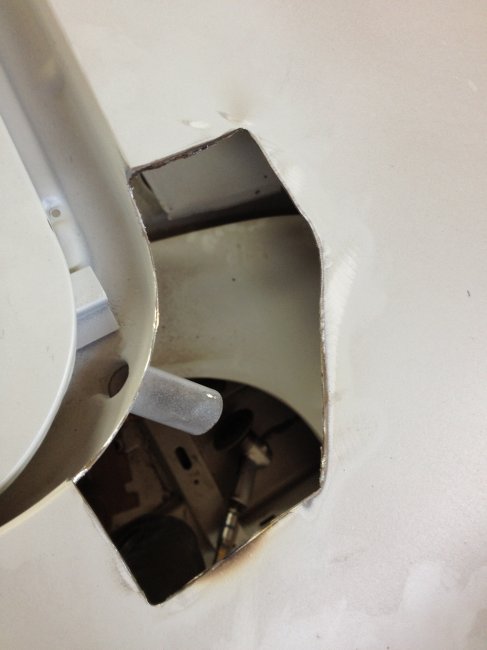 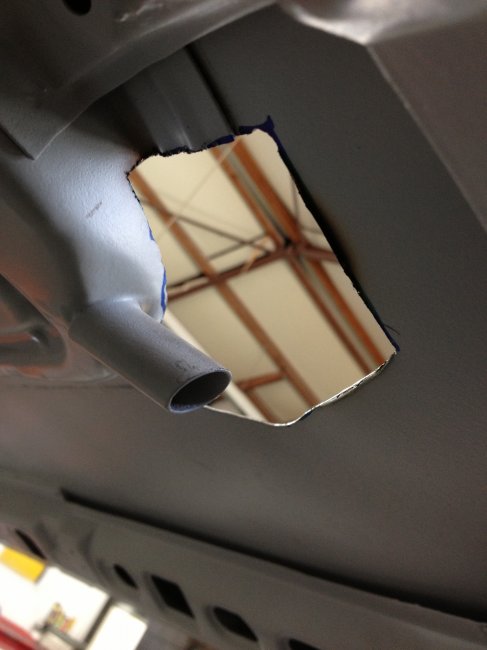 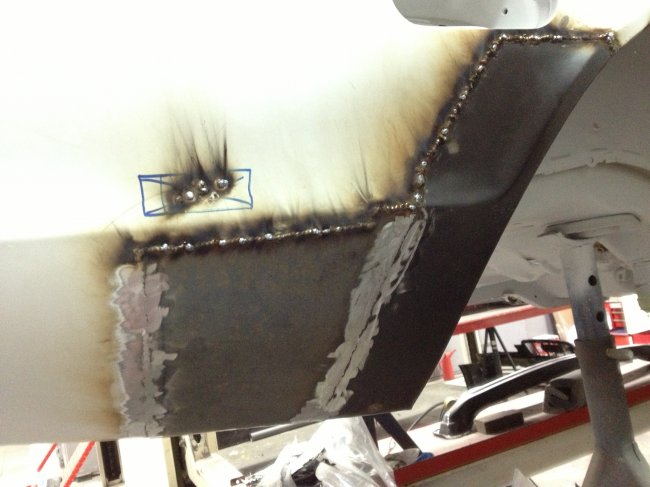 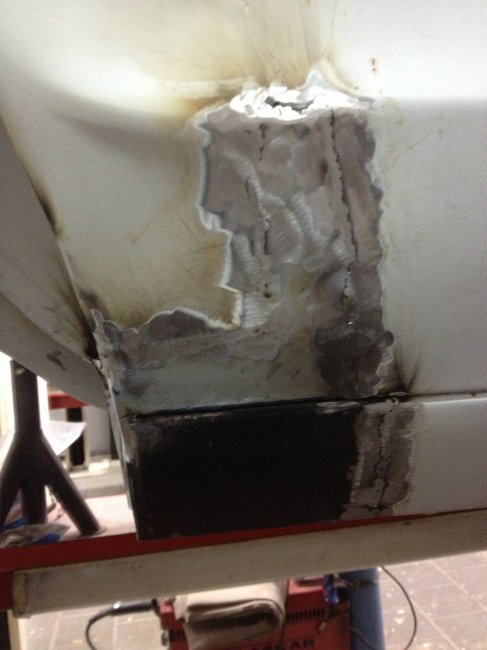 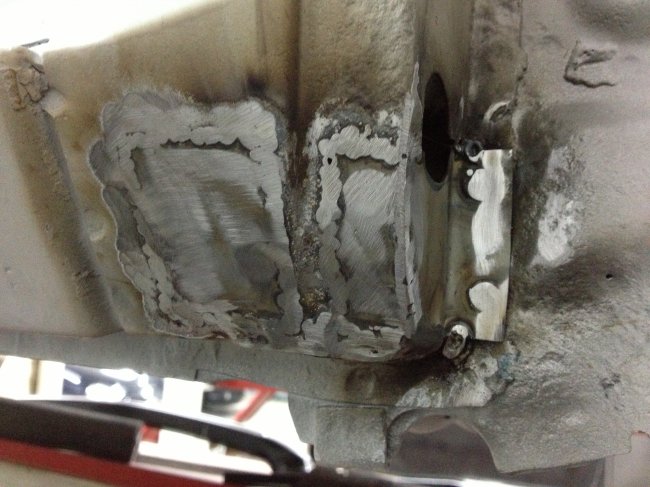 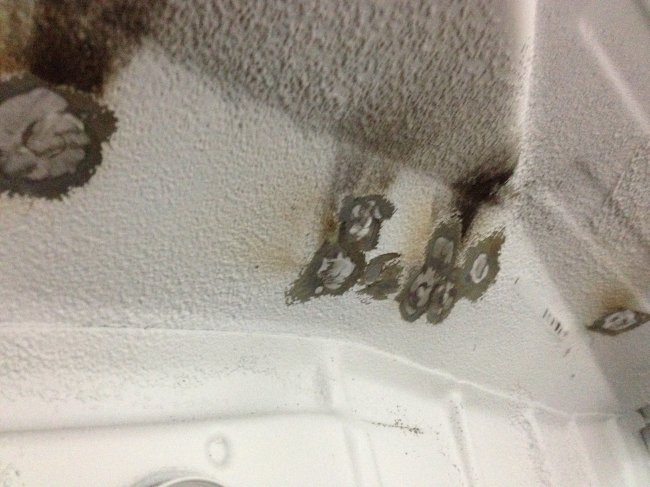 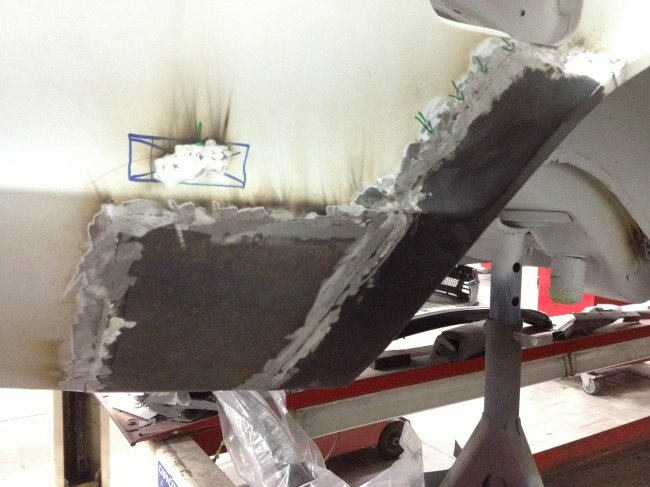 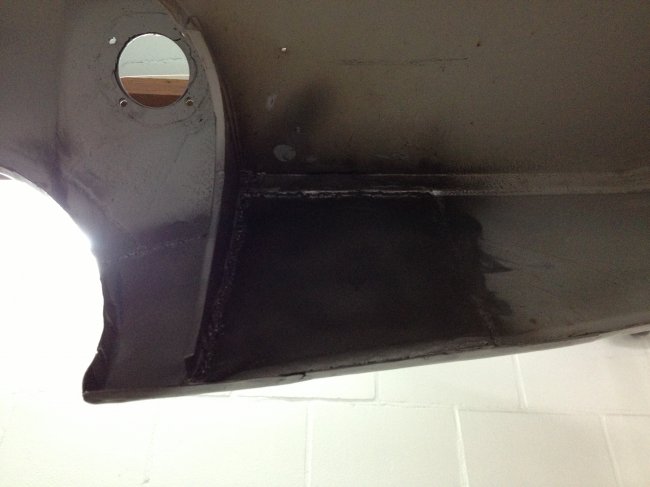 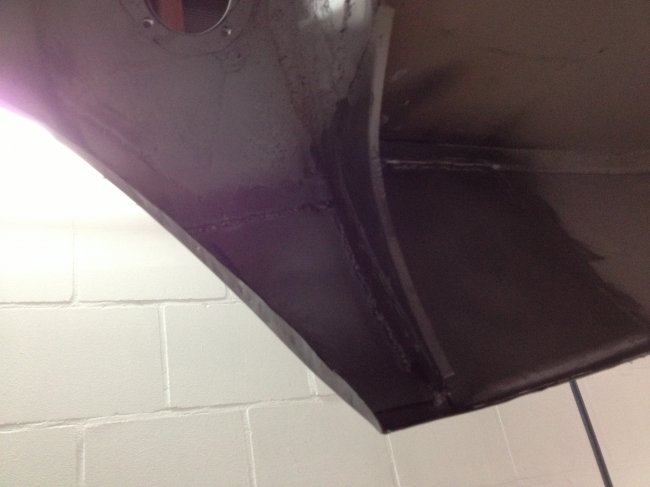 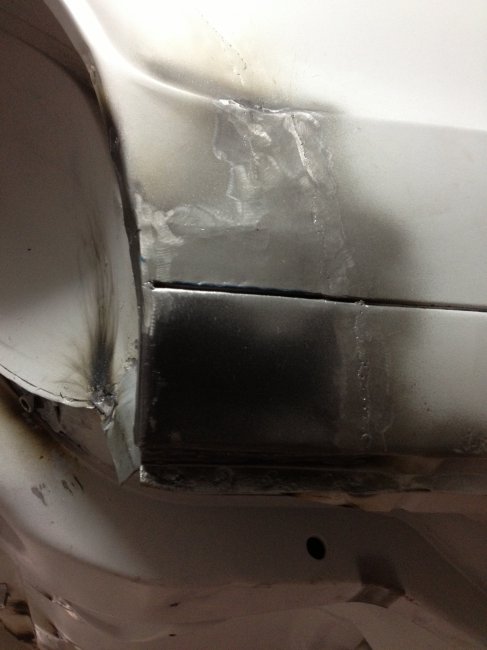 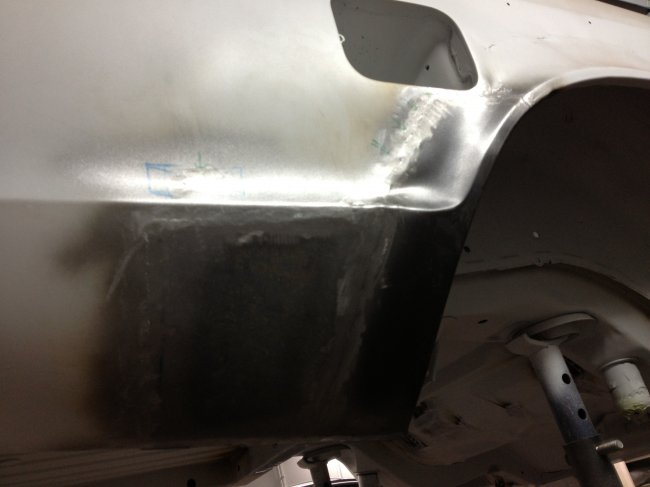 So, what's left to weld? Well, the list is getting shorter: - rear inner right sill (15mins) - trunk area some small patches (15 mins) - roof repair around sunroof (1hr so not to warp the roof skin any more then necessary using gel to help dissipate heat) - four patches to the right front inner wing (1 hr) - some small miscellaneous holes and the reinforcement on the left inner wing (15mins) Probably less time needed then I claim seeing how much we got done in one and a half hours this Saturday. But, with that work finished, the body shell is 100% solid metal again!! To do besides the body shell: - small repair to inner brace of one front outer wing - small repair to outer skin of one front outer wing - replacing the window surrounds on both new doors as they turned out to be from a 2-door sedan not a coupe. I have spares so no problem, but due to the nature of the surrounds (being subjected to the force of closing the doors, the force of rubbers pushing against them etc.) it needs to be really well executed. That would be the full body shell and bolt on parts 100% rust free then! But, the body shell is going to take me at least another week and a half of making patches and getting them in. The bolt on parts will be handled when the bottom and inside of the car have been finished. And let me introduce to you my custom colour for the Granada: A$$hole blue metallic pearl! 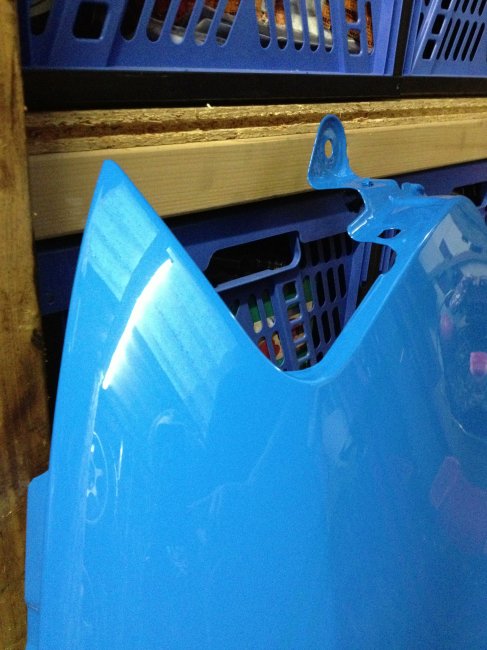 Ok, you're going to have to look closely, as it's a very subtle and fine effect. But when compared to previous pictures of the colour the difference is visible. We basically added a custom mix of very fine pearl metallics, giving the appearance of a solid colour in normal light, but with a very fine sparkle when full on sunlight is introduced. Exactly what I was after. So right after or simultaneous to finishing up the welding of the shell, I will soon start to scotch the floorpan inside and outside. The wheel wells will be relined with 3m rubbery gooey stuff that also held well the first 40 years. The inner front wing area will get the same treatment. The bottom and inside of the floorpan will be seam sealed and then put in quality bodyschutz for the outside and tough semi gloss black on the inside. The trunk will be bodyschutzed as well. With that done the car will be put back on its mechanicals so it can leave the lift and be moved around. This is also the first time the engine and box of the scorio BOB will go in for trial fit. The machanicals I will have to put together in the evenings and weekends from now on as soon a lot of time will be consumed by a home remodeling project where the whole house is painted room by room and a dormer is added to the roof to creat an extra (large) bedroom. This week I'm borrowing a tool from a mate so I can finish up the front suspension and then it is on to the rear. So far it is al very simple yet time consuming work. But then the fun starts...and this is already puzzeling me as we speak. I want to add the heater/condensor of the Scorpio to the granada. There is little room under the dash and although under hood there is a lot more room, the wiper motor is in the way. So, my choices are: moving the wiper motor to the left or putting the heater system in off center and reshaping the air inlet. That will have to be done anyway I think. The drawback of putting the heater in off center is that inside the car a cover has to be made and it will compromise the legroom of the area. I think I'll open a post in another part of the forum to ask for advice opinions etc. I'm thinking of not welding in the required modified sheetmetal, but mounting it in a removable fasion with a proper seal as water will run by that area. Looks like I can keep busy through the winter... The goal is now set to have the car in paint and driving in march 2014. I'll probably have to add the stereo and finish the interior work at that time, but I would be happy just having it on its wheels on a completed floor pan and interior painted and the exterior painted and built up. |
| |
|
|
|
|
|
|
|
|
Excellent progress and looking forward to the build once bodywork is out of the way.
As to decorating, surely you can make excuses for another few years whilst the car gets done? This is far more important. These wives can be remarkably good at this sort of stuff you know, when they finally realise hubby's not going to play! Management people call it specialisation. I call it downright dangerous, but hey.
|
| |
|
|
eurogranada
Europe
To tinker or not to tinker, that is the question...
Posts: 2,556
|
|
|
|
Excellent progress and looking forward to the build once bodywork is out of the way. As to decorating, surely you can make excuses for another few years whilst the car gets done? This is far more important. These wives can be remarkably good at this sort of stuff you know Thanks for your comments. Progress is good and I too can't wait to get the bodywork out of the way. While it's on its wheels being prepped, I'll be prepping the final parts to as good as new condition so when the time comes to mount it all I can fully enjoy that process! The car definitely is important to me, but so is family life. As for the remodel... It's not the wife who's wanting this. It's my 7 year old son who has a room just big enough to fit a bed... He can't play with his toys or friends. His clothes don't even fit in there. So I'm doing it for him! And as he's the future car lover/modifier/builder... I have to treat him right! ;-) The build itself will be done for me, but the final trim and the miscellaneous paintwork required around the house will be for me to get done. What I'm fearing far worse, is the fact that my wife is getting her artificial hip (got it 13 years ago at the age of 28) replaced for a new one as it is letting go. As it's her second, it means doing absolutely nothing for 7 weeks one of which in the hospital... Try taking care of two kids, working from 7:15-17:30 and taking care of the wifey and still finding time to work on the car.... It's going to be a challenge and there will be no help from anyone but grandma/grandpa sometimes... One of the reasons to get as much done as I possibly can now. |
| |
|
|
|
|
|
|
|
|
Ahh, good luck brother.
Hope you didn't think I was out of order and trust everything turns out okay.
Best of luck from Manila.
|
| |
Last Edit: Oct 2, 2013 11:57:15 GMT by georgeb
|
|
eurogranada
Europe
To tinker or not to tinker, that is the question...
Posts: 2,556
|
|
|
|
Hope you didn't think I was out of order Now why would I think that?? You made a comment that clearly was in jest. So no problem here, at all! I appreciate all input! It's a sign of peaple reading and caring for my project. |
| |
|
|
eurogranada
Europe
To tinker or not to tinker, that is the question...
Posts: 2,556
|
|
|
|
|
|
| |
|
|
mk2cossie
Club Retro Rides Member
Posts: 3,057  Club RR Member Number: 77
|
|
|
|
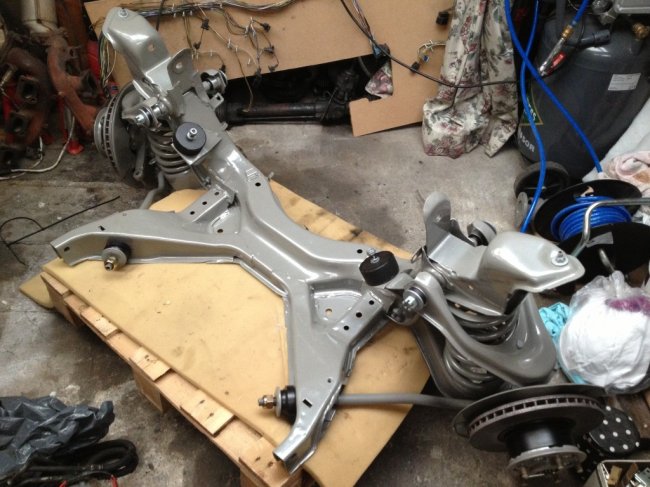
Looking like good progress there  The front wishbones will be held up slightly when you bolt the dampers in to the subframe assembly, as they limit the droop on the wishbones  The heavy ole Cologne engine will also help bolted on top of that lot though!  |
| |
|
|
conair
Part of things
 
Posts: 268 
|
|
|
|
|
Sweet work dude, love granny coupes and the euro hips are really nice and accent the car perfect, wish the ford bods had done this to all the coupes, enjoying this thread bud, can wait for the next update.
|
| |
|
|
|
|
|
|
|
|
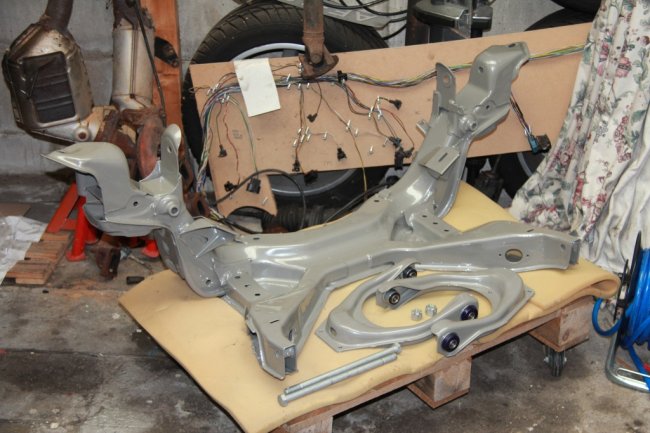
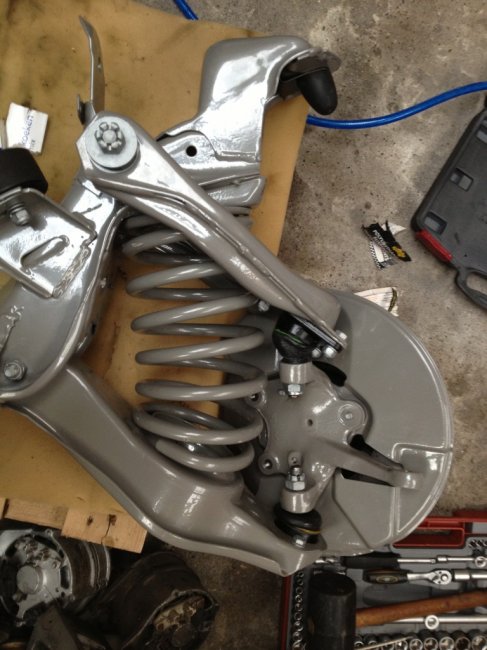
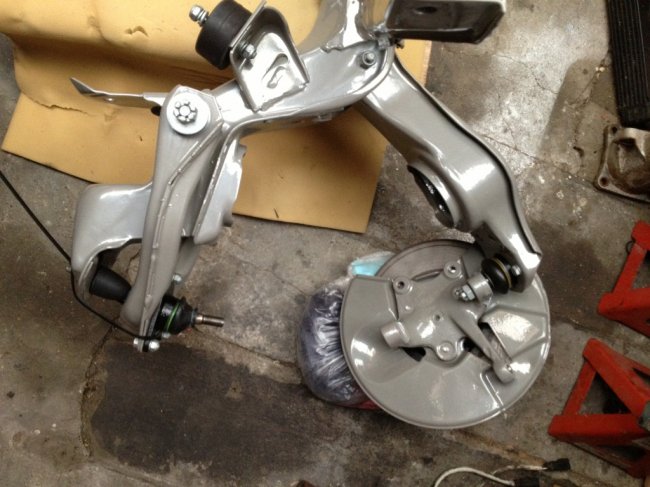
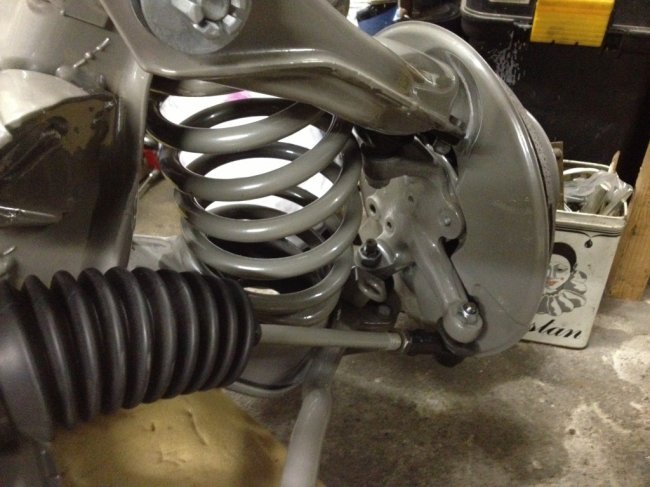
Those pictures from the front axle are just brilliant, your attention to detail is amazing.
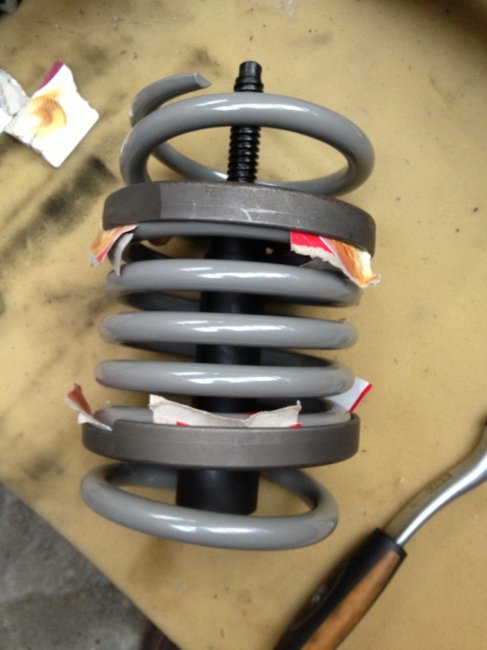
Springs in matching colour - that´s a first for me.
Keep up the good work mate.
|
| |
|
|
eurogranada
Europe
To tinker or not to tinker, that is the question...
Posts: 2,556
|
|
|
|
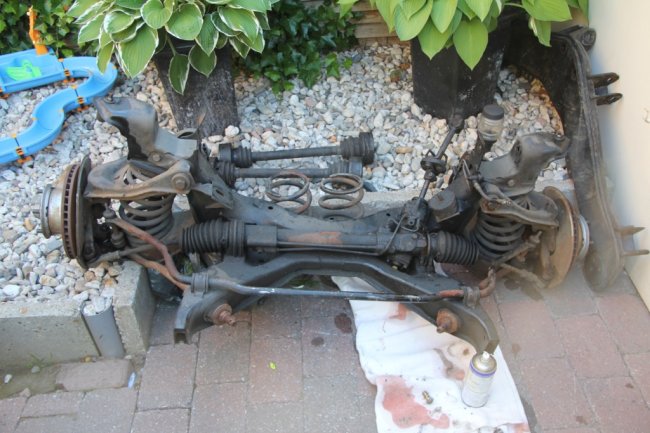
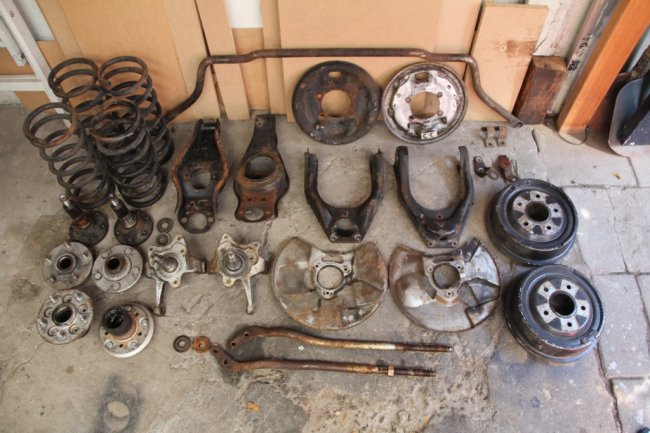
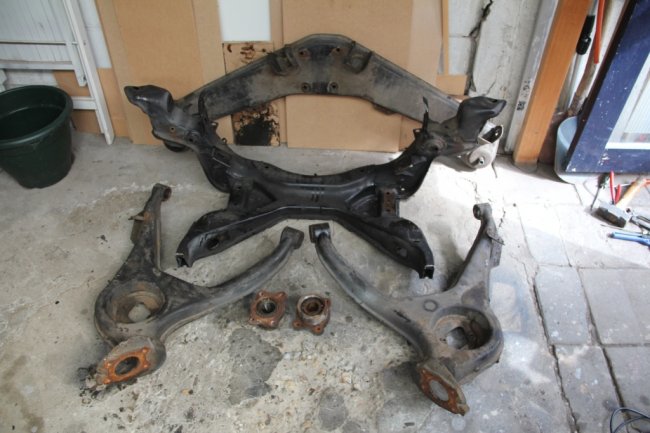
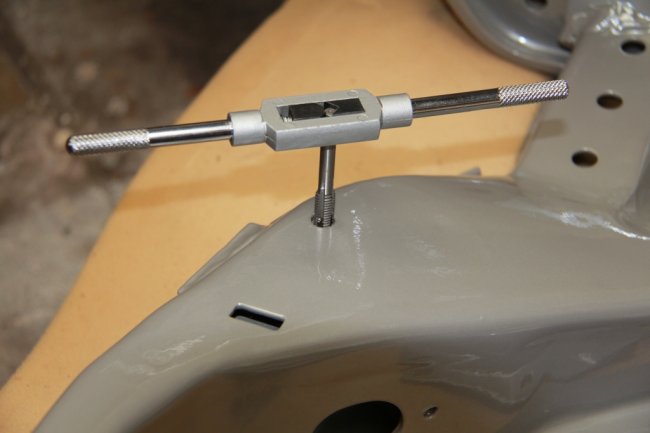
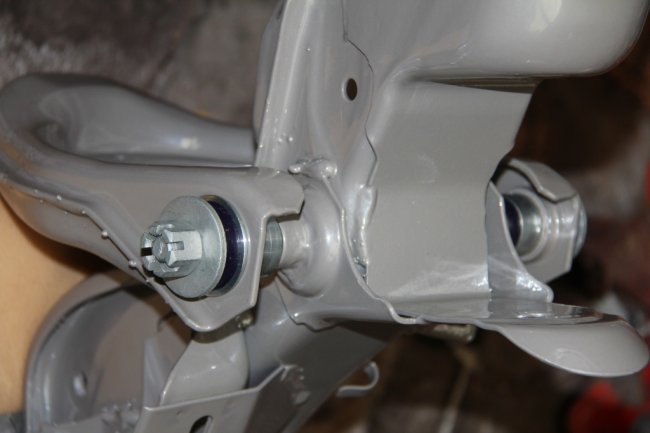
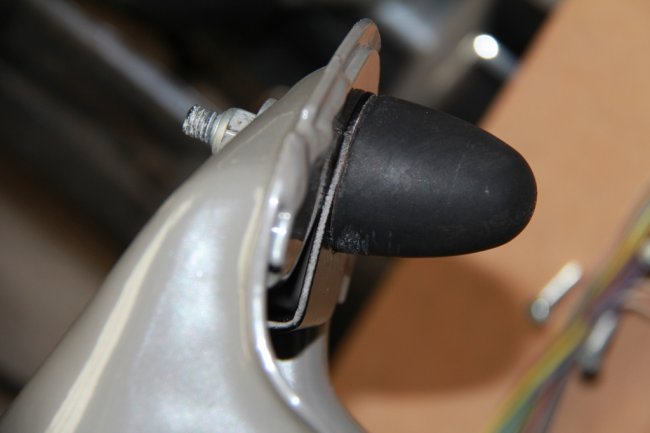
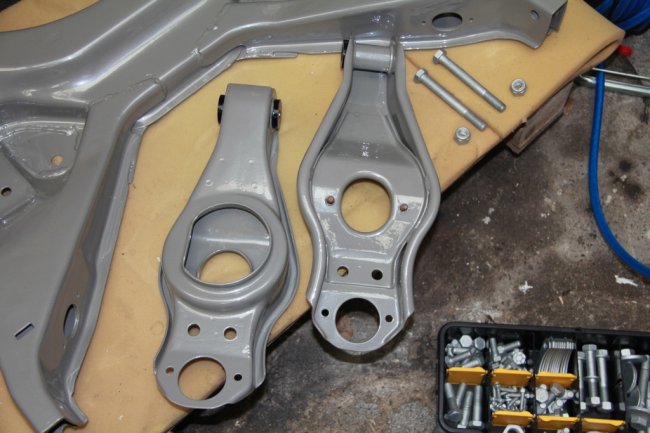
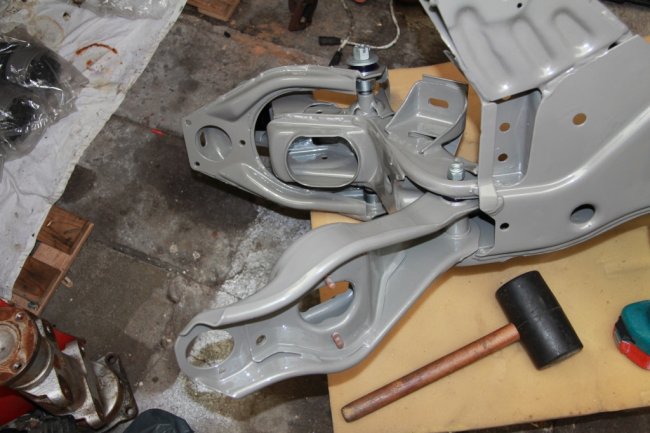
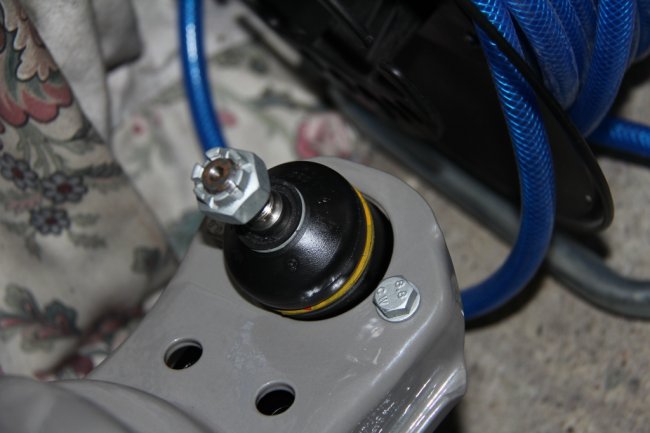
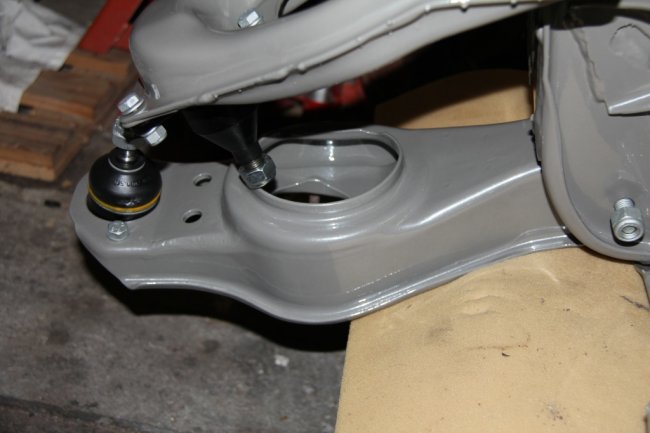
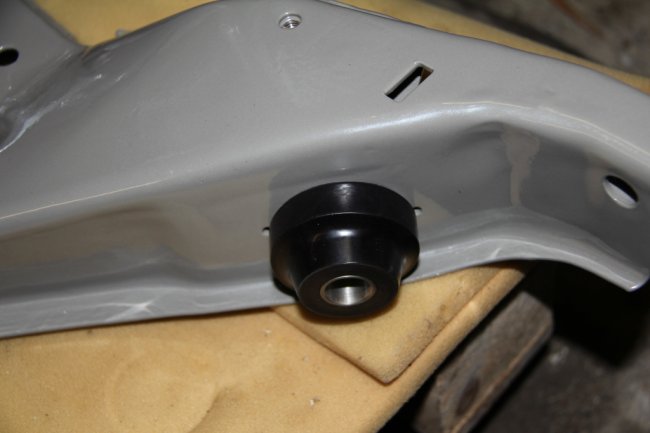
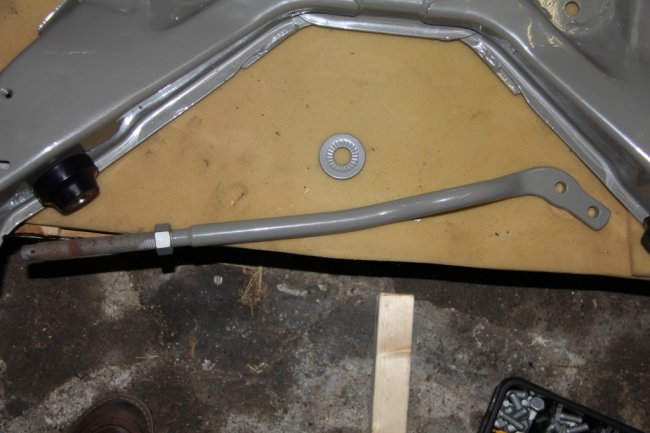
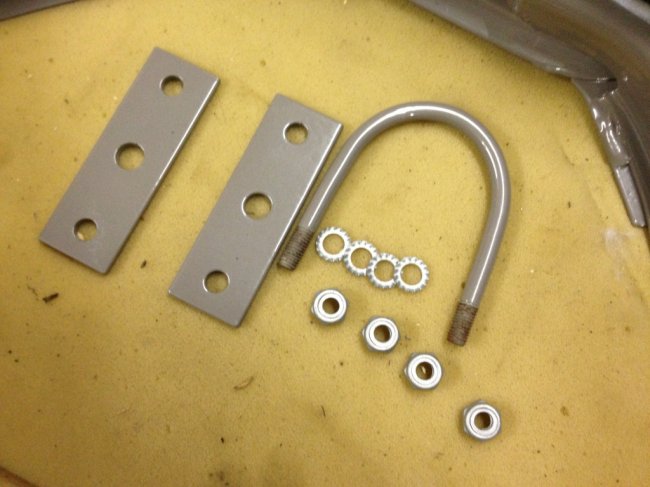
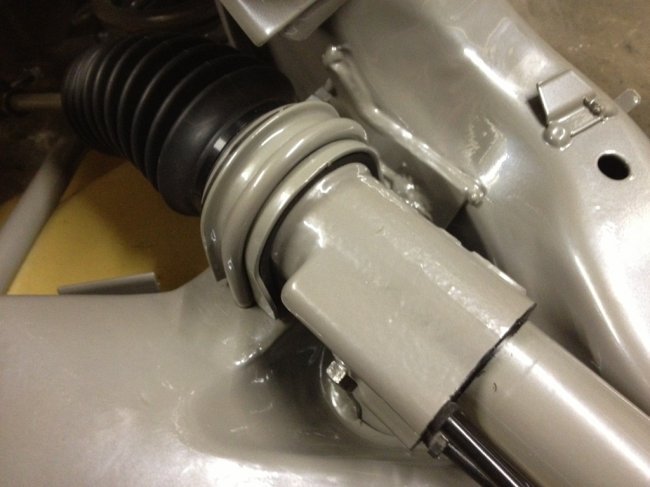
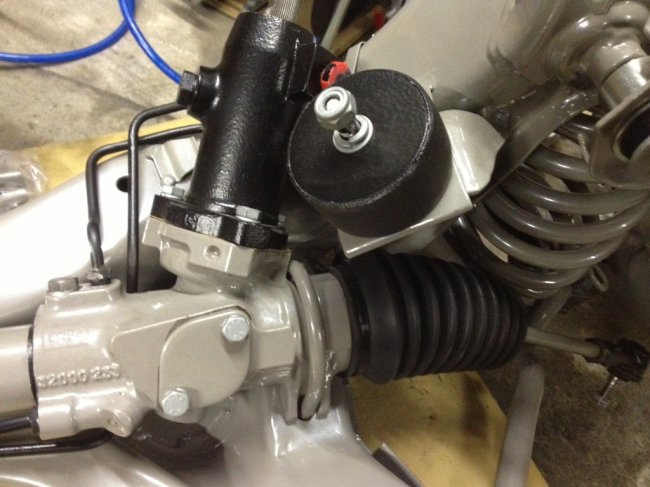
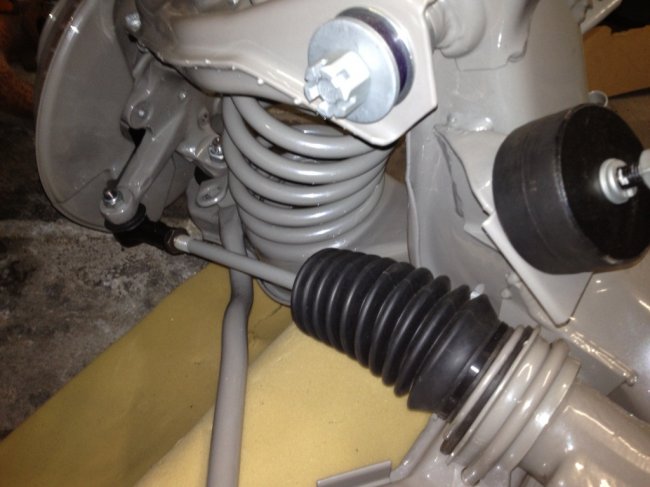
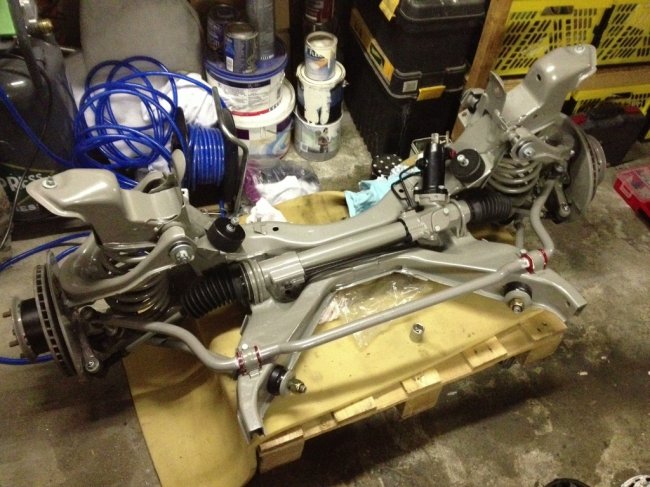
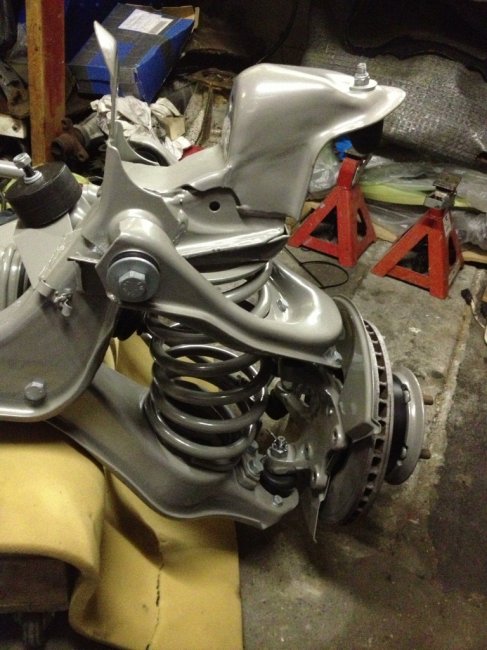
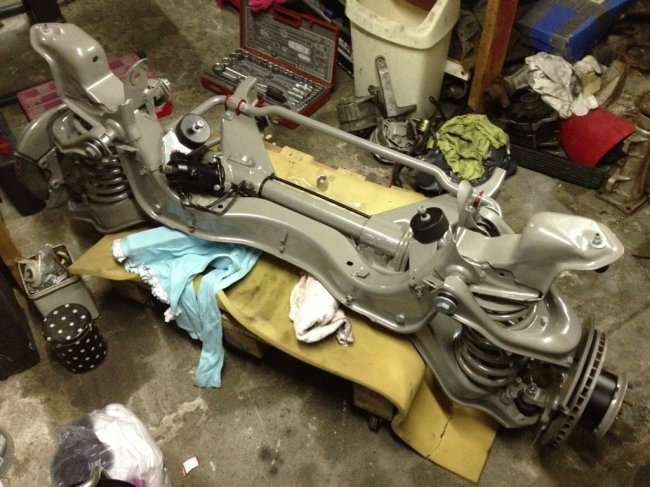
Hmm, for the first time since completely changing the way I dealt with the welding work on the car I feel like I'm taking a step back. Sometimes things don't work as you expect them to, especially if sellers aren't honest about their products. As I said earlier, to finish off the front suspension subframe, I would have to add brakelines, brake calipers and tighten up the anti-roll bar and mount the shocks. The last two are impossible at the current angle so will have to wait until some weight is added to the frame, which won't be long. So I set to adding the brake calipers. Should be a very easy job, but turned out it's a major pain in the @$$. I bought brand new calipers, direct replacements, suited for vented disks, but with bigger brake pads (compared to standard issue) and had them painted. Ik checked the measurements for the mounting holes and other dimensions and it seemed to check out. Come time to fit however and they turn out to hit the splash shields behind the disks and they also foul on the disks themselves. Apparently the originals are milled down just a tad more in two areas than these replacements. Nothing to difficult to fix, but it's going to ruin the paintwork done to them when fully disassembled. To fix the fouling on the splash shields I'm looking for another set that I can trim slightly and then reblast and powdercoat. It did bumm me out a bit as I was just making good progress and finding, modifying and recoating the parts will take some time. At least the frame can be put under the car without the calipers so I won't make a bigger deal of it then necessary, but still it's extra time, work and cost. All because a seller doesn't know their product will fit or (hopefully not) willingly sells parts that don't fit. After that, I started on the brake lines. Delicate work as you don't want to pinch the lines. It went ok, they are quite bendable yet tough as well. Still it's a time consuming job as you should only bend them once in the same spot so you'd better be right the first time. The replacement lines with the correct fittings attached and sized appropriately for each section of the braking system came with 180 degree bends in the long lines due to shipping that I had to straighten first. A bit nerve wrecking! Then to rebend them in the right places. So far always in other spots then the "transport" bends were in. It al feels nice and solid. As I was working on the brakes I also revised my original master cylinder and the replacement master cylinder I put on when I wasn't able to find the right rebuild kit for the original unit. These days these kits are for sale so I just fixed both. The original had suffered a leaky rubber, the replacement seemed fine in that respect yet had managed to leak fluid past the outer seal straight into the brake booster. They should both be ok now. I assembled with fluid and bench bled the units to fill them with clean fluid as the rubbers will hopefully not perish on first use, something one hears about quite regularly and as it will be a while before my car will have operating brakes.... So, now on to the hunt for replacement splash shields (and one missing door spring). Just a few pics this time: 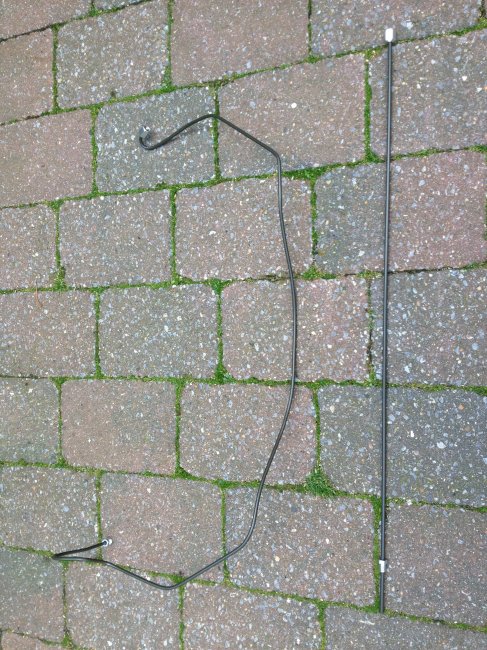 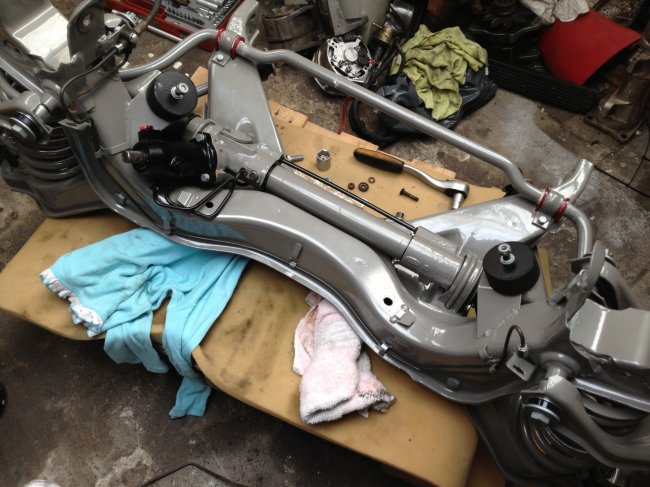 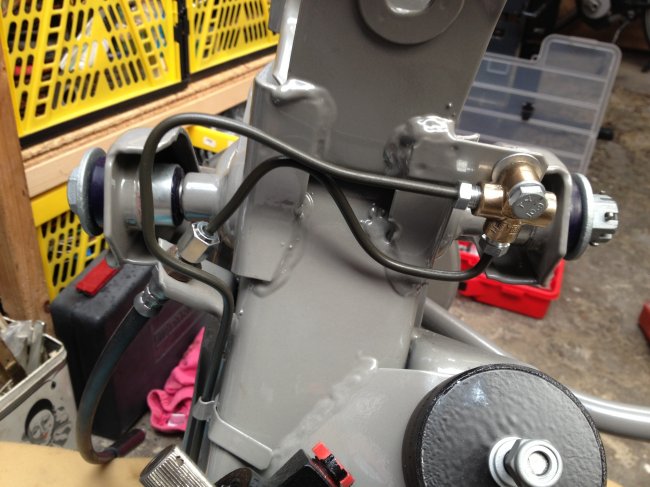 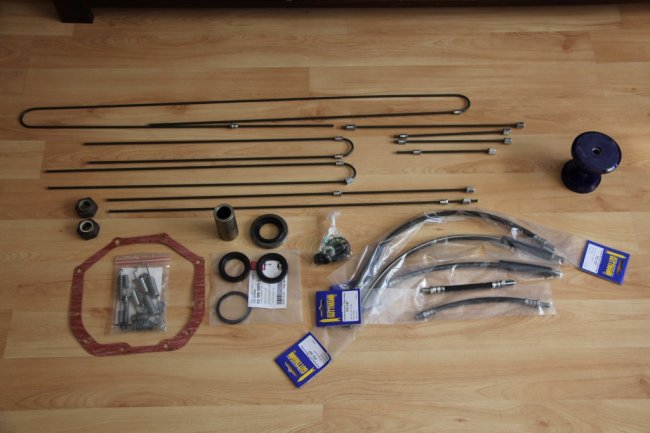 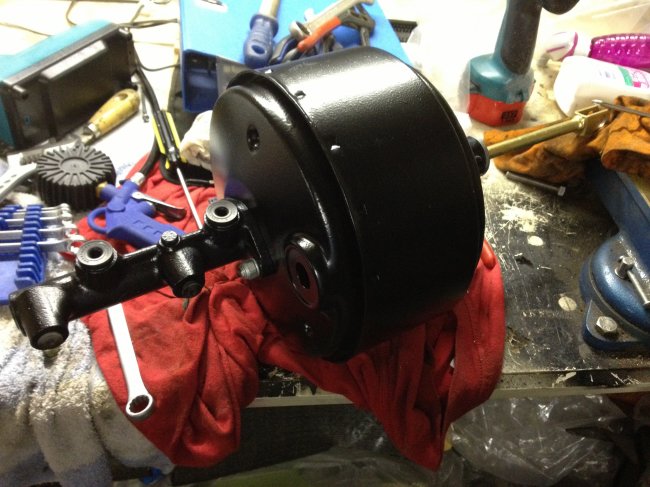 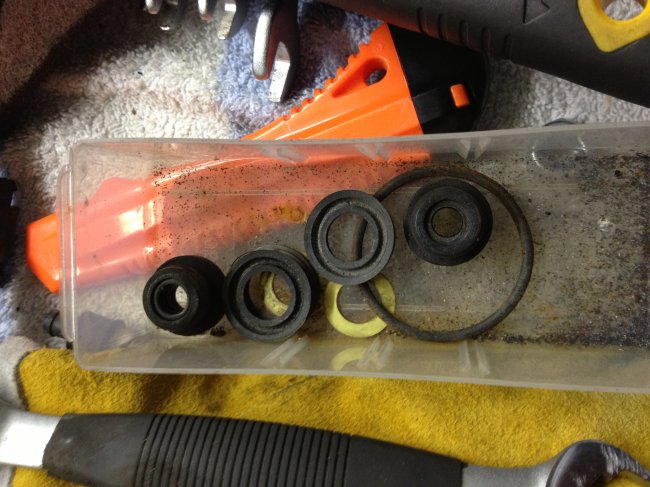 Thanks for your interest! |
| |
|
|
eurogranada
Europe
To tinker or not to tinker, that is the question...
Posts: 2,556
|
|
|
|
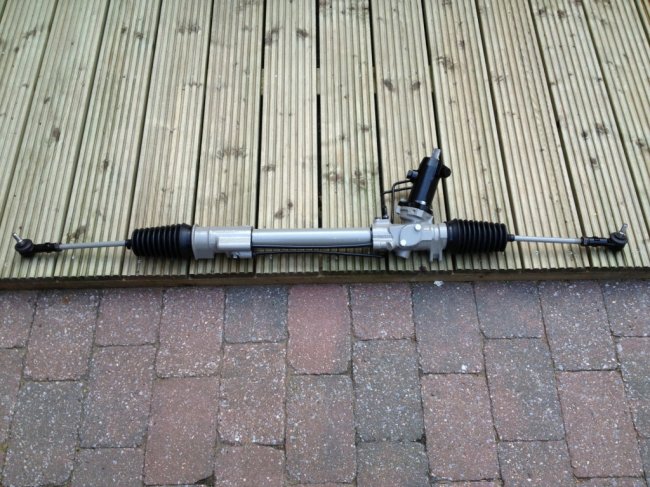
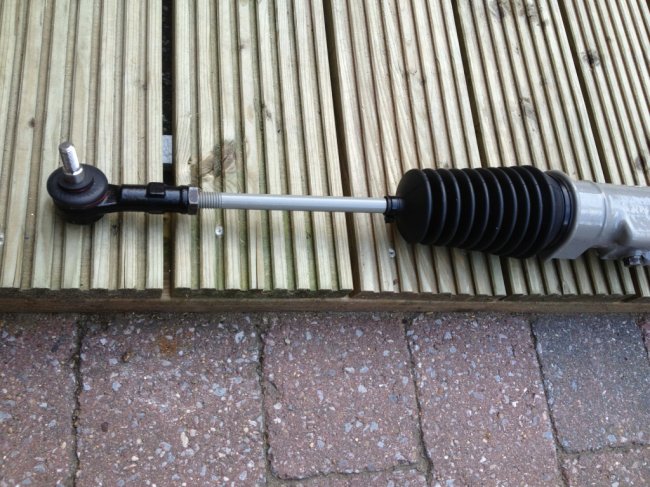
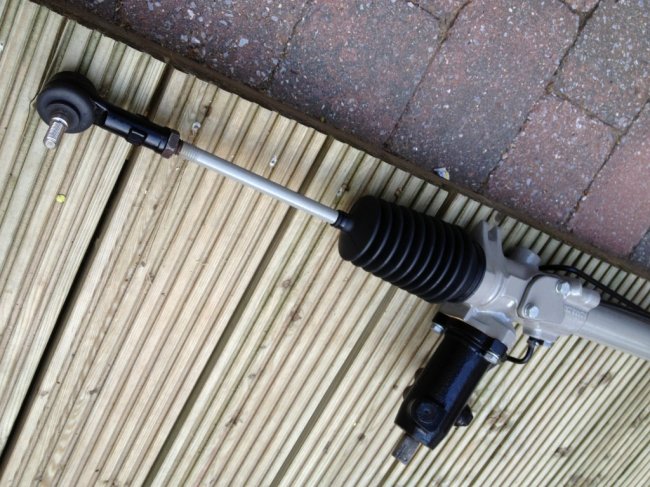
Those pictures from the front axle are just brilliant, your attention to detail is amazing. Springs in matching colour - that´s a first for me. Keep up the good work mate. Haha, thanks!! Yeah, I'm trying to maintain a colour scheme throughout all mechanicals: most large and structural components are a grey metallic, offset with semi gloss black components such as the steering box, engine mounts, brake calipers, some brackets and supports (diff, tranny). I'm trying to use as many blasted and coated nuts and bolts as well, but I find that despite careful checking in advance I seem to miss about 3 kinds. I will just paint these to match the silvery appearance of the others. I hope it will all look nice for a while. All suspension bushes are blue PU, except unfortunately for the anti-roll bar, which for some reason came in red. That to me is a slight bother, but not enough to do something about just yet. The bottom of the car and inside the engine bay will be black as well. The bottom in bodyschutz and the under hood area just painted a chemically resistant black. The grey is supposed to stand out yet not scream look at me. Hence plain black calipers. Only mistake I might have made is that the rear drums are also grey instead of black. But I'm going to see how that looks first. As the wheel rims will probably be semi gloss black as wel it might actually look better than a black drum. The only thing so far that is showing rust through the powdercoat is the diff itself. The large casing was very well rusted and I'm afraid that the blasting has just not gotten it all off. But then again, it's mostly on the upper areas which will not be seen often...(at least I hope so). All other parts look ace and they've been coated I think some two years ago and always just been stored in my cold damp and open workarea. You can't win them all... On to the next installment. Tonight I'll be either welding in the trunk/roof are or making panels for the final piece of the front! |
| |
|
|
foxy99
Posted a lot
  
Posts: 1,451
|
|
|
|
|
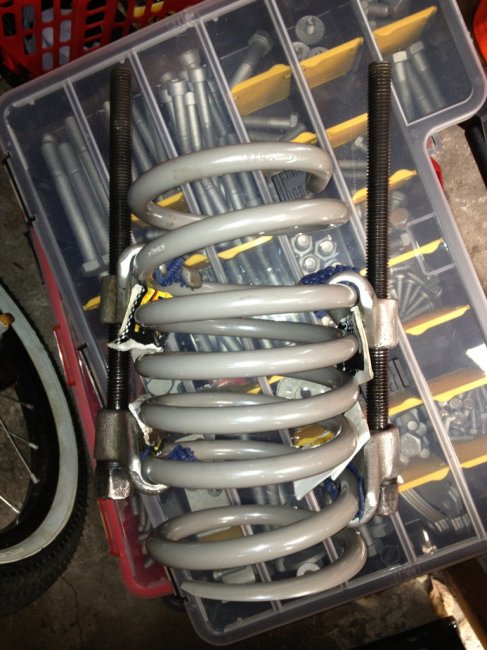
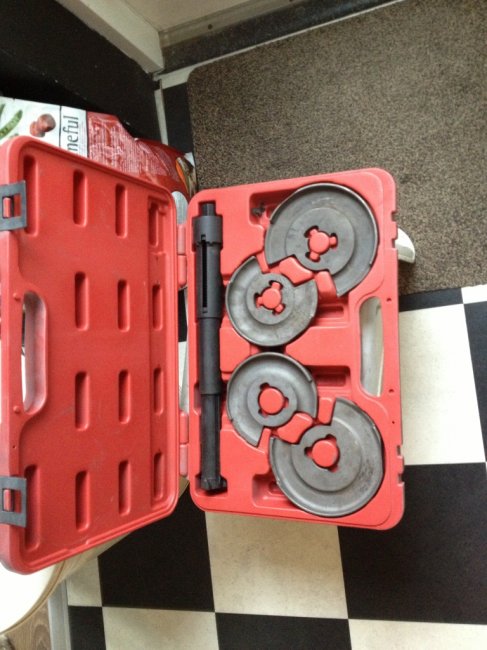
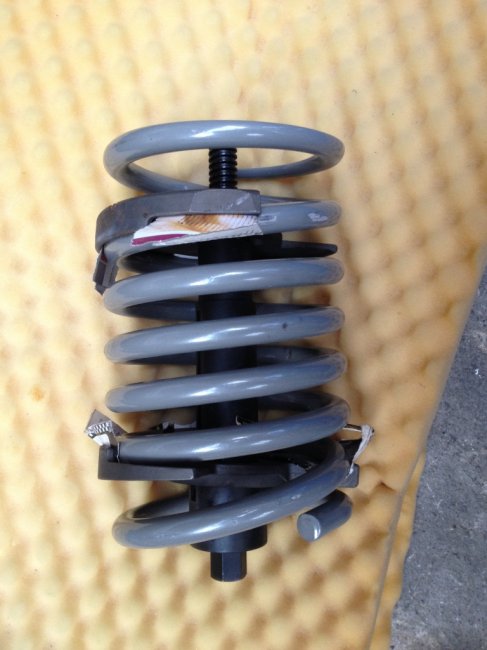
That pro spring-compressor looks good.
A little like the factory tool used on Jaguars (which you can't buy afaik).
What brand it is?
|
| |
1974 Daimler Double-Six VDP
1965/67 Hillman Imp pick-up
1984 VW Polo breadvan
1970s Yamaha Twins (4)
1976 Honda SS50ZK1
|
|


