|
|
|
|
|
Progress on the car has been, er, well, there hasn't been any. The weather has been good this year and the house needs painting so I thought I'd do the worst side. Actually I've had the cast iron guttering off for blasting, burned the old paint off the soil stack, burned the old paint off the woodwork… You get the idea. You've seen what a balmpot I am with the car, you can imagine what happens when I get a big painted house to play with. But I did get some stuff done before I lit the blow lamp. These look a bit scummy. 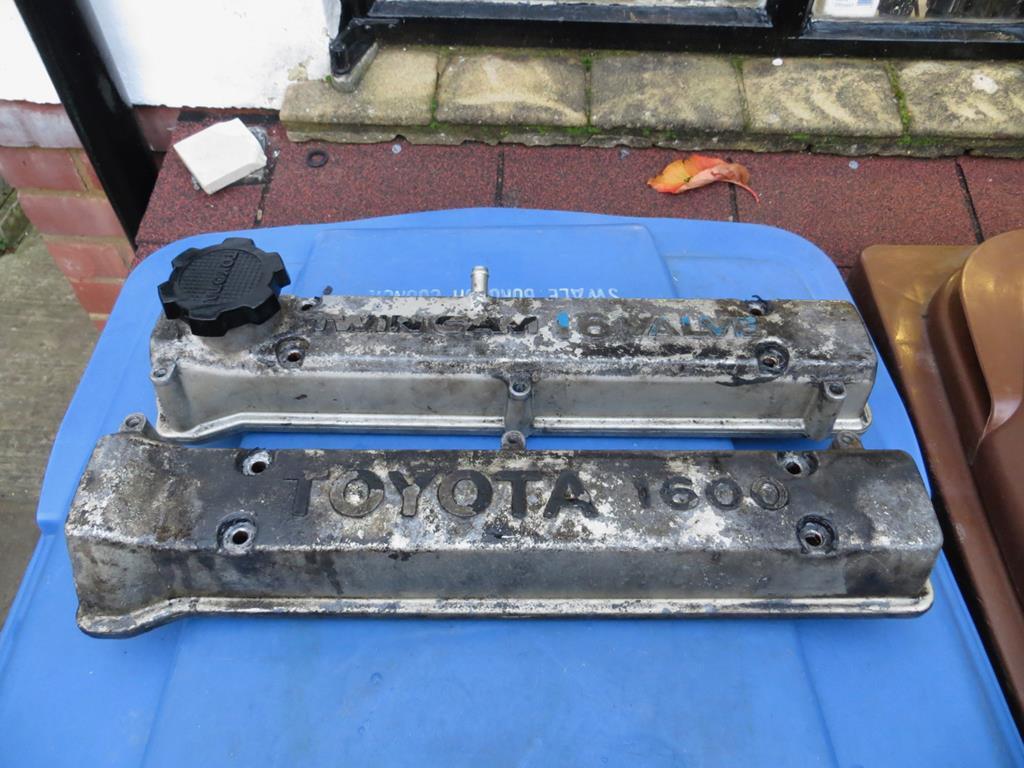 So how to clean them up? I'd been wondering about reinventing a parts washer. I wound up with this. 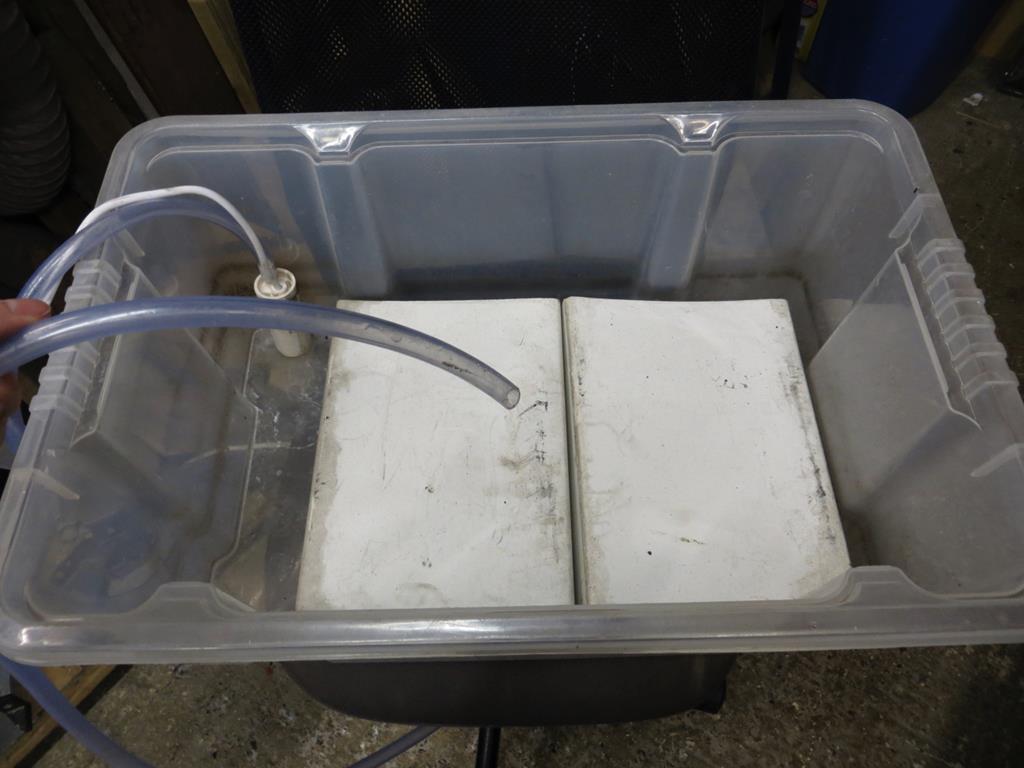 The white bean can in the corner is a little pump. The idea is that you drop a stain digesting washing tablet in some hot water and pump the water over the dirty part. And behold, magic happens… Well it turns out that I'm not Paul Daniels and magic stubbornly failed to happen. But then I had an idea. "You'll like this, not a lot, but you'll like it". (I started out quoting Churchill and Shakespeare and now I'm quoting Paul Daniels. I unreservedly apologise. This thread has gone right down the drain.) Still, you will like this. Connect the pressure washer to the hot water tap. 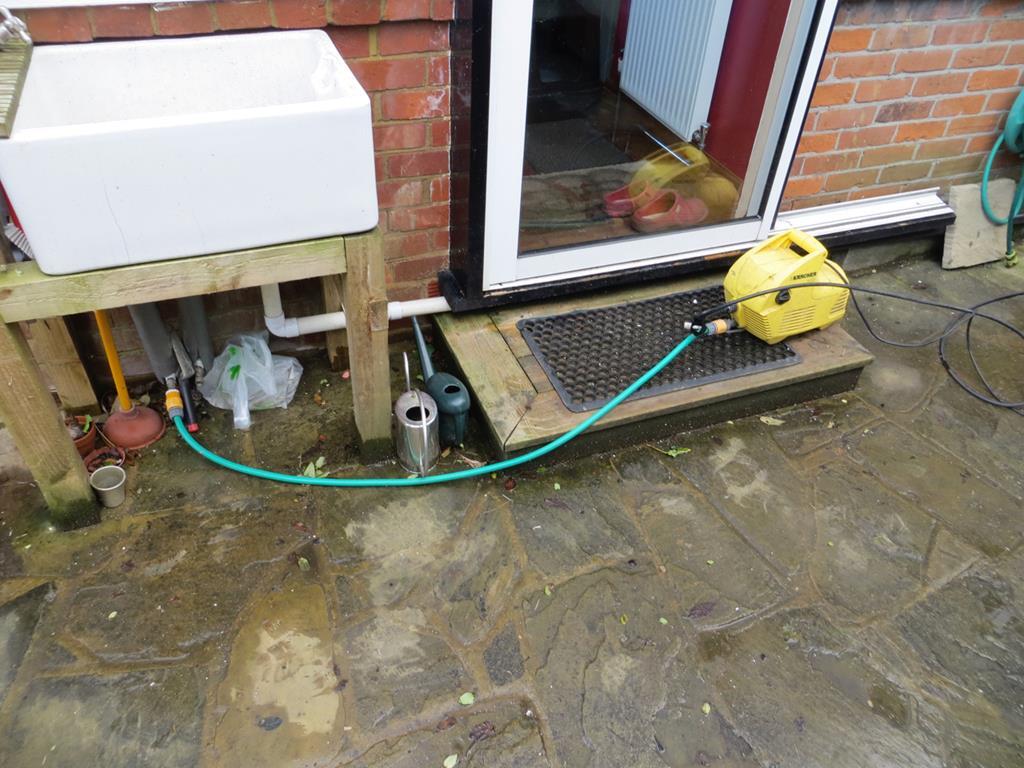 A word of caution here, most pressure washers are only rated for 40 degrees C and your hot water will be 50 to 60 degrees C. Don't come crying to me when your seals melt. Lift a drain cover, chuck a basket in the hole… 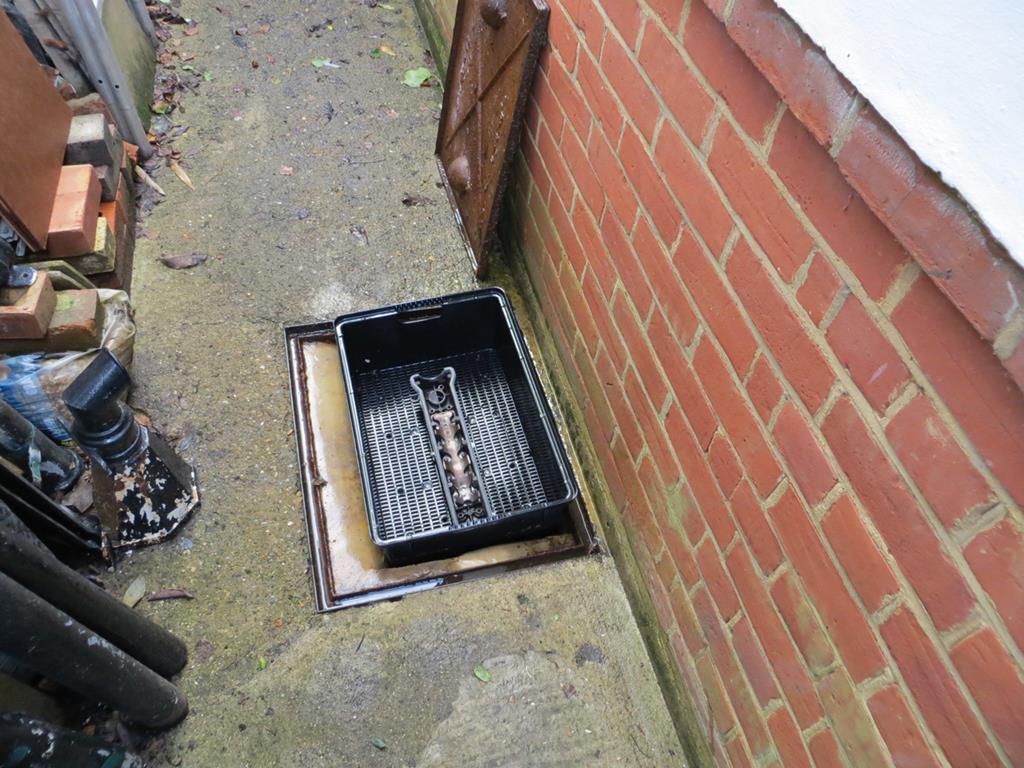 And let rip! 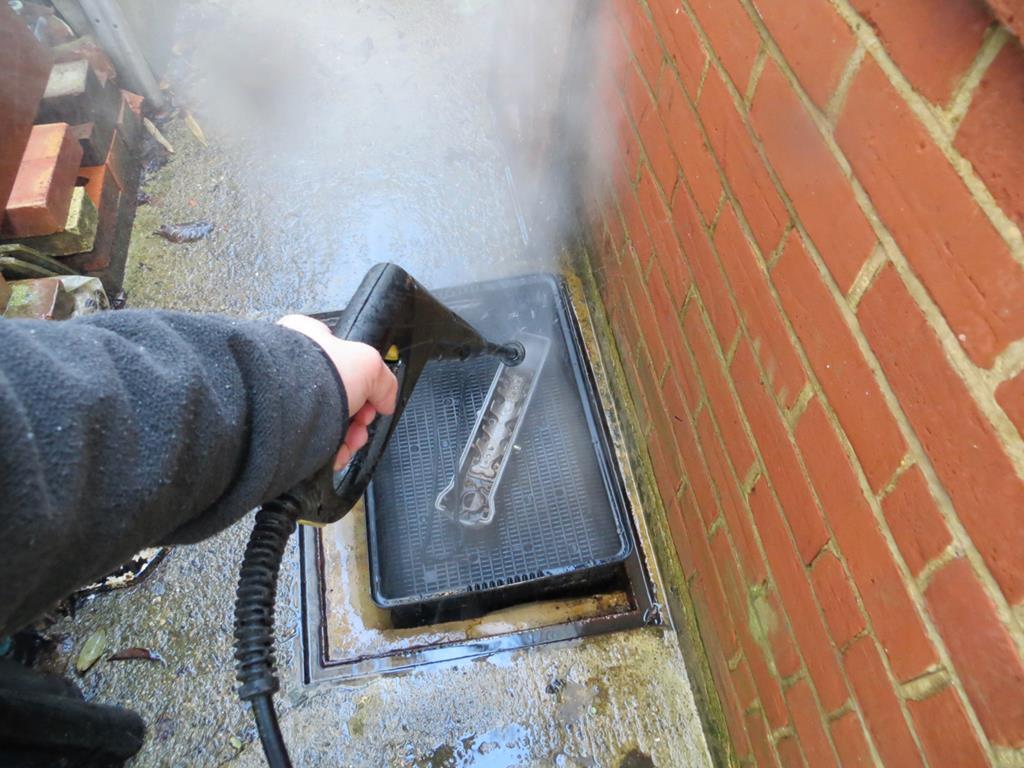 Goes in looking like a part off a tractor, comes out looking like you could eat your dinner off it. 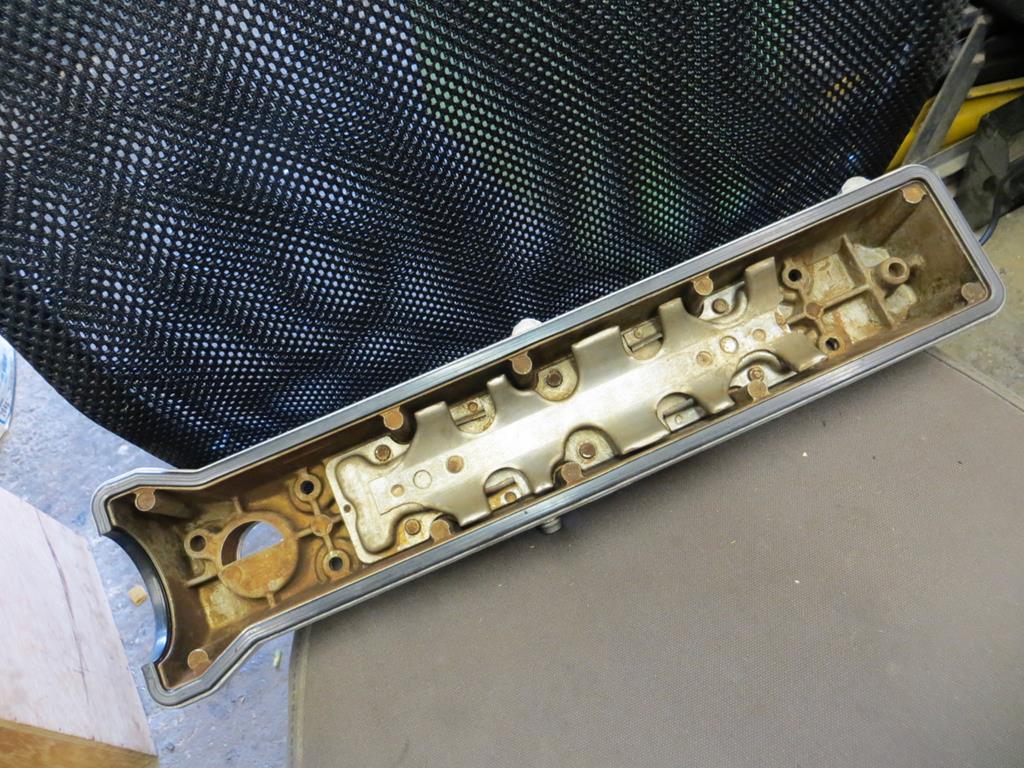 Now that's magic! (Daniels again damnit!) Ok so you wouldn't eat your dinner off it, I lied, but you'd probably get away with a bag of crisps. So next it's into the blaster. Notice I've screwed it to a piece of wood and carefully blocked the holes. The last thing I want is glass bead in the baffles that let oil vapour out. Probably wouldn't be good for a gentleman's big ends to get glass bead in the lubrication. 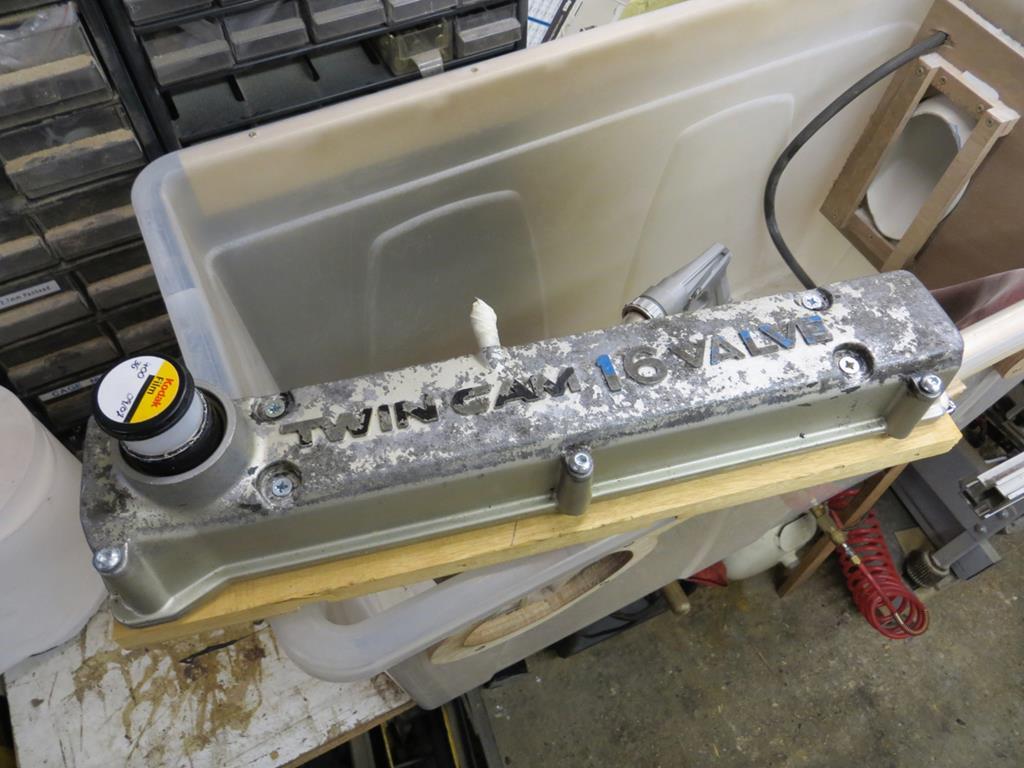 Oh and the little bolts are to stop glass bead clogging the threads. 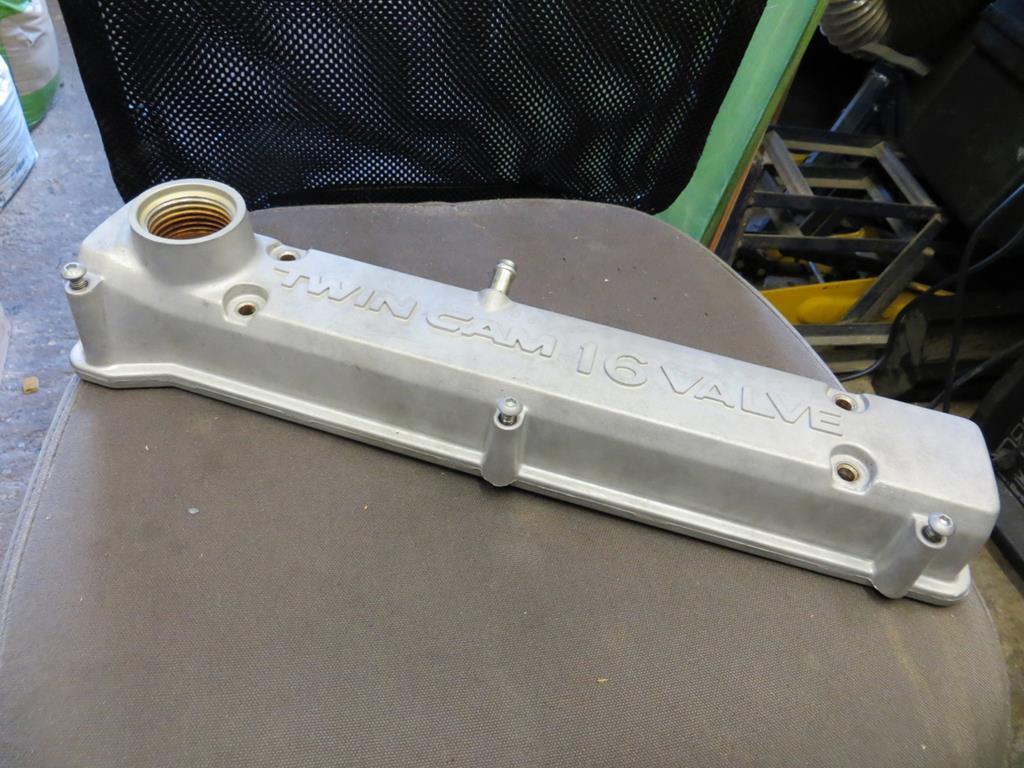 Nice! Then primer. 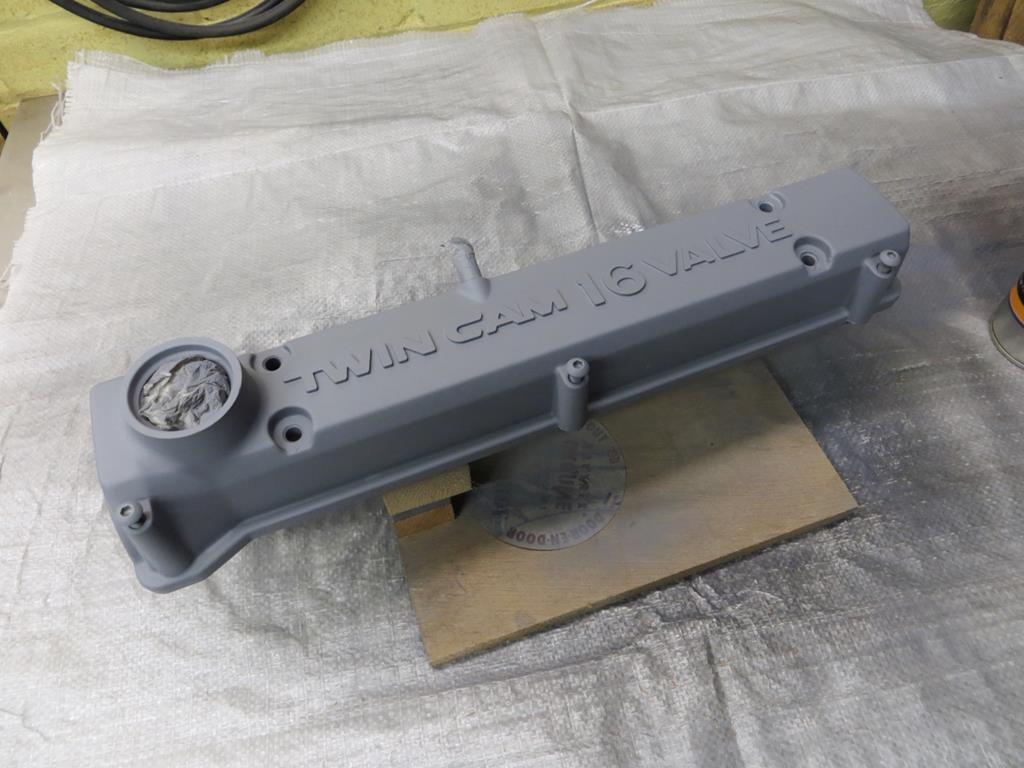 Paint and clear coat. Lastly paint in the lettering and leave to have a paint reaction with the clear. @&%!*. 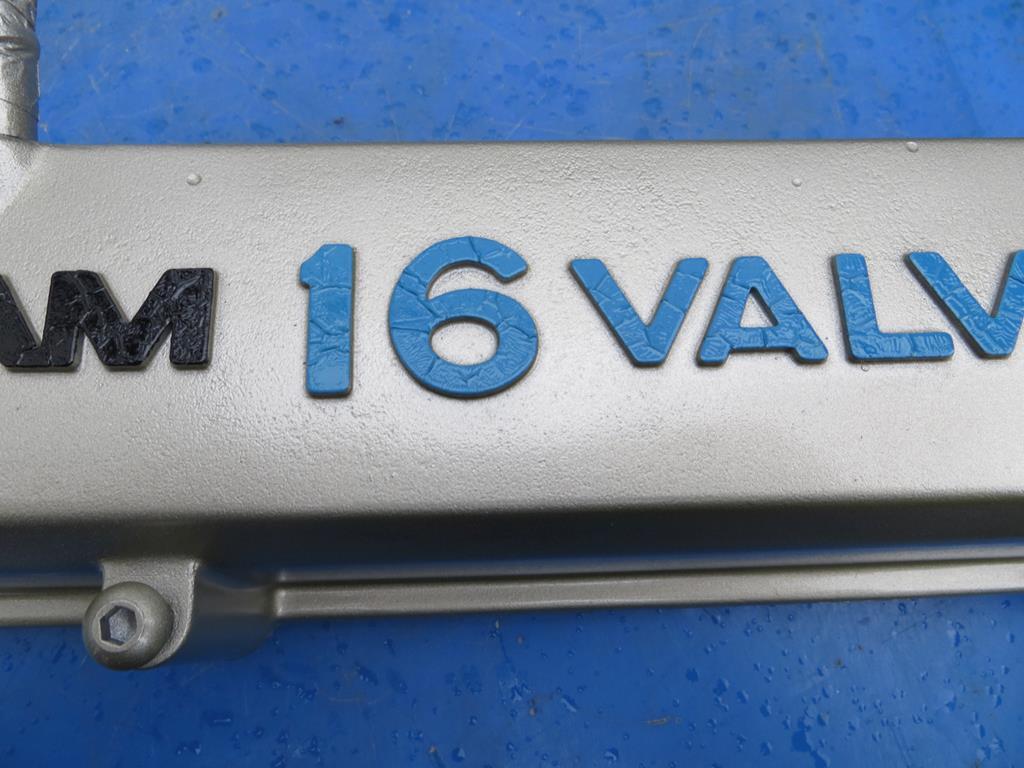 So I sanded the lettering back and tried again. Old and new. 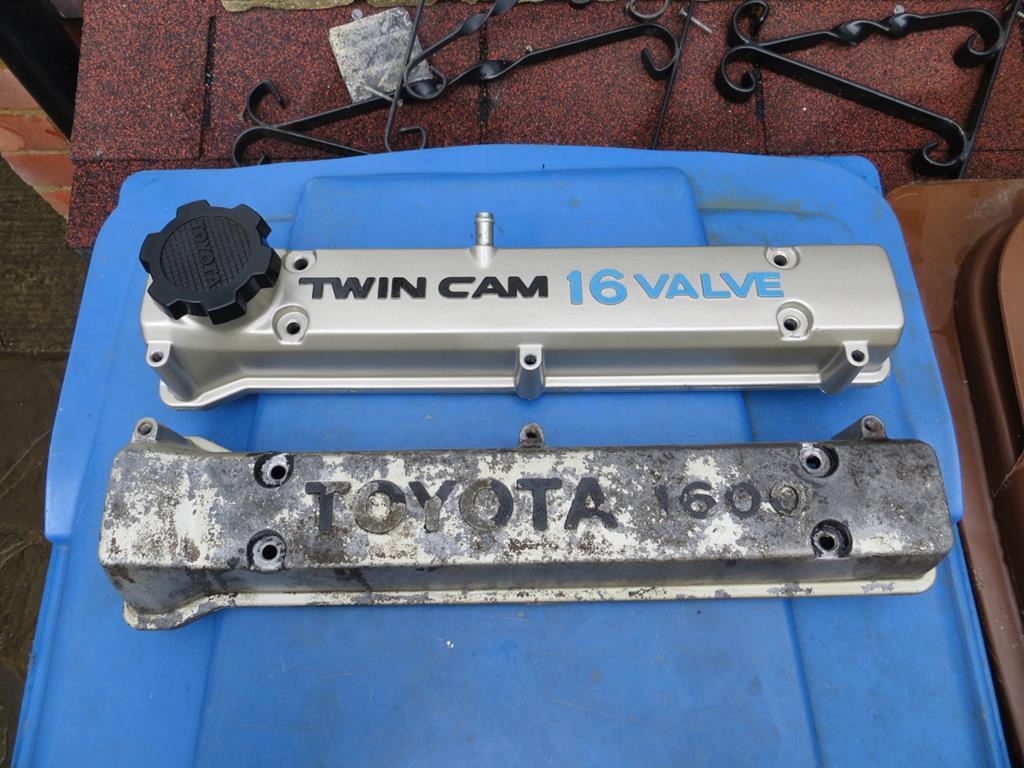 Will it last in the heat of the engine bay? No idea. I'll let you know if I ever get it back together. James PS I did the other side too! 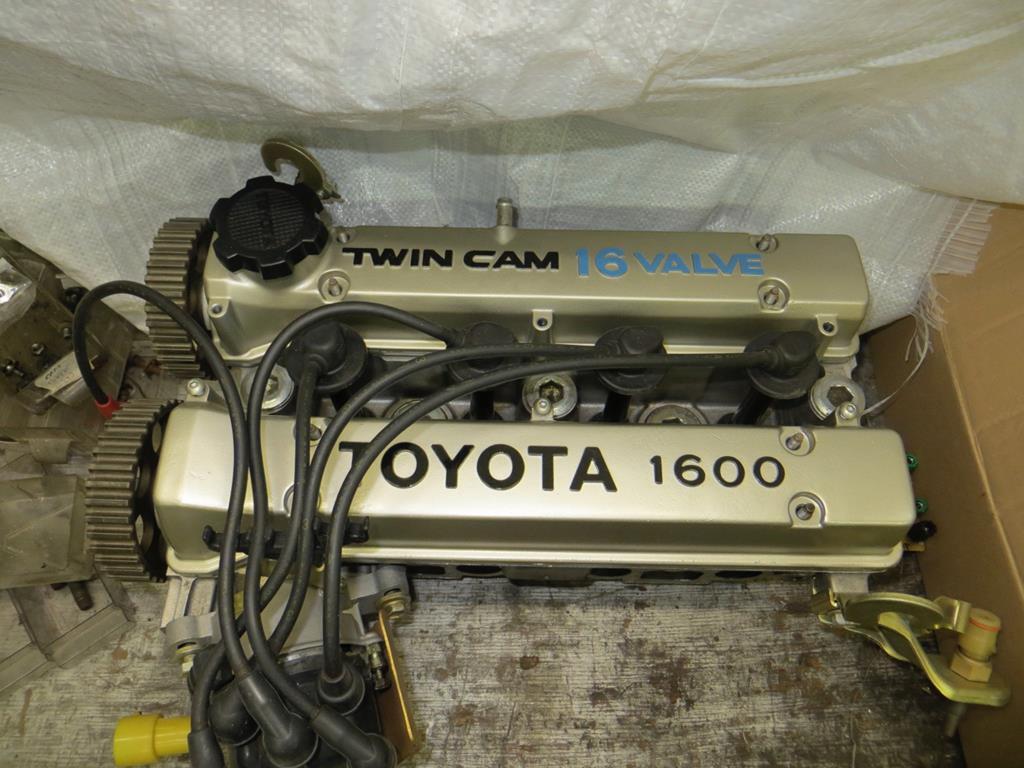 |
| |
Last Edit: Nov 29, 2018 20:58:06 GMT by Sweetpea
|
|
|
|
Ray Singh
Posted a lot
   More German exotica in my garage now
Posts: 1,993
|
|
|
|
|
Excellent work James. The project did look like a basket case, but your skills will soon see that car concours!
I am looking at buying one of these as a daily runabout. Your thread might have encouraged me more!
|
| |
|
|
|
|
|
|
|
|
Thank you for the compliments. I think your estimate that it'll 'soon' be done might be out by a couple of millennia though.
People certainly use them as daily drivers. I guess the biggest issue is finding one with as little rust as possible. Good luck and let us know if you get one.
James
|
| |
|
|
|
|
|
|
|
|
I've just read this whole thread as I'd missed it before (and yes, I do have time on my hands as I'm waiting to meet a bloke who wants to put a mobile phone mast on one of my houses - don't ask) and I love it! Great work, great words and great humour. Is that too many greats? Ah well.
Don't care if it never gets finished as long as the thread keeps going. Bookmarked!
|
| |
Last Edit: Aug 6, 2014 1:15:19 GMT by georgeb
|
|
|
|
|
|
|
|
I'm glad you are enjoying it, thanks for your comments.
As it happens I discovered and read through your thread about a month ago. I can't believe how different your car looks on the new wheels. Never quite got round to saying that though. Sorry. Damn lucky if I get round to updating my own thread!
New years resolution... Comment on other peoples threads more often 'cos there is some jolly good stuff going on here.
Exactly when is new year again?
James
|
| |
|
|
|
|
|
|
|
I'm glad you are enjoying it, thanks for your comments. As it happens I discovered and read through your thread about a month ago. I can't believe how different your car looks on the new wheels. Never quite got round to saying that though. Sorry. Damn lucky if I get round to updating my own thread! New years resolution... Comment on other peoples threads more often 'cos there is some jolly good stuff going on here. Exactly when is new year again? James Ah, don't worry about it and yes, you're right, some cracking threads dotted around the board. Who's new year? We get 3 here; the normal one, Chinese (year of the Sheep next) 19th February 2015 and Muslim at end of October this year  Take yer pick! |
| |
|
|
ToolsnTrack
Posted a lot
   Homebrew Raconteur
Posts: 4,136
Club RR Member Number: 134
|
|
|
|
Will it last in the heat of the engine bay? No idea. I'll let you know if I ever get it back together. It will. Mine did.  |
| |
|
|
|
|
|
|
|
Who's new year? We get 3 here; the normal one, Chinese (year of the Sheep next) 19th February 2015 and Muslim at end of October this year  Take yer pick! Too many new years and not enough Christmases, that's what I say. When I'm Prime Minister I'll introduce another couple. Will it last in the heat of the engine bay? No idea. I'll let you know if I ever get it back together. It will. Mine did.  That's good news! Of course I'll need a running engine to warm things up first... |
| |
|
|
|
|
|
Aug 22, 2014 22:33:45 GMT
|
I don't know why I'm posting this. I've thought all day about if I should or not. Anyway, Bailey puss, a 14 year companion of Mrs Sweetpea and I died this morning. He was immortalised in this very thread stealing my dinner. 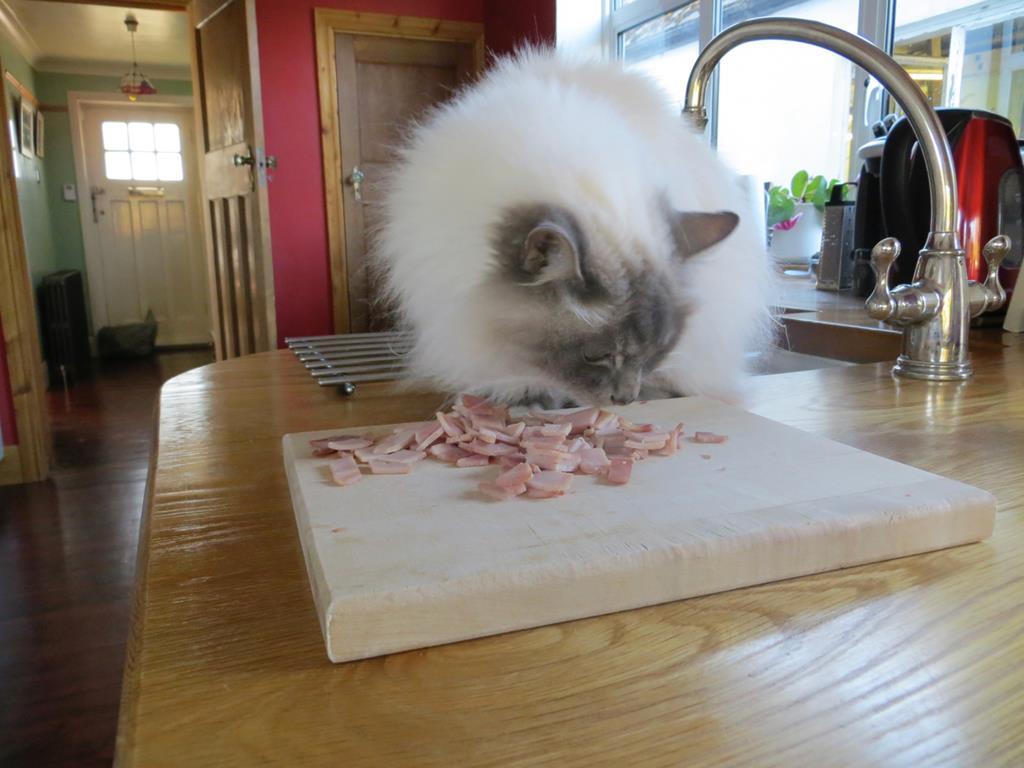 Broadly speaking he died of old age. He'd been looking increasingly old and doddery for the last year. He was off colour yesterday and I was very worried this morning so we took him to the vet. We came back without him. Mrs Sweetpea and I are pretty upset and the house seems quiet even though our other cat is trying her best to keep us occupied. James |
| |
Last Edit: Nov 29, 2018 21:40:09 GMT by Sweetpea
|
|
|
|
|
|
|
|
Sad, always a hole when one goes.
I've purposely stayed away from animals here (using apartment living as the excuse) after having dogs all my life. I miss them, but no heartache.
I shouldn't worry about derailing your own thread, gawd knows I do it enough myself.
|
| |
|
|
ToolsnTrack
Posted a lot
   Homebrew Raconteur
Posts: 4,136
Club RR Member Number: 134
|
|
|
|
|
Cats are an essential support mechanism when you are working on an MR2. I feel for you dude...
|
| |
|
|
|
|
|
Aug 26, 2014 21:02:15 GMT
|
|
Thanks chaps,
I actually like threads that get derailed a bit. You get a feel of peoples personalities and lives.
Our other cat, Portia, twigged that something was wrong. She paced round the house and wouldn't settle for a while. I expect she couldn't work out why the two monkeys that live with her were so miserable.
I've informed Portia that she has to work twice as hard and be my total MR2 support. She seems to be eating twice as much but thats it so far. Cats!
James
|
| |
|
|
|
|
|
Oct 16, 2014 16:04:05 GMT
|
Life has settled down without Bailey puss. Our other cat (Portia) is still behaving a little oddly but I'm sure she's fine. Overdrive suggested that people repairing MR2s need a cat for assistance so Portia is now 'Official MR2 Project Support Cat'. Generally she's either eating, sleeping, or pooing so I'm not sure she's cut out for the role. I guess we'll see. Anyway, I've been a bit tied up over this summer. Ok, dreadful excuse… I would say 'the dog ate my homework' but I don't have a dog and the homework is metal. Even my story telling abilities couldn't pull that off. Not all bad news because I have done an odd bit to the car. Here's the cam belt back plate as it came off the car. 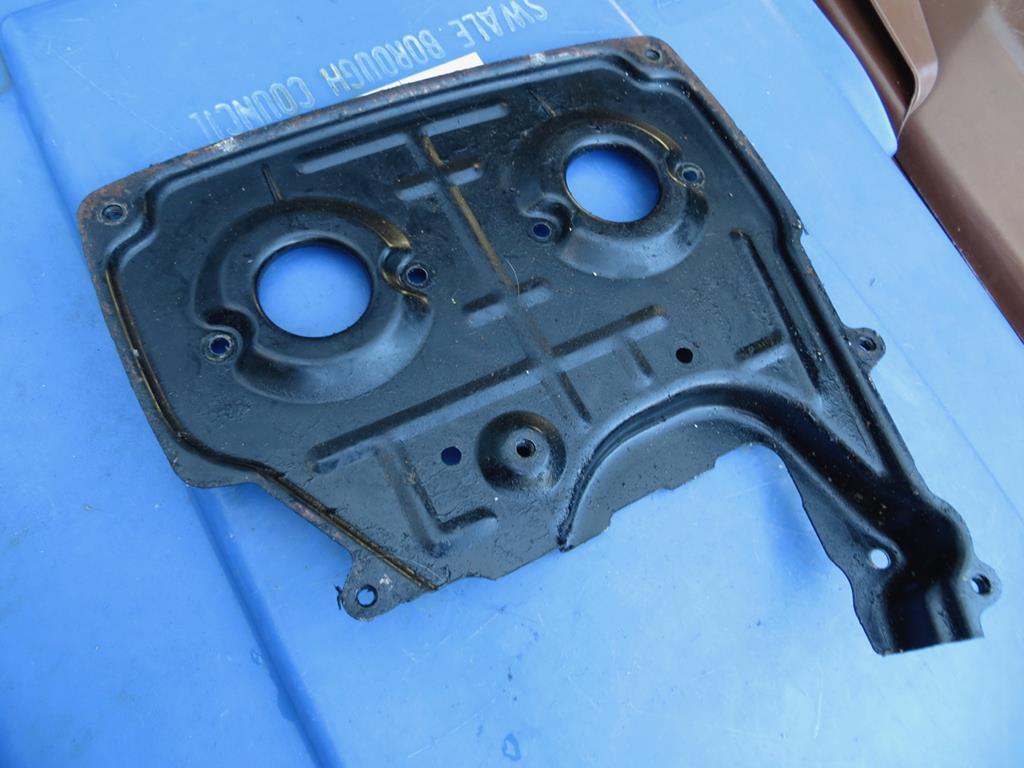 Actually not in bad condition. A bit oily if you look closely. 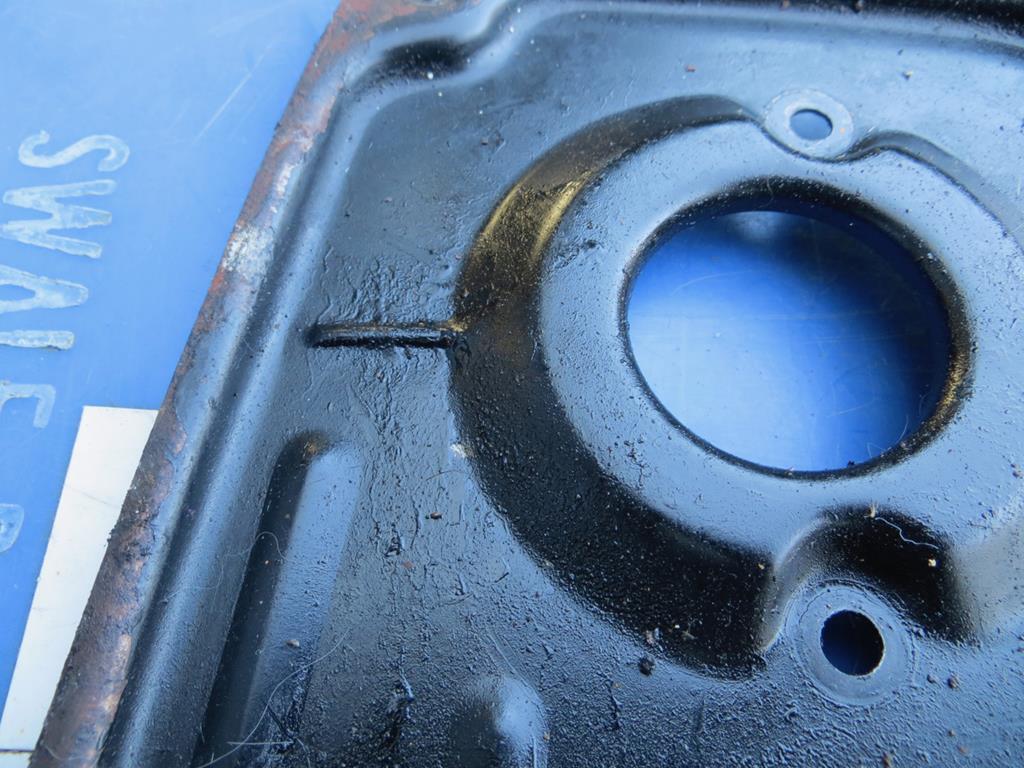 Any normal person would not look closely and bash it back on the car. Hmmm. Always knew there was something wrong with me. Out with the pressure washer then. 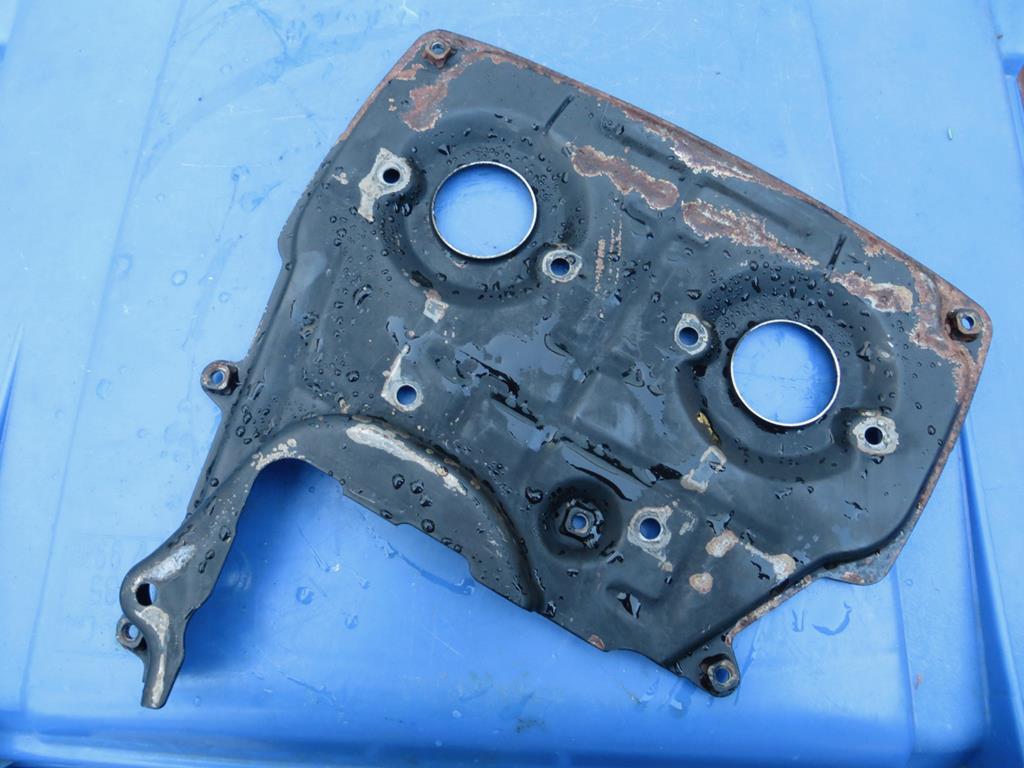 Looks worse than it did before I cleaned it! Into the blaster. 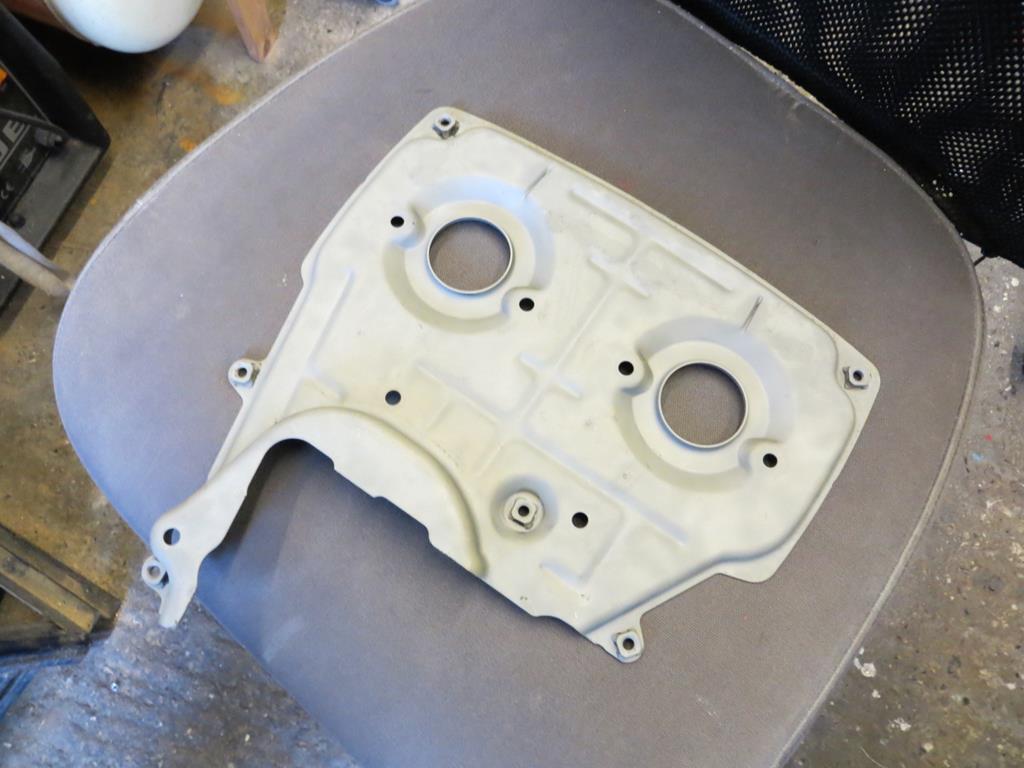 Look! No paint! Coat of etch primer… 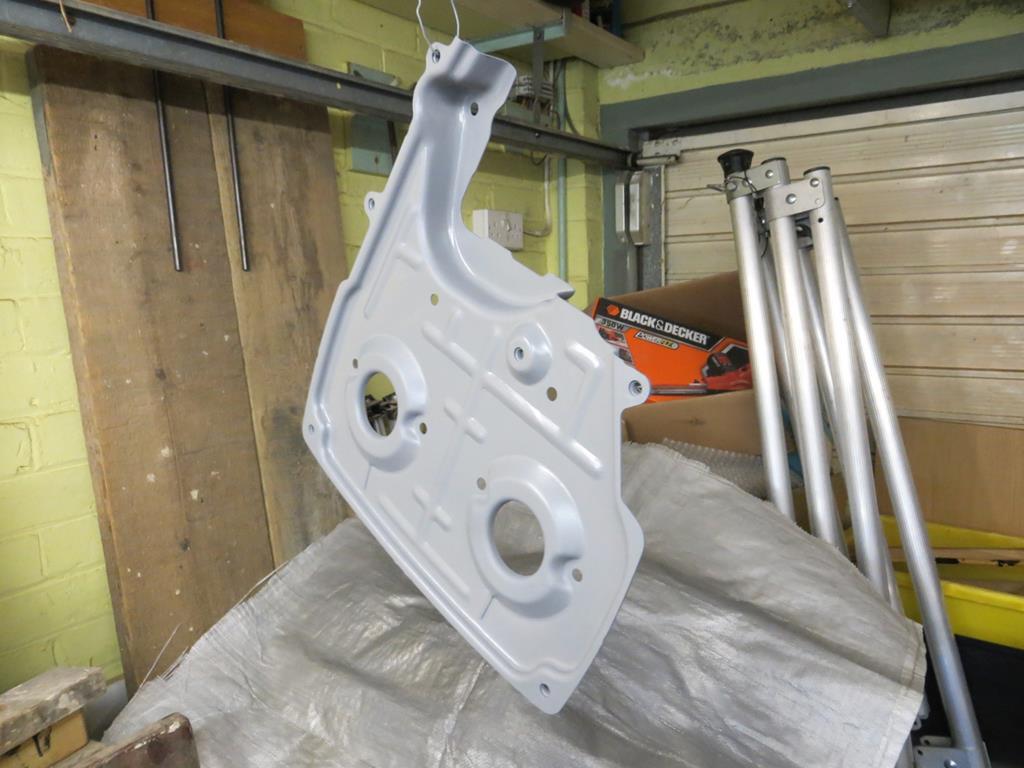 And lastly a coat of black. 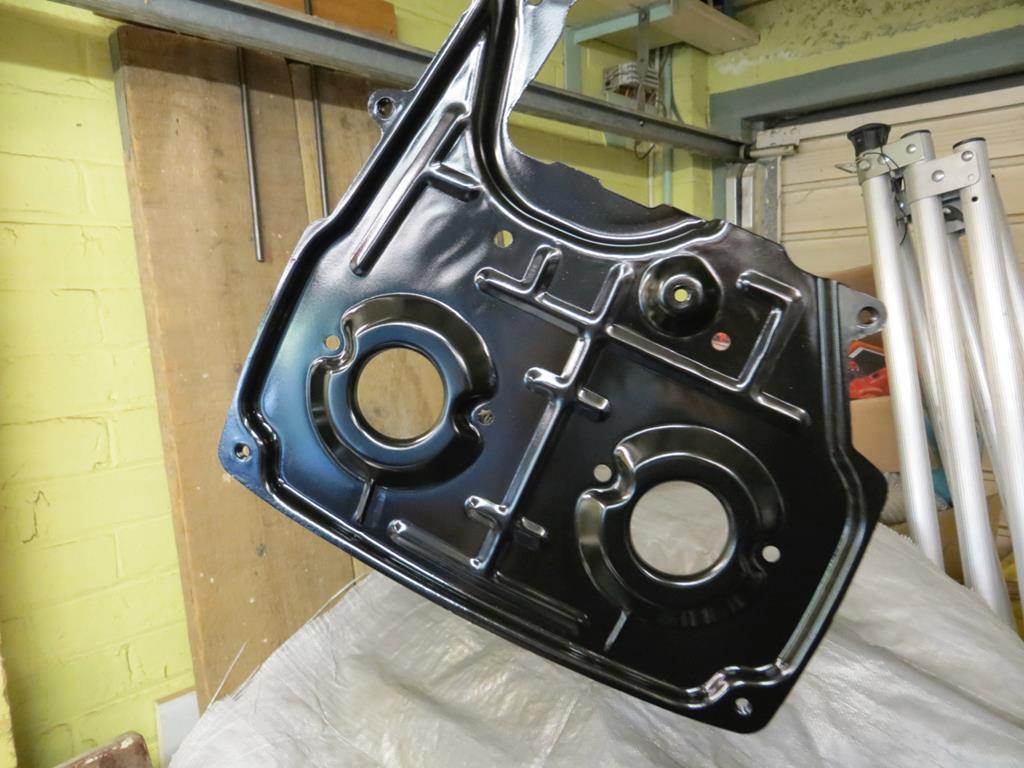 I'm pleased with that. Looks like a bought one. |
| |
Last Edit: Nov 29, 2018 21:48:28 GMT by Sweetpea
|
|
|
|
|
Oct 16, 2014 16:07:02 GMT
|
The story so far… Previous owner has head gasket fail and friends go to tow it home. Friends accidentally rip front off car. James buys wreck of car because he's a complete plank. James spends two years enjoying himself but achieves very little. But I did get a new front end, including rusty bumper, from a nice chap in Orpington. The bumper was going to be my metal bashing and welding practice. And one of the things I did achieve was making a new indicator box. 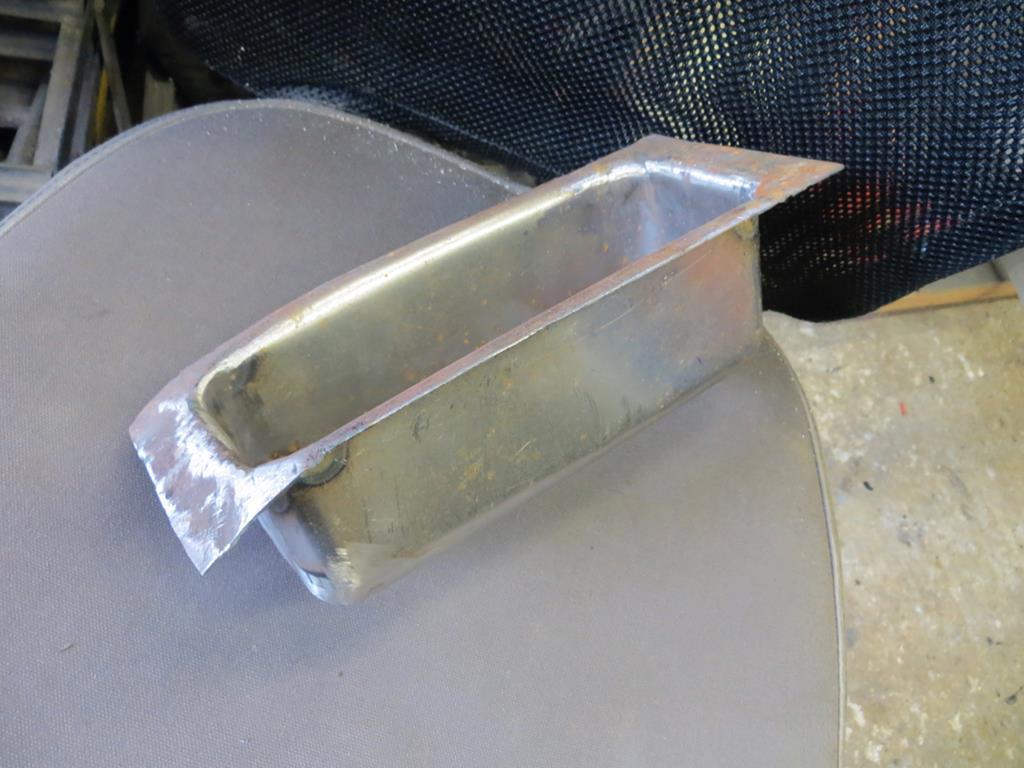 But to be honest I've never been too happy with it. It doesn't really look quite right and it doesn't fit against the back of the bumper properly. Ever wondered why your MR2s valuable front end tries its best to dissolve and turn into this? 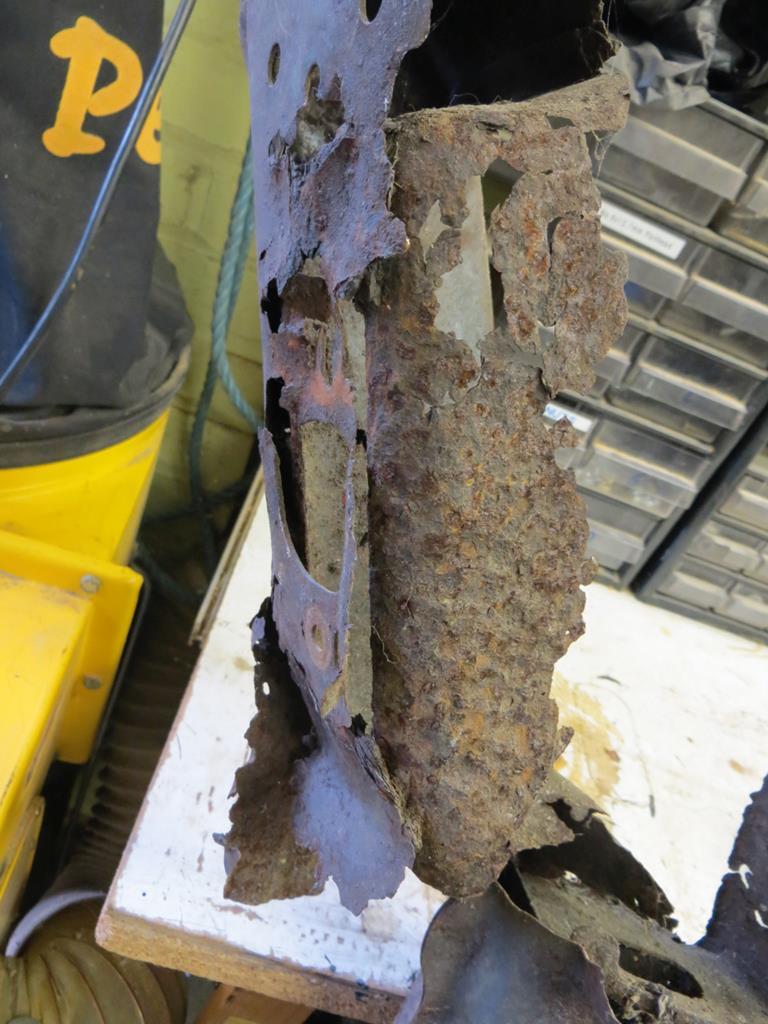 Well I've spent two years thinking about it. Here is the cross section through the bumper where the indicator box is. The Blue bit is the back part, the Red is the front part and the Green is the indicator box. (I've missed the indicator off the drawing.) 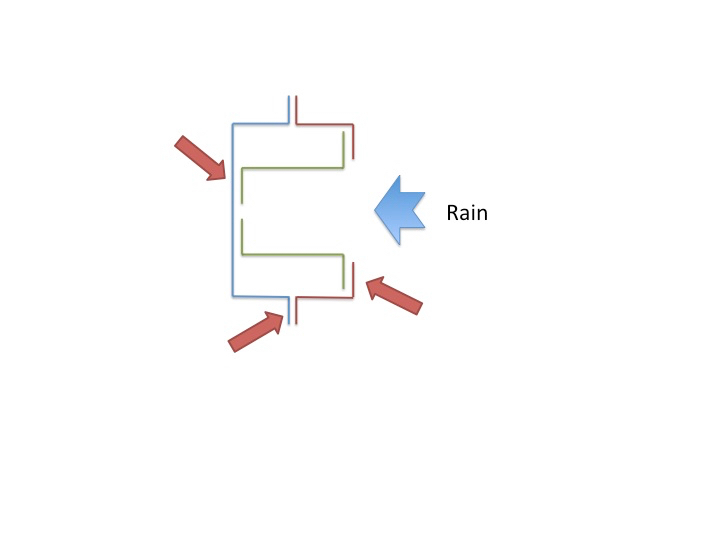 Of course rain is driven past the indicator into the back of the box at 80MPH. Sorry, 70MPH, I'm a good boy really! I've marked three seams that are problematic. The one where the indicator box meets the front isn't too bad but the one where it meets the back fills with water and rots out the back panel and the back of the box. Then, any water that gets through the indicator box winds up sitting in the seam at the bottom and rots the whole of the bottom of the bar away. And it's all inside so you can't get seam sealer into it. To be fair Toyota designed it to last 10 years and it more or less did. To sort the bottom seam out you'd have to cut it out and weld in a flat panel with drain holes. Not doing that today! But I can do something about the back of the box. I can butt the box against the back panel and run a weld round the join. No double thickness of metal to fill with water. Less rust. Just means remaking the indicator boxes but I'd only done one and I don't like it… Off we go again then. Cut a bit of metal and clamp it in the 'TonyBMW' bender with a piece of pipe. 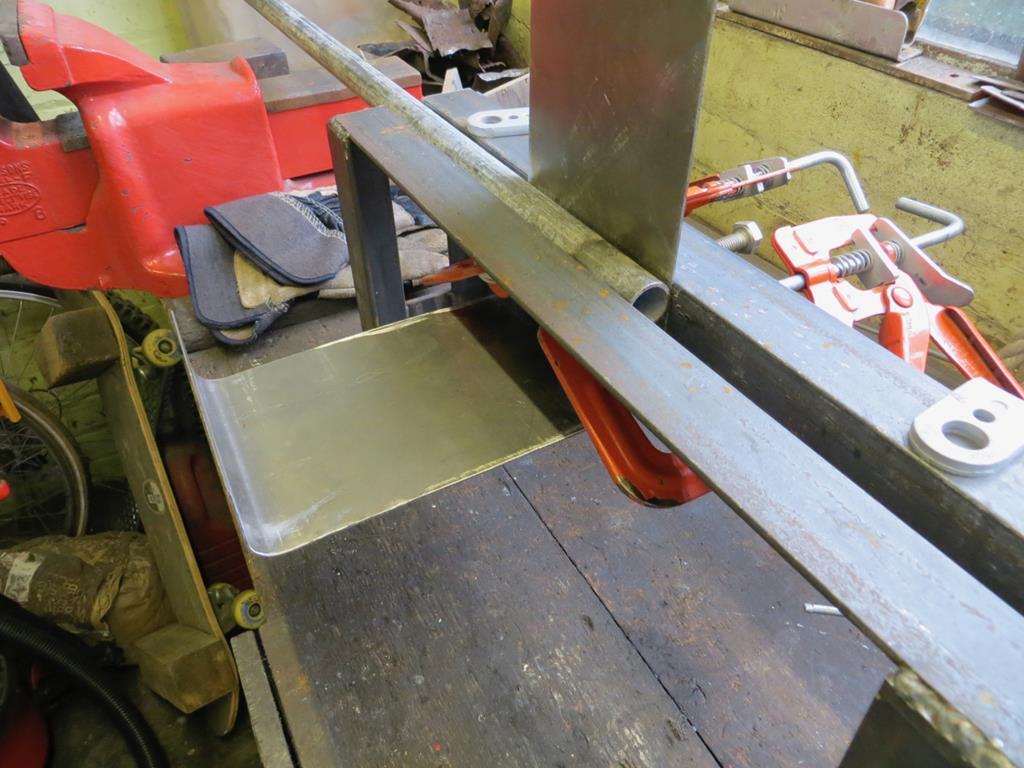 Pull it round the pipe to get a nice curve in the corner. Repeat until you get four sides. 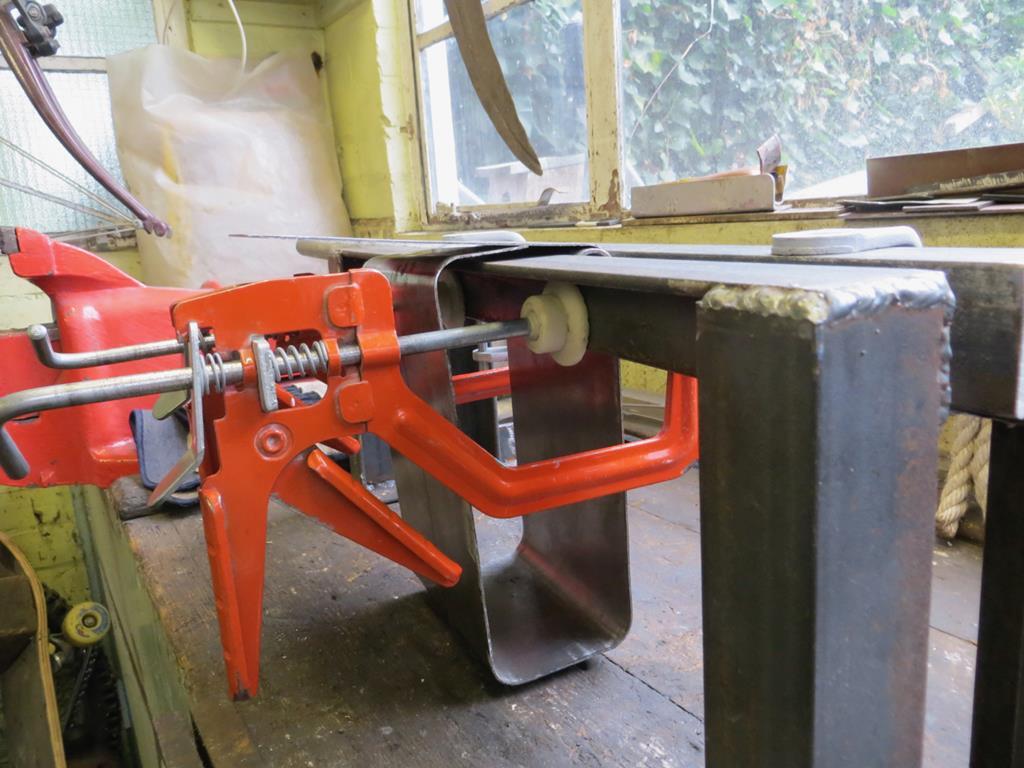 Then weld the ends together. 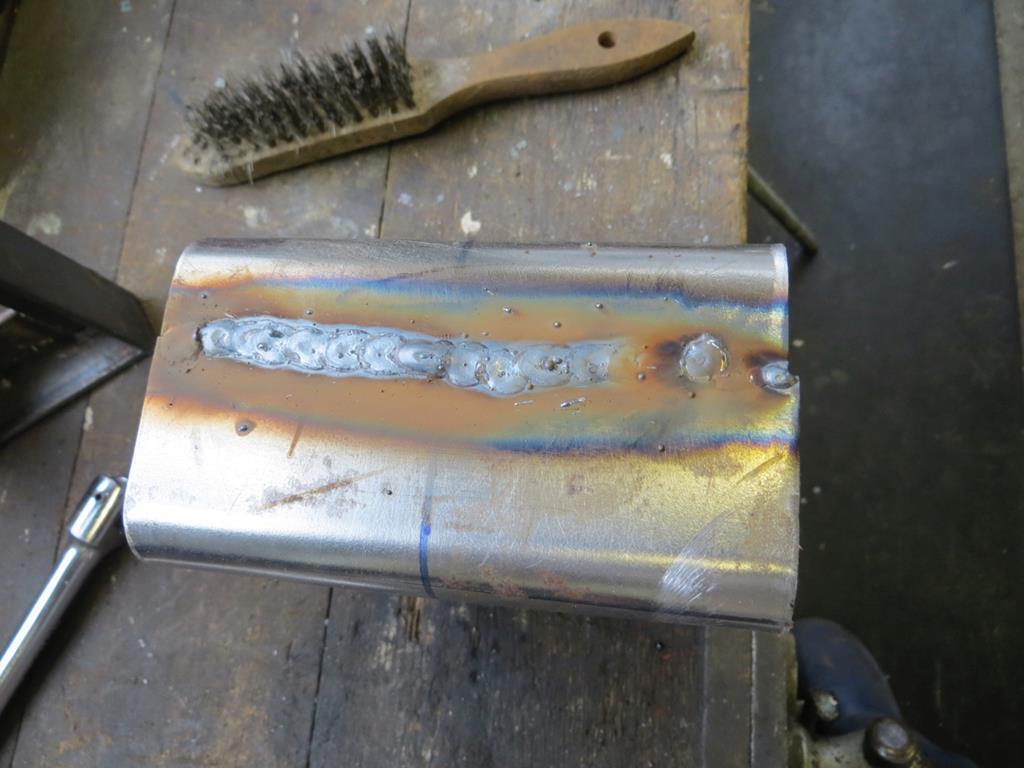 Quite unexpectedly I've suddenly found I can weld. I don't know how but I've suddenly got penetration without blowing holes in everything. Look, this is the inside… 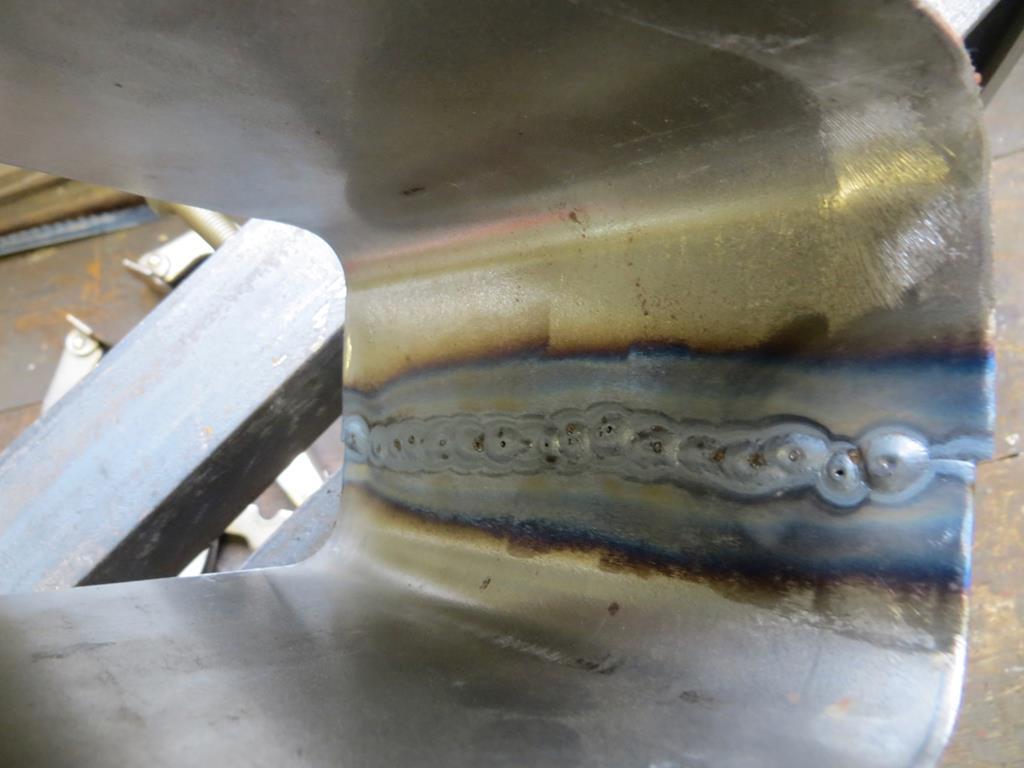 So I folded up another box for the other side and started welding the seam when the wire feed jammed. Must have got splatter in the torch again. I took the shroud off and the wire is free. Oh… The problem must be with the wire feed motor then, although I can hear it turning… Open the door of the welder. 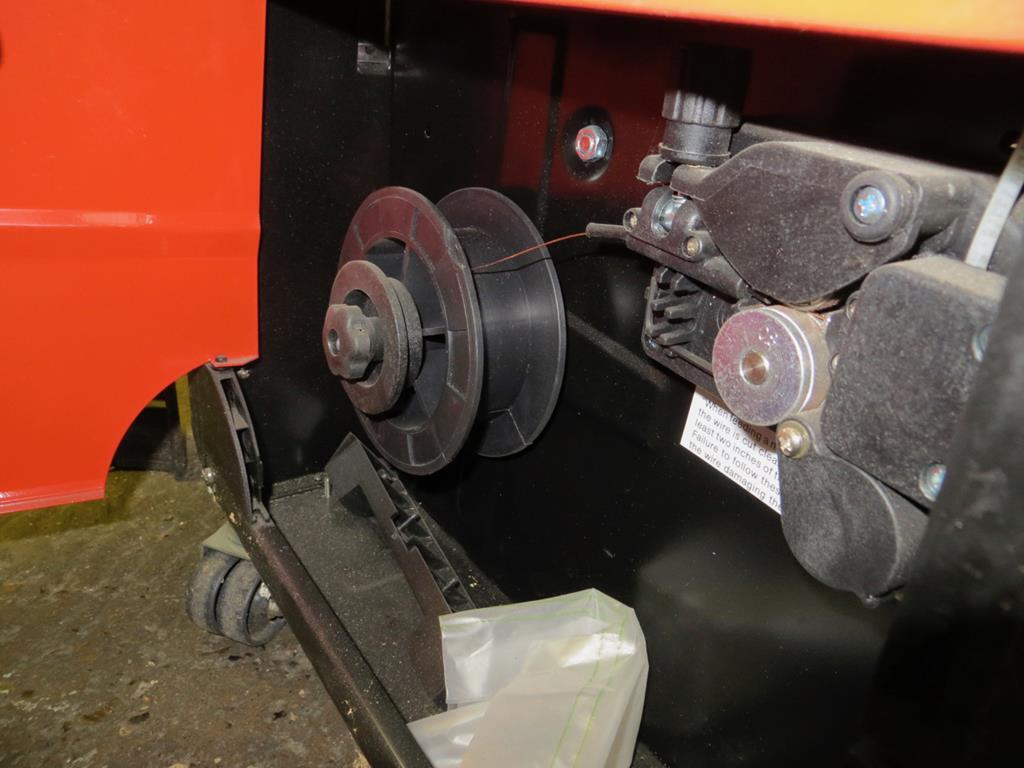 Out of wire. Damn it Janet! |
| |
Last Edit: Nov 29, 2018 22:13:38 GMT by Sweetpea
|
|
|
|
|
Oct 16, 2014 20:36:00 GMT
|
Lovely to see this back at the top of my bookmarks and great work as ever. Generally she's either eating, sleeping, or pooing shopping Are you sure she's not a Filipina? They're not very helpful working on cars either. |
| |
|
|
|
|
|
Oct 27, 2014 22:25:28 GMT
|
Hello, Dr Dolittle here (hold that thought, it'll become clear shortly). I was talking to Portia - Official Project Support Cat (now you've got it!) - about running out of welding wire. 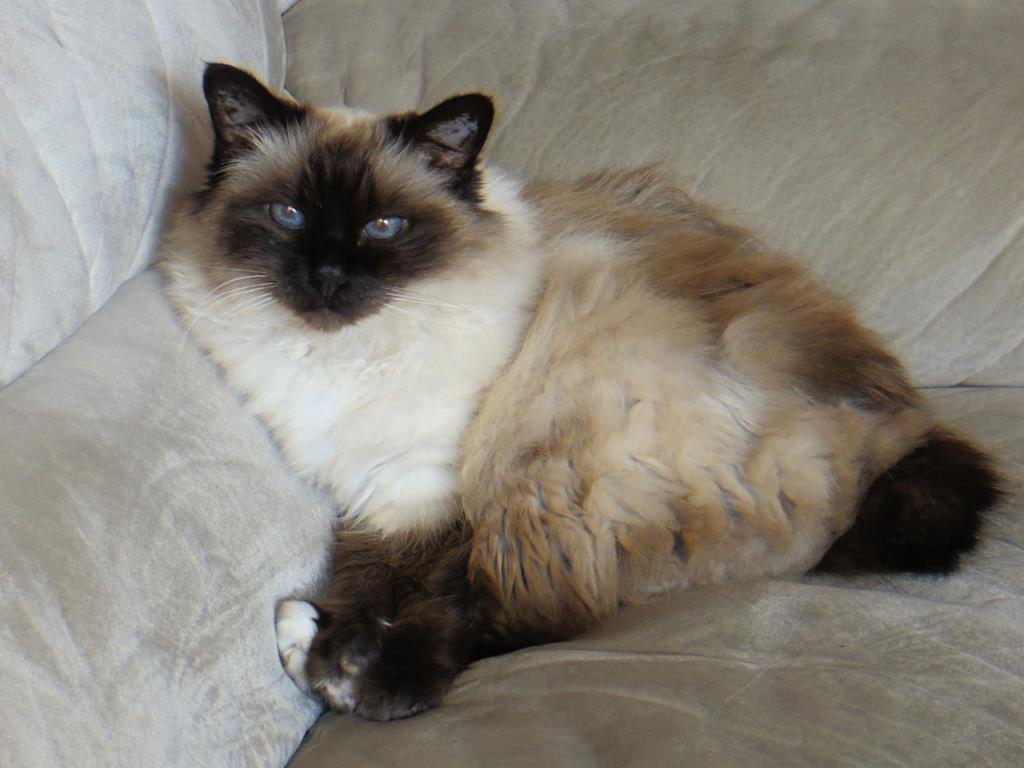 She commented - "Meow meow meow, meow meow Halfords meow!" which translates as "Keep an eye on your gas levels too, or you'll be going to Halfords again!" Wise words there, I'm sure you'll agree. GeorgeB, Portia is just settling into the new role. I'm sure she'll be helpful soon enough! Hang on, you weren't thinking "Dolittle" as in "not done very much" were you? Cheeky git! Accurate though. So, wire restocked, I made a second box for the other side. 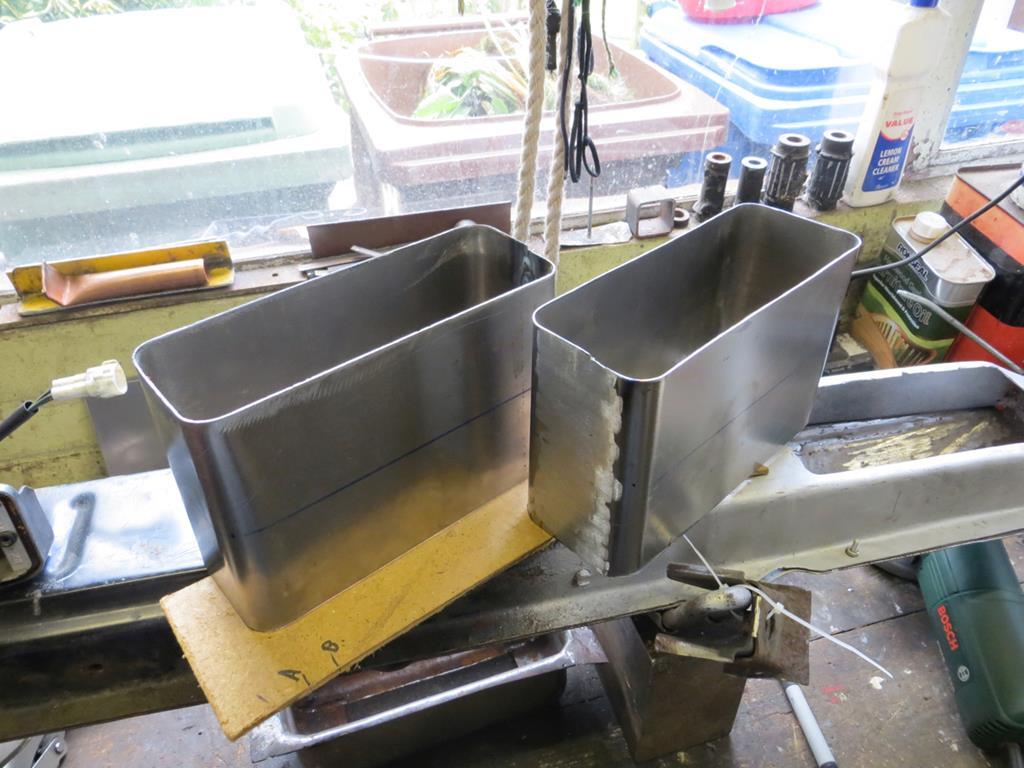 And shaped the bottom as best I could so it sat against the back of the bumper. 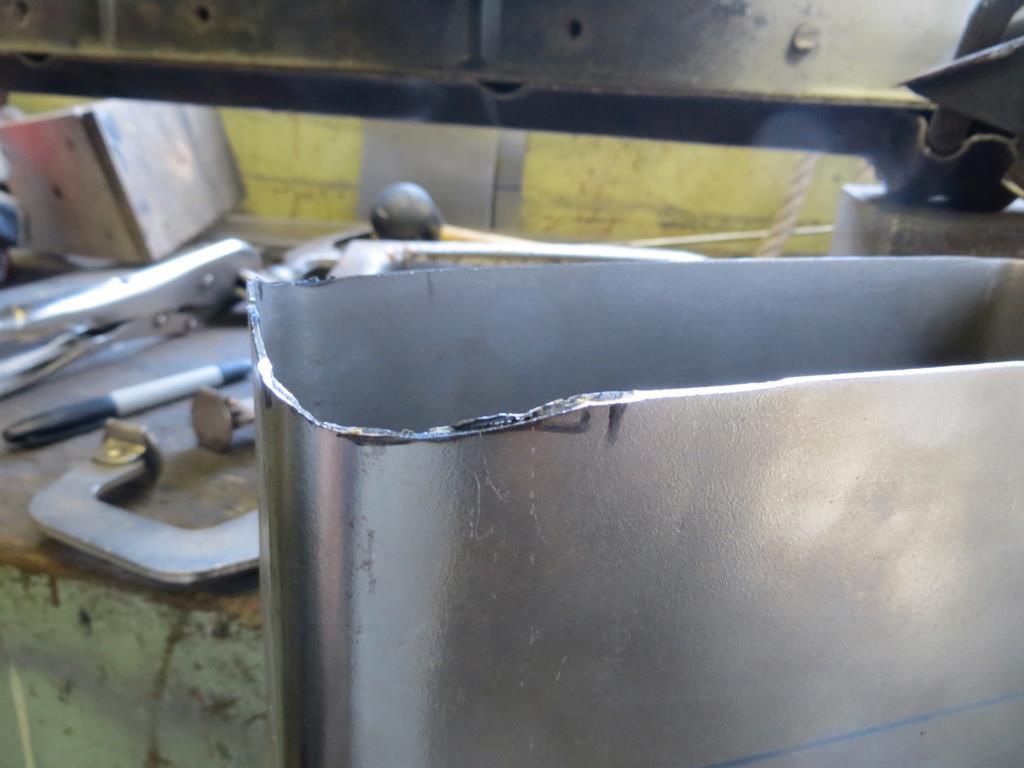 So hopefully it'll be close enough to run a weld round the bottom. 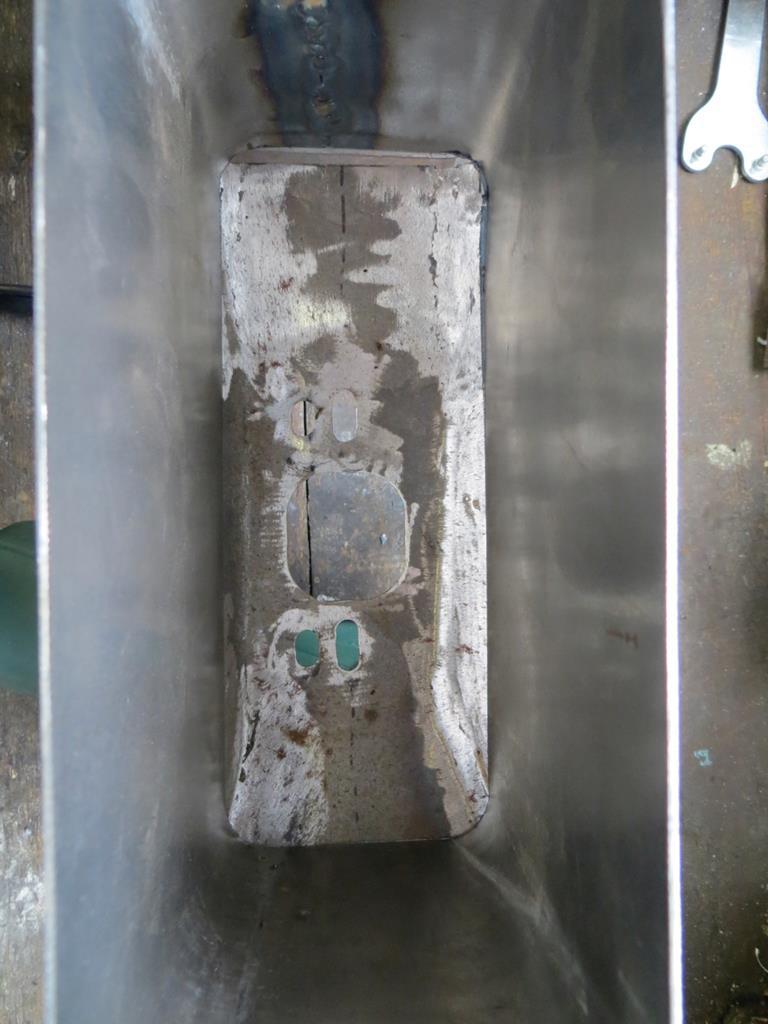 Next is to fold the top down. The flaps will eventually sit under the the bumper surface not on top of it. 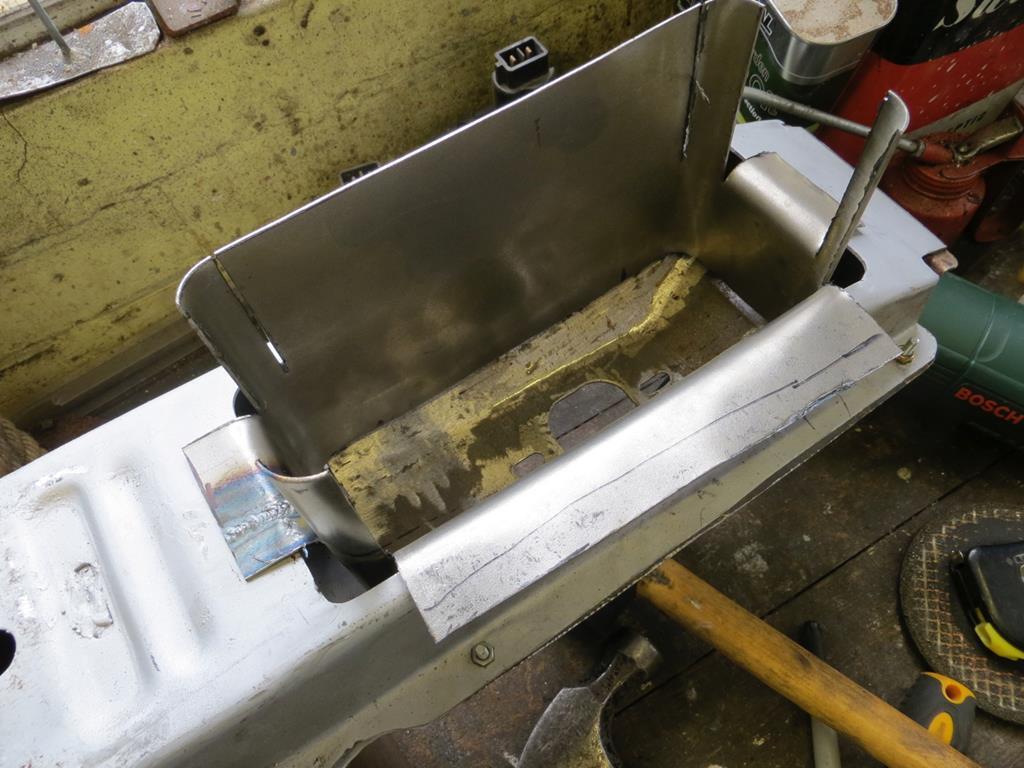 Last time I folded the corners down too and welded in the gaps… 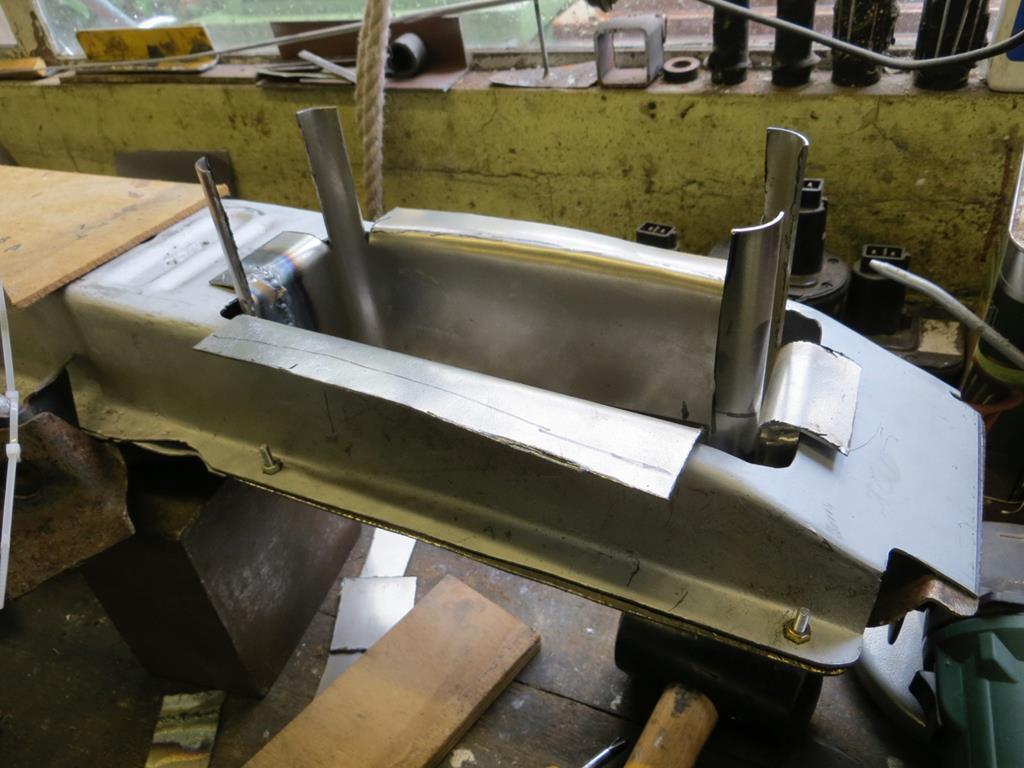 …But this time I had a new idea. Ignore the sticky up bit and weld a complete corner in. 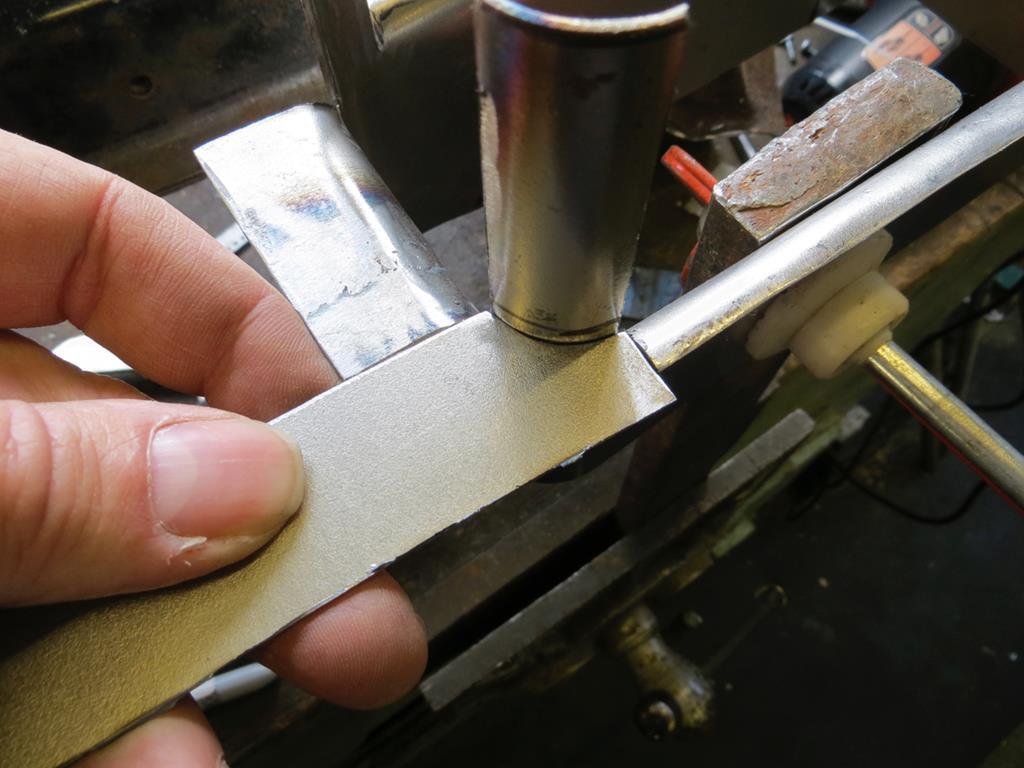 But weld it in on the back side with large bead. 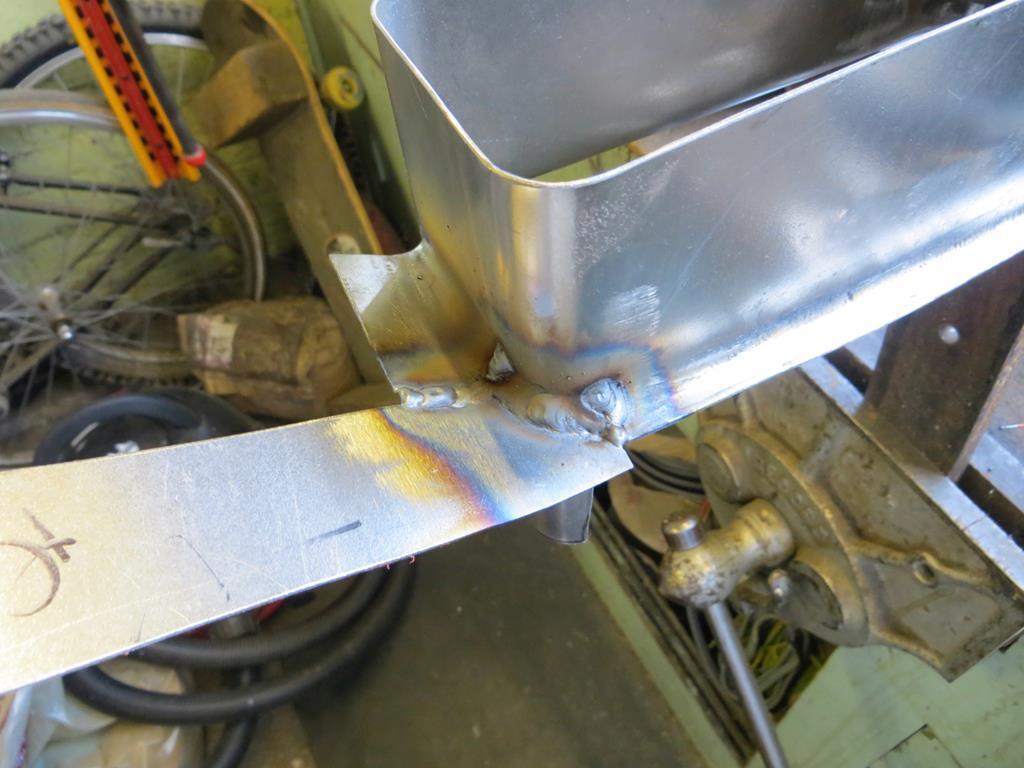 Lastly grind the front side to the correct shape, cutting into the weld. 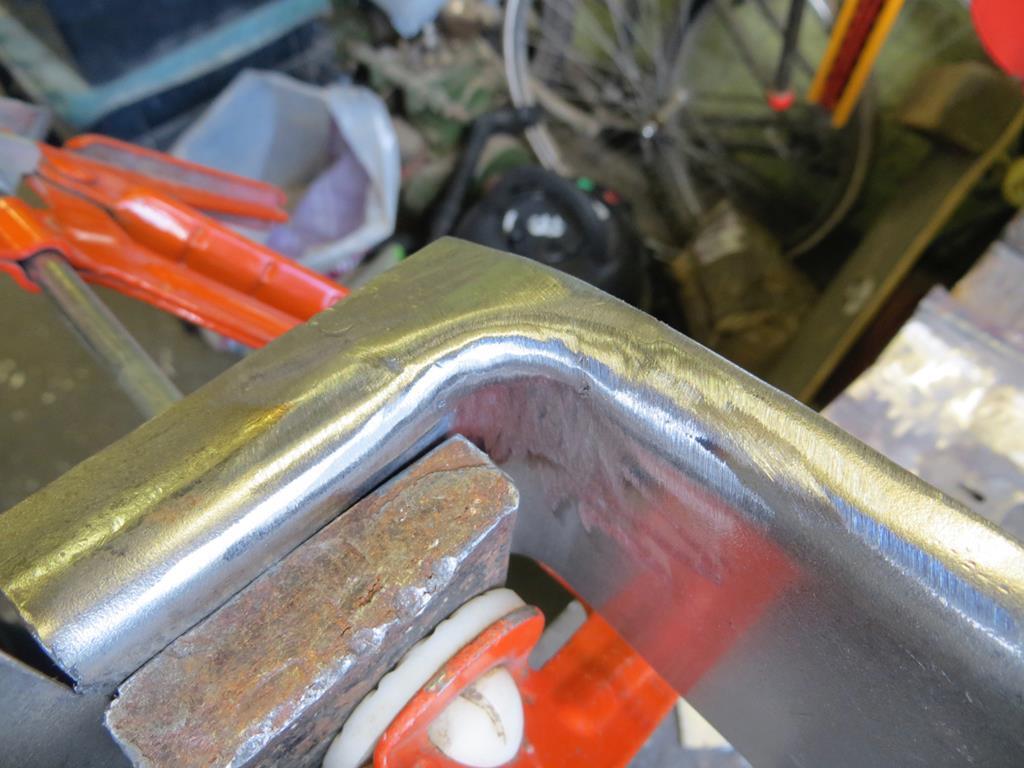 How's that look? 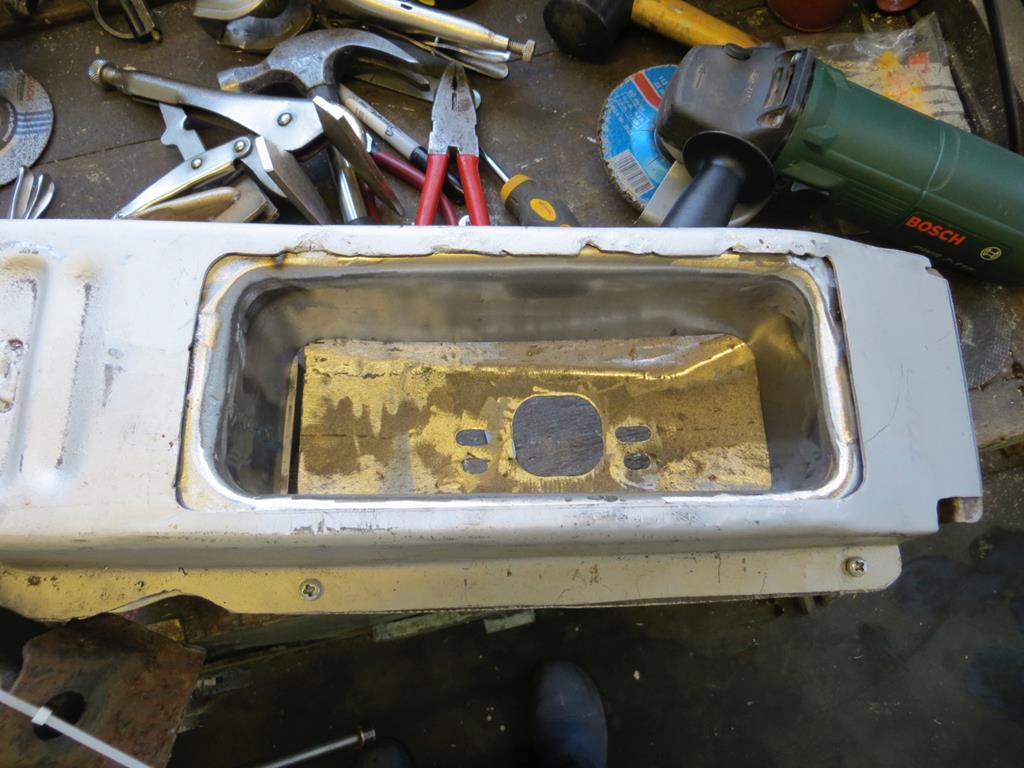 So now I have enough bits to make a complete bumper! 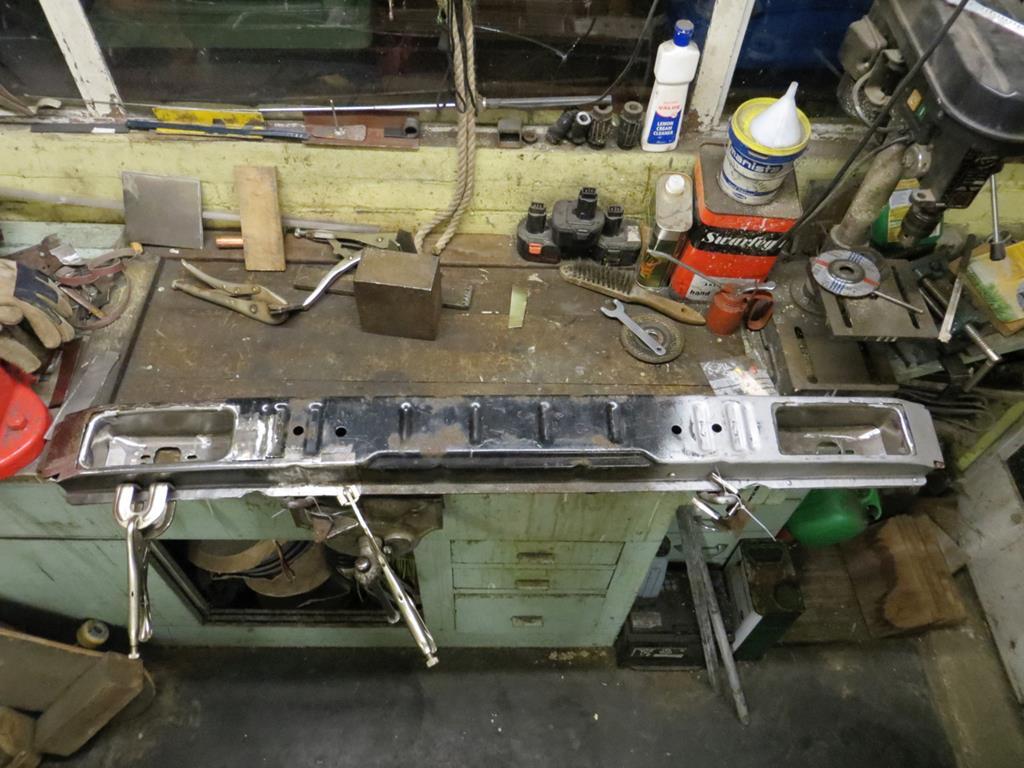 Good heavens!!! Who'd have thought it!? It just needs welding together. Only one thing a sensible person would do now… Weld it together… I on the other hand am going to cut it apart. Really! James |
| |
Last Edit: Nov 29, 2018 22:33:57 GMT by Sweetpea
|
|
|
|
|
|
|
When I said I was going to cut it apart… Out with the spot weld cutter. 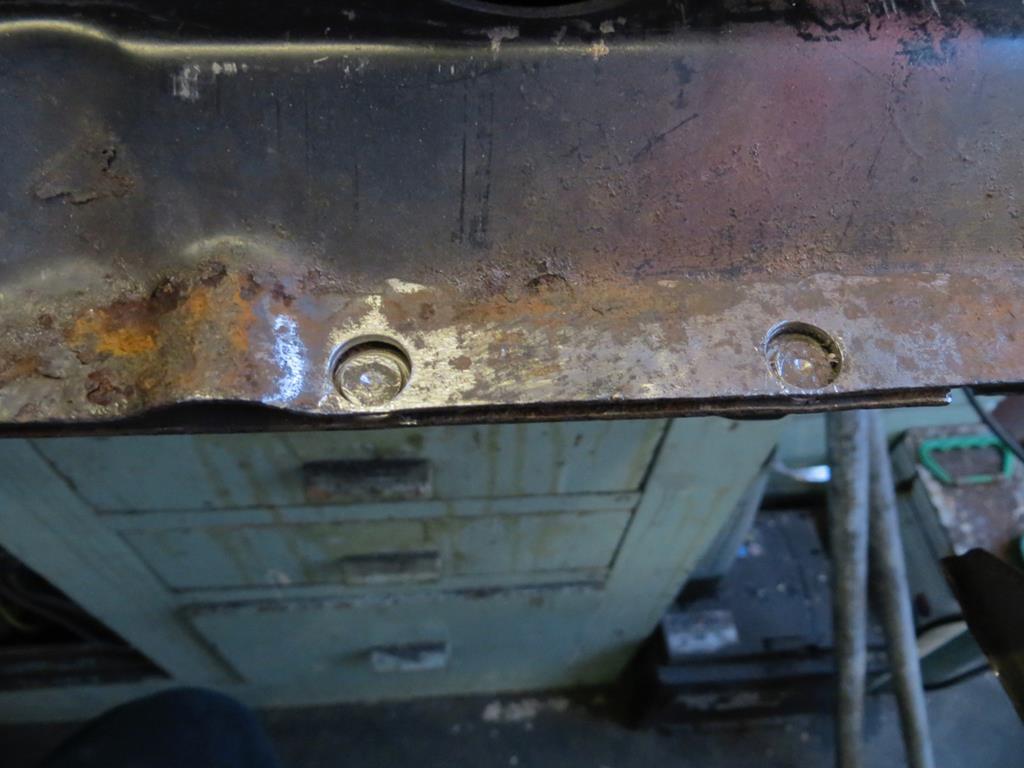 Haa ha ha ha ha…. (That should be that sort of evil laugh that Vincent Price does on the end of Thriller.) Anyway, before I get too carried away I should tag the end on. 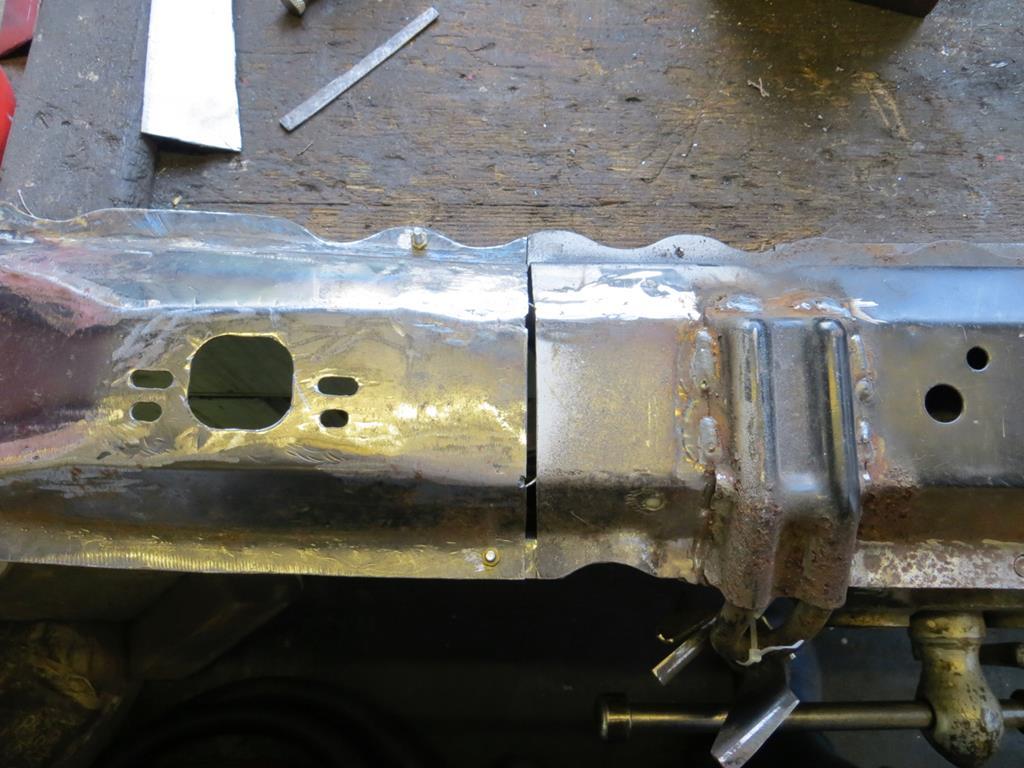 As if by magic, the shopkeeper appeared, brandishing a welder… Ok, so who's going to admit to watching Mr Benn then? 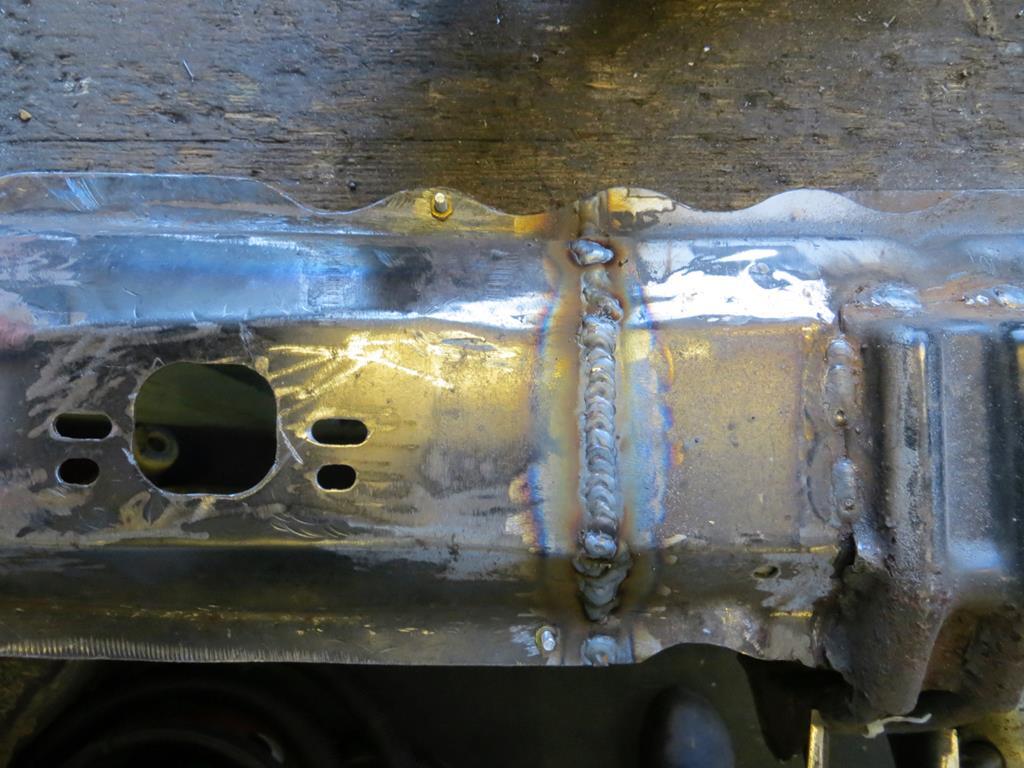 Right, back to business… 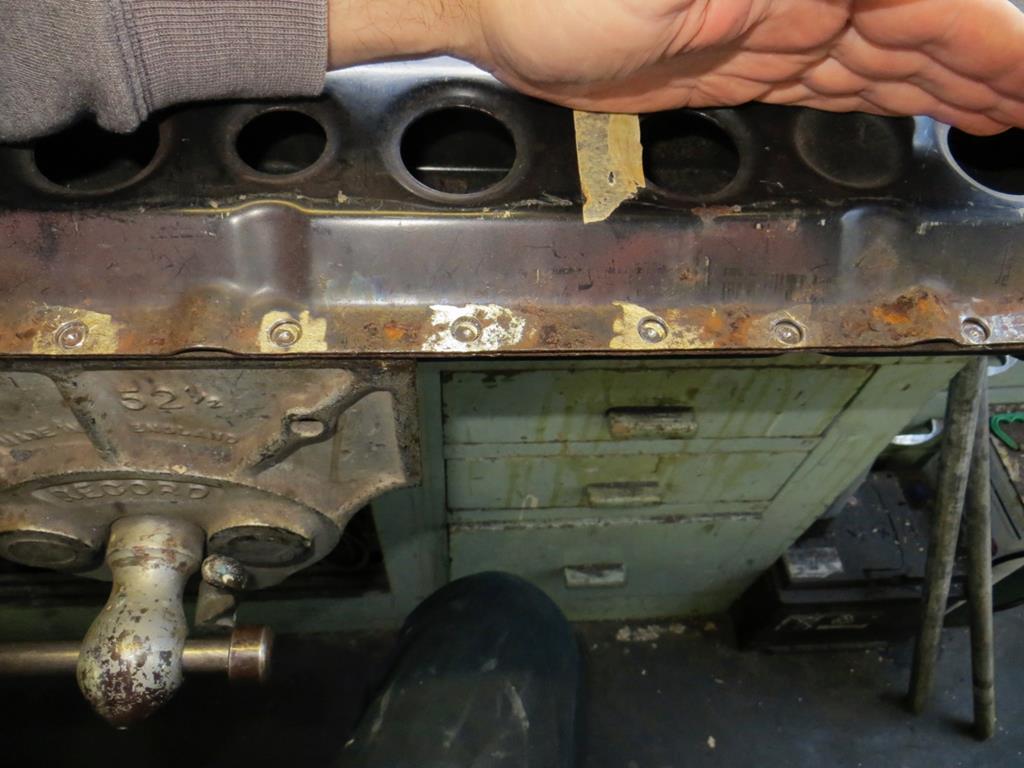 Dink! 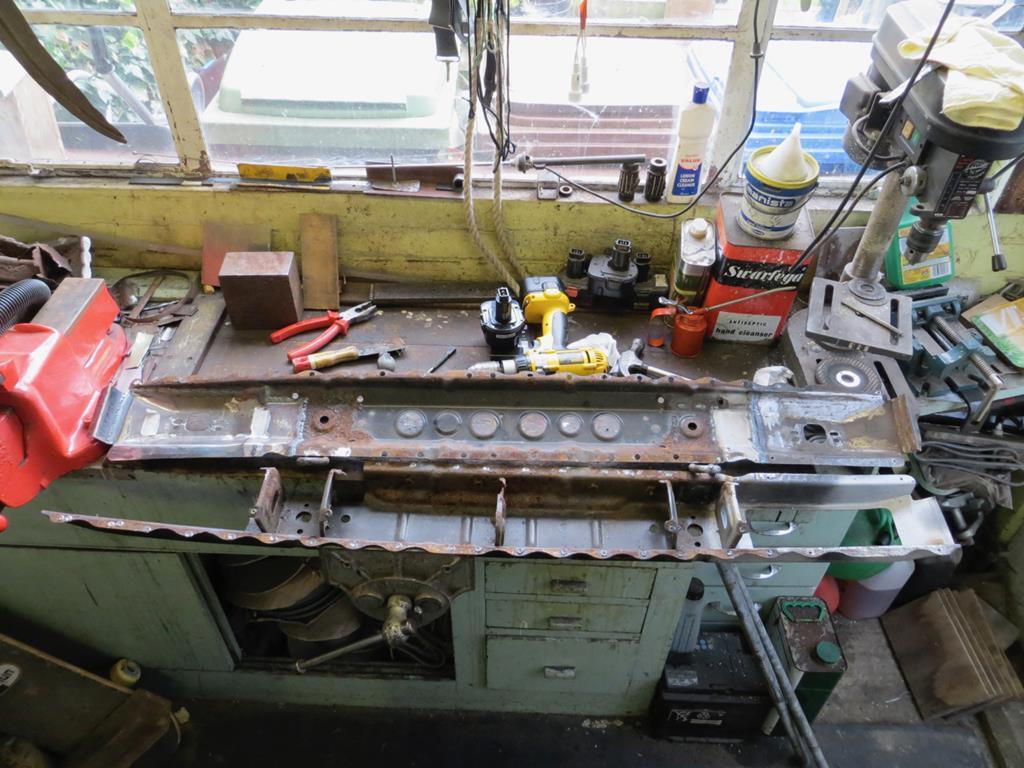 Ooooh Marton! Sorry, I seem to have come over all Kenneth Williams there. (Make your own jokes up there…) First of all you can see how the indicator bucket now butts up against the back panel. Hopefully it's close enough to seem weld. 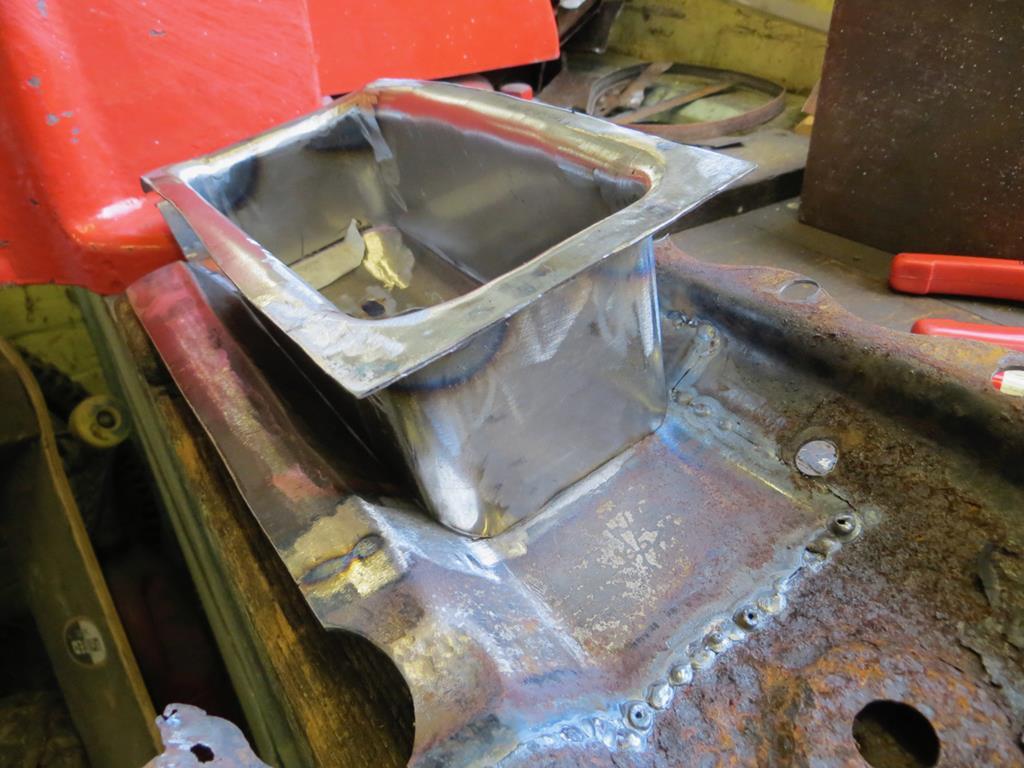 Anyway, what exactly was the point of cutting it open? Well I'm going to replace the captive nuts with stainless steel ones. 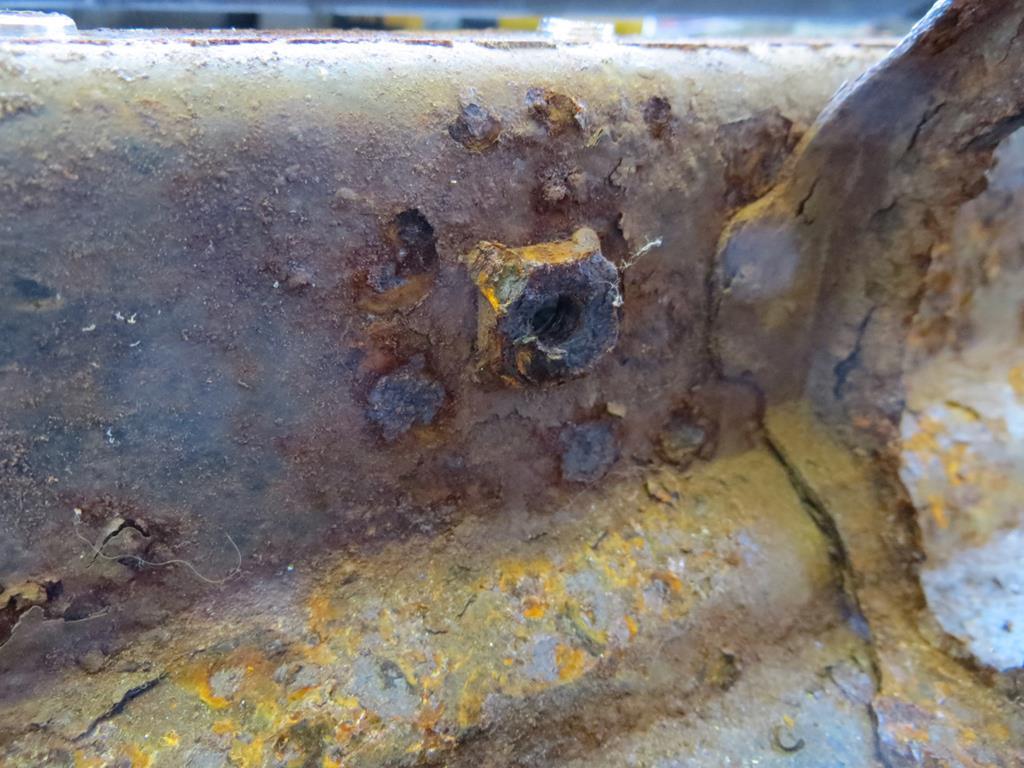 And I knew the centre brace had rotted out and needed replacing. 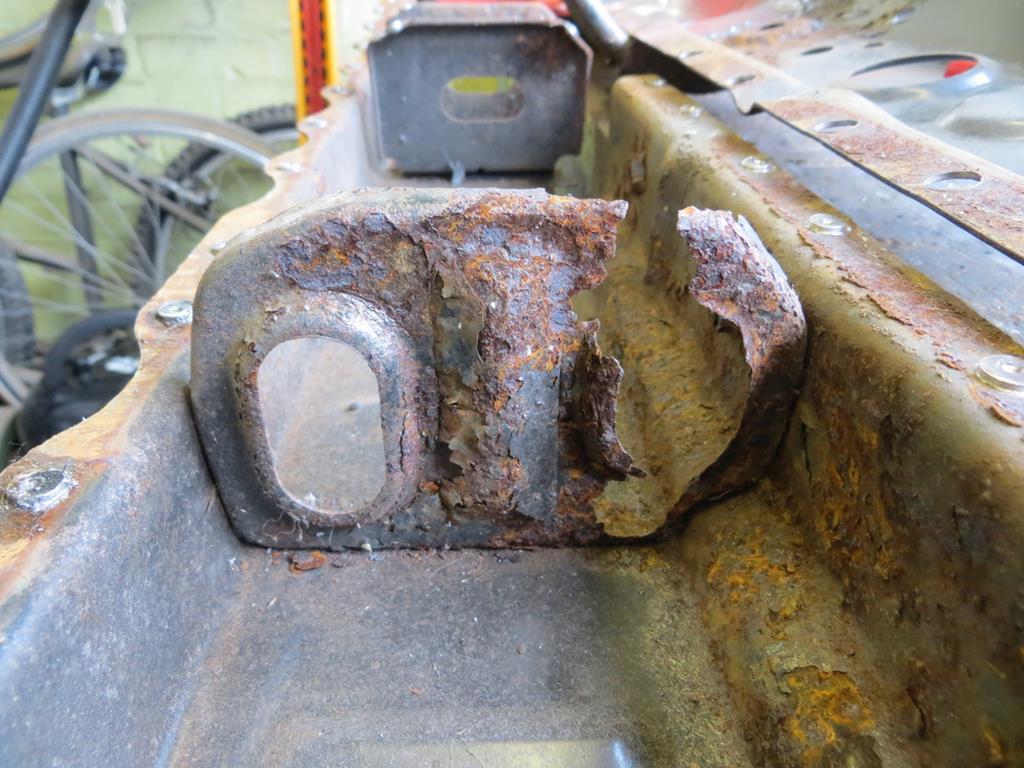 And, lastly, I wanted to sort out any shonky welding and sort out any rust. 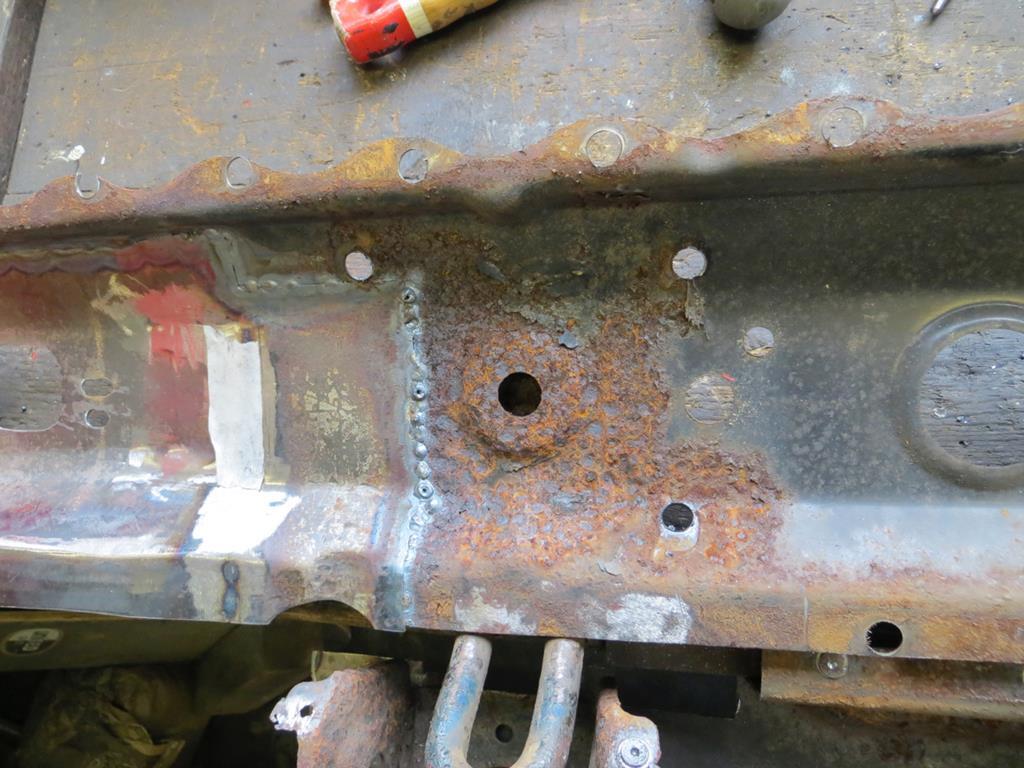 This bit of pitted metal is just going to get cleaned up and painted. It's got the tie down loop on the back and I've already tried to remove one of these. It was well fixed so I left it. 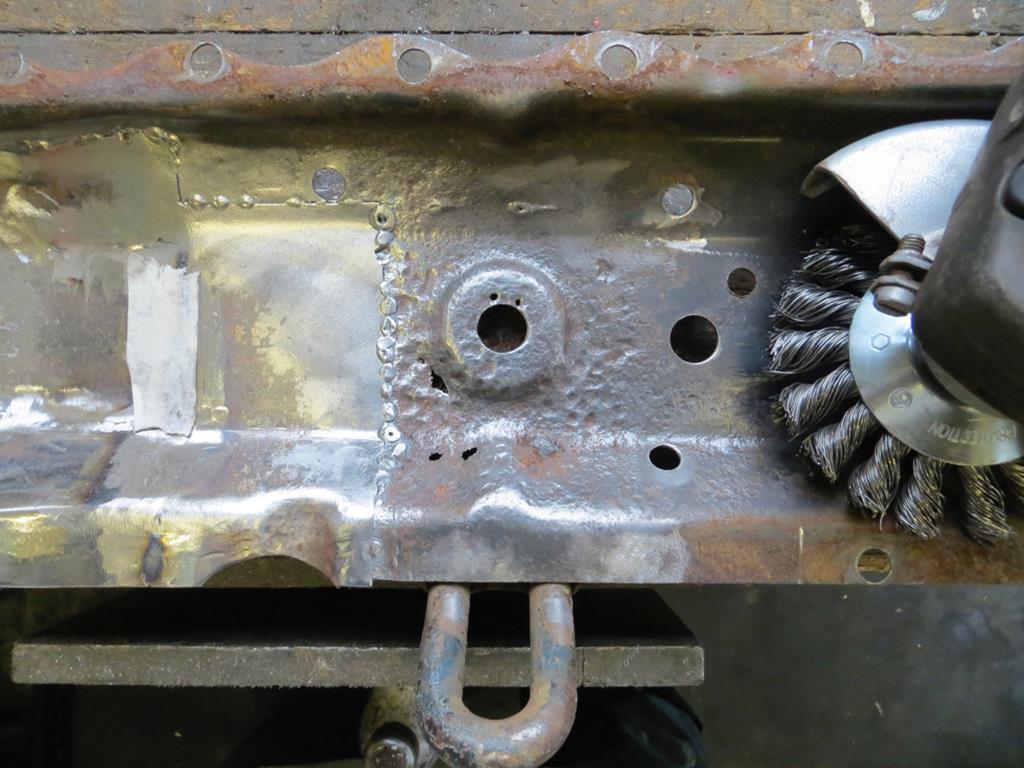 Oh… It's turned into lace... That's going to take quite a lot of paint… James |
| |
Last Edit: Nov 29, 2018 22:48:29 GMT by Sweetpea
|
|
|
|
|
Nov 20, 2014 21:27:49 GMT
|
Portia - Official Project Support Cat - has suggested that I should continue my restoration using the practices and philosophies of the ancient and spiritual Japanese art of ikebana. So lets see how we get on with that… At the end of the last episode we had something that looked more like a paper doily then a bumper. 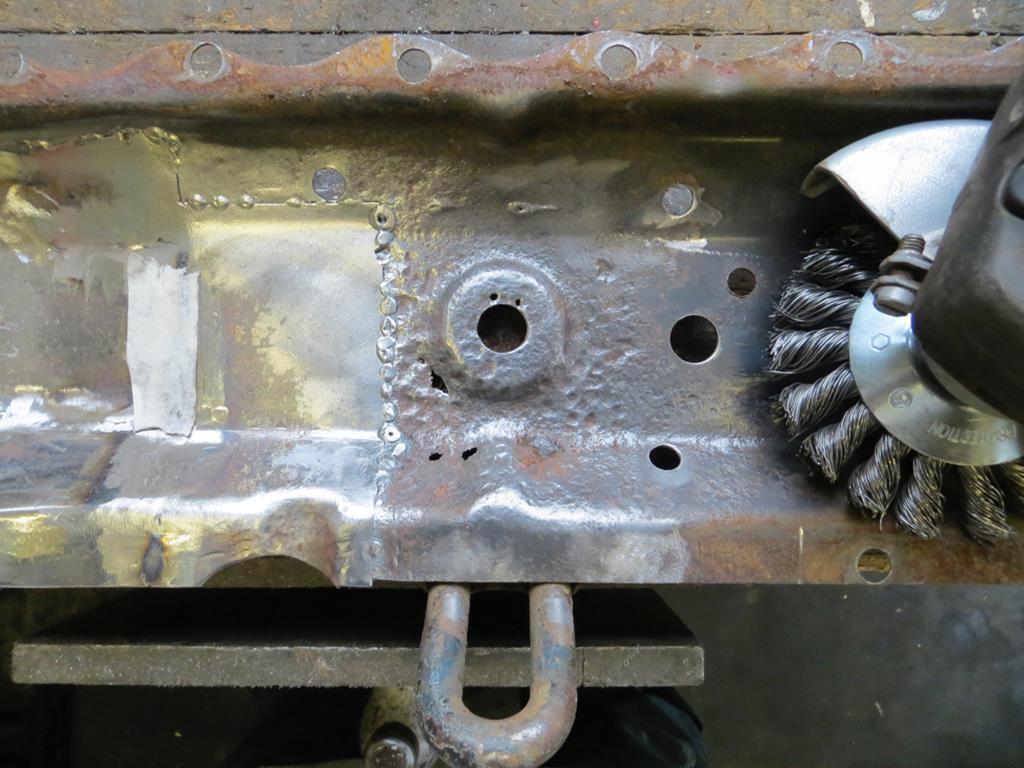 And, clearly, it's a bit beyond painting. So I find myself needing a new bit. The question is - how do you make the round divot with the hole in the middle? I thought I'd try mindless violence. Collect some weapons. 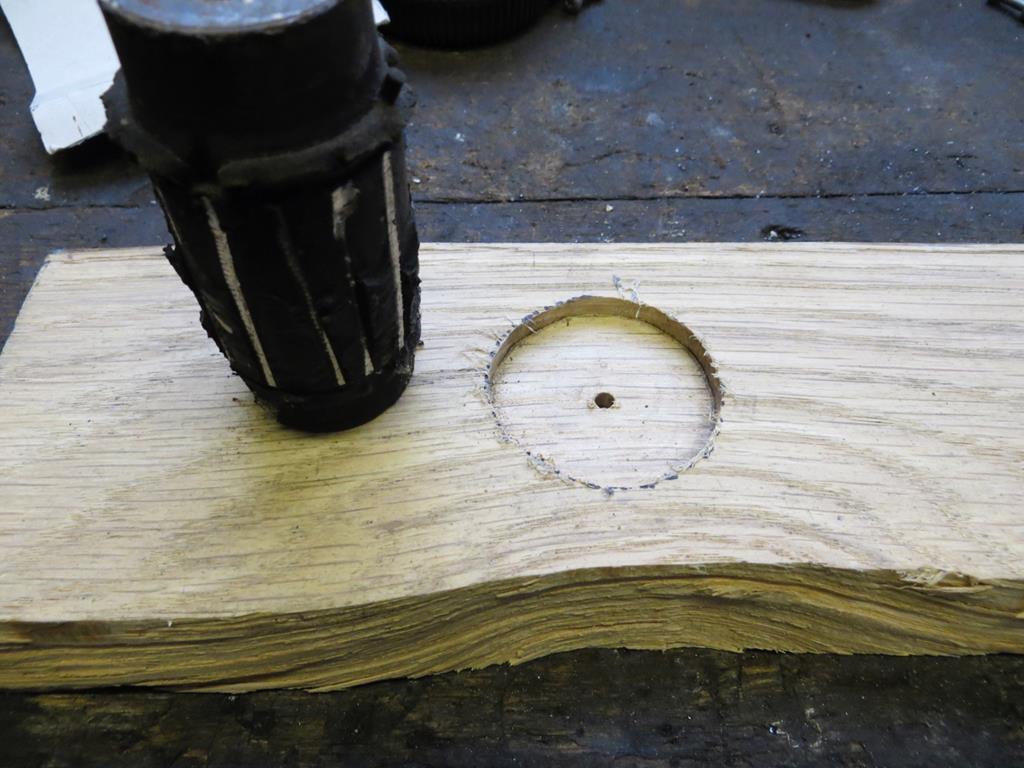 A bit of oak which I cut a circle into with the router and the big black thing is actually part of an old suspension bush. (Never throw anything out!) My bit of metal goes between the two and the whole lot gets a good clattering with a hammer. 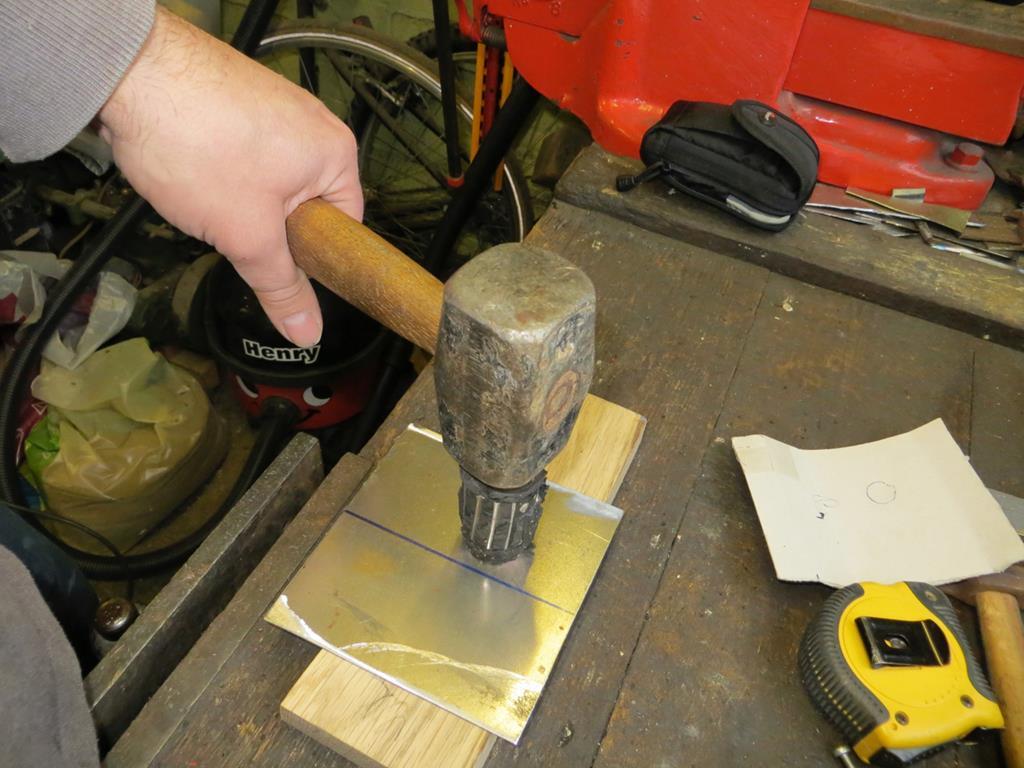 The result is quite pleasing. Not quite as defined as the original but fine considering it'll never be seen. 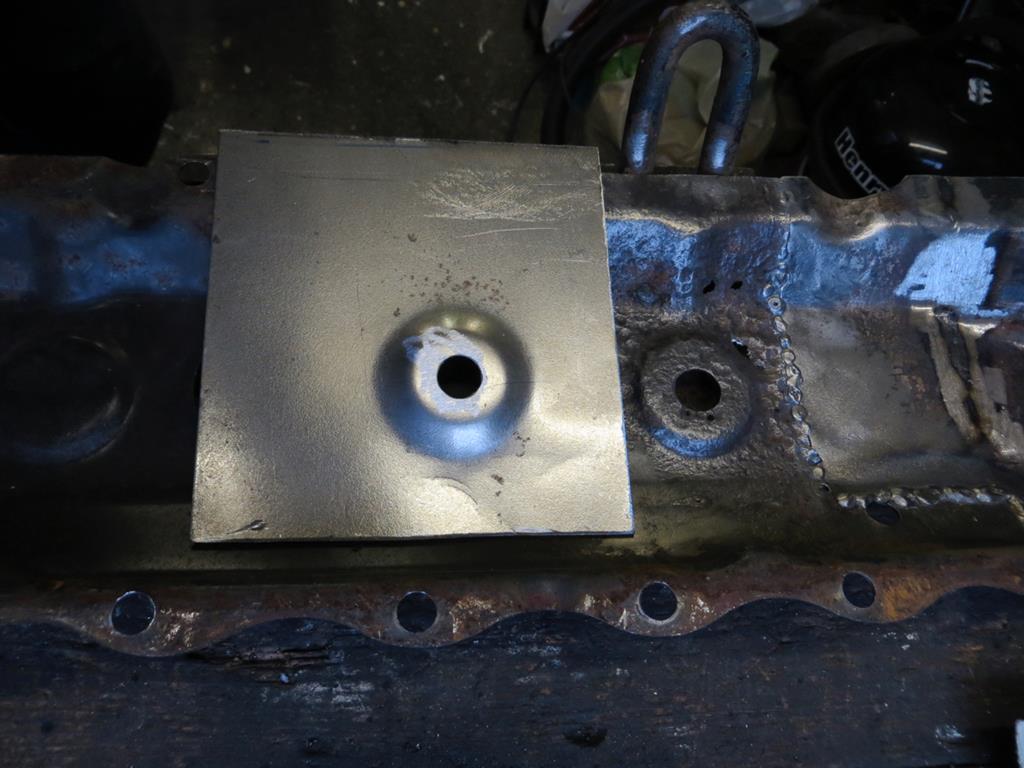 Out with the old. 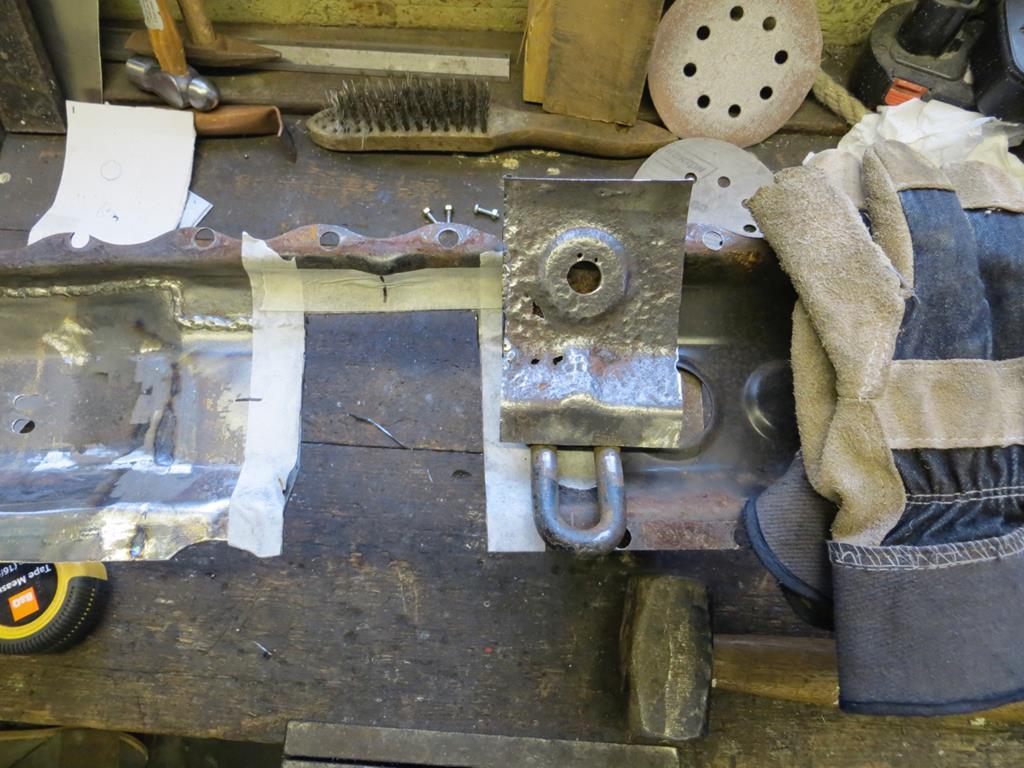 Now I need to recover the tie down from this. I've already tried to cut the loop off the bumper and failed but now I can use another approach. Grind the remains of the bumper off the loop. 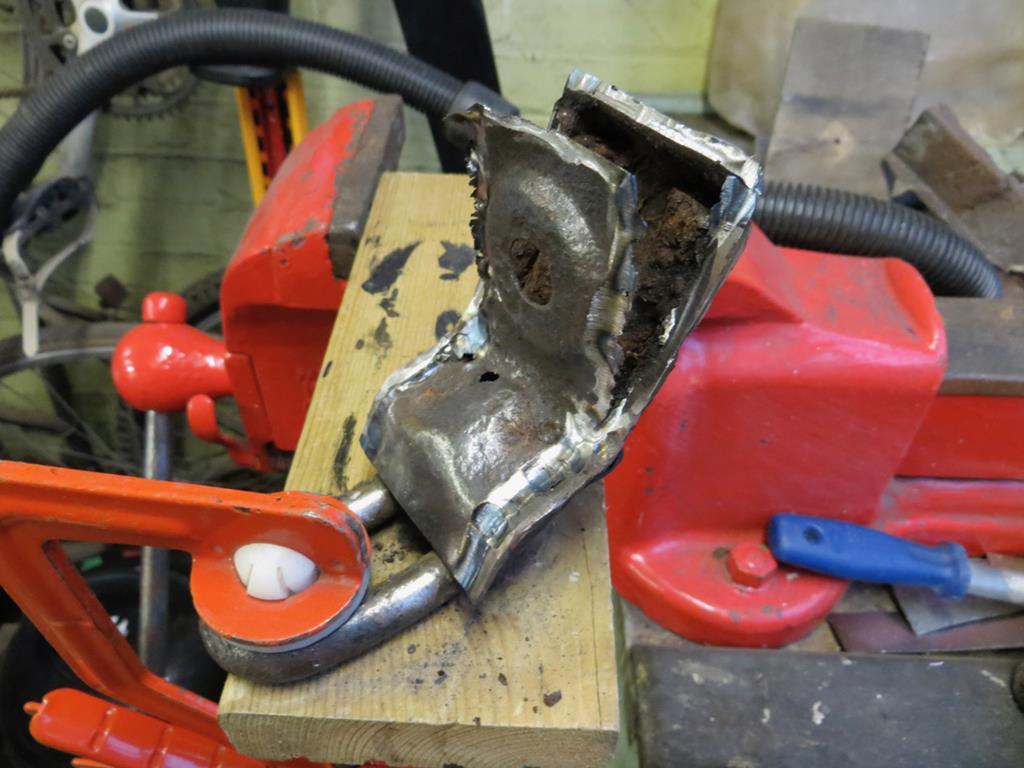 Ta da! Guess that bit wasn't well painted. 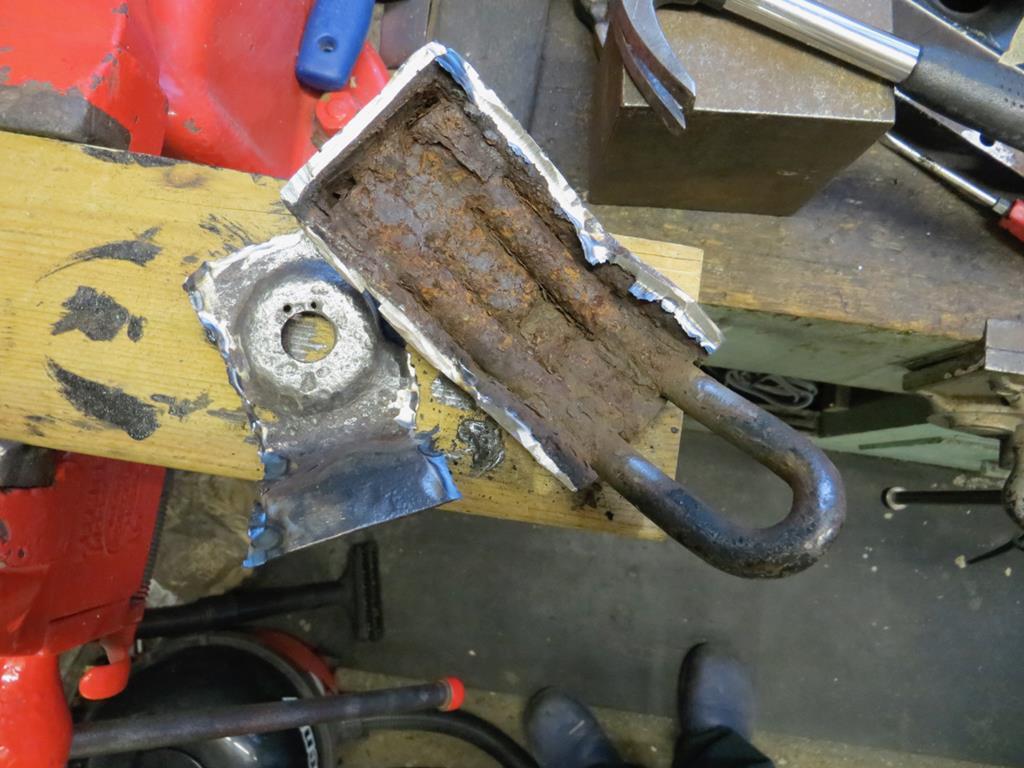 It'll probably get a trip through the electrolytic de-ruster. The new bit gets cut and shaped... 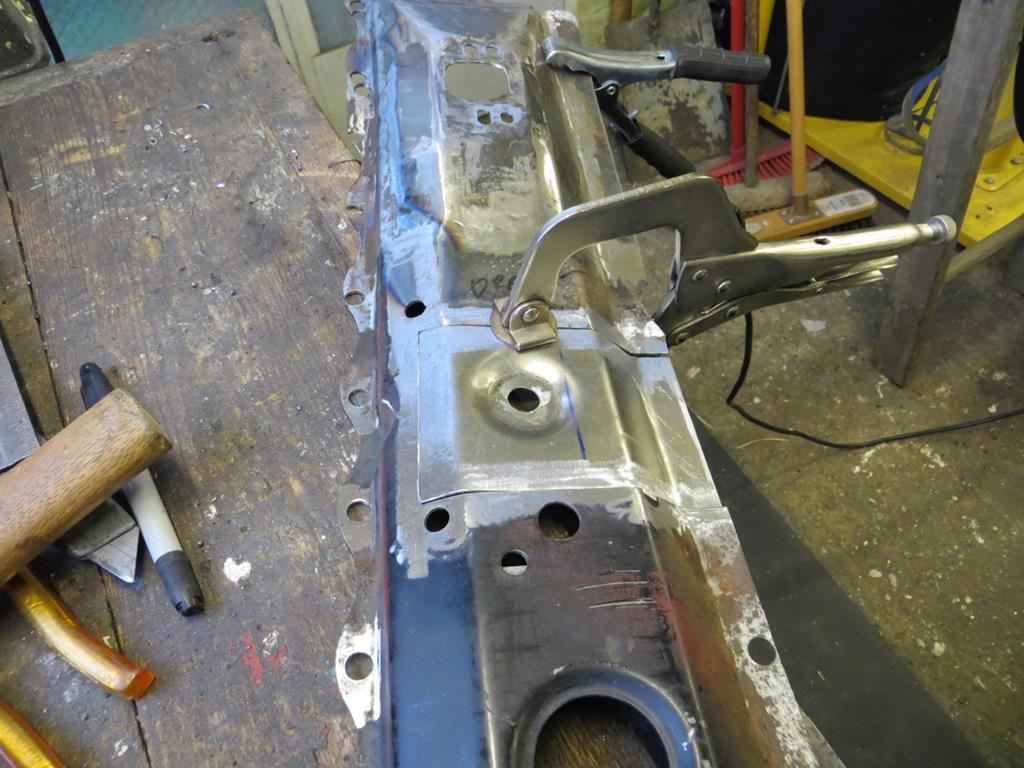 …Welded and dressed. 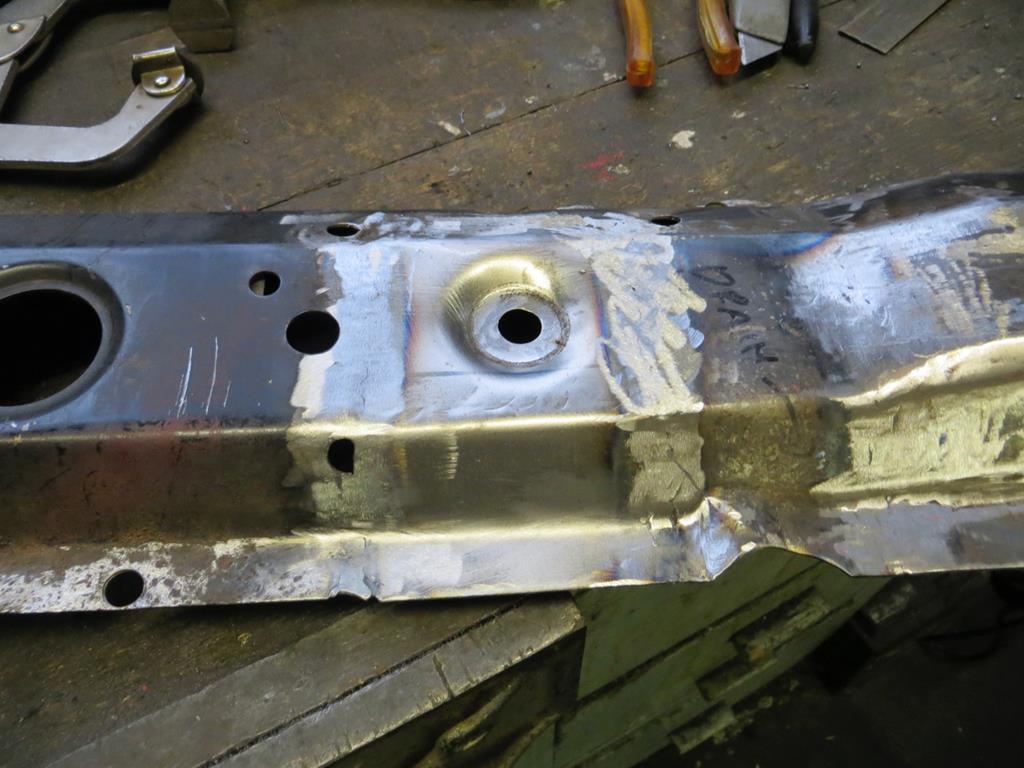 I'm proud of that. 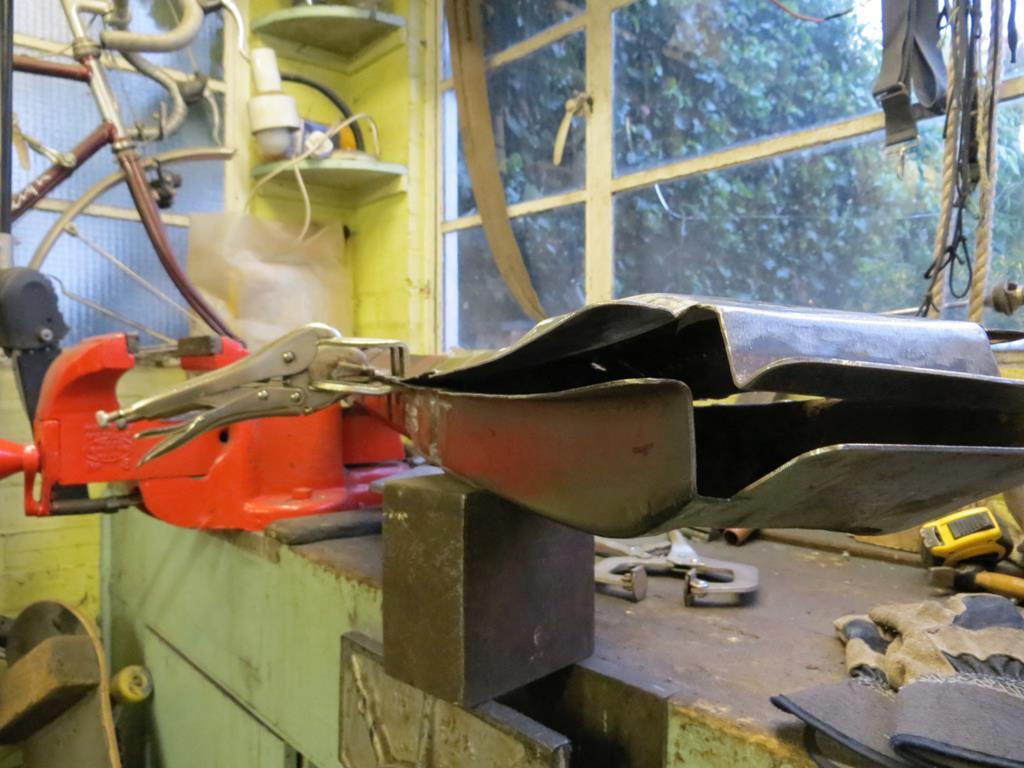 Oh! On the other hand maybe I'm not so proud… Hmmm. That didn't go too well. James PS You'll be wondering how my work fairs against the ancient Japanese teachings of ikebana… Well ikebana turns out to be, er, well, flower arranging. My cat seems to have a sense of humour. |
| |
Last Edit: Nov 29, 2018 23:01:54 GMT by Sweetpea
|
|
jules
Part of things
 
Posts: 75
|
|
Nov 20, 2014 23:22:16 GMT
|
|
Nice bumper repairs. You can see why they like to rust !
|
| |
|
|
|
|
|
|
|
PS You'll be wondering how my work fairs against the ancient Japanese teachings of ikebana… Well ikebana turns out to be, er, well, flower arranging. My cat seems to have a sense of humour. There's actually a certain logic to her thinking. Possibly, as the three main points of Ikebana are said to represent heaven, earth and man, it could be said that you've probably sworn to high heaven at the car because, in parts, it is returning to the earth and that one man has to repair it? By the way, nice work on the dimpled doodah with the hole in the middle. |
| |
|
|



 Take yer pick!


