jamesd1972
Club Retro Rides Member
Posts: 2,919  Club RR Member Number: 40
|
|
Oct 18, 2021 21:51:01 GMT
|
|
Time for the BFH ?
I’d lend you ours but it’s currently employed on scabby Land Rover duties…
Nice steady progress of late chap, carry on.
James
(Still the younger).
|
| |
|
|
|
|
|
|
|
Oct 18, 2021 22:27:59 GMT
|
|
I agree with Glen, lose 6mm off the bumper mount.
|
| |
|
|
vulgalour
Club Retro Rides Member
Posts: 7,275
Club RR Member Number: 146
|
|
|
|
|
A 6mm drop side to side is surprisingly easy to end up with, and to adjust out. Doesn't take much for it to add up when you've got so many components making up the bumper. A slot of a hole here, a tweak of a bumper component there, and you may well end up pulling it back visually square.
If it were an old fashioned bumper, you'd deal with it by raising one iron and dropping the other and meeting in the middle as best you could. Perhaps there's a bit of that you can do here? Slotting a hole, adding a washer, hoping tolerances add up and balance out sort of thing.
|
| |
|
|
|
|
|
|
|
|
Is there any adjustment possible in the bumper outer skin?
|
| |
|
|
|
|
|
Oct 19, 2021 21:06:54 GMT
|
Right, well... Here's an old picture... 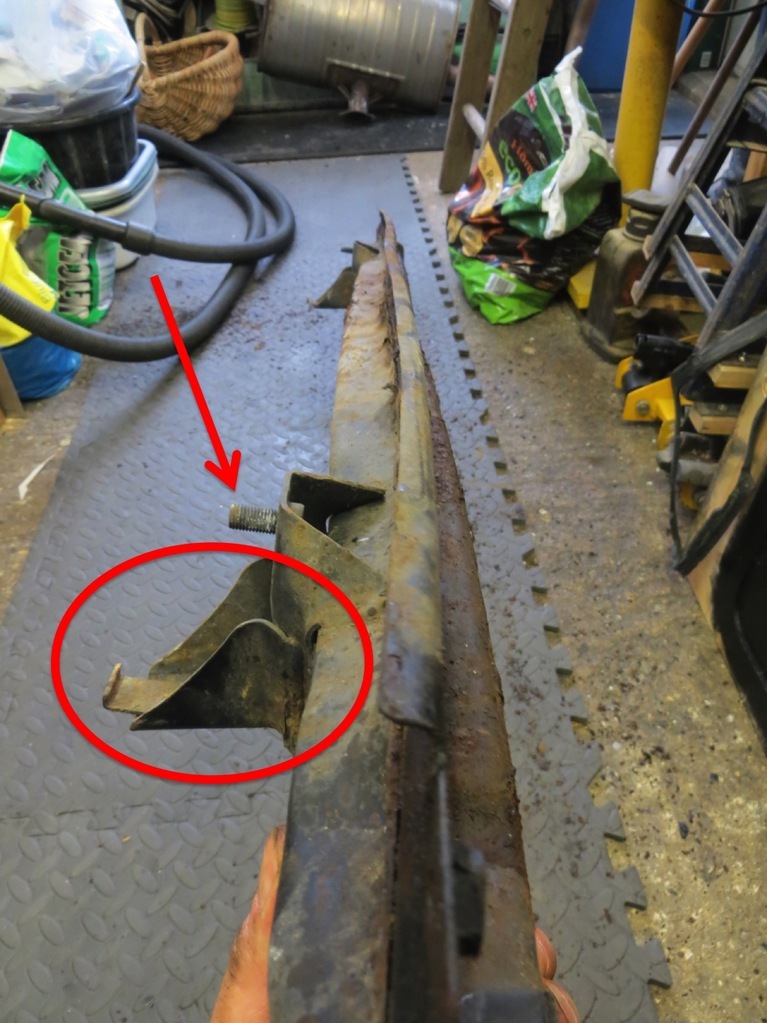 The arrow points at a welded bolt that goes through the back panel into the boot. In the circle thing is the bit that slips into the chassis rail and bolts to it. The likely fix is to cut that bit off, move it 6mm and weld it back on again. There isn't really any movement in the cover. There are elongated holes but it only really fits in one place. I think the Japanese way was to make things right so that they just fit together on the line. Don't waste time adjusting things, just make it so it fits properly. Which leads me to the 6mm difference between sides. So far this car has been really accurate. Things just fit. Even the replacement wing, which had a hard life on another car, just fits. The only panel gap that's a little odd is the one between the door and the wing and I suspect that's because the door needs to move back. It's actually catching the front wing when you open it. So I can't believe that it's really 6mm out between sides at the back. It's just not, er, Toyota. James |
| |
|
|
|
|
|
Oct 19, 2021 22:15:45 GMT
|
|
I assume it's not had a shunt in its life?
|
| |
|
|
|
|
|
Oct 20, 2021 10:04:20 GMT
|
|
If you cut the bracket that goes into the chassis rail and re-weld, wont that put the welded bolt in the wrong place ?
|
| |
|
|
|
|
|
Oct 20, 2021 19:39:11 GMT
|
I assume it's not had a shunt in its life? I think that might be the one corner of the car that hasn't been thumped. No, I don't believe so. The boot floor is all lovely, the chassis rails are good, the spot welds all look original. It all looks factory. If it's not factory it's been repaired very well. The only place that looks a bit odd is where the back panel meets the end of the chassis rail which is off between sides. But the boot floor to the boot opening looks good which doesn't make any sense. I want to have another measure to see what's going on. It probably won't alter how I correct the problem, I just don't want to miss something that I can fix. If you cut the bracket that goes into the chassis rail and re-weld, wont that put the welded bolt in the wrong place ? Quite correct. It will. But that welded bolt goes through a large hole in the back of the car with a flanged nut on the inside. I think there is enough slop to get away with it but I need to have a measure to make sure. James |
| |
|
|
jimi
Club Retro Rides Member
Posts: 2,185 
|
|
Oct 20, 2021 21:52:30 GMT
|
James Have you tried checking the bumper itself, ie a line between the two welded bolts, the two insert brackets and the bumper bar itself to see if its all square ? I'm wondering if there's any kind of twist in it. I agree with the "its not Toyota" sentiment, in my experience with mine things fit first time and may only need tiny adjustments, certainly not 6mm. In my case I was able to square the gap up on the nearside of the bumper by "adjusting" the corner bracket on that side. As you know, because the bumper inner is only in 3 parts there's very little adjustment to play with. you can't really lose anything with the foam insert & cover, they just follow the inner and are too flexible to retain any adjustments. This pic shows mine before I adjusted the nearside corner, you can see there is a very slightly bigger gap (only a couple of mm) between the bumper and the nearside/offside rear lights  |
| |
Last Edit: Oct 20, 2021 21:55:18 GMT by jimi
Black is not a colour ! .... Its the absence of colour
|
|
briang
Part of things
 
Posts: 83 
|
|
Oct 21, 2021 21:19:30 GMT
|
I assume it's not had a shunt in its life? I think that might be the one corner of the car that hasn't been thumped. No, I don't believe so. The boot floor is all lovely, the chassis rails are good, the spot welds all look original. It all looks factory. If it's not factory it's been repaired very well. The only place that looks a bit odd is where the back panel meets the end of the chassis rail which is off between sides. But the boot floor to the boot opening looks good which doesn't make any sense. I want to have another measure to see what's going on. It probably won't alter how I correct the problem, I just don't want to miss something that I can fix. If you cut the bracket that goes into the chassis rail and re-weld, wont that put the welded bolt in the wrong place ? Quite correct. It will. But that welded bolt goes through a large hole in the back of the car with a flanged nut on the inside. I think there is enough slop to get away with it but I need to have a measure to make sure. James Could be that it isn't the original bumper iron. The one on the car I had was badly rusted by the time it was 8 years old. Brian. |
| |
|
|
|
|
|
Oct 22, 2021 21:06:32 GMT
|
|
Ah well, since you both mention the bumper sub structure...
I don't know if it's original. But it's certainly rusty and it's certainly been bent. Probably more than once. The car appears to have been reversed into a post at some point which straightened out the curve in it. And, of course, it took a thump on the left corner although I think that missed the strong bit and just crushed the extension bracket. Surprisingly I don't think it's twisted though.
Anyhow, I've been out with the tape measuring things again. I'll post the results shortly.
James
|
| |
|
|
|
|
|
Oct 22, 2021 21:18:37 GMT
|
Has the car had a shunt? Did Toyota build it wrong? Can James actually use a tape measure properly? All these questions, and many others I haven’t even thought of, will be skirted around vaguely in this exciting episode of ‘Project Portia”. Can I measure stuff? Well I guess I’m ok if I concentrate. There has been a fair bit of concentrating today ‘cos I’ve been measuring the car again. Here’s the plan. Two bits of metal bolted to the bumper mounts and a length of wood plonked on them across the back of the car.   Later I added the bit across the top of the wings. Next measure everything in sight with respect to the bit of wood across the bumper mounts. This left me with a drawing full of measurements which can best be described as a drawing full of measurements.  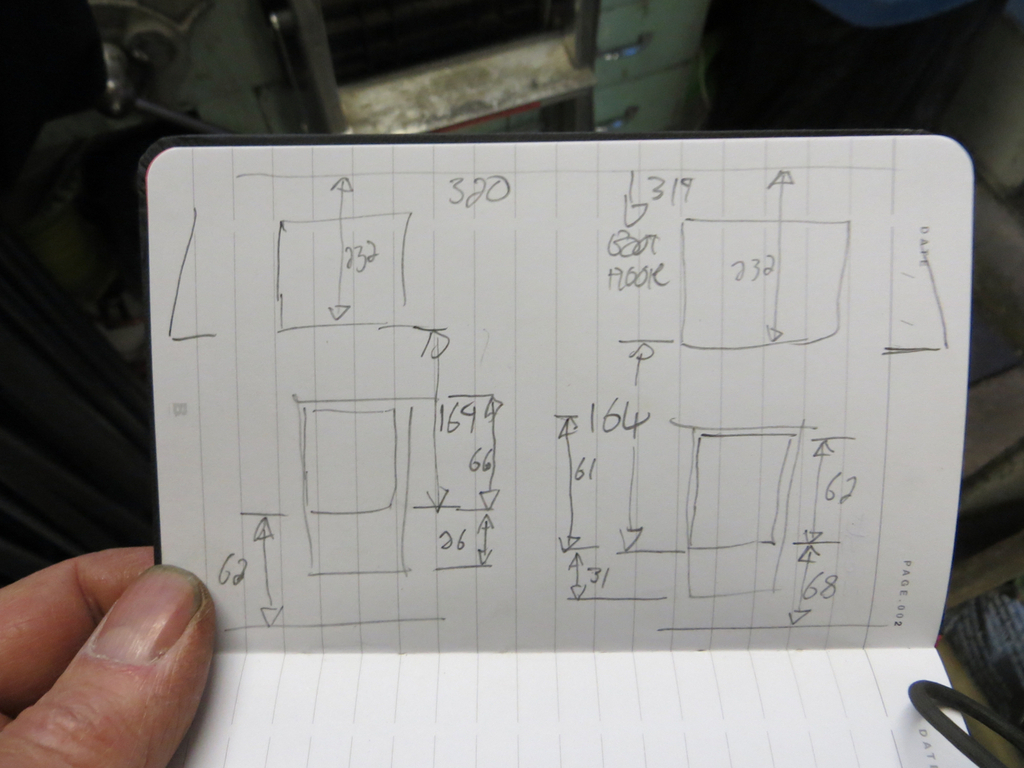 Is it consistent? Yep. Pretty much. All the evidence is that the right side of the rear panel is 5mm lower than the left. That’s when it’s measured against the bumper mounts. Interestingly when you measure from the boot floor to the top of the rear panel the right side is only 1mm lower. And if I’m totally honest I can’t find the 4mm discrepancy. So did Toyota build the car with a 5mm error between sides? Nah, of course not. Blimey, 5mm across the car is a country mile in Toyota land. You’d take the Shinkansen to cover that distance. So has the car been bent on the right rear corner? Well I’m beginning to think it has. There are only three clues to this though. 1, The rear panel appears to be cattywampus. 2, I think the sealer between the rear panel and the boot floor is not original. The original sealer is quite solid but some of the bead across the back is a bit more squidgy. 3, Every MK1 MR2 rear wheel arch has been replaced because they all rusted away. But I don’t think this one has. Toyota saw fit to put some sealer in the arch seam but all it did was hold water. Most of the arch on the right side of my car looks immaculate. And I’ve seen no evidence of the arch being replaced. The obvious answer to this is that the wing has been replaced. If it’s true that the back of the car was thumped it happened very early in the cars life. The bottom of the wing had time to rot off, was repaired, and rotted off again. Just like a normal MR2. Then I put the piece of wood across the top of the wing and measured some more. The distance between the bits of wood is a strong 8mm different between sides. I mean, WT actual F!? If 5mm is a train ride in Japan, 8mm is in another time zone. So where has another 3mm turned up from? Well after another pile of poking around and scratching my head I think I’ve got the left wing sitting a little high. I pulled the Clecos out of the back corner of the wing and lent on it a bit. It does happily sit a little lower. So I’ll push it down and redrill the Cleco holes which should get me back to the 5mm error that I already know about. So… What am I going to do about it being 5mm down on the right side? I’ve started drilling out the spot welds holding the back half of the wing to the boot floor… Nah, only kidding! Of course I haven’t.  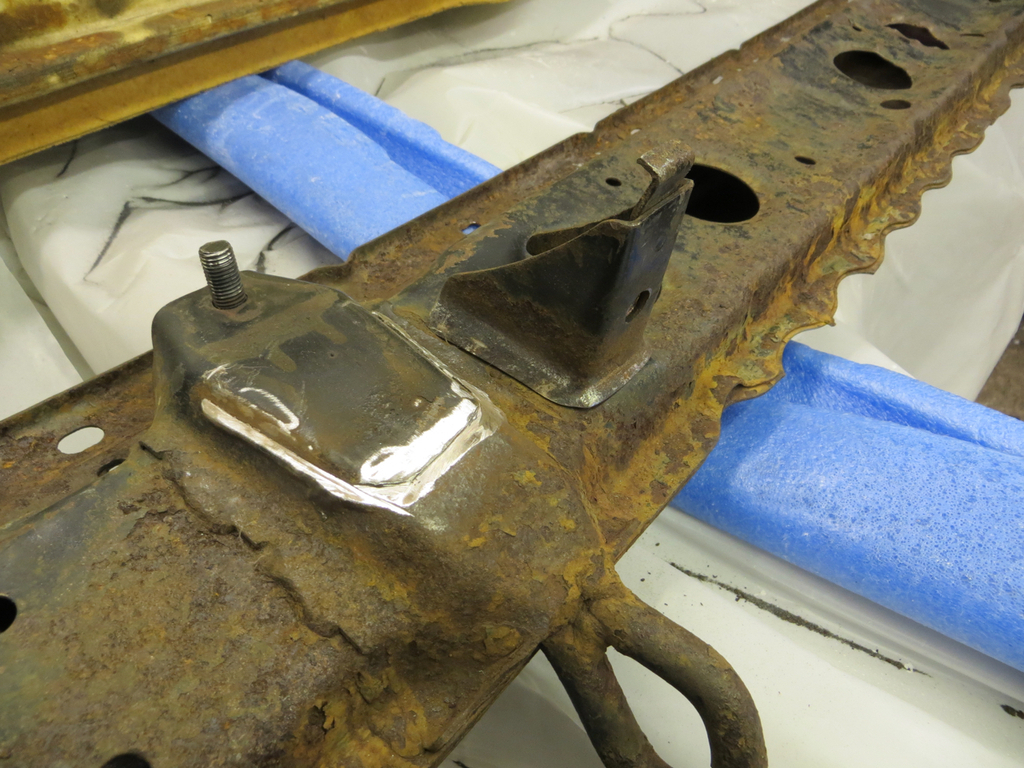 But I did think about it. James |
| |
Last Edit: Oct 22, 2021 21:34:35 GMT by Sweetpea
|
|
briang
Part of things
 
Posts: 83 
|
|
Oct 22, 2021 22:04:24 GMT
|
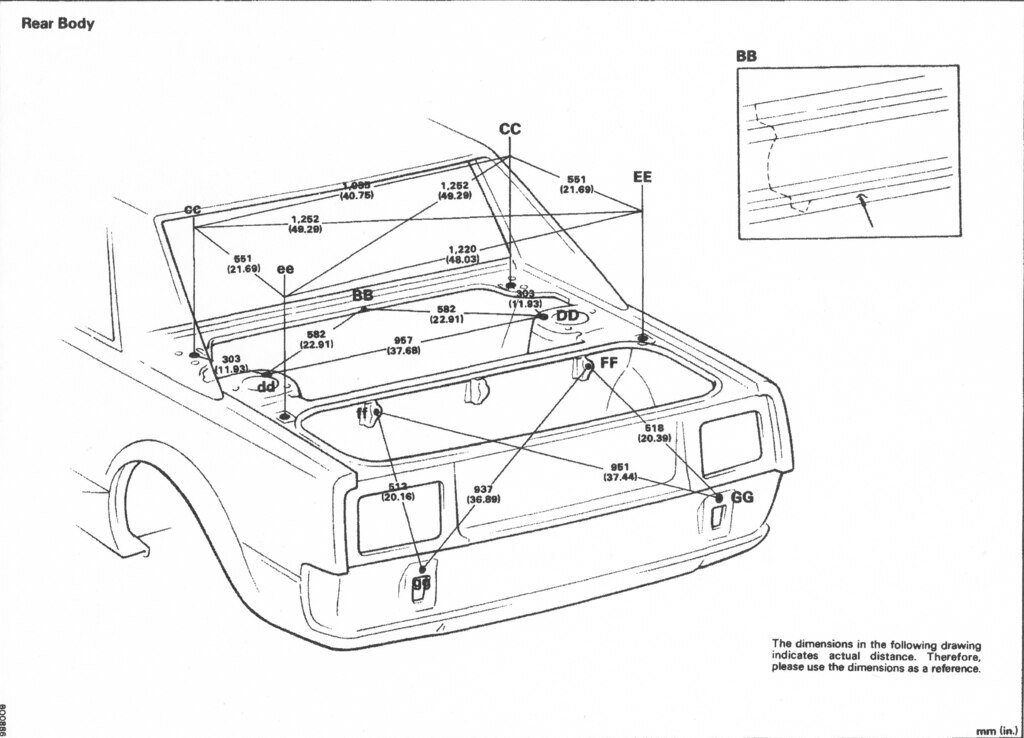 you might find this useful ..... Brian. edited to add:- FF &ff are 'trim board installation hole (7mm dia)' |
| |
Last Edit: Oct 22, 2021 22:10:02 GMT by briang
|
|
jimi
Club Retro Rides Member
Posts: 2,185 
|
|
|
|
|
If you put spirit level across the bottom piece of wood, how does it look for level ?
|
| |
Last Edit: Oct 23, 2021 2:25:38 GMT by jimi
Black is not a colour ! .... Its the absence of colour
|
|
|
|
|
Oct 23, 2021 16:50:38 GMT
|
|
Are both those timber battens actually true? I ask since if they were only bowed by 8mm over that distance, it would probably be pretty good!!
My thoughts would be to measure various diagonals to see what they reveal.
|
| |
Last Edit: Oct 23, 2021 16:52:04 GMT by Paul H
|
|
|
|
|
Jul 24, 2022 22:07:06 GMT
|
Mrs Sweetpea was wondering what the big silver thing on the front drive was. “What’s the big silver thing on the drive?” She asked “What big silver thing?” “This big silver thing” she said.  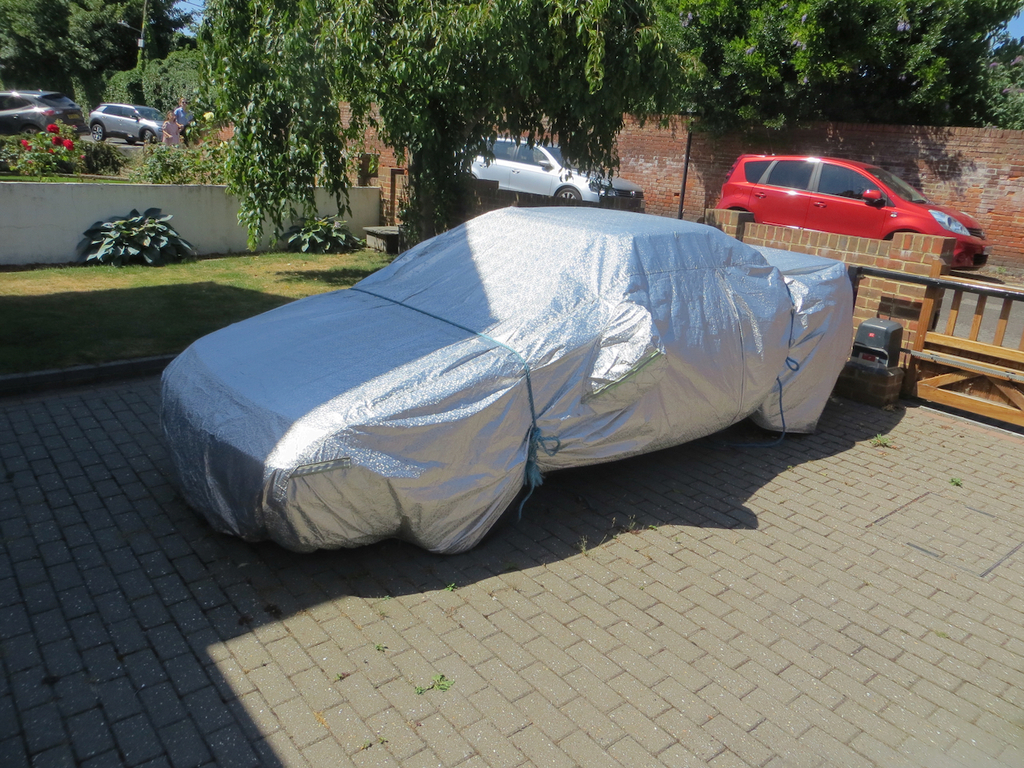 Oh yeah… To be honest I had wondered the same thing when I walked past it the other day. It does look a bit like a present. Maybe it’s a box of chocolates? They’ve probably melted if it is. Let’s unwrap it and find out.  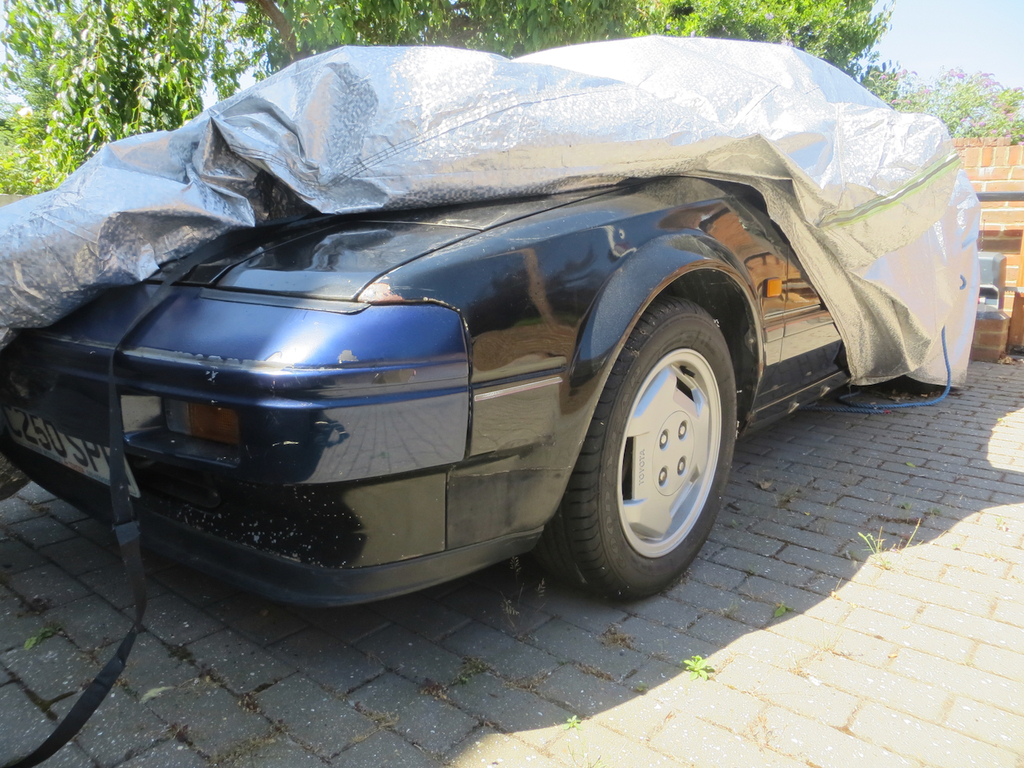 Ooh, it seems to be a car. Doesn’t seem to be a very tidy car. I wonder which evil git has dumped a scrap car on my drive.  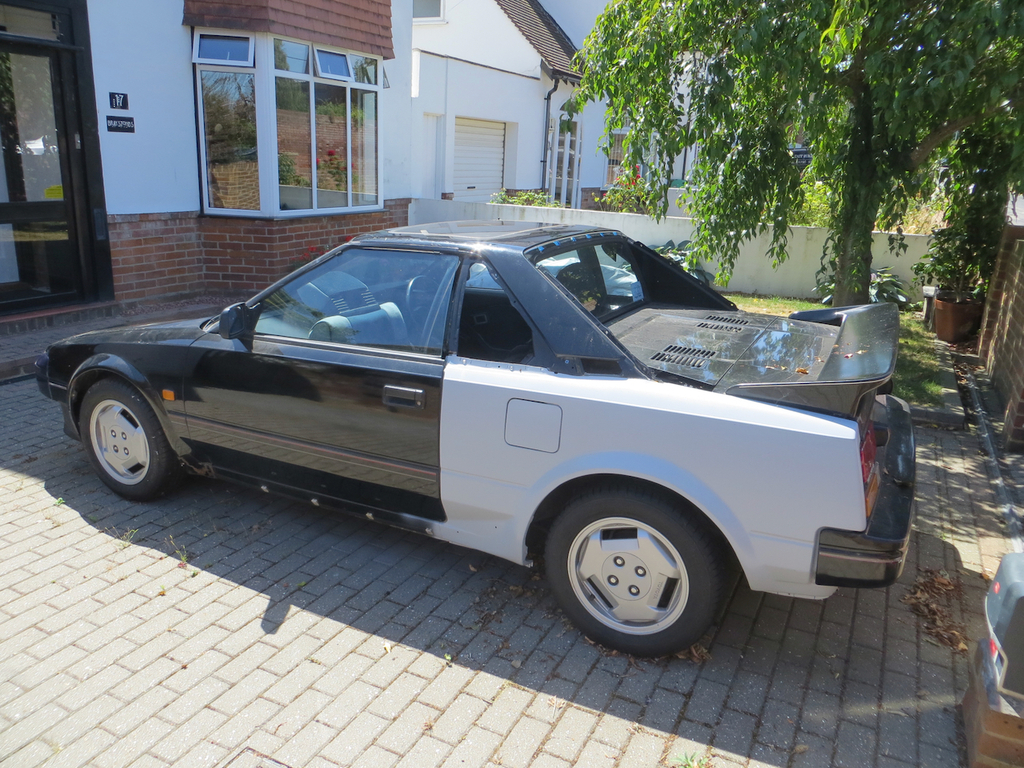 Oh I remember, it’s my car. Seems like years ago since I saw this. I was replacing the rear wing wasn’t I. Let’s get it started and turn it round so it’s easier to work on. Except… It won’t start. Wadda yer mean it won’t start yer ding dong! It’s a Toyota, they always start. It really won’t start. It’s cranking nicely but it’s not firing. Not even trying. I do have some, let’s say, ‘security’ on this car. So firstly I needed to make sure that wasn’t killing it off. After a slight false diagnosis it looks like the security wasn’t causing the problem. I guess we go for the basics then. Spark and fuel. Spark is easy to prove. I have a timing light. It’ll only flash if the plug fires so I can quickly go through all four plugs and see that all four are firing. I quite like using the timing light to prove the ignition is working. You don’t have to pull the plugs out. You don’t get a belt when you get it wrong. And you also know the plug is firing under compression which used to be a possible problem back in the old days. Fuel then? That’s harder to prove as I’ve never heard the fuel pump. It’s buried in the tank. So I unhooked the fuel pipe from the fuel rail and chucked it in a bottle, made a link in the ‘check connector’ that bypasses the computer control of the fuel pump, and turned on the ignition. No fuel in the bottle. That’s bad news ‘cos it suggests that the pump has jammed. Now this is a common problem with MR2s. I believe what happens is that if the fuel level in the tank is low and the car isn’t used the motor dries out and sticks. The only fix is to replace the pump and that means taking the tank out, and that’s an utterly terrible job. It’s also really expensive. Now my car hasn’t got a lot of fuel in it because I need to weld that wing close to the filler neck so I didn’t wan’t a tank full of fuel. However it did get a new fuel pump a few years ago and, surely, it wouldn’t have jammed? Damn it Janet! OK. The way to prove this is to stick 12V directly into the fuel pump connector in the car. Then reverse the polarity and listen for a clunk as the motor tries to reverse. That’s what happened last time I had this problem. 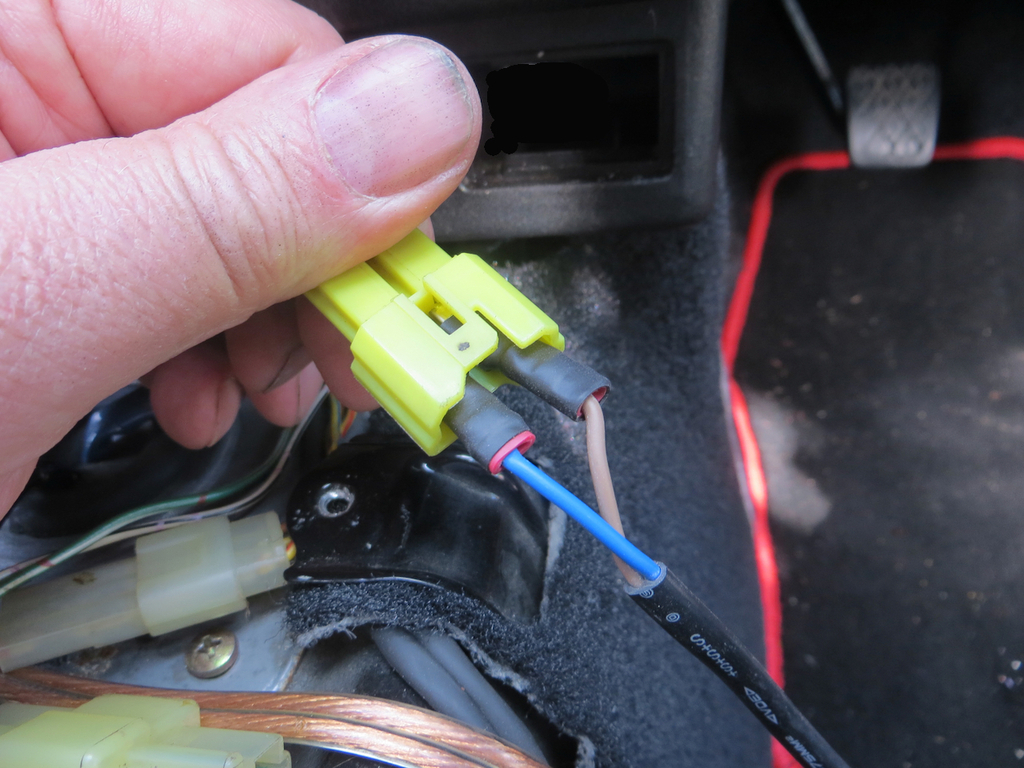 So I stuck the battery up the fuel pump connector and reversed it a few times. No clunking. Interesting. That doesn’t mean it’s not stuck though. The other give away is that if the pump is jammed the current drawn will be really high. I can’t remember how high but I’m expecting 10 to 15 amps. Out with the multimeter then.  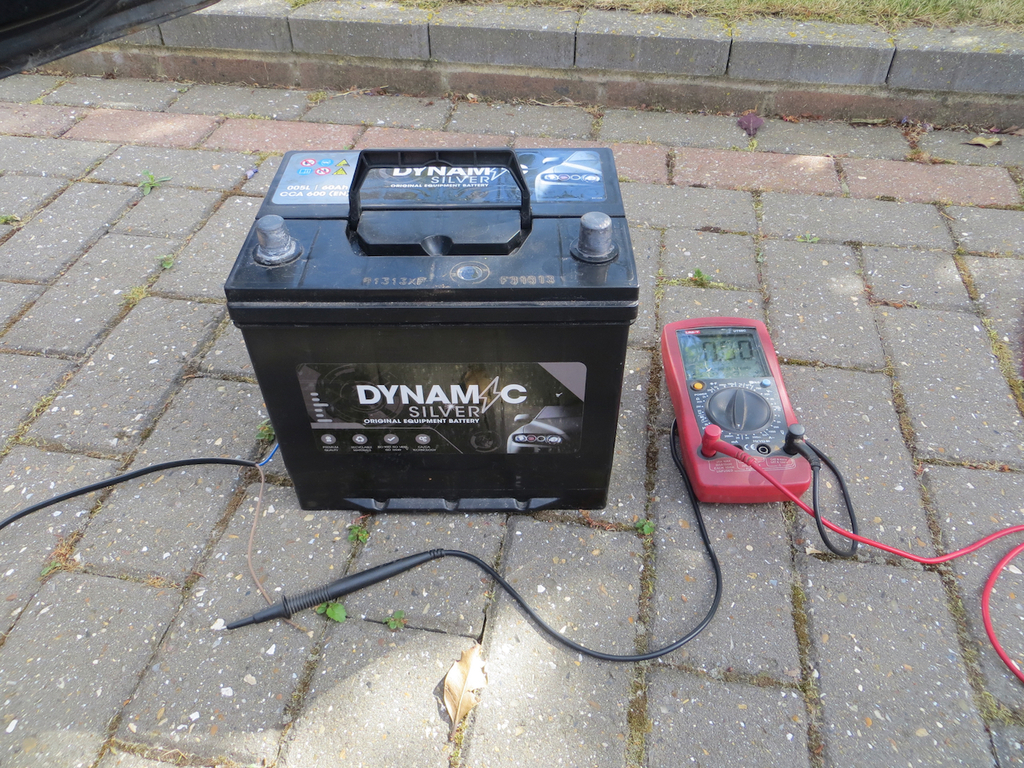 Would you like to guess how many amps the pump is pulling? Twelve? Thirteen? Seventeen? Nope. If’s not drawing any current. The pump is open circuit. I need to think about this because it’s not making sense. Why would the pump go open circuit just sitting on the drive? Either way I think the next step is to drop the tank. In other news, I was (like probably a year ago) trying to paint the trim from round the windows. The problem was that I couldn’t get a consistent finish across all the parts. Some were plastic, some stainless steel, some a sort of rubber. The paint was coming up anything between gloss and matt.   I was hoping for satin… Anyway, somebody (I think it was vulgalour . Whoever it was, thank you) suggested Halfords satin black so I tried it.  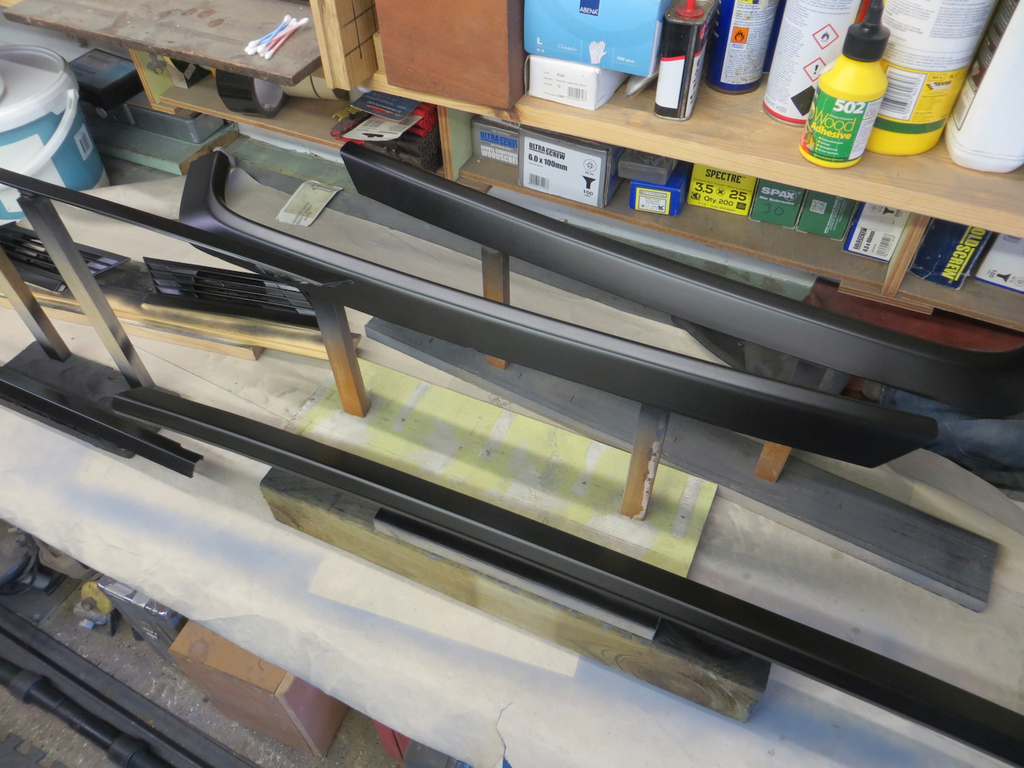 Finally a consistent finish. Need to get another tin now. James |
| |
Last Edit: Jul 24, 2022 22:12:32 GMT by Sweetpea
|
|
vulgalour
Club Retro Rides Member
Posts: 7,275
Club RR Member Number: 146
|
|
Jul 24, 2022 23:50:55 GMT
|
Halfords satin black is magic stuff, I don't know what they did to make it so good and I hope they don't see fit to 'improve' it any time soon. It does sound like something I'd suggest so I'll happily take credit, unless it goes wrong in which case someone else suggested it.  Good to see another update on this, you'll get there eventually. |
| |
|
|
qilin
Part of things
 
Posts: 19
|
|
Jul 25, 2022 12:11:33 GMT
|
|
Hi Sweetpea
Your issue with the pump is not unique to MR2. I have found that since the introduction of ethanol to fuel it is a continual problem.
It destroys fuel hose that is not ethanol resistant and seizes up fuel pumps. The ethanol absorbs moisture and corrodes the metal in the pump.
I have had the problem you have encountered numerous times. The trick is to do what you have done, (hide the car under a cover that probably blinds the people in the space station) and leave it alone for a long period of time.
Sometimes applying power with a power probe would start it. Sometimes removing the pump and connecting to a battery would start it. Ultimately I have lost a couple of pumps now so I have a couple of cars with no pump fitted.
I would suggest that you only fit a new pump when you are ready to drive the car. Having a full tank may help but my feeling is the pump should be run regularly.
|
| |
Last Edit: Jul 25, 2022 12:12:32 GMT by qilin
|
|
jimi
Club Retro Rides Member
Posts: 2,185 
|
|
Jul 25, 2022 12:14:15 GMT
|
|
Perhaps its corrosion on the pump connections inside the tank ? A nearly empty tank is liable to cause corrosion if left for long periods (also more dangerous from the explosion point of view than a full one) Is that the last connector you can access from under the centre console ?
|
| |
Black is not a colour ! .... Its the absence of colour
|
|
|
|
|
Jul 25, 2022 12:51:56 GMT
|
|
If you have corrosion causing a poor connection from the brushes to the commutator you get an open circuit. Given it's a car which is probably going to more of a occasional use toy for the rest of it's life could you replace the in tank pump with a length of tube and fit an easily accessible external pump ?
|
| |
Last Edit: Jul 25, 2022 12:52:44 GMT by kevins
|
|


