|
|
|
Sept 24, 2021 21:06:18 GMT
|
Remember that damage on the drivers side rear wing that I’ve been skimming and sanding and painting and sanding and so on and so forth? Well I think it’s ready for a final coat of epoxy to seal it all up, blend it in and then paint it black. That’d be a good name for a record - ‘Paint It Black’. Somebody should deffo do that. In order to get less of a step where the paint hits the masking tape and to save myself some blending I tried a trick I’d seen on the interwebz. Basically you fold the edge of the tape back on itself creating an unsticky edge. The air from the gun lifts the edge a little and blows a bit of paint under it. That way you get the beginnings of a feathered edge from the gun. Kind of like this…  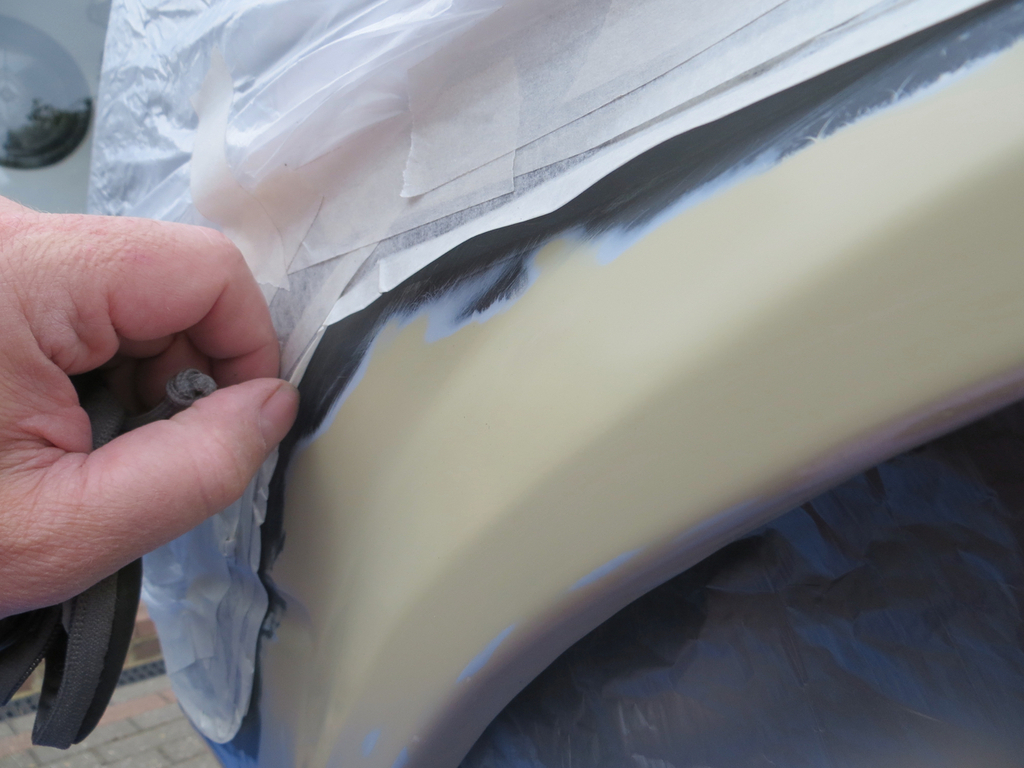 I’ll freely admit I didn’t do this seriously. I was playing. But it does seem to work so I’ll try this technique later. Now I need advice. But please, as usual, don’t be offended if I don’t do what you suggest. People learn from their mistakes and I’m more than happy to go against advice and make mistakes as a result. That’s how I learn the most. Here is the dilemma. This needs blending and flatting off. Then it needs black base coat and clear.  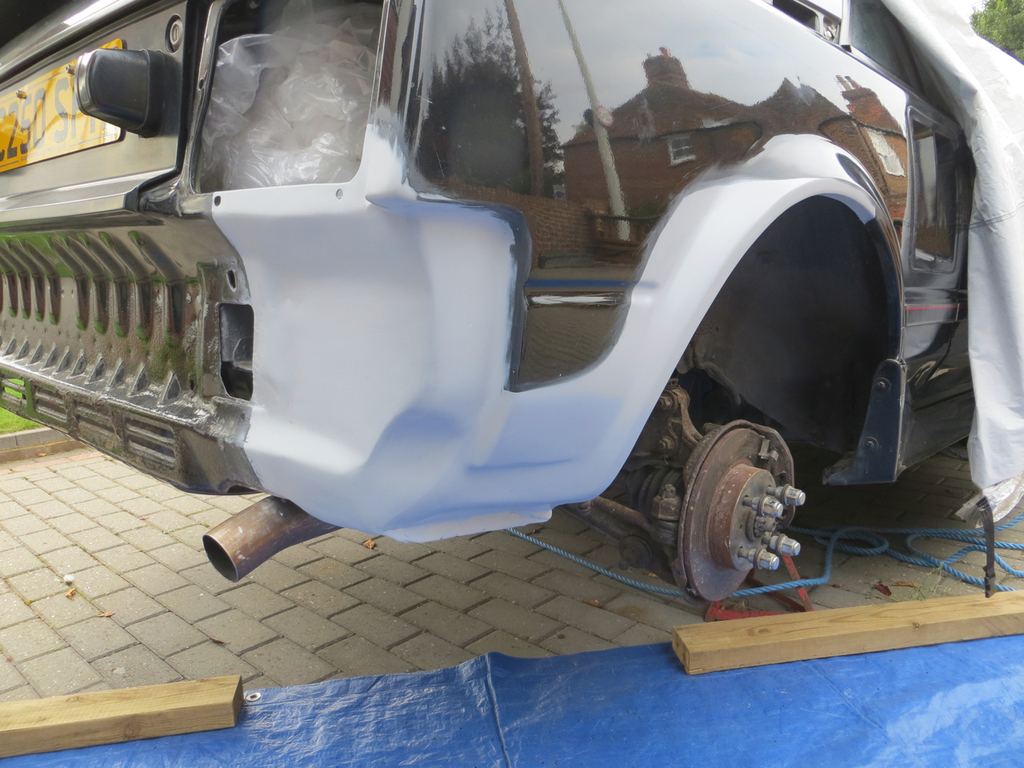 But I’m not going to paint the whole wing. One day I plan to take it back to metal, fix it and paint it. But not tonight Josephine. I just need to roughly blow this over to tidy it up a bit. However, if it doesn’t look completely perfect I’ll be really upset and not forgive myself. Yeah, I’m a crazy person, You’re right. So here’s the idea… Flat the primer off and go a few inches into the original paint with 2000 grit wet and dry. Then spray black base coat ending somewhere on the bit I flatted back. (I’ll use the feather edge tape method I mentioned above.) That edge is likely to need feathering with some 2000 grit wet and dry too. When that looks perfect (which it will because in my head I’m brilliant) I go over it with clear. But do I stop on the flatted bit and then polish it in or do I go over onto shiny clear and lightly polish it in, risking that it won’t key on? Before you answer that you need to see this.  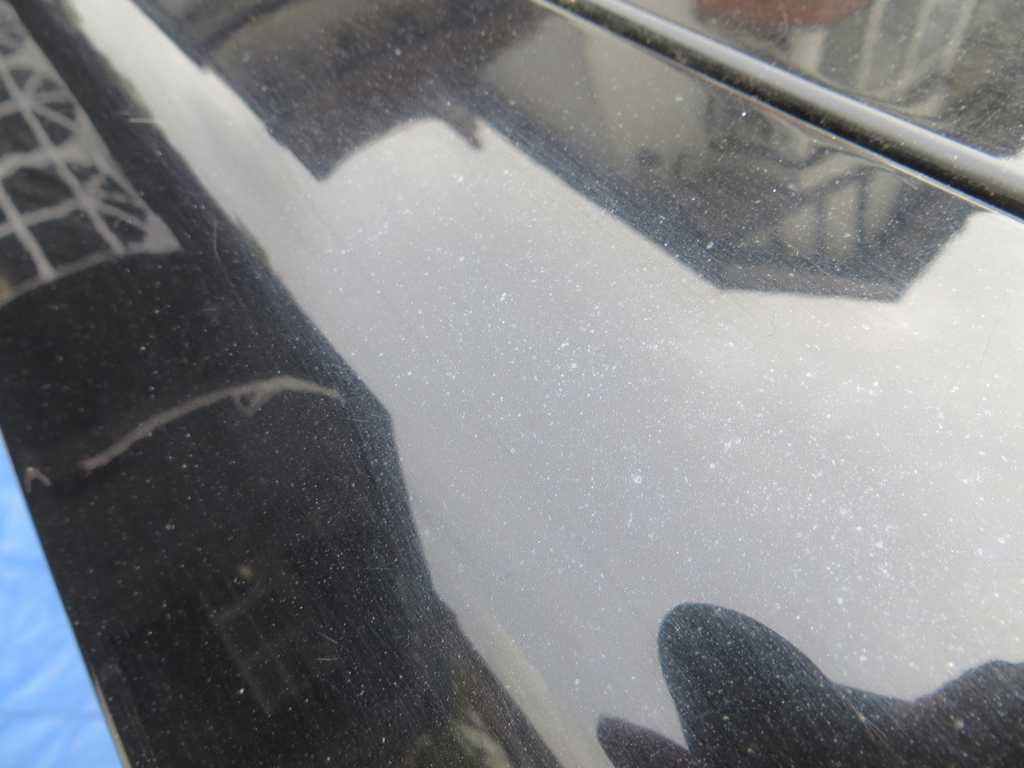 This is the existing paint on that wing. The little light spots are, I think, grinding dust from all the work that I’ve been doing. That and years of lack of care by previous owners. Certainly if you wash and polish the car it still feels as rough as a badgers bum. So I’m wondering about flatting the whole wing and machine polishing it anyway. Or should I be flatting it and just clear coating the whole wing? Obviously I’m going to be doing this, the most difficult bit, early in my learning experience… Because… Well… Crazy person. James PS Houston, we have a problem. Again. I flatted off the skirts today and gave them another coat of primer.  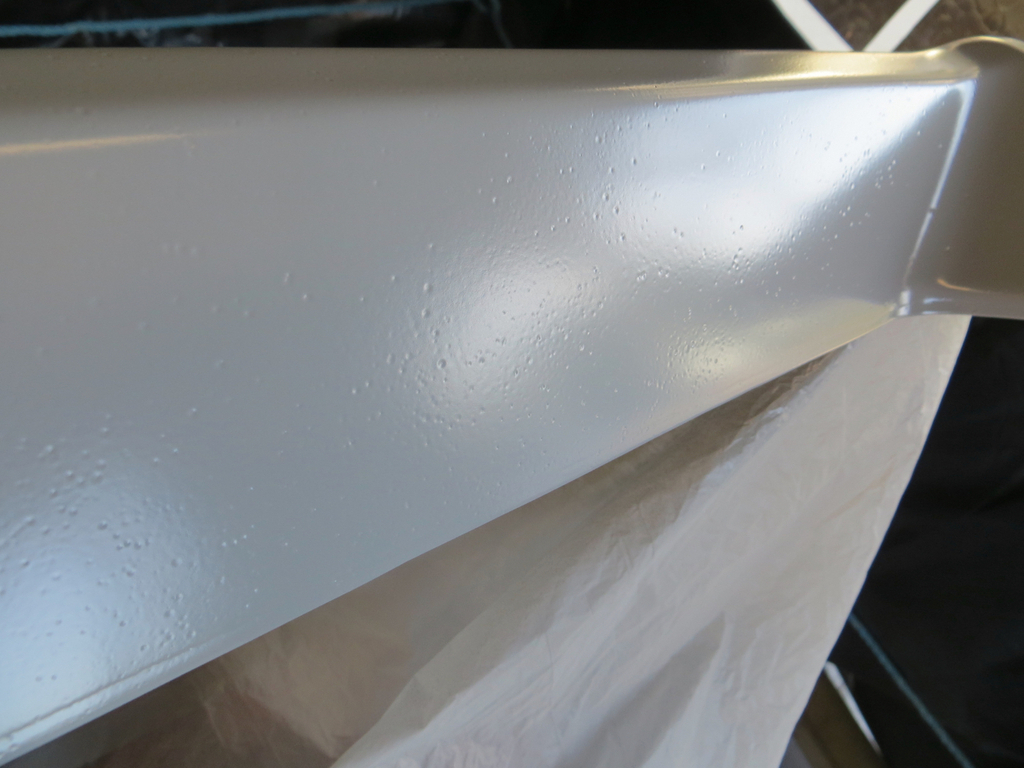 It looks more like a lunar landscape than a side skirt. So I flatted the wing back and painted that too. It’s done the same. When I did the wing I literally flatted it off, walked it to the Dexter tent, Wiped it over with thinners, yes thinners. Then mixed the paint. While that was draining into the gun through a filter I wiped the panel with panel wipe. Then I painted it. It can’t possibly be contaminated surely? I was paranoid about cleanliness when I did the wing. The paint I did on the car (outside) last weekend was perfect (the photo two above). But I also painted the skirts in the tent and they weren't so good. Not terrible but not brilliant. So is it the tent leaching something into the atmosphere? Or it is something coming up the air pipe? But the traps are all spotless. I dunno… But I need to work it out a bit sharpish. I might get the black out tomorrow and paint that stuff above. Nothing like trying something you have no idea about when you also have a major problem with the process. Hmmm. |
| |
|
|
|
|
|
|
|
Sept 25, 2021 0:39:21 GMT
|
|
Compromised compressed air supply? Those look like fisheyes, but if the car is outside, I suppose it’s much more likely something got on the surface. A water-based surface prep (dish soap, diluted) and a Scotch Brite may be a good idea. And I wonder if wiping it with thinners (what kind? reducer?) was a bit risky?
Any chance the collective legion of admirers can dissuade you from attempting a blend/spot repair? So much easier to do the whole panel, even if you want to do it “better” in the future. Imagine the pages of angst which will be devoted to mismatch within the panel … can we all handle that?
Biting my nails, I remain, yours truly, etc
“Concerned in Connecticut”
|
| |
|
|
jonomisfit
Club Retro Rides Member
Posts: 1,788
Club RR Member Number: 49
|
|
Sept 25, 2021 7:54:14 GMT
|
|
Had you drained the compressor and put a water trap / filter in the air line?
If not could be water contamination.
|
| |
|
|
|
|
|
Sept 25, 2021 10:07:43 GMT
|
|
Thanks for the replies chaps.
Compressor... Drained yesterday. Very little in it. But then there are a few lengths of copper pipe as a condenser followed by a huge drip leg. That was almost empty. Then there is a proper filter / pressure regulator - that's spotless. And another baby filter at the gun, also spotless. So I don't believe it's anything coming down the airline. At least, if it is it's getting through a lot of filtering.
Contamination on the panel?
The process I've done is to wet sand with 240 grit (because I have surface imperfections at this stage) then wipe down with a rag (a possible contamination source) then move it to the Dexter Tent of Doom. There it gets panel wipe and paint. (Am I missing a step given I'm wet sanding?)
I added the thinners step before the panel wipe as an experiment. I figured if there was something on the panel that the panel wipe wasn't removing then the thinners would. It's only gun wash so nothing exciting and it neither helped nor made it worse.
I'm going to sand it all back again and then maybe paint some in the garden and some in the tent to see if it's a tent problem.
Thanks again!
James
PS - I'll worry about blending the panel another day!
|
| |
Last Edit: Sept 25, 2021 10:09:52 GMT by Sweetpea
|
|
|
|
|
Sept 25, 2021 11:57:16 GMT
|
|
Did you allow some time for the panel to dry before 'wiping' it? coud be moisture trapped in the primer ...
|
| |
|
|
|
|
|
Sept 25, 2021 12:49:55 GMT
|
Did you allow some time for the panel to dry before 'wiping' it? coud be moisture trapped in the primer ... Oh now that's a really interesting idea that I hadn't thought of. Yes it was 'dry' but who knows what was soaked in the paint. Thank you! I'll put that on the list. I might do the sanding today and then paint tomorrow. Incidentally... Whoever named this process 'painting'... 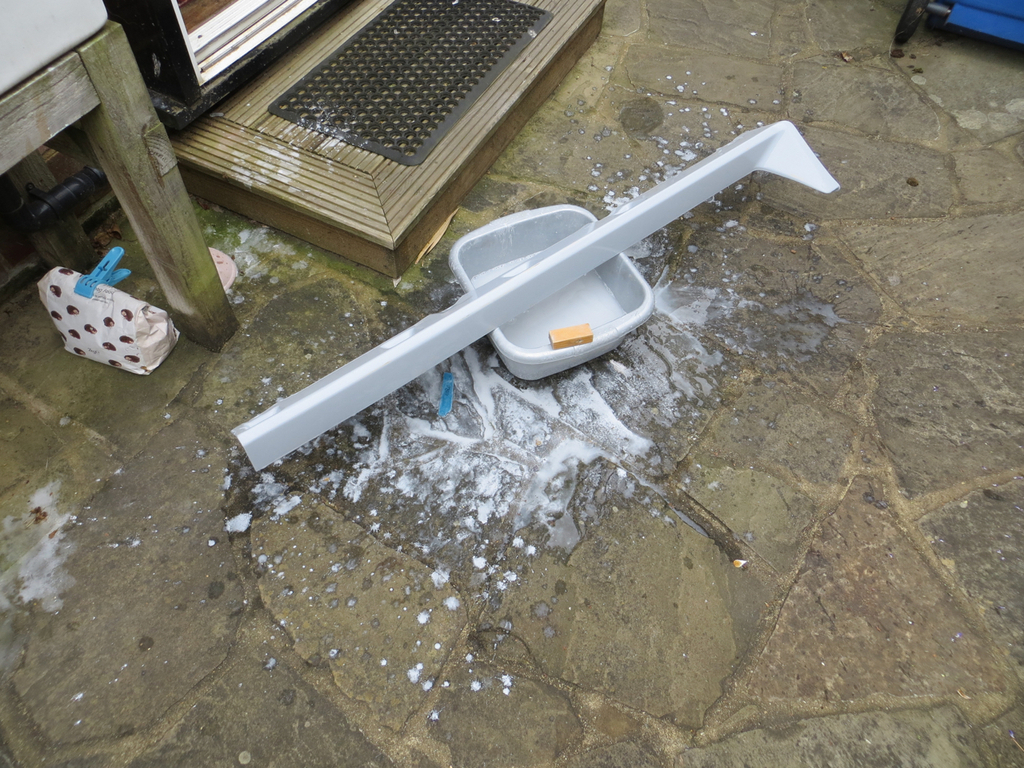 Was havin' a chuffin' laugh... |
| |
|
|
|
|
|
Sept 25, 2021 13:38:30 GMT
|
|
Maybe check out a product like Norton Scuff Gel, use it with a red or grey scuff pad. Water-based, so needs time/conditions to dry. 3M likely has similar.
John
|
| |
|
|
|
|
|
Sept 26, 2021 19:51:13 GMT
|
|
2000 grit is too fine, 800 is about right as you need a rougher surface for the paint to grip to.
Scotchbrite is good for prepping the unprimered paint you want to spray over.
Try clay barring the panel before painting, this should remove all of the rough finish you can feel.
Then invest in some fade out thinners to help blend the new paint into the old. A light mist over the paint joint immediately after painting from about 12" away will be all you need. Don't use too much or you will dissolve all the fresh paint and it will run everywhere.
don't use thinners on the panel to prep it - only panel wipe with fresh lint free paper towels. Personally I never wet sand until gloss coats go on, dry sanding is better to avoid moisture in the paint.
|
| |
|
|
|
|
|
Sept 26, 2021 20:32:10 GMT
|
|
In a similar vein, I used to only dry sand but now I do all my prep with epoxy, it's harder to flat back but doesen't absorb water. Pro's stick it in a low bake oven to dry out, but only so many days you can rely on a hot sunny day.
|
| |
|
|
|
|
|
Sept 26, 2021 21:25:59 GMT
|
Thank you both! I actually have Scotchbrite pads so they are on the agenda for later in the story. As you'll see in the latest update I've been using the 2000 grit today for blending the wing. I need to look and see what other grades I have - or get some. kevins I'm actually working in epoxy primer which has started giving me grief. Anyway, while you were writing to me, I was writing this... Well that’s been the most frustrating weekend. To recap a little… I put primer on the sill on Friday. It was covered with fisheyes. Something was contaminating it. I wet sanded it back to a good finish in Saturday with the intention of priming it again that afternoon. Then there was westbay 's idea that water might have soaked into the primer during sanding and was causing the problem. So I held off and primed it on Sunday morning. It had 20 hours or so to dry out. Has it fixed the problem??? Do I have a lovely smooth finish??? Like hell… So I’m back to square one and no clues as to what’s going on. I did one part of the skirt in the tent and the other part in the garden. I still have a problem with both parts so it’s not the tent contaminating the atmosphere. We’ll come back to this in a bit. For a change I got some 2000 grit wet and dry to flat and blend the right side wing. I’ve taken it a bit onto the existing paint which is where I’m thinking of blending the black.  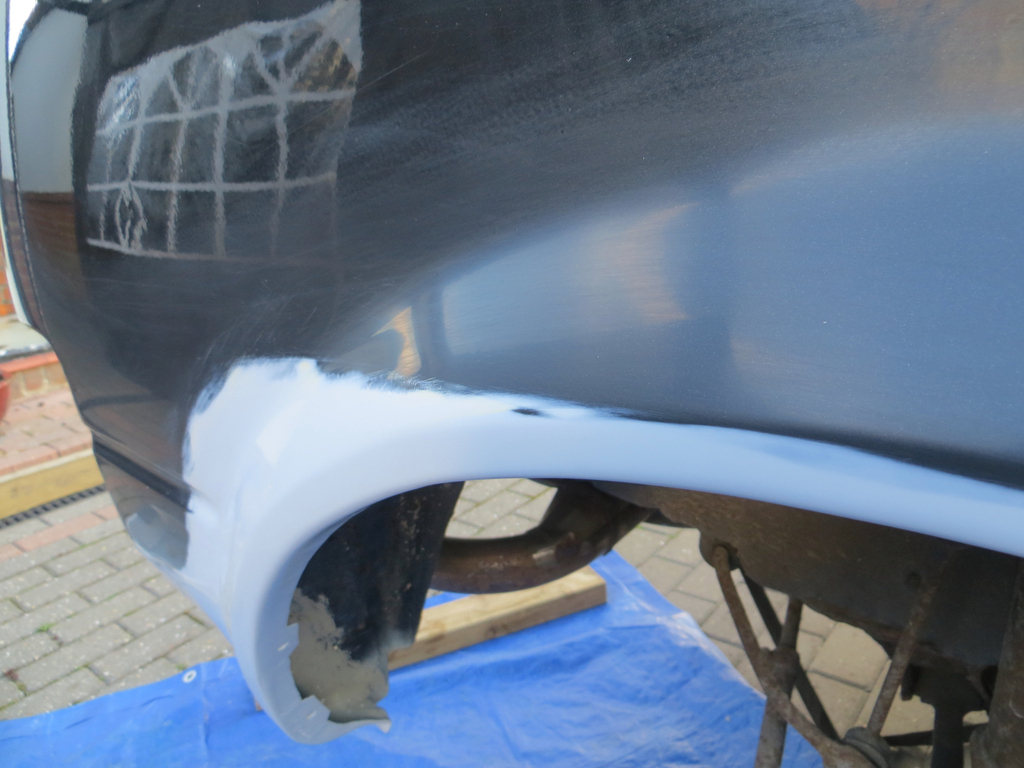 Yeah, I know it’s been suggested that I paint the whole wing. Well if I can’t blend it reasonably that’s still a possibility. But at least this way I get a bit of practice. Next on the list is to open my little tin of black paint.  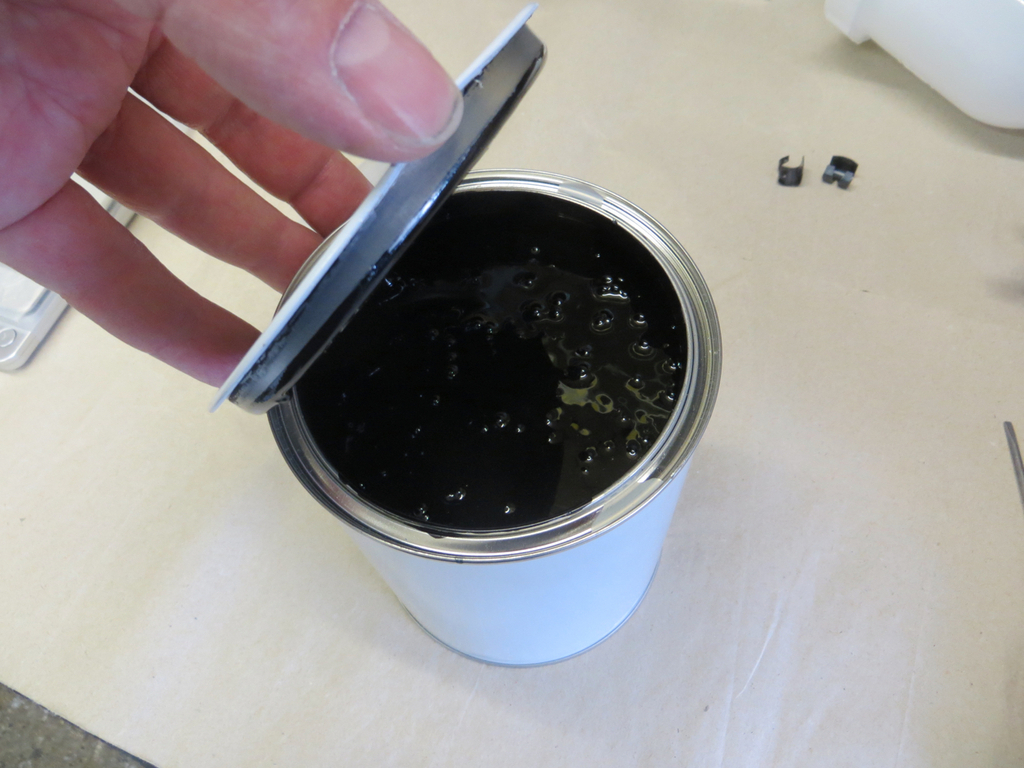 Queue slightly manic laughter. This is the proper paint for the car but it isn’t going on the car, it’s for practice and to see if I have the fisheye problem. I sprayed a few bits of metal. Some bits got panel wipe, some I didn’t bother. Below is the black base coat on the back of the old wing.  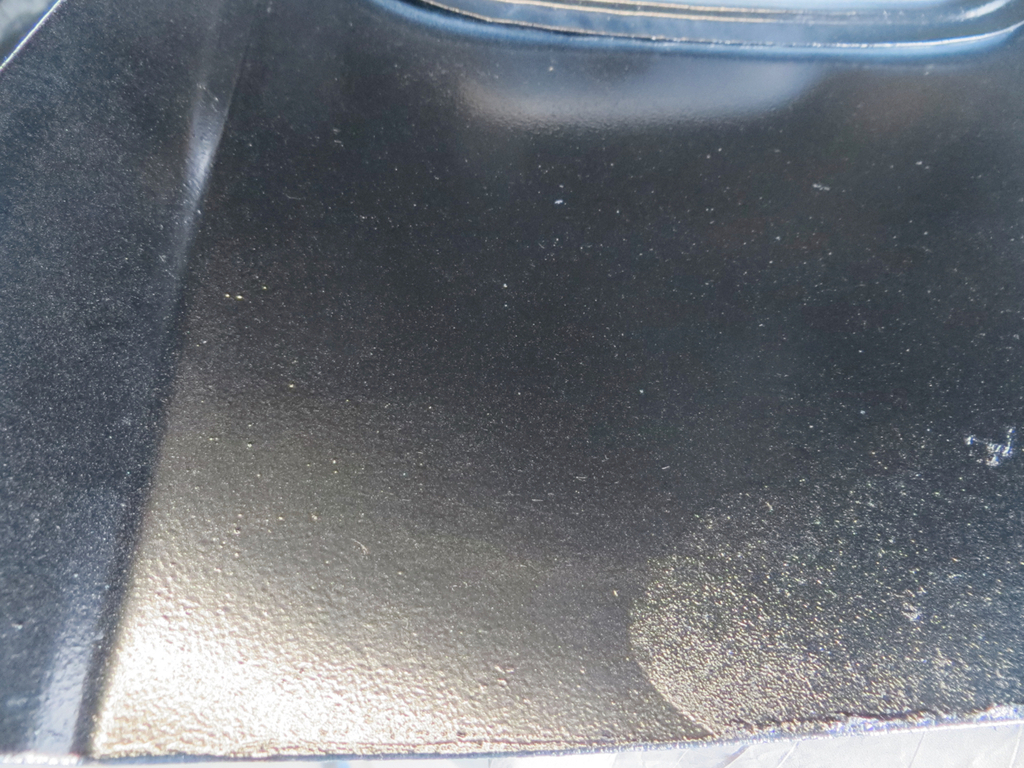 No fisheyes. In fact the only place I saw fisheyes was where I’d painted over the fisheyes in the primer. Well that’s good I suppose. So where does that leave us? What’s causing the problem in the primer. It would appear not to be the tent because I had the problem painting outside. I don’t think it’s water in the primer from wet sanding because I left it 20 hours and still had the problem. (Was that long enough? Do I need to use some warmth too? I left the parts in the garage.) I don’t think it’s the air supply or the gun because the black was ok. (Although that’s cellulose rather than epoxy.) I don’t think it’s my paint mixing process because it’s the same as I used for the black. So what’s left? Have I managed to contaminate the entire tin of primer some how? Another thing that a neighbour mentioned today… I’m more confident with the paint and the gun now so I’m putting more through the gun and putting it thicker on the panel than I was at the beginning. Could that be causing the problem. Or could it have been masking a problem I’ve had since the beginning? Thoughts are always welcome. I’ve run out of ideas. James |
| |
|
|
|
|
|
Sept 27, 2021 7:23:29 GMT
|
|
Have you tried spraying the epoxy again on a new panel, that would determine if there is a problem with the paint. If the new panel comes out OK my suggestion would be your panels panel had contamination on it which is now in the applied paint.
If so Unfortunately the only real way to fix if is probably to sand it all off and start again
|
| |
|
|
|
|
|
Sept 27, 2021 8:36:42 GMT
|
|
What did you stir the primer with ? an old stick ?, an old screwdriver ?, might, have introduced some contaminate(s) ...
|
| |
|
|
|
|
|
Sept 27, 2021 11:38:29 GMT
|
Then invest in some fade out thinners to help blend the new paint into the old. A light mist over the paint joint immediately after painting from about 12" away will be all you need. Don't use too much or you will dissolve all the fresh paint and it will run everywhere Sorry for basic clarification in very detailed reply, but do you mean spray the join with paint that has fade out thinners in it. Or spray literally just fade out thinners? |
| |
Last Edit: Sept 27, 2021 11:39:04 GMT by darrenh
|
|
|
|
|
Sept 27, 2021 12:11:46 GMT
|
|
Fade out thinners comes in a rattle can, you use it after spraying paint in the usual manner.
Hope that helps?
|
| |
|
|
|
|
|
Sept 27, 2021 12:15:29 GMT
|
|
I don't think you have conmtamination in the paint. I have had that sort of finish in the past and I've just blocked it smooth and carried on.
It's more likely pinholes in the filler that the primer has sunk into.
|
| |
|
|
|
|
|
Sept 28, 2021 21:43:57 GMT
|
Morning! Sorry, I'm having to work longish shifts in the office this week and it's a flippin' disaster there. Only done two days and I'm exhausted already. I'll get back to this at the weekend. Thanks for the thoughts and ideas though.  James |
| |
|
|
|
|
|
Sept 29, 2021 20:24:13 GMT
|
|
Re your welding problem, I had the same thing, turned out I was using a long extension lead from the far away shed, changed back to my shorter, fatter one from closer outlet & welding back to normal again, just a thought.
|
| |
|
|
|
|
|
Sept 29, 2021 21:33:28 GMT
|
|
Sweetpea, I had a couple of paragraphs written yesterday explaining why I think blending will be a waste of time. Then I realized I don’t really know your goals, such as desired quality or whether you might plan on painting the whole car. So I’ll limit myself to this: I tried a similar repair on the rear wing of a black German car from the early 80’s … single stage (non-clear coated) factory enamel. It was very difficult; the color match was the main obstacle … it needs to be perfect, and without the ability to change the tint you get stuck. I painted the whole panel. And at some point, I’ll have to (have someone better than me) re-do it with better matched color/colour.
Best wishes, John
|
| |
|
|
|
|
|
Sept 30, 2021 13:20:16 GMT
|
Sweetpea, I had a couple of paragraphs written yesterday explaining why I think blending will be a waste of time. Then I realized I don’t really know your goals, such as desired quality or whether you might plan on painting the whole car. So I’ll limit myself to this: I tried a similar repair on the rear wing of a black German car from the early 80’s … single stage (non-clear coated) factory enamel. It was very difficult; the color match was the main obstacle … it needs to be perfect, and without the ability to change the tint you get stuck. I painted the whole panel. And at some point, I’ll have to (have someone better than me) re-do it with better matched color/colour. Best wishes, John my (admittedly naive) idea was to spray up to a straight edge, perhaps a swage line or corner, and not try to blend anything. because there's already a difference in colour at those points due to natural difference in tone from shadowing or physical gap |
| |
|
|
|
|
|
|
|
Hello and welcome to this evenings Q and A session. Well it’s more likely to be a Q & I and C C session. Questions and Ideas from from you and Complete Confusion from me… Re your welding problem, I had the same thing, turned out I was using a long extension lead from the far away shed, changed back to my shorter, fatter one from closer outlet & welding back to normal again, just a thought. I’ve not used it much since putting a new tip on it so I can’t really confirm that it’s fixed. Anyway, I do use it on an extension lead but have never had a problem. And to be honest it was doing a cruddy welding job in the garage too. I mean, definitely it… Couldn’t possibly be me. Have you tried spraying the epoxy again on a new panel Yeah, I blew it onto some scap bits if steel. They weren’t really prepped very well but they did show the problem. Suggests it’s not panel contamination. What did you stir the primer with ? an old stick ?, an old screwdriver ?, might, have introduced some contaminate(s) ... Now, to be fair, I used the cleanest screwdriver in the tool box….  Being serious for a moment, this week I’ve taken delivery of new mixing pots and stiring sticks just to head off this possibility. Fade out thinners comes in a rattle can, you use it after spraying paint in the usual manner. Hope that helps? Certainly helps me, thank you. Sweetpea, I had a couple of paragraphs written yesterday explaining why I think blending will be a waste of time. Then I realized I don’t really know your goals, such as desired quality or whether you might plan on painting the whole car. So I’ll limit myself to this: I tried a similar repair on the rear wing of a black German car from the early 80’s … single stage (non-clear coated) factory enamel. It was very difficult; the color match was the main obstacle … it needs to be perfect, and without the ability to change the tint you get stuck. I painted the whole panel. And at some point, I’ll have to (have someone better than me) re-do it with better matched color/colour. Best wishes, John my (admittedly naive) idea was to spray up to a straight edge, perhaps a swage line or corner, and not try to blend anything. because there's already a difference in colour at those points due to natural difference in tone from shadowing or physical gap Well… The closest handy corner / swage line thing is essentially the boot lid panel gap. There are two reasons for trying to blend the paint. One is that the panel already has at least 3 coats of paint on it so I need to do something serious to it one day. And the other reason is to practise the technique. If I fail dismally I can still paint the wing so I can’t lose really. I haven’t got any decent photos but I did run a spray of black onto the old panel I cut off. As if I was going to blend it. I can’t actually see where the old paint ends and the new begins from a colour point of view. The new paint is dull because there is no clear on it, but the colour fades across beautifully. Got to be worth a try then? Today it’s been a proper summers day. Chucking it down, blowing a gale. So I’ve (yet again) sanded the skirts back. But this time I did it dry (which was a right pain in the tushy) and I’ve gone back harder than previously. I’ll try and prime it again but with new mixing pots and stiring sticks, and I’m going to turn the paint flow down a bit so I’m not hammering so much on. Apart from anything else it’ll make it easier to sand off again. James |
| |
|
|


