|
|
|
Dec 20, 2015 20:58:56 GMT
|
Righty ho! Forever onwards! 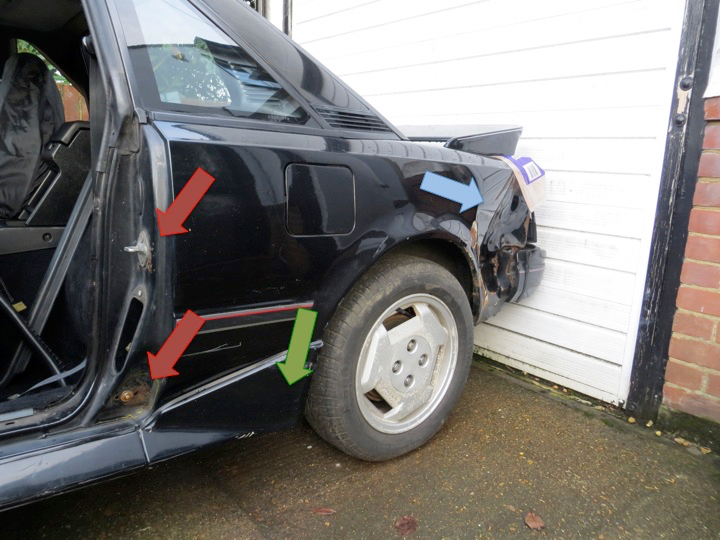 Might I introduce you to my back left quarter? Well, technically it's the car's back left quarter, I didn't think you'd want a photo of mine. So, the blue arrow, the bit that some previous owner stuffed in. That passed the MOT. God knows how but it did. But it does mean that the rear wing is destined for the skip. In a moment of great sanity (it had to happen eventually) I actually got a replacement (second hand) wing and aren't going to repair this. What a let down eh? Behind plastic sill (green arrow) the car is missing. This upset the MOT man. I'm keeping the inner arch here so that'll need a proper repair but the outer panel is going with the rest of the wing. The red arrows point to two areas where the outer skin has rusted due to the car being double skinned. The MOT man didn't like that either but, again, the replacement wing will sort them out. But the objective is to get the car on the road, replacing the wing is for another day. What I need is a proper repair to the inner arch and some quick and dirty work on the other bits to keep the MOT man happy. Start in the door shut then? A nasty bodge to that bit round the door switch me thinks. Just remove the old and seized door switch first. 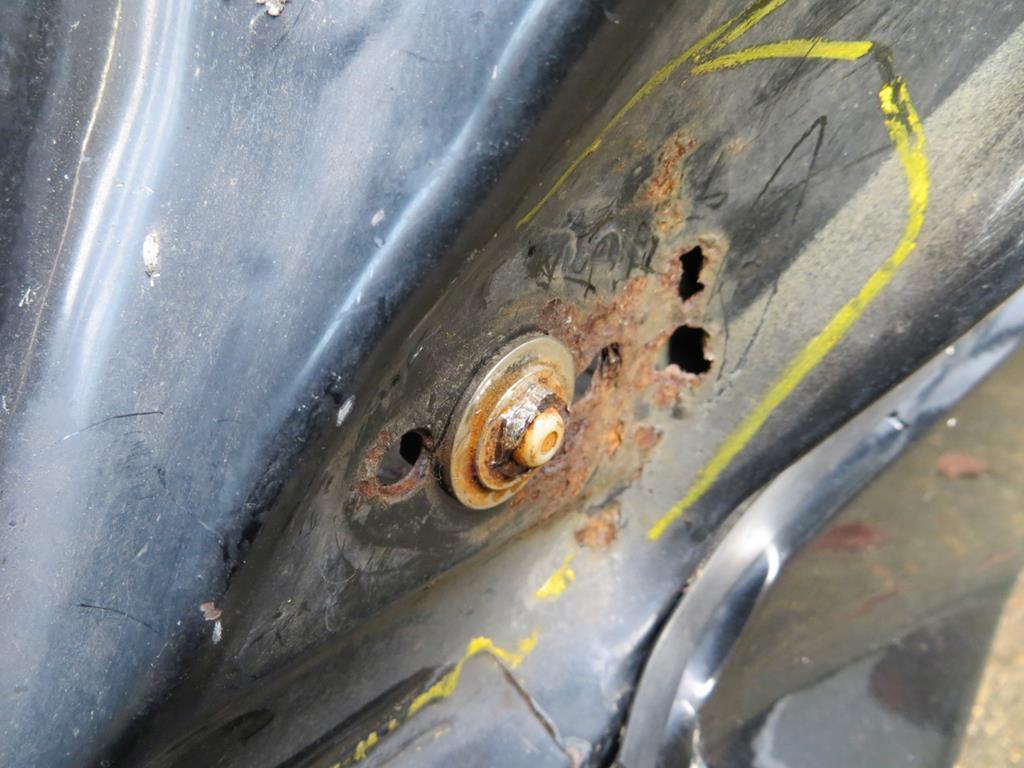 That's a 12mm nut on the end. Or it was 30 years ago. Now it's trashed. After 30 mins of tools, bashing, swearing and cursing it was still firmly attached to the car. Hmmmph. This was supposed to be the easy repair. Out with the big guns then.  Weld a big bolt to the end and hit it with the air tools.  I do like a bit of total overkill. I like winning too! We'll see the door switch again in another post. I've had an idea... Chop out the problem bit.  I'm going to forget about the couple of holes in the back skin. It's not staying on the car. Quick cardboard template. 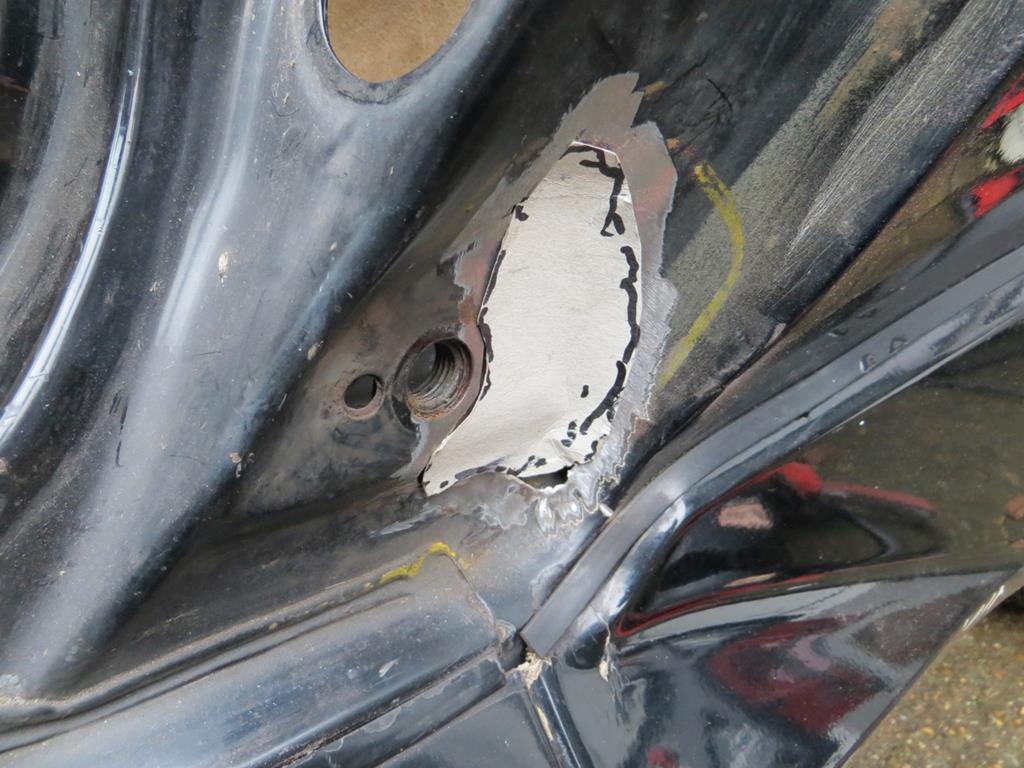 Quick bit of bent metal to weld in. 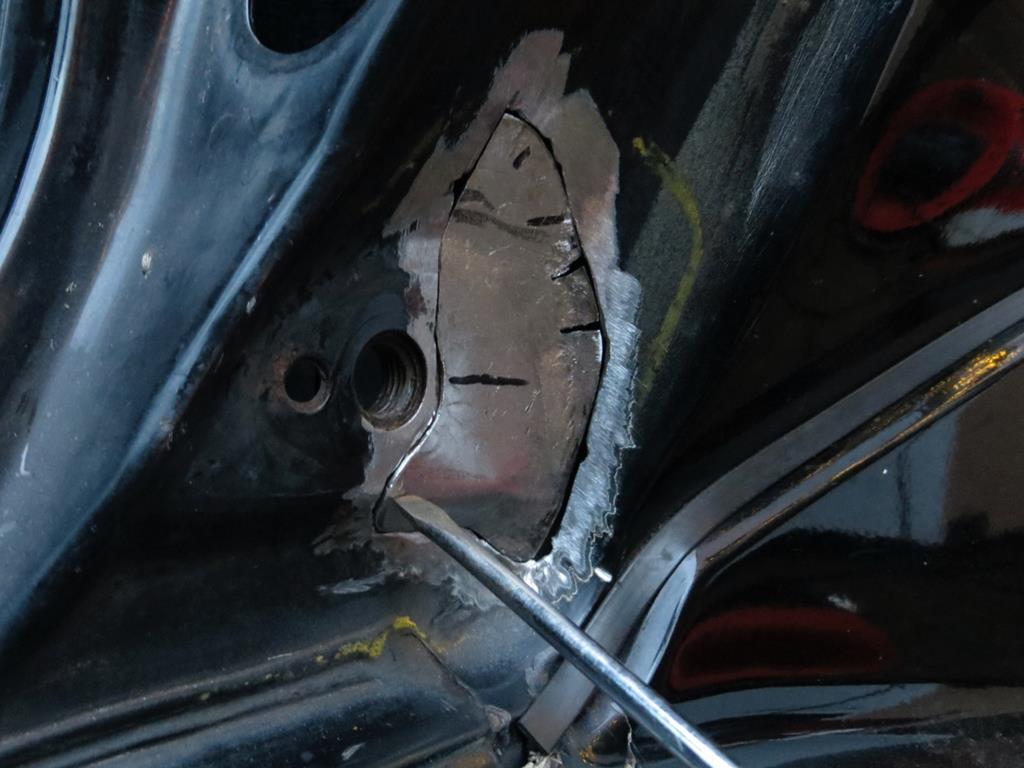 Bzzt bzzt. It was very overcast when I was doing this and I couldn't really see until I sparked up the welder. That and I wound up blowing through and following thin metal around. Mask up - take a look - mask down - bzzt bzzt. Mask up - take a look - mask down - buzz bzzt. Mask up - take a look - bzzt. BUM HATS!!! That was poxy bright. Remind me to buy a bright work light so I can see. Anyway once the spots had gone from my eyes… 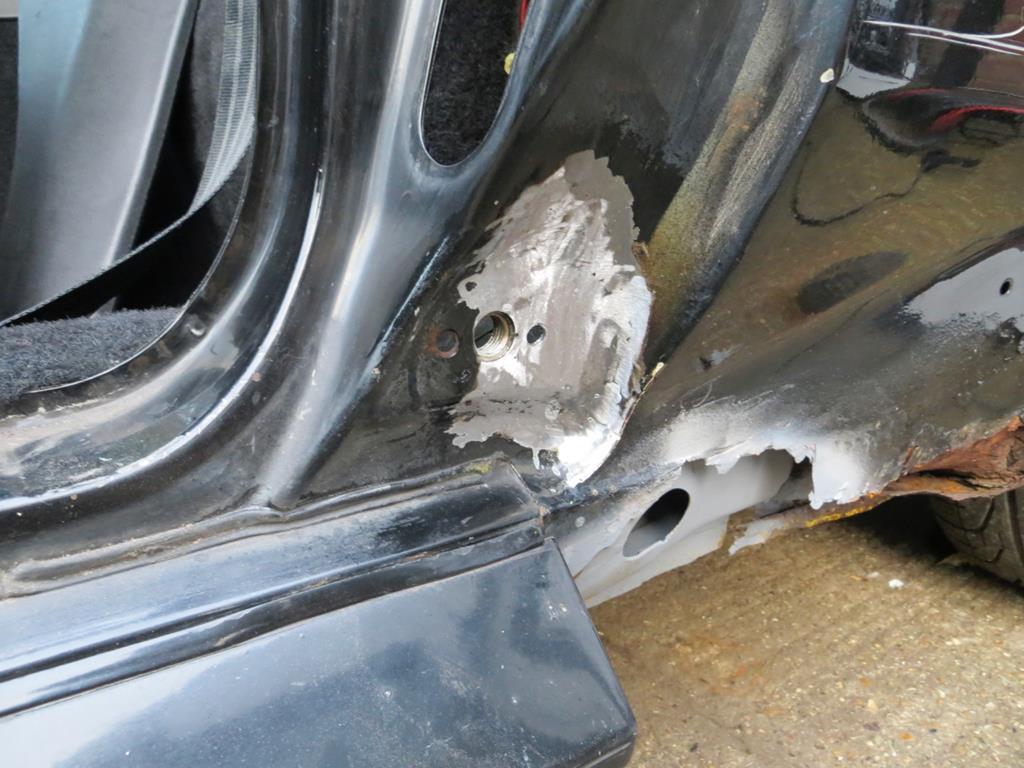 I think I was dropped on my head when I was a child. I can say the words "quick and dirty" and "nasty bodge" and I even understand what it means. But the bit of my brain that actually does quick, dirty, nasty bodges doesn't seem to work… Bit of primer to keep the rain off. 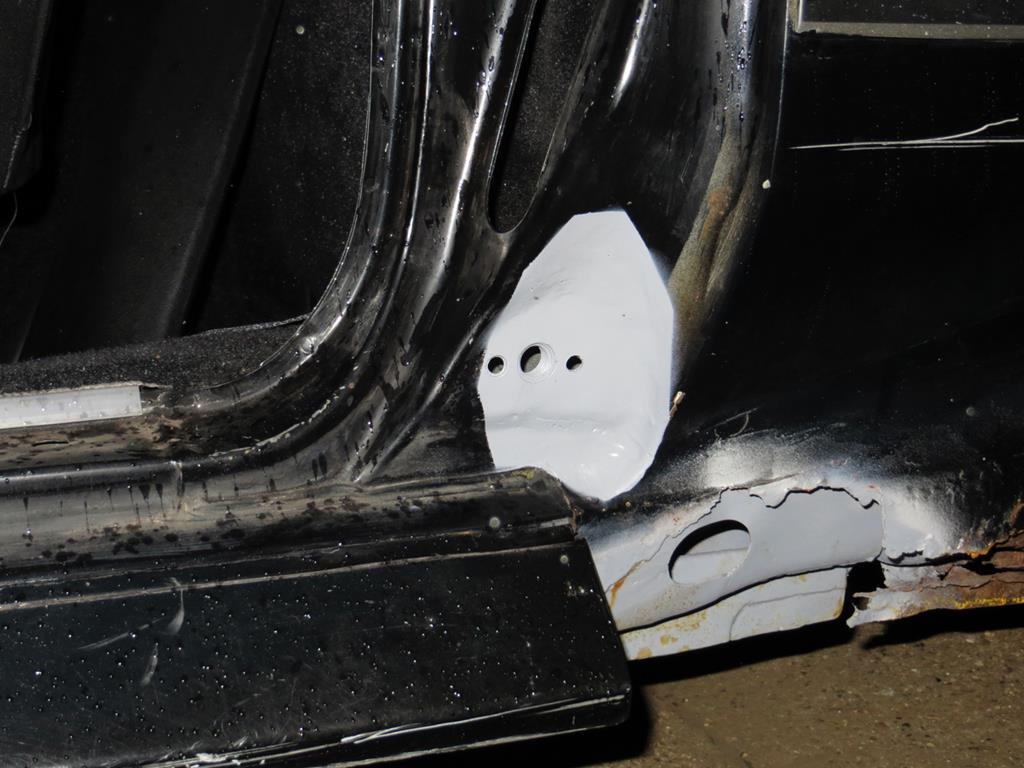 It might not be quick, dirty, nasty or much of a bodge but it's good practice in't it. James |
| |
Last Edit: Dec 23, 2018 22:23:11 GMT by Sweetpea
|
|
|
|
|
|
|
Dec 20, 2015 21:03:23 GMT
|
That is utterly fantastic! This thread is an absolute inspiration anyway, but the precision in the stereo cage and bracketry is brilliant. Keep up the good work. Why thank you mrtow , it's good of you to say. |
| |
|
|
|
|
|
|
|
|
Pretty tidy repair, that.
Something I have found invaluable in my never-ending war against seized and rounded off and usually whitwurth bolts on the Minor is a large and small reverse drill bit. Slap your drill in reverse and drill in to that stripped out phillips head and it'll do all the work for you!
Or, occasionally it'll drill through until the head comes off, and that's where you swap to the smaller one so you can drill in to the shaft of the bolt instead!
Also probably a lot quieter than an air impact gun, I would imagine.
|
| |
|
|
|
|
|
|
|
|
Sure ain't quick and dirty....more like you took your time and made it nice and clean...very nice...too nice for a temporary repair!...but I totally know where you are coming from...good practice it is!
JP
|
| |
I know its spelled Norman Luxury Yacht, but its pronounced Throat Wobbler Mangrove!
|
|
|
|
|
|
|
 I do like a bit of total overkill. I like winning too! We'll see the door switch again in another post. I've had an idea... James Can't wait to see this re-purposed! Nice repair, as always  |
| |
|
|
|
|
|
Dec 21, 2015 11:18:30 GMT
|
Nice repair, as always. And can I just add, that there isn't enough use of "Bum Hats" as an expletive; I shall endeavour to use it several times over the upcoming festive season.  |
| |
|
|
gt
Part of things
 
Posts: 136
|
|
Dec 21, 2015 14:42:30 GMT
|
|
just read all of your thread over a couple of nights ,some nice fabrication skills with very little tooling ,my favorite part is the patch you made for the front wing there are some complicated curves going on there and not easy to get right.
I'm just waiting on the weather to get better before i tackle the sills on my mk1 mx5 ,dreading grinding it back as it looks like some one has done it before and it's always much worse than it looks, anyway keep up the good work.
dave
|
| |
|
|
|
|
|
|
|
Pretty tidy repair, that. Something I have found invaluable in my never-ending war against seized and rounded off and usually whitwurth bolts on the Minor is a large and small reverse drill bit. Reverse drill bit!? Well I've learned something new today! I'll have a look and see what I can find over here. I once tried a stud extractor and it broke off in the bolt. Then I had a real problem on my hands. Haven't used one since. I quite like the 'welding a bolt on the end' method. I think the heat shock cracks the rust a bit. And the impact tool bashes things apart nicely. Sure ain't quick and dirty....more like you took your time and made it nice and clean...very nice...too nice for a temporary repair!...but I totally know where you are coming from...good practice it is! JP I must learn to bodge it. I must learn to bodge it. I must learn to bodge it.... Can't wait to see this re-purposed! Re-purposed? No mate, I'm going to repair it! See, I really am crazy. Nice repair, as always. And can I just add, that there isn't enough use of "Bum Hats" as an expletive; I shall endeavour to use it several times over the upcoming festive season.  Yes, I rather like "Bum Hats" too. Makes me giggle like a school girl! Not sure where I got it from. I shall make using it a new years resolution. Might be the first one I actually do. just read all of your thread over a couple of nights ,some nice fabrication skills with very little tooling ,my favorite part is the patch you made for the front wing there are some complicated curves going on there and not easy to get right. I'm just waiting on the weather to get better before i tackle the sills on my mk1 mx5 ,dreading grinding it back as it looks like some one has done it before and it's always much worse than it looks, anyway keep up the good work. dave I fully understand that feeling of dread as you take the grinder to your car. I'm getting more confident in my abilities to put it back together though. Slowly. Happy Christmas everybody! |
| |
|
|
|
|
|
|
|
Re-purposed? No mate, I'm going to repair it! I had a funny feeling that's what you were going to say  |
| |
|
|
crahel
Part of things
 
Posts: 210 
|
|
Dec 24, 2015 11:19:21 GMT
|
|
I some times drill a hole into the broken off bolt and knock an old Allen key in, if that doesn't work weld another bolt on as you do. Its a challenge to remove a stubborn bolt that just wont budge.
Merry Christmas
|
| |
1973 Lancia Fulvia s2 coupe (sold)
1998 Audi a4 sedan (sold)
2000 Nissan maxima (sold)
2007 Audi convertible.
|
|
gt
Part of things
 
Posts: 136
|
|
Dec 24, 2015 11:41:31 GMT
|
|
i've done that as well drill a hole and knock a torque bit in but i also think the best method is welding a stud onto the old bolt the heat works wonders, i hate stud extractors they are very brittle especially in the smaller sizes.
|
| |
|
|
|
|
|
Dec 24, 2015 14:28:08 GMT
|
I always wondered what to do with all those old Allen keys. Corking idea. Anyway... Happy Christmas!  From me, the car, Mrs Sweetpea, and Project Manager Portia the cat. |
| |
Last Edit: Dec 23, 2018 22:39:27 GMT by Sweetpea
|
|
|
|
|
Dec 24, 2015 21:17:19 GMT
|
|
And to you, James.
|
| |
|
|
|
|
|
Dec 30, 2015 22:37:38 GMT
|
Next please! 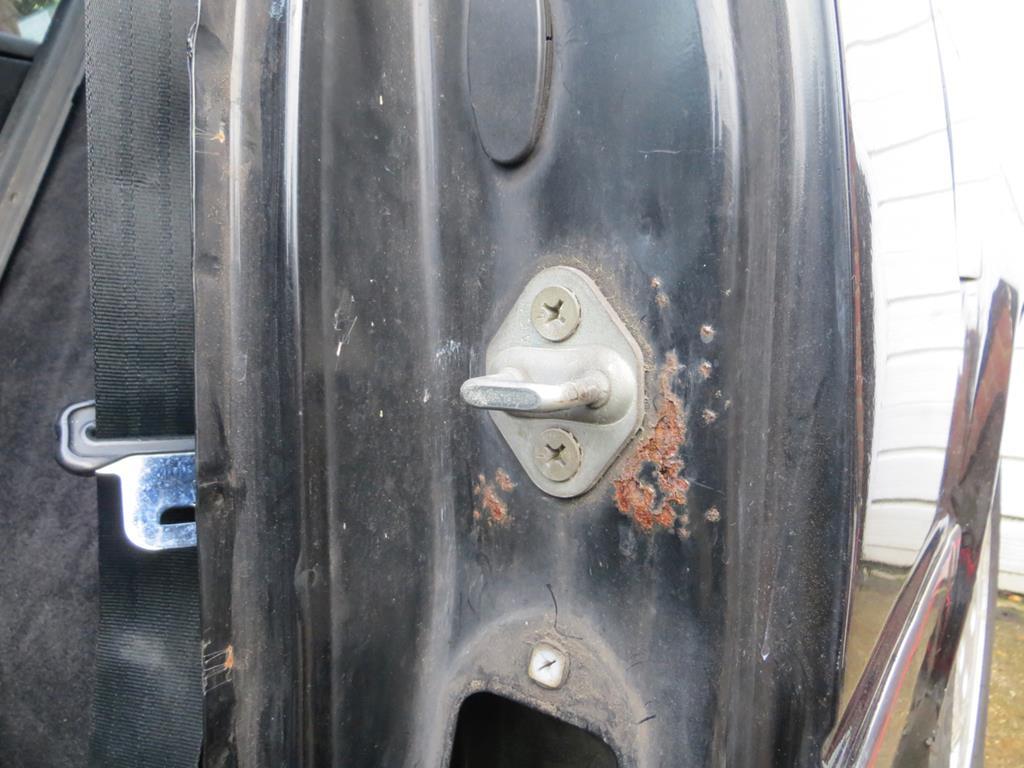 Doesn't look too bad. Especially since it's going in the skip. 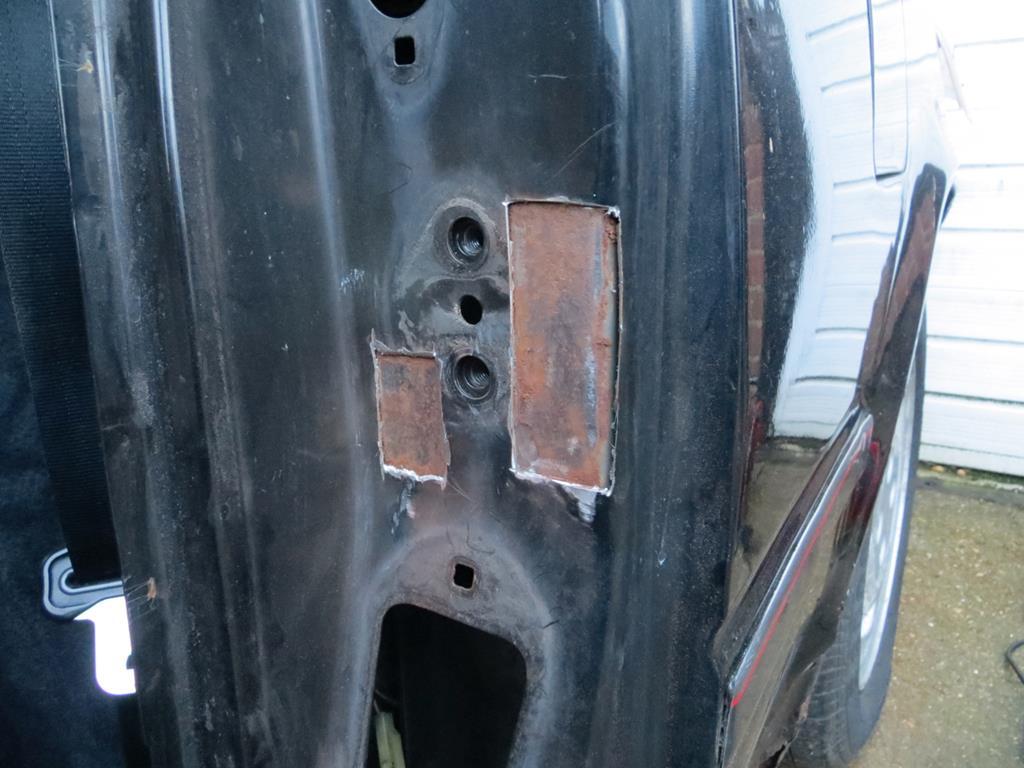 Knock up a couple of patches.  Welded, ground and primed. 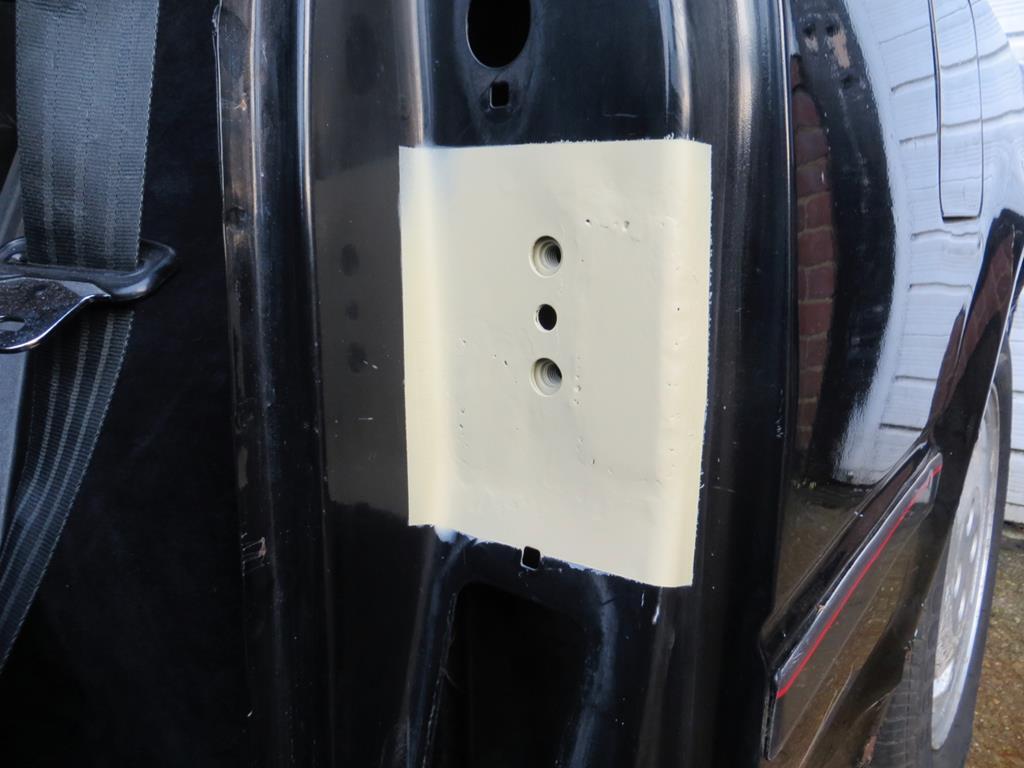 You can see a couple of pin holes in the weld. It's where the primer on the inner skin contaminated it. Normally I'd grind that back and weld the holes back in - but since it's a botch job I didn't bother. However I do need some practice with the P38. 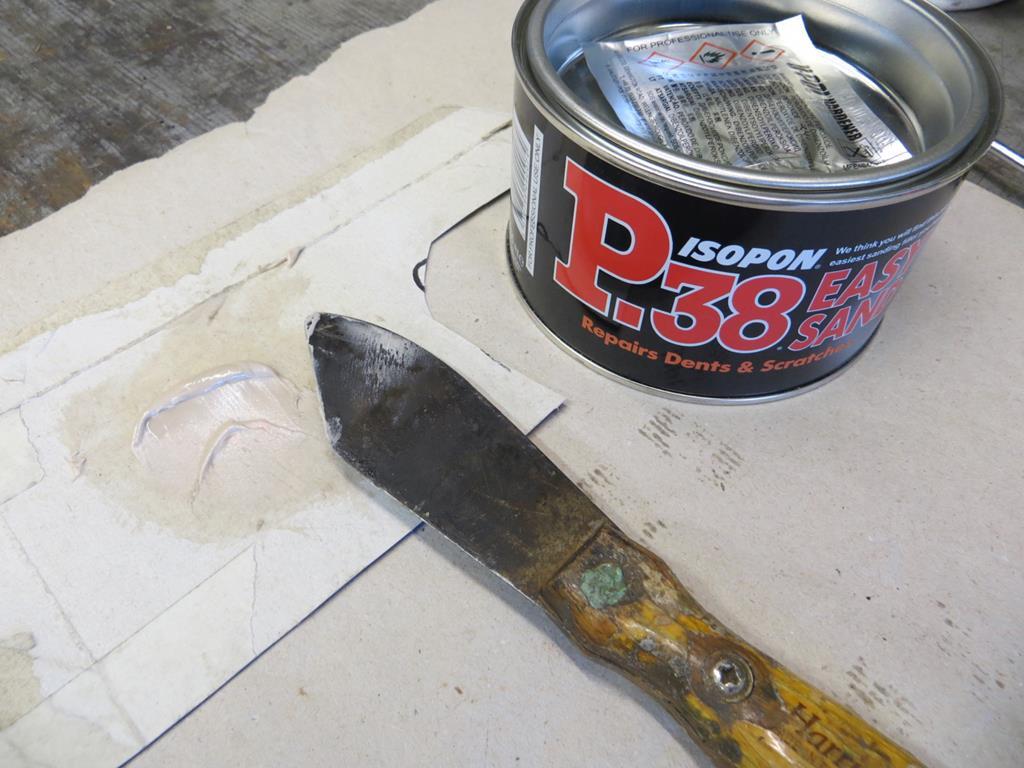 That's P38 the gooey stuff, not P38 the Range Rover. Sorry georgeb . It's literally years since I played with this stuff and I think I'll be using it a fair bit so lets see if I can still remember how it works. 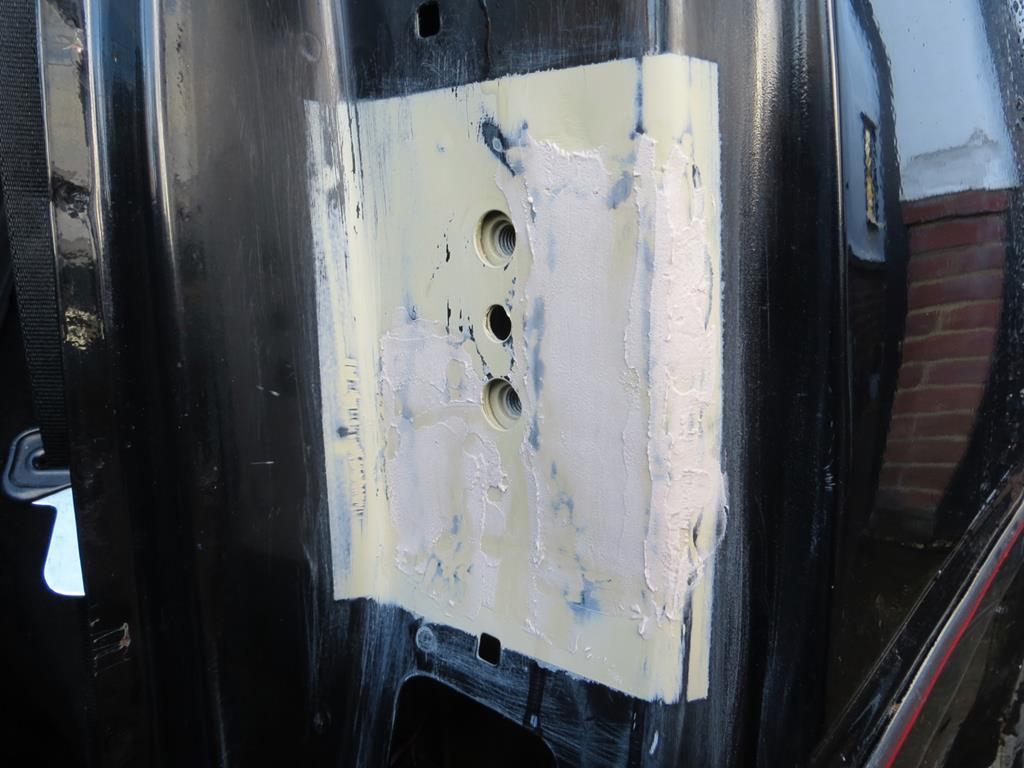 The other thing I need a bit of practice with is painting so after a bit of sanding and masking… 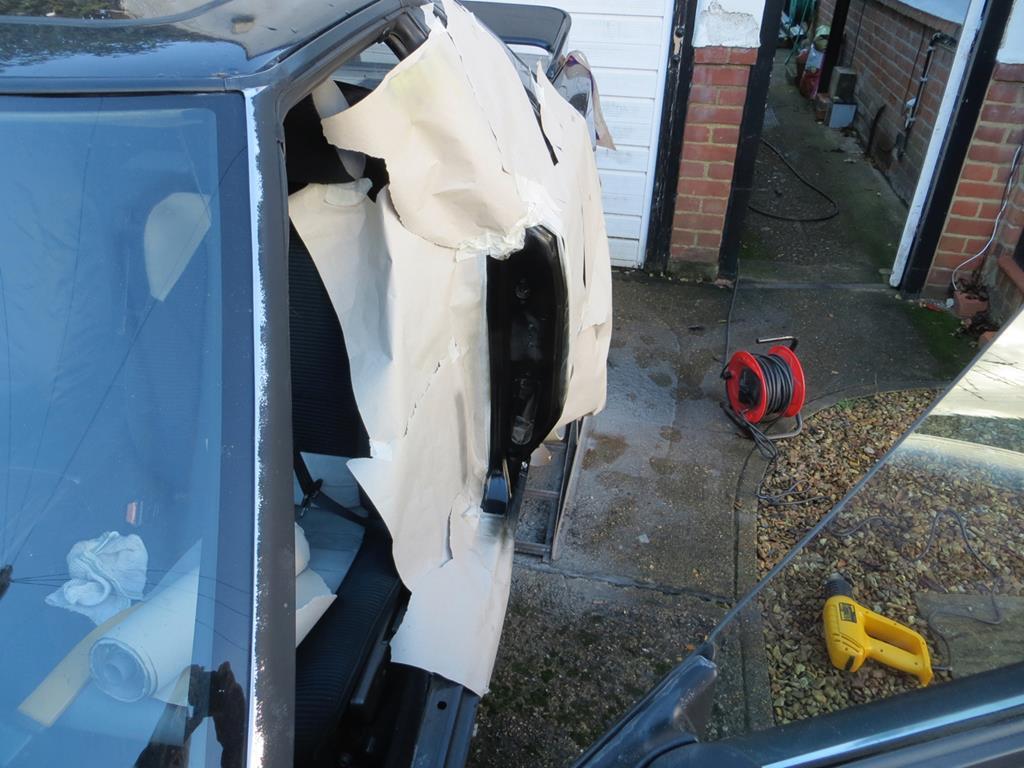 … I blew it over. And clear coated it. Botch job eh? Hopeless boy.  About paint… My car is "metallic black" code 204. It's clear coated. In a post somewhere or another I remember saying that I could see the metallic fleck in the paint. The response was more or less silence which made me wonder a bit. Not surprisingly my car has been painted a time or two. I suspect the roof is the original colour but nothing much else is. And indeed I can see the metallic fleck in one panel. But only one panel. So broadly speaking, the car is a patchwork of colours and I'm not sure which is the right one. To be fair, you don't notice it - it's not far off being right. When I was in Halfords they had a can of the more common 202 black so I figured it'd do until I do a proper job. And since the car is a multitude of colours anyway… That's what the door shut is painted in. Well 202 black has a surprisingly brown tinge against the paint on the car. Looks look I need to find somewhere that does 204 metallic black in a tin. James |
| |
Last Edit: Dec 23, 2018 22:52:48 GMT by Sweetpea
|
|
The Doctor
Club Retro Rides Member
Posts: 3,445
Club RR Member Number: 48
|
|
Dec 31, 2015 10:54:13 GMT
|
I thought Toyota metallic black was 205? Great bodge btw  |
| |
|
|
|
|
|
Dec 31, 2015 19:16:19 GMT
|
I thought Toyota metallic black was 205? Great bodge btw  I double checked. Mine is definitely 204. It looks like 205 was a 90s colour. |
| |
Last Edit: Dec 31, 2015 19:16:51 GMT by Sweetpea
|
|
|
|
|
Dec 31, 2015 19:45:25 GMT
|
Remember this? 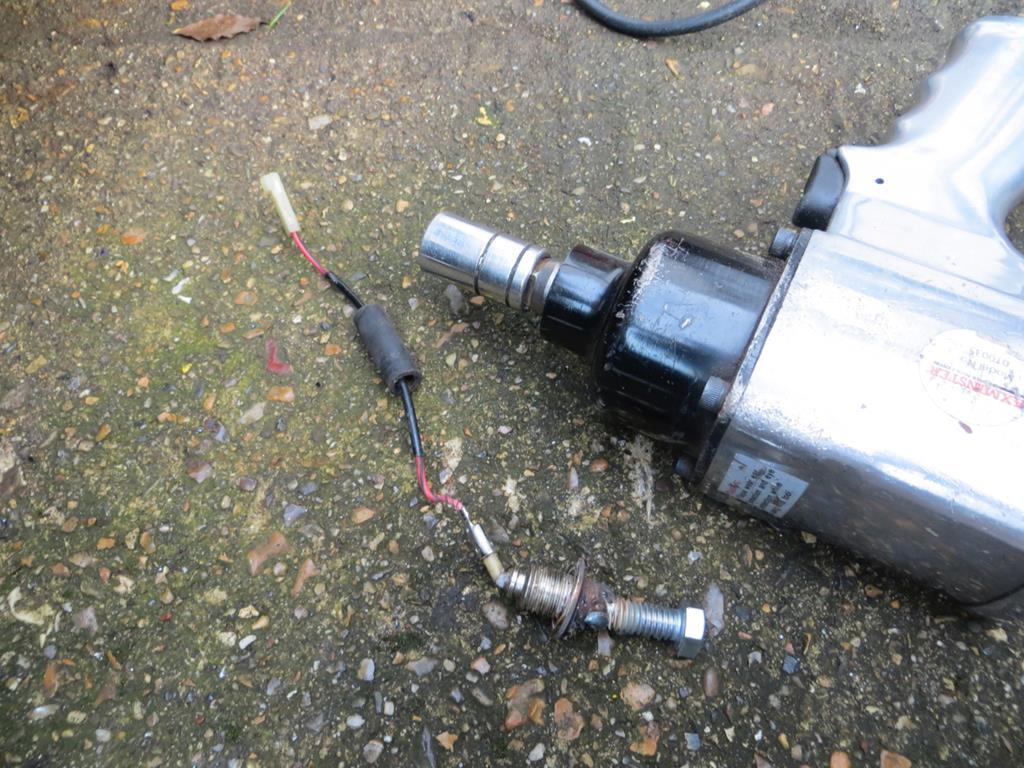 It's what's left of the door switch. I couldn't get it off the car so I wound up welding a bolt on the end. Well that's trashed then. I don't think… So I cut the bolt off and ground the hex back into the end. It's not a perfect shape but at least a socket now fits. 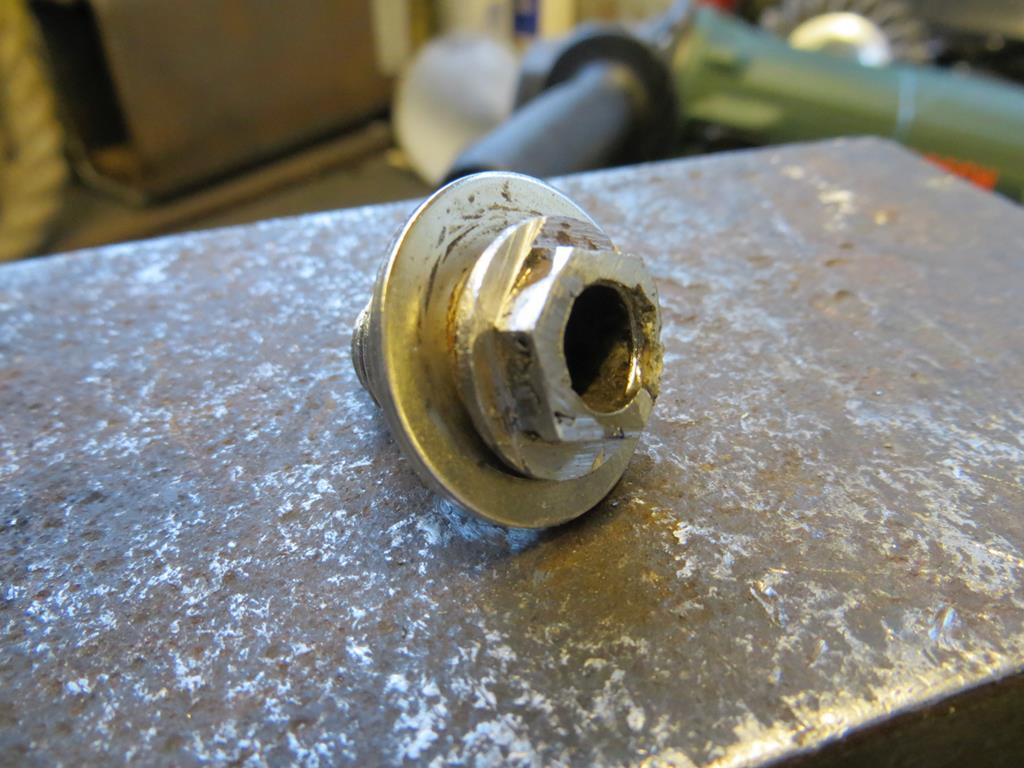 The plunger was made of plastic so it didn't survive welding the bolt on the end. It was stuck solid anyway. So I drilled it out and recovered the spring. Then I made a new plunger out of a handy bolt. 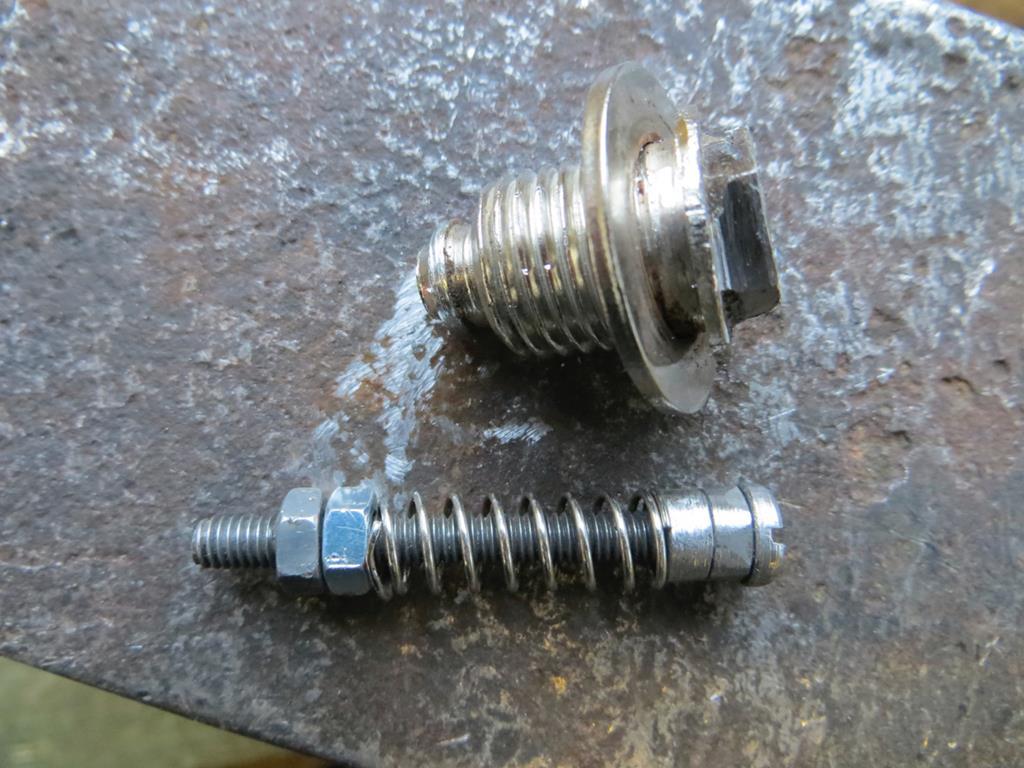 Pin switches usually work by having a plastic plunger with a metal cap on the end which touches the body of the switch when the door is open. Clearly this isn't going to work because my entire plunger is metal. What I need is for the plunger to operate a microswitch.  Which needs a bracket to mount it. That's the bit of metal in the photo. It just needs a few holes and bends in it. Here is the complete pile of parts for my version of the door switch.  Impressive isn't it? And this is it all screwed together. 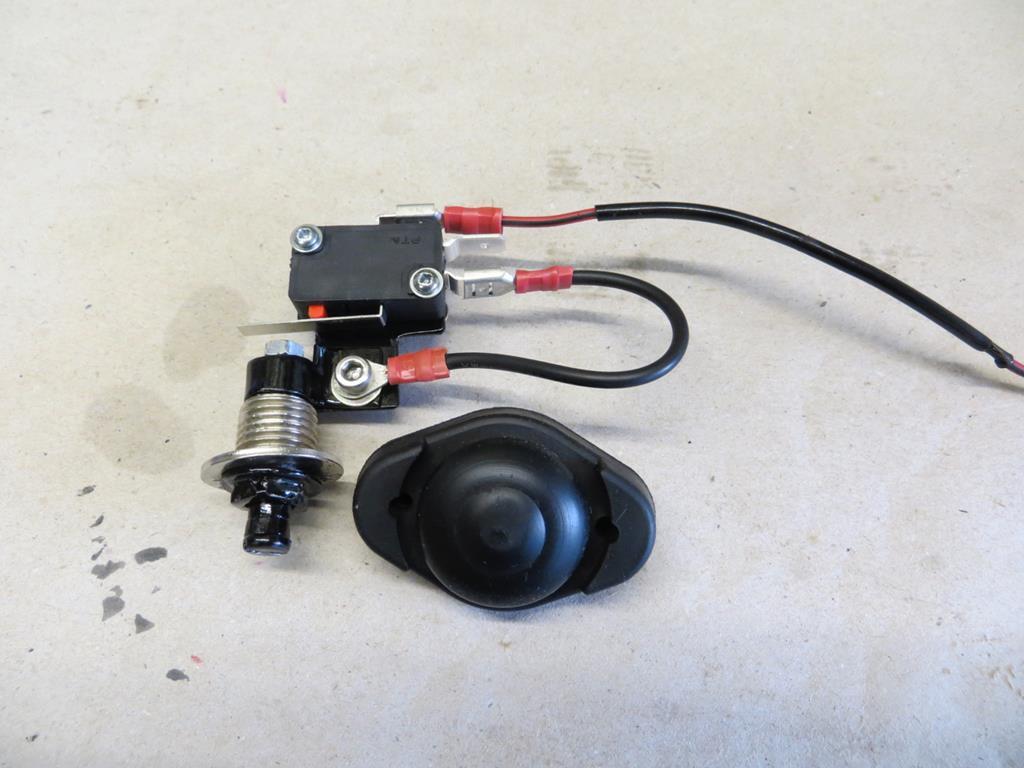 It's a bit tight but it does actually fit in the bottom of the B pillar. And it works! 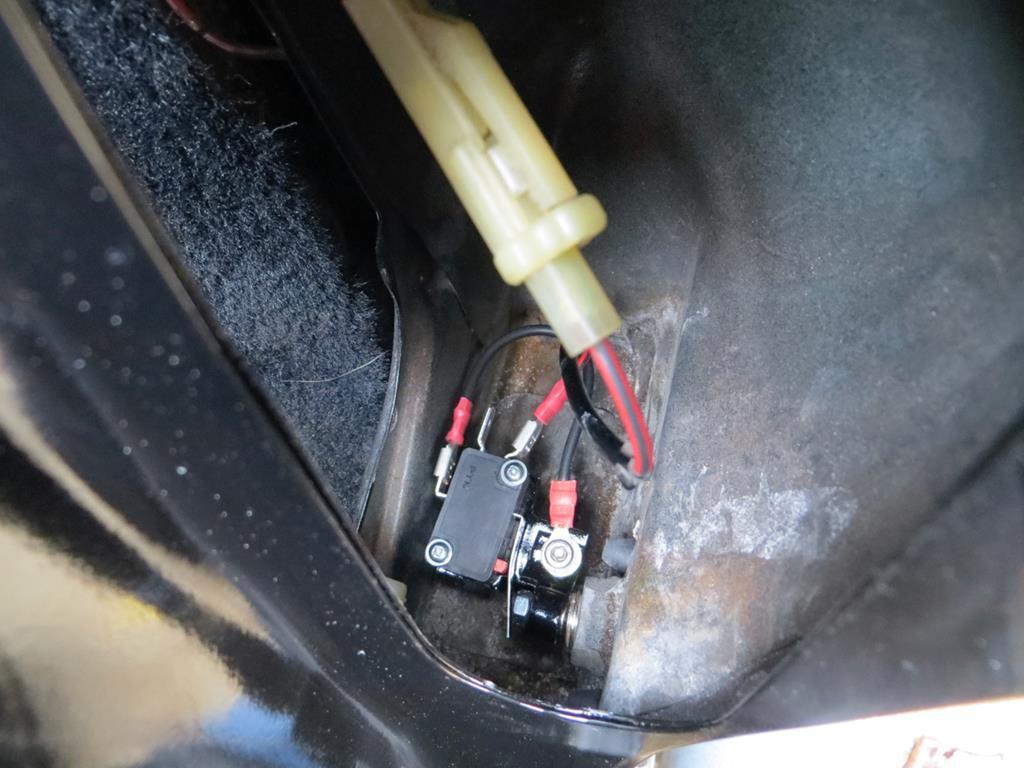 Why did I do all this rather than just buy a new one? God only knows. I think the best answer lies some where between "because I could" and "because I wanted to". Or possibly "because I'm barking mad". James PS That bolt that I welded to the switch to get it off the car… It found a new life too. The threaded bit is now bolting the bog brush together after the plastic head broke off. We will be buying a new bog brush! |
| |
Last Edit: Dec 24, 2018 21:29:08 GMT by Sweetpea
|
|
79cord
Posted a lot
  
Posts: 2,617
|
|
|
|
|
Yes I think I would have to go with barking mad on that door switch too.
But then I don't understand the point of metallic black either & might redo my CR-X in straight black instead.. If I ever get around to working on that one.
|
| |
|
|
johnl
Part of things
 
Posts: 20 
|
|
|
|
Anyone else would have bought the $10 door switch ! This is like watching an episode of MacGyver, entertaining how your head works lol keep it up  |
| |
|
|
|
|
|
|
|
|
Good stuff. I've got two of those I cant get out too. Recon they must glue the threads in. I'll try your method but it annoys me that they have to be destroyed to get them out.
Mark
|
| |
14 Audi A3 Sportback - Easy driver
05 Audi TT MK1 3.2 DSG - Damn quick
73 Triumph 2000 - Needs work
03 Range Rover 4.4 V8 petrol. Had to get it out of my system.
|
|


