|
|
|
Jan 27, 2020 21:08:37 GMT
|
Next you'll be filling caulking guns up with cake mix and making custom cakes for the boot fair! Nice work, though.  If there are any cakes on the go they'll be in my tummy! Nobody else is getting a look in! These must be the refined yet audacious skills that the bus restoration team hunted you down for? John To be honest I doubt there are many people willing to volunteer to crawl under a filthy old vehicle. They probably didn't have to do many interviews for the position. Genius - which is possibly another way of saying: outstanding, inspired madness.  "Inspired madness." Yep, I think that sums it up nicely. So just to prove that I'm mad, my head is now wondering how I could make them better. If I took a fibreglass plug off the wooden mould I could then prep it properly and then make a new fibreglass mould to make more gaskets from. But more accurate ones. It's a silly thought because I only need to make one more gasket for the other side of the car! |
| |
|
|
|
|
ToolsnTrack
Posted a lot
   Homebrew Raconteur
Posts: 4,126
Club RR Member Number: 134
|
|
|
|
|
That home brew gasket is the best bodge I have seen all year.
|
| |
|
|
|
|
|
Jan 28, 2020 15:40:14 GMT
|
That home brew gasket is the best bodge I have seen all year. its only the 28th of Jan lol |
| |
|
|
|
|
|
|
|
Plenty of year left for sweetpea to regale us with bodgery! Although I'm not sure it counts as a bodge if you've successfully made a gasket? |
| |
Last Edit: Jan 29, 2020 2:24:02 GMT by varelse
|
|
bstardchild
Club Retro Rides Member
Posts: 14,962
Club RR Member Number: 71
|
|
|
|
Genius - which is possibly another way of saying: outstanding, inspired madness.  Absolutely amazed that it worked so well I've now a solution to a problem of my own |
| |
|
|
vulgalour
Club Retro Rides Member
Posts: 7,268
Club RR Member Number: 146
|
|
Jan 30, 2020 11:18:02 GMT
|
|
That's a superb solution to an annoying problem and a great example of why you should never throw anything useful looking (bit of wood) away.
|
| |
|
|
|
|
|
Jan 30, 2020 21:33:10 GMT
|
Why thank you chaps! Plenty of year left for sweetpea to regale us with bodgery! <cough>Exhaust<cough> Absolutely amazed that it worked so well If I'm honest I thought it would work. But I thought I'd have to have two or three goes at the mould before I got it right. But yes, I'm surprised too. Of course it'll fall apart tomorrow now I'm patting myself on the back. I've now a solution to a problem of my own Do tell... Actually that's ^^^ the best bit... I came up with this plan by taking thoughts and ideas from others and mixing in my own special brand of madness. And then somebody else takes that idea and turns it to something for their problems. Good, this site, isn't it! |
| |
Last Edit: Jan 30, 2020 21:34:08 GMT by Sweetpea
|
|
bstardchild
Club Retro Rides Member
Posts: 14,962
Club RR Member Number: 71
|
|
Jan 30, 2020 21:38:15 GMT
|
I've now a solution to a problem of my own Do tell... I have knackered headlamp lens gaskets on the Commodore and they are like poor quality wobbly children's play pony poo Actually that's ^^^ the best bit... I came up with this plan by taking thoughts and ideas from others and mixing in my own special brand of madness. And then somebody else takes that idea and turns it to something for their problems. I've learnt loads for this site over the years - from making tools to do a specific task to really simple solutions to issues where people have gone about stuff in a different way Good, this site, isn't it! Always has been  |
| |
|
|
bstardchild
Club Retro Rides Member
Posts: 14,962
Club RR Member Number: 71
|
|
Jan 30, 2020 21:40:54 GMT
|
they are like poor quality wobbly children's play pony poo They are like "Ro cking Ho rse P oo" if anyone is confused Sheesh who has been upgrading the swear filter It'll be Scunthorpe that gets it next |
| |
|
|
|
|
|
Jan 31, 2020 22:18:27 GMT
|
I noticed that the interior light didn’t quite work. If you turned it on, it came on. Good. But if you set it to ‘door’ it didn’t come on. There is also a light by the ignition key and that was working so the door switches were working. The problem must be in the light or the wiring to it. So I popped the cover off it, removed the screws, and went to unplug the wiring when it exploded parts all over the car. I finally found the last bit in the carpet.  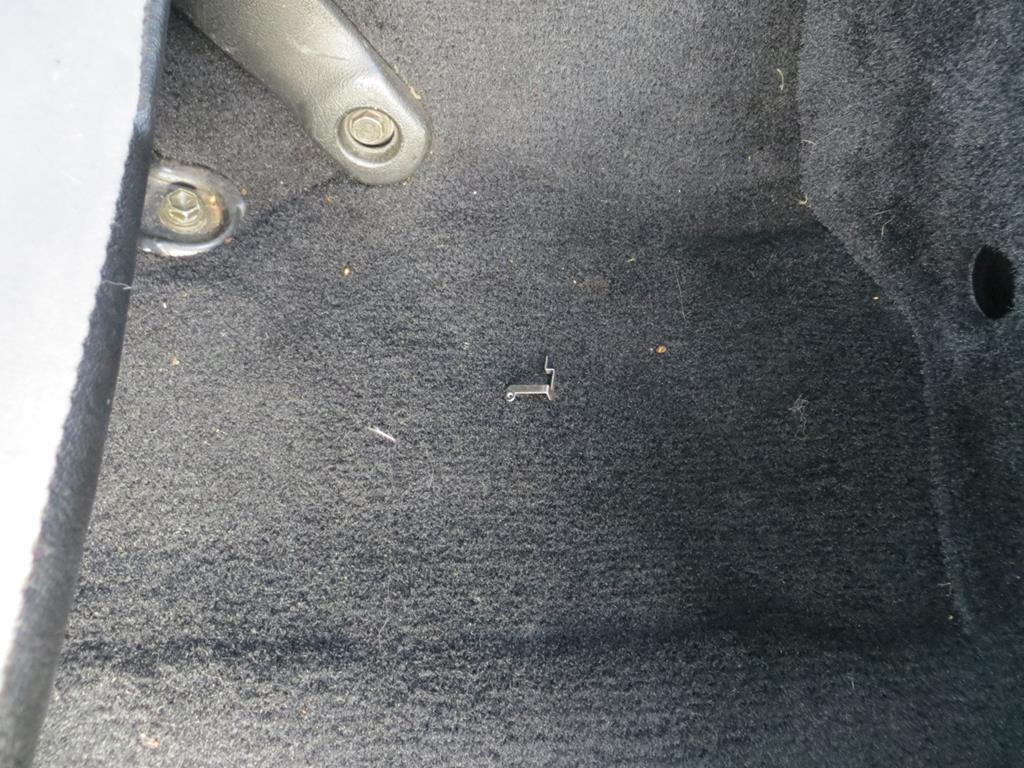 Likely as not this is what’s wrong then.  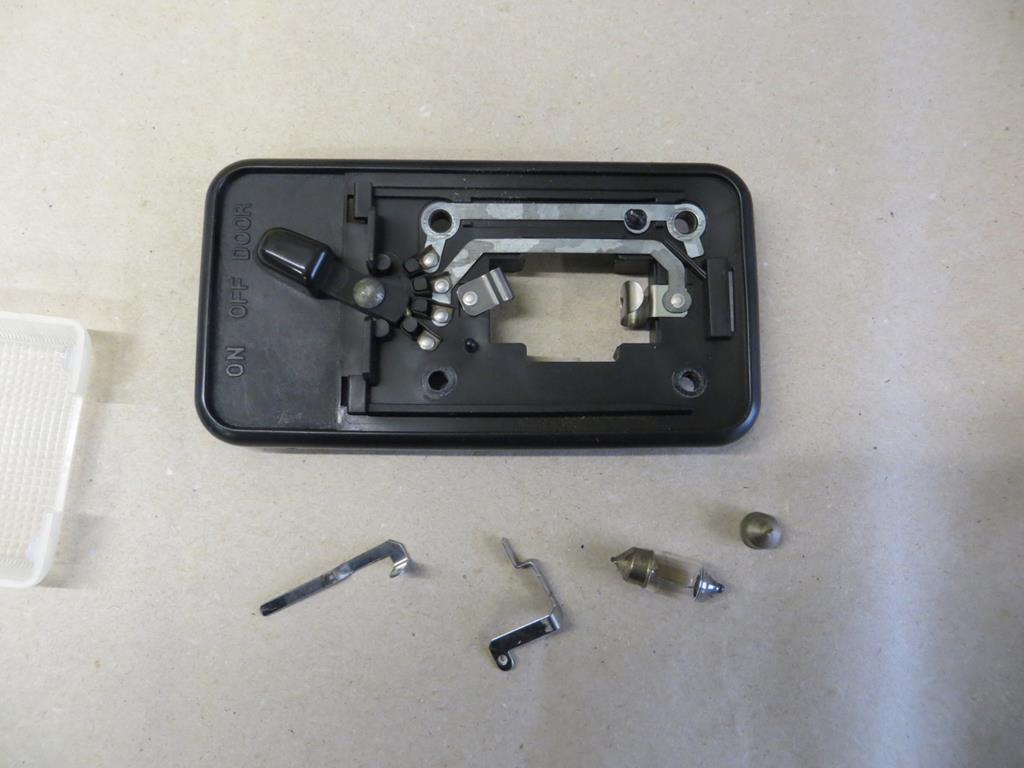 The root cause was that a couple of the little aluminium rivets that hold it together had popped off. Many of the rest were lose when I started measuring resistance so I hammered them tight. That just left the broken ones to deal with. When I was looking on the ‘net for photos to see what bits I was missing I found one on Ebay that was actually missing one of the connections completely. I don’t think mine is the only one to fall apart. I couldn’t find pop rivets anything like that small. The are about 2mm in diameter. I did have some tiny nuts and bolts though. About M2.5. Just too big to go through the holes. So I very carefully drilled them out.  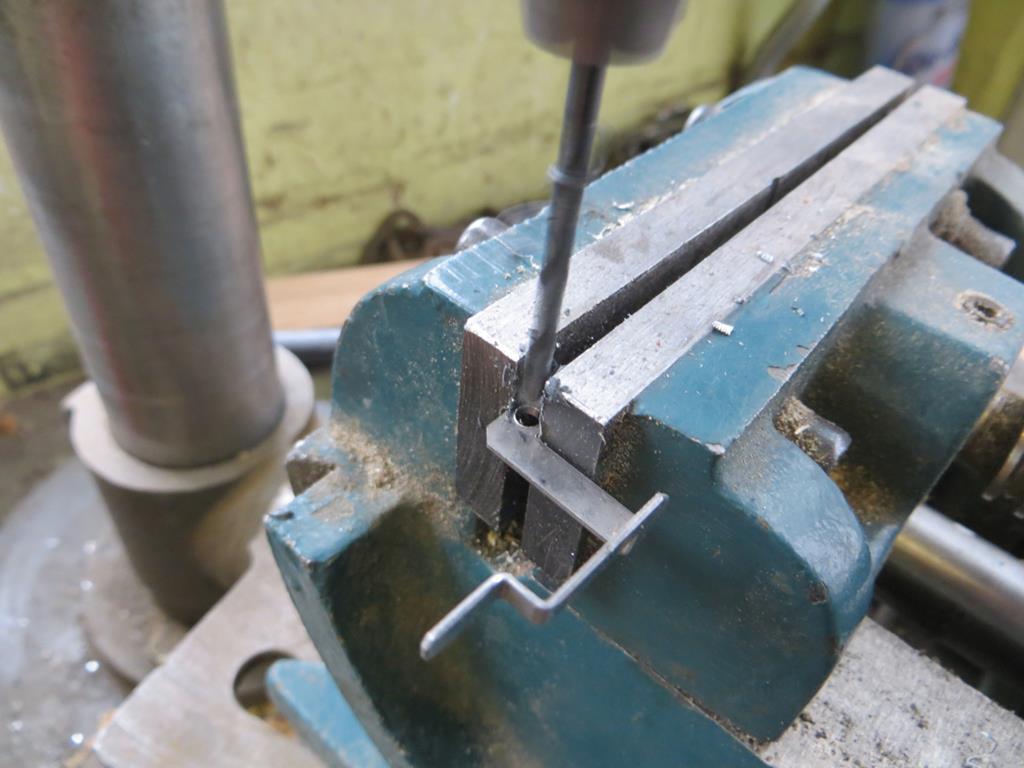 There isn’t much meat to make an error. And then just screwed it back together. 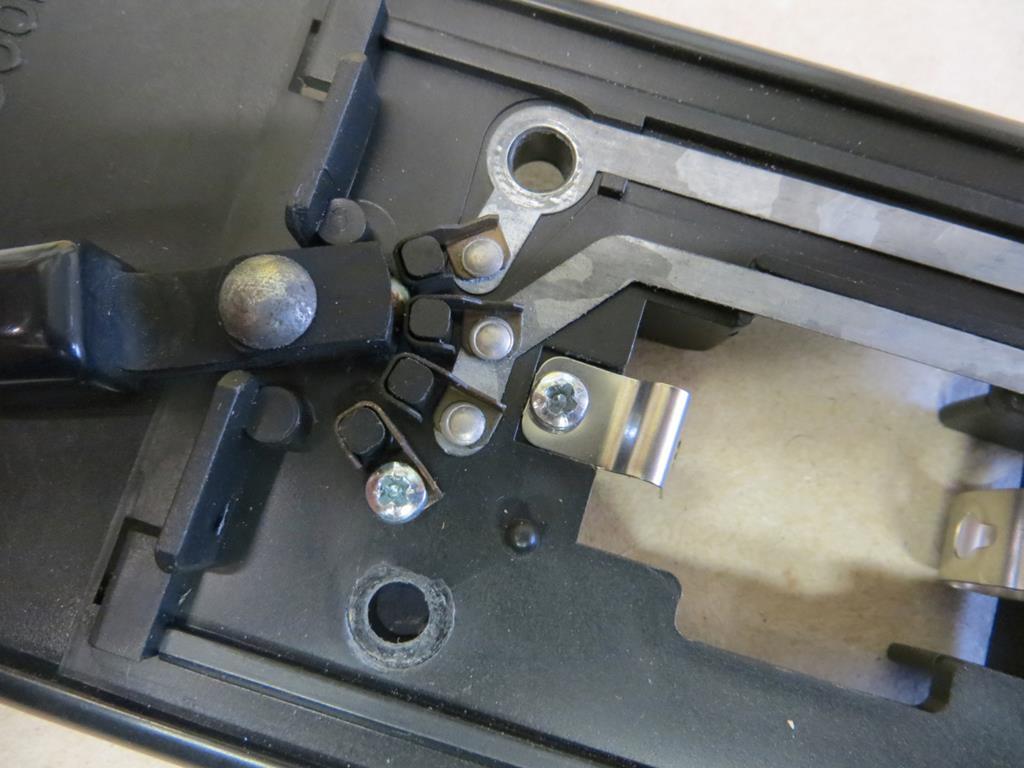  And the back side…  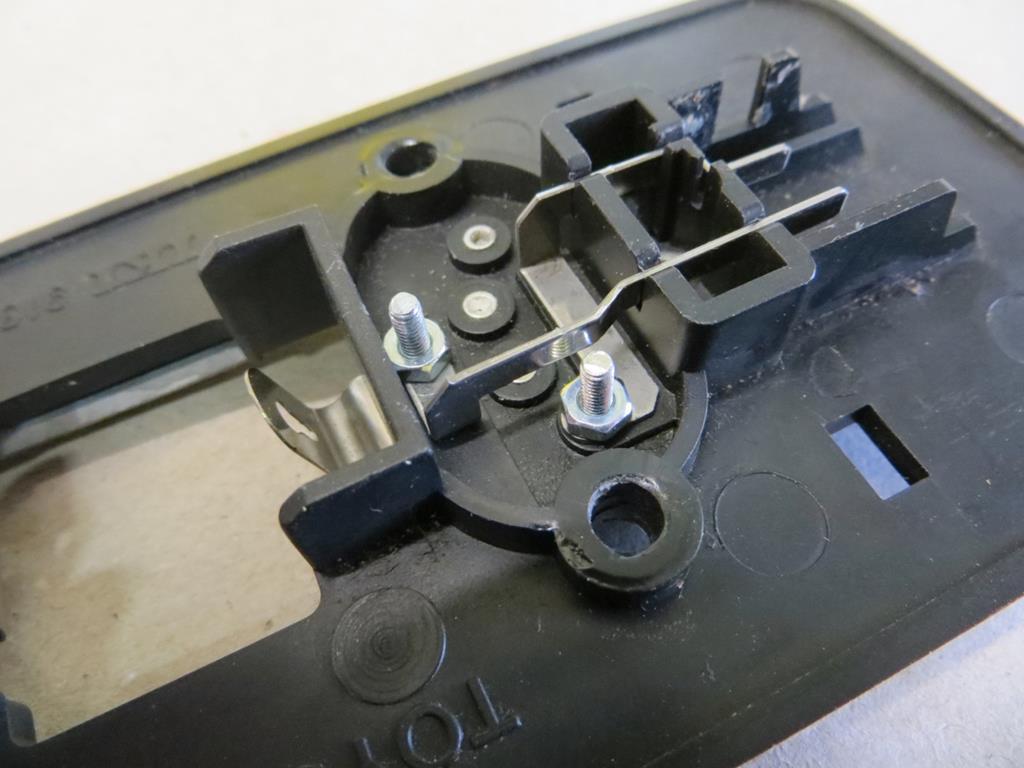 Easy win that. I’ve measured it on the car. I get 12V at the right times so I reckon it’ll work… But no light just yet. I need a new bulb. When it flung its internal organs to the four winds one cap came off the festoon lamp. It was only 34 years old. Things just aren’t made to last any more. So I popped over to Halfords on the Thanet Way to buy a new bulb today. Only to find it’s gone. Halfords, that is, the Thanet way is still there. When did that happen? So I drove over to Canterbury instead. You know, I’m growing to like the old car. It’s quite nice to trundle around in. Bit noisy on the motorway but otherwise quite pleasant. Interestingly I parked near a MK3 at B&Q, and as I was pulling into Halfords a MK2 was coming out. I saw the driver start to smile when he twigged the mobile scrap yard going the other way was a MK1. New bulb fitted and I have another problem… Poxy light won’t go out now. This time it’s the drivers door switch. Think I’ll be rebuilding that soon. James |
| |
|
|
|
|
|
Jan 31, 2020 22:28:18 GMT
|
|
Nice work. i have a few of these lightsthat have exploded. they have a knack for it.
Tempted to try soldering one together or failing that throw it under the tig welder and make sure it doesnt come apart again.
Thought you had done the drivers door switch? A bit of bog brush was utilised from what i recall.
|
| |
|
|
|
|
|
Jan 31, 2020 23:36:32 GMT
|
|
|
| |
Last Edit: Jan 31, 2020 23:44:25 GMT by Sweetpea
|
|
|
|
|
Jan 31, 2020 23:54:48 GMT
|
You just can't rush a craftsman!  |
| |
|
|
|
|
|
|
|
If I’m planning to fit that offside rear wing I need the rear bumper to fit. And at the moment it doesn’t because some previous owner reversed it into a post an bent it. It doesn’t look terrible but there are a couple of clues.  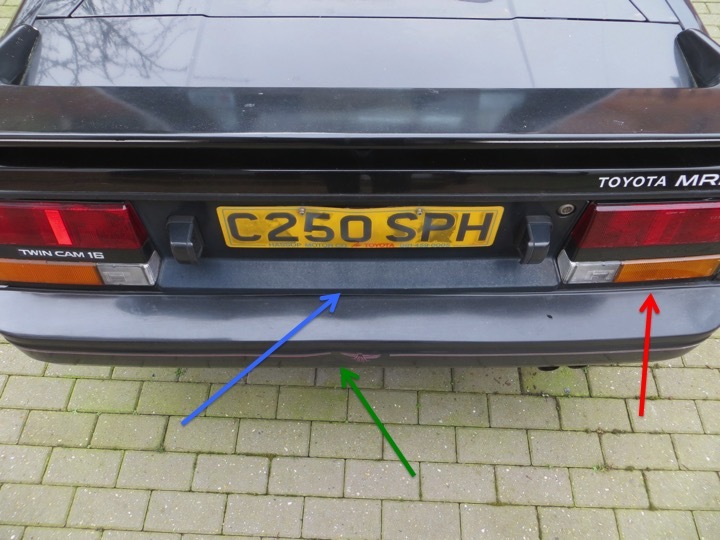 Along the top of the bumper is a crease line that sits under the lights and rear panel. You can see it at the red arrow. By the blue arrow it’s pushed in. And there is a ‘dint’ in the bumper cover at the green arrow.  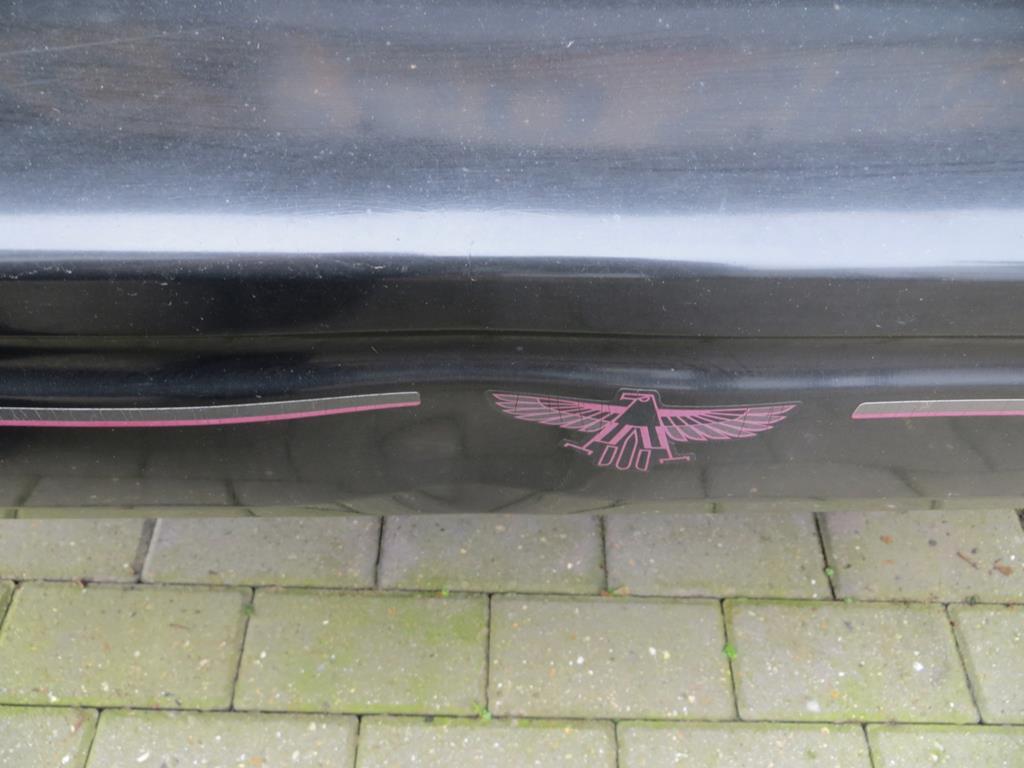 There was also a crack in the back edge of the spoiler in the same place. I fixed that some time ago. Drivers side where it meets the body…  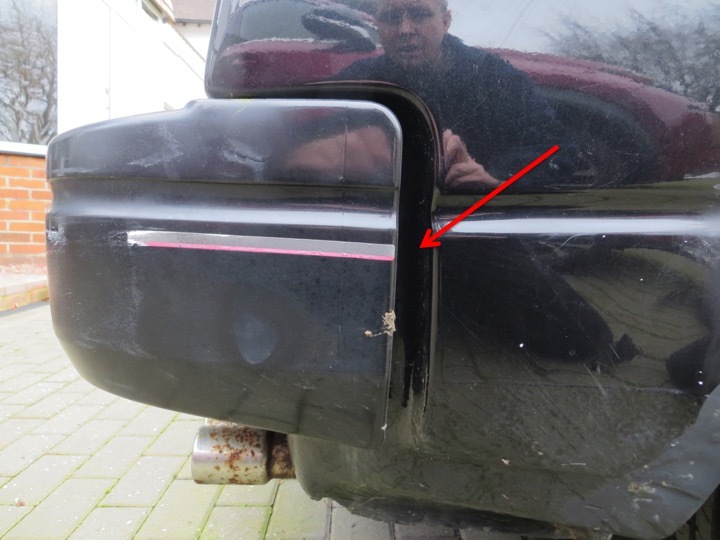 The gap between the body and the bumper should be tighter than that (I think it should be tighter than that). The passenger side…  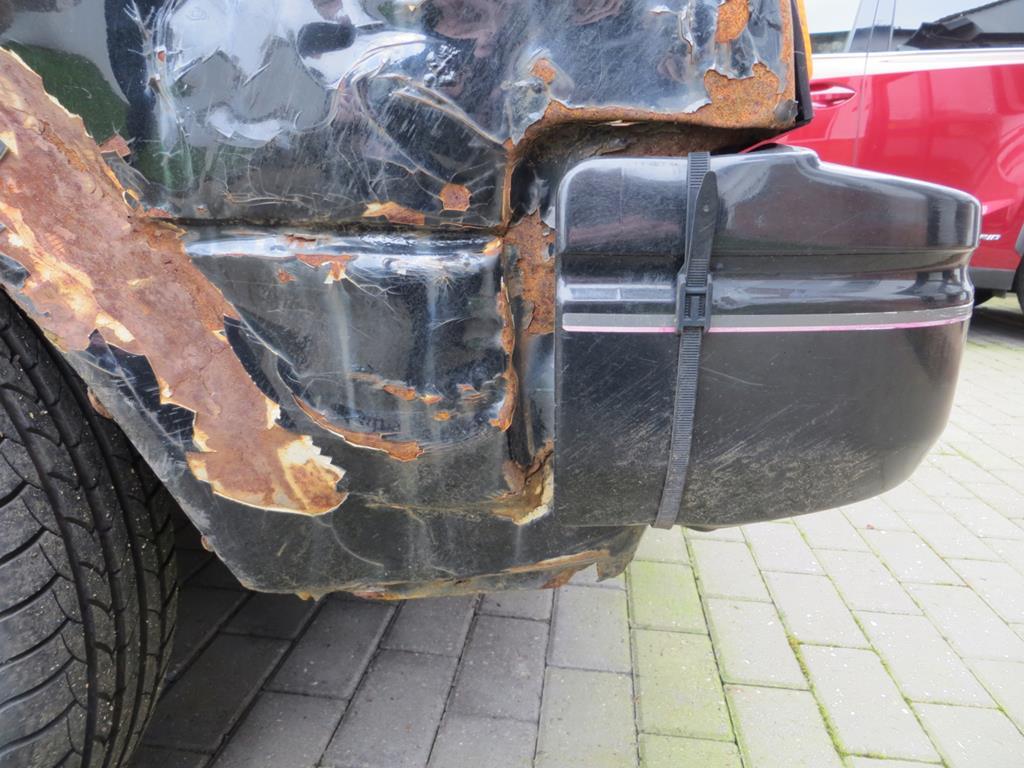 Yeah, lets not worry about that. The bumper comes off with two nuts and two bolts. Easy 5 minutes job with Mr rattle gun.  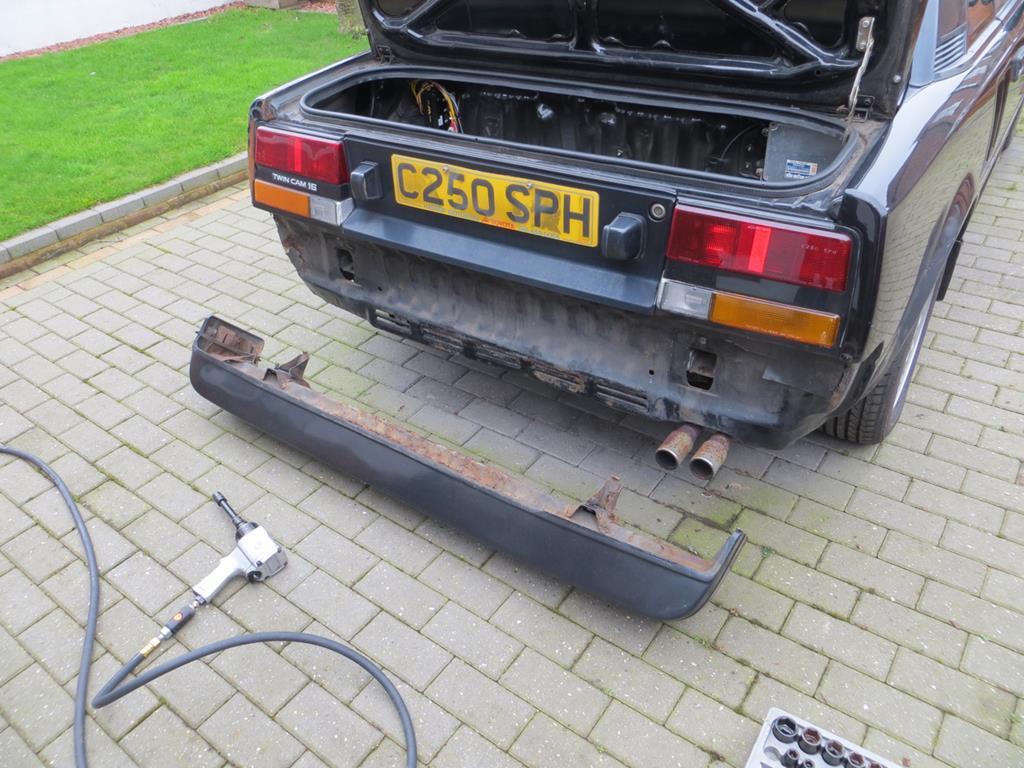 Looks OK behind there. I thought, given it’s had a thump, it might have bent the panel behind but it hasn’t. Now I can have a closer look at the hole under the right side tail light. I had, optimistically, hoped that the hole would only be on the inside of the car…  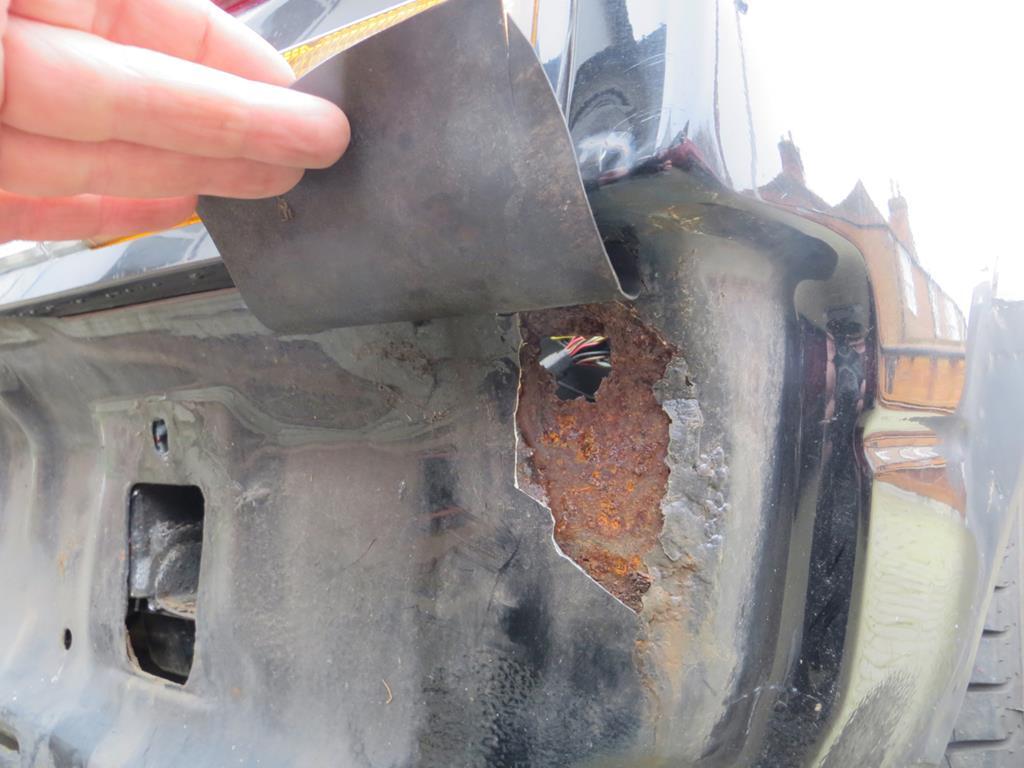 But no, there is a hole on this side too. And some filler. It seems I’m not the first person to this party.  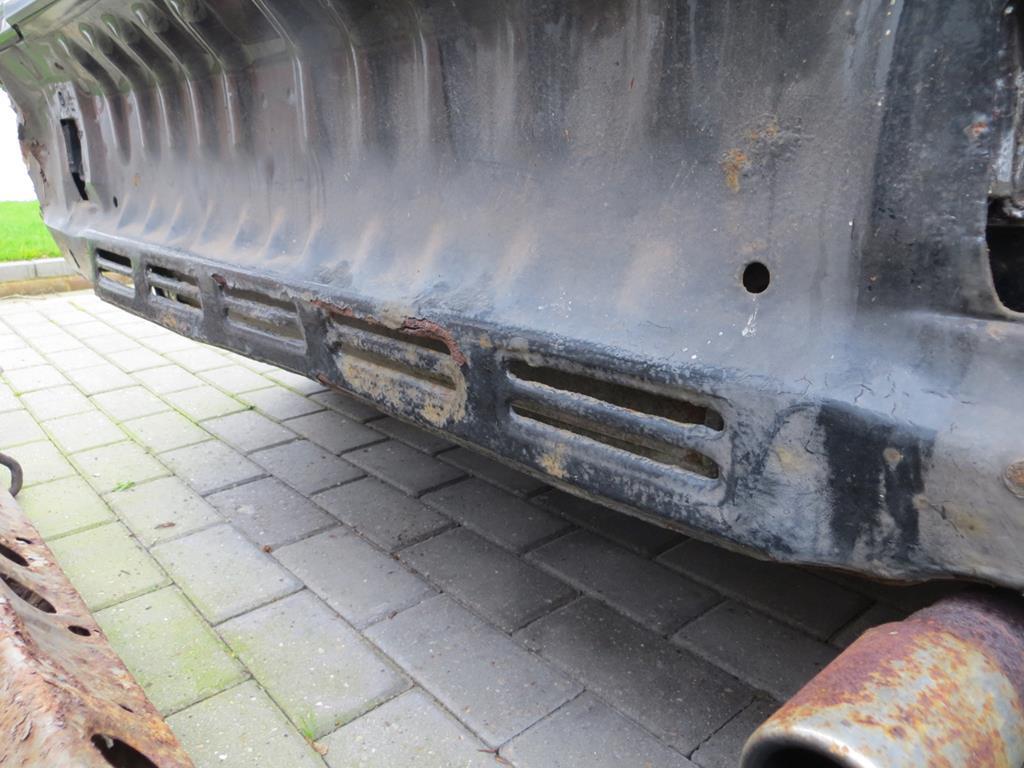 The vent bit under the bumper is falling apart. That’s going to be a bit of a git to remake and I’m not sure I can be bothered. It might wind up as a plain panel. And there is this…  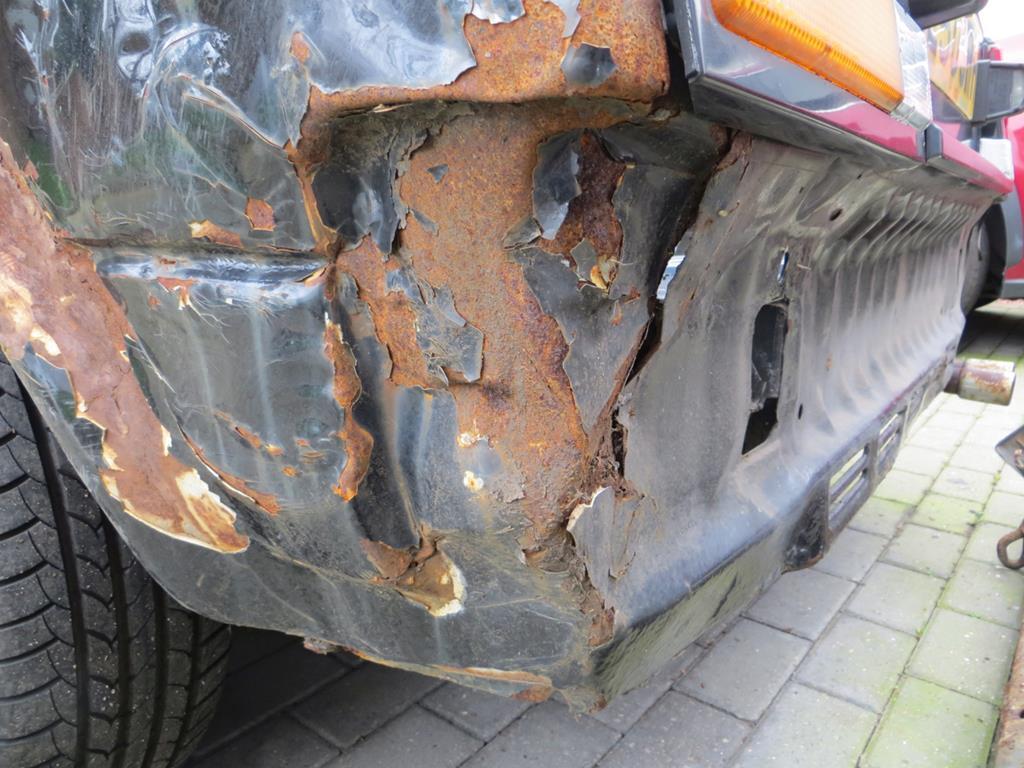 Yeeeeees. |
| |
|
|
|
|
|
|
|
So what of the bumper itself?  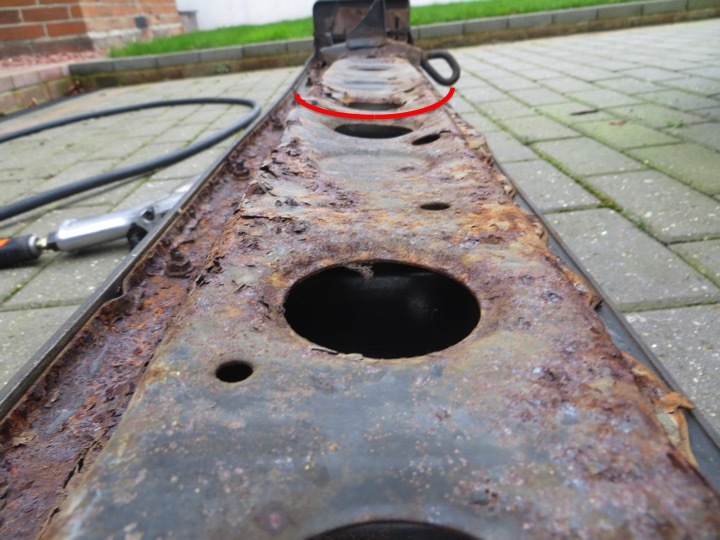 The back face is slightly concave in the middle. It should be flat. I believe this is where somebody has been jumping on it in an attempt to straighten it. There is a little bracket to pick up the leading edge of the cover. On the left side it’s a bit bent.  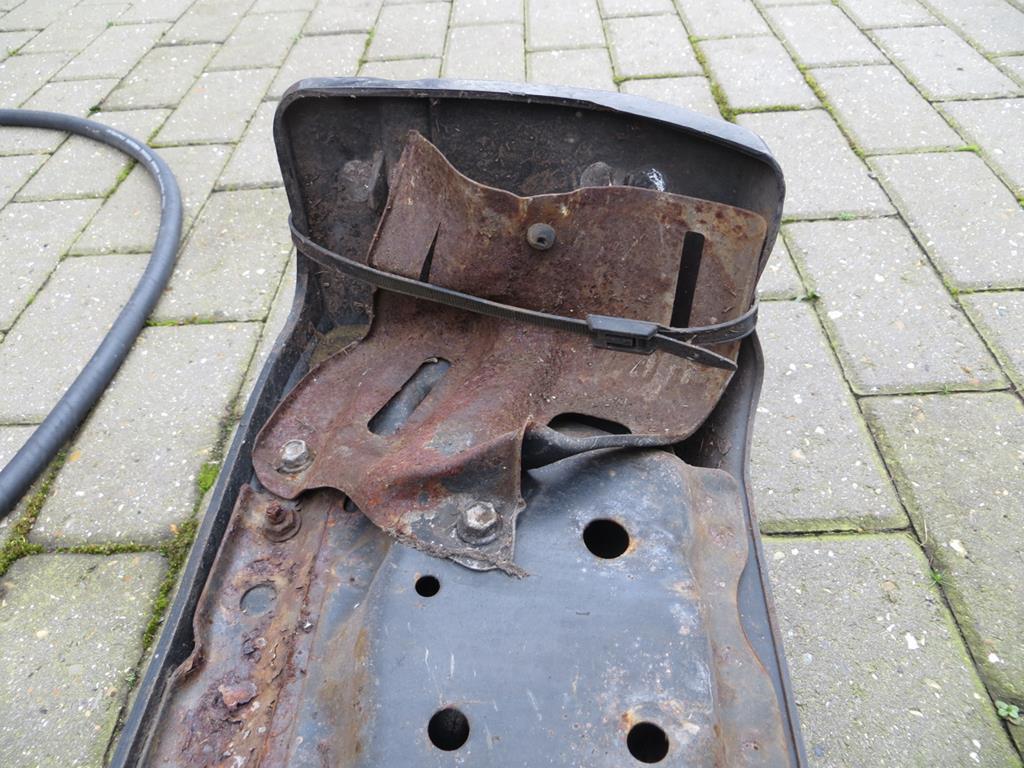 That’s no problem. But more significantly there are two spring clips that should attach the cover to it. They are both missing. The outer cover is fine apart from the ‘dint’. I was hoping this would pop out when it was unbolted from the crash bar but it hasn’t. Not sure how to deal with this. Maybe a bit of gentle heat?  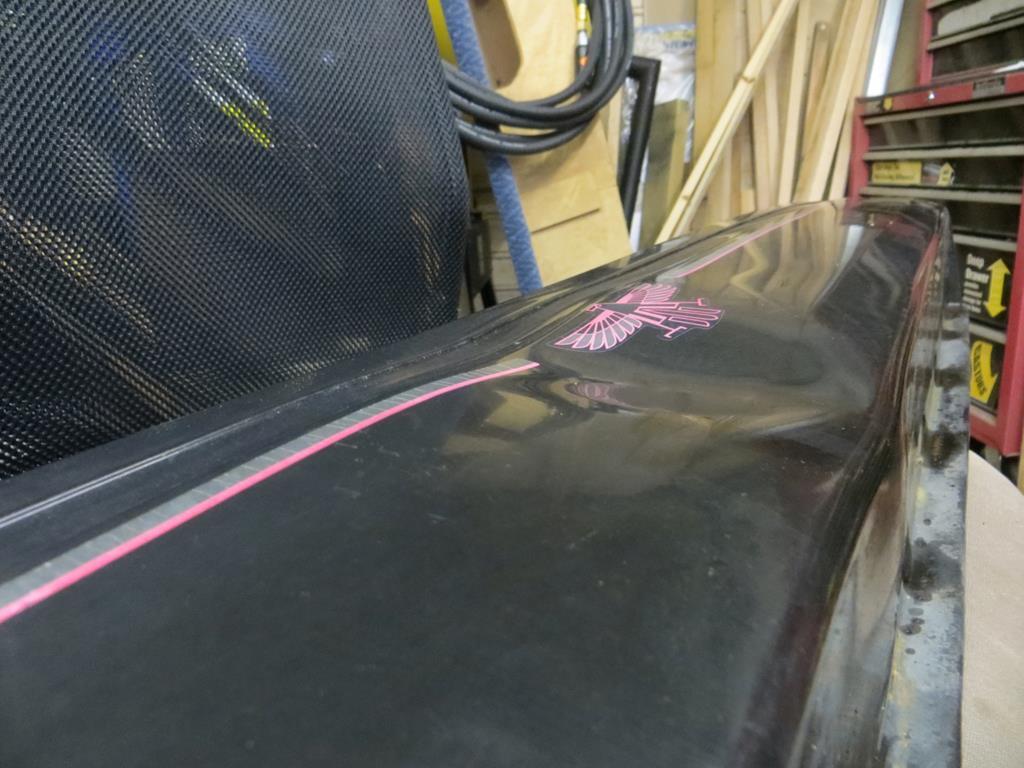 And…  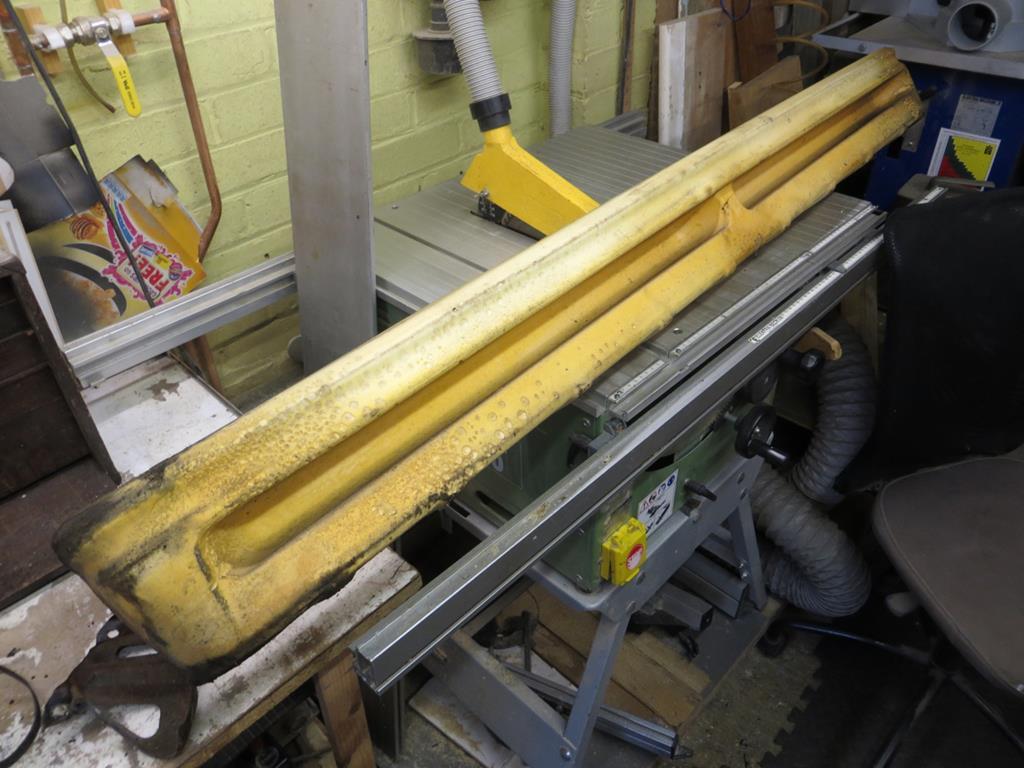 The foam is fine. But it’d be hard to damage that. The crash bar is disappointingly rusty. Not as bad as the front one that I repaired but it is holed in places along the top edge.  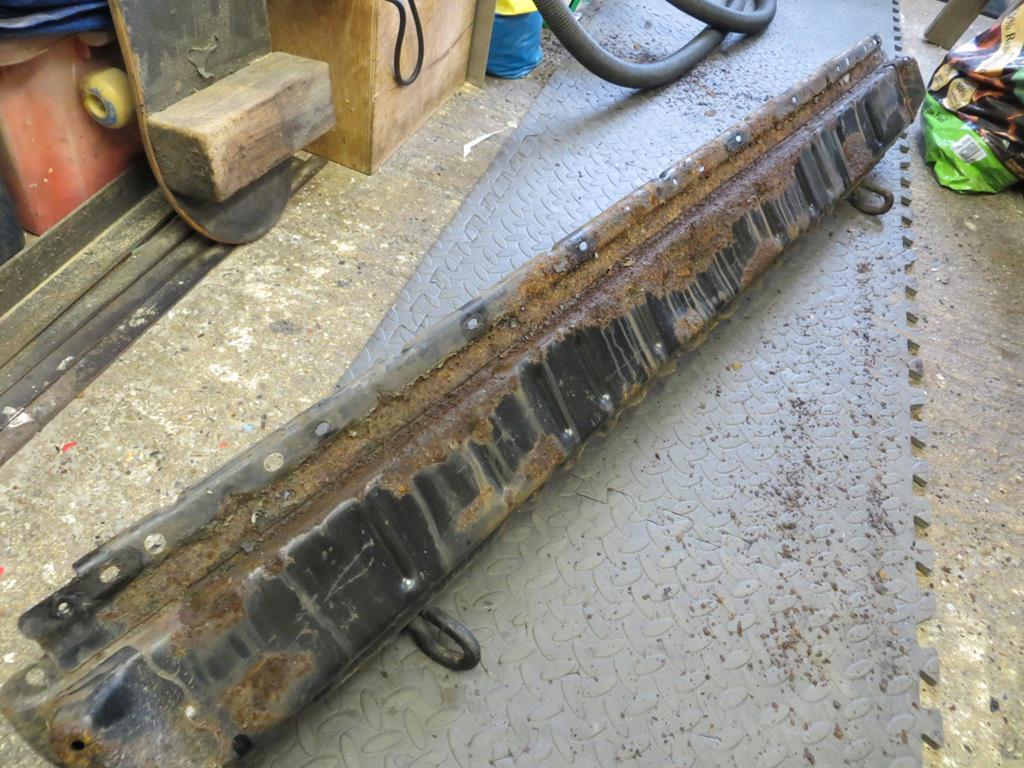 You might just see it’s bent just right of centre. It doesn’t really show up in the photo above but you can see it in this one.  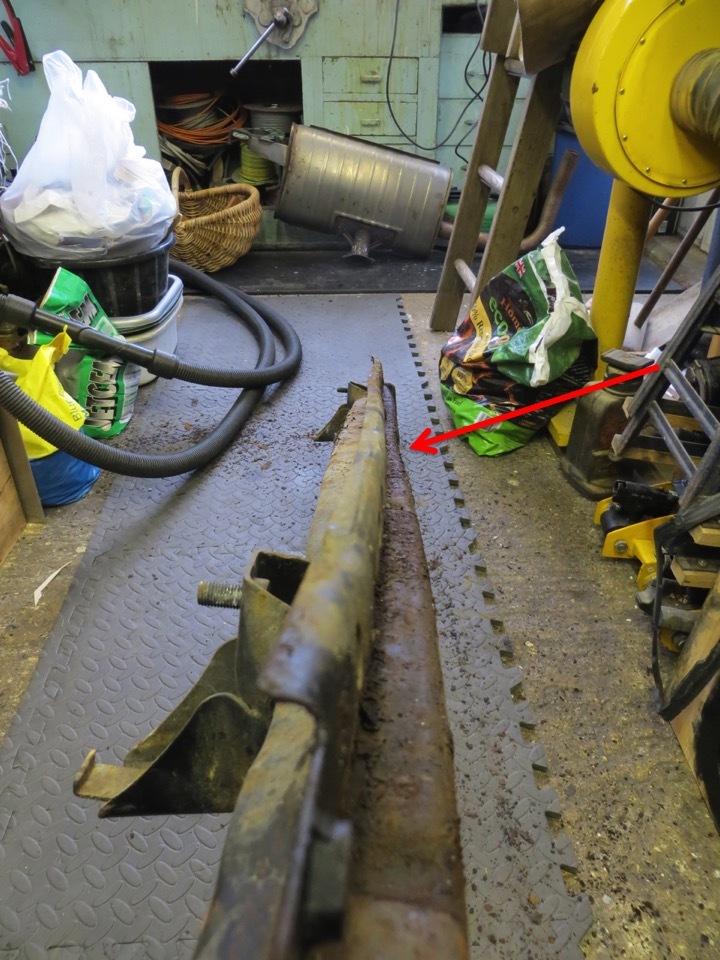 First job… Thump that back into shape as best I can.  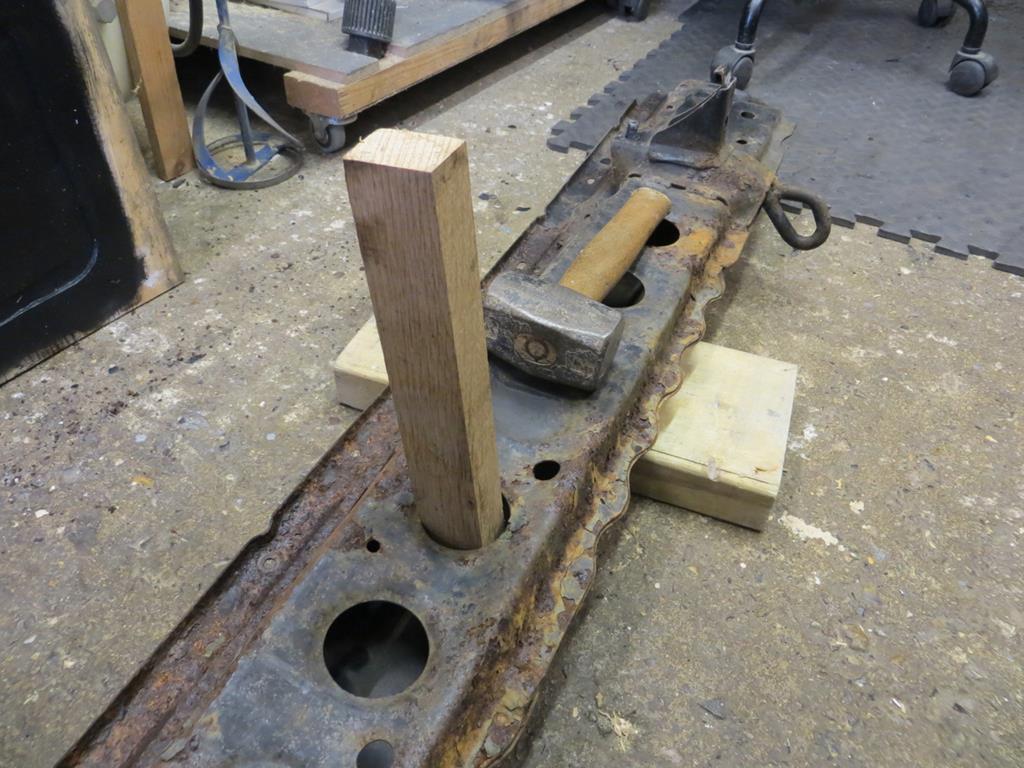 A bit of wood and a lump hammer shifted a fair bit of it but I couldn’t get to it all. So I welded a couple of tags to the outside…  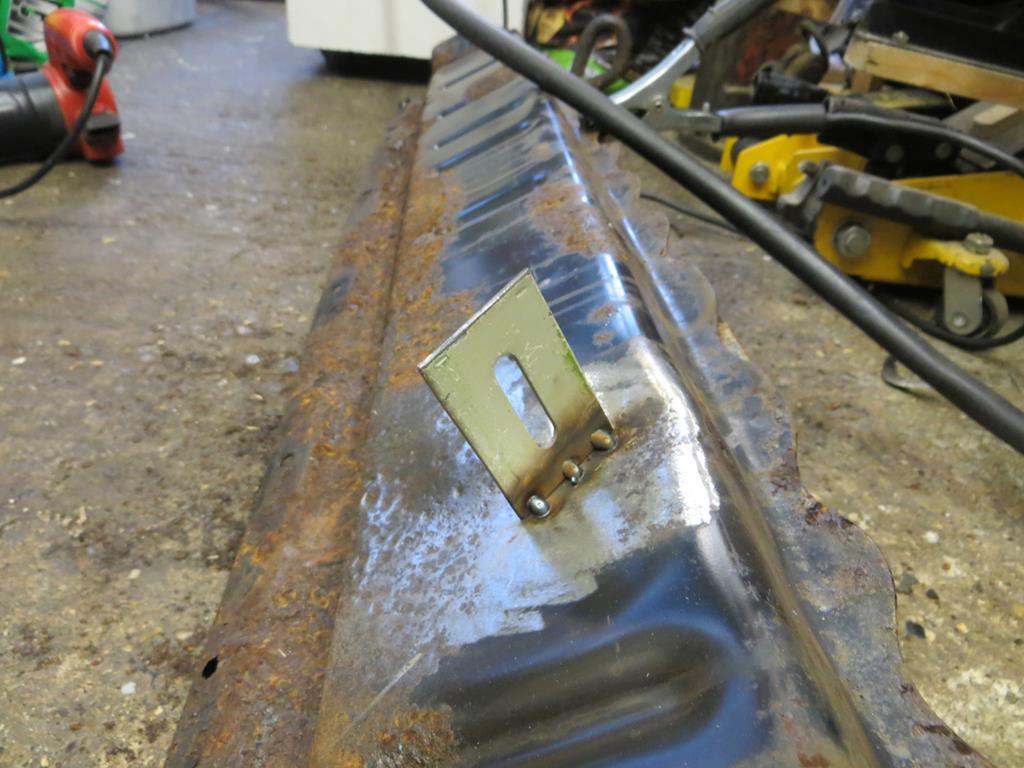 And gave it a few good tugs with my home made slide hammer.  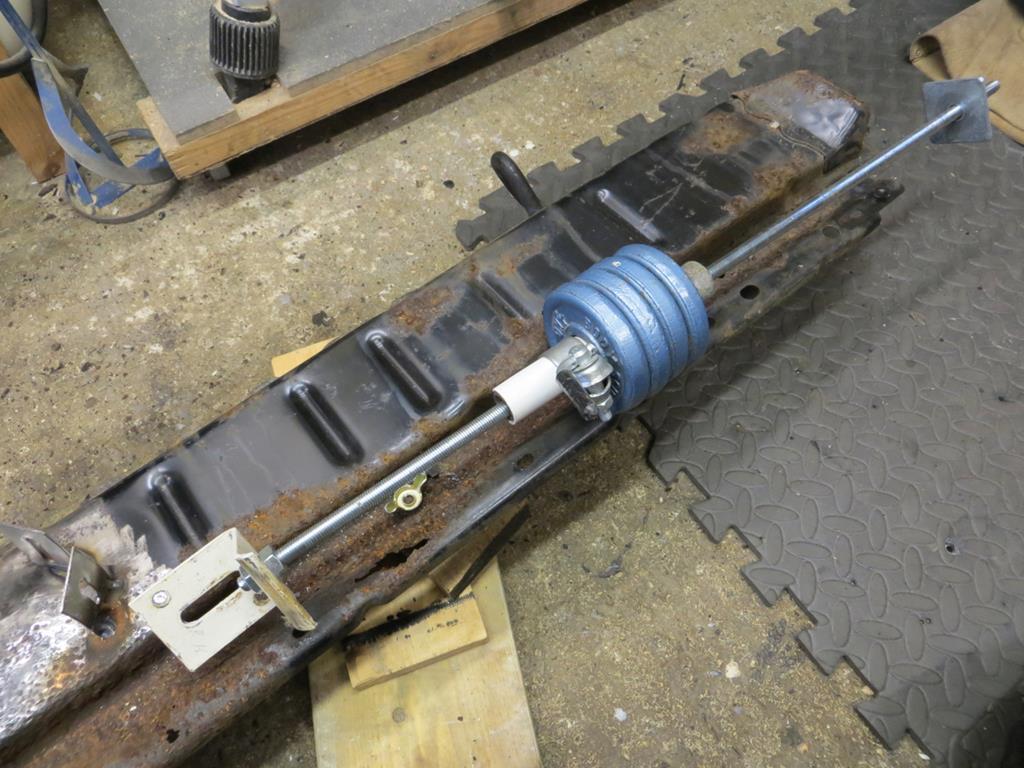 Which is flippin’ hard work. After which I offered it against the car to find, not surprisingly, it wasn’t any better than when I took it off. It should have a gentle curve along the length (I think) and it’s still pretty flat. Time to stop messing about and get serious.  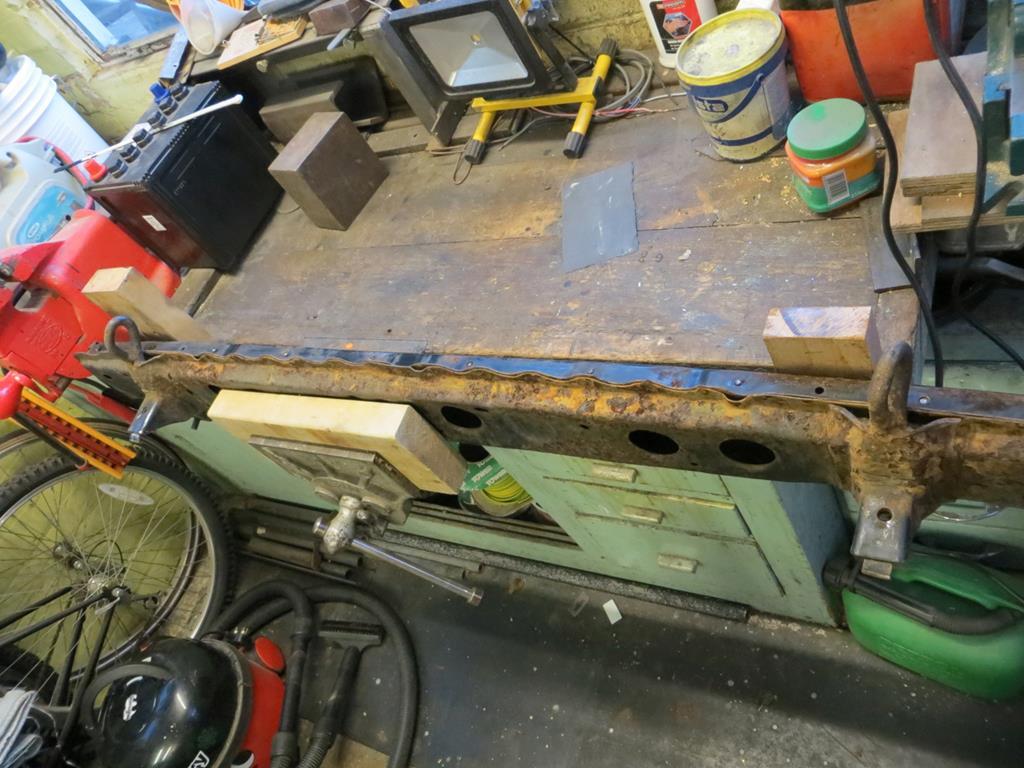 I stuck it in my poor abused wood working vice across the bench with some blocks of wood and screwed it up. This looked like it was beginning to work but, because the other face of the bumper is not against the back of the vice it’s actually trying to rip the vice out of the bench. This limited how much pressure I could put on it, and it wasn’t enough. Time to stop messing about and get really serious. It just so happens that there is a damn great steel I beam hidden in the ceiling across the garage. I also have some big steel tubes as part of my scaffold kit. So I hatched a plan. Two poles against the ceiling under the I beam.  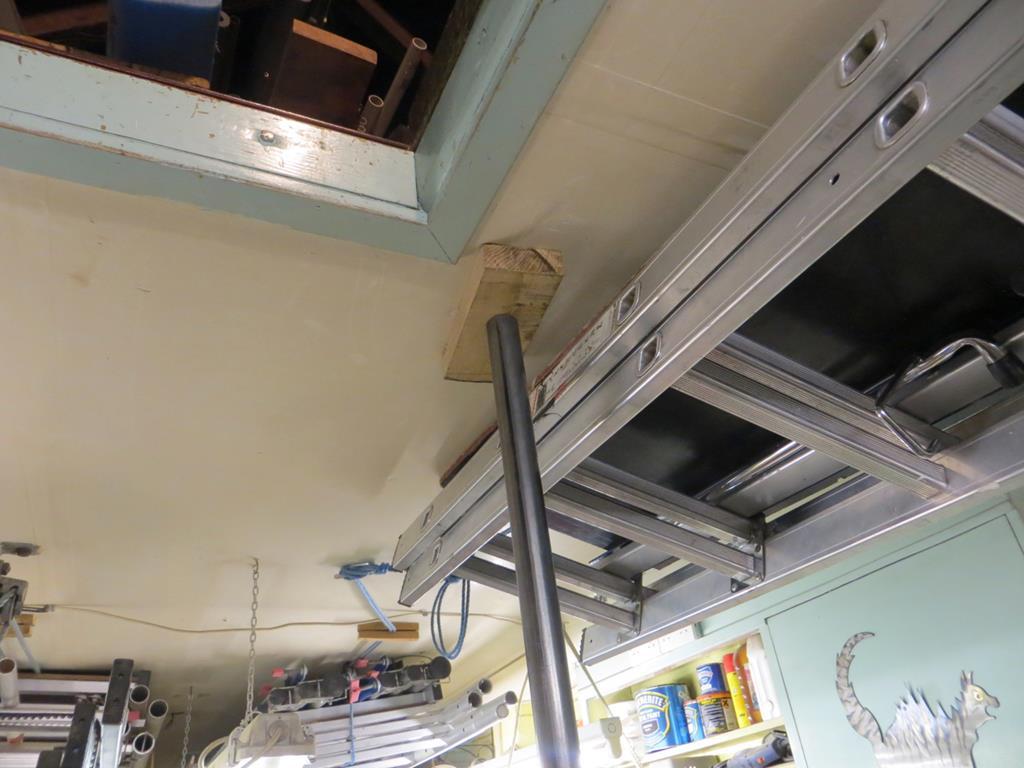 One to each end of the bumper. And a trolly jack in the middle.  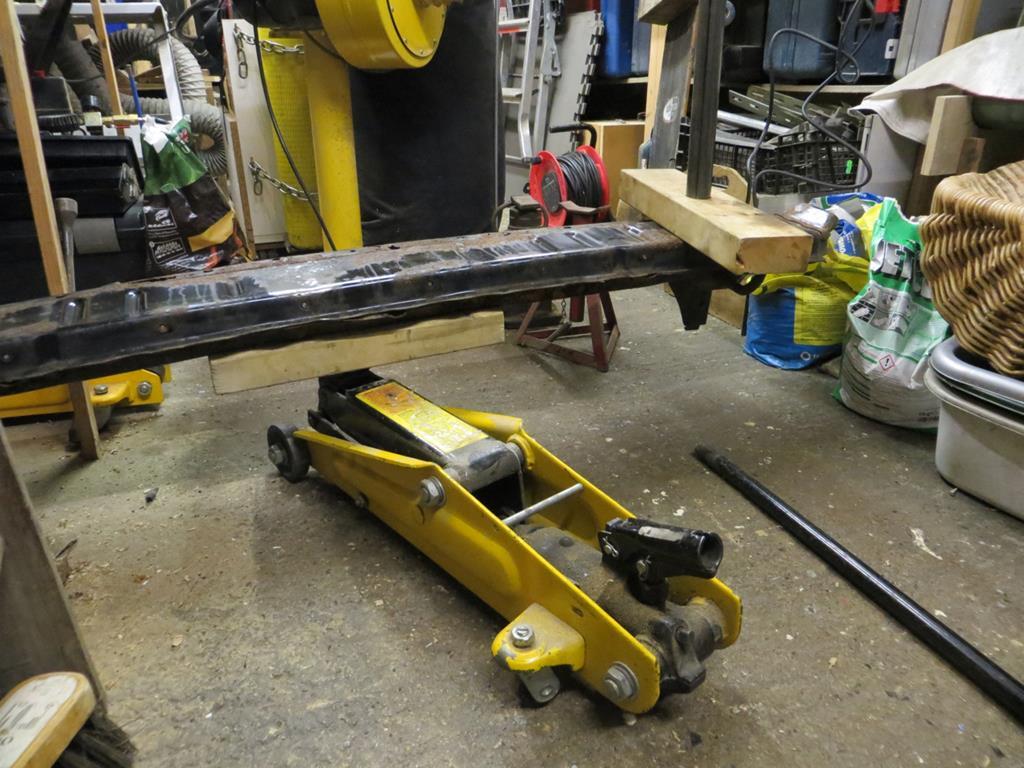 Now I can give it as much stick as I wish until it either breaks the crash bar, or I lift the roof off the garage. No photos ‘cos it had gone dark, but it does look a better fit to the car now. Thing is… It’s one of the things that I might need to use as a reference when fitting the new wing. I can’t trust it to be the right shape so just how much of a reference it it? The sensible thing might be to replace it with one that hasn’t been stuffed… |
| |
|
|
|
|
|
|
|
|
'Ere, that costs money, don't it?
Bstard, I'm not over what commodore you have, but if it lines up with Australian models somewhere, you can likely get a new light assembly plus gasket here, but probably not just the gasket. Pretty much all models still have repros available.
|
| |
|
|
|
|
|
|
|
|
Ooh your back end is a mess! funny they never look as bad until you start taking them apart!
|
| |
|
|
|
|
|
|
|
they are like poor quality wobbly children's play pony poo They are like "Ro cking Ho rse P oo" if anyone is confused Sheesh who has been upgrading the swear filter It'll be Scunthorpe that gets it next Not trying to hijack the thread but a few part numbers while I remember to help find the elusive Commodore seals, Opel 1217620 & 1217621, Vauxhall 3469475 & 3469476 |
| |
|
|
|
|
|
|
|
|
Good idea for the taillight gasket 👍🏻
However.... the use of silicon sealant isn’t the greatest idea. It contains acetic acid that will make the steel rust. Rather look for a non acetic acid base or polyurethane sealer instead.
|
| |
|
|
|
|
|
|
|
Good idea for the taillight gasket 👍🏻 However.... the use of silicon sealant isn’t the greatest idea. It contains acetic acid that will make the steel rust. Rather look for a non acetic acid base or polyurethane sealer instead. Thanks for the heads up JB. I knew silicone sealant isn't the best stuff for cars but didn't know exactly why. Am I right in thinking that the acetic acid is what is released as it cures? |
| |
|
|


