ToolsnTrack
Posted a lot
   Homebrew Raconteur
Posts: 4,126
Club RR Member Number: 134
|
|
|
|
|
Sweetpea, I may have spare discs knocking around for this. I upgraded to Celica ones. I'll have a look and they are yours for postage if you like?
(We can just lie and say you found them in the boot or something, rather than having actually bought a thing for this)
|
| |
|
|
|
|
oukie
Part of things
 
Posts: 307 
|
|
Jul 29, 2015 14:08:01 GMT
|
|
The rears on these are where your gonna have mucho fun. The calliper on the rears winds out/in and loves to bind on, or off. Calliper seal rebuild kits are available from Toyota at about £70 per axle. Or try to get a good spare, you'd be lucky though.
|
| |
Mr2 mk1 x4
Honda Accord 2.4 Executive (luxo barge)
|
|
|
|
|
Jul 29, 2015 20:38:08 GMT
|
ToolsnTrack, that's very good of you, thank you. I had a flick through your thread again and yours looks like a MK1b isn't it? I think they had bigger disks so they might not fit??? Actually I think the disks on my car are 'new'. Once the surface rust is cleaned up you can still see the machining marks in them. oukie, hold that thought... I did the near side rear today. I'll write it up soon.
|
| |
|
|
|
|
|
Jul 29, 2015 21:28:10 GMT
|
One of the problems of having a cat as your project manager is that they are always asleep. While in the project meetings, discussing the goals and objectives of the day Portia's primary item of business is finding a comfortable spot for a snooze. Anyway, she popped out today to investigate the progress. 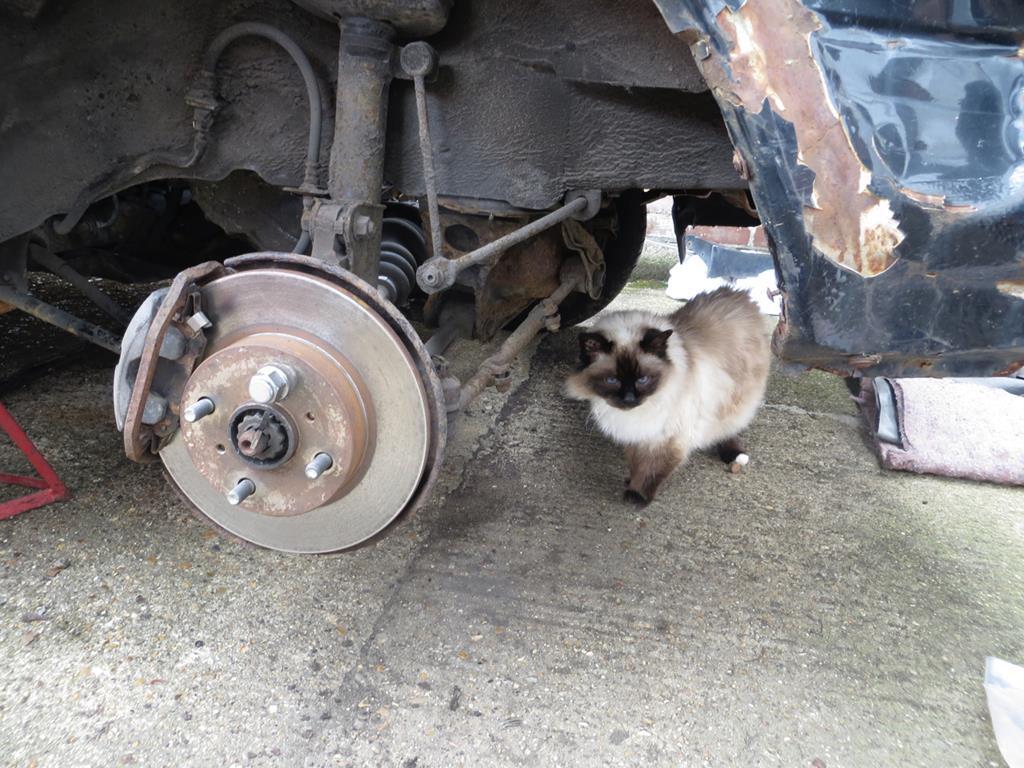 I'd had the left rear brakes apart. The good news is that the turny roundy piston thing is free. In fact the calliper looks fairly new. The bad news is that handbrake was sticking on and the auto adjuster is reluctant to do anything. This does explain why the poxy car is hard to push somethings. The rubber gaiters on the handbrake cable have perished and the left cable is sticking. It's freed off now but two new cables are going on the shopping list. Along with the missing anti squeal shims. One of the things not included in the head gasket set are the 'insulators' that sit under the fuel injectors. Mine are a bit crispy. Look… 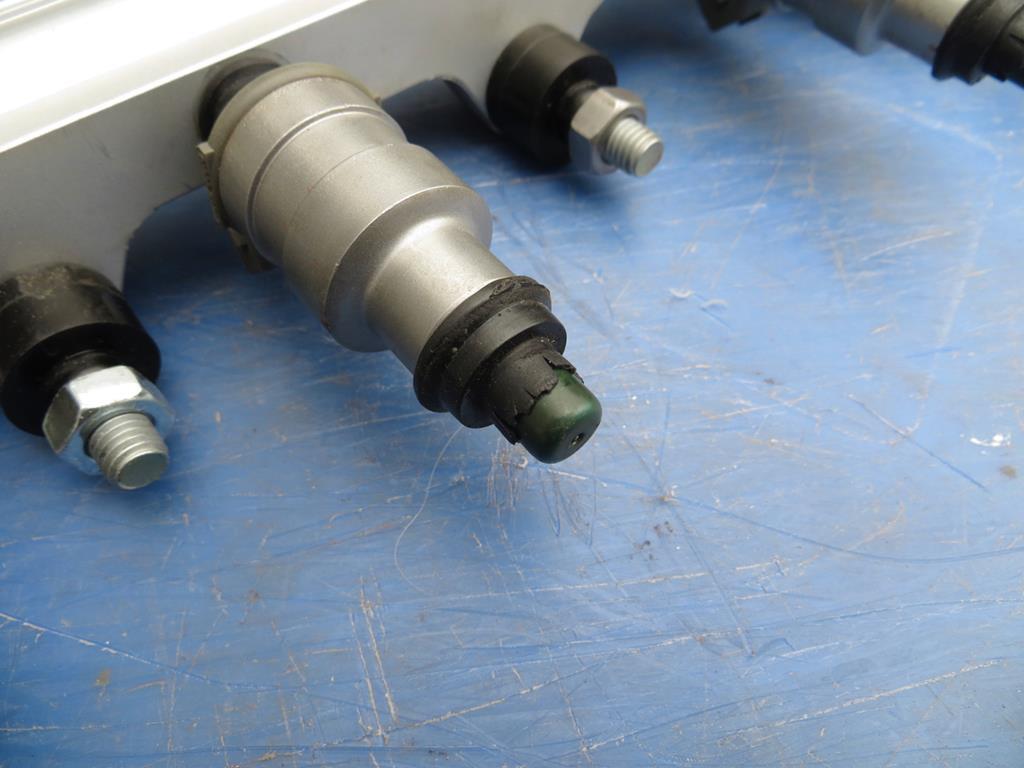 So I ordered some more from the nice man at Toyota. Unfortunately they got the got the wrong bits. Theirs are like plain rubber rings, mine are like little Mexican hats with the top missing. As I said to the chap at Toyota, "mine are like little Mexican hats with the top missing" as I did an impression of a Mexican putting a sub standard, miniature hat on. 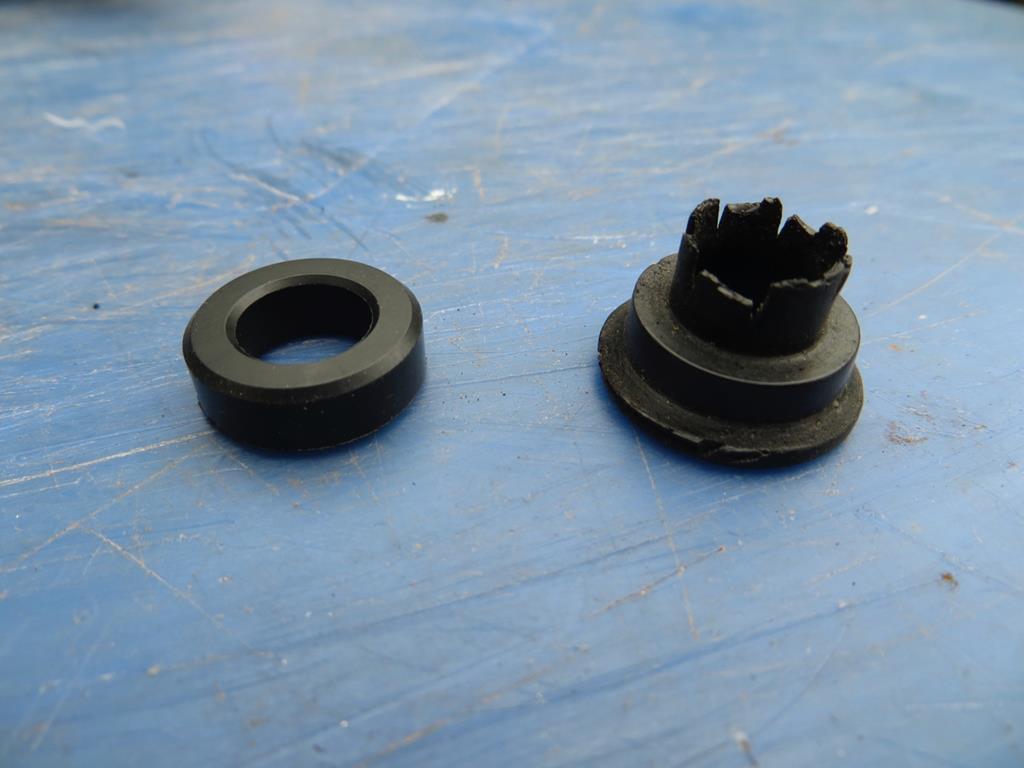 Supposed new part on the left, old one on the right. Clearly not the right bit. Finally the penny dropped. They are the right bits. Mine started like the ones on the left and 30 years of heat has squidged and baked them into defective little Mexican hats. Blimey. James |
| |
Last Edit: Dec 5, 2018 23:03:05 GMT by Sweetpea
|
|
|
|
|
Jul 29, 2015 22:16:20 GMT
|
|
Blimey, and I thought the square O-rings out of my valve block were deformed. This takes shape-shiftery to a whole new level!
|
| |
|
|
oukie
Part of things
 
Posts: 307 
|
|
Jul 30, 2015 10:28:10 GMT
|
|
Good news about the brakes, callipers are blooming fiddly things, wowsers on the injectors seals, good idea to replace them, I've heard of a few fire related stories over the years.
|
| |
Mr2 mk1 x4
Honda Accord 2.4 Executive (luxo barge)
|
|
|
|
|
|
|
I'd always thought the fire problem was due to leaks between the fuel rail and the injector. Not at the bottom end of it. Anyhow, I'm 'avin' new rubbers at both ends! I've decided what to do about tightening the head down. Not completely sure if I should admit the final solution but I'll do a write up of my thought process in the other thread so you'll all know. I started writing up my thought processes but it just came out a big jumbly mess so I'll have to have another go. Having sorted out the head problems I painted up the fan shrouds and put the fans back in them. 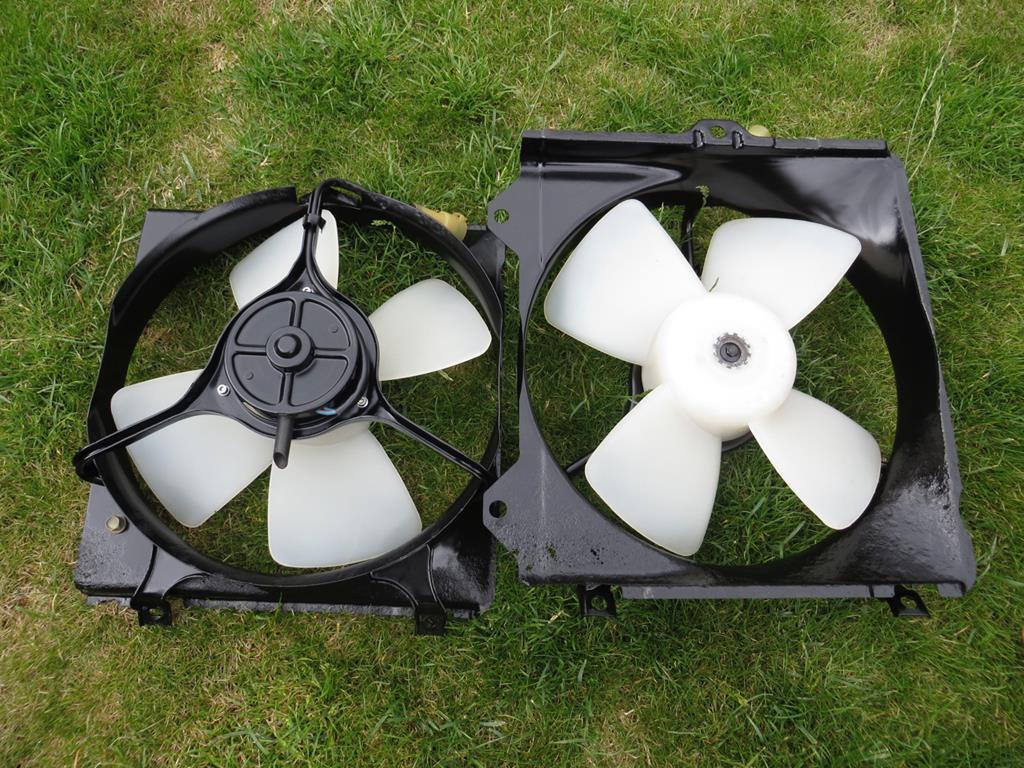 Nice eh? Then I went to put them on the car and discovered I couldn't. The bottom bolts onto captive nuts on the rad. Well the nuts are all missing ('cos the bolts broke when I was taking it apart) and I didn't put new ones on 'cos the rad is going in the bin eventually. Sadly you can't get your fingers in to hold a nut in the right place and the quickest solution is to take the rad off and weld some nuts onto it. See. Short cuts. Never work. So I started bolting the motor back together. First I chucked some oil in and had Mrs Sweetpea crank it over. I wanted to see oil come up the oil feed to the cams. (The cams are not in yet.) I've seen stories about oil starvation to the cams when using ARP bolts. I've got stock bolts but I wanted to see the oil come up the tube anyway. And it'd give the mains a chance to get some oil after 6 years. In actual fact Mrs Sweetpea didn't crank it over 'cos the poxy thing wouldn't turn. I knew it was free to rotate 'cos I'd been winding it by hand so it must be electrical. I'd taken one of the engine relays out to stop the fuel pump pouring petrol everywhere (the line is open at the moment). Putting it back didn't help. After about 10 mins I spotted the engine earth strap not bolted to the thermostat housing. Mostly because the stat housing was in the garage and the earth strap isn't that long. That sorted and the engine goes round and oil gets to where the cams will be. Good. So I started bolting the motor back together… Most of the water system is now back on. Not very good photos but this is the thermostat housing - with a new stat in it. The old one was jammed shut. 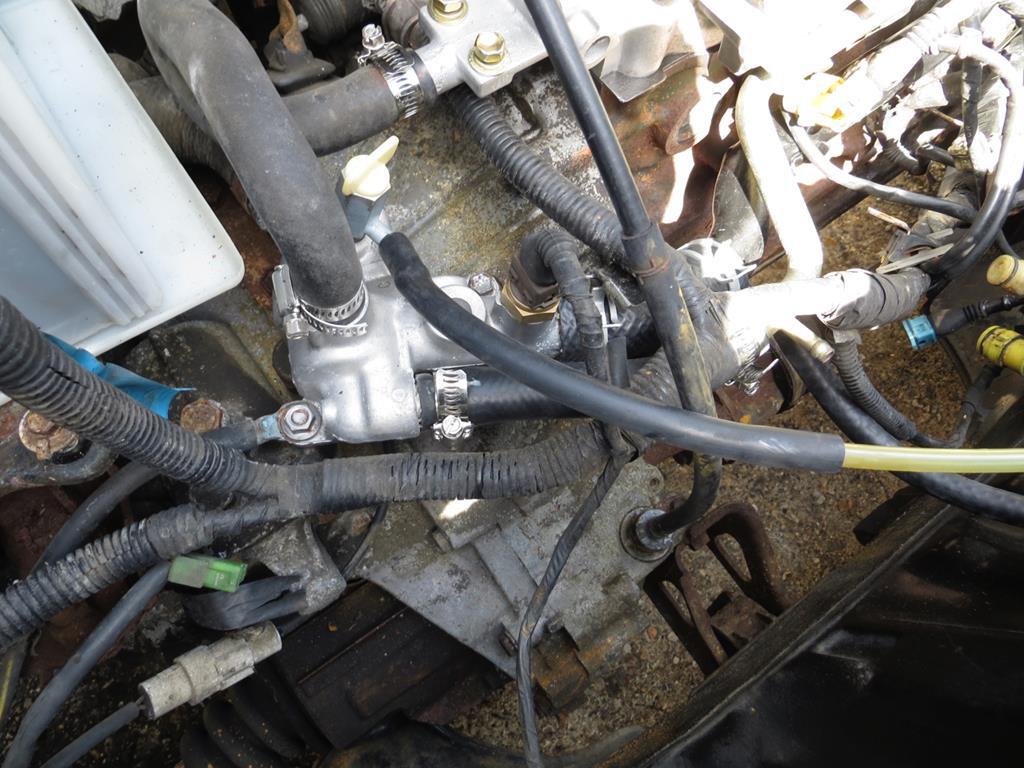 And this is looking back towards the water pump end. 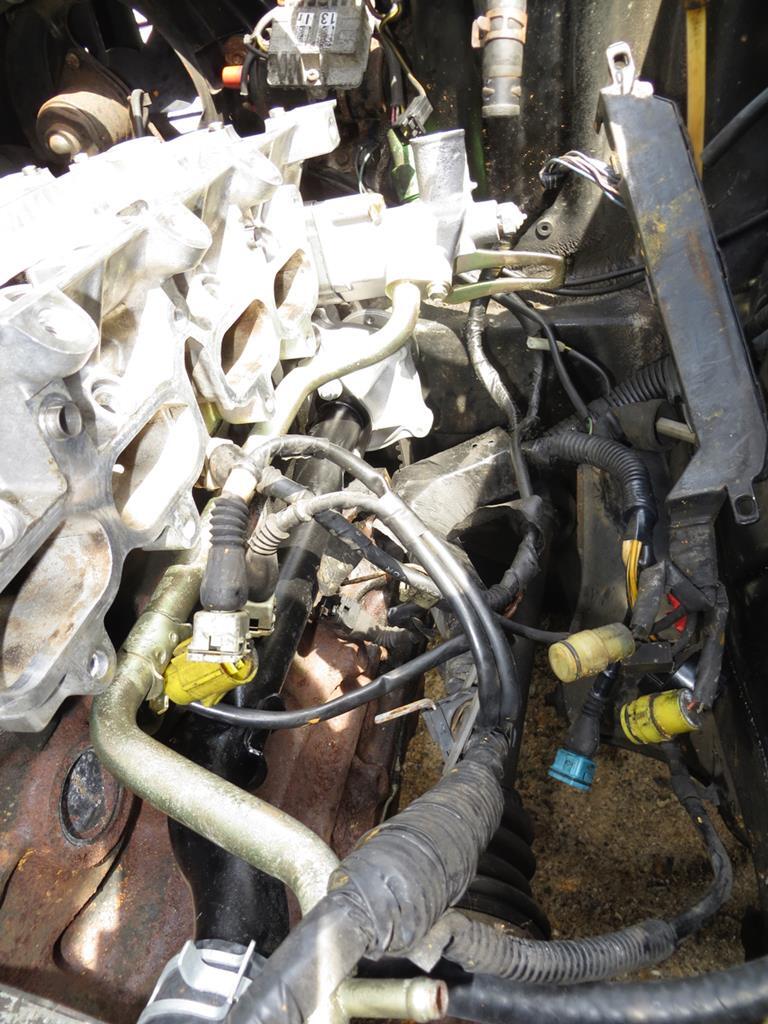 Which has a new pump fitted. Next I wanted to get the exhaust manifold on. (Or 'fanimold' as someone on here put it. Took me hours to clean the tea out of my laptop.) It's easier to do before the cams and covers go on and block the access. Unfortunately I need some studs as I'm missing mine. I have enough bolts to do it but it'll be a total git to fasten it all up and not drop the gasket on the floor without a couple of studs to hang it on. So that's where we are. Oh and I'm rapidly running out of time... |
| |
Last Edit: Dec 5, 2018 23:06:46 GMT by Sweetpea
|
|
|
|
|
|
|
First thing today I ran round the town trying to buy exhaust studs and failed. Even the local motor factors didn't have them. And, more surprisingly, couldn't order them. Engage Moany Old Git Mode… When I was a lad you could buy things like this almost anywhere. Shops had little bins full of them. Now the local car shop can't even help. But only because a part number didn't pop up on the computer. It's only an M10 fine thread stud for goodness sake! Don't people actually fix cars anymore? Oh no. They buy a new one. Sorry. I'll move on. Cams are in. 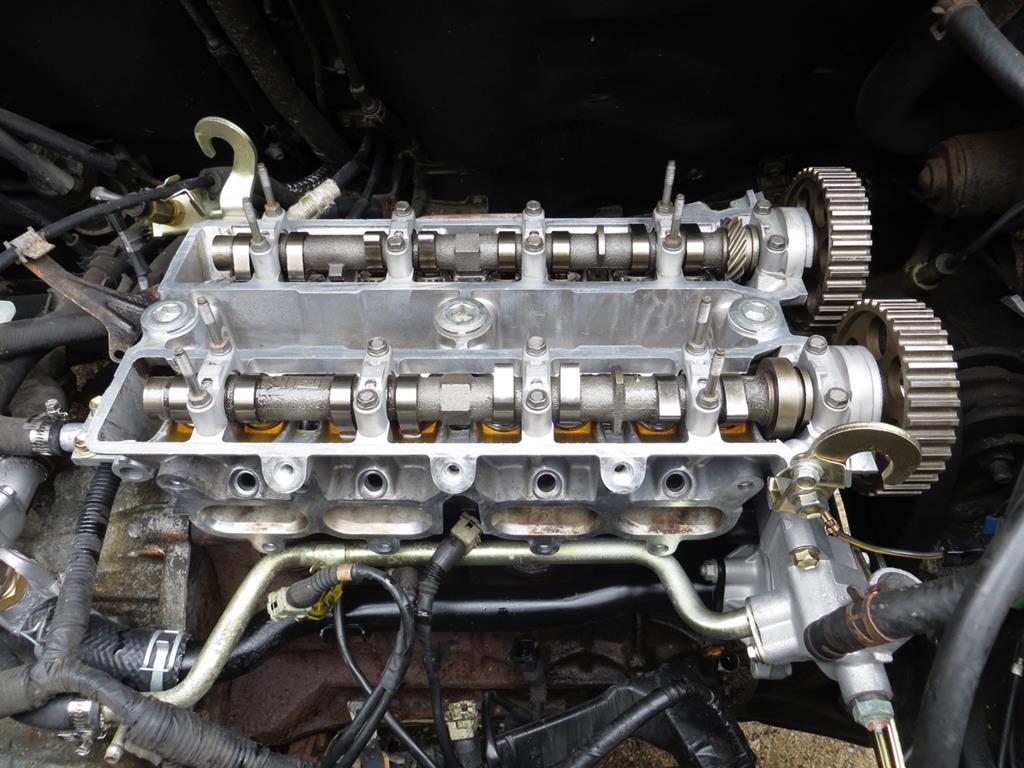 Quick to say. Took ages though for some reason. Next is the cam belt back plate - this doodah. 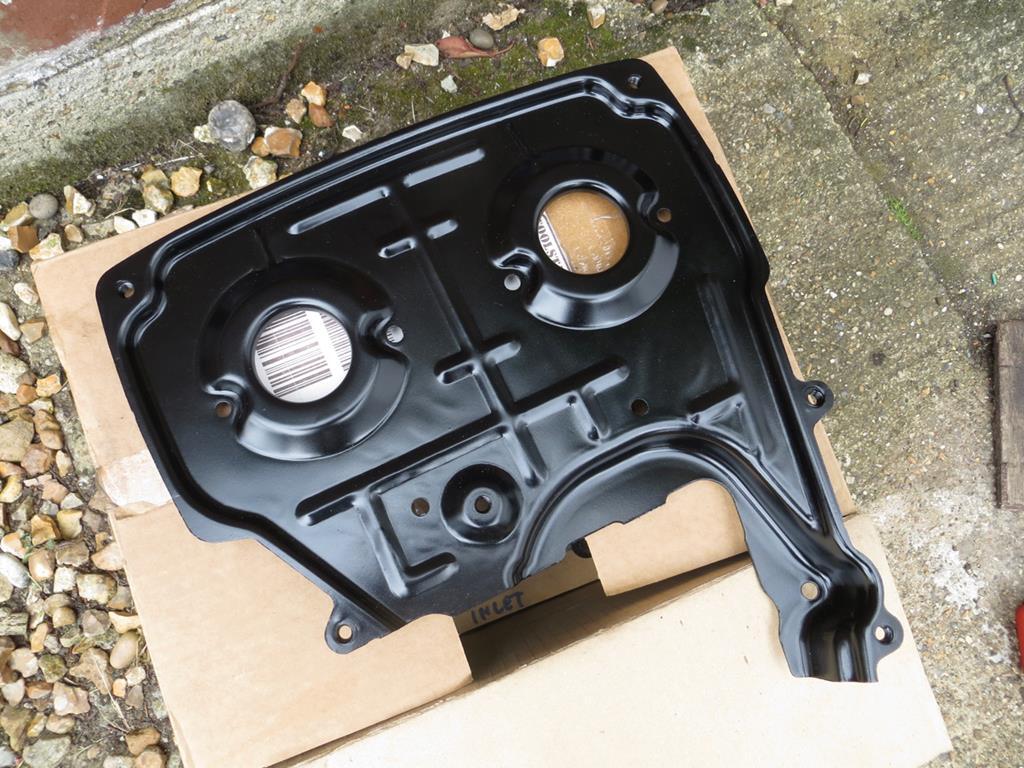 Trouble is I can't get it round the engine mount. The book shows the mount missing but I definitely didn't undo it when I took it off. How on earth did I get it off the engine??? Tires are in good condition. 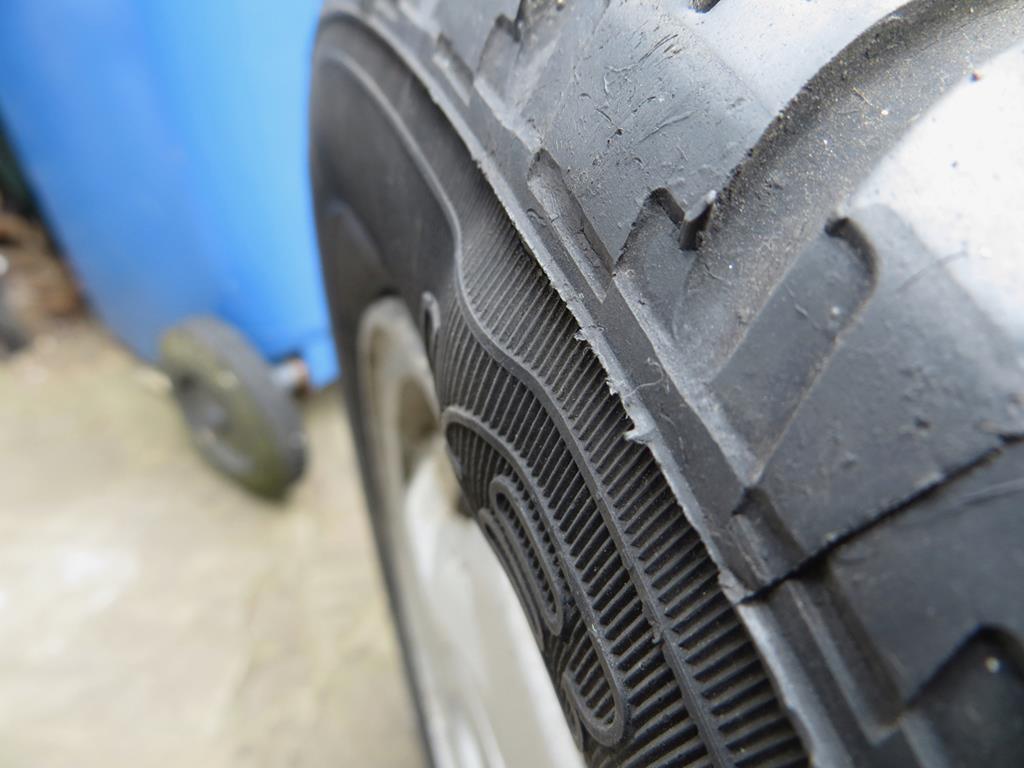 Er, oh. Not that one. I'll put the spare on shall I? |
| |
Last Edit: Dec 5, 2018 23:13:41 GMT by Sweetpea
|
|
|
|
|
|
|
Nope, still can't remember how I got the cam belt back plate out with the engine mount on. And since I have to split the engine mount to swap the cam belt I might as well just take it off. 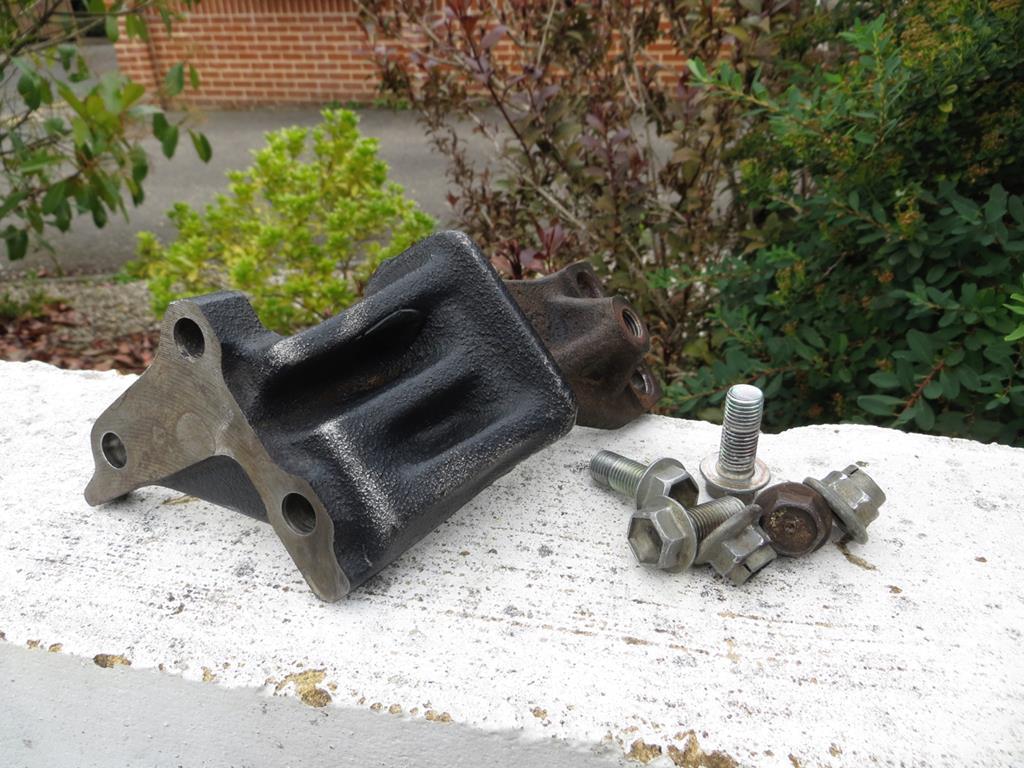 And wash and polish it. Well not actually polish it. I also cleaned up the bottom of the block around the oil pump. Just to make it nicer to work on. Look! Back plate on! 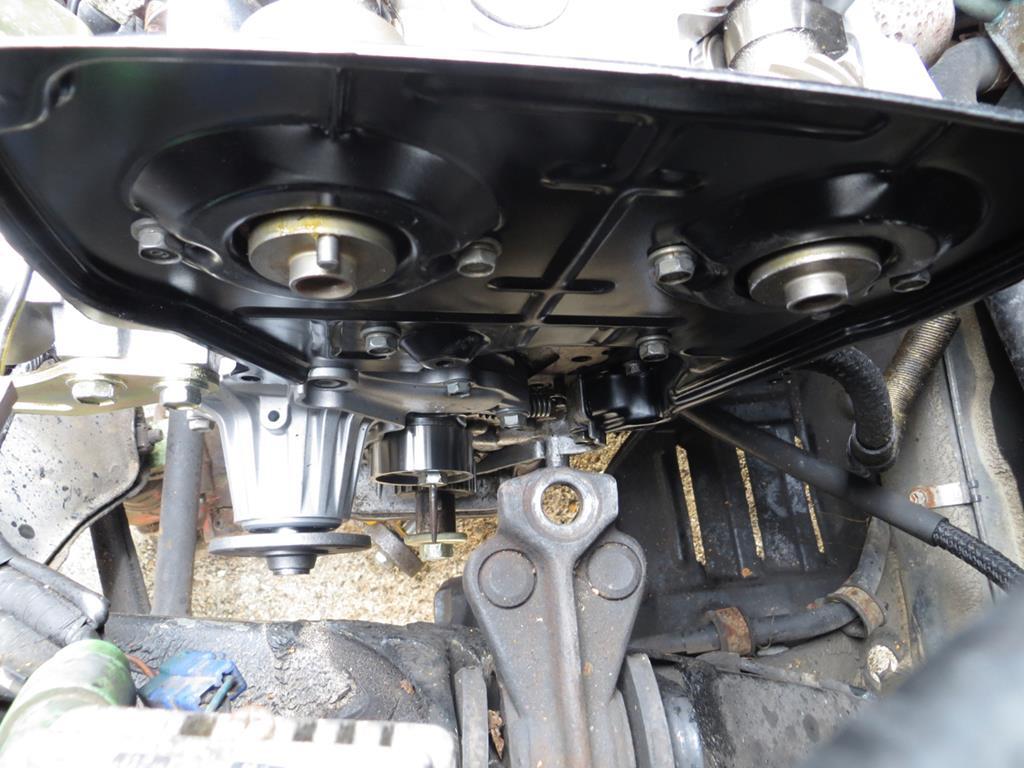 There's a new water pump and belt tensioner down there somewhere. Belt on, cams timed, bottom pulley back on. 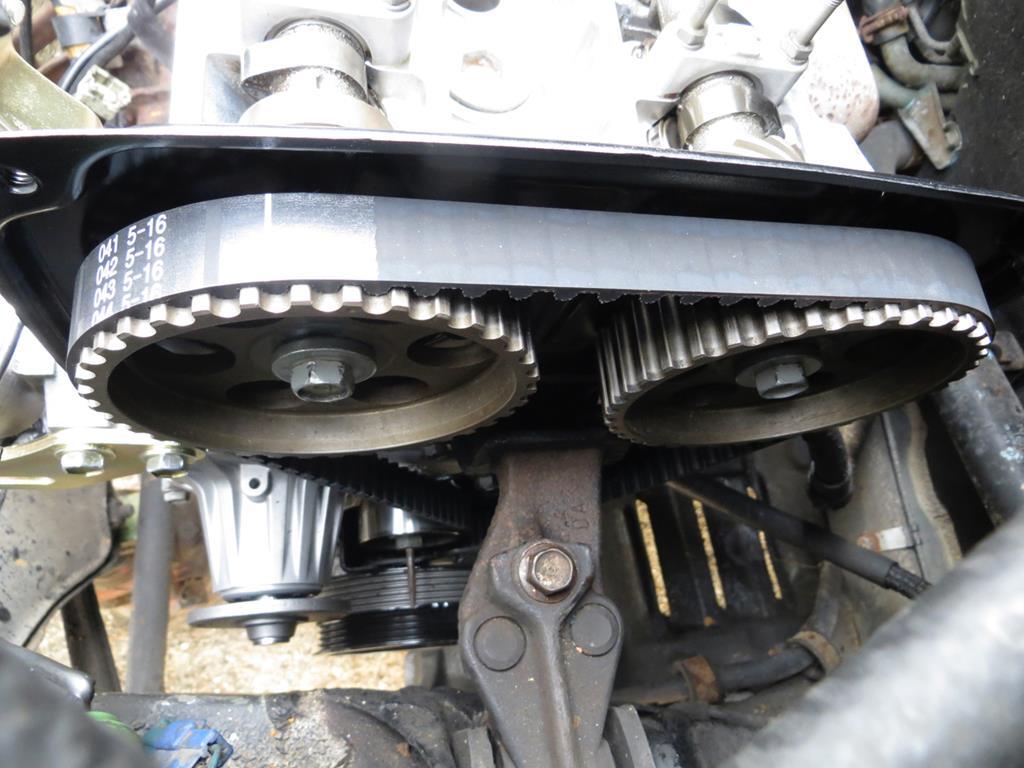 Belt covers back on too. The distributer is back on. New rotor arm and cap… 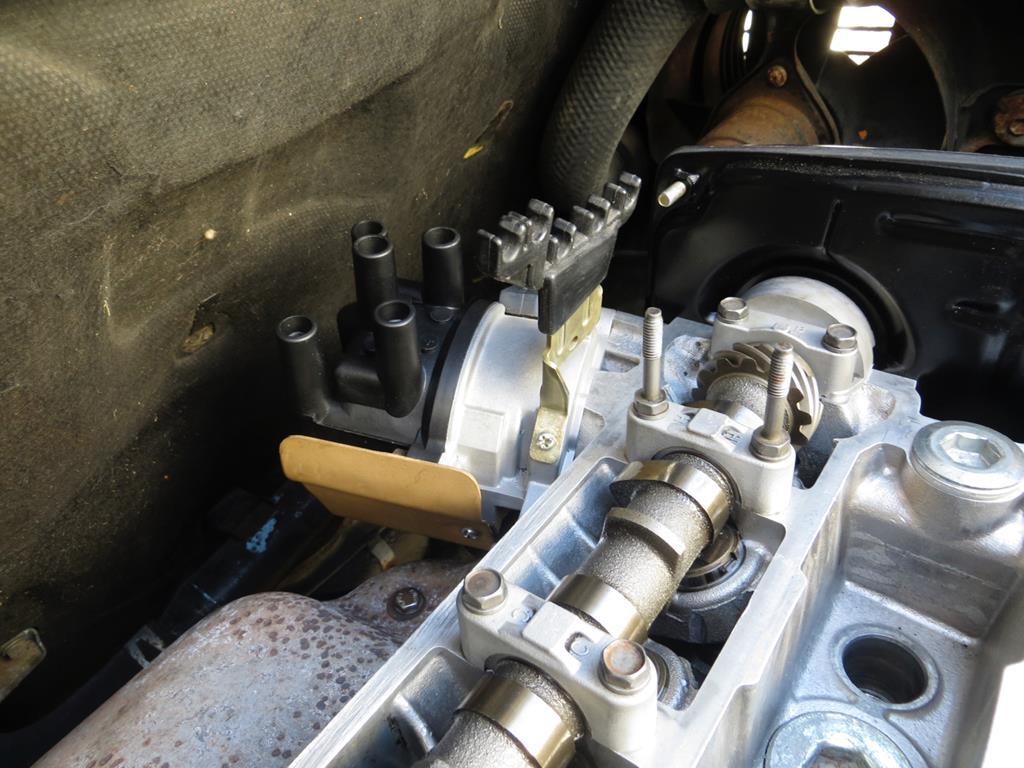 Looks like it's timed in the ball park. The rotor arm is pointing roughly where No 1 plug lead is. I'm not sure how coarse the teeth on the distributer drive are though. I don't know if I'd notice being a tooth out. I guess I'll find out when I get it started. Induction next. |
| |
Last Edit: Dec 5, 2018 23:18:26 GMT by Sweetpea
|
|
|
|
|
|
|
|
By heck, things are moving on apace here. Nice work!
Ticket next week?
|
| |
|
|
|
|
|
|
|
|
did you get to the bottom of the headbolt thing ?
|
| |
|
|
|
|
|
|
|
By heck, things are moving on apace here. Nice work! Ticket next week? Nice thought. Might be a bit premature though. did you get to the bottom of the headbolt thing ? Well I decided what to do and did it. I'll write it up in the other thread when I get a moment. What did I say yesterday? I think it was 'Induction next' wasn't it? What a shocking lie! You just can't trust some people. Lets do that last brake. It starts like this… 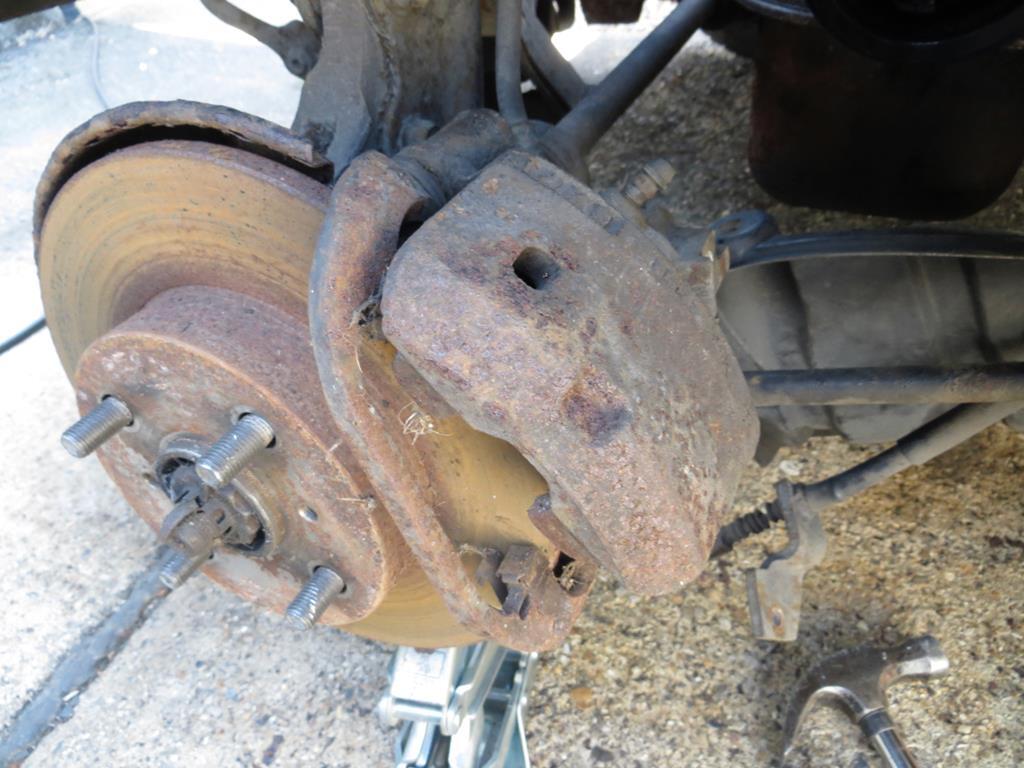 …And I forgot to take a photo of it back together. But it looks much better. 'Looks better' being the operative phrase. The handbrake adjuster / turny roundy piston thing is stuck. The top slide was totally solid (I think it has the wrong rubber on it). And the hand brake cable needs replacing. So the rear brakes need a serious overhaul but they are working well enough for the MOT. Probably. I was fed up of the fans cluttering up the garage so I took the radiator off, welded some nuts to it, and fitted the fans. 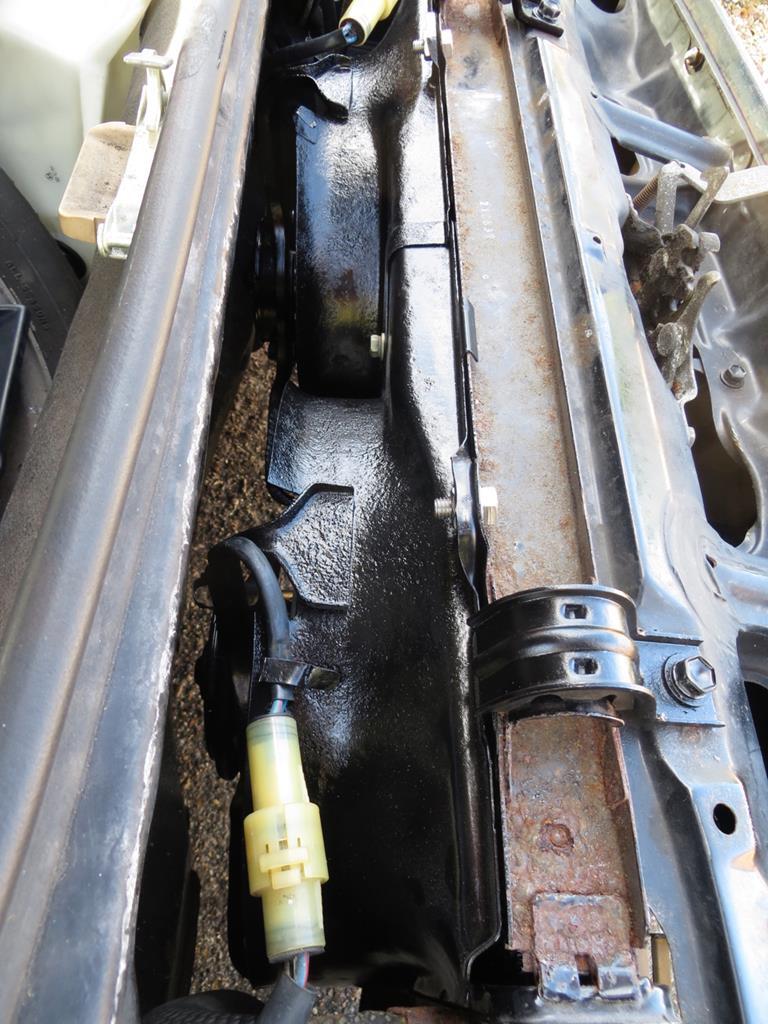 They seem to work when you unplug the temp sender (which they should) so assuming the sender is ok all is well. What next? How about that hole in the drivers sill? It started as a blister which I poked. Then it looked like this. 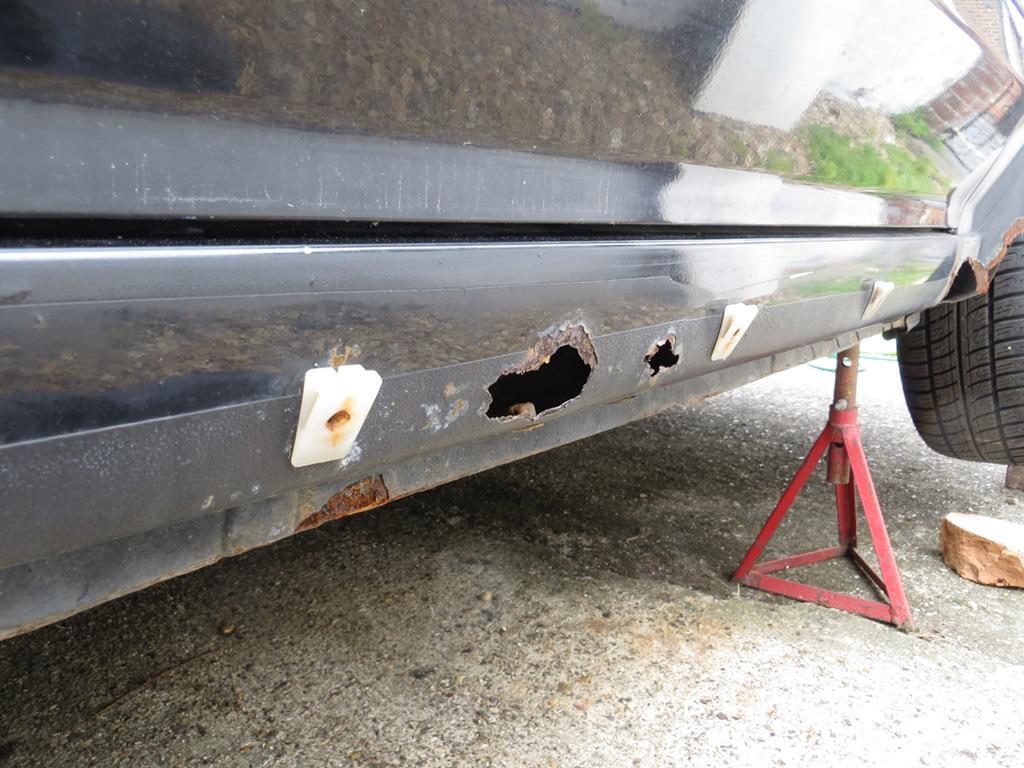 A few minutes with a knotty wire wheel in the grinder and I've got this… 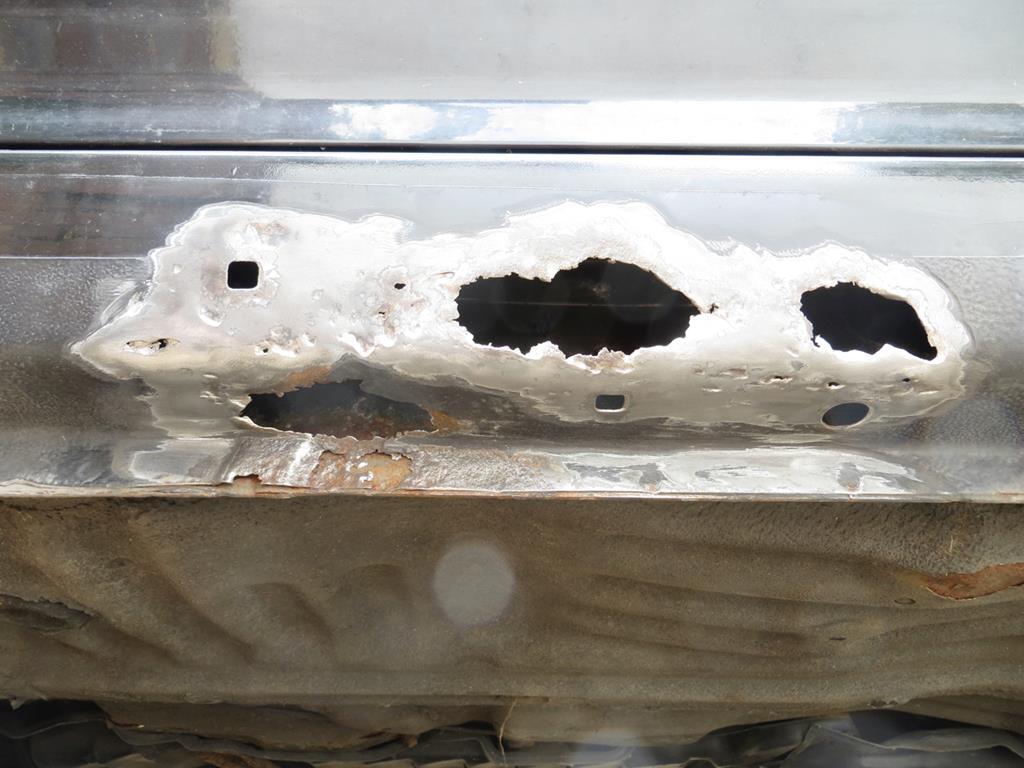 Now I've never attacked a car with a grinder before so this is looking a bit shocking. But ignorance is a wonderful thing - being utterly unaware of how talented I may or may not be. 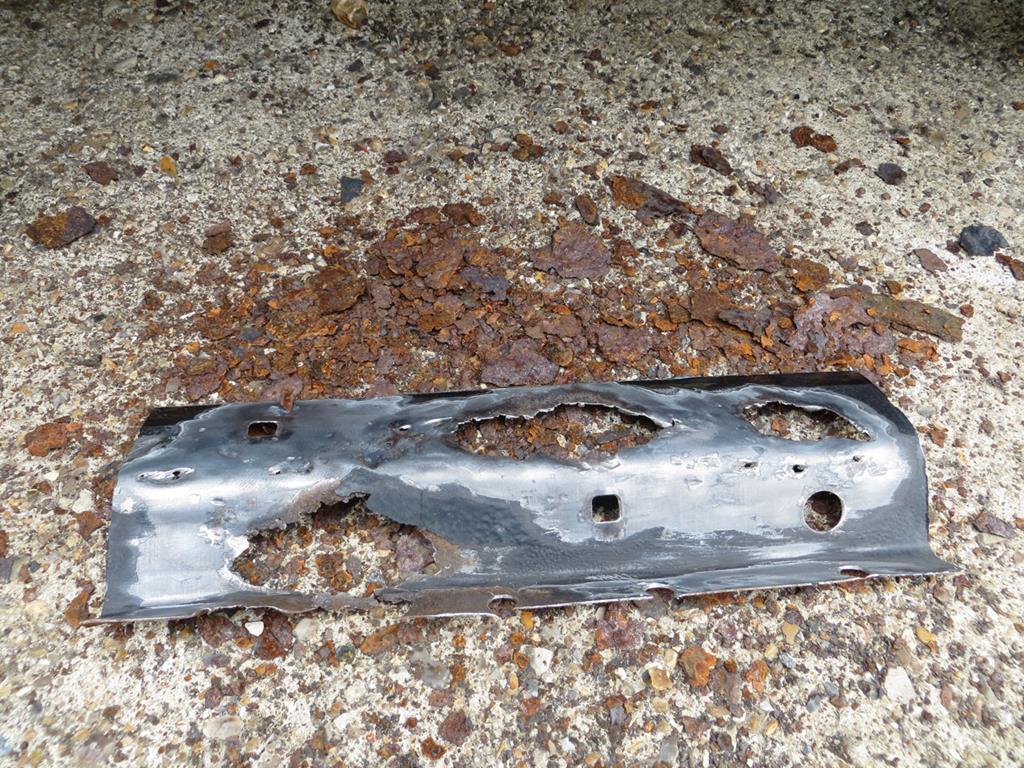 Too late now. Actually it was too late 3 years ago when I decided to take the car on. I'll just have channel some tonybmw . 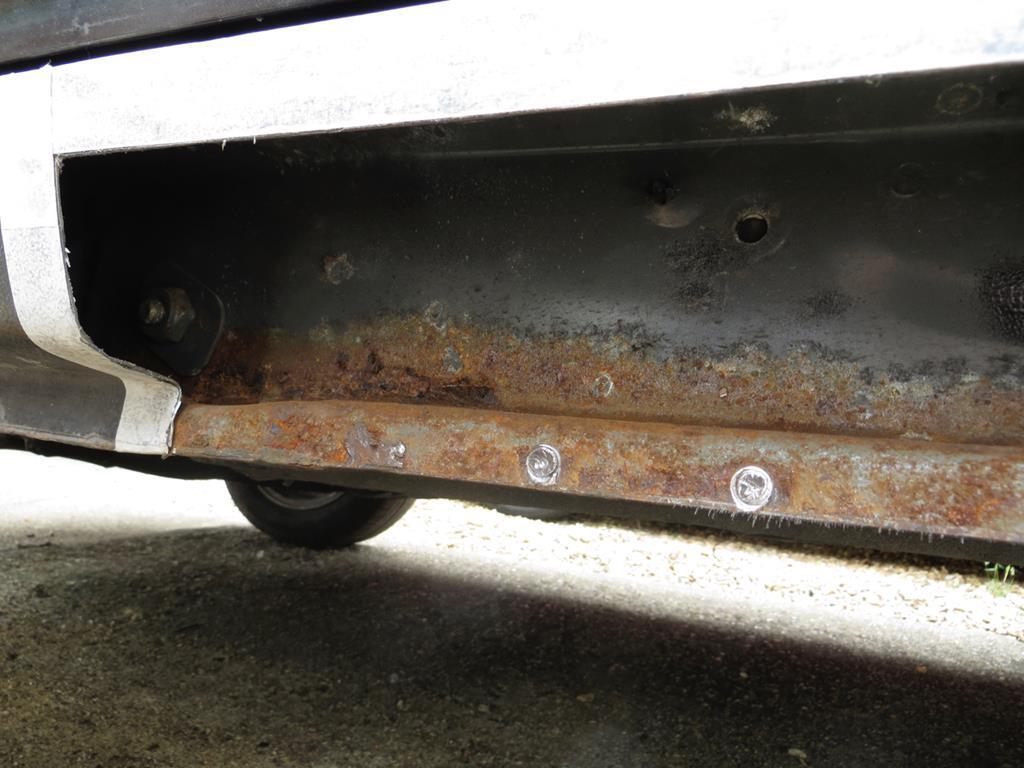 Bit of a hole to fill, but not too bad inside. At least I'm not doing anything about it at the moment which amounts to the same thing. Cleaned and coated in POR15. Xylene seems to be the thinners for POR15 if you want to clean your brushes by the way. 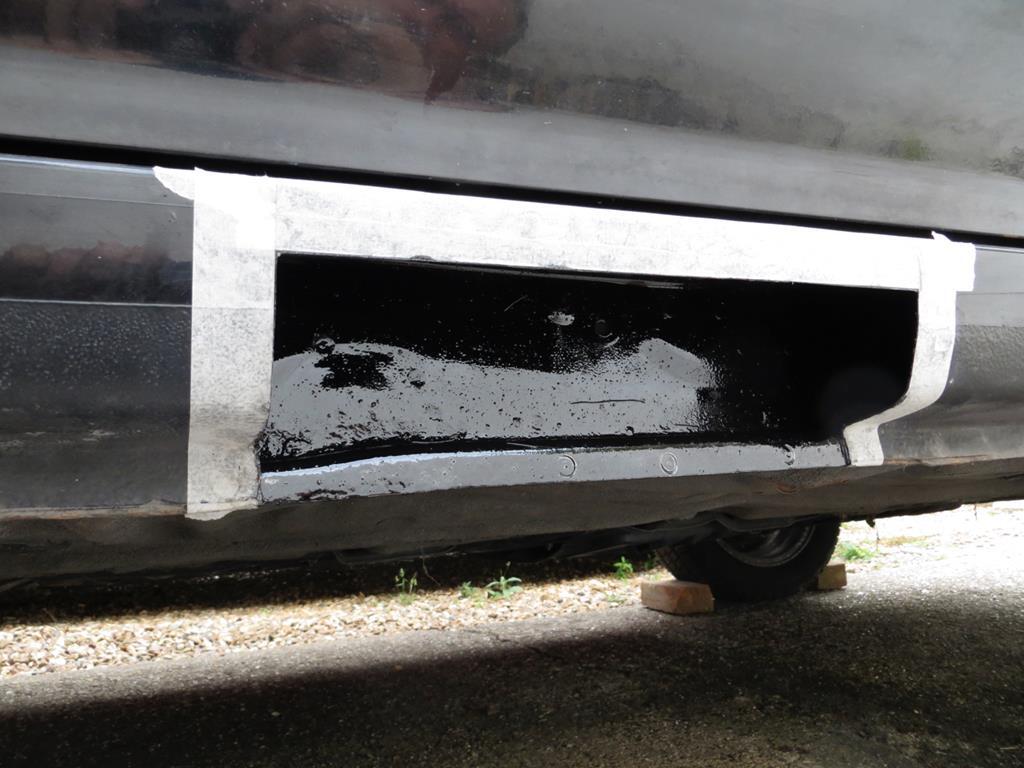 Need something to fill the hole up then. 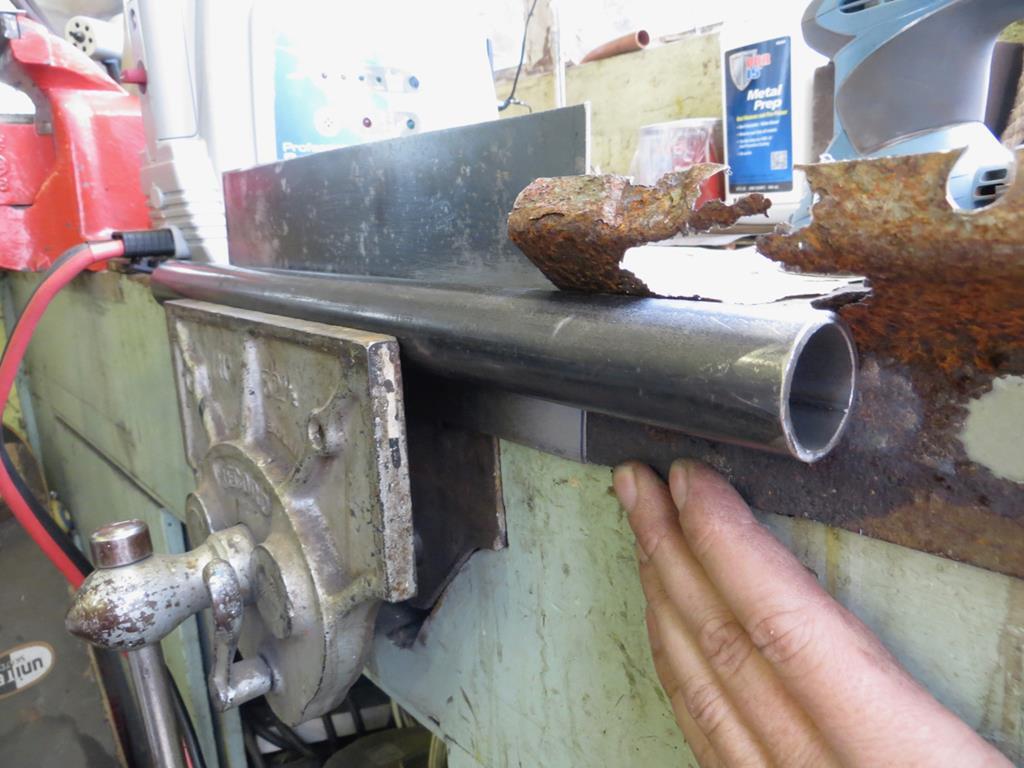 A bit of tin in the vice with a bit of pipe. Looks about the right radius. And bash it with a hammer and a block of wood. 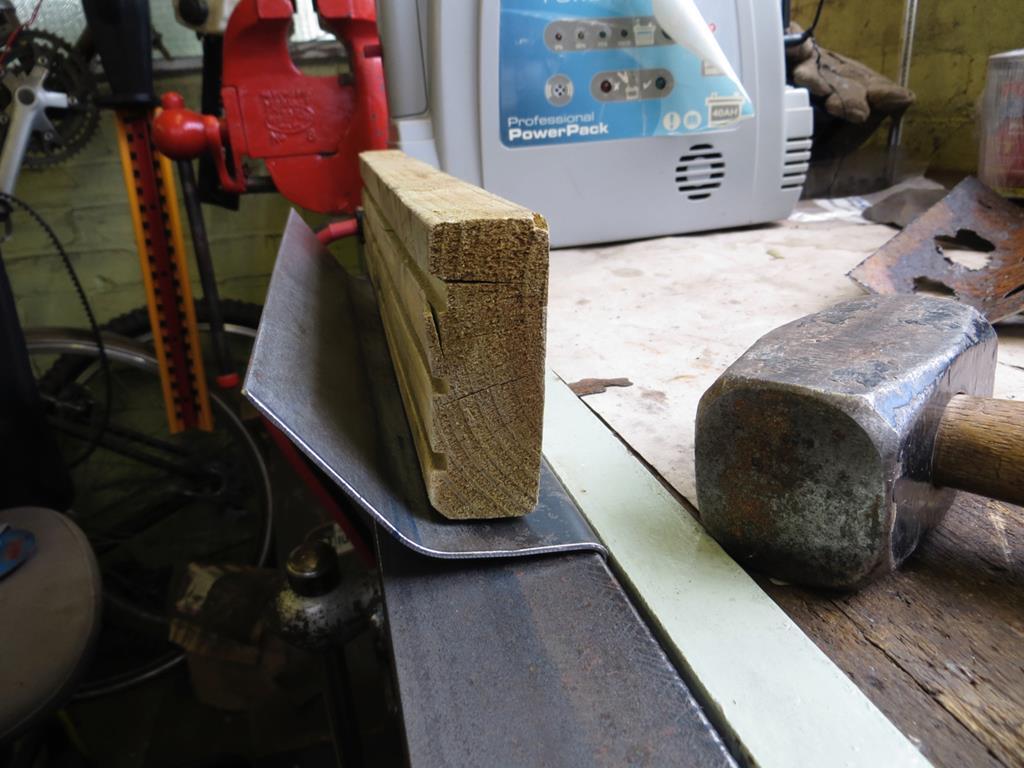 Hmm, nearly. 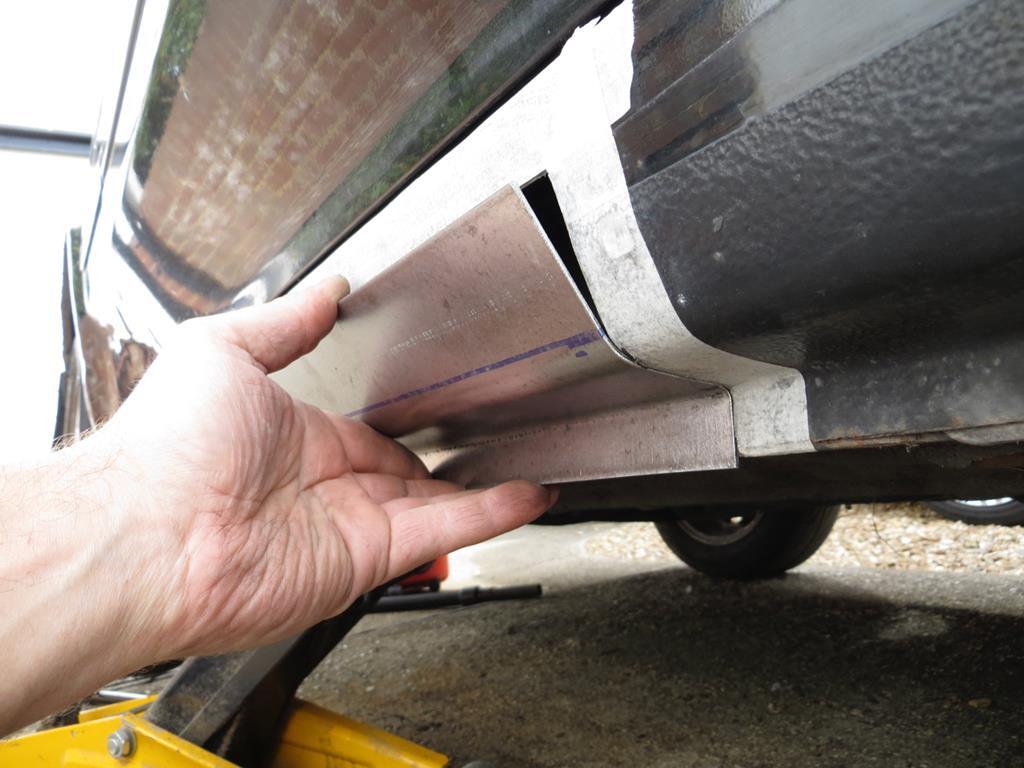 Just a little more… 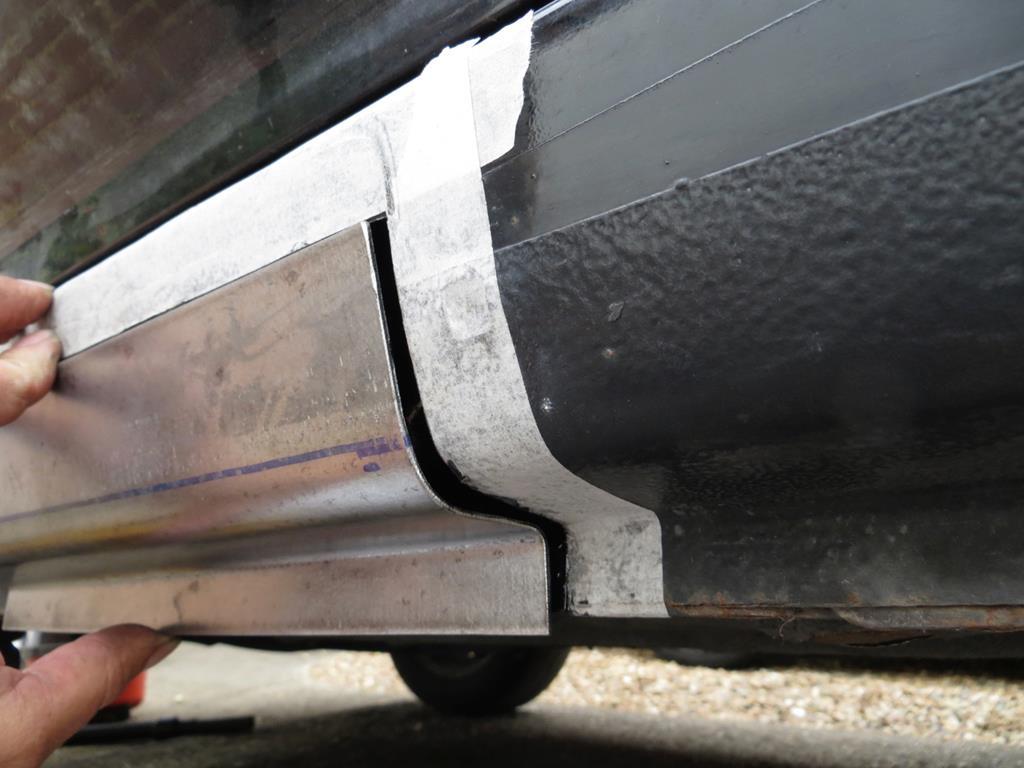 That's better. So that's where we are. It needs trimming to fit the hole, tweaking a bit and welding in… |
| |
Last Edit: Dec 6, 2018 20:57:37 GMT by Sweetpea
|
|
oukie
Part of things
 
Posts: 307 
|
|
|
|
|
Nice fab on the sill.
|
| |
Mr2 mk1 x4
Honda Accord 2.4 Executive (luxo barge)
|
|
nigxl
Part of things
 
Posts: 786
|
|
|
|
|
The slider rubbers on my sportrak brakes were solid too.
I pulled out the rubbers and cleaned out the caliper holes with a dremel, used loads of grease and refitted the rubbers and they were fine. The rust reduces the diameter of the hole and causes the rubbers to go tight on the sliders, may be your trouble ??
|
| |
|
|
|
|
|
|
|
Thank you. Still have to make it fit the hole and weld it in though. And make a drain and a mounting for the skirt. Plenty of time to pull disaster from the jaws of brilliance! The slider rubbers on my sportrak brakes were solid too. I pulled out the rubbers and cleaned out the caliper holes with a dremel, used loads of grease and refitted the rubbers and they were fine. The rust reduces the diameter of the hole and causes the rubbers to go tight on the sliders, may be your trouble ?? That was exactly the trouble and exactly how I got it free again. Right down to the Dremel! Well, first I did 30 mins of huffing and puffing and swearing trying to get it apart. Normally Toyota slide rubbers 'clip' into a recess on the edge of the hole and then the slide stops it from coming out. Daihatsu are probably the same since they are more or less Toyota anyway. What worries me about the right side is that it just pushed into the hole edge and nothing stops it coming out. So it came out and the slide filled with rubbish. That's why I think it has the wrong rubber fitted. Wish I could remember how the left side was engineered. James |
| |
|
|
stevek
Yorkshire and The Humber
Posts: 728
|
|
|
|
|
Wow what a great job your doing. I just read the whole thread and find it very inspiring.
|
| |
|
|
|
|
|
|
|
Wow what a great job your doing. I just read the whole thread and find it very inspiring. Thank you. Although, at the moment, it's inspiring me to buy one that works! Today I 'as mostly been painting the chimney. On the house, the car doesn't really have a chimney. But I did trim and fettle my patch. It needed a drain in the seam at the bottom so I started bashing that in. 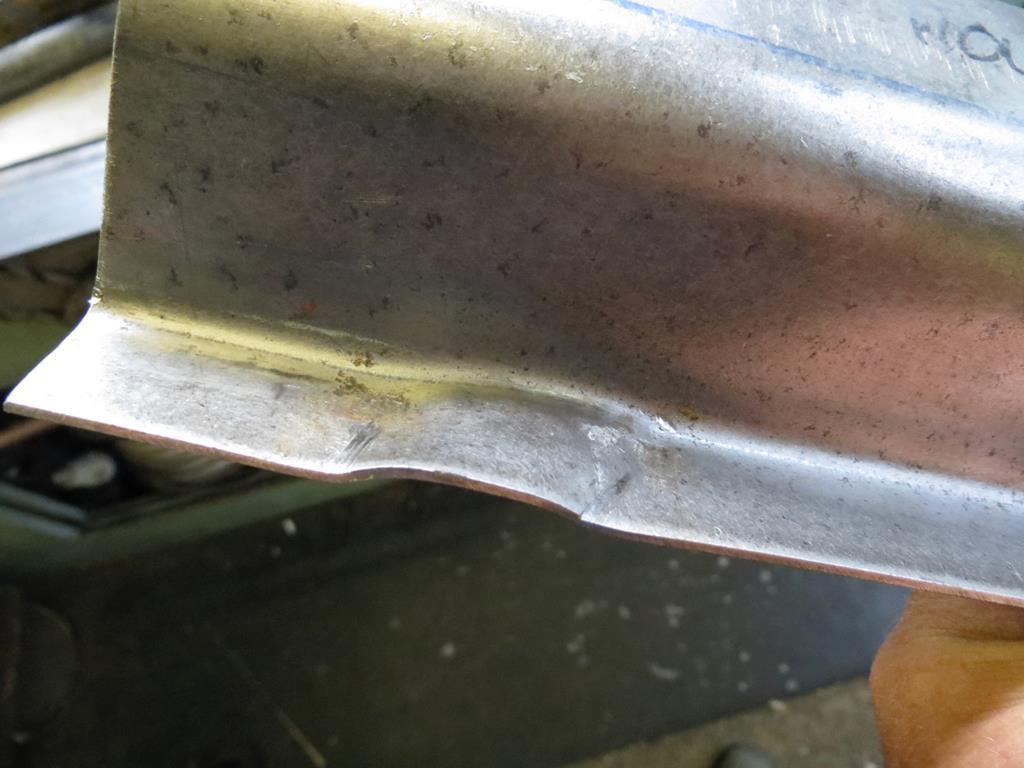 I'm not completely happy with it yet. It's lacking a bit of definition but I'm not sure I can be bothered to keep hitting it. Plus the fact that my favourite tapping hammer suffered a structural failure. 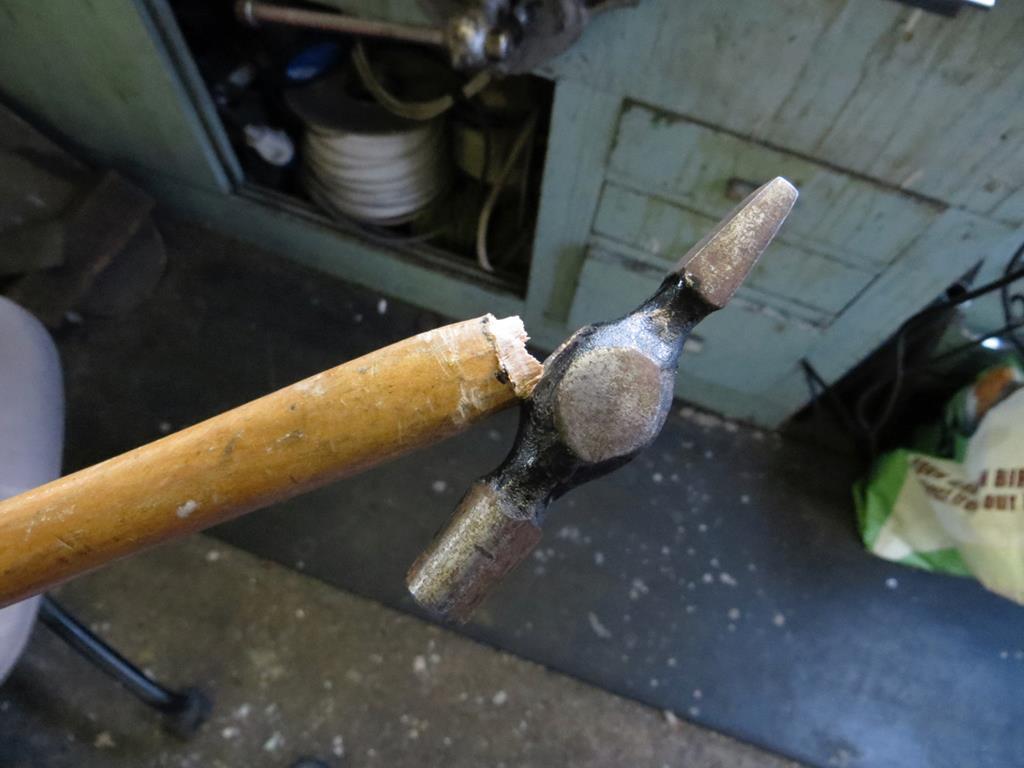 To be fair it was designed to tap panel pins into wood not hoof thick steal around. My cutting disk also suffered a structural failure when the grinder fell off the Swarfega tin. 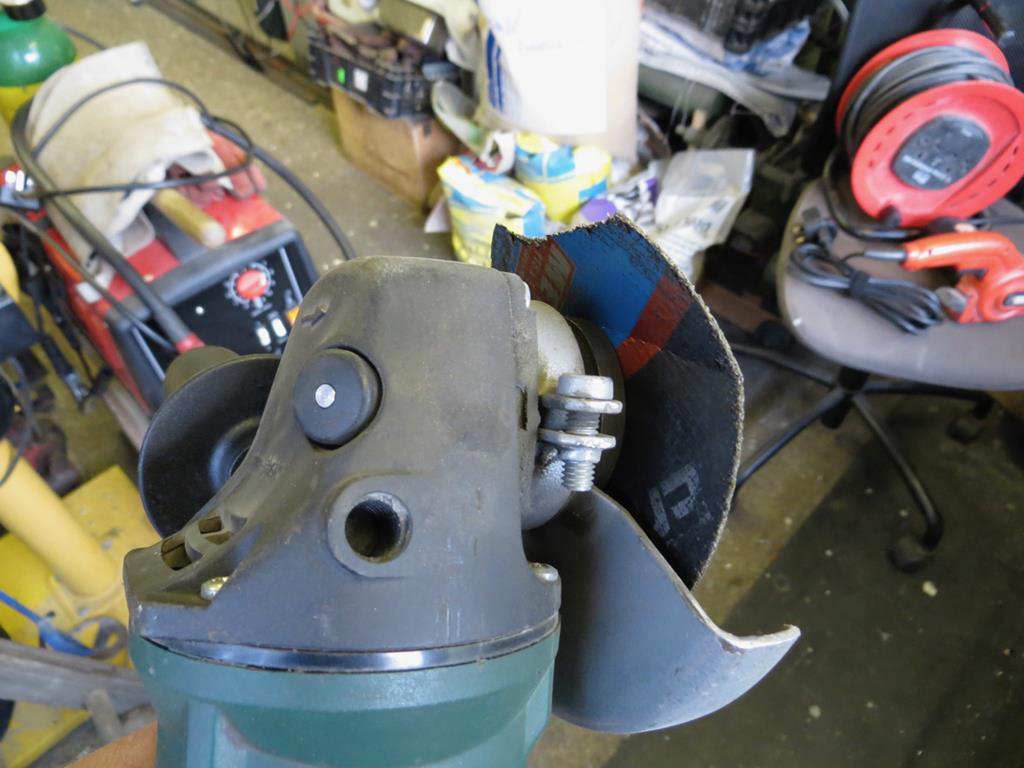 Engage Tight Git Mode… Nearly new that was! Don't bloody grow on trees yer know! Anyway, the patch looks ok I reckon. 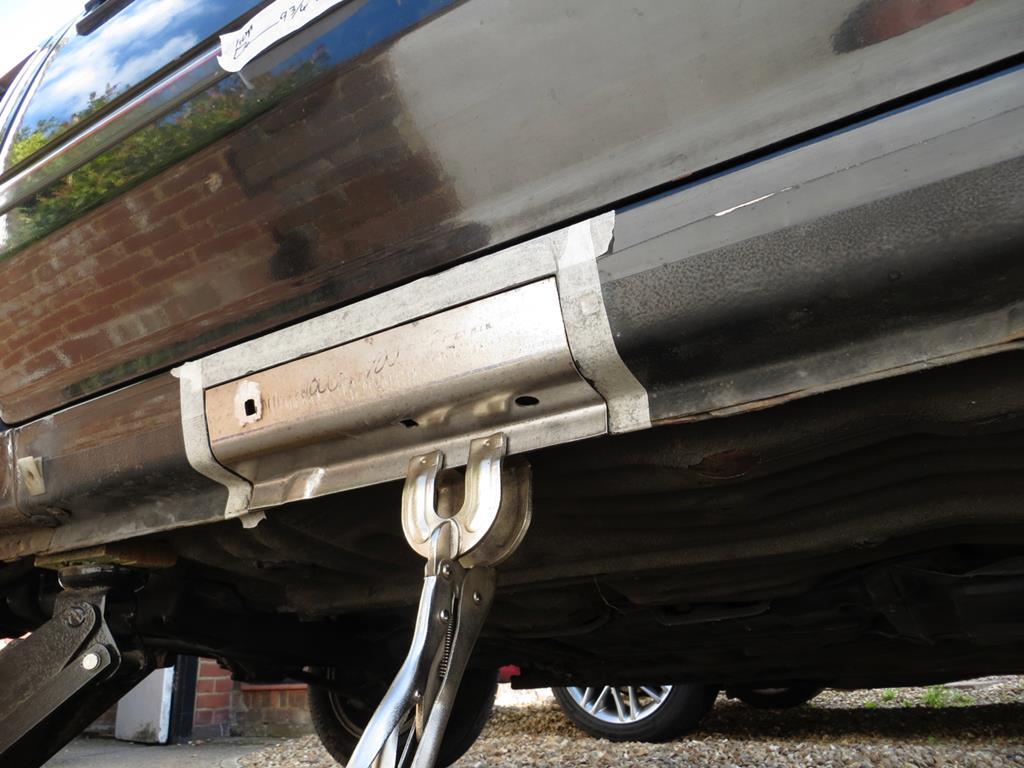 When I was drilling the square holes (have you ever tried drilling a square hole?) I managed to make one a shade too big. Used a bit of copper as a backing and blobbed some weld in. Sorted. That's another trick I learned here. Need to POR15 the back and weld it in. |
| |
Last Edit: Dec 6, 2018 21:27:37 GMT by Sweetpea
|
|
|
|
|
|
|
Anyway, the patch looks ok I reckon.  I know people will say it only a 'simple' shape but that's some of the nicest patchery I've seen outside of those "experts" threads, e.g., Dez/TonyBMW, etc. Nice work and bodes well for the rest. |
| |
|
|
|
|
|
|
|
|
Thanks George. It is a simple thing but, significantly, it took me hours of pushing and pulling before I was happy. I suspect that people who are actually good at metal bashing would get it accurate much quicker.
Hard work too. Glad I wasn't trying to make a whole sill.
|
| |
|
|
|
|
|
|
|
Anyway, the patch looks ok I reckon.  I know people will say it only a 'simple' shape but that's some of the nicest patchery I've seen outside of those "experts" threads, e.g., Dez/TonyBMW, etc. Nice work and bodes well for the rest. As George says great work and good patching...... just goes to show what you can achieve with minimum of tools...lump hammer wood and vice...keep it up!! |
| |
I would be rich if i had not spent so much money on Cars and fast women...oh, i did waste some of it as well!
|
|


