oukie
Part of things
 
Posts: 307 
|
|
|
|
|
Looks good, you've probably got it in hand but just in case, remember to use the skirts as a datum, cause when doing that area it's easy to get wrong and even if a small amount the skirt won't sit right, in fact it exaggerates the look.
Chris.
|
| |
Last Edit: Apr 24, 2016 8:39:14 GMT by oukie
Mr2 mk1 x4
Honda Accord 2.4 Executive (luxo barge)
|
|
|
|
|
|
|
Apr 24, 2016 10:05:37 GMT
|
Oh I think that James is used to having skirts as a datum. Only on weekends of course!  As ever, top work. |
| |
Last Edit: Apr 24, 2016 10:06:08 GMT by georgeb
|
|
|
|
|
Apr 24, 2016 20:51:38 GMT
|
Looks good, you've probably got it in hand but just in case, remember to use the skirts as a datum, cause when doing that area it's easy to get wrong and even if a small amount the skirt won't sit right, in fact it exaggerates the look. Chris. Hi Chris, Yes, I'd heard that tip from somewhere. I've been offering the skirt up and I think I'm in the ball park. But until you weld it all in you don't really know if it's right. Well 'you' might know but, frankly I'm guessing! To be honest until I read the skirt tip it hadn't crossed my mind so it's good of you to think to mention it. Oh I think that James is used to having skirts as a datum. Only on weekends of course!  I find skirts at the weekend quite distracting. I think it's because the welding sparks burn my inner thighs.  It was chilly this morning. Despite my best intentions to do something constructive I wound up sitting in the car listening to cassettes. And making brum brum noises… Another day, another cardboard Pterodactyl. 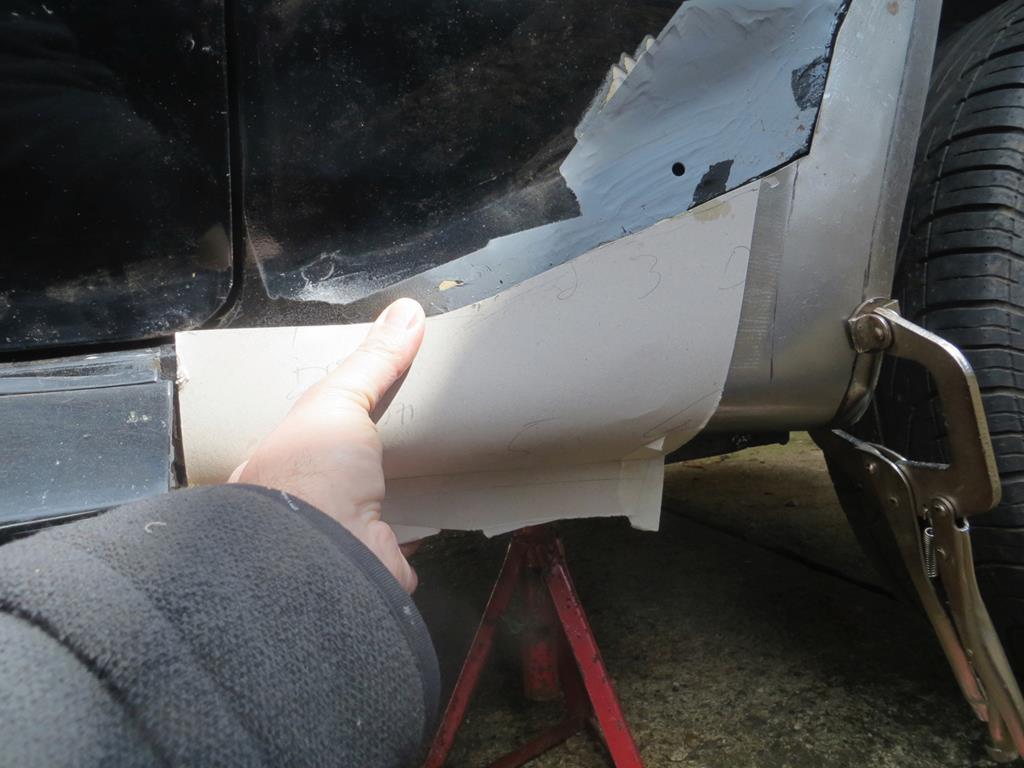 Sorry, I'll try that in English. Another cardboard template. I cut off the last frilly bits of the wing ready for a nice, perfectly shaped new bit. 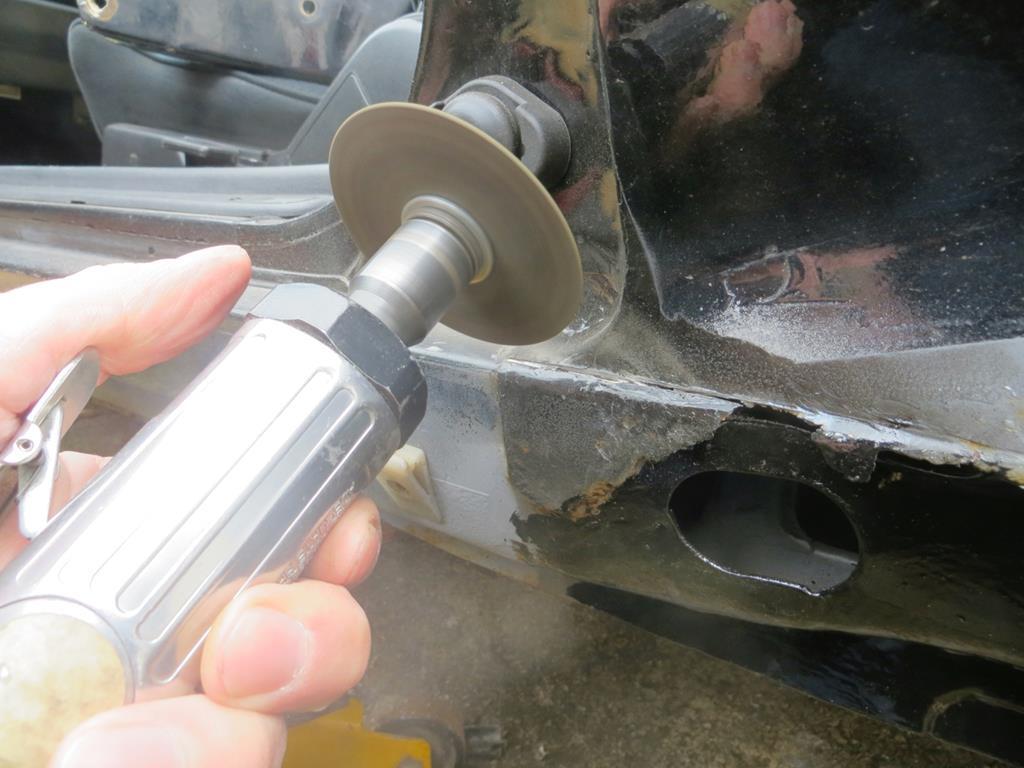 The new bit is fairly flat so it'll be a piece of cake to knock it together. Start by folding the bottom flange - the bit that's spot welded to the inner wing. 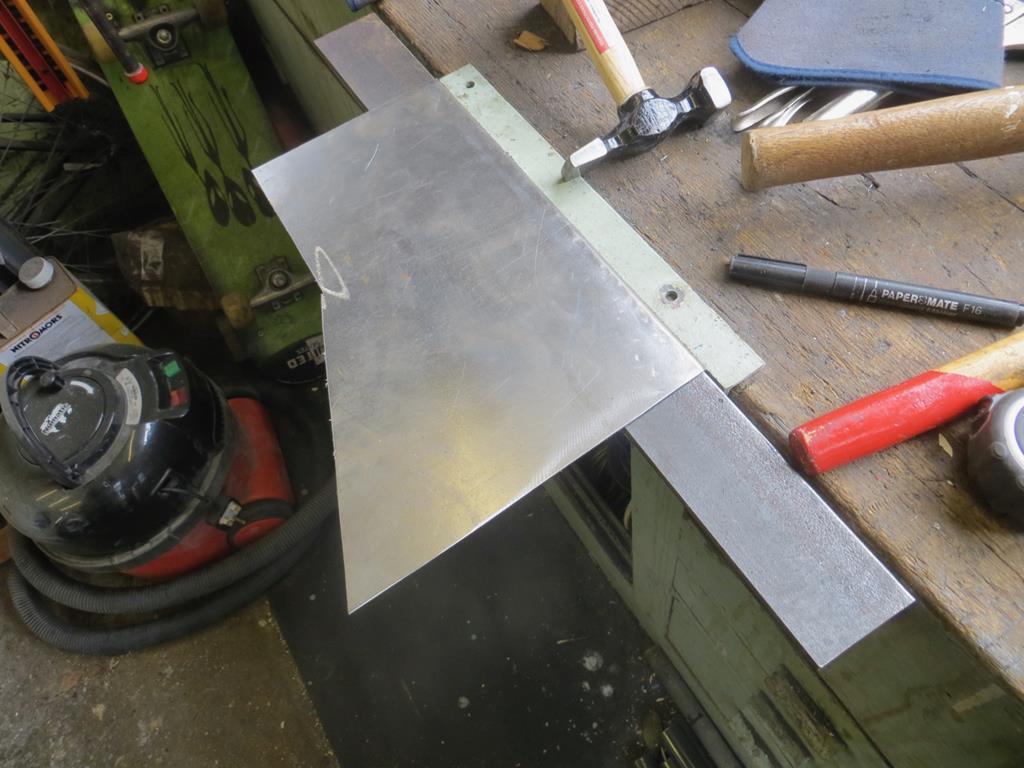 It's highly questionable why I did this because, after trying to put the the lower curves in, I had to cut the bottom flange off and weld it back on again. Oh no! Not in one go. No no no. I had at least 2 chopping sessions to get it right. 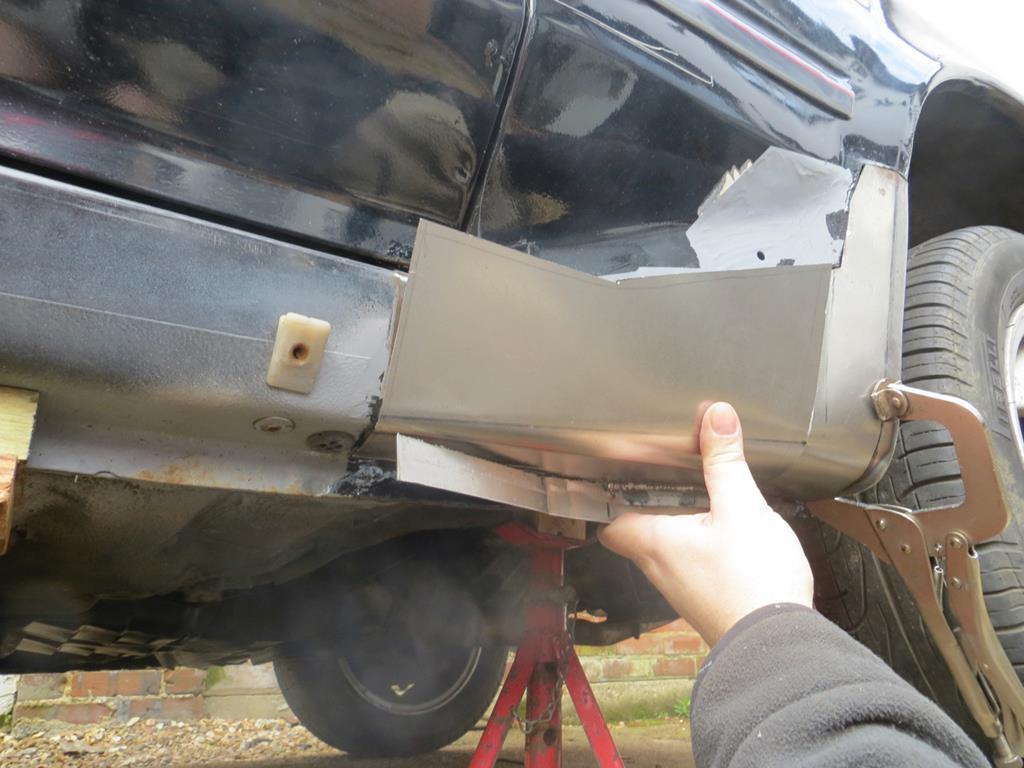 And, once I'd finally got it right, I tried again to put the shape into the top section and pulled the bottom out again. It's a simple bit but I'm damned if I can get it to fit. How can it possibly be this difficult!? 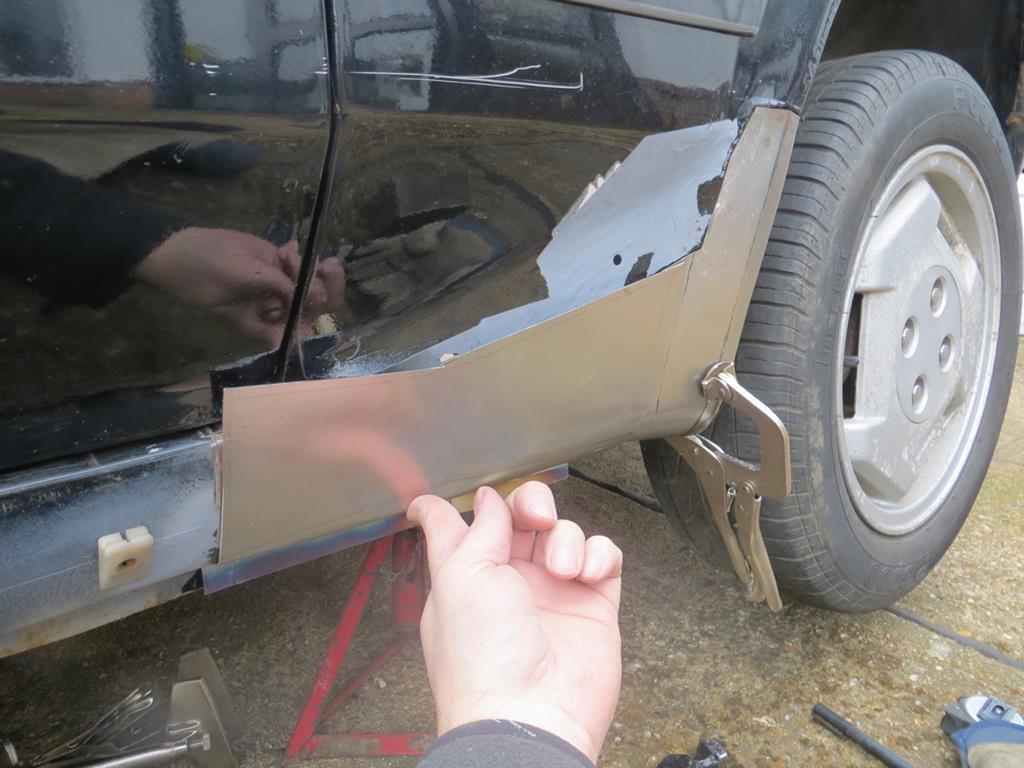 Looks ok in the photo but it's bloody miles out. Every time I get one section to fit something else twists and moves. It's driving me nuts. I'd just slit it and weld it up again except I'm not sure where to make the cut. I gave up and chucked it in the garage in disgust. Perhaps a week of not thinking about it will allow my subconscious to come up with some ideas. Keep your fingers crossed or this is going to turn into a long story. James |
| |
Last Edit: Dec 28, 2018 22:18:08 GMT by Sweetpea
|
|
|
|
|
Apr 25, 2016 15:48:35 GMT
|
|
to be fair leaving it for a while may help, if I'm struggling with something i quite often put it down and come back later and quite often do what i was trying to achieve easily 2nd time round and wonder why i was struggling previously.
keep up the good work its looking better with every update
|
| |
|
|
|
|
|
|
|
to be fair leaving it for a while may help, if I'm struggling with something i quite often put it down and come back later and quite often do what i was trying to achieve easily 2nd time round and wonder why i was struggling previously. keep up the good work its looking better with every update Couldn't agree more. I also find I have my best ideas while on the loo... You didn't want to know that did you? A long weekend. Yippee. Gardening. Hmmph. Well it needed doing, and we did lots of it. I'm bushed now and so is the garden. Unfortunately I didn't get to take the top off the holly tree. Had a play in it but ran out of courage. Maybe another day. Or maybe get a man in. Anyway, I did get some time today to play with Project Portia. Last year I rebuilt the tail end of the sill which had a bit of rot in it. I followed the same shape that Toyota seemed to have. 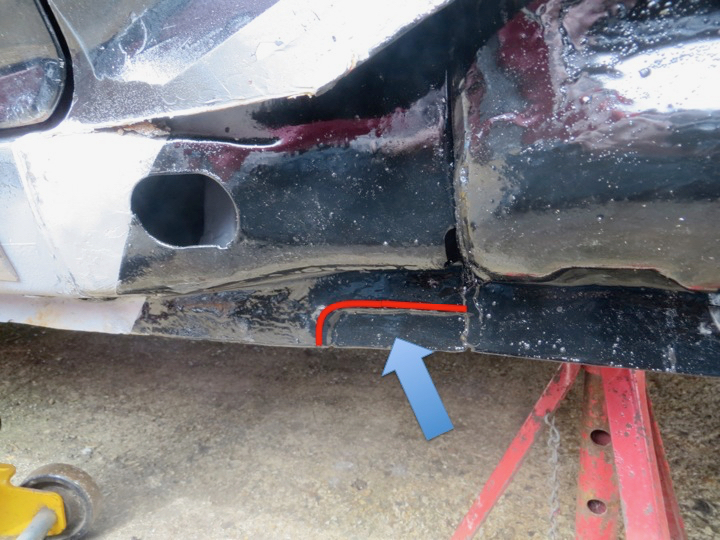 The outer sill has this strange cut back (red line) where it meets the inner sill. This leaves a low bit where blue arrow is. Now I wondered about making this cut out or just taking it to the back edge of the sill. I made the cut out. Well I regretted that decision today. It was causing my new panel to rock on the high spot at the left of the cut out. Remind me to do it my way next time. So I bashed a relief - or dint, as we call it in the trade - into the bottom of the panel so that it sits better against the car. 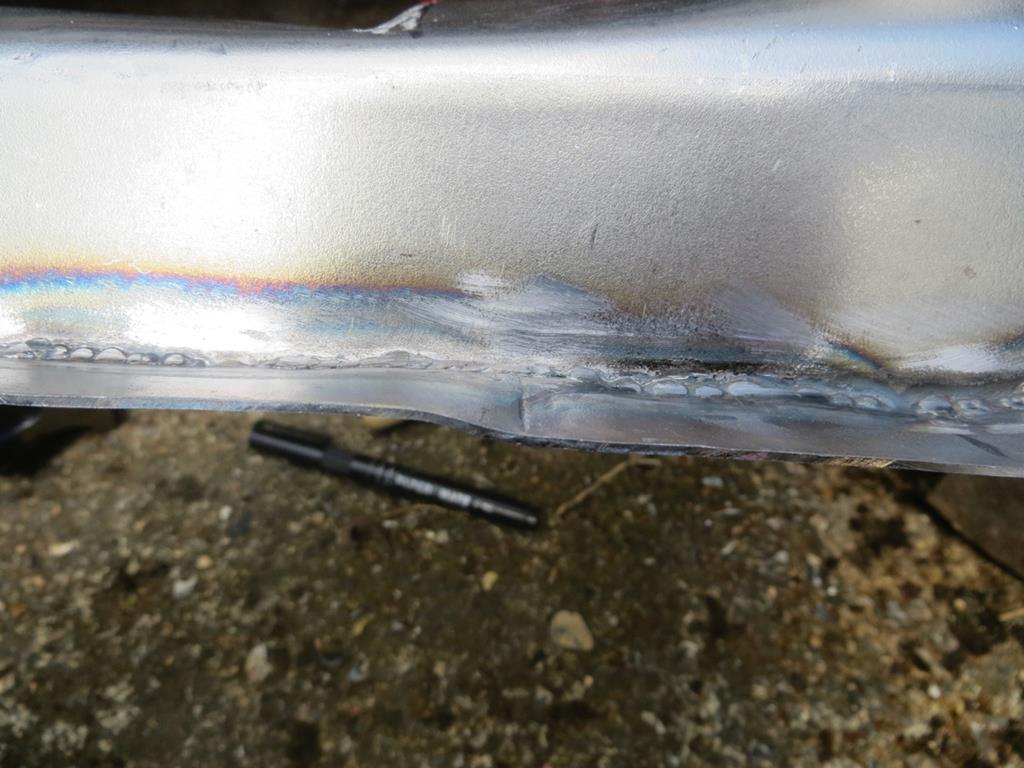 Don't look to tidy in that photo do it? But it works. Also at the end of the last boring and tedious episode I was pondering if I should slit the repair panel 'cos I couldn't get it to fit. As I got one part right it'd pull another part out. And as I put that part right again it'd pull the first part out. Spending another day going back and forth but achieving nothing is what I expect to do at work. 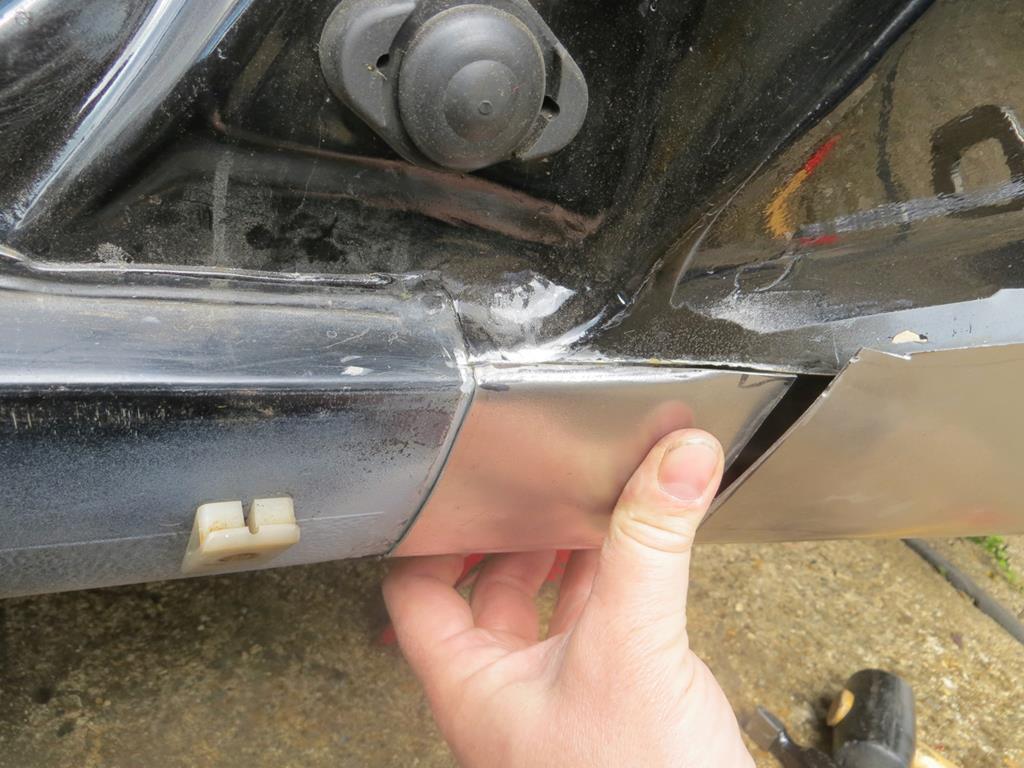 So the panel got a slit in it so I could make some progress. And look! The front part fits now! Next curve the middle part to the right sort of shape so it meets with the car along the top. 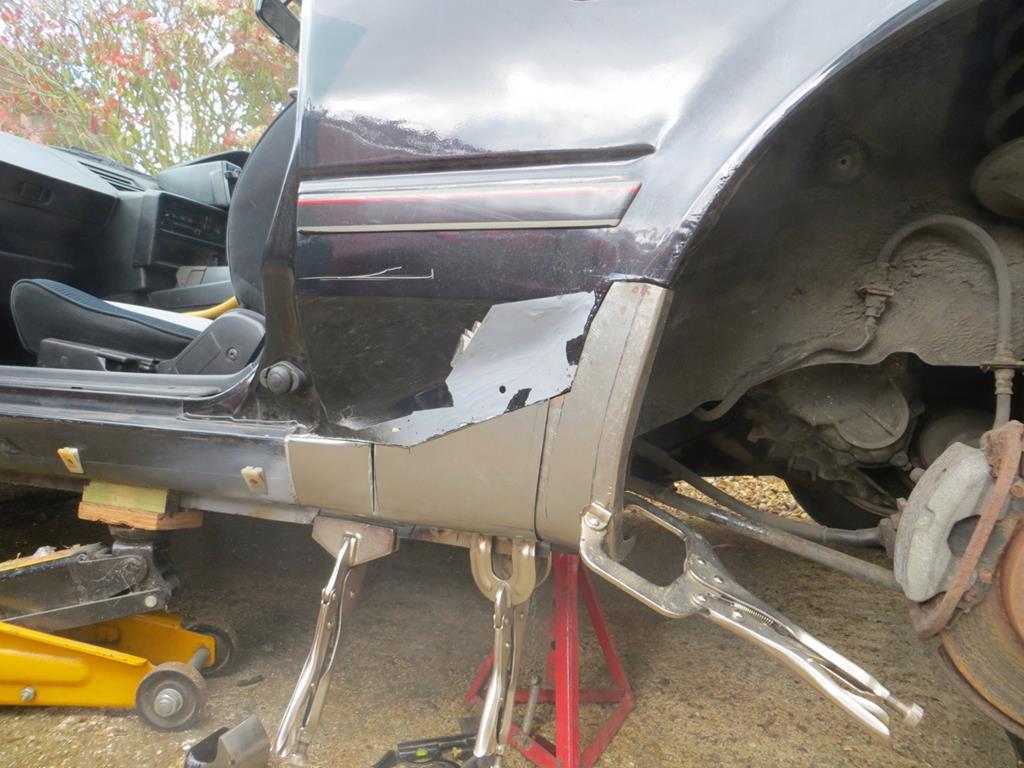 Stand back and admire the progress… 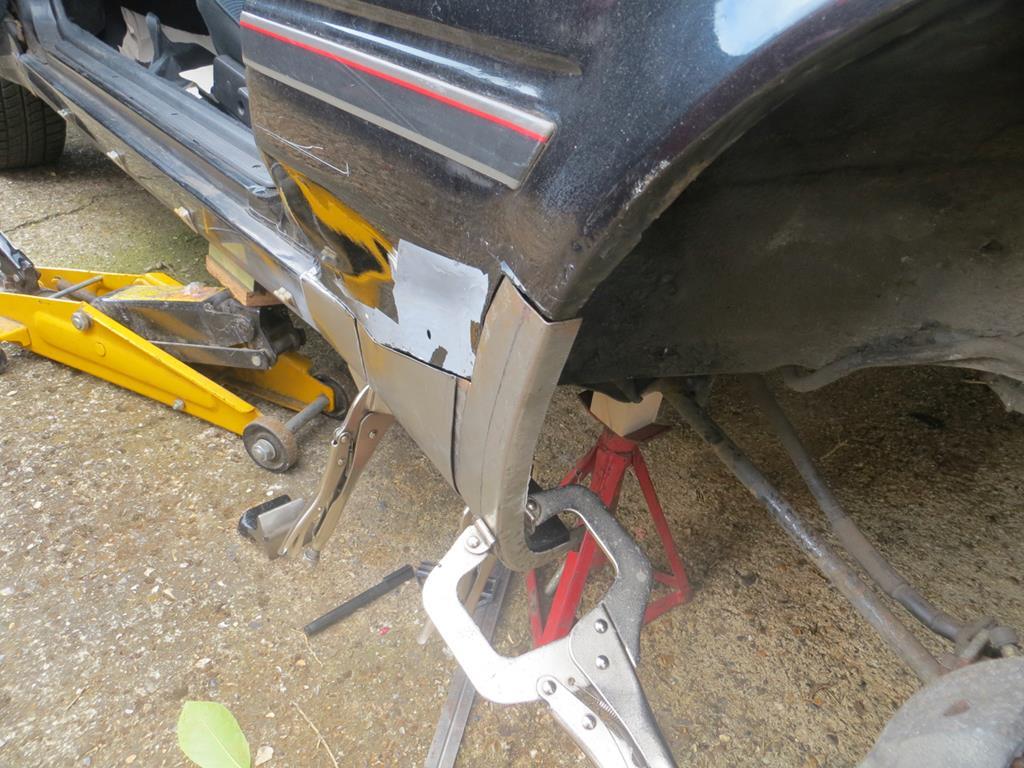 Yup. Grand job. looking' rite good fro' 'ere an all. 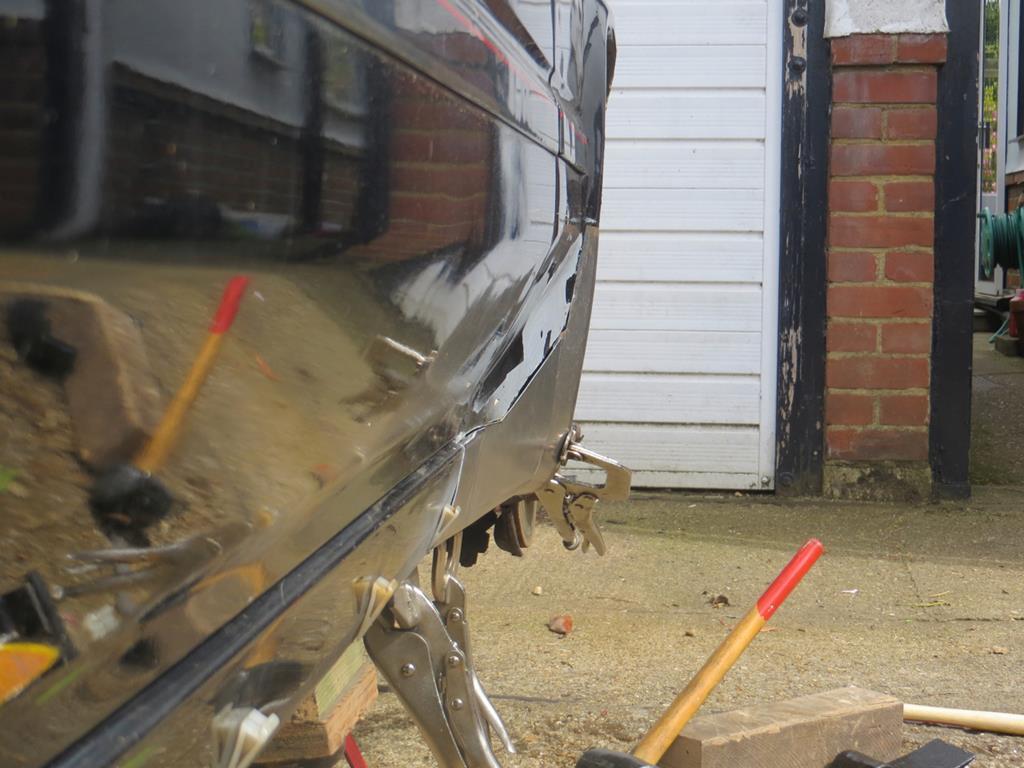 While it was lined up on the car I tacked the bits together. 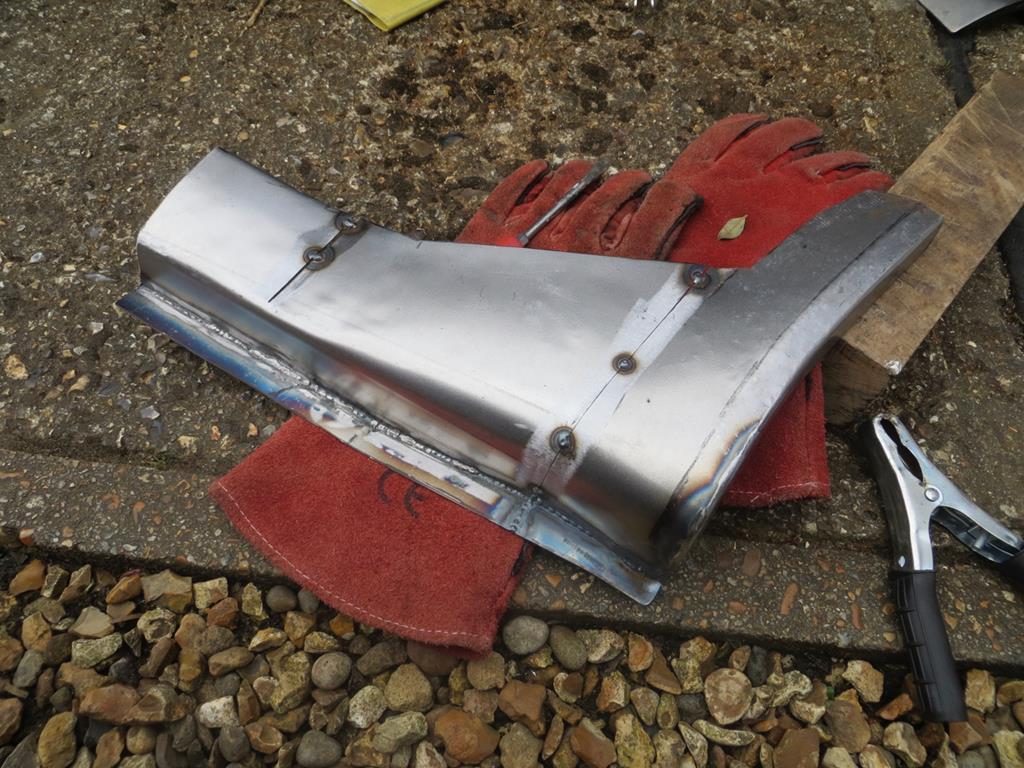 Too many times I've tacked things together off the car and then found they don't fit. Never let it be said I don't learn from my errors. Eventually. And then I welded it together. On the back side. 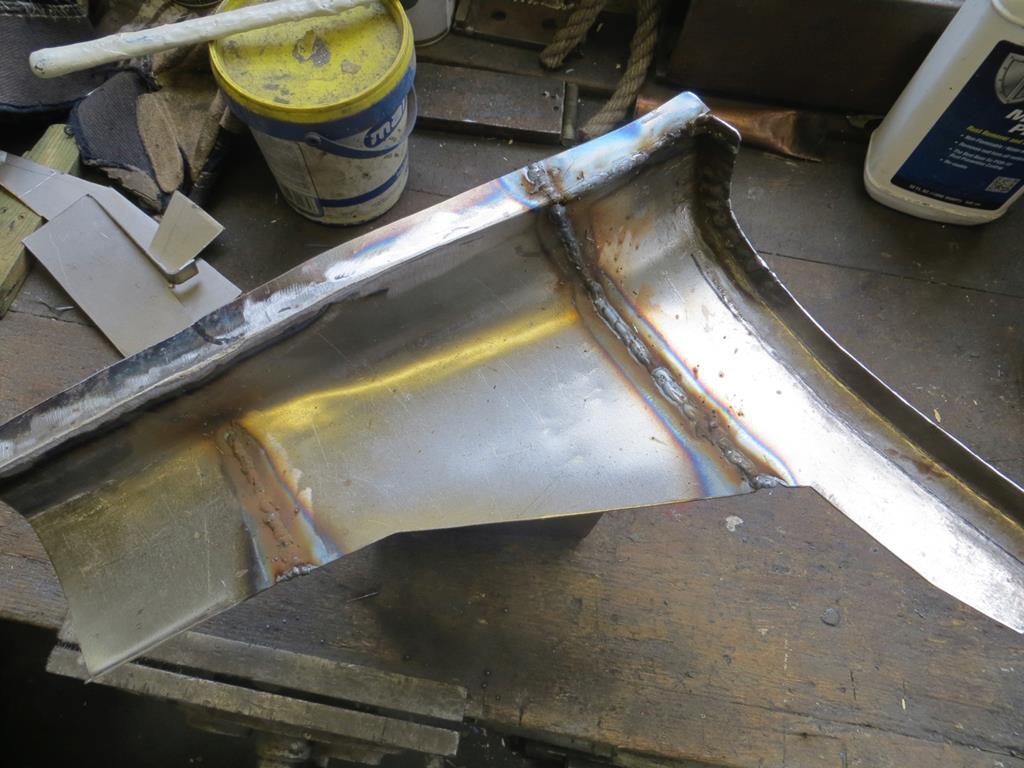 I got fed up of welding on the face side and then spending hours grinding back. If I weld on the back and get the penetration right I have less to grind. Well that's the idea. I haven't ground it off yet so it might turn out to be bolloc…. complete rubbish. Next will be to tap it back into shape, the welding will have distorted it a little. And to add some captive nuts to bolt the skirts on to. Prerequisite photo of great industry… 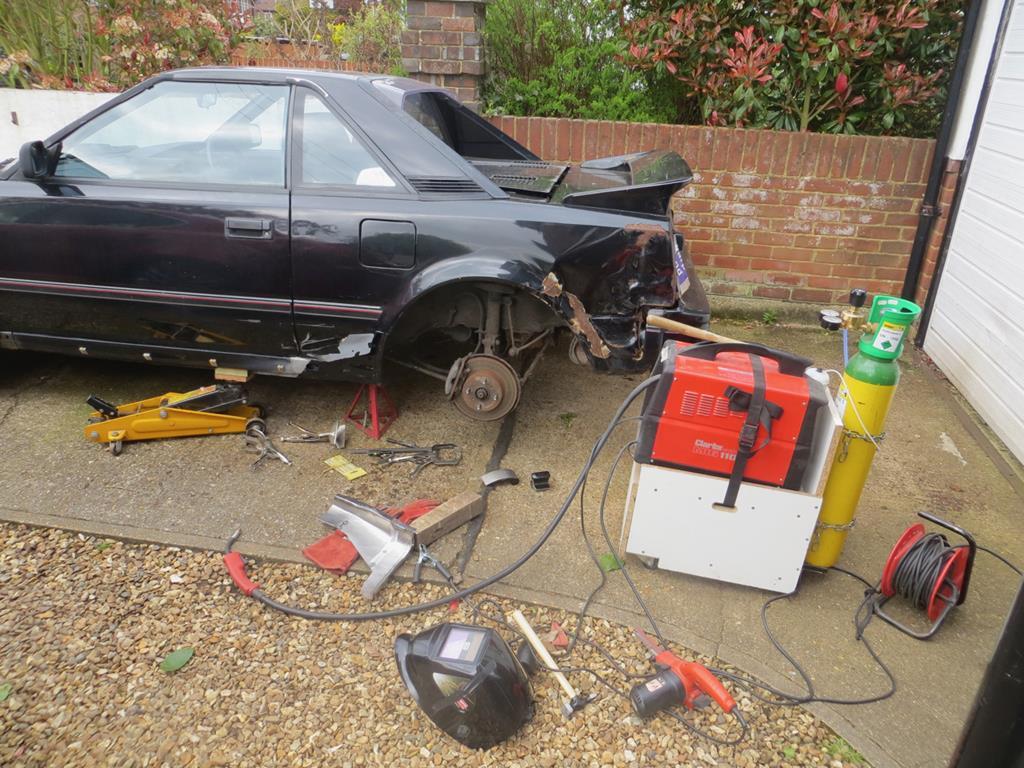 Well, it would be if I was in the photo being industrious rather than poncing about taking it. James |
| |
Last Edit: Dec 28, 2018 22:29:50 GMT by Sweetpea
|
|
|
|
|
|
|
Sad to hear about Portia. But good to see you're motivated to keep going.  |
| |
|
|
|
|
|
|
|
Sad to hear about Portia. But good to see you're motivated to keep going.  Thanks mate. Things are back to normal now. More or less. I still check she's not under the bed covers before I sit on it though. |
| |
|
|
|
|
|
|
|
I'm going to start with a digression. Sorry. Is it actually possible to digress when I haven't even started the main story? Apparently I'm going to be pedantic too. Mrs Sweetpea has a Vitara. The previous owner must have been a country lady with kiddies and mud. It seems the kiddies were encouraged to get as muddy as possible and then plaster it all over the seats and carpets and anywhere else they could reach. Further more the previous owner seems to have never cleaned it. Well it was acceptably tidy when we got it but dirt was always coming out of the seats and carpets. Mrs Sweetpea was going out with her lady friends so muggins 'ere got the job of Vaxing, washing and polishing the Vitara last weekend. Under the thumb? Me? I don't think so but I'll just ask… Some of the polish must have splashed on the MR2. 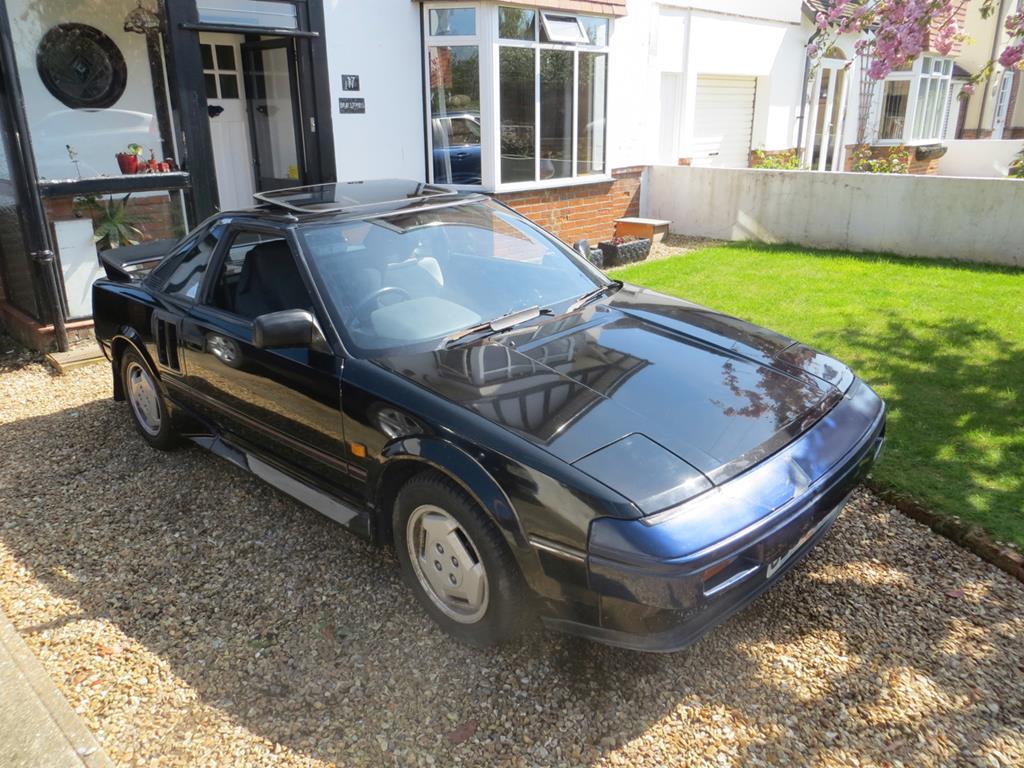  To be fair it doesn't look that good in real life. The paint (clear lacquer) needs a serious cutting back. Really it needs respraying but that's not going to happen for some time. I have to say that a week later with a pile of dirty rain and bird poo all over it things aren't so shiny. Ah well. It had a moment of glory. While the Vax was out I thought I'd have a go at the interior. 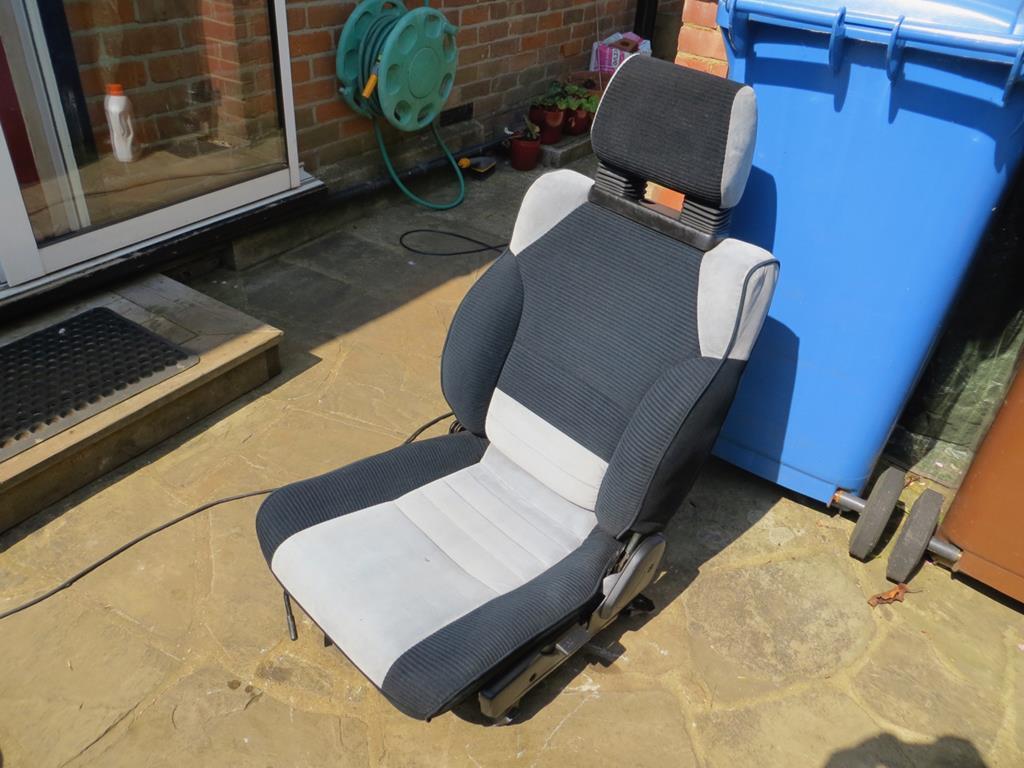 The passenger seat looked pretty clean (the whole interior did) but the water in the Vax told a different story. 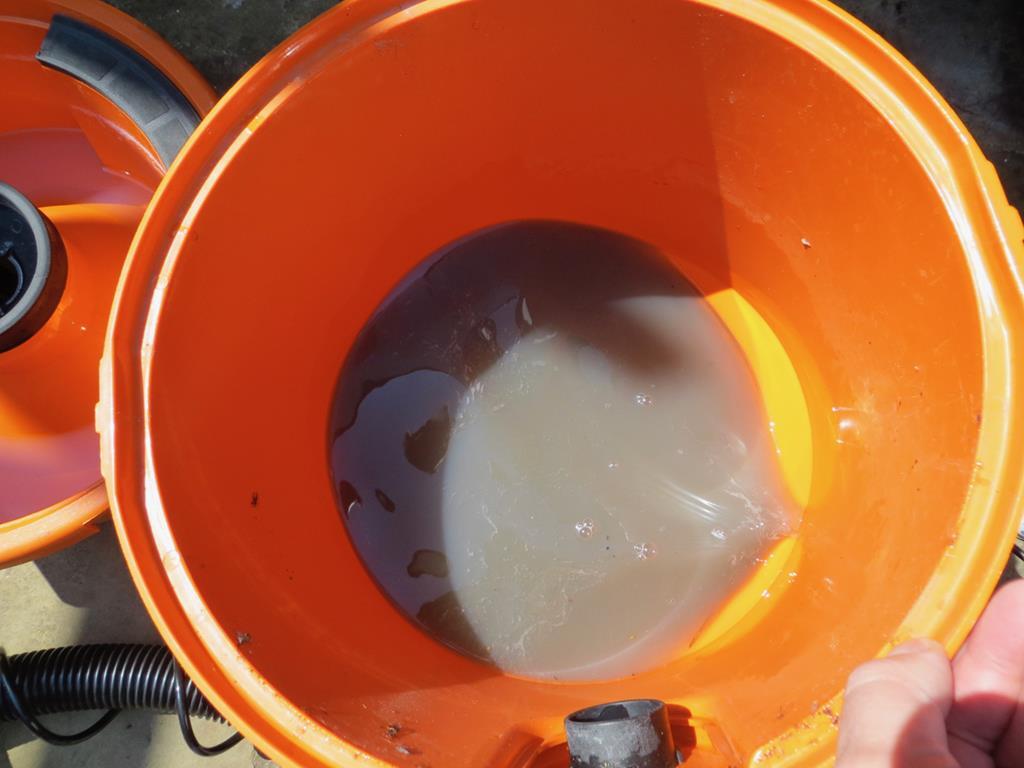 This is the drivers seat after a clean. 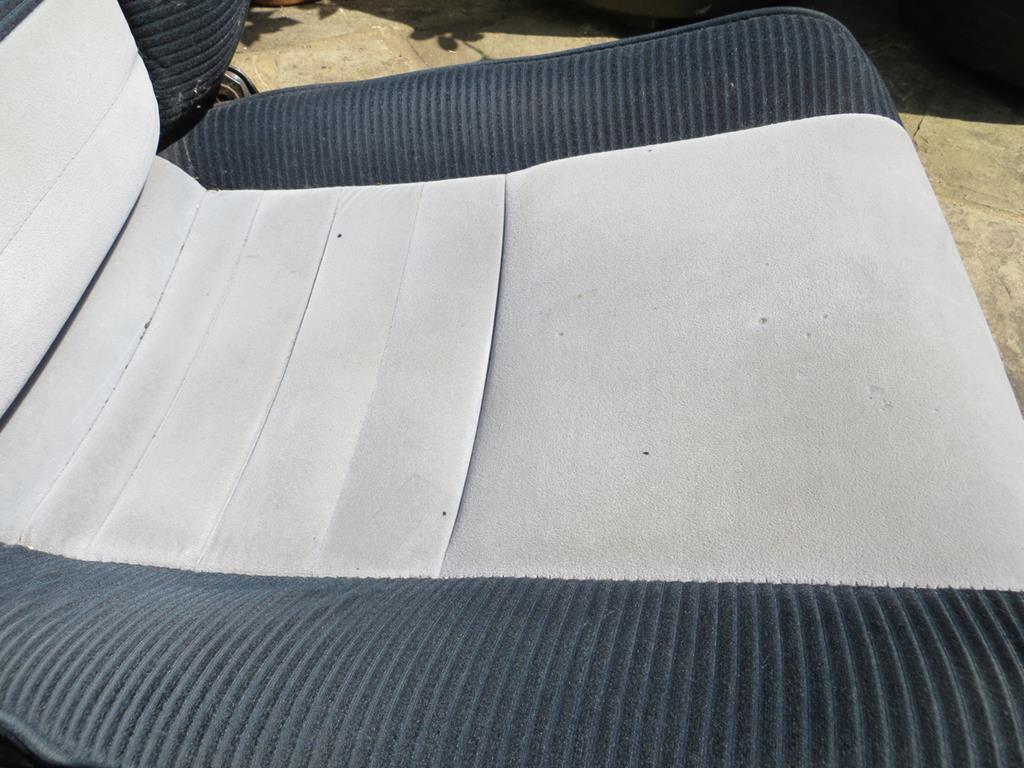 For a 30 year old car with light coloured seats they are pretty good. There are a few spots that look melted. Maybe some owner smoked? The seats probably haven't been out of the car in a long time, if ever, so the carpets did need a scrubbing. 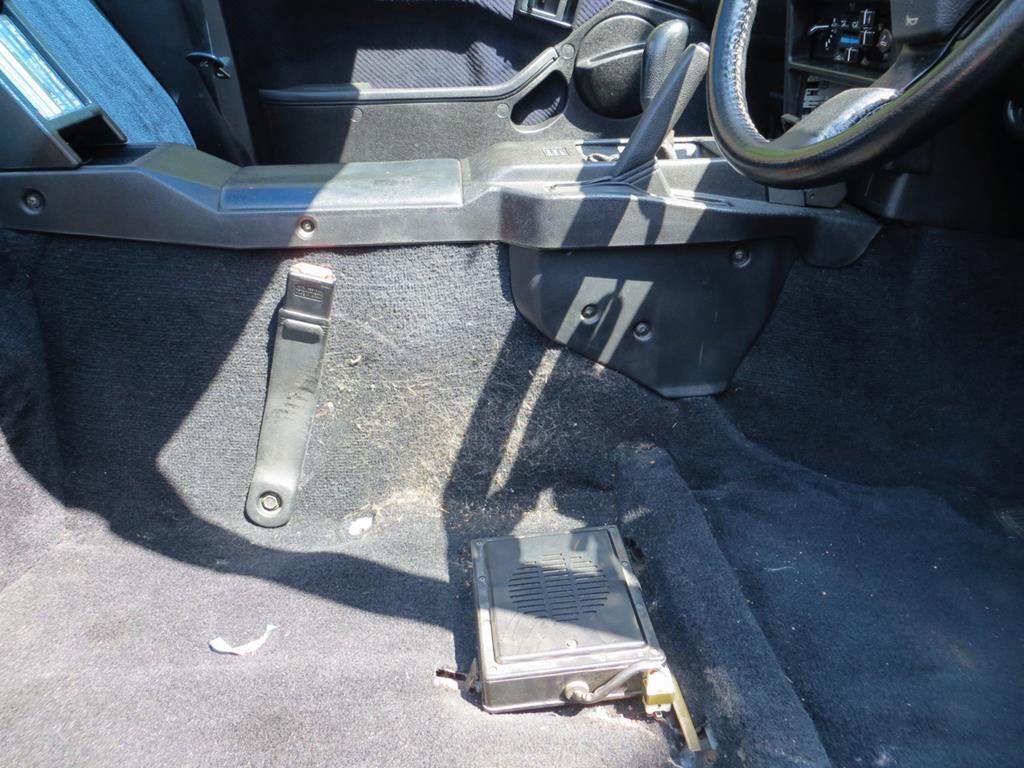 Hiding under the sub woofer was lip gloss (in red) and... 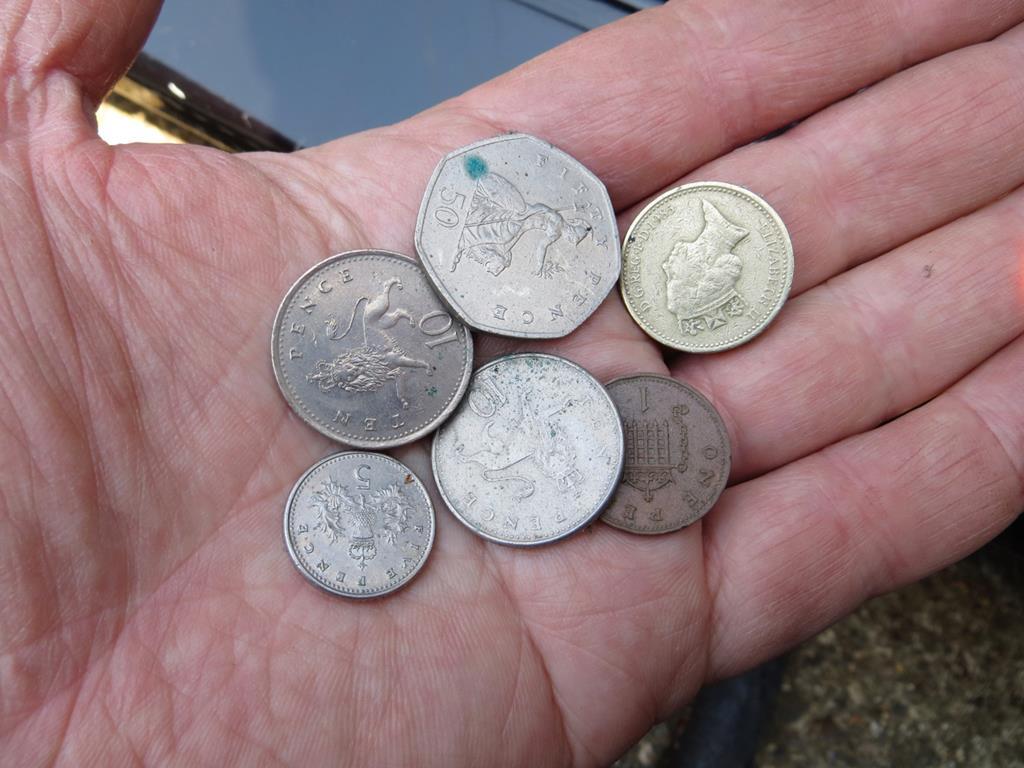 …£1.76. This project could be in profit if I find much more. There is a reason for taking the seats out which we'll get to shortly. But first what's caused this by the clutch? 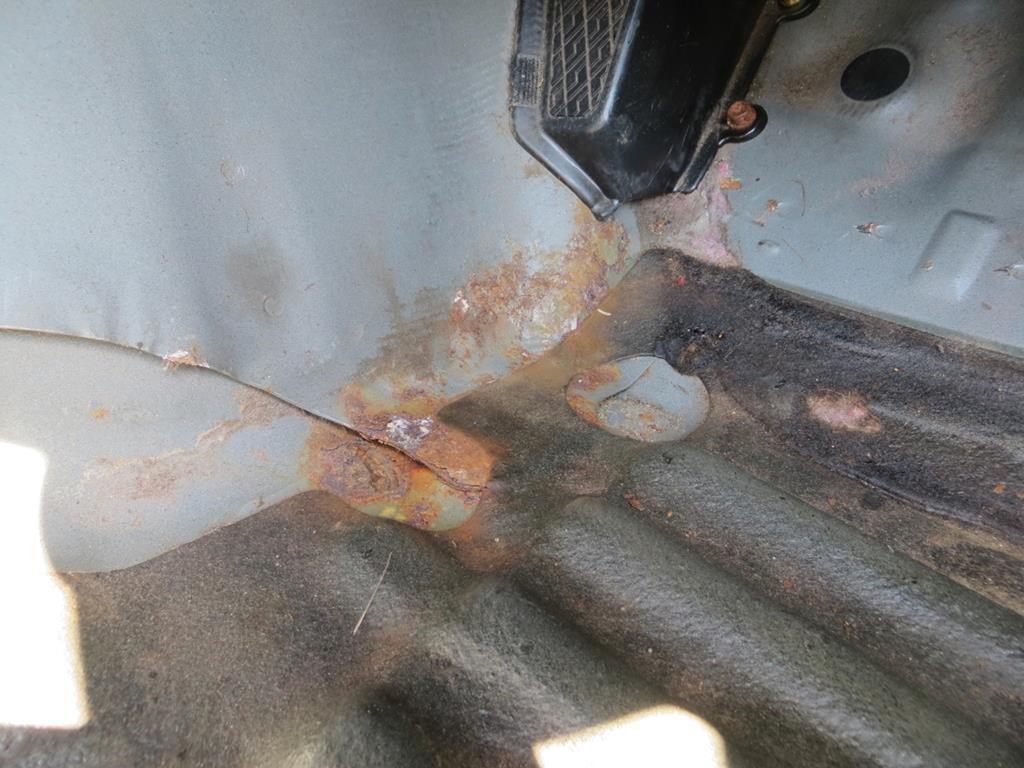 That'll need looking at, but not now. Interestingly the carpet was damp under the pedals. Since the car hasn't been driven this must be rain getting in from the top. I suspect this might be something to do with it. 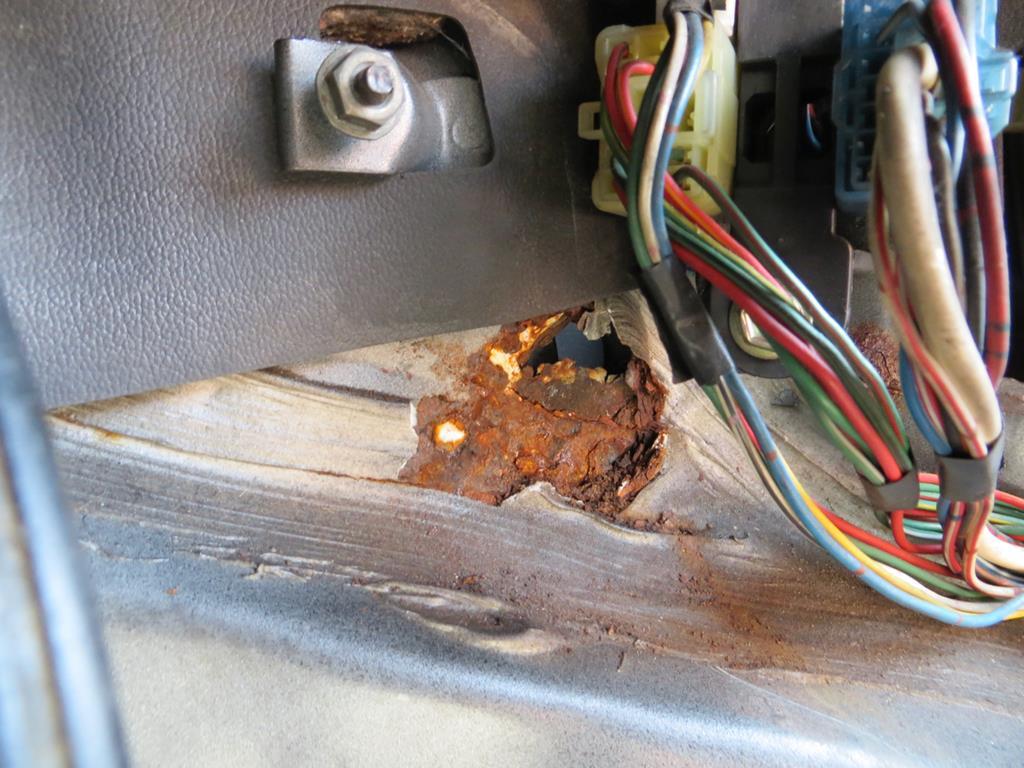 This is to the right of the accelerator and, I think, opens to the wheel arch behind the liner. Water off the windscreen winds up down here I think. I'll sort it out when I take the wing off but it'll have to be done fairly promptly. There is a little job I wanted to do on the floor pan. 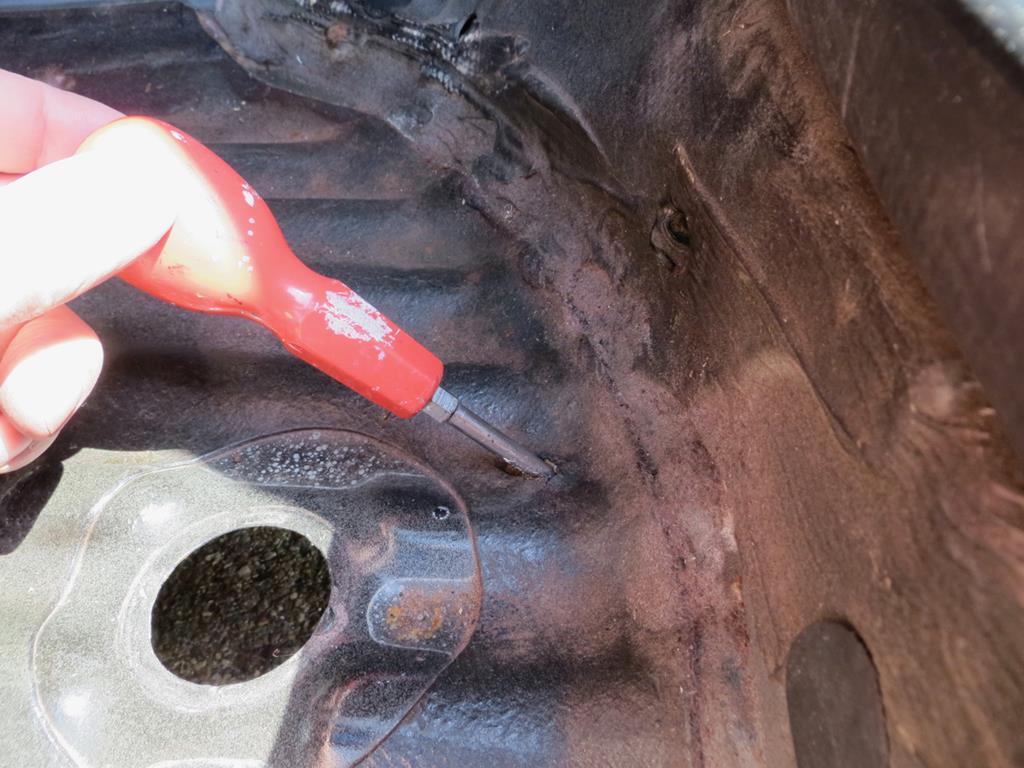 The underseal had been damaged at some time and it's rotted through. This would be a problem in the rain as the car will fill with water. A quick job so lets knock it off. Chop out the rust. 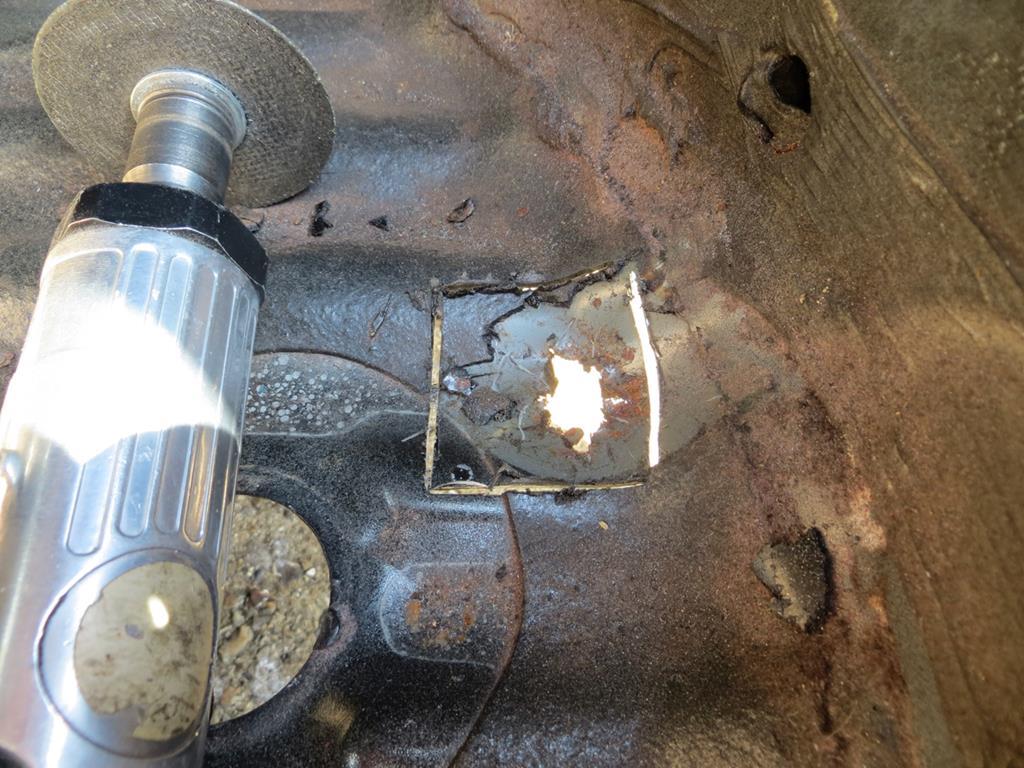 Make a patch. 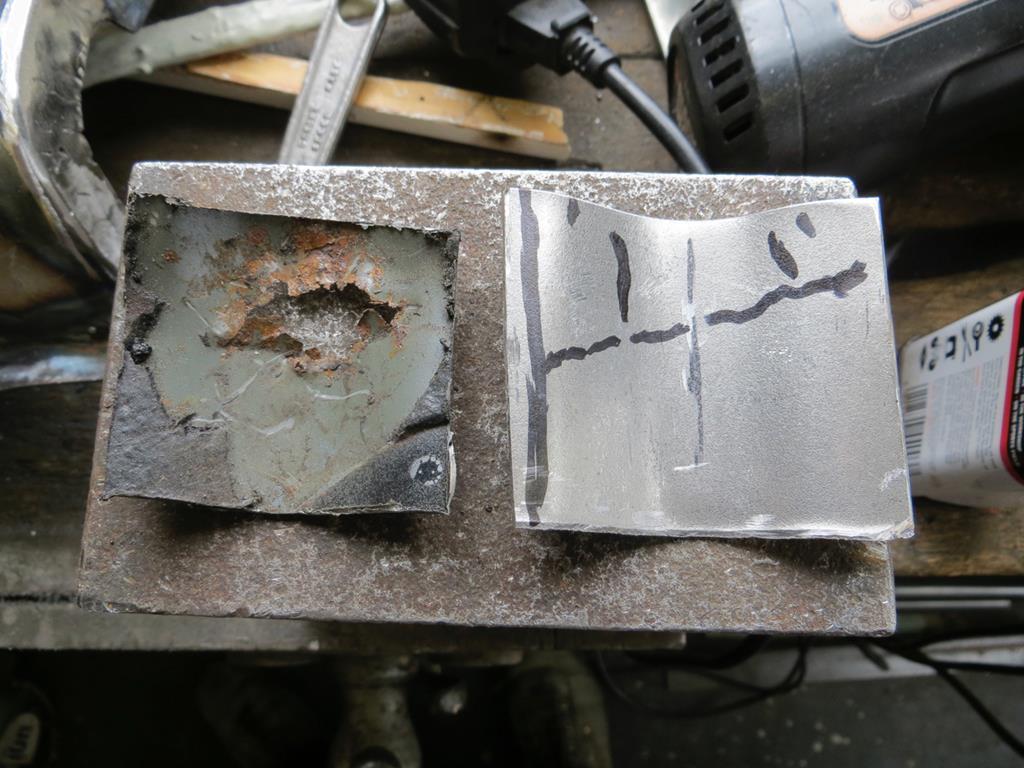 And spend the next hour blowing holes in the floor of the car. So much for "quick". The metal must be really thin in places. Or I'm a curse word welder - which is true but I don't think I'm that bad. I can see why people joggle the edges. But eventually I got it in. 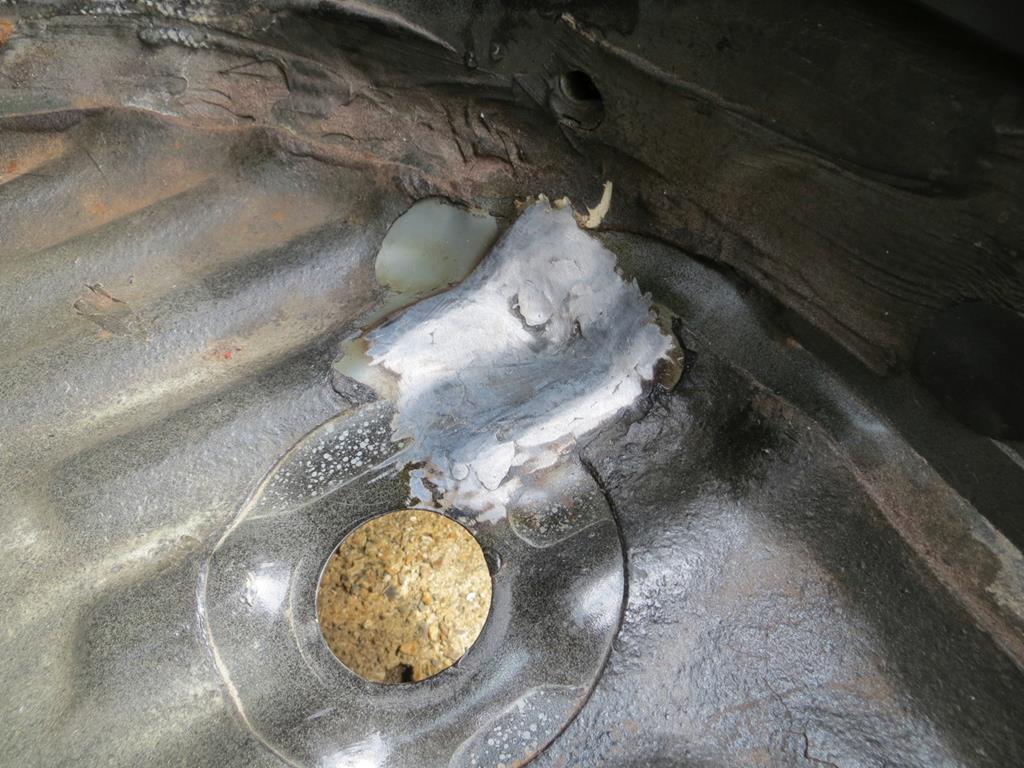 Slap some paint on it. 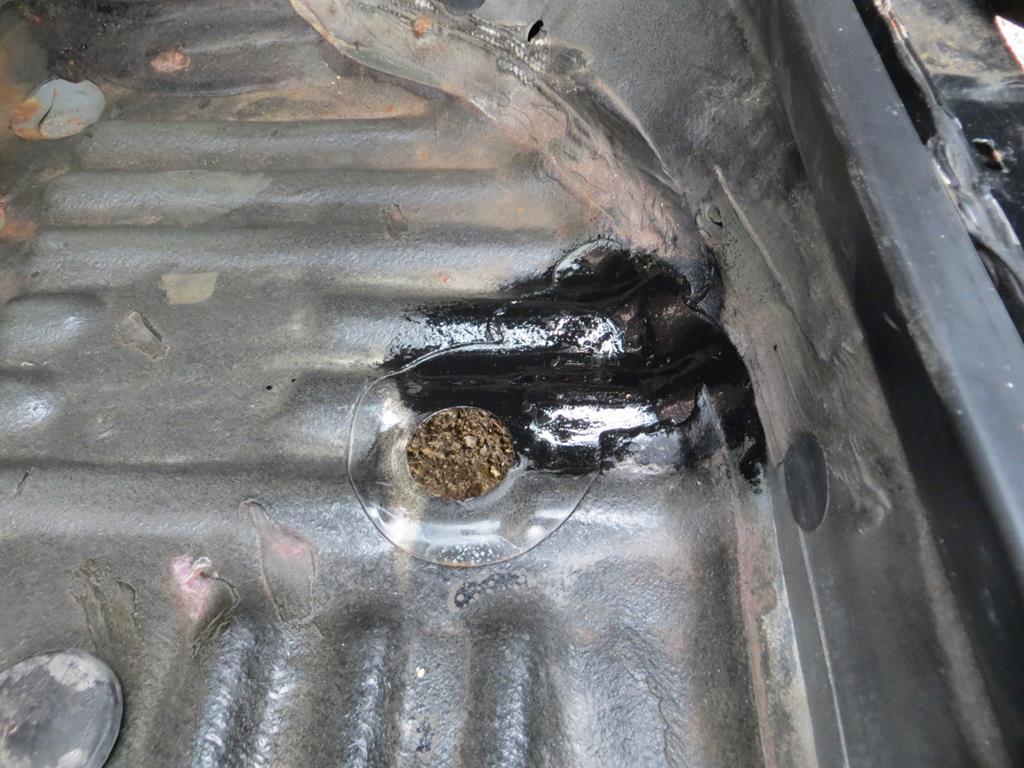 In the morning, when that's dried, the carpets and seats can go back in. On a different subject… Every now and again I take a lump of wood and lump of hammer, er, I mean a lump hammer and bash a bit more of the rear wing out. 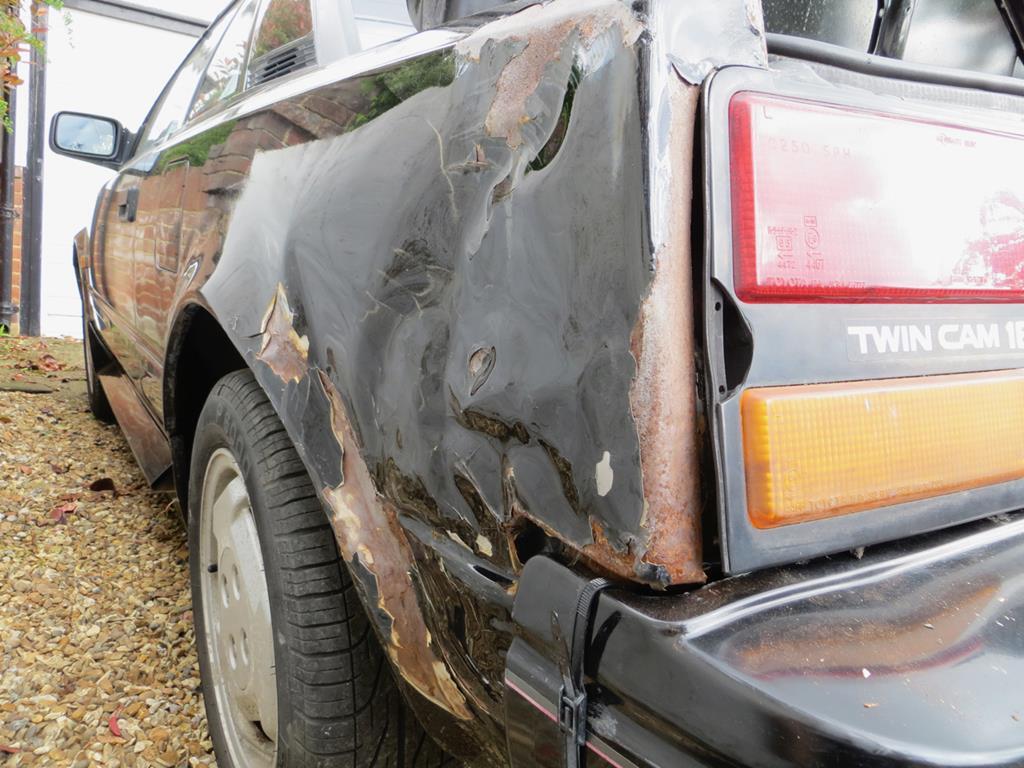 It's getting closer. The fact that it's never going to look any good doesn't matter. I have a replacement wing to put on. The objective is to make it look a little better and, most importantly, to get the back light to fit. It was leaking badly. In fact the car had pulled away from the light by about 3/4 of an inch at the left edge. That's approximately 19.05mm if you are from one of these new fangled metric countries. It's close enough now that a thick bead of silicone will seal it. However all the seams where that wing joins to the corner of the car have split so keeping the water out is a relative thing. The lower part of the arch is miles out though. That's because the accident has rucked up the inner arch. Here is the inner arch from inside the boot. You can see the long vertical folds in it. Not pretty. 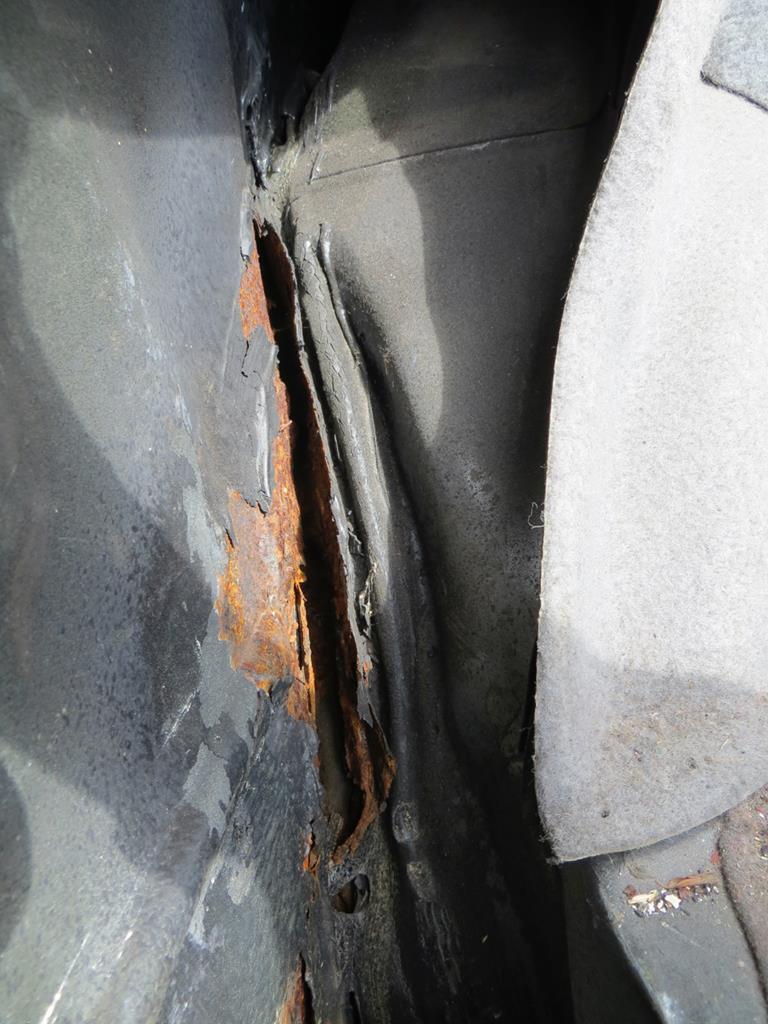 The inner arch has to be fixed at some point so I'll keep thumping it with hammers. I find it therapeutic although it probably annoys the neighbours. James |
| |
Last Edit: Jan 4, 2019 21:46:33 GMT by Sweetpea
|
|
|
|
|
May 15, 2016 10:20:18 GMT
|
|
Those neighbours don't know what they're missing out on. Next time one of them pokes their head over the fence, offer them the hammer to let out their aggression.
Just be sure to point at the the car to be the recipient...
That inner arch looks like it needs some Porta-Power treatment.
|
| |
|
|
|
|
|
May 15, 2016 21:21:51 GMT
|
Another hole filled. Nearly filled. But first here is the other side of that mangled inner arch. 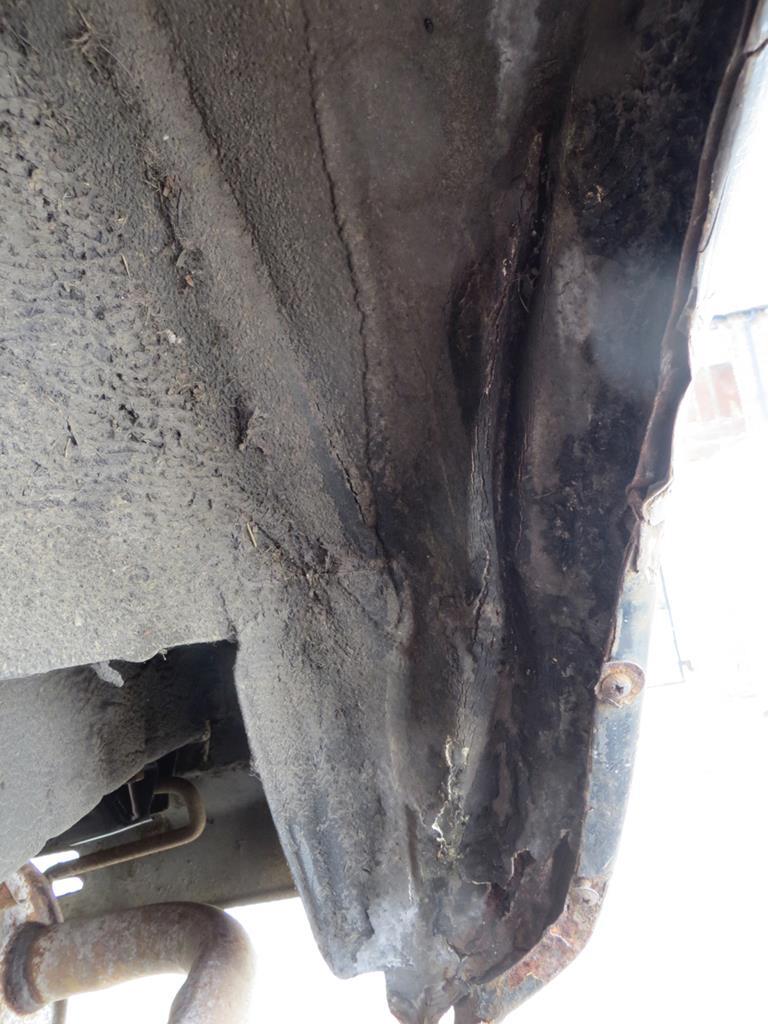 The pain in the booty is that it's put folds into the arch which is making it difficult to bash out. That inner arch looks like it needs some Porta-Power treatment. Quite right. It really needs pulling. I did 'make' a slide hammer which I might show you another day. Using it to pull the arch back out was just knocking the rust on the floor and splitting the inner and outer arch. It may be better to leave this until the wing comes off. Anyway, back to the plot… This bit needs to go in this hole. 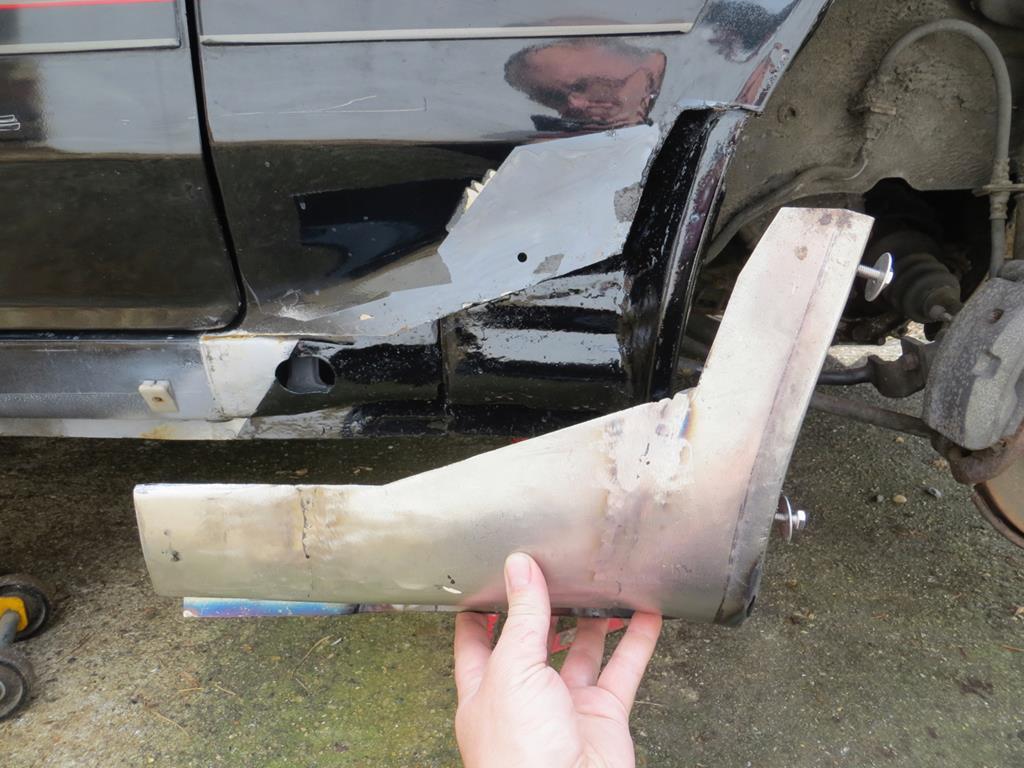 I painted the back side of it yesterday so what's stopping me from fastening it to the car? Well, er, that'd be nothing then. Out with the very hot glue gun. 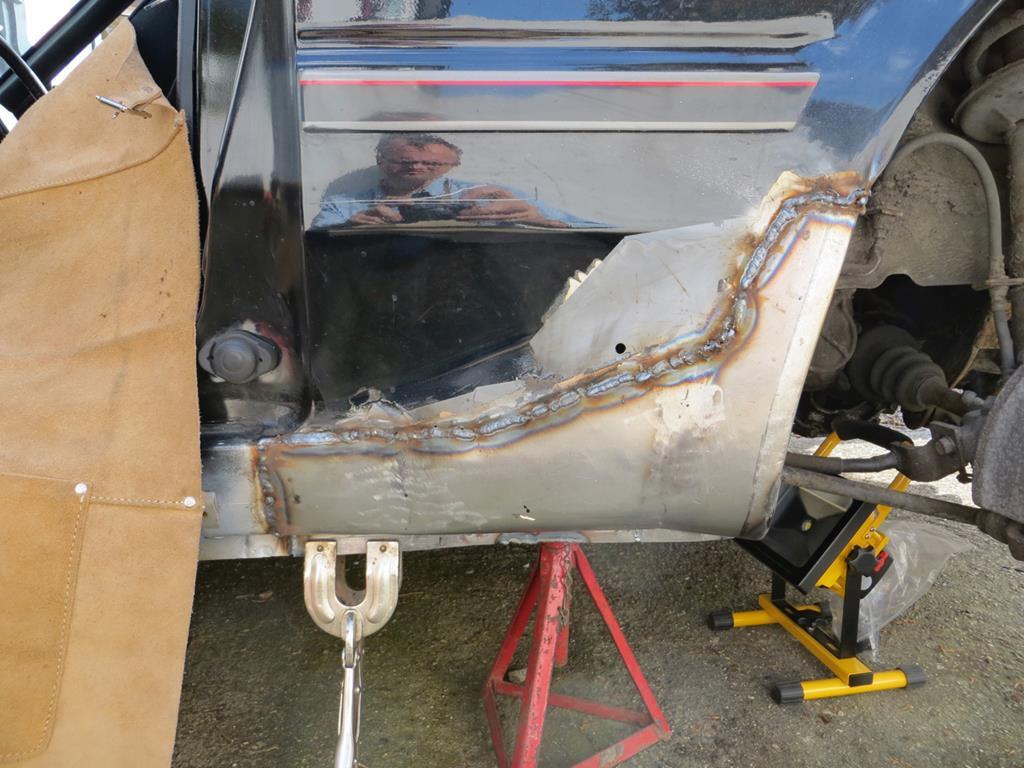 I'm not totally finished. In the upper sections I had the usual horrid problems with the car melting. The welding there is pretty ugly. When I grind it back it'll be full of holes and will need a second pass. And the car was too low to run the seam weld along the bottom for the MOT man. I'll put it on my tall ramps and buzz it in next weekend. Maybe. Mrs Sweetpea wants a trip to DFS which will be a barrel of giggles. Lastly I bolted the skirts back on to see if they'd fit. 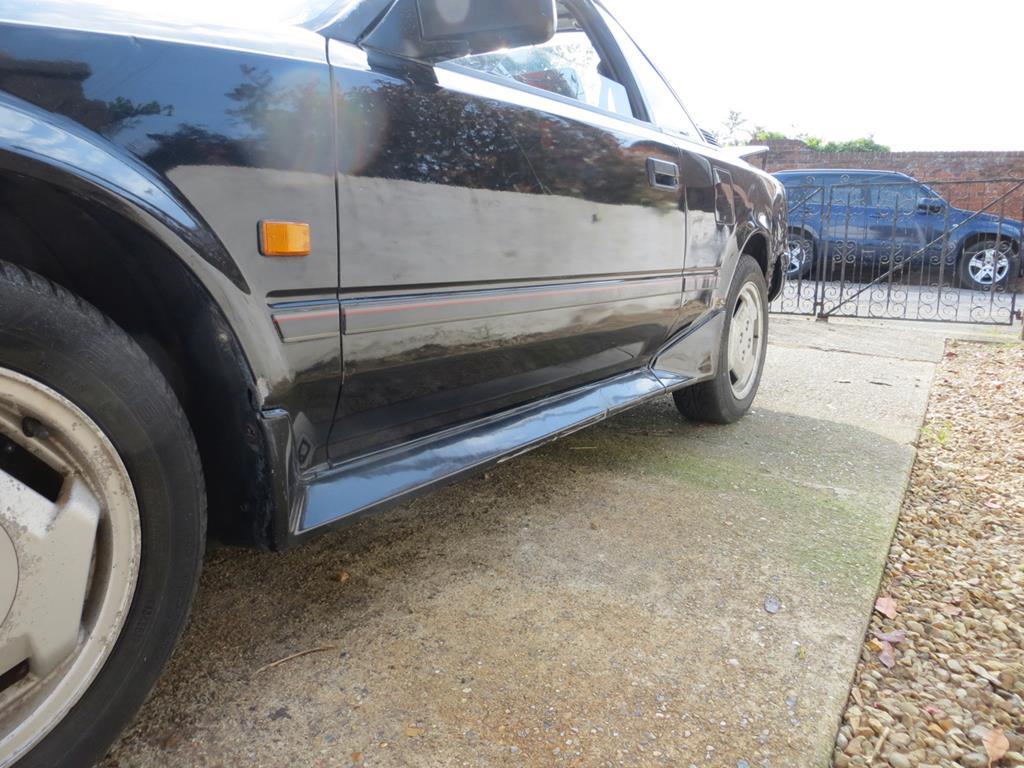 They do. More or less. I think I'm a couple of mm short as it's pushed the front section forwards. But that can be adjusted with a washer in the arch the back section. Or a skim of filler. Better too short than too long. So, lots of grinding next… James |
| |
Last Edit: Jan 4, 2019 21:54:07 GMT by Sweetpea
|
|
|
|
|
May 16, 2016 10:31:33 GMT
|
poor show welding that hole in the floor pan. now theres no way for the sunroof, skuttle, door seal, heater matrix, inner wheel arch, sill leaks to get out of the car  |
| |
Last Edit: May 16, 2016 10:31:57 GMT by darrenh
|
|
Wilk
Part of things
 
Posts: 528 
|
|
May 16, 2016 10:49:24 GMT
|
Needs the repair panel upgrading..... Needs a drainage hole drilling in it  ? |
| |
If it can be fixed with a hammer, then it must be an electrical fault
|
|
|
|
|
May 16, 2016 11:10:11 GMT
|
|
once you have the outer wing off it should be possible to pull the inner out , if need be weld some tabs to it, use a slide hammer to pull it out, and then grind them off.
|
| |
|
|
|
|
|
May 16, 2016 20:04:56 GMT
|
poor show welding that hole in the floor pan. now theres no way for the sunroof, skuttle, door seal, heater matrix, inner wheel arch, sill leaks to get out of the car  Smartarse! Made me laugh though! once you have the outer wing off it should be possible to pull the inner out , if need be weld some tabs to it, use a slide hammer to pull it out, and then grind them off. Great minds think alike. That wing is staying there for some time though. I have other priorities before that. And I suspect Mrs Sweetpea has priorities that will be more urgent than my priorities. Needs the repair panel upgrading..... Needs a drainage hole drilling in it  ? You mean the one by the wheel? Well you bring up an interesting point. A very interesting point. One that I've been pondering. That particular part has rotted off the car at least twice so something is wrong. It must be filling with water - but from where? The inner wing was original until I replaced it so the problem isn't from inside the wheel arch. The rear sun roof drains exit from the vents high up by the quarter lights. Unless there is a problem up there that's not the source. Theoretically the area isn't in the sill either. The sill has drains and then goes up hill slightly at the back. Although looking at the photos tonight I can easily imagine water could get from the sill to my little rot box. What puts me off the idea that the water is from the sill is that I've had a camera in the sill and it's spotless - no rust (on the passenger side at least). The back of the sill looks like it was damaged with water coming from my little rot box, not going to it. So where is the water coming from? Who knows. Maybe I should put a drain in it but I'd rather keep the water out. James |
| |
|
|
Wilk
Part of things
 
Posts: 528 
|
|
May 16, 2016 20:38:42 GMT
|
|
Leave the interior out and sprinkle some talc on the floor pans or get someone to sit inside the car. Get the hose out and see if there's any water trails
|
| |
If it can be fixed with a hammer, then it must be an electrical fault
|
|
oukie
Part of things
 
Posts: 307 
|
|
May 16, 2016 22:33:16 GMT
|
|
James the sunroof has little drains that are connected to rubber pipes that drain down the A pillers into the sills, curse word design eh, if you remove the inner roof trim (carefully you have been warned) you can see the pipes, there is a pair of drains that go down the B pillers but there is almost certainly are a pair that go down the front, these disappear in to the roof A pillers then into the door pillars then drain into the sills, that's what the drain holes in the sills were originally for, but obviously it causes rust, from the inside out, some owners make the pipes longer and go straight through the car and terminate just below the sills.
Chris.
|
| |
Last Edit: May 16, 2016 22:43:11 GMT by oukie
Mr2 mk1 x4
Honda Accord 2.4 Executive (luxo barge)
|
|
|
|
|
May 29, 2016 22:06:37 GMT
|
|
Hi Chris,
I've been thinking about the drains in the A pillars. I can't bring myself to believe that enough water can get down them that it overwhelms all the drains and collects in the back. But then I've been wrong before...
I'll be pulling the drains out of the sills at some point anyway.
|
| |
|
|
|
|
|
May 29, 2016 22:08:05 GMT
|
You're a bit behind. Try and keep up for goodness sake! Oh, sorry. My fault really. Haven't been updating my thread. So, we'd welded the outer panel into the rear wing and had checked that the skirt still fitted. Which it did. More or less. Next job is to grind it all back… 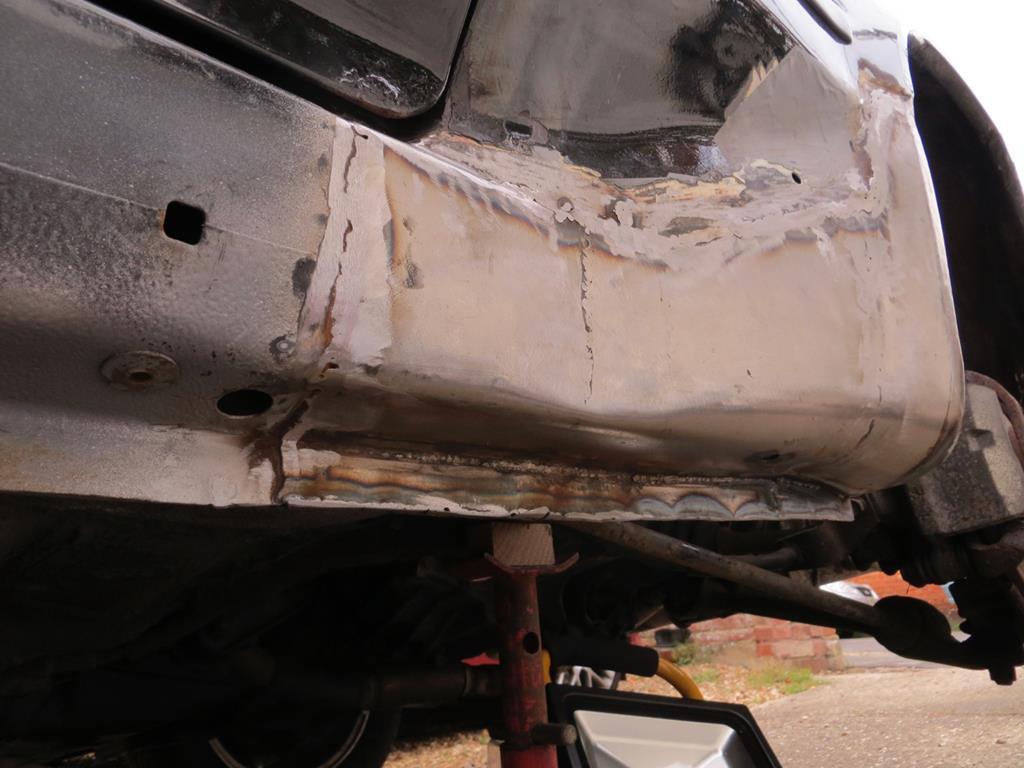 …and pop a coat of POR 15 on to keep the rain off. 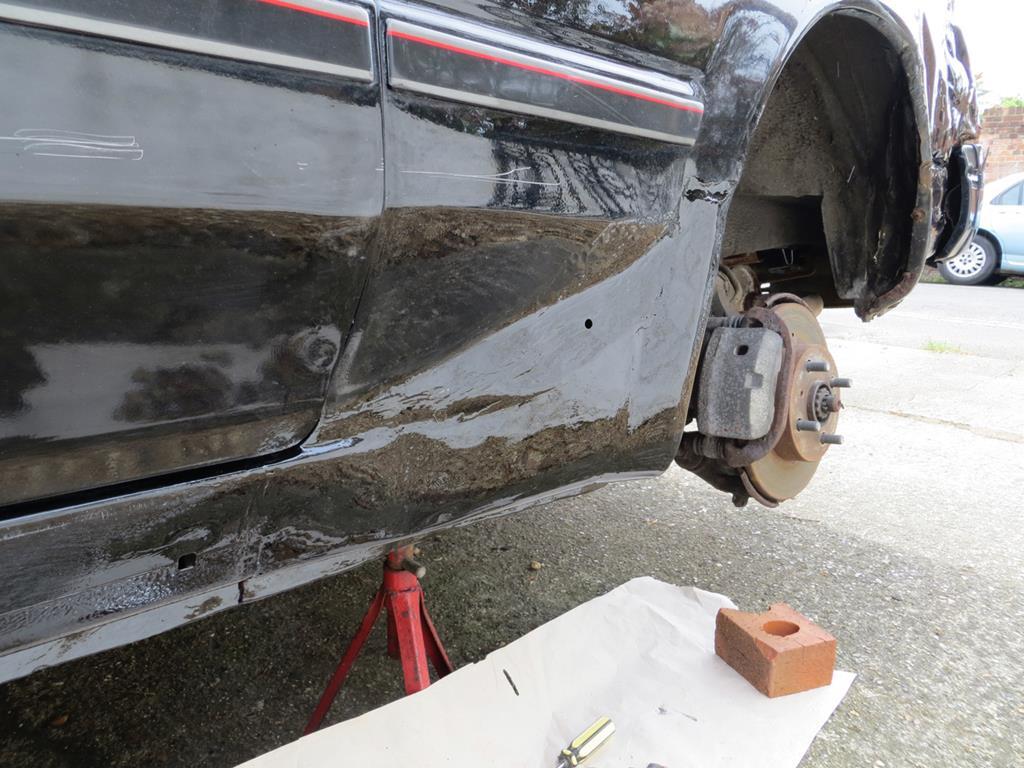 I did paint the inside of the repair panel before I welded it on. A job that was notably lacking in the original repair. Job done. For the time being anyway. Another thing on my MOT failure sheet was that the wipers didn't clear the screen. I hadn't realised but the drivers side rubber had torn. Well, as I was passing a major car parts supply store I popped in and bought a couple of new blades. I hadn't been looking forward to this job because the two screws that hold the blade to the arm never ever come out. I always chew the head off. Always. So imagine my surprise when I chewed the heads off all four screws. Yeah, not very surprised at all really. I had to drill the heads off. That left me with four studs to remove. Three of them came out with a pair of pliers. Yay! One didn't. It wound up showing about half a millimetre out of the wiper arm with no hope of getting hold of it. Now I'm faced with drilling it out and possibly retapping it. I really hate that job 'cos it invariably doesn't work very well. One last plan. And given this is an M3 screw I really didn't think this would work. Using the MIG welder put a blob on top of the screw. 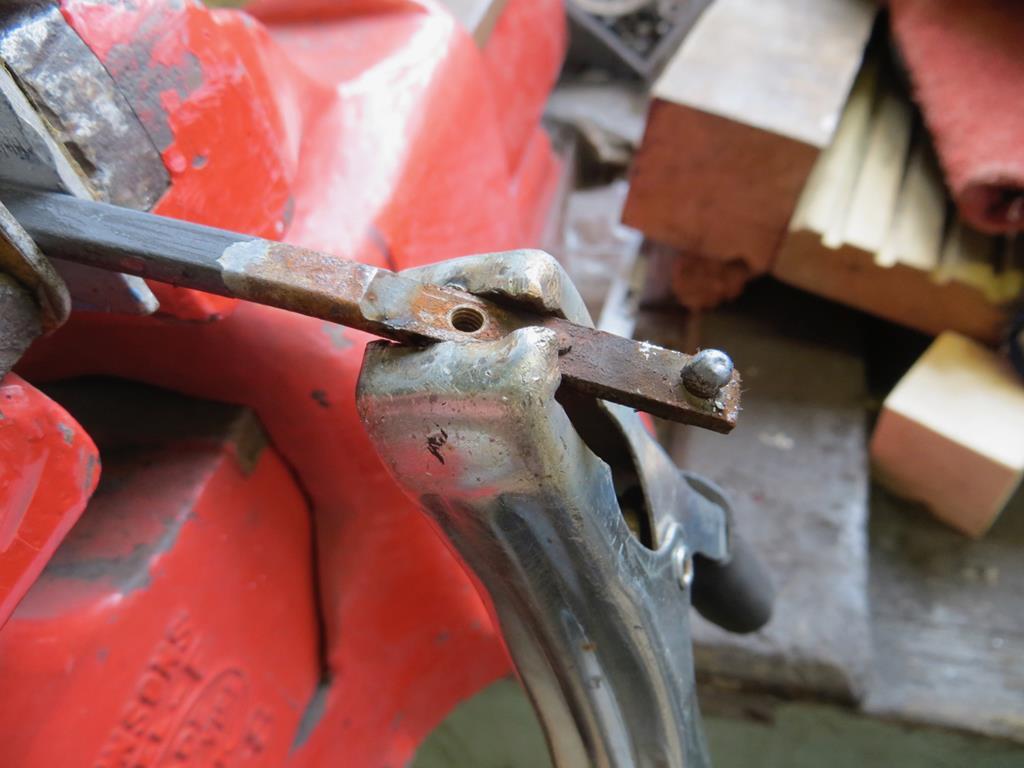 Get hold of the blob with pliers and remove the remains of the screw. Well, to be fair, it took two goes but I got it out. 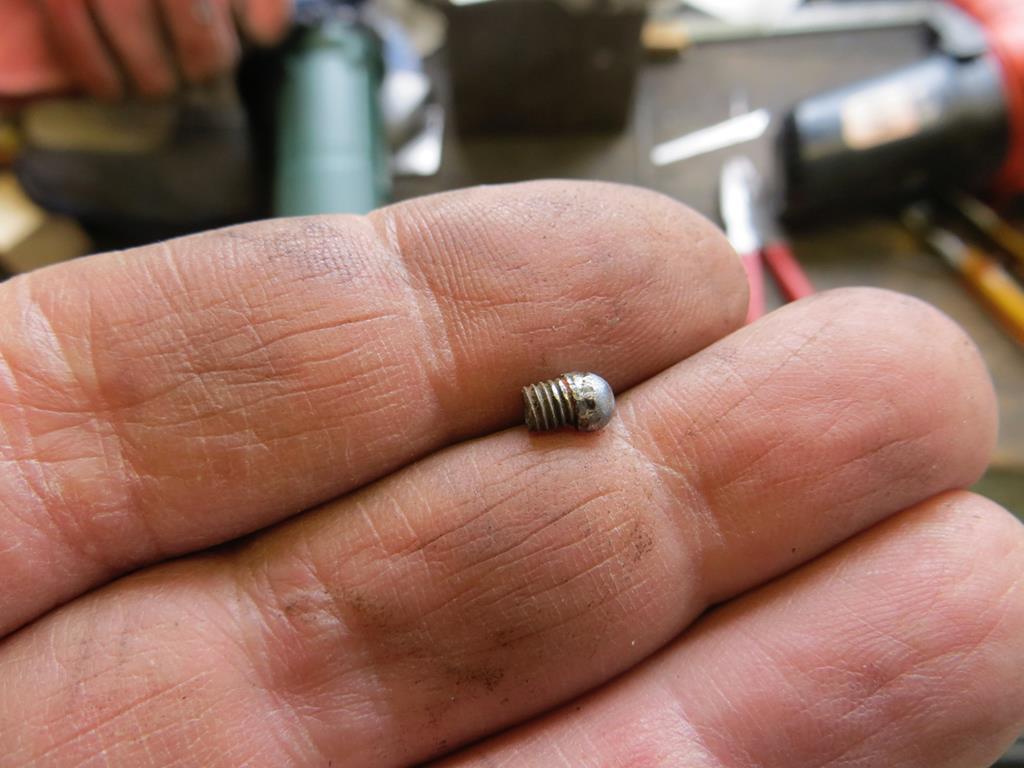 This little trick really does work incredibly well. I think the heat of welding often cracks the rust in the threads. Almost worth owning a MIG just to remove broken bolts. One last thing I noticed today. When I welded the drivers floor pan I evidently forgot to put the rubber plug back in. So I'm going to have to lift the carpet to fit it. One minor problem. I've lost the plug. Bumhats! James |
| |
Last Edit: Jan 4, 2019 21:59:10 GMT by Sweetpea
|
|
|
|
|
May 29, 2016 22:21:45 GMT
|
I assume that, in keeping with other parts of this build, you'll be reusing the screws?  |
| |
|
|
|
|
|
May 29, 2016 23:14:53 GMT
|
You're a bit behind. Try and keep up for goodness sake!  Those little screws, I always use a screwdriver that looks like it's one size oversized for the job and apply a lot of pressure. Can usually get them out no dramas. |
| |
|
|




 ?
?


