MiataMark
Club Retro Rides Member
Posts: 2,971
Club RR Member Number: 29
|
|
Apr 23, 2015 10:59:06 GMT
|
After a successful first track day, well a minor dent on the front wing but nothing broke, it's evident that the suspension could do with a refresh. So today a box of goodies arrived....  Gaz Gold Pro coil-overs, and a rear IL Motorsport rear strut brace, MX5 parts were having an Easter sale... I've also got the chance to buy some ready polybushed wishbones, from a race car only 2 races old, for £300 which is about what a set of bushes would cost. Now I just need to work out how to fit them and get a C spanner which wasn't included  (edit: found it in the other box  ) This is getting expensive.... Mark |
| |
Last Edit: Apr 23, 2015 17:18:33 GMT by MiataMark
1990 Mazda MX-52012 BMW 118i (170bhp) - white appliance 2011 Land Rover Freelander 2 TD4 2003 Land Rover Discovery II TD52007 Alfa Romeo 159 Sportwagon JTDm
|
|
|
|
|
|
|
Apr 23, 2015 14:06:47 GMT
|
|
Great thread - I really enjoy seeing an MX5 being brought back to life (my son has an NA for his first car, I track an NB turbo and the good lady has a late NB s-vt)
Carry on the excellent work!
|
| |
|
|
MiataMark
Club Retro Rides Member
Posts: 2,971
Club RR Member Number: 29
|
|
Apr 23, 2015 17:20:05 GMT
|
Great thread - I really enjoy seeing an MX5 being brought back to life (my son has an NA for his first car, I track an NB turbo and the good lady has a late NB s-vt) Carry on the excellent work! Thanks. I think you mean carry on the 'expensive' work.... just said yes to the wishbones. |
| |
1990 Mazda MX-52012 BMW 118i (170bhp) - white appliance 2011 Land Rover Freelander 2 TD4 2003 Land Rover Discovery II TD52007 Alfa Romeo 159 Sportwagon JTDm
|
|
MiataMark
Club Retro Rides Member
Posts: 2,971
Club RR Member Number: 29
|
|
|
|
Been having problems with the battery lately, does this count as a hybrid car? I have to charge it up every-time I want to use it  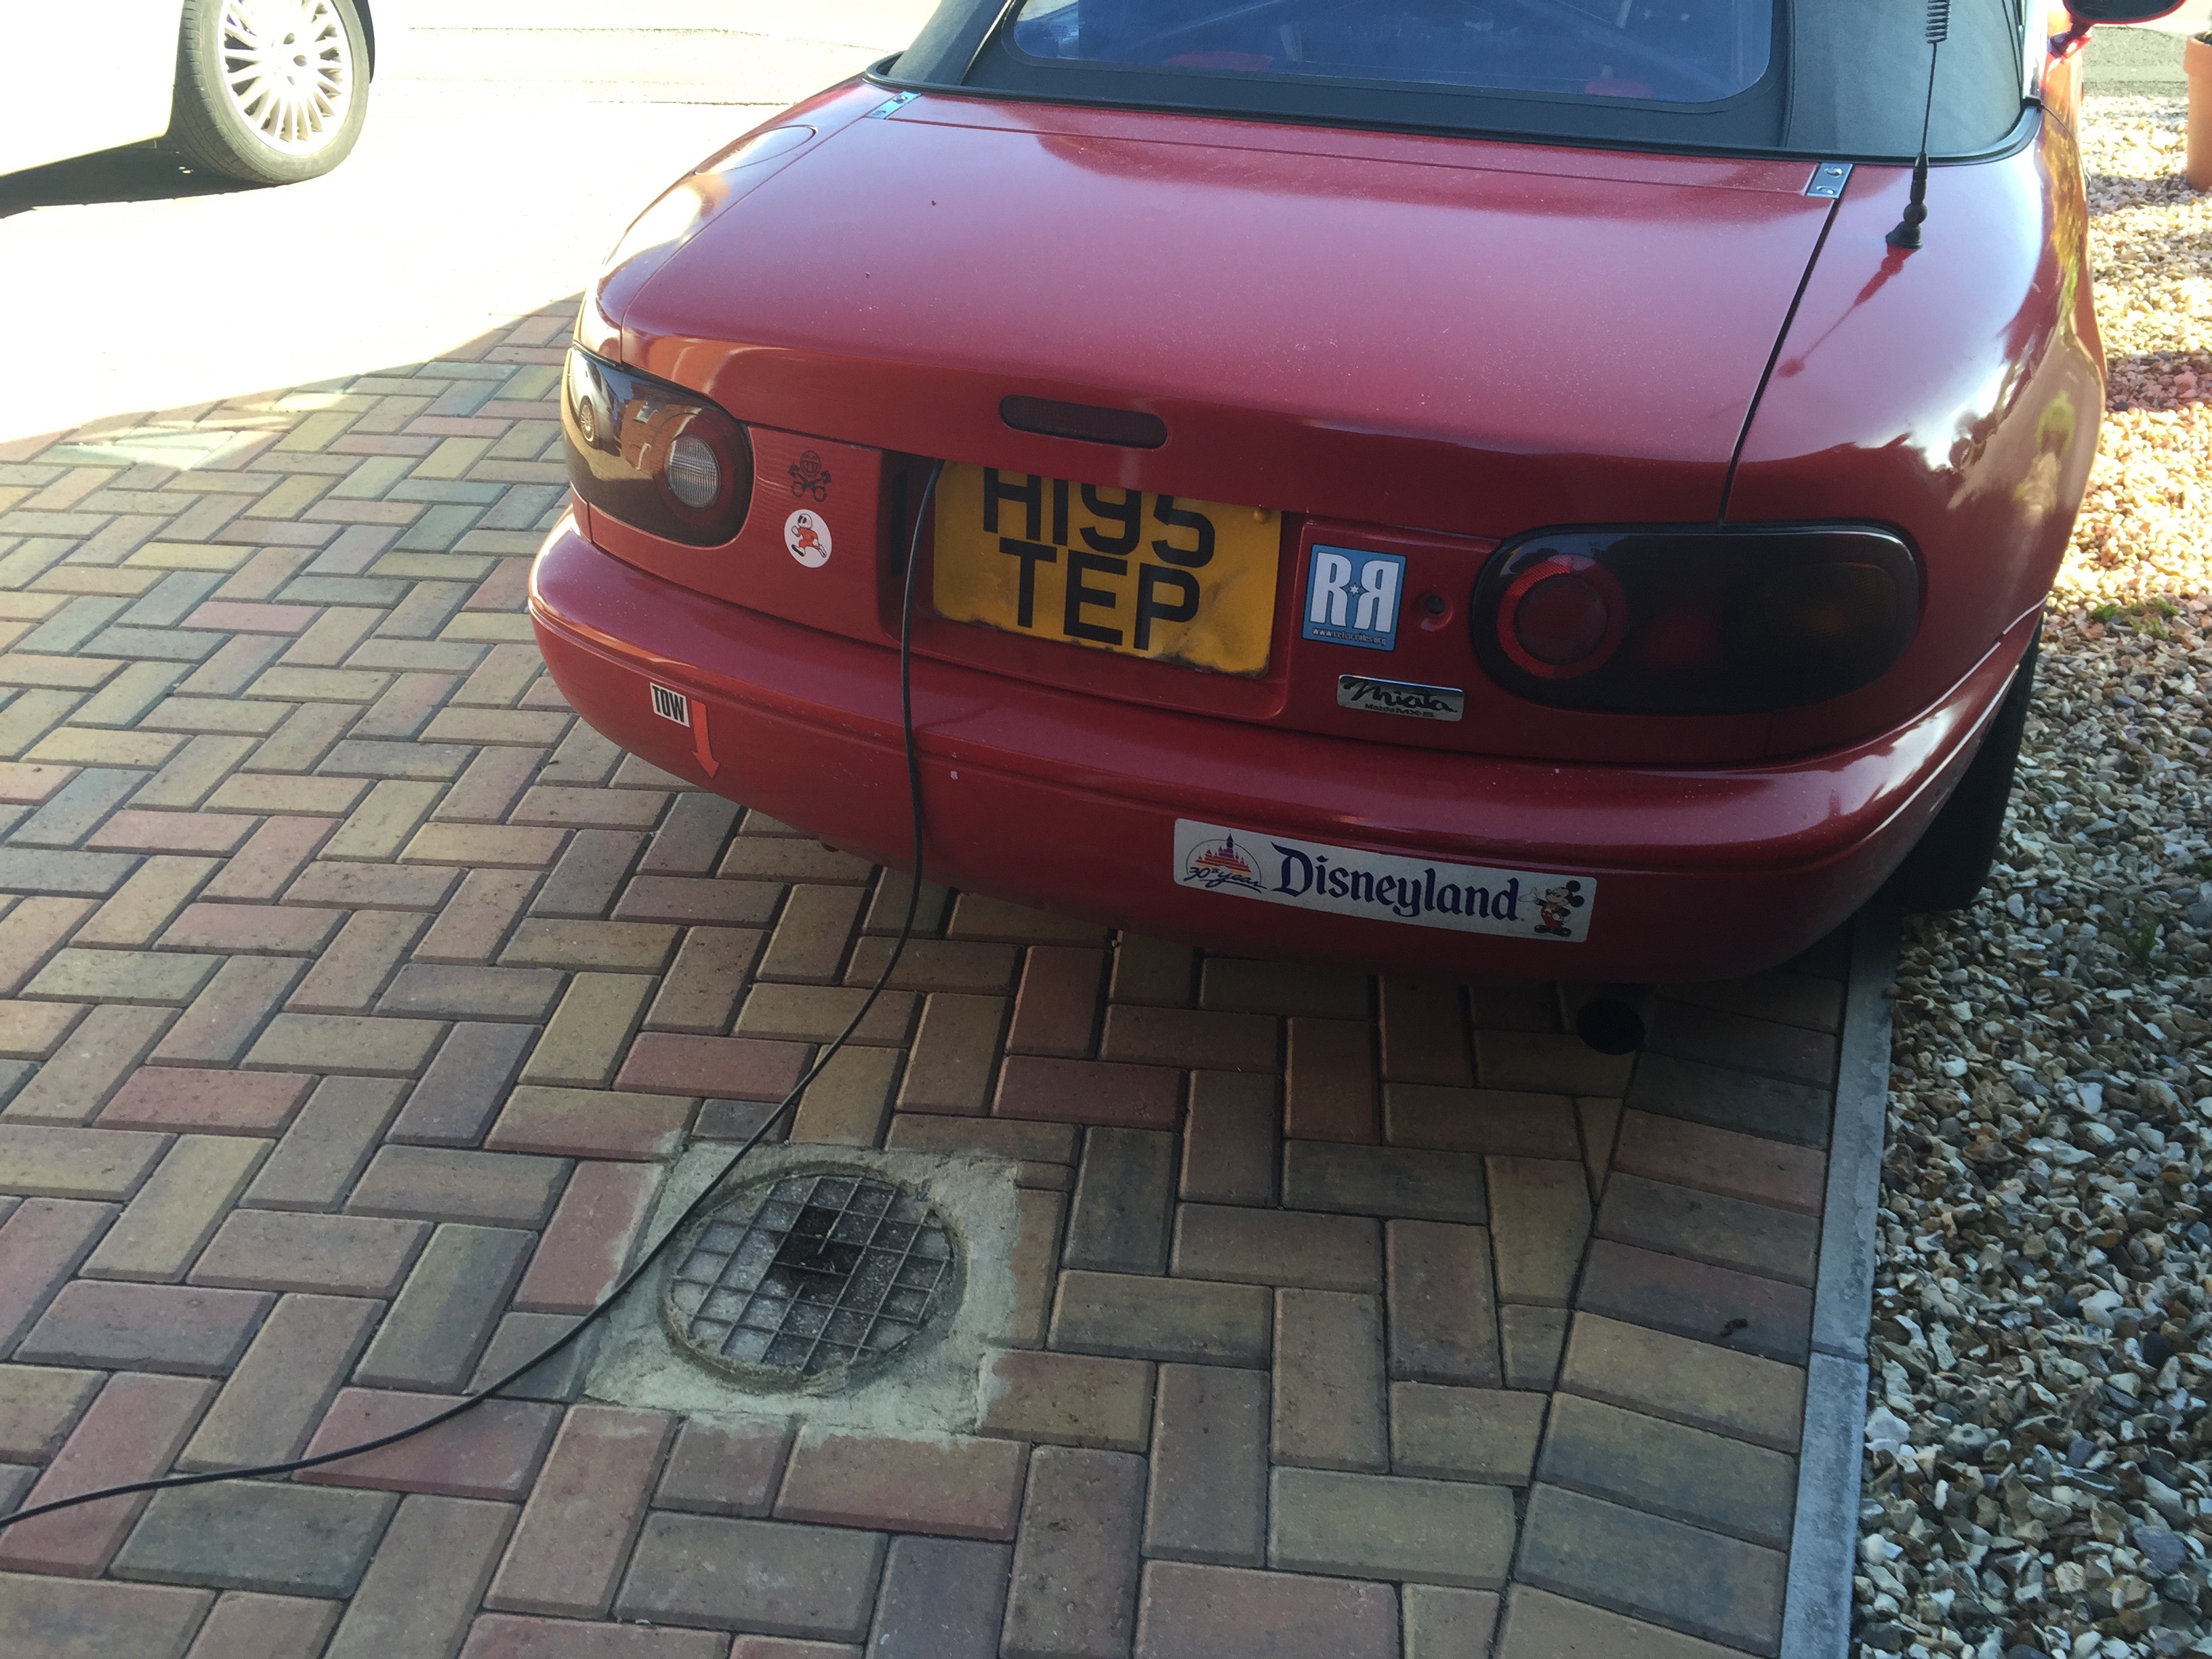 Anyway the MOT is due beginning of June so I thought it was prudent to get it MOT'ed early to see if it needs anything (apart from a battery) before I start doing work on suspension and brakes. Apart from embarrassingly failing to start, due to the battery, between the ramp inspection and the brake tests it passed  Bit of an advisory (verbal not written) on drivers side rear brake maybe sticking everything was OK. As it's a friendly MOT station that I've been using for years I got to have a look underneath, all looks good, bashed up chassis rails but I think that's pretty standard for MX5's. A few, old, leaks from petrol and what looks like brake or clutch fluid making it look a bit grubby, needs an underneath steam clean. So all I need now is a new battery! Mark |
| |
1990 Mazda MX-52012 BMW 118i (170bhp) - white appliance 2011 Land Rover Freelander 2 TD4 2003 Land Rover Discovery II TD52007 Alfa Romeo 159 Sportwagon JTDm
|
|
goldnrust
West Midlands
Minimalist
Posts: 1,889
|
|
May 19, 2015 10:17:59 GMT
|
Looks like you're going about this the right way, to make a nice useable fun to drive mx5  Hope you get the battery sorted soon. I'd give the alternator a check over before popping a new battery on, make sure it's charging right. How are you finding the GAZ golds? I remember communing on your suspension thread about them. In combination with the polybushes wishbones it should make for a pretty awesome handling little car  |
| |
|
|
MiataMark
Club Retro Rides Member
Posts: 2,971
Club RR Member Number: 29
|
|
May 19, 2015 10:25:38 GMT
|
Looks like you're going about this the right way, to make a nice useable fun to drive mx5  Hope you get the battery sorted soon. I'd give the alternator a check over before popping a new battery on, make sure it's charging right. How are you finding the GAZ golds? I remember communing on your suspension thread about them. In combination with the polybushes wishbones it should make for a pretty awesome handling little car  My mantra is safety -> handling -> power -> looks... (unless something breaks then I'll fit an uprated part if appropriate). I'm pretty sure it's the battery, it ran down in the space of 20mins or so. Haven't fitted the suspension yet as I'm waiting to get the wishbones, also really should do the brakes first or at the same time. So need buy brake lines, fluid, as well as top mounts and new wishbone bolts all adds up. Thanks for the comments. Mark |
| |
1990 Mazda MX-52012 BMW 118i (170bhp) - white appliance 2011 Land Rover Freelander 2 TD4 2003 Land Rover Discovery II TD52007 Alfa Romeo 159 Sportwagon JTDm
|
|
MiataMark
Club Retro Rides Member
Posts: 2,971
Club RR Member Number: 29
|
|
|
|
Bought a new battery, cheap Halfords job I should have been wary when it said modifications may be required.... Anyway new battery vs old batter, my longer term plans were to have a centrally mounted battery; 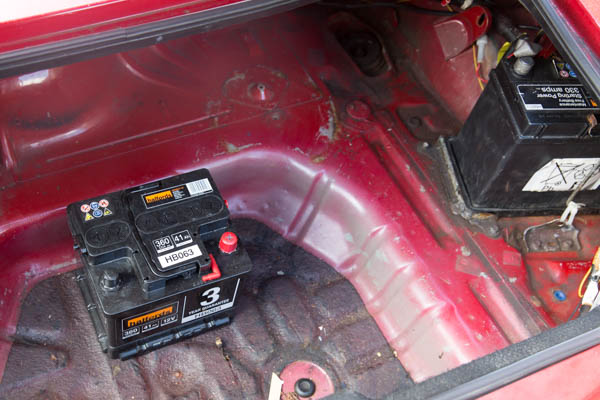 You might have noticed the size (footprint) difference, anyway out with the old; 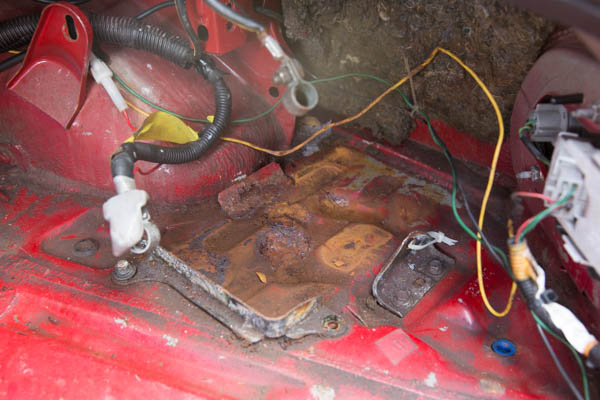 So to get the battery in, I thought straighten out the side bracket and reverse the front bracket which sort of worked except the 2 bolts holding the tie down bracket snapped  Anyway cut the plastic tray about, straighten out the long bracket, and drill out the nut. Then break out the tie-wraps  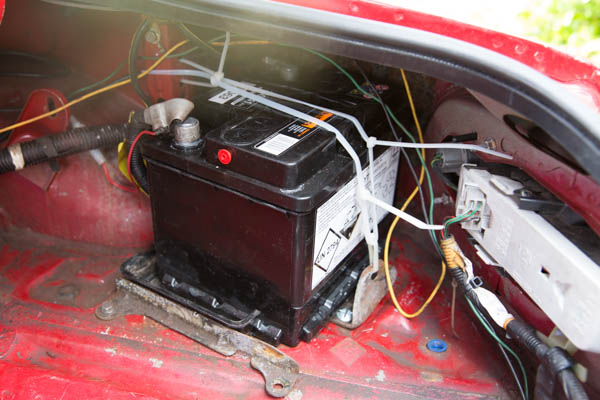 Not exactly a luckyseven quality job (didn't even cut off the ends of the tie-wraps) but at least it works and the car started! I think I'll either be buying an alloy battery tray or some aluminium sheet to make my own, and on retrospect I'll probably still mount it on the side. The rear fog lamp wiring needs a tidy up as well. One good thing I've now got a working remote boot release (connector fallen off and connecting cable.rod loose) not that I particularly want one as it's a security risk. Lost all the carpeting as well (because race car) and the spare wheel, it will be in the way of the rear strut brace and about an inch less diameter than the current wheels/tyres. Should be going to Castle Combe to see the MX5 Championship will be looking for inspiration in the pits, and maybe the Moptorpunk sprint on Thursday. Mark |
| |
1990 Mazda MX-52012 BMW 118i (170bhp) - white appliance 2011 Land Rover Freelander 2 TD4 2003 Land Rover Discovery II TD52007 Alfa Romeo 159 Sportwagon JTDm
|
|
MiataMark
Club Retro Rides Member
Posts: 2,971
Club RR Member Number: 29
|
|
Jun 22, 2015 10:43:26 GMT
|
I've been putting off fitting the coil-overs I bought as I wanted to fit wishbones with new bushes at the same time but as that has been delayed I thought I might as well fit the coil-overs. After watching a video of somebody fitting HSD coil-overs without removing any wishbones I thought I'd give it a go. So lay out the parts/tools, new GAZ Gold coil-overs, new IL droop links and some new nuts/bolts etc. sockets, penetrating spray and a crow bar that should do it and some Halfords coil spring compressors. I'd pre-assembled the coilovers with new top mounts (Lemforder from www.wanapart.co.uk £33/each as opposed to £68 for Mazda ones). 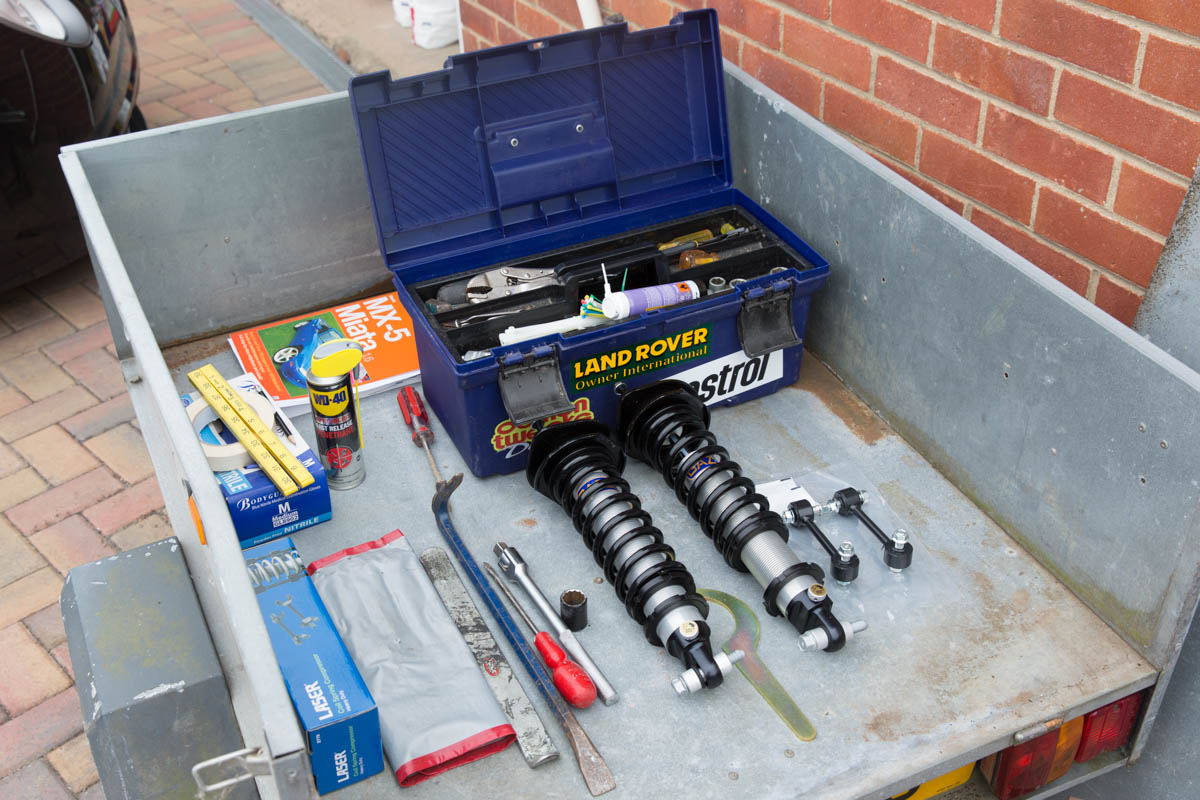 Before I started I measured the ride height 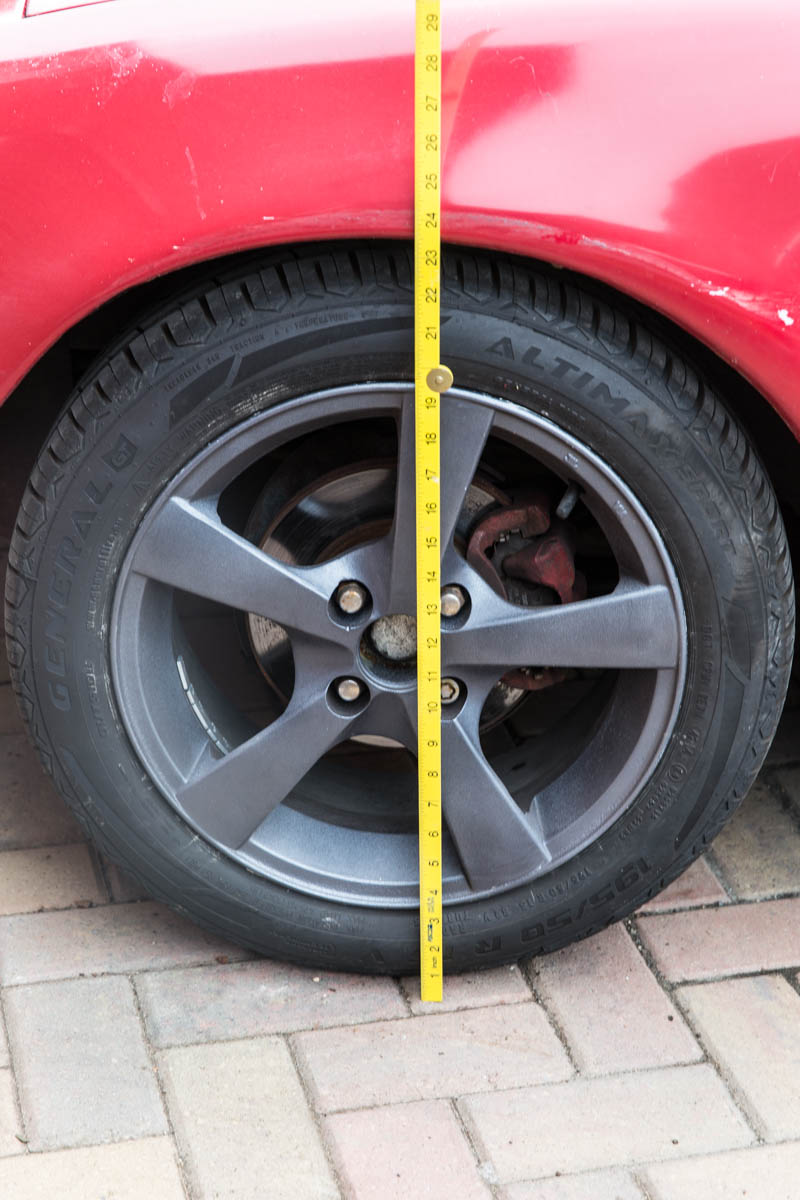 23 1/2" to arch lip The steering arm is in an awkward place for both the drop link and bottom shock bolts, when I put the new ones in I put the bolt in from the rear (not as in the Haynes manual) I'll make sure there is plenty of grease to protect the threads. 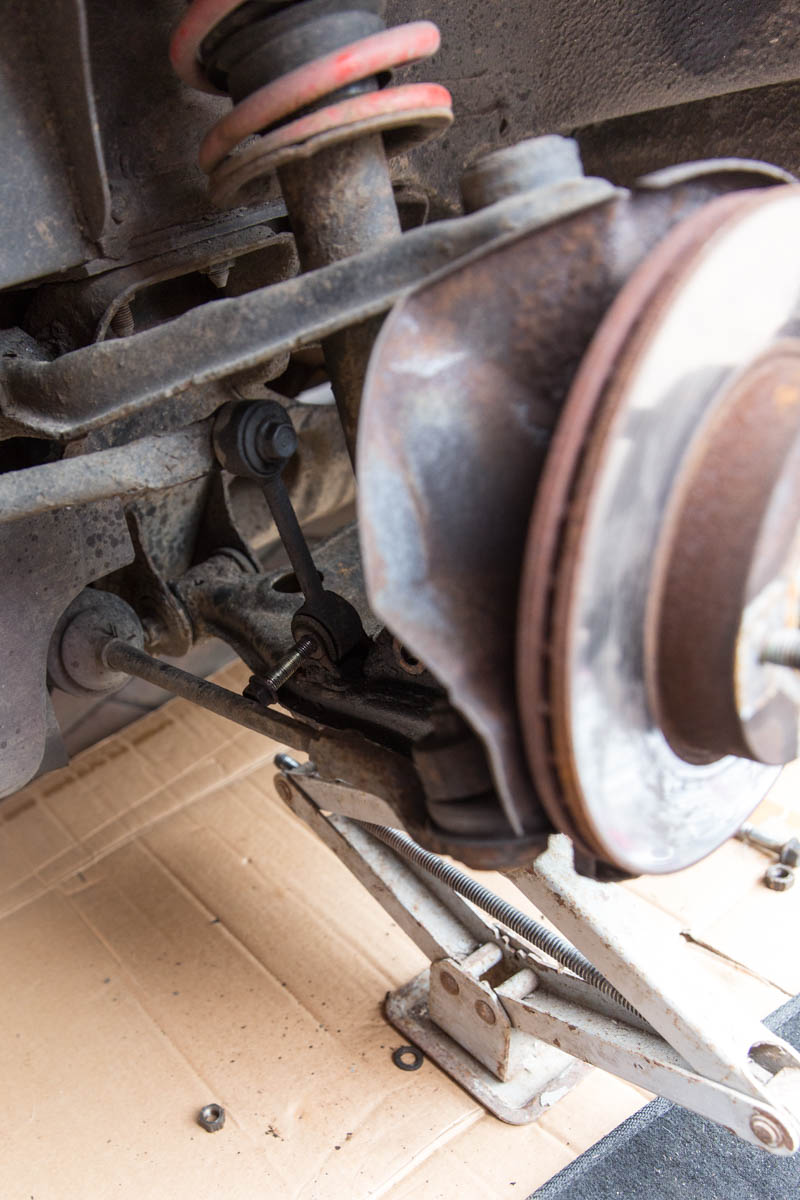 After much fighting, use of spring compressors that are a bit big for the confines of the wheel arch (motorbike ones might be better) I did finally get the shock out. The trick is separating the bottom of the shock from the wishbone, I ended up jacking up the wishbone putting the crow bar between the bottom of the spring perch and the floor then dropping the wishbone which got the bottom of the shock out of the bracket. BTW the grey scissor jack is from a Renault 8 about 40 years old now. The coil springs are GMAX and will be for sale. 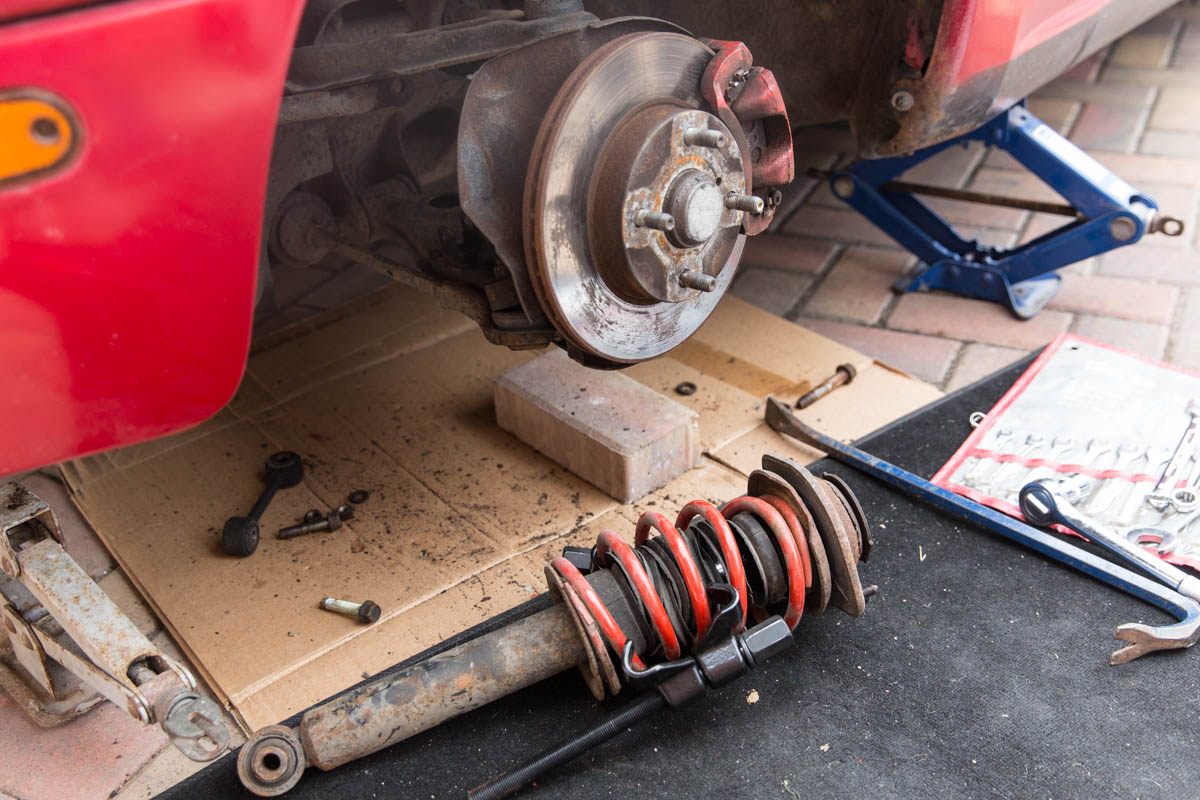 and lowered onto a jack to approximate a wheel to check ride height, took a bout 3 goes to get this. Measured how high up the thread the lower spring cup is to repeat on other side. 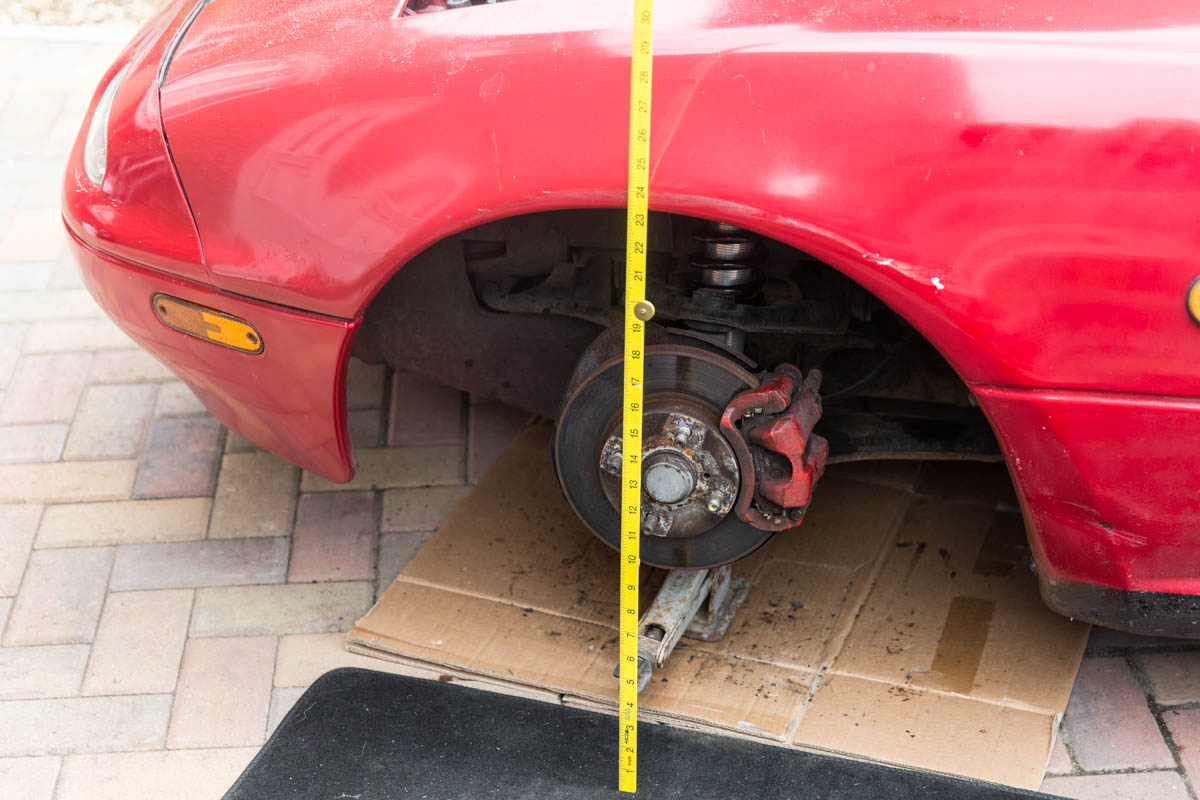 About the same, didn't take a photo with the wheel back on but it's about 1/2" lower. So the other side should be easier now I've learnt things the hard (and painful way) nope just as much of a fight but got there in the end. Lowered it onto the jack as above and everything measured the same so put the wheel back on and lowered it to the ground in anticipation of a finished job... 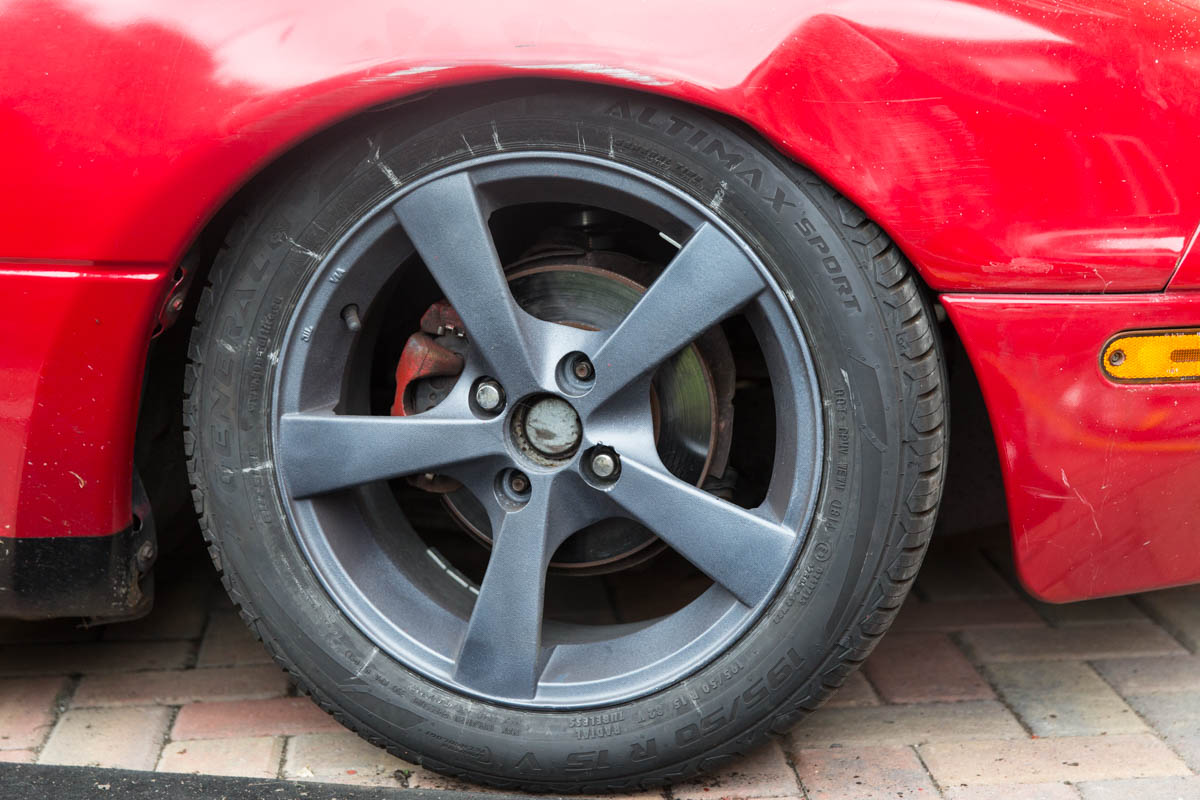 Well yes it's "well wicked low ride" etc. but not quite what I was after  at this point I wasn't sure why the difference. After a bit of thinking I checked the springs for the rear, the spring rates are different front to back and yep looks like I've mixed up the springs and got 1 rear and 1 front spring fitted  I now have a 50/50 chance to get the right unit off, I think it's the drives side as the rear spring rate is softer so that would make the car lower for the same spring position? What I don't understand is how they measured the same when mocked up with the jack... Oh well next weekend sort out the springs and try and fit the rear ones. Need to get it sorted as want to do a hill climb course early July. Also took the console cowl off to paint matt and all the clips are broken... Mark |
| |
Last Edit: Jun 22, 2015 11:17:28 GMT by MiataMark
1990 Mazda MX-52012 BMW 118i (170bhp) - white appliance 2011 Land Rover Freelander 2 TD4 2003 Land Rover Discovery II TD52007 Alfa Romeo 159 Sportwagon JTDm
|
|
goldnrust
West Midlands
Minimalist
Posts: 1,889
|
|
Jun 22, 2015 11:15:32 GMT
|
Shame about the mix up with the springs, always frustrating when things like that happen! As you say the front springs should be harder than the back. Quite often people measure the ride height from centre of the wheel to the arch, as this eliminates tyre/wheel size differences, and means you can compare cars easier.  Might make your set-up with the jack more accurate? |
| |
|
|
MiataMark
Club Retro Rides Member
Posts: 2,971
Club RR Member Number: 29
|
|
Jun 28, 2015 10:12:42 GMT
|
and so onto part 2, correcting the mistake from part 1... Before I started I thought it was about time I had a trolley jack, so off to MachineMart. Obviously I needed a low entry and it would have been good to have got one that I could also use on the Discovery, but that one weighed a ton(ish) so I ended up with an aluminium 'racing' jack. Also got an extending 1/2" ratchet which is great. 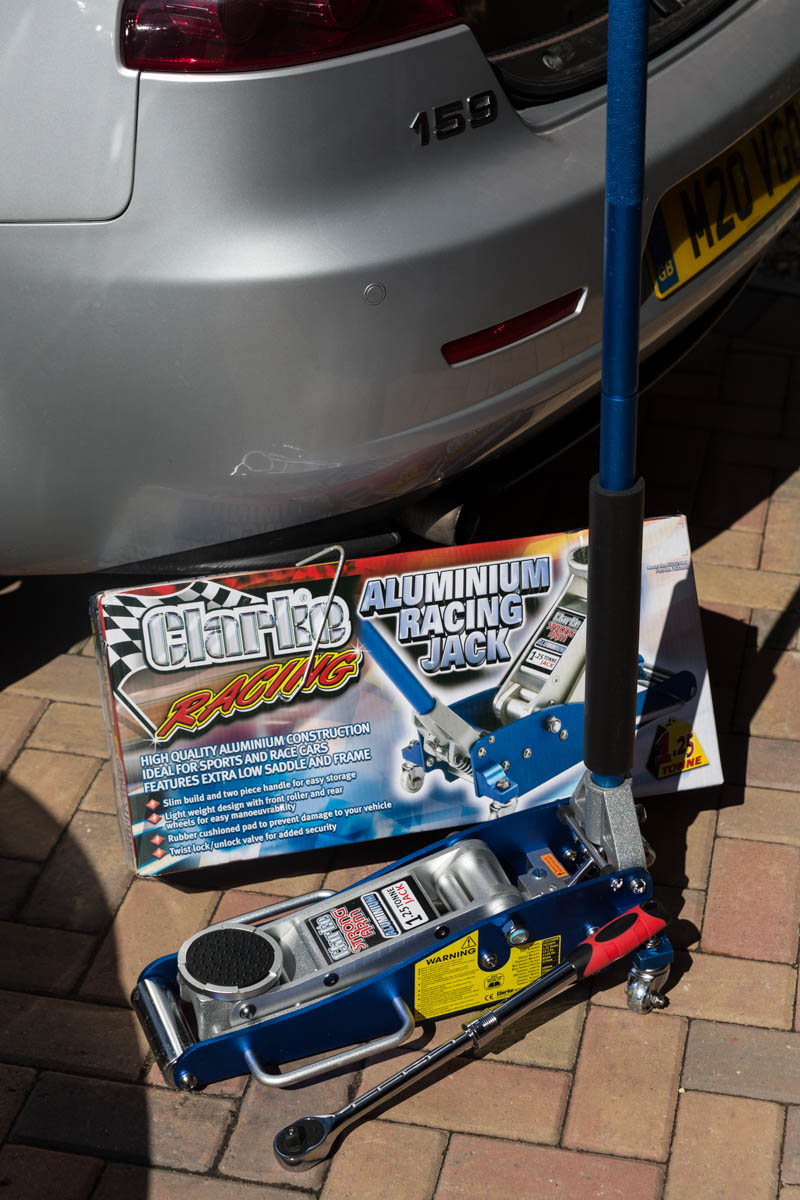 Getting the, drivesr side, coil-over out wasn't as hard as the original spring/strut but still a pain and I had to unbolt the lower shock and tie-rod. Got it out and at least I'd got the right (with the wrong spring) side first  After a few 'adjust, lower, get wrong height, try again etc' (at least it's easier with the trolley jack) I settled on about 23" and took a measurement of the coil-over spring position (~4 3/4" from bottom). Then had to re adjust the other side to match, ending up with; Passenger side 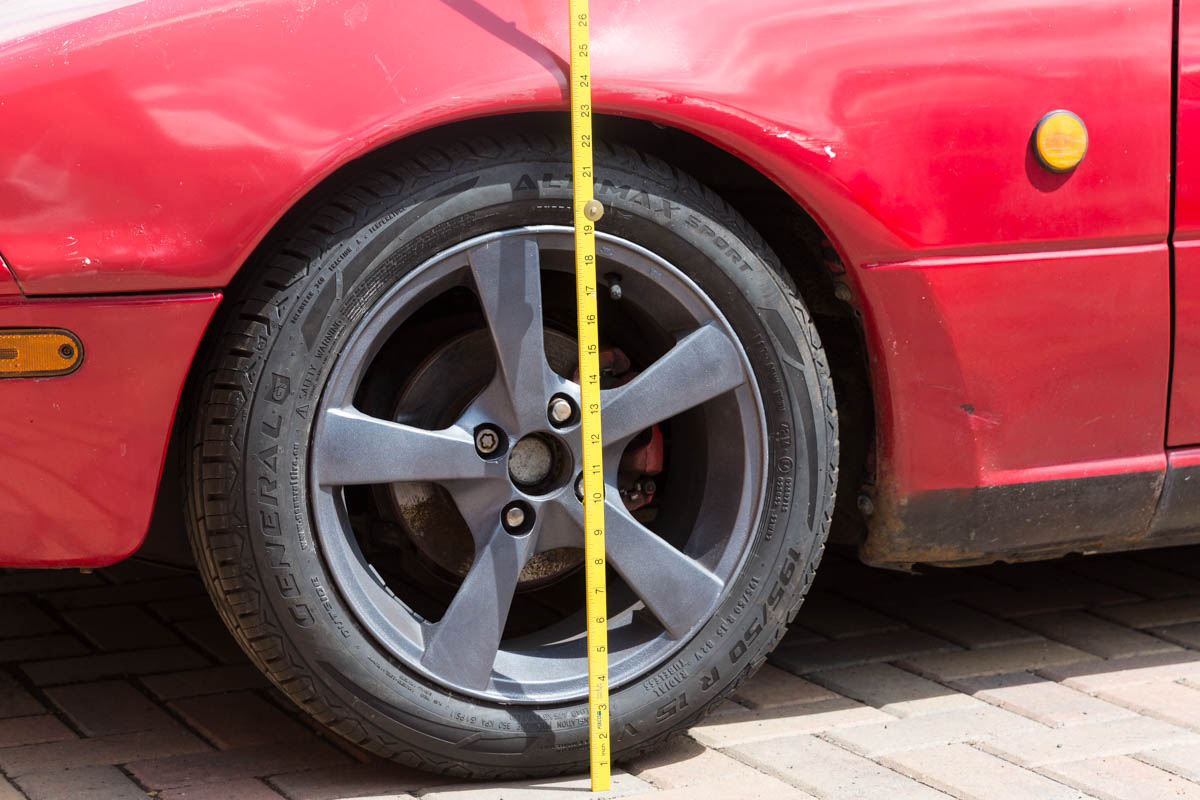 Drivers side 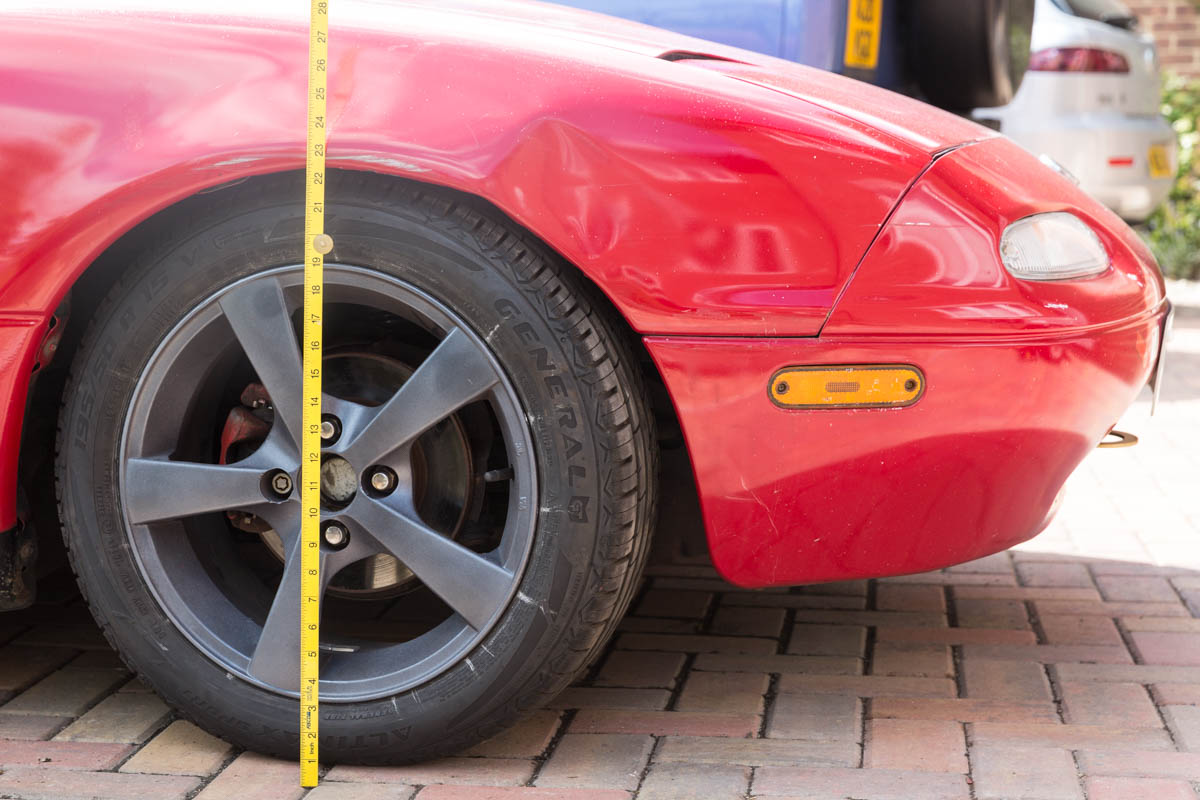 Note that the drivers side is running about 1/2" lower although coil-overs are set the same. Went for a spirited drive to see what the difference is like and also if anything was touching. Feels much better at the front end steering etc but a couple of graunches from front right. Got back and there is evidence of the tyre hitting the inner arch, maybe not made better by the Castle Combe legacy dent and mangled inner arch lip of having to drive the car a few yards when it was stupid low on that side. So part 3 will be readjusting the drivers side while part 4 the rear can wait a while. In other news, started to paint the instrument cowl with Rust-Oleum peel paint (from Halfords), learning that using it in direct hot sunlight onto black doesn't work well, took it inside and started again. Not a bad finish but you have to be careful not to go too heavy (like I have), this is when it was still wet. To be continued... 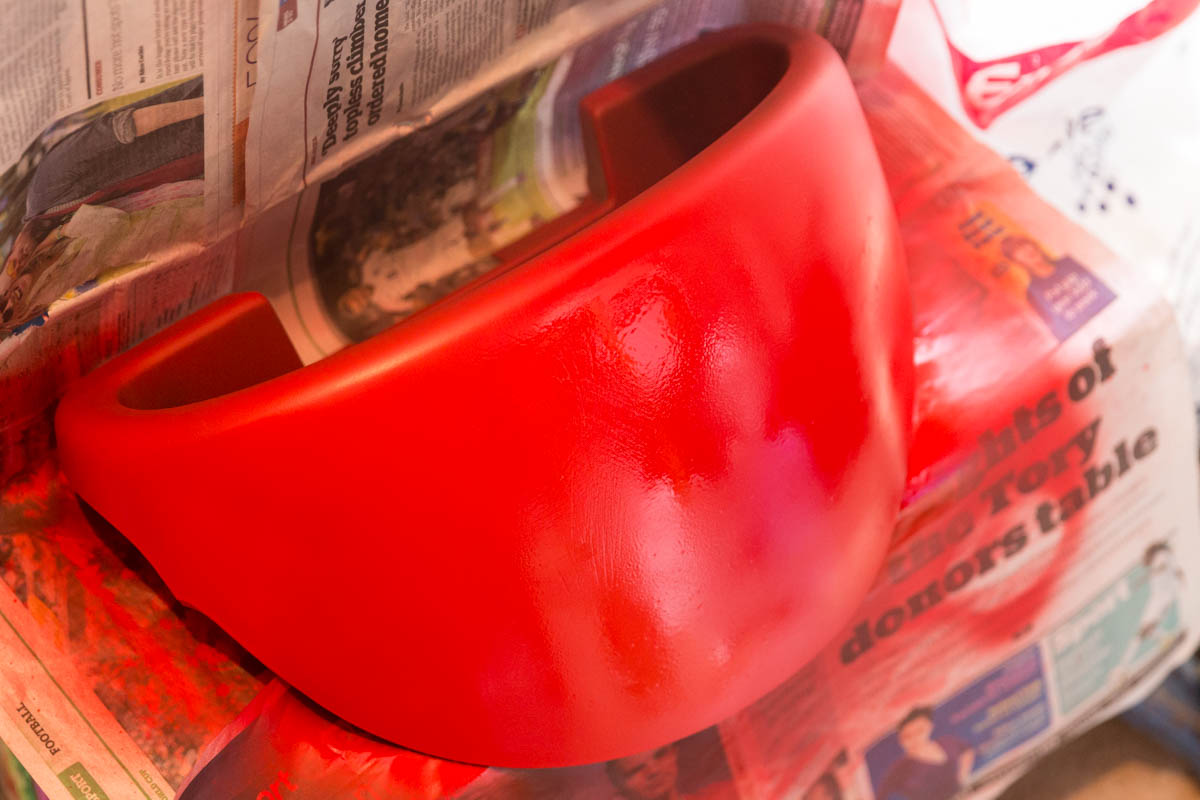 I've decided not to do the hill-climb course and look to do that early next year and then some hill-climbs/sprints and use this summer to do a few track days and the winter to get the car competition ready (seat, brakes, etc). Mark |
| |
1990 Mazda MX-52012 BMW 118i (170bhp) - white appliance 2011 Land Rover Freelander 2 TD4 2003 Land Rover Discovery II TD52007 Alfa Romeo 159 Sportwagon JTDm
|
|
|
|
MiataMark
Club Retro Rides Member
Posts: 2,971
Club RR Member Number: 29
|
|
|
|
So after bashing (literally) about with miss matched front ride heights I thought it was about time to do something. Wound up the drivers side to match the other side, they could both probably come down a bit though, and wound up the coil-overs to 12 clicks, much better. Took out the inner wheel arch, some evidence of wheel scraping but not much. Cleaned it and the wheel arch up with a pressure washer and put it back. The front end of the sills look OK which is good, not so sure about the other end. How it looks, or this could be before I cleaned it, think I need another front wing after the cone interface instance; 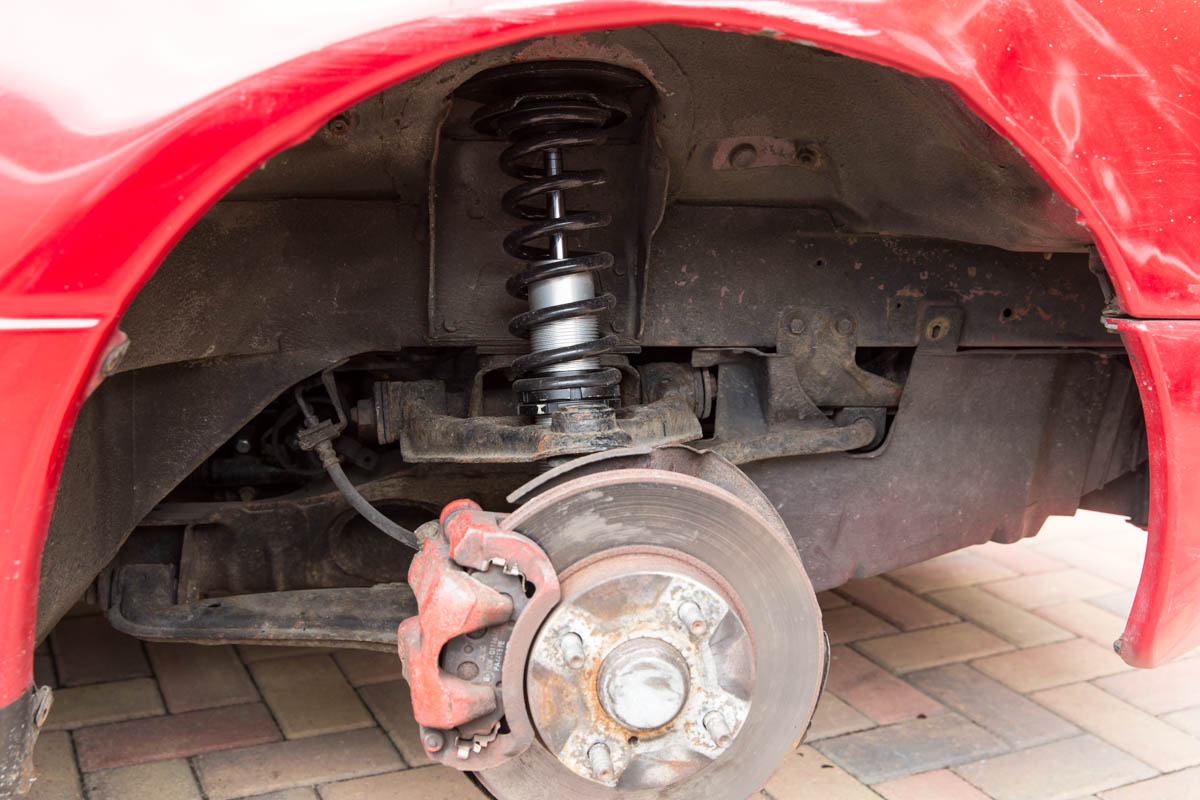 So moved onto the interior, I'd removed the cowl to paint in matt red (Rust-Oleum peel paint) this didn't work as well as I hoped, runs etc, then I dropped it and cracked the top, the clips broke off and super-glue gel isn't so super! Anyway gave all the interior a good vacuum and the dash a clean. Polished the instrument cluster face to get rid of a 'this mileage might not be correct' sticker residue. Fitted the cowl and used some bathroom type sealant to stop it rattling around. 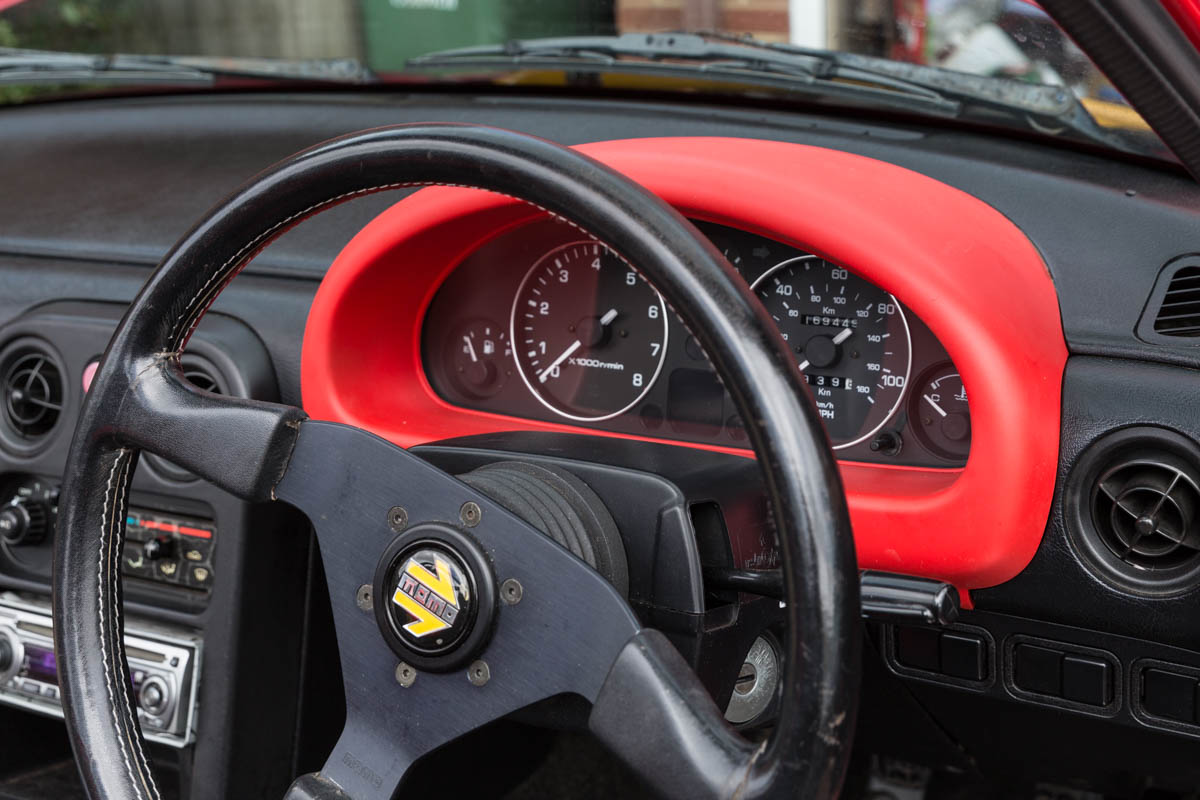 And drivers view, what a difference, looks much nicer and the reflections are less. I might even get some spare crash pads and do them in red (like a Fiat Coupe). 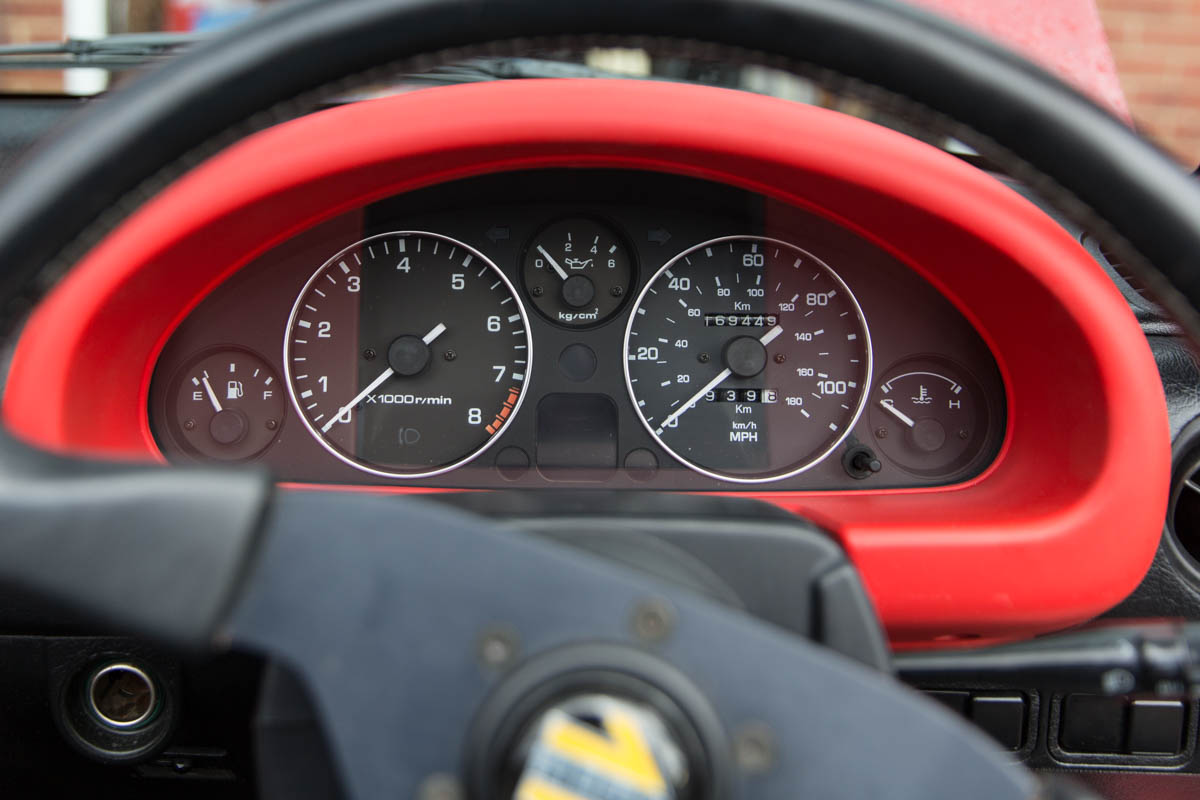 The car drives much better with the front coil-overs sorted, still need to do the rears and I really need to get the alignment done but if I'm going to change bushes I rather wait until then rather than have to get it done twice. Also after fighting with the front I think it's better to wait to do the rear coil-overs and wishbone bushes at the same time. I think I'll wait until after RRG until I do anything else and I'd like to get a couple more track days in. |
| |
1990 Mazda MX-52012 BMW 118i (170bhp) - white appliance 2011 Land Rover Freelander 2 TD4 2003 Land Rover Discovery II TD52007 Alfa Romeo 159 Sportwagon JTDm
|
|
Ray Singh
Posted a lot
   More German exotica in my garage now
Posts: 1,993
|
|
|
|
|
Fantastic work mate. I notice you are based in Royal Wootton Bassett - I will look out for you on the back roads around Marlbrough.
I was born in Pompey too - fantastic place.
Keep us updated, I'm kicking myself that i didnt buy a Mx5 a year ago....
|
| |
|
|
MiataMark
Club Retro Rides Member
Posts: 2,971
Club RR Member Number: 29
|
|
|
|
Fantastic work mate. I notice you are based in Royal Wootton Bassett - I will look out for you on the back roads around Marlbrough. I was born in Pompey too - fantastic place. Keep us updated, I'm kicking myself that i didnt buy a Mx5 a year ago.... I quite often go to Fyfield so you might see me around Avebury. There's a red MX5 with a black front wing I see around that I'd like to track down. |
| |
1990 Mazda MX-52012 BMW 118i (170bhp) - white appliance 2011 Land Rover Freelander 2 TD4 2003 Land Rover Discovery II TD52007 Alfa Romeo 159 Sportwagon JTDm
|
|
joeytalent
Part of things
  ITB Everything.
Posts: 440
|
|
Aug 18, 2015 13:45:10 GMT
|
|
Enjoyable read. The rears are MUCH easier than the fronts, from what I remember you just undo the droplink, the lower shock bolt and the top two bolts at the top mount, and you can wiggle a full sized OEM shock out whilst using a scaffold bar to pull the wishbones down. It's much easier with an assistant.
|
| |
|
|
|
|
|
Aug 18, 2015 20:26:05 GMT
|
|
Mark i have a set of crash pads you can have if you are passing by.....good effort by the way
|
| |
Ginetta G15 BMW K1100 conversion Sold
Mk1 Mx5 on ITB'S Sold
TVR Chimaera 400 supercharged
MR2 Red Roadster 2ZZ
Bee*R 324 Skyline
95 Cherokee Jeep
|
|
MiataMark
Club Retro Rides Member
Posts: 2,971
Club RR Member Number: 29
|
|
Aug 18, 2015 21:29:30 GMT
|
Mark i have a set of crash pads you can have if you are passing by.....good effort by the way I haven't fitted most of the parts I got from you back at the beginning of this saga, but I'd be interested in the crash pads. Mind you I only found you last time by pure fluke. |
| |
1990 Mazda MX-52012 BMW 118i (170bhp) - white appliance 2011 Land Rover Freelander 2 TD4 2003 Land Rover Discovery II TD52007 Alfa Romeo 159 Sportwagon JTDm
|
|
MiataMark
Club Retro Rides Member
Posts: 2,971
Club RR Member Number: 29
|
|
|
|
So some minor tweaking, the passenger window has stopped working and as I'd replaced the complete unit I assumed a wiring problem (I'd just pushed the new wiring into the old connector). Also the drivers window is slow. Stripped down the passenger door and the wiring is still in place, check the switch and looks it works going up but not down, if you bash it a bit it works  so I'll need a new switch assembly. May delay this as I have some ideas on a shorter console. Onto the drivers side, some generous application of lubricant and it's working better but still painful when it's right down. Good enough for the time being until I get time to replace it with the new one I bought as I thought it was totally jammed. While I had the door panel off, and had horrible black goo stuck everywhere really must get/make new plastic liners and get rid of the goo, I thought I better do the wiring properly so following the guide blackpopracing posted I spliced in the old connector to the new motor, as so; 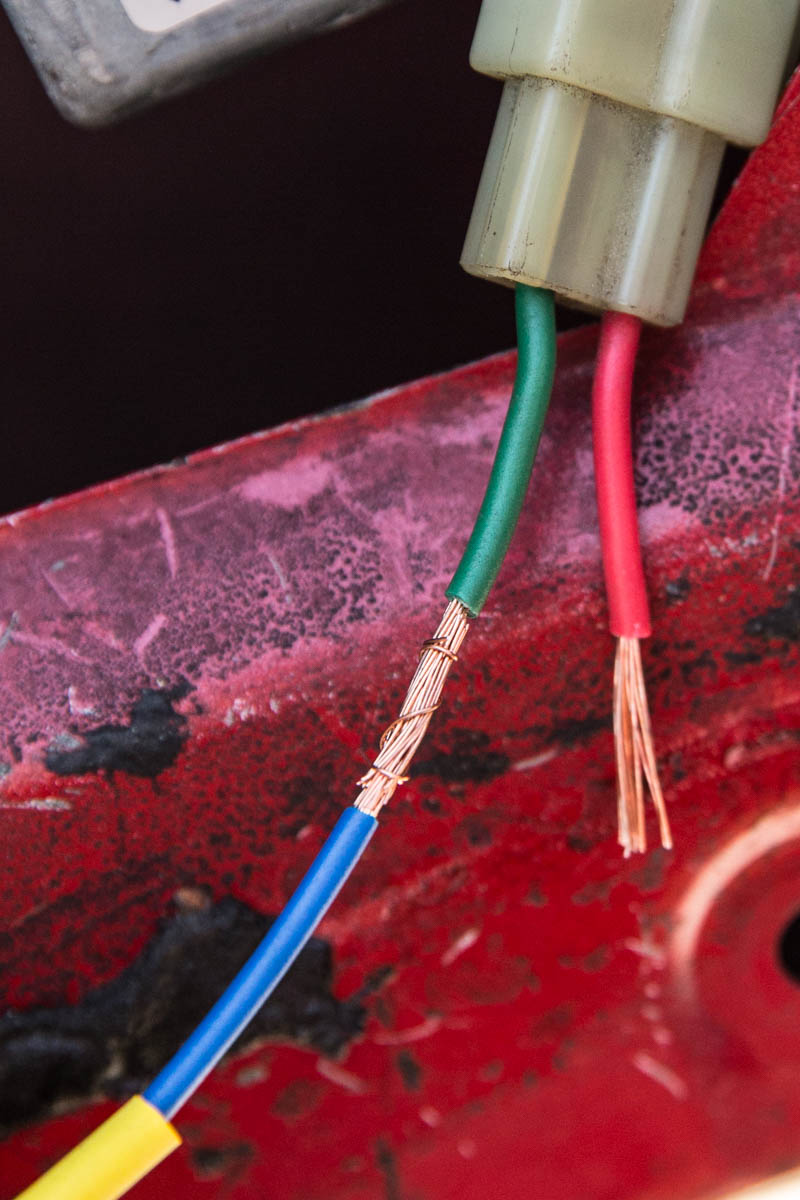 Covered with yellow heat shrink that you can see on the left, probably one of the neatest wire joins I've ever made  More frivolously, some time ago I went to a Japanese themed event and they gave us name badges with out first names in Japanese (apparently in Japanese Mark is pronounced Maaku), a bit of searching on google and I had a mask, sized to match the rear badge. I used the paper mask with a paint pen, a vinyl 'sticker' would be better. 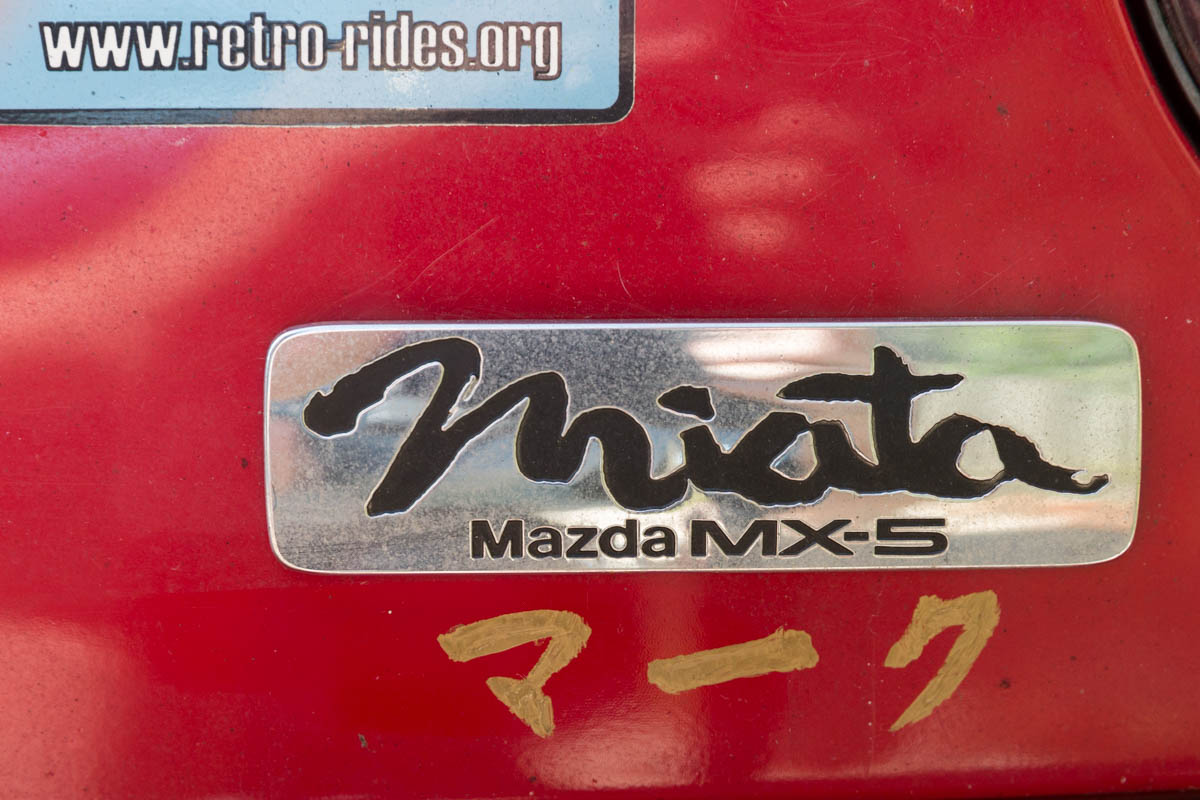 So now my car matches my username :-) |
| |
1990 Mazda MX-52012 BMW 118i (170bhp) - white appliance 2011 Land Rover Freelander 2 TD4 2003 Land Rover Discovery II TD52007 Alfa Romeo 159 Sportwagon JTDm
|
|
MiataMark
Club Retro Rides Member
Posts: 2,971
Club RR Member Number: 29
|
|
Oct 14, 2015 14:12:13 GMT
|
Small update. I've been thinking about a steering wheel change for a while, the current one (standard Momo wheel), is too thin, worn smooth and feels a bit too large (360mm), as a reminder; 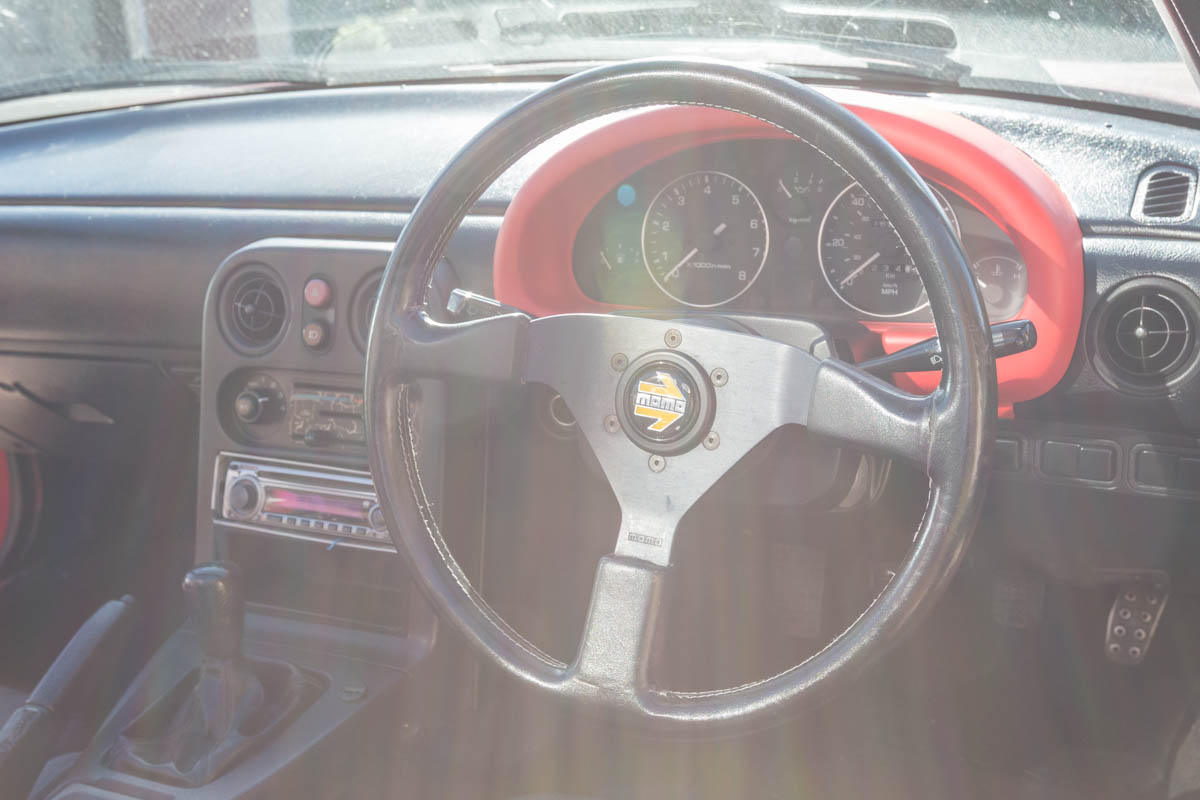 I've been looking at the Momo/Sparco/OMP wheels and although they're nice as I was undecided about the size I wanted I didn't want to gamble ~£120 on one. I also wanted a flat wheel as the reach is good for me in the standard seat. While looking through the Rally design catalogue (I read car parts catalogues my wife reads horse tack catalogues, cheaper than books!) I noticed they had a range of cheaper (£60) steering wheels that fitted the Momo boss. I was tempted by the 320mm D shaped wheel (because race car) but thought that was going too far so settled on a 350mm suede flat wheel, which is about the same size as the steering wheel in my Alfa 159. 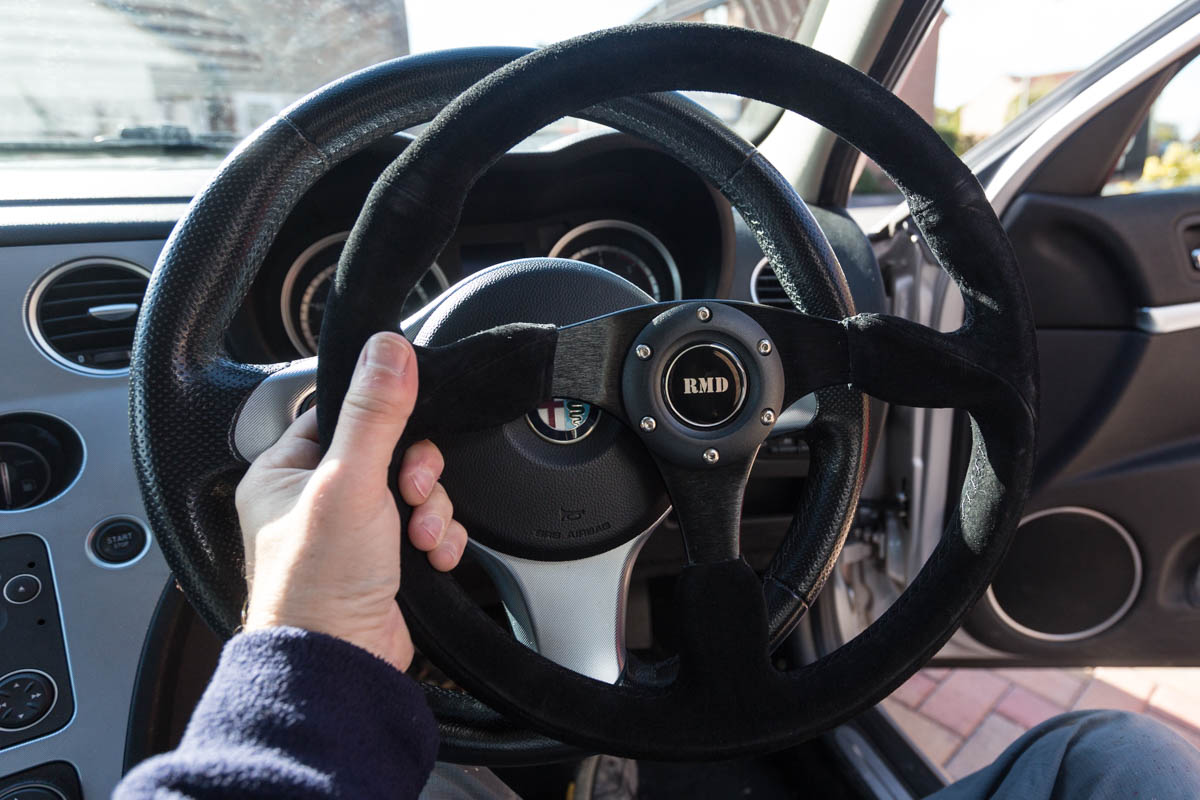 Fitting was fairly straight forward ignoring allen screws that didn't want to sift after 25years, replaced with new stainless screws, and the horn sticking on during reassembly, uninsulated connections now covered in insulating tape. 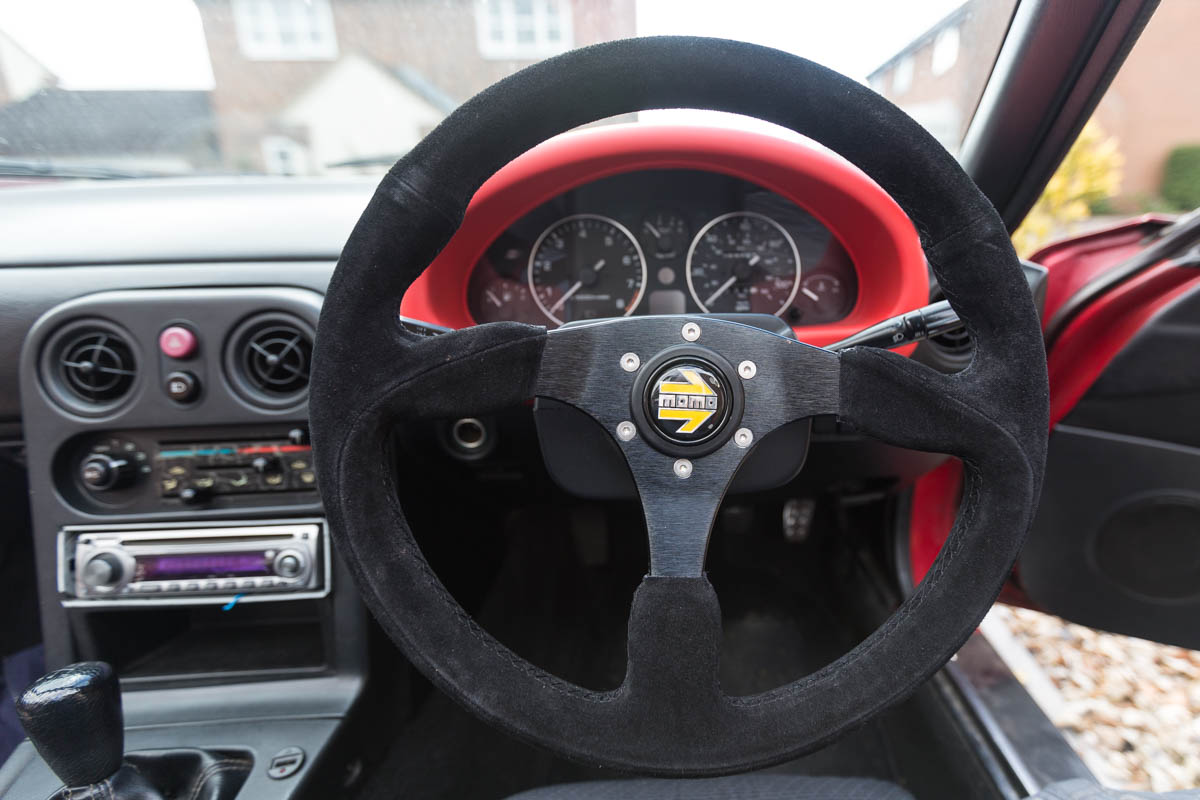 You'll notice I kept the Momo boss this is for 2 reasons 1/ The horn button on the RMD wheel had 2 connections and the Momo only one so I kept with what was there 2/ It looks better  Looks good and after a short drive feels better as well. The proof will be Friday's track day, really need proper driving gloves now so it's suede griping on suede. I'll probably try and restore the original wheel because it felt good when 'cruising' the lanes in an old fashioned type of way ad might still try the D shaped on as well... Mark |
| |
1990 Mazda MX-52012 BMW 118i (170bhp) - white appliance 2011 Land Rover Freelander 2 TD4 2003 Land Rover Discovery II TD52007 Alfa Romeo 159 Sportwagon JTDm
|
|
106e30
Part of things
 
Posts: 247 
|
|
Oct 14, 2015 14:18:45 GMT
|
|
Now that's a proper steering wheel, looks better for keeping the MOMO there too.
|
| |
Own
1991 BMW E30 318is
Owned
2002 Peugeot 106 1.1
1979 BMW E12 520/6
|
|
MiataMark
Club Retro Rides Member
Posts: 2,971
Club RR Member Number: 29
|
|
Oct 18, 2015 17:12:18 GMT
|
At reasonably short notice I decided to do another track day (my second) at Abingdon, which is an airfield circuit and organised by MotorSport Events link, a bit more grass roots than Castle Combe with the emphasis on road going cars not thinly disguised testing (their words). The cars present were various of MX-5's a selection of Caterham/Sevens/Westfields with various engines, some modern Porsche's and a few BMW's. Plus an Aston Martin DBS Volante that sounded amazing, I followed him round on the familiarisation laps. The circuit was actually slower, despite a fairly long straight, than Castle Combe but with more twiddly (or as Graham Hill used to describe them "Micky Mouse bits" bits). From the pit exit there was a reasonable run to a left hand 90deg left hand bend onto the main runway then a run along the straight a left /right chicane (to slow people down not me I didn't get that fast) then a run to another left hand 90 degree approach speed here was about 80-90mph. Then a left right kink, a series of kinks through cones, then then a wide left hand 90degree followed by a slight right and back to where we started. When I was pushing it through the last corner and first left hand the front right tyre was rubbing in the inner arch (later inspection shows I now have a hole!). The left onto the main straight was quite bumpy which didn't help. I spent the day getting out of the way of people but did manage to go past a Z4. I did have one fairly monumental spin coming onto the main straight, it went left and I nearly caught it, went right then left then fully round ,whoops. Was getting some nice drifts out of the 90degree corner at the back of the circuit, approach in 4th ~80mph, change down to 2nd under heavy braking, turn in unsettled and floor it  stopped doing it before I got told to as 'drifting' is frowned on. Towards the end of the day when I was getting a bit more committed caught a few cones and got the black flag of shame for a minor ticking off. Finished when; exuberance > ability = time to go home... My wife was on photography duties so the results are pretty bad but you get the idea; 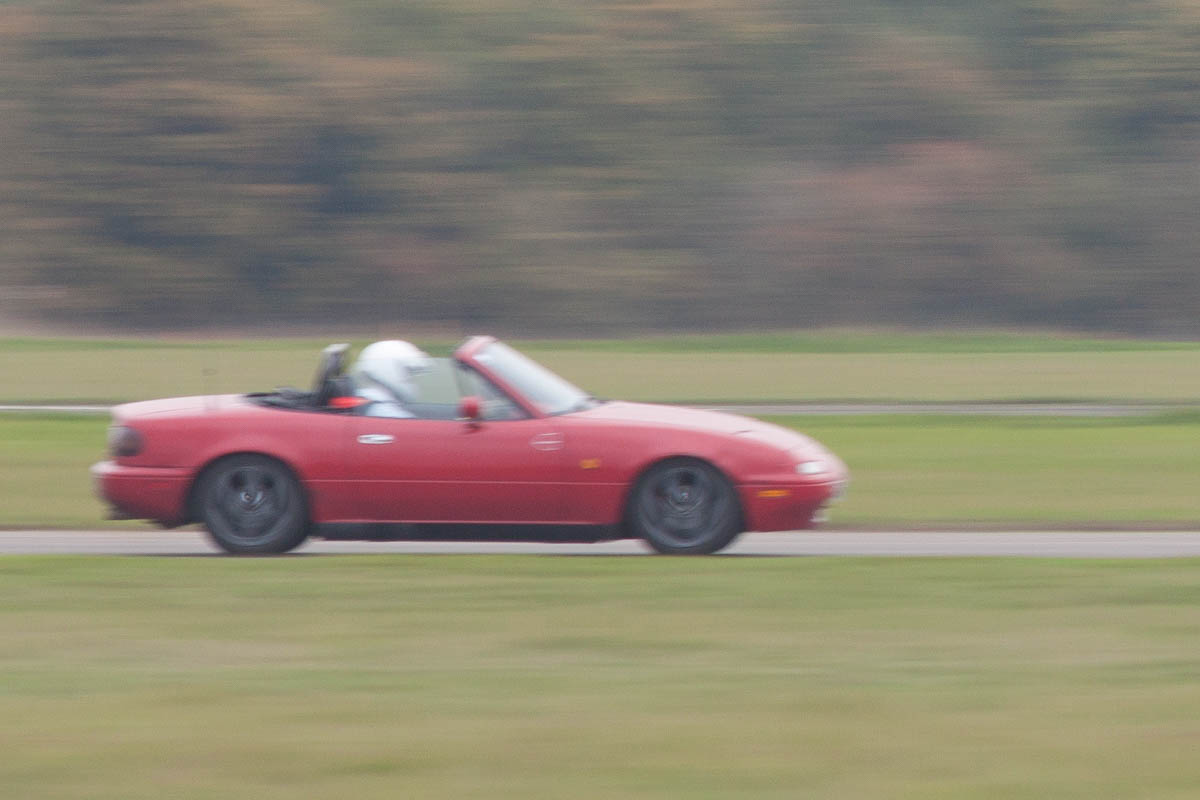 This is exiting the final corner, you can see the loading on the front right. 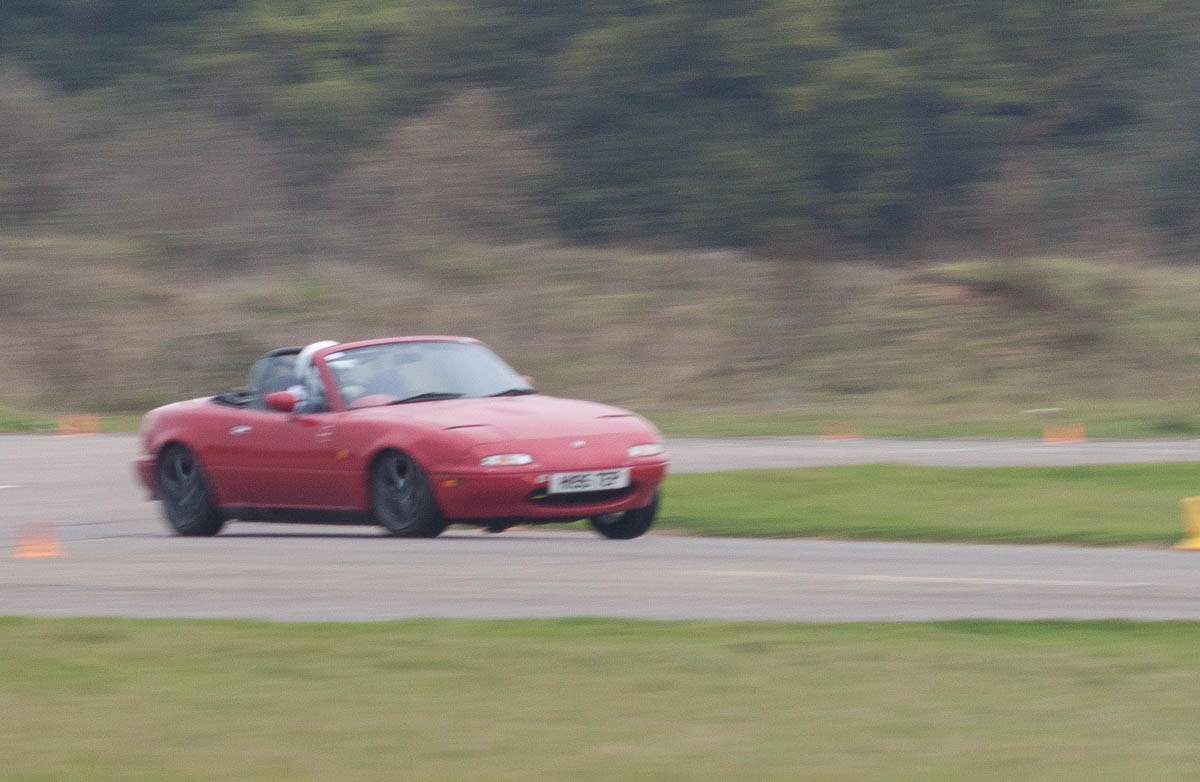 and through the corner no wonder it was rubbing. 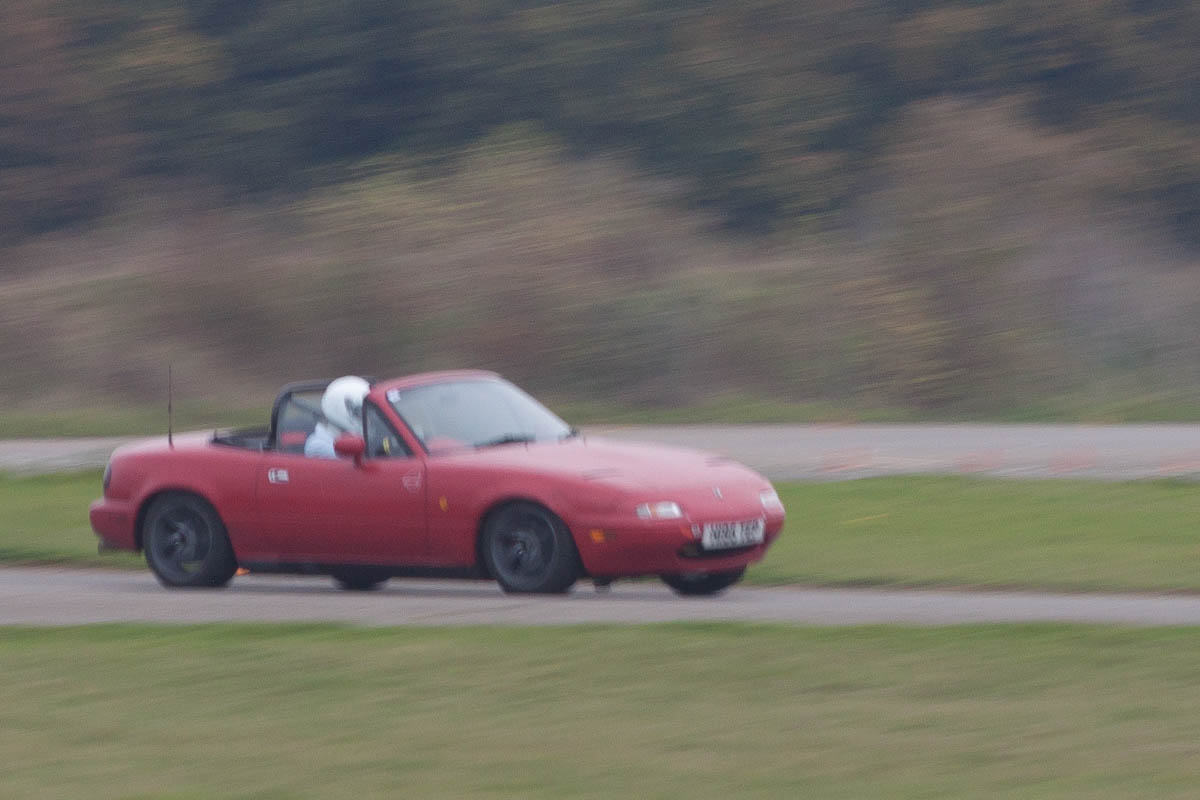 On the exit of the corner. The front has Gaz Gold coilovers fitted and I turned them up near the end, but perhaps it's running a bit low? I've still got all the inner arch fitted don't know if it's a good idea to remove it and get the arches rolled? Conclusions, the car ran fine, standard 1.6 brakes wit Pagrid poads were fine, no mechanical troubles and new steering wheel was much better.. Things to do; - I need instruction
- Need to sort out the suspension (e.g. fit rear coilovers), sort out ride height and alignment
- More power would be good
- Teach the wife how to pan...
Any tips/hints gratefully received particularly if it doesn't mean spending lots of money. The Aston, he (nice bloke happy to chat) spent most of the morning with people saying "...are you tracking that?..." fair play to him, he was taking it easy and keeping out of the way. 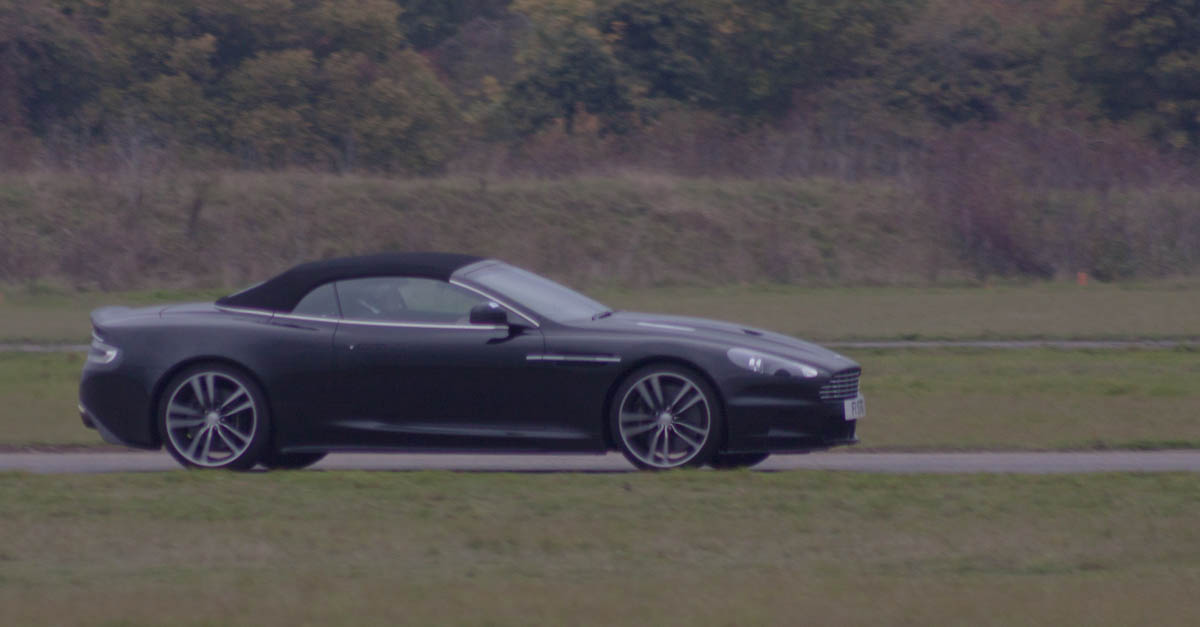 I'll certainly do some more of their events, probably at Hullavington as it's more local. A good relaxed fun day out. Mark |
| |
1990 Mazda MX-52012 BMW 118i (170bhp) - white appliance 2011 Land Rover Freelander 2 TD4 2003 Land Rover Discovery II TD52007 Alfa Romeo 159 Sportwagon JTDm
|
|
|
|

 (edit: found it in the other box
  )
)
 (edit: found it in the other box
  )
)


 Hope you get the battery sorted soon. I'd give the alternator a check over before popping a new battery on, make sure it's charging right.

 Anyway cut the plastic tray about, straighten out the long bracket, and drill out the nut. Then break out the tie-wraps


 at this point I wasn't sure why the difference.


